


Tired of those ugly bathroom tiles? Here’s your fix. Let me guess, every time you step into your shower, those old tiles make you cringe.
But is painting shower tile actually worth doing? Trust me, when you’re looking at spending thousands to rip out old tiles, a $50 paint job starts sounding pretty smart.
Here’s the thing, though. I’ve seen way too many people mess this up and end up with paint peeling off after a few weeks. That’s why I’m sharing exactly what works: the right paint, the simple steps that anyone can follow.
Ready to love your bathroom again without emptying your wallet?
Why Painting Shower Tiles Makes Perfect Sense
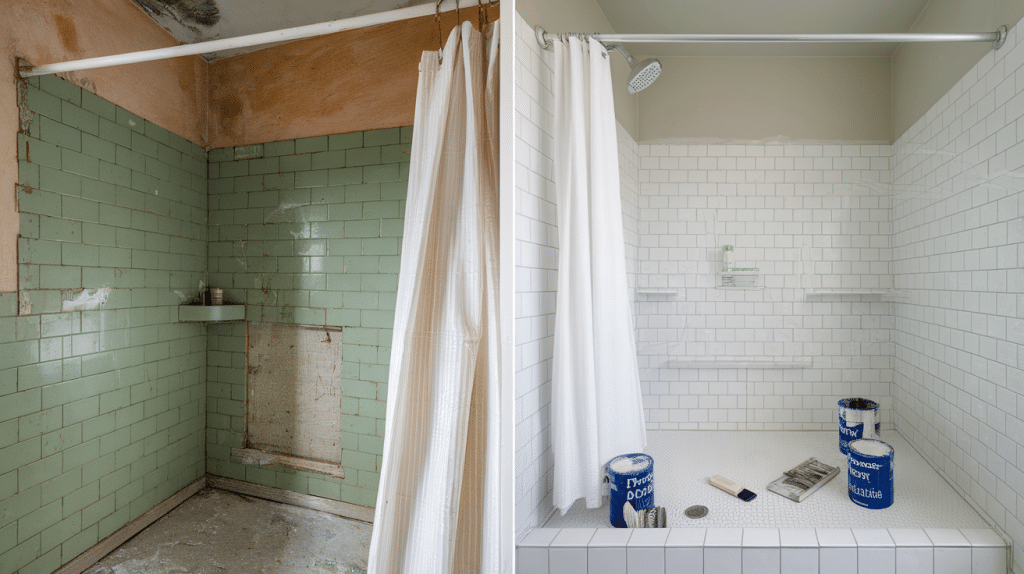
Replacing bathroom tiles is expensive and messy. Homeowners face thousands of dollars in costs, weeks of construction, and contractors tracking dirt throughout the house.
Painting tiles offers a complete bathroom makeover for $30-50, compared to $3,000-8,000 for a full replacement. The math is simple.
This project can be completed over a weekend. No jackhammers, no dust, no living without a shower for weeks. The process involves cleaning, priming, and painting.
If the color becomes outdated in a few years, simply paint over it again. This flexibility doesn’t exist with ceramic tiles.
When done correctly, painted tiles last 3-5 years before needing touch-ups. This durability exceeds most expectations for a DIY paint project.
Tile painting isn’t just about cost savings – it’s about achieving the desired bathroom aesthetic without major construction disruption.
Is Painting the Shower Tile Worth It?
The decision to paint tiles depends on specific bathroom conditions and renovation goals.
When It Makes Sense
Tile painting works best in specific situations where the benefits outweigh the risks.
- Budget renovations are the perfect scenario for tile painting. When a full bathroom remodel isn’t financially feasible, paint transforms the space for under $100.
- Quick fixes for rentals benefit from this approach. Property owners can update outdated bathrooms without major capital investment, and tenants can improve their living space with landlord approval.
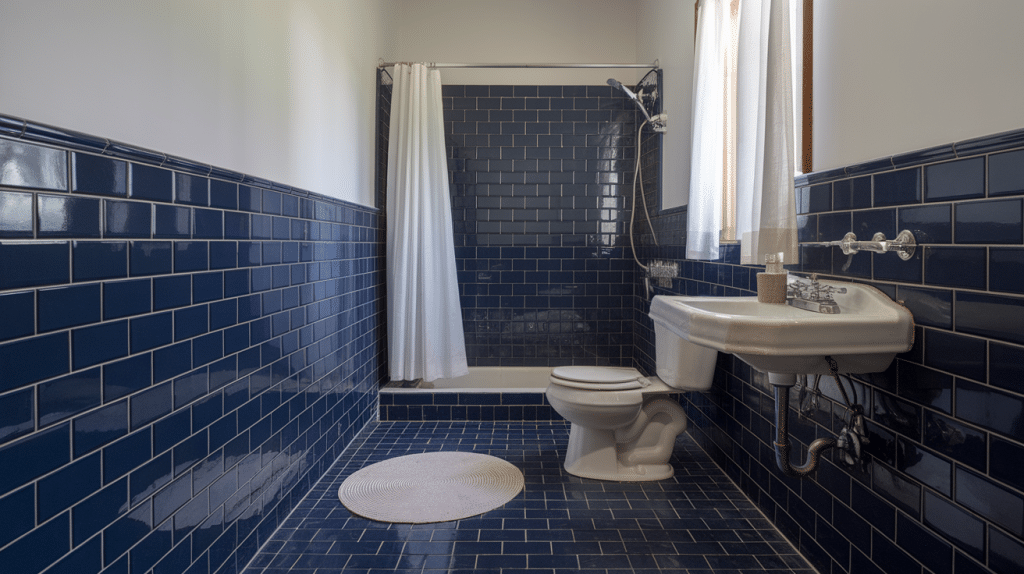
- Outdated or ugly tile colors get a second life through paint. Those avocado green or harvest gold tiles from decades past can become modern and stylish again.
These scenarios make tile painting a smart choice that delivers real value.
When You Should Avoid It
Certain conditions make tile painting a recipe for failure.
- Poor ventilation creates problems for painted tiles. Bathrooms without proper exhaust fans trap moisture, leading to paint failure and potential mold issues.
- Cracked or damaged tile won’t hold paint properly. These surface imperfections need repair before painting, or the paint will fail at weak points.
- High-traffic showers without sealing plans face rapid wear. Daily use requires proper sealing and maintenance to prevent paint from chipping and peeling.
Skip tile painting if any of these red flags apply to avoid wasted time and money.
Pros and Cons
| Pros | Cons |
|---|---|
| Low costs (typically under $100) | Risk of peeling over time |
| Customizable colors | Moisture issues can cause failure |
| Fast bathroom refresh (about a weekend) | Lower resale appeal compared to new tiles |
| Quick DIY-friendly project | May not add property value like ceramic tile installations |
What Kind of Tile Paint Works Best in Bathrooms?
The paint you choose decides if your project looks great for years or starts peeling in a few months.
Paint Types to Use
Not all paints can handle bathroom moisture and daily use.
- Epoxy paint is the toughest option. It’s waterproof and creates a hard finish that won’t chip or peel easily. Think of it like a protective shell over your tiles.
- Latex or acrylic paint works fine for areas that don’t get wet often, like walls far from the shower. These paints are easier to work with and come in more colors.
- Specialty tile paints like Rust-Oleum Tub & Tile are made just for bathrooms. Companies like Valspar also make these. They’re stronger than regular paint but easier to use than epoxy.
- Enamel paint gives a glossy, hard finish that’s great for high-moisture areas. It takes longer to dry but creates a smooth surface that’s easy to clean and resists water damage.
Pick your paint based on how wet the area gets and how much use it sees.
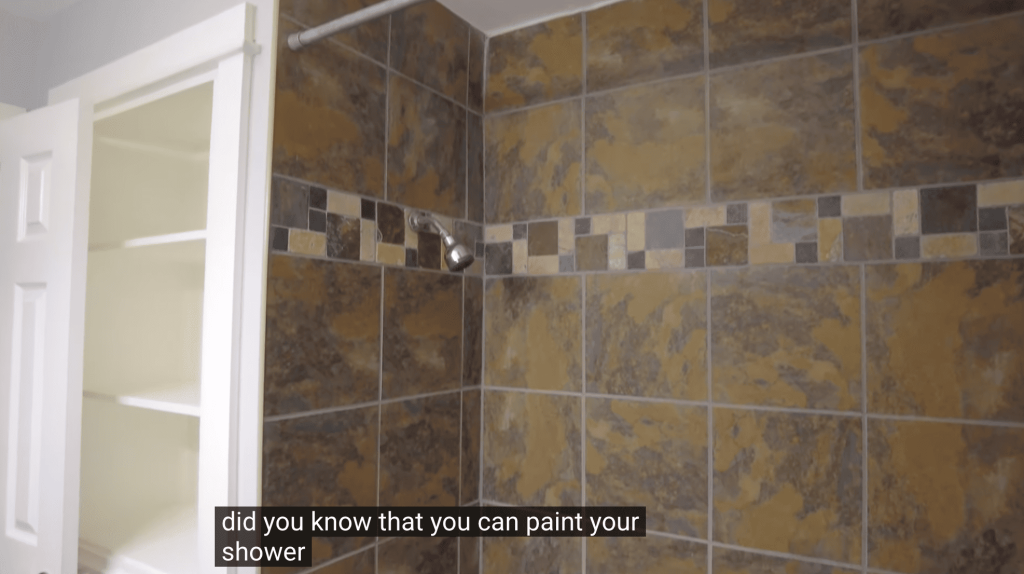
How to Paint Shower or Ceramic Tile
Here’s the exact process that transformed ugly brown tiles into a bright, modern shower.
Step 1: Remove or Protect Fixtures
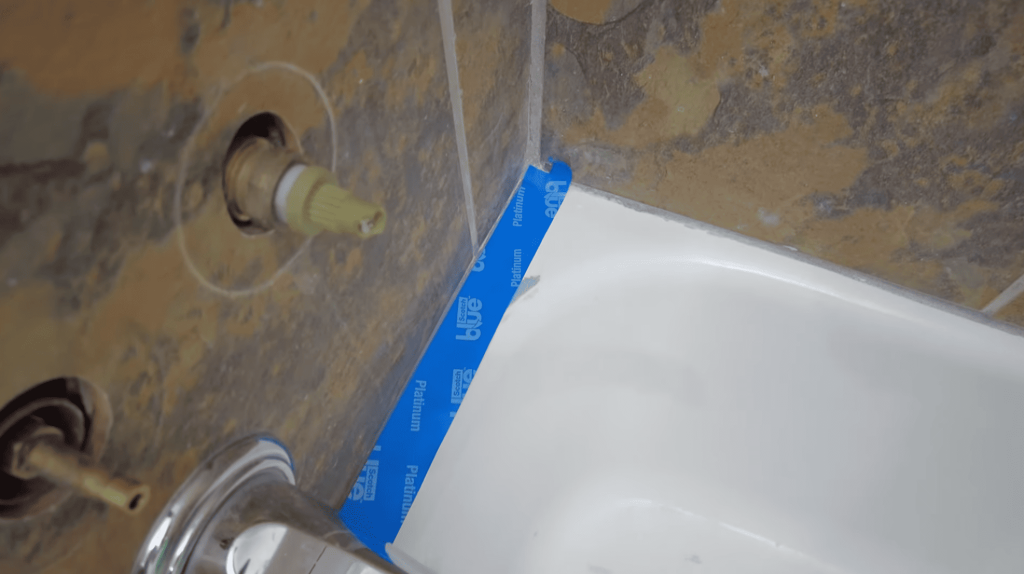
Remove plumbing fixtures or tape around them carefully. The paint used in this project is really hard to clean up, so protecting fixtures saves significant time and hassle later in the process.
Step 2: Deep Clean the Tiles
Clean the tile like it has never been cleaned before. This deep cleaning step is absolutely crucial for proper paint adhesion and ensures long-lasting, professional-looking results on your shower surfaces.
Step 3: Apply Bonding Primer (Two Coats)
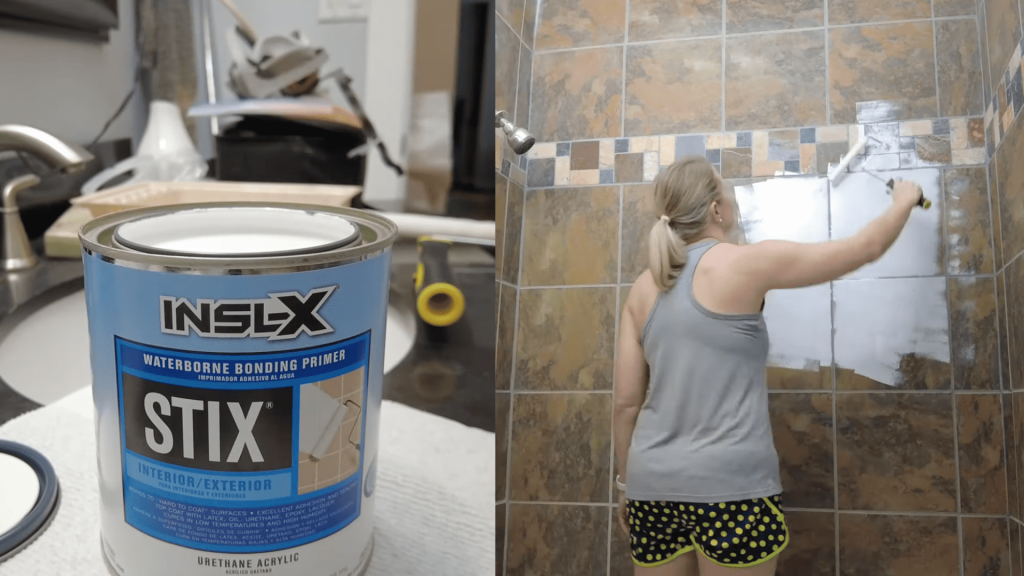
Use Insl-X Stix acrylic waterborne bonding primer; this is the secret to project success. Apply the first coat thoroughly, then add a second coat for complete, even coverage on glossy tile surfaces.
Step 4: Protect Surrounding Areas
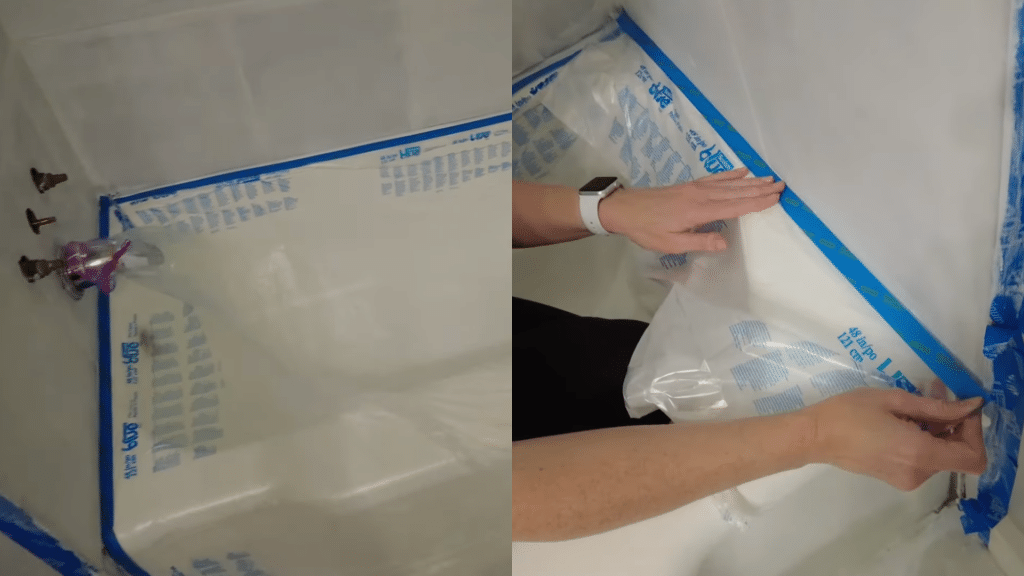
Before starting the actual painting process, tape and use plastic sheeting to cover the bathtub and other finished surfaces. This careful preparation prevents accidental paint splatters and protects your investment.
Step 5: Paint with Oil-Based Enamel
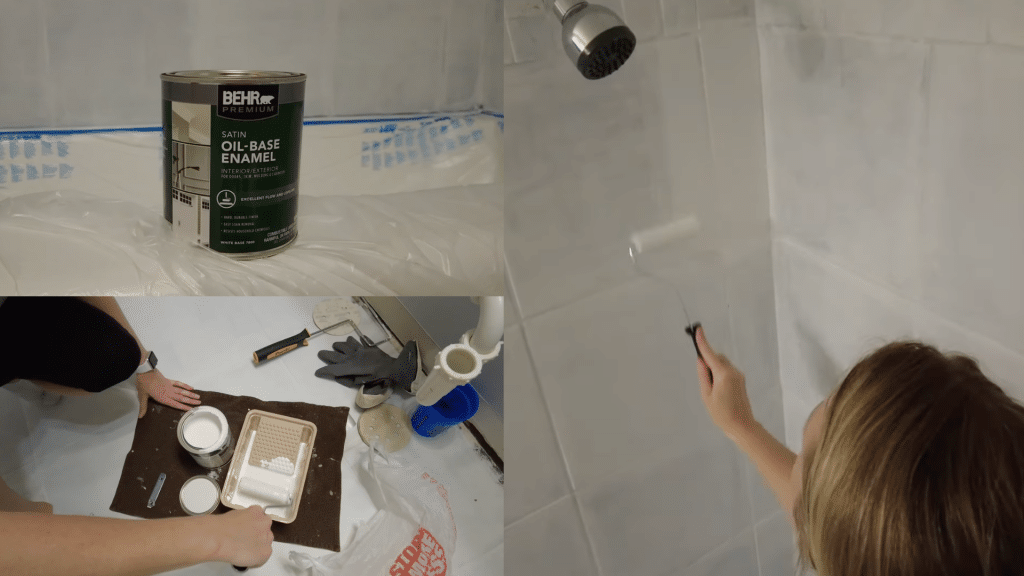
Apply high-quality satin oil-based enamel paint in your chosen color. I recommend Behr Premium oil-based satin enamel, which cures to a hard, durable finish and effectively resists household chemicals.
Follow these steps exactly, and you’ll get the same dramatic transformation shown in the video.
The above video provides a thorough guide through every step of painting shower and ceramic tiles that last long. Also, with the help of this, you’ll know how to paint a ceramic tile as well.
Painted Bathroom Tile Maintenance Tips
Taking care of painted tiles is easy when you know what to do.
How to Prevent Peeling
A few simple habits keep your paint job looking good for years. Let the paint cure for 5-7 days before using the shower normally. This gives the paint time to get really hard and stick to the tiles properly.
When cleaning, avoid scrubbing too hard; instead, use gentle soap and soft cloths, as rough sponges can scratch the paint off.
If you live in a humid area or frequently use the shower, you may need to apply a new coat of sealer annually to prevent water from seeping under the paint. Do these things, and you won’t have paint peeling off your tiles.
How Long Does Painted Tile Last?
Most people get 2-5 years out of painted tiles before needing to redo them. How long yours lasts depends on a few things.
If your bathroom has good air flow and you did a great job prepping the tiles, you’ll get closer to 5 years. But if it’s really steamy in there and lots of people use the shower every day, you might need to repaint sooner.
Just plan on touching up or repainting every few years, and you’ll always have nice-looking tiles.
Bathroom Tile Paint Ideas to Try
1. Solid Color Update
Sometimes, keeping it simple works best. White paint makes dark bathrooms brighter and small spaces look bigger. It also makes everything feel cleaner and fresher.
Black might sound scary, but it looks really cool and modern. Navy blue gives your bathroom that relaxing spa feeling without being too crazy or bold.
2. Two-Tone or Border Patterns
Using two colors is easy, but it looks like you hired a pro. Try painting tile “rugs” by making rectangles of different colors on your floor or walls.
You can also paint borders around the room, like making the bottom rows one color and everything else another color.
3. Stenciled Designs
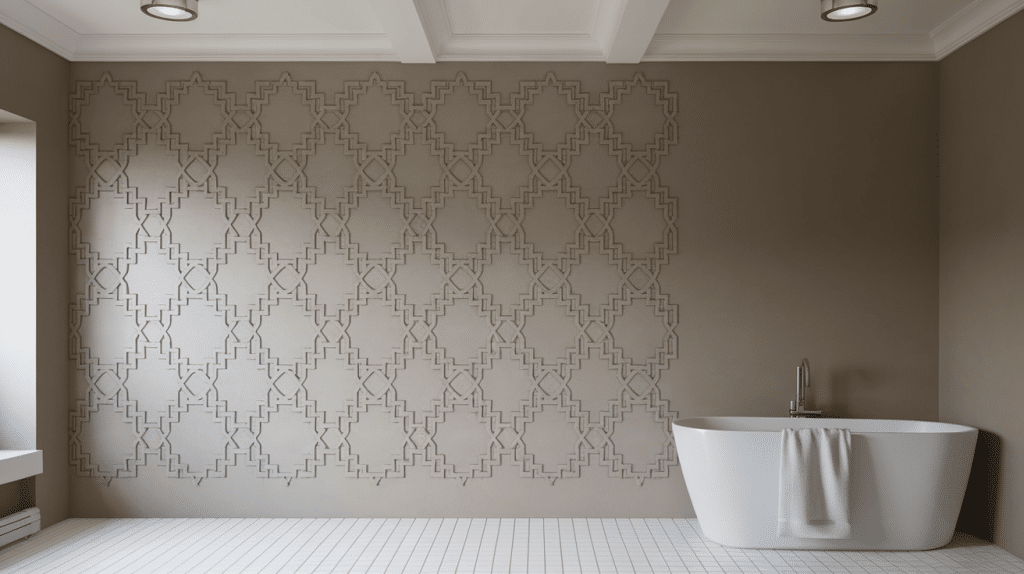
Stencils help you make fancy patterns even if you can’t draw. Moroccan patterns have cool curvy shapes that make your bathroom feel like a fancy hotel.
Geometric designs use triangles, circles, or diamonds for a modern look that’s really popular right now. You can even use stencils to make fake grout lines so painted tiles look like the real thing.
4. Painted Faux Terrazzo or Stone Look
Make your tiles look like expensive stone with some simple tricks. Use a sponge or splatter paint to copy the look of real stone or terrazzo floors.
Earth colors like tan and brown make it look natural, while gray and white give it a modern feel.
5. Color Fade Effects
Create a smooth color change that looks super trendy. Start with a dark color at the bottom and slowly make it lighter as you go up the wall.
Try dark blue fading to light blue, or gray fading to white. You can even do sunset colors like orange blending into pink for something really fun.
Mistakes to Avoid
These three mistakes will mess up your project before you even finish.
- Painting floor tiles – Don’t paint tiles on the floor. People walk on them every day, which makes the paint chip off really fast. Water sits on floors longer, too, so the paint bubbles up and peels.
- Using the wrong paint type – Don’t use regular wall paint in your bathroom. It can’t handle all the steam and water, so it’ll start peeling in no time.
- Skipping cure time – Don’t use your shower right after painting. The paint needs 5-7 days to get really hard and stick properly.
Avoid these three things, and your painted tiles will actually last.
Conclusion
Ready to Give Your Bathroom a Makeover? Painting shower tile isn’t for everyone, but if your bathroom has good airflow, solid tiles, and you’re willing to prep it right, it can work wonders.
For around $50, you can skip the expensive remodel and finish this project in a weekend. Just don’t cut corners. If you skip the bonding primer or rush the prep, the paint won’t last.
My advice? If your setup checks out, stop overthinking and get started. The results are worth it.
Want more simple updates that won’t drain your wallet? Check out other posts for smart, budget-friendly bathroom upgrades.


