


Have you ever found yourself with more microgreens than you can eat before they wilt?
You’re not alone, and that’s probably why you’re wondering: can you freeze microgreens? The short answer is yes, but there are a few things you’ll want to know before tossing them in the freezer.
In this guide, I’ll walk you through the pros, cons, and exact steps to freeze them the right way.
You’ll also learn how to incorporate frozen microgreens into meals and explore alternative storage options if freezing isn’t a suitable fit.
If you’re ready to cut down waste and get the most out of your greens, let’s find out how to make it happen.
Is Freezing Microgreens a Good Idea?
Freezing microgreens can be helpful if you have a surplus, but it comes with trade-offs.
While freezing preserves their nutritional content to some extent, it significantly alters their texture, making them limp and less visually appealing.
They won’t work well in salads or as raw garnishes, but they’re still useful in blended or cooked dishes, such as smoothies, soups, and omelets.
If appearance and crunch are essential, freezing may not be the best option. Consider freezing only when the goal is practical use, not presentation.
Step-by-Step Guide to Freezing Microgreens
Follow these simple instructions to freeze your microgreens properly. You’ll keep them fresh, usable, and nutrient-rich for months, perfect for smoothies, soups, or any cooked meal later on.
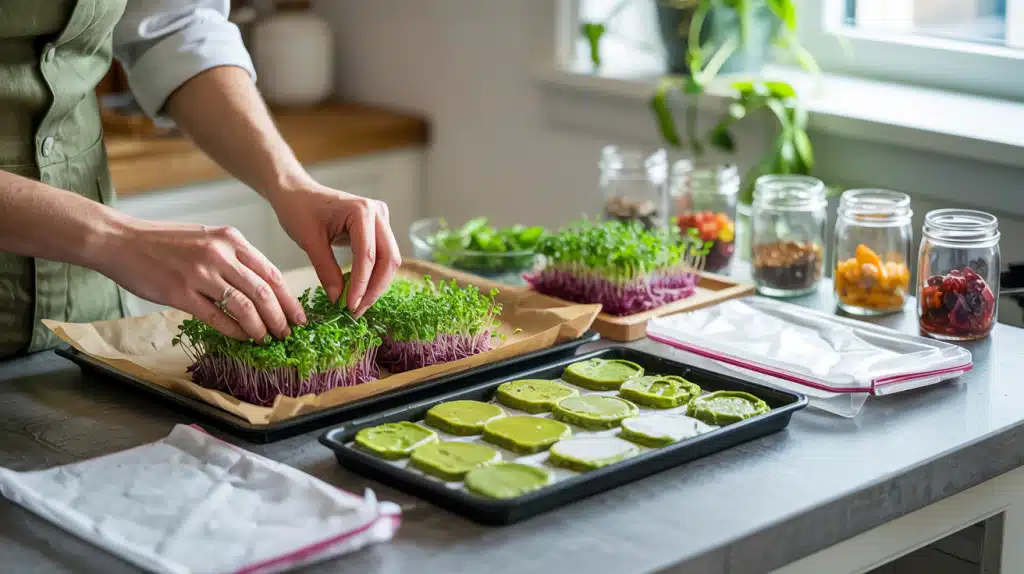
Step 1: Rinse and Dry Thoroughly
Begin by gently rinsing your microgreens under cold water to remove dirt, dust, or other unwanted particles. You want them clean before freezing.
After rinsing, use a salad spinner or pat them dry with a clean towel; getting rid of excess water is key.
If you freeze them wet, they’ll clump together and may develop ice crystals that hurt their texture. Make sure they feel dry to the touch before you move on to the next step.
Step 2: Prepare for Flash-Freezing
Once your microgreens are dry, lay them out flat on a baking tray lined with parchment paper. Spread them in a single layer; this keeps them from freezing into one solid lump.
You want the air to move around each leaf so they freeze quickly and separately. Don’t stack them or overload the tray.
If you have a lot, use multiple trays or freeze in batches. This part helps you later when you want to grab just what you need without thawing everything.
Step 3: Flash-Freeze Until Solid
Slide the tray into your freezer and leave it there for one to two hours. During this time, the microgreens will freeze individually, which makes them easier to store and use later.
Don’t open the freezer during this step; you want a steady temperature so they freeze evenly. You’ll know they’re ready when they feel crisp and excellent to the touch.
Skipping this step can lead to soggy, frozen clumps that are hard to portion and use later on.
Step 4: Transfer to Storage Containers
Once your microgreens are frozen solid, take them out of the freezer and quickly move them into airtight containers or freezer-safe bags.
Try to remove as much air as possible from each bag to prevent freezer burn. If you’re using containers, fill them tightly, but don’t crush the greens.
Label each one with the date and type of microgreen so you know exactly what you’re reaching for later. Keep the bags flat to save space and make stacking easier in your freezer.
Step 5: Label and Store
Before putting your greens away for the long haul, grab a marker and label each bag or container with the freeze date and contents.
Store them toward the back of the freezer where the temperature stays most stable. Use your frozen microgreens within three to six months for the best taste and nutritional value.
If you’ve frozen more than one type, keeping them labeled saves you from guessing later. This last step helps keep your freezer organized and your food plan simple.
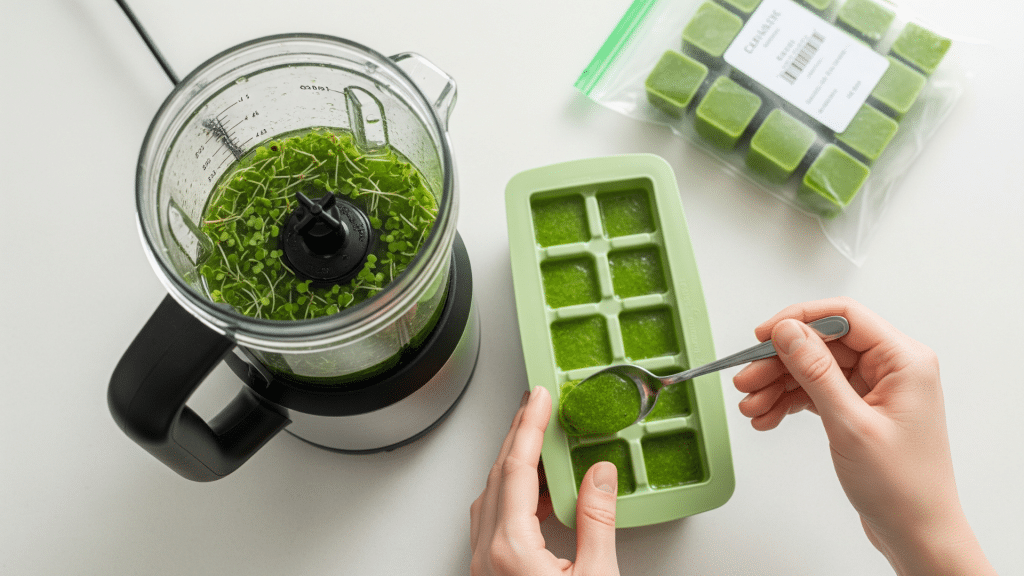
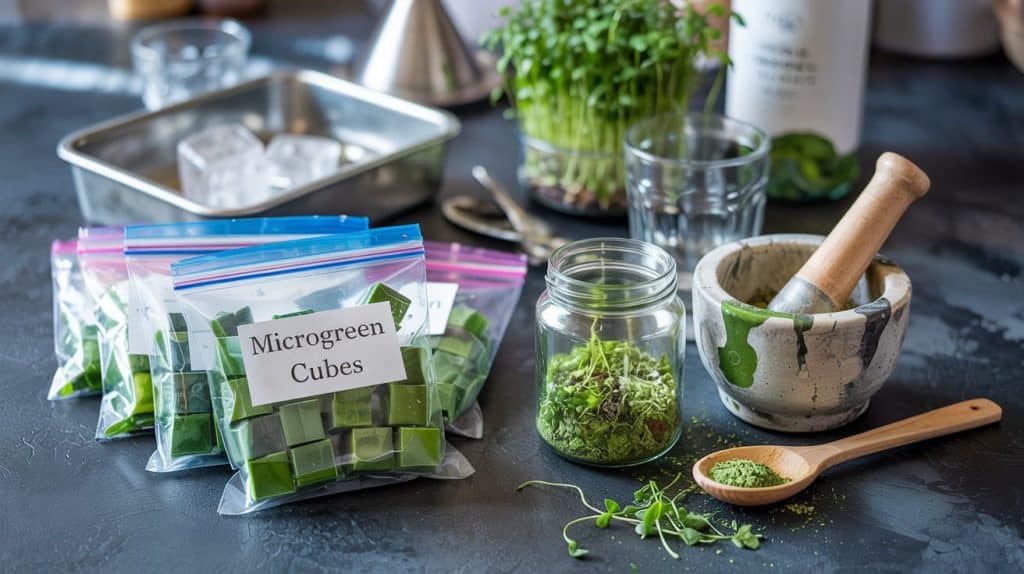
Step 6: Blending and Freezing into Cubes
If you primarily use microgreens in drinks or hot meals, try blending them with a small amount of water. Once smooth, pour the mix into ice cube trays and freeze until solid.
When ready, pop the cubes into freezer bags. This method gives you quick, pre-measured boosts of nutrition that you can toss right into smoothies, soups, or sauces.
It’s a smart way to use up extra greens and a great option if you want fast access to nutrients without extra prep.
Step 7: Store and Label the Frozen Cubes
Once the cubes are fully frozen, remove them from the trays and place them into labeled freezer-safe bags or airtight containers.
Press out as much air as possible before sealing to help prevent freezer burn. Write the freeze date and the type of greens used on each bag.
Store the bags flat to save space and make stacking easier. Store them in the back of your freezer, where the temperature remains consistent. Use the cubes within 3–6 months for the best flavor and nutritional quality.
Other Preservation Techniques Worth Considering
If freezing isn’t the best fit for your needs, there are other reliable ways to extend the life of your microgreens. Consider these options based on your tools, storage space, and usage goals.
Drying with Air or a Dehydrator
Air-drying or using a dehydrator is a great way to extend shelf life while maintaining a good portion of the nutrients. Air-drying works best in warm, dry environments, though it can take several days.
A dehydrator speeds up the process and gives more consistent results.
Once dried, microgreens can be crushed into powders or stored whole for use in teas, as toppings, or as meal improvements without refrigeration. Store in airtight containers away from moisture.
Freeze-Drying at Home
Freeze-drying is one of the most effective preservation methods, but it requires a specialized freeze-dryer, which can be costly.
This method removes moisture while preserving flavor, color, and nutrients better than freezing or air-drying. Freeze-dried microgreens are incredibly lightweight and have a long shelf life.
They’re ideal for emergency food storage, powdered supplements, or travel-friendly nutrition. If you have the budget and space, this method offers excellent long-term benefits.
How to Choose the Right Method Based on Use and Volume
Start by thinking about how much you’re preserving and how you plan to use it. For small batches used in smoothies, freezing or blending into cubes is easy and fast.
If you want a longer shelf life and use microgreens in dry form, consider dehydrating. For large harvests or if nutrition retention is your top priority, freeze-drying may be worth the investment.
Match the method to your tools, budget, and how often you’ll use the greens.
What Types of Microgreens Work Best for Freezing?
Not all microgreens respond the same way to freezing. Some retain flavor and structure better than others. Choosing the right types can help you get the most out of your frozen supply.
Varieties that Hold Up Well
Sturdier microgreens like kale, pea shoots, radish, and broccoli tend to freeze better. Their thicker stems and more robust leaves hold up during freezing, making them suitable for smoothies and cooked meals.
These varieties are also more likely to retain flavor and nutrients when properly stored, giving you better results after thawing.
Greens that May Not Freeze Well
Tender microgreens such as basil, cilantro, and similar leafy types don’t freeze as effectively. Their delicate leaves can become mushy or lose flavor quickly when frozen.
These greens are best enjoyed fresh or preserved using other methods, such as drying. If frozen, they may still be usable in blended or cooked dishes, but expect a drop in texture and aroma.
Practical Uses for Frozen Microgreens
Frozen microgreens can be added to a variety of meals and drinks, giving you flexibility and extra nutrition even after harvest season ends.
Cooking
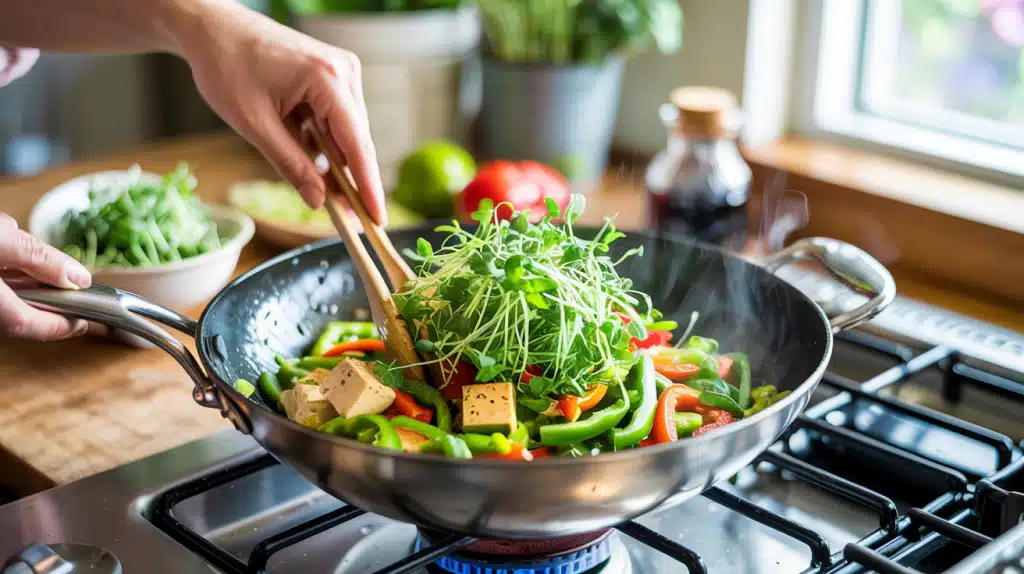
Use frozen microgreens in cooked dishes where texture isn’t as important. Add them to stir-fries, soups, stews, omelets, or pasta sauces.
Since freezing softens the greens, they blend seamlessly into hot meals without affecting taste.
Simply toss them in while cooking; there’s no need to thaw. This makes frozen microgreens a simple way to boost nutrition in everyday meals.
Drinks
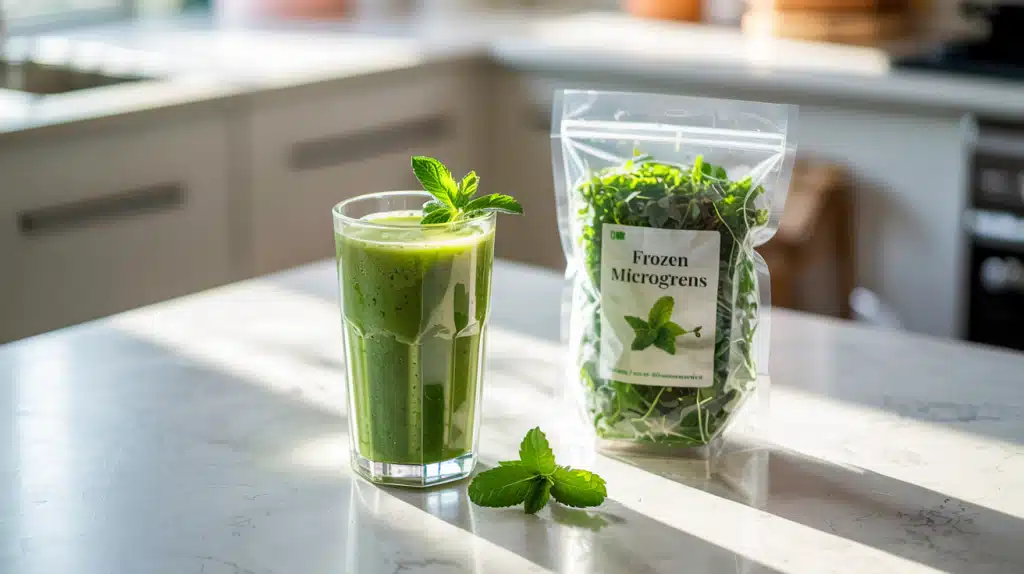
Frozen microgreens are perfect for smoothies, green juices, and health shots. Their softened texture blends easily with fruits and other ingredients, making them ideal for quick nutrition boosts.
You can use them directly from the freezer; no preparation is needed. This method is beneficial when you want to add greens without worrying about freshness or spoilage. It’s a fast, low-effort way to stay consistent with your health goals.
Storage Blocks or Powder
For long-term use, you can blend microgreens with water and freeze the mixture in ice cube trays. These blocks are easy to portion and use later in drinks or recipes.
Alternatively, you can dry frozen microgreens and grind them into powder, creating a shelf-stable supplement for shakes, soups, or sauces. Both methods are space-saving, easy to manage, and reduce waste from leftover greens.
Comparison of Preservation Methods
Each preservation method offers different benefits. Use this table to compare them quickly and decide which one suits your needs best.
|
Method |
Shelf Life |
Texture After |
Equipment Needed |
Best For |
|
Freezing |
3–6 months |
Softened |
Freezer |
Smoothies, soups |
|
Dehydrating |
6–12 months |
Crisp/dry |
Dehydrator |
Teas, seasoning |
|
Freeze-Drying |
1+ year |
Lightweight |
Freeze-dryer |
Storage, supplements |
Conclusion
So, can you freeze microgreens? Now you know you definitely can, and how to do it in a way that works. You’ve got the steps, tips, and alternative options to help you store your greens safely and use them wisely.
If you’re blending them into smoothies or adding them to soups, you’ll waste less and keep the goodness going longer.
If you’ve made it this far, you’re serious about getting the most from what you grow or buy.
Don’t stop here, check out my other how-to posts for more smart ways to store, prep, and use your fresh food. You’ve got options, and I’m here to help you make the most of them.


