


Are you tired of looking at your boring, outdated stairs every single day? I have the perfect solution for you! A DIY cheap stair makeover is one of the smartest home improvement projects you can tackle.
You can change your stairs into stunning focal points for under a few hundred dollars. Most makeovers can be completed in just one weekend, making them perfect for busy homeowners like you.
I’m here to show you exactly how to create a beautiful stair changeover on any budget. You don’t need special skills or expensive tools to get professional-looking results at home.
My step-by-step approach covers everything, including materials, costs, instructions, and maintenance tips. Get ready to fall in love with your stairs all over again!
Why a Stair Makeover is Worth It
Stairs are one of the most overlooked spaces in your home, but they have huge makeover potential! You walk past them every single day, so why not make them beautiful?
A stair makeover offers incredible value for your investment compared to other home projects. You can completely alter the look for under a few hundred dollars. Most stair makeovers can be completed in just one weekend, making them perfect for busy homeowners.
Even if you’re a complete beginner, stairs are forgiving to work on. You can practice your painting and decorating skills without major consequences.
Plus, when guests visit, updated stairs create an excellent first impression that makes your whole house feel more expensive and well-maintained.
Material You’ll Need for a Stair Makeover
The following table outlines the estimated cost range for each material required for a DIY, budget-friendly stair makeover. These prices reflect budget-friendly options that will help you alter your stairs affordably.
| Material/Equipment | Estimated Cost Range (USD) |
|---|---|
| Carpet runners (6 ft each) | $8 – $40 per runner |
| Primer and paint | $15 – $40 (per quart/set) |
| Electric stapler | $22 – $80 |
| 9/16 staples | $3 – $13 |
| Carpet tape | $5 – $15 |
| Steamer | $20 – $50 |
| Carpet cutter | $8 – $20 |
| Antiquing wax | $10 – $20 |
| Sconce lights | $15 – $40 each |
| Rechargeable light | $10 – $25 |
| Total Estimated Cost | $116 – $343 |
This table provides an estimated cost range for each essential material required for your stair makeover. Depending on your specific needs, the total cost may vary, but this should give you a good idea of what to expect.
NOTE: These costs are estimated and may vary depending on material choices, quantity, and location of purchase.
Step-By-Step Process: DIY Cheap Stair Makeover
This simple five-step process will change your stairs from boring to beautiful on a budget. I’ll guide you through each step, building on the last to create a professional-looking makeover that you can complete over a weekend.
STEP 1: Clean And Prepare the Stairs
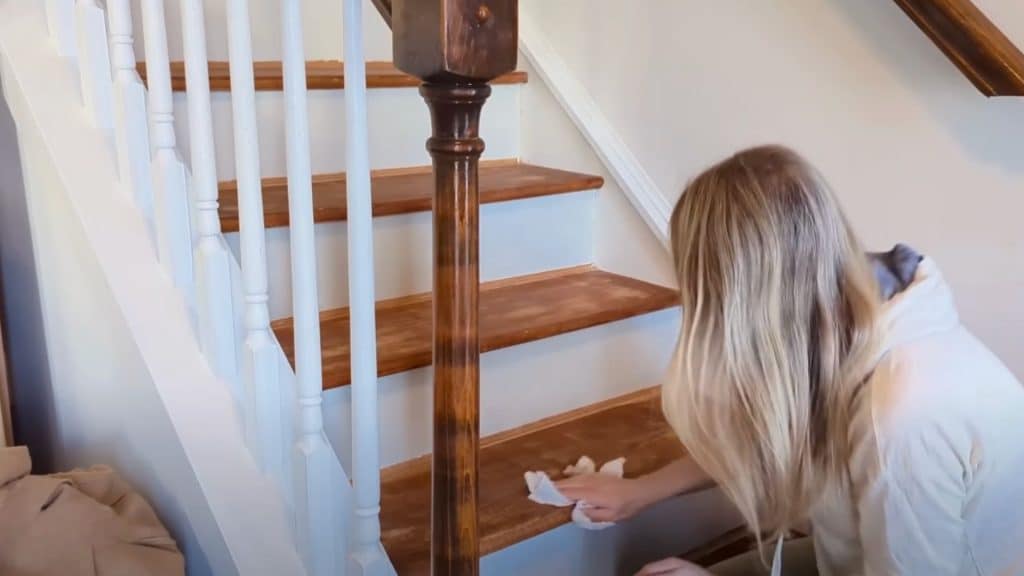
Start by wiping down your stairs with a damp paper towel to get rid of any dust or debris. If you’ve sanded the stairs, use a vacuum to ensure they’re completely clean before painting.
Proper preparation is key to a smooth finish, so take your time to ensure the surface is well-prepped for the paint and runner installation.
Pro Tips:
- Use a microfiber cloth to trap dust more effectively.
- Take breaks to avoid over-exerting yourself while prepping.
- Vacuum the edges thoroughly for a cleaner surface.
STEP 2: Prime And Paint the Risers
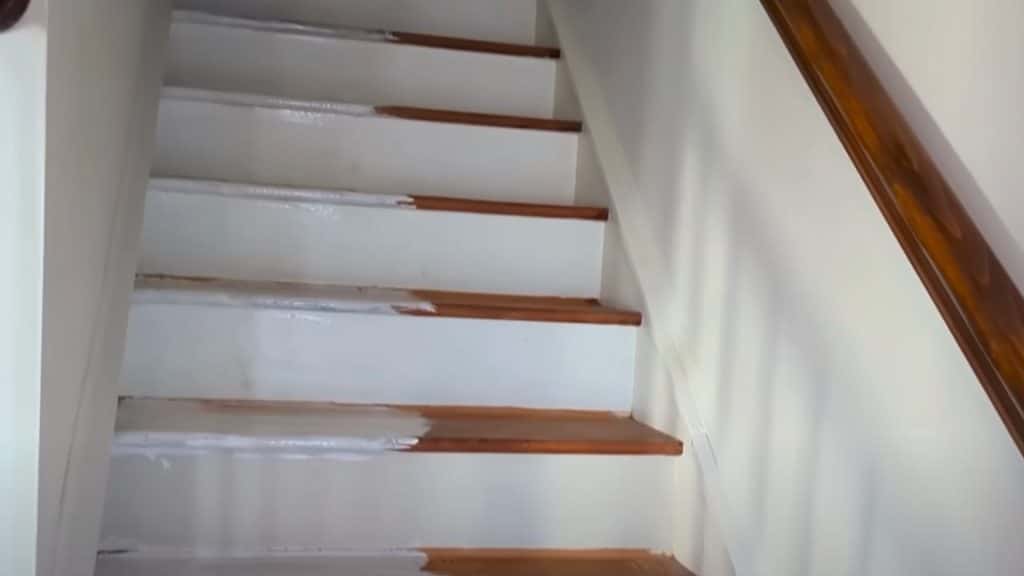
Apply a coat of primer to the risers (vertical parts of the stairs) for a smooth finish. Once dry, use Sharon Williams Pure White for the top coat.
This color complements your walls, creating a flawless look. Be sure to let the primer dry fully before applying the paint for the best result.
Pro Tips:
- Wait for the primer to fully dry before applying the top coat.
- Use a small brush for detailed areas like corners.
- Apply a second coat for a more even, durable finish.
STEP 3: Paint the Treads With Shiitake
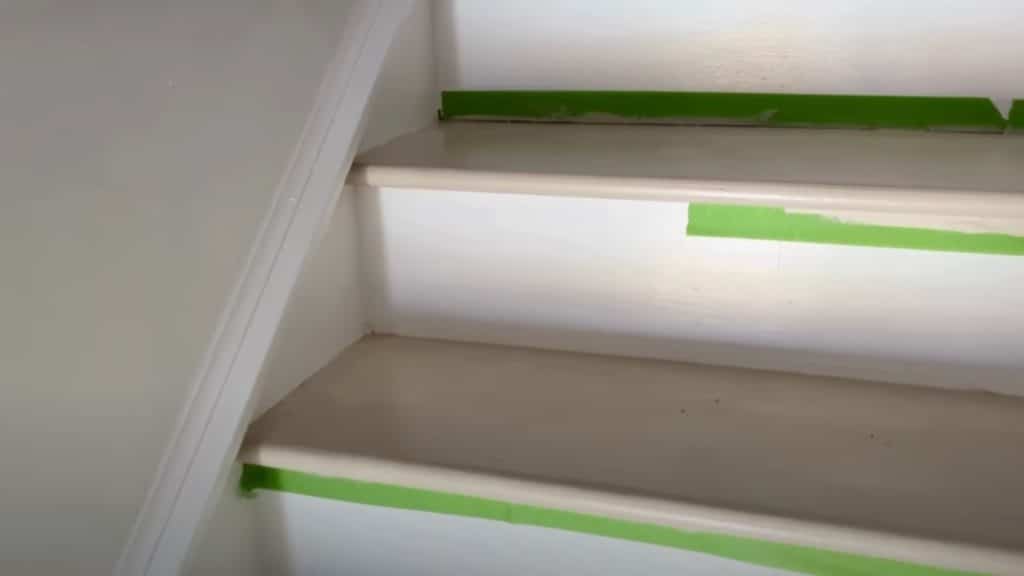
For the treads (flat part of the stairs), use Shiitake paint to match the flooring. This color adds a neutral, warm tone and blends well with your home decor.
If you don’t want to refinish the stairs fully, this step provides a quick solution for a fresh, updated look without sanding the old surface.
Pro Tips:
- Use a roller for a smooth, even coat.
- Let each coat dry before adding another.
- Work in sections to avoid streaks or smudges.
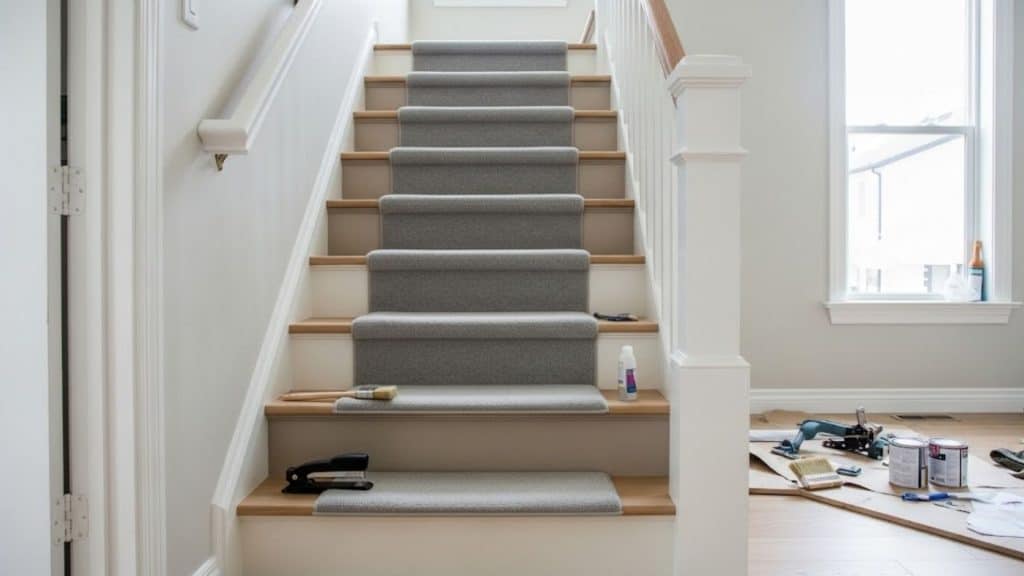
STEP 4: Install the Carpet Runner
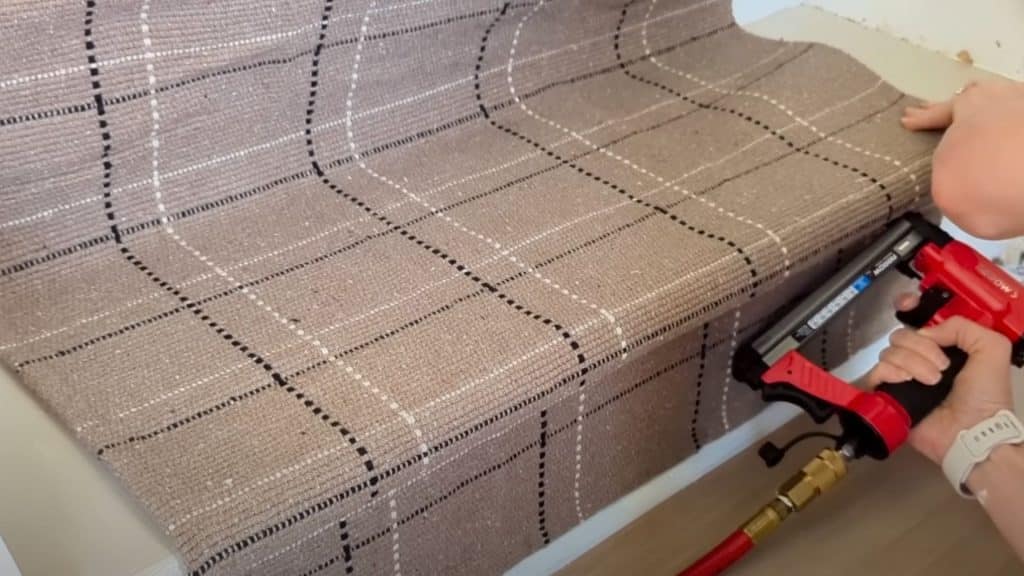
Measure your stairs and mark where the runner should be placed. Then, use an electric stapler to attach it, starting at the bottom and working your way up.
Pull the runner tight to avoid creases, stapling underneath each stair lip to keep it securely in place.
Pro Tips:
- Use carpet tape to hold the runner in place as you staple.
- Make sure to staple at the edges and at the bottom back crease for a firm hold.
- Don’t rush – go slowly to get each stair even and tight.
STEP 5: Add Finishing Touches and Gallery Wall
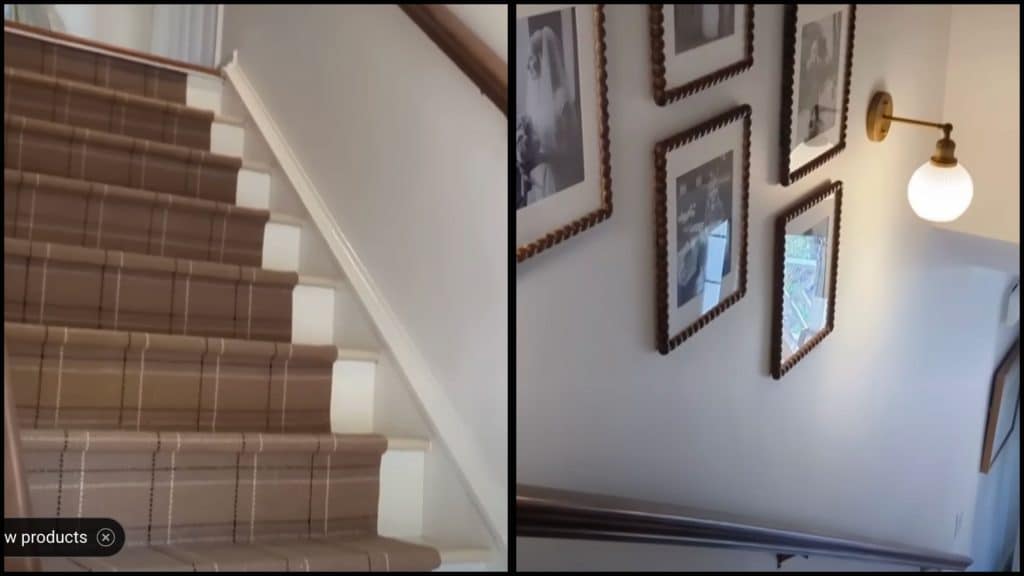
Complete the makeover by installing a sleek newel post and painting the handrails with a dark wash of Urbane Bronze.
Once that’s done, update your gallery wall with new frames and add some stylish sconce lights to enhance the space. This adds a modern, personal touch to your upgraded stairs.
Pro Tips:
- Use a remote-controlled sconce for easy on/off access.
- Choose frames that complement your runner and wall colors.
- Consider adding extra frames later to complete your gallery wall.
Watch How it is Done: DIY Cheap Stair Makeover Video Tutorial
Maintenance and Longevity Tips for Stairs
Your beautiful stair makeover will last years longer with simple, regular care and smart maintenance habits.
Clean your stairs weekly with a damp cloth to prevent dirt buildup that can damage finishes. Vacuum carpet runners regularly and spot-clean stains immediately before they set in permanently.
Keep leftover paint on hand for quick touch-ups when you notice small chips or scuffs appear. Use a small brush to fix problem spots before they become bigger issues.
Consider refreshing high-traffic areas every two to three years with a fresh coat of paint. Complete redos are only needed when colors look outdated or materials show major wear.
Place small rugs at the bottom and top of the stairs to reduce daily wear and tear. Your stairs will stay beautiful much longer with these simple protective steps.
Common Mistakes to Avoid while DIYing Stair Makeover
Even simple stair makeovers can go wrong if you’re not careful. Learning from these common mistakes will save you time, money, and frustration.
- Skipping proper prep work means your paint won’t stick well and will look bumpy and unprofessional.
- Choosing weak materials for high-traffic areas will result in chipping and wearing within months.
- Ignoring safety codes when adding thick materials can create uneven steps that cause dangerous falls.
- Rushing through steps without allowing for proper drying time can lead to peeling paint and wasted effort on the weekend.
Take your time and do each step properly for the best results. Your future self will thank you for the extra effort you put in today.
Wrapping It Up
Your DIY cheap stair makeover can create excellent results without breaking your budget or schedule. I’ve shown you how paint, carpet runners, and simple finishing touches make the biggest visual impact.
Remember, you can achieve dramatic modifications for under a few hundred dollars and one weekend of work.
The key is taking your time with prep work and choosing durable materials for high-traffic areas. Your beautiful new stairs will welcome guests and bring a smile to your face every day.
I encourage you to start planning your stair changeover today and join thousands of homeowners who’ve discovered this budget-friendly makeover magic. Share your experience in the comments below!


