


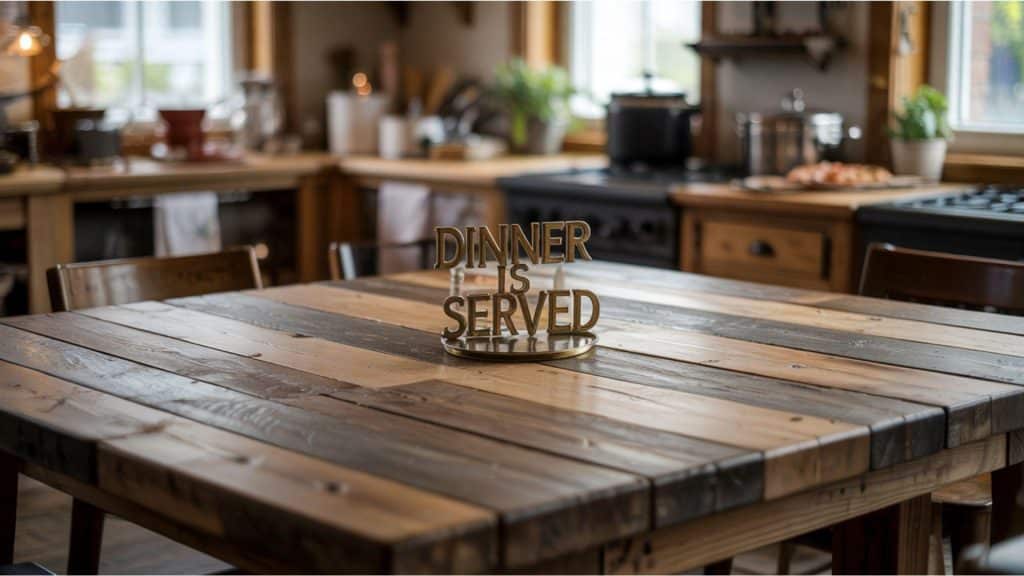
Looking at your tired old dining table and thinking if it’s time for a change? Before you start shopping for expensive new furniture, I have exciting news for you.
Your current table might just need a little love and imagination to become the star of your dining room again. I believe DIY dining table makeover ideas can change any boring or worn-out piece into something stunning.
You don’t need to be a skilled carpenter or spend a fortune to achieve excellent results. With some basic supplies and a free weekend, you can completely change how your dining space looks and feels.
I’m here to help you find the perfect project. Your dining room changeover starts with just one simple decision to try something new!
Material You’ll Need for a DIY Dining Table Makeover
To complete your DIY dining table makeover, you’ll need a few essential materials and tools. Below is a table showing the estimated cost range for each material required, keeping the project budget-friendly and accessible.
| Material/Equipment | Estimated Cost Range (USD) |
|---|---|
| Gloves | $3 – $15 |
| All-purpose cleaner | $5 – $15 |
| Scraper | $5 – $20 |
| Sandpaper (220-grit) | $4 – $20 |
| Paint primer (gray) | $15 – $40 |
| Paint sprayer | $25 – $80 |
| Satin black paint | $15 – $40 |
| Stain (walnut and espresso) | $10 – $30 |
| Lint-free rags | $5 – $15 |
| Polyurethane sealant | $10 – $30 |
| Soft bristle brush | $5 – $15 |
| Total Estimated Cost | $102 – $320 |
NOTE: Costs are estimates and may vary based on location, material availability, brand choices, and current market prices.
DIY Dining Table Makeover: Step-By-Step Guide
I’ll walk you through five key steps to alter your dining table completely. You’ll learn how to prepare, sand, prime, paint, and stain your table for professional-looking results.
Step 1: Fix Loose Parts and Clean Thoroughly
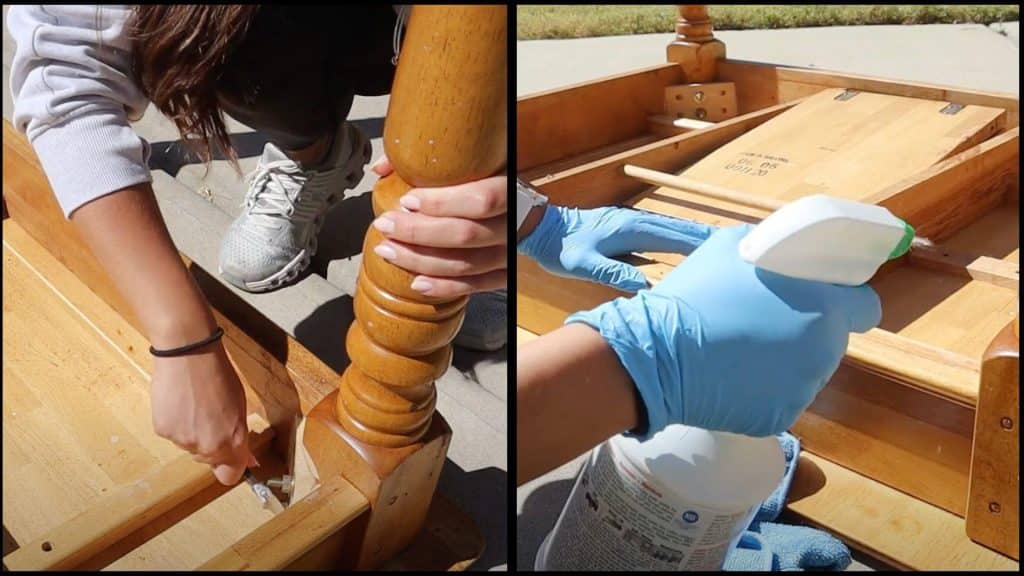
Start by fixing any loose parts, like table legs. Tighten any screws or bolts to ensure everything is secure once the structure is solid. Clean off any dirt, grime, and old stains.
Use a scraper to remove larger chunks, and then wipe down surfaces with a rag and an all-purpose cleaner.
Pro Tips
- Ensure you scrub the hard-to-reach spots with a brush.
- Remove any removable pieces, like table leaves, for easier cleaning.
- Use gloves to protect your hands from cleaning agents.
Step 2: Sand the Surface
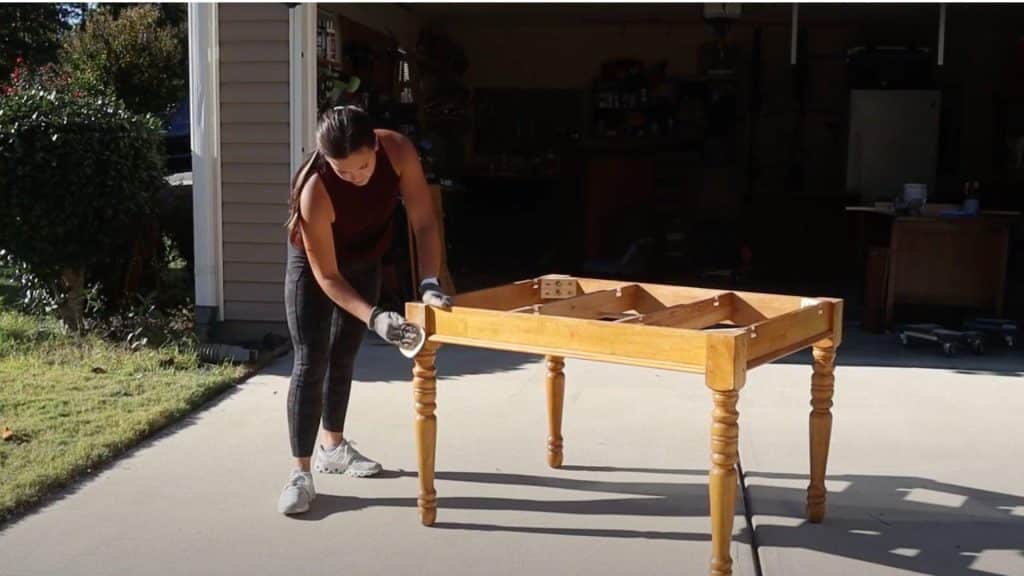
Next, lightly sand the table’s surfaces with 220-grit sandpaper. Sanding removes any old finish, giving the new paint or stain a good base to stick to.
Don’t rush; take your time to ensure a smooth surface. You can also sand the chairs for a more uniform look.
Pro Tips
- Work in small sections to avoid missing any spots.
- Use a high-quality sandpaper for a smoother finish.
- Always blow off the dust before starting the next step.
Step 3: Apply Primer
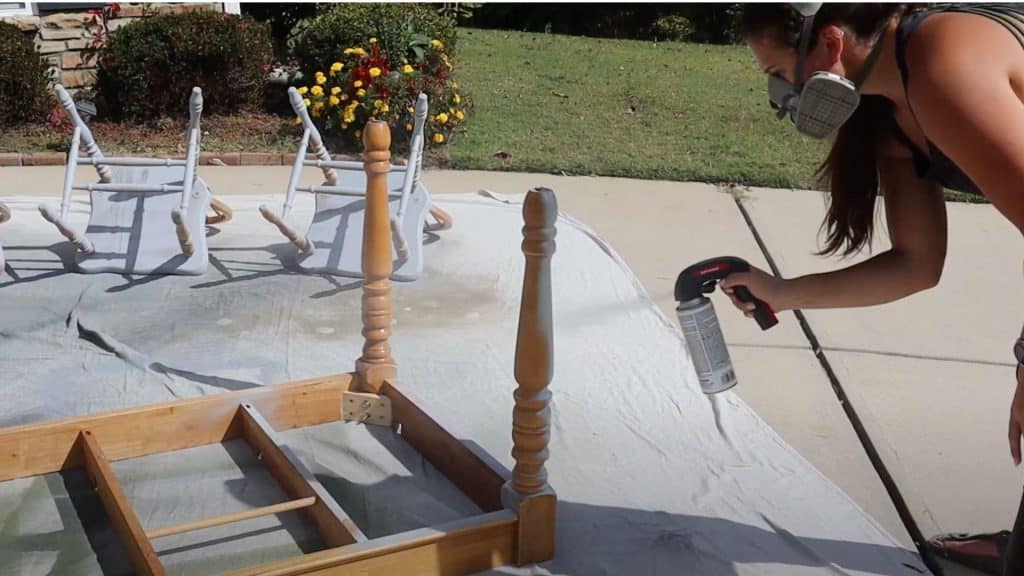
Once everything is sanded and smooth, apply a coat of primer. A good primer helps paint bond better and prevents chipping.
For the base and chairs, use a gray primer, which works well with dark colors like black. Let it dry completely before proceeding to the next step, which is painting.
Pro Tips
- Apply primer with a sprayer for an even coat.
- Use a light coat to avoid any streaks.
- Let the primer dry for at least an hour before painting.
Step 4: Paint the Base and Chairs
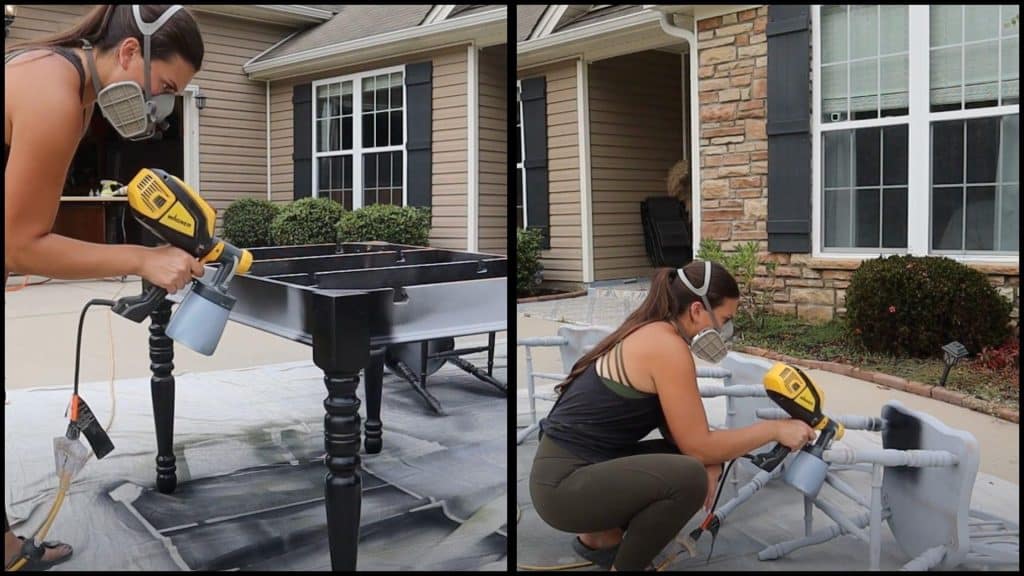
After the primer is dry, it’s time to paint. For the base and chairs, use a durable satin black paint. A paint sprayer makes the job quicker and gives a smoother finish. Be sure to apply thin layers and allow each coat to dry before adding another.
Pro Tips
- Use a sprayer for even coverage and fewer brush marks.
- Paint in light, even strokes, to avoid drips.
- Allow enough time for each coat to dry completely.
Step 5: Stain the Tabletop
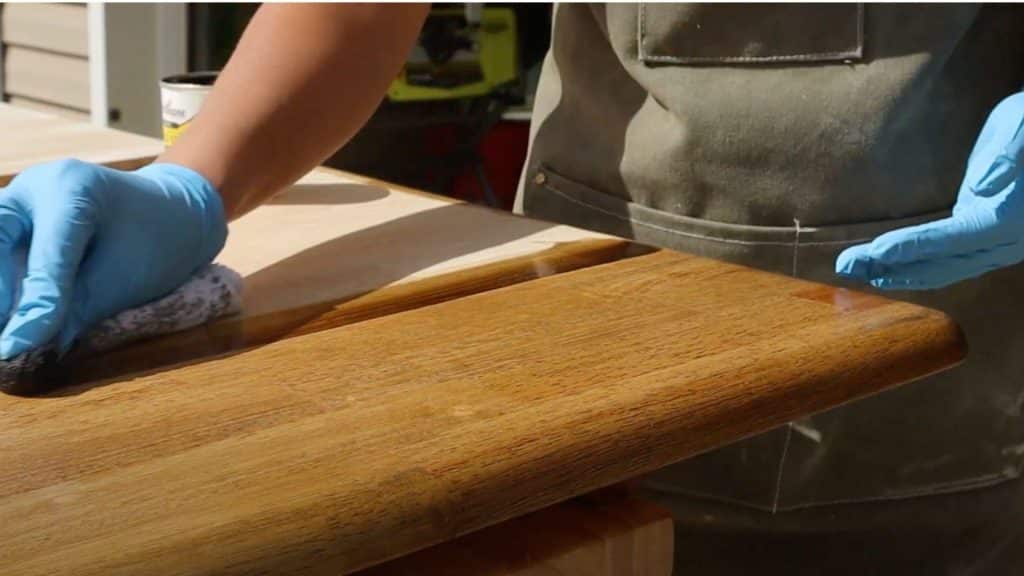
For the tabletop, choose a stain that suits your style. Start with a light stain, such as walnut, and layer darker stains, like espresso, for added depth.
Let each coat dry before applying the next. Finish off with a polyurethane sealant to protect the wood from wear and tear.
Pro Tips
- Use a lint-free rag to apply the stain evenly.
- Wipe off excess stains immediately to avoid uneven coloring.
- Apply at least two coats of stain for a rich, more vibrant look.
Watch How it is Done: DIY Dining Table Makeover Video Tutorial
DIY Dining Table Makeover Ideas You Can Try
I’ve gathered innovative makeover ideas that can convert your old dining table into something special and new. You can choose from different techniques and materials that match your style and skill level.
1. Rustic Farmhouse Look
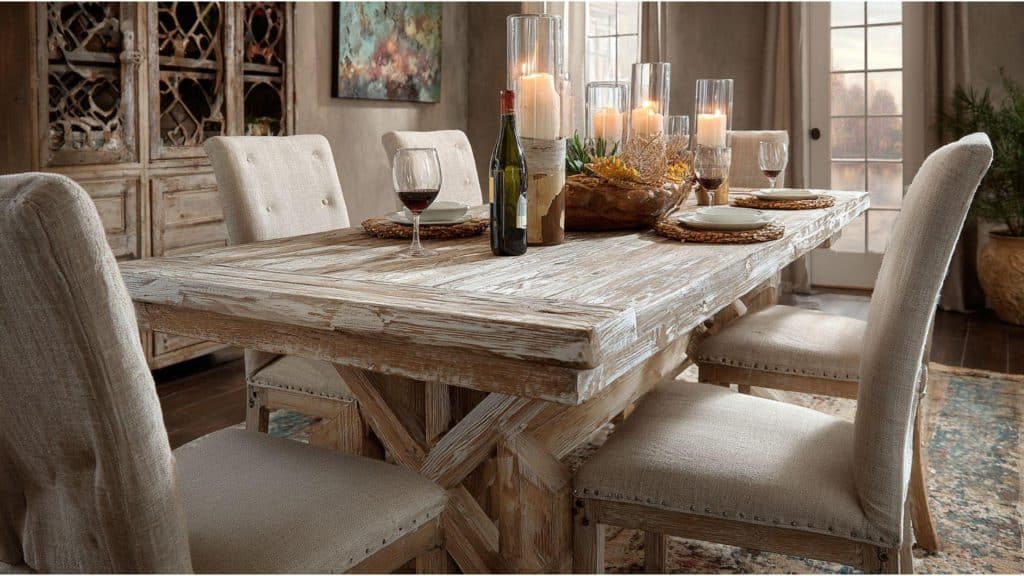
Convert your dining table into a rustic farmhouse piece by sanding it down and applying a light white or gray wash. This simple distressed finish adds a lovely, aged look.
The rustic feel is ideal for creating a warm and welcoming dining space, especially in homes with vintage or country-style decor.
2. Industrial Metal and Wood Fusion
For a modern, industrial appeal, consider replacing wooden legs with metal ones or simply painting the existing legs matte black.
This combination of raw wood and sleek metal brings a stylish, rugged look that is ideal for creating an urban or minimalist dining area. The fusion of both materials gives it a unique appeal.
3. Chalk Paint for a Shabby Chic Look
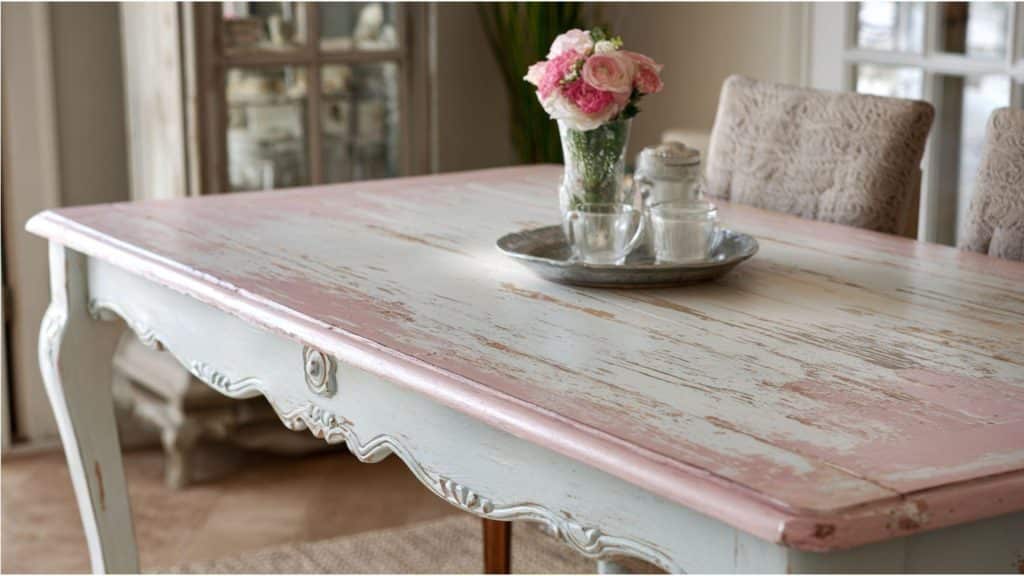
Use chalk paint in soft pastels or neutral tones to give your table a shabby chic makeover. Lightly distress the edges for a vintage, weathered effect.
This technique adds character and joy to any dining space, offering a cozy, relaxed atmosphere, and it’s a budget-friendly way to update an old table.
4. Geometric Patterns on the Tabletop
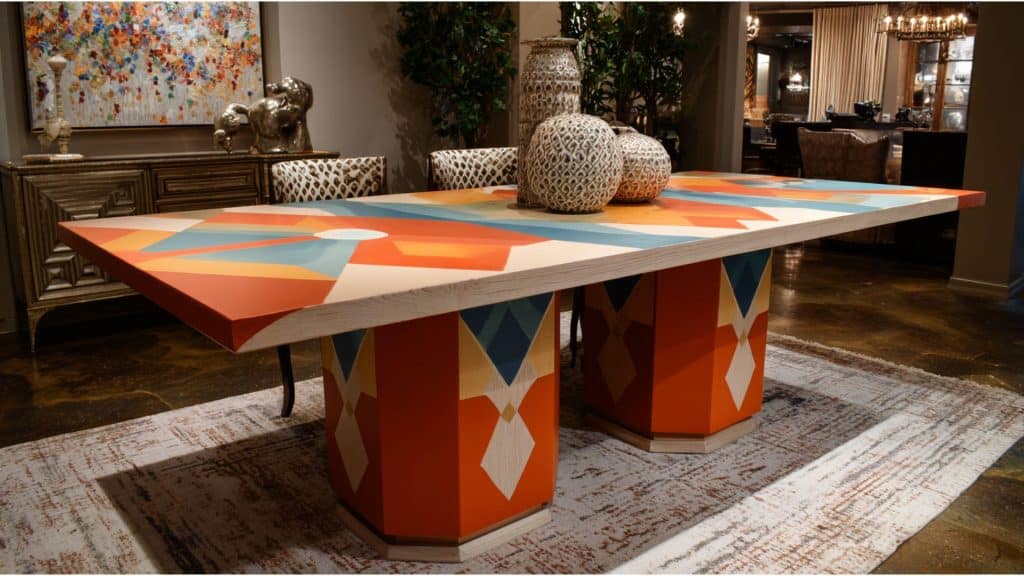
Create a bold, modern look by adding geometric patterns to your table. Use painter’s tape to create sharp, clean lines and paint each section in contrasting colors.
This DIY project is perfect for a contemporary or artistic dining room, allowing you to experiment with vibrant shades or subtle neutrals for a unique design.
5. Marble Effect Using Contact Paper
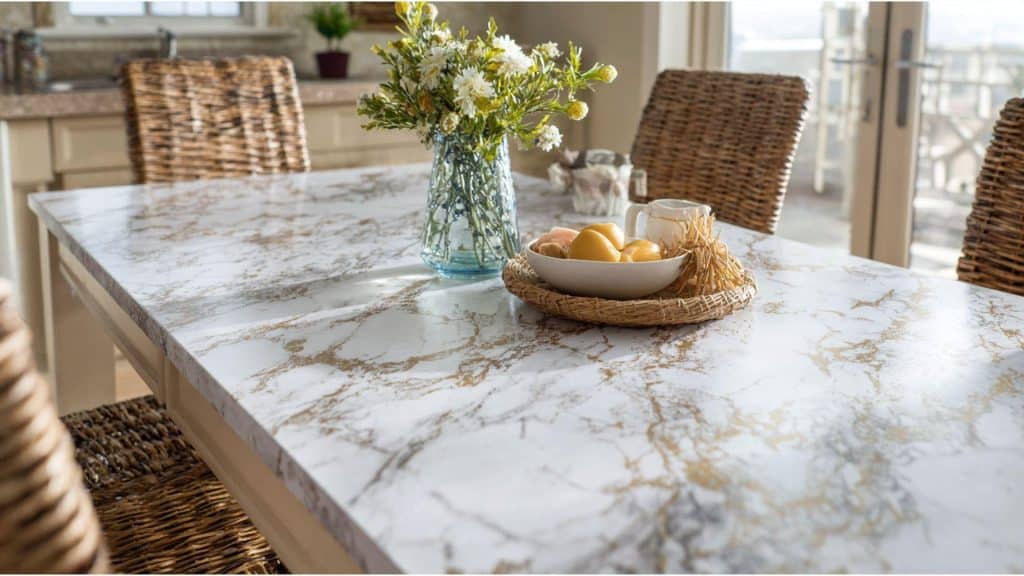
Mimic the luxurious appearance of marble by applying marble-patterned contact paper to your table. It’s an affordable, simple solution for a high-end look without the hefty price tag.
This makeover gives your dining table a graceful, refined feel that works in both modern and traditional dining rooms.
6. Decoupage Tabletop with Fabric or Paper
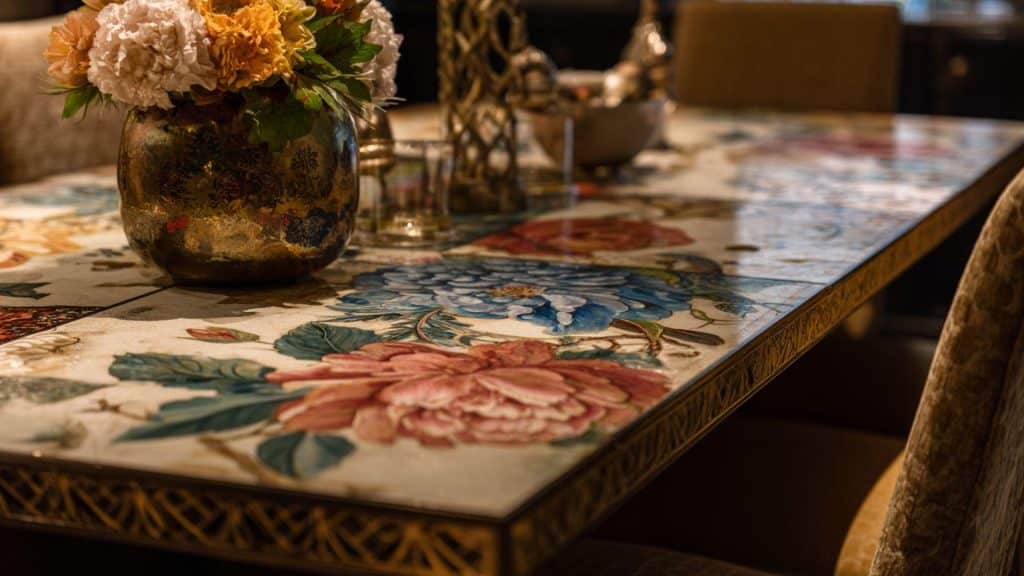
For a personalized touch, decoupage fabric or decorative paper onto your dining table. Choose fabrics or prints that match your home’s style, and use decoupage glue to apply them smoothly.
This technique is ideal for adding texture and color, creating a unique dining experience while repurposing old materials.
7. Ombre Painted Tabletop
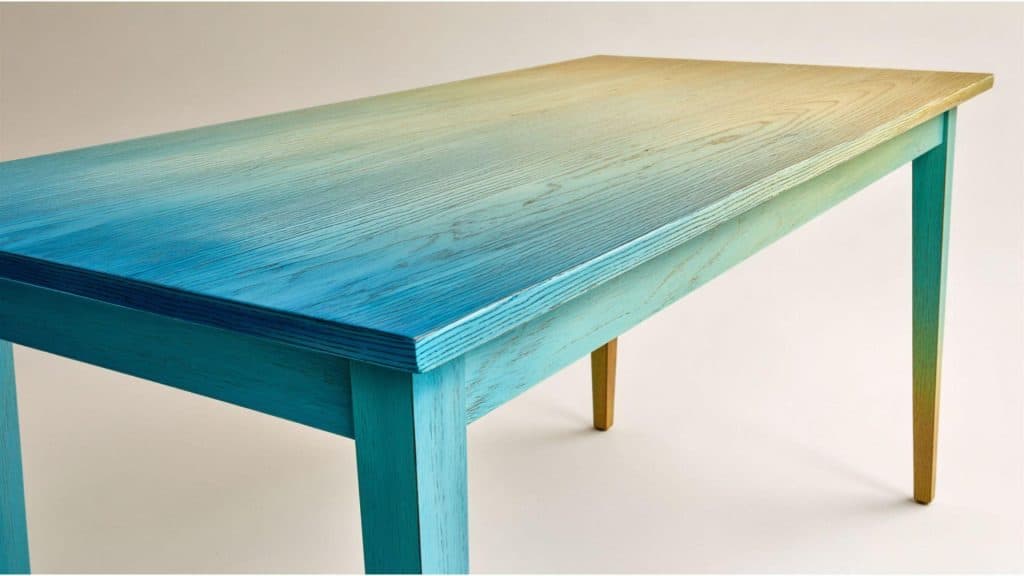
Add a trendy, eye-catching touch to your table with an ombre-painted effect. Choose two or more paint colors and blend them together from light to dark for a smooth, gradient look.
This fun project creates a unique, dynamic centerpiece for your dining room that reflects your personal style.
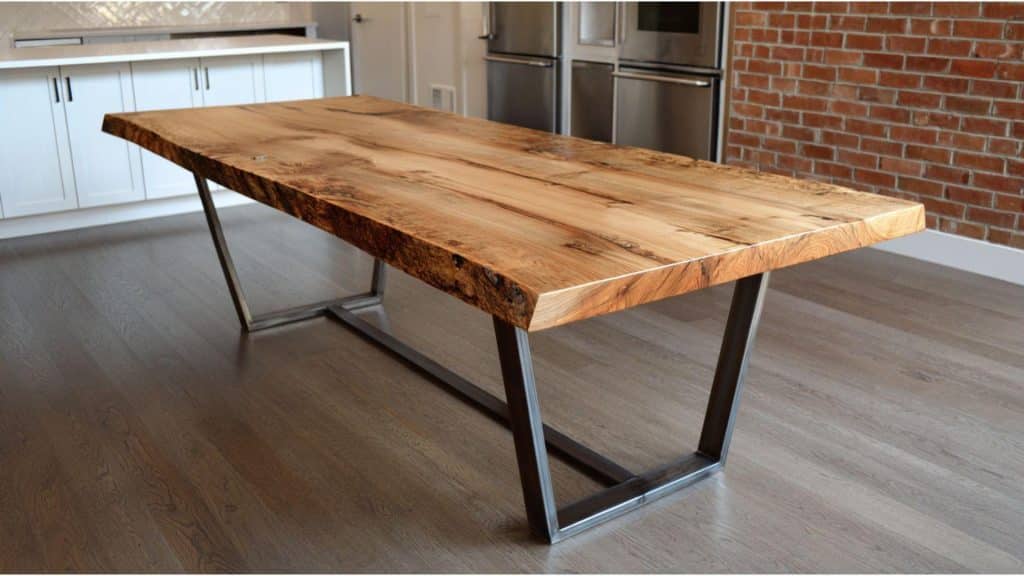
8. Reclaimed Wood Tabletop for a Vintage Feel
Replace your old tabletop with reclaimed wood to add a rustic, vintage appeal. The unique, natural imperfections of the wood will give your table character and history.
This sustainable choice not only improves your space but also adds warmth and texture, making it perfect for a cozy dining area.
9. Glass Top Dining Table with a Wooden Base
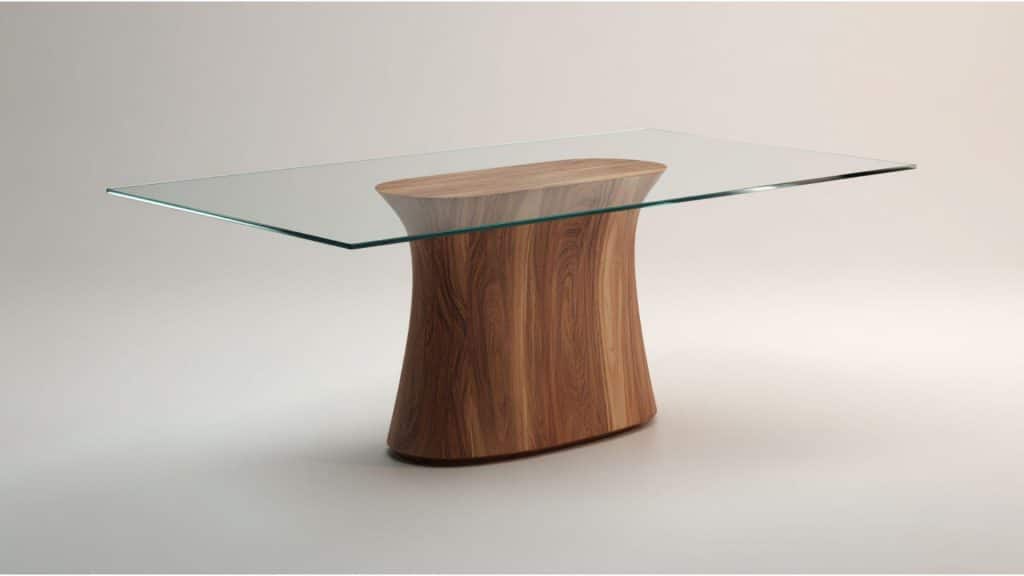
For a sleek, contemporary look, replace your wooden tabletop with a glass one. This minimalist design accentuates the wooden base, creating an airy, cultured atmosphere in your dining space.
Glass tops are ideal for modern, open-concept rooms, allowing the natural beauty of the wood to be showcased underneath.
Maintenance Tips for DIY Dining Table Makeover
Taking care of your newly made-over dining table will keep it looking great for years to come. These simple tips will help you protect your hard work and investment.
- Clean spills immediately: Wipe up any liquid spills right away to prevent staining or water damage to your new finish.
- Use placemats and coasters: Protect the surface from hot dishes, scratches, and ring marks by using protective mats during meals.
- Dust regularly with a soft cloth: Keep your table clean by dusting it weekly with a microfiber cloth to maintain its fresh appearance.
- Apply protective wax annually: Give your table a thin coat of furniture wax once a year to keep the finish looking smooth and protected.
Following these easy habits will ensure your DIY makeover stays beautiful and functional. Your table will remain the centerpiece of your dining room for many years.
Common Mistakes to Avoid
Before you begin your DIY dining table makeover, it’s helpful to know some common mistakes to avoid. Here are a few things to keep in mind:
- Skipping the sanding step can prevent the paint from sticking properly and result in a rough finish.
- Choosing the wrong paint or stain can cause uneven coverage or affect the final look of your table.
- Not allowing enough drying time can lead to smudges, streaks, or peeling once you move to the next step.
- Skipping the protective coat can cause your table to become damaged from spills or everyday wear.
Avoiding these mistakes will help you achieve a polished and long-lasting result. With patience and attention to detail, your table makeover will turn out beautifully!
Wrapping It Up
Your dining table makeover pilgrimage doesn’t have to end here with these DIY dining table makeover ideas. I hope you found the perfect project that matches your style and skill level.
Remember that every expert was once a beginner, so don’t worry if your first attempt isn’t perfect. The most important thing is having fun and creating something that makes you smile every day.
Your friends and family will be amazed at what you accomplished with your own hands. Take your time, be patient with yourself, and enjoy the process.
Drop a comment below and tell me which makeover idea caught your eye!


