


Ever dreamed of having gorgeous marble countertops but worried about the cost? Marble countertops bring lasting grace to any kitchen or bathroom.
Their unique veining and natural beauty make every surface special. But here’s the exciting part – you don’t need to break the bank! DIY marble countertops are your ticket to luxury on a budget.
I’m here to show you exactly how to create stunning faux marble surfaces. You’ll save thousands while getting that high-end look you’ve always wanted. Here, I will walk you through every step needed for success.
Ready to alter your space? Let’s turn your countertop dreams into reality!
Why DIYing a Marble Countertop is Worth It
Marble countertops are a lasting and wise choice that never goes out of style. Their unique veining and natural patterns add beauty to any space, making each countertop one-of-a-kind.
If you prefer a classic white marble or something with bold, colorful veins, it complements both modern and traditional styles. Marble’s durability is another big plus.
It can handle daily wear and tear in kitchens and bathrooms, making it a practical yet luxurious option. While it might seem expensive, it adds lasting value to your home. With proper maintenance, marble countertops can last for many years.
Overall, marble is a versatile material that combines flawlessly with any design, creating a stunning and functional focal point in your home.
Choosing the Right Marble for Your Project
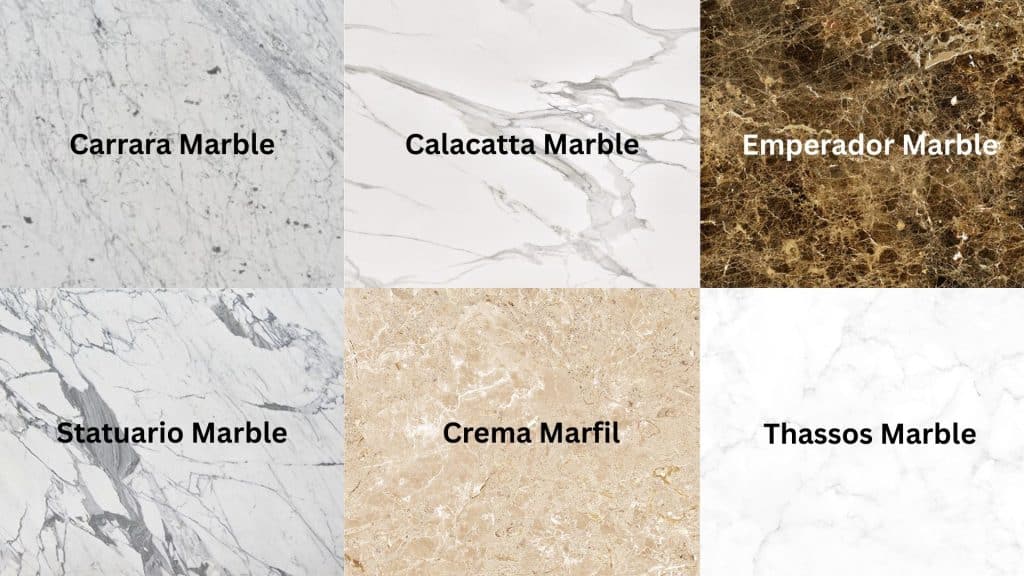
When choosing the right marble for your project, it’s important to consider the color, pattern, and price. Here’s a quick guide to help you determine which marble is best suited for your needs.
| Marble Type | Description | Best For |
|---|---|---|
| Carrara Marble | Classic white with soft gray veins, this is a classy and versatile choice. | Kitchens, bathrooms, and floors. |
| Calacatta Marble | Bright white with bold, dramatic veins in gold or gray. | Luxury kitchens, bathrooms, and features. |
| Emperador Marble | Dark brown with lighter veins, rich and warm. | Bathrooms and classic interiors. |
| Statuario Marble | White with dramatic gray veining, premium appearance. | High-end kitchens, bathrooms, and countertops. |
| Crema Marfil | Light beige with subtle gold and brown veins. | Neutral spaces, living rooms, and bathrooms. |
| Thassos Marble | Pure white with minimal veining, clean and bright. | Contemporary designs and modern bathrooms. |
Now that you have an idea of the different types of marble, choose the one that best fits your style and budget. Each option can alter your space and add a unique touch to your home.
Step-By-Step Process: DIY Marble Countertops
Create a stunning faux marble countertop with these easy, cost-effective steps. Each stage ensures a smooth, professional-looking result that lasts. Here is what you’ll need for DIY Marble Countertops
- Paint (Valspar Bistro White or your preferred color)
- Glaze
- Sea sponge
- Rag
- Chip brush
- A duck feather or a small paintbrush
- Polycrylic (Minwax Clear Matte)
- Painter’s tape
- Sandpaper (220 grit)
- Foam brush (for applying polycrylic)
STEP 1: Prepare Your Countertop Surface
Start by thoroughly cleaning your existing countertops to remove any dirt, dust, or grime. Remove fixtures, such as sinks and cooktops, to make the job easier.
Apply painter’s tape around areas you don’t want to paint, and cover the surrounding space to prevent accidental spills.
Bonus Tips:
- Use a mild cleaner to avoid any residue.
- Ensure your tape is pressed down tightly to prevent paint bleeding.
- Take your time cleaning for the best results.
STEP 2: Apply the Base Coat
Once your countertop is clean and dry, apply a crisp white base coat. This is the foundation for the faux marble look. Use a roller for an even spread, and allow it to dry completely before moving to the next step.
Bonus Tips:
- Allow the base coat to dry completely to prevent smudges when applying the next layers.
- Choose a paint designed for countertops for better durability.
- Apply a second layer if the first coat isn’t fully opaque.
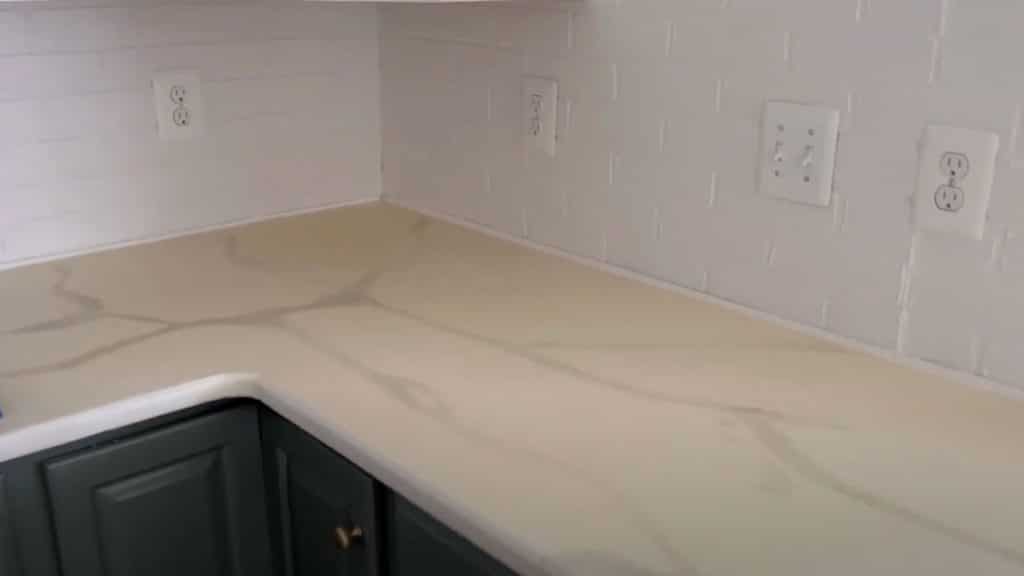
STEP 3: Create the Veins
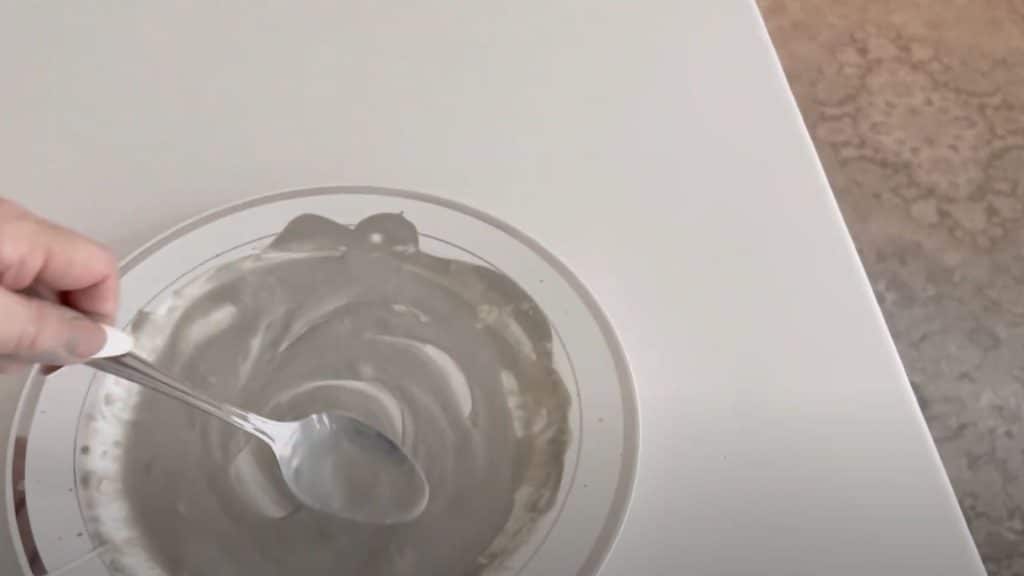
For the marble effect, mix one part paint, one part glaze, and three to four parts water. Use a sea sponge to stamp the paint mixture onto your countertop in small sections. Then, quickly blot with a dry rag to create soft, combined lines that mimic the veins of marble.
Bonus Tips:
- Practice your veining technique on scrap paper before applying it to your work.
- Work in smaller sections to keep the paint wet for mixing.
- Don’t worry if it looks messy – you can fix it!
STEP 4: Add the Marble Veins
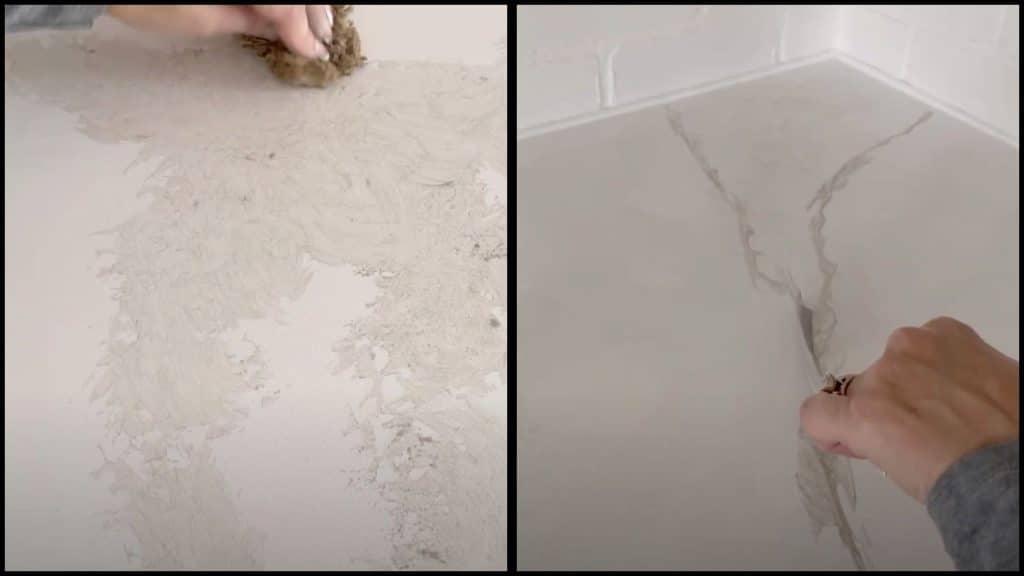
Once the initial veining layer has dried, mix one part paint with one part glaze and add a few drops of water.
Using a duck feather or small brush, apply random veins at a slight angle. Create a more natural look by using a chip brush to blur the lines gently.
Bonus Tips:
- Use a feather for a soft, natural look.
- Experiment with darker veins for added depth and dimension.
- Don’t be afraid to adjust the veins if they don’t look right at first.
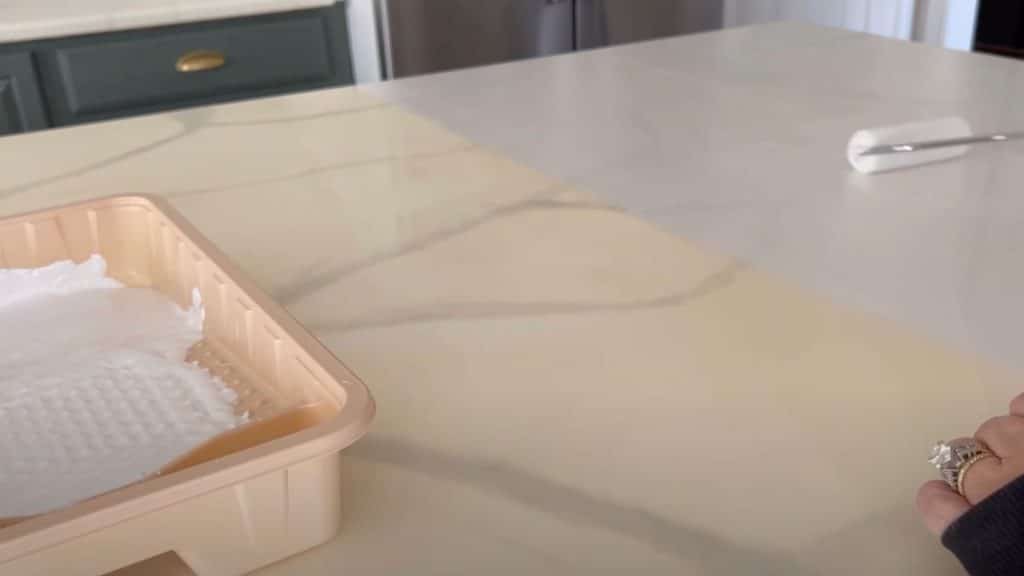
STEP 5: Seal Your Countertop
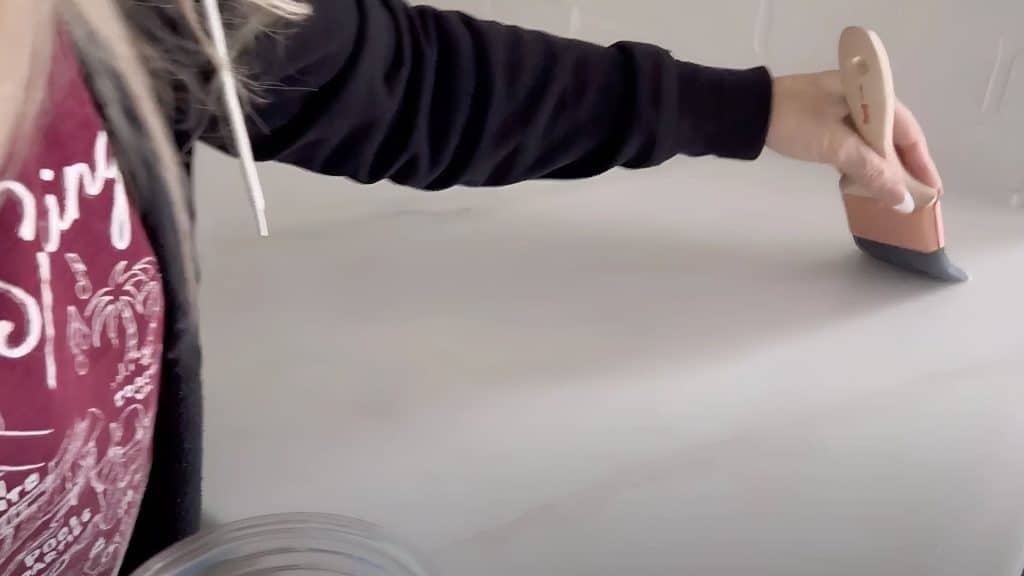
Once the paint and veins are dry, apply a protective clear finish with polycrylic. This ensures the marble look lasts and protects your countertops from spills and scratches. Use a synthetic brush for the best finish, and let the coat dry before adding additional layers.
Bonus Tips:
- Opt for a matte finish for a realistic look.
- Let the polycrylic dry completely before using your countertop.
- Lightly sand between coats for a smoother finish.
See the Process: DIY Marble Countertops Video Walkthrough
Cost Analysis and ROI
DIY marble countertops can cost as little as $200 to $900 for materials and basic tool rentals. On the other hand, hiring a professional to install marble countertops in an average kitchen typically costs between $1,200 and $6,000.
This means DIYers can save anywhere from $1,000 to $5,000 compared to hiring a pro. While the savings are significant, the return on investment (ROI) for DIY projects typically ranges from 50% to 65%.
Professional installations tend to deliver a higher ROI of approximately 70%–81%, thanks to their better durability and increased buyer appeal.
So, while DIY marble countertops offer major savings, a professional installation provides greater resale value and long-term return. Consider your budget and future plans when deciding between a DIY installation and a professional installation.
NOTE: The figures provided are estimates and may vary based on factors such as location, materials, and project complexity. Always get multiple quotes to ensure accuracy.
Common Mistakes to Avoid
When installing DIY marble countertops, it’s easy to make mistakes, but they can be avoided with a bit of care and attention. Here are some common errors to watch out for:
- Failing to properly clean the surface before starting can cause the paint to peel or not adhere well.
- Skipping the sealing step leaves your countertops vulnerable to stains and damage from spills or moisture.
- Applying too much paint or epoxy at once can lead to uneven coverage or drips.
- Using the wrong cleaning products can damage the marble’s surface over time, so always choose gentle, pH-balanced cleaners.
By avoiding these mistakes, your DIY marble countertops will last longer and retain their appearance for years to come. Make sure to follow the steps carefully for the best results.
Wrapping It Up
DIY marble countertops offer incredible savings while delivering beautiful results. You get the luxury look without the hefty price tag. Plus, you’ll feel amazing knowing you created something gorgeous with your own hands.
The key is to take your time and follow each step carefully. Your patience will pay off with stunning countertops that’ll make friends jealous. Don’t let fear hold you back from this rewarding project.
Start planning your DIY marble countertops makeover today! You’ve got all the knowledge needed to succeed.
Share your success story and inspire others to take the plunge. I’d love to hear about your experience – please comment below with your questions or share your excellent results!


