


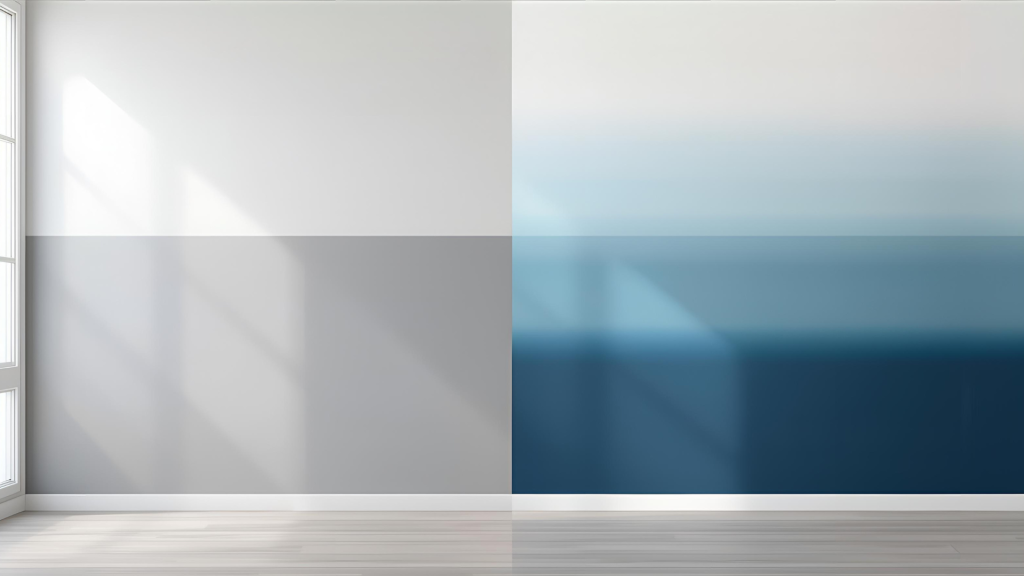
Have you ever looked at your walls and felt they needed something more? I know that feeling, wanting a fresh look without turning your space upside down. That’s where ombre wall paints come in.
With a smooth color fade, you can give your walls a soft, subtle movement and life without going overboard. You’ll love how this style adds depth, hides small flaws, and makes rooms feel brighter and more open.
In this guide, I’ll walk you through how to paint ombre walls step by step, pick the right colors, and handle small mistakes like a pro.
By the end, you’ll feel confident creating your own gradient wall that feels calm, clean, and completely yours.
What are Ombre Wall Paints?
Ombre wall paints create a soft color fade that moves gradually from one shade to another. This technique gives your walls a gentle transition, often from light to dark or between two related colors.
It adds more life than a solid color while keeping the look simple and balanced.
People choose ombre walls because they offer visual depth and texture, making plain walls feel more dynamic. The gradual fade can also make small spaces seem larger and help hide uneven wall surfaces.
Ombre walls are a favorite in modern interiors because they work with many styles, from minimalist to boho.
You can use this paint style in bedrooms for a calm feel, living rooms for an open, airy look, kids’ rooms for playful energy, or bathrooms for a soft, relaxed vibe. It’s flexible, creative, and easy to match with different color palettes.
Step-by-Step Guide to Painting Ombre Walls
I’ll walk you through each stage of painting ombre wall paints so your wall looks smooth and professional.
Tools and Materials You’ll Need
You don’t need special tools for this project. Just gather:
- 2–3 shades of latex paint (in the same color family)
- Chip brushes, rollers, or sponges
- A spray bottle with water for blending
- Painter’s tape, chalk, and a drop cloth
- Optional: glaze medium to slow drying and make blending easier
Tip: Use a separate brush for each paint color and keep a clean rag nearby to wipe off extra paint before switching shades.
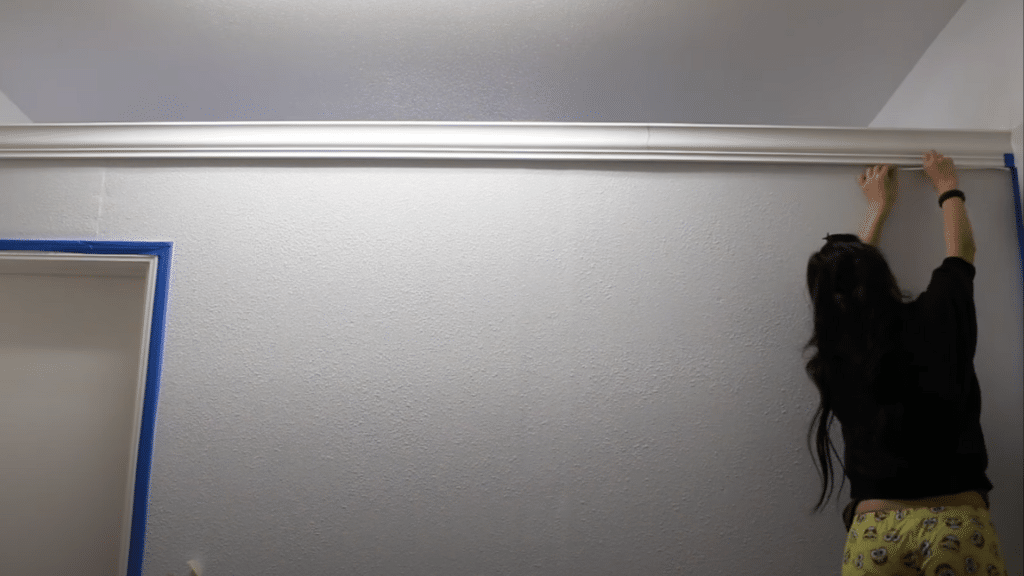
Step 1: Prep the Wall
Before you start painting, make sure your wall is ready for a clean and even ombre finish. Preparation makes blending easier and gives you a smoother result.
- Mask off the edges: Use painter’s tape around doors, trim, crown molding, and baseboards for a neat finish.
- Clean and inspect: Wipe down the wall to remove dust or grease.
- Prime if needed: If your wall is dark or has old paint, cover it with a coat of white paint first.
- Set up your paints: Have two to three shades ready in the same color family before you begin.
Why this matters: Good prep ensures your paint sticks evenly, prevents color interference, and helps your ombre fade look clean once blended.
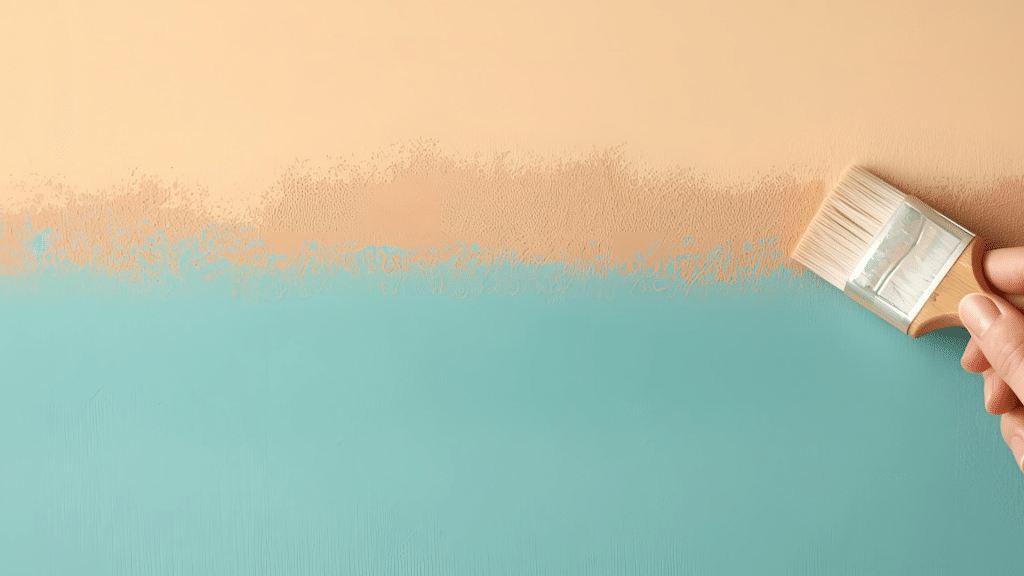
Step 2: Paint the Base Layer
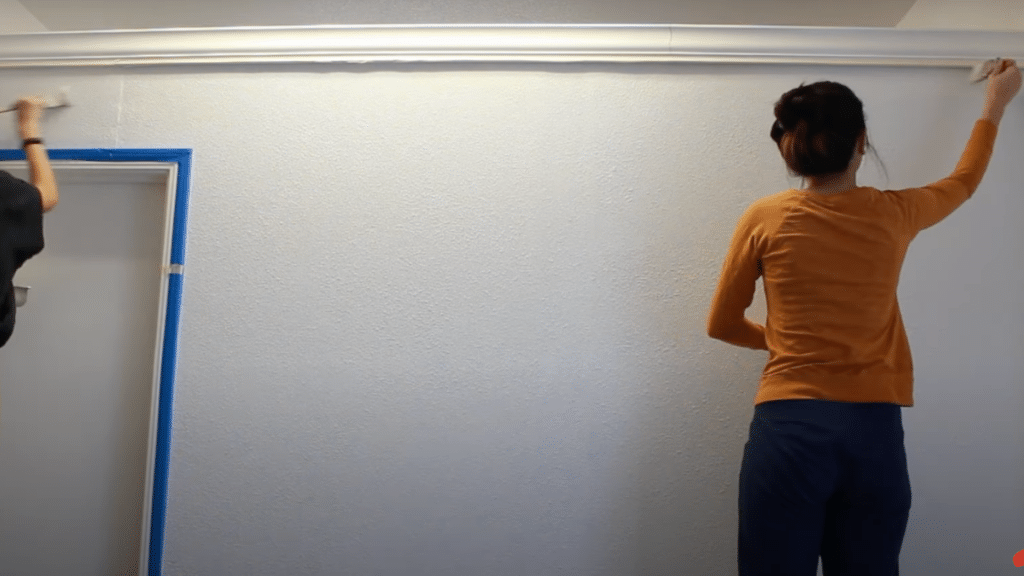
Start your ombre wall paint from light to dark. Begin with your lightest shade — usually white or a pale tone — and roll it across the top half of the wall.
Work in smooth, overlapping strokes until you get an even coat. Let this layer dry completely before you move on.
Pro Tip: If your second color is much darker than your base, save a little of each in separate trays. You can mix a mid-tone later to help the two blend more naturally.
Step 3: Mark the Transition Zones
Now, decide where your colors will meet. Divide your wall visually into three zones: top (light), middle (mixed), and bottom (dark). Use painter’s tape or chalk marks as a rough guide.
When mixing, don’t combine paints directly on the wall without saving a separate mix; otherwise, you’ll lose your mid-tone shade.
Instead, use small trays or plastic bowls to create your blend color in advance. This middle tone helps bridge the gap between your top and bottom colors.
Do: Work in sections and keep both paints wet while blending.
Don’t: Rush or mix directly from the can; it’s easy to lose your color balance.
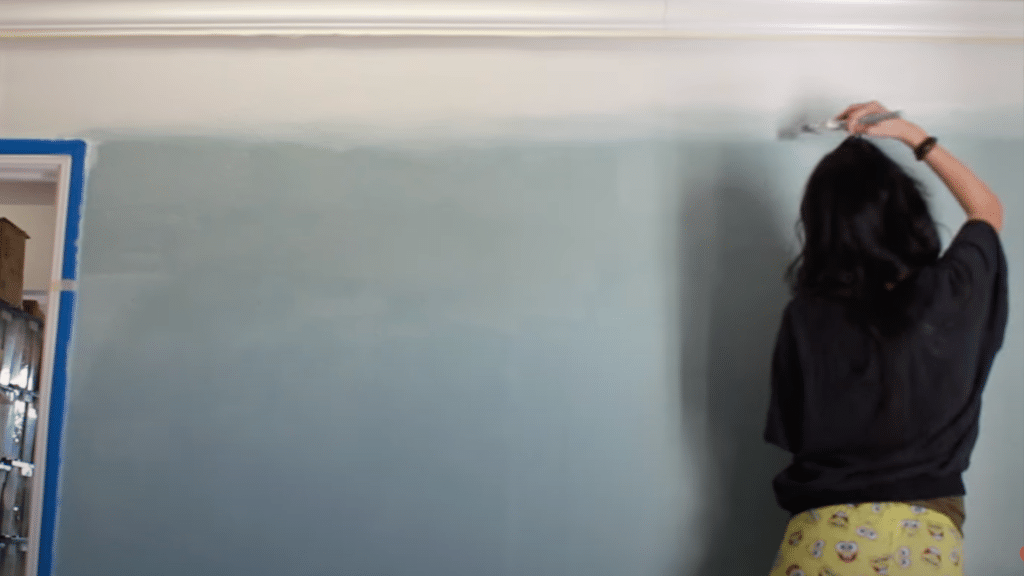
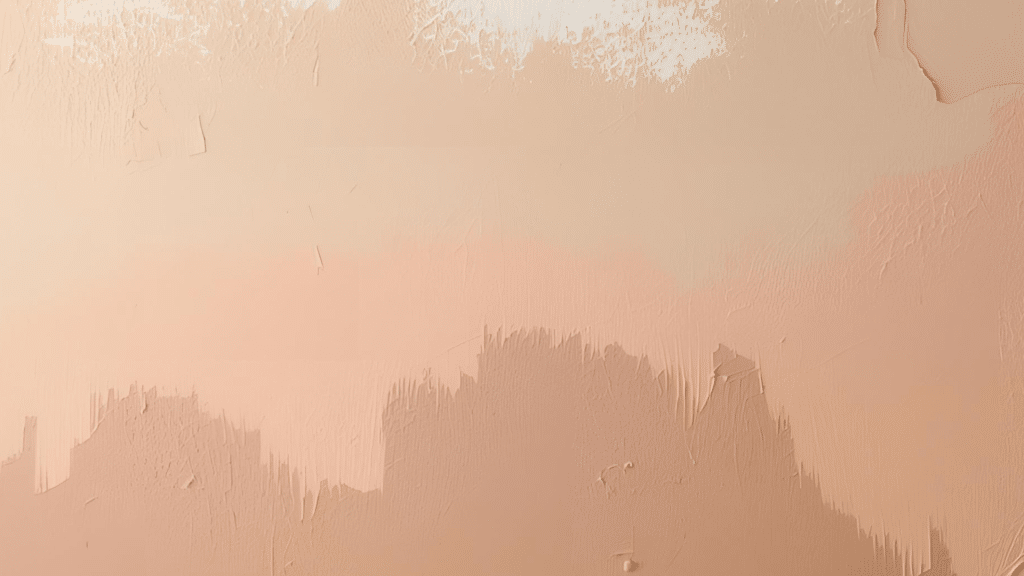
Step 4: Blend the Shades
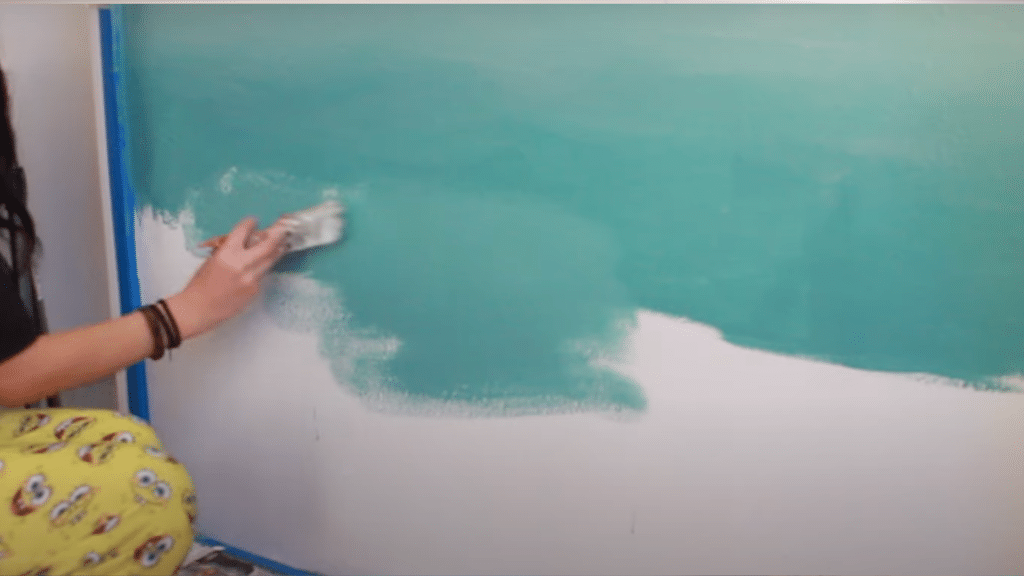
Here’s where the ombre magic happens.
Start by applying your second color in the middle and your darkest shade at the bottom. Then, blend where the two colors meet using a clean brush or sponge.
Work while both colors are still wet; this is key to getting a soft transition.
Use light horizontal or crisscross strokes to merge the shades. If one area looks too harsh, dip your brush lightly in the mid-tone color or mist it with water to soften the edges.
Always blend in small sections, moving from left to right.
Pro Tip: Paint looks different wet vs. dry, so don’t panic if your colors seem uneven. Once dry, the gradient will appear softer and more natural.
Step 5: Refine and Seal
When you’re done, step back and let the wall rest. Check your ombre in both natural and artificial light; it’s easier to notice rough spots once your eyes are fresh.
Touch up any patchy areas by gently brushing on the mid-tone or blending again with a damp brush. If you want extra durability, seal your wall with a thin matte topcoat once everything’s dry.
Final Tip: Ombre walls are forgiving; if something doesn’t look right, just re-blend with paint and water. No two walls ever look the same, and that’s what makes yours personal.
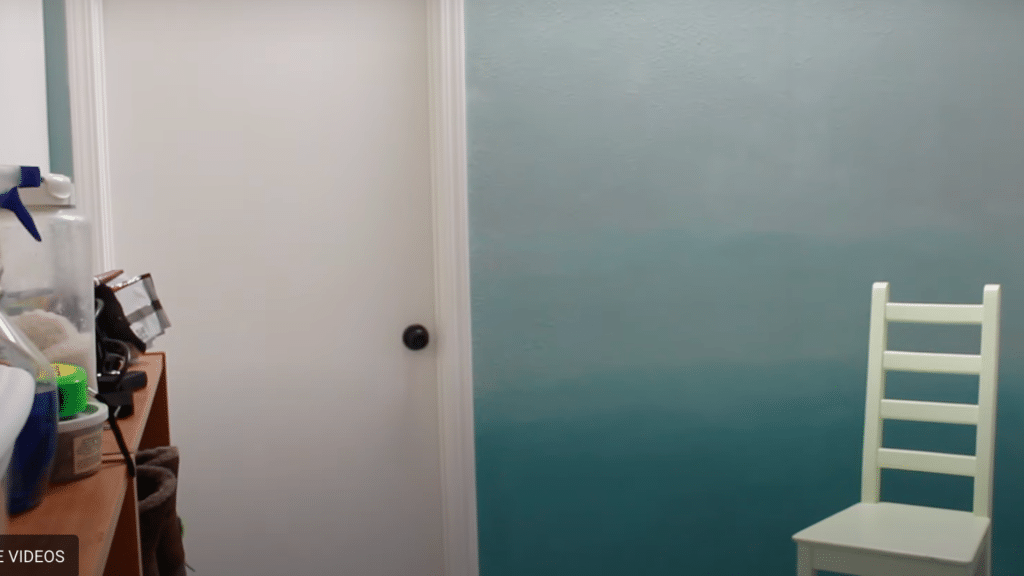
Watch this easy video tutorial on painting ombre wall paints step by step to follow along visually:
Choosing the Right Paint and Finish for Ombre Walls
Picking the right paint type and finish makes a big difference in how smooth and soft your ombre wall looks.
- Latex or Acrylic Paints: Easy to blend and quick to clean up. Great for beginners and most wall surfaces.
- Avoid Fast-Drying Paints: These make blending harder because they dry before you can smooth the transitions.
- Matte Finish: Best for subtle fades and soft transitions since it doesn’t reflect much light.
- Satin Finish: Easier to clean and gives a mild sheen that brightens rooms slightly.
- Eggshell Finish: Works well for most walls and keeps a gentle balance between flat and shiny.
- Glaze Medium: Add a small amount to slow drying time and extend blending time.
- Test Colors First: Try small patches to see how light affects the shades before painting the entire wall.
Ombre Wall Color Ideas and Inspiration
Here are color combinations and styles to inspire your ombre wall paints and help match them to different rooms and moods.
1. Soft Neutrals
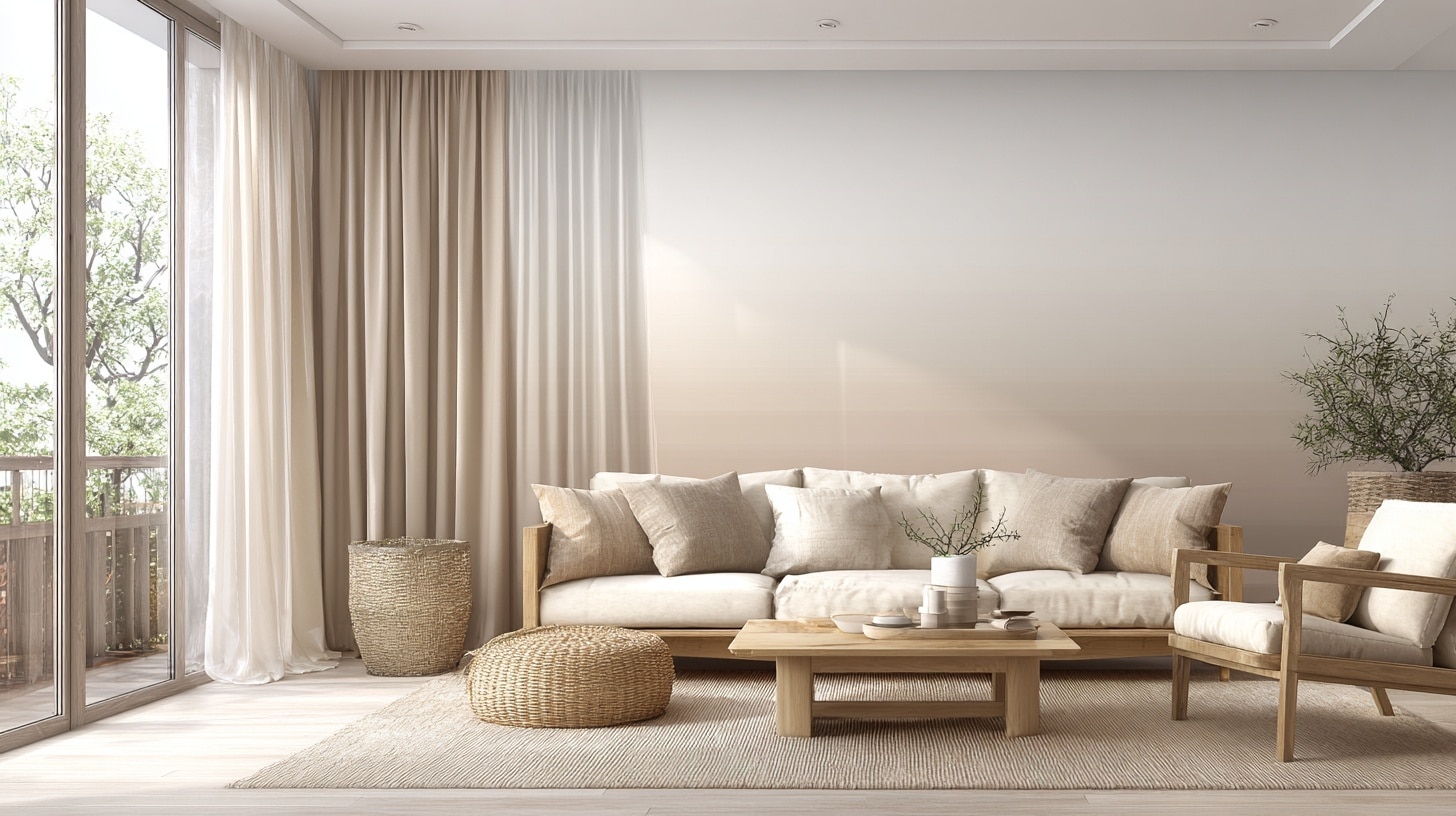
Neutral tones like beige, gray, and cream create a calm, classic look that fits almost any space. These shades make rooms feel open, clean, and restful.
A soft beige fading into white gives a warm glow, while gray blending into off-white feels modern and subtle. Cream-based ombre walls work beautifully in bedrooms and entryways, bringing a sense of comfort and lightness.
Pair them with natural wood furniture or linen textures to keep the look balanced. This option is great if you prefer something simple but still want a little visual interest.
2. Pastel Gradients
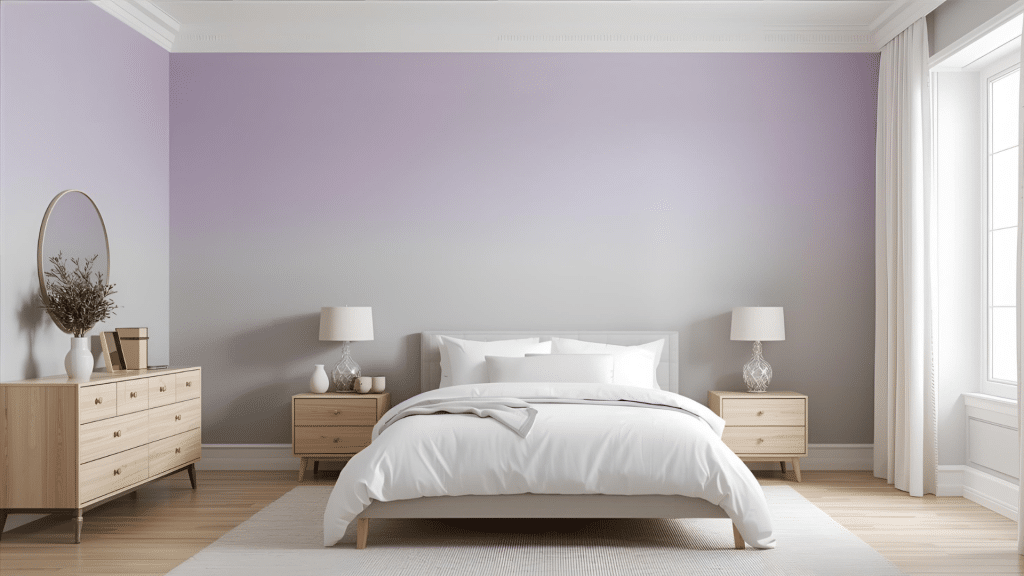
Pastel ombre walls add a gentle touch of color without feeling overwhelming. Try lavender fading into soft gray for a dreamy bedroom, or peach blending into ivory for a cozy nursery.
Mint transitioning into white gives a fresh and airy look, perfect for small spaces. These light gradients help brighten rooms while keeping them peaceful. You can pair pastel ombre walls with white trim and light wood floors to maintain a soft, open feeling.
If you love subtle color but want to avoid bold tones, pastel gradients give your space a soothing and cheerful charm.
3. Bold Transitions
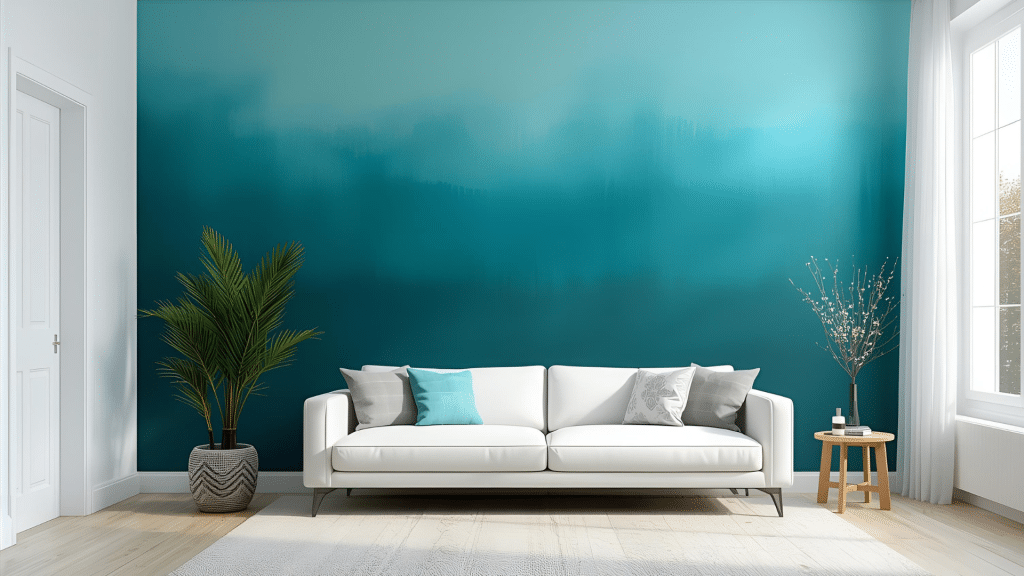
For living rooms or feature walls, bold ombre colors make a strong statement. Teal fading into turquoise creates a coastal vibe, while coral melting into blush adds warmth and energy.
Sunset-inspired tones, gold, orange, and soft red, give your space a lively yet cozy feel. These combinations work best in areas where you want personality and movement.
Use them behind a sofa, in a hallway, or even on a stair wall for instant style. To balance the boldness, keep furniture and décor simple with whites, beiges, or natural wood accents.
4. Two-Color vs. Three-Color Ombre Walls
A two-color ombre wall is ideal if you’re new to painting. It uses one transition point, like white fading into gray, for a clean and simple look. It’s easier to blend and requires fewer tools.
A three-color ombre wall adds more depth and contrast, for example, dark blue at the bottom, soft blue in the middle, and white on top. This approach gives more control over how gradual or dramatic your gradient appears.
The three-color style takes more time but delivers a richer, layered finish that works beautifully in large or open rooms.
Color Psychology and Mood in Ombre Design
Colors do more than decorate a wall; they shape how a room feels. When you choose ombre wall paints, think about the emotion you want to bring into your space. Each color transition creates a different mood and energy.
Blue Tones Peaceful and Calm: Blue fades remind you of the sky or ocean. They make bedrooms and offices feel quiet, cool, and relaxing.
Green Fades Refreshing and Natural: Green gradients bring a sense of balance and growth. They work well in living rooms or bathrooms for a gentle, nature-inspired look.
Pink Tones Warm and Inviting: Soft pinks create comfort and warmth, especially in bedrooms or nurseries. They add a friendly, cozy touch without feeling heavy.
Gray to White Modern and Airy: This combination keeps spaces bright and clean. It’s perfect for minimalist or modern designs where you want light and openness.
Choosing colors with purpose helps your ombre wall not just look good but also feel right for your space.
Beginner vs. Advanced Ombre Techniques
Not every ombre wall project needs to be complex. Here’s how to match your skill level to the right technique.
| Skill Level | Technique Type | Difficulty | Tools Needed | Estimated Time |
|---|---|---|---|---|
| Beginner | Two-color horizontal fade | Easy | Roller, sponge, painter’s tape | 2–4 hours |
| Intermediate | Three-color blend | Moderate | Three brushes, spray bottle, glaze medium | 4–6 hours |
| Advanced | Diagonal or sunset-style gradient | Challenging | Multiple brushes, blending rags, a spray bottle, and patience | 6–8 hours |
Each level offers a different look, so start simple and move up as your confidence grows.
Fixing Common Ombre Painting Mistakes
Even with care and patience, small mistakes can happen while painting ombre wall paints. Here’s how to correct them easily.
Harsh Lines Between Colors
If your paint dries too quickly, it can leave sharp lines where colors meet. To fix this, dampen the area slightly with a clean, wet brush and blend again using light strokes.
You can also apply a thin layer of glaze medium to reactivate the paint and smooth the transition. Always blend while the paint is still damp to avoid hard edges, and work section by section so the gradient stays soft and natural.
Patchy or Uneven Transitions
Uneven spots happen when the paint dries before you finish blending. Add a small amount of diluted glaze or water to the dry area and use a clean brush to blend in short, overlapping strokes.
Step back often to check for color balance across the wall. If needed, apply another thin coat of the lighter color and blend it again while wet. Slow, light motions help restore an even fade without dark patches.
Paint Drips or Overlaps
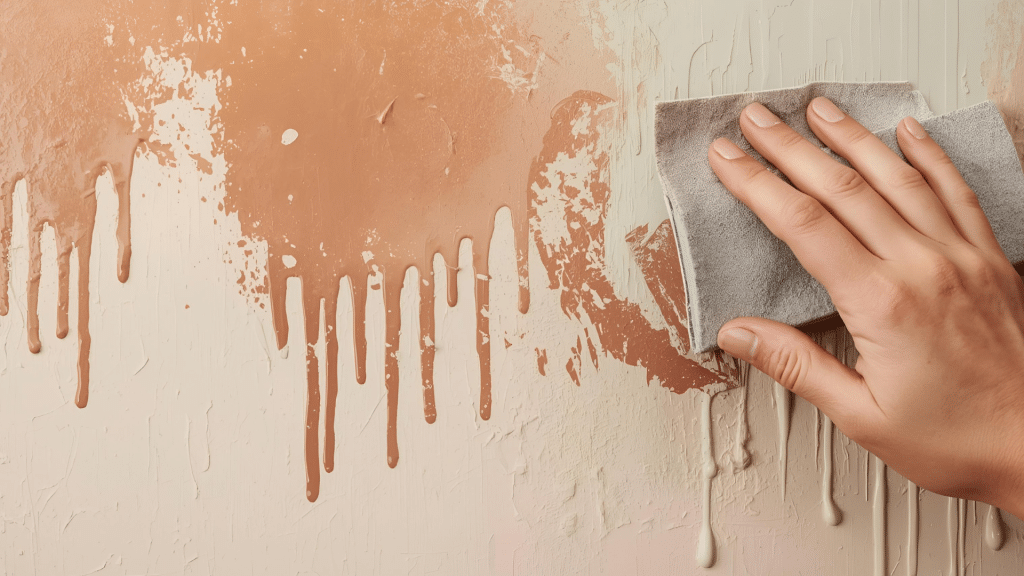
Drips appear when there’s too much paint on the brush or roller. Let the spot dry completely before fixing it; never try to wipe wet drips. Once dry, lightly sand the area with fine-grit paper until smooth.
Reapply a thin coat of the lighter shade, then blend gently into the darker tone using a sponge or clean brush. Work slowly and keep your brush slightly damp to avoid visible patch marks.
Ombre Alternatives and Shortcuts
If you rent or want a faster way to get the ombre look, try these simple and removable options.
Alternative 1: Peel-and-Stick Ombre Wallpapers: Easy to apply and remove, these wallpapers mimic real paint gradients. Perfect for renters or anyone wanting a quick wall update without painting.
Alternative 2: Gradient Wall Decals: Decals come in various colors and sizes. They let you create an ombre-style accent without tools, mess, or long drying times.
Alternative 3: Painted Ombre Canvas Art: If you prefer smaller projects, paint ombre designs on canvas. Hang them together to create a soft, gradient look without touching your walls.
Budget and Time Estimate for DIY Ombre Walls
Before starting your ombre wall paint project, it helps to plan your budget and time. The overall cost depends on paint brand, wall size, and how many shades you use. For an average wall, you’ll need about one quart of each color.
Popular options like Sherwin-Williams, Behr, or Dulux offer durable paints with good blending ability.
Expect to spend between $50 and $120 for paint and supplies. Small accent walls may take around three to four hours for beginners, while larger walls or advanced multi-color fades can take up to eight hours.
Professionals can complete a full room in half that time. Planning ahead ensures smooth blending, proper drying time, and fewer unexpected costs during your DIY project.
Aftercare and Maintenance Tips
Keeping your ombre wall paints looking fresh is simple with a few easy cleaning and care steps.
- Use Gentle Cleaners: Wipe walls with a soft, damp cloth and mild soap. Avoid harsh chemicals that can fade colors.
- Clean Regularly: Dust your wall occasionally to prevent buildup that dulls the gradient effect.
- Avoid Scrubbing: Use light pressure when cleaning. Rubbing too hard may damage the finish or blend lines.
- Check for Wear: In high-traffic areas, touch up scuffed spots with leftover paint to keep colors even.
- Mind the Finish: Matte finishes need extra care, while satin or eggshell finishes are easier to clean.
- Repaint Carefully: If repainting, apply primer first to cover the gradient fully before adding a new color.
Conclusion
Painting an ombre wall is one of the easiest ways to add personality and calm movement to your space.
You’ve learned how to prepare your wall, choose the right shades, and blend them smoothly for a soft, seamless finish. The best part is that no two walls ever look the same; your gradient will always reflect your own style.
Take your time, be patient with the blending, and enjoy watching the colors flow together. I’ve seen how rewarding it feels to step back and admire your work once it’s done.
If you enjoyed this project, check out my other blog for more simple DIY paint ideas, design inspiration, and easy home updates you can try next.


