

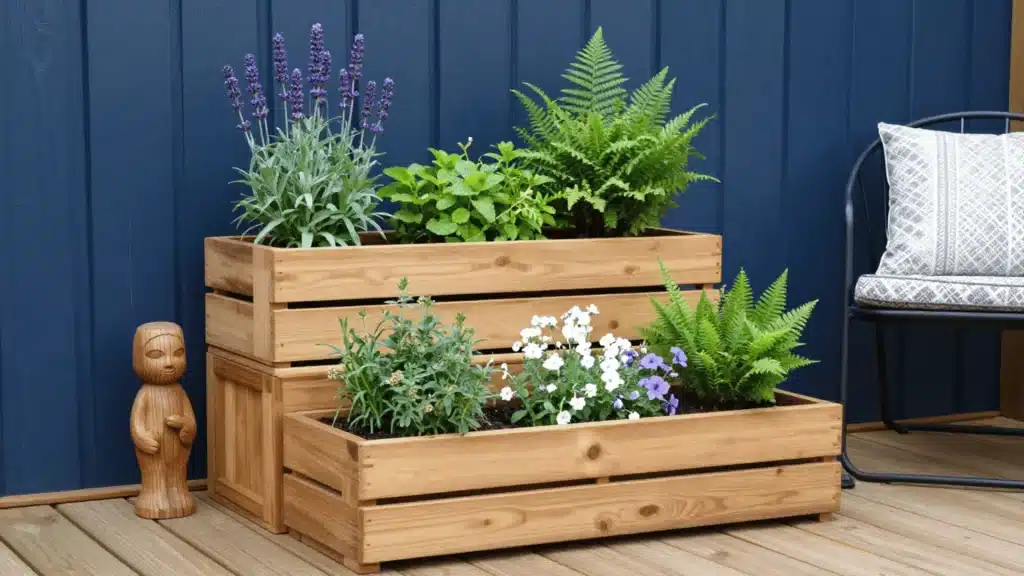

The first time I decided to build a planter box, I stood in the lumber aisle longer than I’d like to admit. If you’re here to learn how to build a DIY planter box, you probably want something simple, affordable, and sturdy enough to last. I get that.
Store prices can feel ridiculous, and the quality doesn’t always match the cost. In this guide, I’ll walk you through the exact steps I use, the tools you actually need, and the small details that make a big difference in durability.
You’ll also learn how to avoid common beginner mistakes that shorten a planter’s life. By the end, you’ll feel confident starting your own build.
Building Your Own Planter Box Makes Sense
Before you pick up a saw or buy your lumber, it helps to understand what really goes into building a DIY planter box that lasts.
I’ve learned that a successful build starts with smart material choices, proper drainage planning, and using the right fasteners for outdoor conditions.
You also want to think about size, depth, and placement so your plants have enough room to grow strong. Small details like sealing the wood and lift the base make a huge difference over time.
When you approach the project with a clear plan, you avoid costly mistakes and end up with something sturdy, practical, and built to handle the seasons ahead.
Step-by-Step: How to Build a DIY Planter Box
Follow these five simple steps, and you’ll go from raw wood to a finished planter box that looks custom-built and lasts for years. No experience needed, just the right steps in the right order.
Tools & Materials Checklist
- Table saw (or circular saw)
- Miter saw
- Drill
- Countersink bit
- Outdoor decking screws
- Clamps
- Merbau decking boards
- Treated pine lumber
- Heavy-duty plastic container
- LED strip light (cuttable)
- Aluminum LED channel
- Black exterior paint
- Rubber feet/stoppers
- Potting mix
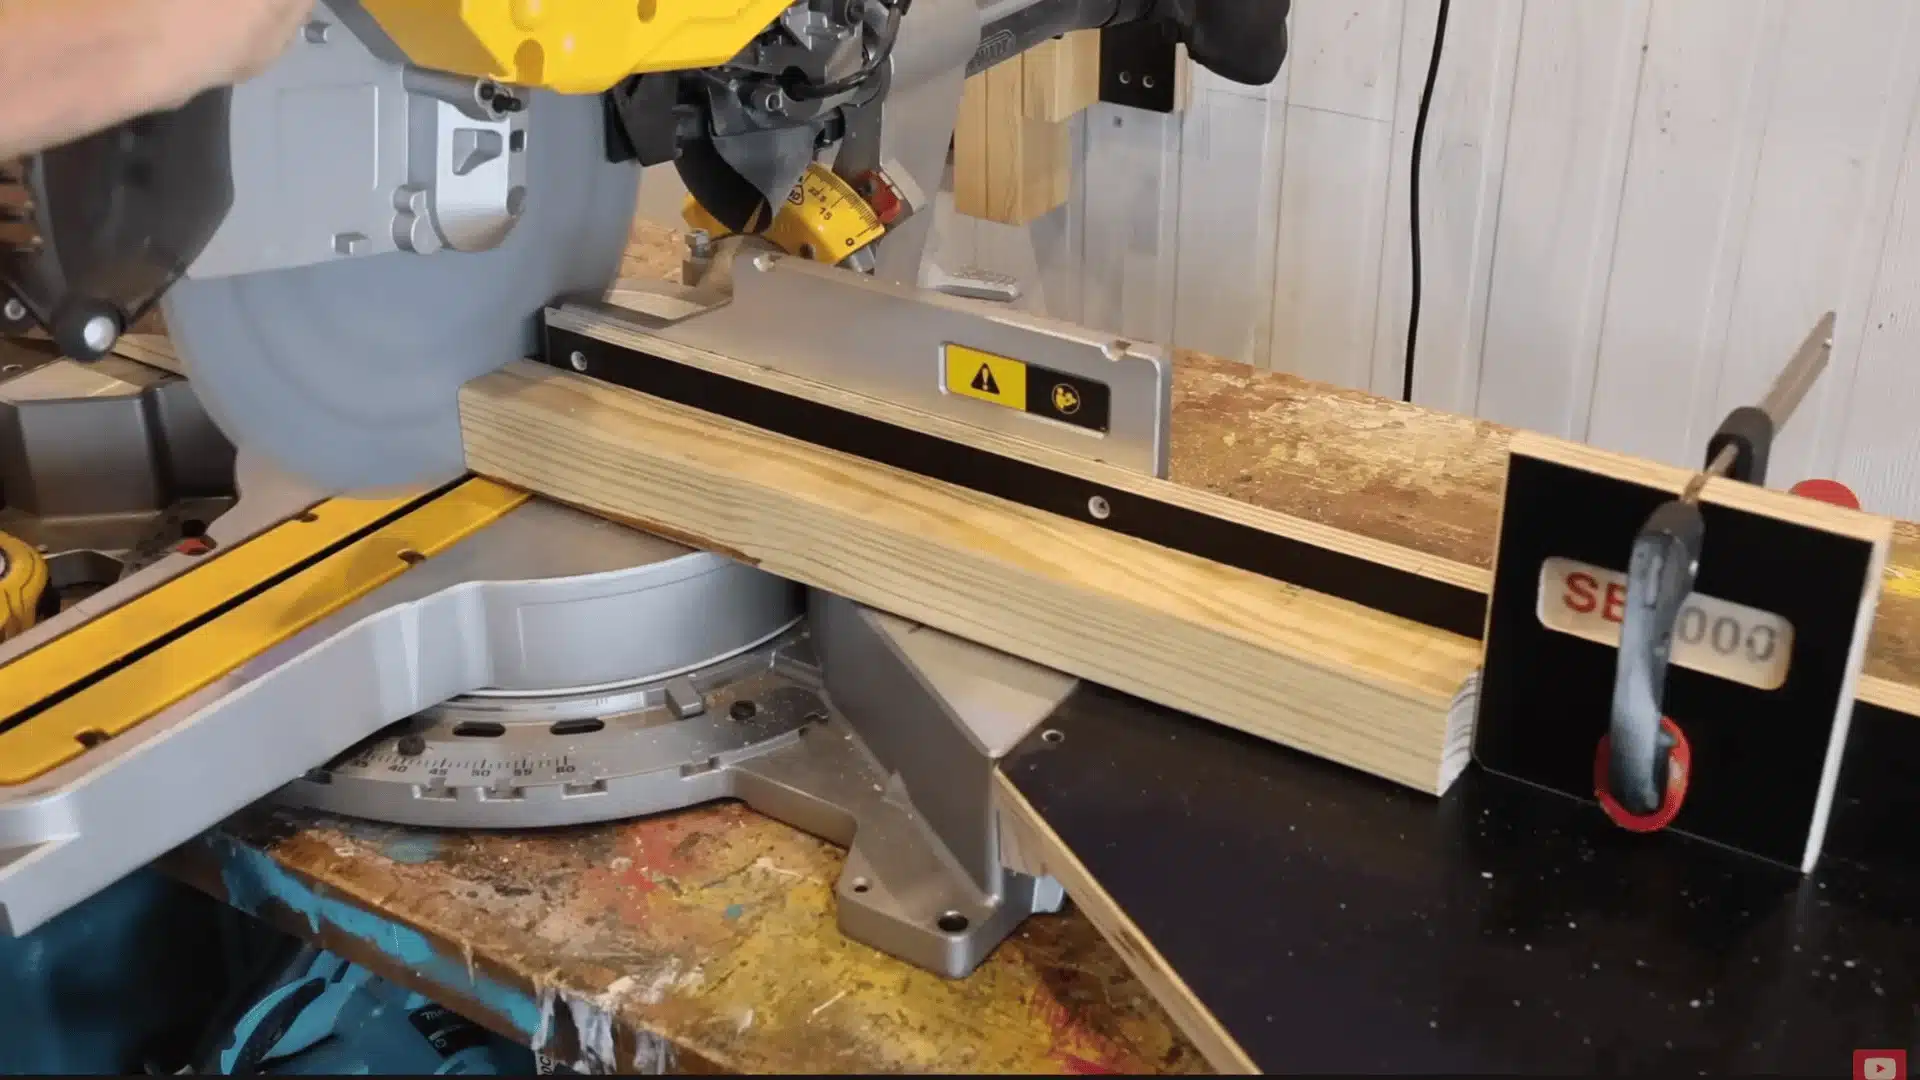
Step 1: Build the Legs and Prep the Frame
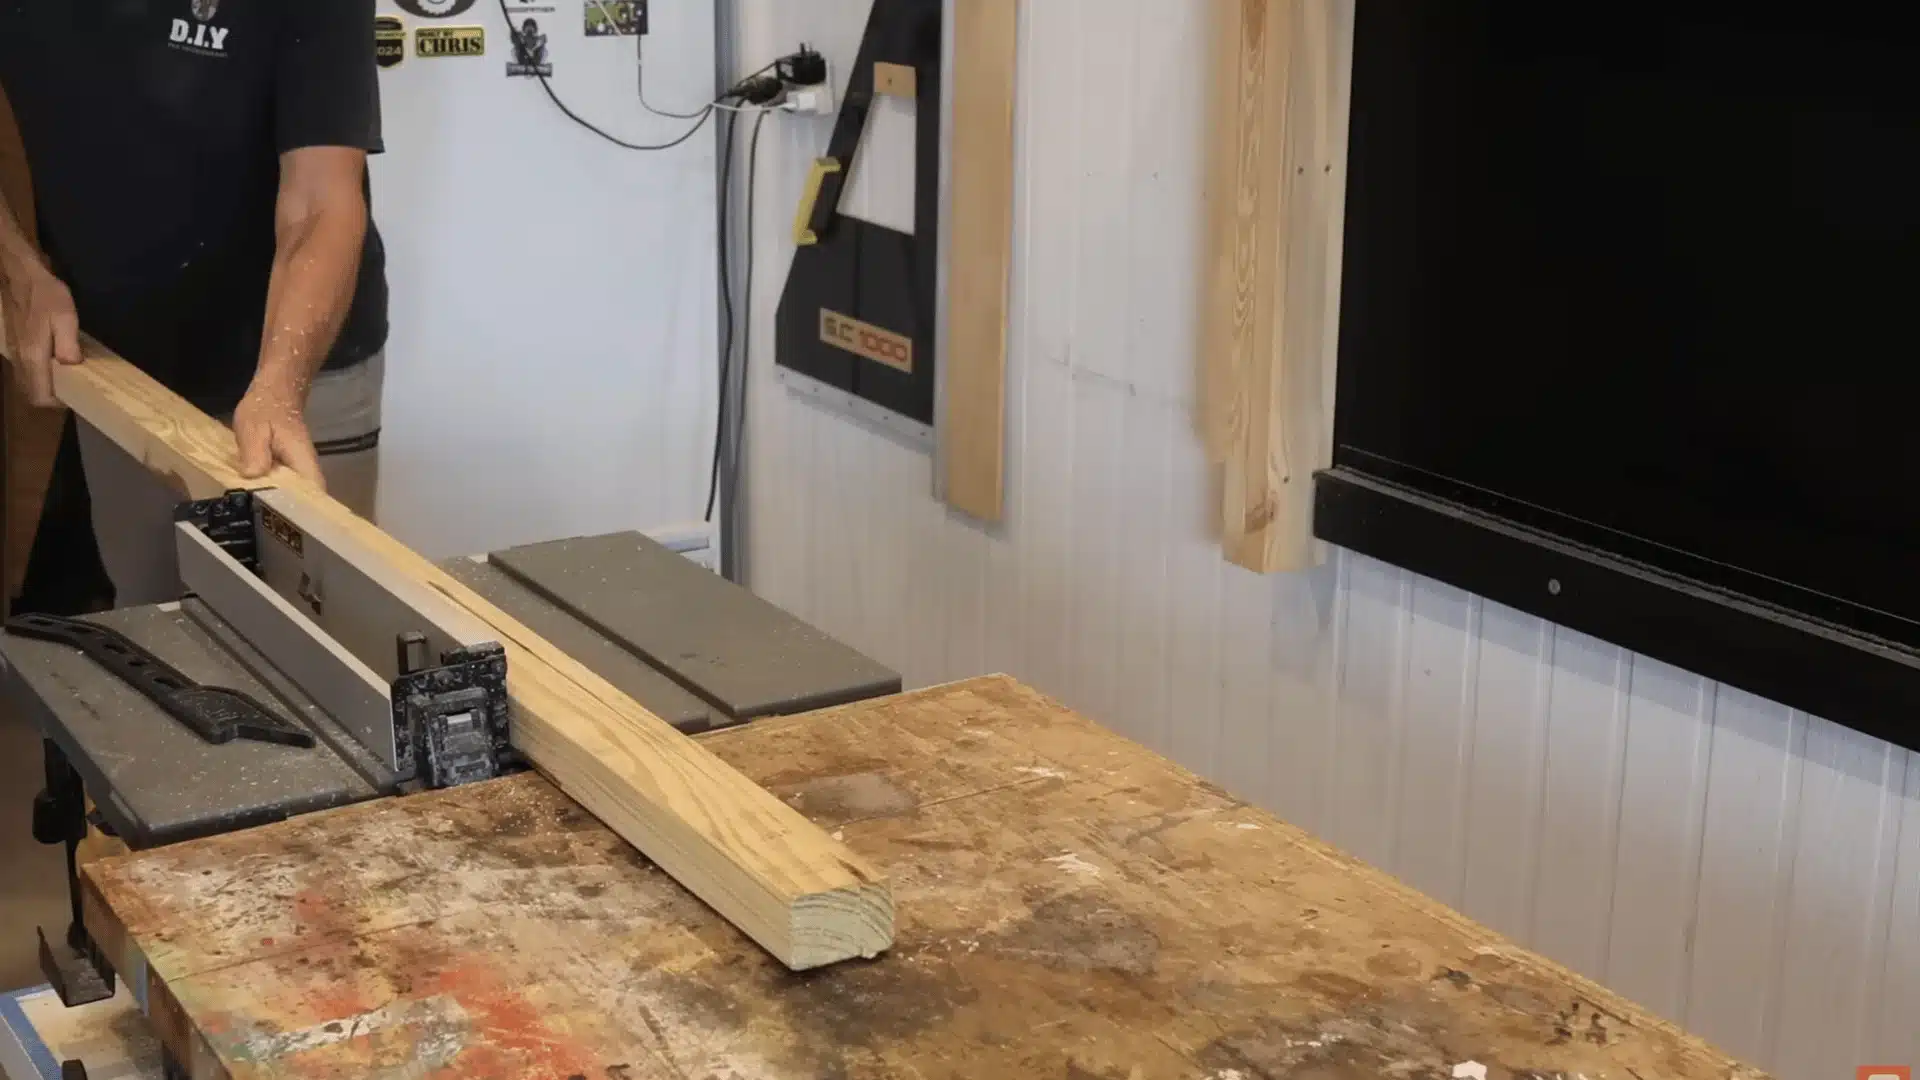
Start by cutting your pressure-treated pine into legs all the same length. Use a stop block to keep every cut consistent. A circular saw works perfectly fine here. Once cut, paint the legs black for a clean, modern look.
Drive a screw into one end so you can coat all four sides easily and let them dry without touching anything. Simple prep, big payoff.
Step 2: Prepare and Cut the Decking Boards
Use hardwood decking boards for the sides or pressure-treated wood if you’re on a budget. Before ripping, measure carefully so both pieces come out the same width. After cutting, run a router along the edges to smooth them out.
This small step makes every board look neat and uniform. Then cut all sideboards to your final length, and you’re ready to start building.
Step 3: Assemble the Side Panels and Box
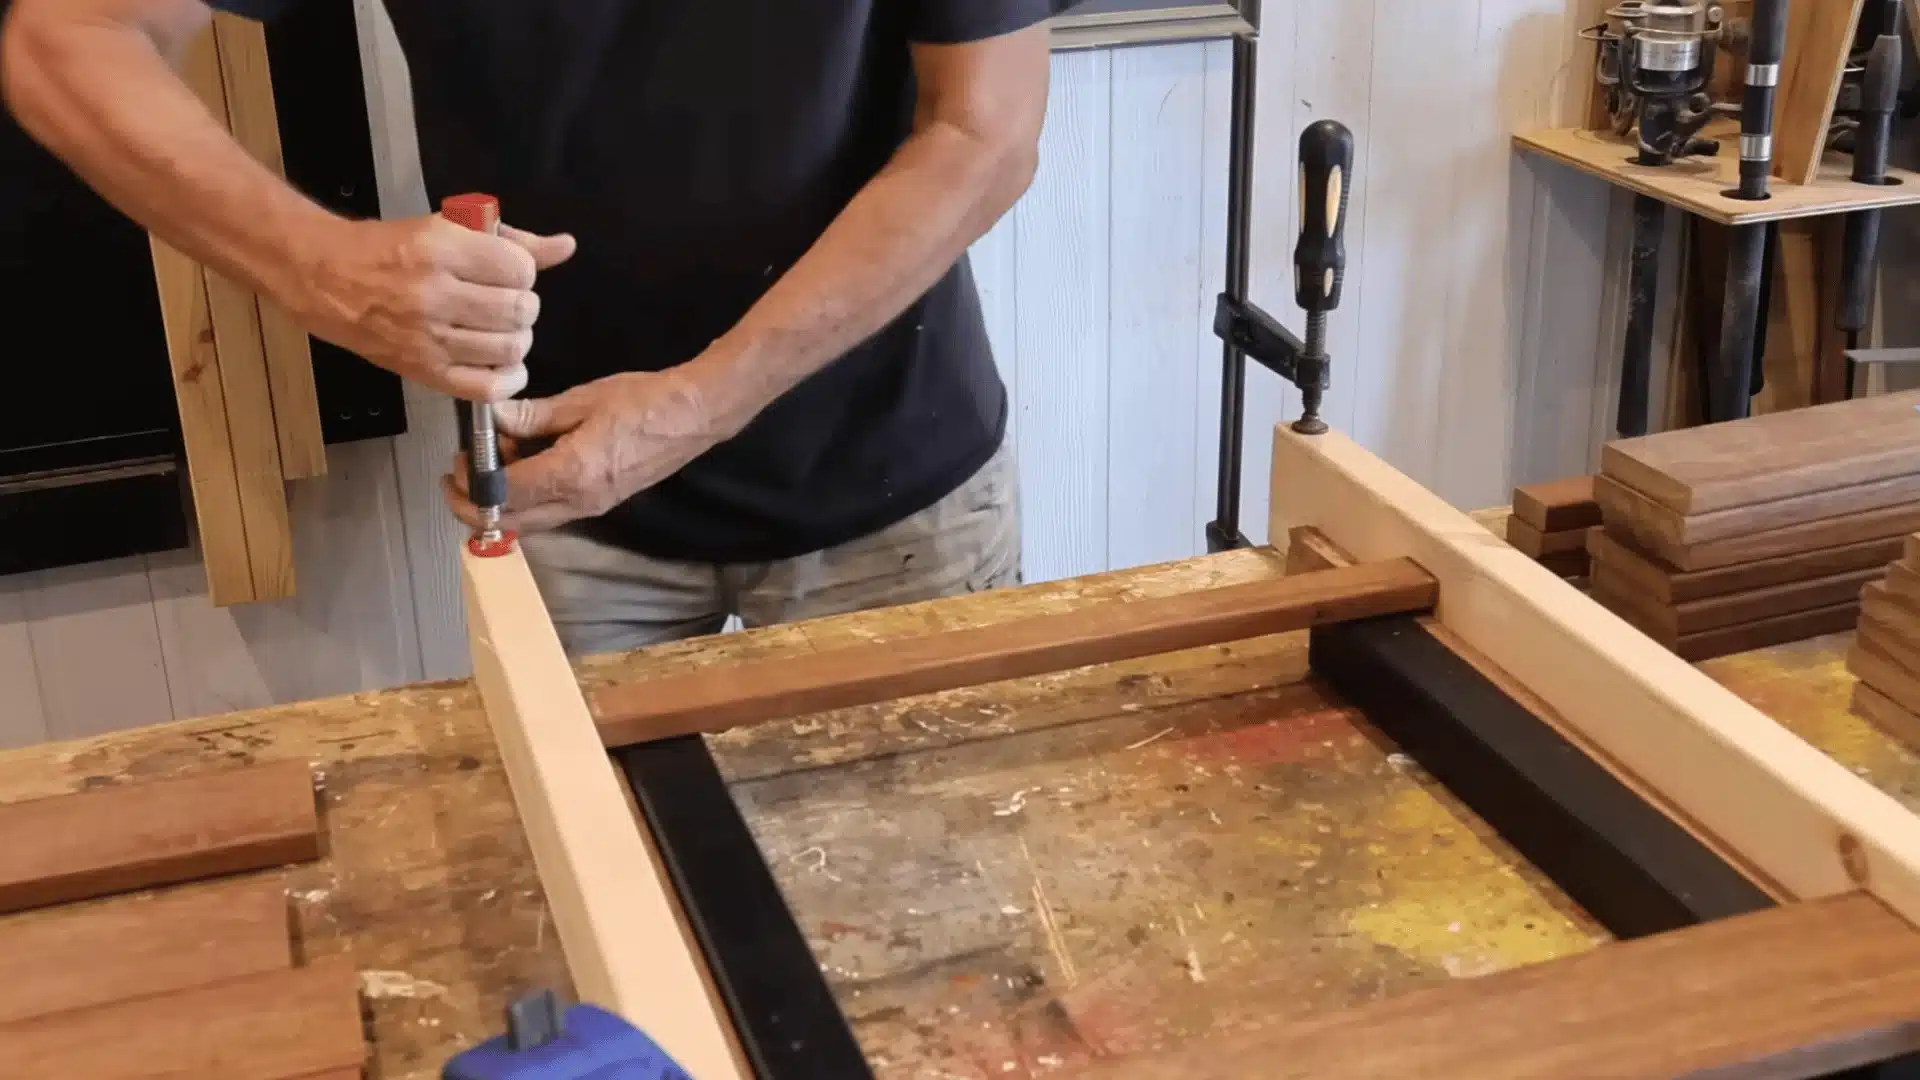
Set up a simple jig to keep everything square as you work. Use small plastic shims to create even gaps between boards. Always pre-drill and countersink before driving screws.
This keeps the surface clean and stops the wood from cracking. Build two side panels first, then connect them all together like a puzzle. Go slow. A patient build always looks better than a rushed one.
Step 4: Add the Plastic Insert and Bottom Support
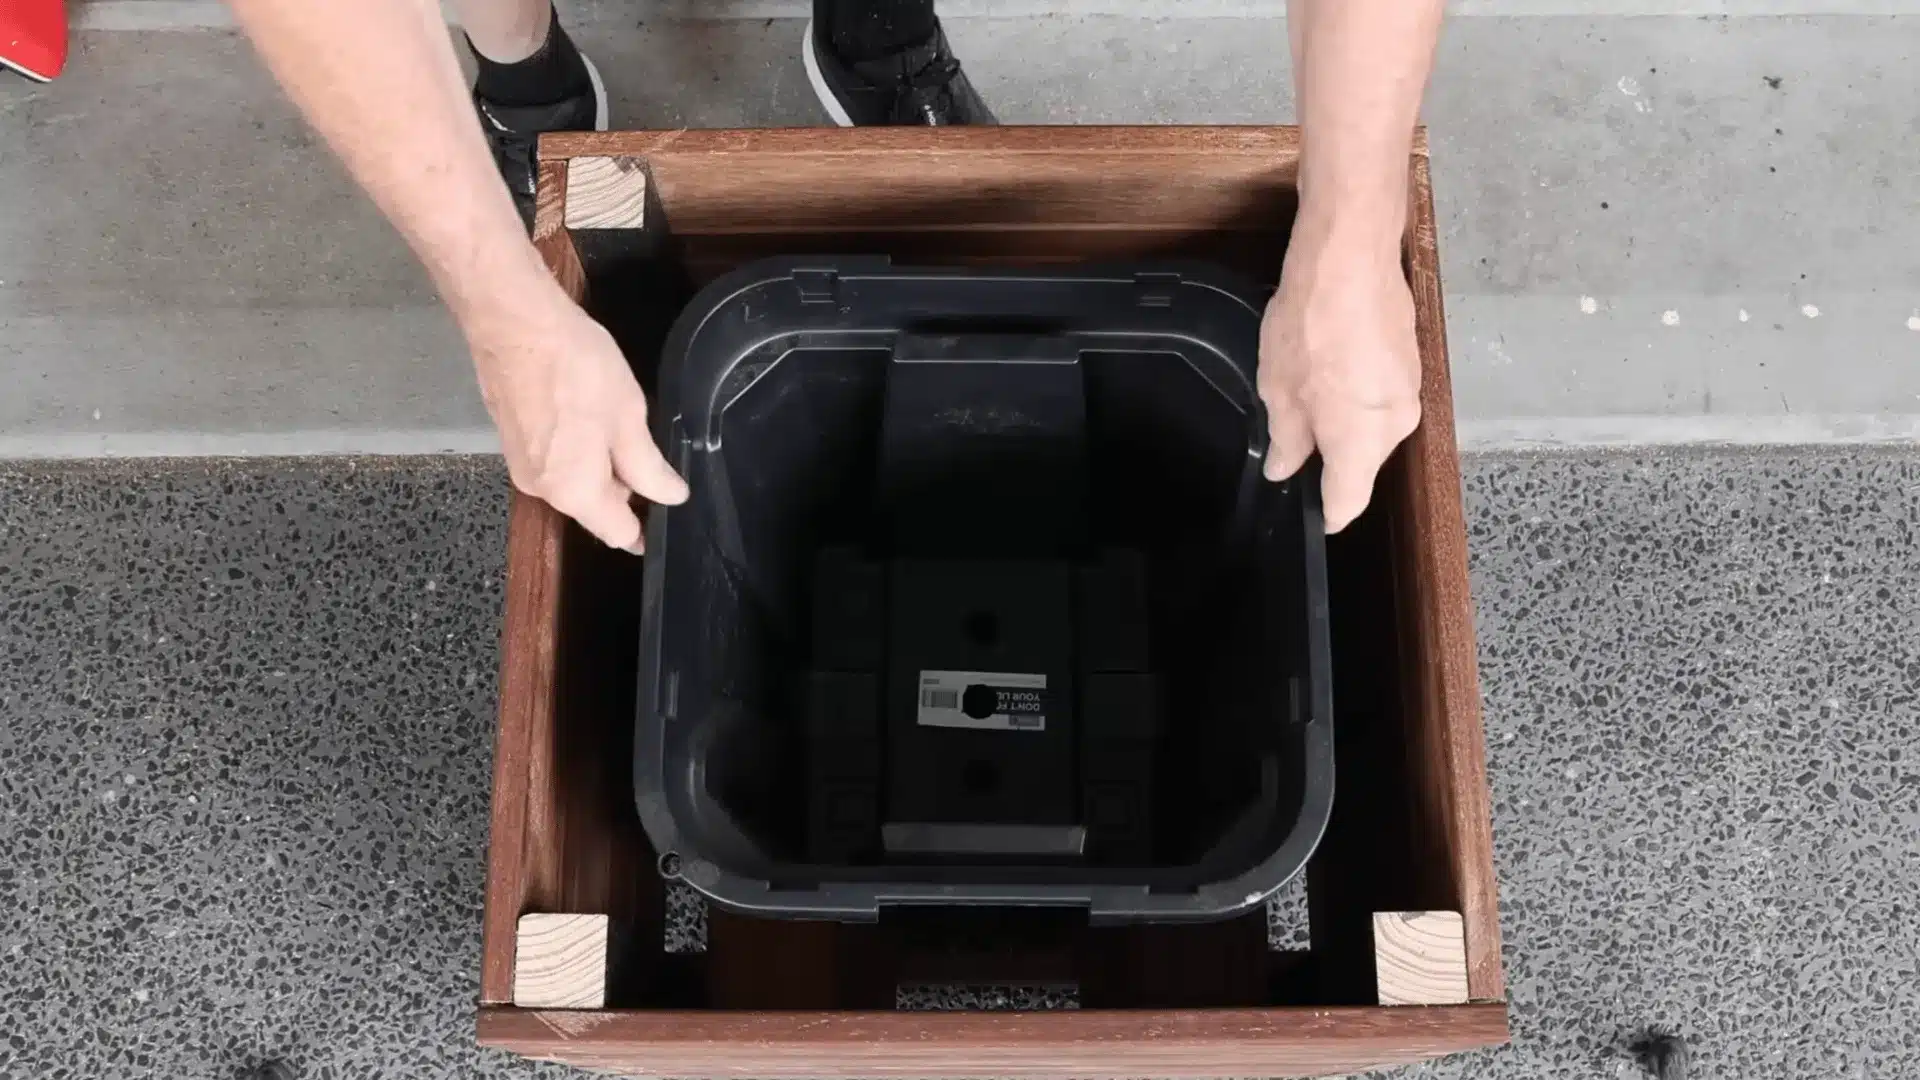
Skip the plastic lining and use a heavy-duty plastic container inside the box instead. Drill drainage holes in the bottom so water flows out and doesn’t sit against the wood.
Then build a simple support floor inside, with a center drainage gap. This one step protects your wood from rot and makes your planter last years longer than most store-bought options ever will.
Step 5: Install the Top Cap and Built-In Lighting
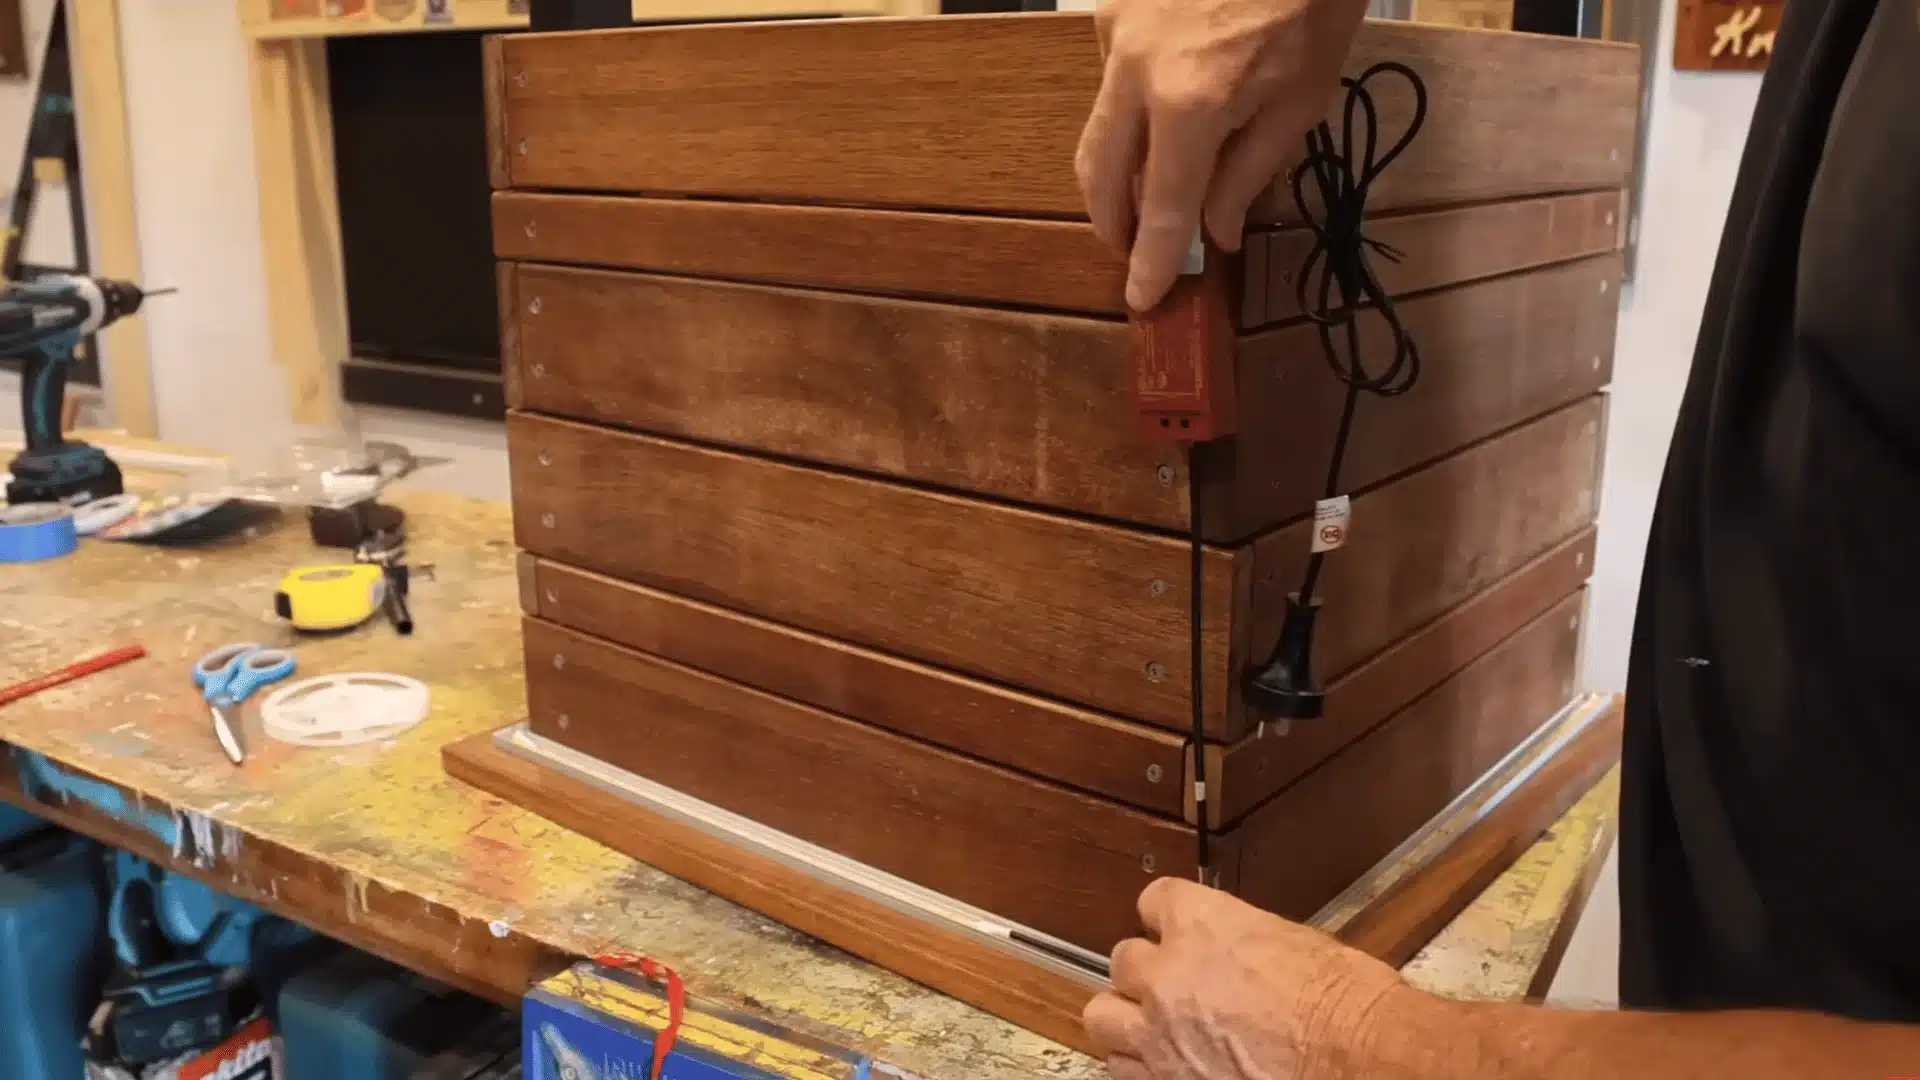
Cut the top capping boards to size and use a spacer block to evenly position them. Rub nails with candle wax before driving into hardwood; it makes the job much smoother.
Mount an aluminum LED channel under the cap, insert a cuttable LED strip, and snap on the diffuser. Tuck cords neatly inside, add rubber feet, fill with soil, plant, and water.
For full measurements, cuts, and detailed instructions, watch the complete video for a clear visual walkthrough of every step DIYForKnuckleheads.
Common Experience in Building First DIY Planter Box
In this Reddit thread, user TessaMercury asked whether milk paint or chalk paint would work best for distressed built-in bookshelves in a 1936 bungalow.
Several users pushed back on the distressed idea. Kittyroux said built-ins should match walls and trim, not look aged. EatsTheCheeseRind and others felt that shabby-chic styles are outdated. mortalwombat- suggested a clean, classic finish instead.
Durability was a major concern. computer1490 regretted using chalk paint on cabinets due to poor wear and difficult touch-ups. csguydn recommended enamel paint with polyurethane for bookshelves.
A few users, like NomDrop and [deleted], defended milk paint when used properly. Overall, most advised choosing a durable, classic finish over a distressed look.
How to Make Your Planter Box Last for Years
Building the box is only half the job; how you protect it afterwards is what separates a planter that lasts one season from one that lasts a decade:
- Seal wood: Apply an exterior-grade sealant or waterproof stain to all surfaces before adding soil. This blocks moisture and slows wood breakdown.
- Lift base: Raise the planter off the ground using rubber feet or risers. Airflow underneath prevents trapped moisture and rot.
- Add drainage: Drill proper drainage holes so excess water can escape instead of soaking into the wood.
- Use liner: Insert a heavy-duty plastic container or landscaping fabric to keep wet soil from touching the wood directly.
- Apply stain: Reapply exterior stain every couple of years to maintain protection and extend lifespan.
- Install rubber feet: Keep legs dry by preventing direct contact with wet surfaces.
- Winter storage: Empty soil, dry thoroughly, and store in a covered space during freezing months.
- Check screws yearly: Tighten loose screws and replace any that show rust to maintain structural strength.
Take care of your build, and it will take care of your garden. These steps alone can easily add five or more years to your planter’s life.
Budget Breakdown: What It Really Costs
Here’s a realistic look at what you’ll spend building a DIY planter box using basic, budget-friendly materials.
| Item | Estimated Cost |
|---|---|
| Lumber (pressure-treated pine or decking boards) | $20–$30 |
| Outdoor screws | $5–$8 |
| Exterior sealant or stain | $8–$15 |
| Optional upgrades (LED lights, rubber feet, liner) | $10–$25 |
| Total Estimated Cost | $35–$60, depending on upgrades |
Even with upgrades, you’ll likely spend far less than store-bought planters while getting better quality and custom sizing.
Common DIY Planter Box Mistakes to Avoid
Even simple builds can go wrong fast. Here are the five mistakes most beginners make and exactly how to dodge them:
- Skipping Drainage: No drainage holes means water sits at the bottom, rotting your wood and drowning your plants from the inside out.
- Using the Wrong Screws: Regular screws rust outdoors. Always use exterior-grade or stainless steel screws, or your box will fall apart within a season.
- Choosing Weak Wood: Soft, untreated wood warps and rots quickly. Stick with cedar, redwood, or pressure-treated pine for a build that actually lasts.
- Making It Too Shallow: A planter under 10 inches deep starves plant roots of the space they need to go deeper, and your plants will grow stronger and healthier.
- Not Sealing the Inside: Bare wood soaks up moisture like a sponge; line or seal the inside to protect the wood and double your planter’s lifespan.
Avoid these five, and your planter will look great, hold strong, and outlast anything you’d find on a store shelf.
Final Thoughts
Building your own planter box gives you more than just a place to grow plants. You now understand why DIY makes financial sense, how to choose durable materials, and the step-by-step process to assemble a strong, long-lasting box.
I have covered drainage, wood protection, proper screws, and the simple upgrades that prevent rot and extend lifespan. I’ve also shared the common mistakes that trip up beginners, so you can avoid them from day one.
The best part is realizing you can build something solid with basic tools and patience. Start small, take your time, and trust the process. When you finish yours, share how it turned out. I’d love to hear about your build.


