


Are you thinking about building a barn door but aren’t quite sure where to start? I get it, it can seem like a big project.
You might be wondering what materials to buy, what tools you’ll need, or how to make sure everything lines up just right. That’s exactly why I put this guide together.
In this post, I’ll show you how to build a barn door from start to finish. You’ll find clear steps, practical tips, and simple options that actually work. Ready to save some money and do it yourself? Let’s get into it.
Choosing the Right Barn Door Style
When picking your barn door, you’ll want to match the style to your needs. Think about where you’ll install it and how you plan to use the space.
Popular Styles (Z-frame, X-frame, flat panel, Dutch)
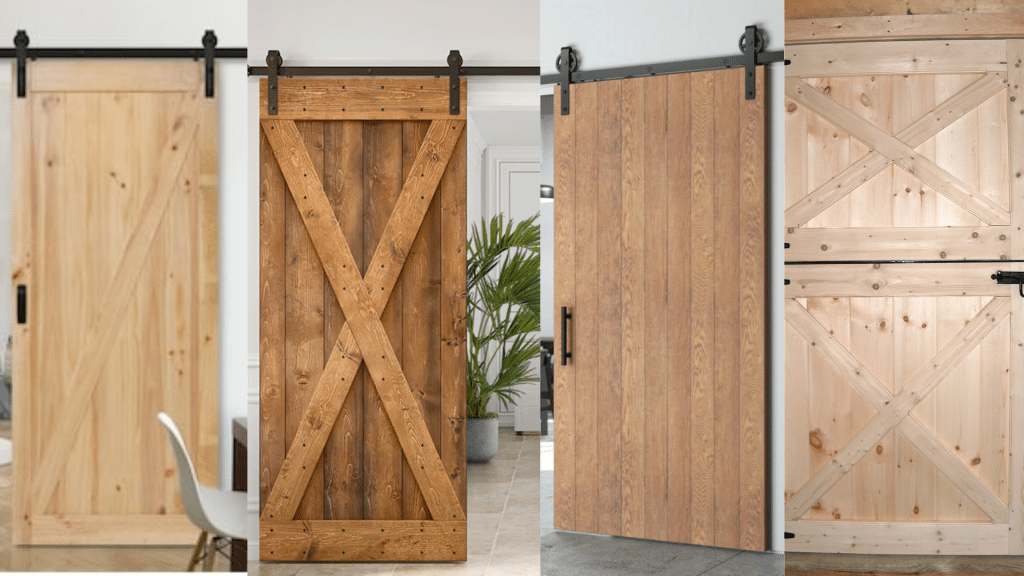
Each barn door style offers a different level of support and simplicity. A Z-frame provides strong bracing, often used where moisture or weight might cause sagging.
An X-frame is classic and symmetrical, popular in rustic builds. A flat panel is a clean option using just horizontal planks, often chosen for its minimal layout.
Dutch doors are split in half, letting the top and bottom open independently, useful in barns or pet-friendly areas.
Interior vs. Exterior Use Cases
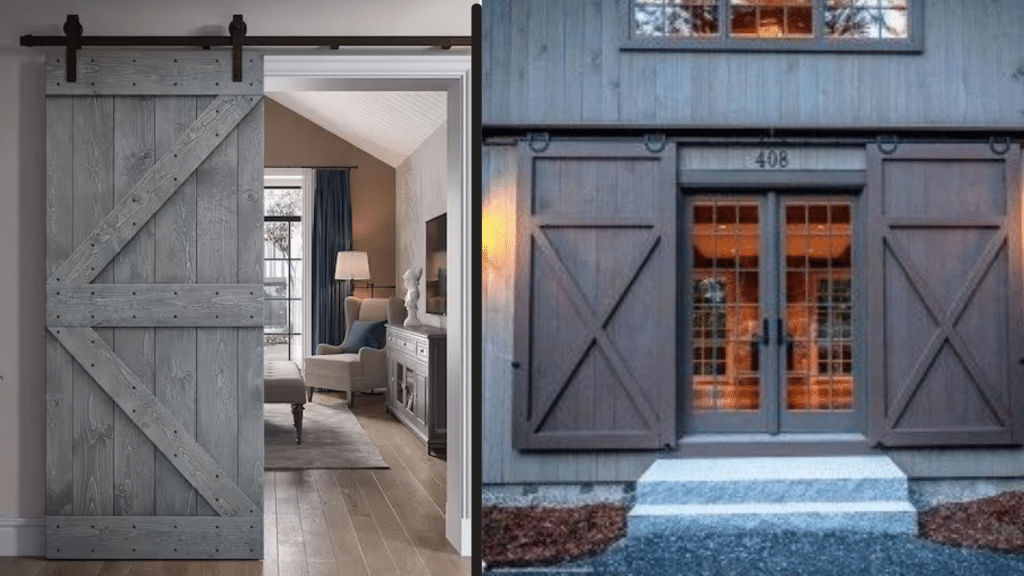
Interior barn doors are usually lighter, easier to install, and focused on dividing spaces such as bedrooms, closets, or bathrooms. These often slide on tracks and require less insulation or sealing.
Exterior barn doors, on the other hand, must withstand moisture, wind, and long-term use. They’re often heavier, use treated wood, and include additional framing support or weatherproofing materials to reduce swelling or movement over time.
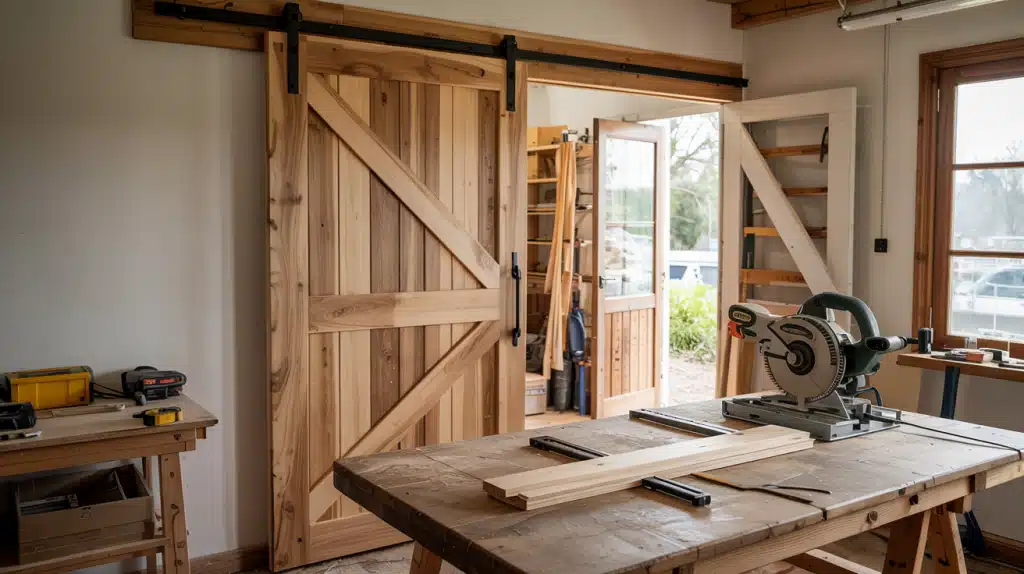
Step-by-Step Build a Barn Door
In this section, I’ll guide you through each part of the build, allowing you to follow along easily. I’ve kept it simple, so you can get it done without hassle.
Tools and Materials Checklist
- Table saw
- Circular saw / Track saw
- Sliding compound miter saw
- Drill / Drill press
- Brad nailer (18 gauge)
- Router
- Orbital sander
- 120-grit sandpaper
- 220-grit sandpaper
- 500-grit sandpaper
- Flap disc
- Cutoff saw / Angle grinder
- Stud finder
- Measuring tape
- Straight edge / Spacer board
- Clamps
- Shop vac / Air compressor / Leaf blower
- Spray paint (black satin)
- Painter’s tape
- Cardboard (for screws during painting)
- Rags / Alcohol wipes
- OSB sheathing panels
- Cedar fence pickets (5/8″ thick)
- 1×4 board
- 3/16″ thick metal flat bar
- 1¼” brad nails
- Wood glue / Construction adhesive
- Wood filler
- Oil-based polyurethane (ultra-flat sheen)
- Metal screws
- Sliding barn door hardware kit
- Recessed handles
Step 1: Measure the Door Opening and Plan the Layout

Start by measuring the opening to determine the door size. For double doors, each door should slightly overlap the center and cover the trim if needed. Uses 18½-inch wide doors for a 34-inch opening.
This layout allows doors to meet in the center and clear clutter while controlling sound. Planning includes deciding between single, double, or pocket-style layouts based on space and framing. Once sizing is settled, you can plan material cuts and hardware alignment.
Step 2: Cut the Back Panels
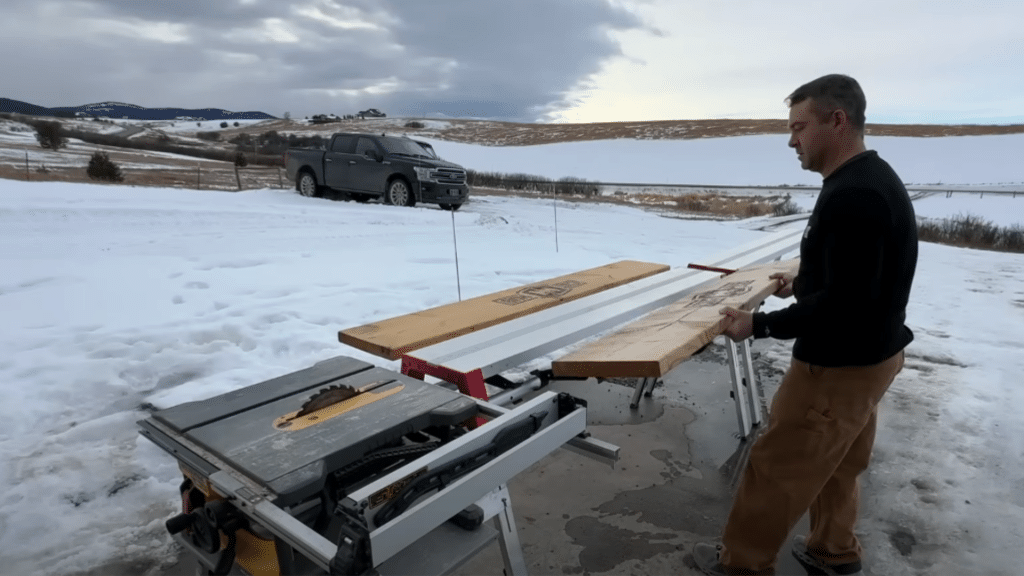
The builder uses 5/8-inch cedar pickets and OSB plywood as the core of each door. After letting cedar boards dry to reduce shrinkage, OSB is cut using a table saw.
The rough width is cut slightly oversized, then trimmed to the exact width (e.g., 18 inches) for precision. Height is left slightly long for later adjustment. If needed, flip OSB sheets during cutting.
These core panels become the structural base for mounting pickets and support hardware.
Step 3: Test Fit and Determine Final Door Height
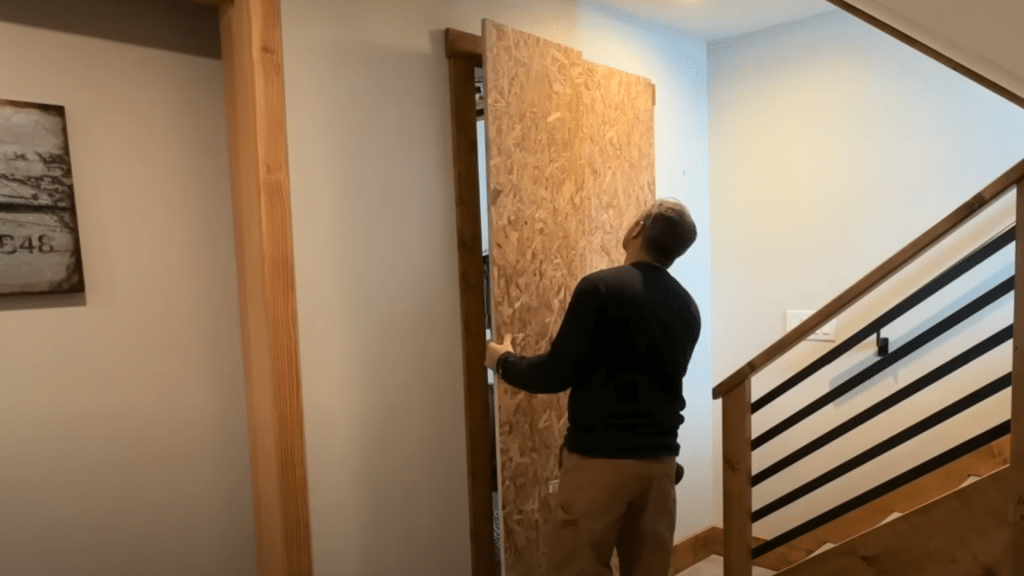
Before final cuts, test-fit the OSB panels to check how the height looks and functions in the actual space. A spacer board helps simulate floor clearance and track height. The final height is chosen to allow smooth sliding and visual balance.
This step ensures the doors aren’t too short or tall once installed. Leave room for the mounting board and track, and make sure the top edge aligns well with the backer board and railing placement above the opening.
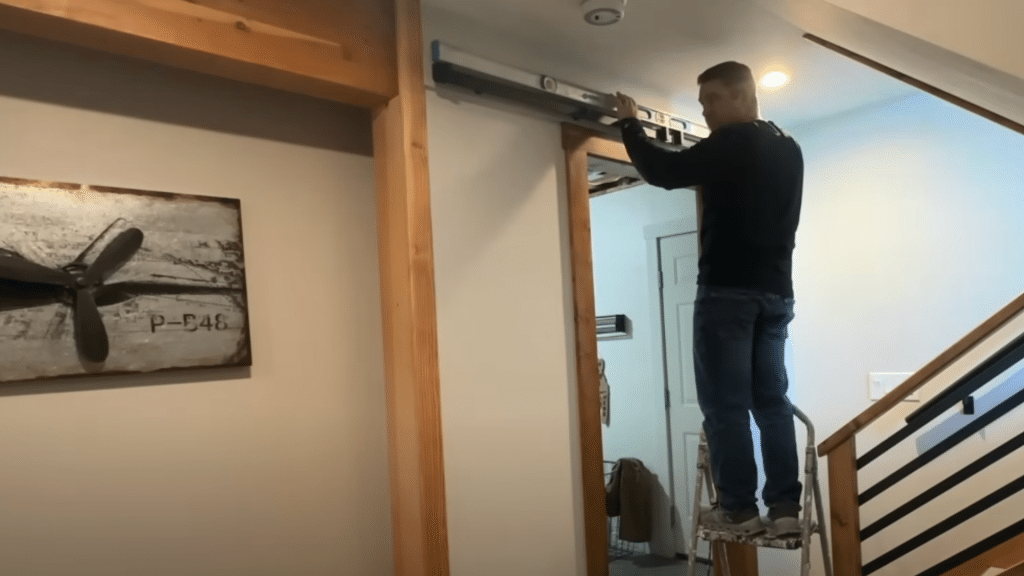
Step 4: Install the Mounting Backer Board
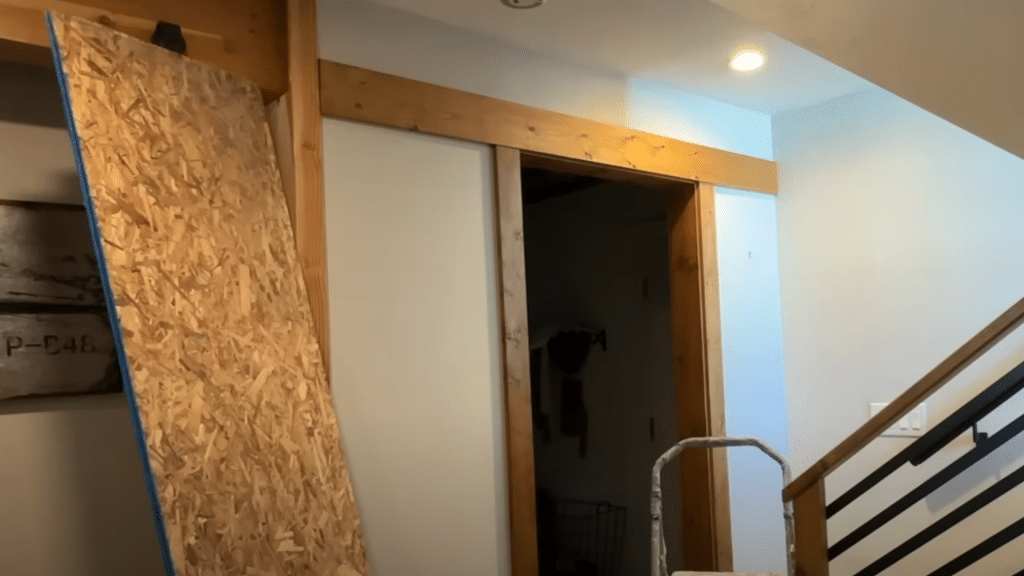
To support the track hardware, a 1×4 board is mounted above the opening. Use a stud finder to locate framing for secure anchoring. Sand the board smooth and paint it to match the wall for a clean, low-profile finish.
Align the board at the correct height, and if needed, drill extra holes or add blocking behind the drywall for a stronger hold. This board provides critical support for the rail and ensures the doors move safely and evenly.
Step 5: Cut and Attach the Cedar Pickets
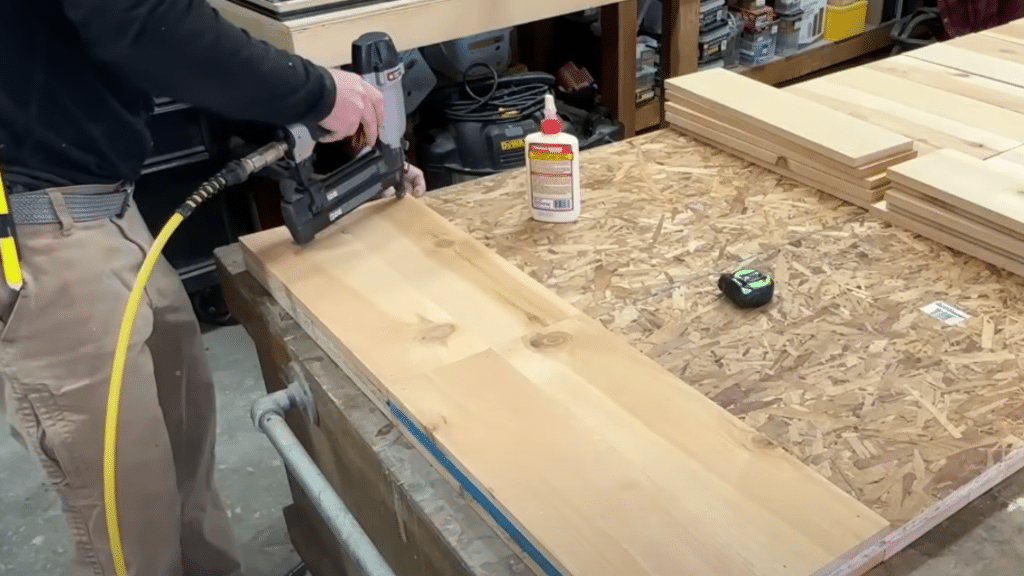
Cut cedar pickets to match the door width. For double doors, lay them out to align grain patterns. Trim the top or bottom boards as needed to fit. You can divide the total height by the number of pickets for uniform sizing.
Attach each board to the OSB using wood glue or construction adhesive and 18-gauge brad nails (1¼-inch long). For extra strength, add a center row of nails. Label doors clearly to track left/right sides, tops, and backs.
Step 6: Fill Nail Holes and Prep for Metal Trim
Use wood filler to cover nail holes, then smooth excess with a damp rag. Avoid over-sanding cedar to preserve natural texture and saw marks. Measure and cut a 3/16-inch thick metal flat bar for trim.
Use a metal cutoff saw or angle grinder, then smooth the sharp edges. Cut the top and bottom trim to the door width and the side trim slightly longer to overlap.
Lay everything out before painting. Clean metal with alcohol before applying black satin spray paint outdoors.
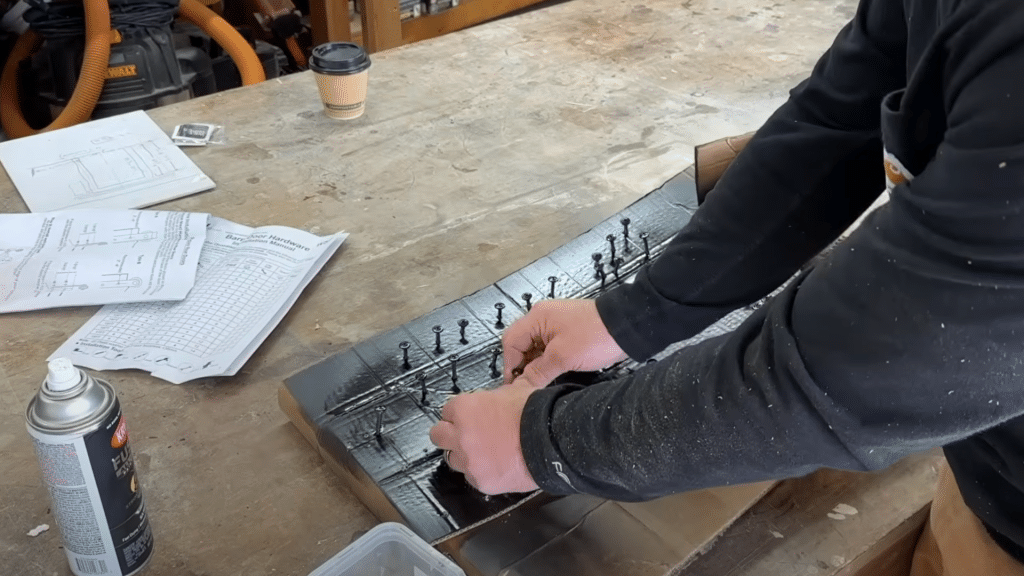
Step 7: Drill and Paint Metal Trim and Screws
Use a drill press or standard drill to make holes in the metal bar. Drill three holes in each short piece and seven in long side pieces, spaced evenly.
For center-facing door edges, stagger screw positions to prevent bumping. Sand all holes and clean the metal before spray painting.
Insert screws into cardboard and give them a few light coats of paint too. Apply two to three thin coats to both metal and screws for a strong, clean finish.
Step 8: Final Sanding and Polyurethane Finish
Use 120-grit sandpaper on an orbital sander to smooth the door sides and 220-grit to slightly bevel the edges. Lightly sand the surface of pickets to even the texture without removing too much character.
Clean all sawdust using compressed air or a blower. Apply oil-based polyurethane (ultra-flat sheen) to highlight the natural knots and grain.
Watch for drips on the edges. Let dry, then flip and repeat coats on the other side. Light sanding between coats ensures a smooth final finish.
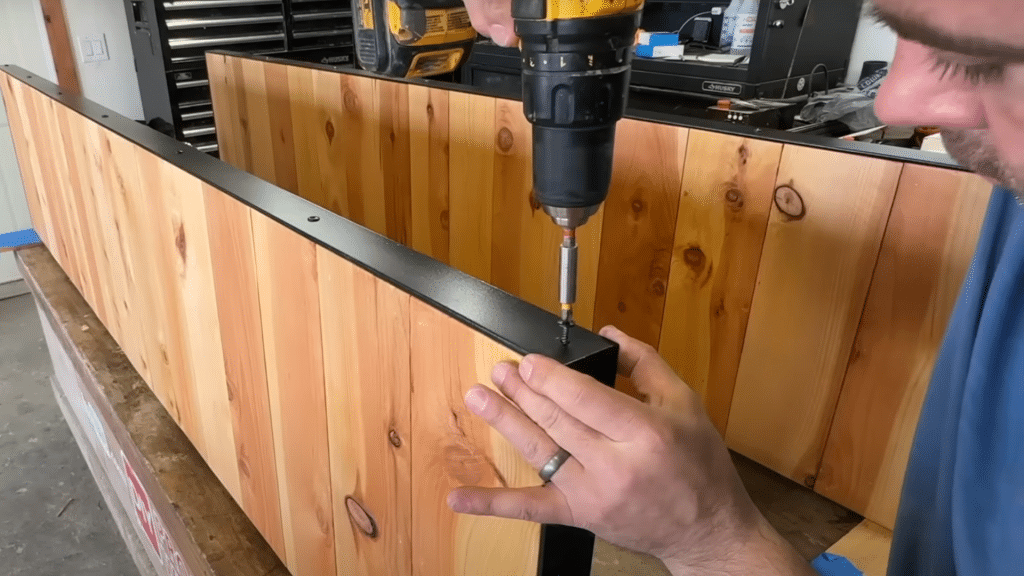
Step 9: Attach Metal Trim to Doors
After the polyurethane is fully dry, attach the painted metal trim. Start with the top and bottom pieces, pre-drilling each hole to prevent wood splitting. Use clamps if needed to align the metal perfectly to the edge.
Then attach the vertical side bars, overlapping the ends. This step strengthens the edges and gives the doors a finished, professional appearance.
Metal trim also helps maintain straight lines over time, especially for doors that are opened and closed frequently.
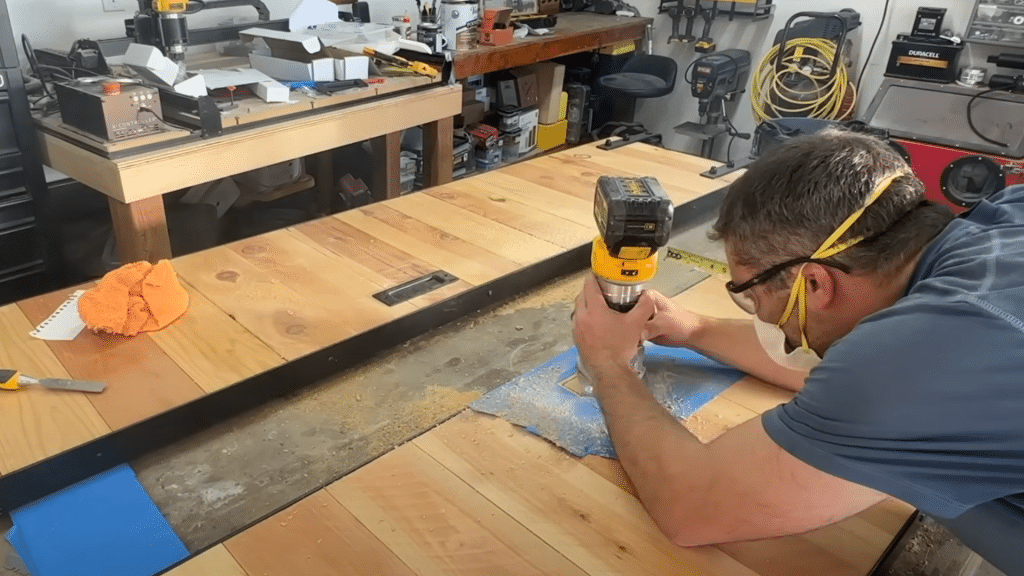
Step 10: Install Sliding Hardware and Handles
Mark and pre-drill hardware holes on the door face, 2 inches from each edge. If bolts are too short, router out a recess in the back of the door to seat the bolt heads. Install rollers and recessed handles.
Make sure they are aligned and square. To avoid a gap between doors, stagger screw heads on inner edges.
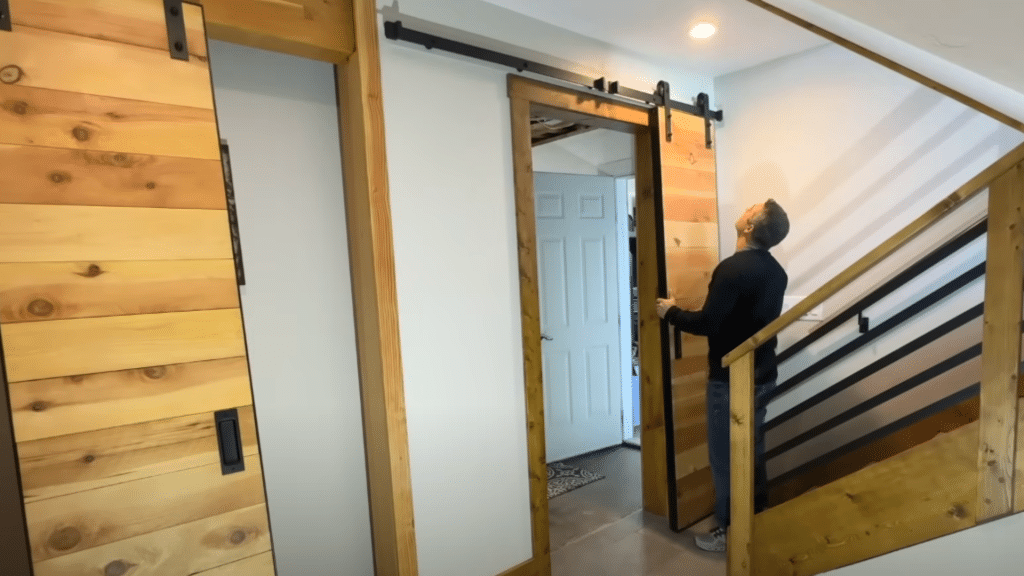
Follow the rail kit’s instructions for mounting height and door clearance. Then install the rail, floor guide, door stoppers, and safety pads.
Watch the full build in action to see each step come together. Click below to view the complete video walkthrough and results.
Finishing Your Barn Door
Now that your barn door is built, I’ll guide you through the final touches. You’ll choose how it looks and how well it holds up over time, especially outdoors.
Painting or Staining Options
Paint or stain can be chosen based on the desired appearance and the space where the door will be used. Stain works well for highlighting the natural wood grain, while paint offers a smooth, solid look.
Before applying either finish, sanding the surface is important to ensure good adhesion. The surface should be clean and dry.
Using a brush allows for better control around edges. Applying two coats provides stronger coverage and longer-lasting protection.
Protective Finishes for Outdoor Use
For doors exposed to outdoor conditions, applying a clear protective coat is essential. Exterior-grade polyurethane or water sealers are commonly used to help resist moisture and sunlight.
It’s recommended to apply the finish after painting or staining and allow full drying between coats. This process helps reduce the risk of warping, swelling, or cracking caused by weather exposure.
Even one proper coat can significantly increase the door’s durability in outdoor environments.
Budget and Time Breakdown
When you plan your barn door project, it helps to know what you’re spending and how much time you’ll need. I’ll walk you through both so you can prepare well.
DIY vs. Store-Bought Comparison
| Feature | DIY Barn Door | Store-Bought Barn Door |
|---|---|---|
| Time Investment | Requires several hours of hands-on work | Minimal effort, arrives ready to install |
| Customization | Full control over design, size, and finish | Limited to available styles and sizes |
| Tools and Skills Needed | Basic tools and comfort with measurements | None required beyond installation |
| Material Selection | Choose your own wood and hardware | Pre-selected materials |
| Labor | You handle everything from cutting to installing | Professional finishing and assembly included |
| Flexibility | Easily adjust to fit unique spaces | May need trimming or adjustment |
Cost-Saving Tips and Alternative Materials
These simple choices can help reduce the cost without affecting strength or function:
- Use construction-grade pine or spruce instead of cedar or oak
- Reuse hardware from old doors or cabinets
- Buy boards in bulk or use off-cuts from other projects
- Check local salvage yards or community boards for free or cheap materials
- Skip decorative trim and go with a flat panel layout for fewer cuts and pieces
- Use screws instead of nails for better strength and flexibility
Customization and Style Ideas for Barn Door
Once your barn door is installed, you can add personal touches to match your space and preferences. Here are a couple of simple ways to give your door more character.
Vintage Finishes, Modern Looks, Chalkboard Inserts
Adding your own design elements can make a basic door stand out. For a worn-in look, try distressing the wood with sandpaper or a wire brush before sealing.
A more modern style might use clean lines, smooth panels, or matte black hardware. You can also attach a chalkboard panel to part of the door, great for pantries, kids’ rooms, or schedules.
These small changes can help your door match different rooms without needing to rebuild it.
Using Reclaimed or Eco-Friendly Wood
Choosing reclaimed wood or responsibly sourced materials is a smart way to cut down waste and keep costs manageable. Boards from old barns, pallets, or demolished homes often have a unique look and natural wear.
Just make sure the wood is clean, dry, and free of pests before using it. Eco-friendly lumber options are also available at many hardware stores if you prefer something new but sustainably produced.
Common Mistakes to Avoid
A few simple oversights can slow you down or weaken your final result. Here’s what to watch out for before and during your build:
- Skipping the level check before mounting the track or hinges
- Using untreated wood for outdoor doors without a protective coat
- Ignoring stud placement when installing sliding hardware
- Failing to leave enough clearance between the door and the floor
- Choosing warped or wet boards that may shift over time
- Not pre-drilling holes, which can lead to split wood
- Over-tightening screws, causing hardware to strip or pull loose
Conclusion
Now that you’ve seen each step, you know how to build a barn door that’s both strong and practical. You’ve got the tools, the process, and the know-how to make it happen.
Whether you’re adding it to a shed or inside your home, you can build it your way. Just take your time, follow the steps, and don’t skip the finishing touches.
Need more ideas or want to find other DIY projects? Check out the rest of the blog, you’ll find plenty to keep your hands busy.


