


Replacing all your kitchen cabinets can cost a lot, but changing just the doors? That’s much more budget-friendly and something you can actually do yourself.
In this blog, I’ll walk you through three ways to build DIY cabinet doors: a beginner pocket hole method, an intermediate table saw method, and a pro-level router table method.
I’ll help you choose the right joinery for your skill level and pick the best wood for long-lasting doors. You’ll also see common mistakes that waste time and materials, and how to avoid them.
By the end, you’ll feel ready to start with one small project and build your confidence from there.
Why Build Your Own DIY Cabinet Doors?
Building your own cabinet doors saves serious money; custom doors from retailers cost $50-150 each, while DIY cabinet doors run $15-30 in materials.
Beyond the savings, homemade doors fit your non-standard openings perfectly, solving the frustration of older kitchens or unique furniture pieces.
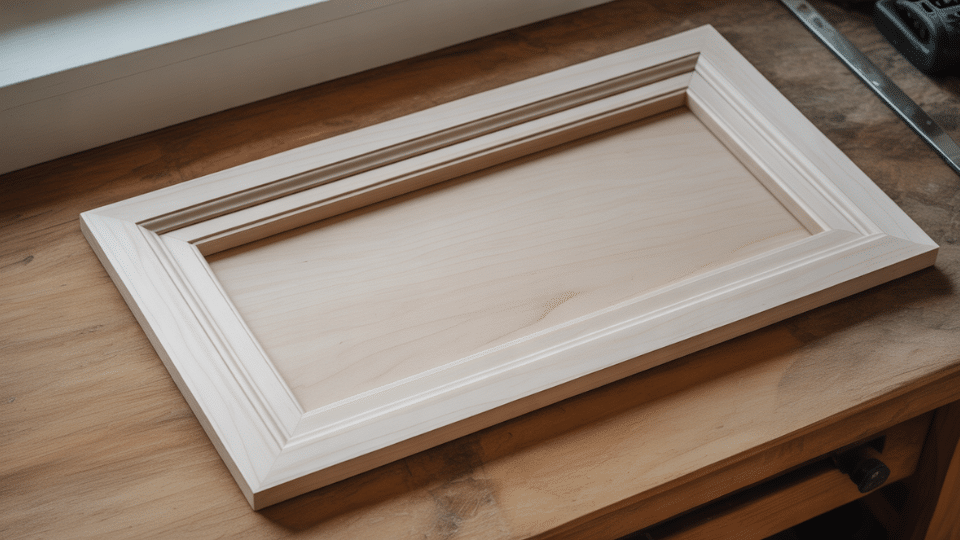
Shaker-style doors make an ideal starting point: simple flat panels with basic frames require minimal tools and forgiving techniques.
Master one bathroom vanity door, then tackle your full kitchen. Each project builds your skills, turning you from a nervous beginner into someone confidently customizing any space in your home.
Cost Comparison Between Beginner, Intermediate, & Pro
Before choosing a method, it helps to compare the approximate cost of each door. These estimates show how materials and techniques affect price, regardless of skill level.
| Method | Approx. Cost per Door | Notes |
|---|---|---|
| Beginner | ~$35 | Higher material cost due to trim and plywood backer; uses basic tools. |
| Intermediate | ~$21 | Most cost-efficient; the mortise-and-tenon structure uses fewer materials. |
| Pro | ~$31 | Slightly higher cost but offers the cleanest, most precise joinery and finish. |
Cost matters, but it shouldn’t drive your entire decision. The right method depends more on your tools, finish expectations, and the build quality you want long term.
Beginner DIY Cabinet Doors with Simple Tools
Here is a step-by-step guide for the builders who are new to woodwork and seek to delve into DIY projects, such as making a DIY cabinet door.
Materials and Tools Required
This beginner-friendly method uses basic tools and straightforward joinery, making it ideal for first-time builders updating kitchen or furniture cabinet doors.
| Material | Notes |
|---|---|
| Pine or other softwood boards | For simple door frames |
| Plywood panel | Used as the door backer |
| Small trim moulding | Adds decorative detail to the front |
| Wood glue | For frame assembly and trim |
| Pocket hole screws | Frame joinery |
| Brad nails | For attaching backer and trim |
| Wood filler | Patch nail holes and gaps |
| Sandpaper | Smooths surfaces before finishing |
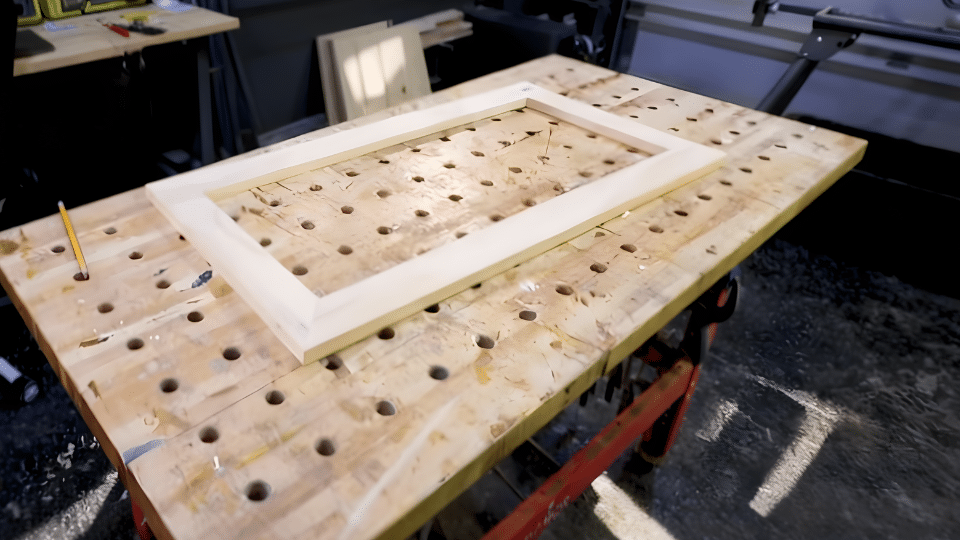
Step 1: Build the Frame Using Pocket Holes
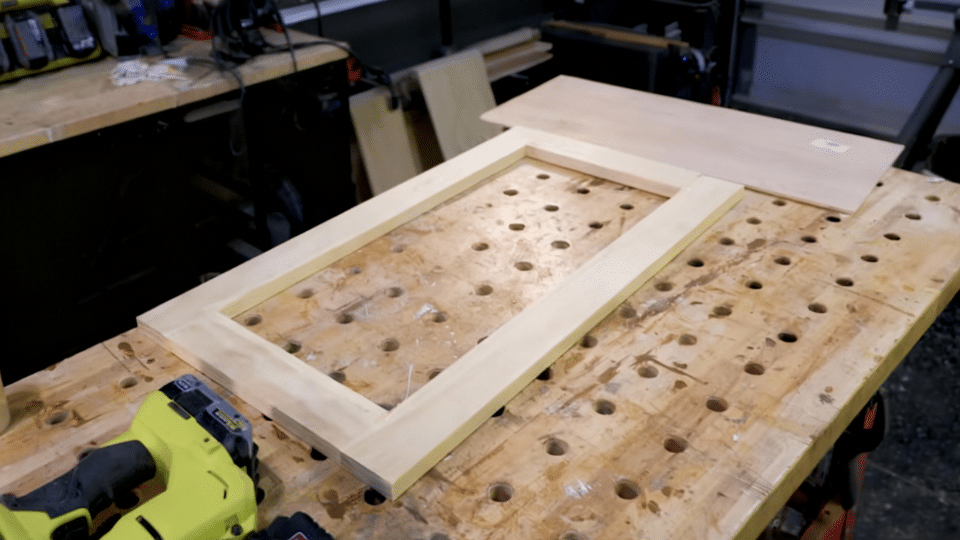
Cut your boards to size based on your desired overlay and opening. Drill pocket holes in the rail pieces, apply glue at each joint, and clamp the door frame flat.
Drive screws to tighten everything together, ensuring the structure remains square. This creates a simple, sturdy frame that forms the foundation for the rest of the door.
- Keep the frame flat to avoid twist
- Pocket screws work best with 3/4 in stock
Step 2: Add the Plywood Backer and Decorative Trim
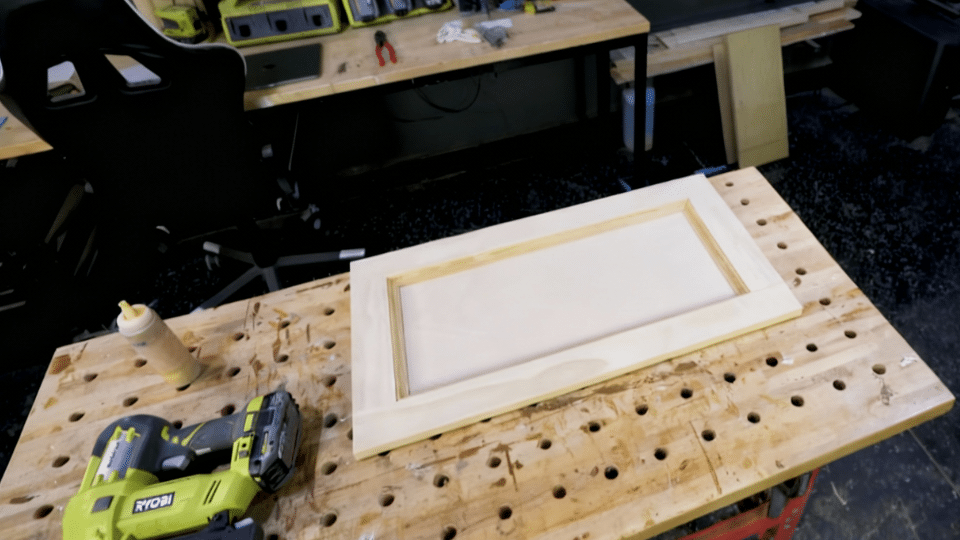
Cut a plywood panel slightly larger than the inside opening and glue plus brad nail it to the back of the frame. Flip the door, then install small trim around the inner edge to mimic more detailed cabinet profiles.
Nail trim into the frame for strength, not just into the thin plywood.
- Plywood: paint-grade birch works well
- Nail trim into rails and stiles, not the panel
Step 3: Fill, Sand, and Prep for Hinges
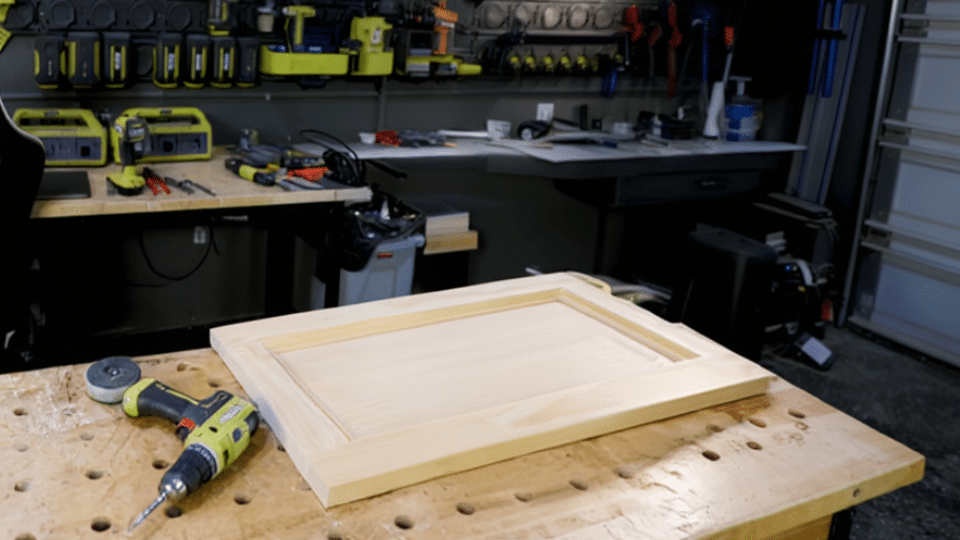
Wipe away any glue squeeze-out before it dries, then fill nail holes and seams with wood filler. Lightly sand the entire door for a clean, paint-ready surface.
Drill hinge cups or pilot holes before painting so you don’t damage the final finish when installing hardware later.
- Sand lightly with 120–180 grit
- Drill hinge cups with a 35 mm Forstner bit
Making of Intermediate DIY Shaker Cabinet Doors
Materials and Tools Required
This method offers stronger joinery and a traditional Shaker design, ideal for DIYers ready to move beyond basic pocket screws.
| Material | Notes |
|---|---|
| Hardwood or softwood boards | For stiles and rails |
| Plywood panel | Center panel for Shaker design |
| Wood glue | Joinery adhesive |
| Painter’s tape | Reduces tear-out on plywood |
| Wood filler | For tiny imperfections |
| Sandpaper | Pre-finish smoothing |
Step 1: Cut Rails, Stiles, and Calculate Tenon Allowances
Rip your boards to a uniform width and cut the stiles to full door height. For the rails, subtract the combined stile width from your overall door width and add material for the two tenons.
- Tenon allowance: approximately 3/8 in per end
- Rail length formula: door width − stiles + tenon allowance
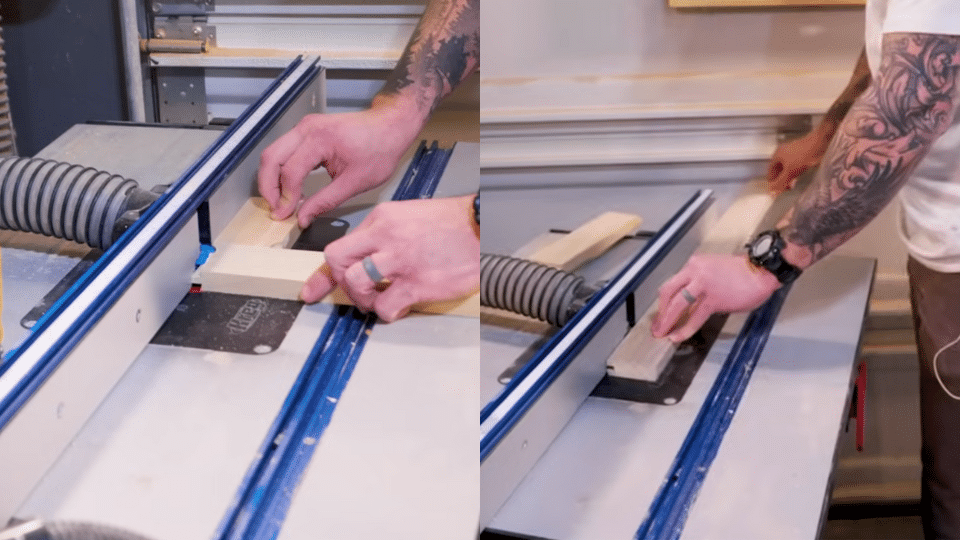
Step 2: Cut Tenons on the Table Saw
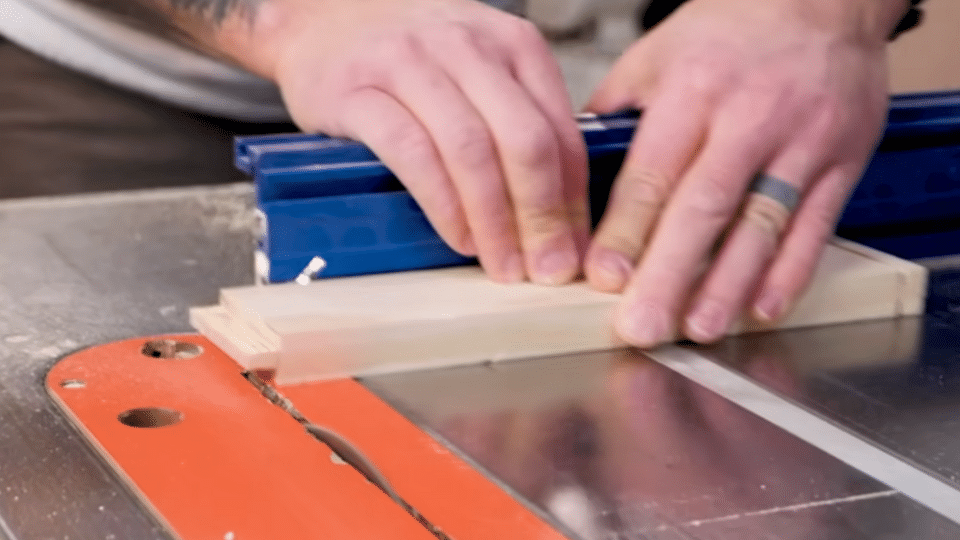
Raise your saw blade to form the tenon shoulders, using a miter gauge or sled with a stop block for repeatability.
Cut both shoulders, then remove waste between them by sliding the rail sideways over the blade. Test the tenon in a stile groove and adjust blade height or fence position in small increments.
- Adjust in 1/32 in increments for precision
- Shoulders must be clean and square
Step 3: Cut Mortises and Prepare the Center Panel
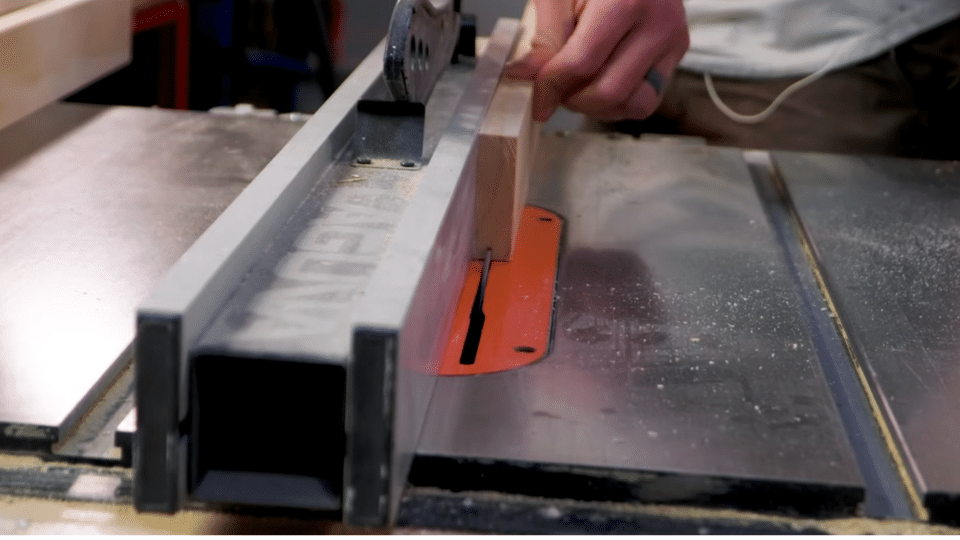
With the same blade height, switch to the fence and cut the groove that forms the mortise. Make two passes to reach the correct width.
Cut the plywood panel slightly smaller than the opening and use painter’s tape to prevent tear-out during cutting. Dry fit everything before glue-up.
- Groove depth: shallow enough for strength but not through
- Reduce panel size slightly for easy fit
Step 4: Glue, Clamp, and Square the Door
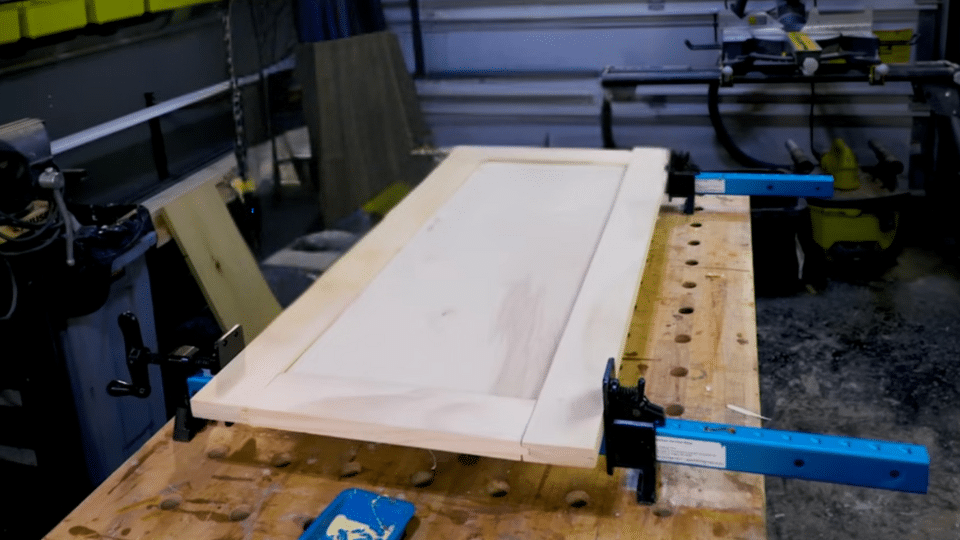
Apply glue to the tenons and assemble the frame around the panel. Clamp evenly, checking that glue stays inside the joints and the door remains square.
Let it cure overnight for maximum strength, then drill hinge cups as needed. This creates a durable, classic Shaker door.
- Do not overtighten clamps
- Ensure diagonal measurements match
Making of Advanced DIY Cabinet Doors Using a Router Table
Materials and Tools Required
Before starting the advanced method, gather the materials and router-specific tools you’ll need. This method relies on precision, consistent cuts, and a stable setup for clean, professional-grade joinery.
| Material | Notes |
|---|---|
| Hardwood boards | Primary door frame material |
| Solid wood panel or plywood | Center panel based on desired look |
| Wood glue | For mortise-and-tenon joints only |
| Blue tape or painter’s tape | Reduces tear-out and protects surfaces |
| Sandpaper | For smoothing and pre-finish prep |
| Optional edging/profile material | For decorative router details |
Step 1: Rout Tenons and Mortises With Combination Bits
Cut your stiles and rails using the same calculation method as the intermediate version. Install the combination router bit that cuts tenons first, then switch to the matching mortise bit.
Keep one consistent reference face on each board to maintain alignment, and use light passes to avoid burning and ensure crisp, repeatable cuts.
- Reference face: always against the fence
- Light passes: prevents burning and tear-out
Step 2: Shape the Center Panel and Add Profile
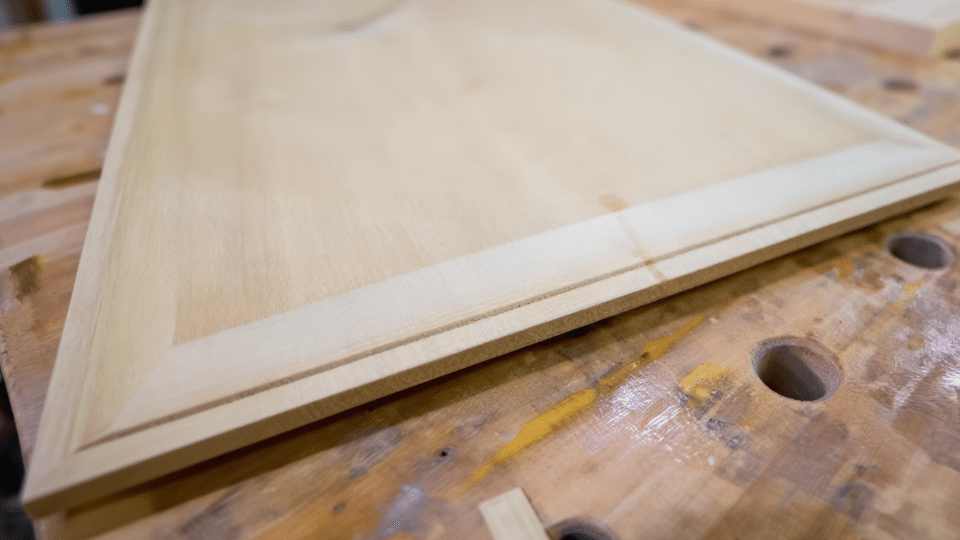
Cut the panel with slight clearance so it sits comfortably inside the frame. Use a panel-lip or tenon bit to create the tongue that fits into the mortises.
For a more dimensional look, optionally use a raised panel bit. A router table gives smooth, uniform results that eliminate the need for sanding or trimming the panel edges later.
- Clearance: 1/16–1/8 inch per side
- Raised panel bits: run at reduced RPM
Step 3: Assemble With a Floating Panel and Final Sanding

Apply glue only to the mortise-and-tenon joints, allowing the solid wood panel to float so it can expand and contract naturally.
Clamp with light, even pressure and confirm the door is square before the glue sets. Once cured, soften the edges with a roundover bit and sand the door thoroughly in preparation for finishing.
- Do not glue solid wood panels in grooves
- Check diagonal measurements to confirm square
For more details and tips, refer to the YouTube video:
Which Joinery Method Should You Choose?
Two joinery methods dominate DIY cabinet doors: pocket holes and mortise & tenon. Here’s how to choose.
Pocket Hole Joinery
- Best for: First-time builders, quick bathroom updates, budget projects
- Build time: 20 minutes per door
- Strength: Solid for everyday use, may loosen after 10+ years of heavy kitchen traffic
Mortise & Tenon Joinery
- Best for: Full kitchen remodels, heirloom-quality furniture
- Build time: 45+ minutes per door
- Strength: Lasts generations with zero loosening
My Recommendation
Start with pocket holes. Build 2-3 practice doors, then upgrade to mortise & tenon when you’re ready for advanced techniques.
Hammer That Nail
DIY cabinet doors let me control my home’s look and feel, choosing style, size, and finish instead of settling for store options.
Starting with the pocket hole method, then using the table saw or router table, each door builds confidence. Don’t worry if the first isn’t perfect, that’s normal.
The beauty of learning these three techniques is flexibility: quick updates when you need speed, heirloom quality when a project deserves it.
Start with one door this weekend. You’ll surprise yourself with how quickly confidence builds once you see that first frame come together.
Got questions about your specific project? Drop them in the comments.


