


After years of sewing, I can tell you that few things are as rewarding as hanging curtains you made yourself. I still remember my first pair, slightly uneven hems and all, but they were mine, and I was hooked.
Over the years, I’ve sewn curtains for nearly every room in my home, experimenting with fabrics, styles, and techniques along the way. What started as a simple cost-saving idea turned into one of my favorite sewing projects.
In this blog, I’m sharing everything I’ve learned on how to sew curtains, so you can skip the guesswork and go straight to the good part: creating beautiful, custom curtains that fit your space perfectly.
Why Sewing Your Own Curtains Is Easier Than You Think?
Many people assume sewing curtains requires advanced sewing skills. In reality, it’s one of the easiest projects you can start with.
You don’t need complicated techniques or special training. If you can sew a straight line, you already have the main skill needed to make basic curtain panels.
Curtains are also forgiving projects. Small mistakes are rarely noticeable once the panels are hanging on the rod.
Another reason this project works well for beginners is the time commitment. Most simple curtain panels can be completed in just a few hours.
Once you understand the basic process, you can sew curtains for any room using the same steps. With the right fabric and measurements, you can create panels that fit your windows exactly the way you want.
Step-by-Step: How to Sew Basic Curtain Panels
Sewing your own curtain panels is easier than it looks, and the results are always worth it. Follow these simple to know how to sew curtains, steps to get started:
Tools and Fabric Essentials for Sewing Curtains
Before you start sewing, it helps to see your tools and fabric options side by side. I like keeping this simple, so you can plan your budget and shop smart in the following:
| Item | Type | Why It Matters | Estimated Cost |
|---|---|---|---|
| Sewing machine or needle | Tool | Needed to stitch hems and headers | $0–$200+ |
| Polyester thread + 12/14 needle | Tool | Strong enough for medium to thick fabric | $5–$12 |
| Measuring tape + fabric scissors | Tool | Ensures accurate cuts and clean edges | $10–$40 |
| Cotton fabric | Fabric | Easy to sew and great for simple panels | $8–$15/yard |
| Blackout fabric | Fabric | Blocks light and adds privacy | $10–$20/yard |
| Drapery-weight fabric | Fabric | Heavier fabric for fuller, structured curtains | $15–$40/yard |
These are the main items you’ll need to get started without overcomplicating things.
Prices are estimates and may vary by brand, quality, and where you shop.
Step 1: Measure Your Window and Prepare the Fabric
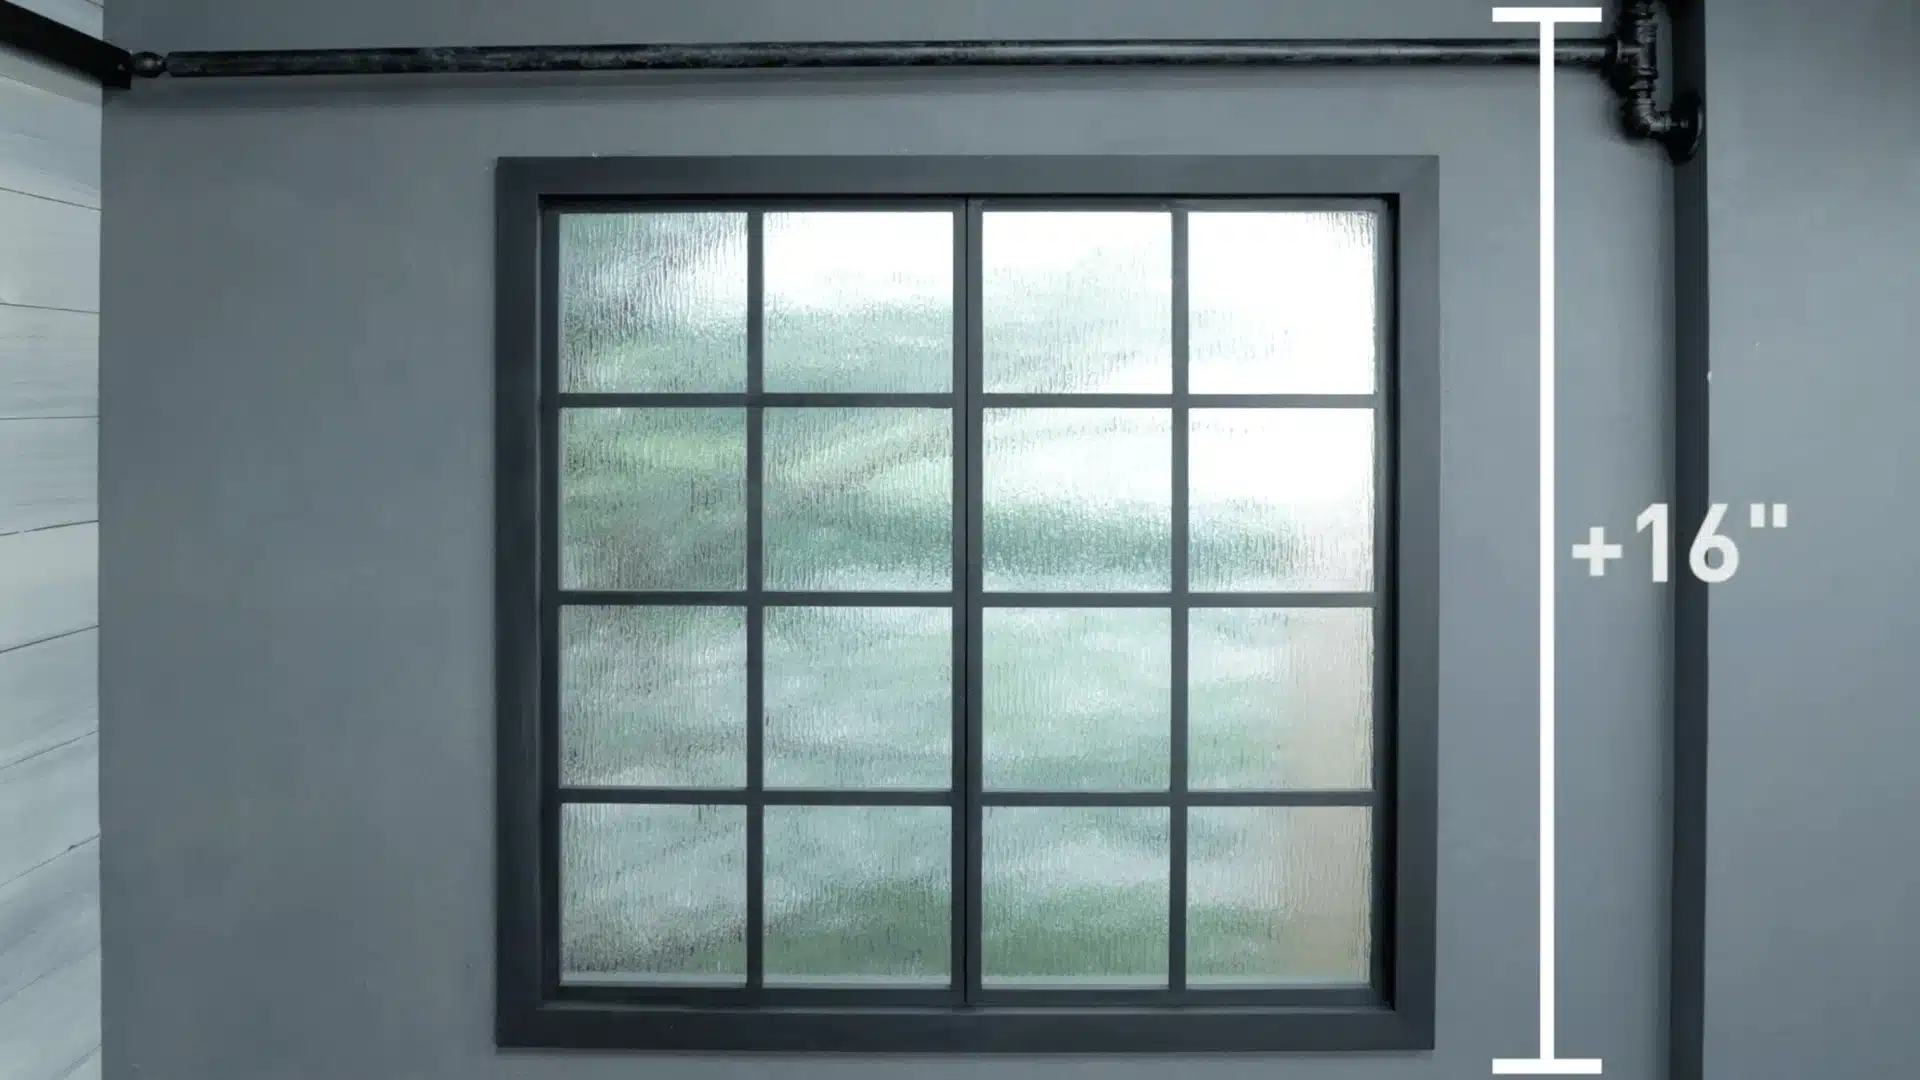
Start by measuring from the curtain rod to where you want the curtain to end, then add 16 inches for the top fold and bottom hem. For width, measure your window and double it for a fuller look.
Before you cut, trim off the selvages; those tightly woven edges can make your curtain hang unevenly. A little prep here saves a lot of trouble later.
Step 2: Sew the Side Hems
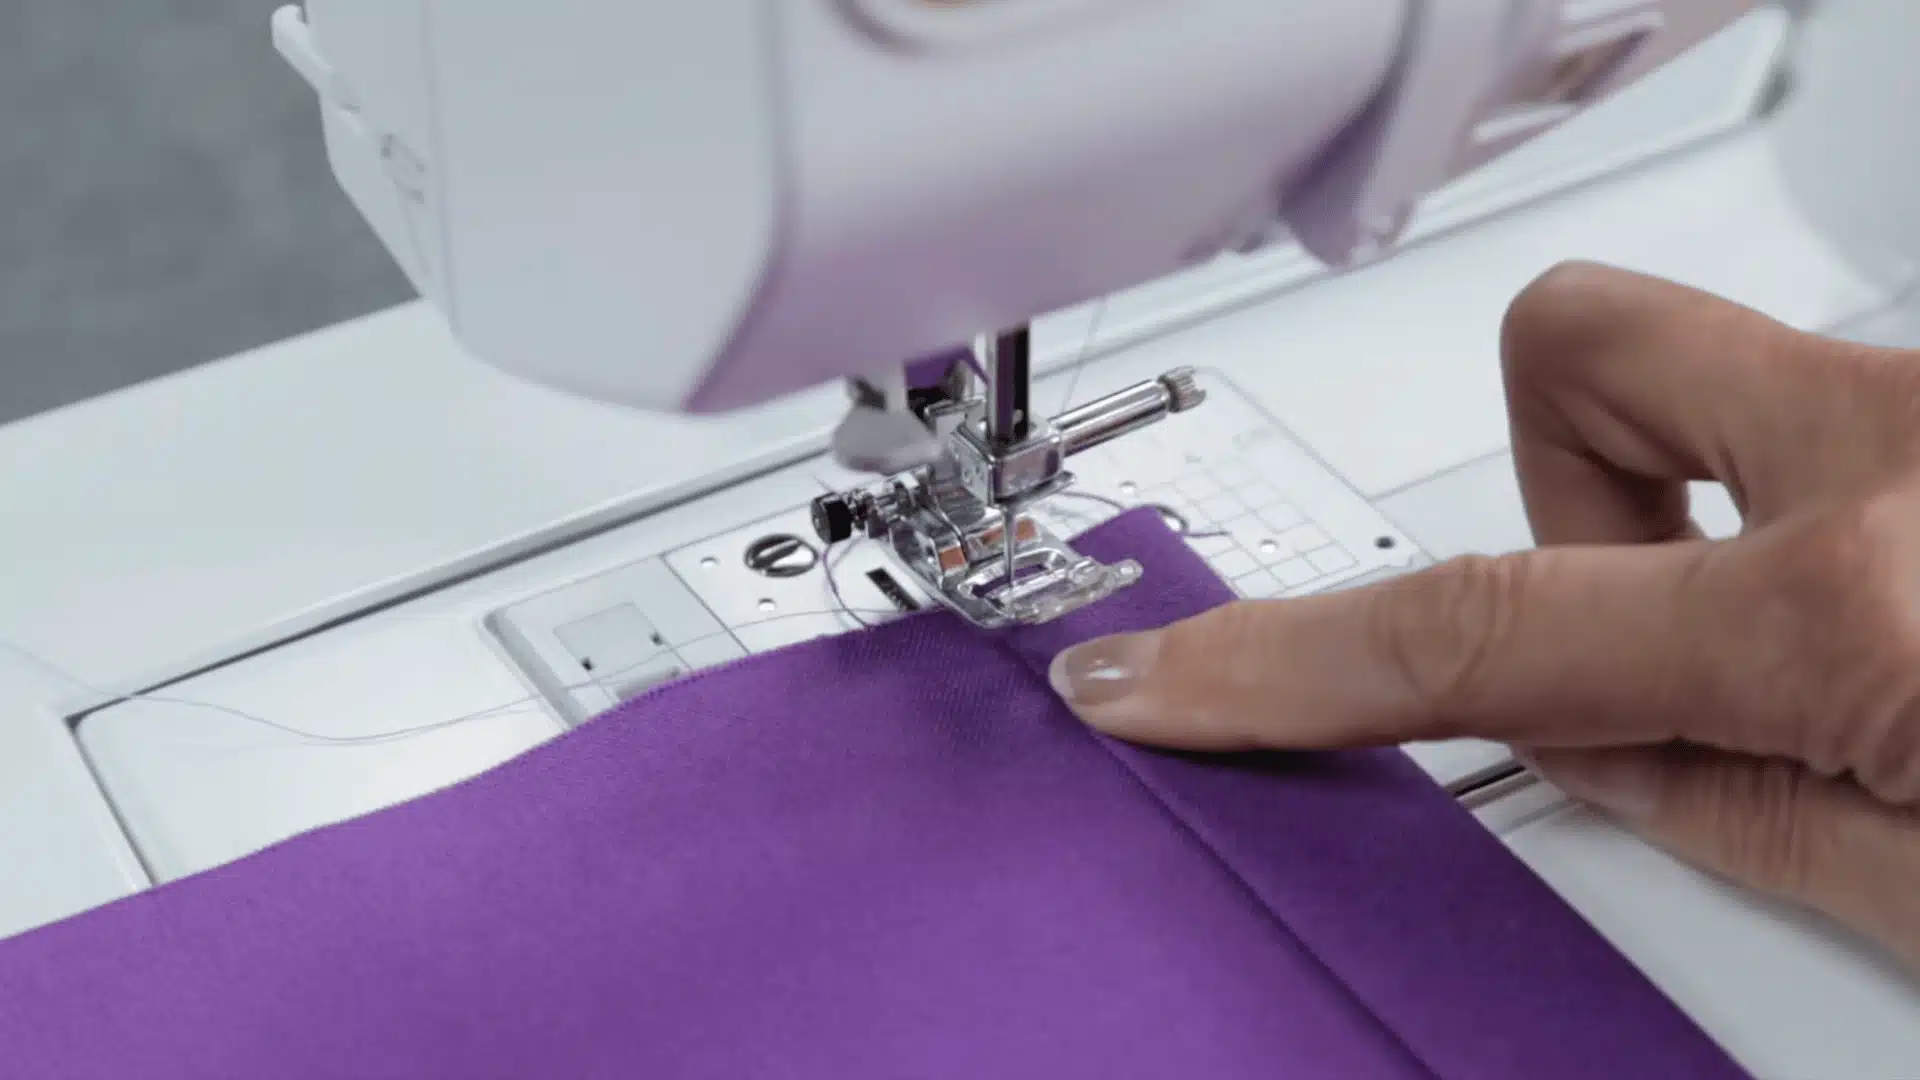
Fold the fabric 1 inch toward the wrong side, then press it flat. Then fold it one more inch and press again. Sew close to the inner fold, about 1/8 inch from the edge.
If your fabric is thick, set your stitch length to around 3.0 for smoother sewing. Repeat the same steps on the other side. Pressing as you go keeps everything neat and straight.
Step 3: Create the Bottom Hem
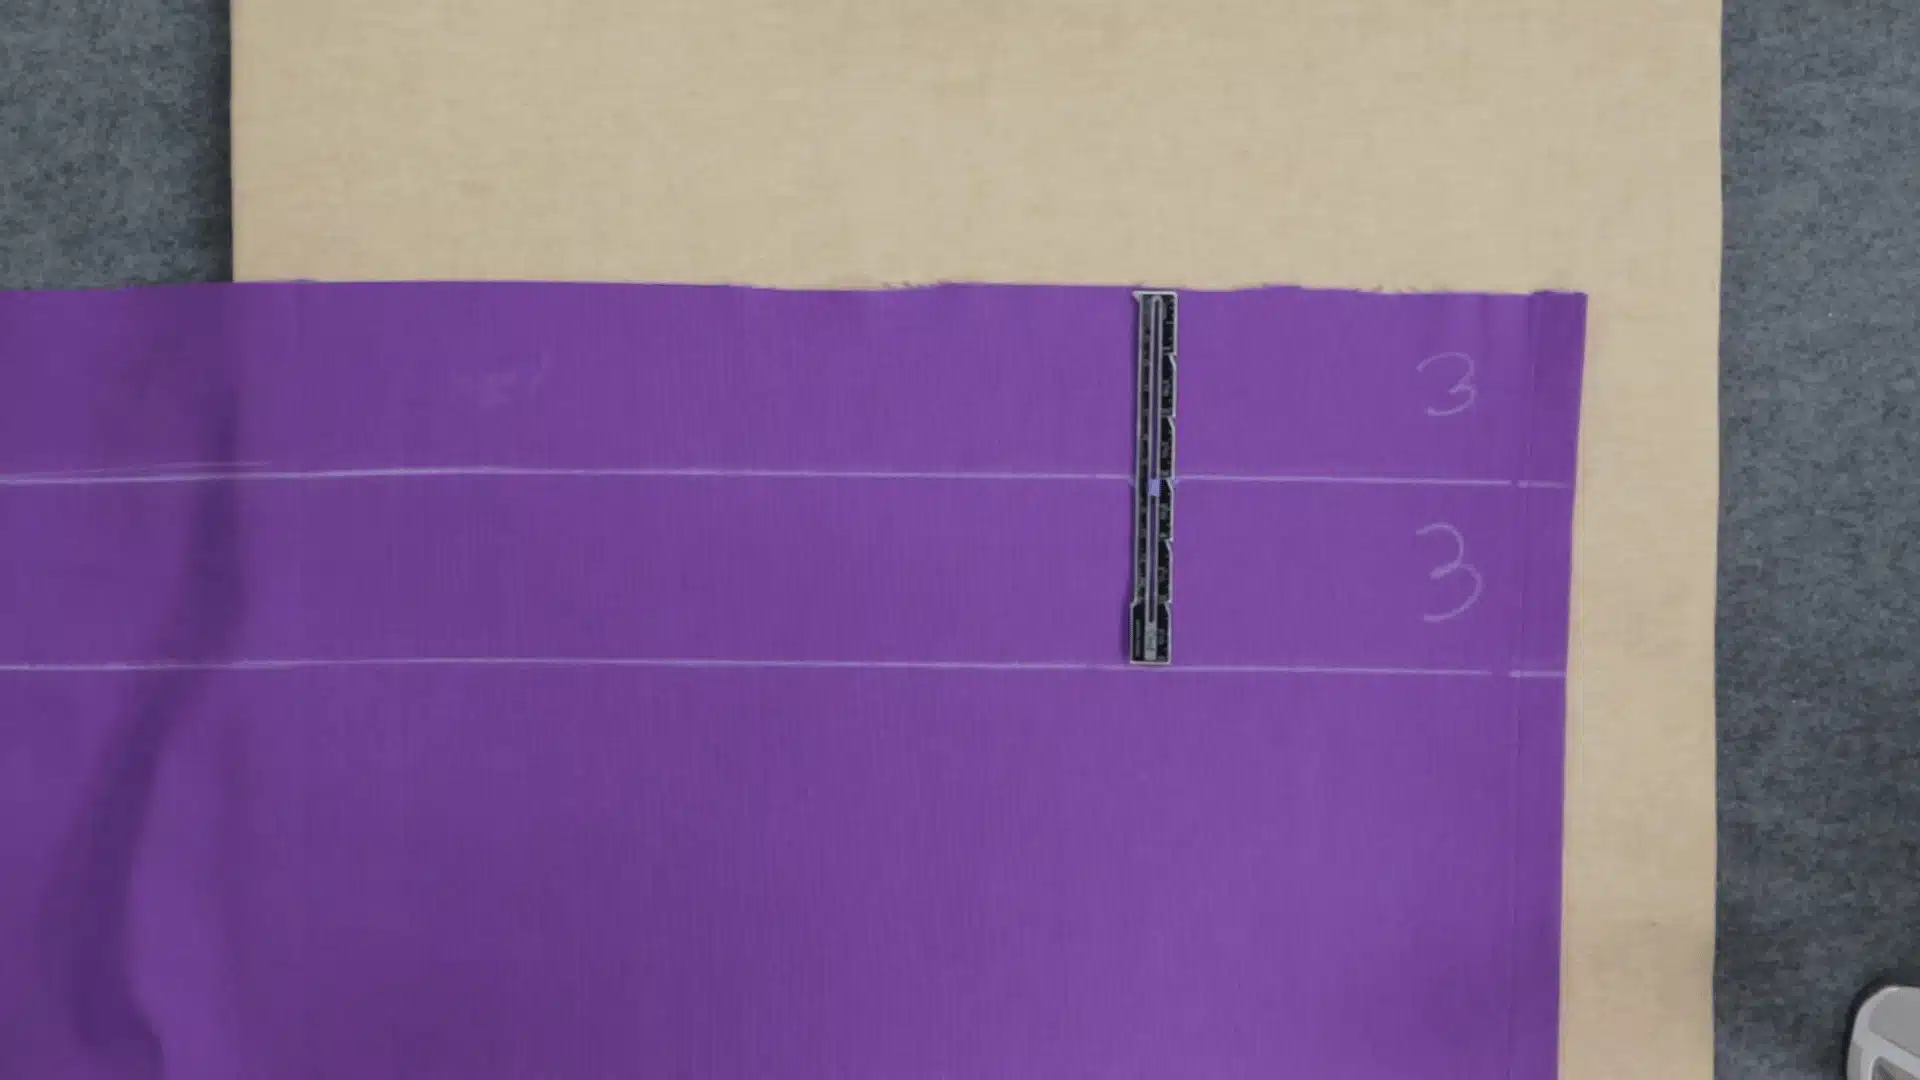
Measure 3 inches up from the bottom edge and fold the fabric up. Press it flat, then fold up another 3 inches and press again. A deep hem like this adds weight to the curtain, helping it hang straight and look polished.
Stitch along the folded edge just like the sides. If the fabric feels too bulky under the presser foot, level it before you stitch.
Step 4: Sew the Top Header for Grommets
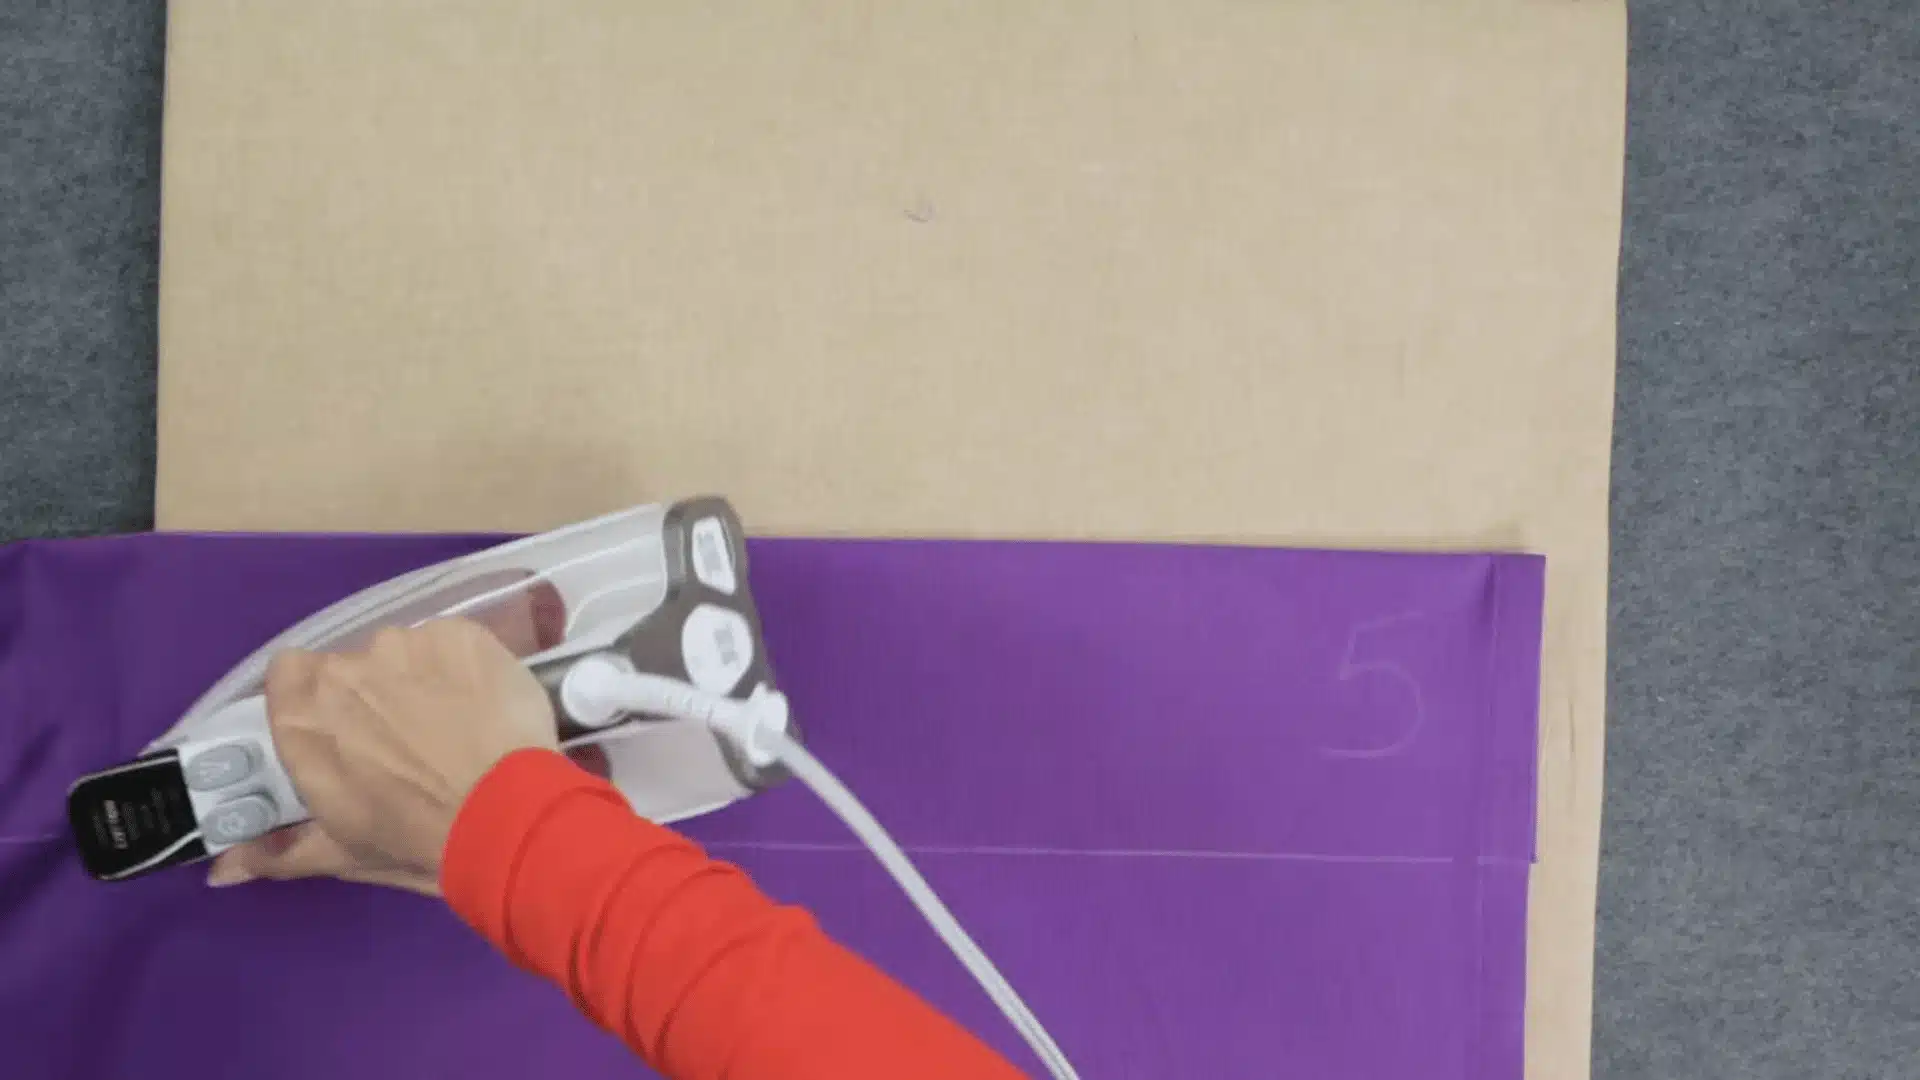
Measure 5 inches down from the top edge and mark it with chalk. Fold the fabric toward the wrong side and press. Then fold down another 5 inches and press again. Stitch close to the folded edge to hold the header in place.
This double fold creates a firm, sturdy top, giving your grommets something solid to grip onto without pulling or tearing over time.
Step 5: Install the Grommets and Hang the Curtains
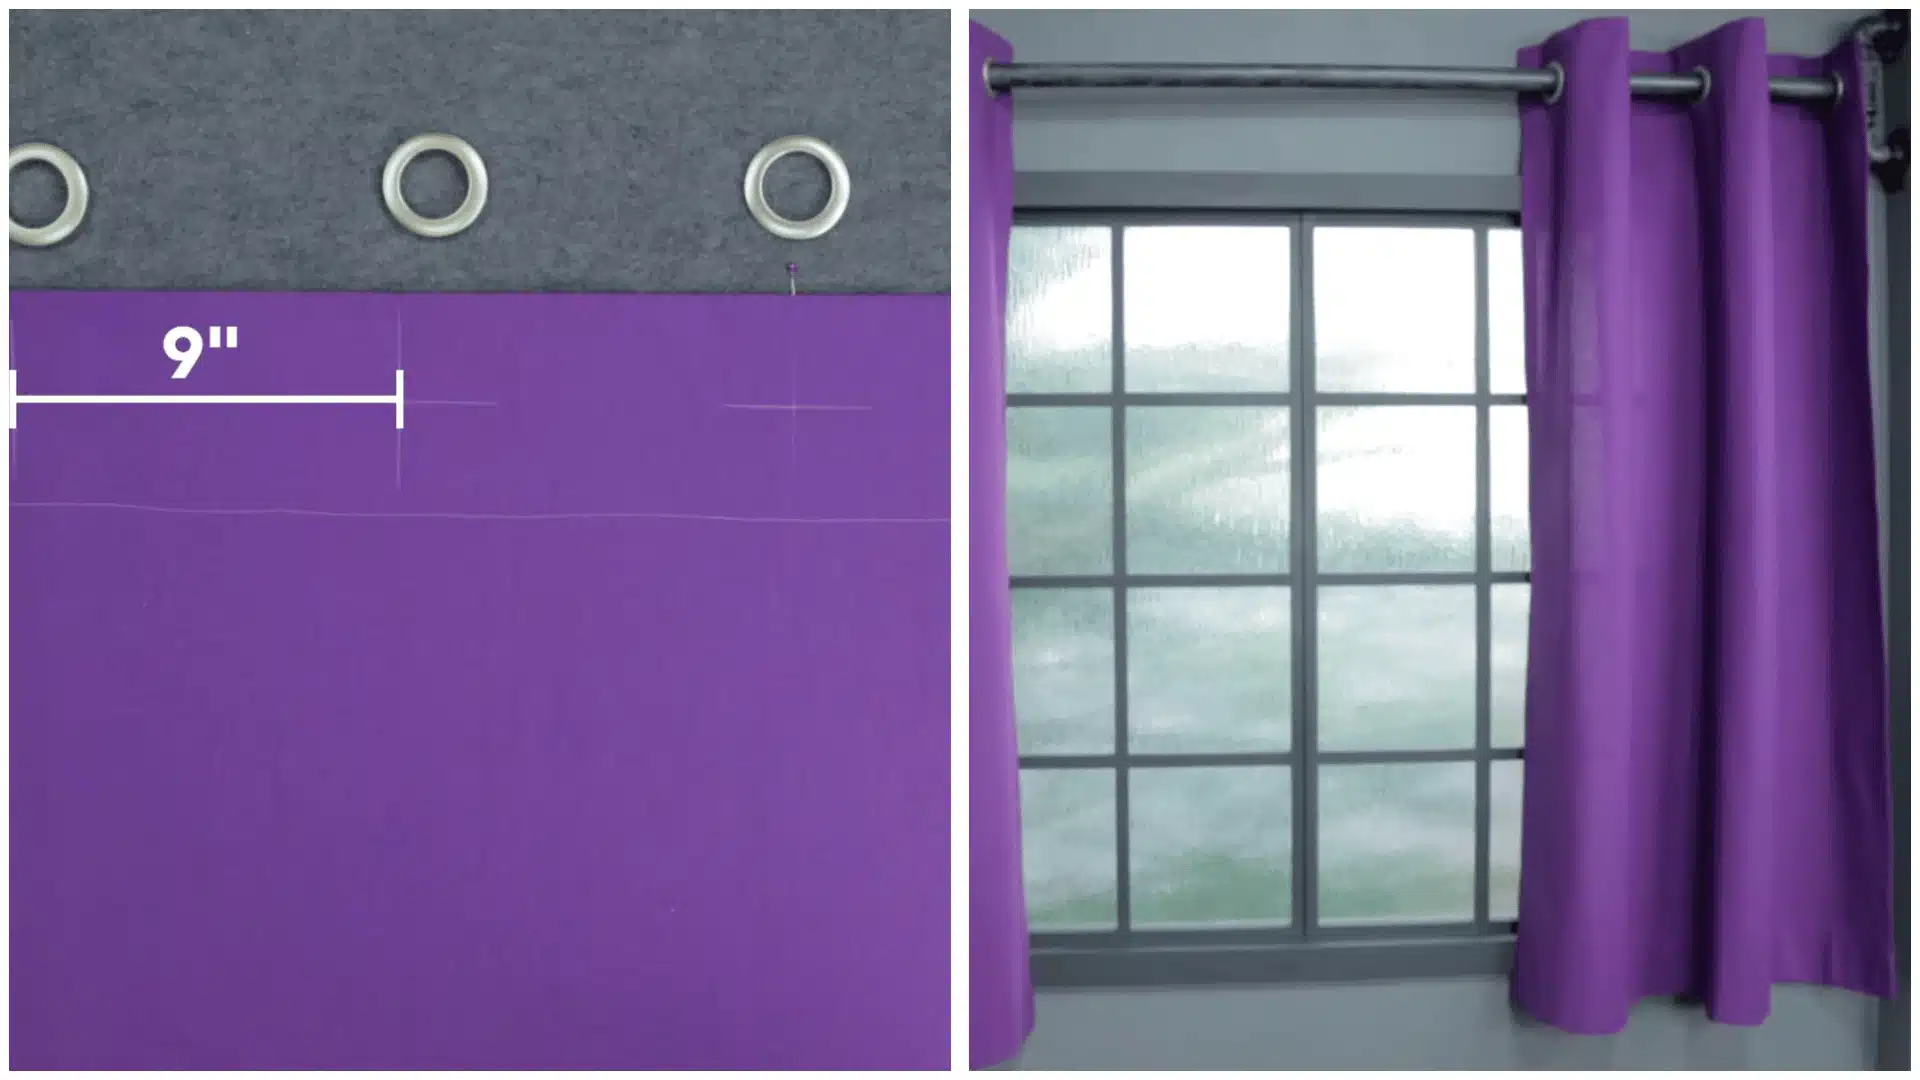
Mark your grommet spots 2½ inches from the top and sides, spacing each one about 9 inches apart. Use the grommet template to trace each circle, then carefully cut out the holes.
Push the bottom piece through from the right side of the fabric, then snap the top piece firmly into place. Once all grommets are set, slide the curtain onto the rod, and you’re done.
For the more clear and more brief step, check out the video tutorial by Craftsy.
Video Tutorials for Different Curtain Styles
Learning curtain styles is so much easier when you can see every step in action that’s exactly what this section is for: a curated playlist of the best tutorials, organized by style and skill level, so you always know where to start.
1. Rod Pocket Curtains
Rod pocket curtains are the perfect starting point for anyone new to sewing. You simply sew a folded channel at the top, slide the rod through, and you’re done, no grommets, no hooks, no extra tools needed.
Difficulty level is beginner-friendly, and most panels take about 1 to 2 hours to complete. Watch this easy step-by-step tutorial to follow along at your own pace.
2. Back Tab Curtains
Back tab curtains have a sleek, polished look because the rod stays completely hidden behind the fabric.
The tabs are sewn onto the back of the panel, giving the front a smooth, uninterrupted finish perfect for a modern or minimalist space. It takes a little more precision than a rod pocket, but nothing difficult.
3. Tab Top Curtains
Tab top curtains are casual, relaxed, and full of personality. The fabric loops sit right on top of the rod, making them easy to hang and simple to sew.
They work beautifully in bedrooms, reading nooks, or any space where you want a laid-back, cozy feel. If you’re past the beginner stage and want something fun to make.
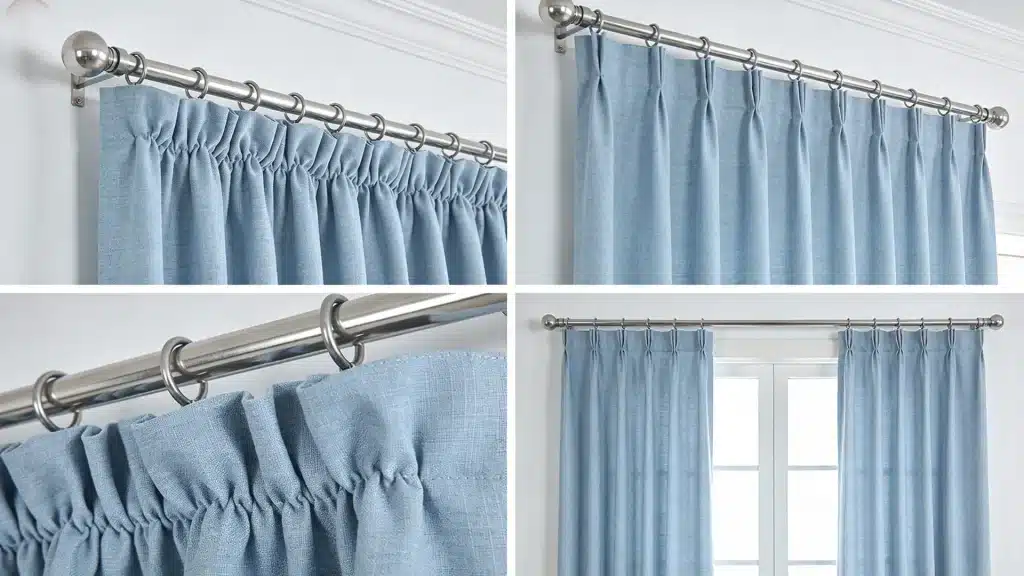
4. Pinch Pleat Curtains
Pinch pleat curtains are the most formal and tailored style on this list, ideal for dining rooms, living rooms, or anywhere you want an elegant, structured look.
They require more measuring and attention to detail, and pleater tape makes the whole process much easier by doing the spacing work for you. If you’re ready to level up, this tutorial is for you.
Common Curtain Sewing Mistakes
Every sewist makes mistakes, and what matters most is knowing exactly how to fix them and move forward with confidence:
- Uneven hems: Always press and pin your hem before sewing, and use a hem gauge for consistent folding every time.
- Crooked seams: Slow down at the machine, use your seam guide, and never skip the pinning step.
- Curtain too short: Always add extra length when cutting. You can hem up, but you can never hem down.
- Not enough fullness: Double your fabric width at minimum, triple it if you want a rich, gathered look.
- Fabric fraying: Finish all raw edges with a serger, zigzag stitch, or a simple fold-and-press before sewing.
Take your time with each step, trust the process, and remember every mistake is just a lesson that makes your next pair of curtains even better.
Final Thoughts
If you’ve made it this far, you already have everything you need to get started. I have covered it all, from measuring your window and preparing your fabric to sewing clean hems, installing grommets, and choosing the right curtain style for your space.
You’ve seen the most common mistakes and learned exactly how to fix them before they slow you down.
After years of sewing curtains myself, I can tell you that the first pair you hang will feel like a genuine accomplishment, and it only gets easier from there.
Pick your fabric, thread your machine, and trust the process. Your windows are waiting, and your best curtains are the ones you make yourself. Also, comment below on how your very first sewing experience went.


