


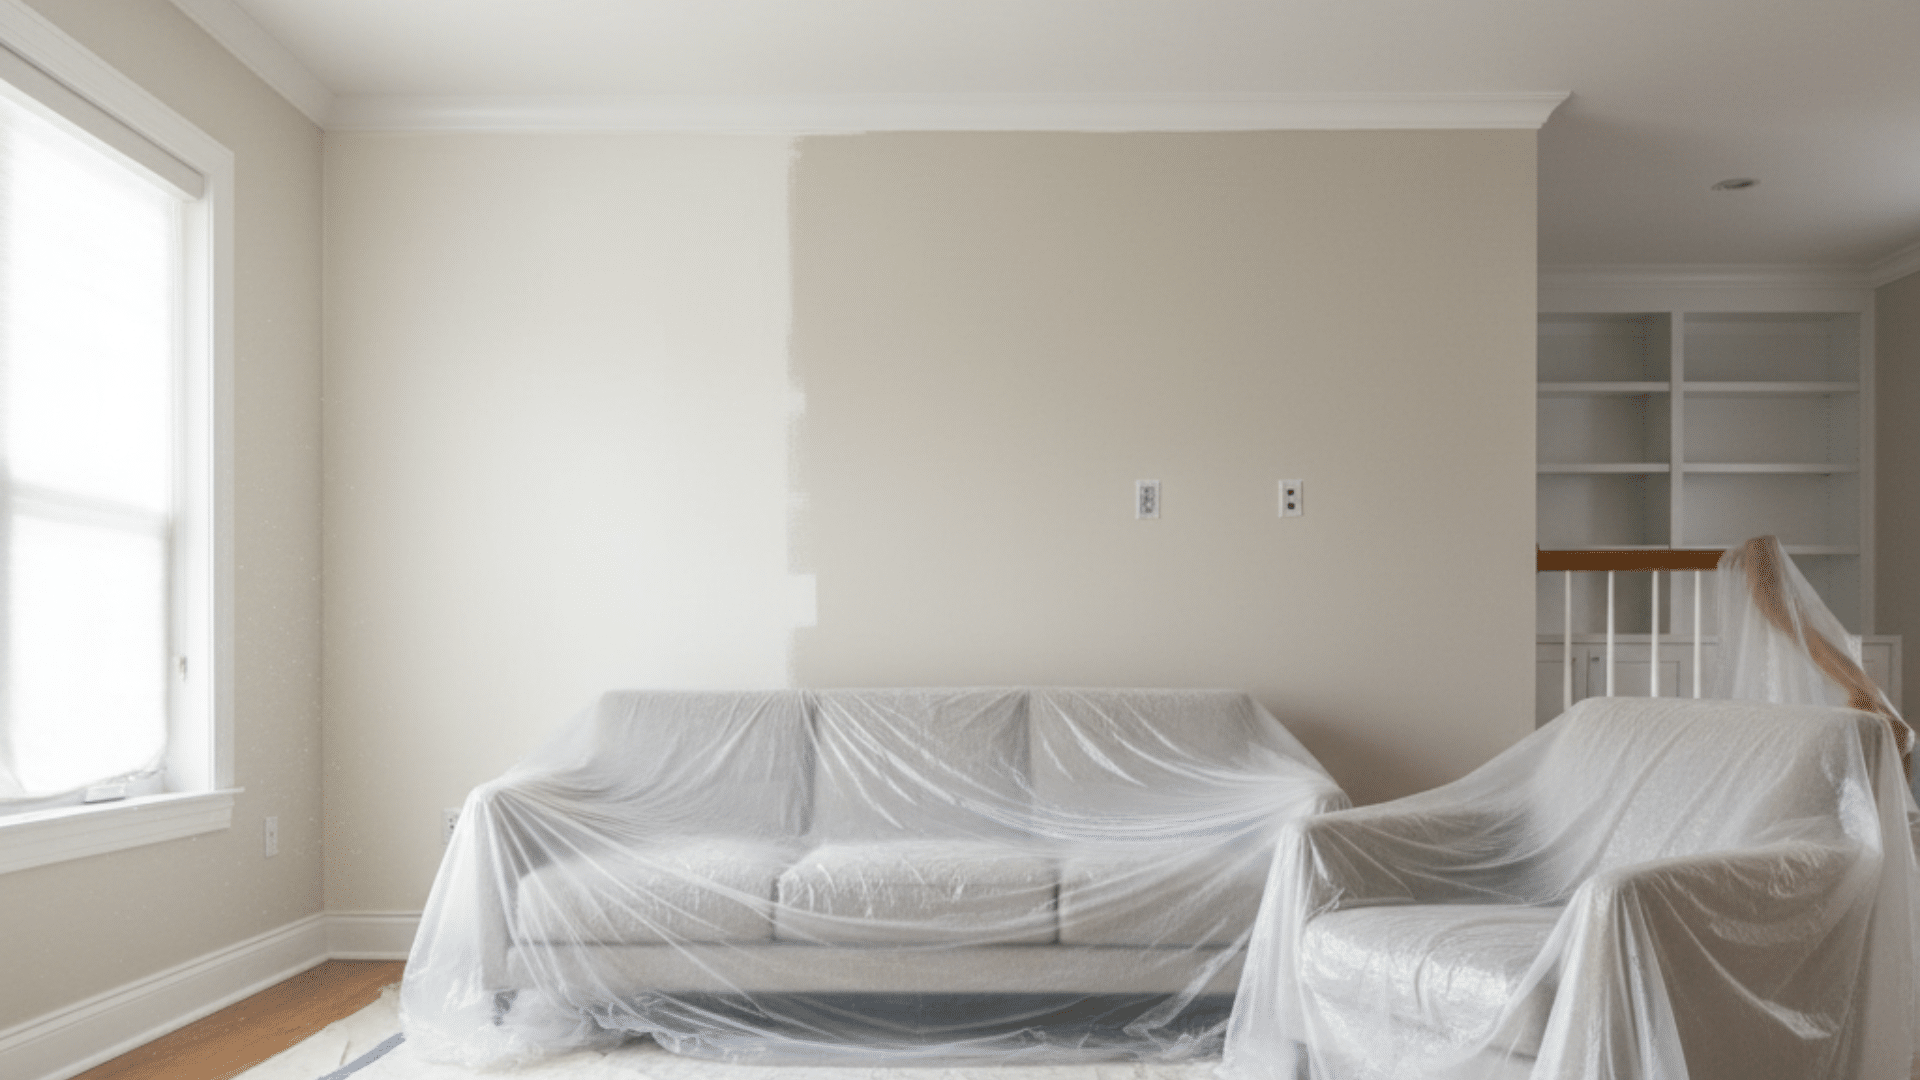
I remember walking into my living room one afternoon and noticing how dull the walls looked.
Maybe you’ve had that same moment where you realize fresh color could make your space feel better. Interior residential painting can seem like a big task, but it becomes simple once you understand the steps.
You might want to paint on your own, or you might feel better having a crew handle the work. Either choice can work well when you know what to expect.
I’ll walk through the key parts so you can plan with confidence and avoid stress.
What Does Interior Painting Cover?
Interior painting includes the main surfaces inside your home, plus any extra features you choose to add.
Standard Surfaces
Most projects focus on the areas used and seen every day. This includes walls, ceilings, baseboards, door frames, and window trim. These parts form the base of the room and set the tone for a new color.
Crews usually clean, sand lightly, and apply steady coats to create a smooth finish. These areas also show wear the quickest, so updating them brings the most noticeable change.
When planning your project, list each surface clearly so your estimate reflects the full scope.
Optional Add-Ons
Some homes have extra features that need attention during a project. Closets, built-ins, cabinets, and stair rails fall into this group.
These parts take more time because they have edges, hinges, or tight corners. They can raise project cost, but they also help the room look complete once finished.
If these areas match the main surfaces, the room feels consistent. If they stay older or marked, they can stand out. Decide early which extras matter most based on use and budget.
Prep and Repairs
Smooth results rely on good prep. This includes patching small holes, sanding rough spots, and filling gaps with caulk. These steps help paint sit flat and last longer.
Some spots need primer, especially where stains show or where dark colors change to lighter ones. Taking time to prep reduces the need for touch-ups later.
Many crews include basic repairs, but larger issues may call for separate help. Clear prep notes in your estimate prevent confusion once work begins.
Interior Painting Costs
Interior painting prices shift based on the size of your home, the number of rooms, and the condition of each surface.
Across the U.S., most professional interior painting projects fall between $2.50 and $5.50 per square foot. In some areas or for higher-end finishes, costs can range from $2 to $6 per square foot, with premium or complex jobs reaching higher.
Walls usually sit at the lower end of the range. Ceilings, trim, and detailed areas cost more because they take extra time and care.
Cost by Surface
Different parts of the room are priced differently.
- Walls: about $1.50 to $3.50 per square foot
- Ceilings: about $1.00 to $3.00 per square foot
- Trim and detailed work: around $2 to $6 per linear foot
If your home has high ceilings, textured walls, tight corners, or stair rails, labor time increases. That pushes pricing toward the higher end.
Cost by Home Size
Total cost depends on how much space needs paint.
- 500 sq ft: roughly $200 to $1,000
- 1,000 sq ft: about $2,000 to $6,000
- 2,000 sq ft home interior: typically $3,950 to $6,250
A single average-sized room often falls between $990 and $1,320, depending on prep work and surface condition.
What Affects the Final Price
Labor makes up the largest part of the total. Homes with multiple rooms, heavy prep work, repairs, or several coats will cost more.
Paint quality matters too. Higher-grade paint costs more per gallon but often covers better and lasts longer.
Extra areas such as closets, cabinets, and stair railings add to the total because they require detailed work.
A clear list of all surfaces helps you see exactly how your estimate is built and why your final number lands where it does.
DIY or Hire a Pro
Choosing between doing the work yourself and bringing in a crew depends on your time, skill level, budget, and project size.
| Factor | DIY | Hire a Pro |
|---|---|---|
| Cost | Lower cost, higher effort | Higher cost, less effort |
| Time | Slower pace, flexible schedule | Faster results, set schedule |
| Skill | Basic skills needed | Skilled crew handles details |
| Finish | Good with steady prep | Consistent finish across all rooms |
| Tools | Must buy or rent gear | Tools included in the service |
| Safety | Ladder work and fumes | Crew manages safe setup |
| Stress | More steps to manage | Less to coordinate |
Use this to decide which option fits your comfort level and timeline, then follow the path that supports your goals.
DIY Interior Painting Process: Step-By-Step
Before you start, set yourself up like a pro. When you use the right tools and a simple order, you can paint faster with cleaner lines and less tape.
Tools And Materials You’ll Need
- Paint tray with disposable liner
- Quality roller cage
- Extendable pole (paint stick) with a secure locking handle
- Microfiber roller sleeve (good for smooth, even coverage)
- Three-inch angle brush
- Five-in-one tool (scraper, screwdriver, and roller cleaner)
- Utility knife
- Ladder or step stool
- Sanding sponge or sanding pad
- Drop cloths or tarps
- Good interior wall paint
- Small bucket or can for cutting-in paint
- Damp rag (for quick wipe-ups)
Step 1: Prepare the Space and Fix Old Lines
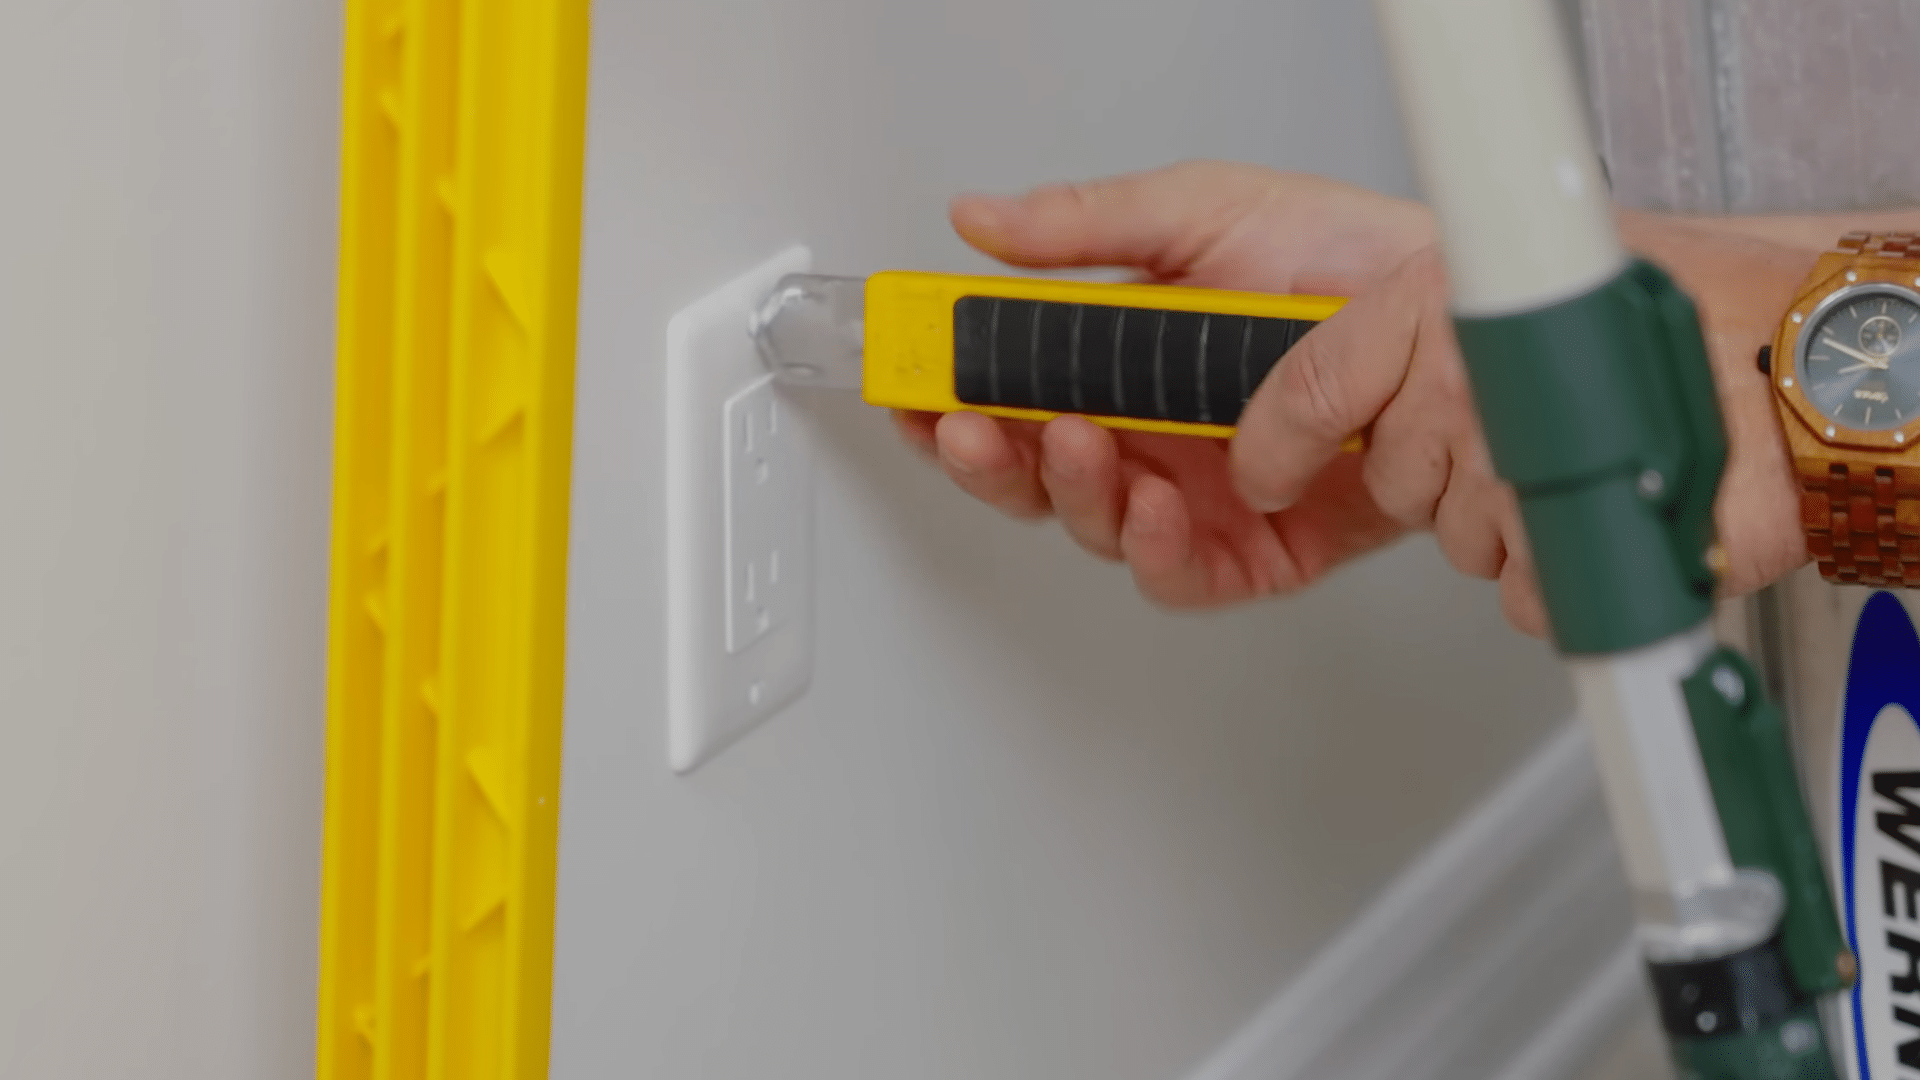
Start by clearing the hallway so you can move freely without bumping the roller. Cover floors and stairs with drop cloths, and slide furniture away from the walls. Remove all outlet and switch covers with your knife or screwdriver instead of painting around them.
Next, fix old, messy edges where wall paint sits on trim or ceiling. Use trim or ceiling paint to clean that line first, so you’re not fighting three different colors later. This gives you a fresh, clean starting edge.
Step 2: Sand for A Smooth, Professional Finish
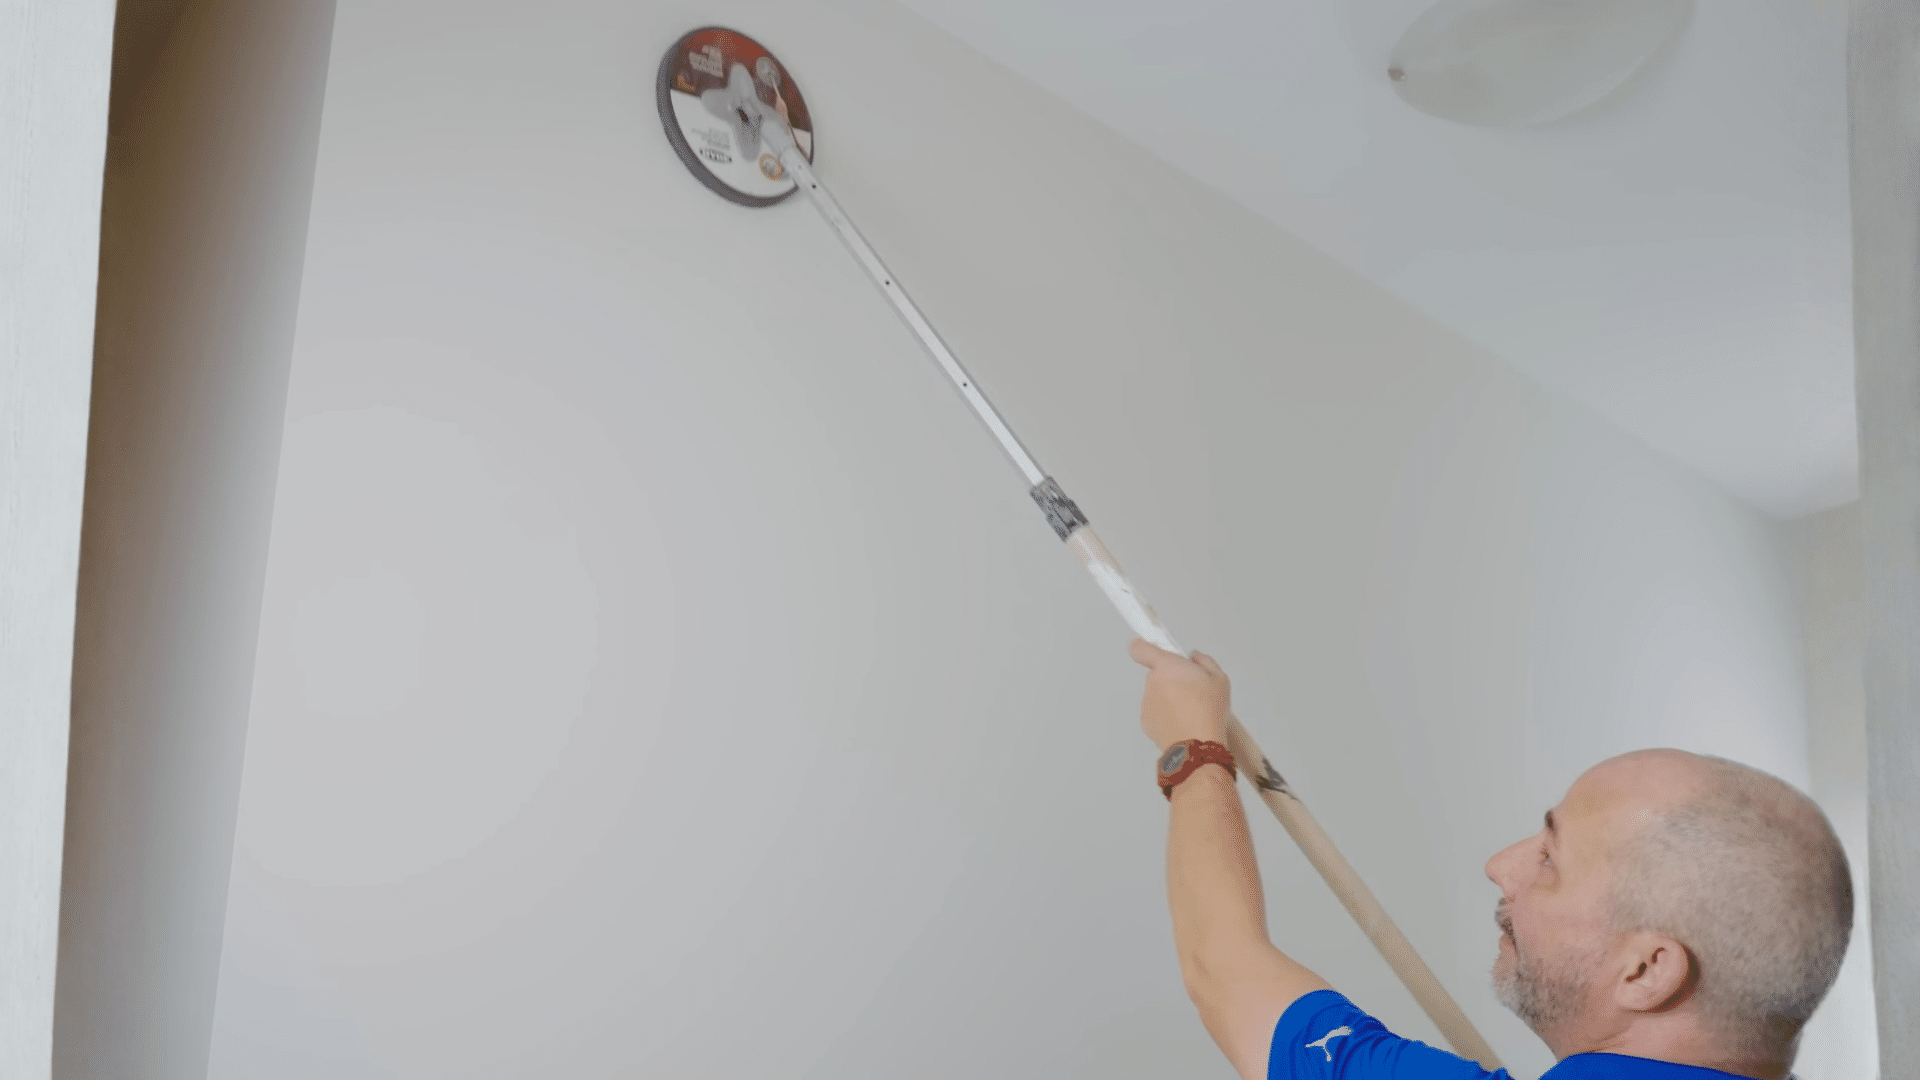
Lightly sand the walls with a sanding sponge or sanding pad. Builders often skip this step, which leaves walls feeling gritty and rough. You don’t need to press hard or remove paint; you’re just knocking down bumps, dust, and tiny splatters.
Run your hand across the wall before and after sanding so you feel the difference. Smooth walls make your paint glide better, cover evenly, and look more finished. This one step separates a “good enough” job from a pro-looking result.
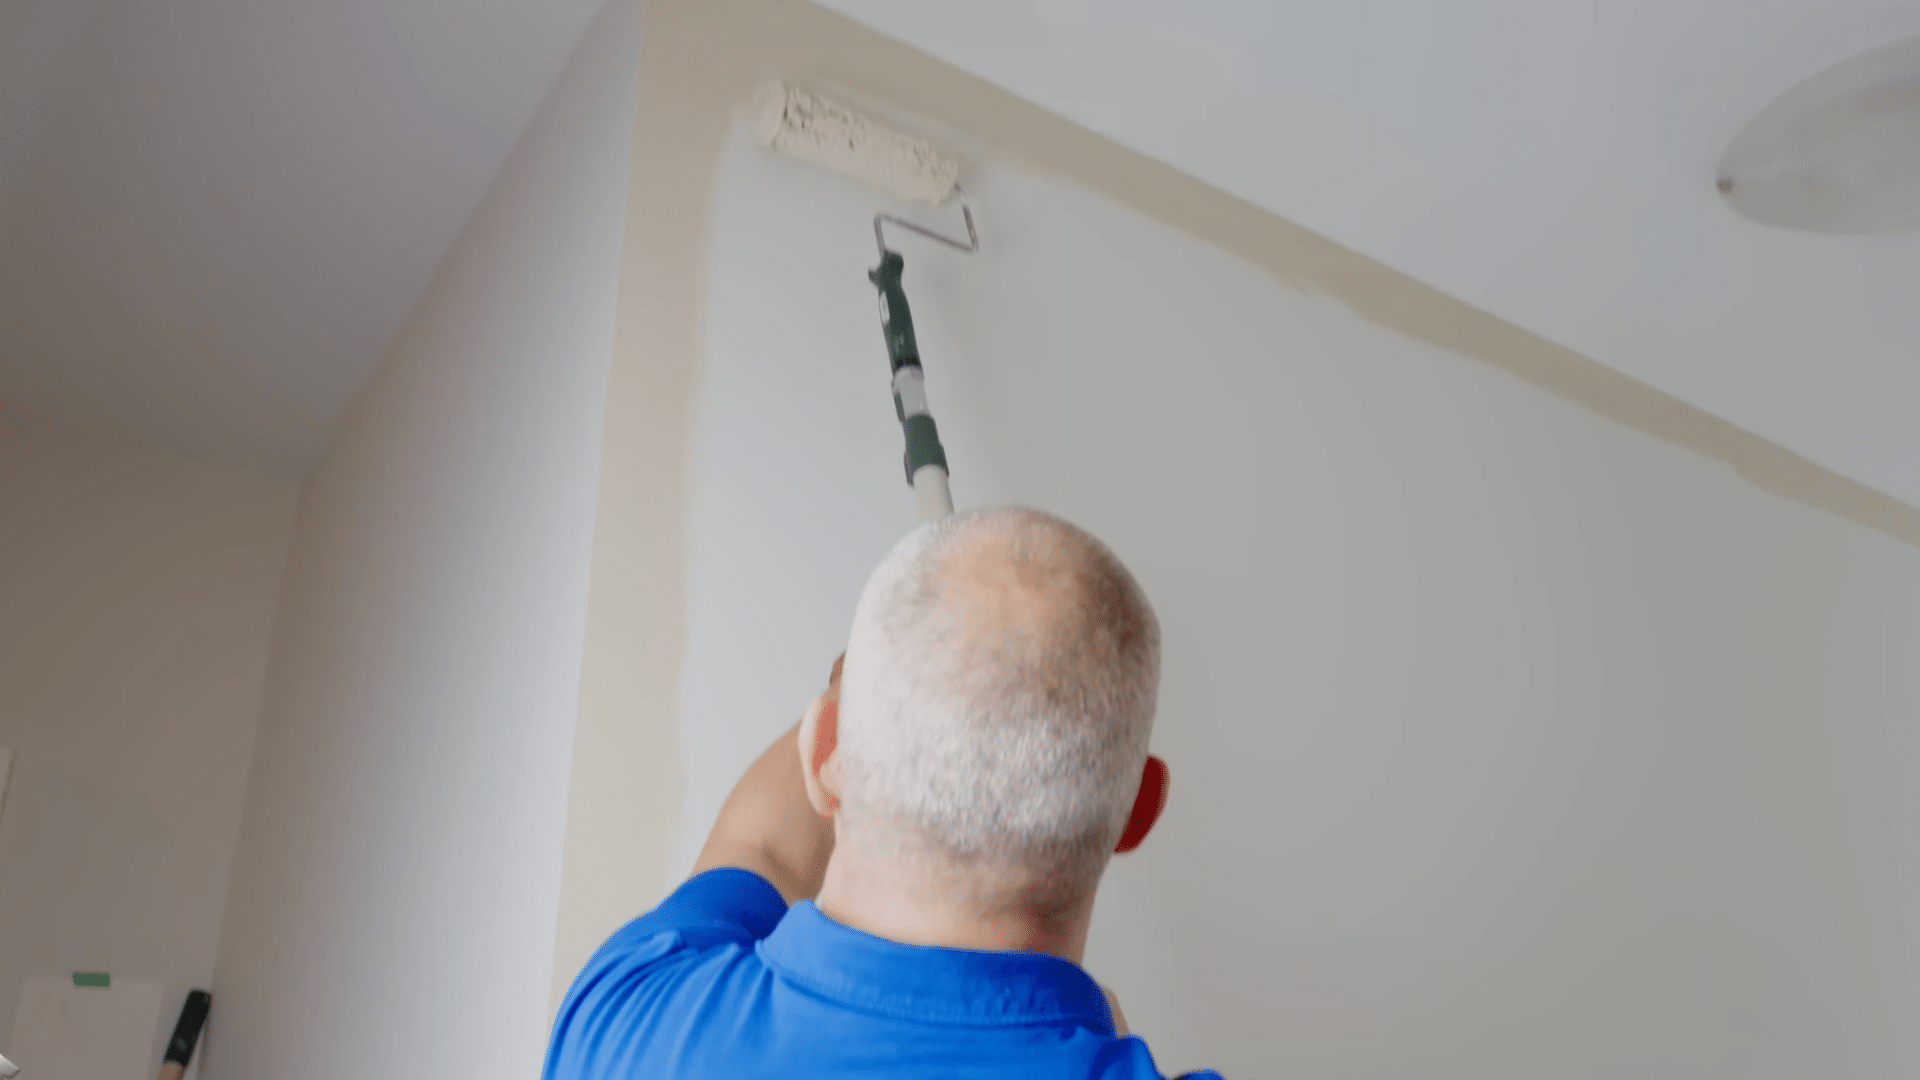
Step 3: Cut in Ceilings, Corners, Trim, and Outlets
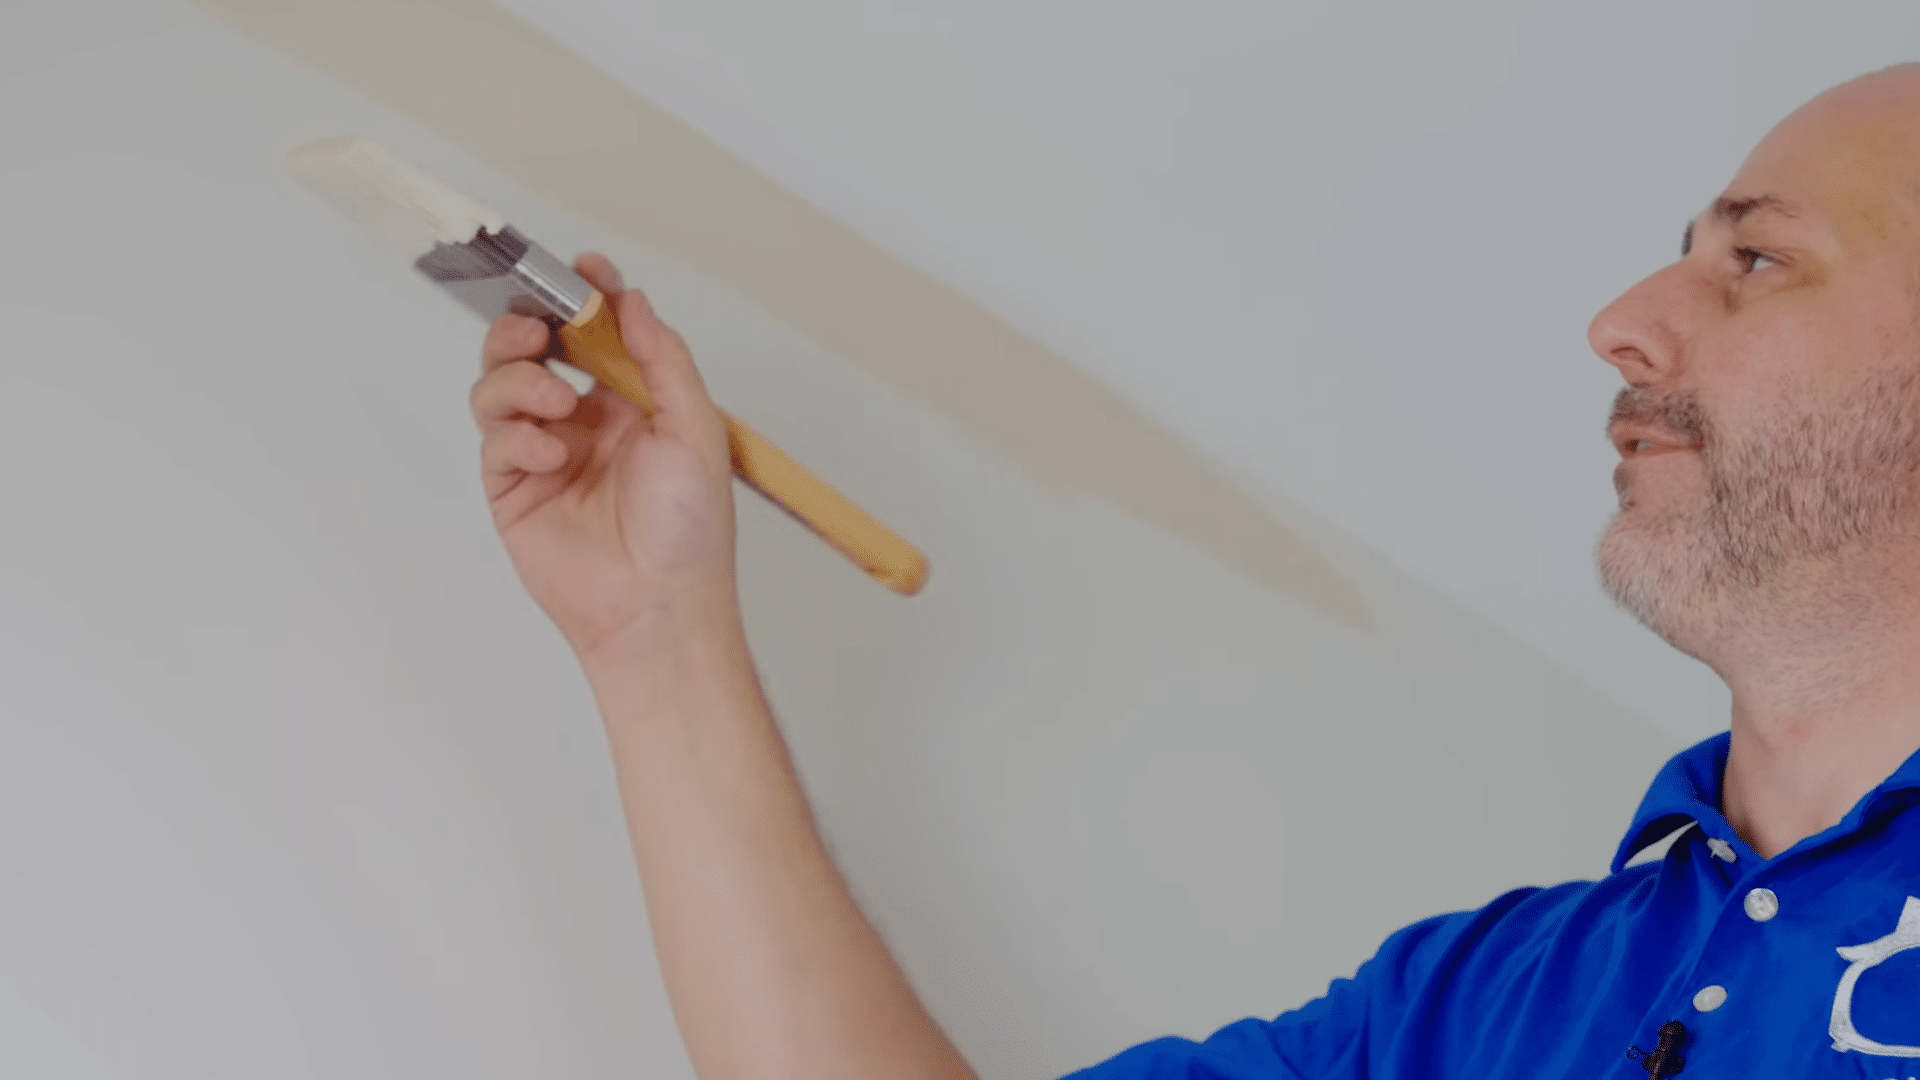
Load your three-inch angle brush and start cutting at the ceiling line, but on the first coat, stay about one-quarter inch away if the old paint is flat. Then move to outside corners, using the heel of the brush to pull a clean line and gently push paint to the edge.
Cut along baseboards and trim with your head low so you can see clearly. Finally, brush around outlets and switches, so your roller never hits them. This avoids splatters on plastic and hardware.
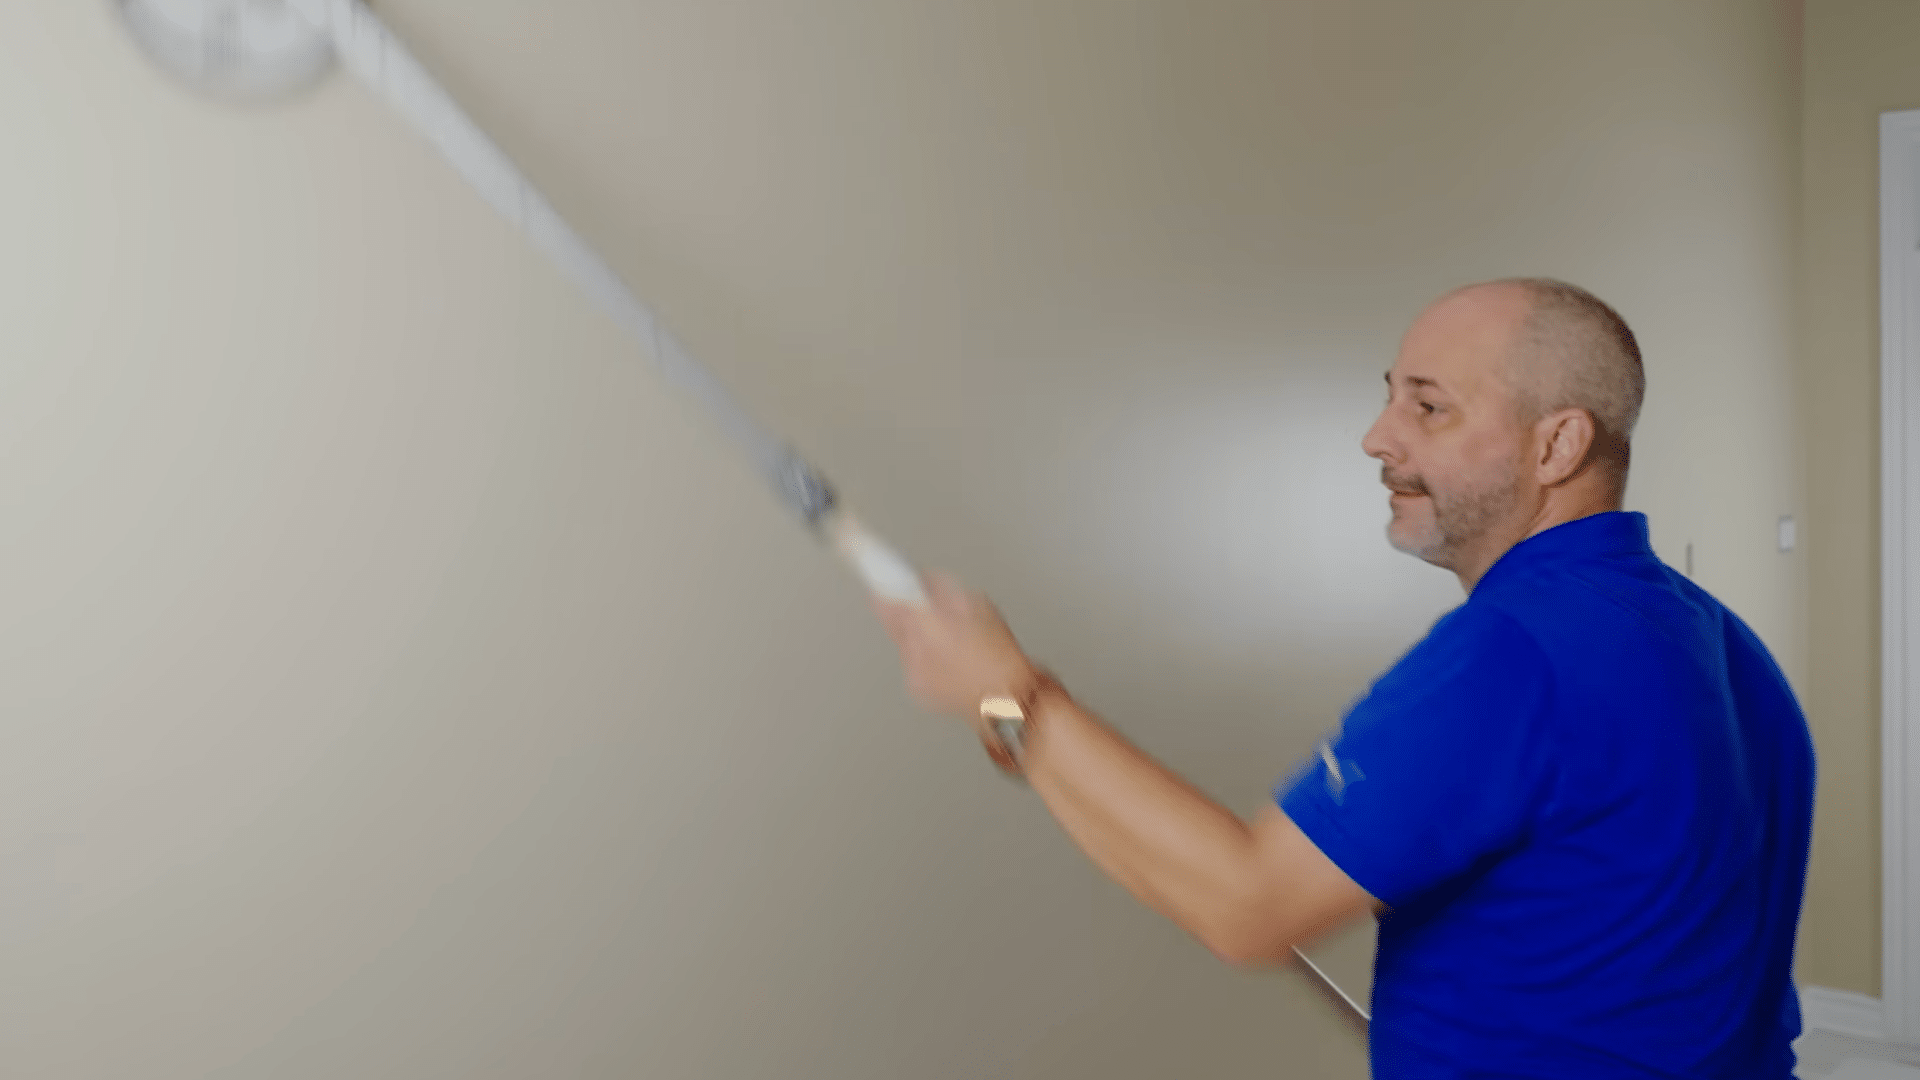
Step 4: Roll Walls with An Extension Pole and Wet Edge
Attach your roller to an extendable pole, so your hands stay below your heart, and you can use two hands. Load the microfiber sleeve slowly until it’s fully saturated. Roll straight up and down from almost floor to ceiling, not in a “W” pattern.
Work in sections about two roller widths wide. After each section, back-roll lightly to even the texture. Always keep a wet edge by rolling into paint that’s still wet. If you stop mid-wall, you risk ridges and lap marks.
Step 5: Sand Lightly, Then Do a Precision Cut and A Second Coat
Once the first coat dries, sand the walls again very lightly to remove dust nibs and small bumps. For your second cut, load the brush, then wipe extra paint so it sits inside the bristles, not globbed on top.
Now you can press gently right into the corner or ceiling line for a crisp edge. On coat two, always finish one wall at a time: cut that wall, then roll it immediately. This keeps the brush and roller work wet together and blends the texture perfectly.
Step 6: Let the Paint Cure, Then Clean up And Reset
After the second coat looks even, let the paint dry and begin curing. Avoid hanging pictures or mounting hooks for at least forty-eight hours so you don’t dent soft paint.
Wait about a month before scrubbing or washing high-traffic spots, so the finish hardens fully. Clean brushes before they gum up, and use your five-in-one tool to scrape extra paint from the roller back into the can.
Peel any tape carefully, reinstall cover plates, and label leftover paint for future touch-ups.
For an in-depth walkthrough of the whole process, check out the complete interior painting video tutorial below:
How To Hire an Interior Painter
Hiring the right crew saves time, avoids stress, and gives you steady results that last. Use these points to guide your choice.
- Look for painters with solid reviews and a clear record of completed projects.
- Ask for proof of insurance before any work begins.
- Request a written estimate that lists surfaces, prep steps, and coat count.
- Confirm the paint brand and finish they plan to use.
- Ask who will be on the crew and how many days the job should take.
- Check how they handle minor repairs or extra surfaces not listed.
- Review warranty terms for touch-ups or early wear.
- Avoid bids that seem unclear or far lower than others.
- Compare at least two quotes side by side for accuracy.
- Make sure communication feels steady and easy before you commit.
Preparing Your Home For Painting
A little planning helps the project move smoothly and keeps daily life comfortable while work is underway.
1. What You Handle
Take down wall decor, remove shelf items, and clear furniture tops so nothing gets in the way. Confirm your colors before the crew arrives, including sheen for each room. Move small items out of walking paths to prevent tripping hazards.
Set aside a spot for painters to place tools and paint cans, and keep valuables in a safe location. This simple prep gives the crew room to work and prevents delays once the job starts.
2. What Painters Handle
Most crews protect floors with drop cloths and cover large furniture that cannot be moved. They mask windows, doors, and fixtures as needed. Many also handle light repairs, such as filling small holes or smoothing minor rough spots.
These steps help create a clean base for paint and reduce the risk of splatter or drips. Once they begin, try to give them steady access to each room so they can finish on schedule.
3. Living in the Home During Painting
If you stay in the home, plan which rooms will be painted first so you always have space to sleep and relax. Open windows when possible, and use fans to keep air moving. Keep pets and kids away from wet walls and tools to avoid accidents.
Choose one hallway or entry as the main path to reduce mess. Good airflow and clear routes help keep the home comfortable while the work gets done.
4. Vacant Home Advantages
An empty home allows painters to move quickly, reach every wall with ease, and set up tools without shifting furniture. They can complete several rooms at once, which shortens the overall schedule.
Drying time improves because nothing blocks airflow. This often results in fewer interruptions, cleaner results, and a smoother finish. If timing allows, scheduling painting before moving in is one of the simplest ways to speed up the entire process.
How Long Does Painting Take
The time needed for interior painting depends on your home’s size, the number of rooms, and how much prep each surface requires.
A single bedroom with simple walls may take part of a day, while larger rooms with high ceilings need more time for cutting, rolling, and drying. Hallways and stairwells often add extra hours because of tight corners and detailed trim.
Whole homes can take anywhere from one to several days based on crew size and surface conditions. Drying also plays a role, since some paints feel ready quickly but still need time before the next coat.
Planning room order and clearing paths helps keep the schedule on track and reduces downtime between stages.
Paint Care and Wall Maintenance
- Dry Time: Give fresh paint at least two days before hanging frames or pressing anything on the wall.
- Early Cleaning: Avoid washing new paint for about a month so the finish can harden fully without marks.
- Gentle Wash: Use a soft cloth or sponge with mild soap and water, then pat dry instead of scrubbing hard.
- Spot Marks: For scuffs or fingerprints, start with plain water first, then mild soap only if needed.
- Touch Ups: Keep a small labeled container of leftover paint for small spots, and use a clean brush or foam pad.
- Room Checks: Look over busy areas every few months, fix small chips early, and wipe dust from trim and baseboards.
Final Thoughts
Now you’ve seen how simple planning, steady prep, and the right tools can shape your results.
I wanted to give you a clear path so you feel ready for the next stage, whether you paint on your own or hire a service. Interior residential painting can refresh your rooms without a large budget when each step is done with care.
Keep your paint labeled, fix small marks early, and check busy areas from time to time. These habits help your walls stay clean longer.
If you’re ready to try another project or want more home guidance, check out other blogs on the website and see what fits your next goal.


