


Have you ever dreamed of having a secret passage in your home, like in spy movies? Now, you can make that dream come true!
DIYing a hidden door is one of the coolest home projects you can tackle without breaking your budget. Building your secret door costs much less than buying expensive kits and gives you complete innovative control.
I’m here to show you exactly how to create your professional-looking mystery door that works perfectly. You’ll learn everything about planning, building, and maintaining your secret passage.
If you want hidden storage or just something incredibly fun, building your own secret door is easier than you think. Get ready to become the coolest homeowner on your block!
Why You Should Consider a DIY Hidden Door
Hidden doors aren’t just for movies and mystery novels anymore. They’re becoming popular home features that everyone can enjoy building and using.
A DIY hidden door adds an instant wow factor to your home that guests will never forget. Kids love finding secret passages, making your house the coolest one on the block. You can create private spaces for hobbies, work, or quiet time away from the busy demands of family life.
Hidden doors also solve storage problems by creating concealed spaces for valuables, seasonal items, or clutter. Building one yourself becomes an exciting weekend project that combines imagination with practical carpentry skills.
If you’re looking for a secret reading nook, a hidden pantry, or simply something unique and fun, a DIY hidden door can convert ordinary rooms into extraordinary spaces with mystery and joy.
Types of DIY Hidden Doors You Can Build
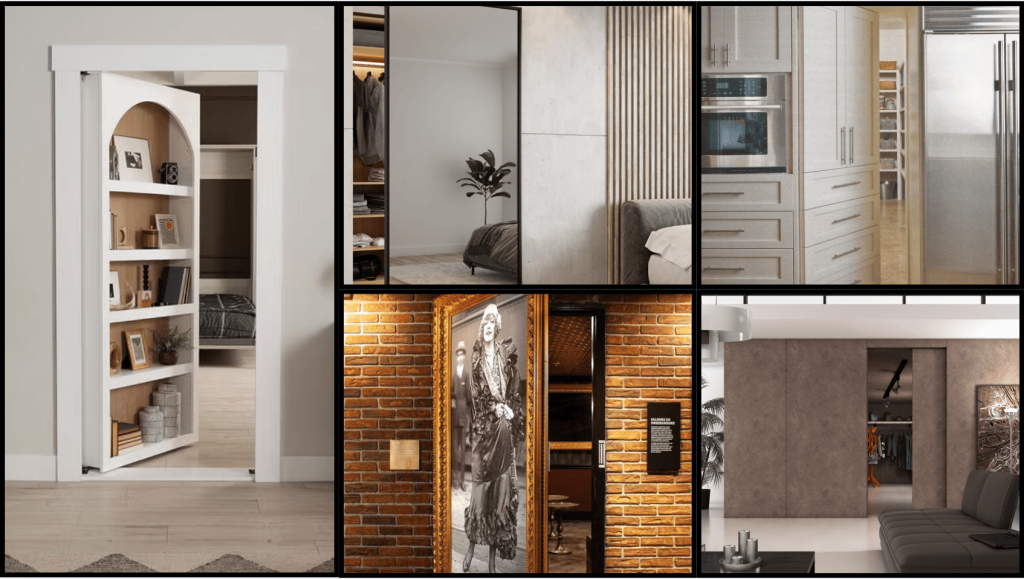
You have several exciting options when choosing which type of DIY hidden door to build. Each style offers different benefits and works best in specific areas of your home.
| Door Type | Description | Best For | Difficulty |
|---|---|---|---|
| Bookcase | Secret entrance behind fake shelves | Studies, basements | Medium |
| Mirror | Hidden passage behind the wall mirror | Bedrooms, hallways | Easy |
| Cabinet | Secret storage in kitchen/bath cabinets | Kitchens, bathrooms | Easy |
| Photo Frame | Small compartment behind the artwork | Any wall space | Beginner |
| Sliding Panel | Modern barn door-style entrance | Large rooms, lofts | Hard |
Consider your skill level and available space when selecting your hidden door project. Start with easier options, such as photo frames or mirrors, before tackling more complex bookcase doors.
DIY Hidden Door: Step-By-Step Process
This five-step process will guide you through creating your own secret bookcase door, from planning to painting.
I’ll show you each essential step to build a functional hidden door that looks professional and operates smoothly. Here are the materials you’ll need:
- 2×4 lumber
- Plywood (3/4 inch thick)
- Quarter-inch plywood or wood panel
- Screws (lag bolts, deck screws)
- Pocket hole screws and wood glue
- Magnetic door catches
- Baseboard trim
- Primer and paint (flat black and white)
- Dark-stained bamboo flooring
- Handle for the door
- Door hinges (heavy-duty)
- Sandpaper
STEP 1: Plan and Measure Your Space
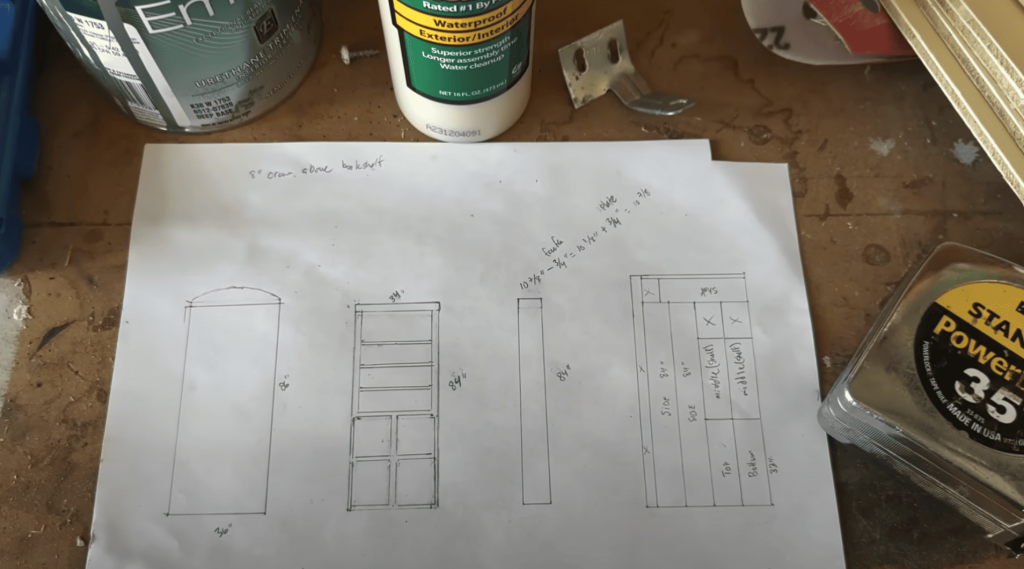
Begin by planning the location of the secret bookcase door. Measure the width and height of the doorframe accurately to ensure a proper fit.
Make sure the door can clear any surrounding walls or furniture when opened. Consider how deep you want the bookcase to be for storage and how to conceal it flawlessly against the wall for a truly secret door effect.
Bonus Tips:
- Double-check measurements to avoid mistakes.
- Leave enough space for the door to swing open freely.
- Consider the room’s layout when deciding on placement.
STEP 2: Build The Frame
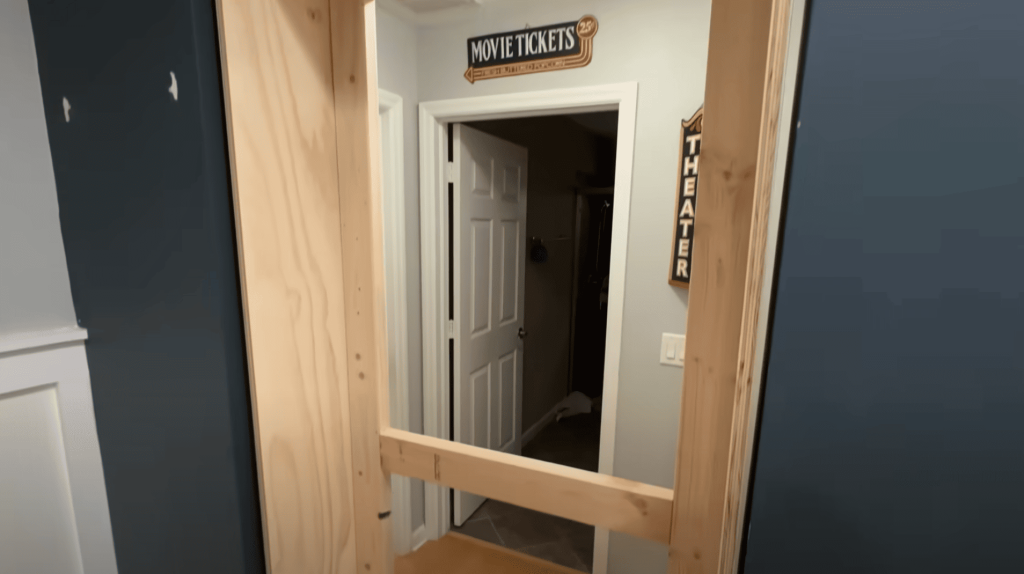
After measuring, begin by building a sturdy 2×4 frame for the bookcase door. This frame will provide the necessary strength and structure to support the weight of the bookshelf and its contents.
Ensure the frame is square and level to prevent any issues when mounting the door. Use screws to assemble the frame and check for stability before moving forward.
Bonus Tips:
- Use clamps to hold the frame in place while you work.
- Ensure the frame is level for smooth operation.
- If the wood is warped, straighten it before use.
STEP 3: Attach The Plywood Panels
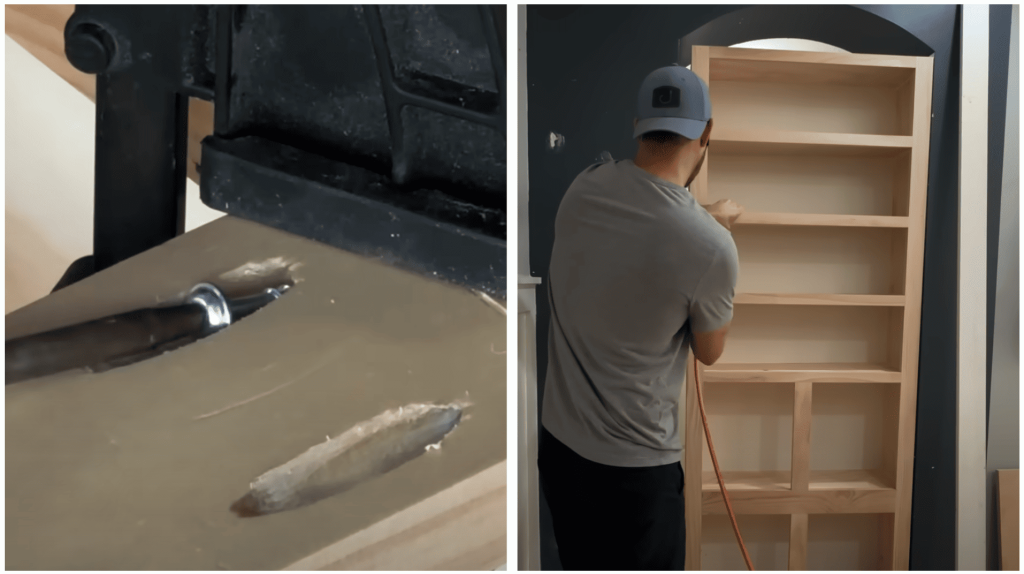
Once your frame is set, the next step is to attach the plywood panels to it. Secure the panels with screws to the frame for a sturdy construction.
Use quarter-inch plywood or wood paneling to cover the frame’s front side, ensuring it looks smooth and flawless. This step creates the surface for your bookcase door and conceals the 2×4 structure behind it.
Bonus Tips:
- Pre-drill holes to avoid splitting the wood.
- Ensure the plywood is flush with the frame.
- Use a strong adhesive for extra hold.
STEP 4: Install The Hinges and Handle
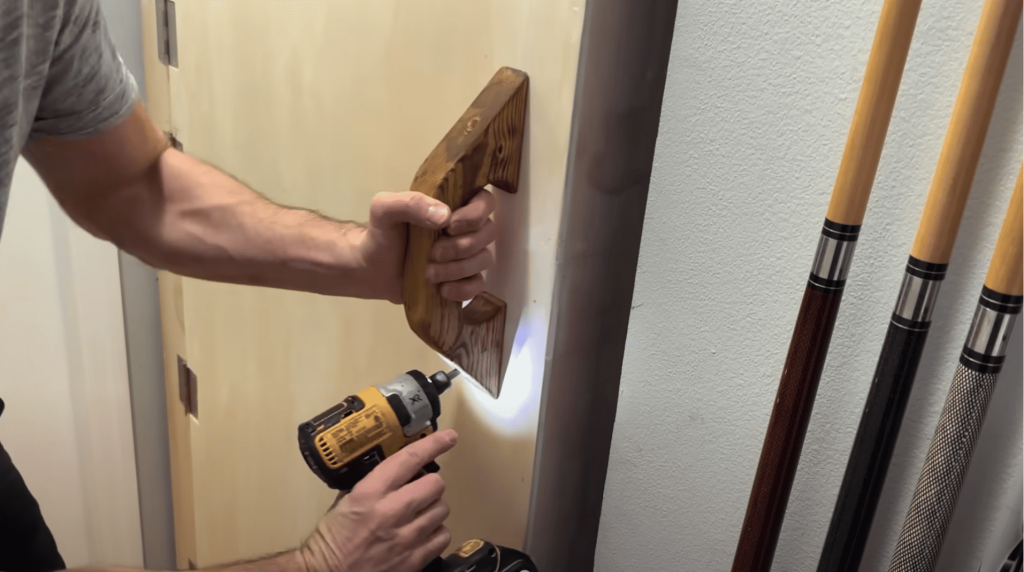
Now, install heavy-duty door hinges to support the door’s weight. Attach the hinges to the frame and door to make sure the door opens and closes easily.
Add a handle on the inside of the door, making it easy to pull open from within the room. Ensure everything is correctly aligned for smooth operation and a correct fit.
Bonus Tips:
- Use at least 3 hinges for stability.
- Test the door for smooth opening and closing.
- Ensure the handle is comfortable and easy to use.
STEP 5: Finish and Paint
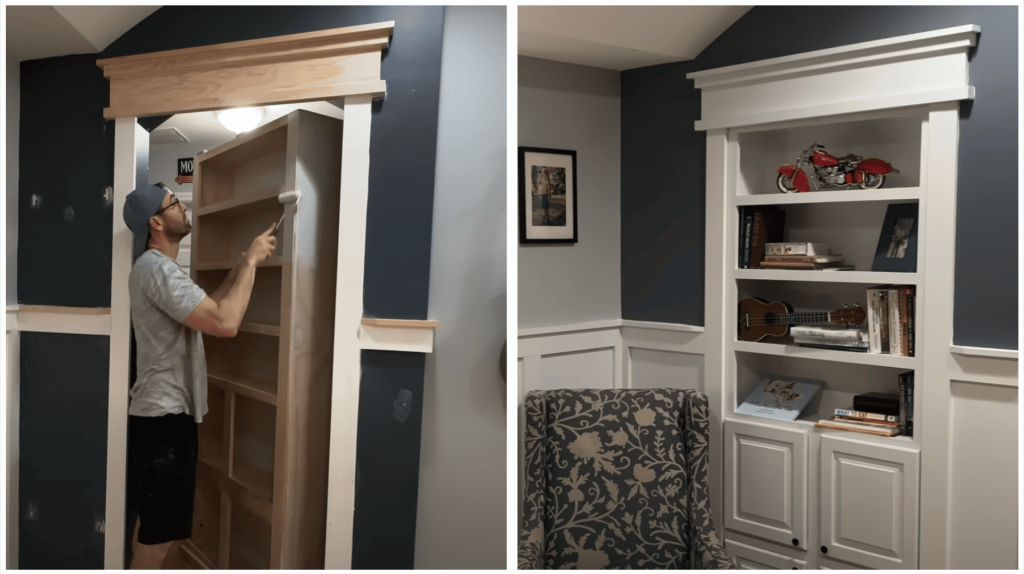
The final step is to finish the bookcase door with a clean, attractive paint job. Apply a primer coat, and then use your desired exterior paint.
For contrast, consider painting the door’s exterior in white, while the interior gets a dark, moody color like flat black. Allow the paint to dry completely for the best results.
Bonus Tips:
- Sand between coats for a smooth finish.
- Use a brush for detailed areas and a roller for flat surfaces.
- Let the paint cure completely before using the door.
Cost Analysis and ROI of DIYing a Hidden Door
Building your hidden door costs just $150–$400 when you buy materials smart and do the work yourself. That’s huge savings compared to purchasing pre-made kits!
Store-bought hidden door kits typically cost $700–$ 1,000 or more for materials alone. Add professional installation, and you’re looking at $1,500–$3,000 or more for the complete project.
Hiring professionals guarantees perfect results, but DIY saves you thousands in labor costs. Hidden doors can enhance your home’s value, particularly in more desirable neighborhoods.
The best part? Well-built DIY hidden doors need very little maintenance over the years. You get a cool, functional upgrade that pays for itself while impressing everyone who visits.
Why pay triple when you can build something amazing yourself?
NOTE: The above costs are estimated and may vary depending on material choices, quantity, location, and specific project needs.
Maintenance and Troubleshooting
Your DIY hidden door will last for years with just a little regular care and attention. Simple maintenance prevents big problems and keeps your secret door working like new.
- Check your hidden door monthly by opening and closing it to catch problems early before they worsen.
- Focus on hinges and handles, as they receive the most use and wear out the fastest over time.
- Adjust the door alignment twice a year because wood expands in the summer heat and contracts during the cold winter months.
- Apply light oil to hinges and moving parts every few months to keep everything operating smoothly and quietly.
NOTE: Call professionals for repairs if your door won’t close properly, makes loud noises, or has structural damage issues.
Final Thoughts
Building a DIY hidden door brings movie magic right into your everyday life in a truly exciting way. You’ve learned how to create secret passages that amaze guests and provide practical storage solutions.
Your hidden door will become the favorite feature that everyone talks about when visiting your home. I believe you’ll love the satisfaction of building something this unique and functional with your own hands.
Ready to create your secret passage? Share your DIY hidden door photos and questions in the comments below!


