


I’ve had those moments where I walk into my bathroom and the tile just feels outdated. It’s still in good shape, but the style is tired.
When I wanted a quick, affordable refresh, painting my bathroom tile floor turned out to be the perfect solution.
It’s a simple DIY project that can make a huge difference, without removing a single tile.
I’ll walk you through how to prep the surface, choose the right tools, and apply the paint step by step. I’ll also share tips I’ve picked up to avoid common mistakes and keep the finish looking fresh.
Let’s find out together if a painted tile floor can really stand the test of time.
What to Know Before Painting Bathroom Tile Floors
Painting tile floors can be a smart and budget-friendly way to refresh your bathroom, especially if the tiles are in good condition. It works best in low-traffic or guest bathrooms, or when you want a short-term makeover without the cost of new flooring.
Some of the main benefits include low cost, easy DIY steps, and flexible design options. But it’s not without drawbacks. It requires proper prep and may wear faster in high-use or wet areas.
You should avoid painting if your tiles are damaged, constantly damp, or if you want a long-term solution with no maintenance.
In the right situation, with the right materials and prep, painting tile floors can be a great solution.
Step-by-Step Guide to Painting Bathroom Tile Floors
Painting bathroom tile floors can be a budget-friendly way to refresh your space without a full remodel.
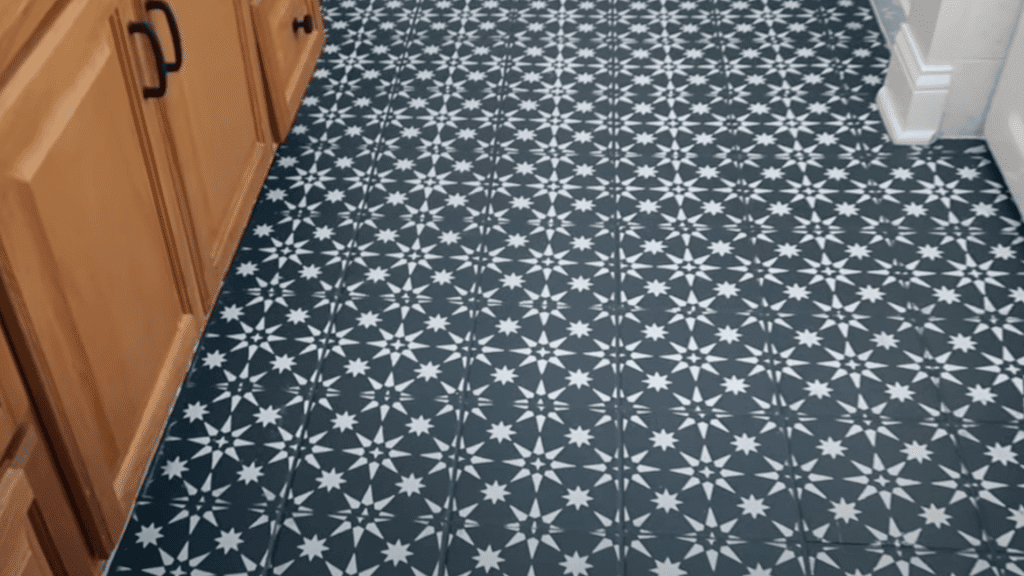
By the end, you’ll see a dramatic paint-over-tile before and after transition, dull, outdated tiles become a fresh, modern surface that brightens up the entire space. Here’s a step-by-step guide to help you do it right:
Tools Required
Before you begin, gather the right tools to make the job easier and neater. These basic items help you prep, paint, and clean up efficiently:
- Degreasing cleaner
- Sponge or scrub brush
- Clean water & clothes
- 120 or 220 grit sanding block
- Mini roller
- Angled brush or small paintbrush
- Painter’s tape (optional)
- Stencil (optional)
- Water-based polyurethane or topcoat
- Ventilation tools (e.g., fan)
Step 1: Deep Clean the Surface
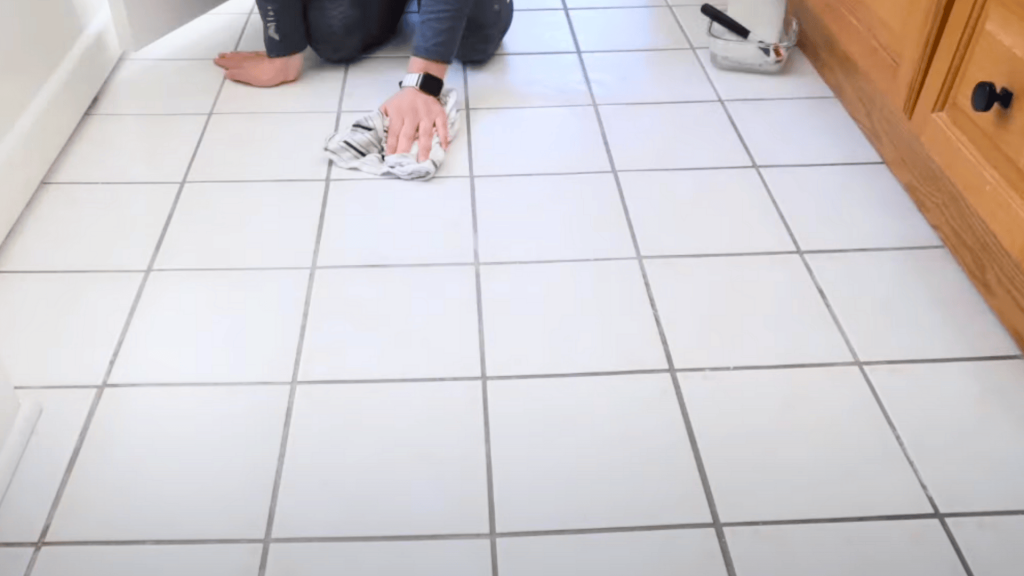
Before you paint, the tile needs to be completely clean. Dirt, soap scum, and grease can prevent the paint from adhering properly. Use a strong degreasing cleaner to scrub the surface well. Rinse everything with clean water and let it dry fully before moving on.
Step 2: Protect the Surrounding Areas
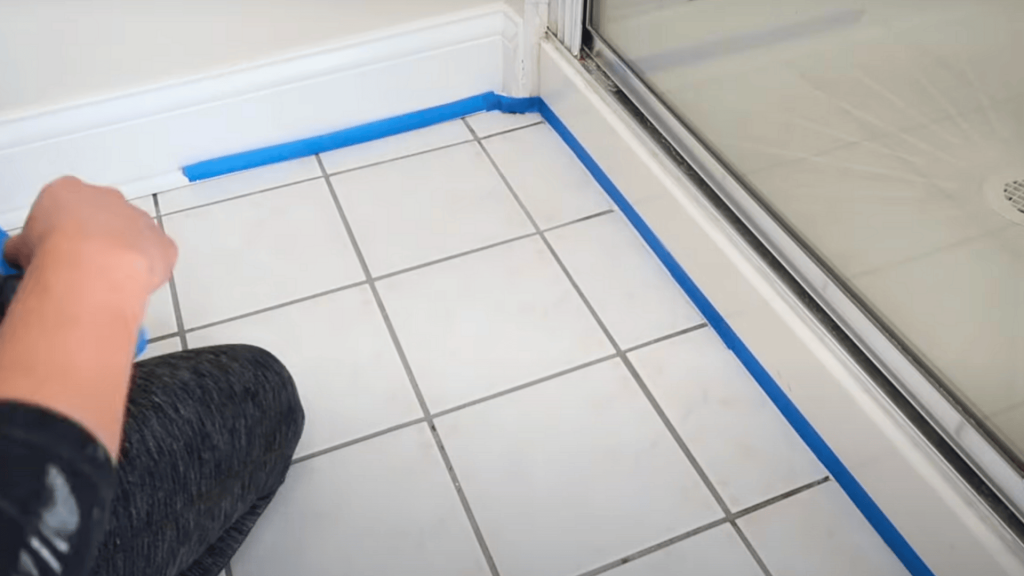
Before you open your paint, tape off anything you don’t want painted, like the base of the toilet, the vanity, and the walls. If there’s any old caulk around the toilet or tub, remove it now. This gives you clean edges and helps the paint stay where it belongs.
Step 3: Apply the Base Coat

Using a high-quality brush, begin by trimming around the edges of the floor. Then grab a ⅜ inch nap roller to cover the rest of the tile in small, manageable sections. Work from one side of the room to the door so you don’t trap yourself inside. The paint is low-odor and easy to roll on. Just make sure to apply it evenly without overloading your roller.
After your first coat, let it dry for six hours. During this time, only walk on it with socks to avoid scuffing. Once those six hours are up, apply a second coat in the same way, brush the edges, and roll the rest. Allow it to dry overnight before stenciling.
Step 4: Apply the Top Coat
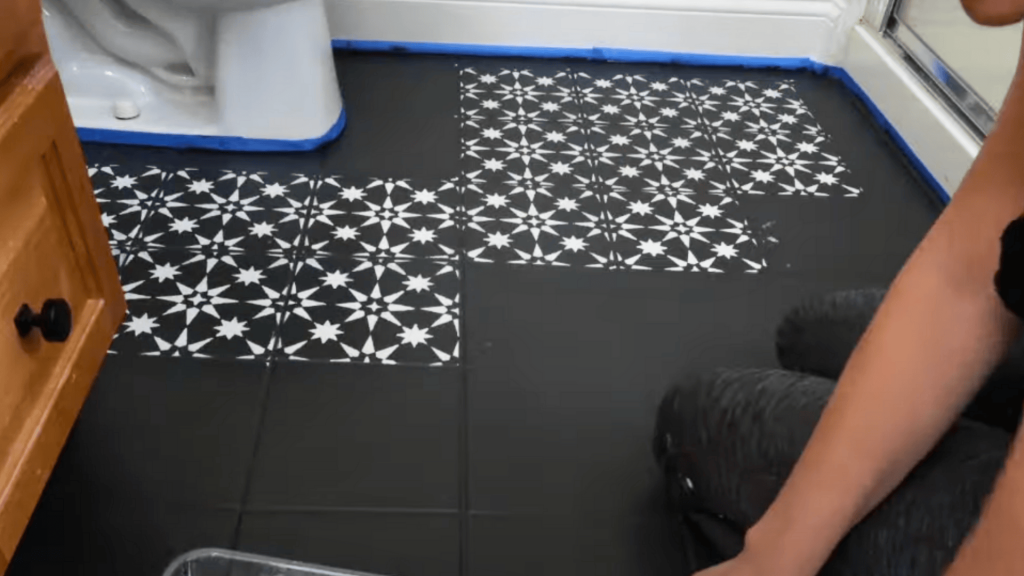
After the stencil layer dries for two hours, it’s time to seal everything in. Use Rust-Oleum’s top coat and a ¼ inch nap roller for best results. Apply it just like the base coat trim, then roll. One coat is enough for most bathrooms, but you can add a second coat for extra durability. This top layer protects your floor from scratches and wear.
Step 5: Let the Paint Cure Fully
The final step is curing. While paint may feel dry to the touch in a few hours, full curing takes longer. Wait 24 to 48 hours before stepping on the floor, and give it up to 7 days to fully cure.
During this time, avoid getting the surface wet or putting anything heavy on it. Heat and humidity can also affect how fast the paint cures, so keep the room well-ventilated.
And that’s it, once everything’s cured, you’ll have a bathroom tile floor that looks brand new, all without breaking the bank or tearing anything out.
If you’d like to follow along with a visual tutorial, you can watch it here:
Tips for Best Results
A few smart tips can make your painted tile floor look better and last longer. Painted tile floors need patience and attention to detail. Rushing the process or skipping steps can lead to chipping, peeling, or uneven color.
Here are some tips to help your project go smoothly:
- Work in small sections: This gives you more control and helps you keep edges clean while the paint is still wet.
- Use light, even coats: Thick coats can bubble or peel. Thin layers dry better and give smoother results.
- Avoid high-humidity days: Moist air slows down drying and can affect how the paint sticks. Choose a dry day with good airflow.
- Don’t skip primer: Primer is what makes the paint last. Without it, the paint may peel within weeks.
- Learn from real DIYers: Many bloggers and YouTubers share their results after 1, 3, or even 5 years. Their reviews can help you avoid mistakes and pick the right products.
Following these tips gives you the best chance at a durable, great-looking finish that holds up in your bathroom.
How Long Will Painted Bathroom Tile Last?
Painted bathroom tile can last anywhere from one to five years, depending on how well it’s prepped and how much daily use it gets. In low-traffic areas like guest bathrooms, the finish may stay smooth for years.
But in busy bathrooms with lots of foot traffic, water, or steam, the paint may start to wear down sooner, especially near sinks, tubs, and entry points.
Moisture, strong cleaning products, and skipped prep steps are the main reasons paint fails early. If the floor wasn’t cleaned, sanded, and primed properly, it won’t hold up well.
The good news is that you can touch up small chips or worn spots by sanding lightly, repainting the area, and letting it cure. With the right care and maintenance, a painted tile floor can keep looking fresh much longer than you might expect.
How to Maintain Your Painted Tile Floor
To keep your painted tile floor looking good, clean it gently and regularly. Use a damp mop with mild soap or a pH-neutral cleaner. Avoid steam mops, as high heat can weaken the paint and shorten its lifespan.
Stick to soft cloths, microfiber pads, or sponge mops to avoid scratching the surface.
Avoid soaking the floor or letting water sit for too long. Good ventilation helps the floor dry faster and keeps moisture from building up. If your bathroom has poor airflow, consider using a fan or leaving the door open after showers to reduce humidity.
Do not use bleach, harsh chemicals, or abrasive scrubbers, as they can wear down the paint and cause it to peel. Even “tile-safe” cleaners meant for glazed surfaces might be too strong for painted floors. Always test a small area first if you’re unsure about a product.
If you start to see dull spots, chipping, or color fading in high-traffic areas, it may be time for a quick touch-up.
Lightly sand the worn area, clean it, and reapply paint and sealer as needed. Regular care and gentle cleaning can keep your painted floor looking great for years without the need for a full redo.
Common Mistakes and How to Avoid Them
Even a small mistake can lead to peeling, chipping, or uneven results. Here are the most common issues people run into and how to prevent them.
- Skipping prep: Not cleaning or sanding properly is the fastest way to ruin a paint job. Dirt, grease, or a slick surface will stop the paint from sticking.
- Using the wrong paint type: Regular wall or latex paint won’t hold up on tile. Always use tile-specific or epoxy-based paint made for floors and moisture.
- Overloading the paint roller: Too much paint can cause drips, bubbles, and uneven coverage. Light, even coats work best and dry more smoothly.
- Inadequate drying time: Rushing between coats or walking on the floor too soon can cause smudging or peeling. Always follow the dry and cure times on the label.
- Applying sealant too soon: If you add a topcoat before the paint is fully dry, it can trap moisture and ruin the finish. Let the paint cure before sealing.
Taking your time and following the right steps will save you from most problems and give you a smoother, longer-lasting result.
Conclusion
I’ve found that painting bathroom tile floor can totally change the feel of a space, without the stress (or cost) of a full remodel.
Now that you know what tools to use, how to prep, and what to avoid, you’re set up to tackle this project with confidence.
Taking the time to prep properly really does make a difference, and a little patience goes a long way in making those results last.
You’ve got what you need to nail this project, whether it’s a clean white finish or a bold design. If you want to know what else you can tackle around the house, check other blogs on the website for more DIY guides.


