


I’ve always loved woodworking, but nothing frustrated me more than seeing a router table that didn’t fit my router or my workshop. Buying one often meant compromising; it was either too expensive or the wrong size. That’s when I decided to make my own router table. It was not only cheaper but could be customized to my exact needs.
This guide will walk you through everything you need to create a functional and sturdy router table. From the essential tools and materials to step-by-step assembly, common mistakes to avoid, and layout options for your workspace, you’ll gain a complete plan to build your ideal router table.
Even if this is your first DIY woodworking project, it’s beginner-friendly and easy to follow, with safety and precision in mind.
If you’ve already worked on a workbench build guide, this setup will feel familiar. Once you finish, you’ll have a table that fits perfectly into your workshop and workflow.
| Cost Note: Figures here are estimates based on national averages. Actual costs vary significantly by region, material quality, and router model. Always price out your specific material list before starting. |
Why Build Your Own Router Table?
Building your own router table gives you complete control over size, stability, and features. You can save money, match your workshop layout, and design a table that works exactly as you need it. It also provides the satisfaction of completing a hands-on project that’s fully customized.
A DIY router table allows you to:
- Custom Fit: Ensure your router table perfectly matches your router and workshop space.
- Cost Savings: Avoid paying high prices for commercial tables that may not meet your needs.
- Flexibility: Add features like T-tracks, adjustable fences, and storage shelves.
- Skill-Building: Improve your woodworking skills while constructing a functional piece.
Understanding these advantages shows why DIY is often better than buying a pre-made table. Once you know the benefits, the next step is gathering the right tools and materials to ensure smooth assembly and safe operation.
Supplies & Tools You’ll Need
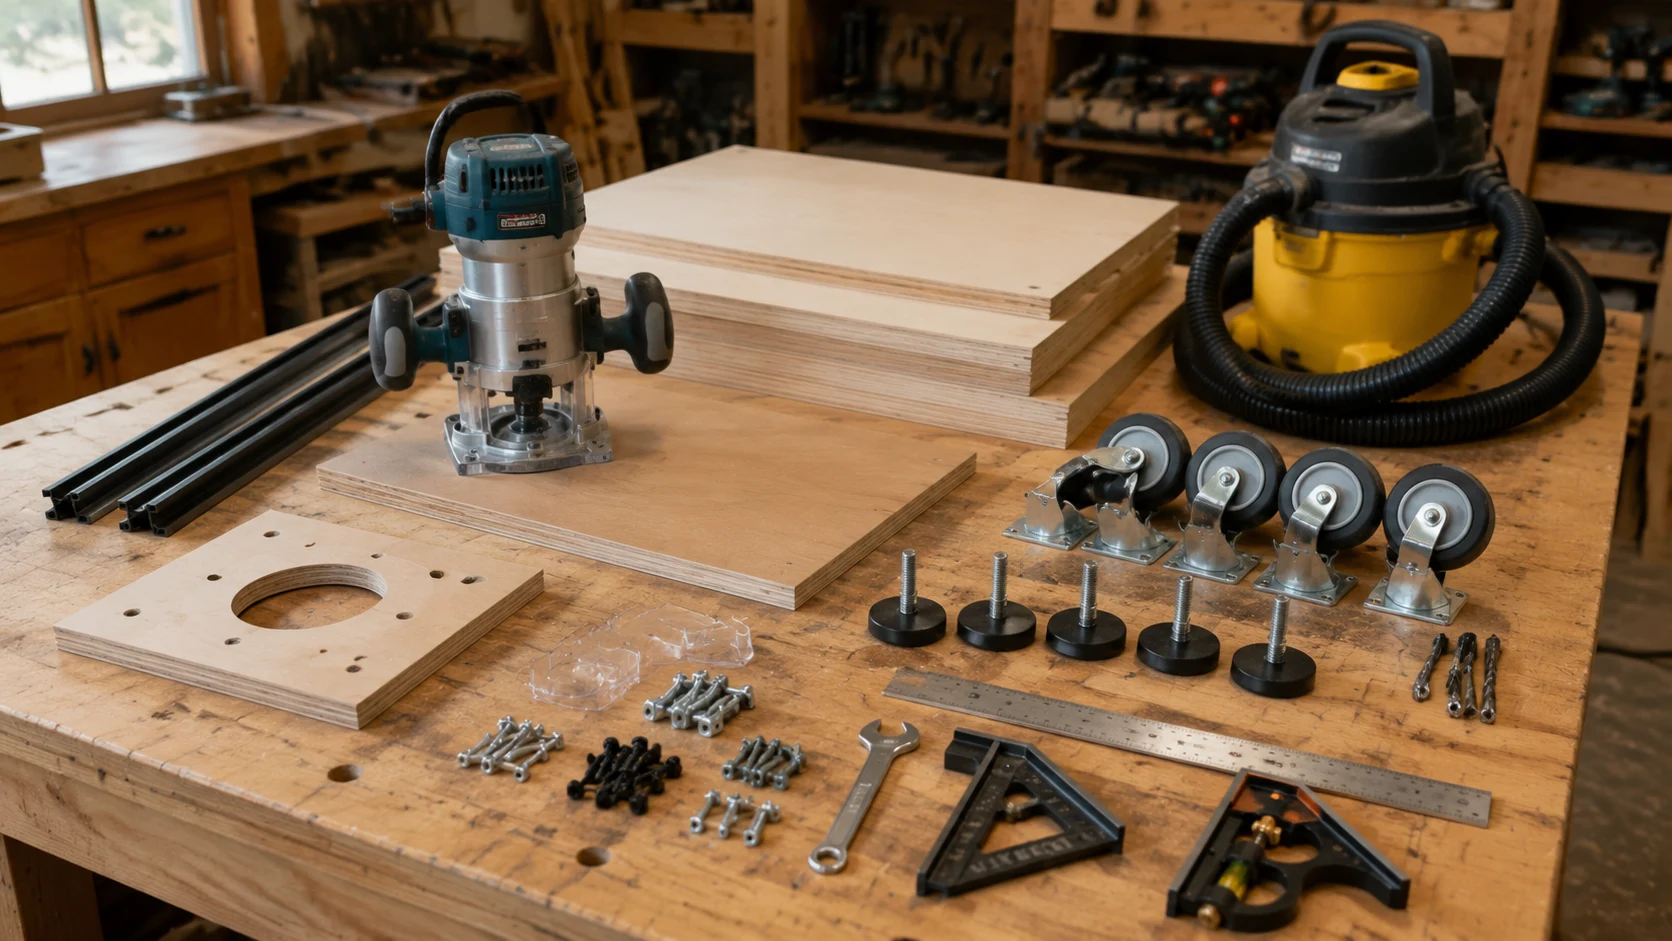
Preparing the correct tools and materials before starting saves time, ensures safety, and prevents mistakes. This section lists the essentials and optional items for improved functionality and workflow.
| Tool / Material | Description | Tip |
| Router | Cordless or fixed base | Check compatibility with your table cutout |
| Plywood (18mm) | Tabletop and braces | High-quality plywood ensures durability |
| Adjustable feet | Level the table on uneven floors | Drill accurately to prevent wobble |
| Screws & bolts | Assembly | Counter-sink for a smooth surface |
| T-track & T-bolts | Fence adjustment | Measure placement carefully before cutting |
| Square & speed square | Accuracy | Keep cuts straight and aligned |
Optional extras: dust extraction port, shop vacuum, casters for mobility, or a removable top insert for different routers. Planning ahead ensures smooth progress and fewer interruptions during assembly.
This step-by-step process ensures stability, precision, and safety while assembling the router table. Each step includes practical tips and cautions to help you avoid common mistakes and create a functional workspace.
The frame construction here follows the same basic principles as a sturdy workshop workbench build if you’ve done one, the sequencing will feel familiar.
Step-by-Step Construction of Your Router Table
Before starting, it’s important to understand each step’s purpose. Following the sequence ensures a stable, safe, and fully functional router table that fits your workspace. The instructions are detailed enough for beginners to follow without prior experience.
| Safety Note: Always disconnect the router from power before installing or adjusting the router plate, checking bit height, or making any changes inside the table cabinet. Routing is loud, wear hearing protection and eye protection for every step that involves the router running. |
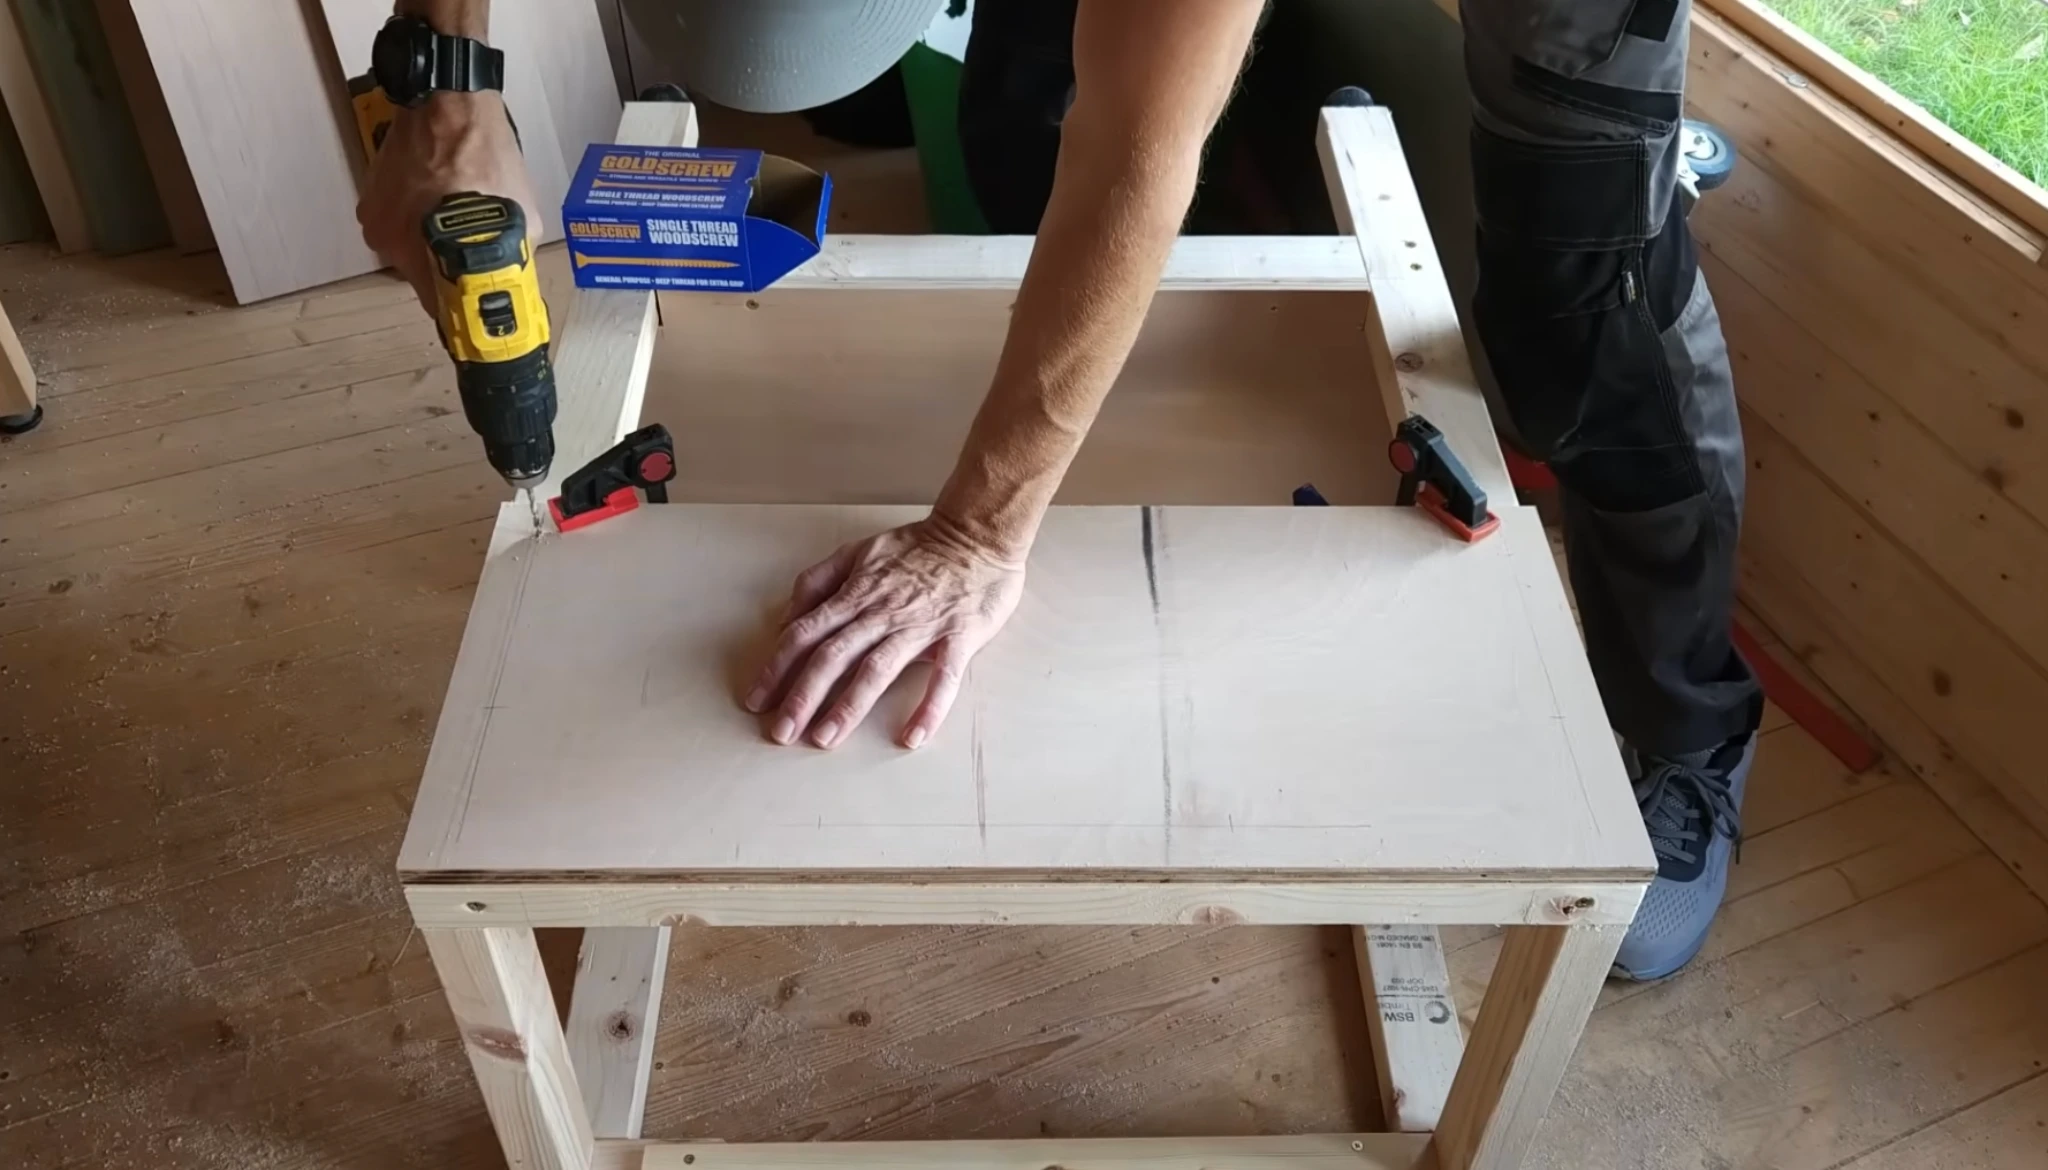
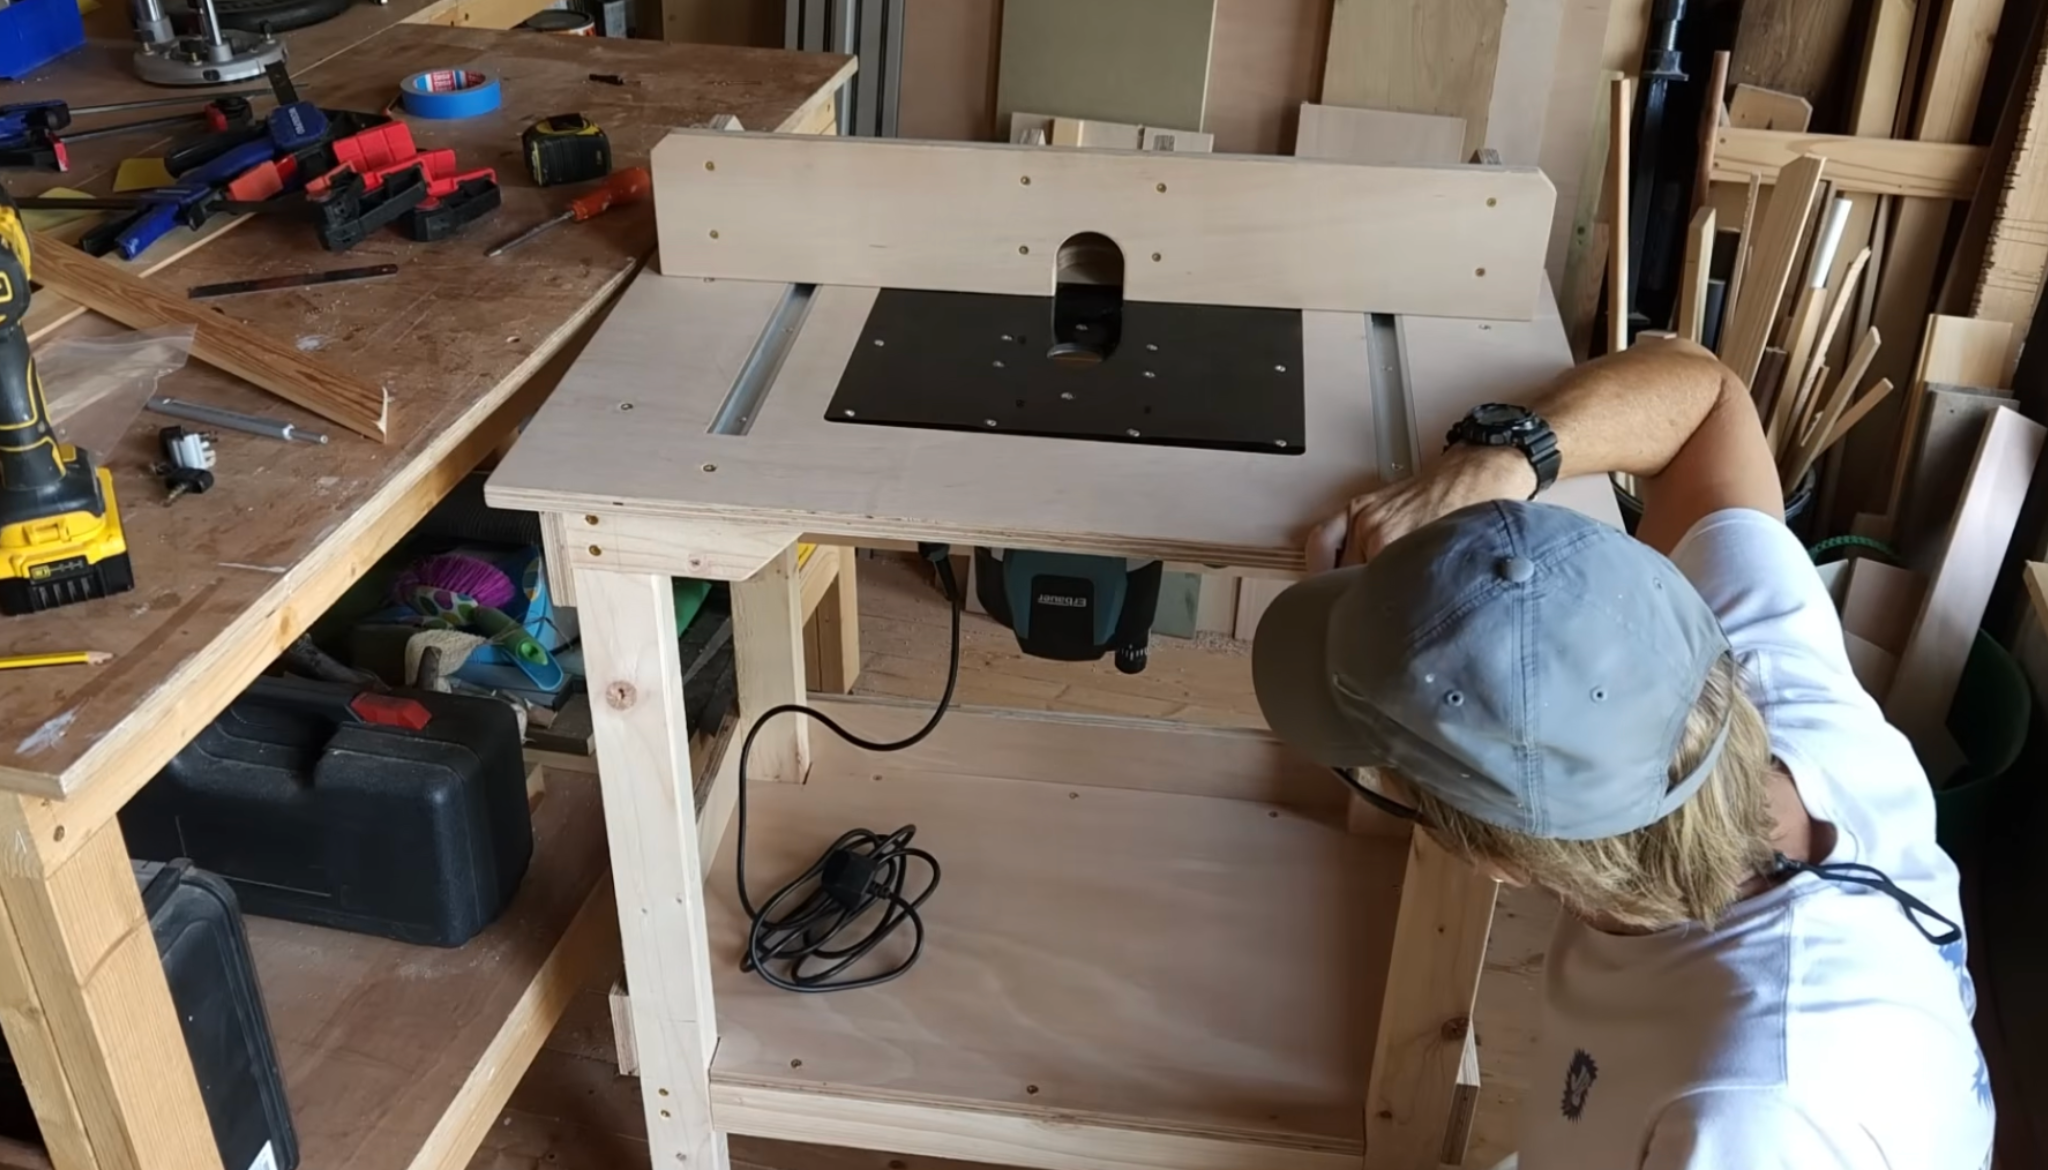
Step 1: Building the Table Frame
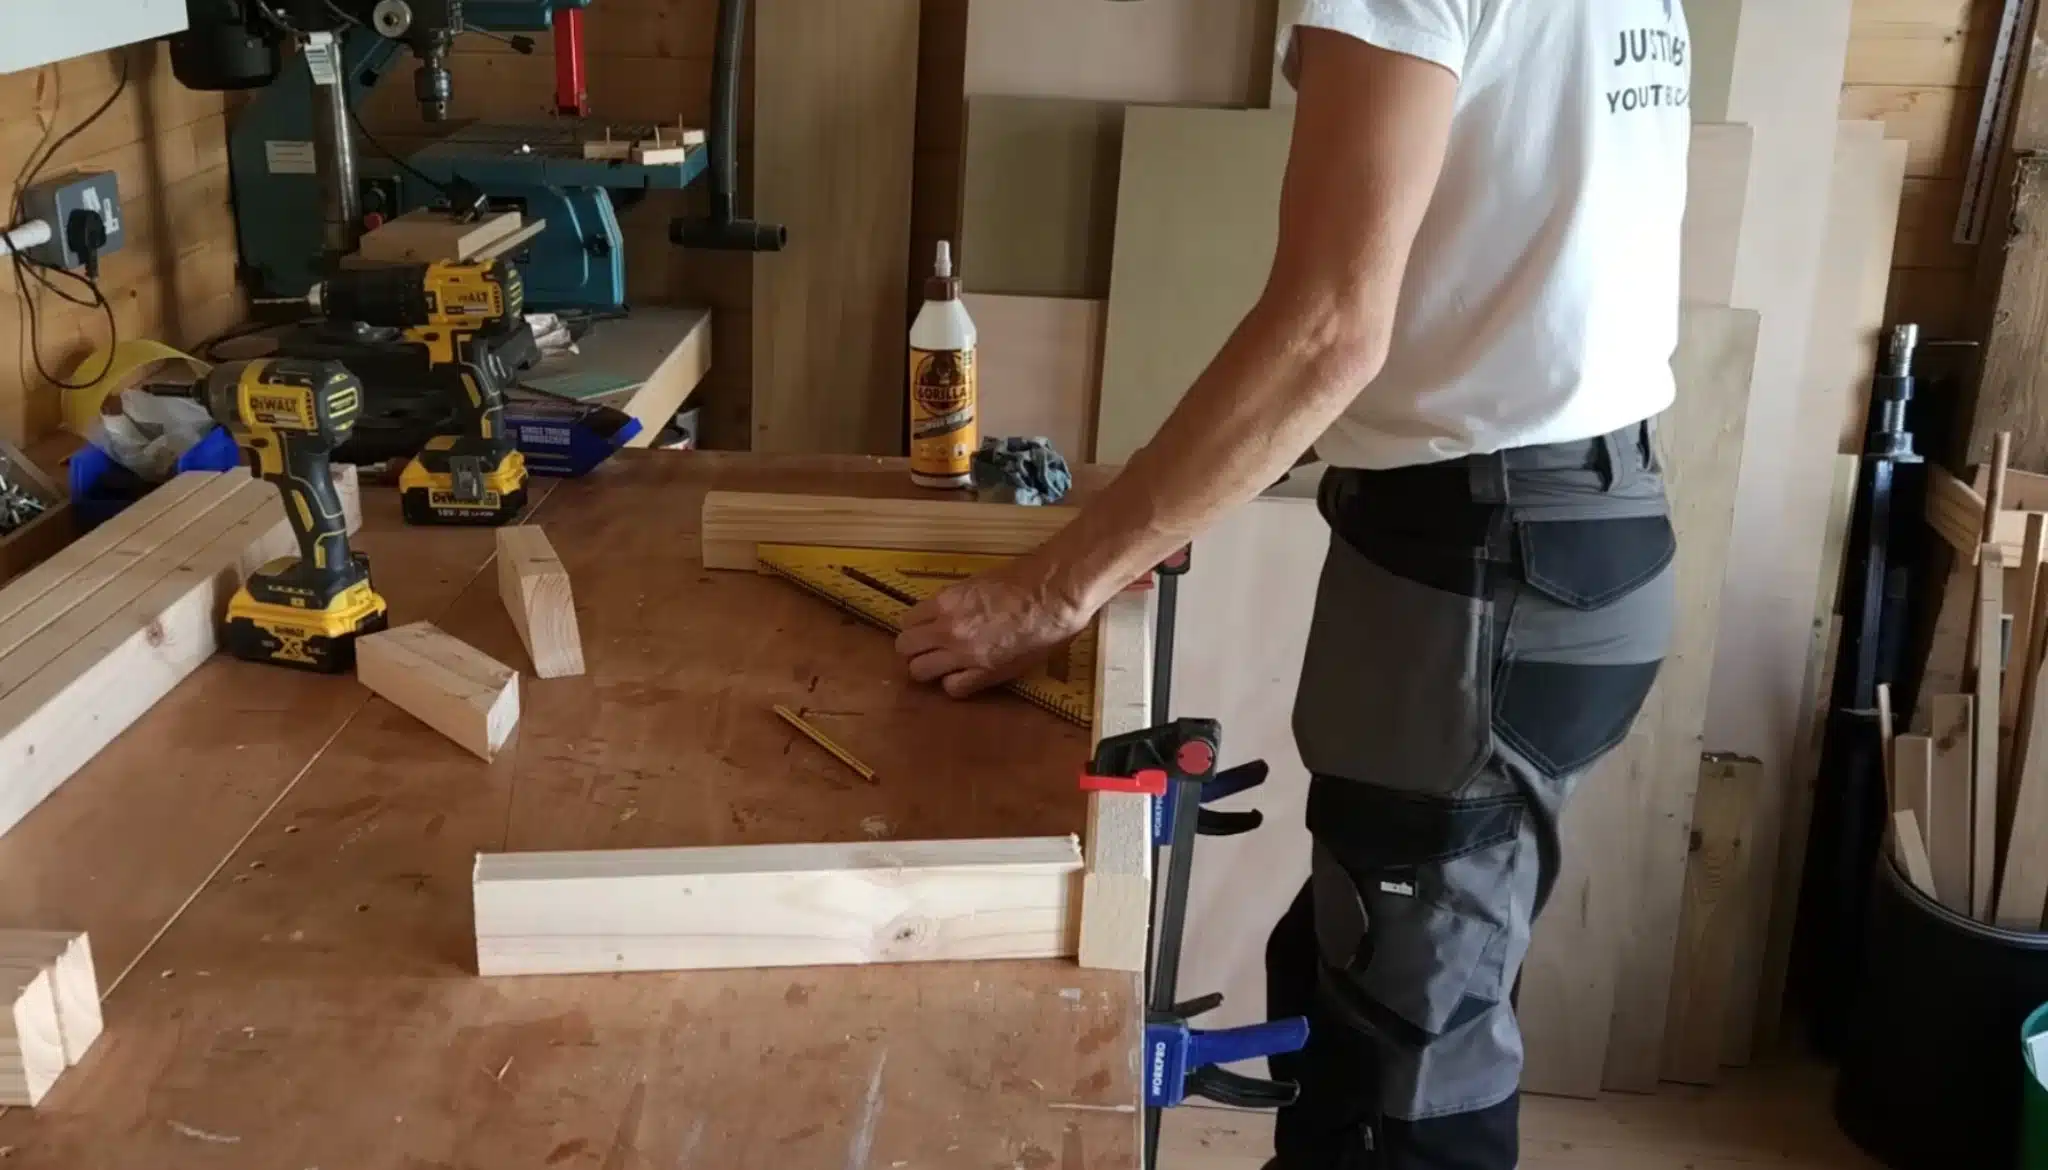
Start by selecting sturdy plywood, ideally 18–25mm thick. Cut four legs and side, front, and back rails according to your desired height (34–36 inches) and top size (24 “x 36 “is common). Understanding different types of tables helps in choosing the right structure strength before assembly.
Mark joints carefully with a square, pre-drill holes to avoid splitting, and clamp pieces before screwing. Double-check squareness and rigidity. Add cross braces if needed to prevent wobbling and ensure a strong foundation for your router table.
Step 2: Fitting the Base Shelf
Measure and cut a shelf to fit snugly between the table legs, ensuring it doesn’t interfere with braces or the router. Attach it using screws and reinforce it with small braces underneath.
The shelf adds structural rigidity while providing storage for bits, push blocks, and other tools. Use a square to confirm level alignment. A well-installed shelf ensures stability and organizes your workshop workspace efficiently.
Step 3: Bracing the Table
Install side and back braces to reduce lateral movement and absorb pressure when feeding wood through the router. Place each brace flush against the frame and evenly spaced, then secure with screws.
Proper bracing prevents wobble, protects hands during use, and allows safe handling of long or heavy boards. Double-check alignment with a square to maintain an even, sturdy, and safe working surface.
Step 4: Setting Out the Table Top
Position and mark the table top for the router plate placement. Outline the exact area to cut, ensuring the router will fit perfectly. Consider the layout for fence placement, T-tracks, and other features before cutting.
Use precise measurements and mark multiple points for accuracy. Planning the tabletop ensures the router sits flush, the surface remains level, and your woodworking setup stays precise and safe.
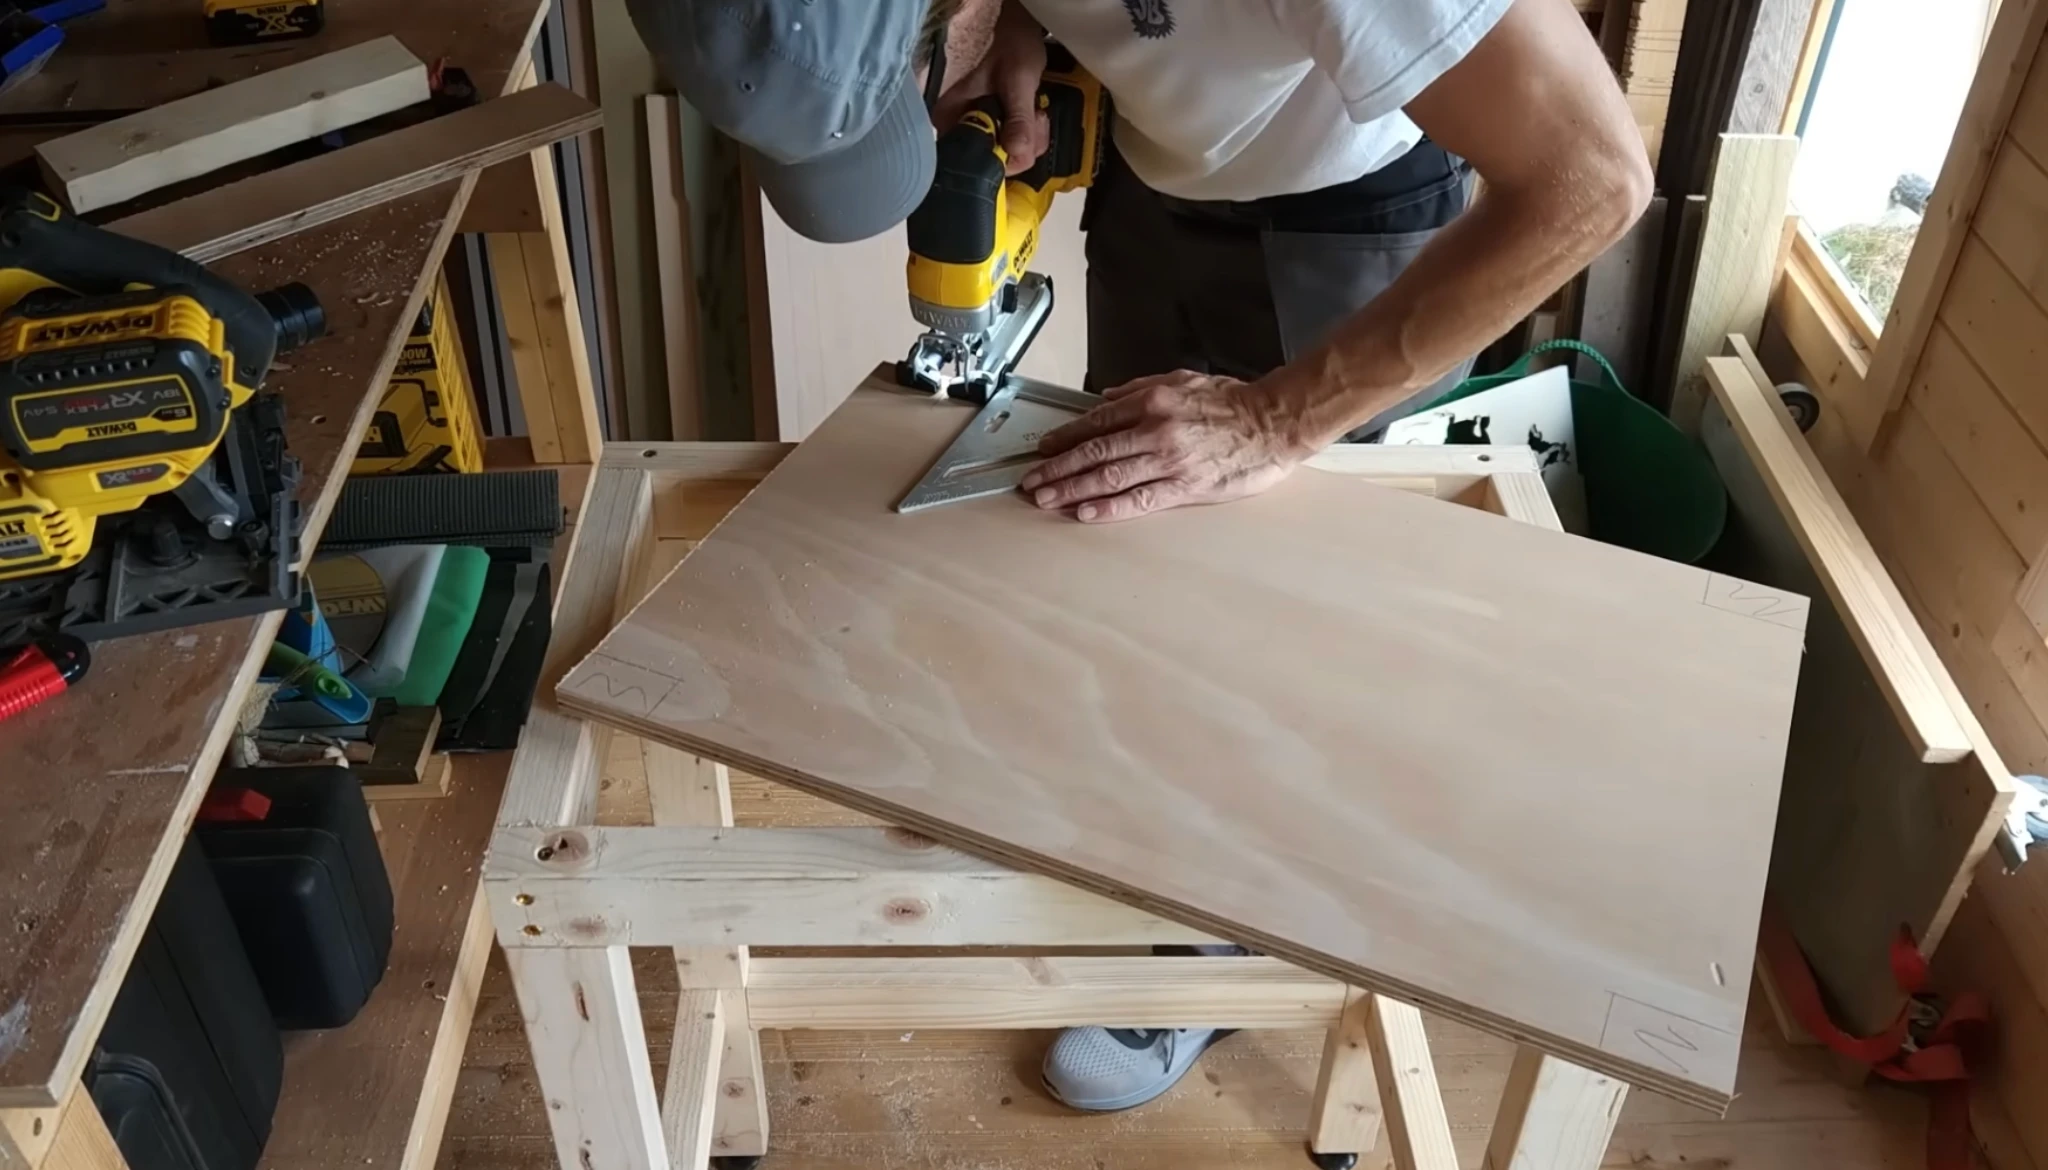
Step 5: Cutting Out for the Base Plate
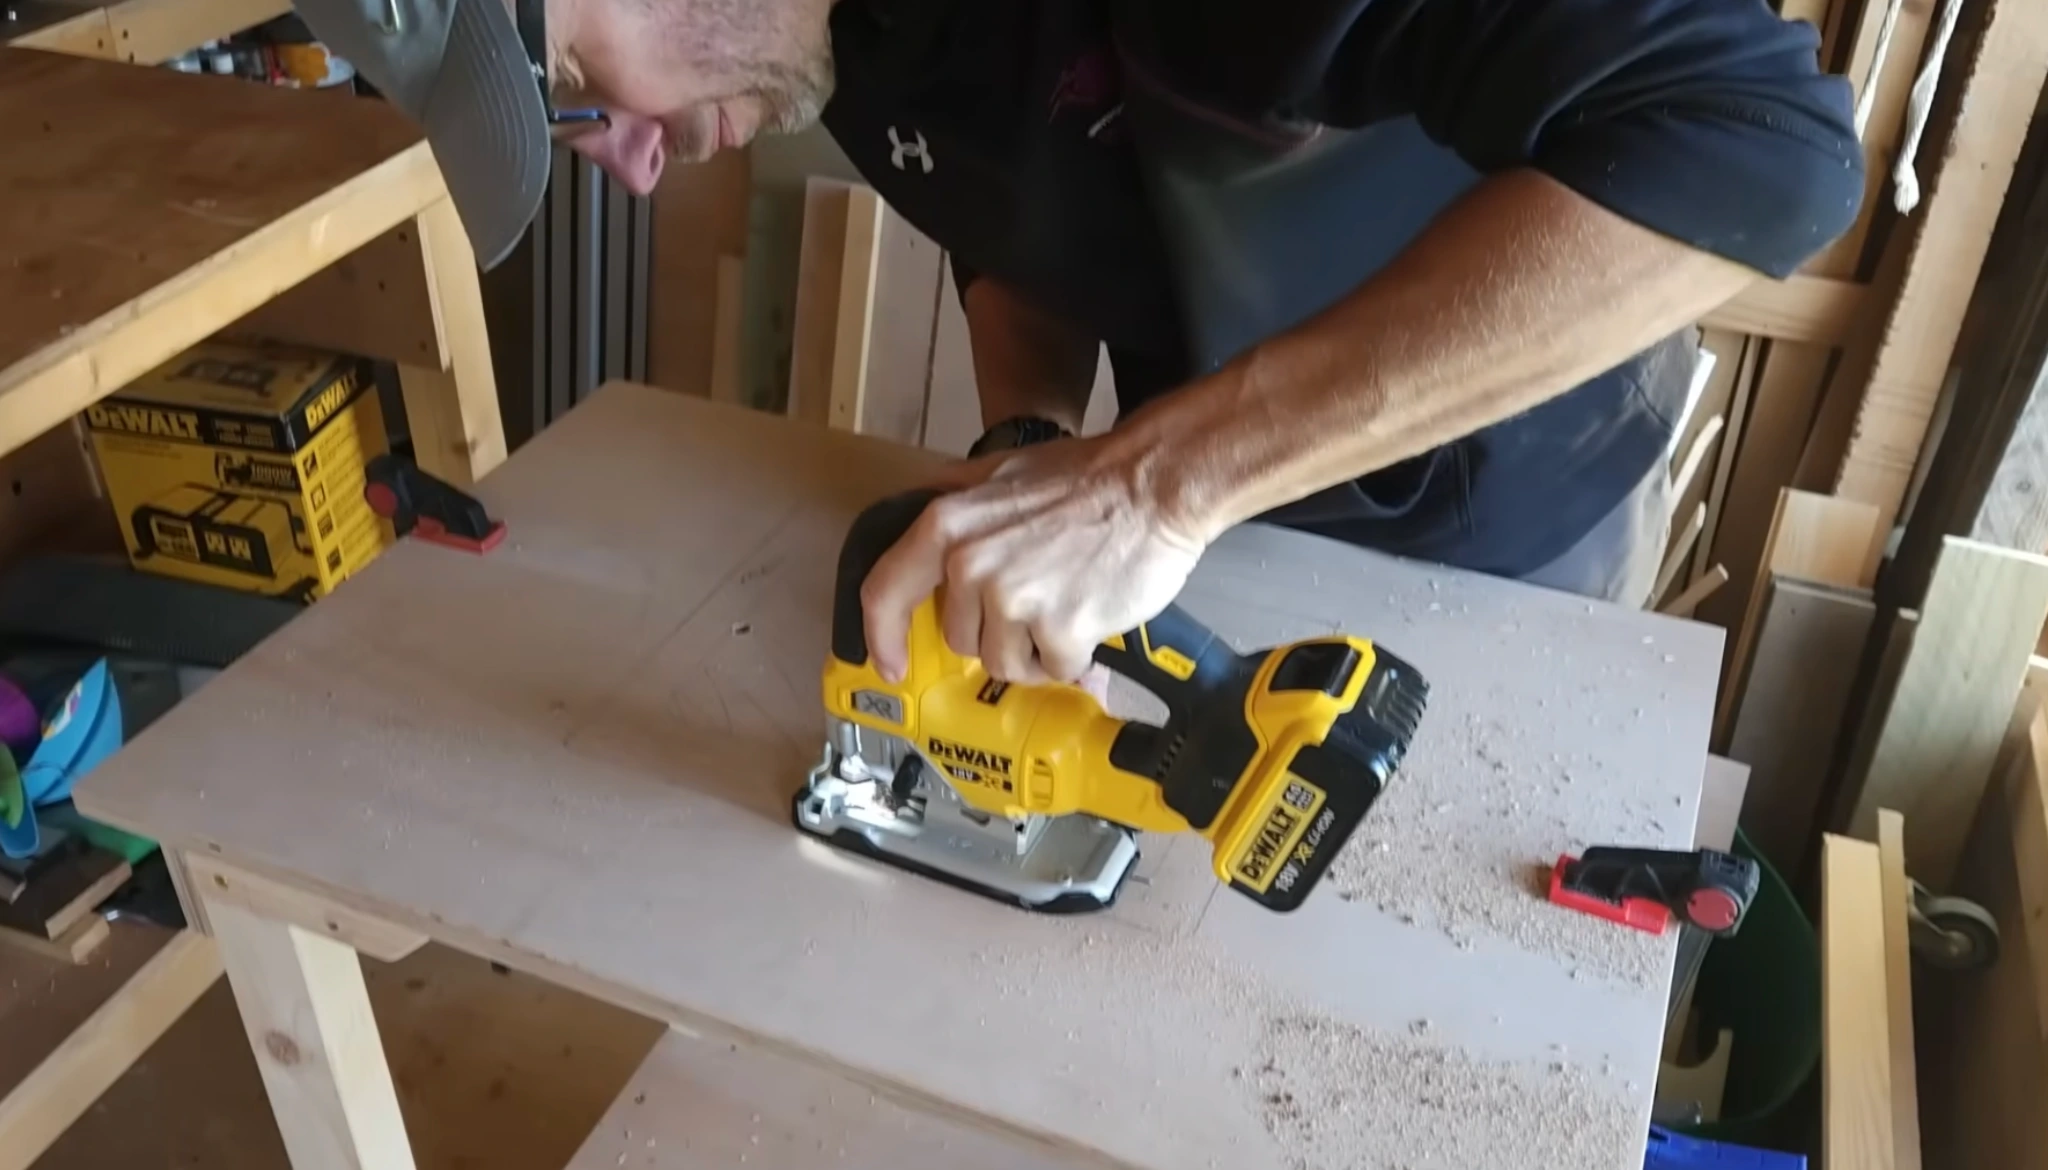
Carefully cut the router plate opening in the table top using the marked template. Make slow, controlled cuts with a straight bit or router for clean edges. Check frequently to ensure proper depth and alignment.
This step ensures the router sits securely and flush with the tabletop, preventing wobbling. A precise cut allows the base plate to fit perfectly and ensures smooth, safe operation.
| Pro Tip: Use a scrap piece of the same plywood to practice your rebate cut before touching the actual tabletop. Five minutes of practice saves an hour of fixing. |
Step 6: Creating the Base Plate Rebate
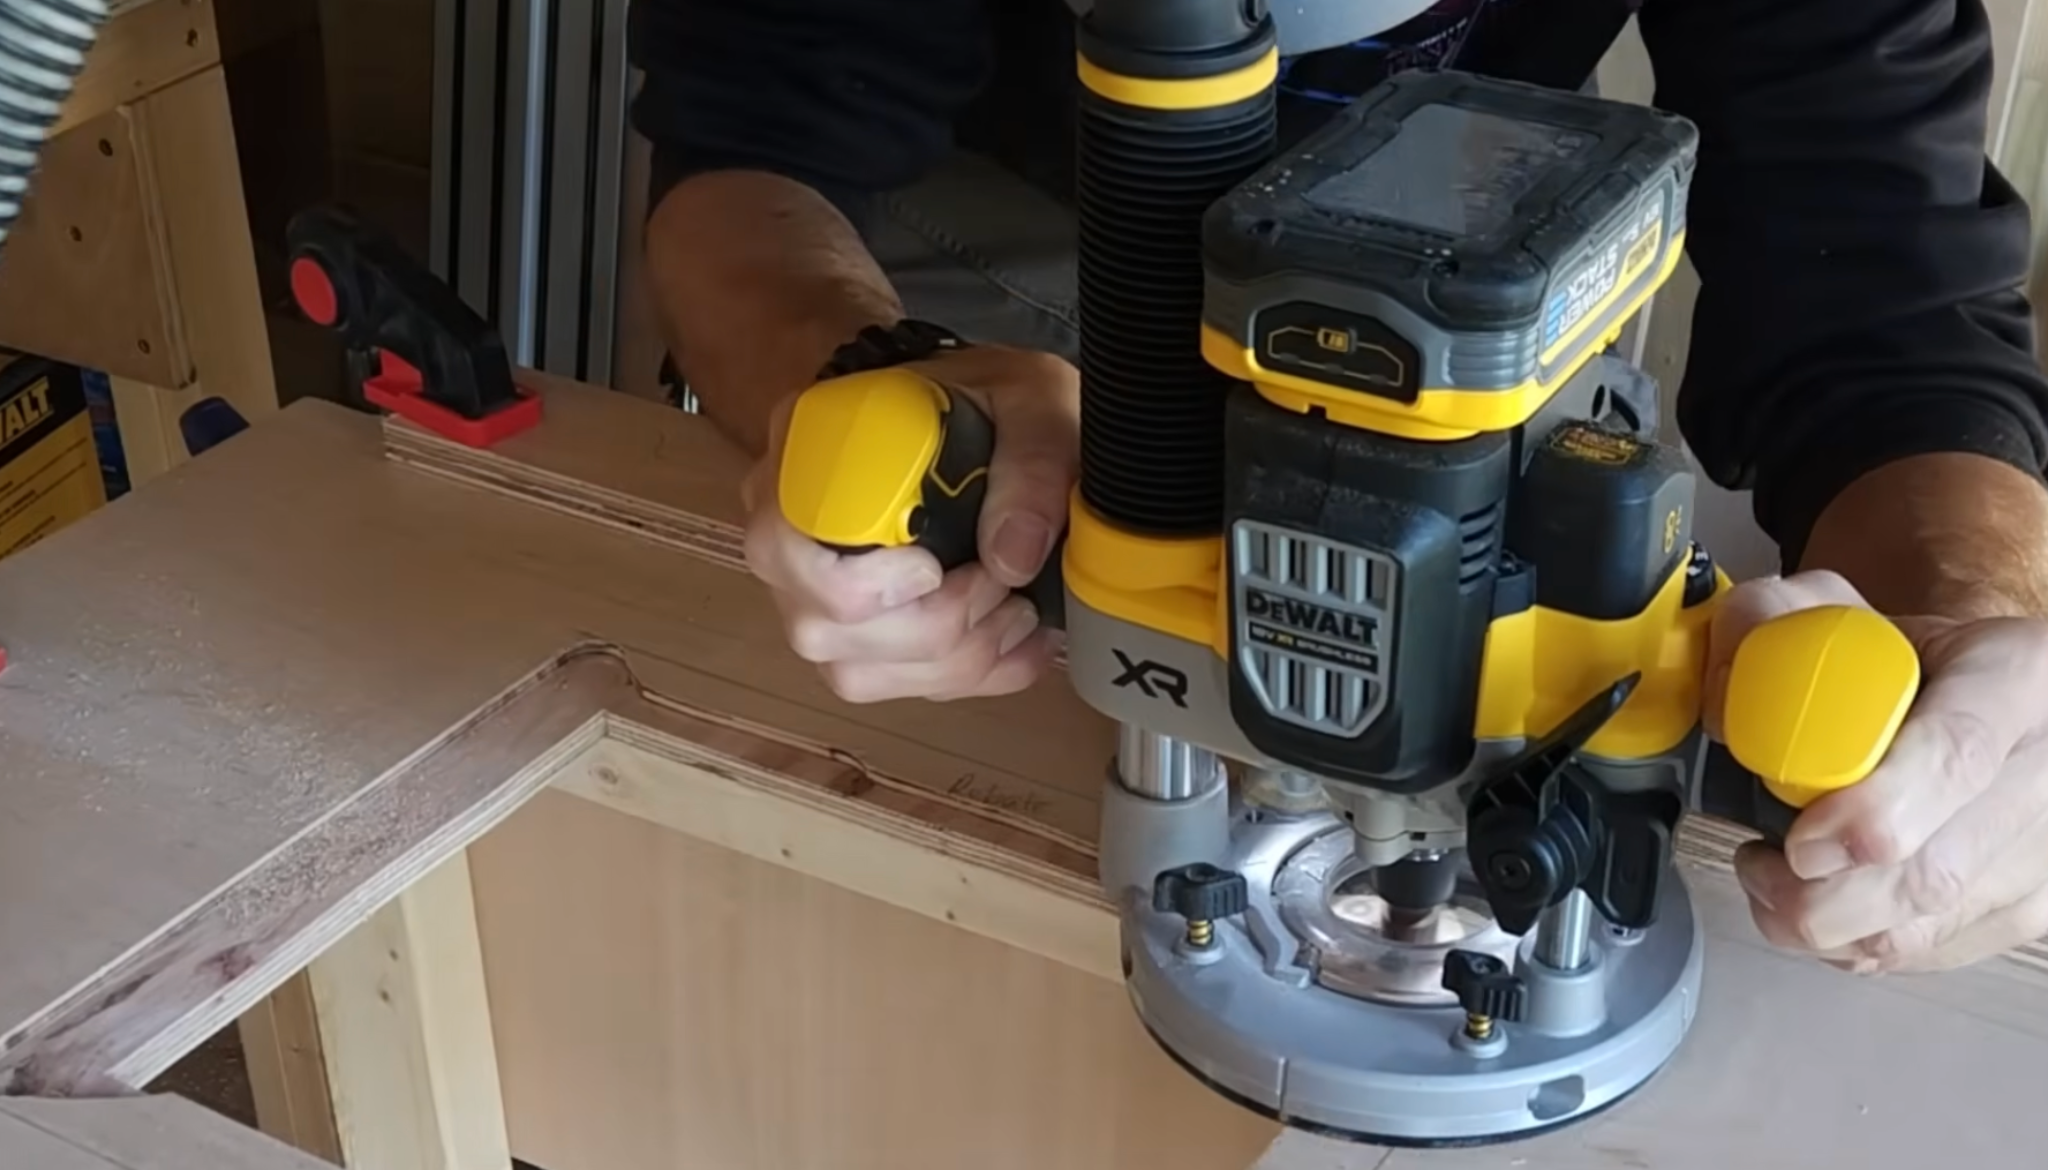
Rebate the edges of the router plate cutout so the plate sits flush with the tabletop. Remove small amounts gradually, sanding the edges afterward to prevent splinters. Double-check the plate fit and alignment with the surrounding surface.
Properly rebating the plate ensures stability, prevents vibration during use, and creates a flat working area that supports accurate and safe routing operations for various woodworking projects.
Step 7: Positioning and Grooving the T Track

Mark and cut grooves for the T-track in the tabletop where the fence or stops will slide. Drill bolt holes carefully and check alignment. The T-track allows quick attachment of fences, stops, or clamps for jigs.
Ensure the track sits level and smooth to prevent binding. Proper placement enhances precision, allows adjustable setups, and ensures safe operation during cuts and woodworking tasks.
Step 8: Fixing the Base Plate
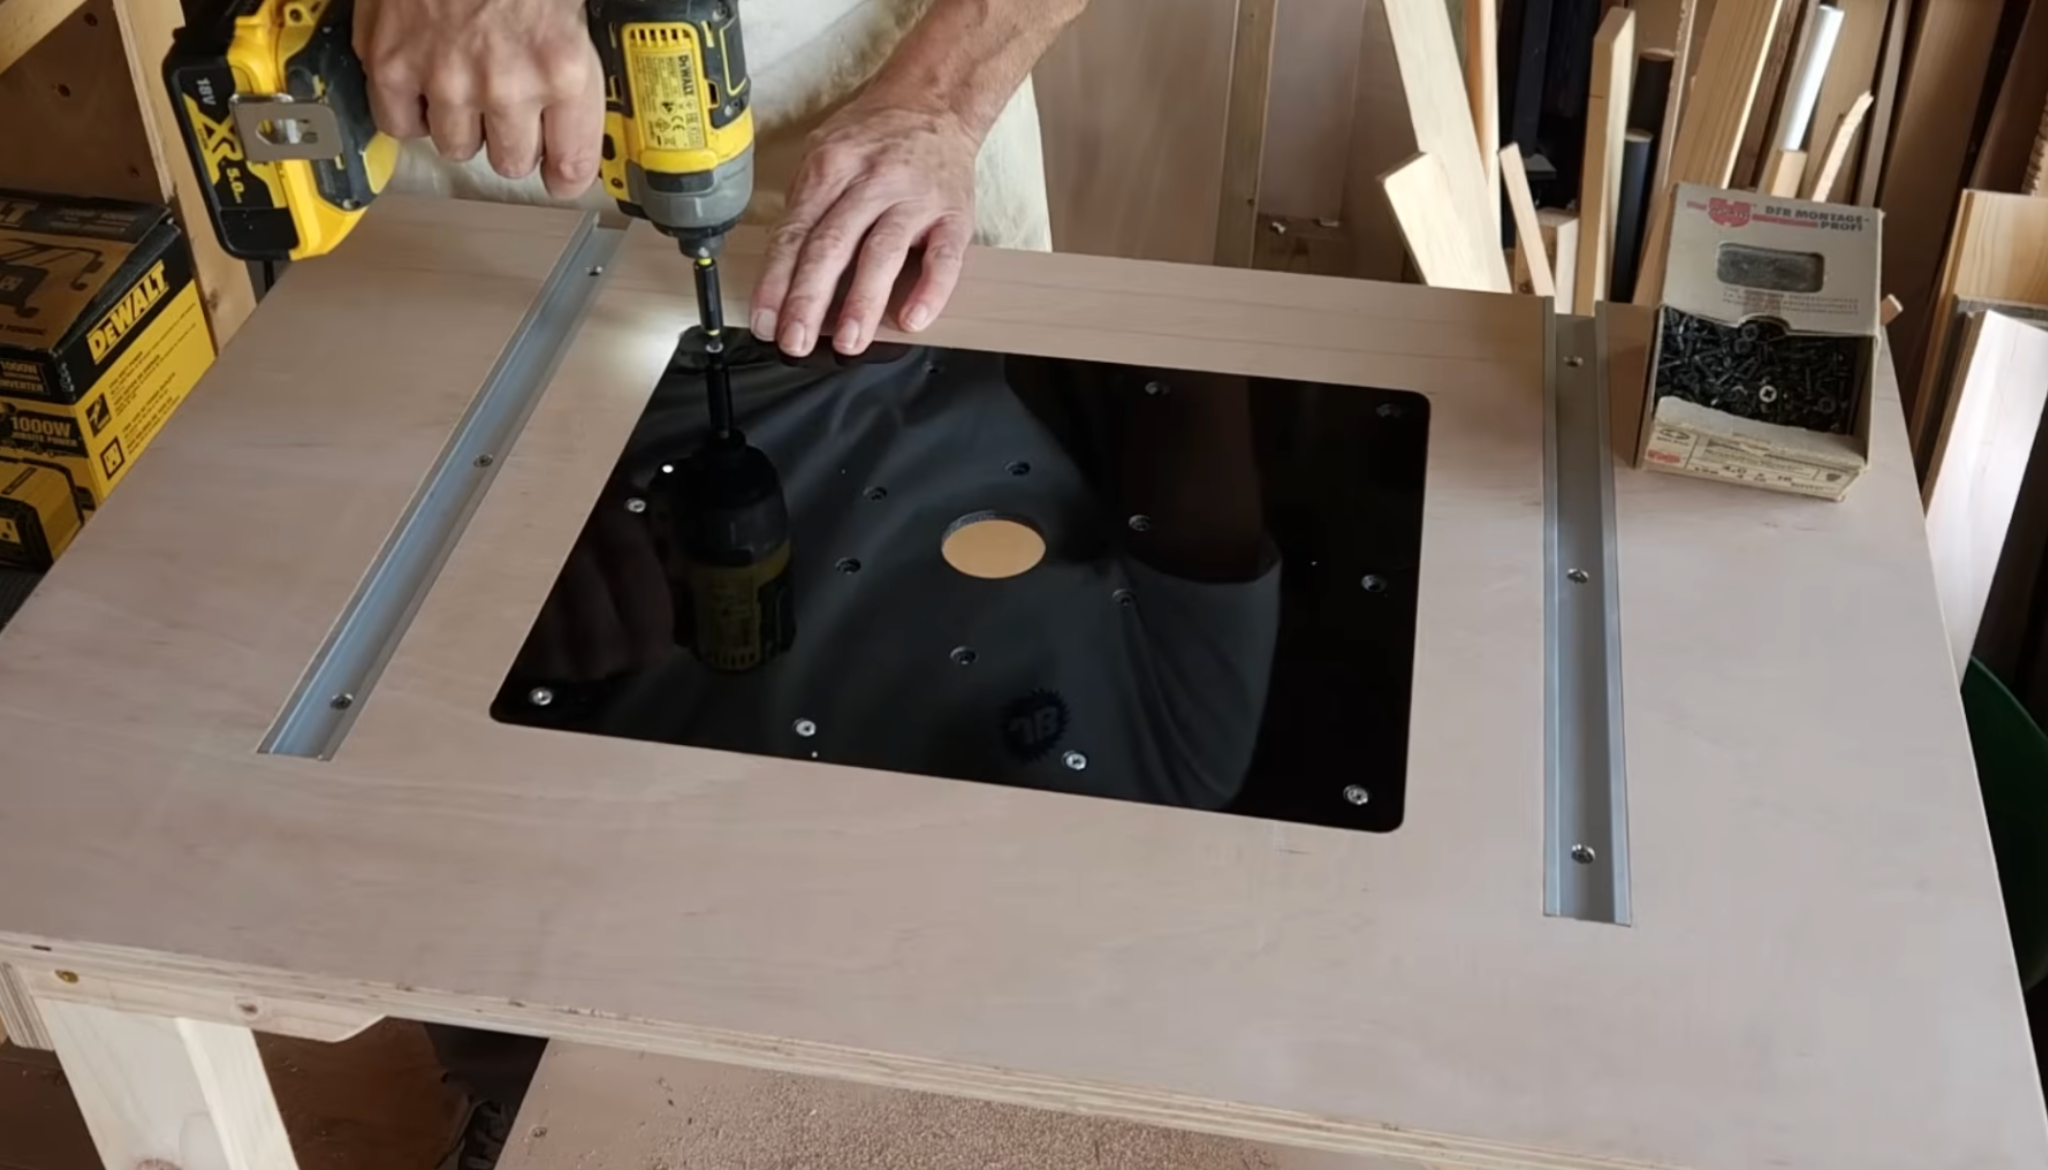
Secure the router plate into the cutout using screws. Ensure it sits flush and level with the tabletop. Check all corners and sides for tightness without over-tightening, which could warp the plate or plywood.
Confirm alignment with the fence area. Proper attachment stabilizes the router, reduces vibration, and provides a safe working surface for precise cuts, making the table ready for additional assembly steps.
Step 9: Fixing the Table Top
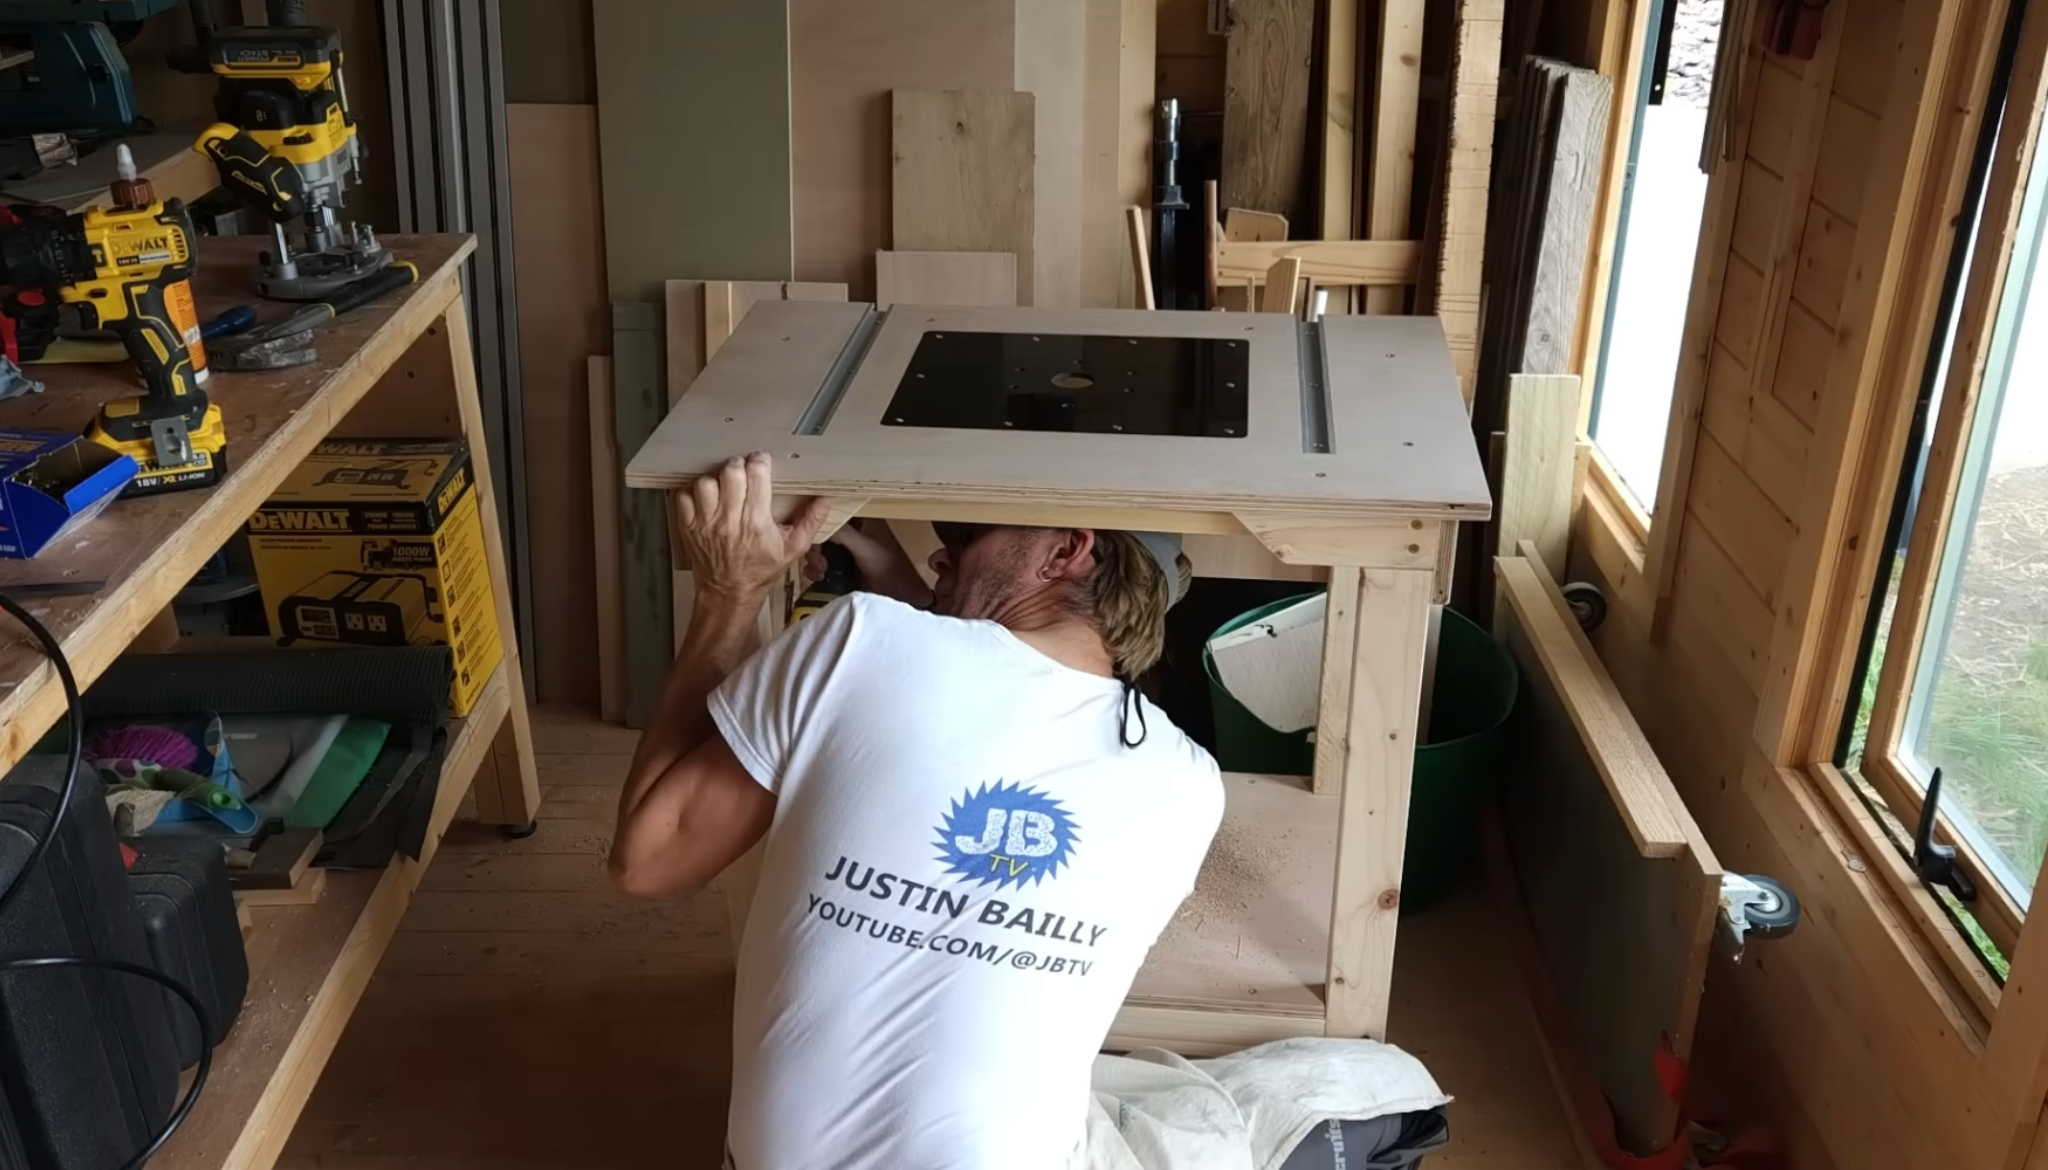
Attach the completed tabletop to the frame, ensuring alignment with the legs and braces. Use screws or brackets, spacing them evenly for maximum stability. Avoid overtightening to prevent splitting plywood.
Check levelness and adjust if necessary. A secure tabletop ensures a flat, sturdy surface, creating a reliable foundation for fence installation, router mounting, and all future woodworking operations on your DIY router table.
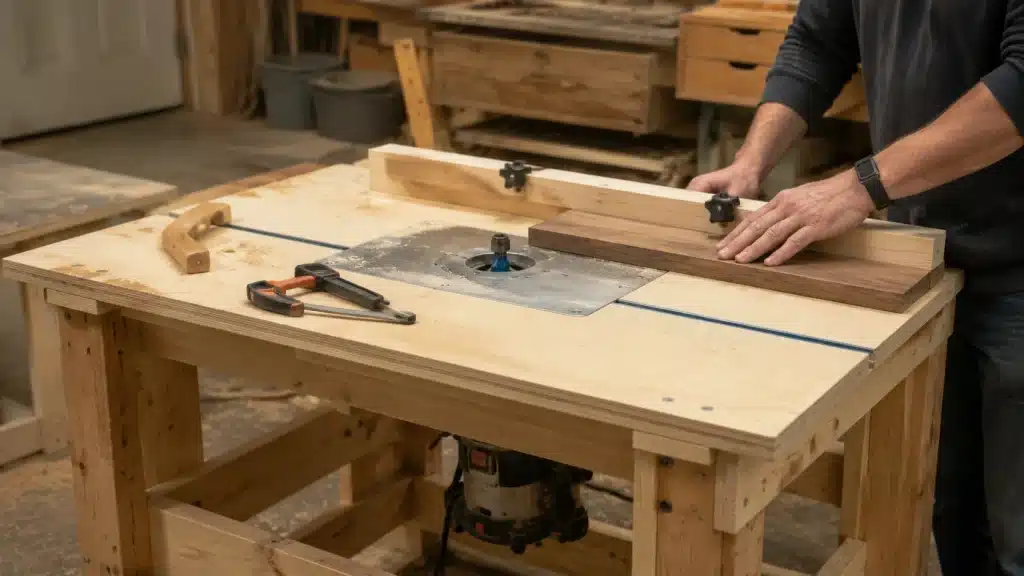
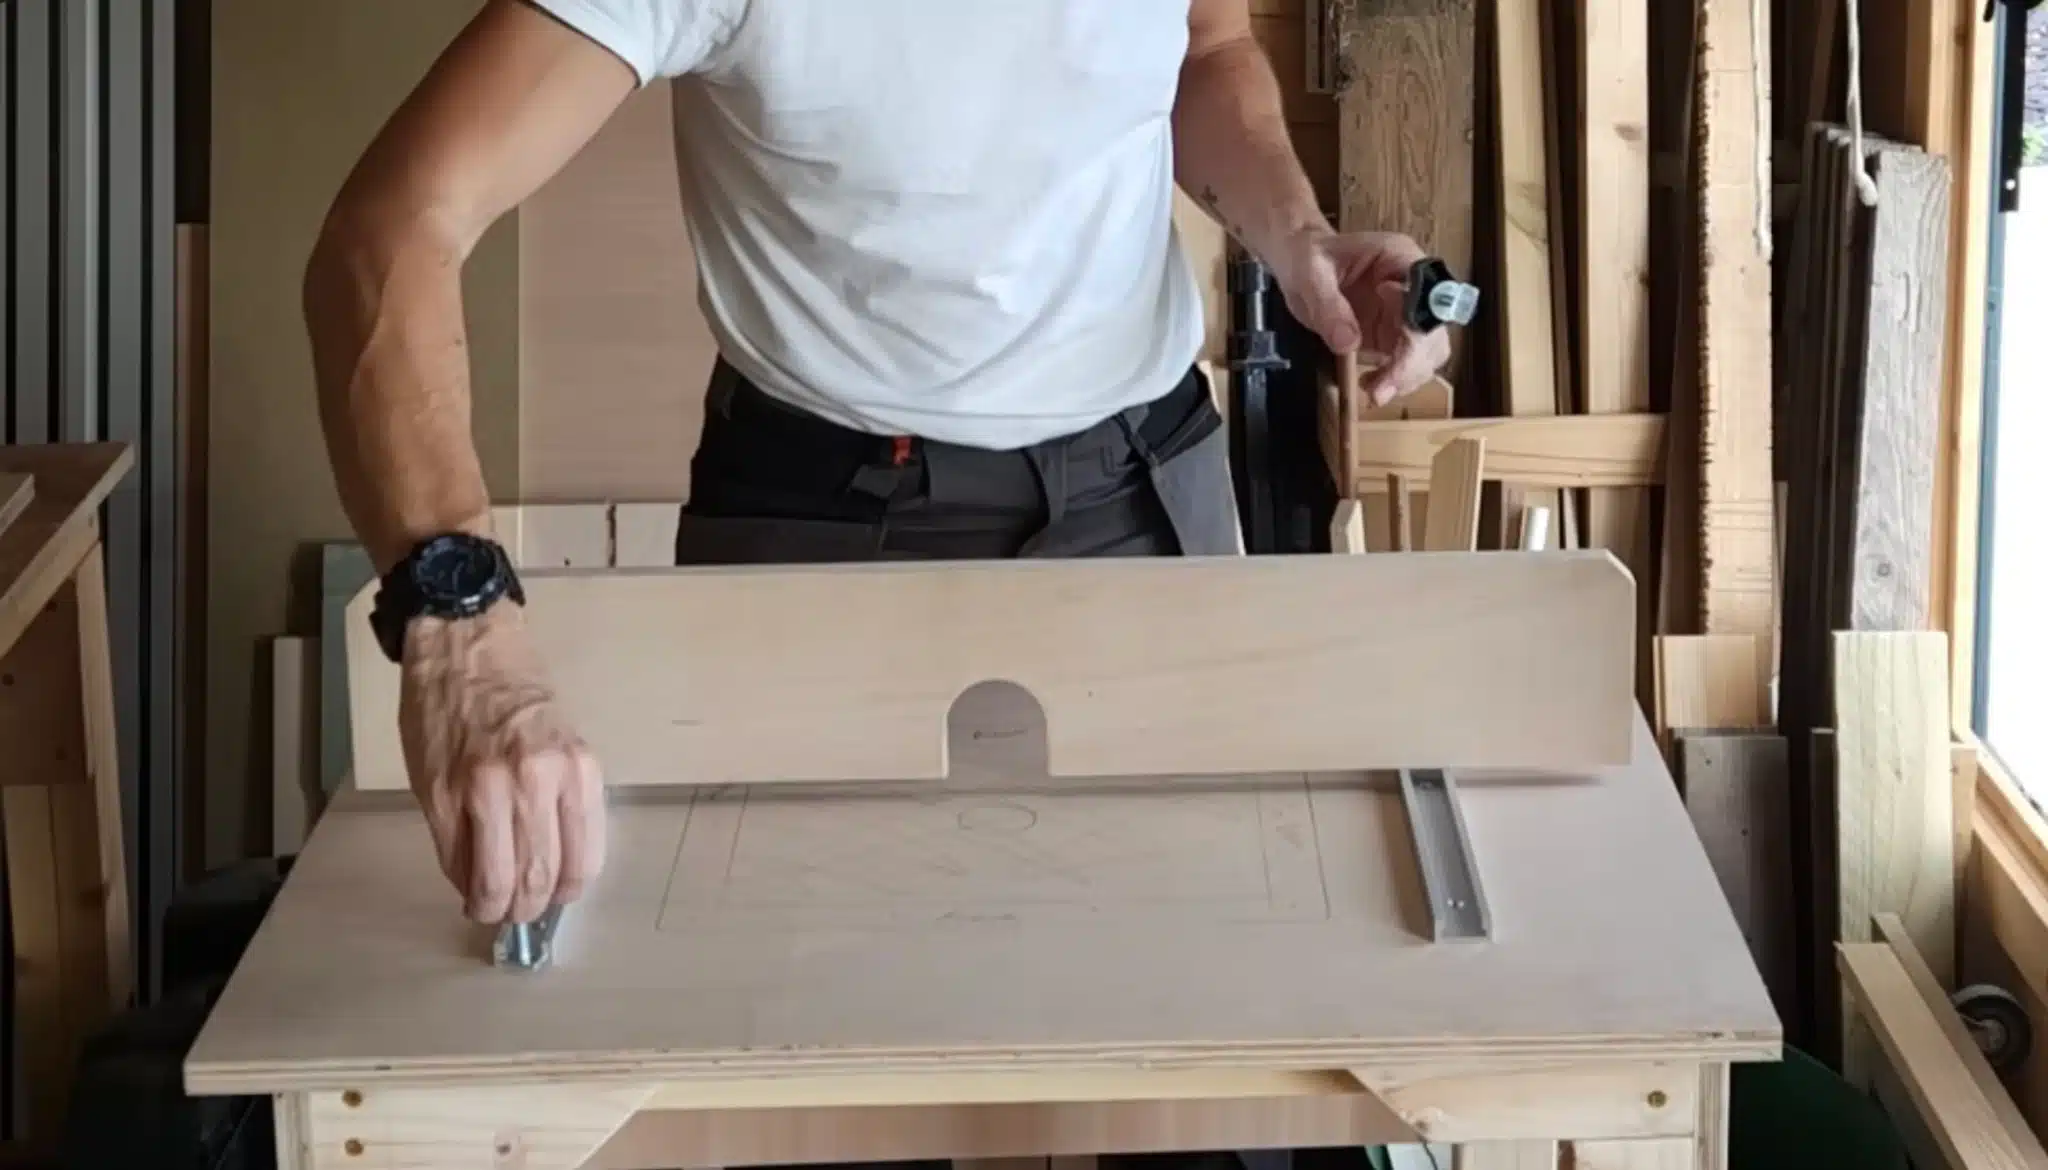
Step 10: Building the Fence
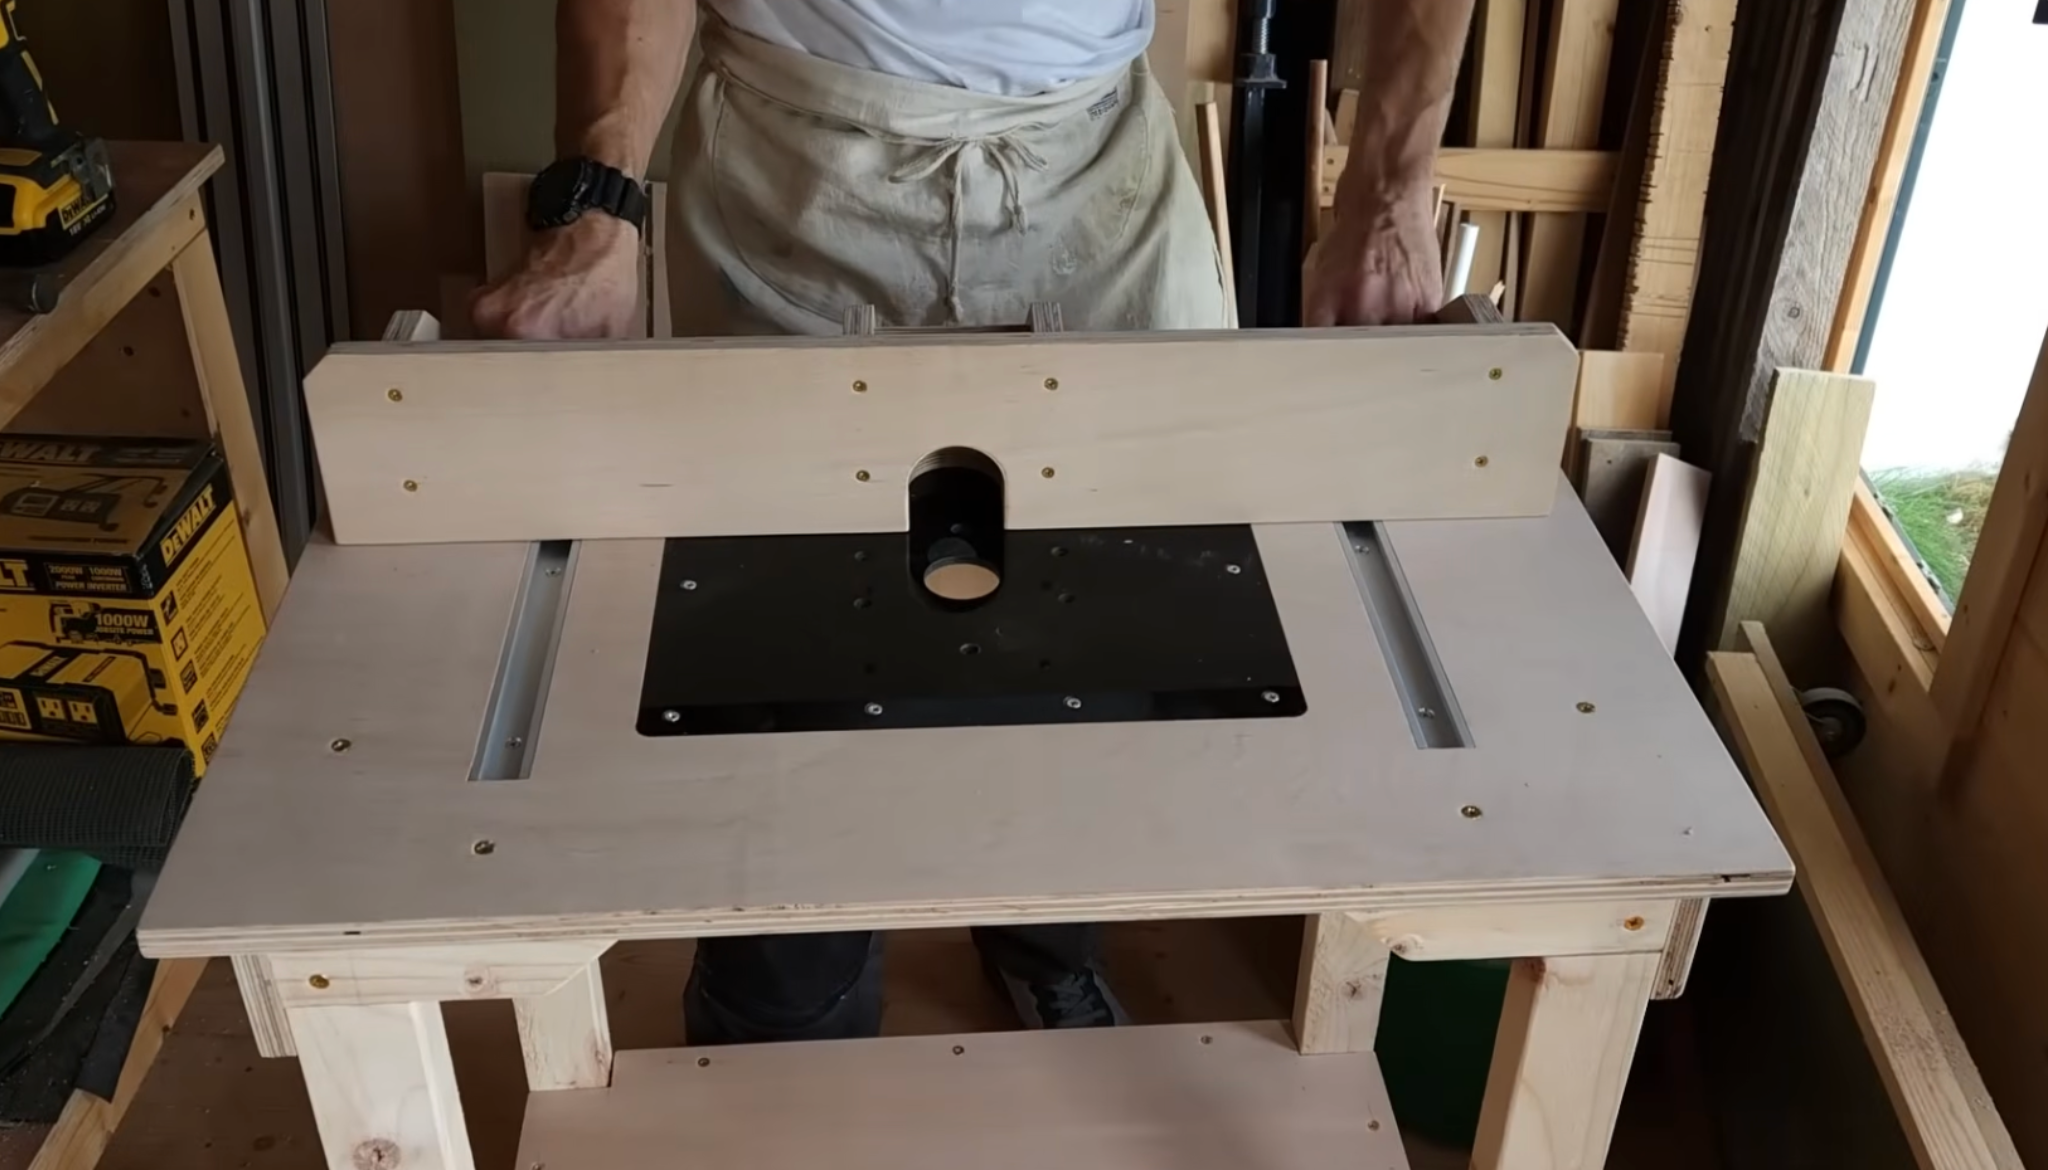
Assemble the fence components and attach them to the table or T-track. Ensure it slides smoothly while locking securely. Verify that the fence is square to the table and aligns with the router opening.
Use clamps if necessary to hold parts in place during assembly. A properly built fence enables repeatable, accurate cuts, prevents kickback, and provides consistent control while guiding materials through the router.
Step 11: Attaching the Router
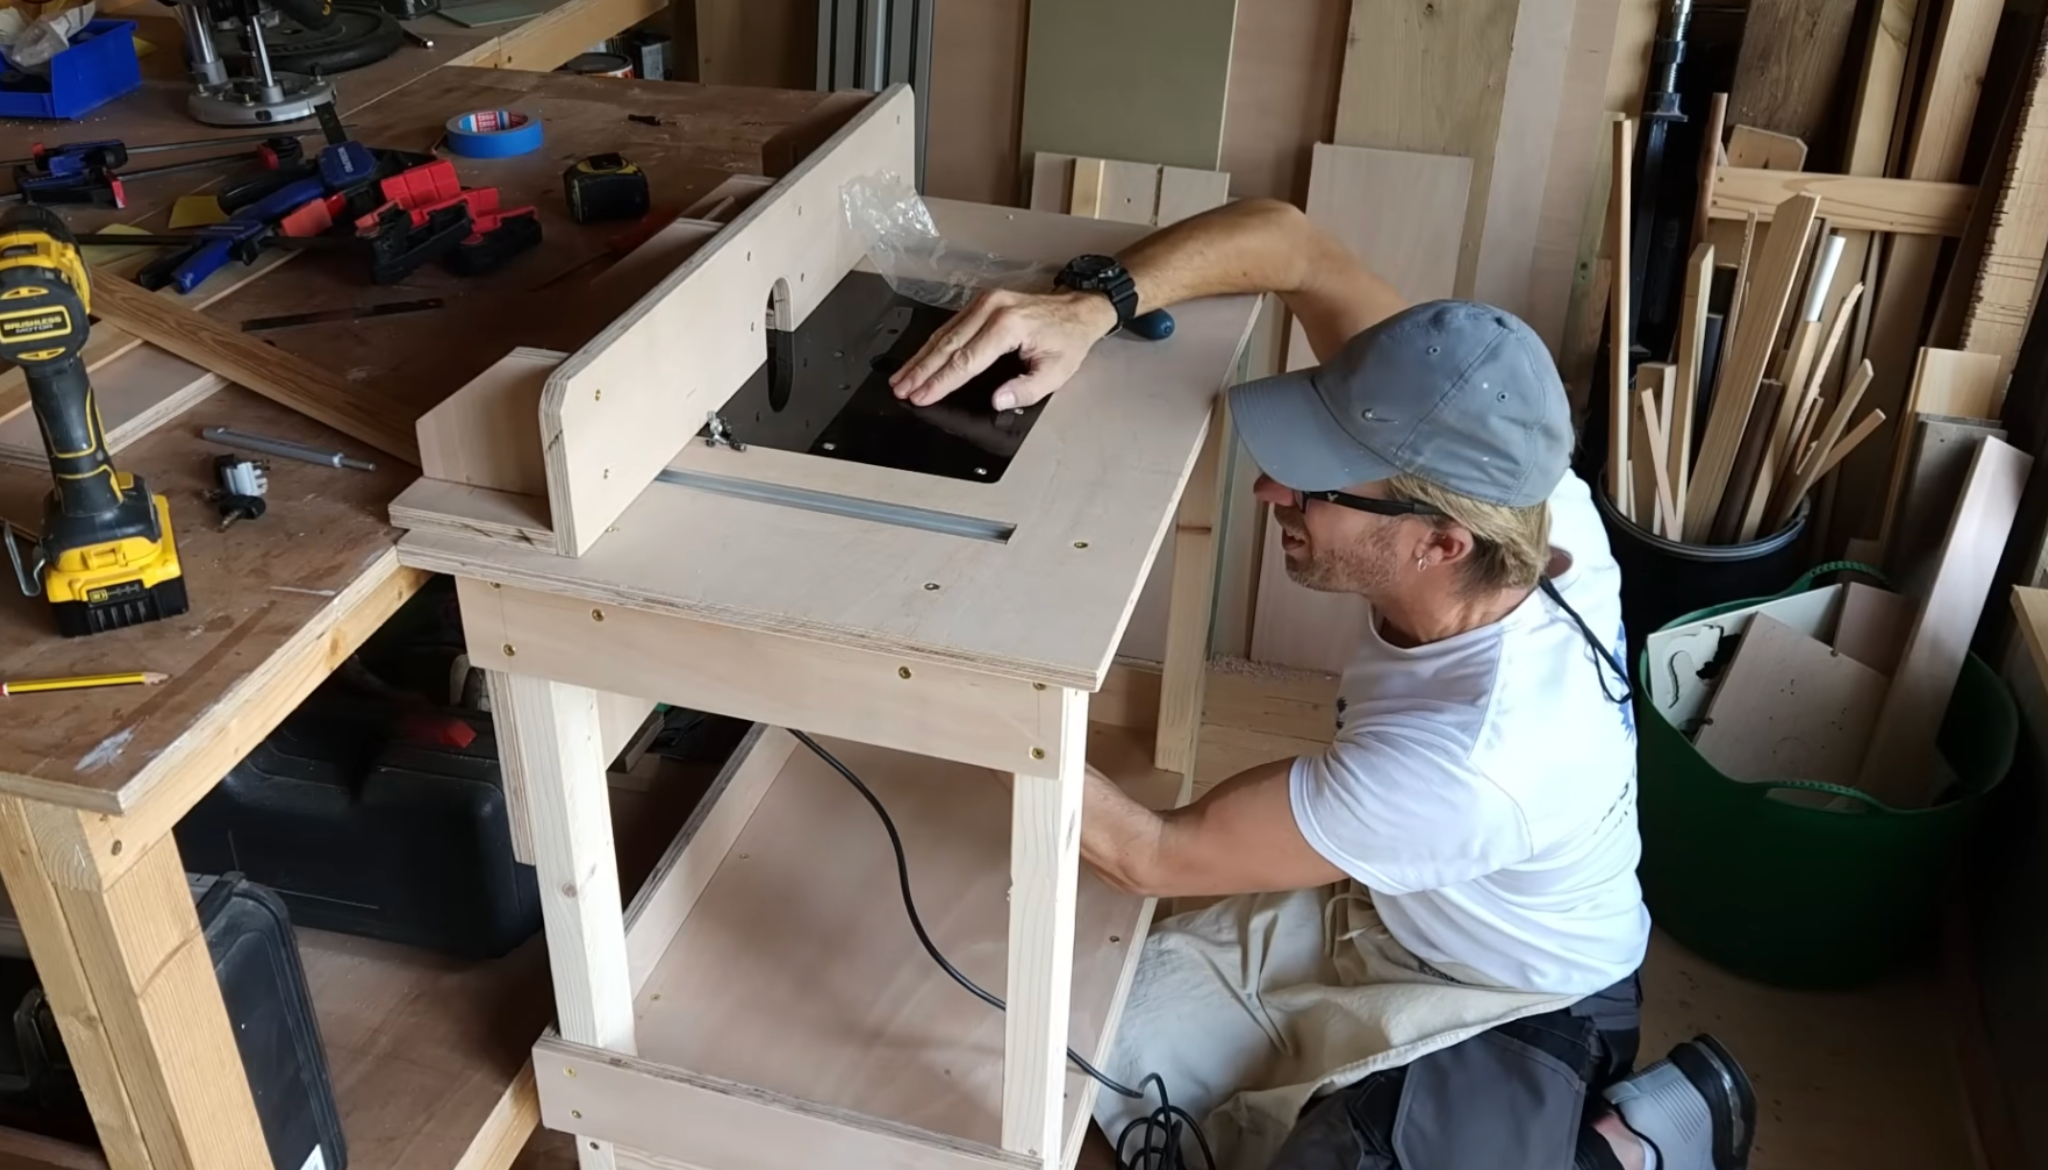
Place your router into the plate opening and secure it with screws. Remove unnecessary screws from the router base for maximum clearance. Align it carefully with the table surface and fence.
Avoid overtightening, which could warp the base. Verify the router is flush and stable. Proper attachment guarantees smooth, safe operation and maintains precision for all routing tasks, making your table fully functional.
Step 12: Testing It Out
Power on the router and check overall table stability. Test fence movement, T-tracks, and router operation using scrap wood. Look for wobble, uneven cuts, or misalignment. Adjust feet, braces, or screws as necessary.
This final test ensures safety, accuracy, and smooth workflow. A well-tested table is ready for all woodworking projects, providing confidence in both performance and user safety.
After completing all assembly steps, your router table is fully functional and ready for projects. Testing ensures safety, stability, and precision. Next, explore layouts and configurations to optimize your workflow, storage, and efficiency for your woodworking space.
Router Table Maintenance
A router table is an investment in your woodworking setup. Proper maintenance keeps it stable, accurate, and durable for years of use. Routine checks and simple care prevent issues like wobbling, misalignment, or uneven cuts.
- Check Screws, Braces, and Fence Alignment: Over time, screws can loosen and braces can shift. Inspect all components periodically and tighten or adjust as needed to maintain stability.
- Clean and Lubricate T-Track: Dust and debris can accumulate in T-tracks, causing fences or stops to bind. Keep the tracks clean and lightly lubricated for smooth, repeatable fence movement.
- Maintain the Table Surface: Sanding and resealing the table top prevents warping and splinters. Use a light coat of finish or wax for smooth operation, especially around the router plate cutout.
- Inspect Router Plate and Inserts: Ensure the router plate sits flush with the table top and that inserts remain secure. Misaligned plates can reduce cut quality and increase safety risks.
Regular maintenance preserves your router table’s accuracy, stability, and lifespan. With a well-maintained setup, you can focus on your projects without worrying about equipment issues or safety hazards.
Cost and Time Estimates for DIY Router Table
Building your own router table involves basic materials, optional upgrades, and assembly time. This table provides a realistic overview of costs and how long each step might take, helping you plan your project efficiently.
| Component / Step | Estimated Cost (USD) | Approx. Time for Beginners |
| Plywood (18–25mm, table top & braces) | $40–$80 | 1–2 hours for cutting & prepping |
| Router | $80–$200 (if not owned) | N/A (existing tool) |
| Screws, bolts, brackets | $10–$20 | 30–45 minutes |
| Adjustable feet | $15–$25 | 15–30 minutes installation |
| T-track & T-bolts | $15–$25 | 30–45-minute installation |
| Dust collection port (optional) | $20–$40 | 20–30 minutes |
| Featherboards (optional) | $10–$20 | 10–15-minute installation |
| Storage drawers/shelves (optional) | $20–$50 | 30–60 minutes assembly |
| Casters (optional) | $15–$30 | 15–20 minutes installation |
| Step-by-step assembly (frame, top, fence, router installation) | Included in the materials above | 4–6 hours total for beginners |
| Testing and adjustments | Free | 30–45 minutes |
Notes:
- Costs vary by location, plywood quality, and router type.
- Time estimates assume beginner-level familiarity; experienced woodworkers may finish faster.
- Optional upgrades increase functionality but are not required for a basic, fully usable router table.
Planning ahead with a cost and time overview helps you budget, schedule, and approach your DIY router table project with confidence. You’ll know what materials to buy, what optional features to include, and how long each step should take.
Router Table Plans and Examples
Creating a DIY router table allows you to match your workspace, workflow, and woodworking projects perfectly. The right plan balances portability, precision, and storage while giving you a solid, functional table. Below are five practical examples to inspire your build, each designed for specific needs and setups.
1. Compact Benchtop Table
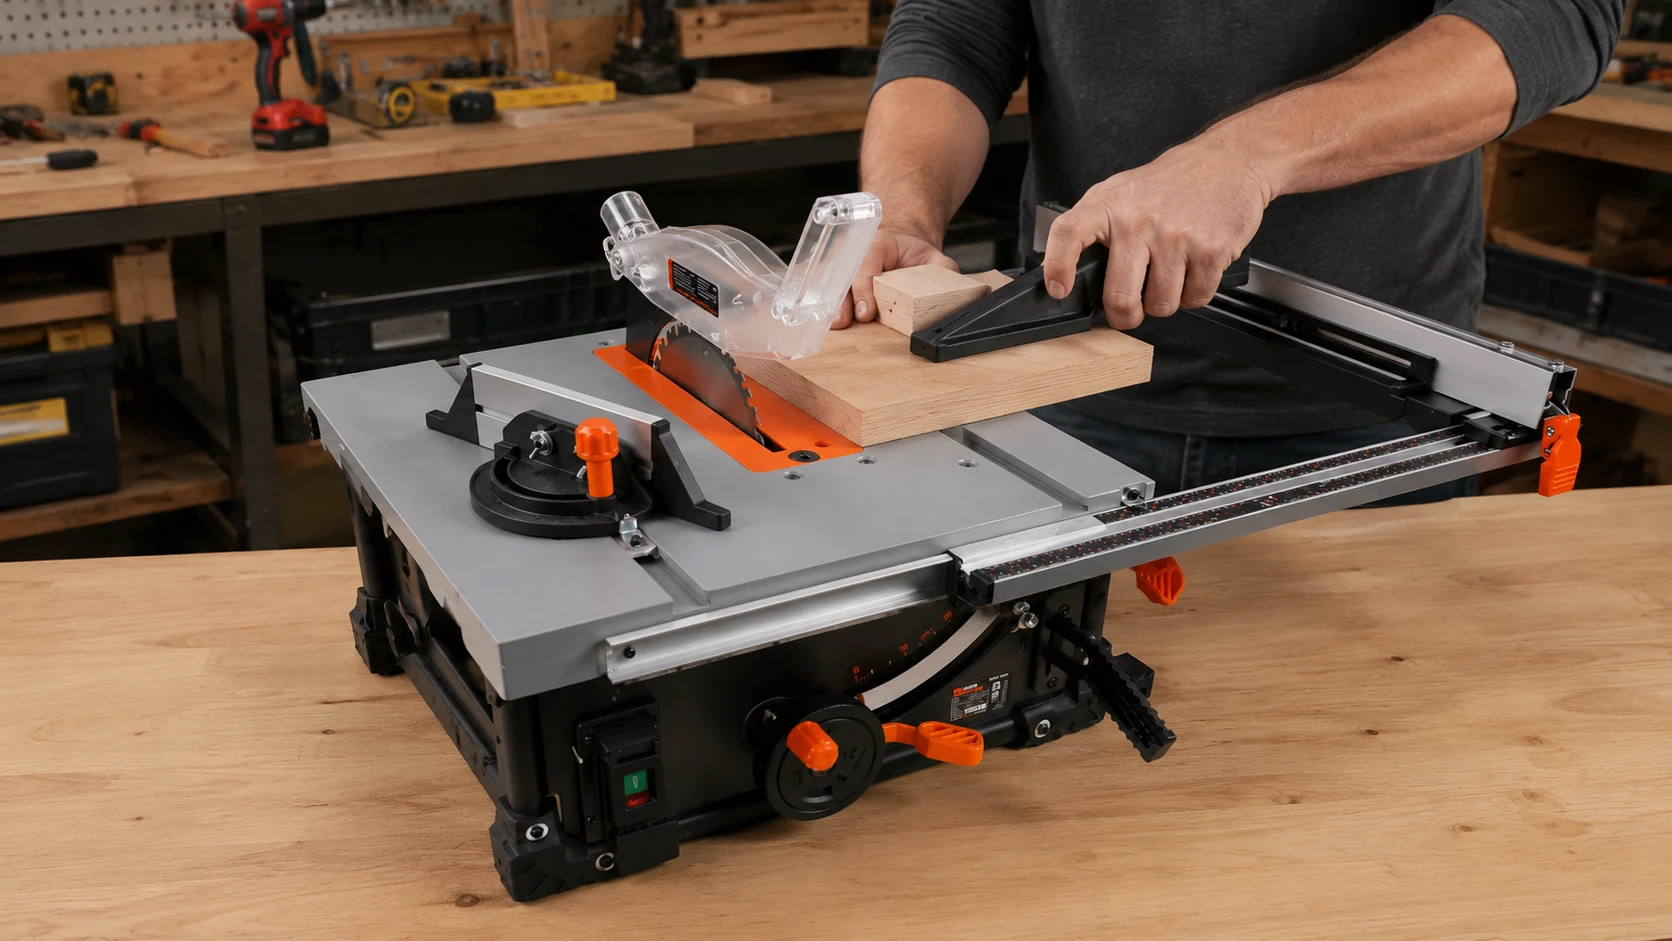
Perfect for small workshops or limited spaces, this table sits on a workbench and is lightweight enough to move or store easily. It provides just enough surface for precise routing without taking up too much room.
A simple fence and optional dust port make it functional, while the compact design ensures it fits comfortably in small areas, ideal for beginners or hobbyists.
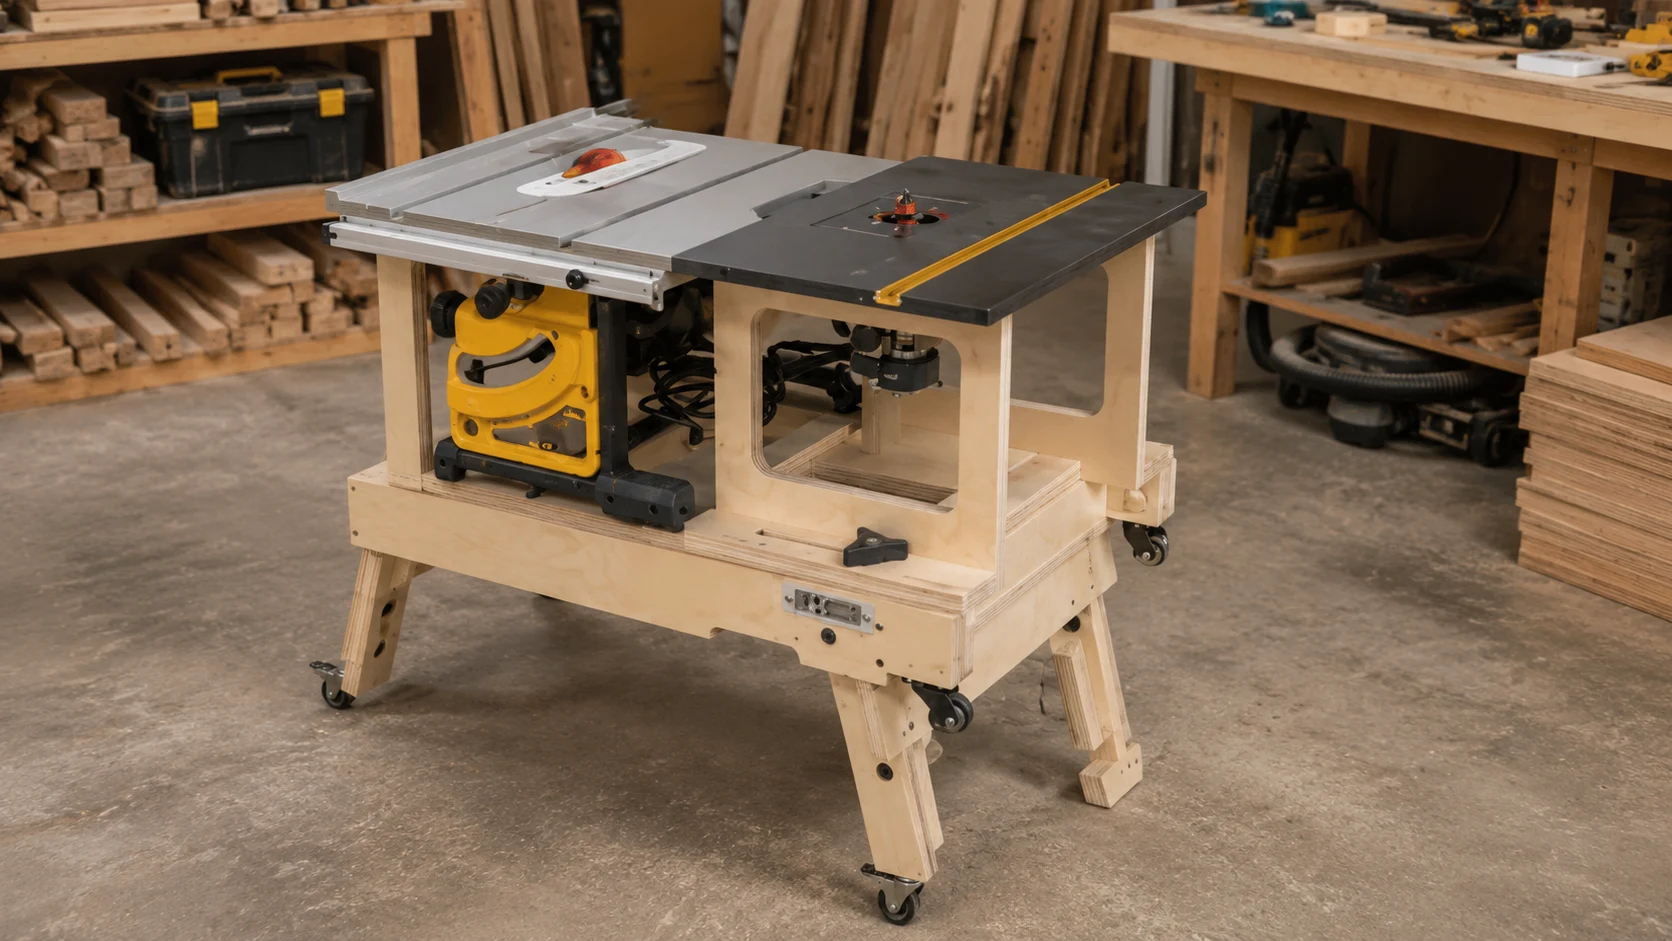
2. Mobile Router Table
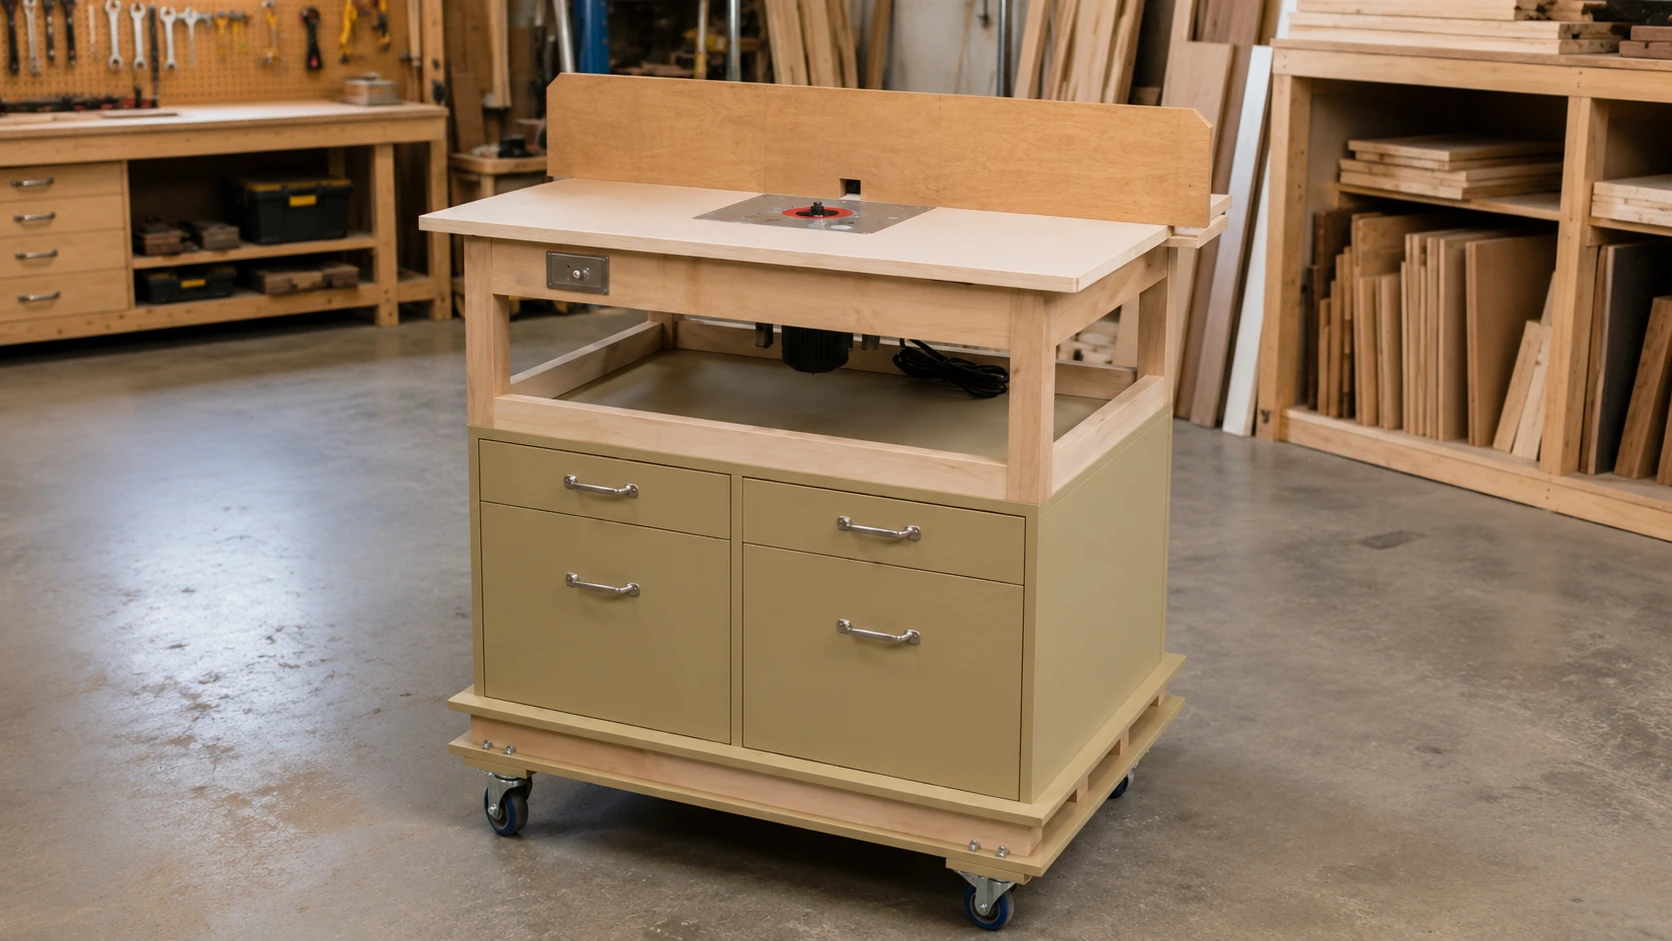
This flexible setup includes lockable casters for easy movement around the workshop and storage beneath for bits, tools, or jigs. Adjustable feet ensure stability on uneven floors, making it suitable for larger projects.
The portable design allows you to position the table wherever you need it, combining mobility, convenience, and functionality without sacrificing strength or precision in your woodworking.
3. Integrated Multi-Tool Table

Designed for serious workshop setups, this table combines a router, sander, and jointer into one station, saving space while improving workflow. It features T-tracks and adjustable fences for versatile cutting and shaping.
Integrated dust collection keeps the workspace clean, while a robust base supports heavier tools and materials, making it ideal for multi-step projects or workshops that handle varied woodworking tasks.
4. Extended Work Table
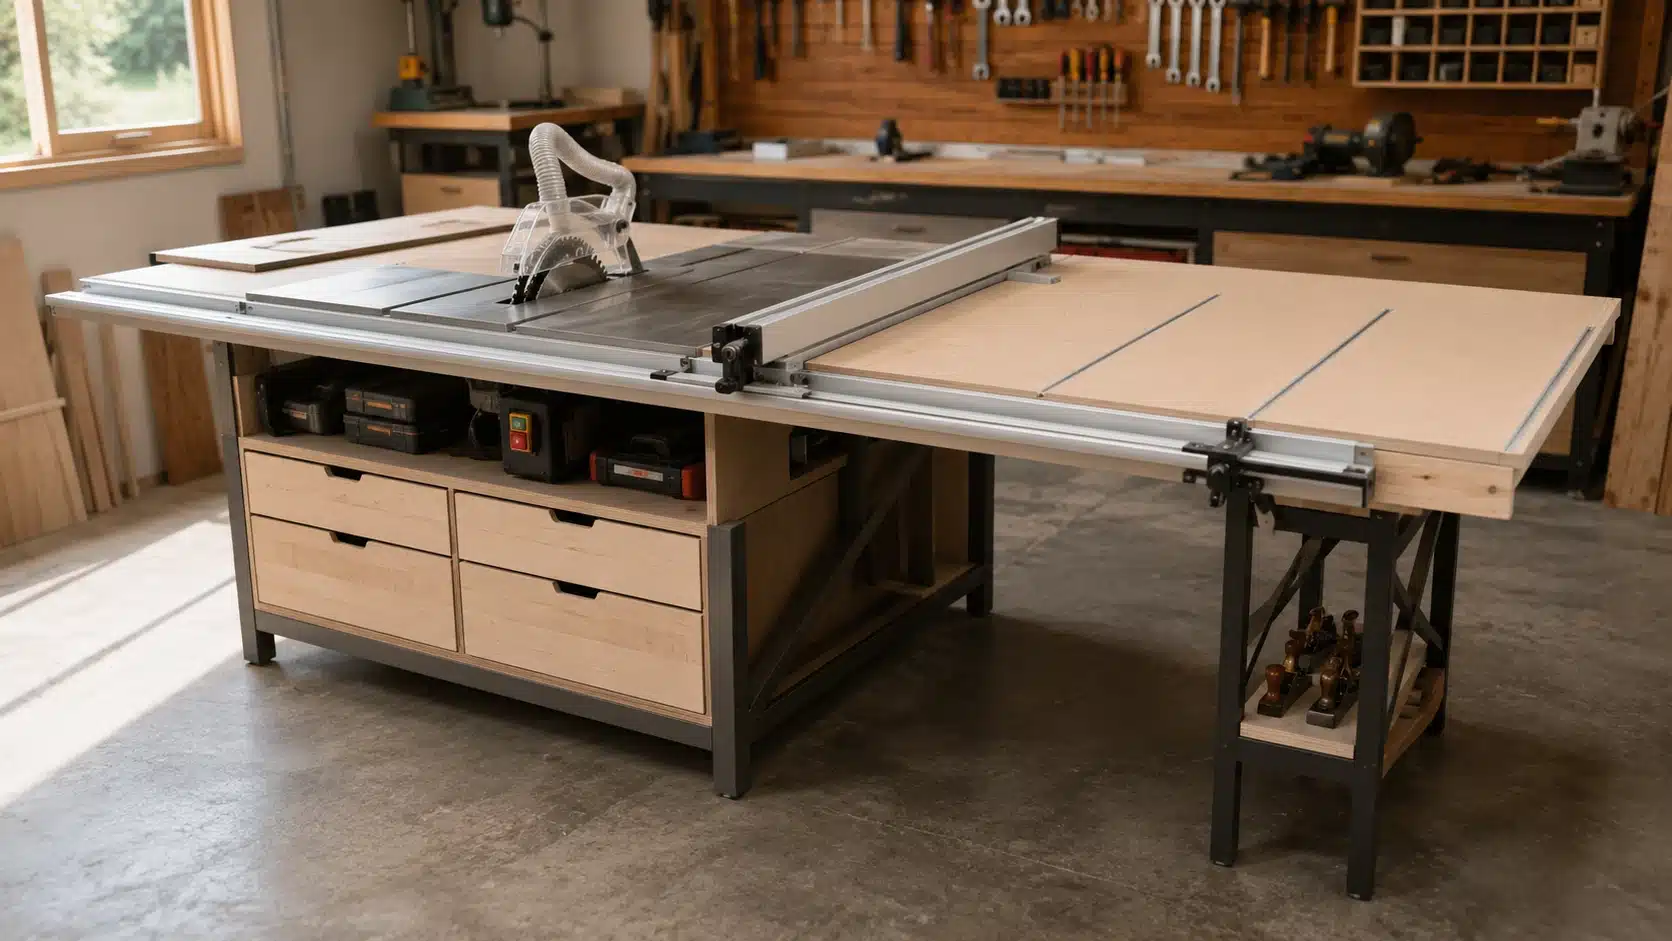
Aimed at handling larger boards and complex projects, this table has a wide top, multiple T-tracks, and an adjustable fence. Reinforced braces ensure rigidity under heavy use, while optional drawers provide convenient storage for tools and bits.
Its design allows for longer or wider workpieces, making it perfect for detailed joinery, large panels, or advanced DIY projects that require extra workspace and precision.
5. DIY Trim Router Table
Ideal for hobbyists or small-scale projects, this compact table focuses on precision and ease of use. It includes a split fence and T-track for featherboards, ensuring accurate cuts.
Its lightweight design allows easy relocation in your workspace, while still providing a stable surface for trim, small moldings, or detailed routing tasks. Perfect for home workshops or specialty projects where space is limited.
These router table examples offer clear guidance for building a table suited to your space and project needs. Optional upgrades such as dust collection, adjustable fences, T-tracks, and storage solutions can further improve safety, workflow, and usability.
Common Mistakes to Avoid
Avoiding common mistakes during your DIY router table build ensures the table is not only functional but also safe and long-lasting. Many beginner projects fail because of rushed measurements, skipped structural supports, or improper router installation. Taking your time and following the right sequence prevents issues and improves your overall woodworking experience.
- Ignoring Measurements: Failing to measure accurately can lead to a table that is unstable, uneven, or difficult to assemble. Always double-check lengths, widths, and spacing before cutting materials. Proper measurements are the foundation of a durable and safe table.
- Skipping Braces: Braces provide essential structural support. Without them, your table may wobble or vibrate during operation, reducing precision and potentially causing safety hazards. Always install side and back braces, make sure they are level and flush.
- Incorrect Router Fit: Using a router that doesn’t fit the cutout or plate properly can block movement and compromise safety. Verify your router dimensions and adjust the template or plate if necessary before securing it.
- Over-tightening Screws: Screws that are too tight can crack plywood or warp the table surface. Counter-sink screws where necessary and tighten gradually, checking alignment as you go to maintain a smooth, flat surface.
By paying attention to these common pitfalls and carefully assembling each component, your router table will remain stable, precise, and safe for years of reliable woodworking.
Frequently Asked Questions
What type of router is best for these plans?
Most standard routers will work, but always check the dimensions carefully. Some may need custom mounting plates or slight adjustments to fit securely. Test-fit your router before permanent installation to ensure it operates smoothly, safely, and doesn’t obstruct movement or the table fence during cutting tasks.
How can I improve accuracy for repeated cuts?
Use a T-track fence with adjustable stops and make sure the tabletop is perfectly flat. Level the table using adjustable feet. This setup allows consistent placement of workpieces, ensuring precise, repeatable cuts without measuring each piece repeatedly, saving time and reducing errors in your woodworking projects.
Can I add storage or drawers to this router table?
Yes, you can install shelves or drawers under the table to organize router bits, clamps, and tools. Ensure the supports are strong enough to maintain stability. Position drawers so they don’t interfere with the fence, T-tracks, or router, keeping the workspace safe and accessible while maximizing efficiency.
How do I prevent the table from rocking during use?
Adjust each foot individually to level the table on uneven floors, and test by pressing on all corners. If needed, add shims under the legs. A stable table minimizes vibration, enhances cut precision, and ensures safety while feeding wood through the router, particularly for larger or heavier pieces.
Is it possible to make this router table portable?
Yes, add lockable casters to the table legs. Ensure the frame is sturdy enough to handle movement without shifting. Lock the casters during operation to maintain stability. This setup allows easy relocation within your workshop while keeping the table secure and safe during routing tasks.
Wrapping Up
Using these router table plans, you can build a fully customized table that saves money, enhances safety, and fits perfectly into your workshop. A strong frame, braces, adjustable feet, and a carefully installed fence ensure stability, precision, and durability.
Add T-tracks, dust collection, or storage to suit your workflow, and test each component for smooth operation. Following these steps prevents common mistakes and ensures years of reliable service.
A DIY router table not only improves your woodworking efficiency but also builds confidence in your skills. Share your experience or questions in the comments to connect with other woodworkers and get feedback on custom setups.


