


If you want to add a touch of rustic style to your home, a shiplap half wall is a great choice.
If you’re updating your bathroom, kitchen, or living room, installing a shiplap half wall can bring warmth and character to any space. It’s also a clever way to add visual interest while choosing the right colors to maximize a small space.
I’ll guide you through the step-by-step process of installing a shiplap half wall. You’ll get all the helpful tips you need to make sure your DIY project goes smoothly.
From gathering materials to the final touches, I’ll cover everything. By the end, you’ll feel ready to take on this project with confidence.
Shiplap Half-Wall Basics You Should Know
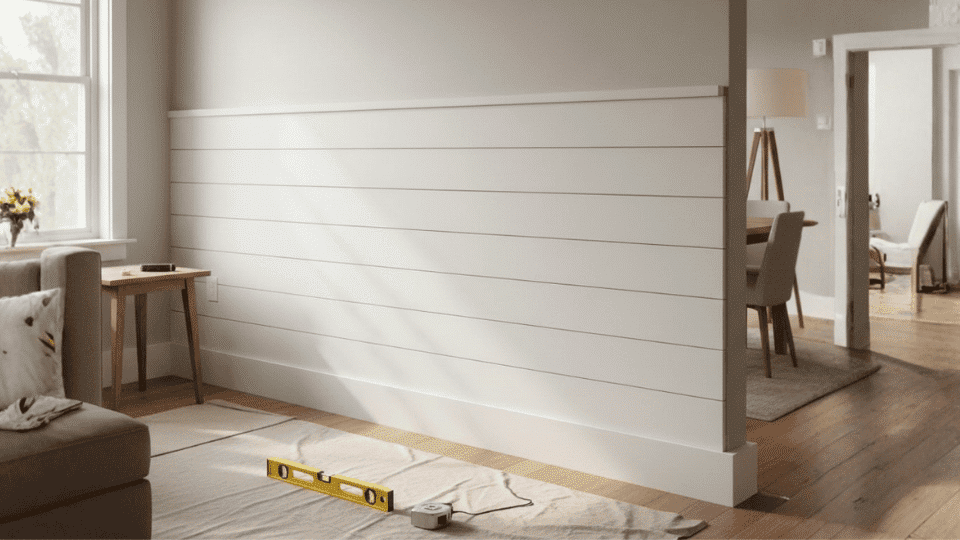
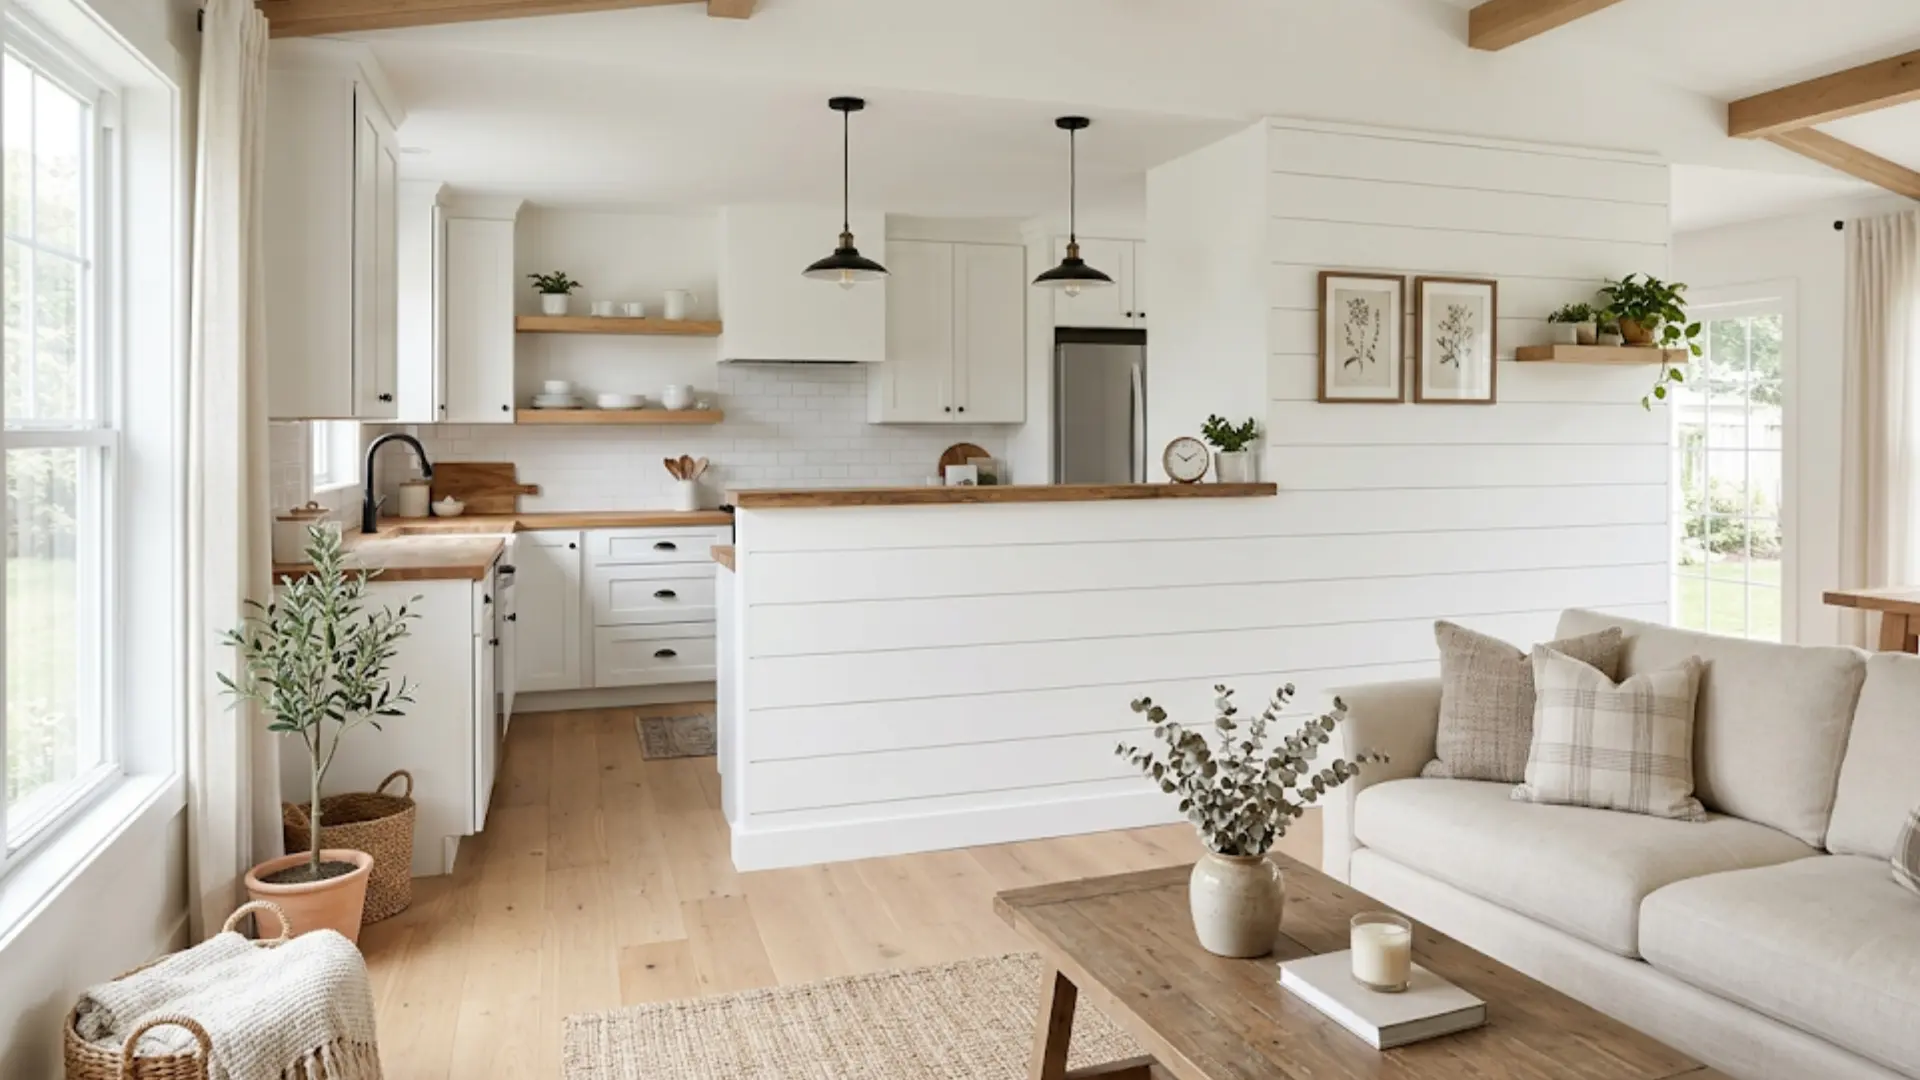
A shiplap half wall is a stylish design feature that covers the lower portion of a wall with shiplap boards, leaving the upper part exposed.
It’s a popular choice for adding texture and character to rooms like kitchens, bathrooms, or entryways. This design is a staple in rustic cabin-inspired bathroom designs while maintaining a clean, modern feel.
Shiplap half walls can also serve as functional dividers in larger spaces, offering both aesthetic appeal and structure. They are easy to install, making them a great DIY project for those looking to refresh a room’s style quickly.
Step-by-Step Guide to Installing a Shiplap Half Wall
Now that you know what a shiplap half wall is, let’s dig into the installation process. I’ll walk you through each step so you don’t feel stuck at any point. You can follow along and build your shiplap wall with more confidence and fewer mistakes
Gather Your Materials
Getting everything ready before you start saves time and keeps your work smooth from beginning to end.
- Shiplap boards (usually 6-inch wide)
- Nails or screws
- Level
- Saw or miter saw
- Measuring tape
- Pencil
- Caulk
- Trim for edges
- Safety goggles and ear protection
Having tools within reach helps you stay focused and avoid stopping halfway through the installation process. Taking a few minutes to check your materials also reduces mistakes and makes the whole setup easier and safer.
Step 1: Measure and Mark the Wall
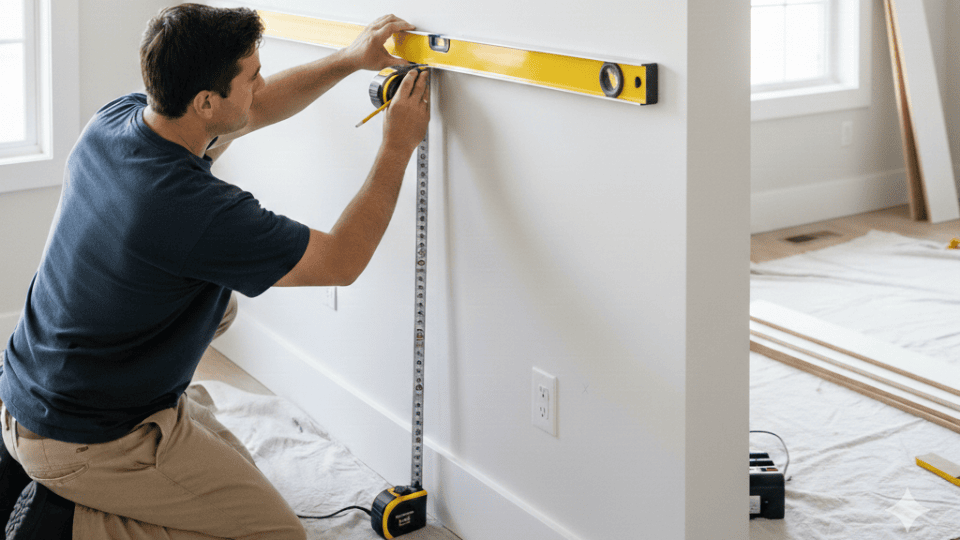
Start by measuring the height of your half wall. Typically, this is between 36 and 42 inches from the floor, but adjust based on your room’s design.
Use a pencil to mark the height all around the room, then use a level to ensure the lines are even. Next, mark the studs along the wall using your stud finder to help you attach the shiplap securely.
Step 2: Cut the Shiplap to Size

Cut the shiplap boards to the required lengths using a saw. If you’re cutting across the grain, a miter saw will give you the cleanest cuts. Double-check your measurements before cutting to ensure each board fits perfectly.
For corners or tricky areas, like around light switches or outlets, use a jigsaw to make the necessary cuts. Always measure twice and cut once!
Step 3: Install the First Board
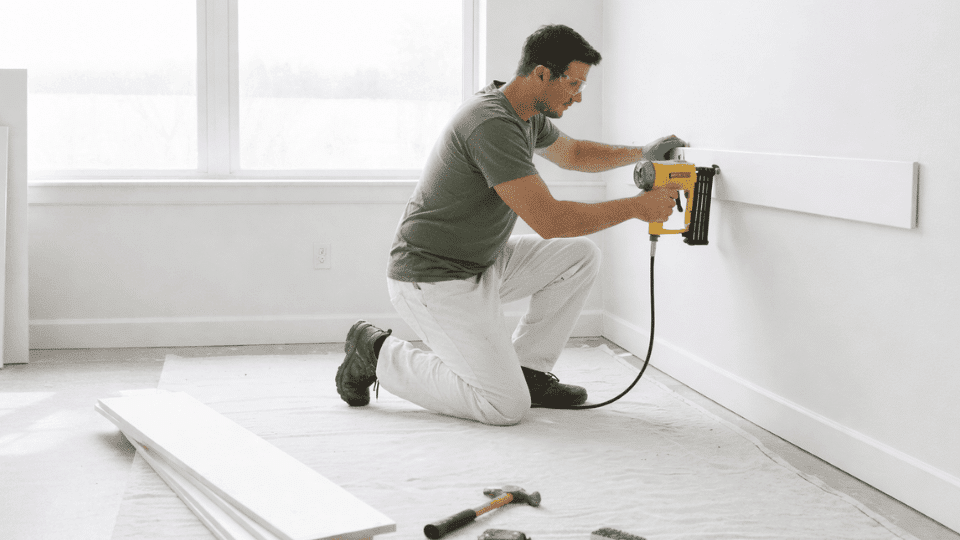
Once you have your first board ready, position it at the bottom of your marked line and check for level. It’s crucial to make sure the first board is level since this will affect the alignment of all the following boards.
Nail or screw it into place, securing it along the studs. Use a pneumatic nail gun or a hammer and nails to fasten it firmly to the wall.
Step 4: Continue Installing the Boards
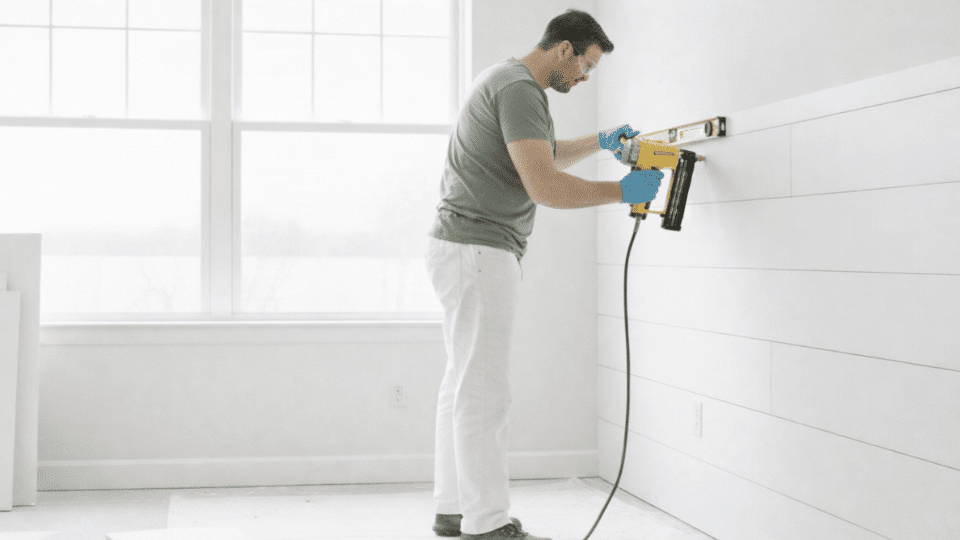
Start installing the next shiplap board, ensuring it fits snugly against the previous one. As you go, keep checking each board with a level to ensure the shiplap stays straight.
You can either nail the boards into place through the tongue or use nails to fasten them from the side, depending on the type of shiplap you’re using. Keep the boards aligned with your marked line.
Step 5: Finish with Trim and Caulk
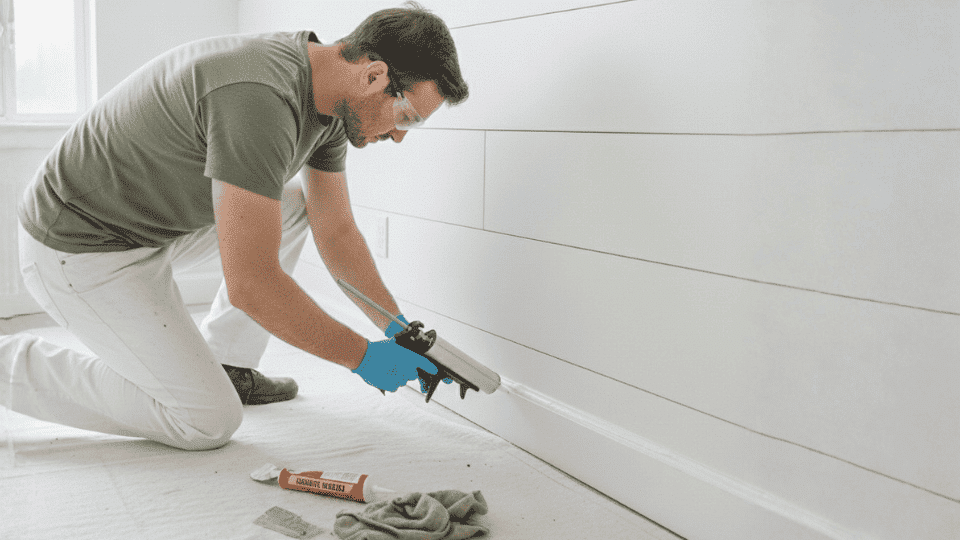
Once all the shiplap boards are in place, it’s time to finish the edges. Add trim or baseboards around the half wall to cover any rough edges. Use caulk to fill any visible gaps between the boards and along the trim.
This will give your shiplap half-wall a clean, polished look. Finally, paint or stain the shiplap if desired, to match your home’s décor and give it that perfect finishing touch.
How to Prep Your Wall Before Installing Shiplap
From my experience, prep is where most people go wrong. If you take a few minutes to check your wall properly, you’ll avoid problems later and get a cleaner final result.
- Uneven or damaged drywall: Shiplap doesn’t hide major bumps or holes — it follows the contour of the wall beneath it. Patch and sand any significant imperfections first.
- Existing baseboards: You’ll need to decide whether to remove them or work around them. Removing baseboards gives a cleaner result; working around them requires precise cuts at the bottom row.
- Outlets and switches: Turn off the circuit before working near them. You may also need to add outlet extenders once the shiplap adds thickness to the wall. Standard outlet extenders (about $2 each at any hardware store) handle this easily.
- Moisture or mold: If you’re installing in a bathroom or kitchen, inspect for any moisture damage behind the drywall first. Installing shiplap over a wet wall traps the problem
Types of Shiplap: Which One Should You Use?
I’ve tried different types over time, and you’ll notice each one works better in certain spaces. This will help you pick the right option based on your needs and budget.
| Type | Best For | Avg. Cost (per sq ft) | Notes |
|---|---|---|---|
| Real pine shiplap | Authentic farmhouse look | $1.50–$3.00 | May need priming; can warp in humid rooms |
| MDF shiplap boards | Painted finishes, dry rooms | $0.80–$1.50 | Budget-friendly; not suitable for bathrooms |
| Primed pine boards (DIY shiplap) | Custom sizing, tight budgets | $1.00–$2.00 | Rip 1×6 or 1×8 boards yourself for the gap effect |
| PVC/composite shiplap | Bathrooms, laundry rooms | $2.00–$4.00 | Moisture-resistant; more expensive |
I used primed pine boards for my living room project; they’re easy to paint and hold up well. For my friend’s bathroom remodel, I recommended PVC shiplap instead, and it was the right call. Moisture warped a couple of her pine test pieces within a few weeks
Benefits of Installing a Shiplap Half Wall
I like this upgrade because it adds both style and function without much effort. You’ll see how it improves your space while staying easy to maintain and use daily.
- Adds Rustic Charm and Character: Shiplap brings a rustic, timeless charm to any room, adding texture and depth while complementing a range of interior styles, from modern to farmhouse.
- Affordable and Easy Update: Shiplap is a cost-effective, DIY-friendly option that requires minimal tools, offers great value, and transforms your space quickly without breaking your budget.
- Acts as a Functional Divider: A shiplap half wall provides privacy while maintaining an open feel, helping to define spaces in open-concept areas without closing them off entirely.
- Customizable Finishes: Shiplap is highly customizable, allowing you to paint or stain it to match your decor, offering endless style options to suit your home.
- Low Maintenance and Durability: Shiplap is easy to maintain, durable, and resistant to wear, making it an ideal choice for high-traffic areas like kitchens and bathrooms.
In conclusion, a shiplap half wall offers a stylish, affordable, and low-maintenance upgrade, making it a great addition to any room in your home.
Common Mistakes to Avoid
I’ve seen small mistakes ruin the final look, even after good effort. If you watch out for these, you’ll save time, avoid rework, and get a much better finish.
- Improper Measuring: Not measuring properly can lead to uneven boards or gaps between them, ruining the final look.
- Excessive Adhesive: Overloading with too much adhesive can cause boards to shift or leave unsightly marks on the wall.
- Skipping Preparation Steps: Skipping steps like marking studs or leveling the first board can lead to crooked walls and difficulty with installation.
- Not acclimating to the wood: Wood expands and contracts with temperature and humidity. Let your boards sit in the room where they’ll be installed for 24–48 hours before cutting and nailing. Skipping this step, especially in humid climates, can cause boards to buckle or gap after installation.
- Forgetting outlet extenders: Shiplap adds 3/4 inch or more of thickness to your wall. If existing outlets are flush with the original wall, they’ll now be recessed. Outlet box extenders are cheap and easy to install; forgetting them is a code issue and a safety hazard.
- Using the wrong caulk: Use paintable, flexible latex caulk — not silicone. Silicone can’t be painted and doesn’t grip painted surfaces well.
To avoid these mistakes, take your time, double-check measurements, and follow each step carefully. Proper preparation ensures a smooth and successful installation.
Final Thoughts
Now that you have a full guide to installing a shiplap half wall, you should be ready to take on your own project.
With the right materials and a little patience, you can transform your space in no time. Remember, it’s all about measuring twice and cutting once, so take your time and enjoy the process!
Whether you’re adding shiplap to your living room or creating a stylish accent in your kitchen, this project will give your home a charming, timeless look.
If you have any questions or need help along the way, feel free to reach out. I’m here to help! Ready to get started? Grab your tools and make your shiplap dream wall a reality today!
Frequently Asked Questions
Do I need to remove baseboards before installing shiplap?
Not necessarily, but removing them gives the cleanest result. If you leave them in place, you’ll need to scribe or notch your bottom board to fit around them. Most DIYers find it easier to pop the baseboards off, install the shiplap, then reinstall the baseboards at the bottom.
Can shiplap go directly over drywall?
Yes. You don’t need to remove drywall; shiplap installs directly over it, nailed into the studs behind. Just make sure your drywall is in good condition with no major moisture damage.
What’s the right gap between shiplap boards?
Typically 1/16 to 1/8 inch. A nickel is a common spacer; it’s just the right thickness to create that signature shadow gap. Some people prefer a tighter fit (using a penny) for a more modern look.
Should I paint shiplap before or after installing it?
Both approaches work. Painting before installation makes it easier to get clean coverage on the edges and the back. But if you’re painting after, you have better control over consistency across the whole wall. I personally paint after installation, one coat of primer, two coats of finish paint, and caulk the gaps last.


