


The first time I limewashed brick, I mixed the batch too thick and skipped wetting the surface. By the time I’d covered four bricks, the leading edge had already dried to a chalky crust and nothing blended. I scraped it back and started over.
That 20-minute mistake taught me more about how to limewash brick than any tutorial I’d watched, and it’s the thing I’ll make sure you don’t repeat before you touch a brush to your own wall.
This article shows you before and after limewash brick results across 14 different surface types, from fireplaces and exterior walls to garden walls and kitchen feature walls.
It covers cost, color options, what goes wrong, and the exact steps I use now. If you’re trying to decide whether limewashing is right for your project, or just trying to do it without wasting a gallon of material, this is where to start.
| Cost Note: Figures in this article are estimates based on national averages. Actual costs vary significantly by region, contractor, materials, and project scope. Always get at least three quotes before committing to any project above $1,000. |
| Difficulty | 2 out of 5 – manageable for a first-timer with proper prep |
| Time | Half day to full weekend depending on surface area |
| DIY Material Cost | $50-$100 per gallon (covers 150-200 sq ft per coat) |
| Tools Needed | Wide masonry brush, spray bottle, bucket, drop cloths, gloves, safety glasses |
| Skill Required | Beginner – but surface prep is non-negotiable |
What Limewash Actually Is (and Why It Behaves Differently from Paint)
Limewash is made from slaked lime, water, and alkali-resistant pigment. Unlike latex paint, which dries as a film on top of the surface, limewash absorbs into the pores of brick and stone.
That absorption is what gives it the soft, matte, layered finish you see in before and after limewash brick photos. It’s also why the process requires a damp surface: dry brick pulls the mixture in too fast, before you can work it.
Because it absorbs rather than coats, limewash allows the brick to keep breathing. Moisture can still move through the wall, which matters for older structures and for preventing the kind of trapped-moisture damage that can cause latex paint to peel from the inside out.
| Pro Tip: Quality limewash products like Romabio Classico Limewash are rated to last 15-25 years on exterior brick. Budget hydrated lime mixed 50/50 with water (available at Home Depot for under $20) works but fades closer to 5-10 years depending on sun and rain exposure. Test both options on a small section first – the colour reads differently on each brick type. |
The Most Common Failure Point: Skipping the Wet-Down
Before any steps, understand what goes wrong most often. Dry brick absorbs limewash so fast that by the time you load your brush for the next stroke, the first stroke has already set.
You end up with visible lap marks and splotchy coverage that’s extremely hard to fix without stripping back.
The fix is simple: mist the brick with a spray bottle until the surface is damp but not dripping. Work in sections no wider than two bricks at a time.
Keep the spray bottle in your non-dominant hand the whole time. That one habit change is the difference between a smooth first coat and a salvage job.
Before and After Limewash Brick: 14 Surface Types
The examples below span interior and exterior applications, each with a note on what to expect and what to watch for.
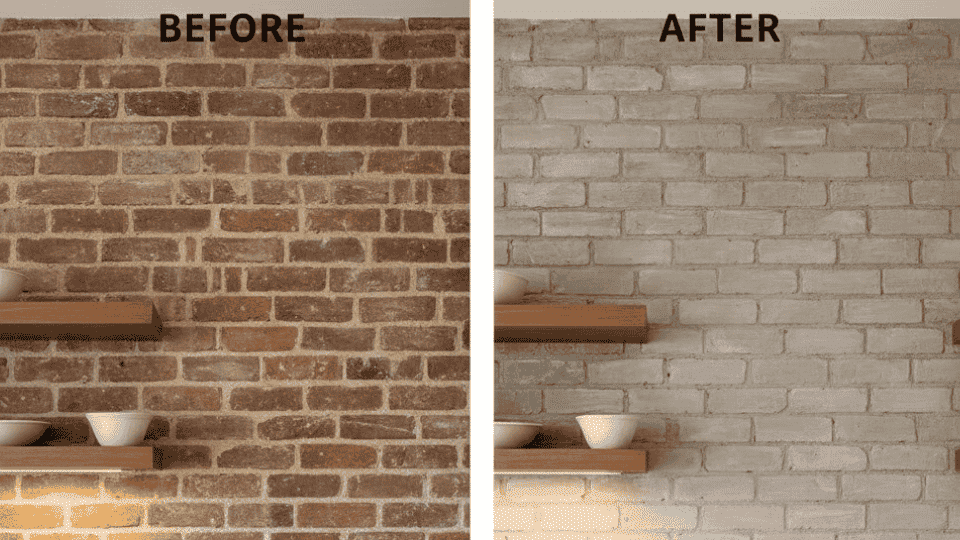
1. Limewash Brick Fireplace (Classic Dark-to-Light)
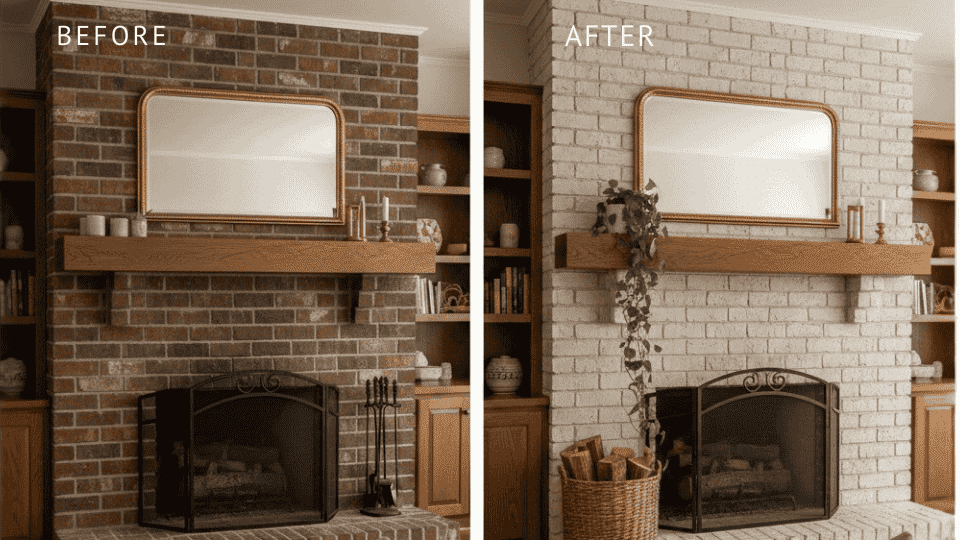
A dark, dated brick fireplace shifts into a lighter focal point that stops competing with the rest of the room. The limewash softens the visual weight without removing the texture that makes a brick fireplace worth keeping.
This is one of the most common applications for good reason: fireplaces are a contained surface area, easy to test on, and low-risk if you change your mind.
Wetting the brick before you start is especially important here because fireplace brick is often highly porous from years of heat cycling. Work small – two bricks at a time – and blend while the surface is still damp.
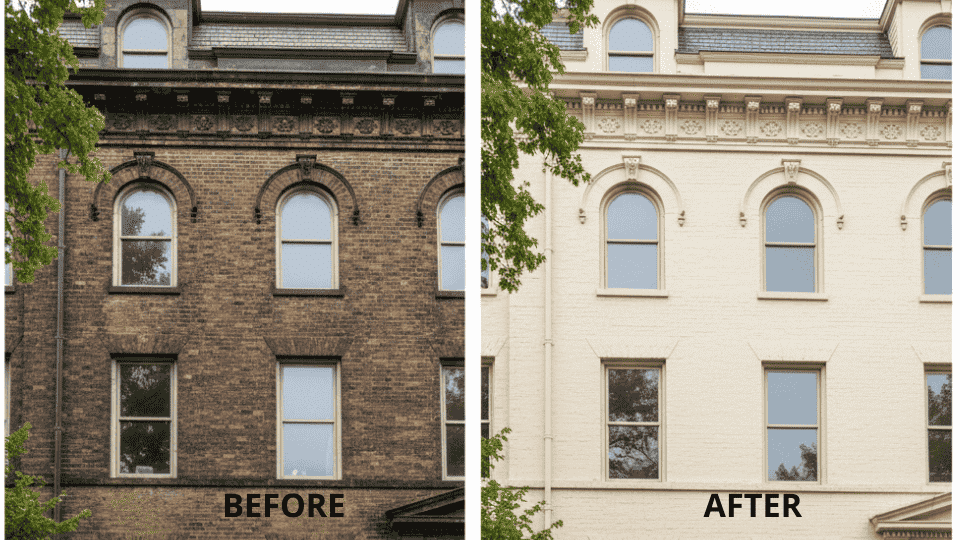
2. Exterior Brick Walls
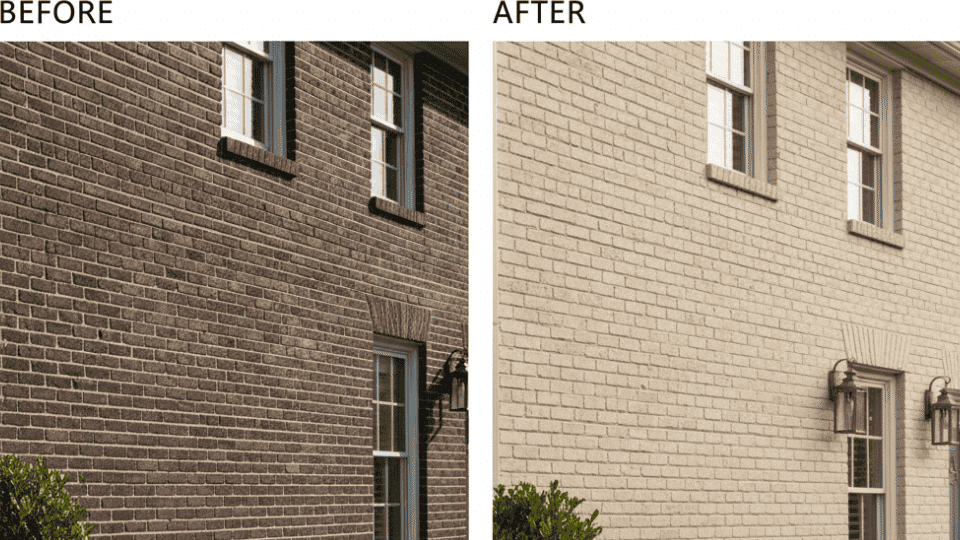
Strong red or brown tones soften into muted, earthy shades that feel more cohesive. Limewash tones down contrast rather than covering it, which is why exterior results read more natural than a painted finish.
Exterior walls will fade gradually over time, faster in areas with heavy rain or south-facing sun exposure.
This is part of the character of the finish, not a defect. If you want a uniform result that stays static, exterior limewash isn’t the right product. If you want something that weathers honestly and improves with age, it is.
3. Brick Patios and Outdoor Spaces
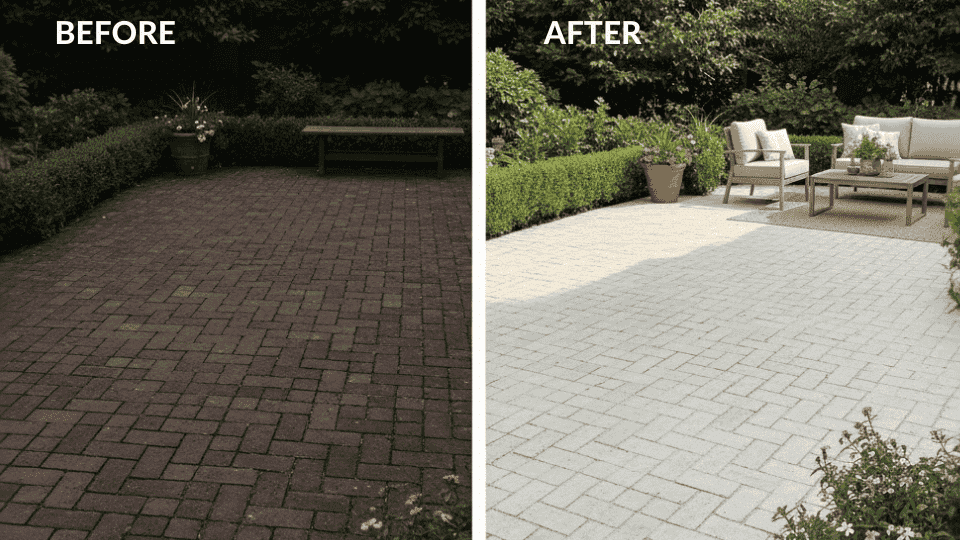
A worn, dark patio becomes lighter and visually cleaner, and planters and outdoor furniture read better against a softer background.
Limewash is not a sealant. On horizontal patio surfaces that see foot traffic, it will wear faster than on walls – especially along the main walking path. Plan for touch-ups every two or three years in high-traffic zones.
For low-to-moderate traffic patios where the look matters more than the durability, it holds up well.
4. Limewash on a Modern Living Room Fireplace
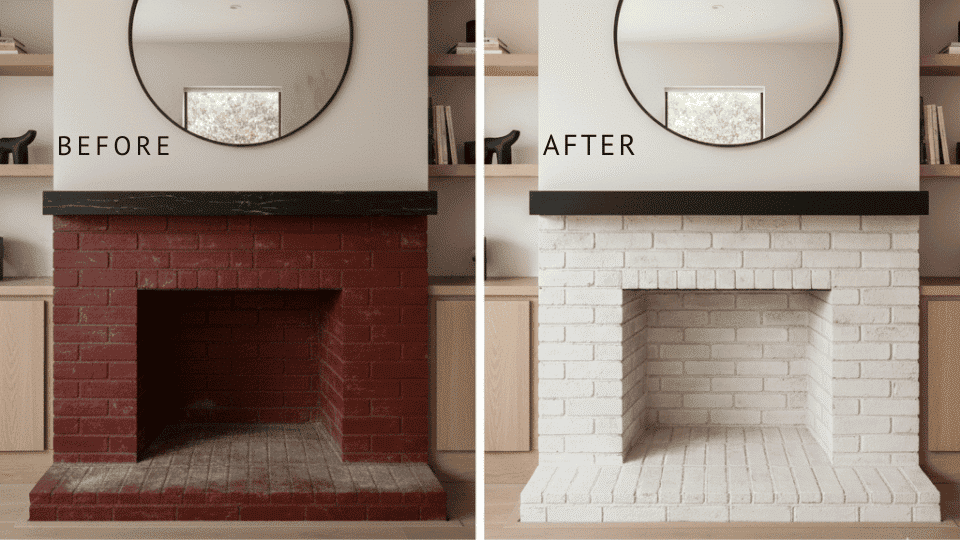
Deep brick tones shift into a soft whitewashed finish that sits with modern furniture rather than fighting it. The fireplace stops dominating and becomes a backdrop.
The level of opacity matters here. A heavier limewash coat produces a more modern, uniform surface. A lighter single coat leaves more original brick showing through, which reads more rustic. If you’re designing around a modern aesthetic, two coats applied with a brush and partially wiped back while wet gives you control over exactly where the coverage lands.
5. Exterior Brick Columns
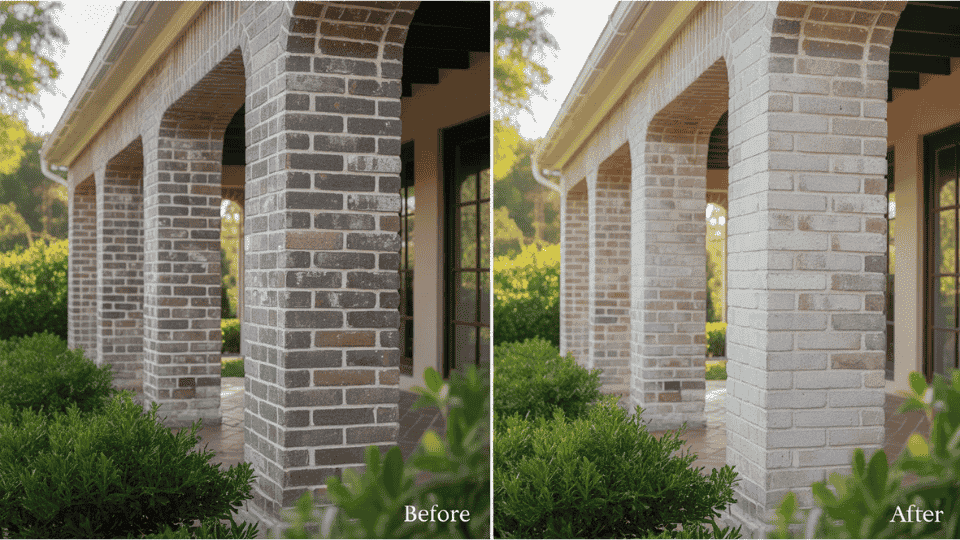
Dark columns shift into softer neutral tones that feel more proportional to the surrounding structure. Limewash highlights shape and form rather than drawing attention to colour inconsistencies in the brick.
Columns are exposed to weather on multiple sides, so fading happens unevenly. The windward face and the top face will fade faster. After two or three years you may notice variation across the column faces.
This usually adds character, but go in knowing it won’t stay uniform.
6. Full House Exterior Limewash
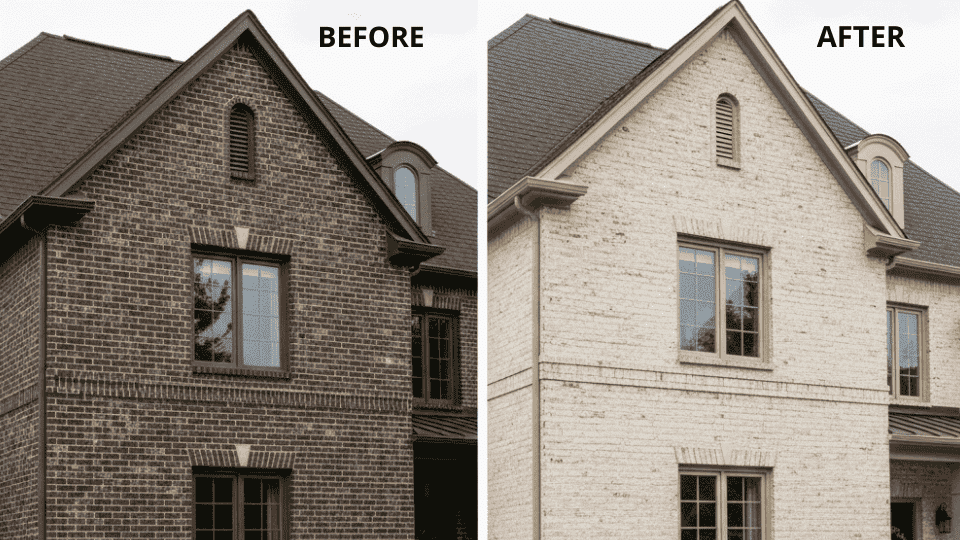
A dark brick home becomes lighter, softer, and more visually unified. The house reads as bigger and more open without changing structure.
This is the most significant commitment on this list. Limewash can be removed, but not easily – it takes pressure washing and in some cases chemical stripping.
Test a 2-foot-square section on a less visible wall, let it cure for 72 hours, and assess the colour in morning and afternoon light before committing the whole exterior. If the test section convinces you, it’s one of the more dramatic and cost-effective home exterior changes you can make.
7. Garden Wall
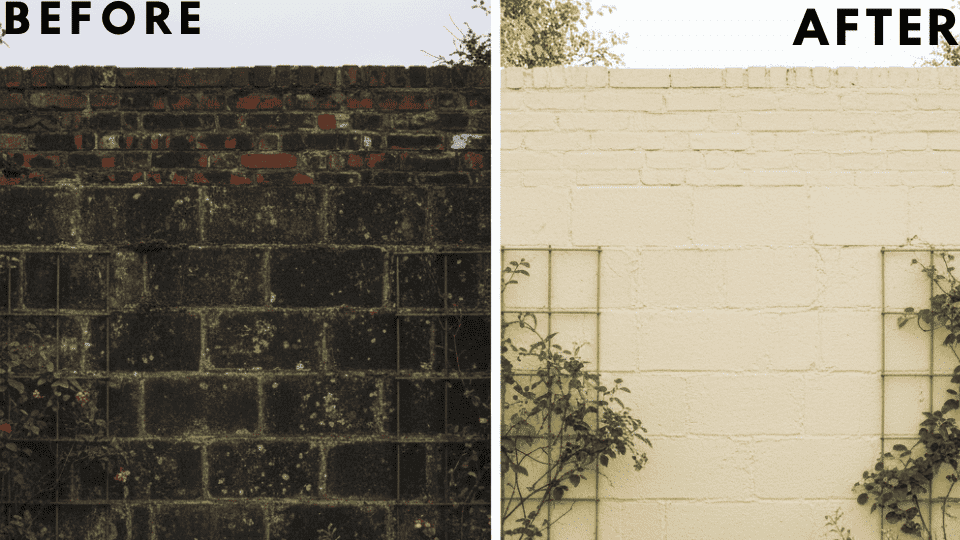
A faded wall becomes warmer and more visually integrated with surrounding greenery. Plants and garden beds read better against a lighter, softer background than against raw weathered brick.
Limewash is non-toxic and won’t harm plants – it’s derived from limestone and returns to soil naturally. That said, if you’re applying near a garden bed, lay drop cloths over the soil to avoid heavy concentrations of the wet mixture reaching the root zone during application.
Moisture exposure over time will create natural variations in the finish. This is usually desirable on a garden wall.
8. Kitchen Feature Wall
Dark brick becomes a soft neutral that reflects more light and reduces visual weight – especially useful in smaller kitchens where a brick accent wall can easily feel oppressive.
In kitchens, cooking grease and steam can affect the finish over time. An optional vapour-permeable matte sealer will help maintain the look without trapping moisture inside the brick. Use one specifically rated for lime-based finishes – standard acrylic sealers can cause adhesion problems.
9. Historical Brick Building
Uneven, aged brick becomes more balanced while still showing its history. Limewash has been used on masonry structures for centuries, and it’s compatible with older brick in a way that modern latex paint is not.
Older brick is typically softer and more porous – it needs a finish that allows moisture movement, not one that seals it in.
10. Modern Office Brick Wall
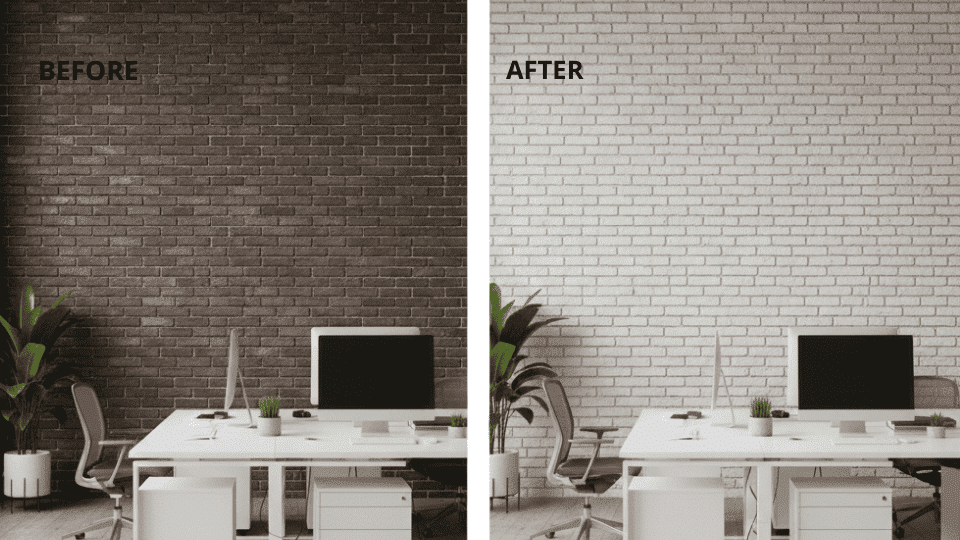
Dark brick shifts into a soft, even-toned surface that functions as a neutral backdrop rather than a design statement. Lighter walls improve ambient lighting conditions and reduce visual fatigue in workspaces. This works equally well in home offices and commercial settings.
11. Fire Pit Area
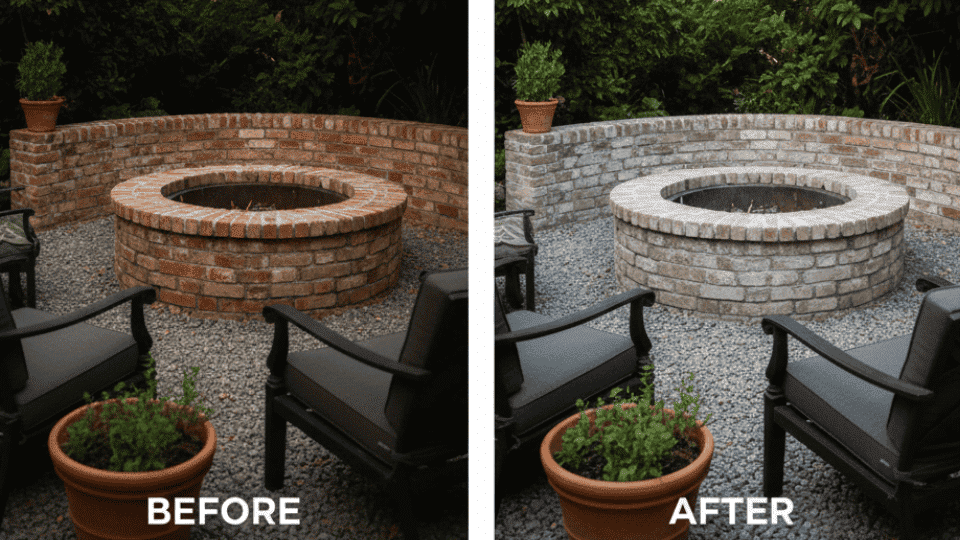
Bright brick tones shift into calmer, muted shades that make the fire pit area feel more intentional and less visually loud. Heat exposure near the fire source will slightly affect the finish over time – this adds patina rather than damage, but expect some variation around the opening.
12. Brick Archway

Dark tones shift into lighter neutrals that draw attention to the shape of the arch rather than the colour of the brick. Lighter finishes are better at emphasising architectural form – the arch reads more clearly when the brick isn’t competing for attention.
13. Bedroom Feature Wall
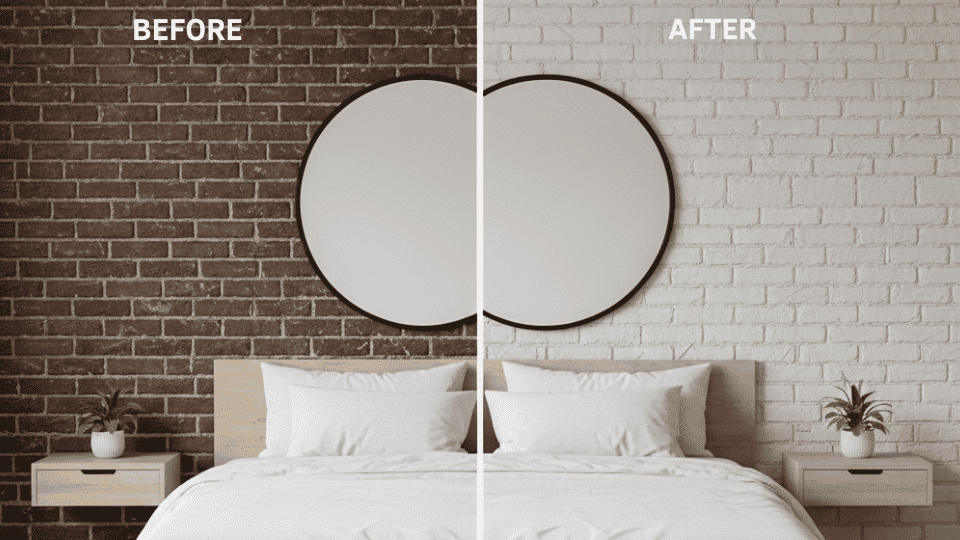
Dark brick becomes a softer, muted tone that reduces contrast and visual intensity. Low-contrast surfaces promote a sense of calm, which is why bedrooms in particular benefit from limewash over full paint coverage.
The texture is still there, but it no longer dominates. For a modern organic interior where brick is part of the material palette, this is the right finish level.
14. Exterior Brick Steps
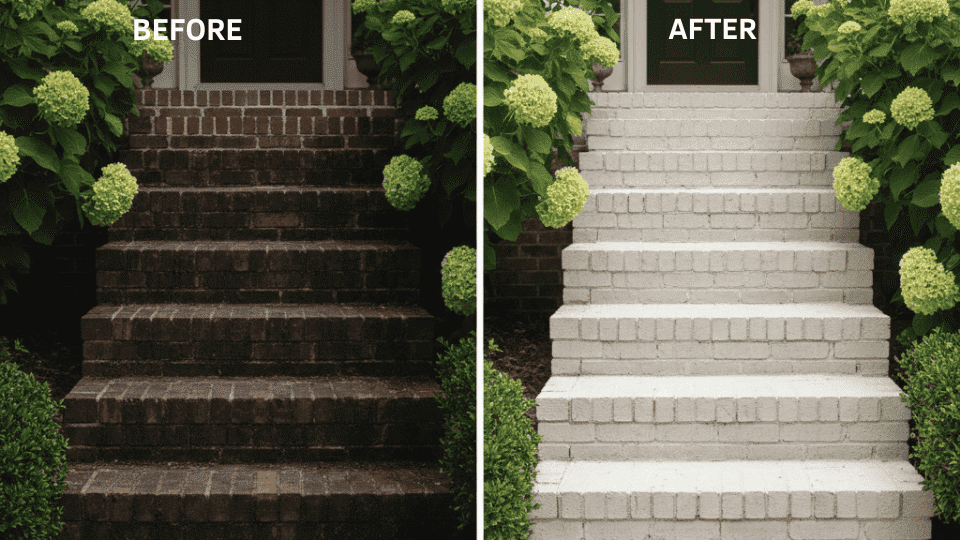
Dark steps become lighter and more uniform, making the entrance feel cleaner and more considered. Steps take more wear than any other surface on this list.
Expect faster fading on the tread edges and the front lip of each step. Regular touch-ups in those zones will be needed within 18-24 months if the steps see daily traffic.
Limewash Color Options: It’s Not Just White
Most people picture off-white when they think of limewash brick before and after photos, but the actual colour range is broader. Alkali-resistant pigments can be mixed into the lime base before application:
- Warm putty and taupe: Very popular for Tudor and Colonial styles, looks naturally aged from day one
- Grey and charcoal: Works particularly well on dark brick with strong mortar lines, and is the finish most often used in modern and industrial interiors
- Terracotta and clay: Enhances brick that already has warm undertones without fighting them
- Soft black: Increasingly requested for modern farmhouse and industrial-adjacent applications
The dry colour will almost always be 20-30% lighter than the wet colour in the bucket. Test your mixed batch on a small section of brick, let it cure for 72 hours in natural light, and assess before committing to the full surface.
How to Limewash Brick: Step by Step
For a detailed visual walkthrough, the video above from Your Home, Renewed shows the process well. Here’s how I approach it.
Step 1: Surface Prep
Clean the brick thoroughly – remove dirt, dust, and any loose material with a stiff brush or low-pressure hose. If there’s old paint or sealant, it needs to come off: limewash will not absorb through a sealed surface and will peel. Let the surface dry completely before you begin mixing, but plan to re-wet it section by section as you work.
Step 2: Mix and Test
Mix limewash to a creamy consistency – roughly the texture of whole milk. If you’re using Romabio Classico, it comes pre-mixed and needs only a brief stir. If you’re using bagged hydrated lime, mix it 50/50 with water and stir thoroughly. Apply a test patch about two bricks wide. Let it cure 72 hours before evaluating colour and coverage. Adjust the dilution ratio if needed before going further.
Step 3: Application
Mist the brick section you’re about to work on. Apply limewash with a wide masonry brush using irregular, overlapping strokes – avoid going back and forth in the same direction or you’ll get brush tracks. While the surface is still damp, use a dry section of the brush or a damp rag to blend edges and soften coverage where you want more brick to show through. Keep a spray bottle in your off hand. Work section by section rather than trying to cover a large area at once.
Step 4: Second Coat (If Needed)
One coat gives a lighter, more distressed look with significant brick still visible. Two coats give fuller, more opaque coverage with a more modern result. Wait for the first coat to cure fully – 24 hours minimum – before applying the second. The second coat goes on faster because the surface has already been primed by the first.
Step 5: Aftercare
Clean limewashed surfaces with a damp cloth only. Avoid acidic or solvent-based cleaners – they will strip the finish. On exterior surfaces, you may see slight variation develop over the first season as the lime continues to carbonate and harden. This is normal. Touch-ups are straightforward: clean the area, re-wet the brick, and apply a thin new coat. It blends in.
Limewash vs. Whitewash vs. German Smear: What’s Actually Different
| Method | Material | Penetration | Reversibility | Best For |
| Limewash | Slaked lime + water | Absorbs into brick | High (pressure wash while fresh; chemical strip once cured) | Natural aged look; breathable surfaces; longer lifespan |
| Whitewash | Diluted latex paint or lime + water | Partial – sits closer to surface | Moderate | Budget-friendly lightening; faster coverage on smaller areas |
| German Smear | Mortar | Surface coating only | Very low – essentially permanent | Heavy textured coverage; older European aesthetic |
Whitewash doesn’t penetrate as deeply as limewash, which makes it less durable and more prone to flaking over time. German Smear uses actual mortar and is extremely difficult to remove – if you apply it and change your mind, you’re looking at mechanical removal. If you want the look but need flexibility, limewash is the right choice.
Cost of Limewashing Brick
| Line Item | Low End | High End | What Drives the Variation |
| Limewash product (DIY) | $18 (bagged hydrated lime) | $100 (Romabio Classico, 1 gallon) | Product quality; branded vs. raw material |
| Coverage per gallon | 150 sq ft (rough, porous brick) | 200 sq ft (smooth, less porous brick) | Brick age, texture, porosity |
| Tools and prep supplies | $20 | $50 | Whether you already own brushes, drop cloths |
| Professional labour | $500 | $2,000+ | Surface area, detail work, region |
One gallon of Romabio Classico Limewash covers 150-200 sq ft in a single coat. A standard exterior fireplace wall running about 50 sq ft typically needs half a gallon for one coat. Budget for two coats on any surface where you want fuller coverage. Highly porous or older brick will absorb more product and sit at the lower end of the coverage estimate.
Common Mistakes That Ruin the Finish
I’ve made most of these. They’re avoidable if you know to look for them.
- Not wetting the brick before applying: The single most common problem. Dry brick absorbs the mix instantly, creating splotchy coverage you can’t blend out. Always mist the section first.
- Working in large sections: The larger the section, the more likely you are to have a dry leading edge before you can blend it. Keep sections to two bricks wide until you know how fast your brick absorbs.
- Applying in direct sun or high heat: Limewash dries in minutes in hot sun. Work on shaded sections or choose an overcast day. Temperature below 50°F is also a problem – cold slows curing and can affect adhesion.
- Using a latex paint limewash product on unsealed brick: Some products marketed as “limewash” are actually diluted latex. They behave differently and won’t absorb the same way. Check the ingredient list: it should say slaked lime or calcium hydroxide, not acrylic.
- Skipping a test patch: The colour shifts significantly as it dries, and it cures further over 72 hours. What looks right in the bucket won’t necessarily look right on the wall.
- Applying over painted brick: Limewash needs to penetrate bare masonry. If there’s existing paint or sealant, it has nowhere to go and will eventually peel. Strip the surface first.
Questions I Get About Limewash Brick
These are the questions that come up most often from people who’ve already got their materials and are standing in front of the wall.
Can you limewash over painted brick?
No. Limewash needs to absorb into bare brick. Apply it over a painted surface and it will sit on top of the paint film, dry as a skin, and eventually peel. Strip any existing paint or sealant first – this is the part most people skip that causes problems six months later.
How long does limewash last on exterior brick?
Quality products like Romabio Classico are rated for 15-25 years. Budget hydrated lime options last closer to 5-10 years depending on weather exposure, orientation, and how well the surface was prepared. South-facing and west-facing walls fade faster. North-facing walls hold colour longer.
Does limewash wash off in the rain?
It stays water-sensitive for 24-48 hours after application. Do not apply if rain is expected within two days. Once the limewash has fully cured, it weathers naturally without peeling – unlike paint, which can lift when moisture gets underneath the film.
What is the difference between limewash and whitewash brick?
Limewash absorbs into the masonry and creates a finish that lasts significantly longer. Whitewash sits closer to the surface, costs less upfront, and tends to flake sooner. If you’re treating a surface that will be exposed to the elements, limewash is the better investment.
Do I need to seal limewash after applying it?
Usually no. In kitchens or bathrooms where grease and steam are regular, a vapour-permeable matte sealer can help maintain the finish – but use one specifically compatible with lime-based products. Standard acrylic sealers can cause adhesion failures. For exterior and dry interior surfaces, sealing is not necessary and can interfere with the breathability that makes limewash effective.
Can you limewash red brick?
Yes, and it works well. A diluted mix softens the red without covering it fully. A denser two-coat application produces more opaque coverage. Red brick with strong orange undertones will still show some warmth through a single coat – test the mix at your target dilution on a small section before committing.
Is limewashing brick reversible?
Partially. Fresh limewash wipes back easily with water while still wet. Once cured, removal requires pressure washing or chemical stripping – neither is a small job on an entire exterior. Treat it as semi-permanent and test thoroughly before applying to a full surface.
How many coats of limewash do I need?
One coat gives a lighter, more distressed result with the original brick showing through significantly. Two coats give fuller coverage with a more uniform look. I’d recommend starting with one coat, letting it cure, and assessing whether you want more coverage before mixing a second batch.
Final Verdict: Is Limewashing Brick the Right Project for You?
If you’ve got dark or dated brick and you’re not ready to paint it permanently, limewashing is the most reversible and forgiving update you can make. The before and after limewash brick results in this article are achievable by a first-timer on a weekend – the step-by-step isn’t complicated. What gets people in trouble isn’t the technique; it’s skipping the wet-down or working too large a section at once. Fix those two things before you start, and the result will hold for years. Order a test sample of your chosen product, mist a two-foot section of your brick, apply a single coat, and see how it cures. That one test will tell you more than any photo.
Cost estimates based on manufacturer spec sheets and national averages as of 2026. Coverage rates may vary depending on brick porosity and surface condition. Verify current pricing with local suppliers before budgeting.


