


I realized that a Japanese-style living room was the ideal choice when I wanted my home to feel peaceful and welcoming. Maybe you’re looking for the same clean lines, natural materials, and an open layout that feels both peaceful and practical. Many of us want a living room that’s beautiful yet easy to live in every day, and this style delivers exactly that. I’ll walk you through the key design principles to follow and plenty of ideas to inspire you. You’ll also get simple tips for keeping the space fresh over time. Let’s get started and help you create a simple, comfortable room. What Makes a Living Room Japanese Style? A Japanese-style living room is peaceful, simple, and functional, using natural materials, open space, and a strong connection to nature. It reflects Japan’s cultural values of harmony, balance, and minimal living, where every item has a purpose and the space feels uncluttered. Traditional designs feature tatami mats, sliding shoji screens, low furniture, and minimal decor such as a tokonoma alcove for art or flowers. Modern versions keep the clean lines and simplicity but add comfort upgrades, mixing tatami with wood or laminate floors, using modern lighting and technology, and sometimes blending with other styles like Scandinavian to create Japandi. Core Design Principles The Japanese-style follows three main principles that shape its look and feel. These elements help create a space that is peaceful, practical, and connected to nature: 1. Minimalism & Open Space Furniture and decor are kept to a minimum to avoid clutter. Open areas allow light and air to flow freely, making the room feel larger and more peaceful. This simplicity also makes cleaning and maintaining the space much easier. 2. Harmony with Nature Natural materials like wood, bamboo, and stone are common. Large windows, plants, and soft lighting bring the outdoors inside and create a balanced atmosphere. This connection to nature helps reduce stress and encourages relaxation. 3. Functionality & Multipurpose Layouts Every piece of furniture serves a purpose, often with more than one function. Sliding doors, foldable furniture, and hidden storage make the space adaptable for different needs. This approach ensures the room stays tidy and useful without sacrificing style. Japanese Style Living Room Ideas to Try A Japanese-style living room blends comfort, simplicity, and cultural tradition. These ideas combine classic elements with modern updates to create a peaceful, inviting space: 1. A Low-Profile Sofa for Floor-Centric Seating A low sofa keeps seating close to the ground, which is a key feature of Japanese interiors. Choose a design with clean lines, neutral fabric, and minimal legs so it feels grounded and open. Pair it with a small coffee table to keep proportions balanced. This setup makes the space feel relaxed, airy, and connected to the floor. 2. Shoji Screens for Soft Light and Privacy Shoji screens are wooden frames filled with translucent paper that let in soft, natural light. They can replace curtains or serve as stylish room dividers. The light they filter feels warm and peaceful, and they provide privacy without closing off the space. This keeps the room bright. 3. A Kotatsu Table for Cozy Winter Gatherings A kotatsu table has a low wooden frame, a thick blanket, and a heater underneath. It’s perfect for cold months when you want to sit comfortably on floor cushions. Use it for meals, tea, reading, or simply relaxing with family. It brings warmth and a sense of togetherness to the living room. 4. Neutral, Nature-Inspired Color Palette Soft tones like beige, cream, and muted green create a peaceful backdrop. These colors work well for walls, furniture, and rugs, complementing natural materials like wood and stone. Darker browns or charcoal can be added in small amounts for depth. A neutral palette makes the space feel balanced and restful. 5. Bonsai Trees as a Living Art Element A bonsai tree is a miniature plant shaped to mimic full-size trees in nature. Place one on a low table, shelf, or windowsill where it can get enough light. Different species offer different looks, so choose one that fits your space and care level. A bonsai brings life, beauty, and cultural depth to the room. 6. Bamboo Blinds for Natural Window Coverings Bamboo blinds are light, breathable, and fit seamlessly into a Japanese-inspired design. They filter sunlight softly while adding warmth and texture to the space. Use them on large windows or sliding doors to connect with the outdoors. Their natural look blends easily with wood and other organic materials. 7. A Tokonoma Alcove to Showcase Art or Flowers A tokonoma is a recessed display space often found in traditional Japanese rooms. It is used to highlight a single piece of art, a flower arrangement, or a small sculpture. Keep the display minimal so the focus stays on the chosen item. This small feature adds cultural authenticity and elegance to your living room. 8. Built-In Storage to Hide Clutter Built-in shelves, benches, or wall cabinets help maintain a clean, uncluttered look. Store books, electronics, and other items out of sight to preserve the room’s open feel. Pick finishes that match the floor or wall color so the storage blends in. This keeps the room looking calm and balanced. 9. Layered Floor Cushions for Casual Seating Floor cushions, or zabuton, are versatile seating options that can be stacked when not in use. Keep them in soft, muted colors that match the rest of the room. They’re perfect for guests, casual meals, or tea time around a low table. This seating style adds flexibility without taking up much space. 10. Sliding Doors to Save Space Sliding doors, no matter if it’s traditional shoji or modern glass, move along a track instead of swinging open. They’re ideal for smaller living rooms because they free up floor space. Choose materials that match your room’s overall style for a cohesive look. These doors keep the layout open while offering privacy when needed. 11. Rattan or Wicker Accent Chairs Rattan and wicker chairs add warmth and texture to a Japanese-style living room. Choose designs with a low profile to match the rest of your seating. Neutral cushions keep the look soft and understated. These chairs are lightweight, making them easy to move around for extra seating when needed. 12. Washi Paper Lamps for Warm Light Washi paper lamps create a soft, diffused glow that makes a room feel cozy. They work well as table lamps, floor lamps, or hanging lanterns. The gentle light complements natural materials like wood and bamboo. This style of lighting keeps the mood peaceful and inviting. 13. Low and Horizontal Decor Arrange decorations along low tables, shelves, or platforms to keep the room grounded. Avoid tall arrangements that disrupt the flow of the space. A few carefully chosen items make a stronger impact than a crowded display. This approach maintains the clean, horizontal lines common in Japanese interiors. 14. Indoor Plants for a Fresh, Zen Feel Plants like bamboo, orchids, and ferns bring life into the room without overwhelming it. Place them in simple pots and position them where they can get natural light. A few well-placed plants can freshen the air and soften the room’s look. They help connect your living space to nature. 15. Stone or Pebbled Accents in Corners Small stone arrangements or pebble trays add a grounding element to the room. They can be placed in unused corners, near plants, or along entryways. Natural textures like these make the space feel more peaceful and organic. This simple touch adds quiet beauty without cluttering the design. 16. Traditional Scroll Paintings (kakemono) Scroll paintings featuring calligraphy or nature scenes add cultural depth. Hang one in a tokonoma or on a clean wall where it can be the focal point. Choose soft colors and minimal patterns so they blend with the overall style. This single piece of art can give the room an authentic touch. 17. Raw Wood Finishes for Furniture Raw or lightly finished wood keeps the grain and texture visible, adding warmth to the room. This works well for coffee tables, shelving, and seating frames. Pair wood tones with neutral fabrics to keep the look balanced. The natural finish gives the space a classic, welcoming feel. 18. Tatami Platform for Seating and Sleeping A tatami platform can serve as a lounge area during the day and a sleeping area at night. Use it with cushions for daytime comfort and bedding for overnight use. This feature is perfect for small spaces where every inch counts. It combines traditional style with modern practicality. 19. Irori-Inspired Hearth for Warmth and Gathering An irori is a traditional Japanese sunken hearth once used for heat and cooking. In a modern living room, you can echo this with a low central table that includes a small built-in fire or decorative hearth. It creates warmth, a natural focal point, and a cozy place to gather without adding clutter. 20. Minimal Shelving for Books or Decor Minimal shelving offers storage without crowding the walls. Floating or recessed shelves work best to keep the design clean. Limit the number of items displayed for a more open look. This helps the room feel organized and uncluttered. 21. Symmetry in Furniture Arrangement Arrange furniture and decor in balanced pairs for visual harmony. Matching chairs, lamps, or side tables can create a pleasing order. Keep spacing even, so the layout feels intentional. This symmetry improves the peaceful, structured feel of the room. 22. Handmade Pottery as Decor Handmade pottery adds texture and craftsmanship to the space. Display bowls, vases, or mugs on shelves or tables. Stick to earthy colors and simple shapes to keep the style cohesive. Each piece brings a unique, natural touch to the room. 23. Natural Fabrics Like Linen or Cotton Natural fabrics feel soft, breathe well, and suit a relaxed atmosphere. Use them for curtains, cushions, or throws. Choose light, solid colors, or subtle patterns for a simple look. These textiles keep the room comfortable and easy to maintain. 24. Futon that Can Double as A Bed A foldable futon is a versatile piece for seating and sleeping. Use it in living rooms that double as guest spaces. Choose a cover that matches your decor for a perfect look. It saves space while offering comfort for both day and night use. 25. Small Tea Ceremony Corner Set up a low table with a tea set and floor cushions in a quiet spot. Keep the area simple with minimal decoration. This can be a peaceful place to relax and unwind. It also adds a meaningful cultural element to your living room. 26. Woven Straw Baskets for Storage Straw baskets provide a natural way to store blankets, magazines, or small items. Place items under tables or along walls to save space. Their texture pairs well with wood and fabric in Japanese-style rooms. They help keep the room neat without looking plain. 27. Electronics Hidden when Not in Use Hide TVs, speakers, and cords inside cabinets or behind sliding panels. This prevents modern tech from dominating the space. Concealing electronics helps maintain the peaceful, natural feel of the room. The focus stays on the design instead of the devices. 28. Single Statement Vase with Fresh Flowers A tall, simple vase with seasonal flowers can serve as a perfect centerpiece. Keep the arrangement minimal so it matches the clean style. Switch flowers with the seasons to keep the room fresh and bright. 29. Floor-Level Lighting Instead of Overhead Lanterns, low table lamps, and floor lamps create a softer mood. Place them near seating areas or along pathways. Avoid harsh ceiling lights that can feel too bright. This type of lighting makes the space feel cozy and inviting. 30. Folding Bamboo Room Divider A bamboo divider can separate areas while still allowing light through. Fold it away when not needed to save space. The natural texture fits perfectly with other organic elements. It’s a flexible and stylish way to define spaces. 31. Noren Curtains Between Spaces Noren curtains are short panels that hang in doorways. They help define areas while allowing airflow and light to pass. Choose plain fabric or simple patterns that match the room. They add a subtle traditional touch. 32. Zen Rock Garden A small tray with sand and smooth stones can serve as a quiet focal point. Rake patterns into the sand for a meditative activity. Add a small plant or ornament for interest. This feature brings a peaceful, mindful element into the space. 33. Engawa-Inspired Transition Space An engawa is a narrow wooden veranda that links indoor rooms to the garden. You can bring this idea inside with a small raised wooden platform or a bench by a window or wall. It creates a quiet sitting spot, offers natural light, and reminds you of the connection between indoors and outdoors. 34. Small Water Feature A tabletop fountain or water bowl creates soothing background sound. Place it in a seating area or near it to enjoy its effect. The sound of running water helps the room feel more relaxing. It also adds a subtle natural element. 35. Simple Wall Art Wall art keeps the walls looking clean and uncluttered. Choose pieces that reflect nature or peaceful abstract designs. Hang them at eye level for the best effect. This keeps the style simple and harmonious. You can also group a few related pieces together for a gallery feel without overwhelming the space. 36. Natural Scent Diffusers Like Hinoki Wood Hinoki wood releases a light, fresh scent that lasts for months. Place small pieces in bowls or on shelves. It also adds a warm, natural look to the decor. This scent can make the space more pleasant without overpowering it. 37. Minimal Furniture Legs Choose furniture with low or hidden legs to keep the focus on clean lines. Skirted pieces or floor cushions also work well. This keeps the look grounded and open. The result is a room that feels peaceful and uncluttered. 38. Indoor-Outdoor Connection with Large Windows Wide windows bring in natural light and views. Keep coverings light so they don’t block the scenery. Connecting the indoors with the outdoors makes the space feel bigger. It also strengthens the link to nature. Adding sliding glass panels or folding doors can make this connection even stronger, allowing fresh air and garden scents to flow inside. 39. Layered Rugs for Warmth and Texture Start with a tatami mat as the base and layer a soft rug on top. Choose neutral or earthy tones to keep the look cohesive. The combination adds comfort and visual interest. It also helps define seating areas. 40. Monochrome Theme with Subtle Accents Stick to one main color throughout the room for a unified look. Add interest through texture and tone changes rather than bold contrasts. Small accent pieces can bring variety without breaking the flow. This approach keeps the room peaceful and simple. 41. Recessed Shelving in Walls Recessed shelves provide storage without taking up floor space. Use them for books, plants, or pottery. Keep displays minimal to maintain an open feel. Add warm lighting inside the shelves to highlight decor pieces. 42. Floor-Level Reading Nook You can create a corner with a low bench or thick cushions. Place it near a window with good natural light. Add a small side table for books or tea. You can also include a soft throw blanket for extra comfort. Adding a potted plant nearby will bring a fresh, peaceful touch. This becomes a relaxing spot to unwind. 43. Seasonal Decor Changes Swap textiles, plants, and small accents as the seasons change. Use light fabrics in summer and warm textures in winter. This keeps the space feeling fresh without a complete redesign. It’s an easy way to keep the room visually interesting year-round. 44. Negative Space as a Design Feature Leave certain areas intentionally empty to give the room breathing space. Avoid filling every wall or surface with decor. This open space highlights the elements you choose to include. It adds balance and peace to the design. 45. Mixing Traditional and Modern Elements Mindfully Combine tatami mats and shoji screens with modern lighting or furniture. Keep colors and textures consistent so the mix feels intentional. The result is a space that honors tradition while feeling current. This balance can make your living room truly unique. Maintenance & Care Tips Regular upkeep helps a Japanese-style living room stay beautiful and functional for years. These tips will keep traditional features in great condition and ensure your space adapts well to seasonal changes: Vacuum Tatami Mats Weekly using a Brush Attachment to Remove Dust and Dirt without Damaging the Surface. Keep Tatami Mats Dry by Avoiding Spills and Using a Dehumidifier in Humid Months to Prevent Mold. Dust Shoji Screens Gently with A Feather Duster or Soft Cloth to Avoid Tearing the Paper. Clean Wooden Frames of Shoji Screens with A Slightly Damp Cloth, Taking Care Not to Wet the Paper. Rotate Textiles and Decor Seasonally by Using Lighter Fabrics in Summer and Adding Warmer Layers in Winter. With these habits, your Japanese-style living room will stay fresh, comfortable, and true to its design year after year. Conclusion A Japanese-style living room is all about creating a peaceful, balanced space you can enjoy every day. When I started using natural materials, a thoughtful layout, and simple decor, my living area became both beautiful and practical, and yours can too. Now that you know the key principles and ideas, start adding elements that work for your home and lifestyle. Small changes can make a big difference over time. If you found this helpful and want more tips on home design and decor, check out my other posts on the website for fresh inspiration and step-by-step advice to help you create a home you truly love!
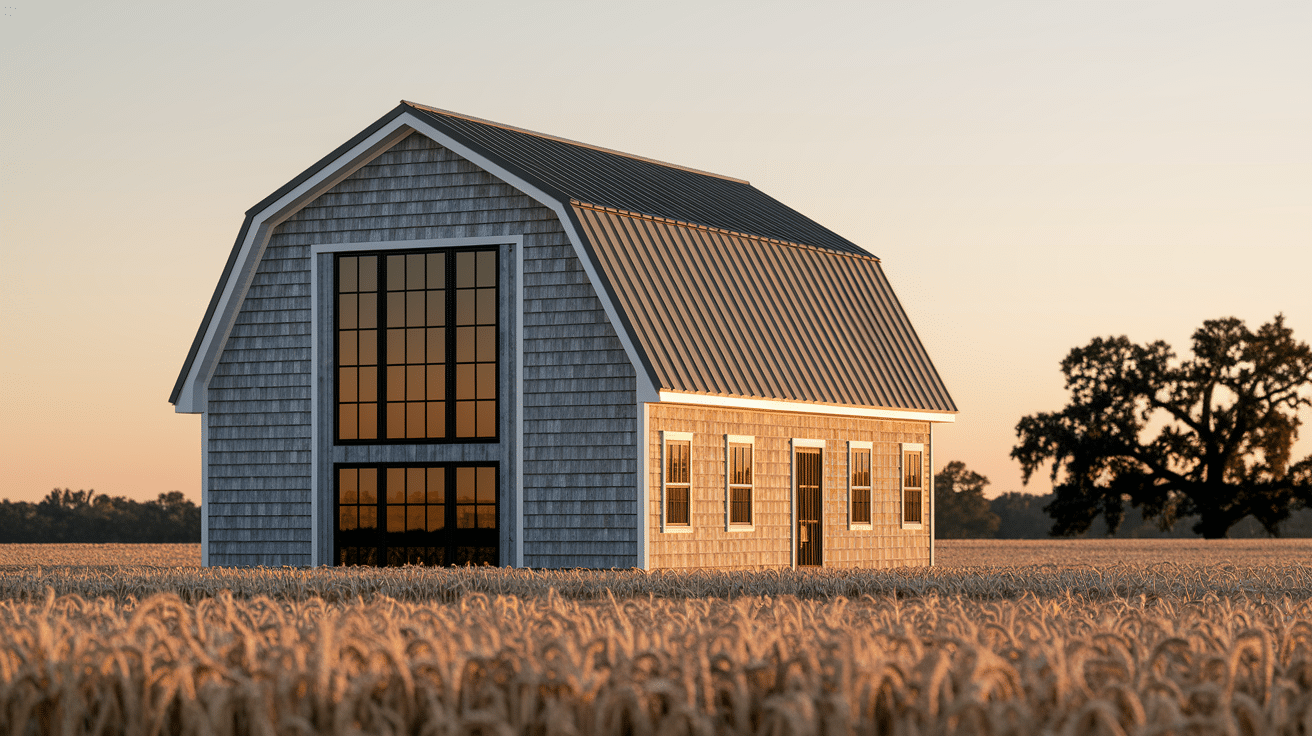
Project Type Barndominium exterior design and finishing Best Author Jack Reynolds, Outdoor & Exterior Cost Range $8,000, $60,000+ depending on siding, features, and square footage Most Durable Exterior Steel or Corten metal panels Most Common Mistake Choosing aesthetics before material performance Key Structural Decision Roof style, gambrel, gable, or shed, before any exterior finishing I’ll be honest, I used to think barndominiums were just trendy barn conversions until I saw one in person, and wow, was I wrong. These incredible homes combine the spacious, practical design of a barn with all the comfort and style you could want in a modern house. If you’re dreaming of classic red barn siding or sleek modern metal panels, there are so many ways to make your barndominium exterior absolutely pretty. From wraparound porches to dramatic black-framed windows, each design choice can completely change how your home looks and feels. Ready to find your perfect barndominium style? Let’s get into it! Cost Note: Figures in this article are estimates based on national averages. Actual costs vary significantly by region, contractor, materials, and project scope. Always get at least three quotes before committing to any project above $1,000. What Makes a Barndominium Different From a Standard Home Build A barndominium is a post-frame or steel-frame structure built with barn construction methods but finished as a living space. The name combines “barn” and “condominium,” though most have nothing to do with shared ownership; the “condominium” part just refers to the quality of interior finish. The structure is wider, simpler, and faster to frame than stick-built houses. High ceilings, open floor plans, and large spans without load-bearing interior walls are standard. The exterior is where most of the design variation happens, because the box underneath is usually the same. Why the exterior matters more on a barndominium: The silhouette of a metal-frame barn is plain. The exterior finish is almost entirely responsible for whether the building reads as a home or a storage unit. That’s not a knock on the building type; it’s a design opportunity. Your siding material, roof pitch, window size, porch design, and color choices do more work here than they would on a traditional house with built-in architectural detail. Before committing to any of the ideas below, make sure your roof structure is settled. The hip roof versus gable decision affects almost everything downstream: porch attachment points, gable window placement, and overall silhouette. Get that resolved first. Popular Barndominium Exterior Ideas Barndominiums are loved for their mix of farmhouse style and modern comfort, and the exterior sets the tone right away. Here are some popular design ideas to inspire yours: 1. Classic Red Barn Siding with White Trim Want your barndominium to look like a traditional country barn? Then this design is perfect. The bright red siding paired with crisp white trim around the windows, doors, and roofline instantly gives your home a warm, classic farmhouse feel. This combination is classic and works beautifully in both rural settings and modern neighborhoods that want a rustic touch. Red siding draws attention and makes the home look lively, while the white trim highlights structural details and keeps the overall look clean and balanced. Design Tip: Pair this look with a metal roof in white or black for extra contrast. Add a front porch with white railings to complete the true barn-inspired style. 2. Metal Siding for a Modern Farmhouse Look If you love the modern farmhouse trend, metal siding is a stylish and practical choice. It gives your barndominium a sleek, shiny, and contemporary look while also offering excellent protection against the weather. Metal panels resist rust, pests, rot, and fading, making them one of the most low-maintenance siding options available. Aside from durability, metal siding shows light beautifully and makes the home look more polished and high-end. You can choose from different finishes, such as matte, glossy, or textured, to match your preferred style. Design Tip: Go for neutral tones like charcoal gray, soft white, or matte black for a bold, modern appearance. Combine metal siding with wooden accents for a perfect balance between rustic charm and contemporary design. 3. Wraparound Porch for More Outdoor Space A wraparound porch is the most structurally significant exterior addition you can make to a barndominium. It changes the silhouette, adds usable outdoor square footage, and breaks up the plain box of a standard barn frame. The trade-off is cost and structural complexity; the porch posts, beams, roof, and decking need to be engineered alongside the main structure, not bolted on afterward. If you’re comparing your options, the deck versus porch value comparison covers which adds more to resale price and which is cheaper to build per square foot. For barndominiums specifically, an attached covered porch usually wins on value and livability over a freestanding deck. Design Tip: Use natural wood flooring or composite decking for a cozy, farmhouse feel. Add string lights, planters, and outdoor rugs to make it warm and inviting. Consider ceiling fans for comfort during warmer months. 4. Big Black-Framed Windows for Lots of Light Large black-framed windows are one of the most popular modern barndominium design trends right now. They allow tons of natural light into your home, making your interiors feel bright, open, and airy. The bold black frames create a striking contrast against lighter walls and siding, giving your home a chic farmhouse-meets-modern look. These windows also bring the outdoors inside, letting you enjoy beautiful views without stepping outside. If you want a spacious, welcoming atmosphere inside your barndominium, this feature is a must-have. Design Tip: Floor-to-ceiling windows make smaller rooms feel larger and more open. Pair black-framed windows with light wood interiors for a cozy, modern feel. Consider energy-efficient glass to keep your home cooler in the summer and warmer in the winter. 5. Sliding Barn Doors as a Bold Entry Sliding barn doors are one of the most popular features you can add to your barndominium. These doors save space, look stylish, and add a rustic farmhouse class to your home. Unlike traditional doors that swing open, barn doors slide smoothly on a track, making them practical and functional, especially in smaller spaces. They work beautifully as front entry doors, but you can also use them inside the home for bedrooms, pantries, or laundry rooms. Available in wood, glass, or metal designs, you can choose a style that matches your barndominium’s overall look. Design Tip: Go for a distressed wood finish for a rustic farmhouse look. Choose matte black or brushed metal tracks for a modern edge. Pair sliding barn doors with neutral walls to make them a bold statement piece. 6. Stone or Brick Bottom Walls for a Rustic Feel Want to give your barndominium a solid, grounded look? Adding stone or brick to the bottom half of your walls is a perfect way to create a classic farmhouse feel. It not only uplifts your home’s curb appeal but also protects the lower structure from dirt, moisture, and weather damage. Stone adds a natural, earthy charisma, while brick provides a warm, vintage character. This layered design creates visual depth and makes your barndominium look more luxurious and sturdy. Design Tip: Combine stone or brick with vertical board-and-batten siding for a textured farmhouse style. Use neutral stone shades like beige, gray, or whitewashed brick for a softer, modern feel. Add landscaping with plants and lighting to highlight the stonework at night. 7. Tall Porch Columns and Wood Beams Adding tall wooden columns and exposed wood beams to your barndominium instantly creates a warm, rustic farmhouse environment. These natural wood elements give your porch a sturdy and welcoming appearance, making the entrance feel grand and cozy at the same time. If you choose natural cedar, pine, or reclaimed wood, these beams and posts add a touch of class while upgrading the structural character of your home. Pairing them with stone bases or wraparound porches makes the design even more inviting. Design Tip: Use thicker posts for a bold, dramatic farmhouse look. Stain the wood in warm brown or deep walnut tones for extra character. Add hanging lanterns or string lights around the beams for a cozy nighttime feel. 8. Matte Black Exterior for a Striking Modern Feel An all-black or near-black barndominium exterior is the boldest choice on this list, and it has real performance implications beyond aesthetics. Dark colors absorb heat; in hot southern or western climates, a black exterior wall with western exposure will run significantly hotter than a light-colored alternative, which affects cooling costs and panel expansion rates. In cooler northern climates, the heat absorption is less of a liability. Matte finishes also show dust, pollen, and water streaking more visibly than semi-gloss. That’s worth knowing before you commit. If you’re choosing black or dark charcoal, pair it with black-framed windows and minimal trim; the look works when it’s complete. Half-measures end up looking unfinished rather than modern. For color pairing ideas on dark exteriors, exterior roof and wall color coordination follows the same contrast principles that apply here, too. Note: Black siding in climates with significant temperature swings experiences more panel expansion and contraction than lighter colors. Make sure your installer accounts for this in panel gap and fastener specifications. 9. Blue or Deep Green Paint for a Fresh Twist Want something unique and refreshing? Painting your barndominium navy blue, teal, or deep green adds a playful yet stylish feel that stands out without being too bold. These earthy tones combine beautifully with nature, making your home feel calm and inviting while still giving it personality. Lighter shades of blue create a coastal farmhouse feel, while darker greens add a rich, classy touch. These colors also pair well with white trims, wood accents, and metal roofs, giving your barndominium a fresh, updated appearance. Design Tip: Pair deep green siding with black or bronze accents for a rich, moody feel. Use navy blue walls with white trim for a crisp, timeless look. Add stone details at the base for extra texture and charm. 10. Board and Batten Siding for Classic Feel Board-and-batten siding is one of the most popular barn-inspired designs you can add to your barndominium. It features vertical wooden boards with thin strips placed between them, creating a textured look that has been loved for decades. This siding style instantly adds depth and dimension to your exterior, making your home look classic, charming, and full of character. It works beautifully in both modern and traditional farmhouse designs, especially when paired with bold trim colors. Design Tip: Paint the siding white for a traditional farmhouse look or dark gray/black for a modern twist. Combine board and batten with stone accents at the bottom for added contrast. Use wider battens if you want a bold, eye-catching design. 11. White Siding with Dark Accents for Contrast A white exterior with dark accents has become one of the hottest farmhouse trends, and for good reason. White siding creates a clean, timeless backdrop, while dark-colored doors, windows, and trims add sharp contrast that makes your home stand out beautifully. This combination works with almost any design style, from classic farmhouse to modern minimalist. Plus, it shows light, keeping your home cooler while still maintaining a classy, high-end appearance. Design Tip: Pair white siding with black-framed windows for a striking modern look. Add a wooden front door for warmth and balance. Use matte black outdoor fixtures like lanterns or house numbers for extra style points. 12. Carport or Breezeway Connected to the House A carport or breezeway is a smart and stylish addition to your barndominium. A carport provides a covered space to park your vehicles, protecting them from rain, sun, and snow. A breezeway, on the other hand, connects your garage or carport to your house with a covered walkway, so you can stay dry and comfortable even in bad weather. Besides being functional, breezeways and carports add a layer of class to your barndominium’s design. They also create extra space that can be used for storage, outdoor seating, or even small garden areas. Design Tip: Use the same roofing material as the house for a seamless look. Add stone columns or wooden posts to upgrade the design. Include recessed lighting for safety and style at night. 13. Multiple Gables or Roof Peaks for Interest Adding multiple gables or extra roof peaks instantly makes your barndominium’s exterior more eye-catching. Instead of having one simple flat roofline, extra peaks add depth, shape, and character to your home. They also create the illusion of a bigger, more spacious house from the outside. This feature works especially well for larger barndominiums, where you want to break up a long, plain roof and give it more structural personality. Design Tip: Pair multiple gables with contrasting siding colors for extra definition. Add stone or brick details under the peaks for texture and charm. Install small decorative vents or windows inside the gables to uplift the farmhouse look. 14. Dormer Windows for an Upper-Level Feel Dormer windows are small windows that extend out from the roof, and they add both function and style. These windows bring natural light into upper levels or loft spaces, making the inside brighter and more inviting. Dormers also make the exterior look taller and more classy, giving your barndominium a traditional farmhouse allure. They work especially well for homes with pitched roofs and are perfect for adding usable space to the second floor. Design Tip: Use arched or triangular dormers for a classic farmhouse style. Match the trim color of the dormers to your window frames for a cohesive look. Add flower boxes beneath dormer windows to give your home extra personality. 15. Metal Awnings Over Windows and Doors Adding metal awnings over your windows and doors serves both a practical and stylish purpose. These small overhangs provide shade in the summer, protect against rain and snow, and reduce glare inside your home. Awnings also add an industrial farmhouse feel, especially when paired with modern metal roofs and wood siding. They’re available in various colors and finishes, allowing you to match them perfectly with your overall exterior design. Design Tip: Choose matte black or dark bronze awnings for a sleek, modern farmhouse look. Combine metal awnings with wood siding for a warm, balanced style. Install accent lighting above or below the awnings for nighttime appeal. 16. Large Glass Garage Doors for Light and Style Large glass garage doors can completely change your barndominium’s look. They allow tons of natural light into your garage or workshop area, making it feel open and bright. You can also use them in living spaces, such as a game room or home gym, where you want to bring the outdoors inside. These modern glass doors create a luxurious and stylish feel, while still being durable and functional. Design Tip: Use frosted or tinted glass for added privacy without losing light. Pair glass garage doors with a matte black frame for a sleek, modern finish. Surround the garage door area with stone or wood details to make it a design feature. 17. Cedar or Wood Planks Mixed with Metal Panels Mixing natural wood planks with metal siding panels creates a perfect blend of rustic hex and modern style. Wood adds warmth and coziness, while metal gives your barndominium a sleek, durable, and contemporary edge. This combination works beautifully for exterior walls, porch ceilings, and entryways. It creates visual contrast and makes your home look custom-designed rather than plain or predictable. Design Tip: Use cedar or reclaimed wood for a rich, natural look. Pair it with matte black or gray metal siding for bold contrast. Add hidden accent lighting to highlight the wood texture at night. 18. Decorative Shutters on Windows Adding decorative shutters instantly makes your windows pop and gives your barndominium a cozy, farmhouse feel. Shutters can add a splash of color, contrast, or texture, making even simple exteriors look more magnetic and stylish. From classic wood shutters to modern composite designs, there are endless styles to choose from. Even if they’re purely decorative, shutters add depth and visual interest to your exterior. Design Tip: Choose bold colors like deep green, navy, or black to create contrast. Opt for rustic wooden shutters for a classic farmhouse feel. Match the shutter style to your window shape for a balanced, symmetrical look. 19. Landscaped Flower Beds Along the Walkway A well-designed, landscaped walkway lined with flower beds and small shrubs can completely change your barndominium’s curb appeal. Bright, colorful flowers make your home look warm, welcoming, and full of life. You can create neat, structured beds for a modern look or plant wildflowers and greenery for a natural farmhouse feel. Adding lighting along the path makes it safe and beautiful even at night. Design Tip: Use mulch or stone borders to give flower beds a polished look. Choose low-maintenance plants if you want something easy to care for. Add solar-powered pathway lights for an inviting glow after dark. 20. Covered Patio or Outdoor Kitchen for Relaxing A covered patio or outdoor kitchen extends the barndominium’s usable square footage without adding conditioned space, which makes it one of the better cost-per-use additions you can make. A well-built covered patio runs $20 to $50 per square foot depending on finish level. A full outdoor kitchen with built-in grill, refrigerator, sink, and counter adds another $5,000 to $20,000, depending on specifications and local labor costs. The roof over any covered patio attached to the barndominium should match the main roof material and pitch. Mismatched lean-to additions, a flat metal lean-to against a steep-gable roof, for example, look like additions rather than design decisions. If you want a partially open structure instead of a fully covered roof, a pergola off the back wall is a lower-cost option that still defines the outdoor space without requiring full structural engineering. Making Exterior Decisions That Hold Up Over Time The most common mistake on barndominium exteriors is choosing the photos taken at completion rather than for what the exterior actually does over ten years. Red paint fades. Wood siding in full sun exposure needs regular maintenance. Stone veneer in freeze-thaw climates without proper flashing fails quietly and expensively. The barndominium exterior ideas that hold up best share a pattern: quality base materials, proper installation with climate-specific detailing, and design choices that match the scale of the building. A large barndominium with undersized posts, undersized windows, or underpowered landscaping reads as unfinished even with fresh paint. Scale matters. The interior follows directly from the shell, ceiling height, window placement, and siding material; all shape what works inside. Getting the exterior right first makes those decisions easier, and barndominium interiors work differently from stick-built homes in ways that are worth knowing before you start finishing. Cost is the other variable most people underestimate on the exterior alone. If you’re working from a budget, what construction costs per square foot in your region give you a realistic floor to plan against before you start picking siding finishes. Frequently Asked Questions What is the most durable exterior siding for a barndominium? Steel panel siding with a factory-applied Kynar 500 coating is the most durable option; it handles UV, moisture, and impact well with minimal maintenance. Stone and brick are comparably durable at the base. Wood and fiber cement are workable but require more maintenance over time. How much does a barndominium exterior typically cost? Exterior finishing (siding, windows, doors, roofing) on a standard barndominium runs roughly $25,000 to $60,000 depending on square footage, materials, and regional labor costs. Add-ons like wraparound porches, covered patios, or stone accents add $10,000 to $40,000 on top of that range. What color is most popular for barndominium exteriors? Charcoal gray and matte black are the most requested finishes in modern barndominium builds right now. Classic barn red remains popular in rural settings. White or off-white siding with dark trim is the most common choice when resale value is a priority. Can you paint metal siding on a barndominium? Yes, but field-applied paint on metal siding performs significantly worse than factory-applied coatings. If painting metal panels, use a bonding primer rated for metal, then an exterior paint with UV protection. Expect to repaint every 7 to 12 years versus 20+ years for quality factory coatings. Does a barndominium exterior add or hurt resale value? Barndominiums appraise differently than stick-built homes, and rural properties have different resale dynamics than suburban ones. In markets where barndominiums are common, well-finished exterior design improves appraisal value. In suburban markets, the barn aesthetic can limit the buyer pool, which affects resale liquidity more than value. What roof style works best on a barndominium exterior? A gable roof is the most common and most structural for large spans. Gambrel roofs add upper-floor usable space but cost more to frame. Hip roofs are wind-resistant but limit upper-level space. Monitor-style roofs, a raised center ridge section, are ideal for maximizing clerestory light in the main living area. How do you make a barndominium look less like a barn? The fastest upgrades: large black-framed windows, a covered porch with timber framing, mixed siding materials (metal plus wood or stone), and intentional landscaping at the entry. Dormers or secondary gable peaks also add residential character that plain barn silhouettes lack. Conclusion Designing a barndominium is an exciting process, and I hope these exterior ideas sparked some inspiration for your own plans. What I enjoy most about barndominiums is the flexibility – you can lean into a classic farmhouse look, go for something sleek and modern, or mix styles to create something that feels just right for you. The key is choosing features that match your lifestyle and make you feel good every time you pull into the driveway. Start small, focus on the elements that stand out to you, and let the design grow from there. Your barndominium should reflect who you are, and now’s the perfect time to bring that vision to life. Which exterior idea are you most excited to try first?

Does your bathroom feel a little too cold or boring? I used to feel the same way. I wanted a space that felt calm, cozy, and close to nature. That’s when I started looking into earthy bathroom ideas and styles like cabin bathroom ideas that bring warmth and a natural feel. Here, I’ll share simple ways to give your bathroom an earthy feel. I’ll talk about using natural colors, raw materials like wood and stone, soft lighting, and simple decorations. You don’t need a big budget or fancy items, just the right mix of texture, tone, and light. If you want your bathroom to feel cozy, peaceful, and close to nature, you’re in the right place. Let’s get started with some easy ideas that can help you make your bathroom feel like a relaxing escape. Key Materials for an Earthy Bathroom Look To bring an earthy feeling into your bathroom, the materials you choose matter a lot. These natural items add warmth, texture, and a calm mood. Here are some key materials you can use to create that down-to-earth, peaceful space: Natural Wood: Wood brings warmth and a natural feel. Use it for vanities, floating shelves, or small storage boxes. Lighter wood gives a soft and calm look, while darker wood feels rich and grounded. Make sure to seal it well to handle bathroom moisture. Stone and Clay: Stone and clay give the room a raw, grounded look. You can use stone for floors or shower walls. Clay sinks and tiles add soft color and texture. These materials help the space feel solid, simple, and close to nature. Textiles: Soft fabrics matter more than you’d think. Go for linen shower curtains, cotton towels, and jute rugs. They feel great to the touch and also look warm and natural. These choices help soften the space and keep it cozy and simple. Plants and Greenery: Adding real plants brings life to the room. Pick plants that like humidity, like ferns or pothos. You can place them on shelves or hang them near the shower. They clean the air and give the space a fresh, calm feeling. Earthy Bathroom Ideas for a Natural, Relaxing Space If you want your bathroom to feel calmer and peaceful, bringing in natural touches can really help. These earthy bathroom ideas are simple to try and can make your space feel warm, quiet, and more like nature, even insmaller spaces, using half bath ideas. Color & Palette Ideas The colors you use in your bathroom can shape how the whole space feels. Earthy tones create calm, warmth, and a strong connection to nature. Here are simple color ideas to help guide your paint choices, wall tones, and accents for a peaceful, natural look: 1. Warm Terracotta Walls Terracotta gives off a cozy, sun-baked feel. It works great for an accent wall or all-over paint if you want your bathroom to feel warm and inviting. This color looks rich but not too bright, and it pairs well with wood, stone, and soft whites. It’s perfect for making the room feel grounded and welcoming. 2. Soft Beige and Sand Tones Beige and sand are gentle, warm colors that keep the room feeling open and clean. These tones work well on walls, floors, or even cabinets. They give the bathroom a soft, calm vibe that’s easy to live with. These shades also make natural light feel warmer and more relaxed. 3. Sage Green Accents Sage green is cool, soft, and earthy. Use it for towels, plant pots, or a small shelf to add color without making things loud. It brings a fresh and peaceful feel, especially when paired with wood or white. Sage makes the space feel more like nature without needing too much green. 4. Deep Forest Green Vanity A deep forest green vanity adds a bold but grounded touch. It feels rich and natural at the same time. Pair it with brass or black handles for a clean look. The dark green stands out while still fitting the earthy theme. It’s a great way to add color without going too bright. 5. Clay-Inspired Tile Backsplash Tiles in clay shades—like brown, red, or peach—add texture and warmth. Use them behind the sink or around the shower. They make the space feel handcrafted and natural. These tones remind you of the earth and work well with wood, stone, and simple white paint. 6. Earthy Gray with Natural Wood A soft gray wall or cabinet color mixed with raw wood creates a calm and balanced look. The gray adds coolness, and the wood brings warmth. This combo is great for people who want a clean space that still feels warm and inviting. It’s simple but never dull. 7. Rust Orange Textiles Rust orange is a strong but warm color that works well in towels, rugs, or shower curtains. It adds life to the bathroom without making it feel loud. Rust works nicely with beige, brown, or green tones. It’s an easy way to give your space more energy while staying earthy. Material-Focused Ideas for a Natural Feel Textures and finishes play a big role in how your bathroom feels. Choosing the right materials can make the space feel cozy, grounded, and peaceful. Here are some earthy material ideas that bring texture, warmth, and a natural mood to your bathroom: 8. Stone Vessel Sink A stone vessel sink adds a raw, grounded look. It feels heavy and natural, like it came straight from the earth. These sinks are smooth inside but rough or matte on the outside. They work well with wood countertops and metal taps, making the space feel solid and peaceful. 9. Bamboo Bath Mat Bamboo bath mats are smooth, strong, and dry fast. Unlike soft fabric mats, they bring a wood-like texture to your floor. The natural color adds warmth, and the slatted design lets water drain easily. They’re also easy to clean and perfect for an earthy, simple bathroom style. 10. Reclaimed Wood Vanity Reclaimed wood brings character and warmth. A vanity made from this wood has natural knots, grain, and color changes that make it stand out. It adds texture and tells a quiet story of age and use. This material pairs well with stone sinks and matte black or brass hardware. 11. Clay or Ceramic Accessories Use clay or ceramic for soap dishes, trays, and toothbrush holders. These materials feel handmade and real. Their slight color changes and textured finishes add charm without looking too fancy. Soft clay tones like brown, cream, or soft pink work well with other earthy elements. 12. Slate Tile Flooring Slate tiles are dark, textured, and naturally slip-resistant. They bring depth and a strong, earthy tone to the floor. The rough texture adds interest underfoot, and each tile has a slightly different pattern. Slate works well with both light and dark wall colors. 13. Pebble Shower Floor A pebble floor in the shower feels like standing near a stream. The rounded stones feel smooth but give your feet a light massage. Pebble floors also drain well and bring texture and nature right into the shower. Choose stones in grays, browns, or whites for a calm look. 14. Linen or Jute Shower Curtain A linen or jute shower curtain adds texture without looking too soft or modern. Linen feels light and flows well, while jute is thicker and has a strong weave. Both bring a natural, raw look. These fabrics are great if you want the space to feel relaxed and real. Nature-Inspired Decor Want to feel closer to nature without stepping outside? Small changes in decor can bring the outdoors in and make your bathroom feel fresh, peaceful, and alive. These nature-inspired decor ideas are easy to add and help create a calm, grounded space. 15. Hanging Eucalyptus in the Shower Hang a bunch of eucalyptus from your showerhead for a spa-like feel. When hot water runs, it releases a fresh, calming scent that fills the space. It looks simple and natural, too. You can replace the bunch every few weeks to keep the scent strong and the look fresh. 16. Indoor Potted Plants Add small potted plants like ferns or snake plants to bring life to your space. These plants love the bathroom’s steam and light. Place them on a windowsill, shelf, or in a hanging pot. They clean the air, add color, and make the room feel more alive and peaceful. 17. Wooden Open Shelves with Greenery Install open shelves made of raw or light-stained wood. Place small plants, rolled towels, and clay jars on them. The wood brings warmth, and the greenery adds softness. These shelves are not only useful but also make the room feel more natural and put together. 18. Woven Baskets for Storage Woven baskets are great for holding towels, toiletries, or even extra toilet paper. They add texture and an earthy feel to the room. Choose ones made from jute, seagrass, or rattan. You can place them under the sink or beside the tub to keep the space tidy and warm. 19. Driftwood Towel Rack A towel rack made from driftwood adds a raw and beachy look. The natural shape and texture make each piece one of a kind. You can mount it on the wall with simple hooks or ropes. It’s both useful and a strong nature-inspired statement in the room. 20. Terracotta Pots as Organizers Use small terracotta pots to hold brushes, cotton pads, or even toothbrushes. Their warm color and rough texture bring in a natural touch. You can line them up on the sink counter or shelf. It’s a small detail that adds a lot of charm without trying too hard. 21. Nature-Themed Wall Art Put up simple art that shows leaves, trees, or mountain scenes. Go for soft colors and hand-drawn or printed styles. Avoid anything too shiny or modern. This kind of art keeps the theme calm and earthy while filling empty wall space in a nice, quiet way. Design Style Variations with an Earthy Feel Earthy bathroom design doesn’t just fit one style, but it blends well with many. From clean and simple to rich and bold, there’s a version of earthy design for every taste. Here are some unique styles with earthy touches that bring nature, calm, and texture into your space: 22. Minimalist Earthy Bathroom Keep things clean and quiet. Use smooth stone surfaces, matte fixtures, and soft neutral paint like beige or gray. Limit clutter and pick one or two natural elements, like a wood bench or a small plant. This style focuses on calm and space, letting each earthy piece stand out on its own. 23. Rustic Farmhouse with Stone Accents Bring in rough textures and vintage charm. Use a reclaimed wood vanity, stone sinks, and shiplap or simple white walls. Wrought iron fixtures and an open shelf with jars or towels help finish the look. It feels handmade, grounded, and full of warmth—like a cozy countryside home. 24. Modern Organic Spa Retreat Think peaceful and soft with lots of natural light. Use smooth stone, warm wood, and large mirrors. Add soft towels, a soaking tub, and potted greenery to complete the calm feeling. Keep the layout open and airy. This look blends natural textures with comfort and relaxation. 25. Boho Earthy Bathroom with Textiles Mix in soft textures and easy-going charm. Use jute rugs, patterned towels, and woven wall hangings. Add some greenery, clay accessories, and warm-toned lighting. The goal is comfort without structure—think layers, colors, and personal touches that make the space feel lived-in and natural. 26. Japandi (Japanese + Scandinavian Earthy Mix) Stick to light wood, clean lines, and neutral colors like cream, taupe, and soft gray. Add in a few stones or clay pieces and maybe a bonsai or small plant. This style is about calm and order, blending the warmth of nature with quiet, clean design. 27. Mediterranean Clay-and-Stone Look Use warm colors like terracotta, sand, and sun-washed white. Clay tiles, arched mirrors, and a stone sink give the room a breezy, coastal vibe. Add bronze taps and textured plaster walls to bring the Mediterranean mood to life. It feels rustic, warm, and relaxed. 28. Moroccan-Inspired Earthy Tiles Bring in bold floor or wall tiles in earthy tones like rust, deep green, or clay red. Use arched details, brass taps, and handcrafted sinks. Keep other areas simple to let the patterns shine. The result is rich, colorful, and still grounded in nature. 29. Luxury Earthy Bathroom with Marble + Wood Use natural marble in soft shades like cream, brown, or gray. Pair it with raw or smooth-finished wood for vanities and storage. Add soft lighting, gold or black accents, and maybe a freestanding tub. This style feels high-end without being cold, thanks to the natural textures. Budget-Friendly Earthy Touches (Great for Renters Too) You don’t need to spend a lot or make big changes to get that earthy bathroom feel. Even if you rent your place, you can still add a natural style with small updates. These ideas are quick and easy to implement, making a big difference without repeating the same look. 30. Swap in Earth-Tone Towels and Rugs Changing your towels and rugs to warm, natural colors like rust, beige, sage, or clay can shift the whole mood. These colors feel cozy and grounded. Choose soft, textured fabrics like cotton or linen. It’s a simple way to bring earthy style without touching the walls or furniture. 31. Add Peel-and-Stick Earthy Tiles Peel-and-stick tiles are perfect for renters. Use them behind the sink or even on part of the floor. Choose patterns and shades like clay, stone, or wood textures. They’re easy to apply and remove, but they instantly add depth, texture, and a natural feel to your space. 32. Replace Hardware with Bronze/Copper Tones Switch out your cabinet knobs, towel hooks, or faucet handles with ones in bronze or copper tones. These warm metals pair well with earthy themes and are easy to switch back to when needed. The right finish can make your bathroom feel more crafted and connected to nature. 33. Use Natural Soap Dispensers or Trays Look for soap dispensers, trays, or toothbrush holders made from stone, wood, or clay. These materials are easy to find and cost little but bring in texture and natural charm. Keep colors warm and simple to match the earthy feel without making things look busy. 34. Candle Clusters in Warm Earthy Hues Even unlit, they add color and style. When lit, they create a cozy, soft glow that fits perfectly with earthy vibes. 35. DIY Reclaimed Wood Mirror Frame If your mirror has a plain edge, frame it with reclaimed or weathered wood. You can attach it using removable strips if you’re renting. The wood adds natural texture and makes your bathroom feel handmade and warm without needing a full renovation. Small & Apartment-Friendly Earthy Bathroom Ideas Even in tight spaces, you can still bring in natural textures and calm colors. These earthy design ideas are made for small bathrooms or apartments where space is limited. They focus on smart use of walls, corners, and compact pieces. 36. Vertical Plant Wall in a Small Bath If floor space is tight, go up. A vertical plant wall made with small pots or hanging planters adds life without clutter. Use moisture-loving plants like ferns or pothos. Mount them on a wooden board or metal frame to keep things neat. It adds greenery without losing any floor space. 37. Floating Wood Vanity to Save Space A floating vanity opens up the floor, making the room feel bigger and less crowded. Choose light wood like oak or pine for a clean, earthy feel. The space underneath can be left open or used for baskets. It keeps the bathroom looking open while still giving you storage. 38. Compact Earthy Vanity in Natural Oak For really small bathrooms, a compact oak vanity with a built-in sink is perfect. The light grain of oak brings warmth without darkening the space. Choose a vanity with simple lines and slim hardware. It adds function and style without taking over the whole room. 39. Light Terracotta Paint for Small Bathrooms Using a light terracotta paint color on one or two walls brings warmth without feeling heavy. It adds personality to a small space while still staying in the earthy theme. Keep other surfaces like floors and ceilings light to help the room feel open and calm. 40. Corner Shelving with Earthy Decor Accents Use corner space for small wooden or metal shelves. Decorate with mini plants, stone accessories, or rolled cotton towels. This keeps storage simple and stylish while staying within a nature-inspired look. It’s a great way to add layers of texture without overcrowding a small bathroom. Lighting & Ambiance Ideas for an Earthy Bathroom Lighting shapes how your bathroom feels. The right kind of light can turn a cold space into something warm, calm, and close to nature. These ideas help you create a soft, earthy atmosphere using natural tones, cozy fixtures, and calm glows. 41. Warm-Toned LED Bulbs Switch out harsh white lights for warm-toned LED bulbs. These give off a soft golden glow that feels calm and gentle. Use them in overhead lights or mirrors to make the space feel inviting. They’re energy-efficient and renter-friendly, but still help create a cozy, earthy mood. 42. Woven Rattan Pendant Light A rattan pendant light adds texture and warmth above a vanity or in the center of the room. The woven shade casts soft patterns across the walls, making the space feel relaxed and natural. Choose a light beige or natural finish to match an earthy color scheme. 43. Candlelit Spa Corners Group a few candles in warm tones—like brown, clay, or amber—on a small tray or shelf. Use different sizes for depth. When lit, they give off a soft, flickering glow that instantly adds calm. Perfect for winding down or creating a spa-like corner without extra effort. 44. Skylight or Window for Natural Light If your bathroom has a skylight or window, use it to bring in natural light. Keep the window area clear of heavy curtains or dark shades. Natural sunlight adds brightness during the day and keeps the space feeling fresh, open, and connected to the outdoors. 45. Wall Sconces with Wood or Stone Detailing Wall sconces with wood or stone finishes can add soft lighting and texture. Install them beside a mirror or above a shelf. The natural material in the fixture adds an earthy touch while spreading gentle light, which works well for both style and comfort. Frequently Asked Questions Can earthy bathrooms work with white tiles? Yes, white tiles can still work in an earthy bathroom. Add warmth with wood shelves, beige towels, woven baskets, clay accessories, and plants. The white background keeps the room clean, while natural textures stop it from feeling cold or plain. What flooring suits an earthy bathroom? Stone-look tile, slate, terracotta tile, warm beige tile, and wood-look porcelain work well for an earthy bathroom. Choose flooring that handles moisture safely. Natural texture matters, but the surface should still be easy to clean and slip-resistant for daily use. How do I make an earthy bathroom feel modern? Keep the layout simple and use clean lines, matte fixtures, and a limited color palette. Pair natural wood, stone, or clay details with simple mirrors and minimal decor. This keeps the bathroom earthy without making it feel too rustic or busy. Are earthy bathrooms hard to clean? Earthy bathrooms are not hard to clean if you choose practical materials. Sealed wood, smooth tiles, washable textiles, and simple storage make upkeep easier. Avoid too many small decor pieces because they collect dust and make cleaning feel more time-consuming. What metal finish works best with earthy bathrooms? Bronze, brass, copper, matte black, and brushed nickel all work well with earthy bathrooms. Warm metals feel cozy with terracotta, beige, wood, and clay. Matte black gives a cleaner modern contrast, especially when paired with stone, oak, or sage green. Can I use fake plants in an earthy bathroom? Yes, fake plants can work if your bathroom has no natural light or poor ventilation. Choose realistic-looking greenery and place it in clay, stone, or woven planters. Real plants feel fresher, but good faux plants still add softness and color. How do I avoid making the bathroom too dark? Balance deep earthy colors with lighter walls, mirrors, warm lighting, and pale stone or wood. Use dark tones on one vanity, backsplash, or accent wall instead of everywhere. This keeps the bathroom grounded while still feeling open and comfortable. What scent fits an earthy bathroom style? Soft natural scents work best, such as cedar, eucalyptus, sandalwood, lavender, citrus, or rosemary. Use candles, essential oil diffusers, or dried eucalyptus carefully. Keep the scent light so the bathroom feels fresh and calming instead of overpowering. Conclusion Making small changes with some of these earthy bathroom ideas helped me turn my space into something that feels calm and natural, and I think you can do the same. You don’t need a full remodel. Just adding a warm light, a wooden shelf, or a plant made a big difference for me. If anything in here gave you a new idea or got you thinking, that’s a great place to start. Pick one thing and try it out; you’ll feel the shift. Just keep it simple, natural, and your own style. I’ve put together more easy, honest tips like this. If you want more ideas to help you feel good at home, check out other blogs on the website. You might find something that fits just right!

I turned my barndominium into a dream home; here’s how you can too. When I first walked into my empty barndominium, I froze. The huge walls and cold concrete floors felt overwhelming and expensive to decorate. But I was wrong. Barndominiums are becoming popular because they cost less than traditional homes. The best part? You can create a cheap barndominium interior that still looks incredible without spending a fortune, just like many barndominium exterior ideas focus on style without high costs. I learned that after making a few pricey mistakes. In this guide, I’ll share the budget tricks that worked for me, dollar store finds that look high-end, quick DIYs, and the smartest places to spend and save. You’ll see how to make your space warm, personal, and stylish without draining your bank account. Why Choose a Barndominium? Barndominiums are way cheaper than regular houses. We’re talking half the price, around $20-40 per square foot instead of $80-120. Plus, you can change anything you want since there aren’t walls holding up the roof. Want a huge kitchen? Go for it. Need to move a wall? Easy. Total costs usually run about $150,000 for everything, while traditional houses often cost $300,000 or more for smaller spaces. The best part? These homes look totally unique with those high ceilings and open spaces. The rustic-modern style gives you something completely different from cookie-cutter neighborhoods. With all that extra money left over, you can focus on making the inside exactly how you want it without breaking the bank. which is one reason people alsocompare them with tiny house building costs when planning affordable living. Cheap Barndominium Interior These tricks will help you create an amazing home without spending a fortune. Each idea is tested and proven to work in real barndominiums. 1. Use Barn Doors Instead of Regular Doors Barn doors cost about $150-300 versus $400-800 for regular doors with fancy hardware. You can build them yourself with basic lumber and sliding hardware from Home Depot. They save space since they don’t swing open, and they add that perfect rustic touch. Plus, installation is way easier than hanging traditional doors. 2. Install Open Shelving Instead of Upper Kitchen Cabinets Open shelves cost about $30-50 each to build versus $200-500 per cabinet. Use reclaimed wood or simple brackets and boards from the hardware store. They make your kitchen look bigger and force you to keep things organized. Just display your prettiest dishes and hide the messy stuff in lower cabinets. 3. Buy Furniture from Facebook Marketplace Each upper cabinet runs $200–500 installed. A floating shelf with brackets costs $30–50 in materials. For a kitchen with six upper cabinet positions, that’s a $1,000+ difference before factoring in labor. The tradeoff is organization: open shelves punish clutter, so the prettiest dishes go up front, and everything else goes in lower cabinets. For a closer look at building floating shelves that hold real weight, consider bracket placement and the right wood thickness. 4. Use Concrete Blocks and Wood Planks for Instant Shelving This industrial look costs under $50 for a whole wall unit. Stack concrete blocks and slide wood planks between them. No screws or complicated measuring needed. Perfect for displaying books, plants, or storage baskets. You can rearrange it anytime you want something different. 5. Hang Curtains from Ceiling to Floor Long curtains trick your eye into thinking ceilings are higher than they really are. Buy cheap panels and hang them right at the ceiling line, not at the window frame. This costs the same as regular curtains but makes your room look way more expensive and spacious. 6. Paint Brick Walls Instead of Covering Them Painted brick looks modern and clean without the cost of drywall or paneling. Use masonry paint and a thick roller for the best coverage. White or light gray makes spaces feel bigger. This update costs about $75-100 versus thousands to cover a brick with other materials. 7. Use Rope Lighting for Cheap Ambient Lighting Rope lights cost $15-30 and create amazing mood lighting. Run them behind furniture, under shelves, or around ceiling beams. They’re way cheaper than fancy light fixtures and add a warm glow to any room. Plus, they’re super easy to install without an electrician. 8. Build Window Seats with Storage Underneath A simple window seat costs $100-200 in materials but adds seating and storage. Use plywood for the base, add hinges for the top, and throw on some cushions. It’s perfect for storing blankets, books, or seasonal stuff while giving you a cozy reading spot. 9. Install Peel-And-Stick Tile for Quick Bathroom Updates These tiles look like real ceramic but cost $1-3 per square foot versus $5-15 for real tile. No grout, no special tools, no mess. Just clean the surface and stick them down. Perfect for renters or anyone who wants a quick bathroom refresh without major renovation. 10. Use Galvanized Tubs as Planters or Storage Big metal tubs cost $20-40 and work great as planters for herbs or flowers. Drill some drainage holes and you’re set. They also make cool storage for toys, firewood, or laundry. The industrial look fits perfectly with the simple barndominium style, and they’ll last forever. 11. Make Artwork from Old Windows or Shutters Old windows with or without glass make amazing wall art for $10-30 each. Find them at flea markets or salvage yards. Hang them as-is for rustic charm, or add photos behind the glass. Old shutters work too. Way cheaper than buying art from stores. 12. Use Industrial Pipes for Towel Bars and Pot Racks Black iron pipes and fittings cost about $30-50 for a towel bar versus $100-200 for fancy ones. They look super cool and match the barndominium vibe perfectly. You can make pot racks, curtain rods, or shelving brackets the same way. Just screw pipe flanges to the wall. 13. Paint Old Furniture Instead of Buying New A $5 can of paint can make a $20 garage sale dresser look like it cost $500. Clean it, sand lightly, and paint with a good brush or roller. Chalk paint works great and doesn’t need primer. This trick works on almost any wooden furniture piece you find. 14. Use Mason Jars for Light Fixtures and Storage Mason jars cost $1-2 each and work for everything. Make pendant lights by adding cord kits. Use them for bathroom storage, kitchen canisters, or flower vases. They’re cheap, versatile, and fit the farmhouse style perfectly. Plus, they’re easy to replace if they break. 15. Install Shiplap Accent Walls with Plywood Strips Real shiplap costs $2-4 per square foot, but you can fake it with thin plywood strips for under $1 per square foot. Rip 1/4 inch plywood into 6-inch strips and nail them up with small gaps. Paint everything the same color for a clean, modern farmhouse look. 16. Use Outdoor Rugs Indoors Outdoor rugs cost 30-50% less than indoor ones and handle spills better. They come in tons of styles now, not just boring stripes. Perfect for kitchens, bathrooms, or high-traffic areas. You can hose them off outside when they get dirty. 17. Buy Plants from Grocery Stores Instead of Nurseries Grocery store plants cost $3-10 versus $15-40 at garden centers. They’re usually healthy and come in basic pots you can cover with prettier ones. Pothos, snake plants, and rubber trees are nearly impossible to kill and make any room look more alive and welcoming. 18. Use Throw Pillows to Change Room Colors Seasonally Pillows cost $10-25 each and instantly change your room’s vibe. Switch from bright summer colors to cozy fall tones without buying new furniture. It’s way cheaper than redecorating and keeps your space feeling fresh. Store off-season pillows in vacuum bags to save space. 19. Install Floating Vanities to Save on Plumbing Costs Wall-mounted vanities look modern and cost less to install since plumbing is easier to access. You can build a simple one with a wood slab and a vessel sink for under $200. They make small bathrooms look bigger and are easier to clean underneath. 20. Use Mirrors to Make Small Spaces Feel Bigger Big mirrors cost $30-100 but make rooms look twice as large. Hang them across from windows to reflect natural light around the room. Leaning a large mirror against a wall is trendy and doesn’t require hanging hardware. They’re the cheapest way to make any space feel more open. These simple tricks prove you don’t need a huge budget to create a beautiful barndominium. Start with one or two ideas and add more as your budget allows. Budget Barndominium Interior Costs (1,500 sq ft, 2025) The table below breaks down realistic cost ranges across the major interior categories, comparing DIY approaches to mid-range contractor builds. Category Budget Option (DIY/Discount) Mid-Range Option (Contractor/Retail) Money-Saving Tips Flooring $3K–$4.5K, Luxury vinyl or polished concrete $7K–$11K, Engineered wood/tile DIY install saves $3–$5/sq ft; shop sales Paint & Finishes $900–$1.6K, Quality DIY $2.2K–$3.8K, Professional painting Paint yourself; buy during promos Lighting $1.1K–$1.7K, Basic fixtures, DIY rope lighting $2.8K–$4.5K, Designer/retail fixtures Shop clearance; mason jar pendant lights; DIY rope lighting Kitchen $6K–$9K, IKEA cabinets, butcher block $14K–$22K, Custom cabinets, quartz Keep/paint existing cabinets; open shelving; DIY counters The DIY column runs less than half the mid-range total, which is the gap that makes phasing a project in stages financially realistic. Start with flooring and paint; those two categories set the visual baseline for everything else. Add furniture and smaller upgrades over time as the budget allows. Costs can climb quickly if labor is outsourced or premium finishes replace budget ones. Cost estimates based on national averages, 2025. Verify current pricing with local suppliers before budgeting. Land, shell, foundation, and site prep are not included in these interior-only figures. Pro Tip: Phase Your Project Start with essentials (flooring & paint, ~$5,000–7,000), then add furniture and decor over time. It’s easier to find deals and avoid overspending if you go step by step. Biggest Money Savers. DIY Labor: Saves up to 40–60% vs. hiring out finish work. Buy Used Furniture: Save 70–80% on high-quality pieces; refinish yourself. Shop Sales & Clearance: Time purchases for major holidays or off-season sales. Keep Plumbing Simple: Avoid moving water lines. Open Shelving: Spend up to 80% less than on upper cabinets. This is less than half the cost of turnkey retail interiors, freeing up funds for land, workshops, or avoiding debt. Costs can go much higher if you outsource labor or choose luxury finishes. Land, shell, foundation, and site prep are not included in these interior-only numbers. Always budget for those separately. Money-Saving Tips for Barndominium Interiors Getting the look you want without breaking the bank comes down to knowing where to shop and what you can do yourself. These simple tricks can cut your decorating costs by 60-80%. Shop clearance sales at the right time: Hit up stores like Home Depot and Target in January for holiday décor, and August for patio furniture that works great indoors Use Facebook Marketplace and thrift stores: Search for “moving sale” terms online and visit thrift stores on Monday mornings for solid wood furniture at $20-50 that just needs paint Paint rooms and furniture yourself: Save $500-800 per room compared to hiring professionals, and turn $20 garage sale finds into $200 showpieces Learn basic DIY from YouTube: Hanging curtains, installing peel-and-stick tile, and building open shelves each cost $50–200 in handyman fees if outsourced. Most take a few hours once learned. For broader decorating principles that hold across room types, minimalist decor rules cover which choices add visual clutter and which ones don’t. These strategies alone can cut your interior costs in half while giving you exactly the style you want. The best part? You’ll have unique pieces that nobody else has. Common Mistakes to Avoid When on a Budget Measure before buying: Keep room dimensions on a phone note and carry a tape measure when shopping secondhand. The piece with the best bones won’t fit through a doorway that wasn’t measured first. Don’t go cheapest on daily-use items: Beds, kitchen sinks, and main couches take daily wear. Buying these secondhand at a quality level beats buying them cheap and new. The couch that feels fine in a showroom for 30 minutes will tell you something different at month six. Don’t ignore resale appeal: Neutral wall colors and large surfaces give barndominium resale value. Personality belongs in throw pillows, art, and plants, things that leave with you when the house sells. Extreme design choices on permanent finishes narrow the buyer pool. Barndominium kitchen designs cover which finish combinations hold resale value and which ones date quickly. Frequently Asked Questions What is the cheapest flooring option for a barndominium? Polished concrete is the most cost-effective at $2–5 per square foot for finishing an existing slab. Luxury vinyl plank is the next best option at $3–5 per square foot installed DIY, and it handles moisture and foot traffic well. How do you insulate a barndominium cheaply? Spray foam on the metal roof and walls is the most effective option for metal barndominium shells. It runs $1–2 per square foot and prevents condensation that causes rust. Batt in framed interior walls adds R-value at a lower cost but needs a vapor barrier in humid climates. Can you drywall a barndominium yourself? Yes. Hanging drywall is a beginner-level skill for walls; ceilings are more demanding and worth hiring out. Budget $0.50–$0.75 per square foot in materials for standard 1/2-inch drywall. Tape, mud, and sanding add time but not significant cost. What paint colors work best in a barndominium interior? Warm whites and light grays work well because they reflect light across large, open spaces without making high ceilings feel cold. Avoid stark cool whites on metal walls; they emphasize any imperfections in the surface finish. How do you heat and cool a barndominium affordably? Mini-split systems are the most cost-effective option. They run $700–2,000 per unit installed, allow zone control, and don’t require ductwork. A well-insulated 1,500 sq ft barndominium typically needs two to three units. Is a barndominium cheaper to maintain than a traditional house? Generally yes. Metal exteriors require less maintenance than wood siding. There are fewer interior walls to repair, and the open layout means HVAC systems work more efficiently across open space. The highest ongoing cost is the roof; inspect seams and fasteners annually. Conclusion I promise you can have your dream home without going broke. I’m living proof that creating a pretty, cheap barndominium interior is possible with smart shopping, DIY projects, and clever design choices. I didn’t need thousands of dollars to make my space look amazing, just creativity and planning. I tackle one or two upgrades at a time instead of doing everything at once. Maybe I’ll paint a room this month and add a thrift store find next month. This spreads costs and helps me score better deals. It’s not about how much I spend, but how smartly I spend it. The money I save goes toward land, equipment, or staying debt-free. For more ideas, check out my other blogs.
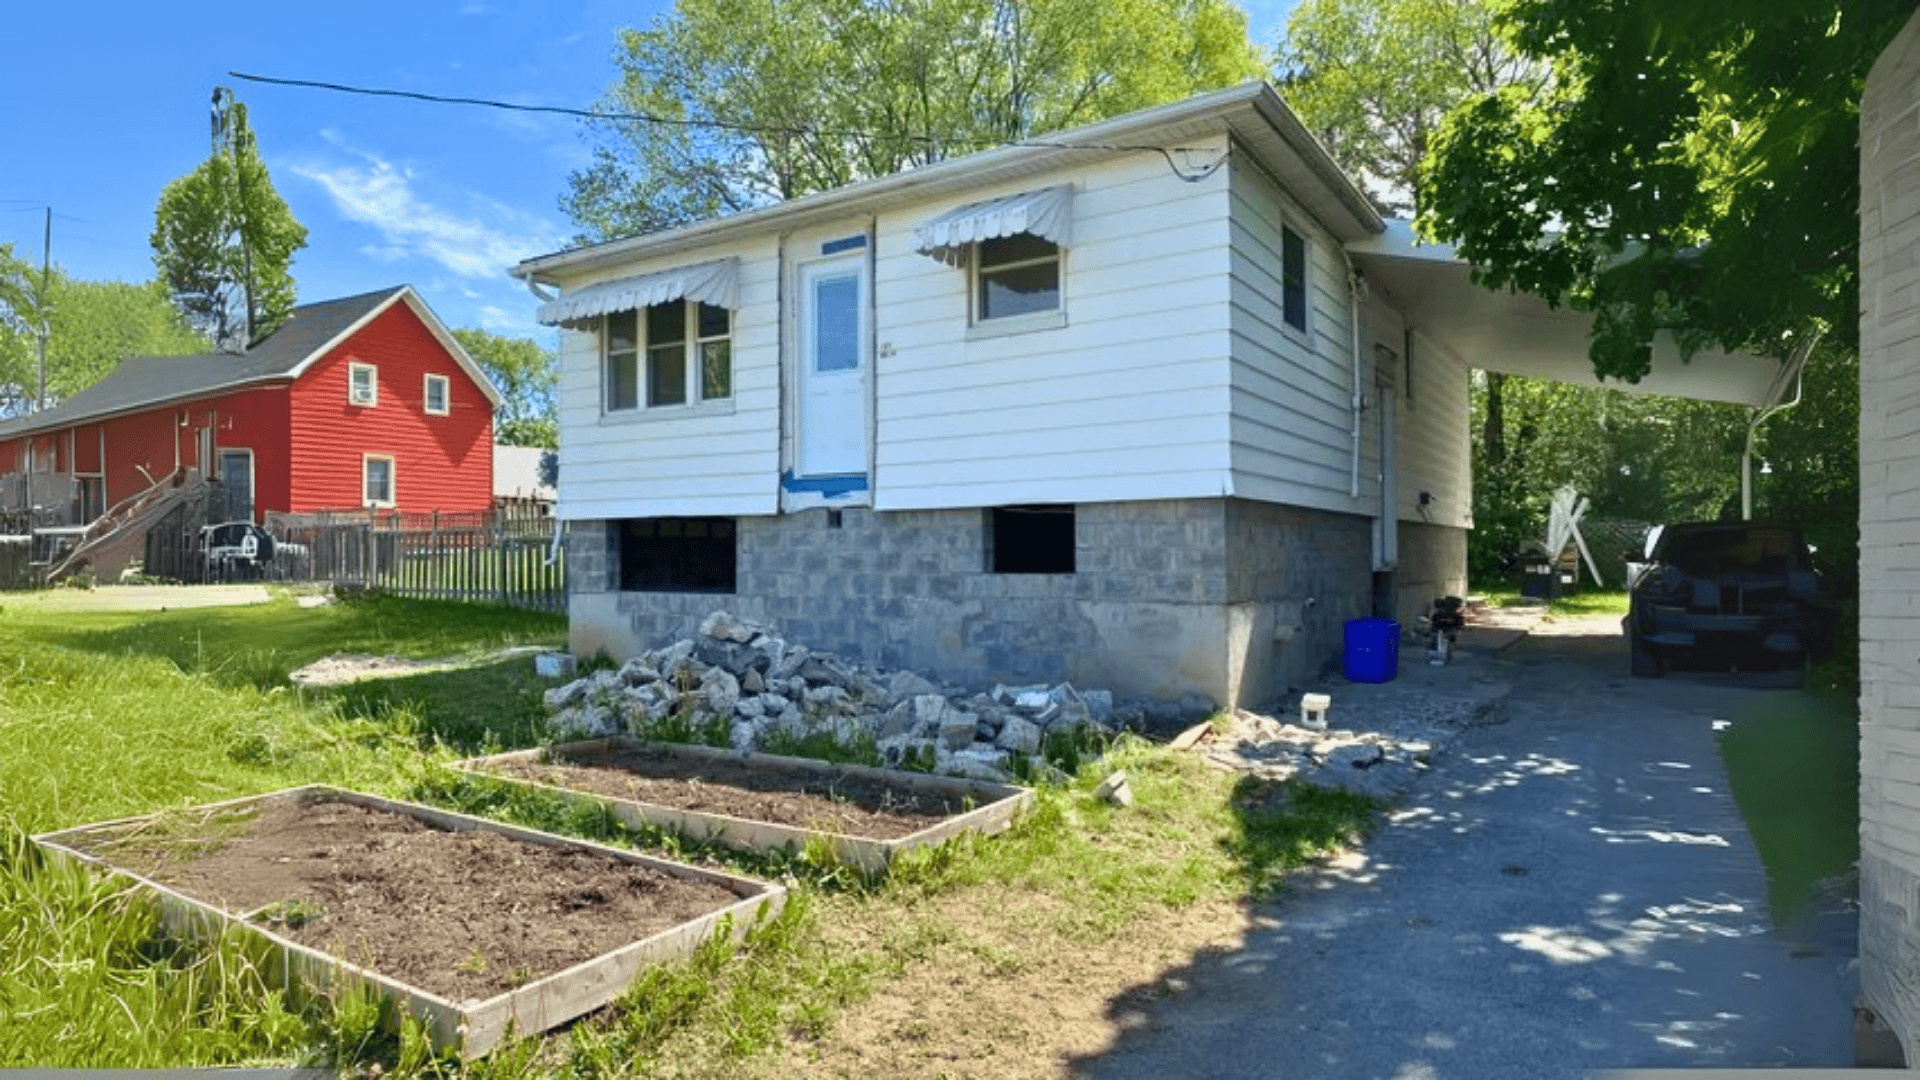
I’ve been thinking lately about ways to add more space to my home, and one question kept coming up: can you add a basement to a house that’s already built? The short answer is yes, but I’ve learned it’s not a simple project. It takes careful planning, the right conditions, and a skilled team to get it done. The costs can also be high, so it’s not something to jump into without weighing your options. In this post, I’ll share what I’ve found about adding a basement, how to tell if your home is a good fit, the methods contractors use, and what it might cost. By the end, you’ll have what you need to decide with confidence. Can You Add a Basement to a House? Yes, you can add a basement to most existing homes. But several factors determine if it’s actually doable for your specific property. The success of your project depends on your home’s foundation type. It also relies on the soil conditions under your house. Your local building codes play a big role, too. Some homes are better candidates than others. Homes with crawl spaces often work well for basement additions. Houses built on concrete slabs face more challenges. Foundation Type Before moving forward, it’s worth looking at your home’s foundation type, since some make the project much easier while others can be far more challenging. Here are some situations you might find yourself in: Homes with crawl space foundations are usually the best candidates. The space already exists under your house. Contractors can work with the existing structure more easily. Slab-on-grade foundations create more problems. The concrete slab sits directly on the ground. Adding a basement means breaking through this slab completely. Basement foundations might seem like they’d work well. But if you already have a partial basement, extending it requires careful planning. Soil Conditions The type of soil beneath your home can make a big difference when adding a basement, as some soils are stable and easy to work with, while others can cause major challenges. These are some soil conditons to observe: Clay soil can shift and move over time. This creates problems for new basement walls. Sandy soil drains well but may not provide strong support. Rocky soil is often ideal for basement construction. It provides solid support and good drainage. However, rocky soil is also expensive to excavate. Your contractor will need to test your soil before starting. This testing reveals the soil’s bearing capacity and drainage properties. Structural Integrity Your existing house must be strong enough to handle the construction process. Adding a basement means digging under your current foundation. This temporarily weakens the support for your home. Your house needs enough structural strength to stay stable during construction. Older homes might need reinforcement before a basement addition can begin. This adds extra time and cost to your project. A structural engineer should evaluate your home first. They’ll determine what reinforcement might be needed. Local Building Codes Every city and county has different rules about basement additions. Some areas don’t allow basement construction at all. Others have strict requirements about depth and drainage. You’ll need permits before any work can start. Building codes also affect the final design of your basement. They determine ceiling height, emergency exits, and ventilation requirements. Check with your local building department early in the planning process. This saves you from expensive surprises later. When It’s Not Recommended: Avoid basement additions in flood zones, with high water tables, weak or damaged foundations, or utilities running under the house. Ways to Add a Basement Contractors use different methods depending on your home’s situation. Each method has its own benefits and challenges. The three main approaches are underpinning, top-down construction, and excavating under the existing home. Your contractor will recommend the best method for your specific situation. 1. Underpinning Underpinning strengthens your existing foundation while adding basement space below. This method works by digging small sections at a time. Contractors pour new concrete footings deeper than your current foundation. They then build new basement walls that connect to these footings. The process happens in stages to keep your house stable. Only small sections get excavated at once. This prevents your foundation from shifting or settling. Underpinning works well for homes with shallow foundations. It’s also good when you need to go deeper for code requirements. The main downside is time. This method takes longer than other approaches. It also requires careful coordination to maintain structural integrity. 2. Top-Down Construction Top-down construction builds the new basement from the top level down. Contractors start by installing support beams and temporary foundations. They then excavate from inside your existing basement or crawl space. New walls get built as they dig deeper. This method offers better control over the excavation process. It also provides more working space for contractors. The existing structure stays more stable during construction. Top-down construction works well for larger basement additions. It’s also useful when soil conditions are challenging. The method requires more initial setup and planning. It can also be more expensive than other approaches. 3. Excavating Under an Existing Home Direct excavation involves digging out space under your current foundation. This method requires lifting or supporting your house during construction. Contractors use hydraulic jacks or steel beams to hold up the structure. They then excavate the soil and build new basement walls. Direct excavation can be faster than other methods. It also allows for more design flexibility in your new basement space. However, this approach carries higher risks. Moving your house even slightly can cause cracks or structural damage. It requires experienced contractors and careful monitoring. Budgeting for a Basement Addition A basement addition is one of the most expensive upgrades you can make to your home. The price can swing a lot depending on your property, location, and the complexity of the work. Here’s a breakdown of the main costs you might face: Cost Item Typical Range Notes Total Project Cost $40,000 – $100,000+ Basic addition; complex builds can exceed $150,000 Labor 40% – 60% of the total cost Skilled trades, excavation crew, structural work Excavation Varies widely Higher for rocky soil or poor site access Waterproofing Included or +$5,000+ Needed for poor drainage areas Permits & Inspections $2,000 – $5,000 Required for code compliance Engineering Consults $1,500 – $3,000 Ensures safe design and construction Materials 30% – 50% of the total cost Concrete, reinforcement, and insulation Regional Adjustments Variable Urban labor costs are higher; rural areas may have higher transport fees Costs can rise quickly when you hit unexpected challenges, such as hitting bedrock or needing major waterproofing. This is why it’s important to get multiple detailed quotes and factor in a contingency budget before you start. How Long Does It Take to Complete a Basement Addition? Most basement addition projects take 3-6 months to complete. Simple projects with good soil conditions might finish in 8-12 weeks. Complex projects with challenging conditions can take 6-9 months or longer. Several variables affect your timeline. Weather delays are common during excavation phases. Permit approval can add weeks to your schedule. Unexpected problems often extend construction time. Hidden utilities, poor soil conditions, or structural issues create delays. Plan for 20-30% longer than the initial estimates. The method chosen also affects timing. Underpinning typically takes longer than direct excavation. Top-down construction falls somewhere in between. Pros and Cons of Adding a Basement Adding a basement can bring valuable space and functionality to your home, but it also comes with challenges. Here are the main pros and cons to consider: Benefits Drawbacks Significant increase in living space Very high upfront costs Adds storage without using yard space Long construction timeline Can increase home value by 10-20% Major disruption to daily life Provides space for utilities and mechanicals Risk of moisture problems Creates opportunities for rental income Requires ongoing maintenance Improves the home’s foundation strength Limited ceiling height options Adds emergency shelter space Potential for cost overruns Weighing these pros and cons will help you decide if adding a basement is worth the investment and effort for your specific home and needs. Basement Addition vs. Other Expansion Options When you need more space, a basement is just one of several expansion options. Here’s how it stacks up against other ways to increase your home’s square footage: Second-story additions: Typically cost less than basement additions and cause less disruption to your daily routine. However, they change your home’s exterior appearance significantly. Ground-level extensions: Often the most cost-effective option, easier to build, and cause fewer structural concerns. But they reduce your yard space permanently. Basement additions: Don’t change your home’s exterior appearance or reduce outdoor living space. The added space works well for utilities, storage, or recreation. Consider your specific needs and budget. Also, think about your neighborhood’s character and your long-term plans for the home. Permits, Codes, and Inspections Basement additions need permits and inspections. Plans must meet safety codes, including 7–8 foot ceilings, emergency egress windows, and proper ventilation. Electrical and plumbing require separate permits and must meet current standards. Inspections happen at key stages: foundation, framing, and final approval. Start the permit process early, as reviews can take weeks and may need soil reports or engineering stamps. How to Choose the Right Contractor for a Basement Addition A basement addition is a major project, and the contractor you hire can make all the difference in the outcome. Start by reviewing their permit history through public records to see if they’ve successfully completed similar basement projects in your area. Ask about subcontractors so you know exactly who will be doing the work and whether they’re properly licensed. Always get a detailed written contract that includes the project scope, materials, schedule, and payment terms to avoid confusion later. Finally, confirm whether they offer a workmanship warranty and how long it lasts. Taking these steps will help you choose a contractor who delivers quality results and keeps your project running smoothly from start to finish. Long-Term Maintenance for the Basement Keeping your basement in great shape over the years takes regular care and attention. Here are some key maintenance tips to protect your investment: Clean drains, gutters, and downspouts. Inspect for cracks or leaks yearly. Control humidity with dehumidifiers. Keep the soil sloped away from the foundation. Check for water intrusion after heavy rain. With consistent upkeep, your basement will stay functional, comfortable, and valuable for many years to come. Wrapping Up Adding more space has completely changed how I use and enjoy my home. If you’ve ever wondered, “Can you add a basement to a house?” you now have a clearer picture of what’s involved. From checking the structure to understanding costs, permits, and hiring the right people, I’ve learned this is a project that takes serious planning. It’s not the easiest thing to take on, but if your home and budget are a good fit, the results can be worth it. I hope walking through these steps has made things clearer for you, too. If you’re looking for more ideas and practical home tips I’ve tried myself, read other posts on the website; you might find your next project waiting there.

Planning a new home is exciting, but it also comes with big questions. One of the first things you need to know is your construction cost per square foot. Knowing this number gave me a solid starting point for my budget. I could take my planned square footage, multiply it by the local rate, and get a realistic idea of my base cost. I’ll walk you through what’s included in that number, what can make it go up or down, and how it changes from state to state. You’ll also see examples, so you can plan with confidence and avoid the surprises that catch many homeowners off guard. National Ranges for Construction Cost per Square Foot Understanding the average construction cost per square foot can help you plan your budget with more confidence. These figures vary based on location, building type, and project complexity, but national ranges give a helpful starting point for estimates. Finish Level Cost Per Square Foot Basic $100 – $130 Mid-Range $130 – $180 Custom $180 – $300+ Factors that push costs higher: Certain choices and conditions can quickly increase your construction costs. Here are some key factors that can push your price per square foot higher: Complex roof lines High-end materials Multiple stories Remote locations Tight labor markets Costs per Square Foot by Location Construction costs can shift significantly depending on where you’re building. Factors like labor rates, material availability, and regional demand all play a role. Comparing location-based averages helps you set realistic expectations and align your project with your budget. State Averages Construction costs vary widely across the country. Here’s what you can expect by region: Lower cost states: $90 – $120 per square foot Alabama, Mississippi, Arkansas Rural areas with lower labor costs Average cost states: $120 – $160 per square foot Texas, Florida, North Carolina Growing markets with steady demand Higher cost states: $160 – $250+ per square foot California, New York, Massachusetts Urban areas with expensive labor and materials City and Zip Code Factors Urban areas typically cost 20 – 40% more than rural locations. Labor rates drive most of this difference. Climate affects costs, too. Cold regions need better insulation and heating systems. Areas with hurricanes or earthquakes require special construction methods. Building codes also vary. Some cities have stricter energy requirements or fire safety rules that add to your budget. Market Examples To give a clearer sense of how construction costs vary across the country, here are sample estimates from three very different markets: Market Type 1,500 sq ft 2,000 sq ft 2,500 sq ft Low-cost (Rural Alabama) $135,000 – $165,000 $180,000 – $220,000 $225,000 – $275,000 Average (Austin, Texas) $195,000 – $240,000 $260,000 – $320,000 $325,000 – $400,000 High-cost (San Jose, California) $300,000 – $375,000 $400,000 – $500,000 $500,000 – $625,000 These figures reflect typical price ranges for new home construction in each area and can help you understand how location influences your budget. What “Cost per Square Foot” Includes (and What It Doesn’t) When looking at construction cost per square foot, it’s important to know what’s part of the calculation and what’s not. Here’s what to know: Included Not Included Foundation and framing Land purchase Roofing and siding Utility connections to the street Interior walls and flooring Landscaping and driveways Basic kitchen and bathroom fixtures Architectural design fees Standard electrical, plumbing, and HVAC Building permits Insulation and drywall Appliances and furniture Garage or outbuildings Tip: These boundaries can vary by builder, so always confirm exactly what’s covered in your estimate before comparing prices. Construction Soft Costs and Site Costs Beyond the base construction price, there are additional expenses that cover planning, permits, and preparing the building site. These costs can significantly impact your overall budget and should be factored in early. Here’s what to know about construction soft costs and site costs: Soft Costs (15-25% of construction) Soft costs cover the behind-the-scenes expenses that keep your project moving, from design fees to permits. Here’s what typically falls into the 15–25% range: Architectural plans: $5,000 – $15,000 Engineering: $2,000 – $8,000 Building permits: $1,000 – $5,000 Inspections: $500 – $2,000 Site Work Ranges Site preparation can vary widely in cost depending on the location and condition of your land. Here’s a look at common site work ranges to help you budget: Basic grading: $2,000 – $5,000 Septic system: $8,000 – $15,000 Well drilling: $3,000 – $10,000 Long driveways: $3,000 – $12,000 Rock removal: $5,000 – $20,000 Design and Specification Drivers The design choices and specifications you select for your home can have a big impact on overall costs. Here are the main factors that often influence the final price: Foundation type matters. Slab foundations cost less than full basements. Crawl spaces fall in the middle. More stories mean higher costs. Two-story homes need more complex framing and additional stairs. Roof complexity adds expense. Simple gable roofs cost less than hip roofs with multiple dormers. Kitchen and bathroom count. These rooms have the highest cost per square foot due to plumbing, electrical, and fixtures. Material choices make a big difference. Vinyl siding costs much less than stone or brick. Market Notes and Trends Material costs have stabilized after the big increases of recent years. Lumber prices remain higher than pre-pandemic levels, but aren’t spiking anymore. Labor shortages continue in most markets. This keeps wages high and can extend construction timelines. Supply chain issues have mostly resolved. Most materials arrive on schedule now. Interest rates affect your construction loan costs. Higher rates mean higher carrying costs during the build process. Timing your build When you choose to start construction can affect both your budget and your timeline. Here’s what to consider when timing your build: Start planning 6-12 months ahead Get multiple bids early Lock in your construction loan rate when possible Plan for weather delays in your timeline Commercial Construction Cost per Square Foot Commercial construction costs can vary even more widely than residential projects, depending on the type of building, its purpose, and the required specifications. Understanding these averages can help set realistic expectations before diving into project planning. Typical Ranges Here’s an overview of the typical cost ranges you can expect, helping you see what your project is might fall and plan your budget more accurately: Office Buildings: Class A $200–$300, Class B $150–$220, Class C $100–$170 per sq ft Retail Spaces: Strip centers $120–$180, shopping malls $180–$250, standalone stores $140–$200 per sq ft Warehouse & Industrial: Basic warehouse $60–$90, manufacturing $80–$120, cold storage $150–$200 per sq ft Regional Premiums In some locations, especially large metropolitan areas, building costs can be much higher than the national average. Here’s how regional premiums can impact your budget: New York City: Add 40-60% to national averages San Francisco: Add 35-50% to national averages Washington, DC: Add 25-35% to national averages Seattle: Add 20-30% to national averages Denver: Add 15-25% to national averages Core and Shell vs. Tenant Improvements Commercial projects are split into two main categories: Core and shell cover the basic building structure, roof, exterior walls, and utilities in each space. This typically runs $80-150 per square foot. Tenant improvements (TI) include interior build-out, flooring, lighting, and finished surfaces. Budget $30-100 per square foot, depending on the use. Common Mistakes to Avoid Avoiding a few common pitfalls can save you time, money, and stress during your build. Here are the mistakes to watch out for when planning your project: Underestimating soft costs: Planning fees, permits, and engineering can add 15–25% to your base construction cost. Skipping a contingency fund: Unexpected expenses are almost guaranteed. Set aside at least 10–15% for surprises. Not accounting for site work: Driveways, grading, or rock removal can add thousands if not budgeted from the start. Choosing materials too late: Last-minute selections can delay schedules and increase costs due to rush orders. Failing to confirm what’s included: Builders vary in what they cover for the quoted cost per square foot. Taking these into account early helps prevent cost overruns and project delays. Summing Up Planning a new home is a big project, and knowing your construction cost per square foot gives you a strong starting point. It’s the number that helps you see how size, finishes, and location all shape your budget. I’ve shared what’s usually included, what’s not, and how costs shift from one area to another. You’ve also seen how extras like soft costs and site work fit into the bigger picture. Now it’s your turn to put the numbers to work. Use them to plan smarter, talk with local builders, and keep your budget realistic from day one. If this was helpful, take a look at other blogs on the website for more tips and practical ideas.

Once the Christmas lights come down, I know it’s easy for your home to feel a little bare. I’ve been tempted plenty of times to leave decorations up just a bit longer, but I’ve found that giving things a winter refresh makes a big difference. You can still have warmth, comfort, and personality, just without the holiday overload. That’s why I’ve put together some practical after-Christmas winter decorating ideas you can start using right away. I’ll share simple updates for every room, from adding cozy layers to swapping in subtle seasonal accents. This way, your home will feel welcoming, balanced, and ready to carry you through the rest of the winter season in style. The Value of Updating Your Home After the Holidays Once the holidays pass, your home can feel empty after festive decorations come down. Changing your setup gives your space a fresh, welcoming feel while still keeping it cozy. It’s a chance to swap bright seasonal pieces for softer winter accents, creating a calm setting that fits the colder months. This update also helps you enjoy your space more, making it feel lived-in rather than bare. By focusing on simple changes like adding layers, soft lighting, and natural elements, you can keep your home feeling warm and inviting until spring arrives. Choose a Winter Color Palette Picking the right winter color palette can set the tone for a cozy and inviting home. Here are some ideas to inspire your seasonal look: Neutral & Cozy Soft whites, gentle creams, and warm wood tones create a calm, comfortable atmosphere during the winter months without feeling plain. Here’s how to use this palette in your space: Add a cream throw blanket with textured knit pillow covers. Use framed wall prints in muted neutrals for visual balance. Pair wood-tone side tables with neutral lamps for warmth. Cool & Frosty Icy blues, soft silvers, and gentle grays bring a refreshing, crisp look that brightens your home during the winter season. Try these ideas to bring the palette to life: Use light blue pillow covers for a seasonal touch. Hang silver-toned wall art for a subtle shimmer. Add frosted glass vases for texture and brightness. Warm & Rustic Earthy taupes, rich browns, and deep greens create a grounded, welcoming atmosphere that feels perfect for the colder months. Incorporate this palette with these touches: Layer a dark green throw on your sofa or bed. Use taupe pillow covers for balance. Add wooden picture frames or shelves in natural tones. After Christmas Winter Decorating Ideas by Room Refreshing your home after the holidays is easier when you tackle it room by room. Here are winter decorating ideas to bring warmth and balance to each space: Living Room In the living room, small changes can make a big impact on how warm and inviting the space feels. Here are some simple living room christmas decor ideas updates to try: 1. Add Seasonal Couch Blankets Drape seasonal blankets in winter colors across your sofa to create a comfortable, welcoming look. Use soft fabrics like knits or fleece for extra coziness. This small touch can refresh your living room instantly, making it feel ready for the colder months without a complete decor overhaul. 2. Style a Cozy Mantel with Candles Arrange pillar candles, lanterns, and fresh greenery across the mantel to create warmth. Use varying candle heights for interest and group them in odd numbers for balance. Consider unscented candles in common spaces to keep the focus on appearance. Add pine or cedar stems for a natural accent that blends well with other winter decor. 3. Add Faux Fur Accent Pillows Place faux fur pillows on sofas or armchairs to introduce softness. Choose covers that are easy to remove and wash for practicality. Keep the color palette neutral to match seasonal tones. Layer these pillows with knit or linen options for texture variation, ensuring the seating area feels comfortable and inviting during winter evenings. 4. Display a Winter Garland Lay an evergreen garland made of pine, cedar, or eucalyptus across the mantel. Secure it with clear hooks or small nails to keep it in place. Leave it undecorated for a simple, natural look, or add small pinecones for interest. A garland like this ties the room together and keeps a hint of greenery indoors. 5. Use a Wooden Coffee Table Tray Place a wooden tray in the center of your coffee table to organize seasonal accents. Include a small vase with bare branches, a few pinecones, and a candle for balance. The tray makes it easy to move items for cleaning and keeps decor contained while still feeling thoughtful and intentional. Entryway Your entryway sets the tone for your entire home, so giving it a seasonal refresh can make every arrival feel warm and welcoming. Here are a few ideas to start with: 6. Lay a Seasonal Welcome Mat Place a mat with a subtle snowflake design or a simple winter greeting at your front door. Choose durable materials that trap dirt and moisture from shoes. Neutral colors ensure it works all season long. A fresh mat not only greets guests warmly but also protects your floors from winter mess. 7. Style a Console Table with Greenery Add a seasonal foliage arrangement with pine or eucalyptus stems to the console table. Pair with one or two candles in simple holders. This arrangement adds height and texture while keeping the entryway clear and uncluttered. Use faux greenery if you prefer low maintenance, or refresh real stems every couple of weeks for lasting freshness. 8. Add a Decorative Wall Hook for Scarves Install a sturdy wall hook or small rack near the door for scarves or hats. Choose a finish that complements your existing furniture. This makes it easy for you and your guests to grab warm accessories quickly. The added detail also brings seasonal charm without taking up much space. 9. Place a Small Lantern or Lamp Set a lantern with a battery-operated candle or a small table lamp in the entryway for gentle lighting. Use a warm bulb to create an inviting feel. Lighting like this is especially helpful during darker winter afternoons and evenings, giving the space a pleasant glow. 10. Use a Basket for Cozy Accessories Keep a woven or fabric basket by the door to store gloves, hats, or small blankets. It keeps these items organized and easy to find. Choose a basket that matches your other decor for a cohesive look. This simple touch helps maintain a neat and functional entry space. Dining Room The dining room and entryway are perfect spots to add subtle winter touches that make your home feel inviting from the moment you walk in. Here are some ideas to inspire you: 11. Create a Winter Centerpiece Fill a long wooden or ceramic tray with candles, pinecones, and sprigs of greenery. Arrange items at varying heights for visual interest. This design can stay in place for weeks without needing much upkeep. Keep the color palette neutral so it fits with any tableware you use during the season. 12. Use a Neutral Table Runner Lay a table runner in a natural fabric like linen or burlap down the center of your table. This adds texture without overpowering the rest of the decor. It also provides a clean backdrop for seasonal centerpieces or dishes. Neutral tones make it easy to switch out accents as winter progresses. 13. Add Seasonal Place Settings Layer dinner plates with cloth napkins and wooden napkin rings for a winter look. This setup feels thoughtful without being overly formal. Use simple patterns or solid colors that match your seasonal palette. It’s an easy way to make everyday meals feel special during the colder months. 14. Hang a Winter Wreath Above the Table Place a plain greenery wreath on the wall near the dining table. Keep it undecorated for a natural appearance or add a few pinecones for interest. A wreath in this setting adds height and seasonal color without taking up table space. 15. Use Clear Glass Vases with Bare Branches Fill tall, clear vases with bare branches for a simple centerpiece or corner accent. You can collect real branches from outside or purchase faux ones for convenience. This look works well alongside candles or greenery for added depth. Kitchen The kitchen is the heart of the home, even in winter, making it a great place to add cozy details and seasonal visuals. Here are some ideas to get you started: 16. Style a Tiered Tray with Winter Mugs Arrange a tiered tray with mugs you use often, adding pine sprigs and a few small ornaments for decoration. Keep items practical but appealing so the display feels purposeful. This setup works well on a counter or island and can be updated as winter progresses. The combination of greenery and mugs adds both seasonal class and functionality to your kitchen space. 17. Hang a Seasonal Tea Towel Choose a cotton or linen tea towel with a simple winter stripe or pattern in soft colors. Hang it over the oven handle or a wall hook for easy access. This is a quick update that costs little and adds a gentle seasonal detail. It also allows you to change the look of your kitchen instantly by swapping patterns when you like. 18. Display a Small Greenery Arrangement Place a countertop foliage display with a few potted pine stems or eucalyptus in a ceramic pitcher or small vase. Set it on the counter, windowsill, or open shelving. Real greenery adds a fresh scent, while faux greenery offers a no-maintenance option. This small arrangement keeps your kitchen feeling lively without taking up much workspace, making it both decorative and practical during the winter season. 19. Use Wooden Cutting Boards as Decor Lean wooden cutting boards against the backsplash to add warmth and texture to your kitchen. Choose boards in different shapes and sizes for variety. This arrangement blends easily with other kitchen items and keeps boards within reach for cooking. It’s a simple way to mix function with style, giving your kitchen a seasonal touch without losing workspace. 20. Add a Countertop Candle Place a candle in a winter scent like vanilla or cedar on the counter where it’s safe and visible. Light it in the evenings or when hosting to create a comfortable atmosphere. Choose a container that matches your kitchen’s style so it looks intentional even when unlit. This small touch brings warmth and aroma to the heart of your home. Bedroom Your bedroom should feel like a warm retreat during the colder months, making it the perfect place to add soft textures and calming winter accents. Here are some ideas to try: 21. Seasonal Bedding Layers Switch to winter-friendly bedding like flannel sheets or a quilt in soft, neutral shades. Add a plush accent throw at the bed’s foot for warmth and style. This layered approach keeps your bedroom comfortable through colder nights while giving it a refreshed, seasonal look without feeling overly decorated. 22. Add Winter Accent Rugs Place a small, soft rug beside the bed to keep your feet warm on chilly mornings. Choose materials like wool or faux sheepskin for comfort and seasonal style. This quick change makes the room cozier without taking up much space or clashing with other winter decor elements. 23. Swap to Seasonal Pillow Covers Replace your current pillow covers with knit or velvet options in winter shades like cream, taupe, or soft gray. Using removable covers makes cleaning simple and storage easy when you switch back. This small change refreshes your bedding without replacing pillows, giving the room a seasonal update that’s affordable and easy to reverse when spring arrives. 24. Add a Small Bedside Lamp with Warm Light Place a lamp with a warm-toned bulb on your nightstand to create a relaxing glow in the evenings. Choose a size that fits your table without overcrowding it. This lighting helps create a comfortable atmosphere for reading or winding down at night, making your bedroom more enjoyable during the darker winter months. 25. Style a Dresser with Winter Greenery Arrange a winter vase display with pine, cedar, or eucalyptus in a small vase on top of your dresser. This simple touch adds seasonal freshness without cluttering the space. Use real greenery for scent or faux stems for low maintenance. It’s a quick, low-cost way to give your bedroom a natural accent that works all winter long. Use Natural Elements for a Fresh Winter Look Add seasonal plants and organic textures to make your home feel connected to nature while keeping a comfortable, welcoming atmosphere. Greenery Fresh pine, cedar, and eucalyptus bring a crisp scent and a touch of green to any space. Place real stems in water-filled vases for longevity or choose quality faux arrangements for low maintenance. These greens work well on mantels, coffee tables, or kitchen counters. Their simple look blends with any style and keeps your home feeling alive during the colder months. Pinecones & Branches in Bowls or Vases Pinecones and bare branches add rustic character without overwhelming a space. Place pinecones in wooden or ceramic bowls for table accents, or stand branches in tall vases for height. Use real pieces from outside for a natural touch, or buy faux options that last year after year. This approach works for entryways, mantels, and dining tables, bringing a seasonal feel indoors. Dried Grasses Dried grasses, such as wheat or pampas, and muted winter blooms add soft texture and visual interest. Arrange them in ceramic or glass vases for tabletops, shelves, or bedside stands. Real dried varieties require little upkeep, while faux options offer the same look without care. Their subtle tones complement winter palettes and mix well with other natural accents like pine or cedar. Small Space & Apartment Tips Even the smallest spaces can feel cozy and seasonal with the right touches. Here are some winter decorating ideas perfect for apartments and compact homes: Choose Multipurpose Furniture Accents: Opt for storage ottomans or side tables with shelves to hold decor and essentials without taking up extra space. Use Vertical Surfaces: Hang wall shelves or floating ledges for small greenery, candles, or framed prints to free up tabletops. Layer Textiles on Key Furniture: Place throws and pillows on main seating areas to keep warmth where you spend the most time. Go for Scaled-Down Decor: Use smaller lanterns, compact garlands, or petite arrangements so pieces fit proportionally to your room size. Maximize Corners and Entry Areas: Add baskets, hooks, or slim stands to store winter accessories neatly in underused spots. With a few thoughtful updates, even a small space can feel warm, inviting, and perfectly suited for the winter months without feeling overcrowded. Storing & Organizing Holiday Decor Keeping your holiday decorations neat and easy to find makes next year’s setup much simpler. Start by grouping similar items together, such as ornaments, lights, and garlands, so you know exactly where everything is. Use clear bins or label each container with its contents to avoid rummaging through boxes. For soft items like stockings, tree skirts, or seasonal pillow covers, vacuum storage bags save space and protect from dust or moisture. Store fragile pieces in padded boxes, and keep everything in a cool, dry area. A little organization now saves time and stress when the holidays return. Recommended Winter Decor Finds Adding a few well-chosen pieces can refresh your home for the season without overhauling your entire setup. Focus on versatile items like soft throws, greenery arrangements, warm lighting options, and neutral wall art that work in multiple rooms. Include a mix of budget-friendly finds for everyday updates and show-off pieces that last for years. You can source these from local home stores, craft markets, or trusted online retailers. Look for styles that match your winter color palette so everything blends seamlessly. A thoughtful selection ensures your decor feels intentional and stays relevant throughout the colder months. Final Thoughts Now that you’ve got plenty of after-Christmas winter decorating ideas, you can start bringing them to life. I like to begin small, maybe with my mantel or coffee table and it’s amazing how just a few changes can shift the whole mood of a room. You don’t have to tackle everything at once. I usually focus on one space, then move to the next when I’m ready. Picking a winter color palette first helps me keep every update feeling connected and intentional. If you’d like even more seasonal inspiration, I’ve shared other winter home styling tips you might enjoy. So, which room will you refresh first? I’d love to hear what you decide and how it turns out!

Are you looking for amazing half bath ideas on a budget that won’t empty your savings account? Small powder rooms offer the perfect opportunity to experiment with innovative decorating without spending a fortune on materials. I understand how overwhelming it can feel when you want to refresh your space but worry about costs. Half bathrooms are actually the smartest place to start your home improvement expedition because they require fewer materials and time. You can achieve surprising conversions using simple tricks, clever storage solutions, and affordable decorative hints that guests will absolutely love. Get ready to turn your tiny powder room into a showstopper without breaking the bank! Why Half Bath Upgrades Are a Smart Move Half bathrooms are small spaces that pack a big punch when it comes to home improvement projects. These compact rooms give you the perfect chance to try bold design ideas without spending tons of money. Since half baths are smaller, you can afford to use higher-quality materials or fun wallpapers that might cost too much in larger rooms. Guests notice your half bath more than any other room because they spend focused time there alone. A stylish powder room creates a lasting impression and shows your attention to detail throughout the house. Plus, small bathroom updates add real value to your home while being much easier to complete than full bathroom renovations. Easy Half Bath Ideas on a Budget I’ve gathered these simple and affordable half bathroom remodel ideas that prove changing your space doesn’t have to cost a fortune. You can create a stylish half bath that looks expensive without breaking your wallet using these budget-friendly decorating tricks: NOTE: These costs are estimated and may vary based on your location, store choices, and current market prices. 1. Paint the Walls a Bold Color Change the look and feel of your half bath by applying a fresh, bold color to the walls. If you choose a deep, dramatic shade or a bright, energizing hue, painting is a simple and cost-effective way to inject personality into the space. A bold color instantly creates a focal point and can make the room feel larger, warmer, and more inviting. Cost: $40 – $100 (budget-friendly paint options) 2. Add a Statement Mirror A statement mirror can completely alter the atmosphere of your half bath. Choose a mirror with an interesting shape, finish, or frame to make it the focal point of the room. A mirror is both functional and decorative, helping to reflect light and visually expand the space. It’s a simple update that adds both style and practicality to the room. Cost: $25 – $100 (affordable decorative mirrors) 3. Install a Floating Shelf Install floating shelves in your half bath to create additional storage while keeping the space feeling open. These shelves are ideal for displaying decorative items, toiletries, or towels, offering both functionality and style. Floating shelves keep the room organized and free of clutter, making them perfect for a small bathroom. They also provide a contemporary, sleek design element. Cost: $20 – $100 (simple, functional floating shelves) 4. Update the Faucet Updating the faucet in your half bath is an easy and budget-friendly way to refresh the look of the space. A new faucet can make the bathroom feel more modern or urbane, depending on the style you choose. Opt for a sleek, contemporary design or a more traditional look to complement the rest of the room’s aesthetic. This simple upgrade can make a big difference. Cost: $50 – $120 (affordable faucet options) 5. Use Peel-and-Stick Wallpaper Peel-and-stick wallpaper is a quick and easy solution for adding pattern and texture to your half bath. With a variety of designs available, you can choose everything from floral patterns to geometric shapes. This affordable and temporary option allows you to create an accent wall or cover all four walls without committing to permanent changes. It’s a fun and low-effort way to alter the room. Cost: $50 – $400 (peel-and-stick wallpaper rolls) 6. Add Pendant Lights A pendant light is a stylish and effective way to brighten up your half bath. This type of lighting fixture can be both functional and decorative, providing ample light while also serving as a design element in the room. If you choose a modern, industrial design or something more traditional, a pendant light can elevate the entire space without overwhelming it. Cost: $30 – $120 (basic pendant light options) 7. Use a Ladder for Towels A wooden ladder is a unique and budget-friendly way to store towels in your half bath. This functional and decorative element adds rustic appeal, warmth, and texture to the room. You can use the ladder to hang bath towels, hand towels, or even decorative items. It’s an easy and affordable solution that also helps save space and adds a personal touch to your bathroom. Cost: $20 – $70 (wooden ladder options) 8. Repurpose Old Furniture Repurposing old furniture is a great way to add joy and character to your half bath without spending a lot of money. Turn an old dresser, console table, or even a small bookshelf into a new vanity, storage unit, or accent piece. This eco-friendly approach gives your bathroom a unique, personalized look while also saving money and reducing waste. Cost: $0 – $150 (costs vary by item) 9. Install a New Shower Curtain A new shower curtain is one of the easiest ways to update the look of your half bath. Choose one that complements the room’s colors or adds a pop of pattern to inject personality into the space. Shower curtains come in many different materials and designs, from simple, minimalist options to bold, statement-making ones. It’s an affordable and effective update. Cost: $15 – $40 (stylish shower curtain options) 10. Decorate with Plants Incorporating plants into your half bath brings a refreshing, organic hint to the room. Choose low-maintenance plants like succulents or air plants, which thrive in humid environments. Plants help improve the room’s air quality and add color and texture to the space. They create a calming, natural atmosphere that makes your half bath feel more inviting and peaceful. Cost: $10 – $100 (low-maintenance plant choices) 11. Add a Rug Adding a rug to your half bath provides warmth, comfort, and style. It’s a simple yet effective way to define the space, especially in a small room. Choose a rug that fits your style, if it’s a bold color, an intricate pattern, or a soft, neutral hue. Rugs also help soften the floor and make the space feel cozy and inviting. Cost: $10 – $100 (low-cost rug options) 12. Change the Cabinet Hardware Changing the hardware on your bathroom cabinets can instantly update the look of your half bath. Swapping out old knobs and handles for more modern or stylish options is a quick and affordable update. If you choose sleek, contemporary pulls or vintage-inspired knobs, this small change can refresh the space and give it a new, more polished look. Cost: $10 – $50 (knobs and pulls for cabinets) 13. DIY Wall Art Creating your own wall art is an affordable way to add personality to your half bath. Use inexpensive materials like canvas, wood, or fabric to craft custom pieces that reflect your style. If you paint your own artwork or use prints, DIY art adds a distinctive feature to the room and can complement any design aesthetic, all while staying within budget. Cost: $0 – $50 (materials for wall art) 14. Create a Gallery Wall A gallery wall is an easy and affordable way to showcase your favorite artwork, photos, or prints. This creates visual interest and adds a distinctive feature to your half bath. You can mix and match different frame styles and sizes to create an eclectic, stylish look that complements the overall decor of the room. It’s a great way to fill empty wall space. Cost: $20 – $100 (frames and art prints) 15. Use Vintage Finds Vintage finds are a fantastic way to add character and delight to your half bath without spending much. Look for unique items such as antique mirrors, storage baskets, or framed artwork. These pieces not only add a sense of history to the room but also bring personality and uniqueness, making your bathroom feel one-of-a-kind. Cost: $20 – $100 (affordable vintage decor) 16. Install Open Shelving Open shelving provides additional storage while helping to keep your bathroom organized. Install a couple of shelves to display decorative items like candles, vases, or small plants. Open shelving also makes the space feel larger and more airy by allowing you to keep essentials within reach while showcasing your favorite bathroom decor. Cost: $50 – $150 (simple shelving units) 17. Update the Toilet Paper Holder A new toilet paper holder can add a hint of style and functionality to your half bath. Replace your old, basic holder with a more modern or unique one that complements your bathroom’s decor. If you go for a minimalist design or something more decorative, a stylish holder makes even the smallest details of your bathroom stand out. Cost: $15 – $40 (stylish toilet paper holders) 18. Use Basket Storage Baskets are a versatile and budget-friendly storage solution for your half bath. Use them to store towels, toiletries, or cleaning supplies while keeping everything organized. Baskets can be placed on shelves, in cabinets, or on the floor, and they come in a variety of sizes, shapes, and materials, allowing you to match them with your bathroom’s decor. Cost: $20 – $70 (storage basket options) 19. Add a Fresh Coat of Grout Re-grouting your tiles can instantly refresh the appearance of your bathroom. Over time, grout can become discolored or worn, but adding a fresh coat can make your tiles look like new. This is a simple, cost-effective way to improve the overall look of your bathroom without replacing the tiles, making the space feel cleaner and more polished. Cost: $20 – $50 (grout for tile refresh) 20. Change the Light Bulbs Switching to warm-toned light bulbs can dramatically change the atmosphere of your half bath. This small update creates a cozy, welcoming atmosphere, making the space feel more inviting. Warm light can also improve your bathroom’s color scheme, providing a softer, more flattering glow compared to harsh, cool lighting, and it’s a simple, budget-friendly upgrade. Cost: $10 – $40 (warm-toned bulbs) 21. Install a Towel Bar Above the Toilet Installing a towel bar above the toilet helps save space while keeping towels within easy reach. It’s a smart and functional addition, especially for small half baths where space is limited. A towel bar also adds a sleek, organized touch to the room, keeping towels neatly stored without taking up valuable floor or wall space. Cost: $15 – $50 (affordable towel bars) 22. Add a Sliding Barn Door A sliding barn door is a stylish and space-saving solution for your half bath. Unlike traditional hinged doors, a barn door slides along the wall, making it ideal for smaller bathrooms with limited space. It adds rustic appeal and can be customized to fit your bathroom’s style while saving space and enriching the room’s overall look. Cost: $300 – $700 (affordable barn doors) 23. Opt for a Simple Shower Shelf A simple shower shelf or caddy can help you keep your bathroom essentials organized. Install a small shelf to hold toiletries like shampoo, soap, and lotion, keeping them within reach while maintaining a tidy space. It’s an inexpensive and efficient way to improve your half bath’s functionality without taking up too much space. Cost: $15 – $40 (hanging caddy or shelf) 24. Install a Small Vanity with Storage A small vanity with storage is a functional and stylish addition to your half bath. Choose a compact design that provides ample space for essentials like toiletries, cleaning supplies, and towels. A small vanity keeps the room organized and adds a modern glimmer without overwhelming the space. It’s a practical solution for maximizing storage in a small bathroom. Cost: $100 – $300 (compact vanity) 25. Use Concrete or Faux Concrete Floor Concrete or faux concrete floors offer a modern, industrial look to your half bath. These durable floors are relatively inexpensive to install, and they come in a variety of finishes. Faux concrete options can mimic the sleek, polished appearance of concrete at a lower cost, making it an affordable and stylish flooring choice for small spaces. Cost: $3 – $7 per sq ft. (concrete flooring) 26. Create a Minimalist Look A minimalist look is perfect for creating a serene, uncluttered space in your half bath. By reducing the number of accessories and focusing on the essentials, you can make the room feel more open and calming. A minimalist design allows the beauty of the space to shine through without distractions, keeping everything neat and simple. Cost: $0 – $50 (minimize accessories) 27. Add a Small, Frameless Mirror A small, frameless mirror can be a graceful addition to your half bath. Its sleek, simple design helps to make the space feel more open and modern. Frameless mirrors are perfect for smaller bathrooms, as they reflect light and create the illusion of a larger space. They are also easy to install and maintain, adding both function and style. Cost: $20 – $100 (sleek mirror) 28. Use Chalkboard Paint Chalkboard paint is a fun and functional way to personalize your half bath. This unique wall treatment allows you to write notes, reminders, or create artwork. It creates a fun atmosphere in the room and can be easily wiped clean. Chalkboard paint is budget-friendly and easy to apply, making it a great DIY option for a quick room update. Cost: $20 – $50 (chalkboard paint) 29. Install a Small Corner Sink A small corner sink is a space-saving solution for tiny half baths. Installing a corner sink maximizes available floor space while still providing the necessary function. These sinks are especially useful in bathrooms with limited space, offering a compact yet efficient design. Choose one with a stylish finish to complement your bathroom’s decor. Cost: $100 – $200 (space-efficient sink) 30. Paint the Ceiling a Dark Color Painting the ceiling a dark color is a bold design choice that can add depth and warmth to your half bath. Dark ceilings create a cozy, intimate atmosphere and can make the room feel more grounded. It’s a unique way to draw the eye upward and add an urbane hint, especially when paired with light-colored walls. Cost: $30 – $80 (paint cost) 31. Add a Floating Wall Hook A floating wall hook is a practical and stylish storage solution for your half bath. Use it to hang towels, robes, or accessories without taking up valuable floor space. This small addition adds functionality and helps keep the room organized while maintaining a clean, uncluttered look. It’s a simple update that makes a big difference in small spaces. Cost: $10 – $30 (hooks for small spaces) 32. Use Reclaimed Wood Incorporating reclaimed wood into your half bath adds rustic appeal a. Use it for shelving, frames, or wall accents to bring warmth and texture to the room. Reclaimed wood is often budget-friendly and eco-friendly, making it a sustainable and stylish way to update your space. Its character and history bring personality to your bathroom. Cost: $20 – $100 (wood for shelves/decor) 33. Install a Pedestal Sink A pedestal sink is a classic, space-saving solution for smaller half baths. Its slim profile provides ample space around the sink, making the room feel more open. Pedestal sinks come in a variety of styles, from traditional to modern, and they can be a classy addition to your bathroom decor. This simple fixture is both functional and stylish. Cost: $50 – $150 (budget pedestal sink) 34. Create a Coastal Feel Create a coastal feel in your half bath by incorporating beach-inspired decor. Use light, airy colors such as soft blues and whites, and add natural elements like seashells, wicker, and driftwood. A coastal theme brings a relaxing, vacation-like vibe to the space, making it feel fresh and calming without the need for expensive updates. Cost: $20 – $100 (beach-inspired decor) 35. Install Wall-Mounted Lighting Wall-mounted lighting is a great option for small half baths where space is limited. These fixtures help save room while providing ample lighting for the space. Wall sconces or other wall-mounted lights can add classiness, providing both task lighting and ambient lighting to improve the atmosphere of the room. Cost: $80 – $120 (wall sconces) 36. Upcycle Old Doors Upcycling old doors is an innovative and budget-friendly way to add character to your half bath. Repurpose old doors as mirrors, vanities, or even as part of the wall decor. This sustainable approach not only saves money but also gives your bathroom a unique, personalized appeal that reflects your style and resourcefulness. Cost: $0 – $150 (repurposing cost varies) 37. Install a Small Wall-Mounted Toilet A wall-mounted toilet is a space-saving design choice that works well in small half baths. By mounting the toilet on the wall, you free up valuable floor space, making the room feel larger and more open. These toilets offer a sleek, modern look while improving the functionality and flow of the bathroom. Cost: $400 – $800 (space-saving toilet) 38. Add Patterned Tiles Patterned tiles are an easy way to add visual interest to your half bath. Choose bold designs for the floor or accent walls to create a statement piece. Budget-friendly patterned tiles come in a wide range of styles, from geometric to floral, allowing you to personalize your space with color and texture without breaking the bank. Cost: $200 – $600 (budget tile) 39. Incorporate Mirrors with Different Frames Incorporating mirrors with different frames is an eclectic way to add character to your half bath. Use a mix of frames in varying sizes, styles, and finishes to create a dynamic, personalized look. This approach can reflect light, making the space feel larger, while adding texture and style to your bathroom walls. Cost: $50 – $120 (eclectic mix) 40. Add a Shiplap Wall Shiplap adds a rustic, cozy feel to your half bath. Install shiplap panels on one wall to create a lovely, farmhouse-inspired aesthetic. It’s an affordable and easy way to bring texture and depth to the room, making it feel warm and inviting. This DIY-friendly option adds significant character to your space without major expenses. Cost: $50 – $150 (shiplap paneling) 41. Use DIY Stencils on the Wall DIY stencils are an easy and cost-effective way to add a custom design to your half bath. Use stencils to create patterns on the walls, giving the room a unique look. If it’s geometric shapes, floral designs, or abstract patterns, stencils allow you to personalize the space without the need for expensive wallpaper or artwork. Cost: $10 – $50 (stencil kits) 42. Install a Freestanding Towel Rack A freestanding towel rack provides both functionality and style in a half bath. These racks can be placed anywhere in the room, providing extra storage for towels without taking up wall space. A simple towel rack creates a minimalist feel and helps keep the bathroom organized and clutter-free. Cost: $50 – $120 (no installation) 43. Repurpose an Old Window as a Mirror Repurposing an old window frame as a mirror is an affordable and innovative way to add character to your half bath. This unique piece gives the room a vintage, rustic feel and can serve as a focal point. It’s a sustainable and budget-friendly DIY project that adds joy to your bathroom. Cost: $0 – $50 (repurposing cost) 44. Choose a Light and Neutral Color Scheme Opting for a light and neutral color scheme in your half bath can create a calming, spacious feel. Soft hues like whites, creams, and light grays help reflect light, making the room appear larger. These colors are versatile and graceful, ensuring your half bath remains stylish for years to come. Cost: $40 – $100 (paint/colors) 45. DIY Pottery for Decor Making your own pottery is a fun and budget-friendly way to personalize your half bath. Create small vases, bowls, or decorative items that reflect your style. DIY pottery allows you to add unique, one-of-a-kind pieces to your bathroom without spending a lot of money. It’s an innovative way to improve the space. Cost: $10 – $50 (pottery supplies) 46. Use a Bamboo Towel Rack A bamboo towel rack is an eco-friendly and stylish storage solution for your half bath. Bamboo is durable, lightweight, and adds a natural hint to the room. This budget-friendly option provides a modern, sustainable way to store towels while adding warmth and texture to the space. Cost: $20 – $70 (eco-friendly rack) 47. Install a Wall-Mounted Soap Dispenser A wall-mounted soap dispenser helps keep your half bath organized and hygienic. It’s a sleek, minimalist option for storing soap, and it frees up counter space. Choose a simple design that complements the rest of your bathroom’s decor, creating a clean, modern look while improving functionality. Cost: $15 – $40 (dispensers) 48. Hang a Simple Art Print Hanging a simple art print can instantly elevate the look of your half bath. Choose a print that complements the room’s color scheme or theme. It’s an inexpensive way to add a personal touch to the space and introduce color or pattern without overwhelming the room. Cost: $10 – $40 (minimal art print) 49. Add Industrial Elements Incorporating industrial elements, such as metal fixtures or exposed pipes, can give your half bath a modern, edgy feel. Use these elements for towel racks, shelving, or lighting fixtures. The contrast between metal and other materials adds visual interest and gives your bathroom a unique, urban vibe. Cost: $20 – $100 (pipes/metal fixtures) 50. Use Wall Decals Wall decals are an easy and budget-friendly way to decorate your half bath. Choose from a variety of designs to add flair to the walls. If you opt for floral patterns, geometric shapes, or fun sayings, decals are simple to apply and can be easily removed, allowing you to change the look as often as you like. Cost: $10 – $40 (removable decals) 51. Repurpose Old Photo Frames Repurpose old picture frames to create unique decor items for your half bath. Use them to frame mirrors, create shelving, or as wall decor. This imaginative and inexpensive solution brings personal style to your bathroom while reusing items that would otherwise go to waste. Cost: $0 – $50 (crafting repurposed items) 52. Use Farmhouse-Inspired Decor Farmhouse-inspired decor can bring warmth and delight to your half bath. Use wooden crates, wire baskets, or vintage-style accessories to create a cozy, rustic look. This style is budget-friendly and can easily be achieved by repurposing or finding affordable items that reflect the farmhouse aesthetic. Cost: $20 – $70 (wooden crates, wire baskets) 53. Use Wallpaper for Accent Walls Adding wallpaper to an accent wall in your half bath can create a gorgeous visual impact. Choose a bold pattern or color that contrasts with the rest of the space to draw attention. Wallpaper is a cost-effective way to improve the look of the room without needing a complete redesign. Cost: $50 – $150 (small wallpaper section) Final Words Now you’ve got a collection of budget-friendly half bath ideas on a budget and more that prove you don’t need to spend a fortune to create style. I’ve shared plenty of ways to refresh your powder room with affordable materials and simple DIY projects. From bold paint colors to a statement mirror or smart storage, even small changes can completely change how your bathroom looks and feels. Half baths are the perfect place to experiment with new decorating ideas before taking on bigger spaces in your home. Pick one project that excites you the most, give it a try, and watch your space evolve. If this inspired you, check out other blogs on the website for more home updates!
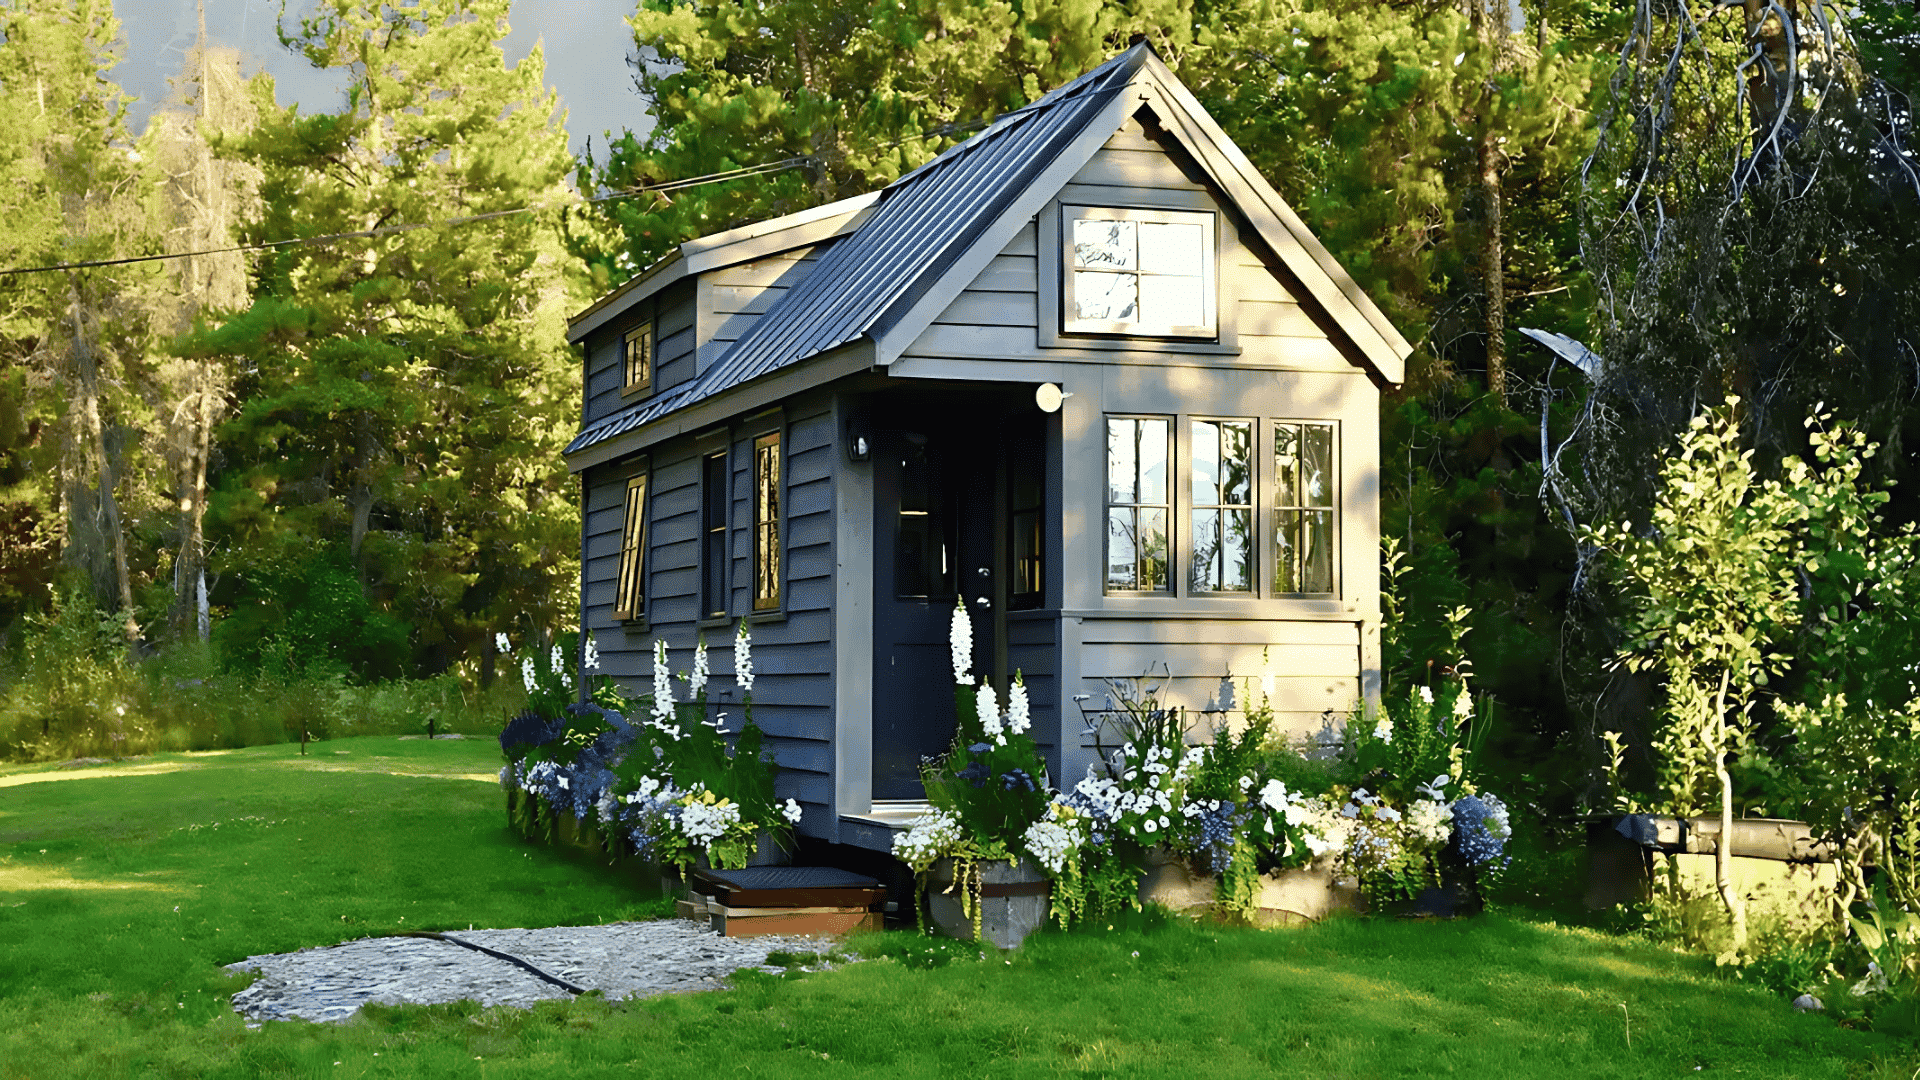
Building your own tiny house can feel exciting. You get to design a space that fits your life and budget. Building mine was one of the most exciting projects I’ve ever taken on. I loved the idea of creating a space that truly fit my life. But before I even started, I needed to answer one big question: how much does it cost to build a tiny house? The truth is, there’s no one-size-fits-all number. Your costs will depend on your building method, materials and location. I’ve seen people make it happen for around $15,000, while others have spent well over $150,000. In this post, I’ll break down each major cost factor so you can plan with confidence and avoid expensive surprises. How Much Does It Cost to Build a Tiny House So, how much does a tiny house cost? Most tiny houses cost between $30,000 and $150,000 to build. The national average sits around $65,000 for a complete build. Tiny houses typically cost $150 to $400 per square foot. Traditional homes cost about $100 to $200 per square foot. This means tiny houses cost more per square foot, but your total cost stays much lower. Here’s a quick breakdown by budget level: Budget Builds: $15,000 – $30,000 Basic materials and DIY labor Simple layouts with minimal features Often built on trailers Mid-Range Builds: $30,000 – $80,000 Quality materials with some professional help Standard appliances and fixtures Good insulation and electrical work High-End Builds: $80,000 – $150,000+ Premium materials and professional construction Custom cabinetry and high-end appliances Advanced systems like solar panels Your final cost comes down to the choices you make for design, finishes, and construction method. Factors That Affect the Cost of Building a Tiny House Before you set a budget for your tiny house, it’s important to understand the factors that can raise or lower the total cost. Here are the main things to consider: 1. Size of the Home Size directly impacts your total cost. Most tiny houses range from 100 to 400 square feet. A 200 square foot home will cost roughly twice as much as a 100 square foot space. The difference comes from materials, labor time, and complexity. Smaller homes under 200 square feet keep costs low. Larger homes over 300 square feet approach traditional construction costs. 2. Materials Your material choices make a huge difference in final costs. Basic materials like pine lumber, vinyl flooring, and standard fixtures keep budgets tight. Premium materials like hardwood, stone counters, and designer fixtures can double your costs. Reclaimed materials offer a middle ground. You save money while getting a unique character. Old barn wood, salvaged windows, and used appliances cut costs significantly. 3. Foundation Type You have two main foundation options: wheels or permanent. Trailer foundations cost $3,000 to $7,000. This includes the trailer, tie-downs, and basic setup. Mobile tiny houses offer flexibility but face more legal restrictions. Permanent foundations cost $5,000 to $15,000. This covers concrete pours, utility connections, and site prep. Permanent homes qualify as traditional housing in most areas. 4. Labor Labor represents your biggest potential savings or expense. DIY builds can save you $20,000 to $50,000 in labor costs. You’ll need basic construction skills, tools, and plenty of time. Most DIY builds take 6 months to 2 years to complete. Professional builds cost $50 to $120 per square foot for labor. Contractors handle permits, inspections, and warranty work. Professional builds finish in 2 to 6 months. 5. Location Regional costs vary significantly across the country. Rural areas typically cost 20-30% less than urban markets. Material delivery costs more, but labor and permits cost less. High-cost areas like California or New York add 40-60% to total costs. Low-cost areas like the Midwest or the South offer the best value. 6. Features & Finishes Special features and upgrades add costs quickly. Off-grid systems cost $10,000 to $30,000 extra. This includes solar panels, batteries, water tanks, and waste systems. Custom-built-ins like Murphy beds, fold-out desks, and hidden storage add $2,000 to $8,000. High-end appliances and fixtures can add another $5,000 to $15,000. Tiny House Cost Comparison Looking at real-world examples can give you a clearer idea of what building a tiny house might cost. Here’s a comparison to help you see the range: Category Cost Components Estimated Cost Range Pros Cons DIY Build Materials: $15k–$50kTools: $2k–$5kPermits: $500–$2k $17,500–$57,000 Low cost, full control, skill building Time-intensive, skills required, risk of mistakes Professional Build Materials & Labor: $40k–$120kPermits: $1k–$3k $41,000–$123,000 Fast, warranties, no learning curve Higher cost, less flexibility Pre-Built (Shell Kit) Kit: $15k–$40kDelivery: $2k–$8k $17,000–$48,000 Structure done, interior flexible Finish the work required Pre-Built (Turn-Key) Home: $50k–$120kDelivery: $2k–$8k $52,000–$128,000 Move-in ready Premium price, limited changes Custom-Built Varies by design & finishes Varies widely Tailored layout, material choice Longer build time, budget creep Cheaper options require more work, while pricier builds offer speed and convenience. Choose based on your skills, budget, and timeline. Hidden and Ongoing Costs to Consider While Building a Tiny House The upfront build isn’t the only expense when it comes to a tiny house. There are hidden and ongoing costs that can add up over time. Here’s what to keep in mind: Permits and Legal Costs Building permits cost $500 to $3,000, depending on location. Some areas require architectural plans, adding another $1,000 to $5,000. Zoning compliance can be tricky. Many areas don’t allow tiny houses as primary residences. Legal consultation costs $150 to $300 per hour. Land Costs You need somewhere to put your tiny house. Land purchase costs vary wildly by location. Rural lots start around $10,000 while urban lots can cost $50,000 or more. RV parks and tiny house communities charge $200 to $1,000 per month. Some include utilities while others charge separately. Utilities and Systems Connecting to city utilities costs $2,000 to $8,000 for water, sewer, and electrical hookups. Off-grid systems cost more upfront but eliminate monthly utility bills. Expect $15,000 to $35,000 for complete solar, water, and waste systems. Insurance and Maintenance Tiny house insurance costs $300 to $1,000 per year. Coverage depends on whether your home is mobile or permanent. Annual maintenance costs about 1-2% of home value. This covers roof repairs, system maintenance, and regular upkeep. Regional and Legal Considerations Where you build your tiny house and the local laws you follow can have a big impact on your plans and budget. Here are some key factors to consider: Cost Variations by Region Southern states offer the lowest construction costs. Texas, Alabama, and Mississippi provide cheap materials and labor. Western states cost the most due to higher wages and material costs. California, Washington, and Colorado add 40-60% to typical budgets. Northeastern states fall in the middle range. New England offers good contractors but higher material costs. Legal Requirements Building codes vary significantly between states and municipalities. Some areas treat tiny houses like RVs. Others require full residential building codes. A few states have created special tiny house regulations. Massachusetts, for example, allows tiny houses as ADUs (accessory dwelling units) in many towns. They must meet residential building codes and connect to utilities. Research your local laws before starting construction. Code violations can be expensive to fix later. Cost-Saving Tips for Building a Tiny House Building a tiny house on a budget is possible if you plan carefully and make smart choices along the way. Here are some tips to help you save money without cutting quality: Use reclaimed materials: Save 30–50% by sourcing lumber and supplies from construction sites, old barns, or demolition projects. Shop discount outlets: Visit Habitat for Humanity ReStores for low-cost windows, doors, and appliances. Check online marketplaces: Monitor Craigslist and Facebook Marketplace for lightly used building materials. DIY selective projects: Take on painting, flooring, and basic electrical; hire pros for plumbing, structural, and HVAC work. Build in phases: Start with a shell and essentials, then add features as budget allows. With the right strategies, you can keep costs down and still create a tiny house that’s comfortable, functional, and built to last. Summing Up While doing my own build, I quickly realized that every choice shaped the whole project. Size, materials, labor, and location all played a huge role in how much it cost and how much effort it took. Doing the work myself gave me more control, but also meant taking on a lot more responsibility. On the other hand, hiring professionals made things run more smoothly and quickly, though I had to step back from some decisions. I also learned to think beyond just construction; planning ahead for permits, land, and utilities saved me from big headaches later. If this gave you a clearer picture of the process, take a look at other blogs for tips, practical advice, and real examples you can use!

I used to game hunched over a cluttered desk with awful lighting, and my back always ached. And just like me, many gamers are realizing comfort changes everything. A cozy gaming setup isn’t just about style; it’s about creating a space you love to be in. Think soft lighting, a supportive chair, and all your gear right where you need it. I’ll share budget-friendly ideas for lighting, seating, organization, and personal touches that make your setup truly yours. Once you experience gaming in real comfort, you won’t go back. Ready to upgrade your space? How a Cozy Gaming Spot Can Make a Big Difference You might wonder why making your gaming space cozy is such a big deal. Well, it turns out there are some pretty cool benefits. First, comfort helps you play better. When you’re not dealing with a sore back or squinting at bright screens, you can focus more on your games. No more getting distracted by uncomfortable chairs or messy desks. But here’s something even cooler: having a comfortable gaming space can actually help you feel less stressed. After a tough day, sitting in a cozy spot helps your brain relax. It’s like having your own little hideaway. Plus, when your gaming area feels good, everything flows smoothly. You spend more time actually having fun instead of dealing with tangled cables or hunting for controllers. A cozy gaming setup isn’t just nice to have; it’s a game-changer. Key Elements of a Cozy Gaming Setup Creating the perfect cozy gaming space comes down to getting four main things right. Let’s break them down so you know exactly what to focus on: Furniture Your chair and desk make or break your comfort. Get a chair that supports your back and a desk with enough space for everything. Add storage, like shelves or drawers, to keep controllers and games organized. When everything has its place, your space automatically feels more relaxing and inviting. Lighting Skip the harsh overhead lights; they’re terrible for cozy vibes. LED strips behind your monitor create a soft, eye-friendly glow. A small desk lamp adds just enough extra light without being too bright. Go for warm, gentle lighting that makes you want to settle in and stay awhile. Decor Add personality with posters, plants, or collectibles from your favorite games. Even one small houseplant can make your space feel more alive and welcoming. Choose decorations that reflect your gaming style and make you happy every time you sit down to play. Tech Position your monitor at eye level to avoid neck strain. Keep all your cables neat and organized; messy wires completely kill the cozy atmosphere. Make sure your keyboard and mouse are at comfortable heights. When your tech setup flows smoothly, you can focus on what really matters: enjoying your games. Gaming Setup Styles, Inspirations, and Essentials If you want your gaming space to feel as chill as the rest of your room, a few small changes can go a long way. Let’s check out some styles, must-haves, and ideas to help you set it up right. Gaming Setup Ideas to Pick From Everyone’s got their own vibe when it comes to gaming. Here are a few setup styles you can pick from to match your mood and space: Minimalist This style keeps things clean and simple. Think white or black furniture, clear surfaces, and only the essentials showing. Everything has a purpose, and there’s no clutter. Perfect if you like that sleek, modern look and want your space to feel calm and super organized. Witchy/Boho This style uses soft colors like beige, green, and brown. Add plants, wooden furniture, and fairy lights. Think natural materials and vintage touches that make the space feel warm and magical. It’s like bringing a peaceful forest indoors with you. Gamer’s Paradise Go bold with this style. RGB lighting everywhere, gaming posters, and custom setups that scream serious gamer. Use bright colors, gaming collectibles, and tech that looks as awesome as it performs. This style celebrates gaming culture and shows off your passion without holding back. Pick the style that feels most like you, or mix and match elements from different styles to create something totally unique. Inspirations You Can Try When it comes to setting up your gaming space, sometimes the best ideas come from what’s already out there. Here are a few inspirations you can borrow and shape into your own style: Retro Gaming Corners Think old-school posters, a lava lamp, and even a retro console if you can find one. It’s inspired by classic 80s and 90s vibes, bringing a nostalgic feel into your gaming space while still working with modern gear. Streamer Setups Many people get inspiration from streamers on YouTube or Twitch. Their setups are designed to look good on camera, with soft lighting, clean layouts, and fun backdrops. You can borrow these ideas to make your own space look exciting, even if you’re not streaming. Cozy Bedroom Setups A lot of cozy gaming ideas come from bedrooms where the setup feels personal. Add string lights, favorite posters, and soft pillows around the space. This inspiration makes your gaming area feel like part of your everyday comfort zone, not just a desk. Gaming Room Essentials No gaming setup feels complete without a few must-haves that make the space comfy and functional. These essentials keep things organized, fun, and ready for long hours of play: A Good Chair You’ll be sitting for hours, so comfort matters. A budget-friendly office chair with back support works just as well as an expensive gaming chair. The right seat makes gaming more fun and keeps you from feeling sore later. Quality Lighting The right lighting changes the entire feel of your gaming setup. Even cheap string lights or an LED strip can make a space look inviting. Good lighting also helps your eyes when you’re gaming late at night. Organized Desk Space No one plays well in a messy setup. Keep cables neat, use a mousepad, and leave enough space for snacks or a drink. A clean desk makes gaming smoother and your setup way more enjoyable overall. Choosing the Right Space for Your Cozy Gaming Setup Finding the perfect spot for your gaming setup can make all the difference in how cozy it feels. Look for a quiet corner away from noisy areas like the kitchen or living room where people watch TV. You want some natural light during the day, but not too much brightness when you’re actually gaming. Make sure you’re near electrical outlets so you don’t need messy extension cords everywhere. Even tiny spaces work great with smart planning. Try putting your desk in a corner to save room and make it feel more private. Use wall shelves to go vertical instead of taking up floor space. Multi-purpose furniture like storage ottomans helps small rooms work harder. The key is making every inch count while keeping everything comfortable and easy to reach. Mistakes Gamers Often Make in Their Rooms It’s easy to get carried away when setting up a gaming space. But sometimes the little choices we make end up ruining the vibe instead of making it better. Here are some common mistakes to watch out for: Too Much Clutter: Stacking gear, snacks, and random items everywhere makes the room feel stressful instead of chill. Harsh Overhead Lighting: Bright white ceiling lights kill the cozy feeling. Softer lighting works way better. Ignoring Cable Mess: Loose wires everywhere make even the best setup look messy. Hiding them instantly upgrades the space. Overloading Colors: Too many bright shades or neon everywhere can feel overwhelming instead of fun. Bad Chair Choice: Sitting on an uncomfortable chair for hours ruins the whole vibe, no matter how cool the room looks. Forgetting About Sound: Loud echoes or no headphones can ruin the experience for you and everyone else around. Neglecting Cleanliness: Dusty desks, dirty screens, and unwashed cups quickly kill the calm mood. A little cleaning goes a long way. Avoiding these mistakes doesn’t mean your room has to be boring. It just means you’ll enjoy your space more, and it will actually feel like the chill zone you’re trying to create. Conclusion For me, a cozy gaming setup really comes down to a few major things: comfort, good lighting, and making it feel like my own space. Some people go for a super minimal look, while others love the full RGB gamer vibe. In the end, what really matters is creating a spot that feels good to you. I didn’t spend a ton to make mine work. I started small, like adding an LED strip, getting a chair that actually supports my back, and even tossing in a soft cushion. Each little upgrade made the space feel better. There’s no single “right way” to build a gaming room. Try different ideas, experiment, and enjoy making it yours. For more ideas, check out other blogs on the website for easy, budget-friendly tips!