

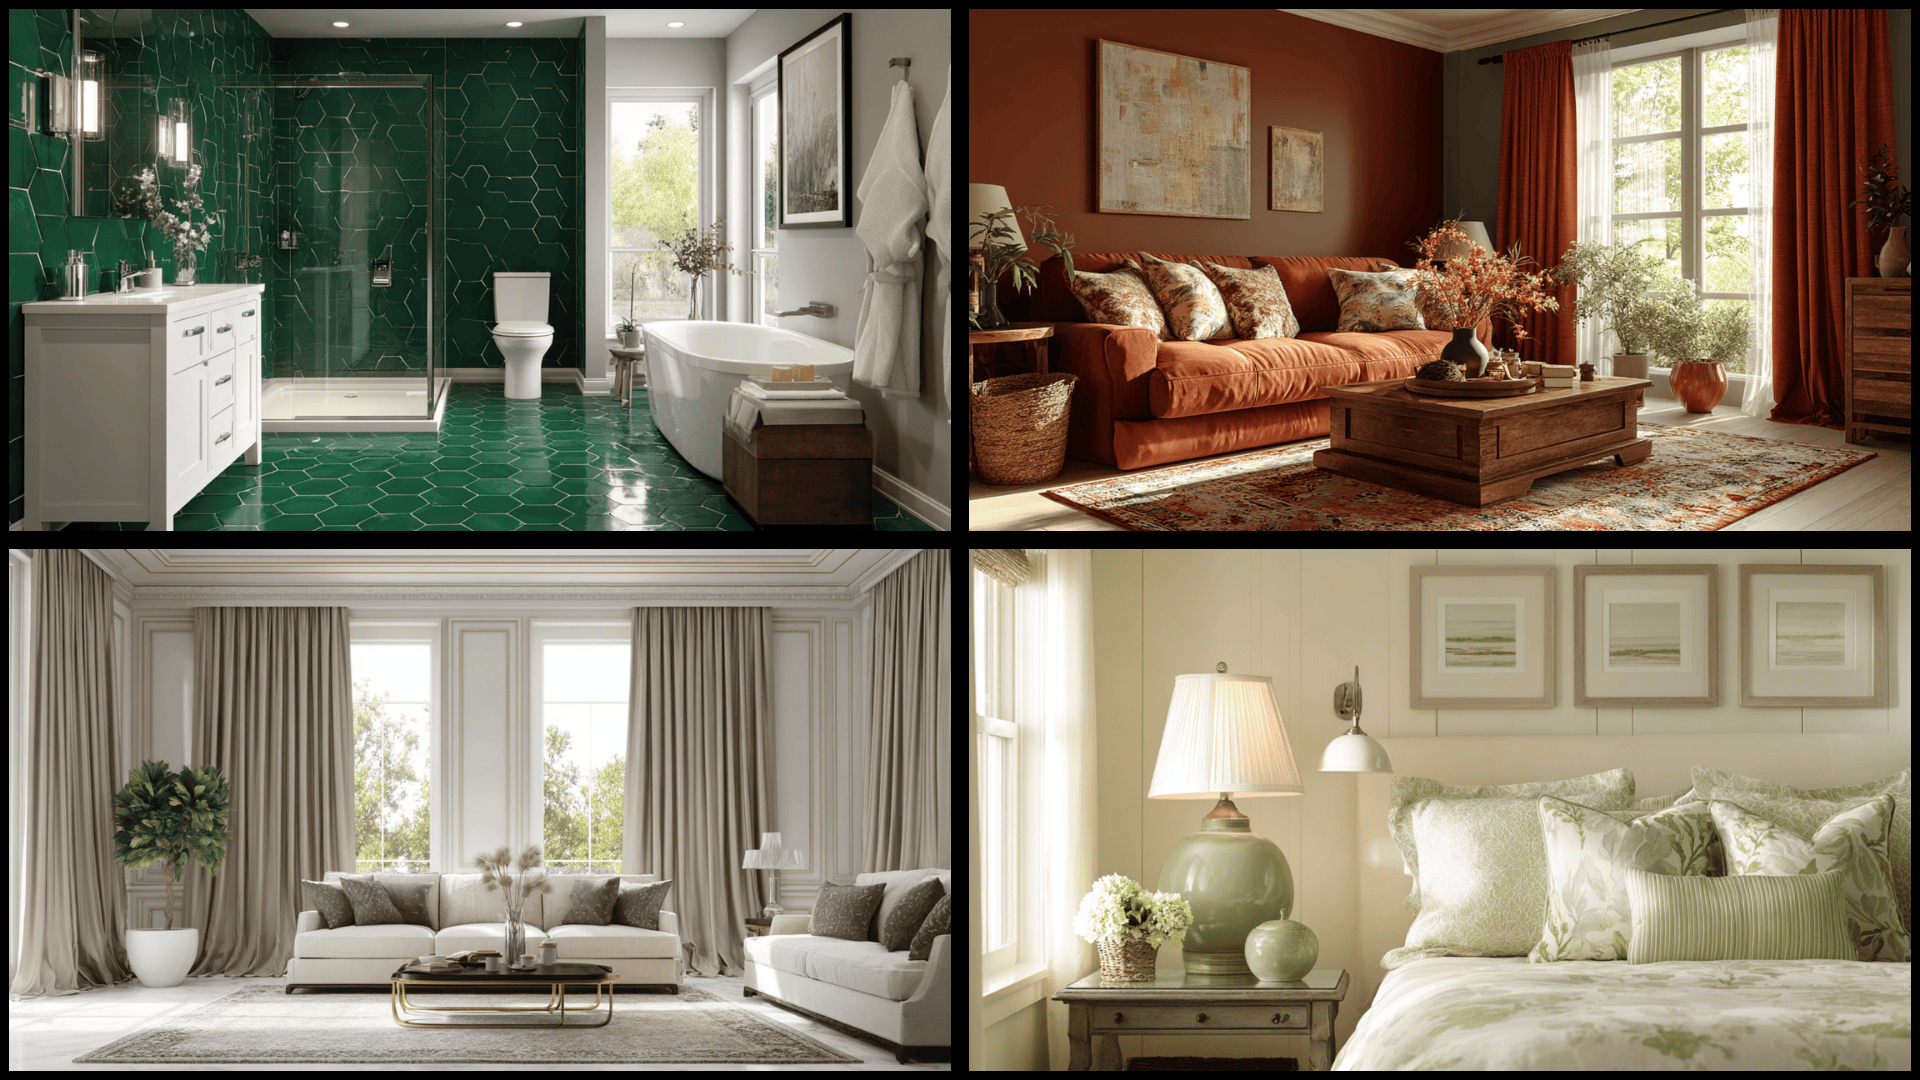
Want to make a room feel bigger without knocking down walls? Color drenching might be exactly what you need. In this post, I’ll walk you through picking the right shade and applying paint like a pro, including options like Sherwin-Williams Debonair review. You’ll learn which rooms work best for this technique and which mistakes to avoid. I’ll also share practical tips for testing colors before you commit to painting everything. If you’re tackling a bedroom, bathroom, or living room, I’ve got step-by-step guidance for you. No decorating background needed; just a willingness to try something different in your space. Let me show you how to pull off this look successfully. What is Color Drenching? Color drenching means painting your walls, ceiling, trim, and sometimes even furniture all in the exact same color. This bold technique creates a flawless, immersive look that envelops the entire room in a single, unified shade. Interior designers originally used this method in historical estates and dramatic commercial spaces during the past decades. The trend has resurged recently because people want maximalist, statement-making rooms that feel intentional and brave. Social media platforms showcase incredible color-drenched spaces that inspire homeowners to try bolder design choices. This approach works with any color, making small rooms feel larger or dramatic spaces even more impactful. Why Color Drenching Works So Well in Interior Design? Color drenching creates a cohesive, immersive atmosphere that makes rooms feel intentional and complete throughout every surface. This technique eliminates visual breaks between walls and ceilings, making small spaces appear larger and more expansive. Light colors open up tight rooms, while dark shades create intimate, cozy feelings that envelop you, especially when using rich tones similar tothose in this Greenblack paint color. The monochromatic approach reduces visual clutter and lets interesting textures like molding, furniture, and fabrics stand out beautifully. You get a bold personality and dramatic impact without filling rooms with excessive decorations or busy patterns. Color drenching simplifies decision-making, as you only need to choose one shade instead of coordinating multiple colors. Color Drenching vs. Monochrome Design People often confuse color drenching with monochrome design, but these techniques create completely different visual effects. Here’s how they compare across key design elements: Aspect Color Drenching Monochrome Design Coverage Paints walls, ceiling, trim, and sometimes furniture in the exact same color Uses various shades and tints of one color family across different surfaces Intensity Bold, saturated color applied uniformly throughout the entire room Lighter and darker variations of the same hue create a subtle contrast Tone Variations No variation – uses identical paint color on every surface Incorporates multiple tones like light gray, medium gray, and charcoal gray Visual Effect Creates an immersive, enveloping atmosphere that wraps the entire space Provides layered depth with tonal differences between surfaces Design Feel Dramatic, bold, and statement-making with maximum impact Urbane, subtle, and graceful with gentle visual interest Example Navy blue walls, navy ceiling, navy trim, navy bookshelf Light blue walls, medium blue ceiling, white-blue trim, dark blue accents Color drenching feels more immersive because the single unified color eliminates all visual breaks between surfaces. Understanding this difference helps you choose the right approach for your specific design goals and room characteristics. How to Color Drench a Bedroom: A Step-by-Step Guide Following these painting steps ensures you get professional-looking results without missing important details. Here’s exactly how to color-drench your bedroom: Test your chosen color on multiple walls and check how it looks in morning, afternoon, and evening light. Start by painting the ceiling first, let it dry completely, then paint the walls from top to bottom. Paint the trim and molding in the same color or a slightly lighter shade for a subtle depth effect. Apply a second coat to all surfaces once the first coat has dried to ensure rich, even color coverage. Touch up any missed spots or uneven areas and remove painter’s tape slowly while the paint is still slightly tacky. Your color-drenched bedroom should now have that wrapped-in-color look that feels cozy and complete. Allow everything to dry for 24 hours before moving furniture back and enjoying your newly converted space. Color Drenching Ideas and Inspiration Color drenching works in countless creative ways beyond just painting walls and ceilings one color. Here are inspiring ideas that show the full range of possibilities: 1. Woven or Painted Colorful Floor Mats Entry mats, kitchen runners, and bathroom rugs in bold colors add practical color at ground level. Bright striped runners in hallways guide foot traffic while injecting personality into transitional spaces. Geometric patterned mats in single color families maintain cohesion while adding visual interest. Choose durable, washable options for high-traffic areas needing both function and style. These smaller commitments let you experiment with bold shades. 2. Full-Wall Patterned Wallpaper Patterned wallpaper covers entire walls from floor to ceiling, creating striking focal points that demand attention. Large-scale patterns like oversized florals work best for maximum impact in living rooms. Match the surrounding walls to the wallpaper’s base color for consistency. Keep furniture simple and solid-colored so the pattern remains the star. Add matching throw pillows that pull colors from the wallpaper. 3. Vibrant Doors and Trim Brightly painted doors and trim pop against neutral walls, creating unexpected bursts of personality throughout homes. Choose bold colors like emerald green or coral pink for door fronts and trim pieces. This works especially well in hallways, where doors create a visual rhythm along the walls. Paint baseboards and window frames in the same vibrant shade for cohesive impact. 4. Color-Coordinated Cabinets and Backsplash Kitchen cabinets and backsplash tiles share matching or complementary colors that create a flawless visual flow. Deep blue cabinets paired with lighter blue subway tiles create a layered effect within the same color family. This coordination makes small kitchens feel larger by eliminating visual breaks. Add brass hardware that complements the color scheme. White countertops balance the bold color. 5. Monochrome Gallery Walls Picture frames, mats, and artwork all share similar tones, creating cohesive gallery walls that feel intentional and well-planned. Black frames with black and white photos create classic refinement on white walls. White frames with cream-toned artwork provide soft displays in bedrooms. Arrange frames in symmetrical grids or organic clusters, depending on your style. The unified color lets individual photos shine. 6. Upholstery and Textiles in One Hue Sofas, curtains, throw pillows, and rugs all feature the same color family for dramatic, pulled-together rooms. Layering different textures in the same color adds depth without introducing competing shades. Velvet sofas and wool rugs in matching burgundy create luxurious living rooms. This works especially striking with jewel tones or earthy neutrals. Add wooden furniture to break up the textile-heavy color. 7. Painted Stair Risers and Railings Stair risers painted in bold colors create eye-catching focal points in entryways that greet visitors immediately. Each riser can feature the same color or alternate between complementary shades for playful variation. Painting railings and spindles in matching colors extends the treatment throughout the entire staircase structure. This works especially well with white or light wood treads that provide contrast. The unexpected pop alters functional staircases into artistic architectural features. 8. Floor-to-Ceiling Accent Walls Accent walls stretch from the baseboard to the ceiling in a single, dramatic color that creates instant focal points. This approach includes the ceiling portion above the wall area for full impact. Dark accent walls behind beds add depth while making furniture pieces stand out visually. Light accent walls in small rooms create the illusion of more space without sacrificing personality. Paint adjacent walls in neutral tones so the colored wall commands attention. 9. Colorful Ceilings Painted ceilings in unexpected colors create surprise elements that most people overlook in traditional room design. Soft pink or sky blue ceilings make bedrooms feel dreamy and peaceful during evening relaxation. Bold colors, such as navy, on ceilings add drama without making the walls feel closed in. This works especially well in rooms with white walls, where the ceiling becomes the unexpected star. Add crown molding painted in the ceiling color. 10. Bright Outdoor Structures Pergolas, sheds, fences, and outdoor furniture painted in vibrant colors create cheerful, personalized outdoor living spaces. Turquoise pergolas or yellow garden sheds become focal points that draw the eye through windows. Color-coordinating multiple outdoor elements creates cohesive outdoor rooms that feel intentional. These bold colors stand out beautifully against green lawns and natural landscaping throughout the seasons. Weather-resistant exterior paint ensures colors stay vibrant despite sun exposure. 11. Monochromatic Bedding Sets Bedding in one color family creates restful, hotel-like bedrooms where everything feels deliberately coordinated. Layer sheets, duvet covers, and throw blankets in varying shades of the same color for subtle depth. Cream bedding with ivory accents creates soft, inviting retreats. Charcoal gray bedding with lighter pillows provides a modern culture. Different textures like linen and velvet in matching colors add visual interest without competing hues. 12. Custom-Colored Appliances Kitchen appliances in matching bold colors become design statements rather than just functional necessities. Retro-style refrigerators and stoves in mint green create playful vintage kitchens. Matte black appliances paired with black cabinets deliver sleek restaurant aesthetics. Coordinate small appliances like toasters in the same color family for complete relaxation. This unified approach converts kitchens into cohesive spaces supporting your color palette. 13. Large Area Rugs in Bold Colors Oversized rugs in saturated colors anchor rooms and define living spaces while adding warmth underfoot. Deep jewel-tone rugs in emerald create luxurious foundations for neutral furniture arrangements. Bright rugs in sunny yellow energize spaces and serve as jumping-off points for accent colors. Choose rugs large enough to fit under all major furniture pieces. The bold color grounds the room while allowing the walls flexibility. 14. Color-Drenched Shelving Units Built-in or freestanding shelves painted in vibrant colors change storage into decorative focal points. Paint the entire shelving unit, including back panels, in one saturated color for maximum impact. Display books and objects that complement or contrast with the shelf color. This works beautifully in home offices or living rooms needing personality. The colored shelving adds architectural interest while providing practical storage. 15. LED Color Lighting Washes Programmable LED strips bathe walls or ceilings in customizable colors that change room moods. Install strips behind headboards or under cabinets for indirect ambient lighting effects. Change colors to match seasons or moods without permanent paint commitments. Warm amber creates cozy evenings while cool blue promotes calm before bedtime. This modern approach lets you experiment with bold color without long-term commitment. 16. Saturated Bathroom Tiles Floor-to-ceiling tiles in one bold color create spa-like bathrooms that feel luxurious and intentionally designed. Emerald green subway tiles covering all walls make small bathrooms feel like jewel boxes. Navy hexagon tiles deliver a dramatic impact in powder rooms. Keep fixtures white or chrome so they pop against the colorful tile background. The waterproof nature makes tiles practical while delivering a serious color punch. 17. Large-Scale Color Murals Hand-painted or wallpaper murals in dominant colors create artistic focal walls that command attention. Abstract color-blocked murals in rust bring warmth to dining rooms or bedrooms. Botanical murals in deep greens convert walls into lush garden scenes. Commission local artists or use peel-and-stick options for temporary installations. The mural becomes a conversation-starting artwork that sets the entire room’s color direction. 18. Matching Curtains and Walls Curtains in the exact wall color create flawless expanses where windows disappear into backgrounds. This technique makes small windows appear larger by eliminating visual boundaries between fabric and paint. Floor-to-ceiling curtains in matching wall colors add height and classiness to standard rooms. Choose heavier fabrics that provide privacy while maintaining the monochromatic effect. The unified approach creates calm, urbane spaces. 19. Colored Glass Panels and Windows Stained or tinted glass panels in doors, cabinets, or windows filter light through colors. Amber glass cabinet doors warm kitchens while concealing contents behind beautiful translucent surfaces. Blue glass panels in bathroom windows provide privacy while casting cool, calming light. Install colored glass in transom windows above doors for subtle color without overwhelming rooms. The natural light interaction creates dynamic color changes. 20. Uniform Color Pottery and Lamps Decorative objects like vases, bowls, and lamp bases in matching colors create curated vignettes. Group terracotta pottery in varying sizes on white shelves for warm, earthy displays. Collect blue ceramic pieces ranging from navy to sky blue for layered arrangements. This intentional collecting creates designer looks without requiring expensive individual pieces. The color repetition ties disparate objects together into cohesive displays. 21. Coordinated Kitchenware and Linens Dish towels, pot holders, and dishware in matching colors create pulled-together kitchens that feel intentionally designed. Choose cheerful colors like lemon yellow or mint green for kitchens that need energy. Neutral options like cream provide urbane coordination that never feels overwhelming. Store matching dishware openly on shelves so colors become part of the decorative scheme. This practical approach combines function with aesthetics. How to Choose the Right Colors for Color Drenching Choosing the right color for a drenching effect requires understanding how warm and cool palettes affect a room’s mood. Warm colors like terracotta, cream, and rust create cozy, inviting feelings throughout your space. Cool colors like navy, sage green, and gray blue provide calm, refined atmospheres instead. Natural lighting changes how colors appear, with north-facing rooms showing cooler tones and south-facing rooms emphasizing warmth. Artificial lighting also shifts undertones, making yellows appear in warm bulbs and blues in cool LEDs. Pay attention to undertones since they determine if your chosen color feels pleasant or jarring overall. Trending colors include earthy greens, creamy neutrals, deep navy, and warm terracotta shades. Best Rooms to Try Color Drenching Color drenching works beautifully in specific rooms where immersive atmosphere creates the most dramatic impact. Here are the ideal spaces to experiment with this bold technique: Bedrooms: Wrapping walls, ceilings, and trim in one color creates a cozy cocoon, perfect for a color-drenched bedroom changeover. Living Rooms: One unified color makes open-concept spaces feel intentional and cohesive throughout. Bathrooms: Single-color treatment alters small bathrooms into spa-like monochrome retreats. Hallways/Entryways: Bold color throughout makes dramatic first impressions that set your home’s tone. These rooms benefit most from color drenching because the technique enhances their specific purposes effectively. Start with smaller spaces like bathrooms or hallways before committing to larger rooms if you feel nervous. Mistakes to Avoid When Color Drenching Color drenching looks amazing when done right, but small mistakes can ruin the effect. Knowing what to avoid helps you create a space that feels intentional and polished. Here are the most common mistakes people make: Using too dark colors in small rooms makes the space feel cramped and smaller than it actually is. Skipping undertone tests leads to colors that clash instead of working together harmoniously throughout the room. Adding contrasting accessories breaks the smooth visual flow that makes color drenching so effective and calming. Painting every surface the exact same shade creates a flat look without any depth or visual interest. Forgetting about lighting changes how colors appear, making your careful color choices look completely different than expected. Avoiding these mistakes ensures your color-drenched room turns out beautifully. Take your time with color selection and testing to get the best results. Final Thoughts I’ve found that color drenching can completely update the way a room feels. Using just one shade brings calm, flow, and intention without the stress of mixing too many colors. You can try it in bedrooms, bathrooms, or hallways and still get great results. Test your color in different lighting, take your time painting, and start small if you’re unsure. A powder room is an ideal space to practice before moving to larger areas. What color would you choose for your first color-drenching project? Share your ideas in the comments!
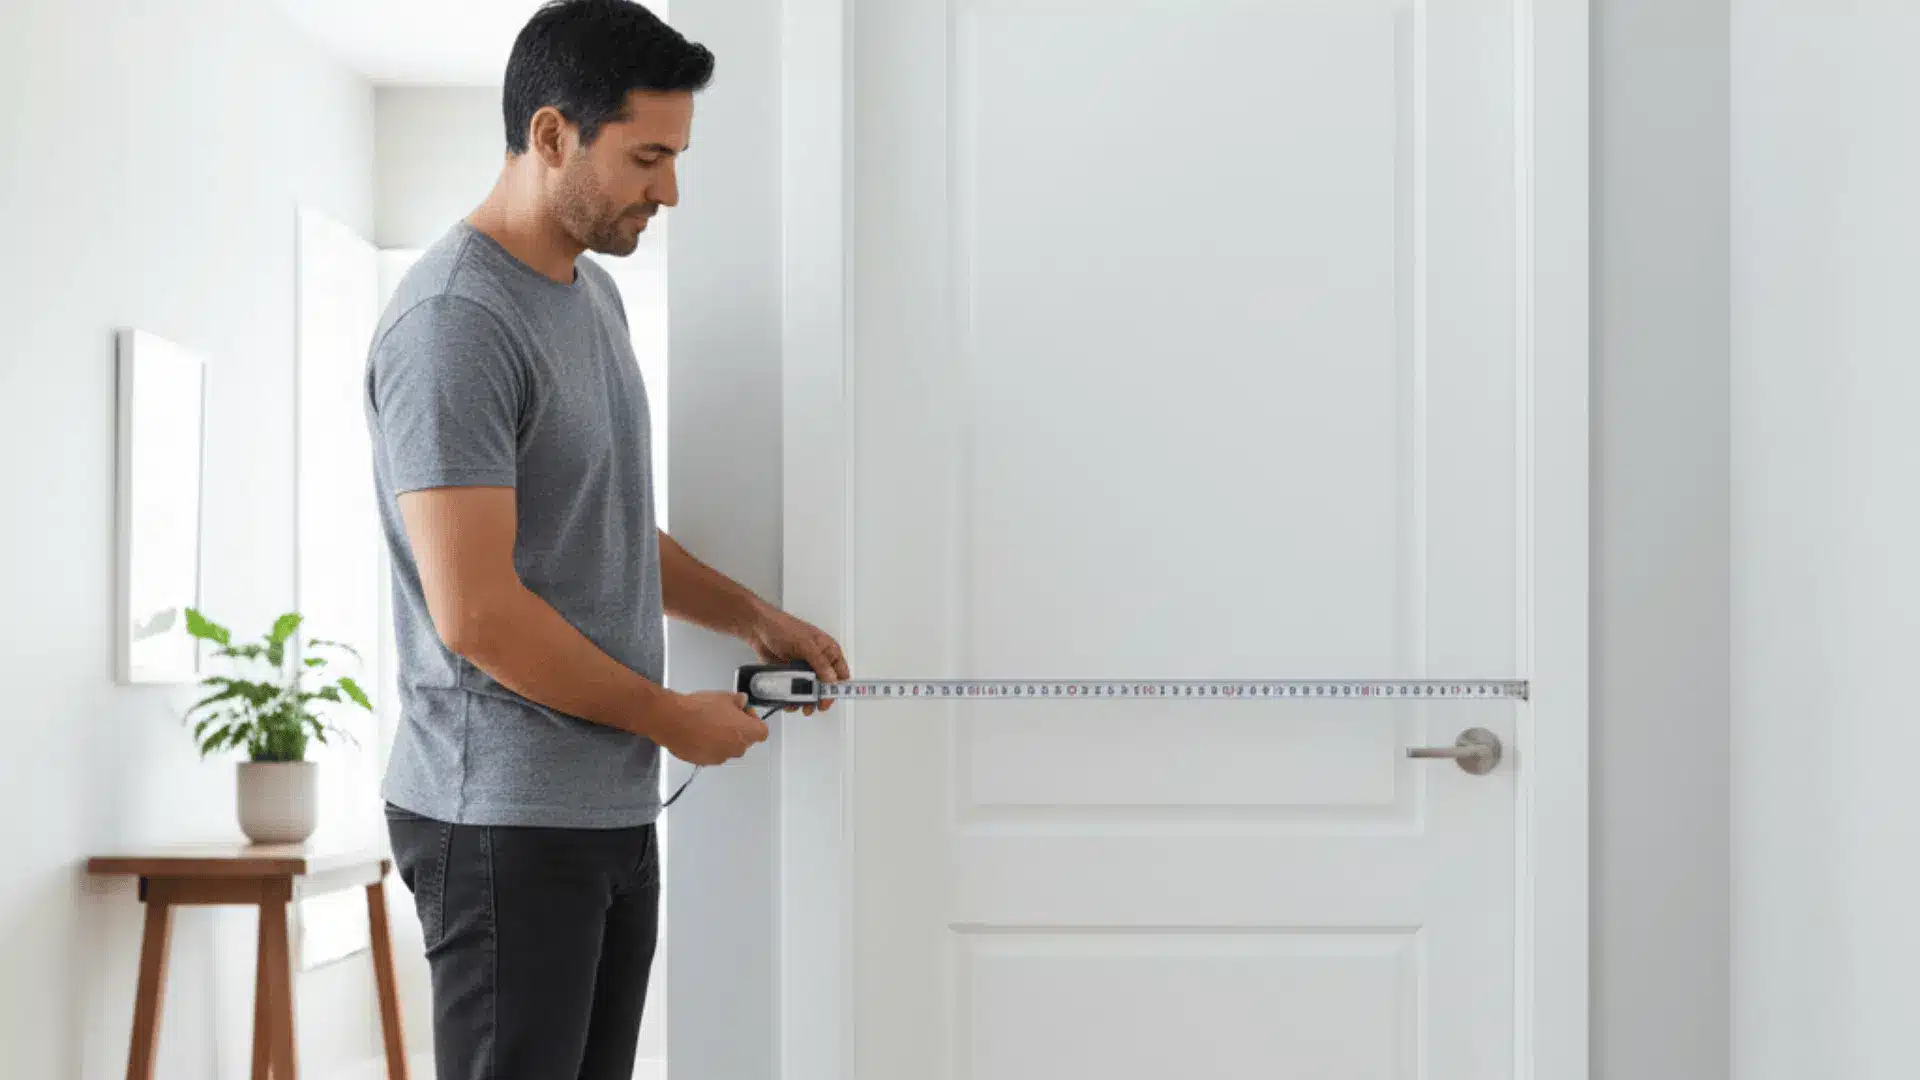
Planning a home renovation or building project and stuck on door measurements? Getting the standard door width right matters more than you might think. Wrong measurements mean doors that don’t fit, wasted money, and installation headaches. I’ve put together everything you need about door widths for different rooms and situations. You’ll learn about interior doors, exterior doors, specialty options, and accessibility requirements. Understanding these standards helps you avoid expensive mistakes and ensures doors work properly in your space. If you’re replacing old doors or installing new ones, knowing the right measurements makes the process smoother. By the end, you’ll know exactly which measurements matter for each room in your home. The standard door width in most homes ranges from 28 to 36 inches for interior doors and 36 inches for exterior doors. These sizes follow building codes to ensure safe access, proper movement, and compatibility with common wall openings. How Wide Is a Standard Door, Really? From working with home layouts and renovation measurements, I’ve seen how choosing the correct door size early prevents fitting issues, wasted materials, and installation delays. The “standard door width” is the usual required width doors must have in buildings. This width ensures people can pass through comfortably and safely. Building rules from the International Building Code (IBC) and the Americans with Disabilities Act (ADA) guide these requirements. Their guidelines help make doors accessible to everyone, including those who use wheelchairs. The rules cover width, clearance space, handle placement, and ease of opening doors. They also ensure emergency exits are safe and easy to use. Builders must follow these rules for legal safety and usability in homes, workplaces, and public spaces. This keeps buildings welcoming and practical for all users. Standard Door Width at a Glance Interior Doors: 28–32 inches common Exterior Doors: 36 inches standard Closet Doors: 24–36 inches Height: 80 inches standard Accessibility (ADA): Minimum 32 inches clear width Standard Interior Door Sizes I’ll walk you through the standard measurements for bedrooms, bathrooms, closets, and utility spaces so you know what to expect: 1. Bedroom Doors Bedroom doors usually measure 28, 30, or 32 inches wide with a height of 80 inches. They are typically 1 3/8 inches thick. These doors are designed to provide privacy and easy access to personal spaces. The measurements follow U.S. building codes, ensuring comfort and safety. Bedroom doors often feature simple wood designs or panels that suit home styles. The 80-inch height standard became common with modern homes to fit 8-foot ceilings, promoting a uniform look. 2. Bathroom Doors Bathroom doors are commonly narrower, ranging from 24 to 32 inches wide, with a height of 80 inches, which is why layouts often focus on space-saving bathroom door ideas. They are thinner, usually about 1 3/8 inches, to save space in smaller rooms. The narrower width fits compact spaces like bathrooms, where extra clearance is limited. Accessible bathrooms use doors at the wider end, meeting ADA requirements for wheelchair access. These doors often have simple, moisture-resistant panels or solid surfaces to handle humidity. Their size standards arise from mixing space efficiency with usability and safety, following government building codes designed for residential comfort and accessibility needs. 3. Closet Doors Closet doors vary by type, with bifold, sliding, or pocket styles being common. They typically have widths ranging from 24 to 36 inches and heights of approximately 80 inches. Bifold doors fold to the side and often measure 24 to 36 inches wide per panel. Sliding doors move horizontally, fitting closets where swing space is limited. 4. Utility Room Doors Utility doors for laundry rooms, pantries, or furnace rooms usually range from 28 to 32 inches wide and 80 inches tall. They must allow easy access to appliances and storage while fitting into tighter spaces. These doors are typically plain, solid wood, or hollow core for durability and cost efficiency. Utility door sizes follow building codes for room use and emergency egress, ensuring safety and function. Standard Exterior and Entry Door Sizes Exterior doors are bigger and sturdier than interior ones because they handle weather and security needs. I’ll show you the standard sizes for front doors, patio doors, and garage entries: 5. Front Doors Front doors in the USA commonly measure 36 inches wide and 80 inches tall. Sometimes double doors are used, each panel usually 36 inches wide, for a grander entry. These doors create a welcoming look and secure the home’s main entrance. Government building codes set these sizes to ensure easy access and emergency exit. Front doors typically feature sturdy wood or steel with decorative glass or panels, combining safety with style. Their standard size was developed to fit typical home wall framing, balancing ease of use with appeal. 6. Patio and Sliding Glass Doors Patio sliding glass doors usually range from 60 to 96 inches wide and 80 to 96 inches tall. They often have two, three, or four glass panels sliding horizontally for space-saving outdoor access. These doors let in light and fresh air, combining the indoors with the outdoor space. Larger widths with more panels create a wide, open feel for decks and patios. Codes guide standard sizes, mostly based on typical wall openings and usability. Sliding doors feature aluminum or vinyl frames with safety glass. Their design originated to maximize natural light while saving space compared to swinging doors. 7. Garage Entry Doors Garage entry doors connecting the house usually measure 32 to 36 inches wide and about 80 inches tall. These doors allow easy passage between the garage and the home without using large garage doors. They prioritize function, made with fire-resistant materials to meet safety codes. Often simple and solid, they resist temperature changes and noise from the garage. Their standard width was developed for a comfortable walking space while saving wall space. Proper garage entry doors improve home safety and convenience. Specialty Door Sizes Specialty doors add style and function beyond standard swinging doors in your home. I’ll cover the unique sizes for French doors, pocket doors, and barn doors: 8. French Doors French doors come in paired panels, each usually 30 to 36 inches wide and 80 inches tall in the USA. These doors open outward or inward, letting in natural light while offering a lavish look. Exterior French doors often have thicker panels for insulation. Originating from French architecture, these doors add appeal by combining indoor and outdoor spaces. Total opening widths commonly range from 60 to 72 inches, perfect for garden doors or grand entries. 9. Pocket Doors Pocket doors slide neatly into wall cavities, saving space in small rooms. Standard pocket door widths range from 24 to 36 inches, with heights usually 80 inches. Their slim profile is great for bathrooms or closets where a swinging door isn’t practical. Pocket doors follow typical residential building codes for door dimensions and clear openings. Their design started to maximize usable room space in tight areas, offering ease of movement without blocking walkways. These doors often feature simple flat panels or glass to add style without sacrificing room. 10. Barn Doors Barn doors are large sliding panels, often 36 to 42 inches wide and 80 inches tall, used inside homes for rustic style. They slide on a track mounted above the doorway and overlap the opening by 2 to 3 inches to block light and noise. While not standard in all codes, their sizes generally match typical door openings and follow safety guidelines for smooth operation. Inspired by traditional farm doors, barn doors now add character and save space in modern homes, especially if you’re considering how to build a barn door for a custom setup. Standard Door Sizes and Dimensions At a Glance Understanding average door sizes helps you plan renovations, replacements, and new builds with confidence. The table below lists common measurements for interior, exterior, and specialty doors so you know what to expect for each space. Door Type Typical Width (inches) Typical Height (inches) Thickness (inches) Bedroom Doors 28, 30, 32 80 1 3/8 Bathroom Doors 24–32 80 1 3/8 Closet Doors 24–36 (per panel) ~80 Varies Utility Room Doors 28–32 80 Varies Front Doors 36 (single), 72 total (double) 80 ~1 3/4 Patio / Sliding Doors 60–96 80–96 Varies Garage Entry Doors 32–36 80 ~1 3/4 French Doors 30–36 each, 60–72 total 80 ~1 3/4 Pocket Doors 24–36 80 ~1 3/8 Barn Doors 36–42 80 ~1 3/4 These measurements give you a clear idea of what’s standard for most homes. Keeping these numbers in mind makes it easier to compare styles, plan installations, and ensure proper fit and function. Factors That Affect Door Size Selection Picking the right door size involves more than just measuring the opening in your wall. Several important factors determine which dimensions work best for your specific situation. Here’s what affects your door size choices: Building codes and ADA compliance requirements set minimum widths for accessibility, similar to how kitchen island spacing ensures safe movement and proper flow in a layout. Your home’s style and each room’s function influence if you need wider doors for furniture or narrower ones for space. Frame thickness and wall construction type limit your options since doors must fit properly within existing or planned wall structures. Clearance space and swing direction are important because doors require room to open fully without hitting furniture, walls, or other obstacles. Understanding these factors helps you select doors that fit properly and function effectively in your space. Taking time to consider each point prevents costly mistakes and ensures smooth door operation for years. How to Measure for Door Width and Height? When measuring a door frame, remember that the rough opening is the whole framed space, while the actual door size is the door itself. Knowing the difference helps to find the correct door size. Follow these steps to measure your door frame accurately: Use a tape measure to record the width inside the frame from stud to stud—this is the rough opening width. Measure the height from the bottom of the rough opening (floor or subfloor) up to the header or top plate. Take three width and height measurements: bottom, middle, and top, to check for any frame irregularities. Note the smallest measurement; this ensures the new door will fit. Measure the existing door slab width and height, if available, to compare with the rough opening. Older homes often have uneven or non-standard sizes. Measure multiple points and allow extra space for adjustments during installation. Custom Door Sizes vs. Standard Sizes Choosing between standard and custom doors is important. Standard doors fit most homes and save money. Custom doors suit unique spaces or special designs. Here is a simple comparison: Feature Custom Door Sizes Standard Door Sizes Best Use When an exact fit or special design is needed For regular door openings and most renovations Price Higher price due to craftsmanship and materials Lower price as they are mass-produced Delivery Time Longer delivery, sometimes several weeks Usually in stock, immediate or quick delivery Installation May require skilled installers and adjustments Easy to install with basic skills Design Options Wide variety, can be personalized fully Limited to common sizes and popular styles Custom doors take time and money but offer a perfect fit. Standard doors are budget-friendly and quick to get. Final Words I’ve learned that standard door widths do more than just fill an opening; they create comfort, safety, and easy movement throughout a home. I’ve seen how knowing these measurements can simplify planning and prevent costly mistakes during the installation process. You’ll find that interior doors usually run narrower than exterior ones, each designed for a specific purpose. Measure carefully before buying, especially in older homes where openings may vary. Taking multiple measurements helps you avoid uneven fits or alignment issues. Standard sizes often save time and money, but custom doors are worth it when your frame doesn’t match typical dimensions. If you found this helpful, go check out other blogs on the website for more helpful posts just for you! Frequently Asked Questions What is the minimum door width for ADA compliance? ADA guidelines require a minimum clear width of 32 inches to allow wheelchair access. Are all interior doors the same width? No, interior doors vary based on room type, with bathrooms and closets often having narrower widths. What size door is used for the front entry? Most front doors are 36 inches wide and 80 inches tall, providing enough space for easy entry and movement. What is the standard door width in homes? Standard interior doors are usually 28 to 32 inches wide, while exterior doors are typically 36 inches wide. Can door sizes vary in older homes? Yes, older homes often have non-standard door sizes, so measuring carefully is important before replacing doors.
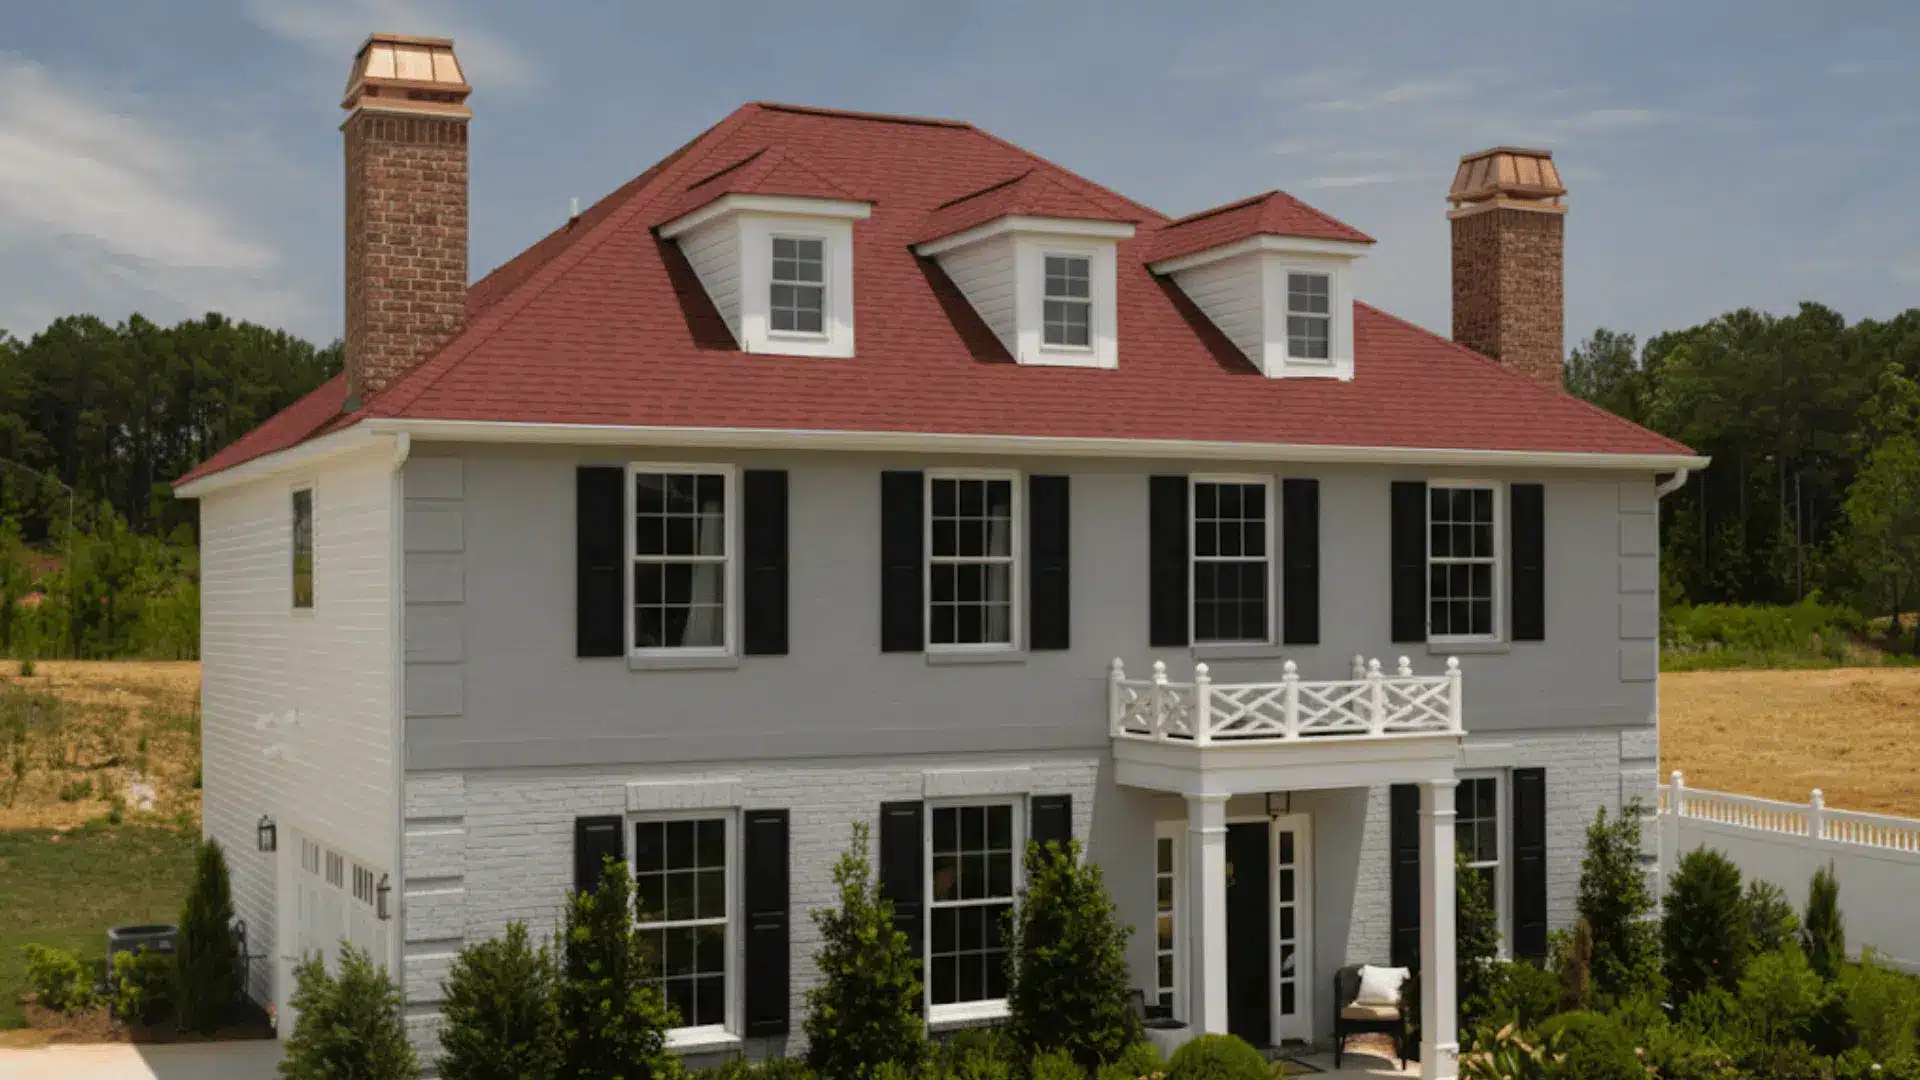
I’ve seen how much roof design can affect a home’s strength and lifespan. When I first started comparing styles, I realized that the shape of a roof isn’t just about looks; it determines how well your home handles wind, rain, and snow. You’ll learn how hip roofs are built, their pros and cons, and what kind of maintenance they need. I’ll also break down design options, costs, and how this style compares to others. If you’re planning a new build or replacing an old roof, this guide will help you decide if a hip roof fits your project. What is a Hip Roof? A hip roof, also known as a hipped roof, features four sloping sides that all slope downward toward the walls. Unlike gable roofs with vertical ends, this design creates a smooth, pyramidal shape, making it visually balanced from all angles. The roof’s highest part is the ridge, where the sloping planes meet. The hips are the angled edges where these planes come together, extending from the ridge to the eaves; the lower edges that overhang and protect the walls. Imagine a pyramid or tent-like shape, where all sides gently slope toward the ground. Hipped roofs provide excellent stability and resist strong winds, making them a popular and sturdy architectural choice. Key Features of a Hip Roof Hip roofs have distinct features that set them apart from other roof styles. I’ll explain the key elements that define this popular roof design: 1. Sloping Sides on All Four Sides A hip roof has four equal sloping sides that all slope downward toward the walls. This equal slope creates a balanced, pyramid-like shape. Unlike a gable roof, which has vertical ends, all sides of a hip roof meet the walls. This design gives the roof strength and helps rainwater run off evenly. Its symmetry is not only attractive but also adds to wind resistance and stability. 2. Central Ridge Point The ridge is the highest horizontal line where all sloping sides meet. It runs along the longest part of the hip roof. This central ridgeline connects the roof’s slopes, providing structural support. The ridge is like the spine of the roof, holding all parts together. It’s usually straight on rectangular buildings, forming the peak and defining the roof height. 3. Hip Lines and Valleys Hip lines are the external edges where two sloping sides meet, forming angled ridges from the roof’s peak down to the eaves. Valleys occur where two roof sections join inward, creating a channel for water to flow. Both hips and valleys are crucial for proper water drainage, preventing leaks. Roof shingles or tiles are installed carefully along the hips and valleys to keep water moving off the roof safely. 3. Common Roof Pitch and Materials Most hip roofs have slopes between 4:12 and 9:12 pitch, which means the roof rises 4 to 9 inches for every 12 inches horizontally. Common materials include asphalt shingles, clay or concrete tiles, and metal panels. Choice depends on style, climate, and budget. Steeper pitches work well with tiles and metal, while asphalt shingles suit moderate slopes. These materials provide durability and weather resistance suited for a hip roof’s design. Types of Hip Roofs Hip roofs come in different styles depending on your home’s shape and design needs. These are the main types so you can see which one might work for your building: 1. Simple Hip Roof A simple hip roof has four equal sloping sides that meet at the ridge. This creates a symmetrical, pyramid-like shape. It offers great stability and wind resistance, making it ideal for areas with heavy storms. This design is common in many homes for its balance of appeal and durability. Though more complex to build, it provides excellent protection and a classic look. 2. Cross-Hip Roof A cross-hip roof features two hip roofs joined at right angles. This roof form suits larger or L-shaped homes well. It adds architectural interest by breaking up the roofline. Cross-hip roofs allow more interior space and better drainage. However, valleys created where roofs intersect need careful waterproofing to avoid leaks. This style combines functionality with appeal. 3. Half-Hip Roof (Jerkinhead Roof) A half-hip roof, or jerkinhead roof, mixes hip and gable features. Its sides slope like a hip roof, but the ends have short vertical gables. This design improves attic space and ventilation compared to full hip roofs. It also resists wind better than standard gables. Popular in cottage and traditional homes, it combines the benefits of both roof styles with a unique style. 4. Pyramid Hip Roof A pyramid hip roof has four equal triangular sides meeting at a single point. It has no ridge line, unlike other hip roofs. This shape works best on square or nearly square buildings like gazebos or cottages. The design provides great wind resistance and easy water drainage. It’s simple, sleek, and highly stable, favored for smaller structures. Advantages and Disadvantages of a Hip Roof Hip roofs offer many benefits, but they also come with some drawbacks you should know about. Understanding both sides helps you decide if this roof style fits your home and budget. Here’s how hip roofs compare: Advantages Disadvantages Excellent stability and wind resistance due to the sloped design on all sides Requires more complex framing and engineering calculations Better water and snow drainage compared to flat or gable roofs More valleys and hips create potential leak points needing maintenance Adds architectural appeal and works well with many house styles Higher cost due to more materials and labor than simple gable roofs Increased attic or ceiling design possibilities with vaulted options Limited attic space compared to gable roofs with vertical walls Durable structure that lasts longer in harsh weather conditions More complex design requiring skilled labor and precise installation Weighing these pros and cons helps you make an informed choice about your roofing project. Discuss with a contractor whether a hip roof is suitable for your specific situation and climate. Design Ideas for Hip Roofs Hip roofs offer plenty of design flexibility beyond just their basic shape and structure. You can add features that boost both function and curb appeal without changing the roof’s core design. Here are creative ways to enhance your hip roof: Pair dormers with hip roofs to bring in natural light, add ventilation, and create extra usable attic space. Use contrasting roofing materials like metal accents on asphalt shingles or mixed tile colors for visual interest. Install skylights on hip roof slopes to brighten dark interior rooms and reduce daytime electricity use. Add solar panels on south-facing hip roof sections to generate clean energy while maintaining the roof’s appeal. These design additions make hip roofs more functional while keeping their classic, stable look intact. Work with your contractor to see which options fit your home’s style and your budget. Here’s the comparison in table format: Hip Roof vs. Gable Roof Hip roofs and gable roofs are two popular choices, each with distinct characteristics and benefits. Understanding the differences helps you pick the right style for your home and climate. Here’s how they compare: Aspect Hip Roof Gable Roof Structural Design Four sloping sides meet at a ridge with no vertical walls Two sloping sides meet at a ridge with vertical triangular walls at each end Wind Resistance Excellent stability in high winds due to aerodynamic sloped design More vulnerable to wind damage, especially on gable ends Water Drainage Superior drainage with slopes on all sides directing water away Good drainage but vertical ends can trap moisture or snow Snow Performance Sheds snow evenly on all sides, reducing load concentration Snow slides off slopes but can accumulate against gable walls Attic Space Less usable attic space due to slopes on all sides More attic space with vertical walls, allowing for storage or rooms Both roof styles work well, but your choice depends on your budget, weather conditions, and space needs. Talk with a roofing contractor about which style suits your specific home and local climate best. How to Maintain a Hip Roof Hip roofs need regular upkeep to stay in good condition and protect your home properly. Simple maintenance tasks prevent expensive repairs and extend your roof’s lifespan by catching problems early. Here’s what you should do to keep your hip roof healthy: Inspect hip lines and valleys: Check twice yearly for trapped leaves, branches, or debris that blocks water flow. Check flashing and seals: Look around chimneys, vents, and roof joints for rust, cracks, or gaps that could let water in. Clean gutters and downspouts: Do this every spring and fall so water drains away from your roof and foundation. Schedule professional inspections: Hire a roofer every few years to catch hidden damage like loose shingles or worn underlayment. Regular maintenance keeps small issues from turning into big, expensive problems down the road. Set reminders on your phone or calendar so you don’t forget these important seasonal tasks. Cost Considerations for Hip Roof Installation Cost considerations for hip roof installation depend on several factors. On average, hip roofs cost about $8 to $12 per square foot, higher than simpler roof styles. Asphalt shingles run about $4 to $7.50 per square foot, while materials like metal and tile can cost much more. Roof pitch and design complexity greatly affect labor and material costs. Hip roofs require more materials and skilled labor due to their angles, raising prices about 30-40% more than gable roofs. Hiring a professional contractor is recommended because hip roof construction is complex. DIY is rarely feasible due to technical demands and safety concerns, ensuring quality and durability when done by experts. These are estimated costs and may vary based on location, materials, and project scope. Conclusion I’ve found hip roofs to be a reliable blend of form and function. Their structure stands up well to harsh weather while adding a clean, balanced look to a home. They may cost a bit more to build, but the durability and long-term peace of mind are worth it. You’ll appreciate how this design handles wind and rain with ease and fits seamlessly with many home styles. If you’re weighing roof options for your next project, a hip roof might give you the mix of strength and style you’ve been looking for. If you found this helpful, check out other blogs on the website, posted with other guides and information that might be useful for you!

