

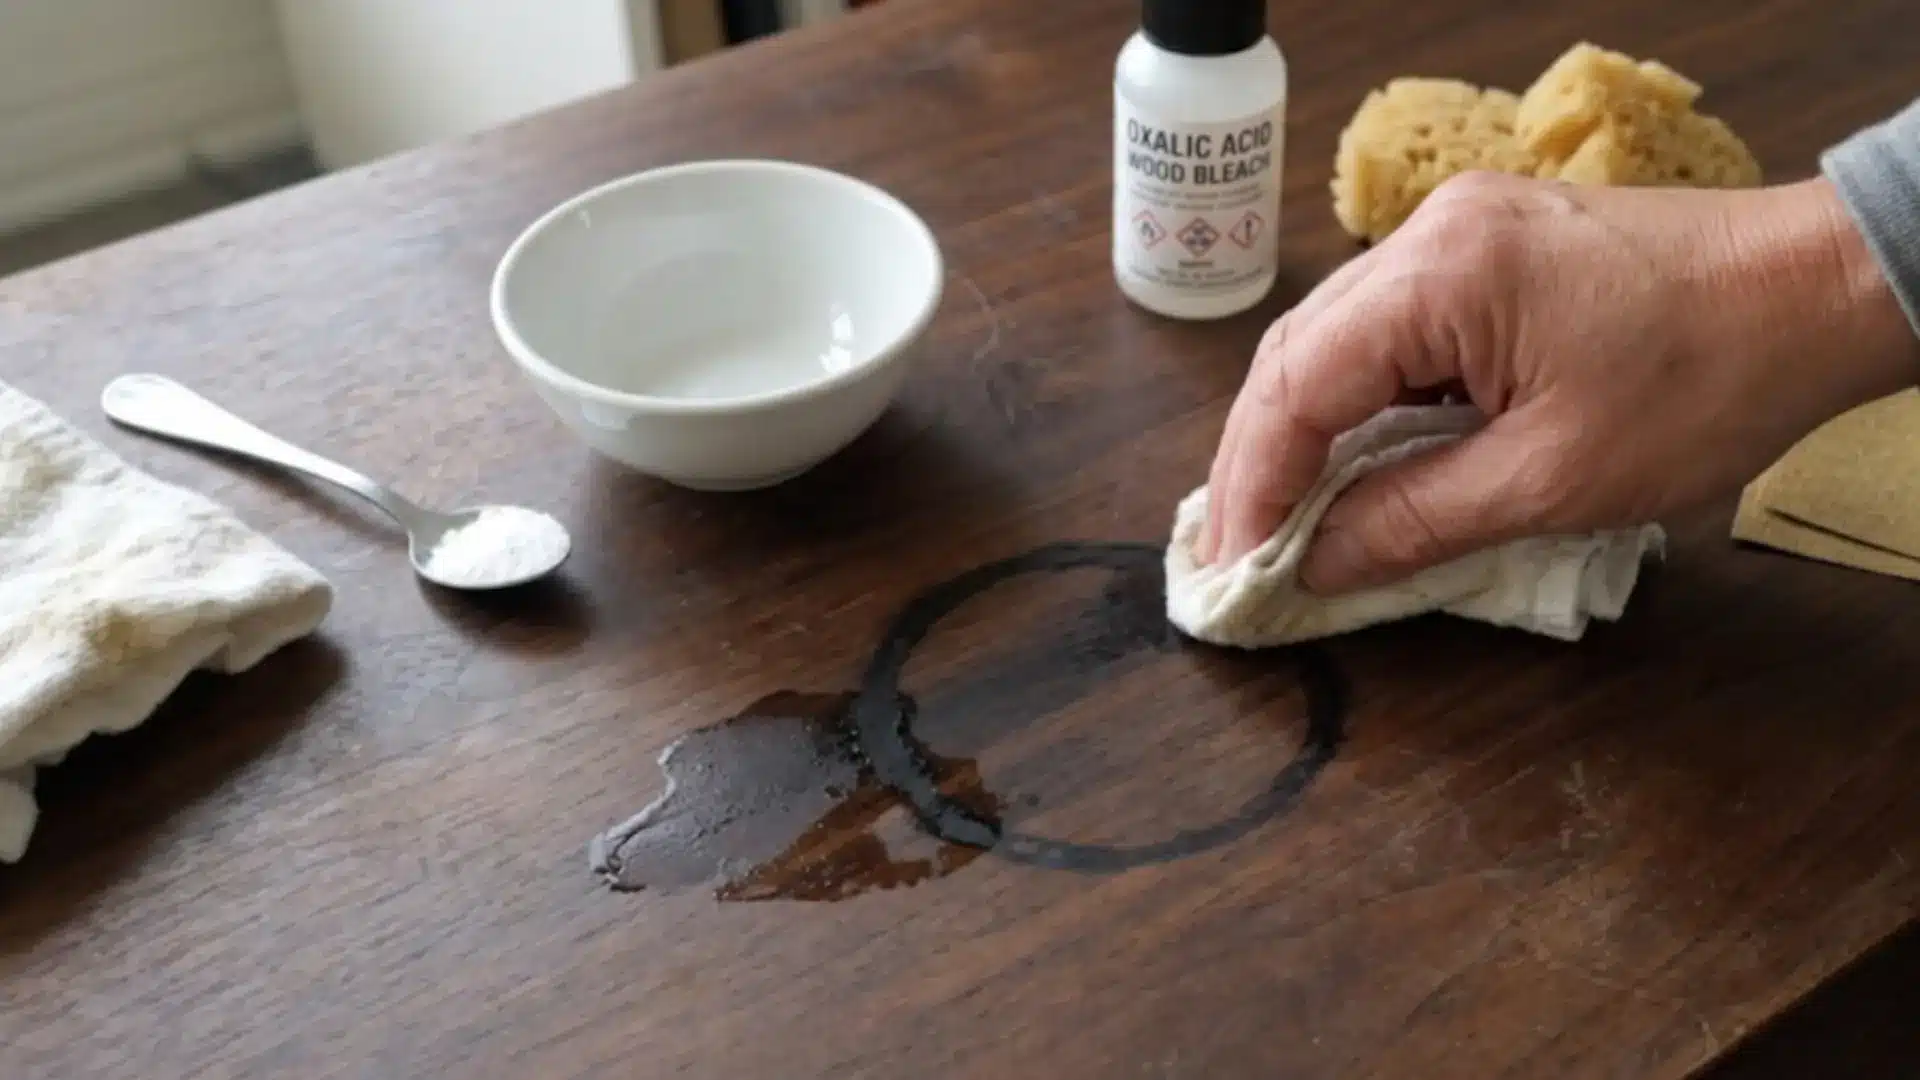
Water rings on a wooden table can ruin the look of an entire room in seconds. Have you ever tried wiping them away only to see the stain still there? It feels frustrating when a clean surface suddenly looks damaged, especially when regular cleaning does nothing. I know how confusing it gets when different fixes online give mixed results and no clear direction. The water stain problem on wood often depends on heat, moisture, and finish type, not just surface cleaning. In this guide, you’ll see how to remove water stains from wood using simple home methods, safe fixes, and practical steps that actually work. How to Remove Water Stains from Wood: What Actually Works If you want to know how to remove water stains from wood, start by figuring out what color the mark is — because white and dark stains behave completely differently and need different approaches. I’ve pulled more than a few water-damaged pieces off job sites over the years, and the most common mistake I see is people trying the same method on every stain regardless of what it is. That’s how you turn a fixable white ring into something that needs sanding and refinishing. The color of the stain tells you how deep the moisture went, and that tells you what will actually clear it. What Causes Water Stains on Wood Surfaces Water stains form when moisture interacts with either the protective finish or the wood itself. White stains appear when water gets trapped under the finish layer, the moisture clouds the coating from below, but the wood underneath is usually untouched. Dark stains are a different problem: those mean water has penetrated past the finish and into the wood fibers, often causing oxidation of the tannins in the grain. Heat makes both worse by opening the finish and allowing liquid to enter faster. The longer moisture sits, the deeper it goes, which is why quick cleanup is worth more than any remedy after the fact. Tannin-rich species like oak, walnut, and cedar are especially prone to dark staining when moisture reaches the wood, because the water reacts with the natural tannins and turns them dark. Pine and other softwoods absorb moisture faster due to their open grain, but the stain chemistry is less dramatic. Understanding this helps you set realistic expectations before you start. Types of Water Stains on Wood: Identify Before You Touch It Before you reach for anything, identify what you’re looking at. The wrong method for the wrong stain type wastes time and risks further finish damage. Stain Type Appearance Cause Difficulty White Ring Cloudy, milky circle on finish surface Moisture trapped under finish from glasses or cups Easy — usually removable with heat or oil Dark Stain Brown or black discoloration in the wood Water penetrated past the finish into wood fibers Hard — may need bleaching, sanding, or refinishing Heat + Moisture Mark Dark or white mark, sometimes with rough texture Hot item combined with condensation breaking down finish Medium — depends on severity and age Finish Damage Dull, patchy areas on a polished surface Long-term moisture exposure weakening the protective coating Medium — often needs polishing or spot refinishing Raw Wood Stain Deep mark on unfinished or bare wood Water absorbed directly into untreated surface Hard — requires refinishing or replacement The stain type determines the method. If you’re looking at a white ring on a sealed dining table, heat or oil will likely clear it. If you’re looking at a black spot on an unfinished piece, you’re looking at a refinishing job — no household remedy will touch that. How to Remove Water Stains from Wood: Four Methods That Work These are the methods I’d walk through in order, starting with the least invasive. Test every method on a hidden area first — the back of a leg, the underside of a leaf. What works on polyurethane can dull an oil finish, and vice versa. 1. Hair Dryer (Best Starting Point for Fresh White Rings) The hair dryer method is a safe and beginner-friendly way to remove light water stains from wood by gently evaporating trapped moisture from the finish layer. It works best when stains are fresh and haven’t deeply set into the wood fibers. Best For: White rings, New cloudy marks, Delicate wood finishes, Small water stains on tables or dressers Start by wiping the wood surface with a soft dry cloth. Remove dust, dirt, or oil buildup so heat can distribute evenly. A clean surface also prevents particles from getting trapped in the finish during heating. Use the lowest heat setting available on your hair dryer. Avoid high heat because it can dry out or crack the wood finish, especially on polished or varnished surfaces. Hold the hair dryer about 6–8 inches away from the stain. This ensures gentle heating instead of direct hot airflow that could damage the wood surface. Keep the dryer moving in slow circular or side-to-side motions. Concentrated heat in one area can cause uneven drying or finish discoloration. Check the stain every 30–60 seconds. As moisture evaporates, the white ring should slowly fade or become lighter. Stop immediately if you notice any surface dulling. Risk Level: Low to medium. This method is fairly safe when used carefully, but too much heat can soften, dull, or damage the finish. 2. Iron Method (Heat Lift for Stubborn White Marks) The iron method is a widely used technique to remove fresh water stains from wood by using controlled heat to pull trapped moisture out of the finish layer. It works best on light surface marks caused by hot cups or recent spills that haven’t deeply penetrated the wood. Best For: White rings, fresh water stains, light cloudy marks, sealed or polished wooden tables, dressers, and cabinets Place a clean cotton cloth over the stained area and set the iron to low or medium heat without steam. Gently move the iron over the cloth in short intervals to avoid overheating the surface. Apply heat evenly across the cloth instead of focusing on one spot. This helps lift moisture gradually without damaging the finish or creating burn marks. Check the stain every few seconds to monitor progress. Stop immediately if the surface starts to feel too hot or shows signs of dulling. Avoid using steam, high heat settings, or direct contact between iron and wood. These can permanently damage the protective finish layer. Repeat the process only in short cycles if needed, allowing the wood to cool between attempts. Risk Level: Medium. Effective for fresh stains, but improper heat use can permanently damage the wood finish. Note: Reddit’s r/howto community has documented this method repeatedly. The consistent report is that it works on white rings, often after two to three short passes, but leaves smudging if pushed too long. Stop when the ring fades — do not try to make it perfect in one session. 3. Mayonnaise or Petroleum Jelly (For Surface-Level Marks on Older Finishes) The mayonnaise method is a popular home remedy that helps reduce white water stains on wood by using natural oils to restore moisture balance in the finish. It works best on surface-level marks caused by glasses or hot dishes. Best For: White rings, light surface stains, polished wooden tables, cabinets, and dressers Apply a small amount of full-fat mayonnaise directly onto the stained area using a soft cloth or fingertip. The oils in mayonnaise help penetrate the finish and loosen trapped moisture. Spread it evenly over the stain in a thin layer. Avoid applying too much, as a thick layer can become messy and harder to clean later. Leave it on the surface for 2–4 hours. For deeper or older stains, it can be left overnight to allow better oil absorption into the finish layer. Wipe the area thoroughly using a clean damp cloth. Make sure no residue is left behind, as it can create stickiness or dull patches. Buff the surface gently with a dry microfiber cloth to restore shine and blend the treated area with the rest of the wood. Risk Level: Low. This method is generally safe but may leave residue if not cleaned properly. 4. Baking Soda Paste (For Mild Marks That Won’t Respond to Heat or Oil) The baking soda paste method is a gentle DIY technique used to remove stubborn water stains from wood by lightly lifting residue from the surface without damaging most sealed finishes. It works best on mild to moderate stains that do not respond to heat or oil-based remedies. Best For: Light dark stains, mild water marks, sealed wooden tables, dressers, cabinets, and slightly older surface stains Mix baking soda with a few drops of water to create a thick paste. Apply it gently onto the stained area using a soft cloth, using light circular motions to avoid scratching the finish. Work slowly and avoid heavy pressure. The mild abrasive nature of baking soda helps lift stain buildup without damaging most sealed wood surfaces. Wipe the area with a clean damp cloth after a few minutes to remove all residue, then dry and buff the surface for a smooth finish. Avoid scrubbing aggressively, as too much pressure can dull or scratch polished or glossy wood finishes. Repeat only if needed, allowing the surface to rest between applications to prevent over-processing. Risk Level: Medium. Safe for most sealed wood surfaces when used lightly, but may damage delicate, glossy, or antique finishes if over-applied. Important: None of the methods above will remove a dark stain that has penetrated into the wood fibers. Commercial wood cleaners may lighten them, but true dark stains, particularly black marks from prolonged moisture or tannin oxidation, require oxalic acid (wood bleach), sanding, restaining, and resealing. That’s a refinishing job, not a cleaning one. Real-Life Advice: What Usually Works Best? In a Reddit r/howto discussion, the original poster had already tried toothpaste, oil and vinegar, and a white ring removal cloth, but the stain was still there. Several people suggested using an iron with a towel between the heat and the wood. The poster later said the ironing trick worked best, though a few smudges remained. Others mentioned mayonnaise for white rings, while some warned that oily fixes can soak into wood and cause problems. The biggest takeaway from real experiences is to start with controlled heat for white marks, avoid rushing through multiple methods, and stop if the stain looks dark, deep, or unchanged after a few careful tries. Commercial Products Worth Considering When home remedies have run out of road, these product types are the next step. They’re faster and more consistent on stubborn or older water stains that household methods can’t fully clear. Product Type What It Does Best Use Effectiveness Wood Restorers Oil-based formulas that revive dull or stained finishes Light to moderate water marks on finished wood High Furniture Polishes Surface cleaners that restore shine and remove mild staining White rings and surface haze Medium Stain Removers Stronger chemical cleaners formulated for deeper marks Older or darker water stains High Wood Oils Lightens deep tannin-based dark stains without destroying wood structure Black marks, tannin oxidation stains, unfinished wood Very High — requires safety precautions Professional Kits Multi-step restoration systems including filler, stain, and finish Severe stains, aged damage, post-sanding repairs Very High Oxalic acid is the one most people skip but shouldn’t overlook for genuinely dark wood stains. It’s the standard in professional refinishing for a reason, it neutralizes the tannin reaction rather than just bleaching over it. Use it with gloves, good ventilation, and follow the neutralizing rinse step exactly as specified on the product label. How to Prevent Water Stains on Wood Prevention is easier than any of the methods above. The finish on your furniture is the only thing standing between the wood and whatever lands on it — protecting that finish is the real job. Use coasters and trivets without exception. Hot cups and cold glasses are the two most common sources of white rings. A coaster costs less than ten minutes of remediation work. Wipe spills immediately. Moisture left for more than a few minutes starts working through some finishes. The faster you act, the less the finish has to absorb. Seal and reapply finish on schedule. Polyurethane and lacquer degrade over time. A surface that was sealed five years ago may no longer be providing the protection it looks like it is. Control indoor humidity. Wood expands and contracts with humidity swings, which opens small cracks in the finish over time. Keeping humidity between 35 and 55 percent extends finish life and reduces stain risk. Polish regularly. Routine polishing maintains the protective layer on many finished surfaces. It’s not a substitute for resealing, but it slows the degradation of the outer coat. These habits matter most on the wood surfaces that see daily use, dining tables, coffee tables, kitchen islands. High-use surfaces need more frequent attention than pieces that sit in a corner. Frequently Asked Questions Does vinegar remove water stains from wood? Vinegar alone can lighten mild surface marks, but it works better combined with olive oil in a 50/50 mix. The acid breaks down mineral deposits; the oil conditions the finish. Apply with the grain and wipe clean after 30 minutes. It won’t touch deep dark stains. Can baking soda remove water stains from wood? Yes, for mild white marks on sealed surfaces. Mix it to a paste, apply with a soft cloth in light circular motions, and wipe clean. Do not use it on glossy or antique finishes — the mild abrasive will dull them. Non-gel white toothpaste works on the same principle. How do you get dark water stains out of wood? Dark stains that have penetrated the wood fibers need oxalic acid (wood bleach), not household remedies. After treatment, the area requires sanding, restaining to match, and resealing. If you’re not comfortable with that sequence, it’s a job for a furniture restoration professional. Does mayonnaise remove water rings from wood? It works on white rings, especially on older lacquer or shellac finishes where heat carries more risk. Apply a thin layer, leave it two to four hours or overnight, then wipe thoroughly clean. Leaving residue behind creates a sticky dull patch that’s a separate problem to fix. Why do water stains come back after cleaning? Usually because moisture is still trapped under the finish, or the surface wasn’t fully dried before it was buffed. Heat or humidity changes can push the mark back to the surface. If a white ring returns after treatment, repeat the heat method and ensure the piece dries completely before reassessing. What type of wood is most resistant to water stains? Hardwoods with tight grain and natural oils — teak, white oak, and walnut — resist moisture penetration better than softer species. Teak in particular contains natural resins that repel water even without an applied finish. Softwoods like pine absorb moisture fastest and stain most readily. Can sunlight remove water stains from wood? Indirect sunlight can sometimes dry a very fresh, shallow white stain over a few days. It is not reliable and should not be the first approach. Direct sunlight causes UV bleaching and can create a discoloration problem worse than the original stain. When should you call a professional restorer instead of using DIY methods? Call a professional when the stain is dark and covers more than a few inches, when the wood feels soft or spongy near the stain, when the finish has visibly cracked or bubbled, or when DIY attempts have left the surface looking worse than the original mark. Summing Up Water stains on wood don’t always mean permanent damage, but they do need the right approach to fix properly. Y ou’ve seen how different stain types react differently and why choosing the correct method matters. Simple heat methods, oil-based fixes, and gentle abrasives can all help depending on how deep the stain has set. The key is to test carefully, avoid rushing, and stop when the surface starts to show any damage or dullness. Knowing how to remove water stains from wood the right way helps you protect furniture and keep surfaces looking clean for longer. Try the method that matches stain type and share your experience or explore wood care tips.
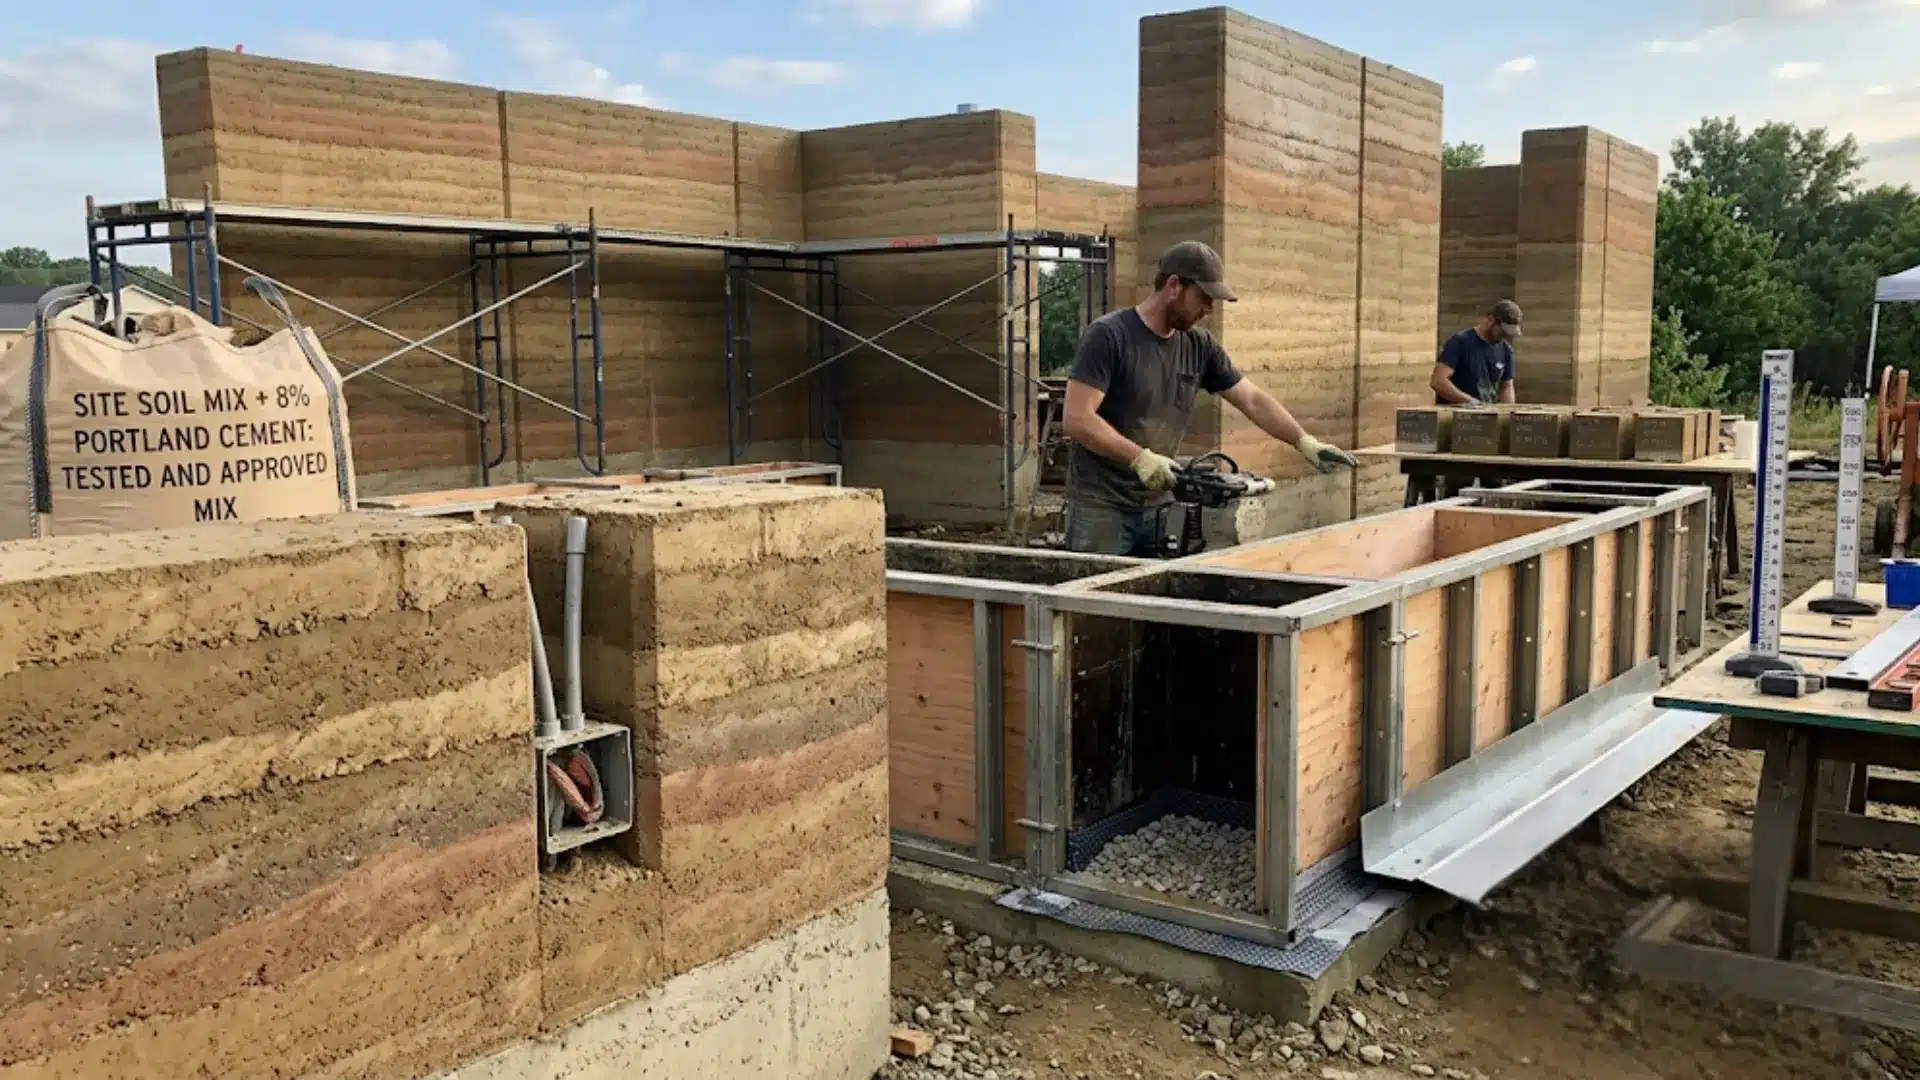
Rammed earth looks simple, but the design details can make or break the wall. If you are planning a home, feature, or landscape or retaining wall, you need more than just a nice texture sample. You need to understand the structure, moisture risks, insulation limits, services, and finishes before construction starts. That is where rammed earth construction details become important. I like to think of this material as both wall and system because every choice affects the next. Here, you will learn how wall type, climate, thickness, openings, footings, sealers, service routes, and cost decisions shape a stronger and longer-lasting project. You will also see what to plan early, what to discuss with your builder, and what mistakes to avoid before formwork begins. What Rammed Earth Construction Actually Costs and What the Details Mean for Your Budget Rammed earth construction details are not just a design checklist. Every decision about wall thickness, soil source, footing depth, and moisture protection has a direct cost consequence, and most budgets go wrong before the first layer is compacted. If you are pricing a rammed earth home or feature wall in the US, the wall-only installed cost typically runs $50 to $225 per square foot depending on complexity, stabilizer content, and whether a specialist contractor needs to travel to your site. That is a wide range for a reason, and understanding what drives it is what this article is about. Cost Note: Figures in this article are estimates based on 2024-2025 US contractor and specialist data from Asiri Designs, GLS Rammed Earth, and Architecture Courses. Rammed earth pricing varies significantly by region, contractor availability, and design complexity. Always get at least three itemized quotes before committing to any project above $1,000. How Rammed Earth Walls Are Built, What Your Contractor Is Actually Doing Understanding the build sequence matters for budget planning because each stage has cost implications that are easy to underestimate when you are looking at a flat per-square-foot rate. The process begins with soil testing and sample production. A good contractor will not skip this step. Test blocks are made using different soil types, cement percentages, and pigment combinations, then left outside to assess color stability, hardness, erosion resistance, and cracking behavior. The soil mix that performs best in testing is the one that goes into your wall, and that decision affects both cost and long-term durability. Once the mix is confirmed, the contractor sets up formwork, typically metal-framed forms with plywood inserts, or a simpler plywood-and-pipe-clamp system. Form release is applied to every interior face before soil goes in. Then the mix is placed in measured layers called lifts, each compacted by pneumatic or manual tampers until it reaches full density. For pneumatic tamping, lifts run about six inches of loose material. For hand tamping, four to five inches is the practical limit. The formwork rises with each completed section until the full wall height is reached. What takes time, and drives labor cost, is that none of this can be rushed. Each lift must reach consistent density before the next one goes down. Moisture content must stay within a workable range throughout. And the formwork must stay level and square at every stage, because rammed earth takes the exact shape of its mold. Rammed Earth Construction Details: The Technical Decisions That Drive Cost These are the specific design and engineering choices that determine what your rammed earth project actually costs to build and maintain over time. Finalizing them early, before formwork is ordered, is the single most effective way to avoid expensive mid-project changes. 1. Wall Thickness and Structural Load External load-bearing walls are typically at least 300mm (roughly 12 inches) thick. Insulated rammed earth assemblies start at 400mm and can exceed 18 inches. Thicker walls mean more material, more labor, and a larger formwork footprint, all of which compound on large or complex floor plans. Internal non-load-bearing walls can be reduced to 200mm, but that change should be confirmed with your structural engineer before it shows up on the drawings. 2. Soil Source and Stabilizer Content Using on-site soil is one of the most effective cost levers available. If your site has suitable clay, sand, and gravel composition, your contractor can blend and test it rather than importing material. If the site soil fails testing, imported material adds transport cost and sometimes a significant delay. Most stabilized rammed earth mixes use 5 to 10% Portland cement. Higher cement content increases compressive strength but also raises embodied carbon and material cost, worth discussing with your builder early rather than accepting a default spec. 3. Footings and Ground Conditions Rammed earth walls are heavy, and that weight has to go somewhere. Modern rammed earth buildings are built on conventional concrete footings or a reinforced slab base. Your soil classification determines footing depth, the amount of steel mesh required, and excavation scope, none of which are visible line items when you look at a wall quote. A structural engineer should assess your site conditions before any cost estimate is treated as reliable. 4. Expansion Joints and Control Joints Long wall runs need planned joints to manage movement from temperature and moisture changes. Without them, cracking is not a question of whether, it is a question of where and when. These joints need to be detailed in the drawings before construction begins because adding them after the wall is up is not a straightforward fix. 5. Electrical and Plumbing Integration Service lines must be routed through conduit embedded in the wall as it is built. Electrical boxes are installed as the wall rises. Doing this right requires coordination between your contractor and your trades before the first lift goes down. Retrofitting services through a finished rammed earth wall is disruptive and expensive, this is not a detail to sort out during construction. Rough-in plumbing and electrical are predictable costs when trades are coordinated before the wall rises; they become unpredictable when they are not. 6. Window and Door Framing Every opening needs reinforced framing to carry the load above. More openings, wider openings, and taller openings all increase the lintels and structural work required. This is also where wall-length limits come in, the plastic index of your soil mix determines how long a continuous wall section can run without cracking, and openings are factored into that calculation. 7. Waterproofing and Capillary Breaks Rammed earth’s primary vulnerability is sustained moisture exposure. The wall base should sit at least 225mm above ground level on a raised foundation, and roof overhangs should be designed to direct water away from wall faces. Breathable sealers, drainage layers at the footing, and cap flashings are not optional upgrades, they are the details that determine whether your wall lasts decades or develops erosion problems within the first few years. Skipping or minimizing moisture protection to reduce upfront cost is the single most common source of expensive long-term repairs in rammed earth buildings. Cost of Rammed Earth Construction in the USA Rammed earth pricing in the US is genuinely difficult to pin down because so few specialist contractors publish detailed rate cards, and because the variable that matters most, whether a qualified builder is available within driving distance of your site, often moves the number more than the design choices do. Here is how the cost picture actually breaks down. Line Item Low End High End What Drives the Variation Soil testing and samples $500 $3,000+ Lab testing vs field testing; number of sample batches; imported vs on-site soil Formwork system Included in labor rate $5,000-$15,000 separately Whether contractor owns forms or rents them; complexity of wall geometry Rammed earth wall (installed, per sq ft) $50 $225 Wall thickness, stabilizer %, site access, specialist travel, finish complexity Structural engineering $2,500 $10,000+ Project scale, seismic requirements, footing complexity Surface sealing $1,500 $8,000+ Wall area, sealer type, number of coats, internal vs external application Permits and inspections $800 $5,000+ Local code familiarity with rammed earth; whether material testing is required for approval Labor consistently represents the largest share of rammed earth cost. Soil, cement, and aggregate are relatively inexpensive. What drives the quote is skilled setup time, form management, compaction labor, and the coordination required to integrate services and openings correctly. A project where the contractor must mobilize from out of state can add $10,000 to $30,000 before a single lift is placed. Regional Variation: Where You Build Changes the Number Significantly The US is not one rammed earth market. The Southwest, particularly New Mexico, Arizona, and California, has the deepest pool of experienced contractors and the most favorable climate for rammed earth performance. Projects in those regions tend to land at the lower end of the installed cost range, assuming on-site soil is viable. The Northeast and Pacific Northwest present a different picture. Cold climate requirements, stricter energy codes, and the near-absence of local rammed earth specialists mean most projects in those regions require insulated wall assemblies (which add thickness and cost), specialist travel, and more engineering input to meet building code. Projects in those markets routinely sit at the high end of the range or above it. The Midwest and South fall somewhere in between. Labor costs are generally lower, but rammed earth specialists are scarce in many metro areas, which pushes travel costs back into the equation. If you are building in a market where rammed earth is uncommon, budget for the learning curve on the permit side as well, local building departments unfamiliar with the material often require additional testing documentation before approvals are issued. Where Rammed Earth Budgets Go Wrong These are the line items I see consistently surprise homeowners who thought they had a solid cost picture going in. 1. Treating the Wall Quote as the Project Cost A rammed earth wall quote covers the wall. It does not cover footings, engineering, permits, service integration, moisture protection, sealing, or the additional structural work that openings require. I have watched homeowners add 40 to 60 percent to their wall quote to get to actual all-in cost, and that was before any site surprises showed up. 2. Underpricing Specialist Access If the nearest experienced rammed earth contractor is three states away, their mobilization cost is real. Some projects in underserved markets spend more on getting the right people to the site than they spend on materials. The answer is not to use an inexperienced local contractor. The answer is to budget the travel cost honestly from the start. 3. Skipping Soil Testing to Save Time Test samples that fail late, after formwork is set up and the schedule is committed, cost far more than the soil testing that would have caught the problem weeks earlier. This is especially true when site soil looks suitable but has clay content or plasticity that only shows up under lab conditions. 4. Underestimating Curing Time Cement-stabilized rammed earth requires a minimum of 28 days of curing before it reaches working strength. Projects that compress that timeline to hit a move-in date risk cracking and surface failure. Curing time is not negotiable, it needs to be in the schedule before the schedule is agreed. 5. Ignoring Climate Exposure in the Design A wall that performs beautifully in Arizona can fail within a few wet winters in the Pacific Northwest if the moisture detailing is not specified for that climate. Roof overhang depth, drainage slope, base height above grade, and sealer type all need to reflect your specific rainfall and temperature conditions, not a generic rammed earth specification. What is Negotiable and What Isn’t The soil mix ratio and compaction standard are not negotiable. Neither is the structural engineering or the moisture protection at the base. These are the things that determine whether the wall stands up in 20 years, and cutting them is where rammed earth projects fail at a structural rather than cosmetic level. What is negotiable: the finish complexity, the number of openings, the wall geometry (simpler rectangular plans cost less to form), and the pigment or color variation in the mix. Using on-site soil rather than imported material, if it passes testing, is one of the most effective cost levers on the material side. Minimizing the number of control joints needed by keeping individual wall lengths within the limits your soil mix supports is another. Best Use Cases for Rammed Earth Construction Rammed earth is best suited for projects where durability, thermal performance, and natural aesthetics are essential. It is a long-term building material choice rather than a low-cost wall system. Residential Homes in Stable Climates: Rammed earth works well in homes where thermal mass improves comfort and energy efficiency. Dry or stable climates reduce moisture risks and allow the material to perform at its best over time. Eco-Resorts and Hospitality Projects: Hotels and resorts use rammed earth for its natural look and sustainability value. The material enhances guest experience while supporting eco-friendly branding and low-impact design goals. Landscape and Retaining Walls: These applications are ideal because one side is often protected by soil or grade. This reduces weather exposure and allows cost-effective use of rammed earth in outdoor structural features. Commercial and Civic Buildings: Used in offices and public buildings focused on green certification, rammed earth provides low embodied carbon construction while acting as both structure and finished surface in many designs. Advantages and Limitations: What to Weigh Before You Commit Advantages Limitations Low embodied energy when local soil is used High labor and formwork cost in most US markets Excellent thermal mass for temperature regulation Poor standalone insulation, requires added assembly in cold climates Monolithic, durable structural wall when properly stabilized Moisture-sensitive without correct base and surface detailing Minimal maintenance when drainage and sealing are handled correctly Specialist contractors are scarce outside the Southwest Off-form finish eliminates the need for separate interior and exterior cladding Permits may require additional material testing documentation in unfamiliar jurisdictions These trade-offs are worth mapping against your specific site conditions and budget before you treat rammed earth as a confirmed decision. The thermal mass benefit, for example, is most valuable in climates with significant day-night temperature swings. In a consistently mild coastal climate, you may not get the energy performance return that justifies the premium. What to Ask Your Contractor Before Signing Anything These are the questions that separate a quote you can rely on from one that will surprise you mid-project. Ask whether the quote is based on your site soil or imported material, and what happens to the cost if the site soil fails testing. Ask how their formwork is set up for your specific wall geometry and whether that cost is included in the rate or quoted separately. Ask what engineering documentation they will provide for the permit application and whether they have experience with your local building department. Ask what the curing schedule looks like and what the weather contingency plan is, rammed earth cannot be placed in freezing temperatures or heavy rain. And ask specifically what moisture protection details are included in the scope, and which ones would be billed as additions. A contractor who can answer all five clearly and specifically, without defaulting to “it depends” on every item, is a contractor who has done enough of this work to plan your project rather than discover it. Frequently Asked Questions How long do rammed earth walls last? Well-built stabilized rammed earth walls can last for generations. Many historic earth structures have stood for centuries. Longevity depends on mix quality, compaction, moisture protection, drainage, and prompt repair of any surface damage. The wall base and roof overhang details matter more than almost any other factor. Is rammed earth construction expensive compared to conventional building? Yes, upfront. Installed wall cost runs $50 to $225 per square foot in the US, compared to $15 to $40 for standard framed walls. Labor is the dominant cost driver. Long-term maintenance is minimal by comparison, which shifts the cost picture over a 30-plus year horizon. Can rammed earth walls get wet? They can tolerate rain when properly detailed — raised foundation, roof overhang, breathable sealer, and good drainage. Sustained moisture against an unprotected wall face will erode the surface over time. The base is the most critical exposure point and should be treated as the primary moisture risk in your design. How thick are rammed earth walls? External load-bearing walls are typically 300mm (about 12 inches) at minimum. Insulated assemblies start at 400mm and can reach 18 to 24 inches. Internal non-load-bearing walls can be reduced to 200mm, but that reduces their structural capacity. Does rammed earth have good insulation? No, not on its own. Rammed earth has excellent thermal mass but low R-value as a standalone wall. In cold climates, insulation must be built into the assembly. Insulated rammed earth walls in the northern US typically achieve R-22 to R-30 with added rigid foam. Is rammed earth allowed by US building codes? It can be approved in most jurisdictions, but familiarity varies by region. Structural calculations, material testing documentation, energy compliance data, and fire rating information may all be required before permits are issued. Your contractor’s experience navigating this process in your specific area is worth asking about directly. Can rammed earth be used for a two-story home? Yes, when engineered correctly. Wall thickness, compressive strength, opening placement, lintels, roof loads, floor loads, and footing design all need professional review. It is not uncommon — it requires the right engineering input from the start. What maintenance does a rammed earth wall need? Keep the base dry, reapply exterior sealer as needed (every 10 to 15 years typically), repair surface chips promptly, and keep sprinkler heads and standing water away from the wall face. Most maintenance is simple when drainage and moisture detailing were done correctly at the outset. How long does rammed earth construction take? Wall construction pace depends on crew size, wall area, and weather. Cement-stabilized walls require a minimum 28-day curing period before the wall reaches working strength. Overall project timeline typically runs longer than equivalent framed construction — factor this into your construction loan and move-in planning the same way you would with any custom house build. Is rammed earth a good DIY project? For small landscape or garden walls, experienced DIY builders can get reasonable results. Structural home construction is a different scope entirely — mix design, formwork engineering, compaction consistency, code compliance, moisture detailing, and permit documentation leave very little room for learning on the job. Conclusion A good rammed earth wall starts long before the first layer is compacted. You need the wall’s purpose, structure, climate response, openings, services, moisture protection, and finish planned together, not handled as separate choices. I would treat rammed earth as a full building system because small decisions can affect strength, comfort, cost, and long-term care. Therammed-earth construction details covered here can help you ask better questions, avoid late changes, and work more effectively with your designer, engineer, or builder. Use these points as a practical checklist before finalizing drawings, choosing wall finishes, approving service routes, or setting a budget. If you are planning a project, share your questions, compare your options carefully, or check out related blogs before you move ahead. Cost estimates based on 2024-2025 US contractor and specialist data from Asiri Designs, GLS Rammed Earth, Architecture Courses, and Colorado Hardscapes. Actual costs vary significantly by region, soil conditions, contractor availability, and design complexity. Verify current pricing with at least three local or regional contractors before budgeting.

