

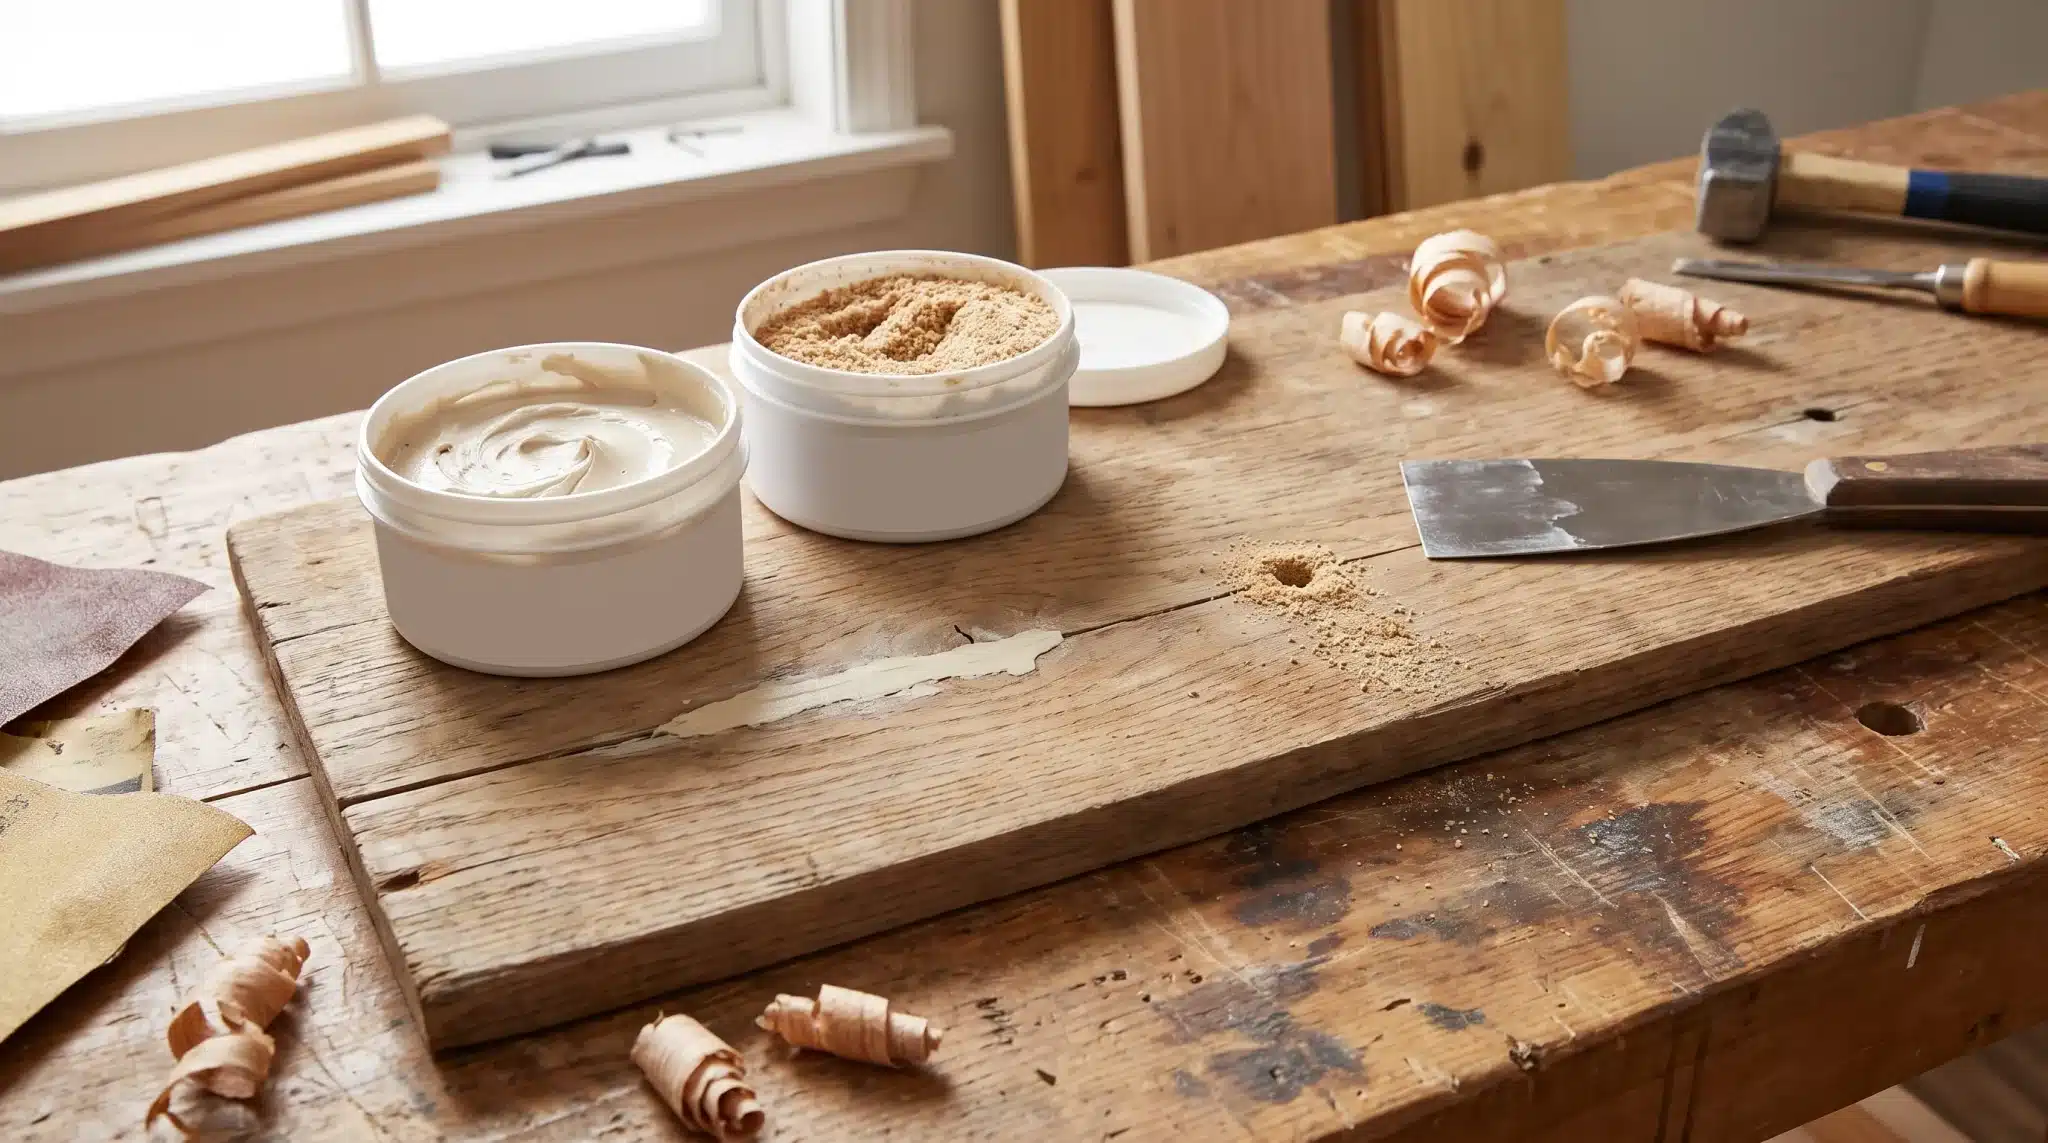
Small wood repairs can be surprisingly tricky. I have seen many projects where a simple crack, dent, or scratch turned into a noticeable patch because the wrong repair material was used. Wood putty and wood filler often look almost identical at first glance. However, each one is designed for a different type of repair. In my experience, wood filler works best for deeper repairs on unfinished wood that will be sanded, painted, or stained, while wood putty is better suited for small touch-ups on already finished surfaces. Choosing between wood putty vs wood filler comes down to understanding the surface you are repairing, the size of the damage, and the finish you want to achieve. You can merge both sections under a broader H2 that introduces the two materials before comparing their differences. What Is Wood Filler? Wood filler is a repair compound used to rebuild damaged areas of wood. It is made with wood fibers or synthetic materials mixed with binders to create a material that hardens as it dries. It works well for filling deeper holes, cracks, dents, and missing sections because it becomes a solid surface that can be sanded smooth. Since filler bonds with the wood rather than sitting only on top, woodworkers often use it during the repair and preparation stage before painting or finishing. Pros Cons Creates a hard surface that can be sanded, shaped, and painted. Can crack if used on wood that expands and contracts frequently. Works well for filling deep holes, cracks, gaps, and damaged wood areas. Usually requires sanding and surface preparation after drying. Bonds with the wood surface for stronger repairs. May not match the natural grain of stained wood. Suitable for unfinished wood projects before painting or staining. Some types dry quickly, leaving less working time. Helps create a smooth surface for professional-looking finishes. Not always ideal for repairs on already finished furniture. What Is Wood Putty? Wood putty is a softer, more flexible material designed for small surface imperfections on finished wood. It is typically made from oils, solvents, and synthetic compounds that keep it slightly pliable after application. Unlike wood filler, putty is not meant for rebuilding damaged areas. It is commonly used after staining or finishing to hide small scratches, nail holes, or minor flaws. Furniture restorers often keep multiple putty shades available to blend repairs into existing finishes without refinishing the entire piece. Pros Cons Stays flexible after drying, allowing it to handle slight wood movement. Not suitable for repairing deep holes, large cracks, or missing wood sections. Works well for small surface repairs like scratches, dents, and nail holes. Takes longer to dry compared to some wood fillers. Available in different colors to match finished wood surfaces. Cannot usually be sanded as smoothly as wood filler. Ideal for repairing finished furniture without removing the existing finish. May not hold up well in areas exposed to heavy wear or moisture. Helps restore the appearance of antique furniture and decorative pieces. Often needs a matching shade for a less noticeable repair. When Should You Use Wood Putty or Wood Filler? Choosing between wood putty and filler comes down to the type of wood and repair. Wood filler works well for serious damage or holes, while putty is best for smoothing surface imperfections and blending with finished wood. Knowing which product to use makes furniture restoration or DIY woodworking projects easier and the results more seamless. Feature / Aspect Wood Putty Wood Filler Best For Small cosmetic repairs on finished wood surfaces Larger repairs on unfinished wood where strength is important Typical Uses Hiding scratches, minor dents, small imperfections Filling nail holes, screw holes, gaps, cracks, small splits Finish Compatibility Matches existing finish, available in different shades Applied before painting or staining for smooth, even surfaces Wood Type Consideration Suitable for all finished wood Dense hardwoods handle differently than softwoods for durability. Strength / Durability Cosmetic only, not structural Strong, durable, can withstand wear Application Examples Furniture, cabinets, interior trim Furniture projects, cabinet prep, trim installation How to Apply Wood Filler Correctly? A smooth wood filler repair starts with proper preparation. Rushing the process can leave uneven patches or weak spots that show through the final finish. Follow these steps for a cleaner, longer-lasting repair. 1. Clean the Damaged Area: Remove dust, dirt, loose wood pieces, and debris before applying filler. A clean surface improves adhesion and helps create a smoother, more even repair. 2. Apply the Filler: Use a putty knife to press wood filler firmly into cracks or holes. Slightly overfill the area because some fillers shrink as they dry. 3. Let It Dry Completely: Allow the filler to dry fully before sanding. Drying time depends on the repair size, product type, and surrounding conditions, with larger areas needing more curing time. 4. Sand the Surface: Once hardened, sand the repaired area with fine-grit sandpaper until it becomes level with the surrounding wood. Create a smooth surface ready for finishing. 5. Finish the Wood: Remove sanding dust and apply paint, stain, or sealant based on the project. Choose a compatible finish to protect the repair and blend it with the wood. How to Apply Wood Putty Correctly? Putty rewards patience and a close color match. Here is the right way to do it. 1. Match the putty color: Choose a wood putty shade that closely matches the finish. Since putty is used for visible repairs on stained wood, a close color match helps the repaired area blend in instead of drawing attention. 2. Press putty into the repair: Apply the putty directly into the scratch, dent, or small surface flaw using a putty knife. For imperfections, you can use your finger to press the material into the damaged area. Make sure the putty fills the spot without leaving gaps. 3. Remove the excess: Once the repair is filled, wipe away extra putty from around the damaged area. Keep the patch level with the surrounding surface so it does not create a raised spot that stands out after drying. 4. Let it set: Allow the wood putty to dry and settle according to the product instructions. Avoid touching or disturbing the repair while it sets, as moving it too soon can affect the final appearance. 5. Seal if needed: Depending on the surface and location of the repair, adding a protective finish can help the putty last longer. Sealing is especially useful for furniture and frequently used wooden surfaces exposed to moisture, dust, or regular wear. How Much Do Wood Putty and Wood Filler Cost? Wood filler runs about $8 to $18 for a standard tub at major retailers. Common DAP fillers sit around $7.98 to $17.98 depending on the size. A single container fills many nail holes and cracks. Wood putty falls in a similar range. Small tubes cost only a few dollars each. A six-pack of Varathane putty runs about $29.69, which works out to $4.95 per unit. DAP putty multi-packs land near $5.57 per tube. Here is a quick price snapshot to compare the two. Product Typical Size Rough Price Wood filler 8 to 16 oz tub $8 to $18 Wood putty 3 to 4 oz tube $5 to $10 Exterior wood filler Larger tub with hardener $15 to $30 Wood Putty vs Wood Filler for Different Home Projects Real projects make the choice clearer. From furniture repairs to flooring fixes, the right product depends on the wood type, surface finish, and level of damage. Engineered hardwood floors, for example, have a layered construction that requires careful repair methods to avoid damaging the top veneer. Project Recommended Product Hardwood floor scratches Filler or repair kit, based on finish Painted cabinets Wood filler Stained furniture Wood putty Door frame repairs Wood filler Small trim damage Wood putty Outdoor wood repairs Exterior-rated wood filler Final Verdict When I choose between wood putty and wood filler, I always start by looking at the repair itself. Wood filler works best for damaged or unfinished wood that needs sanding, painting, or staining, while wood putty is better for small touch-ups on finished surfaces. Taking a moment to match the product to the job can save time and prevent uneven patches later, before applying either one. I recommend checking the type of wood surface and the size of the damage. Those two details usually make it clear which option will give the best result. Frequently Asked Questions Does wood putty harden like wood? No. Wood putty usually stays slightly flexible after it dries. That helps it move with finished wood. It never gets as hard as wood filler. When should you not use wood filler? Skip filler on finished surfaces that need flexibility or a color match. It also fails on large structural repairs and areas with heavy movement. How big of a gap can you fill with wood filler? Most fillers handle small to medium repairs, usually up to about a quarter inch. Bigger gaps may need several applications or another method. Does wood putty need to be sealed? Not always. But sealing helps guard the repair from moisture, dirt, and wear. This matters most on furniture you use every day. How do you apply wood putty correctly? Clean the area, press putty into the spot, and wipe off the excess. Let it set, then add finish protection if the surface needs it.
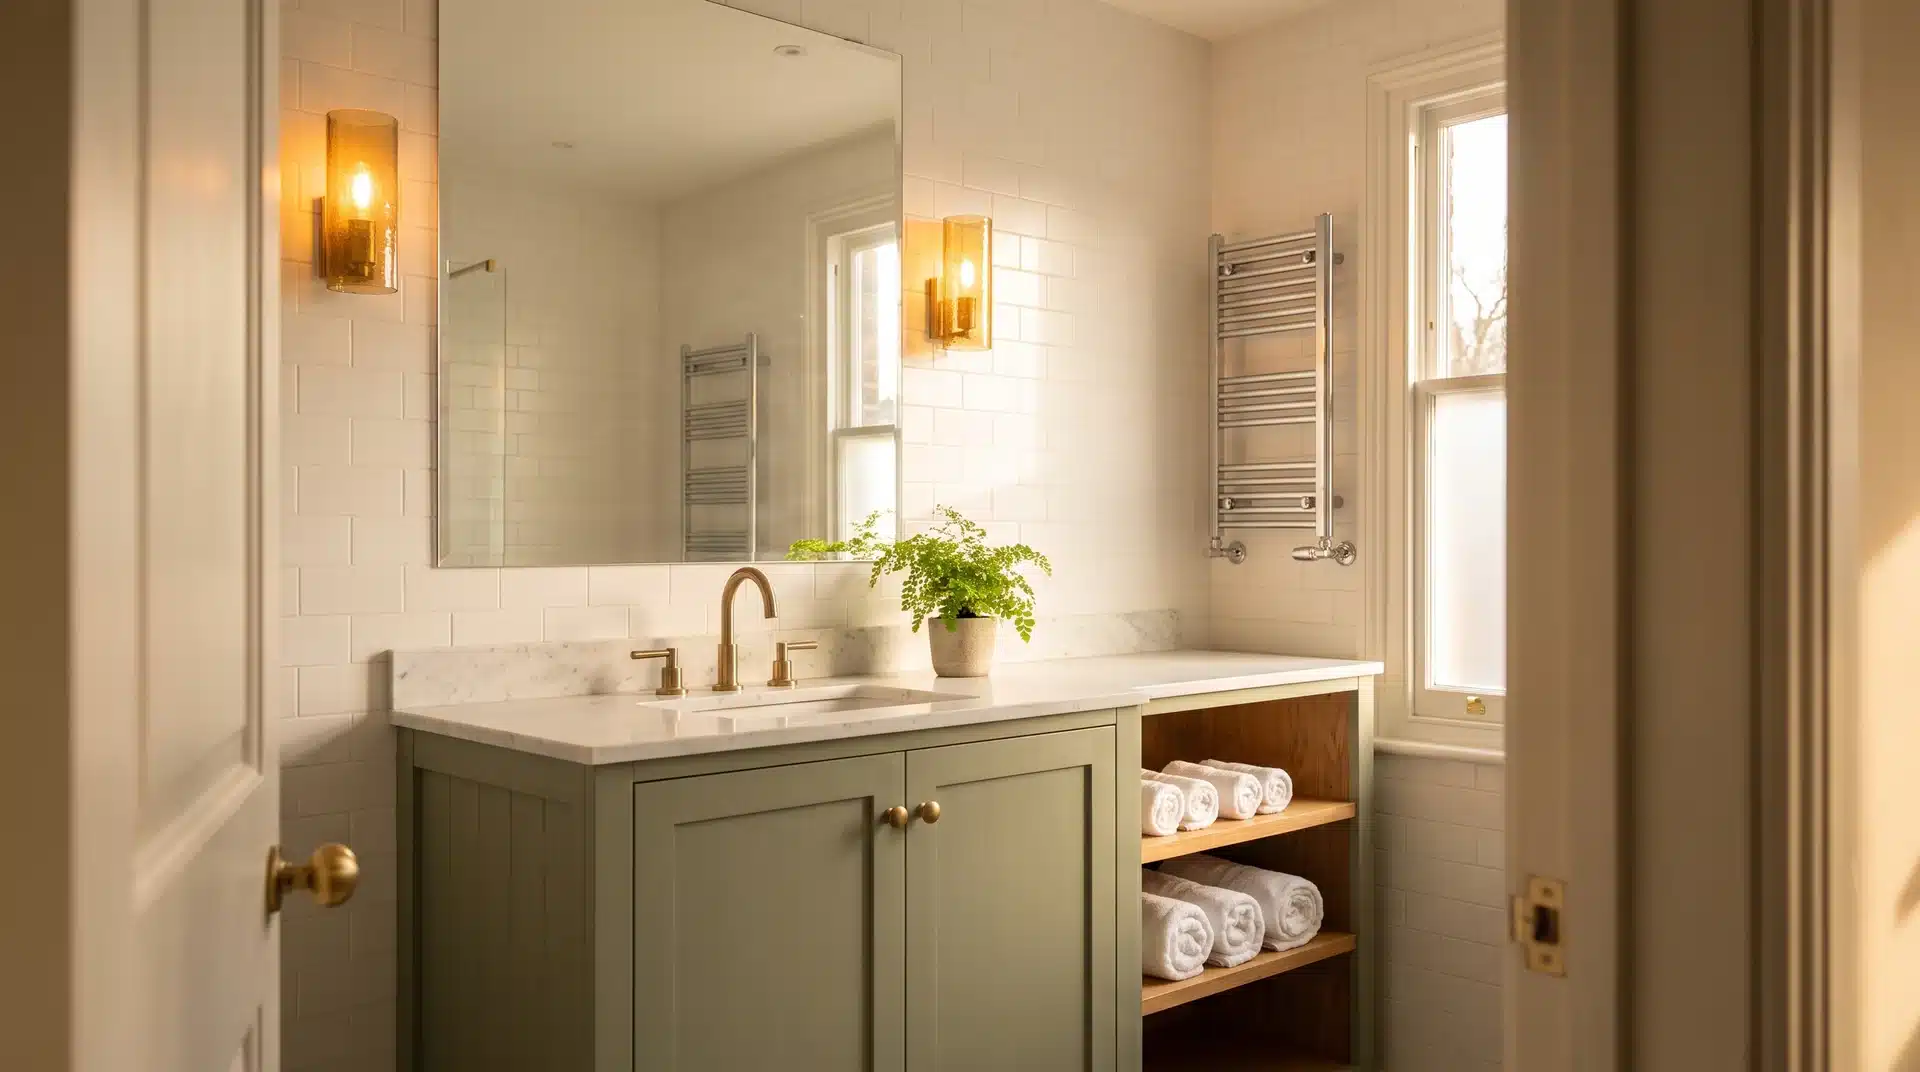
The guest bathroom is the room your visitors judge you by, and most of them do it in the first ten seconds. It does not need a full renovation to make an impression worth remembering. The right guest bathroom ideas can turn a forgotten corner of your home into the detail that guests bring up at dinner months later. A compact powder room, a dated half bath, a full guest suite that simply needs a refresh- the options available now go far beyond new towels and a candle. This list of guest bathroom ideas covers modern, luxurious, welcoming, and low-cost simple bathroom designs with something usable at every budget. Start here. 27 Guest Bathroom Ideas to Inspire Your Next Update The best guest bathroom inspiration does not come from doing more. It comes from doing the right things in the right order and knowing which single change carries the most weight in a small space. 1. Muted Green Vanity With Brass Fixtures A muted green vanity paired with warm brass hardware is one of the strongest guest bathroom combinations. The green adds personality without committing to something loud, and brass softens the contrast against white tile walls. Add a small potted plant and a ceramic soap dispenser to finish the look without overcomplicating it. It photographs well and lives even better in person. 2. White Shiplap Walls With Black Accents White shiplap walls and matte black accents deliver a clean, fresh look that feels inviting without demanding much upkeep. The black fixtures carry the visual work, so the rest of the room can stay quiet. This approach holds up particularly well in smaller guest bathrooms where clutter is the biggest problem to solve. Fresh without trying too hard, which is exactly where a guest bathroom should land. 3. Bold Patterned Wallpaper on One Wall One wall of bold patterned wallpaper turns a forgettable guest bathroom into one guests actually remember. Floral, geometric, or abstract prints all work as long as the rest of the room stays quiet and lets the paper lead. Look for wallpaper labeled for high-humidity rooms and pair it with a simple dark vanity for balance. One wall is enough. The whole room does not need to compete with itself. 4. Floating Vanity for a Modern Guest Bathroom Few upgrades modernize a guest bathroom as fast as a floating vanity without touching anything structural. It reveals the floor line and makes the space read larger than it is. For tighter layouts, the visual breathing room created beneath a floating vanity does more for the room than almost any other decorative choice. Pair with a frameless mirror, and the refresh is complete. 5. Statement Marble Tile Accent Wall A bold marble pattern on a single accent wall elevates a guest bathroom from functional to high-end. Balance it with warmer elements, like a wood vanity or soft lighting, so the drama does not tip into the cold. Large-format marble-look porcelain achieves a visual impact close to the of real marble without the sealing and maintenance demands. Guest bathroom inspiration that ages well rather than dating quickly. 6. Deep Green Vanity With Soft White Tile Deep green against soft white tile is one of the most searched guest bathroom color combinations in the US right now. The contrast is rich without feeling heavy, and the white tile keeps the room from closing in. Pair with brushed gold hardware for warmth or matte black for a sharper edge. Both work. The green carries the design either way. 7. Frameless Mirror Above a Sleek Single Sink A large frameless mirror above a single sink makes a guest bathroom feel designed rather than assembled. It reflects light, adds visual depth, and requires nothing else on that wall to work effectively. Among the highest-impact, lowest-cost upgrades available in any guest bathroom refresh, it suits every design direction from minimal to traditional without forcing a commitment to either. 8. Warm Neutral Palette With Natural Wood Touches Cream, oat, and soft beige tones give a guest bathroom a calm, hospitable quality that holds across seasons and styles. Natural wood touches on the vanity or a small shelf add organic texture without introducing color. This combination reads as intentional yet minimal, making it one of the most broadly appealing guest bathroom ideas for homeowners who want the space to work for a wide range of visitors. 9. Black and White Classic Tile Floor A black-and-white geometric tile floor does the decorating in a guest bathroom without requiring anything bold on the walls. Keep the walls white or off-white, choose simple fixtures, and let the floor carry the visual interest. This has been working in bathrooms for decades and shows no signs of dating. It is one of the most searched guest bathroom ideas for good reason. 10. Layered Lighting With Sconces and Overhead Dimmer Layered lighting transforms a guest bathroom from clinical to warm in a way no paint color or accessory can replicate. Wall sconces flanking the mirror at eye level eliminate the harsh shadows created by overhead-only lighting. Add a dimmer on the ambient circuit, and guests can adjust the room to their own comfort level at any hour. The upgrade most guest bathrooms are missing is the one that makes the biggest, most noticeable difference. 11. Open Shelving With Rolled Towels and Curated Products Open shelving in a guest bathroom signals thoughtfulness. Rolled white towels, a small plant, and two or three curated products displayed neatly communicate that this space was prepared for company rather than just cleaned. The discipline required to keep open shelving organized is part of what makes it so effective. When done right, it is one of the most memorable details in the room. 12. Spa-Inspired Guest Bathroom With Minimal Clutter A spa-inspired guest bathroom does not require expensive materials. It requires editing. Clear the counter of personal items, add one quality texture, invest in a rainfall showerhead if the budget allows, and keep the lighting warm. Guests recognize a spa feeling through what is absent from the room as much as what is present. This is guest bathroom inspiration that costs more in restraint than in spending. 13. Vintage Apothecary Cabinet for Storage and Character A vintage or apothecary-inspired cabinet with glass doors adds character to a guest bathroom while solving the storage problem at the same time. Display folded towels, small toiletry items, and a few curated objects inside. It gives the room a personality that a standard vanity never provides and suits both traditional and transitional interiors without forcing you into either direction. 14. Wainscoting With Bold Paint Above Wainscoting on the lower half of a guest bathroom wall paired with a bold paint color above creates a classic architectural detail that punches well above its cost. Deep navy, forest green, or charcoal above white wainscoting produces a high-end result achievable over a weekend with basic tools and one gallon of paint. Use satin finish above the wainscoting line: it is widely considered the best paint finish for bathroom walls because it handles moisture, wipes clean, and avoids the clinical glare of semi-gloss. 15. Vessel Sink on a Natural Wood Vanity A ceramic vessel sink on a natural wood vanity base reads as purposeful and elevated without approaching luxury price points. The organic quality of the wood grounds the ceramic vessel and keeps the look warm rather than sterile. Choose a countertop vessel over a wall-mount version for easier installation in an existing guest bathroom, and pair with a wall-mounted faucet for a clean, uncluttered counter. 16. Colorful Mosaic Tile Inside the Shower A colorful mosaic tile on the shower floor or back wall is a contained way to add personality to a guest bathroom without committing to bold color throughout. The tile is the feature; everything else stays neutral. Handcrafted tile in artisan finishes adds texture and color depth that standard ceramic tile cannot match, and the effect lands the moment a guest steps inside. 17. Brushed Brass Hardware Throughout Replacing dated chrome hardware with brushed brass throughout a guest bathroom is a low-cost, high-return update that changes how the room reads in an afternoon. Cabinet pulls, towel bars, toilet paper holders, and faucet handles in a consistent brushed brass finish create a cohesion that makes the room feel deliberately designed rather than accumulated over time. This is the single-afternoon project most guest bathrooms need first. 18. Floor-to-Ceiling Tile in a Compact Guest Bath Floor-to-ceiling tile in a compact guest bathroom eliminates the horizontal break that makes tight rooms feel shorter and more confined. A single tile run from floor to ceiling draws the eye upward and adds perceived height. Large-format tiles in a soft neutral tone produce the cleanest version of this effect and require fewer grout lines, which reduces maintenance considerably over time. 19. Rainfall Showerhead as a Luxury Touch A rainfall showerhead is the most consistently appreciated upgrade in a guest bathroom because guests feel it the moment they step in. In most cases, it requires only a showerhead swap and a new arm, not a full shower renovation. The experience it creates makes a guest bathroom feel considerably more premium than its price point suggests, and that gap between cost and perceived value is the whole point. 20. Moody Black and Gold Guest Bathroom Black walls or deep charcoal tile paired with gold hardware and a statement mirror produce a look that photographs well and lands even better in person. This works especially well in powder rooms where there is no shower to contend with. For homeowners who want their guest bathroom to have a point of view rather than a safe palette, this is the direction worth considering. 21. Neutral Linen Towels and Quality Soap Dispenser The accessories in a guest bathroom communicate the level of care that went into the space. Replace plastic soap bottles with ceramic or glass dispensers. Fold neutral linen towels and display them where guests can find them without asking. Add a small dish of hand cream. These are hotel-level touches that cost very little and are immediately apparent when a guest walks in. 22. Patterned Floor Tile With White Walls A patterned cement or encaustic tile floor with simple white walls adds personality to a guest bathroom without touching anything structural. The floor becomes the statement, and the walls recede. This approach works at almost every budget level because the tile is the only investment the design requires. Everything else in the room plays a supporting role. 23. Framed Art Above the Toilet A framed print or small gallery above the toilet is one of the most underused opportunities in a guest bathroom. Guests spend time in that zone, and giving them something worth looking at signals attention to detail. Choose pieces with calm or interesting subject matter and use humidity-rated frames to prevent warping. A small addition that shifts the room from functional to finished. 24. Pedestal Sink for a Classic Small Space A pedestal sink is the right call for a very small guest bathroom where floor space is tight. It opens the floor visually, feels architecturally considered, and suits both traditional and transitional design aesthetics. Pair with a recessed medicine cabinet above for storage that adds nothing to the visual bulk of the room. Simple, purposeful, and still one of the strongest choices for a narrow layout. 25. Statement Mirror as the Room’s Focal Point An oversized, architecturally interesting mirror in a guest bathroom does the work of multiple decorative decisions at once. It reflects light, adds personality, and gives the room a focal point that does not depend on expensive materials elsewhere. An arched, sunburst, or beveled mirror at the right scale can define the entire aesthetic of a small guest bathroom. Nothing else needs to work particularly hard around it. 26. Warm Wood or Shiplap Ceiling Detail A warm wood or shiplap ceiling in a guest bathroom adds dimension and warmth that walls and floors alone cannot deliver. It draws the eye upward, makes the room feel finished rather than incidental, and costs considerably less than tile or stonework. In a narrow bath with lower ceilings, this detail creates the kind of cozy character that guests notice and remember without being able to explain exactly why. 27. Scented Candle and Fresh Flowers as the Finishing Layer No guest bathroom idea works in isolation from how the room smells and feels when someone first walks in. A quality scented candle and a small arrangement of fresh or dried flowers are the finishing layer that ties everything together. They communicate hospitality and attention to detail in a way that no fixture or tile upgrade can replicate on its own. The last thing you add and the first thing a guest registers. Conclusion A guest bathroom does not need a renovation to make an impression. It needs one or two decisions that carry real weight in the space you have, and the kind of finishing touches that say the room was thought about before anyone arrived. The ideas in this list range from a full layout refresh to a thirty-dollar hardware swap that changes how the whole room reads. Pick the one that fits your space, your budget, and the visit you are preparing for. Guests rarely comment on a bathroom directly. But there is a difference between walking into a room that was ready for them and one that was not. They feel it immediately, even if they never say a word. Frequently Asked Questions What is the Best Flooring for a Guest Bathroom? Porcelain tile is the top choice for guest bathroom floors in 2026 due to its water resistance, durability, and wide range of style options at every price point. What Size Vanity Works Best in a Guest Bathroom? A 24-inch vanity suits most compact guest bathrooms without overwhelming the floor space. Wall-mounted versions with at least one drawer and cabinet-handle storage add visual bulk. What are the Guest Bathroom Size Requirements and Clearances? Maintain a minimum of 15 inches from the toilet center to any side wall or vanity, and 21 inches of clear space in front of the toilet to meet standard building code requirements.
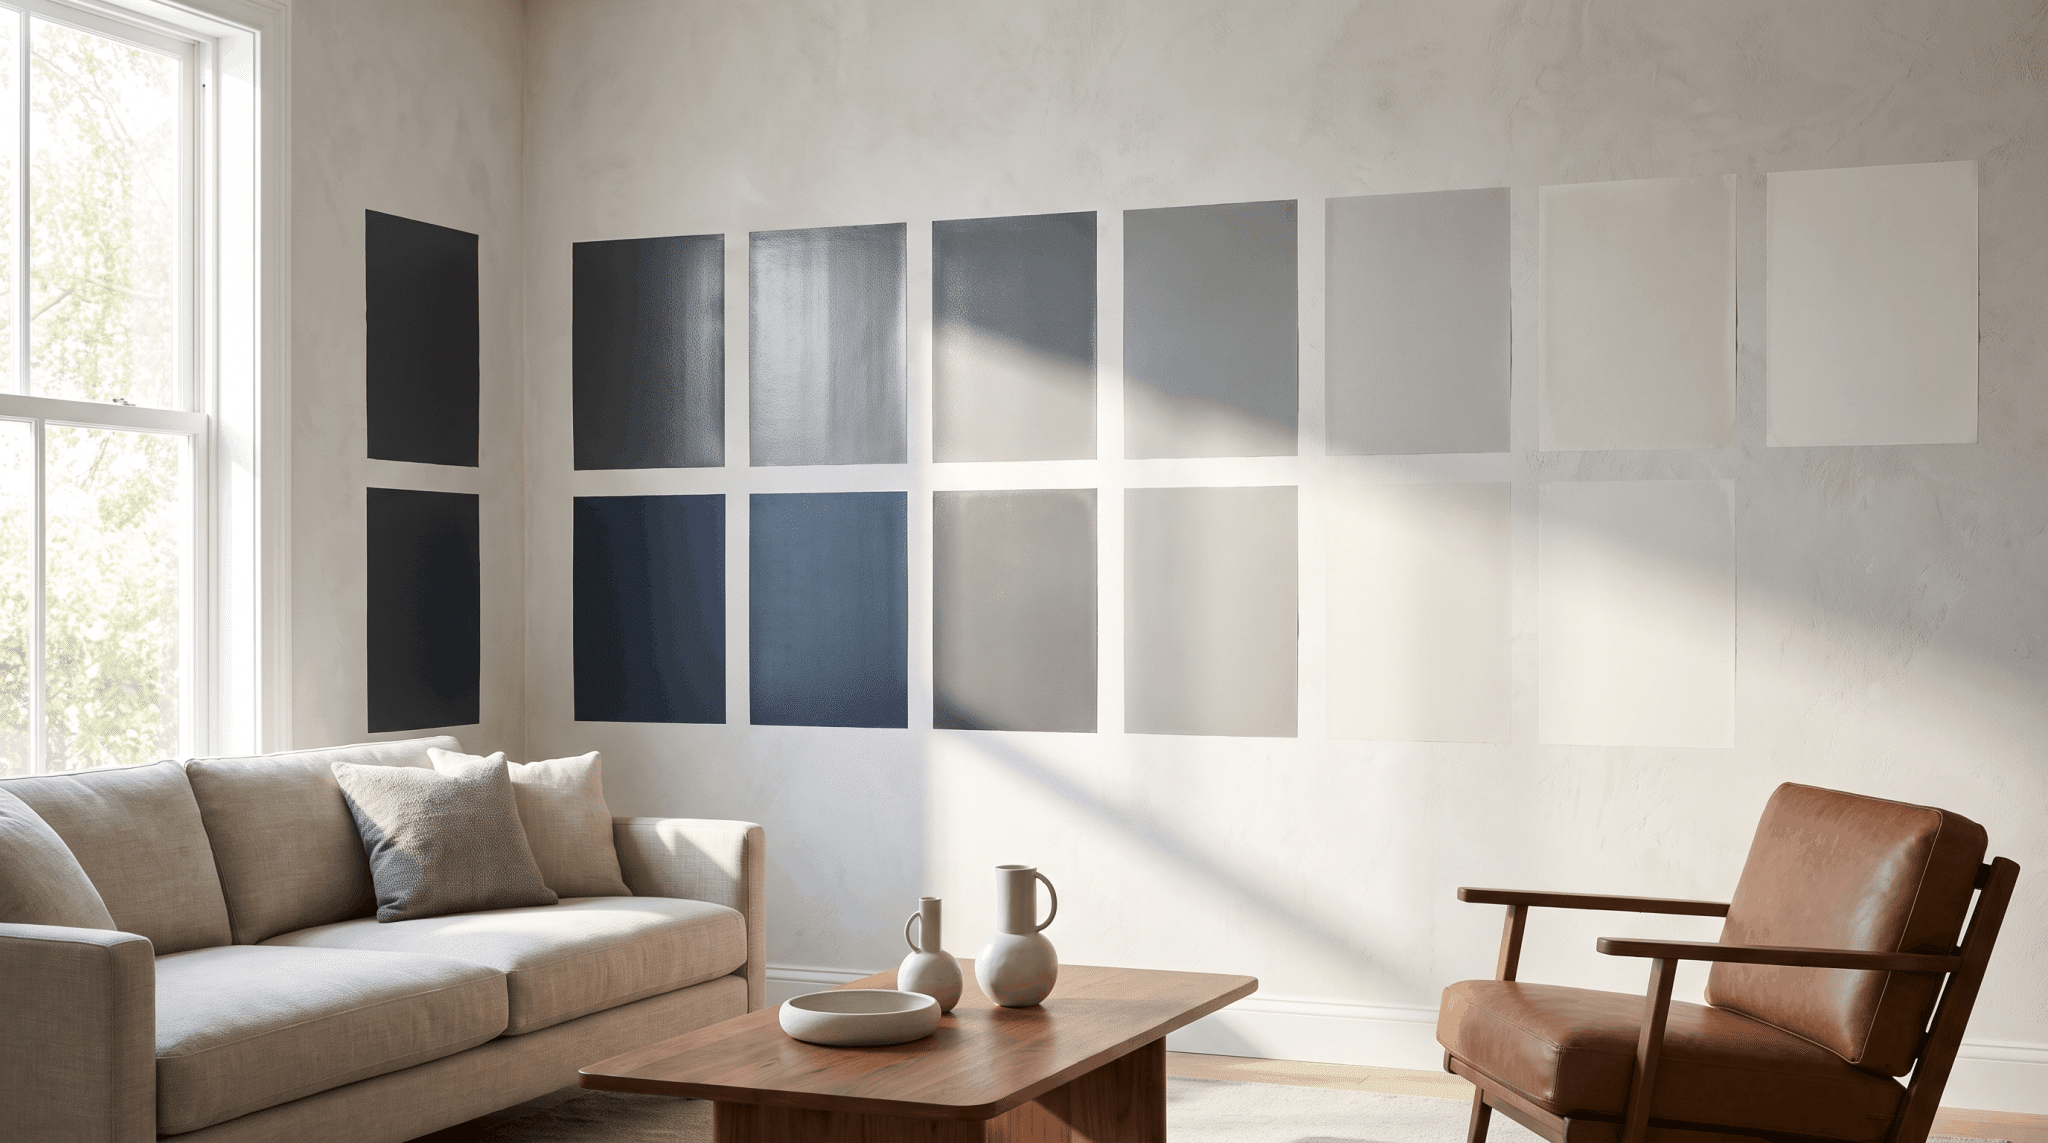
LRV stands for Light Reflectance Value. It tells you the percentage of visible light that a paint color reflects from a surface. This number gives you an idea of how light or dark a color may feel once it is applied to a wall. Paint manufacturers measure LRV using color measurement tools such as spectrophotometers. These devices analyze how a surface interacts with light and assign a value to the color on a fixed scale. Designers, architects, and homeowners use LRV as a reference because it helps predict how a color may perform in different spaces. A deep charcoal absorbs much of the available light, while a soft white reflects more light into the room. Here is how common colors typically behave: Paint Color Typical LRV Range LRV Behavior Black 0–5 Absorbs nearly all light and creates a deep, dramatic look. Dark Navy 5–15 Absorbs significant light and adds depth to a space. Medium Gray 35–60 Offers balanced light reflection with a neutral appearance. Soft White 75–90+ Reflects significant light and helps make spaces feel brighter. Point to remember: a higher LRV does not automatically mean a color is “more white.” A bright yellow can also have a high LRV. LRV only measures light reflection, not whether a color is warm, cool, neutral, or colorful. How Does the LRV Paint Scale Work? The LRV scale runs from 0 to 100. Zero represents pure black, which absorbs the most light. One hundred represents pure white, which reflects the most light. Most paint colors fall somewhere between these extremes because real pigments cannot achieve a perfect black or perfect white. A color below the middle of the scale generally absorbs more light, while a color above the middle reflects more light. Here is a simple way to understand the ranges: LRV Range Appearance Best Used For 0–20 Deep and dramatic Accent walls, cozy spaces 20–40 Dark to medium Bedrooms, offices, feature areas 40–60 Balanced colors Living rooms, dining rooms 60–80 Light and airy Kitchens, bedrooms, open spaces 80–100 Bright whites Ceilings, small rooms For example, Sherwin-Williams Eider White has a moderate LRV and reflects a balanced amount of light, making it softer and less bright than high-reflectance whites while adding a subtle gray undertone to a space. Why LRV Matters When Choosing Paint Colors Understanding LRV removes much of the guesswork from choosing paint. It helps you predict how a color may feel before you commit to painting an entire room. 1. LRV Controls How Bright or Dark a Room Feels High LRV colors reflect more available light around a room. This can make a space feel brighter, cleaner, and more open. Low LRV colors absorb more light, creating a deeper and more dramatic atmosphere. The same paint color can look completely different depending on the room. A gray with an LRV of 60 may appear light and airy in a sunny living room but feel much darker in a hallway with limited natural light. 2. LRV Can Change the Perceived Size of a Room Higher LRV colors can also change how large or small a space feels. They reflect more light, which helps small rooms appear more open and creates a brighter, airier look. These lighter shades work especially well in spaces with limited natural light because they help maximize the available brightness and make the room feel less enclosed. Lower LRV colors absorb more light, which can add warmth and a sense of intimacy to a room. These deeper shades create a cozy or dramatic atmosphere by making spaces feel more enclosed and inviting. They also work well in large rooms, helping balance open areas and making them feel more grounded and comfortable. 3. LRV Helps Avoid Paint Color Mistakes Many common paint complaints happen because light changes how colors appear in a room. A shade that looks lighter online may feel different on a wall, while a gray paint can take on blue tones or a white shade may appear more yellow than expected. LRV helps explain some of these differences, but color perception also depends on factors like lighting, flooring, furniture, surrounding colors, and paint undertones. For example, a pale wall placed next to dark flooring may look deeper and warmer than the same paint used in an all-white room. How Lighting Affects LRV Paint Colors Lighting can make or break a paint color. The direction your windows face changes the type of natural light entering a room, and that light affects how your paint’s LRV is perceived. A color that looks balanced in one room may appear darker, warmer, cooler, or brighter somewhere else. Understanding your room’s lighting helps you choose an LRV that works with the space instead of against it. North-Facing Rooms North-facing rooms receive cooler, softer natural light throughout the day. Because this light has a blue-gray quality, paint colors can appear slightly darker or cooler than expected. Higher LRV paints often work well in these spaces because they reflect more available light and help prevent the room from feeling closed in. Colors with slight warmth can also help balance the cooler quality of northern light. South-Facing Rooms South-facing rooms receive strong, warm daylight for most of the day. This abundant light makes colors appear brighter and more vivid. Very high LRV paints may sometimes feel too bright or washed out in these rooms. Medium LRV colors often provide a better balance because they reflect enough light without losing depth. East-Facing Rooms East-facing rooms change noticeably throughout the day. Morning light is warm and golden, which can make warm paint colors appear richer. As the day progresses, the room receives less direct sunlight, and colors may appear cooler or more muted. Recommendation: Test paint samples at different times of the day. A color that looks bright and welcoming in the morning may feel completely different by evening. West-Facing Rooms West-facing rooms get strong afternoon sunlight, which makes warm tones more noticeable as the day goes on. Shades like beige, cream, and greige can appear richer and warmer in this late-day glow. Test paint samples in the afternoon, as colors that look balanced in the morning may appear more intense by evening. How LRV and Undertones Affect Paint Appearance LRV and undertones are two different factors that influence how paint appears. Understanding both helps explain why two similar colors can look completely different once they are on your walls. LRV tells you: → How much visible light a color reflects Undertones tell you: → The hidden color influence underneath the main shade A gray paint may have blue, green, or purple undertones. White paint may lean warm, with yellow or beige undertones. Factor What It Affects LRV Amount of light reflection Undertones Color direction and warmth Lighting How the color changes throughout the day Surroundings How your eyes perceive the color This is why two paints with the same LRV can create completely different feelings in a room. LRV explains brightness, while undertones explain personality. Does Paint Finish Affect LRV? Paint finish, also called sheen, changes how a surface reflects light. While the official LRV value is measured for the color itself, the finish can influence how bright or soft that color appears once applied. Paint Finish Light Reflection Flat Least reflective Matte Soft reflection Eggshell Moderate reflection Satin More noticeable reflection Semi-gloss High reflection Gloss Maximum reflection A glossy finish can make a color appear brighter because the surface bounces more light. A flat finish absorbs more light and usually creates a softer appearance. Both can influence the final look of a room. Choosing the Right LRV Paint for Different Rooms There is no single perfect LRV for every home. The right choice depends on natural light, room function, and the mood you want to create. Room Suggested LRV Range Why Small bedroom 60+ Helps create an open feeling Living room 50–70 Provides balanced brightness Kitchen 60–85 Reflects available light Bathroom 60+ Helps prevent a closed-in feeling Home office Depends on mood Works with both bright and dramatic styles When selecting paint, consider how much natural light enters the room, the feeling you want to create, and how the color works with existing finishes. A well-lit space may handle deeper shades, while rooms with limited light often benefit from colors that reflect more brightness. A bright home office may benefit from a higher LRV paint, while a reading room designed for relaxation may work better with a deeper shade. Why Exterior Paint LRV Matters LRV is not only important for interior walls. It also plays a role when choosing exterior paint colors. Outdoor surfaces receive much stronger and more direct sunlight than interior walls, which can change how a color appears throughout the day. A paint color that feels balanced indoors may look much brighter, warmer, or more intense outside. Exterior LRV is especially important because darker colors absorb more heat, while lighter colors reflect more sunlight. This can affect how a home’s exterior feels visually and how certain surfaces respond to temperature changes. Lower LRV colors can create a dramatic, modern look, but they may require more consideration on surfaces exposed to intense sunlight. Higher LRV colors often create a lighter appearance and help reflect more light. The best exterior color choice balances the look you want with how the paint will perform in your specific environment. How to Choose Paint Based on LRV and Room Conditions A paint color’s LRV should work together with your room’s lighting, size, and purpose. For Dark Rooms: Choose higher LRV colors, soft whites, and light neutrals to reflect limited light. These shades help brighten the space, reduce heaviness, and create a more open feel. For Bright Rooms With Lots of Sunlight: Choose medium LRV colors and balanced neutrals to maintain depth. They reflect enough light while preventing the room from feeling overly bright or washed out. For Small Rooms: Choose higher LRV colors with soft undertones and light finishes to make small spaces feel brighter. These shades reflect light and create a more spacious appearance. For Cozy or Dramatic Spaces: Choose lower LRV colors, rich shades, and deeper neutrals to add warmth and depth. These tones create a cozy atmosphere while adding character and visual interest. Frequently Asked Questions What is a good LRV for interior paint? A good LRV depends on the room, lighting, and desired mood. Many homeowners start with mid-range values around 50–70 because they balance brightness and depth. Is higher LRV paint better? Not always. Higher LRV colors help brighten darker spaces, but very bright rooms may benefit from a lower LRV to avoid a washed-out appearance. Does LRV affect paint color? LRV affects how light or dark a color appears, but it does not determine the undertone. A color’s warmth or coolness comes from its underlying pigments. What LRV is best for a small room? Higher LRV colors often work well in small rooms because they reflect more light and create a more open feeling. However, the right choice also depends on natural light and room function. Can two paints with the same LRV look different? Yes. Two colors with the same LRV can appear different because of undertones, lighting, finish, and surrounding materials. Make LRV Work for You Before You Pick Up a Brush LRV explains one of the biggest mysteries homeowners face when choosing paint: why a color looks different from a sample card to the actual wall. It gives you a practical way to understand brightness, compare colors, and create the right feeling in each room. But LRV should work alongside other factors, not replace them. Before committing to a color, check its LRV, test samples in your own space, and observe how the shade changes throughout the day. A little planning before painting can help you choose a color that looks right, not just on a card, but where it matters most: on your walls.
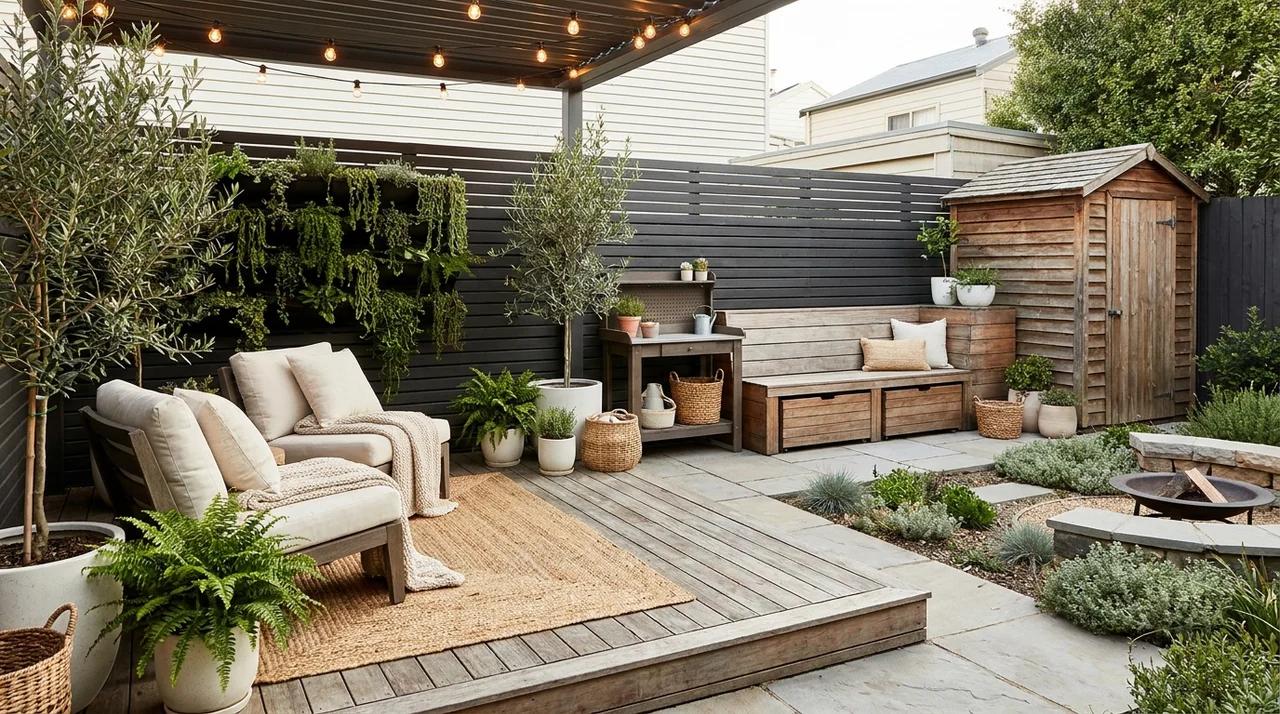
A small backyard does not have to feel limiting. With the right layout, even a compact outdoor area can include comfortable seating, greenery, entertaining space, or a place to relax without feeling overcrowded. Focus on features that match your needs rather than trying to use every inch of the yard. A small seating area, a simple patio, a few plants, or built-in storage can make the space more useful without making it feel crowded. These small backyard ideas focus on practical layouts, space-saving features, and design choices that create a comfortable outdoor area that fits the size of your property. 33 Small Backyard Ideas to Make the Most of Your Space The best small backyard designs combine style and function without overcrowding the space. Explore these creative ideas to transform your outdoor area into a place that fits your lifestyle. 1. Backyard Room With an Outdoor Rug and Furniture Layout An outdoor rug helps define a small backyard seating area and makes it feel like an extension of the home. Pair a weather-resistant rug with compact chairs, a sofa, and a coffee table to create a comfortable outdoor room. This setup works well in limited spaces because it creates a clear purpose for the area without requiring major construction. Layering textures and furniture can make a small backyard feel more complete and inviting. DIY Accessibility: Easy 2. Add a Folding Wall-Mounted Table for Tiny Yards A wall-mounted folding table is a smart choice for small backyards where open space is important. It provides a convenient surface for outdoor meals, morning coffee, gardening tasks, or hobbies and can be folded away when not in use. This design keeps the yard flexible while adding function without bulky furniture. It works particularly well in narrow spaces, balconies, patios, or compact outdoor areas where every square foot needs to serve multiple purposes. DIY Accessibility: Moderate 3. Build a Corner Deck Instead of a Full Patio A corner deck can create a dedicated outdoor area without covering the entire backyard with hard surfaces. By using only one section of the yard, homeowners can add space for seating, dining, or relaxing while keeping the remaining area open. A small wooden platform can also create a visual transition between indoor and outdoor areas. This approach is ideal for compact yards where a full-size patio would reduce usable space Permit note: A raised deck may require a building permit, especially if it is attached to the house, has stairs or railings, or sits above a certain height. Check local codes before starting construction. DIY Accessibility: Advanced 4. Turn a Narrow Side Yard Into a Backyard Extension A narrow side yard does not have to remain an unused passageway. With thoughtful planning, it can become an extension of the backyard with added storage, seating, pathways, or utility areas. Use this space for features that do not fit in the main yard, such as outdoor equipment storage or a small relaxation zone. Using overlooked areas helps maximize the available outdoor space without expanding the footprint. DIY Accessibility: Moderate 5. Create a Multi-Purpose Backyard Platform A multi-purpose backyard platform gives a small yard a flexible area that can adapt to different needs. The same space can work as an outdoor dining area, workout zone, relaxation spot, or entertainment area depending on how it is arranged. Adding movable furniture and hidden storage makes the platform more practical. This type of design helps homeowners get more use from limited outdoor space without adding multiple separate structures. DIY Accessibility: Advanced 6. Design a Backyard Movie Night Setup A backyard movie setup turns an ordinary outdoor area into an entertainment space for family nights and gatherings. A projector screen, comfortable seating, outdoor cushions, and warm lighting can create a cozy cinema atmosphere without requiring a large yard. This idea works well in small spaces because the setup can be temporary or adjusted when the area is needed for other activities. A blank wall or fence can also become part of the experience. DIY Accessibility: Easy 7. Create an Outdoor Dining Experience A small backyard can become a functional dining area with the right furniture choices and layout. A compact table, comfortable chairs, and weather-resistant accessories create a place for everyday meals, weekend breakfasts, or casual gatherings. Choosing furniture that fits the scale of the yard prevents the area from feeling crowded. This setup allows homeowners to enjoy outdoor dining while keeping enough room for movement and other backyard activities. DIY Accessibility: Easy 8. Add a Backyard Bar Cart Station A backyard bar cart is an easy way to add an entertaining feature without committing to a permanent structure. It can hold drinks, serving items, snacks, or outdoor essentials while remaining easy to move when needed. This makes it ideal for small backyards where flexibility matters. Pairing the cart with a few stools or a nearby seating area creates a convenient hosting spot for casual gatherings and outdoor celebrations. DIY Accessibility: Easy 9. Create a Fire Pit Conversation Circle A fire pit conversation area creates a dedicated gathering spot in a small backyard. Instead of filling the space with oversized furniture, a compact fire feature surrounded by chairs can create a comfortable setting for conversation and evening relaxation. Choose a layout that keeps enough open space around the seating area. This idea works well for homeowners who want an outdoor feature that encourages social time without requiring a large renovation. DIY Accessibility: Easy 10. Build a Small Pizza Oven Cooking Area A small DIY pizza oven cooking area adds a unique outdoor feature while keeping the backyard layout practical. A compact oven, preparation counter, and storage space can create a dedicated cooking station for family meals and gatherings. This setup does not require a full outdoor kitchen and can fit into smaller yards. Adding a nearby serving area makes the space more functional for preparing and enjoying meals outdoors. DIY Accessibility: Advanced 11. Install a Hammock or Hanging Chair Escape A hammock or hanging chair creates a simple relaxation zone without taking up much ground space. It can turn an unused backyard corner into a comfortable place for reading, resting, or enjoying quiet outdoor time. These options are especially useful in small yards because they provide seating without requiring large furniture arrangements. Add a small side table, outdoor lighting, or cushions to make the area more comfortable and personalized. DIY Accessibility: Easy 12. Create a Backyard Reading Cabin A backyard reading cabin provides a separate retreat for quiet activities without needing a large addition to the home. A compact shed-style structure with windows, seating, shelves, and lighting can become a peaceful reading or hobby area. This idea uses vertical space and unused backyard corners to create a functional outdoor room. It is a practical option for homeowners who need a dedicated escape from indoor distractions. DIY Accessibility: Advanced Permit note: A backyard cabin is usually considered an accessory structure and may require a permit for construction, foundation work, electrical wiring, or changes to the property layout. 13. Add a Meditation Corner A meditation corner creates a calm outdoor area dedicated to relaxation and mindfulness. A small platform, comfortable cushion, yoga mat, and soft lighting can turn even a limited backyard section into a personal wellness space. The design does not require expensive features or large furniture. Keeping the area simple helps create a peaceful atmosphere where homeowners can take a break, stretch, or spend quiet time outdoors. DIY Accessibility: Easy 14. Add a Compact Water Feature A compact water feature can add movement and a relaxing element to a small backyard without taking up much room. Options such as tabletop fountains, wall-mounted water features, or small ponds can create a visual focal point. These features work well in limited spaces because they add interest without requiring major construction. Placing one near a seating or relaxation area can make the backyard feel more enjoyable and complete. DIY Accessibility: Moderate 15. Create a Shade Lounge With a Pergola A pergola lounge creates a comfortable outdoor room while adding shade and structure to a small backyard. A compact pergola with seating underneath can provide a dedicated place for relaxing, dining, or entertaining. Adding curtains, lighting, or weather-resistant furniture can make the area usable throughout the day. Because it uses vertical space, a pergola can create impact without reducing the available ground area too much. DIY Accessibility: Advanced 16. Add a Stock Tank Pool A stock tank pool is a creative way to add a water feature without the cost or space requirements of a traditional swimming pool. These compact pools can fit into smaller backyards while creating a refreshing summer retreat. Add a small deck, outdoor chairs, towels, and shade options to make the area more comfortable. This idea works well for homeowners who want a fun backyard upgrade that feels practical and easy to maintain. DIY Accessibility: Moderate 17. Turn a Shed Into a Backyard Office A backyard shed can become a functional workspace with a few thoughtful upgrades. Adding insulation, windows, lighting, a desk, and storage can transform an unused structure into a quiet home office. This idea is especially useful for homeowners who need separation between work and home life but have limited indoor space. A compact backyard office creates a dedicated work area without requiring a major home extension. DIY Accessibility: Advanced Permit note: Converting a shed into a workspace may require permits because adding insulation, electricity, plumbing, or heating can change how the structure is classified. 18. Create an Outdoor Art Wall An outdoor art wall adds personality to a small backyard by turning a plain surface into a creative feature. Use weather-resistant artwork, decorative panels, metal designs, or handmade pieces to create visual interest without taking up floor space. This idea works well for compact yards because vertical surfaces become part of the design. A feature wall can make the backyard feel more customized while keeping the rest of the space open. DIY Accessibility: Easy 19. Repurpose Old Containers Into Planters Repurposing old containers into planters is an affordable way to add character to a small backyard. Items like wooden crates, metal buckets, barrels, or ceramic containers can become unique homes for flowers, herbs, or small plants. This approach allows homeowners to add greenery without installing permanent garden beds. Mixing different container styles can create a personalized outdoor look while using items that might otherwise go unused. DIY Accessibility: Easy 20. Create a Butterfly-Friendly Mini Garden A butterfly-friendly garden brings natural activity into a small backyard through carefully chosen plants and simple features. Add flowering plants, shallow water sources, and sheltered areas where butterflies and pollinators can visit. This type of backyard upgrade does not require a large planting area and can be created in a small corner or container setup. It adds seasonal color while supporting local wildlife in a practical way. DIY Accessibility: Easy 21. Build a Backyard Treehouse Retreat A backyard treehouse can turn unused vertical space into a fun family feature. A compact wooden structure built around a mature tree can provide a play area, reading spot, or imaginative retreat. Adding a small balcony, ladder, and comfortable details makes the space more inviting. This idea works best for homeowners who want to create a memorable backyard feature without using a large amount of ground space. DIY Accessibility: Advanced Permit note: Larger treehouses with platforms, stairs, railings, or permanent supports may need approval to meet local safety and building requirements. 22. Create a Small Outdoor Gym Area A small backyard gym provides a convenient place for exercise without the need for a dedicated indoor room. A covered corner with workout mats, weights, resistance equipment, and storage can create a functional fitness zone. Using weather-resistant equipment and smart organization keeps the area practical in a limited space. This setup allows homeowners to enjoy outdoor workouts while keeping the backyard flexible for other activities. DIY Accessibility: Easy 23. Add a Backyard Greenhouse A compact greenhouse provides a dedicated growing space while adding a unique feature to a small backyard. A small glass structure can be used to grow vegetables, start seeds, or protect delicate plants from changing weather. Adding shelves and a small workspace improves functionality. Unlike traditional garden beds, a greenhouse creates a separate area for gardening activities while making efficient use of limited outdoor space. DIY Accessibility: Moderate 24. Turn a Shed Into a Hobby Room A backyard shed can become more than storage by converting it into a hobby room. Add a worktable, shelving, lighting, and organized storage to create a dedicated area for crafts, painting, woodworking, or other interests. This solution uses an existing structure while adding valuable space to the home. A hobby room allows homeowners to enjoy creative projects without taking over indoor living areas. DIY Accessibility: Advanced 25. Create a Backyard Pet Washing Station A backyard pet-washing station is a practical addition for homeowners with dogs or other outdoor pets. A compact setup with a raised tub, water connection, towel storage, and cleaning supplies can make outdoor washing easier. Using durable materials helps the area handle regular use and weather exposure. This idea improves backyard functionality by creating a dedicated space for pet care instead of using indoor areas. DIY Accessibility: Moderate 26. Create a Backyard Game Corner A backyard game corner adds a fun activity zone without requiring a large outdoor area. A compact table for board games, a small sports setup, or outdoor entertainment equipment can create a space for family and friends. Choose flexible furniture that can be moved when the area is needed for other uses. This idea helps small backyards become more enjoyable for gatherings and everyday recreation. DIY Accessibility: Easy 27. Add a Backyard Laundry Drying Area A backyard laundry drying area can make everyday household tasks more convenient while using outdoor space efficiently. A retractable clothesline, folding drying rack, storage basket, and weather protection can create an organized utility zone. This idea works especially well for smaller homes where indoor laundry space is limited. A well-planned drying area keeps the backyard functional while maintaining a neat and attractive appearance. DIY Accessibility: Easy 28. Build a Backyard Music Corner A backyard music corner creates a dedicated place for enjoying instruments, playlists, or creative hobbies outdoors. A small covered area with speakers, storage, seating, or space for instruments can turn an unused section into an entertaining feature. This idea works well for music lovers who want a personal outdoor space without building a large structure. Thoughtful storage keeps equipment protected while maintaining a clean backyard layout. DIY Accessibility: Easy 29. Add a Backyard Storage Wall A backyard storage wall helps keep outdoor essentials organized while saving valuable floor space. Built-in cabinets, shelves, hooks, and weatherproof storage units can hold gardening tools, sports equipment, cushions, and household items. Using vertical space keeps the rest of the backyard open and usable. This practical upgrade is ideal for small yards where traditional storage sheds may take up too much room. DIY Accessibility: Moderate 30. Install an Outdoor Coffee Corner An outdoor coffee corner creates a simple, everyday retreat where homeowners can enjoy morning drinks. A compact counter, small table, coffee station, and comfortable seating can transform a small backyard section into a personal café-style space. This idea does not require a large setup and can be adapted to different layouts. It adds function to the backyard while creating a relaxing spot for daily use. DIY Accessibility: Easy 31. Install a Portable Hot Tub or Spa A portable hot tub provides a relaxing backyard upgrade without the construction required for a permanent spa. These compact units can fit on decks, patios, or other prepared outdoor surfaces, creating a private place to unwind. Add outdoor lighting, towels, seating, and privacy features to complete the setup. This idea works well for homeowners who want a wellness feature that can adapt to smaller spaces. Permit note: While some portable units may not need a permit, electrical connections, reinforced decks, or plumbing work usually require proper approval before installation. DIY Accessibility: Moderate 32. Create a Backyard Dance Floor A backyard dance floor turns a small outdoor area into a celebration space for gatherings and special occasions. A compact wooden platform, outdoor lighting, speakers, and nearby seating can create a flexible entertainment zone. Unlike permanent structures, a small dance area can be designed to fit the available space and adapted for different events. It adds a fun feature for homeowners who enjoy hosting outdoors. DIY Accessibility: Moderate 33. Create a Backyard Camping Experience A backyard camping setup brings the outdoor adventure experience closer to home. A small tent, comfortable blankets, lanterns, outdoor games, and a simple seating area can create a fun overnight retreat without leaving the house. This idea works well for families and small yards because it requires minimal changes. It transforms an ordinary backyard into a temporary escape for memorable evenings and weekend activities. DIY Accessibility: Easy How to Plan a Small Backyard Makeover These simple steps will help you design a backyard makeover that maximizes both style and function. Step 1: Measure Your Available Space Before making changes, measure your backyard to understand what can realistically fit. Consider the length and width of the area, existing structures, sunlight patterns, and drainage conditions. Knowing these details helps you avoid overcrowding the space and choose features that work well with the current layout. Step 2: Decide How You Want to Use the Backyard Choose the main purpose of your backyard before adding features. Decide whether you want the space to focus on relaxation, gardening, entertainment, family activities, or a combination of uses. A clear purpose makes it easier to select furniture, layouts, and upgrades that match your needs. Step 3: Create a Simple Layout Plan where each element will go before starting the makeover. Consider furniture placement, plant locations, walking paths, and storage areas to create a functional flow. A simple layout helps maximize available space while keeping the backyard comfortable and easy to use. Step 4: Add Features Gradually Start with essential improvements before adding decorative upgrades. Focus on the features that will have the biggest impact, such as seating, lighting, or storage. Once the basics are in place, add personal touches and decorative elements that enhance the overall look of the backyard. Final Thoughts on Making the Most of a Small Backyard Small backyard design comes down to making smart use of the space you have. A well-planned layout, practical features, and carefully chosen details can turn even a compact area into a comfortable and inviting outdoor spot. Start by deciding how you want to use the space, whether for relaxing, entertaining, gardening, or spending time with family, before adding decorative touches. Strong designs combine essentials like seating, storage, and privacy with elements that reflect your personal style. Focus on ideas that suit your daily routine and the size of your yard so the space feels both functional and enjoyable. Frequently Asked Questions What Adds The Most Value To A Backyard? Patios, decks, and defined seating areas often add the most value by improving outdoor usability. Functional upgrades that create comfortable living spaces can also attract buyers. How To Elevate A Backyard? Elevate a backyard by creating functional zones for dining, relaxing, and cooking. Add features such as patios, pergolas, lighting, and thoughtful landscaping to enhance the space. What Plants Work Best For Small Backyards? Compact shrubs, dwarf trees, herbs, ornamental grasses, and climbing plants work well in small backyards because they add greenery without overcrowding limited outdoor space. How Can I Make A Small Backyard Look Bigger? Use vertical elements, simple layouts, compact furniture, and consistent materials to create an open feel. Keeping the design uncluttered helps the backyard appear more spacious. How Much Does A Small Backyard Makeover Cost? The cost depends on the upgrades chosen. Simple improvements may require a small budget, while decks, patios, kitchens, or structures require a larger investment.