

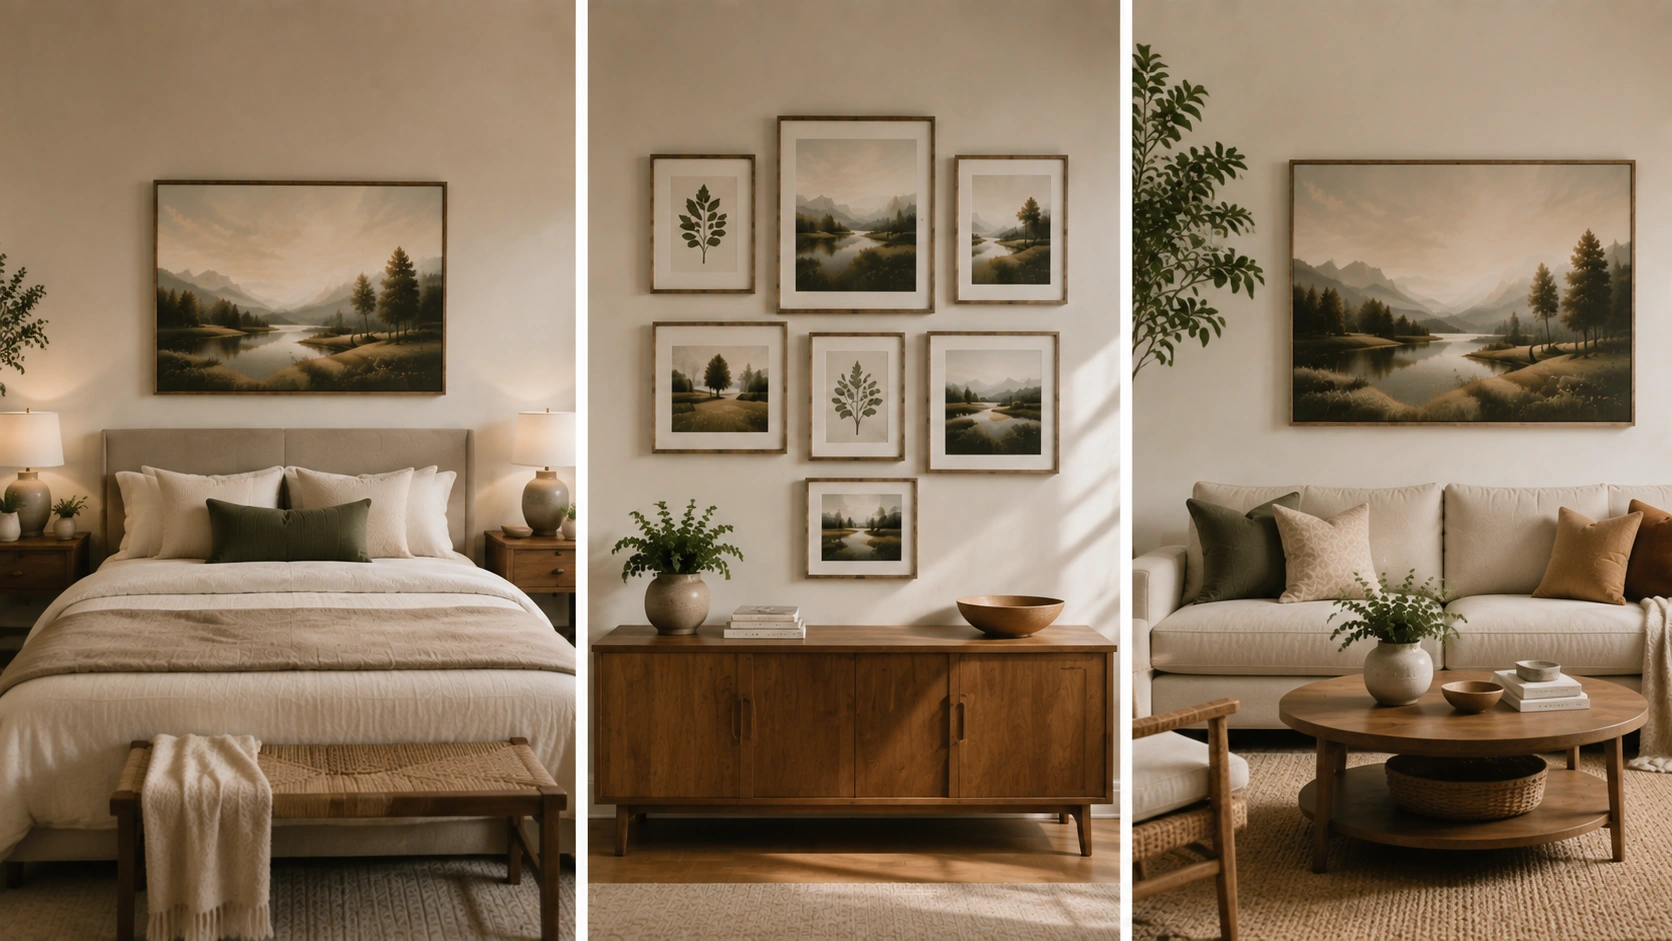


Frames often end up too high, even when you measure twice before drilling. The art creeps toward the ceiling, the wall looks empty underneath, and the room feels slightly off.
Height is not really about the frame. It depends on eye level, the furniture below, the size of the piece, and how people use the room.
You have probably heard the 57- to 60-inch center rule. That rule is a solid starting point, not a fixed requirement.
This blog gives you exact numbers for sofas, beds, hallways, staircases, and gallery walls. It also covers the math for placing the hook.
How High Should You Hang Pictures?
The right height creates balance between artwork, furniture, and open wall space. Start with one simple measurement rule, then adjust it to suit your room layout.
The 57-Inch Rule Explained
The rule is short. Place the center of the framed piece about 57 inches above the finished floor.
Two details matter here. First, you measure to the vertical center of the whole framed object, not the top of the frame.
Second, you measure from the floor you actually walk on, including rug height if the rug stays put. Galleries and designers lean on this number because it sits near the average standing eye level.
Adjust lower when people mostly sit in the room, such as a feng shui dining room. Adjust slightly higher when the piece is small, and the wall is very tall. Never adjust higher just because the ceiling is tall.
How to Calculate the Exact Height for Your Picture Hook
Finding the center of your artwork is only step one. Hook placement also depends on the frame height and on the hanging hardware screwed to the back.
Step 1: Measure the Frame Height
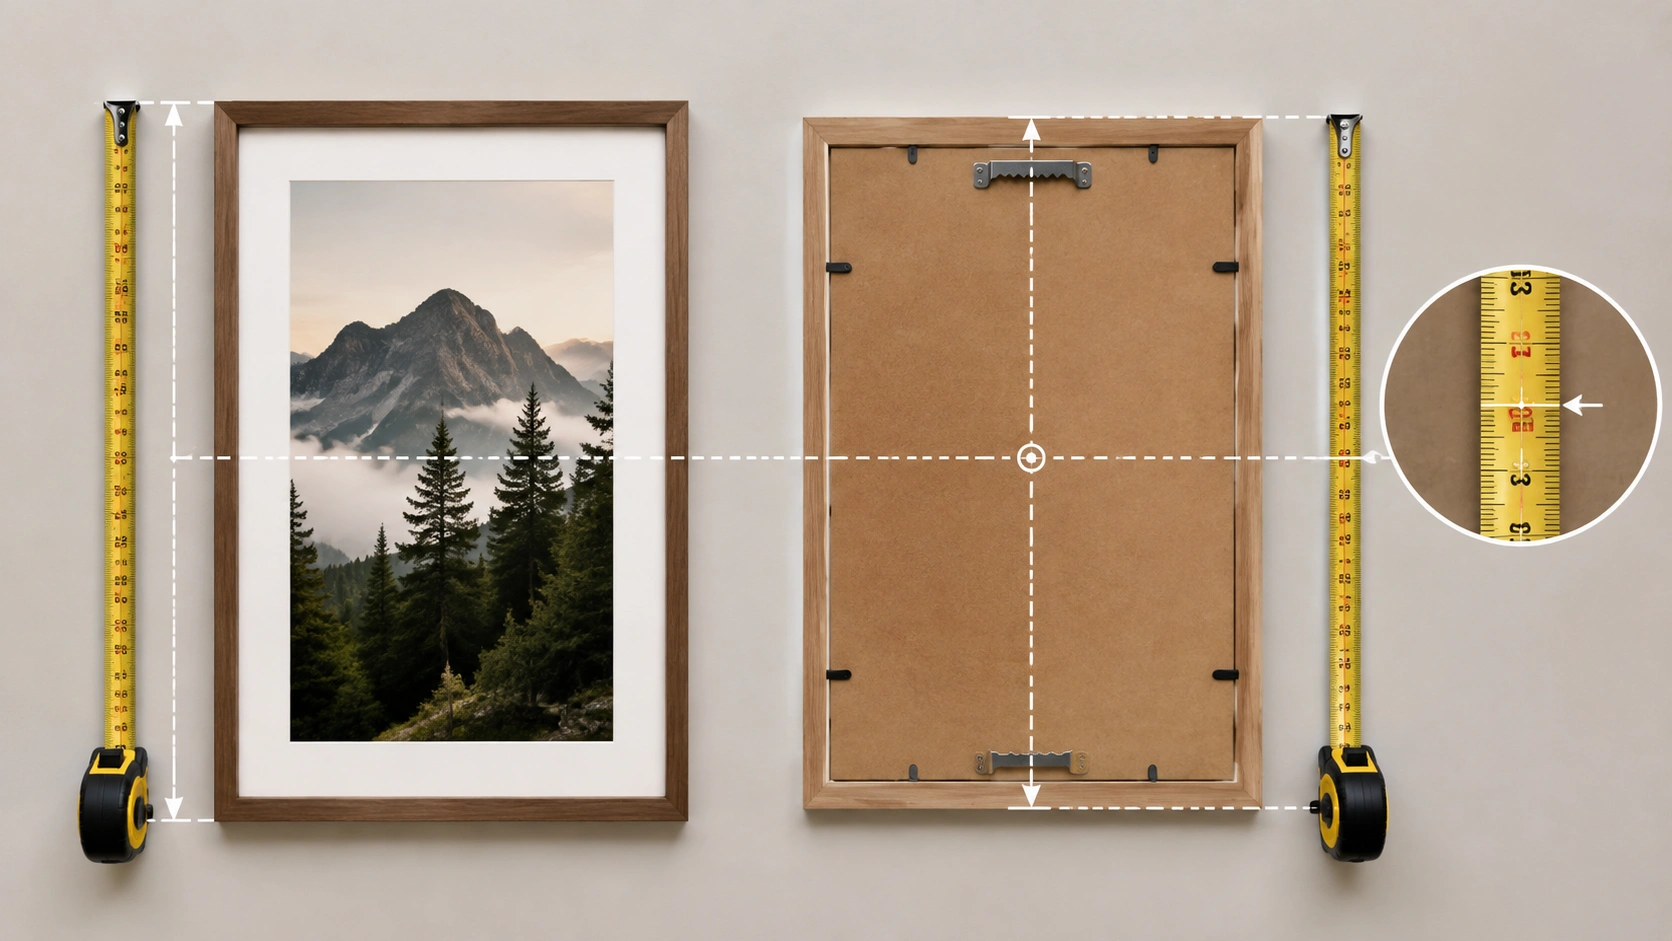
Every calculation starts with the frame itself, not the artwork inside it. Work with the outer dimension, since that is what people actually see on the wall.
Measure the outside of the frame, top to bottom. Then halve it.
- Frame height = 24 inches
- Half the frame height = 12 inches
Step 2: Find the Top Edge Position
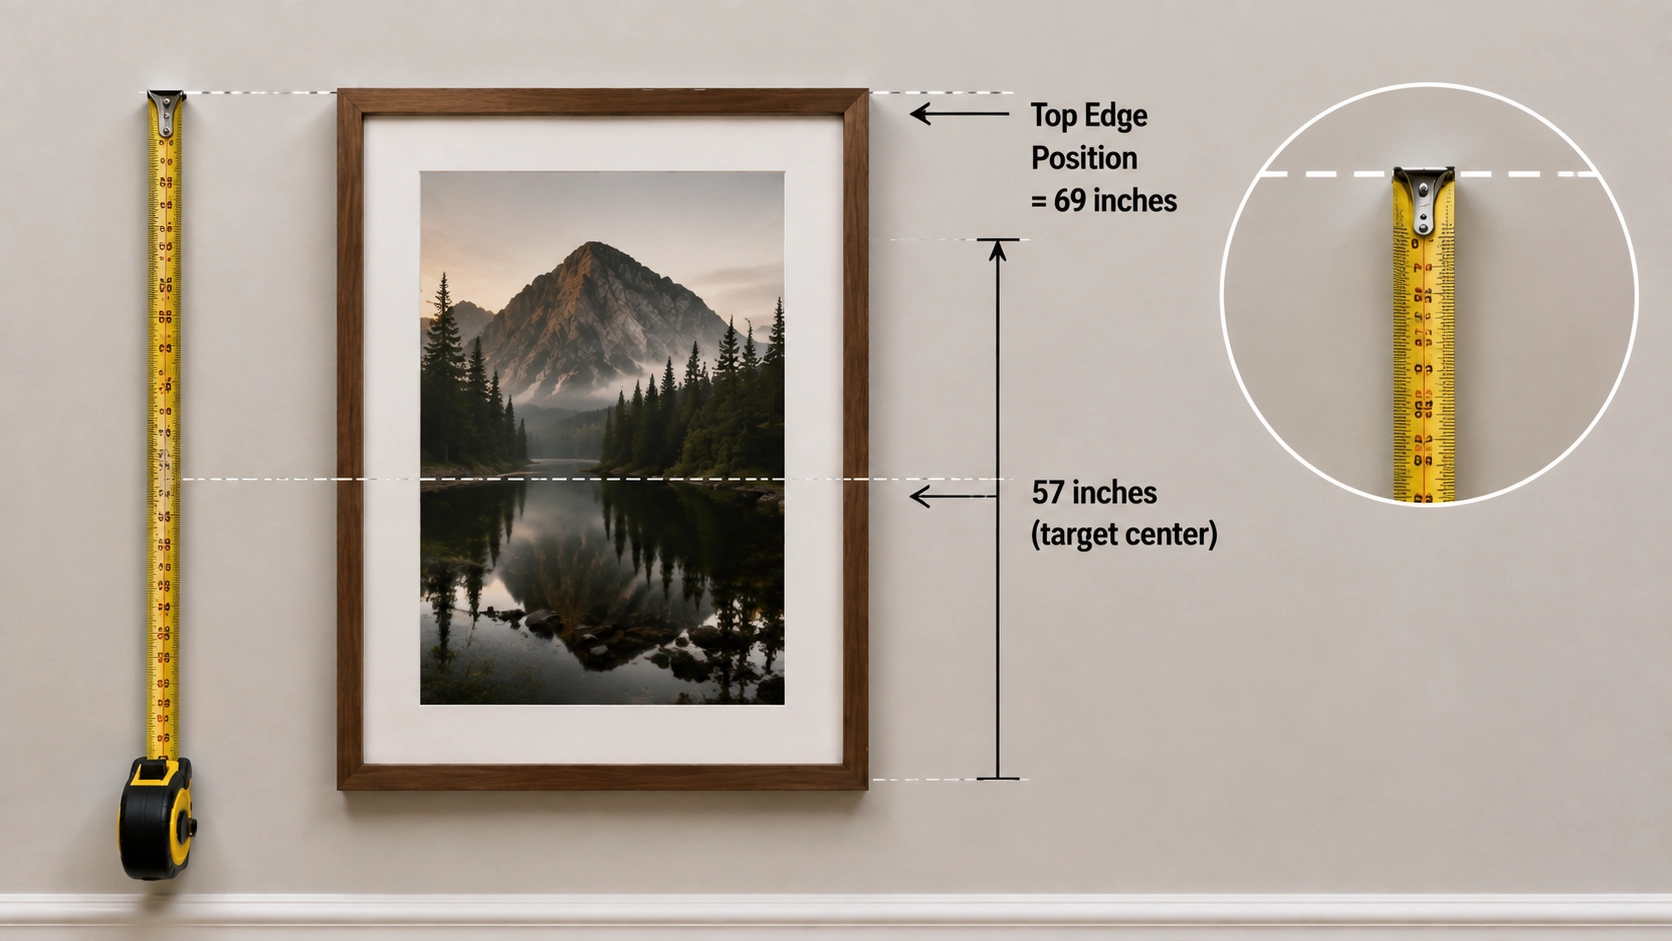
Now you know where the top of the frame needs to land. This number gives you a reference line before hardware changes the final hook position.
Add half the frame height to your target center height.
57 + 12 = 69 inches. That is where the top of the frame will sit.
Step 3: Adjust for the Hanging Hardware
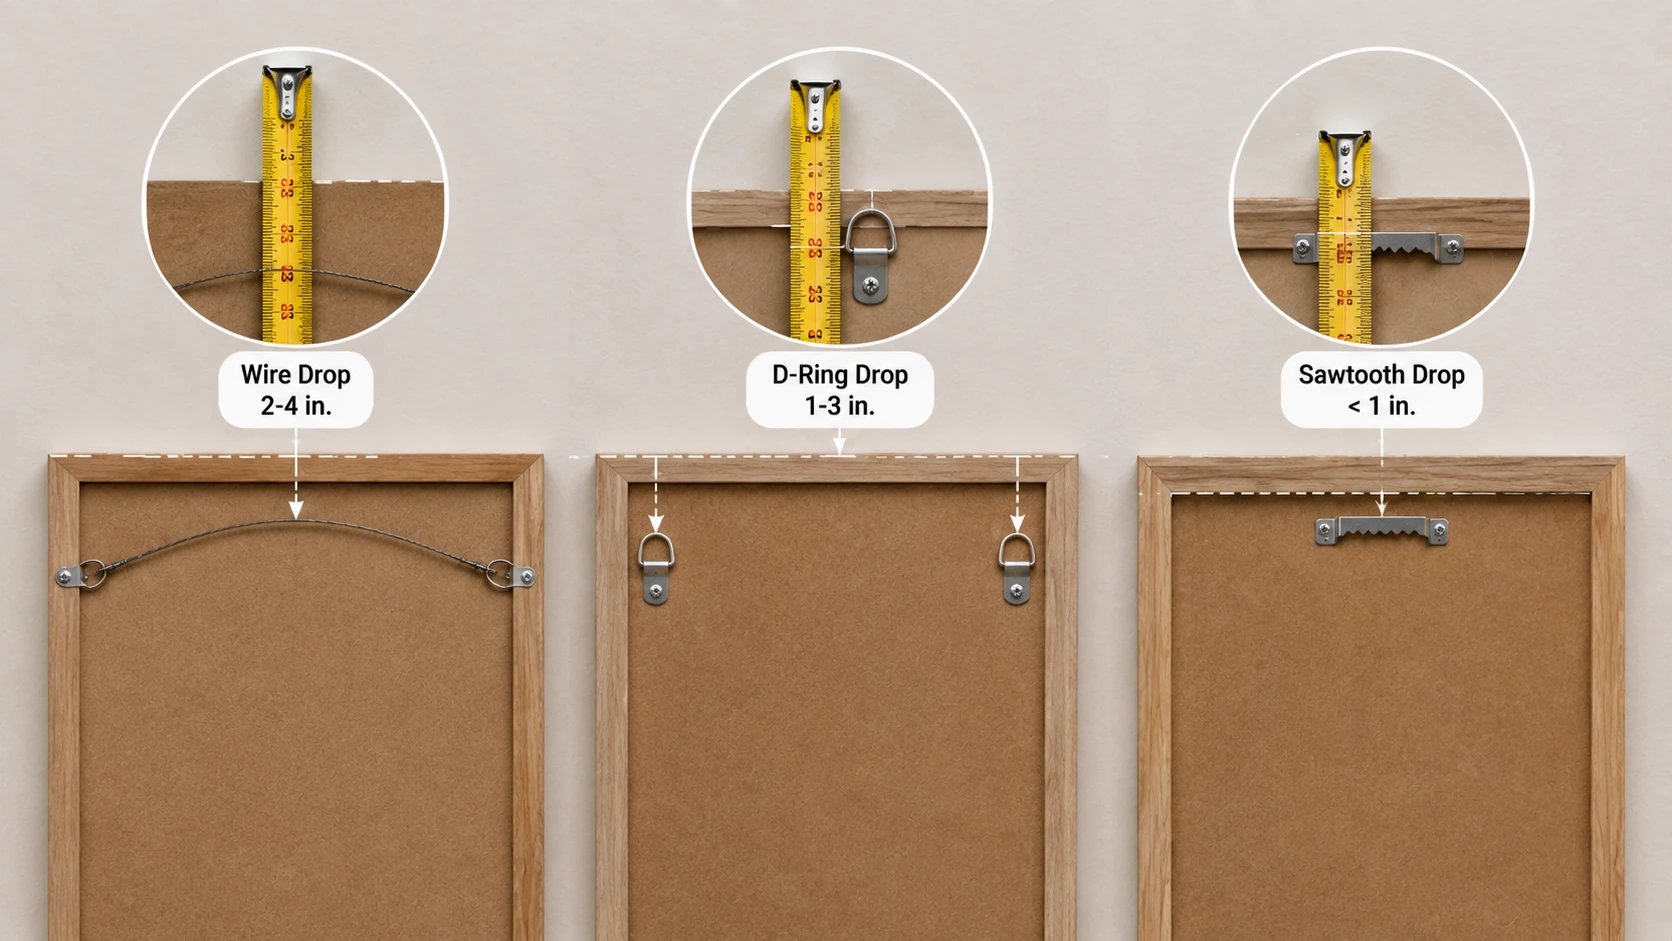
The hook does not go at 69 inches. It goes lower because the wire or bracket sits below the top edge. That gap is the hanging drop.
- Wire: pull the wire taut toward the top of the frame, then measure from the wire to the top edge. Drops of 2 to 4 inches are common.
- D-rings: measure from the top of the ring opening to the top of the frame. The drop is usually 1 to 3 inches.
- Sawtooth hangers: the drop is small, often under an inch, so the frame hangs close to the mark.
Hook height = target center height + half the frame height minus the hanging drop
Take a 24-inch frame, a 57-inch center, and a 3-inch wire drop. Your nail goes at 66 inches.
Tools Needed to Hang Pictures Correctly
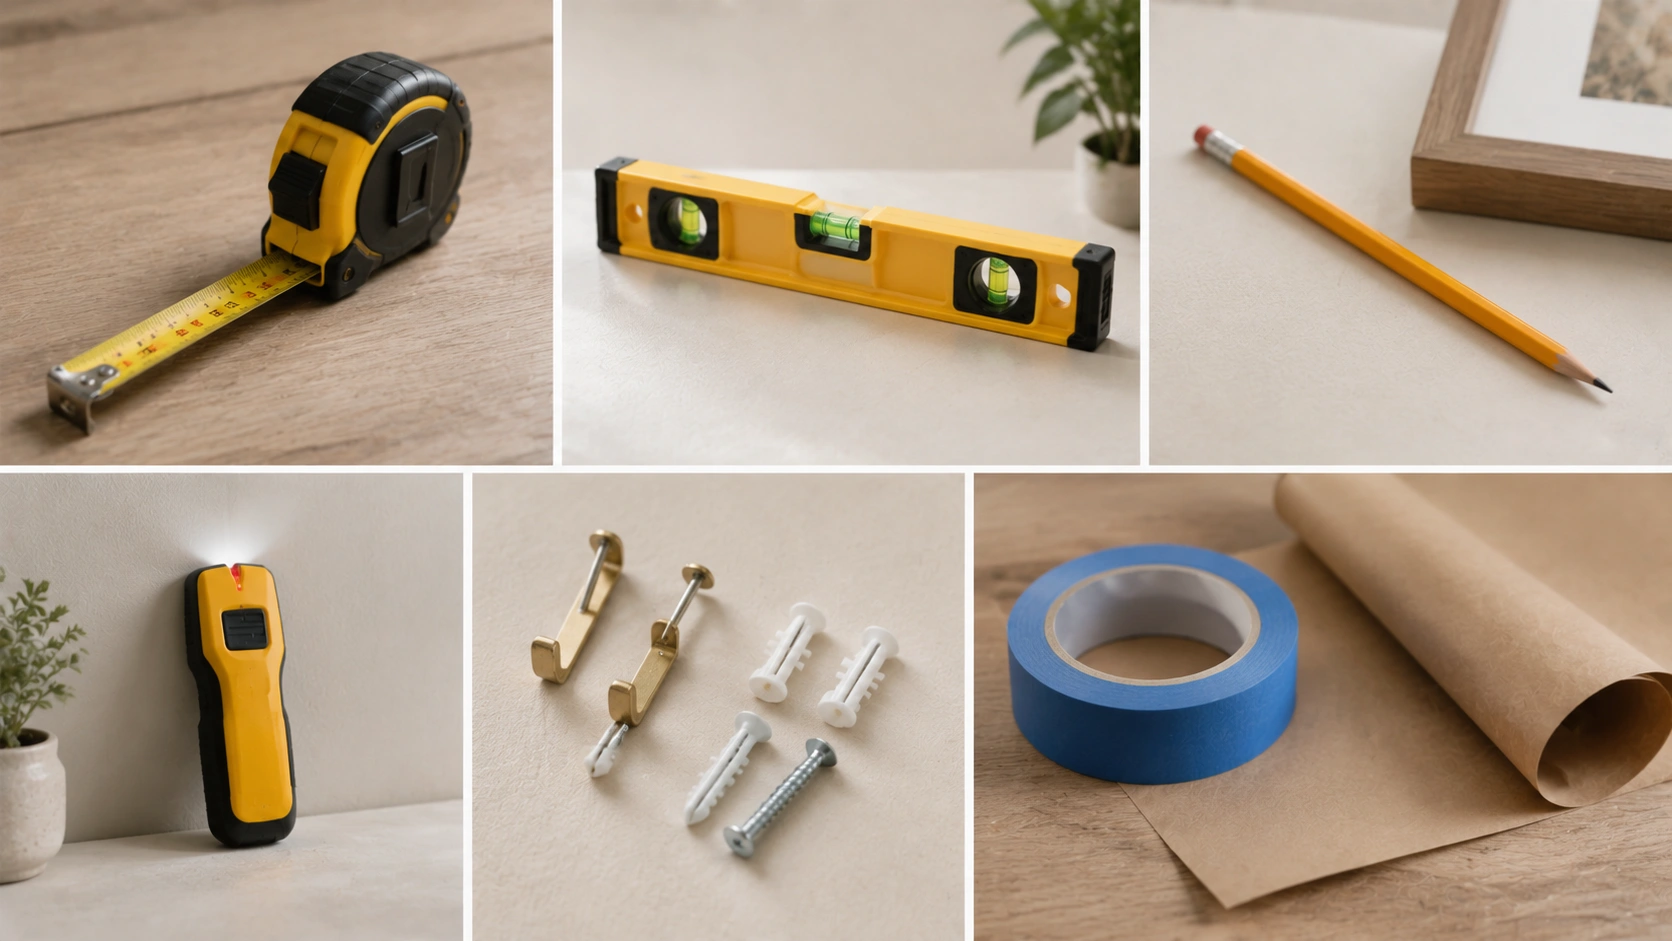
- Measuring tape: Used to find the exact placement and determine where the picture should be positioned on the wall.
- Level: Keeps frames straight and prevents artwork from appearing tilted after installation.
- Pencil: Helps mark hanging points lightly so you can adjust measurements or remove marks easily.
- Stud finder: Locates wall studs to provide stronger support for heavier frames.
- Picture hooks and anchors: Hold the artwork securely while matching the weight and wall type.
- Painter’s tape: Helps test layouts, mark spacing, and create temporary guides before drilling.
- Kraft paper: Used to trace frame shapes and create templates for arranging pictures before hanging them.
A laser level can also be helpful for long hallway walls or multiple frame arrangements, while a two-foot spirit level is usually enough for most standard picture-hanging projects.
Picture Hanging Height Chart
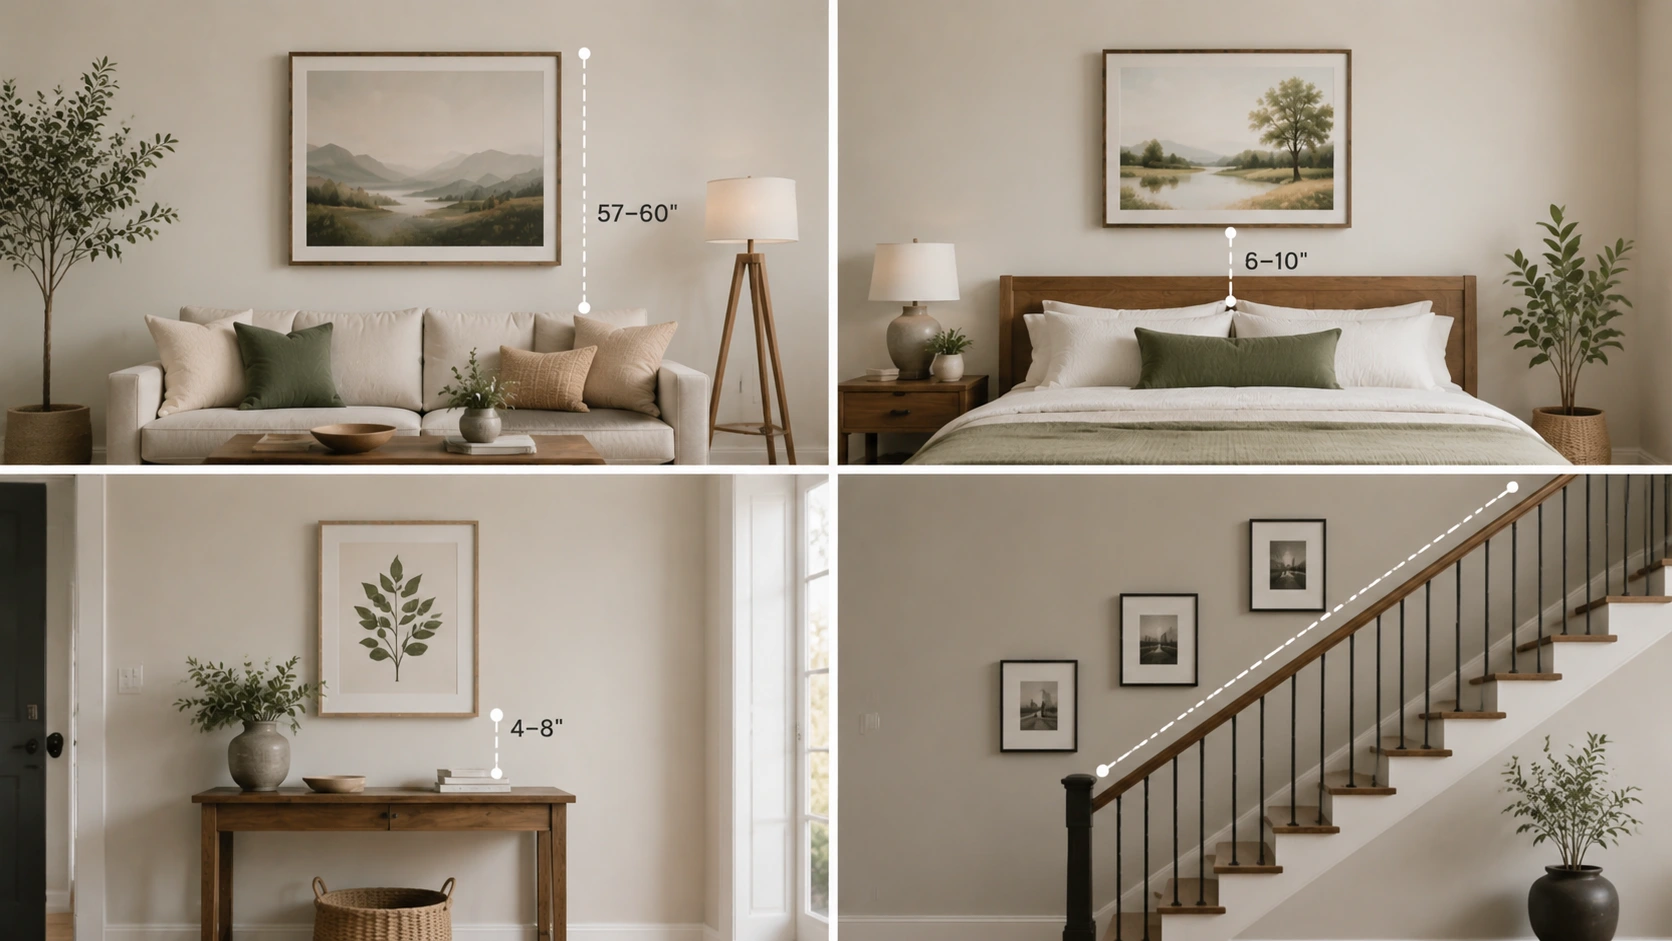
Keep this table beside you while you measure. It gathers all recommended heights in one place, so you can check a wall without redoing the math.
| Location | Recommended height |
|---|---|
| Empty wall | Center the artwork at 57 to 60 inches |
| Above a sofa | Bottom of frame 6 to 8 inches above the sofa back |
| Above a bed | 6 to 10 inches above the headboard |
| Above a console table | 4 to 8 inches above the furniture top |
| Above a sideboard or buffet | 4 to 6 inches above the surface |
| Hallway | Center the artwork at eye level, around 57 inches |
| Staircase | Follow the angle of the stair rail |
| Dining room | Center slightly lower, closer to 57 inches |
All the furniture numbers share one goal. They keep the art tied to the piece below it, rather than letting it drift up the wall.
How High to Hang Pictures Above a Sofa
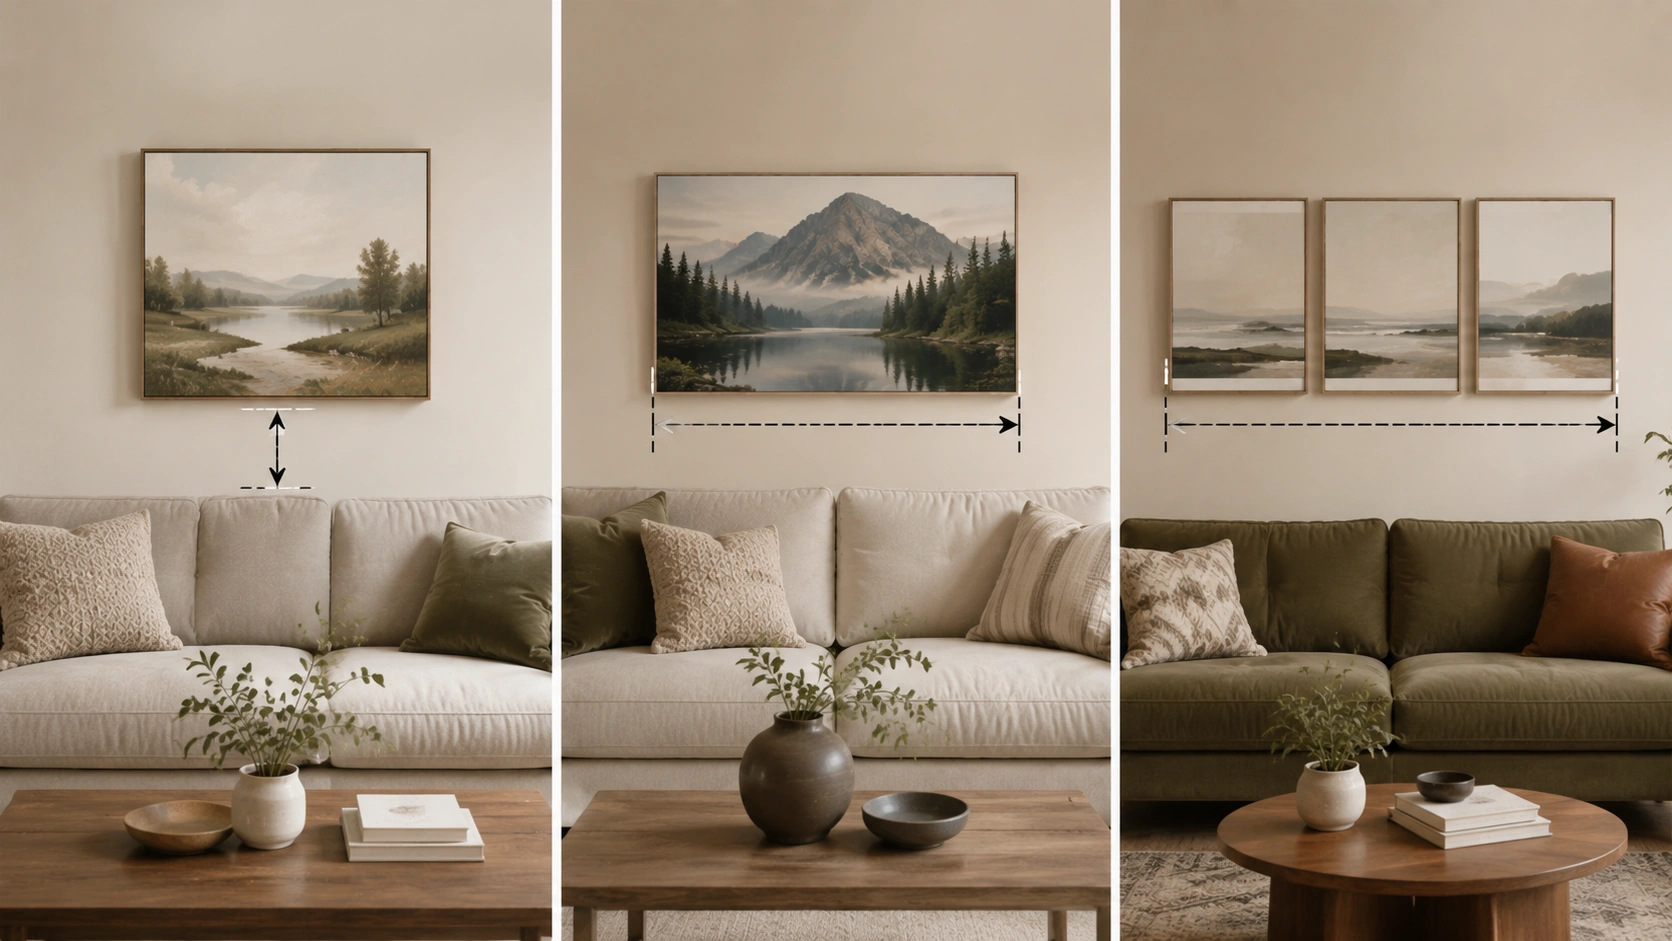
Art above a sofa should read as part of the seating area. Once furniture sits below the wall, that furniture becomes your measuring point instead of the floor.
- Leave 6 to 8 inches above the back of the sofa: This gap binds the art and the seating into one block. Go closer to 8-10 inches if the sofa back is tall or if people lean against it.
- Match the width: Aim for a piece or grouping that spans roughly two-thirds of the sofa’s width. Some rooms carry 75 percent comfortably.
- Watch the empty gap: Once the space passes about 10 inches, the art starts floating toward the ceiling.
- Ignore tall ceilings: Raising the art to fill the height above the sofa breaks the link with the furniture. Choose a bigger piece instead.
A 57-inch center often fails above a sofa. Say the sofa back sits 34 inches high and your canvas is 24 inches tall. That leaves an 11-inch gap. Drop it.
How High to Hang Pictures Above a Bed
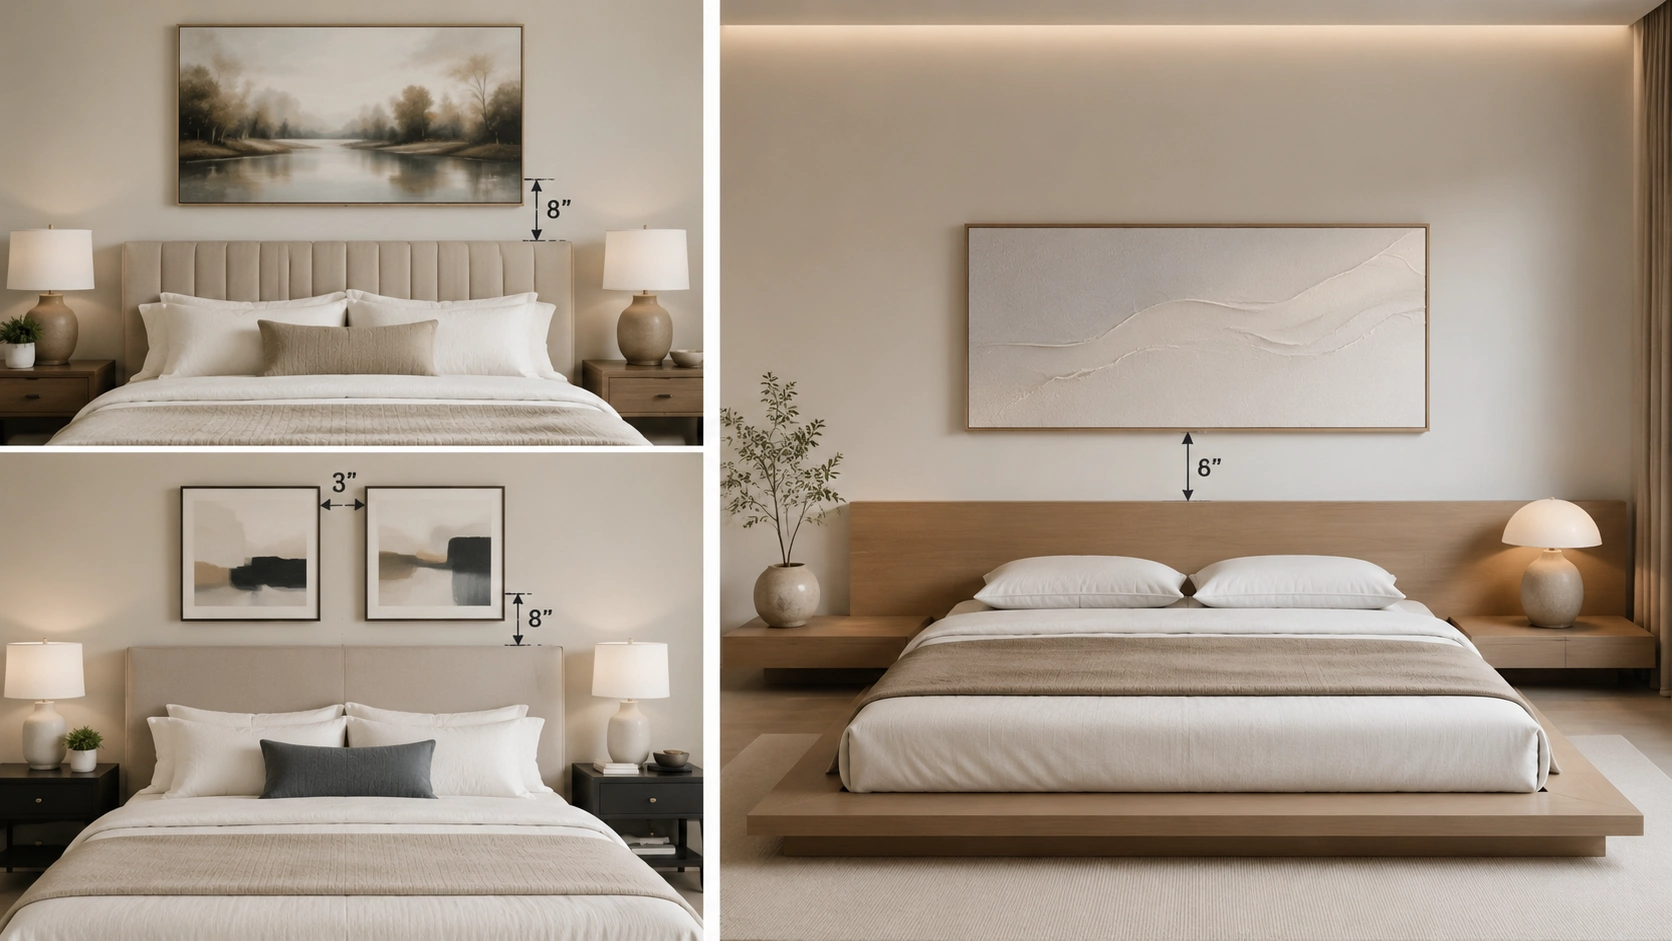
Beds work much like sofas. The headboard sets your reference line, not the floor. Measure up from the top rail, not the finished floor.
Standard spacing runs 6 to 10 inches above the top of the headboard. Tighten it to 4-6 inches when the headboard is tall or the canvas is deep.
Three things change the number:
- Bed height: Platform beds sit low, giving you more wall space to work with.
- Artwork size: A tall piece needs the tighter end of the range.
- Ceiling height: Low ceilings call for horizontal art rather than a higher hang.
Keep DIY bed frames above the reach of anyone sitting up in bed. Avoid heavy glass over a pillow, so choose canvas or acrylic if the piece is large.
- Queen bed example: a 60-inch headboard pairs well with art near 40 inches wide. Hang it 8 inches above the top rail.
- King bed example: a 76-inch headboard suits a 50-inch piece. Two 24-inch frames with a 3-inch gap also work, hung 8 inches up.
How High to Hang Pictures in a Living Room
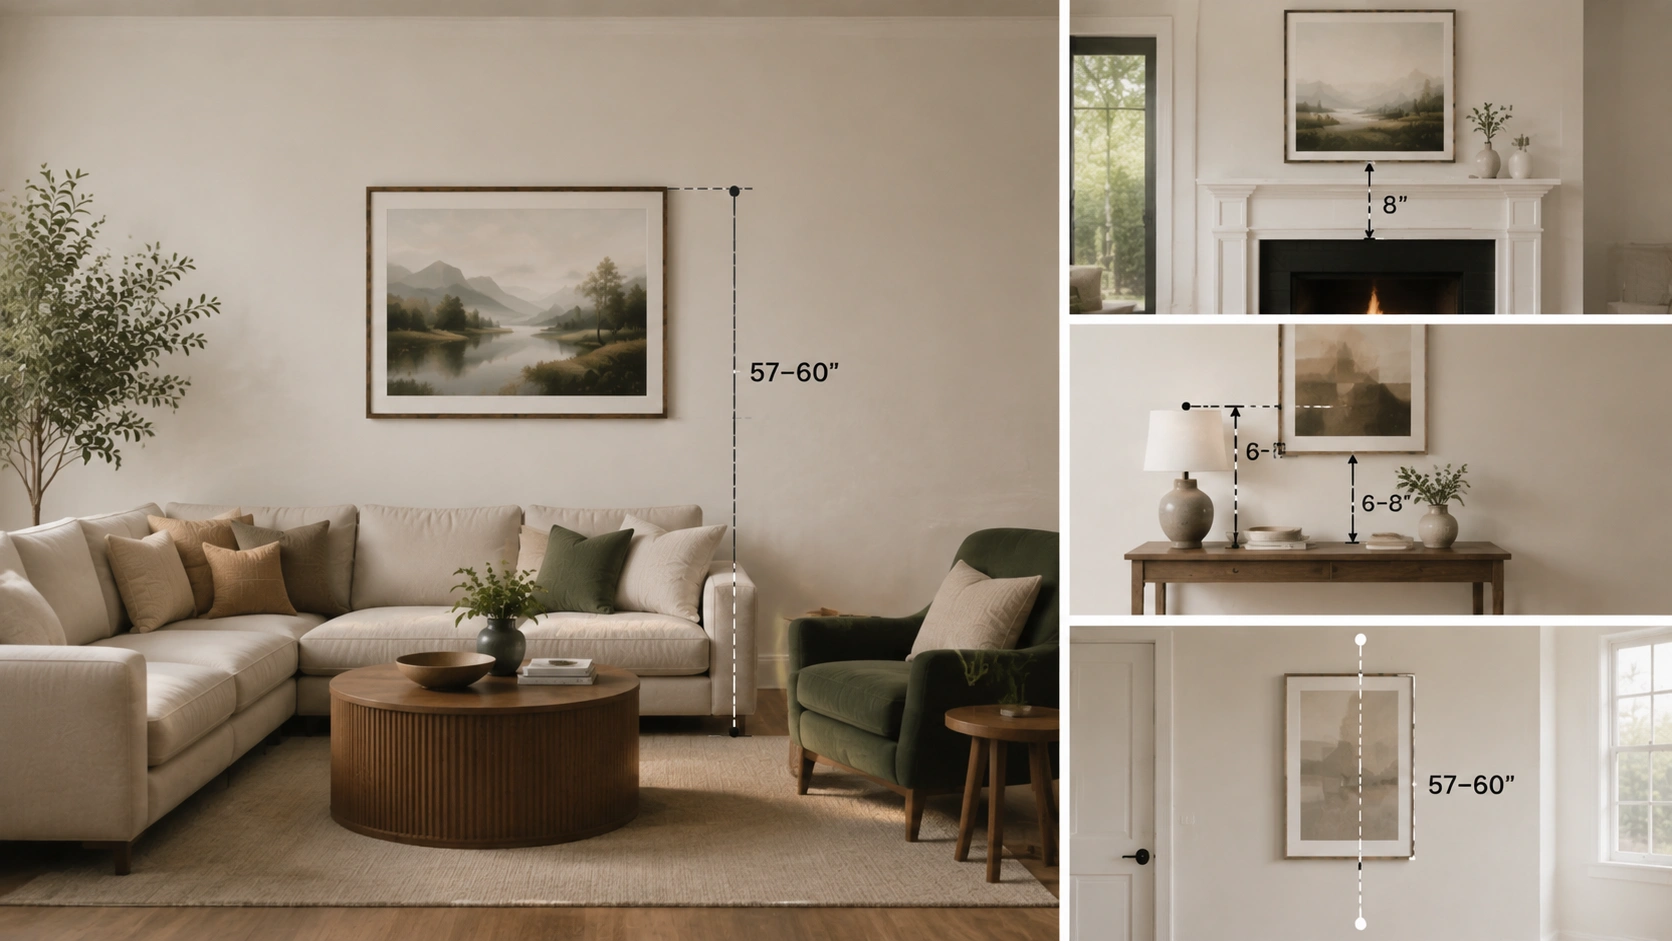
Living rooms mix mantels, sofas, and console tables at different heights. One wall rarely follows a single rule, so handle each surface as its own measuring problem.
- Above a Fireplace Mantel: Fireplace clearance comes before design. Check the manufacturer’s instructions for your unit, as many require a specific clearance distance for combustible items above the opening.
- Above Console Tables: Console tables usually hold lamps, bowls, or books. Measure from the tallest object you plan to keep there, not the tabletop.
- Empty Feature Walls: With no furniture below, go back to the 57- to 60-inch center. Mark the wall, step back, and check the line against a nearby door frame or window head.
How High to Hang Pictures in a Hallway
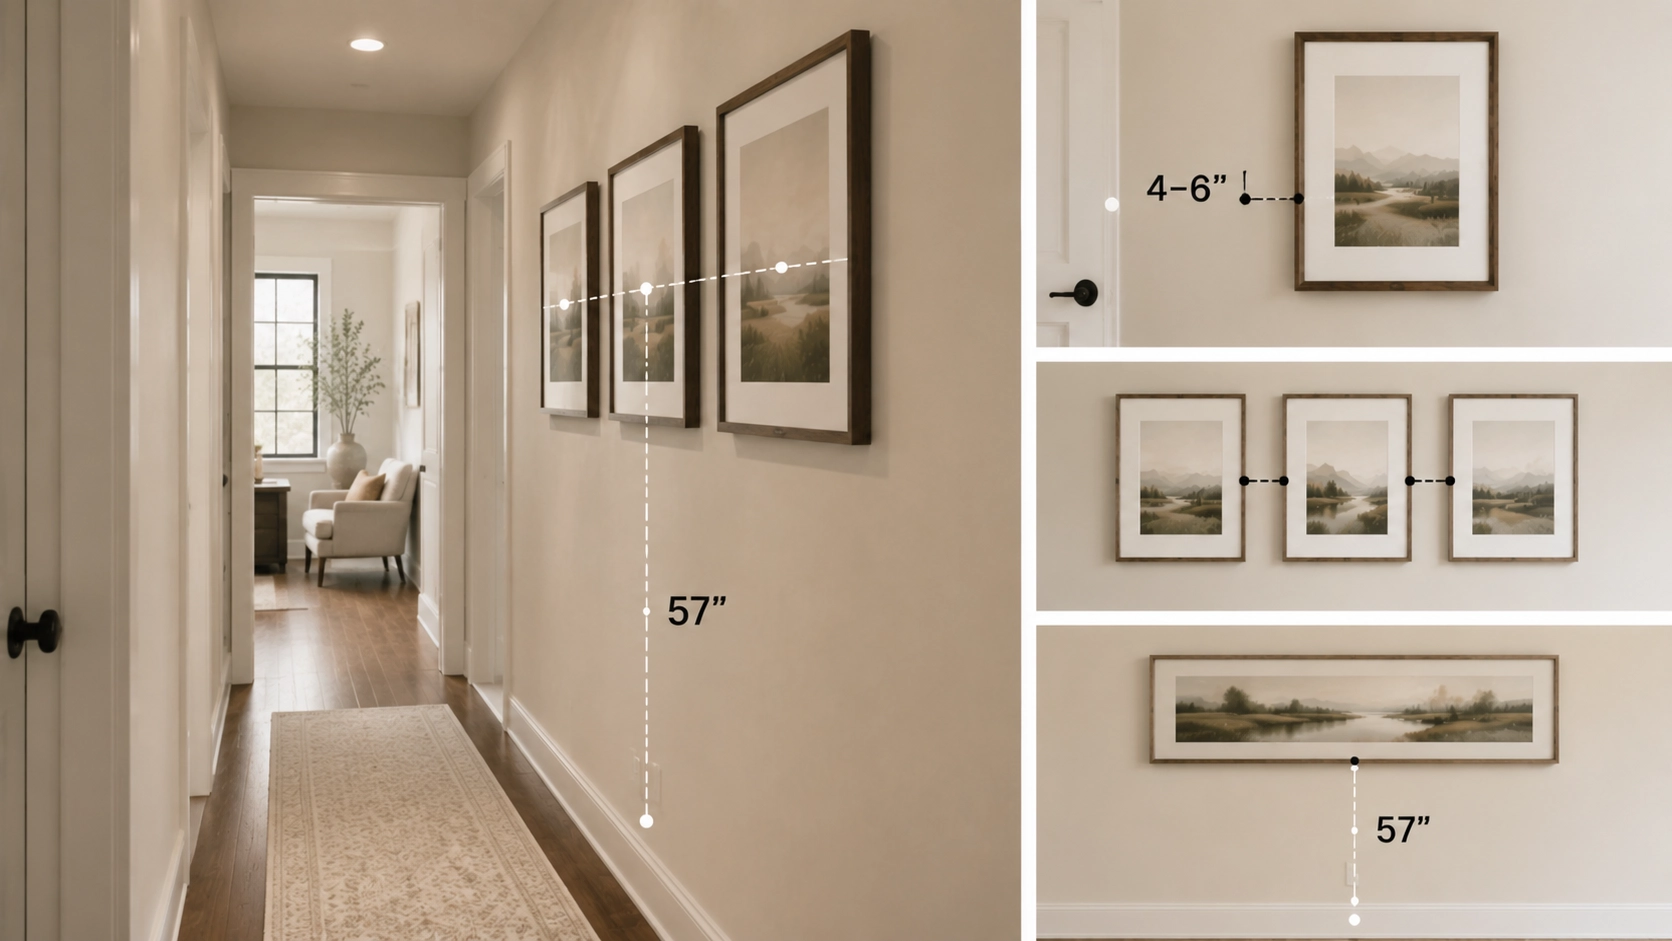
People see hallway art as they walk past it, usually at speed. Consistency across the whole run matters far more here than the height of any single frame.
- Hold one center line at about 57 inches for every frame along the run.
- Match spacing between frames so the row reads as a set.
- Keep at least 4 to 6 inches between a frame and a door casing or corner.
In a narrow hallway, hang smaller frames and skip deep shadow boxes that catch shoulders. Long horizontal pieces suit these walls well, since the eye travels with the direction of the hall.
How High to Hang a Gallery Wall
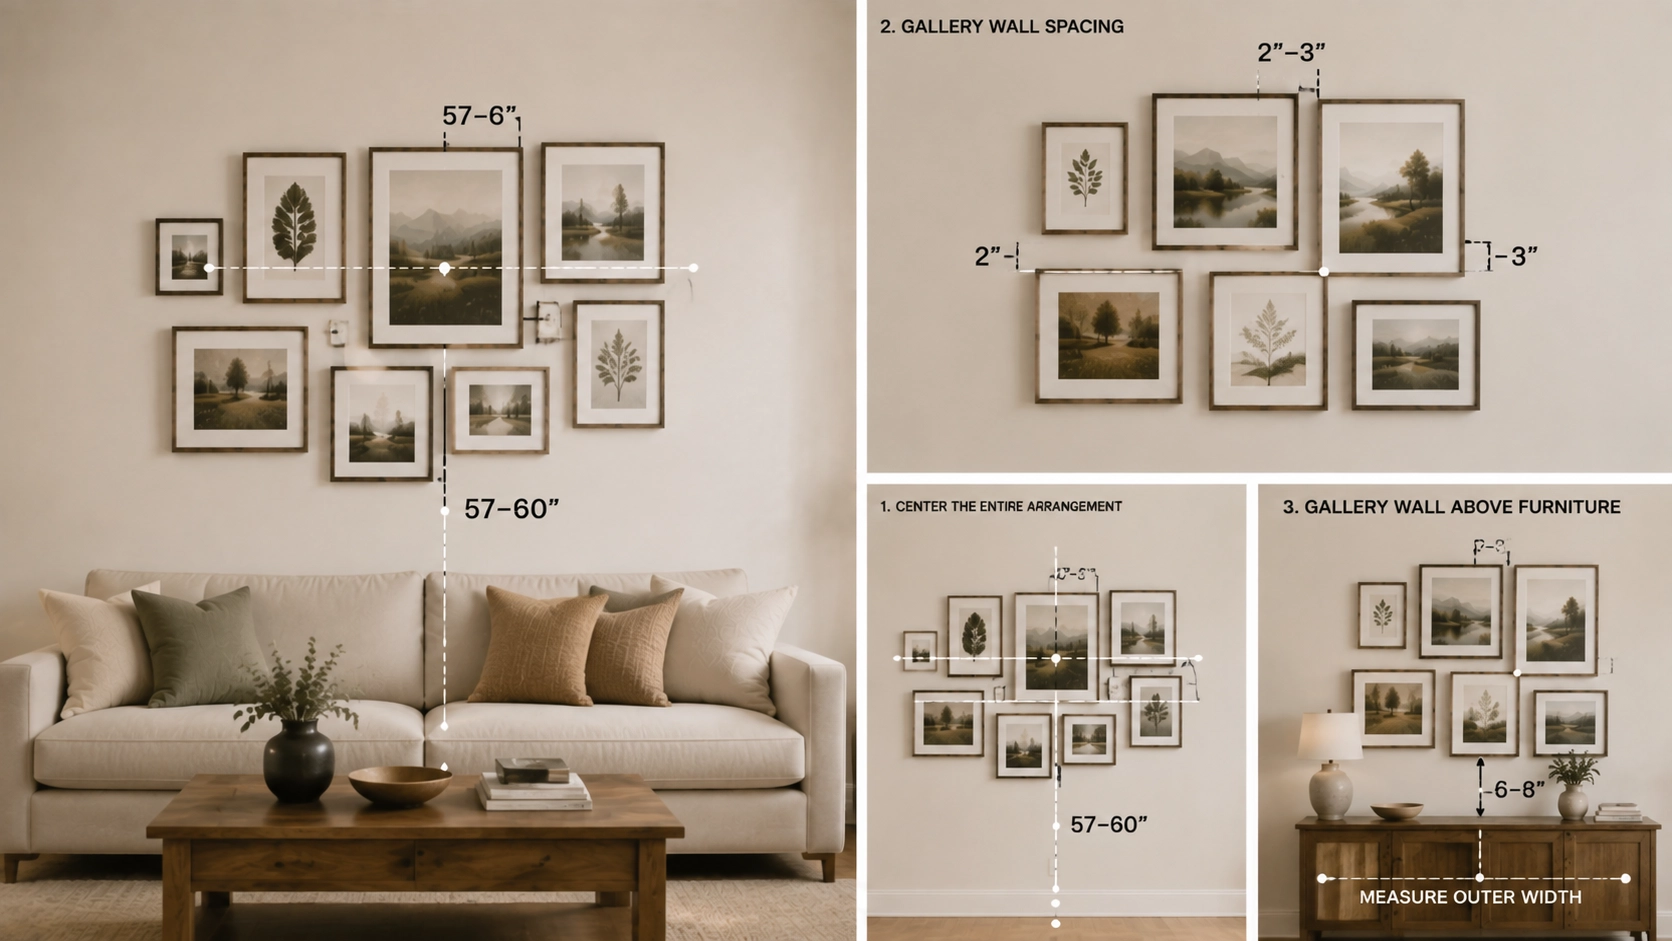
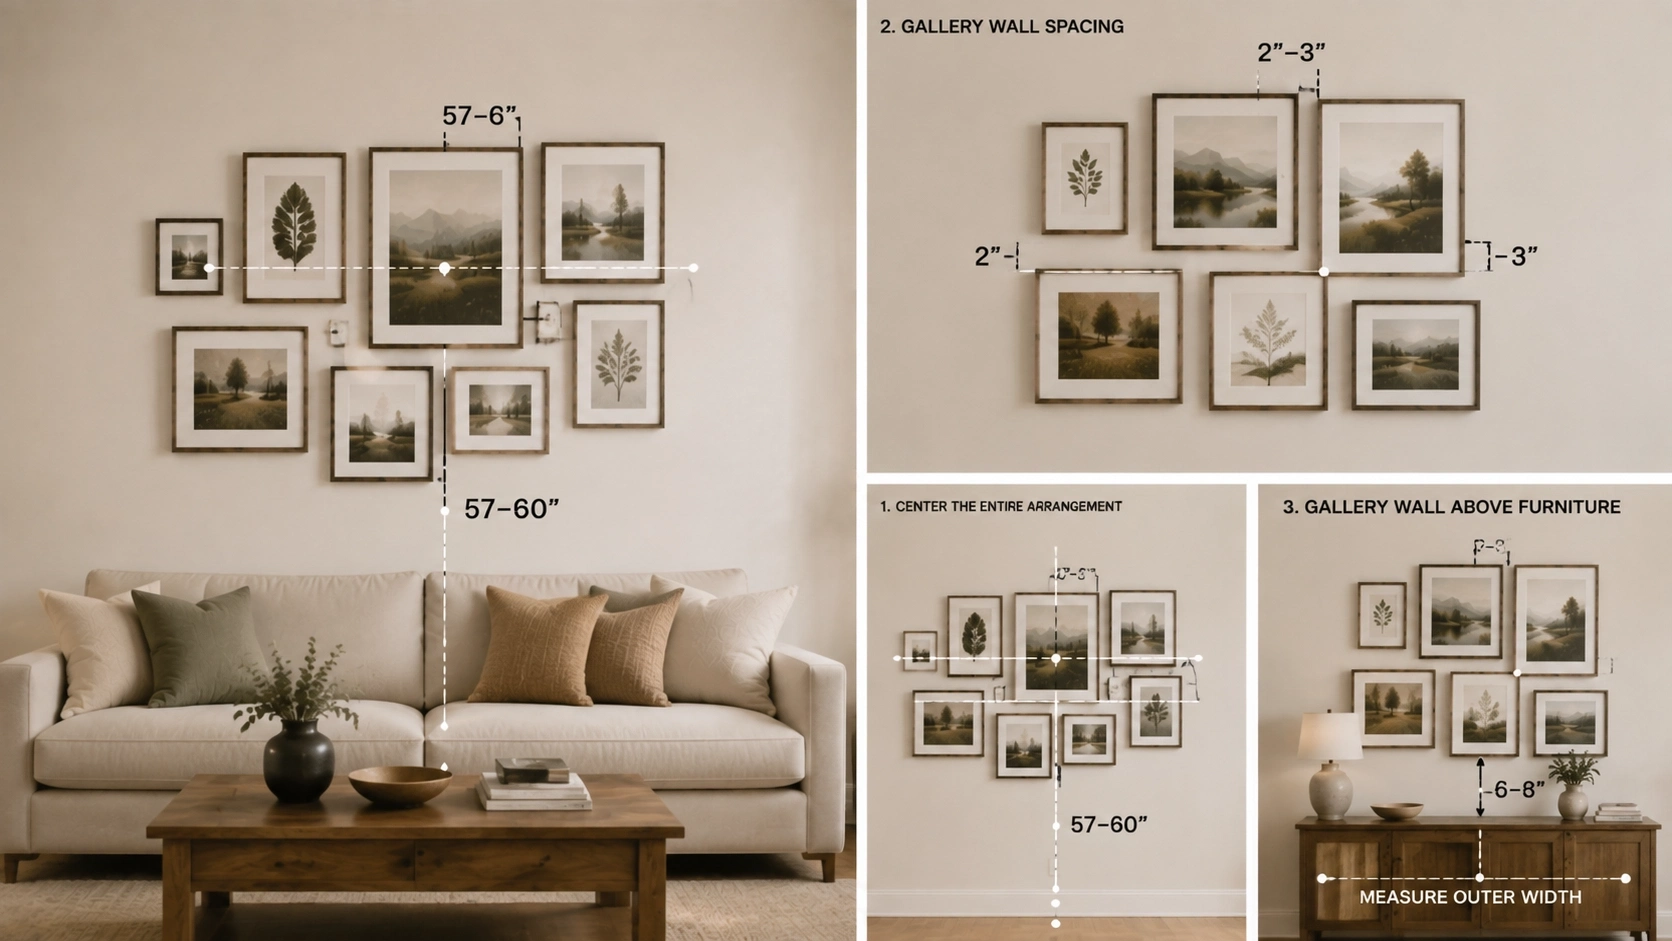
Gallery walls follow one principle. Treat every frame as part of one large rectangle. Hang that rectangle as though it were a single big piece of art.
- Center the Entire Arrangement: Find the visual center of the whole grouping and set that point at 57 to 60 inches. Individual frames will sit above and below the line, which is correct.
- Gallery Wall Spacing: Keep 2 to 3 inches between frames and hold that gap everywhere. Tighter spacing reads as one piece. Wider spacing scatters the wall. Small frames: 2-inch gap; larger frames: 3-inch gap.
- Gallery Wall Above Furniture: Align the bottom row 6 to 8 inches above the sofa or credenza, then build upward. Measure the outer width of the finished group, gaps included.
How High to Hang Different Types of Artwork
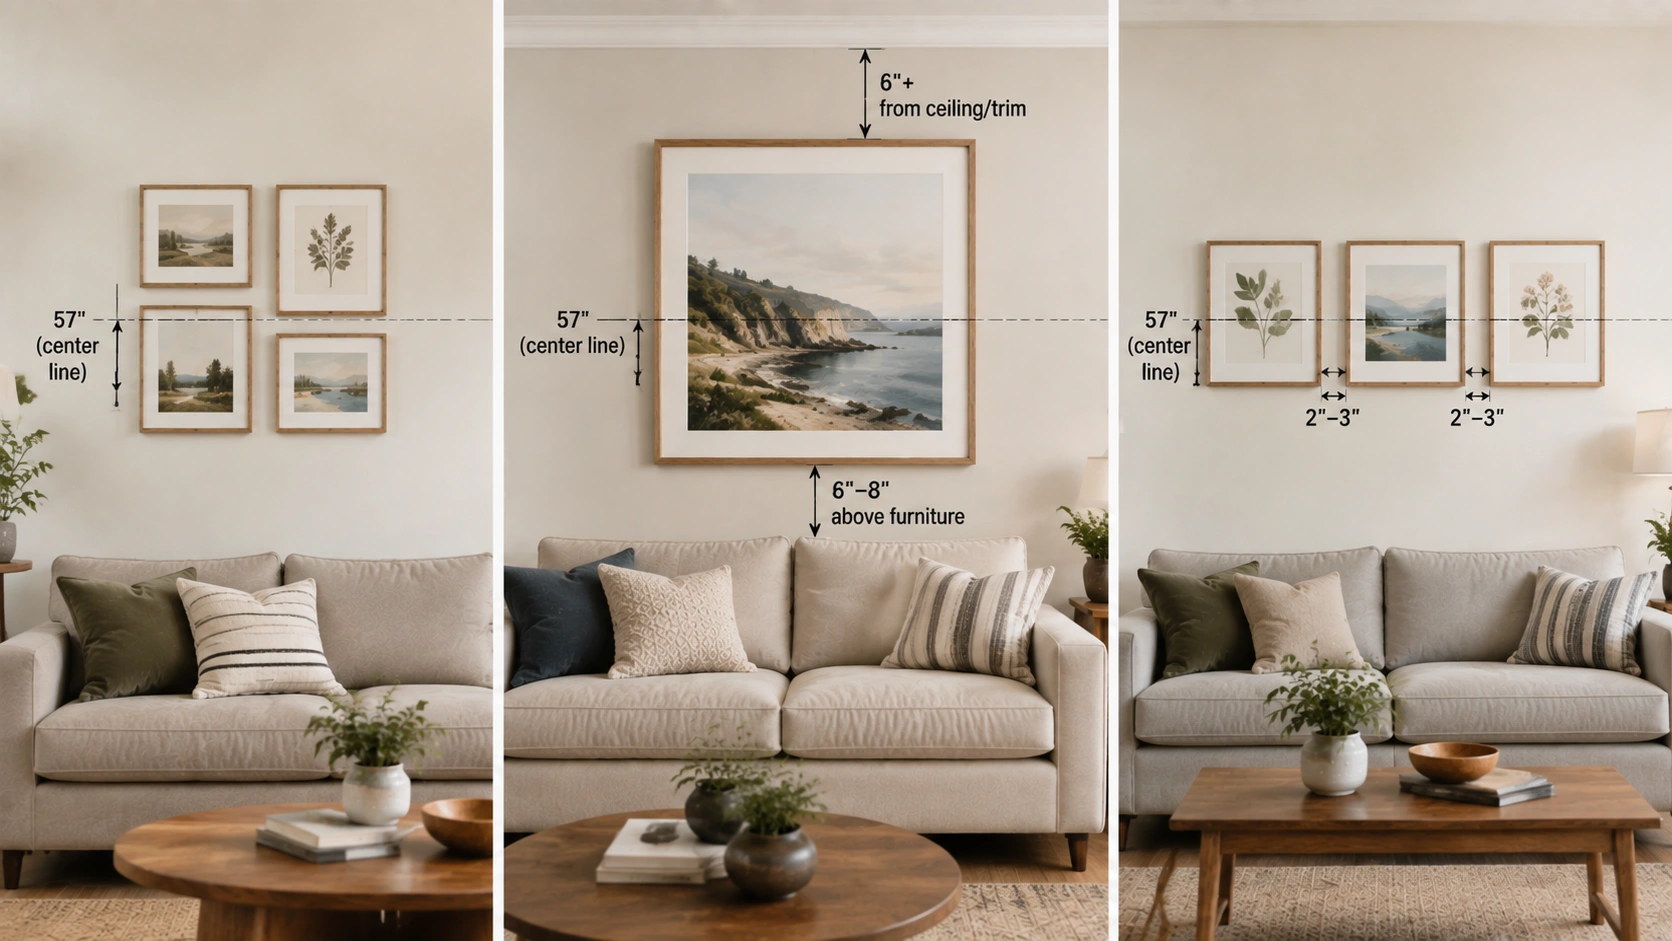
Frame size changes the right height as much as furniture does. A small print and a wide canvas need different treatment, even on the same blank wall.
Small Pictures
Small frames look stranded when they sit high on a big wall. Bring them down to true eye level, or group three or four together to give them visual weight.
A single 8-by-10 frame above a full-length sofa rarely holds the wall.
Large Statement Artwork
Big pieces set their own rules. Center them near 57 inches. Then check that the bottom edge clears furniture.
Keep the top edge at least 6 inches below trim or ceiling lines.
Multiple Pictures Side by Side
Align the centers of all frames along a single horizontal line, even when the frames differ in height. Keep the gaps between them identical.
Matching centers look deliberate. Matching tops do not, once frame sizes vary.
How to Hang Pictures without Damaging Walls
Renters and anyone with fragile plaster walls still have real options. These methods hold artwork at the same height above, without leaving anchor holes to patch later.
- Adhesive strips: These suit light frames, usually under 4 to 16 pounds depending on the set. Clean the wall with rubbing alcohol first, since dust ruins the bond.
- Picture rails: A rail near the ceiling lets you hang and move pieces on wires with no new holes.
- Leaning art. Rest large canvases on a mantel, shelf, or floor against the wall. Height stops being a question.
- Removable hooks: Hardware store hooks that press into plaster leave pinholes rather than anchor holes.
Pro Tip: Before hanging any artwork, take a photo of the wall and mark the frame position with painter’s tape. It helps prevent unnecessary holes and wall damage.
Picture Hanging Mistakes to Avoid
Five habits cause almost every hanging problem. Each one is easy to spot before you drill and easy to fix once you know the cause.
- Hanging Pictures Too High: This is the most frequent error in real rooms. High art disconnects from the furniture, leaving a dead band of wall underneath.
- Measuring to the Top of the Frame: The center is the reference point, not the top edge. Measuring to the top pushes every piece higher than intended, and taller frames drift further off.
- Ignoring Furniture Height: Once a sofa, bed, or console sits below the art, the furniture sets the height. Applying the 57-inch rule over a low sofa creates the floating look you were trying to avoid.
- Using the Wrong Hardware: Weight decides the hardware, so weigh the framed piece before you shop. Frames under 10 pounds should be hung on drywall hooks rated for that load.
- Skipping a Layout Test: Paper templates and painter’s tape cost almost nothing and save patched holes. Cut paper to frame size, tape it up, and view the wall from the doorway and from your seat.
Planning the layout before drilling is standard advice in professional hanging guides, including the one from Architectural Digest.
Frequently Asked Questions
Should pictures be hung at eye level?
Eye level is the right starting point on a blank wall. Furniture, seating height, and room use can all pull the correct height lower.
How high should pictures hang above a couch?
Keep the bottom of the frame 6 to 8 inches above the back of the sofa. Stretch to 10 inches only if the back is tall or the frame is deep.
How far apart should pictures be on a gallery wall?
Use 2 to 3 inches between frames, and keep the gap consistent across the whole group.
Should all pictures in a room be the same height?
Not always. Different furniture heights need different hangs. Maintaining a consistent centerline for the open walls keeps the room balanced.
How do you hang pictures on a tall wall?
Choose larger artwork or a grouped arrangement rather than raising the hang. Keep the center near 60 inches and let the size fill the wall.
Give the Final Touch to Your Wall
Hanging pictures is less about finding one perfect number and more about building a visual connection between the art, the furniture, and the people who use the room. The measurements in this blog give you a reliable starting point, but the room itself is the real test.
Step back from the door. Sit where you normally sit. Look at the wall from the angles you use every day. If the art feels tied to the furniture beneath it and nothing looks like it is floating, the height is right.
Paper templates cost almost nothing and save patches later. Tape before you drill, adjust what needs adjusting, and then commit to it. One careful hang is worth ten impatient ones.





