

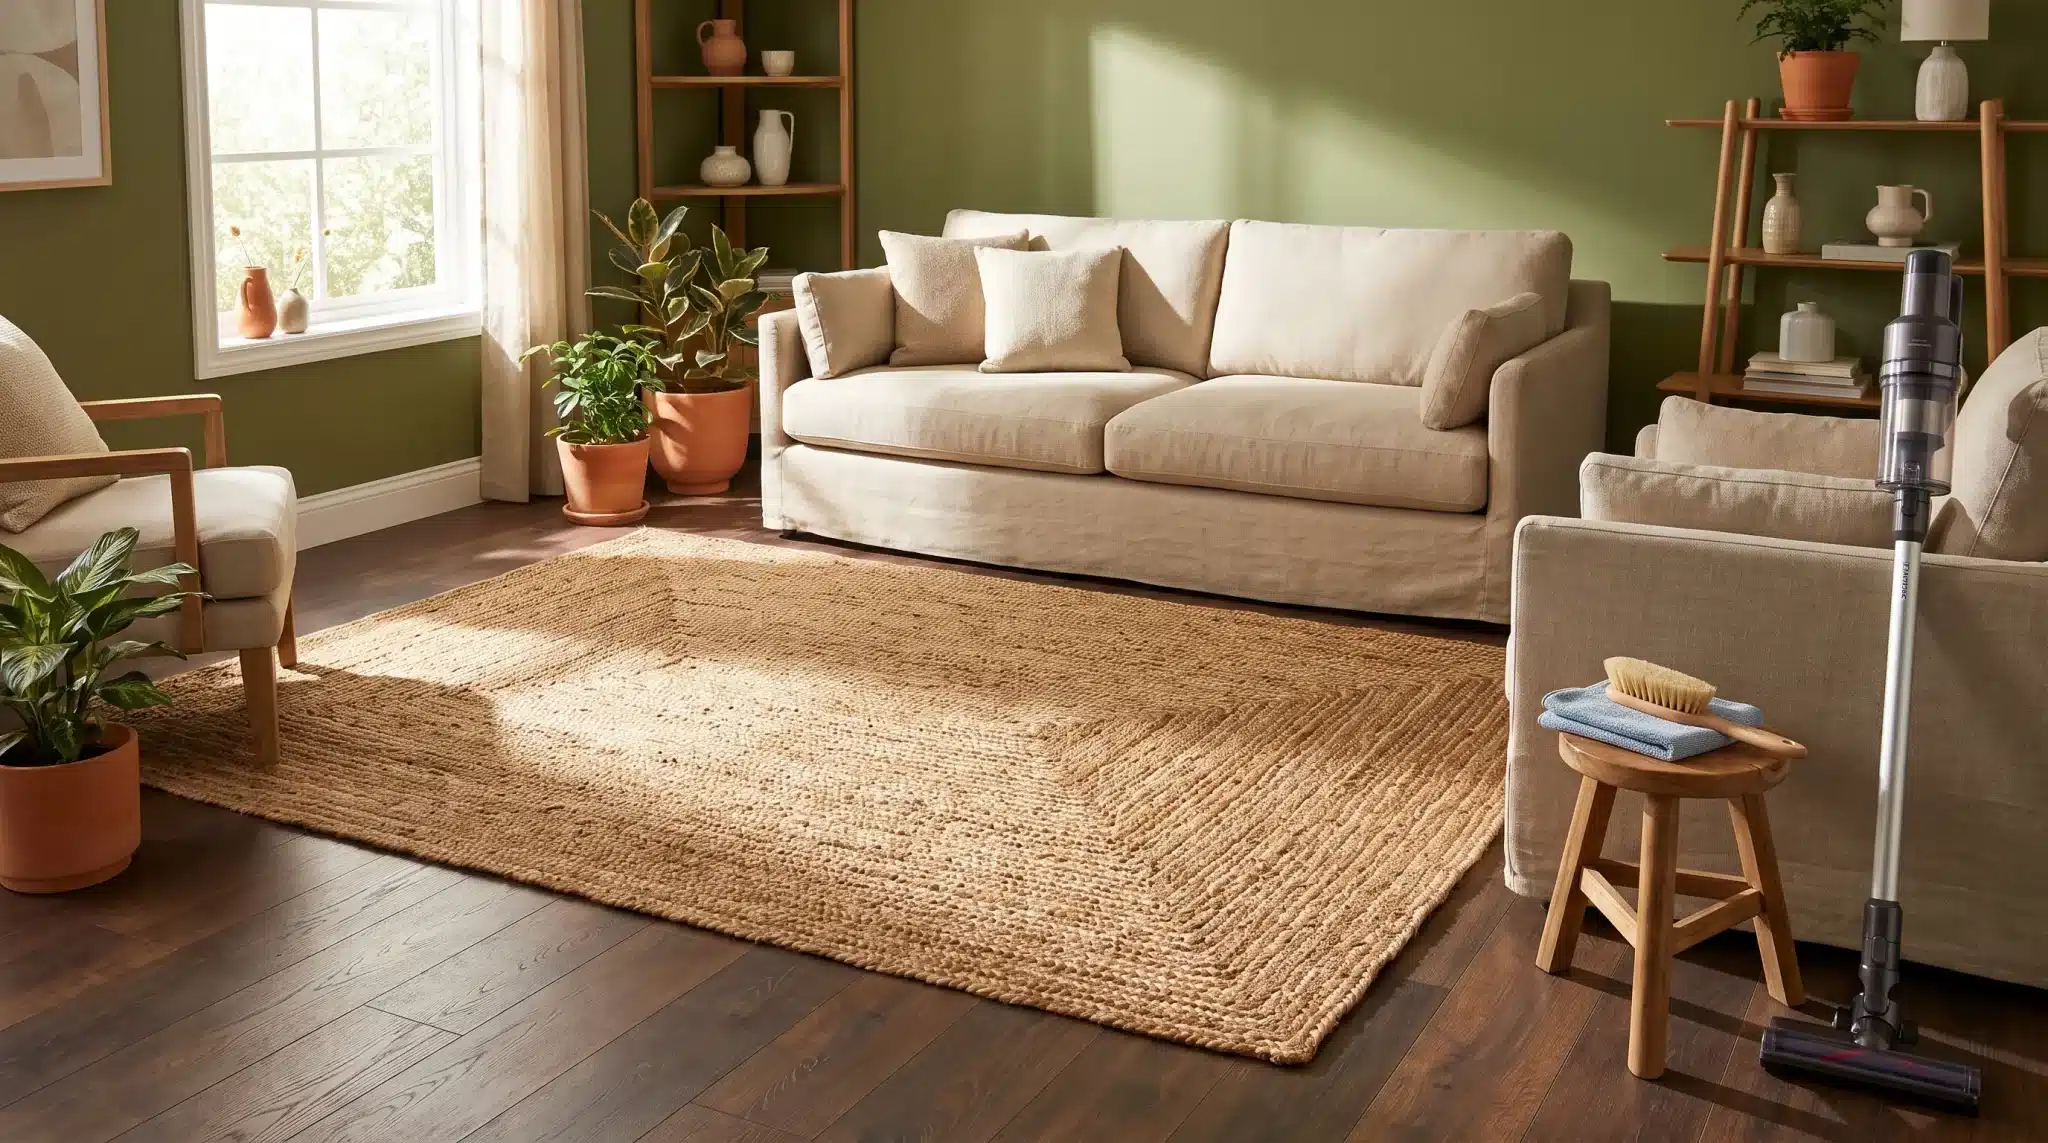
The biggest mistake with jute rugs is treating them like regular carpet. Too much water or aggressive scrubbing can damage the natural fibers and leave behind browning, stiffness, or larger stains. Jute rugs need a gentler approach because their plant-based fibers absorb moisture quickly. Fresh spills and surface dirt are usually easier to handle, while deep stains, pet accidents, and damage that reaches the backing can be much harder to remove. Understanding Jute Rugs and Their Unique Cleaning Needs Jute is a natural plant fiber made from the stem of the jute plant. Its soft texture, earthy look, and eco-friendly qualities make it a popular choice for area rugs. However, unlike synthetic carpets, jute fibers are highly absorbent and can react poorly to excess moisture, harsh cleaners, and rough handling. Water can cause the fibers to swell, weaken, or develop brown discoloration as they dry. Because of this, jute rugs require gentle cleaning methods that remove dirt and stains without compromising their natural texture and durability. Safe Cleaning Methods for Jute Rugs Clean jute rugs with low-moisture methods that protect the natural fibers. Regular vacuuming, dry deodorizing, and careful spot cleaning are generally safe, while soaking, steam cleaning, washing machines, and carpet shampoo machines can damage the rug. Cleaning Method Safe for Jute? Vacuuming Yes Dry baking soda deodorizing Usually yes Spot cleaning Yes, with care Steam cleaning No Washing machine No Soaking No The safest approach is to use gentle, low-moisture cleaning methods and avoid anything that saturates the fibers. Proper care helps prevent shrinking, staining, and weakening of the jute material. How to Clean a Jute Rug Step by Step Cleaning a jute rug requires a careful process that removes dirt and stains without soaking the natural fibers. Follow each step to prevent moisture damage, discoloration, and lingering odors. Step 1: Remove Loose Dirt and Debris Shake out the rug if possible or vacuum away crumbs, pet hair, dry soil, and surface debris. Removing loose dirt first prevents it from getting pushed deeper into the fibers during cleaning. Step 2: Vacuum the Rug Carefully Use low suction and turn off the rotating brush. Vacuum in the direction of the fiber grain and avoid pulling at loose fibers. Aggressive vacuuming can increase shedding over time. Step 3: Spot Clean Small Stains Remove any solids first, then blot liquid right away. Use a minimal amount of cleaner and work from the outside of the stain inward. If the stain is stubborn, choose a gentle carpet cleaner designed for delicate fibers and test it on a hidden area first. Dry the area quickly once the residue is gone. What not to do: Avoid scrubbing the stain, as rough friction can damage the natural fibers and push the mess deeper into the weave. Do not soak the area or pour cleaner directly onto the rug, since excess moisture can lead to browning, stiffness, or lingering odors. Avoid hot water, too, because it can affect the jute fibers and make the stain harder to remove. One thing I learned after ruining a small section of a jute rug is that adding more water rarely fixes the problem. Removing moisture first usually gives better results. Step 4: Dry the Rug Completely Lift any damp sections and get airflow underneath the rug. Check the backing before placing furniture back on top. Drying is one of the most important steps when cleaning a jute rug. Proper airflow helps prevent moisture damage, browning, and musty odors while protecting the natural fibers. How to Clean a Jute Rug without Water Those seeking safer cleaning methods often look for low-moisture options because excessive water can weaken jute fibers and affect the rug’s texture. Vacuuming on a regular schedule Dry brushing to lift surface dirt Sprinkling baking soda, letting it sit, then vacuuming it up Removing dry mud once it has fully hardened Rotating the rug to spread out wear and exposure These methods handle everyday dirt and light odors without increasing moisture risk. How to Clean Pet Stains and Urine From a Jute Rug Pet stains need faster attention than regular spills because urine, vomit, and other accidents can move beyond the surface and reach the backing or rug pad. The key is to remove moisture quickly while avoiding methods that can damage natural jute fibers. Step 1: Remove the Mess Immediately Start by removing as much of the accident as possible before applying any cleaner. Blot urine with dry towels to absorb moisture, and lift solid messes like vomit or feces carefully to avoid pushing them deeper into the weave. Step 2: Check the Rug Pad and Floor Below Lift the rug and inspect the area underneath after a pet accident. Urine can spread beyond the visible stain, so checking the backing, rug pad, and floor helps prevent lingering odors and hidden moisture problems. Step 3: Apply a Jute-Safe Pet Cleaner Carefully Use only a cleaner labeled safe for natural fibers and test it on a hidden area first. Apply a small amount with a cloth and blot gently instead of soaking the rug, as excess moisture can cause browning and stiffness. Step 4: Dry the Rug from Both Sides Proper drying is just as important as cleaning. Use a fan to improve airflow, lift the rug slightly if possible, and make sure both the surface and underside are completely dry before placing it back. Step 5: Decide if the Pet Stain is too Deep Some pet stains cannot be fully removed at home, especially when they reach the backing or rug pad. Signs of more serious damage include returning odor after drying, permanent discoloration, affected backing, or weakened fibers. A surface treatment may remove the visible mark, but hidden contamination underneath can bring the smell back. If the rug pad still holds odor, cleaning only the top layer will not solve the problem. Pet odors may return if the source isn’t fully removed, such as urine trapped in the backing or rug pad.Leftover moisture, old stains, or odor-masking cleaners can also cause smells to come back. How to Remove Different Types of Stains From a Jute Rug Different stains need different cleaning approaches to avoid spreading the mess or damaging the natural fibers. Learn the right methods for common jute rug stains, including mud, coffee, grease, food, pet accidents, and watermarks. Stain Cleaning Approach Mud Let it dry fully, then vacuum. Coffee Blot quickly and spot clean Grease Absorb before treating Food Remove solids first Pet urine Blot and treat carefully Vomit Remove solids, clean lightly. Water marks Dry fully before treating. After treating the stain, always dry the area completely and avoid adding excess moisture. Quick action and gentle cleaning help prevent discoloration, odors, and long-term damage to the natural jute fibers. Why Did My Jute Rug Turn Brown After Cleaning? Browning is a common issue with jute rugs after cleaning and usually happens when excess moisture affects the natural fibers. It can be caused by using too much water, dirt being moved to the surface as the rug dries, natural reactions within the plant fibers, soap residue, uneven drying, or moisture trapped underneath the rug. Fresh brown rings may fade with careful treatment, but older marks that have set for weeks or months are often permanent. To handle browning, let the rug dry completely, avoid adding more water, check the underside for hidden moisture, and try a gentle treatment only after the area is fully dry. If the mark does not improve after one careful attempt, professional cleaning may be the safer option. Why Does Your Jute Rug Smell or Feel Stiff After Cleaning? A stronger smell or stiff texture after cleaning usually means the jute fibers absorbed too much moisture. Trapped dampness, a wet rug pad, old urine becoming noticeable again as the rug dries, mold or mildew growth, or leftover cleaner residue can all cause odor problems. You can often identify moisture issues if the smell is stronger near the floor than on the rug’s surface, returns during humid weather, the rug pad feels different, or the flooring underneath has its own odor. To restore a stiff jute rug, allow it to dry completely before taking further steps. Once dry, vacuum gently to loosen the fibers, brush lightly along the grain, and flex small sections by hand to soften the texture. Avoid adding more water, as excess moisture can worsen stiffness and odor. Severe stiffness or damage may not fully reverse, especially if the rug was soaked rather than carefully spot-cleaned. Jute Rug Cleaning Mistakes to Avoid Jute rugs require gentle care because common cleaning mistakes can cause stains, odors, and fiber damage. Regular vacuuming, rotating the rug, and treating spills quickly all help maintain its natural texture. The most damaging mistake is using too much water, excess moisture soaks into jute fibers, leading to browning, stiffness, and musty odors. When a stain does appear, scrubbing will only spread it, roughen the fibers, and push it deeper, blotting is always the safer approach. Standard carpet cleaners are another problem, as most are formulated for synthetic carpets and are too harsh for natural jute. Beneath the rug, an ignored pad can trap moisture and odors just as effectively as the rug itself, so checking and cleaning it regularly matters. Finally, drying the rug flat after any cleaning restricts airflow and raises the risk of browning and mildew, the rug needs to dry with air circulating underneath it. For stubborn stains or persistent odors, professional cleaning is a safer option than repeated home treatments. Should You Professionally Clean or Replace Your Jute Rug? Professional cleaning is recommended when a jute rug has issues that are difficult to manage at home, such as large pet stains, mold growth, deep odors, major discoloration, or damage from repeated cleaning attempts. Before hiring a cleaner, ask about their experience with natural-fiber rugs, cleaning methods, moisture control, drying process, and pet-odor treatments to ensure they can protect the delicate fibers. However, some rugs may not be worth saving. Replacement may be a better option if the rug has extensive or repeated urine damage, active mold growth, badly broken or frayed fibers, permanent discoloration over a large area, or if professional cleaning costs nearly as much as a new rug. A skilled cleaner can help restore a damaged jute rug, but severe issues may make replacement the more practical choice. How to Prevent Future Jute Rug Stains Keeping a jute rug clean starts with preventing spills, moisture buildup, and pet accidents before they become difficult stains. Simple habits like proper placement, quick cleanup, and using protective layers can help preserve the rug’s natural fibers. Use the Right Rug Placement: Avoid placing jute rugs in pet-heavy areas, bathrooms, damp rooms, or spaces with frequent food and drink. Use a Protective Rug Pad: A good pad protects the floor underneath, helps manage moisture, and is much easier to replace than the rug itself after an accident. Clean Small Messes Early: Treating a small spill within minutes almost always prevents the deeper staining and odor problems covered above. Conclusion Cleaning a jute rug comes down to one core rule: keep moisture to a minimum. Vacuuming, quick blotting, and careful spot treatment handle most everyday dirt and spills without harming the fiber. Pet stains need extra care. Urine can settle into the backing and pad long before it shows on the surface. Catching accidents quickly and checking under the rug make the biggest difference in whether a stain fully clears or lingers. Not every stain comes out, and that is worth accepting early. If a jute rug shows deep discoloration, mold, or a smell that will not lift, weigh the cost of professional cleaning against simply replacing it. Frequently Asked Questions How Long Does a Jute Rug Take to Dry? A small spot usually dries within a few hours with a fan nearby. A thick rug section can take much longer. Always check the underside before assuming it is fully dry. How to Remove Pet Odor from a Jute Rug? Pet odors can linger even when a jute rug looks clean, because urine and other messes may penetrate the backing or rug pad. Use gentle, low-moisture methods to reduce smells without further damaging the fibers. Can You Use an Enzyme Cleaner on a Jute Rug? Enzyme cleaners break down organic pet residue at the source instead of just masking the smell. They usually need some moisture and time to sit on the stain. That is where the risk comes in for jute.
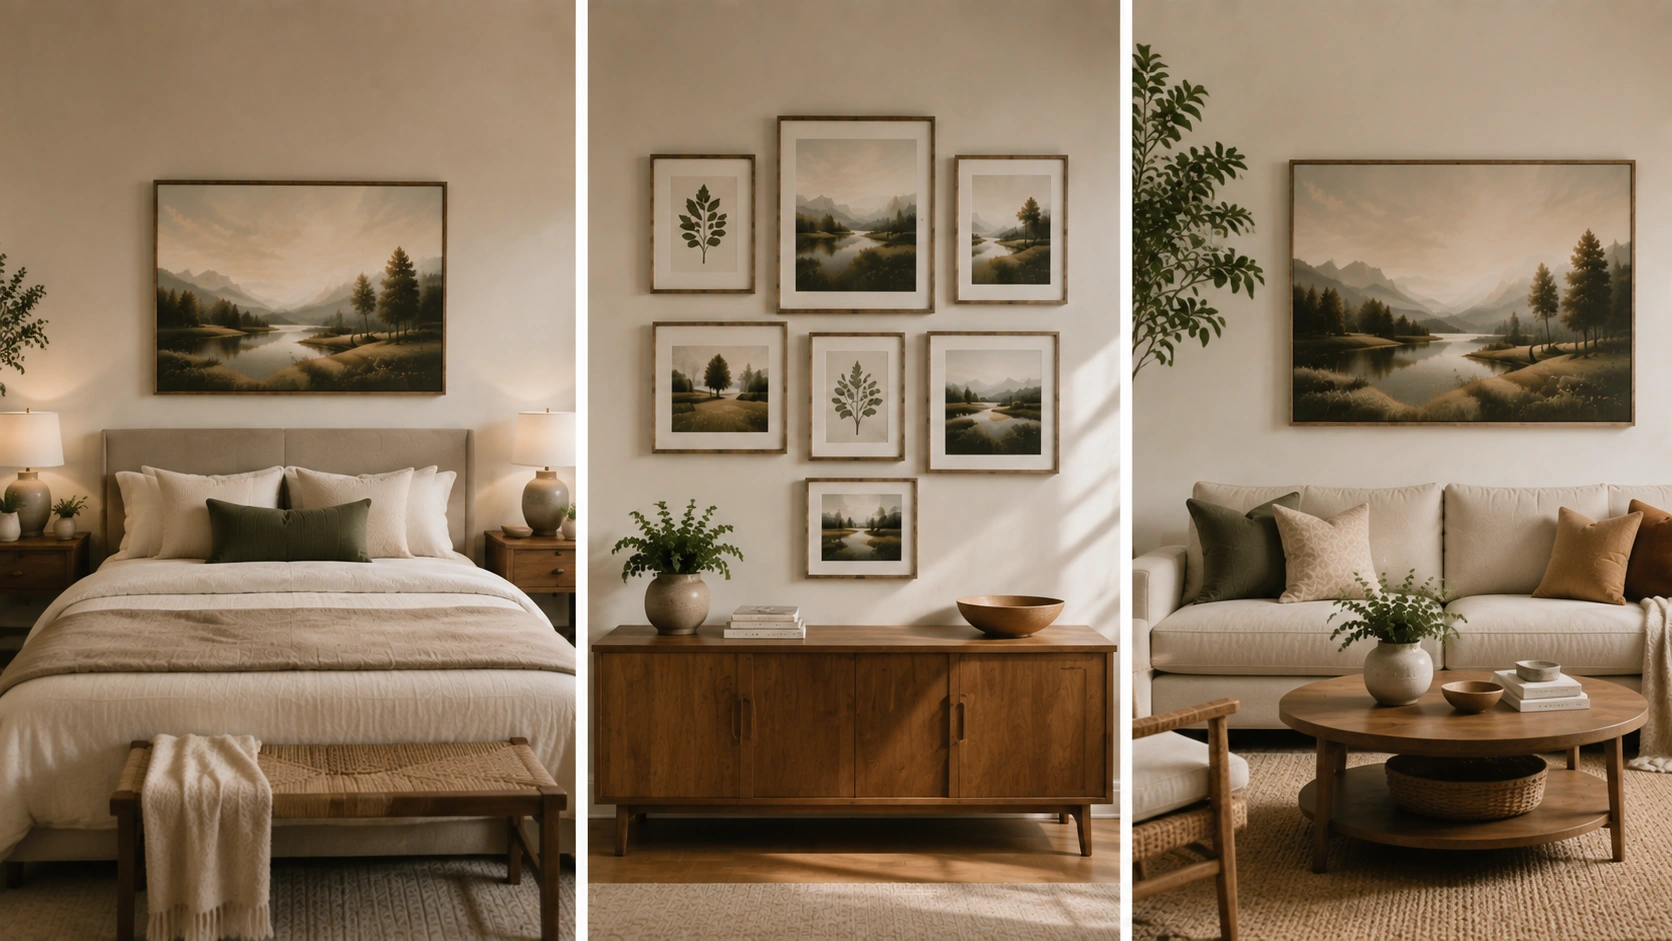
Frames often end up too high, even when you measure twice before drilling. The art creeps toward the ceiling, the wall looks empty underneath, and the room feels slightly off. Height is not really about the frame. It depends on eye level, the furniture below, the size of the piece, and how people use the room. You have probably heard the 57- to 60-inch center rule. That rule is a solid starting point, not a fixed requirement. This blog gives you exact numbers for sofas, beds, hallways, staircases, and gallery walls. It also covers the math for placing the hook. How High Should You Hang Pictures? The right height creates balance between artwork, furniture, and open wall space. Start with one simple measurement rule, then adjust it to suit your room layout. The 57-Inch Rule Explained The rule is short. Place the center of the framed piece about 57 inches above the finished floor. Two details matter here. First, you measure to the vertical center of the whole framed object, not the top of the frame. Second, you measure from the floor you actually walk on, including rug height if the rug stays put. Galleries and designers lean on this number because it sits near the average standing eye level. Adjust lower when people mostly sit in the room, such as a feng shui dining room. Adjust slightly higher when the piece is small, and the wall is very tall. Never adjust higher just because the ceiling is tall. How to Calculate the Exact Height for Your Picture Hook Finding the center of your artwork is only step one. Hook placement also depends on the frame height and on the hanging hardware screwed to the back. Step 1: Measure the Frame Height Every calculation starts with the frame itself, not the artwork inside it. Work with the outer dimension, since that is what people actually see on the wall. Measure the outside of the frame, top to bottom. Then halve it. Frame height = 24 inches Half the frame height = 12 inches Step 2: Find the Top Edge Position Now you know where the top of the frame needs to land. This number gives you a reference line before hardware changes the final hook position. Add half the frame height to your target center height. 57 + 12 = 69 inches. That is where the top of the frame will sit. Step 3: Adjust for the Hanging Hardware The hook does not go at 69 inches. It goes lower because the wire or bracket sits below the top edge. That gap is the hanging drop. Wire: pull the wire taut toward the top of the frame, then measure from the wire to the top edge. Drops of 2 to 4 inches are common. D-rings: measure from the top of the ring opening to the top of the frame. The drop is usually 1 to 3 inches. Sawtooth hangers: the drop is small, often under an inch, so the frame hangs close to the mark. Hook height = target center height + half the frame height minus the hanging drop Take a 24-inch frame, a 57-inch center, and a 3-inch wire drop. Your nail goes at 66 inches. Tools Needed to Hang Pictures Correctly Measuring tape: Used to find the exact placement and determine where the picture should be positioned on the wall. Level: Keeps frames straight and prevents artwork from appearing tilted after installation. Pencil: Helps mark hanging points lightly so you can adjust measurements or remove marks easily. Stud finder: Locates wall studs to provide stronger support for heavier frames. Picture hooks and anchors: Hold the artwork securely while matching the weight and wall type. Painter’s tape: Helps test layouts, mark spacing, and create temporary guides before drilling. Kraft paper: Used to trace frame shapes and create templates for arranging pictures before hanging them. A laser level can also be helpful for long hallway walls or multiple frame arrangements, while a two-foot spirit level is usually enough for most standard picture-hanging projects. Picture Hanging Height Chart Keep this table beside you while you measure. It gathers all recommended heights in one place, so you can check a wall without redoing the math. Location Recommended height Empty wall Center the artwork at 57 to 60 inches Above a sofa Bottom of frame 6 to 8 inches above the sofa back Above a bed 6 to 10 inches above the headboard Above a console table 4 to 8 inches above the furniture top Above a sideboard or buffet 4 to 6 inches above the surface Hallway Center the artwork at eye level, around 57 inches Staircase Follow the angle of the stair rail Dining room Center slightly lower, closer to 57 inches All the furniture numbers share one goal. They keep the art tied to the piece below it, rather than letting it drift up the wall. How High to Hang Pictures Above a Sofa Art above a sofa should read as part of the seating area. Once furniture sits below the wall, that furniture becomes your measuring point instead of the floor. Leave 6 to 8 inches above the back of the sofa: This gap binds the art and the seating into one block. Go closer to 8-10 inches if the sofa back is tall or if people lean against it. Match the width: Aim for a piece or grouping that spans roughly two-thirds of the sofa’s width. Some rooms carry 75 percent comfortably. Watch the empty gap: Once the space passes about 10 inches, the art starts floating toward the ceiling. Ignore tall ceilings: Raising the art to fill the height above the sofa breaks the link with the furniture. Choose a bigger piece instead. A 57-inch center often fails above a sofa. Say the sofa back sits 34 inches high and your canvas is 24 inches tall. That leaves an 11-inch gap. Drop it. How High to Hang Pictures Above a Bed Beds work much like sofas. The headboard sets your reference line, not the floor. Measure up from the top rail, not the finished floor. Standard spacing runs 6 to 10 inches above the top of the headboard. Tighten it to 4-6 inches when the headboard is tall or the canvas is deep. Three things change the number: Bed height: Platform beds sit low, giving you more wall space to work with. Artwork size: A tall piece needs the tighter end of the range. Ceiling height: Low ceilings call for horizontal art rather than a higher hang. Keep DIY bed frames above the reach of anyone sitting up in bed. Avoid heavy glass over a pillow, so choose canvas or acrylic if the piece is large. Queen bed example: a 60-inch headboard pairs well with art near 40 inches wide. Hang it 8 inches above the top rail. King bed example: a 76-inch headboard suits a 50-inch piece. Two 24-inch frames with a 3-inch gap also work, hung 8 inches up. How High to Hang Pictures in a Living Room Living rooms mix mantels, sofas, and console tables at different heights. One wall rarely follows a single rule, so handle each surface as its own measuring problem. Above a Fireplace Mantel: Fireplace clearance comes before design. Check the manufacturer’s instructions for your unit, as many require a specific clearance distance for combustible items above the opening. Above Console Tables: Console tables usually hold lamps, bowls, or books. Measure from the tallest object you plan to keep there, not the tabletop. Empty Feature Walls: With no furniture below, go back to the 57- to 60-inch center. Mark the wall, step back, and check the line against a nearby door frame or window head. How High to Hang Pictures in a Hallway People see hallway art as they walk past it, usually at speed. Consistency across the whole run matters far more here than the height of any single frame. Hold one center line at about 57 inches for every frame along the run. Match spacing between frames so the row reads as a set. Keep at least 4 to 6 inches between a frame and a door casing or corner. In a narrow hallway, hang smaller frames and skip deep shadow boxes that catch shoulders. Long horizontal pieces suit these walls well, since the eye travels with the direction of the hall. How High to Hang a Gallery Wall Gallery walls follow one principle. Treat every frame as part of one large rectangle. Hang that rectangle as though it were a single big piece of art. Center the Entire Arrangement: Find the visual center of the whole grouping and set that point at 57 to 60 inches. Individual frames will sit above and below the line, which is correct. Gallery Wall Spacing: Keep 2 to 3 inches between frames and hold that gap everywhere. Tighter spacing reads as one piece. Wider spacing scatters the wall. Small frames: 2-inch gap; larger frames: 3-inch gap. Gallery Wall Above Furniture: Align the bottom row 6 to 8 inches above the sofa or credenza, then build upward. Measure the outer width of the finished group, gaps included. How High to Hang Different Types of Artwork Frame size changes the right height as much as furniture does. A small print and a wide canvas need different treatment, even on the same blank wall. Small Pictures Small frames look stranded when they sit high on a big wall. Bring them down to true eye level, or group three or four together to give them visual weight. A single 8-by-10 frame above a full-length sofa rarely holds the wall. Large Statement Artwork Big pieces set their own rules. Center them near 57 inches. Then check that the bottom edge clears furniture. Keep the top edge at least 6 inches below trim or ceiling lines. Multiple Pictures Side by Side Align the centers of all frames along a single horizontal line, even when the frames differ in height. Keep the gaps between them identical. Matching centers look deliberate. Matching tops do not, once frame sizes vary. How to Hang Pictures without Damaging Walls Renters and anyone with fragile plaster walls still have real options. These methods hold artwork at the same height above, without leaving anchor holes to patch later. Adhesive strips: These suit light frames, usually under 4 to 16 pounds depending on the set. Clean the wall with rubbing alcohol first, since dust ruins the bond. Picture rails: A rail near the ceiling lets you hang and move pieces on wires with no new holes. Leaning art. Rest large canvases on a mantel, shelf, or floor against the wall. Height stops being a question. Removable hooks: Hardware store hooks that press into plaster leave pinholes rather than anchor holes. Pro Tip: Before hanging any artwork, take a photo of the wall and mark the frame position with painter’s tape. It helps prevent unnecessary holes and wall damage. Picture Hanging Mistakes to Avoid Five habits cause almost every hanging problem. Each one is easy to spot before you drill and easy to fix once you know the cause. Hanging Pictures Too High: This is the most frequent error in real rooms. High art disconnects from the furniture, leaving a dead band of wall underneath. Measuring to the Top of the Frame: The center is the reference point, not the top edge. Measuring to the top pushes every piece higher than intended, and taller frames drift further off. Ignoring Furniture Height: Once a sofa, bed, or console sits below the art, the furniture sets the height. Applying the 57-inch rule over a low sofa creates the floating look you were trying to avoid. Using the Wrong Hardware: Weight decides the hardware, so weigh the framed piece before you shop. Frames under 10 pounds should be hung on drywall hooks rated for that load. Skipping a Layout Test: Paper templates and painter’s tape cost almost nothing and save patched holes. Cut paper to frame size, tape it up, and view the wall from the doorway and from your seat. Planning the layout before drilling is standard advice in professional hanging guides, including the one from Architectural Digest. Frequently Asked Questions Should pictures be hung at eye level? Eye level is the right starting point on a blank wall. Furniture, seating height, and room use can all pull the correct height lower. How high should pictures hang above a couch? Keep the bottom of the frame 6 to 8 inches above the back of the sofa. Stretch to 10 inches only if the back is tall or the frame is deep. How far apart should pictures be on a gallery wall? Use 2 to 3 inches between frames, and keep the gap consistent across the whole group. Should all pictures in a room be the same height? Not always. Different furniture heights need different hangs. Maintaining a consistent centerline for the open walls keeps the room balanced. How do you hang pictures on a tall wall? Choose larger artwork or a grouped arrangement rather than raising the hang. Keep the center near 60 inches and let the size fill the wall. Give the Final Touch to Your Wall Hanging pictures is less about finding one perfect number and more about building a visual connection between the art, the furniture, and the people who use the room. The measurements in this blog give you a reliable starting point, but the room itself is the real test. Step back from the door. Sit where you normally sit. Look at the wall from the angles you use every day. If the art feels tied to the furniture beneath it and nothing looks like it is floating, the height is right. Paper templates cost almost nothing and save patches later. Tape before you drill, adjust what needs adjusting, and then commit to it. One careful hang is worth ten impatient ones.

Quick Answer: A retaining wall requires a stable base, proper drainage, and correct block placement. Prepare the trench, compact the base, install blocks, and add backfill in layers. Interlocking blocks work well for small DIY walls, but always check soil, loads, and local requirements first. Building a retaining wall looks easier than it really is. The blocks are only the final layer of the work. What happens beneath them determines whether the wall stays stable after heavy rain and seasonal changes. For a small backyard wall, careful planning and the right installation steps can make the project manageable. This blog covers preparation, materials, and the building process, and explains when a project is better left to a professional. How to Plan a Retaining Wall Before Installation Good planning saves you from costly mistakes once you start digging. Measure the Wall Length and Height: Measure the full wall height and length, including the buried base. Mark corners, curves, and ends before digging, and account for block setback as each row moves back. Check the Slope and Nearby Loads: Inspect the area around the wall for extra weight from vehicles, patios, sheds, fences, or slopes. These loads can increase pressure and affect wall requirements. On sloped properties with multiple grade changes, a single retaining wall is rarely the whole answer, layered terracing and integrated hardscaping across the full yard are usually the more stable long-term approach. Locate Utilities and Property Lines: Check for underground utilities before digging and confirm property boundaries. Look for irrigation pipes, drainage lines, cables, or wiring that may need protection. Decide Where Water Will Go: Plan drainage before installation to prevent water buildup behind the wall. Check runoff paths, downspouts, and low spots, then create a safe outlet for water. Tools and Materials Needed for a Retaining Wall Gathering the right tools and materials before starting makes the installation smoother and helps avoid delays. Tools Materials Tape measure Retaining wall blocks Level Cap blocks Stakes and mason line Base aggregate Shovel Drainage stone Rake Perforated drainpipe Wheelbarrow Filter fabric Hand tamper Backfill material Rubber mallet Concrete adhesive Plate compactor Geogrid reinforcement (if required) How to Build a Retaining Wall Step By Step? Building a retaining wall starts with proper planning, a solid base, and careful placement to create a strong, stable structure that effectively holds back soil. Step 1: Mark The Wall Layout Start by marking the exact location of the retaining wall before digging. Place stakes slightly beyond both ends of the planned wall, then connect them with a mason line to create a straight reference line. For curved sections, use marking paint or a garden hose to outline the shape. Walk around the marked area from different angles to confirm the layout looks right. Step 2: Excavate The Trench Remove the topsoil, grass, roots, and other organic material before creating the trench. The excavation should provide enough space for the retaining blocks, drainage zone, working area, compacted base, and the portion of the first course that sits below ground. Dig until you reach firm, undisturbed soil rather than building over loose fill, mud, roots, or frozen ground. Step 3: Compact The Subgrade After excavation, inspect the trench bottom for weak or soft areas. Remove unstable soil and replace it with compactable aggregate when needed. Compact the entire trench evenly to create a firm foundation for the gravel base above it. Avoid filling deep low spots with loose soil or sand because they can settle later and affect the wall’s alignment. If water rises through the soil during compaction, address the drainage issue before continuing with construction. Step 4: Add and Compact The Gravel Base Add the approved base material in thin layers rather than applying the full depth at once. Compact each layer thoroughly before adding more material to create a stable foundation. Once the base reaches the required depth, screed it flat and check the surface carefully. Use a level to confirm the base is even from front to back and side to side. Correct any uneven areas before installing the first row because the accuracy of this layer affects the entire wall. Step 5: Set The First Course The first row of blocks is the most important part of the entire retaining wall. Begin placing blocks at the lowest point of the wall and set each unit directly on the prepared base. Check every block individually from front to back and side to side, then use a longer level to confirm the entire row stays consistent. Tap the blocks into position with a rubber mallet, keeping the front faces aligned with the mason line. Remove dirt, gravel, or debris from the base before placing each block. Step 6: Install the Drainage System Proper drainage helps reduce pressure behind the retaining wall and protects it from water-related movement. Place clean angular drainage stone directly behind the blocks as you build. If the wall design requires a perforated drainpipe, install it near the bottom of the wall and ensure it discharges to a safe outlet. Do not allow the pipe to release water into an area where it can collect behind the wall. Protect drainage outlets from soil, roots, and debris so water can continue flowing properly. Step 7: Add the Next Course Before adding another row, sweep the tops of the blocks clean so the next course sits properly. Install each new row using the block manufacturer’s connection system, such as lips, pins, or grooves. Stagger vertical joints between courses to improve stability and prevent continuous weak lines. Continue checking the wall for level and alignment as you work. Fix any movement or uneven sections immediately, rather than covering them with additional rows. Avoid stacking multiple courses without adding drainage stone and backfill behind the wall. Step 8: Backfill and Compact in Lifts Backfill gradually as the wall rises. Place drainage stone directly behind the blocks first, then add suitable soil or a recommended sand-and-gravel mixture farther back. Compact the fill in shallow layers rather than placing a large amount at once. Use hand tools near the wall face to avoid shifting the blocks, and keep heavy equipment away from smaller walls. Step 9: Add Geogrid If the Design Requires It Some retaining walls require geogrid reinforcement to handle additional soil pressure. If the design calls for it, use the exact geogrid type, placement, and spacing recommended by the manufacturer or engineer. Install it at the correct course, extend it in the proper direction, and pull it flat before covering it with fill. Avoid driving equipment directly over exposed geogrid and never replace structural reinforcement with landscape fabric, as they serve different purposes. Step 10: Continue Building and Checking Continue construction using the same process for each course. Set the blocks, check the level and alignment, add drainage stone, place backfill, and compact before moving upward. This repeated process keeps the wall stable and allows small adjustments before they become difficult to fix. Step 11: Cut and Install Cap Blocks Before securing cap blocks, place them temporarily to confirm the fit and layout. Where possible, stagger cap joints from the blocks below for a cleaner finish. Use a block splitter for a textured break, or a masonry saw for a smoother cut. Wear proper eye, hearing, and respiratory protection while cutting masonry. Clean dust from the surface before applying an exterior-grade concrete adhesive, and keep the adhesive away from visible edges to prevent mess around the finished wall. Step 12: Grade the Soil Above the Wall The final grading around the wall helps control future water problems. Shape the soil so that runoff flows away from the wall rather than collecting behind it. Keep downspouts, irrigation discharge, and other water sources directed away from the structure. If the design requires a specific surface soil type, follow those recommendations and avoid disturbing the drainage zone when planting. Quick Tip: Inspect your retaining wall after heavy rain, freeze-thaw cycles, or nearby landscaping work. Watch for leaning, bulging blocks, cracks, drainage issues, standing water, or soil erosion. Fix the cause of the problem instead of only covering visible damage, as these signs may point to deeper issues with drainage, soil pressure, or the wall base. How to Build Different Styles of Corners? Inside corners: Place blocks carefully to keep both wall sections connected. Follow the manufacturer’s overlap pattern and alternate the direction of each wall section as you add courses. Keep the drainage stone continuous behind the corner to prevent water from becoming trapped, and check the alignment regularly, as small shifts can affect the rest of the wall. Outside corners: Use matching corner blocks when available and follow the recommended bonding pattern to maintain strength. Avoid unsupported cut blocks at the corners, as they can shift over time and weaken the wall’s edge. Curved walls: Plan the curve before installation, because block setbacks change the shape of each higher course. Check the minimum curve radius for the block system, expect slightly wider joints on outside curves, and use smaller blocks or approved cuts for tighter curves. Recheck the curve alignment as the wall rises to ensure the correct shape is maintained. How Do Retaining Walls Create More Usable Space? A retaining wall holds soil between two different elevations, preventing the higher side from shifting, eroding, or spreading into the lower area. Once the wall is in place and the ground is level, that new flat area opens up options. A concrete patio or wood deck combination is a great next step in turning a previously sloped space into an actual outdoor living zone. Wet conditions can increase this pressure, especially in clay soil, during heavy rainfall, on steep slopes, or with added weight from vehicles and structures. A small garden border with little soil behind it carries far less pressure, so understanding the difference is important before planning a retaining wall project. Final Thought Building a retaining wall that lasts is not just about stacking blocks. The strength of the wall depends on the work below the surface, including proper excavation, a stable base, good drainage, and careful installation. Taking time to plan the layout, choose the right materials, and follow the correct building process can prevent costly repairs later. For smaller DIY projects, interlocking blocks can be a practical option when site conditions are suitable. However, always consider wall height, soil pressure, water flow, and local requirements before starting. A well-planned retaining wall will not only improve your landscape but also provide reliable support for years to come. The materials and plants you add around the wall matter just as much as the structure itself. Landscaping choices by region cover what actually holds up in your climate once the hardscaping is done. Frequently Asked Questions What is the Cheapest Way to Build a Small Retaining Wall? Pressure-treated timber and interlocking concrete blocks are usually affordable options. Keeping the wall simple, using local materials, and reducing the wall height can help lower costs. What is the 1/3 Rule for Retaining Walls? The 1/3 rule suggests burying about one-third of the wall height for stability. Actual depth depends on soil, drainage, frost conditions, and the wall system. Does a 2 Foot Retaining Wall Need a Footing? A two-foot block retaining wall usually uses a compacted gravel base instead of a traditional concrete footing. Requirements vary by wall type and site conditions. What Can I Use for a Small Retaining Wall? Common options include concrete blocks, timber, natural stone, brick, and landscape blocks. Interlocking blocks are popular for DIY projects because they are easy to install. What is the Easiest Retaining Wall to DIY? A low interlocking concrete block wall is often the easiest DIY choice. It requires fewer specialized skills but still needs proper base preparation and drainage.
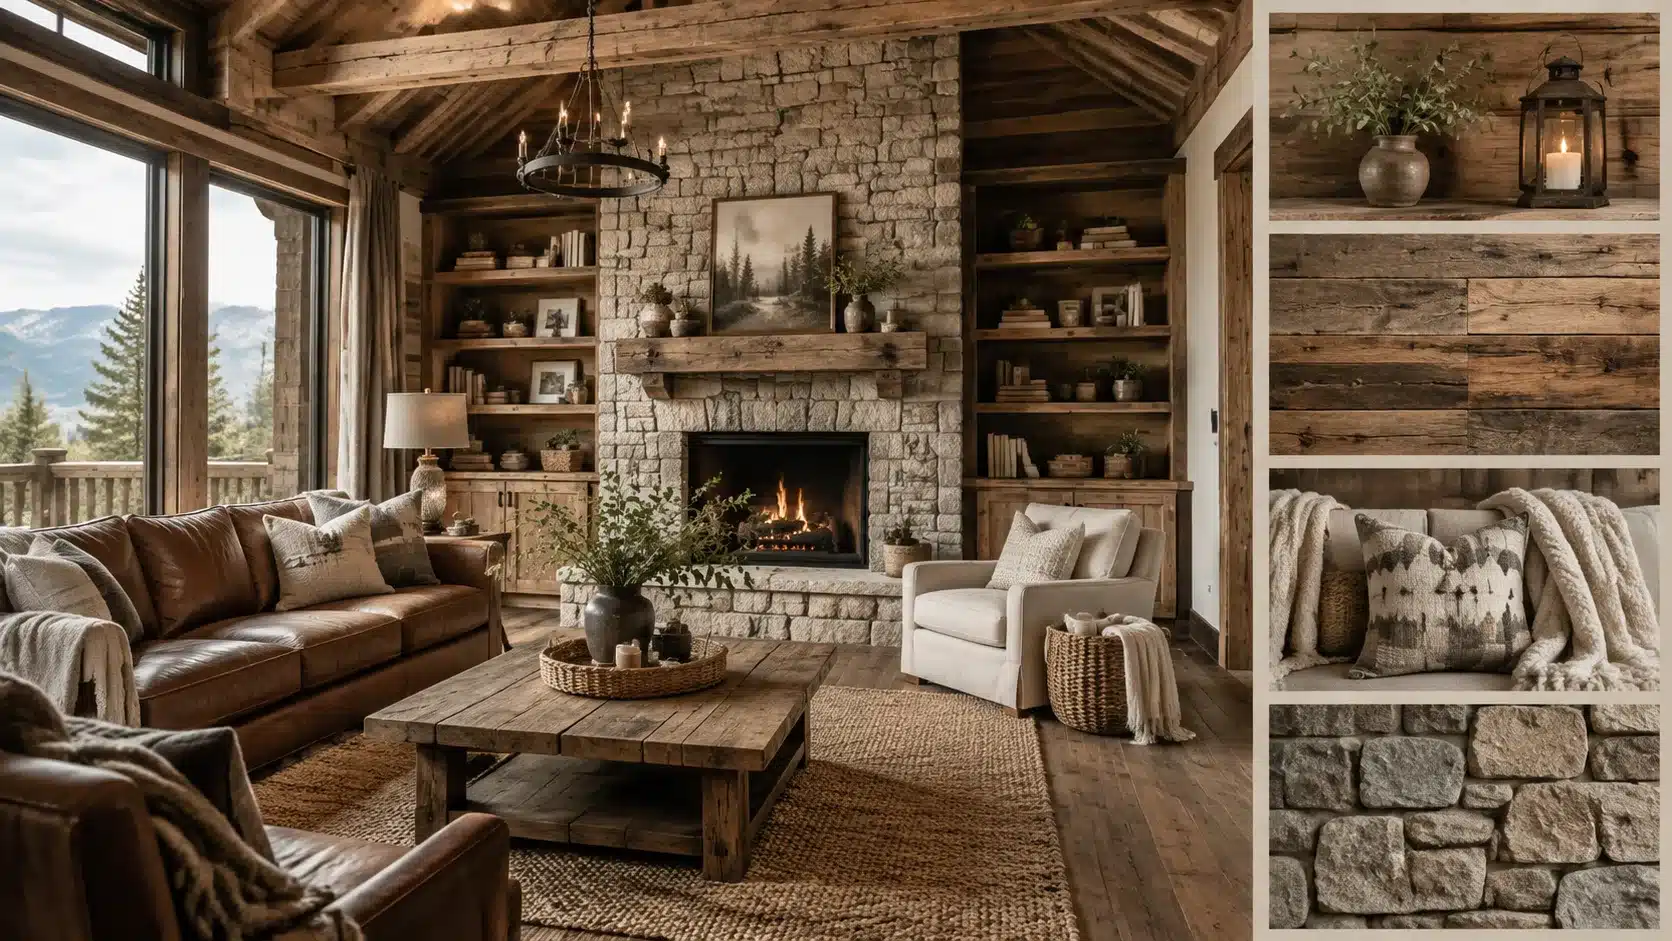
Some homes create an instant sense of comfort the moment you step inside. They feel warm, relaxed, and connected to nature. That is the charm of rustic interior design. While once associated mainly with cabins and rural homes, this style now works beautifully in apartments, modern houses, and urban spaces. Rustic interiors combine natural wood, stone finishes, cozy fabrics, and thoughtful details to create a balanced look. This blog explains the essential elements, color choices, and furniture styles that define rustic design. It also includes room-by-room ideas and tips for blending rustic features with other interior styles. What is Rustic Interior Design? Rustic interior design blends natural materials, earthy tones, and cozy textures to create a warm, welcoming home. Inspired by nature, it brings the outdoors inside through materials like reclaimed wood, stone, leather, and metal. Unlike polished modern styles, rustic design has raw finishes, imperfections, and handcrafted details. Exposed beams, vintage furniture, handmade ceramics, and textured fabrics add character and make each space feel unique. Comfort is a defining part of the style, with cozy blankets, linen fabrics, woven accents, and layered textures creating a relaxed atmosphere. Rustic interiors focus less on perfection and more on creating a practical, personal, and welcoming space that feels connected to nature. Core Elements of Rustic Interior Design Rustic interiors balance natural beauty with everyday comfort. These key elements help shape a space that feels warm, personal, and connected to nature. 1. Natural Materials: Rustic interiors use materials like reclaimed wood, stone, leather, and woven fabrics to bring texture and a natural feel indoors. 2. Earthy Colors: Warm browns, beige, cream, terracotta, and muted greens create a calm, nature-inspired atmosphere. 3. Rustic Furniture: Wooden furniture with visible grain, handcrafted details, and distressed finishes adds character and timeless appeal. 4. Warm Lighting: Soft lighting, wooden fixtures, lanterns, and fireplaces create a cozy and welcoming rustic mood. Rustic Interior Design For Every Room Rustic style can be adapted to different areas of the home by combining natural materials, warm colors, and comfortable textures. Each room can highlight rustic elements while keeping the space functional and inviting. 1. Rustic Living Room with Wood Features A rustic living room brings together natural materials like reclaimed wood, exposed beams, stone fireplaces, and comfortable furniture to create a warm gathering space. Wooden textures add character, while stone elements provide contrast and a grounded feel. Layer the room with linen fabrics, woven rugs, leather seating, and warm lighting to balance the heavier materials. Keeping the décor simple allows the natural textures to become the main feature of the space. 2. Rustic Kitchen with Farmhouse-Inspired Idea A rustic kitchen combines practical design with natural materials. Wooden cabinets, stone countertops, open shelving, farmhouse-style sinks, and rustic kitchen islands create a functional, welcoming space. Use simple ceramics, glass containers, and handcrafted details to add personality without making the kitchen feel cluttered. The focus should remain on durable materials and a comfortable layout. 3. Rustic Bedroom with Layered Natural Textures A rustic bedroom creates a comfortable retreat through natural materials and soft textures. Wooden bed frames, linen bedding, wool blankets, woven rugs, and warm lighting work together to create a relaxed atmosphere. Neutral colors help highlight the beauty of wood and fabric textures while keeping the room calm. Simple furniture and minimal décor allow each material to stand out. 4. Rustic Bathroom With Stone Materials Rustic bathrooms use natural finishes to create a warm and grounded look. Stone walls or countertops, wooden vanities, matte fixtures, and earthy colors add texture without making the space feel outdated. Soft lighting and simple textiles help balance the roughness of stone and wood, creating a bathroom that feels comfortable and connected to nature. 5. Rustic Dining Room With a Statement Wooden Table A solid wood dining table often becomes the centerpiece of a rustic dining room. Its natural grain and imperfect details add character while creating a welcoming place for everyday meals and gatherings. Pair the table with simple chairs, pendant lighting, and subtle natural décor to keep the look balanced. The goal is a space that feels comfortable rather than overly decorated. 6. Rustic Entryway With Functional Storage A rustic entryway combines style with everyday function. Wooden benches, wall hooks, woven baskets, vintage mirrors, and natural rugs help organize daily items while adding warmth to the entrance. Practical storage pieces with natural finishes create a welcoming first impression without taking up unnecessary space. 7. Rustic Home Office with Warm Elements A rustic home office combines a productive workspace with natural warmth. Wooden desks, leather chairs, open shelves, and soft lighting create a comfortable, less formal environment. Adding plants and simple accessories can soften the space while keeping the focus on functionality and organization. 8. Rustic Beverage Station with Earthy Touch A rustic beverage station adds a practical entertaining area while maintaining the style’s warmth. Wooden counters, open shelves, glassware, and natural finishes create a dedicated corner without taking up much space. Warm lighting and simple accessories help the area blend naturally with the rest of the home. Traditional Rustic vs Modern Rustic Design Modern rustic design retains the warmth of traditional rustic style while giving it a cleaner, lighter appearance. Instead of filling a room with heavy wood finishes, it uses natural materials more sparingly. The color palette often includes soft neutrals, warm whites, and earthy shades that create an open feel. Furniture tends to have simpler shapes, with pieces like linen sofas or streamlined chairs replacing oversized designs. The style combines aged materials with modern forms. Rustic details provide texture, while contemporary elements keep the room fresh and practical. Traditional Rustic Modern Rustic Dark wood throughout Balanced wood accents Large, heavy furniture Custom furnitures Decorative approach Simple and purposeful details Modern rustic design creates a comfortable space that feels natural without looking outdated. Blending Rustic Style with Modern Aesthetics Rustic design works well with many interior styles because natural materials create a flexible foundation. Wood, stone, leather, and woven textures can take on a different character depending on the elements paired with them. Here are some popular combinations and how they work. 1. Rustic Modern Design A wooden dining table paired with clean-lined chairs creates a balanced look, where the wood adds warmth and the chairs keep the space refined. Soft neutrals such as warm white, beige, and gray help connect both styles. Concrete surfaces, linen fabrics, and minimal accessories support the look without taking attention away from the natural materials. 2. Rustic Farmhouse Design Rustic and farmhouse styles share many similarities, including wood finishes, neutral colors, and a focus on comfort. The main difference is that farmhouse design draws more inspiration from practical rural living, while rustic style has a broader connection to nature, with open shelving, apron sinks, and shiplap walls. 3. Rustic Industrial Design Rustic industrial style creates contrast by combining warm materials with stronger structural elements. Reclaimed wood works well with metal, exposed brick, concrete, and iron details. The balance between materials is important. Warm wood tones help soften the harder look of industrial features, while metal accents add structure and depth. 4. Rustic Scandinavian Design A Scandinavian design blends natural materials with simple, functional styling. Both styles value wood, wool, and comfortable textures, but Scandinavian interiors usually use lighter colors and cleaner forms. Birch and ash woods often replace darker timber, creating a brighter appearance. Simple furniture, soft fabrics, and subtle decor keep the space calm. Mistakes That Can Ruin a Rustic Interior Design Style Rustic interiors depend on balance. Too many heavy materials, decorations, or dark tones can make the space feel crowded instead of comfortable. Using too much wood: Too much wood can make a room feel dark and heavy. Balance it with lighter colors and fabrics. Adding too many vintage pieces: Too many old pieces can create clutter. Use a few statement items for character. Choosing harsh lighting: Cool lighting can make rustic spaces feel cold. Use warm lights for a cozy feel. Creating a flat color scheme: Only using dark tones can make the room feel dull. Add lighter shades for balance. Filling every surface with décor: Too much décor can make the space feel crowded. Keep only meaningful pieces. Ignoring furniture size: The wrong-sized furniture can affect comfort and flow. Choose pieces that fit the room. How to Add Rustic Style on a Budget? Rustic interiors do not always require major renovations or expensive materials. You can achieve a rustic style without expensive renovations. Small upgrades, secondhand finds, and simple DIY projects can add natural textures, warmth, and character while keeping costs low. Rustic Update How it adds rustic style Average cost Reclaimed wood accents Adds natural texture through shelves, wall panels, or small décor pieces $20–$150 Thrifted furniture Brings aged character and a lived-in feel to the space $50–$300 Furniture refinishing Creates a rustic finish by highlighting natural wood grain $30–$100 Natural fabric décor Adds warmth with linen curtains, woven rugs, and cozy throws $25–$200 Vintage accessories Adds personality through baskets, pottery, and antique-style pieces $10–$100 Warm lighting upgrades Creates a cozy atmosphere with softer, rustic-inspired lighting $20–$150 Start with a few meaningful changes instead of replacing everything. Rustic interiors feel best when they combine natural materials, comfort, and personal touches. Frequently Asked Questions Is modern rustic still in style? Yes, modern rustic remains popular because it combines natural materials, cozy textures, and clean designs for a comfortable yet contemporary look. How do I make my house look more rustic? Use reclaimed wood, stone, textured metals, earthy colors, vintage accents, and warm lighting to bring a rustic feel into your home. What colors make a rustic look? Rustic interiors often use cream, beige, brown, gray, muted greens, and other earthy tones to create a warm and relaxed atmosphere. What stain works best for a rustic look? Dark walnut, classic gray, and aged barrel stains create a weathered wood appearance that adds rustic character to furniture and surfaces. Can rustic design work in a small home? Yes, rustic design works well in small spaces by using simple furniture, natural textures, and warm colors. What stain works best for a rustic look? Dark walnut, weathered gray, and aged oak stains create a rustic finish with a natural, reclaimed wood appearance. Bringing Nature’s Warmth into Your Home Rustic interior design is more than a decorating style, it is a way of creating spaces that feel warm, personal, and connected to nature. By combining natural materials, earthy colors, handcrafted details, and comfortable textures, rustic interiors create a relaxed, timeless atmosphere. Whether you add a few rustic touches or embrace the style throughout your home, the focus remains on simplicity, comfort, and authenticity. The beauty of rustic design comes from celebrating imperfections and creating a space that feels lived-in, welcoming, and uniquely yours.
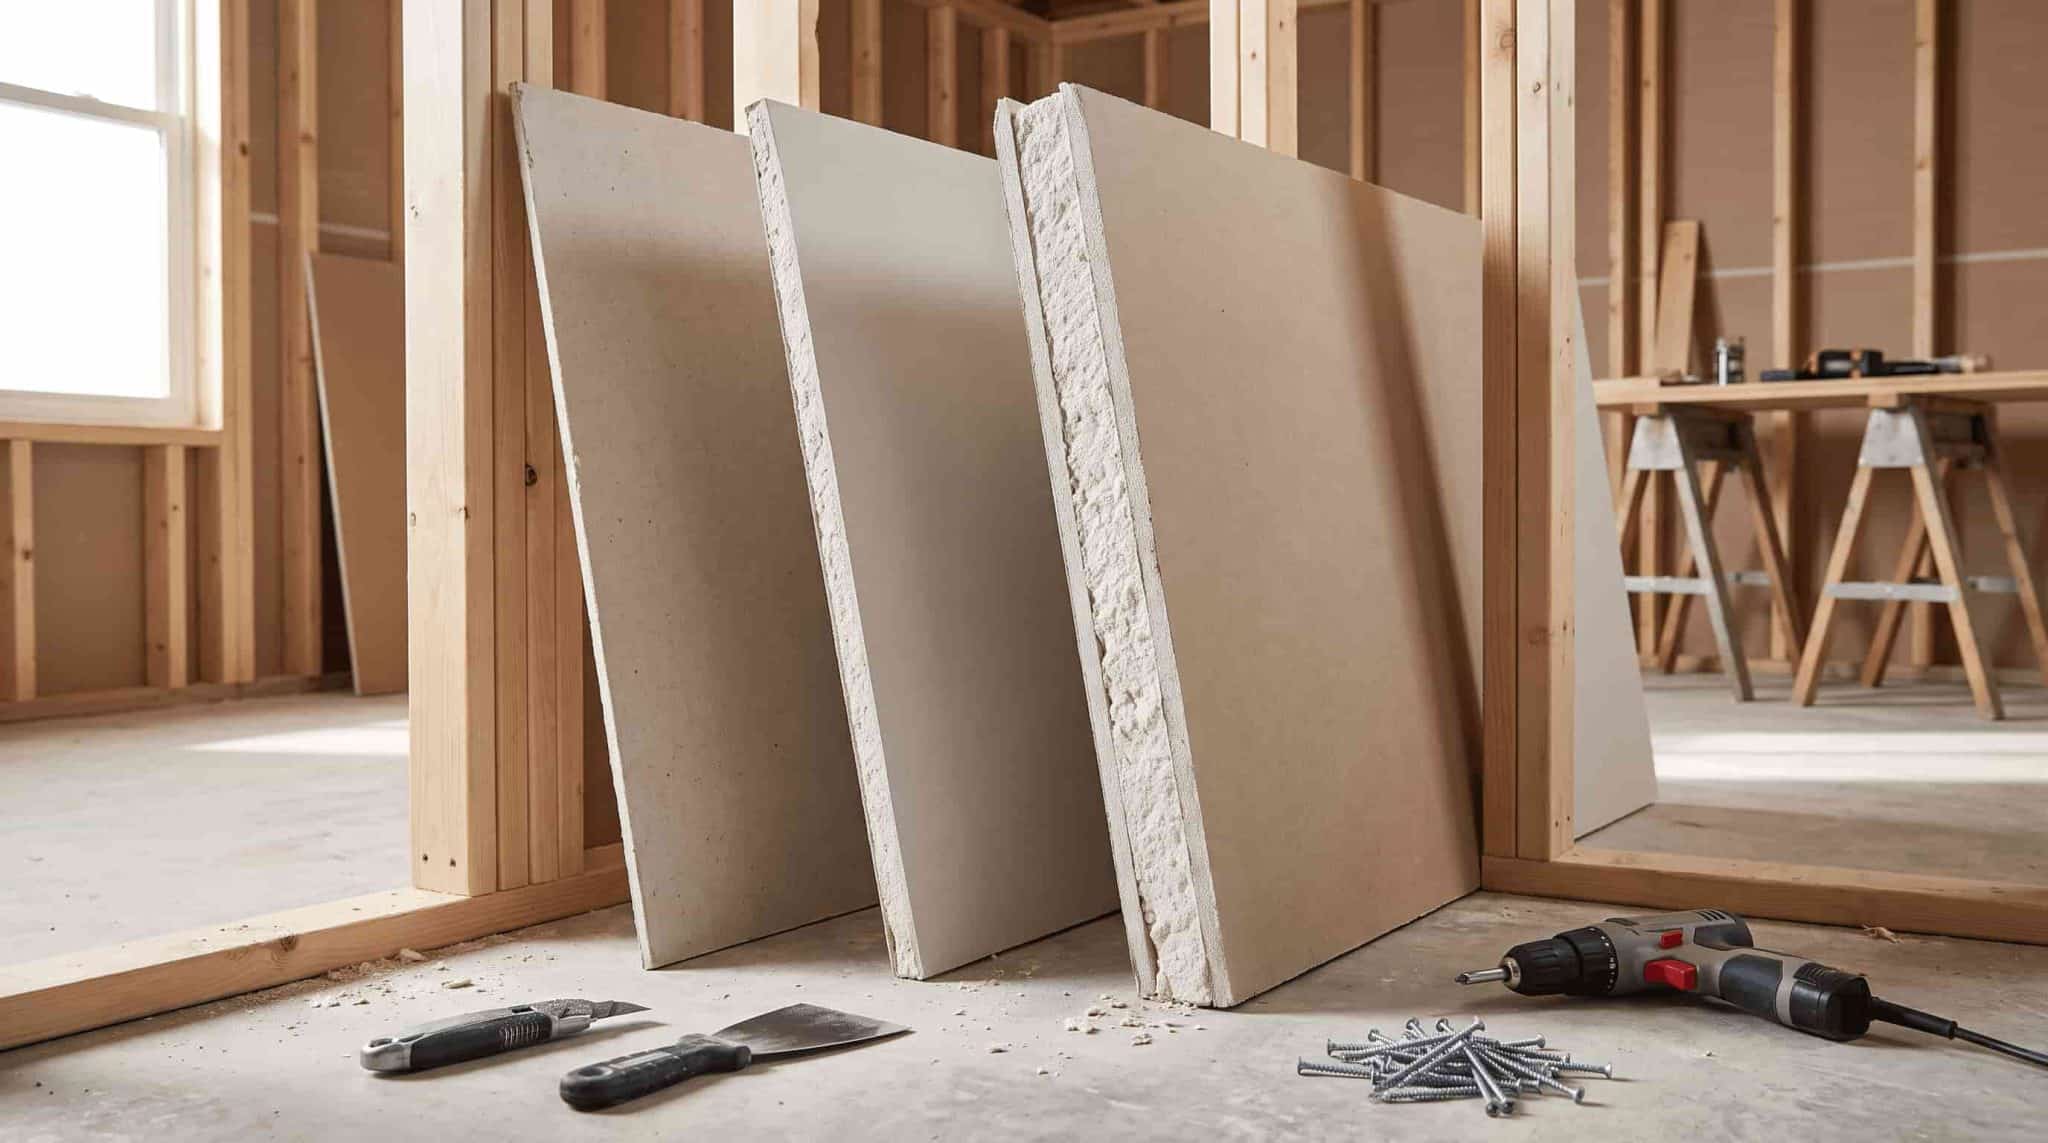
Not all drywall sheets are the same. Many people pick whatever thickness is available at the store, only to discover problems later. A ceiling starts to sag, a wall feels less sturdy than expected, or the project costs more because the wrong board was chosen. Drywall thickness is not just a measurement. It affects strength, sound control, fire resistance, installation difficulty, and where the material can be used. Most interior walls use ½-inch drywall because it offers a good balance of durability, weight, and cost. Ceilings and areas that require extra performance often use ⅝-inch drywall because the thicker panel better handles stress. This guide explains every drywall thickness option, where each one works best, and how to choose the right board for walls, ceilings, basements, garages, and sound-sensitive rooms. Standard Drywall Thickness and Sizes Drywall measurements include thickness and sheet size. Thickness affects strength, sound control, and durability, while sheet size affects installation and the number of seams. Common drywall thickness options include: ¼ inch: Used for repairs, overlays, and curved surfaces ⅜ inch: Used for older repairs and lightweight applications ½ inch: Standard choice for most interior walls ⅝ inch: Used for ceilings, fire-rated walls, and sound control Location Recommended Thickness Reason Interior walls ½ inch Standard residential choice Basement walls ½ or ⅝ inch Depends on moisture, sound, and code requirements Basement ceiling ⅝ inch Better resistance against sagging Garage walls ⅝ inch Type X Often required for fire-rated assemblies Bathroom walls ½ inch moisture-resistant drywall Better suited for humid areas Soundproof rooms ⅝ inch or specialty sound-rated drywall Adds more mass for noise control Curved walls ¼ or ⅜ inch Easier to bend and shape For most homes, ½-inch drywall provides the right balance of strength, cost, and easy installation. However, drywall type and construction quality also affect overall performance. The standard drywall width is 4 feet. Common sheet lengths include: 8 feet: Best for most residential walls 10 feet: Helps reduce seams on taller walls 12 feet: Useful for large walls and open spaces Longer sheets create fewer joints and reduce finishing work. However, they are heavier and harder to move. For most residential projects, 4-by-8-foot drywall sheets are the easiest to handle and install. Which Drywall Thickness Works Best for Your Space? Different drywall textures and thicknesses are designed for different situations. From flexible repair panels to stronger boards for ceilings and sound control, each option has its own purpose. Understanding where each thickness works best helps you avoid choosing a board that is too thin, too heavy, or unsuitable for the job. 1. ¼ Inch Drywall Quarter-inch Drywall is the thinnest standard option available. Its lightweight design makes it easier to bend, which is why it is often used when flexibility matters more than strength. Common Uses of ¼ Inch Drywall Limitations of ¼ Inch Drywall Repairing damaged wall sections Lower impact resistance compared with thicker panels Covering existing drywall surfaces Provides less sound control Creating curved walls or arches Reduced durability for everyday wall applications Adding a second layer over existing walls Not suitable for standard wall construction If you are repairing a small area or working around a curved feature, ¼-inch drywall can be useful. For full walls, ceilings, or heavily used areas, a thicker option is usually the better choice. Because it bends more easily, some installers use multiple layers of ¼-inch drywall for curved applications. This requires more labor but allows them to create shapes that would be difficult to achieve with thicker boards. 2. ⅜ Inch Drywall Three-eighths-inch Drywall was more common in older homes and renovation projects. It is still available today, but it is rarely the first choice for new construction. Common Uses of ⅜ Inch Drywall Limitations of ⅜ Inch Drywall Matching existing drywall thickness in older homes Less common in modern construction due to stronger alternatives Small repair projects Provides less strength than thicker drywall options Lightweight applications Lower durability for high-use areas Slightly curved surfaces Not typically recommended for standard wall installations If you are repairing an older home, matching the existing drywall thickness matters. Installing ⅜-inch drywall next to ½-inch drywall can create uneven surfaces that become noticeable after painting, even with careful finishing. For restoration work, matching what is already installed is often more important than choosing the thickest available option. 3. ½ Inch Drywall Half-inch drywall is the most common drywall thickness used in residential construction. Common Uses of ½ Inch Drywall Limitations of ½ Inch Drywall Bedrooms, living rooms, and hallways Provides less sound control compared with thicker drywall options Standard interior walls May not be suitable for areas requiring higher fire resistance Most residential partitions Can be more prone to sagging when used on ceilings with wider joist spacing General home construction projects Offers less impact resistance than ⅝-inch drywall Works well with standard wall framing Not the best choice for high-performance applications like home theaters or specialty sound rooms A standard 4-by-8-foot sheet of ½-inch drywall usually weighs around 50 to 55 pounds. This makes it manageable for many installations without requiring specialized lifting equipment. For most interior walls, moving to a thicker board does not provide enough benefit to justify the added weight and cost. 4. ⅝ Inch Drywall Five-eighths-inch Drywall is the thickest commonly used standard drywall option. It is selected when a project needs additional strength, sound control, or fire resistance. Common Uses of ⅝ Inch Drywall Limitations of ⅝ Inch Drywall Ceiling installations Heavier than thinner drywall options, making it harder to handle Garage walls requiring fire-rated assemblies More expensive because it uses additional material Shared walls between living spaces More difficult to cut, carry, and install Home theaters and sound-sensitive rooms May require additional labor or help during installation Areas needing better sound control or fire resistance Not always necessary for standard interior walls where ½-inch drywall is sufficient Many ceiling installations require two people to lift and position the sheets safely. Some ⅝-inch drywall products are also made as Type X drywall. These boards contain special core additives that improve fire resistance and are commonly required in certain fire-rated assemblies. For example, garages attached to living spaces often have specific fire separation requirements, so the correct drywall type matters as much as the thickness. Drywall Thickness by Room and Area The right drywall thickness depends on where you are installing it. A wall in a bedroom does not have the same requirements as a basement ceiling or a garage wall. How Thick Should Drywall Be for Ceilings? Ceilings need careful drywall selection because panels are constantly pulled downward by their own weight. Thinner drywall can sag over time, especially with wider joist spacing. Factors that affect ceiling drywall choice include: Joist spacing: Wider spacing may require thicker drywall for better support. Ceiling size: Larger areas place more stress on panels. Texture type: Heavy finishes add extra weight. Moisture exposure: Bathrooms and basements may need added protection. ⅝-inch drywall is commonly preferred for ceilings because it is stiffer and resists sagging better than thinner boards. While ½-inch drywall may work in some cases with closer joist spacing, many contractors choose ⅝-inch drywall for better long-term performance. How Thick Should Drywall Be for Basement Walls? Basement walls typically use ½-inch or ⅝-inch drywall, depending on the space requirements. The right choice depends on factors like moisture levels, sound control, fire ratings, and framing conditions. Factors that affect basement drywall selection include: Moisture exposure: Damp areas may require moisture-resistant drywall. Sound control: ⅝-inch drywall can help reduce noise transfer between floors. Fire requirements: Some basement areas may require fire-rated drywall. Wall framing: Stud spacing can affect the thickness needed. ½-inch drywall works for most finished basement walls, while ⅝-inch drywall is preferred when extra strength, sound control, or fire resistance is needed. Always check local building codes before installation. How Thick Should Drywall Be for Interior Walls? ½-inch drywall is the standard choice for most interior walls in homes. It provides a good balance of strength, cost, and ease of installation for bedrooms, living rooms, hallways, and other common areas. In some cases, ⅝-inch drywall may be a better option. It is often used for shared walls, rooms that need better sound control, or areas where extra fire resistance is required. The right thickness depends on the wall’s purpose, framing conditions, and performance needs. For most residential interior walls, ½-inch drywall is sufficient and remains the most common choice. Side by Side Comparison Basis of Comparison Interior Walls Ceilings Basement Walls Recommended Thickness ½-inch drywall ⅝-inch drywall ½-inch or ⅝-inch drywall Main Requirement Everyday strength and easy installation Sag resistance and added stiffness Strength, moisture control, and sound management Reason for Thickness Choice Balances cost, durability, and handling Thicker panels hold their shape better against gravity Thickness depends on moisture levels, sound needs, and code requirements Common Use Areas Bedrooms, living rooms, hallways, partitions Main ceilings, larger spans, areas with wider joist spacing Finished basements, living spaces below other rooms When to Choose Thicker Drywall Shared walls or rooms needing better sound control Wider joist spacing or heavier ceiling finishes Better sound control, fire resistance, or added durability Key Consideration Wall purpose and performance needs Joist spacing and ceiling load Moisture exposure, framing, and local building codes Does Thicker Drywall Reduce Noise? Thicker drywall can help reduce sound transfer, but it does not completely soundproof a room on its own. The added thickness increases the wall’s mass, making it harder for sound vibrations to pass through the surface. Sound control depends on several factors working together, including: Insulation inside the wall cavity helps absorb sound before it travels through the wall Framing design affects how vibrations move through the structure Multiple drywall layers add more mass for better noise reduction Acoustic sealants reduce sound leaks around gaps, outlets, and joints Proper installation prevents weak points that allow sound to pass through ⅝-inch drywall generally performs better than thinner boards because it provides more mass. It is commonly used in areas where noise control matters, such as: Home theaters Bedrooms near noisy spaces Shared walls between units Home offices For better results, sound-rated drywall combined with insulation and proper sealing often performs better than simply using a thicker standard panel. The entire wall assembly determines how effectively sound is reduced. Does Drywall Type Matter More Than Thickness? Drywall thickness affects strength, weight, and sound control, but it is only one part of how a drywall panel performs. The type of drywall you choose can matter just as much, especially in rooms exposed to moisture, fire risks, or higher noise levels. A ⅝-inch regular drywall panel is not automatically the best choice for every situation. A bathroom, garage, or home theater may need a specialized product instead. Here are the most common drywall types: Drywall Type Best For Main Benefit Regular Drywall Bedrooms, living rooms, hallways Affordable and versatile Moisture-resistant Drywall Bathrooms, laundry rooms, basements Handles humid conditions better Type X drywall Garages, fire-rated walls Improves fire resistance Sound-rated Drywall Home theaters, offices, shared walls Reduces sound transmission For example, using thicker regular drywall in a bathroom does not replace the need for moisture-resistant materials. Likewise, adding ⅝-inch drywall to a noisy room helps, but combining it with insulation and proper sealing creates much better results. The best choice usually comes from combining the right thickness with the right drywall type. Drywall Thickness Cost Differences Drywall thickness affects more than performance. It also changes material costs, handling difficulty, and installation time. Drywall Thickness Approximate Cost per 4×8 Sheet Handling and Installation Best Value For ¼ inch $10–$15 Lightweight and easy to handle Repairs, overlays, and specialty projects ⅜ inch $10–$18 Easy to install but less common today Matching older drywall and small repairs ½ inch $12–$20 Easier to carry, cut, and install Most interior walls and residential projects ⅝ inch $15–$25 Heavier and may require extra help during installation Ceilings, fire-rated areas, and sound-control spaces Note: Prices are approximate and may vary depending on location, supplier, drywall type, and brand. Can You Install Thicker Drywall Over Existing Walls? Installing new drywall over existing walls is possible in some situations, but it is not always the best solution. Quarter-inch Drywall is commonly used for overlays because it adds minimal thickness while creating a smoother surface. Before adding another layer, consider: Door and window trim may no longer fit correctly Electrical boxes may sit too far behind the wall surface Wall dimensions will slightly increase Moisture or damage problems may remain hidden underneath Adding thicker drywall over an existing surface may help improve appearance or add some sound control, but it does not fix damaged framing, leaks, or structural issues. For major renovations, removing old drywall and starting fresh is often the better option because it allows inspection of insulation, wiring, and wall conditions. Key Takeaways for Your Next Project Choosing the right drywall thickness depends on where it will be installed and what the space requires. For most interior walls, ½-inch drywall remains the standard option because it provides a practical balance of strength, cost, and ease of installation. Thicker ⅝-inch drywall is better suited for ceilings, fire-rated areas, and rooms where improved sound control is needed, while thinner panels work best for repairs and specialty projects. The right choice is not always the thickest board available. Considering the room type, framing, moisture exposure, building requirements, and installation needs helps prevent problems like sagging ceilings, weak surfaces, or unnecessary costs. A few careful decisions before installation can help create a stronger and longer-lasting wall system. Frequently Asked Questions What is the most common drywall thickness? ½-inch drywall is the standard choice for most residential interior walls because it offers a good balance of strength, cost, and ease of installation. Can ⅝-inch drywall be used on interior walls? Yes, ⅝-inch drywall works on interior walls where extra strength, sound control, or fire resistance is needed, but ½-inch drywall is more common for standard rooms. What thickness of drywall is used for ceilings? ⅝-inch drywall is commonly used for ceilings because its added stiffness helps reduce sagging, especially with wider joist spacing. Can you use ¼-inch drywall on walls? ¼-inch drywall is mainly used for repairs, overlays, and curved surfaces. It is not recommended as a standalone wall covering. Does drywall thickness affect fire rating? Yes. Fire-rated assemblies often use ⅝-inch Type X drywall because its reinforced core slows the spread of fire. The exact requirement depends on the building assembly and local code.
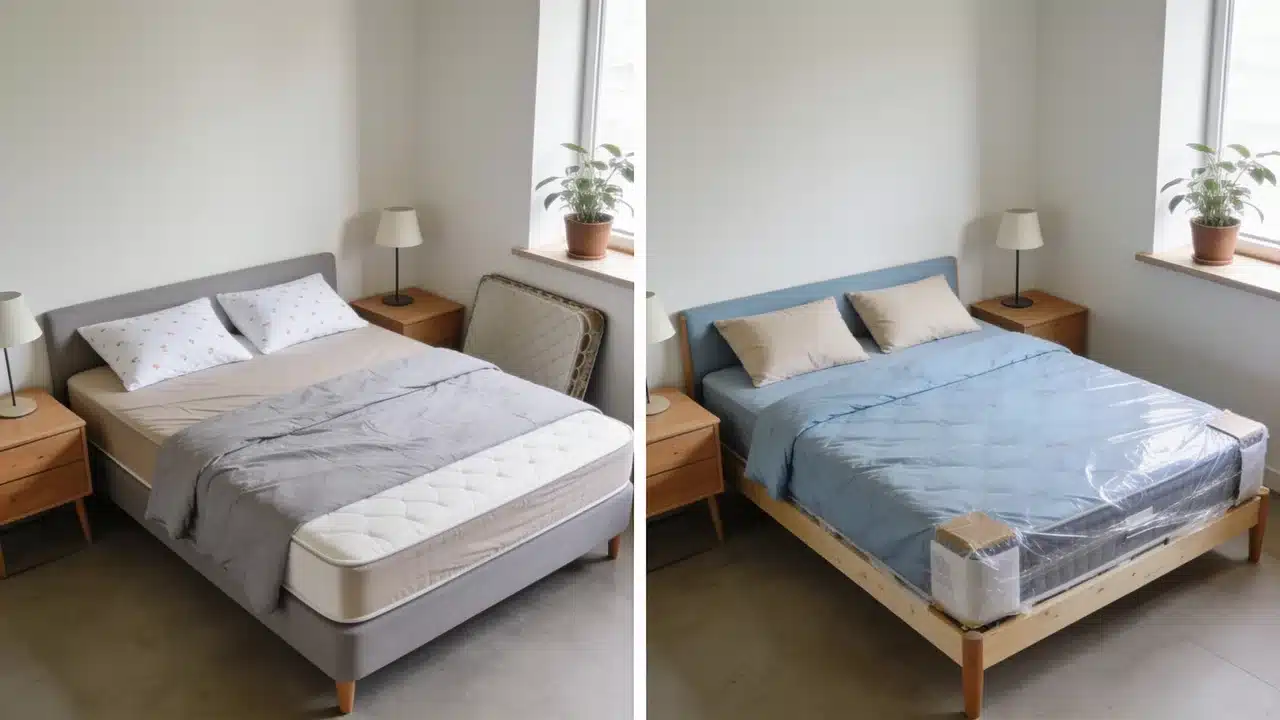
Summary: Most mattresses last between 7 and 10 years. Latex models can often last 10–15 years, while innerspring mattresses usually wear out sooner. Replace your mattress when it no longer provides proper support, comfort, or quality sleep. How long it actually lasts depends on the materials, usage, and maintenance. A mattress gets replaced only after the problem becomes impossible to ignore. A sore back that has been building for months, sleep quality that has quietly dropped, a mattress that looks fine but no longer feels that way. The challenge is that mattresses rarely fail suddenly. They degrade gradually, and because the change is slow, it’s easy to adjust to it without realizing the mattress is the cause. Those ranges in the summary are a starting point, not a fixed deadline. A mattress that is seven years old and still performing well does not need to be replaced. One that is five years old and already sagging does. This blog covers everything that determines a mattress’s lifespan and when to replace it. How Long Does a Mattress Typically Last? Different mattress types age at different rates, depending on how their materials respond to regular use. The table below shows the average lifespans of common mattress types and how long each typically provides proper support. Mattress Type Average Lifespan Durability Latex Mattress 10–15 years Long-lasting and resistant to sagging Hybrid Mattress 7–10 years Good durability from foam and coils Memory Foam Mattress 7–10 years Depends on the foam density Innerspring Mattress 5–8 years Coils and padding wear faster Pillow Top Mattress 5–7 years Comfort layers compress sooner 6 Signs You Need to Replace Your Mattress These signs indicate that a mattress can no longer support proper sleep. Checking for them helps catch the problem before it affects your health or daily routine. 1. Visible Sagging Deep dips or visible body impressions show that the mattress has lost its original support structure. Sagging of one inch or more is a clear sign that replacement is due. Look along the side of the mattress. Uneven areas you do not feel while lying down are often visible from that angle. 2. Morning Aches and Stiffness Persistent back, neck, or hip discomfort upon waking suggests that the mattress no longer adequately supports your body. Stiffness that clears up within the first hour of waking is a common sign. If you sleep better in a hotel or on another bed, your mattress is likely the cause. 3. Poor Sleep Quality Increased tossing and turning or trouble staying comfortable at night can mean the mattress is breaking down. Sleep problems that appear only in bed often point to the mattress first. If your sleep has declined without any other changes in your routine, the mattress deserves a closer look. 4. Uneven or Lumpy Surface A surface that feels uneven or shows visible spring bumps indicates that internal materials have broken down. Sleeping on an uneven surface affects spinal alignment and disrupts sleep quality. You may not notice the unevenness at first. Over time, your body registers it through increased discomfort and restless nights. 5. More Allergies or Odors An older mattress accumulates dust mites and allergens, which worsen allergy symptoms over time. A persistent musty odor usually means moisture has reached the inner layers. If your symptoms improve when sleeping elsewhere, the mattress is likely the cause. A protector alone will not fix the underlying buildup. 6. Increased Motion Disturbance Feeling a partner’s movements more strongly than before can mean the mattress is losing its ability to absorb motion. Springs or foam that no longer isolate movement signals internal wear. Small shifts in the night should not wake you. If they do, the mattress has likely broken down inside. How Often Should You Replace Your Mattress? Replacing a mattress depends more on how it feels than on a fixed schedule. The table below outlines what to check at each stage of a mattress’s age. Mattress Age What to Consider Under 5 years Usually within a normal lifespan 5–7 years Check comfort and support 7–10 years Common replacement period 10+ years Evaluate the condition carefully This comes down to how the mattress performs and feels, not a fixed number of years. That’s really the honest answer to how often you should replace your mattress. What Affects How Long a Mattress Lasts? Three things shape this: materials, usage frequency, and the conditions in which the mattress is kept. 1. Material Quality and Construction The materials inside a mattress shape how long it holds its shape. High-density foam compresses less under body weight and typically lasts longer than low-density options. Latex resists breakdown better than most foam types. Coil design and layer construction also affect how long the support holds up. 2. Usage Frequency A mattress used every night ages noticeably faster than one kept in a guest room. Daily use means more compression cycles and less recovery time between uses. Guest room mattresses often last years longer because they carry body weight far less often. 3. Body Weight and Sleeping Style Greater body weight increases the total pressure on the foam and coils, causing the materials to break down faster. Sleeping positions also affect wear patterns. Side sleepers place concentrated pressure on the hips and shoulders. Stomach sleepers tend to put more strain on the center of the mattress. 4. Mattress Foundation and Support System A mattress typically lasts longer when placed on a compatible foundation. Box springs, slatted bases with gaps of less than 3 inches, and platform beds all affect how weight is distributed. An unsupported or broken frame leads to faster sagging and uneven wear. 5. Sleep Environment The bedroom environment affects how long materials stay in good condition. High humidity causes moisture buildup inside the mattress, which accelerates foam breakdown. Poor ventilation and temperature swings put extra strain on materials. Using a breathable cover and keeping the room dry extends the mattress’s life. Can You Make a Mattress Last Longer? None of the upkeep below takes much time, and it adds up over the years. Use a waterproof mattress protector to stop spills and moisture from reaching inner layers. Rotate the mattress every three to six months if the manufacturer recommends it. This spreads compression across different areas of the foam or coils. Vacuum the surface occasionally and avoid sitting on the same edge every day. Use a compatible foundation and check that it still supports the mattress evenly. A mattress topper can delay surface wear, but it cannot repair underlying structural issues. If sagging is already noticeable, a topper only temporarily covers the problem rather than addressing the cause. What Your Mattress Warranty Covers A mattress warranty covers manufacturing defects, not loss of comfort. The table below compares warranty reality with actual replacement timing across common situations. Situation Replacement Consideration Warranty Reality Daily-use mattress Usually 7–10 years Warranty covers defects, not normal aging Couple’s mattress May wear faster Comfort loss is usually not covered Guest mattress Often lasts longer A longer warranty does not guarantee lifespan Premium latex mattress Can last 10–15 years Warranty reflects coverage, not perfect performance Older mattress (10+ years) Inspect support and comfort Replacement depends on the condition Mattress Topper vs Full Replacement A topper improves the surface feel but cannot fix underlying structural problems. Use a topper if: The mattress has a solid structure but feels too firm or too soft There is no visible sagging, body impressions, or uneven areas The mattress is under 7–8 years old with no signs of structural damage You want to protect the sleep surface and add time before a full replacement Replace the mattress if: Visible sagging or deep body impressions are present Springs feel broken, or the surface is noticeably uneven You wake with pain regularly that eases within an hour of getting up The mattress is over 10 years old Poor sleep quality persists night after night despite no other changes In my experience, a topper usually buys a few months before the underlying problem resurfaces. If the mattress has already given out, replacement is the right call. The clearest test is to press down firmly across the sleep surface. If the mattress springs back evenly, a topper may be enough. If certain areas stay compressed, the structure has already given out. Happy Reading A mattress does not announce when it’s done, it just quietly stops supporting you. So how long does a mattress last? Usually 7 to 10 years, though the actual timing depends on the type, usage, and how it feels. Sag, poor sleep, and persistent stiffness are clearer signals than the calendar. A good foundation, regular rotation, and a protector add real years. As for how often you should replace your mattress, as soon as it stops giving you good sleep. If yours already shows two or more signs above, start comparing mattresses today. Frequently Asked Questions How Long Should a $2000 Mattress Last? A $ 2,000 mattress can typically last 8–12 years when made with quality materials and properly maintained. Lifespan still depends on construction, usage, and care. Can a Mattress Last for 20 Years? Most mattresses do not maintain proper support for 20 years. High-quality latex models may last longer than average, but replacement depends on condition and comfort. How Often Should You Replace a Mattress? Most mattresses should be replaced every 7–10 years, but signs like sagging, discomfort, and poor sleep quality matter more than age alone. How to Tell if a Mattress is Worn Out? Common signs include visible sagging, uneven surfaces, increased motion transfer, waking with stiffness, and a noticeable decline in sleep comfort. Based on the confirmed snippet text from the article, here is the full modified FAQ answer with the link embedded: Do Toddler Beds Use the Same Mattress Size as a Crib? Often yes. Many toddler beds are designed to use a standard crib mattress, with the same 28 x 52-inch dimensions. Check the toddler bed’s instructions before assuming the transition will work, as some designs differ slightly.

Quick Answer: Ergonomic furniture is the type of furniture that is built to match the natural shape and movement of your body. It supports good posture, reduces pain, and helps you sit or stand comfortably for long hours. This is the furniture that adjusts to fit you, not the other way around. It supports your spine, wrists, and legs in a natural position. Working from home or sitting at an office desk both carry the same risk. The right pieces can lower your chance of pain and injury. Ergonomic furniture helps create a more comfortable workspace by improving posture, reducing strain, and making long hours of sitting easier on your body. From adjustable desks to supportive chairs, small changes can make a noticeable difference in daily comfort. What is Ergonomic Furniture? Ergonomic furniture is designed around the science of human movement and body mechanics. It follows the principles of ergonomics, the study of how people interact with their environment. Each piece aims to reduce physical stress on the body during everyday tasks. A regular chair forces you to adapt to its shape, but an ergonomic chair adapts to yours. This furniture keeps your joints in neutral positions. It reduces pressure on your spine and prevents repetitive strain injuries. Long hours at a desk feel less taxing when your setup supports your body correctly. The table below breaks down common types. It shows what each one offers. Furniture Type Key Ergonomic Feature Main Benefit Ergonomic Chair Adjustable lumbar support and seat height Reduces lower back pain Standing Desk Height adjustment for sitting or standing Cuts down sedentary time Ergonomic Keyboard Split or curved design Lowers wrist and hand strain Monitor Arm Adjustable height and angle Prevents neck and eye strain Footrest Angled support for feet Improves leg circulation How Furniture Uses Ergonomic Principles to Support the Body Ergonomics is the science of designing things around how the human body moves and works. It looks at posture, comfort, and movement patterns. Furniture makers use these principles to create pieces that fit the human body. The result is less strain and more support during daily tasks. Good furniture design puts this science into practice. 1. Core Principles of Ergonomics Ergonomic furniture design rests on four core principles. Each one addresses a different source of daily strain, from posture to movement. A well-built chair, desk, or keyboard follows all four at once. 2. Proper Body Alignment Good furniture helps keep your spine, neck, shoulders, and hips aligned. It prevents your body from twisting into awkward angles. This alignment lowers the risk of long-term pain. 3. Adjustability This furniture adapts to different body types and heights. A chair might offer adjustable seat height and lumbar support. A desk might raise or lower to match your reach. 4. Comfort and Support This principle focuses on reducing pressure points. It supports areas that carry the most strain during long hours of use. Soft, shaped surfaces reduce fatigue over time. 5. Ease of Movement Good design lets you shift positions naturally. It encourages healthy movement instead of sitting still for hours. Small posture changes throughout the day protect your joints. What are the Different Types of Ergonomic Furniture Ergonomic furniture comes in several forms, each built for a specific part of your workspace. Some pieces support your seating, while others manage your desk height or screen position. Knowing the main types helps you build a setup that covers your whole body. Below are the pieces most people add first. 1. Ergonomic Office Chairs A good chair is often the first upgrade people make, and for good reason. Look for a seat height you can adjust to match your desk. Lower back support should move up or down to fit your spine. Armrests that shift in height and width keep your shoulders relaxed. Seat depth matters too, since a seat that is too long or short can cut off circulation behind your knees. Breathable fabric keeps you cool during long sessions. 2. Height Adjustable Desks A desk that allows you to switch between sitting and standing gives you more freedom throughout the day. Switching positions cuts down the hours you spend sitting still. Pairing an adjustable desk with the right minimalist home office furniture lets you position your screen and keyboard to suit your height, not a fixed standard. Switching positions cuts down the hours you spend sitting still. Different users benefit in different ways. Taller or shorter people get a desk that actually fits them. Anyone with back pain gets a break from sitting all day. 3. Ergonomic Keyboard and Monitor Setups Your hands and neck need support too, not just your back. A keyboard placed too high or too low forces your wrists into an awkward bend. Split or curved keyboards keep your wrists at a more natural angle. Your monitor should sit at eye level, so you avoid tilting your neck up or down. Getting this height and angle right reduces neck strain and wrist fatigue during long work sessions. 4. Ergonomic Home Office Furniture Remote workers face the same strain as office employees, often with less space to fix it. Compact ergonomic desks fit small rooms without giving up adjustability. A supportive chair matters just as much at home as it does in an office. Look for setups built for smaller spaces that still let you adjust height and support. A healthy home workspace protects your body just as well as a corporate one What are the Benefits of Ergonomic Furniture Choosing the right furniture pays off in ways beyond simple comfort. It changes how your body feels at the end of a workday. It can also affect how well you focus and how much you get done. 1. Improves Posture and Body Alignment Standard furniture often lets you slouch without realizing it. Ergonomic pieces guide your body into a straighter, more balanced position. Over weeks of use, this can train you to sit and stand with better alignment. Small daily corrections add up to a real change in posture. 2. Reduces Neck, Back, and Shoulder Strain Poor desk setups are a common cause of daily aches. A screen placed too low or a chair with no support forces your muscles to compensate. Proper height and support take that pressure off your neck, back, and shoulders. Many people notice less soreness within the first few weeks. 3. Increases Comfort During Long Work Hours Long shifts at a desk feel very different with the right setup. Adjustable features let you fine-tune your chair and desk to your own body. That personal fit makes hours at your desk feel less draining. Comfort during the day can also mean less stiffness once you stand up. 4. Supports Productivity and Focus Discomfort pulls your attention away from your work. Shifting in your seat or rubbing a sore neck breaks your concentration. A comfortable setup removes that distraction. Staying focused gets easier when your body isn’t fighting your furniture. 5. Encourages Healthier Movement Sit-stand desks and adjustable chairs make it easier to change position throughout the day. Small shifts, like standing for a call or adjusting your seat, keep your body from staying still too long. This kind of movement supports circulation and joint health. Over time, it can lower the risk of stiffness tied to long, fixed sitting. Ergonomic Furniture vs Regular Furniture At first, ergonomic and regular furniture can look similar. The real difference shows up in how each one treats your body. Regular furniture follows one fixed shape for everyone. Ergonomic furniture adjusts around the person using it. That gap becomes clear once you compare the two side by side. Feature Ergonomic Furniture Regular Furniture Adjustability Multiple adjustments Limited options Body Support Designed around human posture General comfort Customization Fits individual users Fixed dimensions Long-Term Use Better suited for extended use May cause discomfort over time How to Choose Ergonomic Furniture Picking the right piece takes a bit more effort than grabbing what is on sale. A few practical steps can help you avoid a poor fit and wasted money. Test the piece before you buy: Sit in the chair or try the desk height in a showroom if one is nearby. Many online retailers also offer trial periods, so check the return policy first. A short test run tells you more than any spec sheet. Check for recognized certifications and real reviews: Standards like BIFMA testing help verify durability and safety for office furniture sold in the United States. Reviews from real buyers often reveal how a piece holds up after months of daily use. Set a realistic budget before you shop: Decide which features matter most to you, such as adjustable height or lumbar support. This helps you avoid paying extra for features you will not use. Think about your room layout and space: Measure your area before ordering large items like a standing desk. Furniture for small spaces often includes compact desk alternatives worth considering first. A well-made ergonomic desk still needs to fit your room and its outlets. Frequently Asked Questions What is the Main Purpose of Ergonomic Furniture? Ergonomic furniture supports your body’s natural posture. It reduces strain on your spine, neck, and joints during long hours of use. Is Ergonomic Furniture Good for Back Pain? Yes, it can help. Adjustable lumbar support and proper seat height ease pressure on your lower back. Do Ergonomic Chairs Really Make a Difference? Yes, they do. A chair with adjustable height, armrests, and lumbar support can reduce daily aches within weeks. What Should I Look for in an Ergonomic Desk? Look for height adjustability first. A desk that shifts between sitting and standing supports better posture and movement. Is Ergonomic Furniture Expensive? Prices vary widely. Many budget options offer solid adjustability without the cost of premium brands. Final Thoughts Ergonomic furniture supports your body instead of working against it. From chairs to desks to monitor arms, each piece helps reduce strain. The right setup can ease back pain, improve posture, and keep you comfortable through long work hours. Choosing ergonomic furniture depends on your habits and body. Test adjustability, match pieces to your daily routine, and prioritize quality materials over price alone. A thoughtful setup today can protect your health for years of desk work ahead.
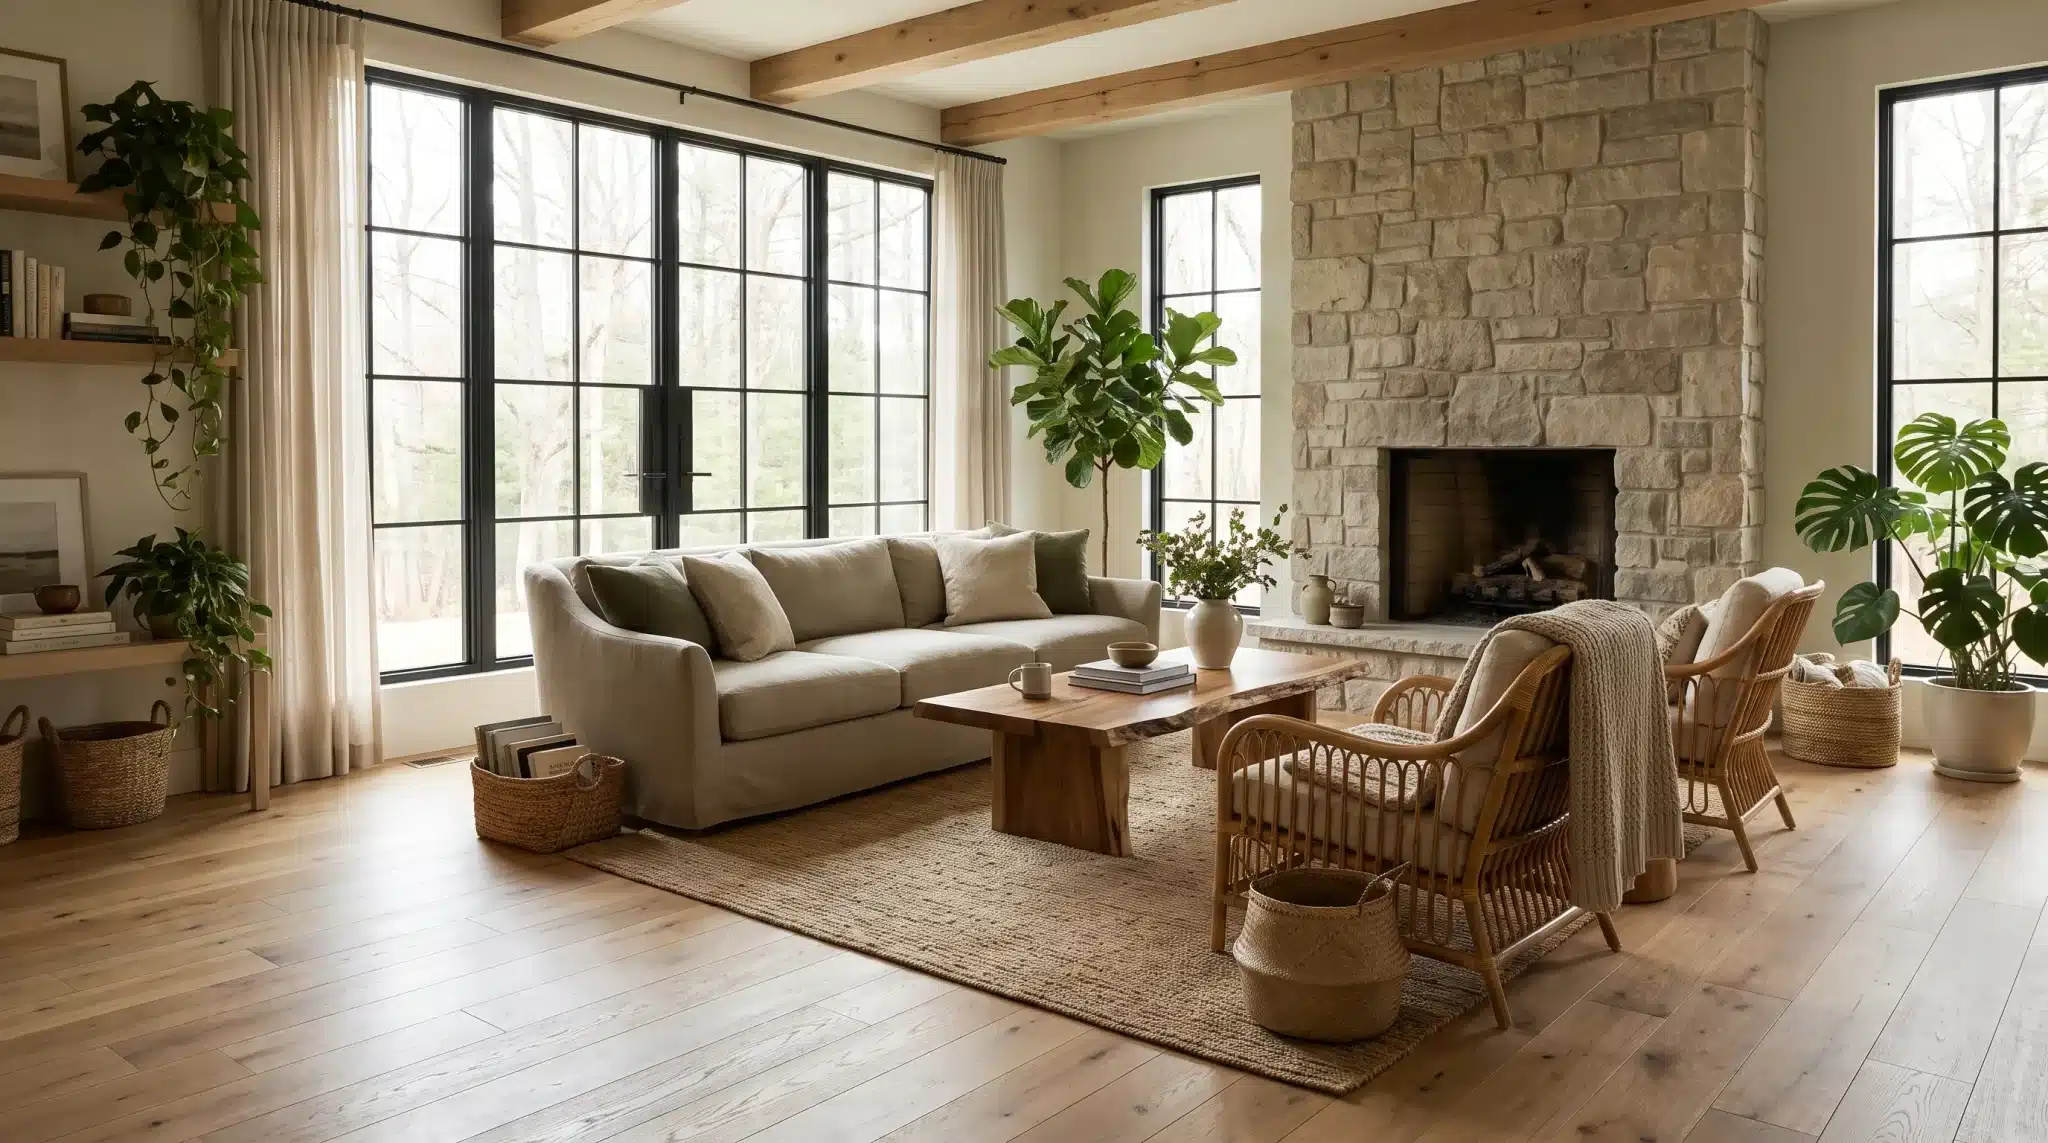
While building my home, I knew I did not want it to feel like a space made only of concrete, glass, and polished surfaces. I wanted it to have a sense of life, warmth, and connection, something that changed with the light, the seasons, and everyday moments. I imagined rooms filled with natural sunlight, the softness of wood and stone, the movement of plants, the calmness of water, and colors that echoed the outdoors. That feeling is what drew me toward biophilic interior design. By bringing together natural elements, organic textures, earthy tones, and sensory details, I made my home more than a place to live. It became a space that felt grounded, personal, and connected to the world outside. 11 Ways to Bring Biophilic Design Into Your Home Biophilic design does not mean turning your home into a greenhouse or copying a picture-perfect space. It is about adding small touches that create a stronger connection with nature. From natural textures and calming colors to plants, light, and organic shapes, these ideas can help you create rooms that feel warmer, more personal, and full of life. 1. Create a Living Green Corner with Indoor Plants Plants are the fastest way to connect a room to nature. Group a few small plants on a shelf. Hang trailing vines near a window, or place one large tree in an empty corner. Choose plants based on the light in the room, not the ones you saw online. A plant that dies within a month teaches you nothing except frustration. Plants also change over time, unlike most furniture. A fern grows new leaves. A vine climbs a wall. I think of plant corners as cozy reading nooks from an old film. Imperfect, a little wild, and completely alive. 2. Use Natural Light as a Design Element Daylight is free, and it does more work than most lighting fixtures. Sheer curtains let light in without losing privacy. Mirrors placed across from windows bounce light deeper into a room. Light colored walls and floors help a small space feel brighter without adding a single lamp. Morning light in a breakfast nook feels different from the golden light of a late-afternoon living room. Once you notice how light shifts throughout the day, you start designing around it rather than against it. 3. Bring in Natural Materials and Organic Textures Wood, stone, bamboo, rattan, linen, and clay all carry small imperfections that machines cannot fake. A wood grain that runs slightly off gives a room texture. So does a hand-thrown ceramic bowl with a rough edge. These materials also age well, which matters more than most trend pieces. Modern earthy homes lean into this fully. Rustic home interiors use it in smaller doses, such as a linen throw or a rattan chair. Either way, texture gives your hand something to notice, not just your eyes. 4. Choose Organic Shapes for Furniture and Decor Nature rarely produces a straight line. A rounded sofa, a curved mirror, or an arched doorway softens a room in a way that hard angles cannot. Sculptural decor pieces do the same job on a smaller scale. Think of a carved wood bowl or an organically shaped vase. Curved furniture has become more common in modern architecture lately. It is not only a style choice. Rooms with soft shapes tend to feel calmer to move through. 5. Build a Nature-Inspired Color Palette Forest green, sage, sand, terracotta, and soft blue all pull from the outdoors. None of them turns a room into a theme park. The trick is balance. One earthy accent wall paired with neutral furniture reads as intentional. Four different greens in one small room read as chaotic. A botanical bedroom might feature sage-colored walls with warm wood furniture. A calm home office might lean on sand and soft blue instead. Pick two or three tones and let them repeat quietly through the room. 6. Introduce Water Elements for Calm and Movement Water brings sound and motion into a space, qualities that plants and materials cannot provide on their own. A small tabletop fountain or a reflective glass surface can add this quality. Artwork featuring water works too, without any renovation. Spa interiors and nature resorts use this constantly. The sound gives your mind something steady to settle on. You do not need an indoor pond to get the benefit. A single fountain on a console table can shift how a whole room feels. 7. Blur the Boundary Between Indoors and Outdoors Large windows, glass doors, and a clear view of a garden or balcony all pull the outside in. If your apartment does not have much of a view, do not worry. A small balcony garden or window box can do surprising work. Outdoor-style seating placed near a big window also helps a room feel less boxed in. Resort-style homes have leaned into this for years. Smaller homes are catching up with clever glass and layout choices. 8. Design for All Five Senses Biophilic design isn’t just something you see. Natural scents like cedar or citrus shape how a room feels. So do soft fabrics, a breeze through an open window, and fresh air. A bedroom with linen sheets, quiet sounds, and fresh air from a cracked window feels restful. A room that only looks good in photos doesn’t feel good. Think about what a room smells like and sounds like, not just what it looks like in a listing photo. 9. Create a Biophilic Home Office Home offices benefit the most from small nature-focused changes. A desk near a window, a plant within reach, and wood furniture instead of laminate all help. Even a view of a tree from your desk chair can make a long workday feel shorter. Creative studios shown in films often mix nature with function. Plants on the desk, natural light, a comfortable chair. It is a small setup, but it works because it removes the sterile feeling most offices default to. 10. Mix Vintage Pieces with Natural Elements A vintage wooden cabinet or a handmade ceramic vase adds a layer of new furniture that cannot be replicated. So does a woven textile passed down from a relative. These pieces carry history, and history makes a room feel personal instead of staged. Pairing an old wooden dresser with a new linen chair does not clash. It tells a story. Rooms built entirely from new furniture can feel like a catalog page. Rooms with a few collected pieces feel like someone actually lives there. 11. Add Botanical Artwork and Nature-Inspired Decor Botanical artwork brings the feeling of the outdoors into rooms where adding real plants is not always practical. A framed leaf print, pressed-flower artwork, landscape painting, or nature-inspired sculpture can create a visual connection to the outside world. Choosing pieces that feel organic rather than overly decorative helps create a balanced look. A handmade ceramic vase, a wooden sculpture, or artwork with earthy tones can add personality without making the room feel themed. Why You Need Biophilic Interior Design A home built around natural light, texture, and greenery tends to feel more relaxing to live in. Several studies in environmental psychology link time spent near natural elements to better focus and lower stress levels. 1. Better Sleep: A bedroom with natural materials, calm colors, and soft light tends to make winding down easier. Harsh overhead lighting, synthetic fabrics, and sterile surfaces pull your body in the wrong direction at the end of the day. Swapping those out for linen bedding, a warmer bulb, or a small plant on the nightstand is a small change that adds up over weeks of better rest. 2. Lower Stress Levels: There is a reason you feel calmer after a walk outside than after sitting in a windowless room. Natural elements, whether real or evoked through texture, color, and material, carry that same quality indoors. A room that includes wood grain, soft green, and a plant in the corner gives your nervous system something gentler to settle on. Over time, that quieter baseline changes how a home feels to return to. 3. Sharper Focus During the Day: Working or studying near a window with a view, even a partial one, tends to reduce mental fatigue. The same effect occurs in plants. A desk positioned near natural light, with a single plant nearby, reduces some of the sensory flatness that comes with enclosed indoor environments. The brain responds to natural variation in light, color, and living things in ways that artificial settings do not replicate. 4. A Stronger Sense of Personal Connection: Homes built with natural materials and collected pieces tend to feel more personal than those filled entirely with new, polished furniture. Wood weathers and changes over time. A handmade clay pot carries marks no machine can reproduce. Living with those things builds a relationship between you and your space that purely aesthetic design does not create. That sense of connection is quieter than most design benefits, but it tends to last longer. Biophilic Design Ideas for Every Room Biophilic design works best when it feels natural to your everyday routine. Instead of adding random nature-inspired elements, think about how each room is used and choose details that bring warmth, texture, light, and a stronger connection to the outdoors. Room Biophilic Design Ideas Living Room Add plants near seating areas, choose wood or rattan furniture, and layer natural fabrics like linen or wool to create a warm, inviting atmosphere. Bedroom Use calming colors, soft natural fabrics, and gentle lighting. Choose simple materials and avoid harsh overhead lights to create a peaceful resting space. Kitchen Place herbs on a windowsill, keep wooden cutting boards visible, and use stone surfaces or natural finishes to add texture to this functional area. Bathroom Add humidity-loving plants, natural stone accents, and soft towels to create a relaxing space that feels more like a spa retreat. Home Office Position your desk near a window, add a nearby plant, and choose natural materials like wood to make the workspace feel calmer and more inspiring. Small changes can make each area of your home feel more connected to nature without requiring a complete redesign. Biophilic design can work in any space, with simple choices that reflect your personal style and bring a more natural feel into everyday living. 5 Biophilic Interior Design Mistakes to Avoid Adding nature-inspired elements can transform a home, but balance matters. Biophilic design works best when it feels natural and personal, not forced. Avoid these common mistakes when creating a nature-connected space: Buying plants without considering your home conditionsA room full of plants looks beautiful in photos, but choosing greenery without considering sunlight, humidity, and the time you have for care can cause plants to struggle or die. Turning your home into a greenhousePlants are an important part of biophilic design, but too much greenery can overwhelm a room. Leave space for furniture, movement, and other natural elements like wood, stone, and textiles. Choosing fake natural materials over authentic texturesPlastic finishes that imitate wood, stone, or plants often feel disconnected up close. Real materials bring warmth, texture, and natural variation that artificial alternatives cannot replace. Ignoring your room’s natural lightEvery room interacts differently with sunlight. A north-facing room may need different plants and colors than a bright south-facing space, so design around the light you actually have. Copying inspiration photos without adapting themA room from Pinterest or a magazine may have different lighting, dimensions, and architecture than your home. Use ideas as inspiration, but adjust them to suit your own space and lifestyle. Final Thoughts Biophilic interior design was never about building a perfect nature-themed room. It is about noticing small things. Morning light on a wood floor, the smell of a plant after watering, a soft throw under your hands. Those moments add up to more than any single design choice. Your home will keep changing, and that is fine. Future homes will likely continue to blend nature, smart technology, and personal touches in new ways. For now, start with one corner, one plant, or one better-placed lamp, and let the rest follow. Frequently Asked Questions How Many Plants Should a Biophilic Room Have? There is no fixed number. Start with one or two plants that match your light and schedule. Add more once you know you can keep them alive. Can Renters Create a Biophilic Interior Without Renovations? Yes. Plants, textiles, mirrors, and furniture choices need no permanent changes. They still shift how a rented space feels. What Furniture Styles Work Best With Biophilic Design? Wood, rattan, and other natural materials pair well with biophilic design. Curved or organically shaped furniture also fits the style naturally. Does Biophilic Design Work with Minimalist Interiors? Yes. A few well-chosen natural materials can bring a minimalist room to life. One or two plants help without adding clutter.

