


Setting a table might seem simple, but doing it the right way can make any meal feel special, whether it’s a regular Tuesday dinner or a big holiday feast.
I used to just toss plates and forks on the table without much thought, until I realized how much a properly set table changes the whole vibe of a meal. It shows care, and honestly, it just looks really good.
I’ll walk you through everything you need to know about how to set a table properly. From a basic everyday setup to a full formal dinner arrangement, I’ve got you covered.
I’ll also share some easy tips and tricks so you’ll never feel confused about where things go again.
Why Table Setting Matters More Than You Think?
Have you ever sat down at a beautifully set table and instantly felt like the meal was going to be something special? That’s not an accident.
A properly set table does so much more than just hold your food; it makes guests feel welcome, keeps the meal organized, and sets the tone for the whole occasion.
Knowing where bread plates and wine glasses go improves the dining experience by reducing confusion during multi-course meals. Once you learn the basics, setting a table properly becomes second nature.
How to Set a Table Properly for Different Occasions
Different occasions call for slightly different table setups. Here are simple ways I adjust table settings for holidays, brunch, and family meals.
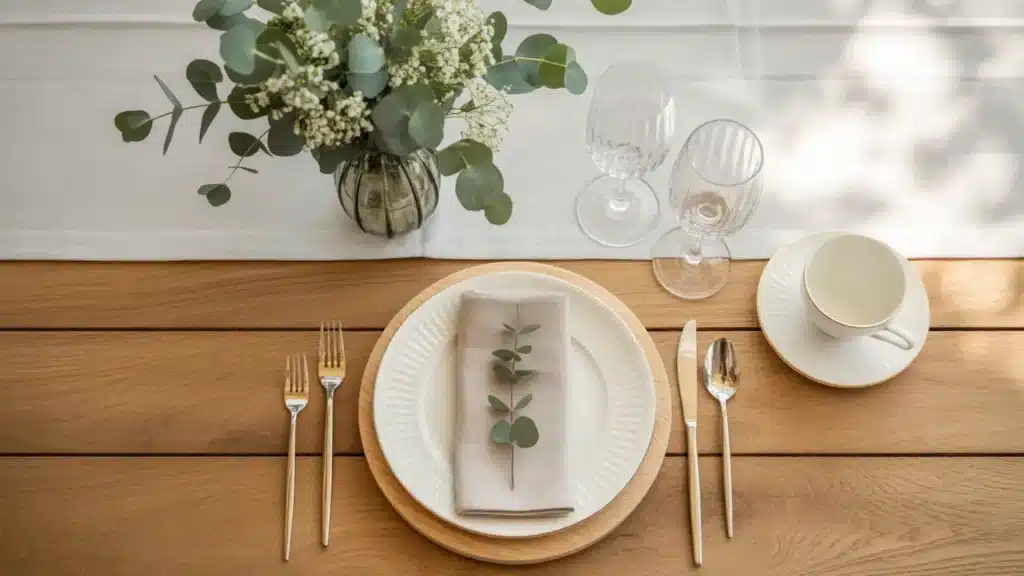
1. The Basic Table Setting For Everyday Meals

This is your go-to setup for casual family dinners, weeknight meals, or any time you don’t need anything fancy. You only need a few items, and placement is straightforward.
What You Need
- Placemat
- Dinner Plate
- Fork
- Knife
- Spoon
- Water Glass
- Napkin
Step-by-Step Basic Table Placement
Setting a table properly becomes simple when you follow a few basic steps. Here’s the easiest way I arrange a basic table setting.
- Lay the Placemat: Place the placemat centered directly in front of each seat. This gives every diner their own defined space at the table.
- Place the Dinner Plate: Set the dinner plate right in the center of the placemat. This is the anchor of the entire place setting, so everything else will be arranged around it.
- Put the Fork to the Left & Knife to the Right: Place the dinner fork directly to the left of the plate and the dinner knife to the right of the plate. The fork and knife should sit parallel to the plate, with the tines pointing upward. Keep it close to the plate but not touching it.
- Set the Spoon to the Right of the Knife: Place the spoon just to the right of the knife, with the bowl of the spoon facing upward. Like the fork and knife, the bottom of the spoon should be aligned about one inch from the table edge.
- Fold and Place the Napkin: Fold the napkin neatly and place it either on top of the dinner plate or to the left of the fork. For a simple family meal, a basic fold works perfectly fine.
Step back and check the full setting. Ensure the bottoms of the plate, fork, knife, and spoon are aligned in a straight line about 1 inch from the table edge. Small adjustments greatly enhance the table’s polished look.
Quick Rule: Forks always go LEFT. Knives and spoons always go RIGHT. Knife blade always faces the plate.
2. How to Set a Formal Dinner Table ( 3 Course Meal)
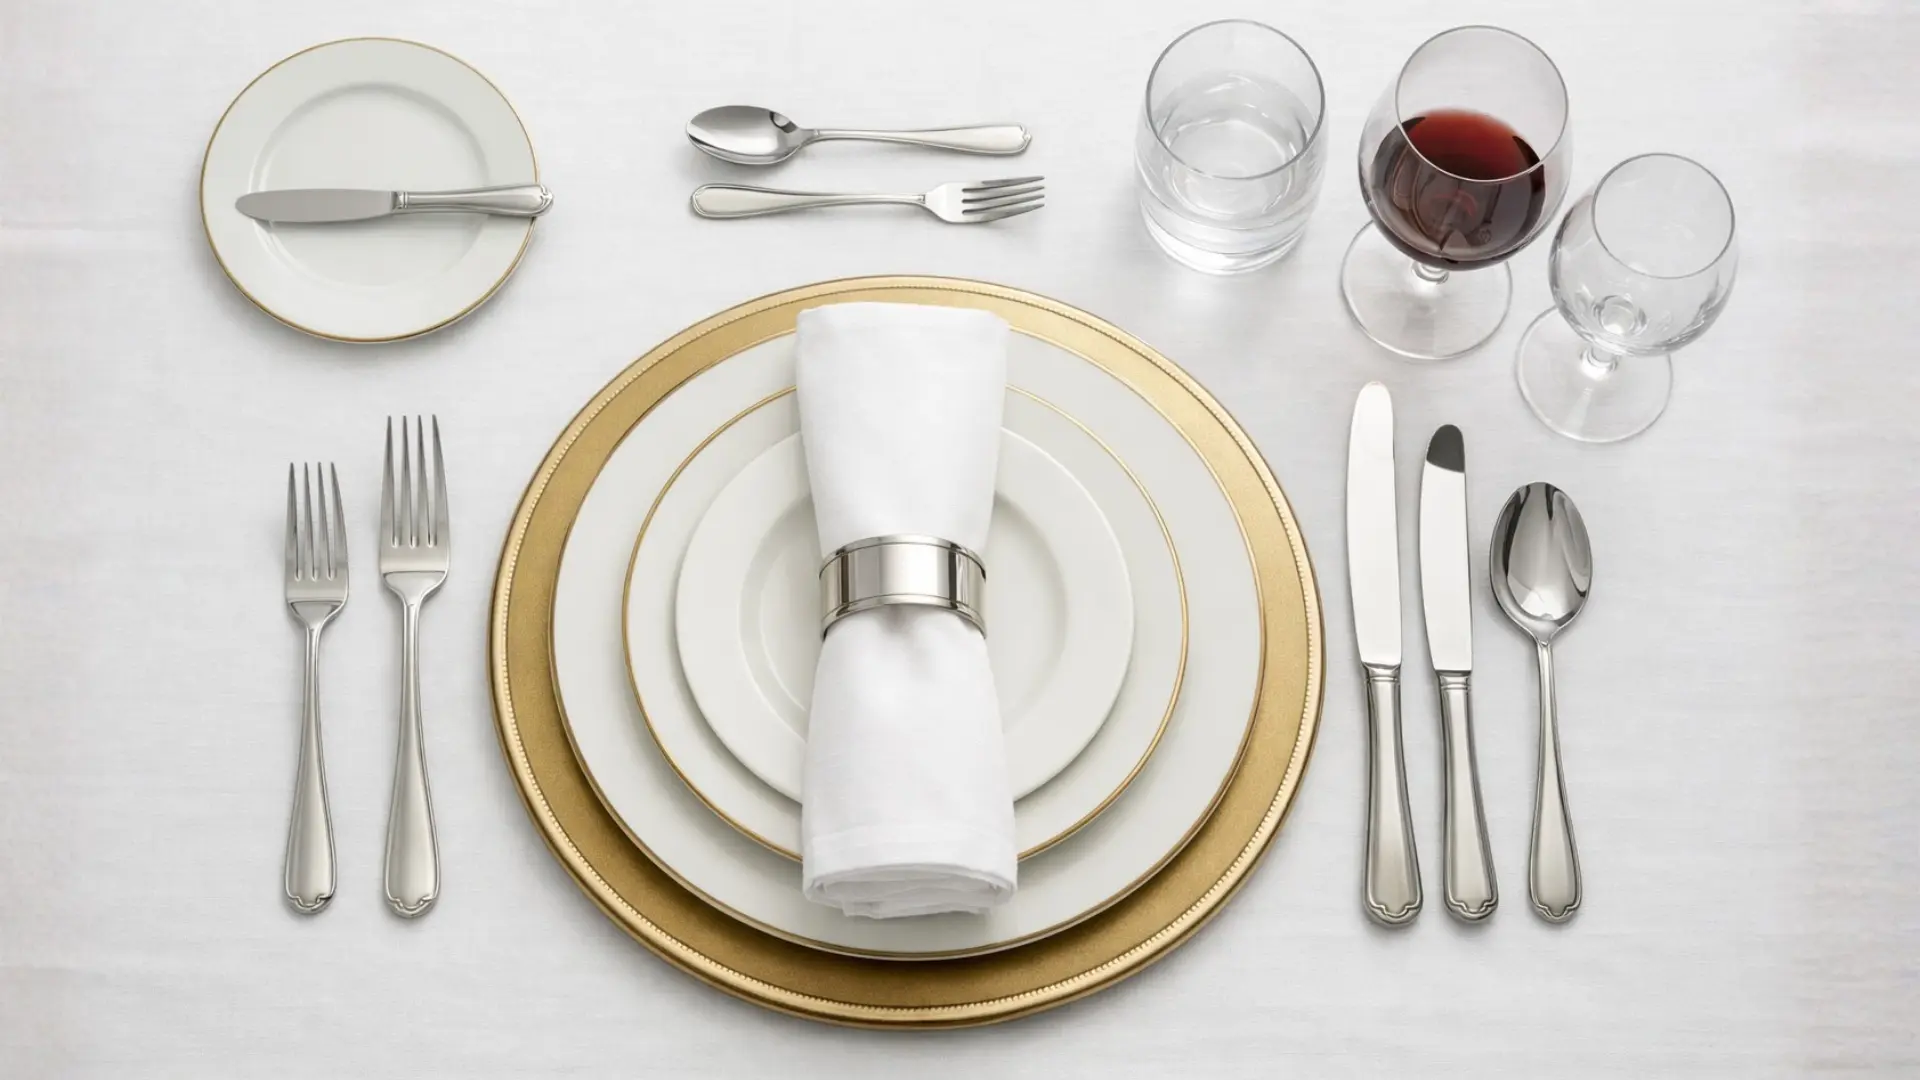
A formal table setting is what you’d see at weddings, holiday feasts, fine dining restaurants, and elegant dinner parties. It looks impressive, but once you break it down step by step, it’s very manageable.
What You Need for a Formal Setting
| Category | Items Needed |
|---|---|
| Plates | Charger, dinner plate, salad plate, bread & butter plate |
| Forks | Salad fork, dinner fork (fish fork if serving fish) |
| Knives | Dinner knife, salad knife, butter knife |
| Spoons | Soup spoon, dessert spoon |
| Glasses | Water glass, white wine glass, red wine glass |
| Extras | Cloth napkin, napkin ring, dessert fork |
Step-by-Step Formal Table Setting
A formal table setting may look complicated at first, but once I follow a few simple steps, the arrangement becomes clear and organized.
- Start with the base: Begin by spreading a solid-colored, well-ironed tablecloth evenly over the table. Then place the charger in the center, in front of each seat, set the dinner plate on top of it, and stack the salad plate on top.
- Arrange the Flatware: Place the forks to the left of the plate, salad fork on the outside, dinner fork closest to the plate. On the right, position the dinner knife first (blade facing inward), then the salad knife, and finally the soup spoon at the far right.
- Set the Dessert Utensils and Bread Plate: Lay the dessert spoon and fork horizontally above the dinner plate, spoon on top facing left, fork below it facing right. Place the bread plate above and to the left of the forks, with the butter knife resting across it.
- Place the Glassware and Napkin: Arrange the glassware in the upper right corner, water glass closest to the plate, then white wine glass, then red wine glass. Finally, fold the cloth napkin neatly and place it on top of the charger or to the left of the forks.
Place utensils in the order they will be used, starting from the outside and moving inward toward the plate.
So if you’re having soup first, then salad, then the main course, your soup spoon sits outermost on the right, salad fork outermost on the left, and dinner fork and knife closest to the plate.
3. Holiday or Thanksgiving Table Setting
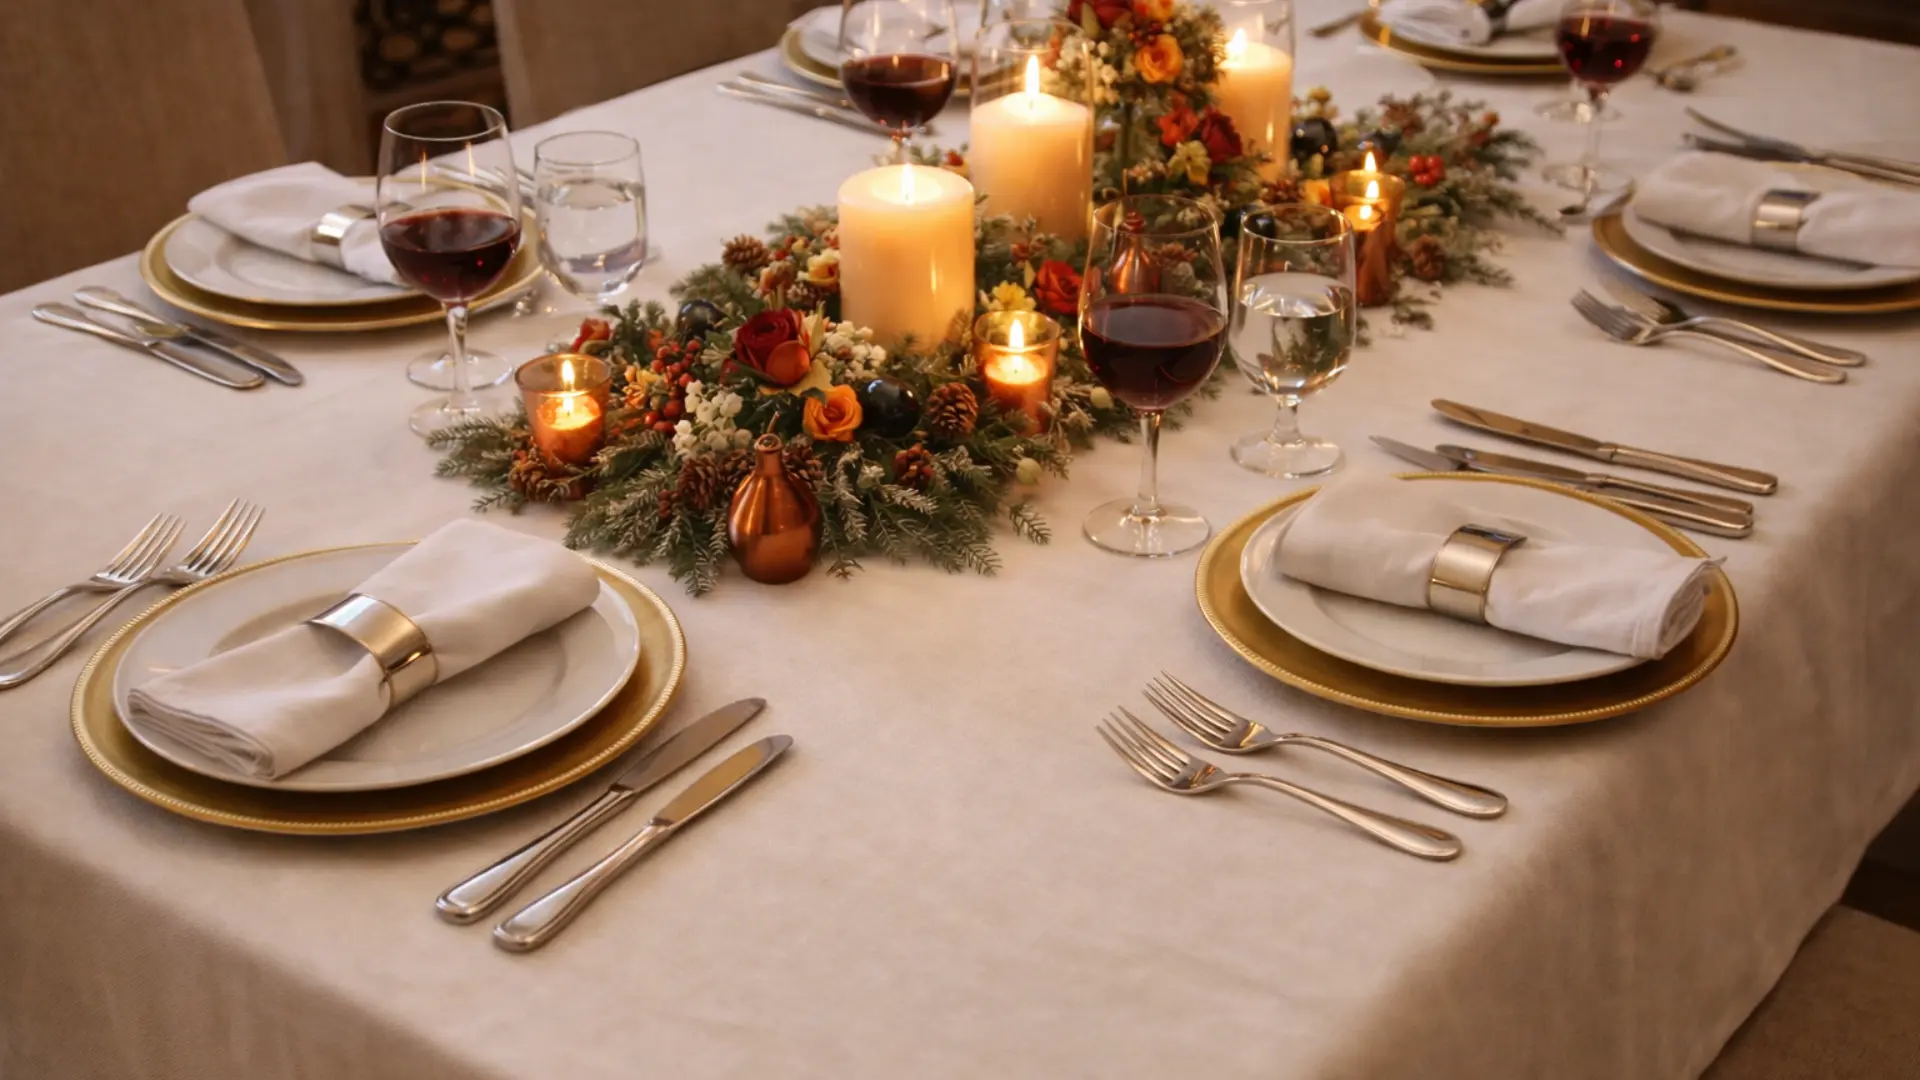
Holiday or Thanksgiving table settings are meant to feel warm, inviting, and a little more elegant than everyday meals.
What You Need
- Tablecloth (white, cream, or seasonal color)
- Charger plates
- Dinner plate, salad plate
- Forks, knives, spoons
- Cloth napkins and napkin rings
- Centerpiece (candle holders, bud vases, or fresh flowers)
Step-by-Step Holiday Table Setting
I usually start with a solid-colored, well-pressed tablecloth in white, cream, or a seasonal shade to create a clean base. Then I add matching cloth napkins, often with napkin rings for a polished look.
- Lay the Tablecloth: Spread a solid-colored, well-ironed tablecloth evenly over the table, making sure it hangs equally on all sides for a neat, elegant look.
- Set the Charger and Plates: Place the charger in the center in front of each seat, set the dinner plate on top, and stack the salad plate above it.
- Arrange the Flatware: Follow the formal setting, salad fork outermost on the left, dinner fork next, then dinner knife (blade inward), and soup spoon on the right.
- Add Cloth Napkins: Fold the cloth napkins neatly, slip them into napkin rings, and place them on the charger plate or to the left of the forks.
- Place the Centerpiece: Set candle holders, small bud vases, or fresh flowers in the center of the table to add a festive touch without crowding the setting.
- Check the Spacing: Make sure there is at least 30 centimeters between each place setting so every guest has a comfortable room to eat and move freely.
Tip: You don’t need to buy new décor every season. Candle holders, bud vases, and tealight holders can be reused year-round, just swap the flowers or colors to match the occasion.
4. Breakfast or Brunch Table Setting
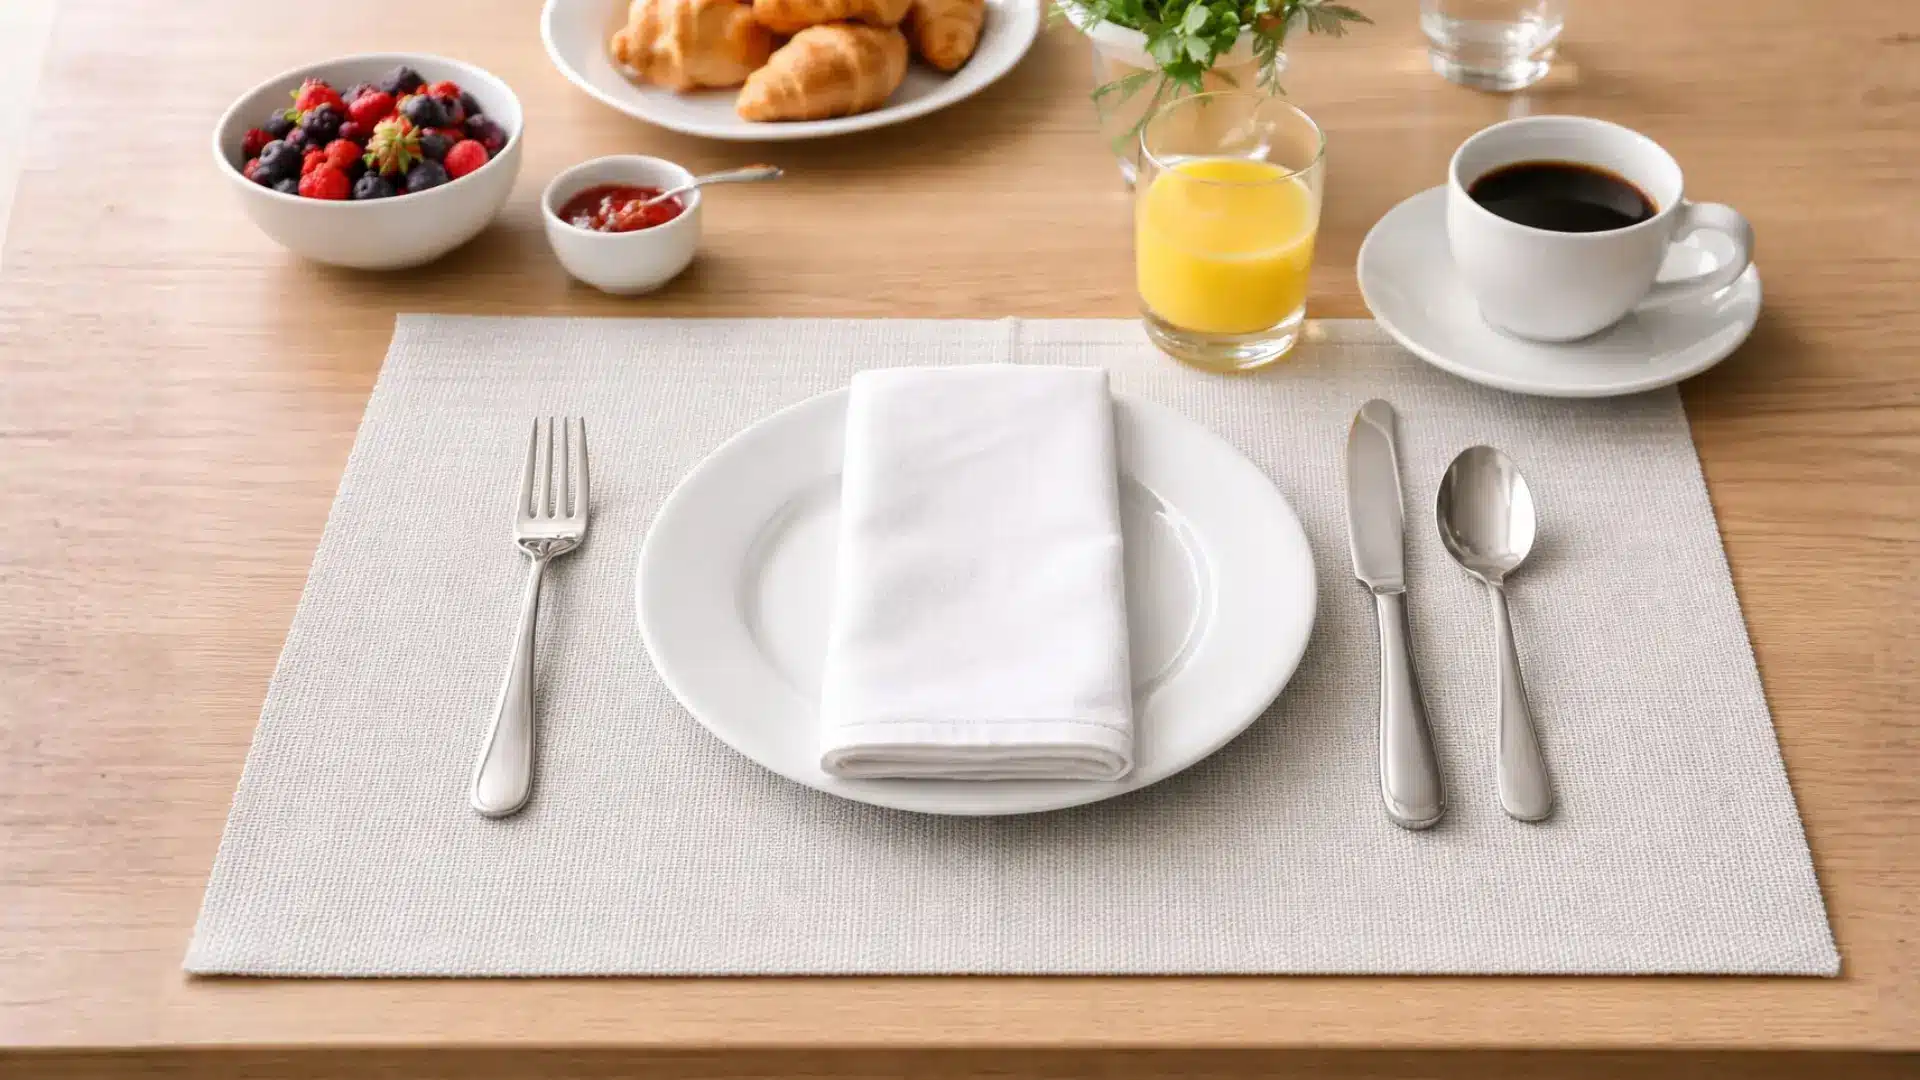
Breakfast and brunch settings are all about keeping things simple, relaxed, and easy to put together, no fancy pieces or formal arrangements needed here.
What You Need
| Item | Placement |
|---|---|
| Placemat | Centered in front of the seat |
| Dinner or side plate | Center of the placemat |
| Fork | Left of the plate |
| Knife | Right of plate (blade inward) |
| Teaspoon | Right of the knife |
| Coffee cup & saucer | Right side, above the spoon |
| Juice glass | Above the knife |
| Napkin | Left of the fork or on the plate |
Step-by-Step Breakfast Table Setting
Setting a breakfast table is quick and straightforward, just a few simple steps, and your morning table will look neat, welcoming, and ready to go.
- Lay the Placemat and Plate: Place the placemat centered in front of each seat and set the breakfast or side plate right in the middle of it as the base of the setting.
- Set the Fork, Knife, and Teaspoon: Place the fork to the left of the plate, the knife to the right with the blade facing inward, and the teaspoon just to the right of the knife.
- Add the Coffee Cup and Juice Glass: Set the coffee cup and saucer on the right side above the teaspoon, and place the juice glass just above the knife for easy reach.
- Place the Napkin: Fold the napkin and place it to the left of the fork or on the plate to keep the setting neat and ready for the morning meal.
Once you follow this simple layout, setting the table in the morning becomes quick, effortless, and stress-free.
5. Table Setting for Kids or Family Meals
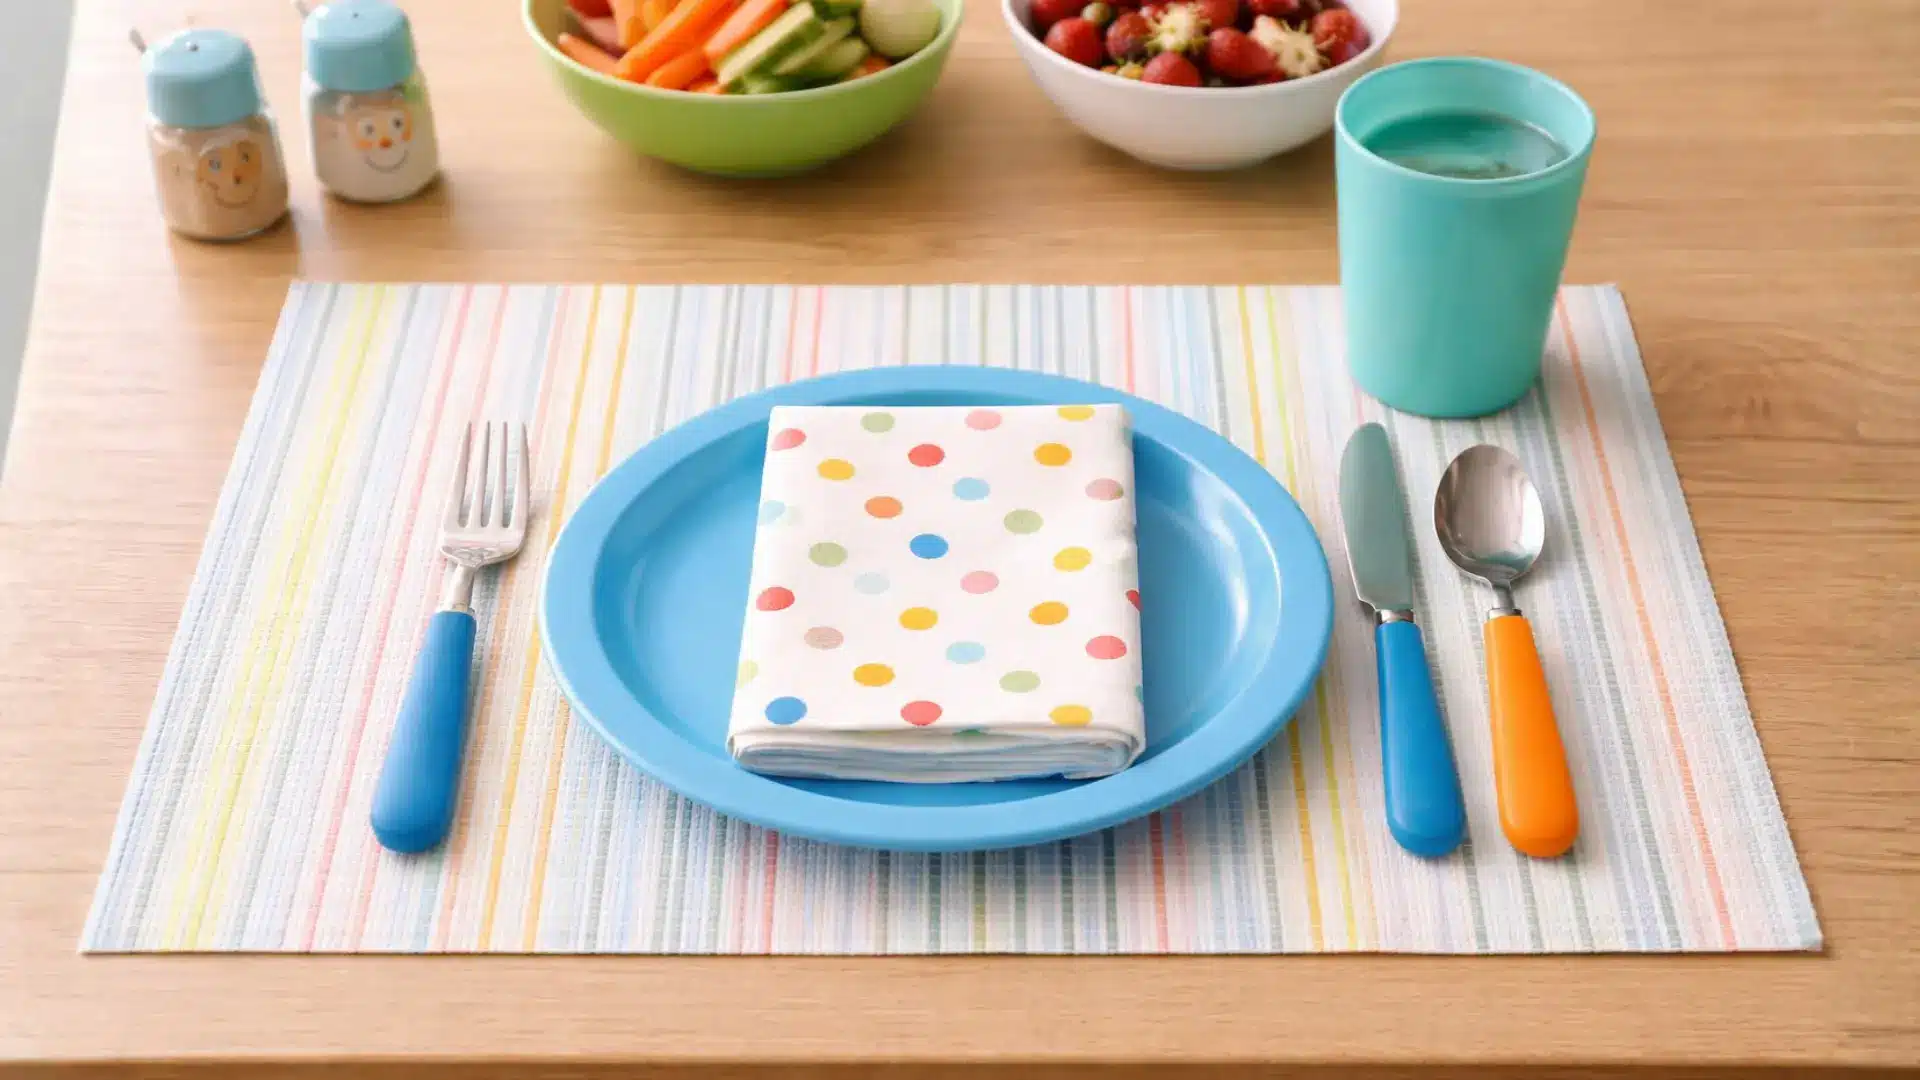
For everyday family dinners with kids, I like to keep the table setting simple and practical. There’s no need for extra pieces or formal arrangements.
What You Need
- Plastic or melamine plate
- Fork
- Knife
- Spoon
- Cup or glass
- Napkin
Step-by-Step Kids Table Setting
Setting a breakfast table is quick and straightforward, just a few simple steps, and your morning table will look neat, welcoming, and ready to go.
- Lay the Placemat and Plate: Place the placemat centered in front of each seat and set the breakfast or side plate right in the middle of it as the base of the setting.
- Set the Fork, Knife, and Teaspoon: Place the fork to the left of the plate, the knife to the right with the blade facing inward, and the teaspoon just to the right of the knife.
- Add the Coffee Cup and Juice Glass: Set the coffee cup and saucer on the right side above the teaspoon, and place the juice glass just above the knife for easy reach.
- Place the Napkin: Fold the napkin and place it to the left of the fork or on the plate to keep the setting neat and ready for the morning meal.
Once you follow this simple layout, setting the table in the morning becomes quick, effortless, and stress-free.
Common Table Setting Mistakes (And How to Fix Them)
Even people who’ve been setting tables for years make these errors. Here’s what to watch out for:
- Knife Blade Facing Outward: Always turn the knife blade inward toward the plate; it’s basic etiquette and a safety habit every host should follow.
- Wrong Glass Placement: Glasses go in the upper right corner, above the knife. Use the “D” trick to remember that your right hand means drink, so the glass is on the right.
- Ignoring the Outside-In Rule: Arrange utensils in the order they’ll be used, with the first farthest from the plate and the last closest.
- Overcrowding the Table: Leave at least one inch from the table edge for all items and keep about 30 centimeters between each place setting so every diner has a comfortable, clutter-free space.
- Using Wrinkled Tablecloths: Always iron the tablecloth beforehand, ensuring it’s solid-colored, well-pressed, and hangs evenly for a polished look.
Avoiding these common table setting mistakes keeps your table neat, comfortable, and welcoming, helping every meal feel more organized and enjoyable.
FinalThoughts
Now you know how to set a table properly, which is not as complicated as it looks. Once you learn the basic rules, forks go on the left and knives on the right, with the blades facing inward, and utensils are always arranged from the outside in.
Everything starts to click. I hope this guide helps you feel more confident, if you’re laying out plates for a quiet family dinner or hosting a fancy gathering.
Ready to put it all into action? Try setting your table tonight using one of the styles above and see how great it looks! And if you found this guide helpful, share it with a friend who could use a little table-setting confidence, too.


