


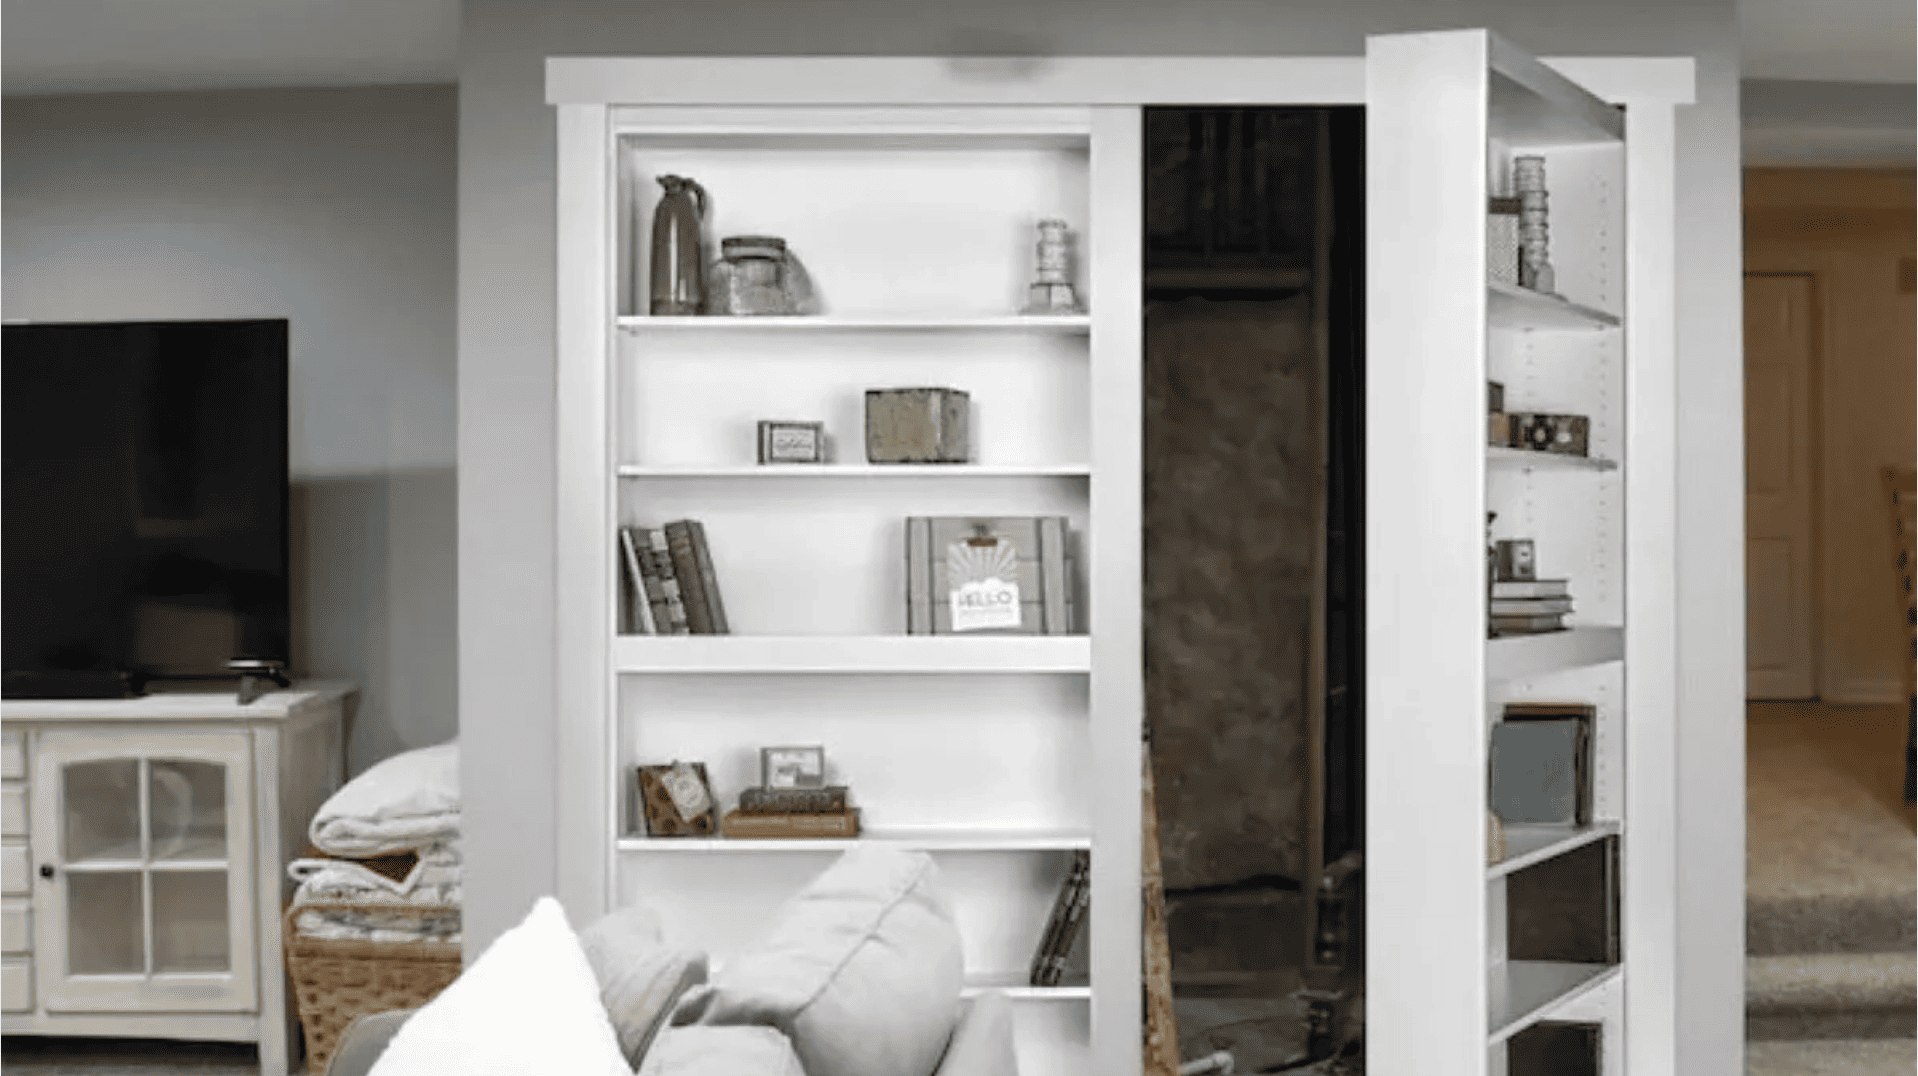
Have you ever dreamed of having a secret passage in your home, like in spy movies? Now, you can make that dream come true! DIYing a hidden door is one of the coolest home projects you can tackle without breaking your budget. Building your secret door costs much less than buying expensive kits and gives you complete innovative control. I’m here to show you exactly how to create your professional-looking mystery door that works perfectly. You’ll learn everything about planning, building, and maintaining your secret passage. If you want hidden storage or just something incredibly fun, building your own secret door is easier than you think. Get ready to become the coolest homeowner on your block! Why You Should Consider a DIY Hidden Door Hidden doors aren’t just for movies and mystery novels anymore. They’re becoming popular home features that everyone can enjoy building and using. A DIY hidden door adds an instant wow factor to your home that guests will never forget. Kids love finding secret passages, making your house the coolest one on the block. You can create private spaces for hobbies, work, or quiet time away from the busy demands of family life. Hidden doors also solve storage problems by creating concealed spaces for valuables, seasonal items, or clutter. Building one yourself becomes an exciting weekend project that combines imagination with practical carpentry skills. If you’re looking for a secret reading nook, a hidden pantry, or simply something unique and fun, a DIY hidden door can convert ordinary rooms into extraordinary spaces with mystery and joy. Types of DIY Hidden Doors You Can Build You have several exciting options when choosing which type of DIY hidden door to build. Each style offers different benefits and works best in specific areas of your home. Door Type Description Best For Difficulty Bookcase Secret entrance behind fake shelves Studies, basements Medium Mirror Hidden passage behind the wall mirror Bedrooms, hallways Easy Cabinet Secret storage in kitchen/bath cabinets Kitchens, bathrooms Easy Photo Frame Small compartment behind the artwork Any wall space Beginner Sliding Panel Modern barn door-style entrance Large rooms, lofts Hard Consider your skill level and available space when selecting your hidden door project. Start with easier options, such as photo frames or mirrors, before tackling more complex bookcase doors. DIY Hidden Door: Step-By-Step Process This five-step process will guide you through creating your own secret bookcase door, from planning to painting. I’ll show you each essential step to build a functional hidden door that looks professional and operates smoothly. Here are the materials you’ll need: 2×4 lumber Plywood (3/4 inch thick) Quarter-inch plywood or wood panel Screws (lag bolts, deck screws) Pocket hole screws and wood glue Magnetic door catches Baseboard trim Primer and paint (flat black and white) Dark-stained bamboo flooring Handle for the door Door hinges (heavy-duty) Sandpaper STEP 1: Plan and Measure Your Space Begin by planning the location of the secret bookcase door. Measure the width and height of the doorframe accurately to ensure a proper fit. Make sure the door can clear any surrounding walls or furniture when opened. Consider how deep you want the bookcase to be for storage and how to conceal it flawlessly against the wall for a truly secret door effect. Bonus Tips: Double-check measurements to avoid mistakes. Leave enough space for the door to swing open freely. Consider the room’s layout when deciding on placement. STEP 2: Build The Frame After measuring, begin by building a sturdy 2×4 frame for the bookcase door. This frame will provide the necessary strength and structure to support the weight of the bookshelf and its contents. Ensure the frame is square and level to prevent any issues when mounting the door. Use screws to assemble the frame and check for stability before moving forward. Bonus Tips: Use clamps to hold the frame in place while you work. Ensure the frame is level for smooth operation. If the wood is warped, straighten it before use. STEP 3: Attach The Plywood Panels Once your frame is set, the next step is to attach the plywood panels to it. Secure the panels with screws to the frame for a sturdy construction. Use quarter-inch plywood or wood paneling to cover the frame’s front side, ensuring it looks smooth and flawless. This step creates the surface for your bookcase door and conceals the 2×4 structure behind it. Bonus Tips: Pre-drill holes to avoid splitting the wood. Ensure the plywood is flush with the frame. Use a strong adhesive for extra hold. STEP 4: Install The Hinges and Handle Now, install heavy-duty door hinges to support the door’s weight. Attach the hinges to the frame and door to make sure the door opens and closes easily. Add a handle on the inside of the door, making it easy to pull open from within the room. Ensure everything is correctly aligned for smooth operation and a correct fit. Bonus Tips: Use at least 3 hinges for stability. Test the door for smooth opening and closing. Ensure the handle is comfortable and easy to use. STEP 5: Finish and Paint The final step is to finish the bookcase door with a clean, attractive paint job. Apply a primer coat, and then use your desired exterior paint. For contrast, consider painting the door’s exterior in white, while the interior gets a dark, moody color like flat black. Allow the paint to dry completely for the best results. Bonus Tips: Sand between coats for a smooth finish. Use a brush for detailed areas and a roller for flat surfaces. Let the paint cure completely before using the door. Cost Analysis and ROI of DIYing a Hidden Door Building your hidden door costs just $150–$400 when you buy materials smart and do the work yourself. That’s huge savings compared to purchasing pre-made kits! Store-bought hidden door kits typically cost $700–$ 1,000 or more for materials alone. Add professional installation, and you’re looking at $1,500–$3,000 or more for the complete project. Hiring professionals guarantees perfect results, but DIY saves you thousands in labor costs. Hidden doors can enhance your home’s value, particularly in more desirable neighborhoods. The best part? Well-built DIY hidden doors need very little maintenance over the years. You get a cool, functional upgrade that pays for itself while impressing everyone who visits. Why pay triple when you can build something amazing yourself? NOTE: The above costs are estimated and may vary depending on material choices, quantity, location, and specific project needs. Maintenance and Troubleshooting Your DIY hidden door will last for years with just a little regular care and attention. Simple maintenance prevents big problems and keeps your secret door working like new. Check your hidden door monthly by opening and closing it to catch problems early before they worsen. Focus on hinges and handles, as they receive the most use and wear out the fastest over time. Adjust the door alignment twice a year because wood expands in the summer heat and contracts during the cold winter months. Apply light oil to hinges and moving parts every few months to keep everything operating smoothly and quietly. NOTE: Call professionals for repairs if your door won’t close properly, makes loud noises, or has structural damage issues. Final Thoughts Building a DIY hidden door brings movie magic right into your everyday life in a truly exciting way. You’ve learned how to create secret passages that amaze guests and provide practical storage solutions. Your hidden door will become the favorite feature that everyone talks about when visiting your home. I believe you’ll love the satisfaction of building something this unique and functional with your own hands. Ready to create your secret passage? Share your DIY hidden door photos and questions in the comments below!
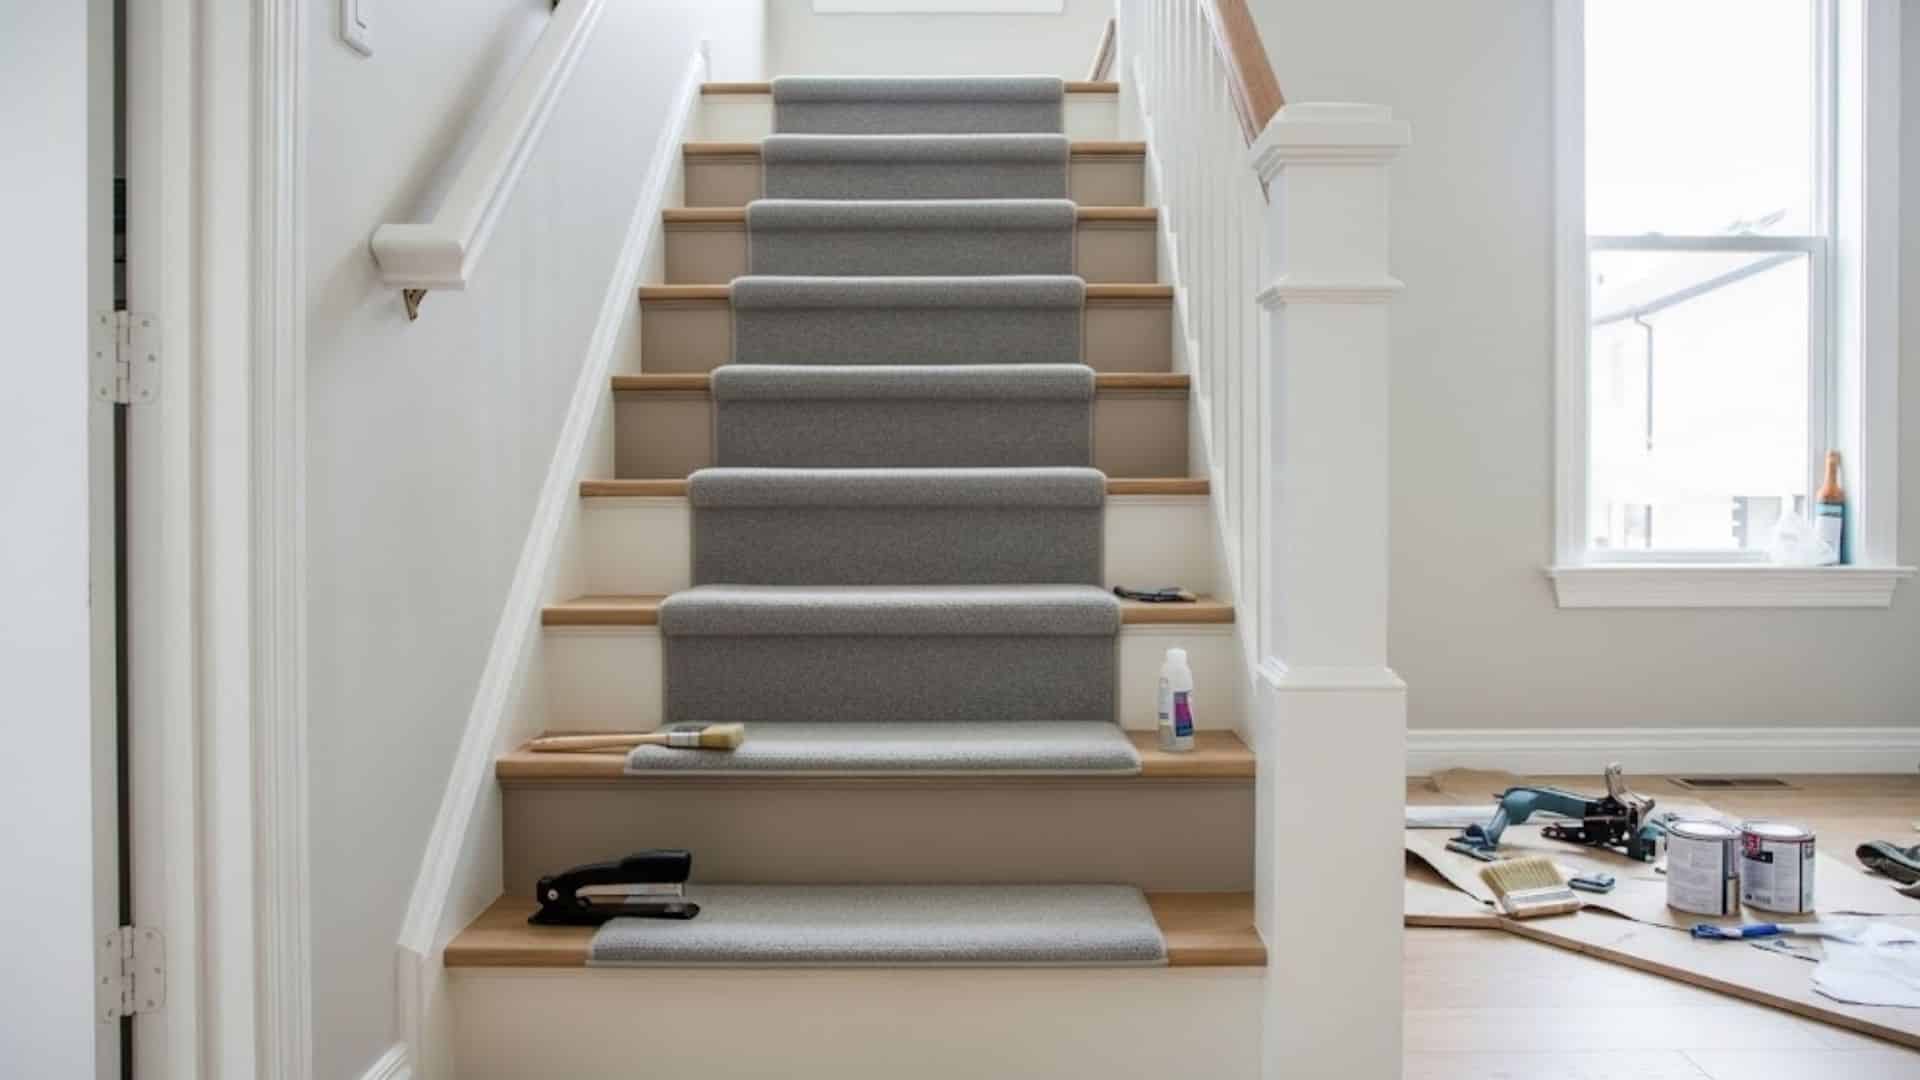
Are you tired of looking at your boring, outdated stairs every single day? I have the perfect solution for you! A DIY cheap stair makeover is one of the smartest home improvement projects you can tackle. You can change your stairs into stunning focal points for under a few hundred dollars. Most makeovers can be completed in just one weekend, making them perfect for busy homeowners like you. I’m here to show you exactly how to create a beautiful stair changeover on any budget. You don’t need special skills or expensive tools to get professional-looking results at home. My step-by-step approach covers everything, including materials, costs, instructions, and maintenance tips. Get ready to fall in love with your stairs all over again! Why a Stair Makeover is Worth It Stairs are one of the most overlooked spaces in your home, but they have huge makeover potential! You walk past them every single day, so why not make them beautiful? A stair makeover offers incredible value for your investment compared to other home projects. You can completely alter the look for under a few hundred dollars. Most stair makeovers can be completed in just one weekend, making them perfect for busy homeowners. Even if you’re a complete beginner, stairs are forgiving to work on. You can practice your painting and decorating skills without major consequences. Plus, when guests visit, updated stairs create an excellent first impression that makes your whole house feel more expensive and well-maintained. Material You’ll Need for a Stair Makeover The following table outlines the estimated cost range for each material required for a DIY, budget-friendly stair makeover. These prices reflect budget-friendly options that will help you alter your stairs affordably. Material/Equipment Estimated Cost Range (USD) Carpet runners (6 ft each) $8 – $40 per runner Primer and paint $15 – $40 (per quart/set) Electric stapler $22 – $80 9/16 staples $3 – $13 Carpet tape $5 – $15 Steamer $20 – $50 Carpet cutter $8 – $20 Antiquing wax $10 – $20 Sconce lights $15 – $40 each Rechargeable light $10 – $25 Total Estimated Cost $116 – $343 This table provides an estimated cost range for each essential material required for your stair makeover. Depending on your specific needs, the total cost may vary, but this should give you a good idea of what to expect. NOTE: These costs are estimated and may vary depending on material choices, quantity, and location of purchase. Step-By-Step Process: DIY Cheap Stair Makeover This simple five-step process will change your stairs from boring to beautiful on a budget. I’ll guide you through each step, building on the last to create a professional-looking makeover that you can complete over a weekend. STEP 1: Clean And Prepare the Stairs Start by wiping down your stairs with a damp paper towel to get rid of any dust or debris. If you’ve sanded the stairs, use a vacuum to ensure they’re completely clean before painting. Proper preparation is key to a smooth finish, so take your time to ensure the surface is well-prepped for the paint and runner installation. Pro Tips: Use a microfiber cloth to trap dust more effectively. Take breaks to avoid over-exerting yourself while prepping. Vacuum the edges thoroughly for a cleaner surface. STEP 2: Prime And Paint the Risers Apply a coat of primer to the risers (vertical parts of the stairs) for a smooth finish. Once dry, use Sharon Williams Pure White for the top coat. This color complements your walls, creating a flawless look. Be sure to let the primer dry fully before applying the paint for the best result. Pro Tips: Wait for the primer to fully dry before applying the top coat. Use a small brush for detailed areas like corners. Apply a second coat for a more even, durable finish. STEP 3: Paint the Treads With Shiitake For the treads (flat part of the stairs), use Shiitake paint to match the flooring. This color adds a neutral, warm tone and blends well with your home decor. If you don’t want to refinish the stairs fully, this step provides a quick solution for a fresh, updated look without sanding the old surface. Pro Tips: Use a roller for a smooth, even coat. Let each coat dry before adding another. Work in sections to avoid streaks or smudges. STEP 4: Install the Carpet Runner Measure your stairs and mark where the runner should be placed. Then, use an electric stapler to attach it, starting at the bottom and working your way up. Pull the runner tight to avoid creases, stapling underneath each stair lip to keep it securely in place. Pro Tips: Use carpet tape to hold the runner in place as you staple. Make sure to staple at the edges and at the bottom back crease for a firm hold. Don’t rush – go slowly to get each stair even and tight. STEP 5: Add Finishing Touches and Gallery Wall Complete the makeover by installing a sleek newel post and painting the handrails with a dark wash of Urbane Bronze. Once that’s done, update your gallery wall with new frames and add some stylish sconce lights to enhance the space. This adds a modern, personal touch to your upgraded stairs. Pro Tips: Use a remote-controlled sconce for easy on/off access. Choose frames that complement your runner and wall colors. Consider adding extra frames later to complete your gallery wall. Watch How it is Done: DIY Cheap Stair Makeover Video Tutorial Maintenance and Longevity Tips for Stairs Your beautiful stair makeover will last years longer with simple, regular care and smart maintenance habits. Clean your stairs weekly with a damp cloth to prevent dirt buildup that can damage finishes. Vacuum carpet runners regularly and spot-clean stains immediately before they set in permanently. Keep leftover paint on hand for quick touch-ups when you notice small chips or scuffs appear. Use a small brush to fix problem spots before they become bigger issues. Consider refreshing high-traffic areas every two to three years with a fresh coat of paint. Complete redos are only needed when colors look outdated or materials show major wear. Place small rugs at the bottom and top of the stairs to reduce daily wear and tear. Your stairs will stay beautiful much longer with these simple protective steps. Common Mistakes to Avoid while DIYing Stair Makeover Even simple stair makeovers can go wrong if you’re not careful. Learning from these common mistakes will save you time, money, and frustration. Skipping proper prep work means your paint won’t stick well and will look bumpy and unprofessional. Choosing weak materials for high-traffic areas will result in chipping and wearing within months. Ignoring safety codes when adding thick materials can create uneven steps that cause dangerous falls. Rushing through steps without allowing for proper drying time can lead to peeling paint and wasted effort on the weekend. Take your time and do each step properly for the best results. Your future self will thank you for the extra effort you put in today. Wrapping It Up Your DIY cheap stair makeover can create excellent results without breaking your budget or schedule. I’ve shown you how paint, carpet runners, and simple finishing touches make the biggest visual impact. Remember, you can achieve dramatic modifications for under a few hundred dollars and one weekend of work. The key is taking your time with prep work and choosing durable materials for high-traffic areas. Your beautiful new stairs will welcome guests and bring a smile to your face every day. I encourage you to start planning your stair changeover today and join thousands of homeowners who’ve discovered this budget-friendly makeover magic. Share your experience in the comments below!
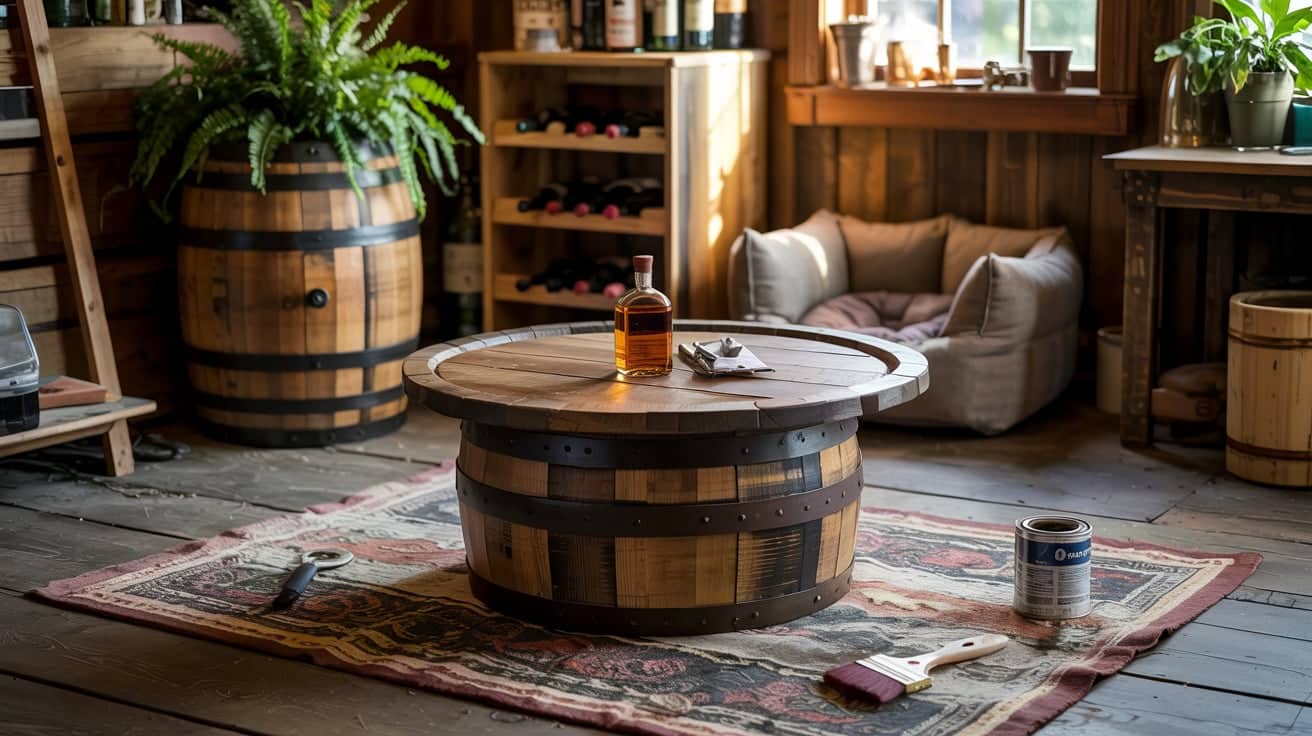
Have you ever come across an old whiskey barrel and wondered what you could do with it? If you’re like me, you want to make something that’s not just practical but also adds character to your space. That’s precisely what you’ll find here. In this blog, I’ll walk you through a variety of whiskey barrel project ideas you can try at home if you’re handy with tools or just getting started. By the end, you’ll have plenty of simple, functional options to turn that barrel into something you’ll actually use. Ready to get inspired? Why Whiskey Barrel Projects are So Popular Whiskey barrel projects have gained popularity for their resourceful use of reclaimed wood, offering a rustic touch that complements both indoor and outdoor spaces. Repurposing these barrels not only reduces waste but also adds useful, long-lasting features to your home. Their sturdy build makes them suitable for a wide range of applications, from furniture to planters. Widely shared across hobby forums, DIY blogs, and social media, these projects continue to appeal to homeowners, woodworkers, and upcyclers alike. Innovative Whiskey Barrel Project Ideas to Inspire You These barrel-based ideas bring function and beauty to various areas of your home or garden using full-size or mini whiskey barrels. 1. Pub Table A whiskey barrel can serve as the sturdy base for a pub-height table. Add a round wood or glass top, and you’ve got a high-top gathering spot for kitchens, patios, or man caves. Some designs include footrests or built-in bottle racks. This project requires minimal cuts and works well with full barrels, making it a go-to choice for those wanting both style and function. 2. Coffee Table Cutting a barrel in half lengthwise allows it to function as a bold coffee table. Add a flat top and possibly storage inside the open cavity. Perfect for rustic interiors, this low-profile piece becomes a conversation starter. It’s also possible to add wheels for mobility or a lift-top for hidden storage. The result is both functional and grounded in vintage design. 3. End Table Use barrel sections or quarter cuts to create compact end tables. These can stand beside couches, beds, or reading chairs. Add a circular top and a small lower shelf for added practicality. This idea suits tight spaces and provides a natural look with minimal materials. It’s a good beginner project with room for customization using paint, stains, or small drawer inserts. 4. Barrel Cabinet Hinge a barrel vertically to open like a cabinet. Add internal shelves, lighting, or racks for glasses and bottles. This design fits well in living rooms or dens. It works beautifully as a liquor cabinet, media storage, or general organizer. With a locking latch and lined interior, it adds function while maintaining a rustic appearance. You can also mount it on wheels for easy movement. 5. Dog Bed Cut a large opening into the side of a barrel and sand the edges for safety. Insert a cushion or memory foam to create a cozy bed. Ideal for small to medium-sized dogs, this project offers both style and comfort. Sturdy and insulated, it can sit indoors or on covered porches. Pet owners love its blend of reuse and pet care functionality. 6. Wall-mounted Shelf Flatten barrel staves and mount them on brackets for a unique shelf set. You can also mount a halved barrel directly to the wall and add internal platforms. These shelves are great for kitchens, bathrooms, or entryways. They showcase books, plants, or décor while giving your space character. It’s a great way to use leftover parts from other barrel projects. 7. Planter Half whiskey barrels make perfect large planters. Drill drainage holes and add a plastic liner for durability. These containers suit herbs, flowers, or even small shrubs. Place them on patios, walkways, or porch corners to bring greenery into your space. They’re popular for their natural drainage and capacity. Plus, they age beautifully outdoors with minimal care. 8. Rain Barrel Add a spigot, lid, and screen to a full barrel to create a rainwater collection system. Position it below a gutter downspout for optimal use. This eco-friendly project helps reduce water bills and supports garden irrigation. Use food-safe sealants inside to ensure safety. It blends utility with appearance, outperforming plastic alternatives while offering a natural look. 9. Garden Pond Line a full or half barrel with pond liner and fill it with aquatic plants or goldfish. Add a small pump for circulation if needed. Ideal for compact gardens or patios, this mini pond introduces tranquility to outdoor areas. Choose a shady spot to reduce algae growth. It’s a beginner-friendly way to incorporate water elements without major digging or structural work. 10. Trash Can Convert a full-size barrel into a rustic trash bin. Add a lift-up lid or hinge it on one side. Use an interior liner or plastic container to simplify emptying. This is a functional upgrade for patios, garages, or even inside rustic-themed kitchens. It disguises waste bins in plain sight while adding structure and visual weight to the area. 11. Lazy Susan Turn a barrel hoop or top into a rotating tray. Add a lazy Susan bearing underneath for smooth movement. These trays are great for dining tables, counters, or buffets. You can also use them to organize spices or condiments. It’s a low-effort project with high usability, especially if you’re repurposing barrel tops left over from larger builds. 12. Coat Rack Mount barrel staves vertically and attach hooks to hold coats, hats, or bags. You can also include a small shelf on top for keys or decor. This setup works well in mudrooms, entryways, or behind doors. It’s a quick build with maximum functionality. Staves are curved, giving the rack a sculpted look while supporting daily use. 13. Lighting Fixture Upgrade barrel staves or hoops into pendant lights, sconces, or chandeliers. Add wiring, sockets, and bulbs to complete the fixture. This works well over dining tables or entryways. You can customize finishes to match the room. It’s a high-impact upgrade that highlights craftsmanship while reusing barrel elements in a functional way. 14. Mini Bar Cut a barrel horizontally and hinge the top to serve as a mini bar chest. Include dividers for liquor bottles and accessories. You can mount wheels for mobility or install LED lighting inside. This compact piece is excellent for small apartments or entertaining spaces. It’s portable, practical, and a conversation piece for guests. 15. Firewood Holder Use metal hoops and partial staves to build a cradle for firewood. It keeps logs organized and elevated off the floor. This project suits fireplaces, wood stoves, or outdoor fire pits. The curved shape helps cradle logs securely. It adds visual structure and keeps your heating space neat and tidy while reusing leftover barrel materials. 16. Wreath Base Use barrel hoops as the base frame for seasonal wreaths. Wrap them with dried flowers, greenery, or holiday accents. These can be hung on doors, walls, or even used as table centerpieces. They’re sturdy and offer a circular form without needing to buy wireframes. A simple and innovative use for leftover hoops. Getting Started with Whiskey Barrel Projects Before beginning any whiskey barrel project, it’s important to start with the right foundation. Authentic barrels can be sourced from local distilleries, online marketplaces, or suppliers of reclaimed materials. Choose between used barrels with character or new ones for cleaner finishes. Gather essential tools, such as a jigsaw, sander, screws, and protective gear. You’ll also need materials like sealant, liners, and finishes, depending on your project. Always clean and dry the barrel thoroughly, remove residue or mold, and seal the wood properly to ensure long-lasting, safe results for indoor or outdoor use. Build Ideas by Room or Outdoor Space Match your whiskey barrel project to specific areas in your home or yard for maximum function and visual impact. Living Room & Kitchen Barrel coffee tables, end tables, and mini bars work well in cozy spaces, adding structure and beauty. Wine racks and Lazy Susans made from staves or tops serve both decorative and storage purposes. These pieces offer practical solutions that pair well with existing furniture while preserving the unique look and texture of the barrel wood. Patio & Garden Use barrels to create rain collection systems, large planters for herbs or flowers, and compact water ponds. They suit outdoor spaces perfectly due to their durability and natural resistance to weather. Trash bins and firewood holders can also be constructed to blend with outdoor decor while serving essential roles in maintaining order and convenience. Entryways & Utility Areas Add function to overlooked spaces with coat racks built from barrel staves, wall-mounted shelves for organization, or barrel dog beds with a custom cushion. These ideas make good use of small areas and provide storage or comfort. With simple tools and minimal materials, they bring usefulness to transitional areas of your home. Customization Tips & Skill Levels Tailor your whiskey barrel project to your experience level and style preferences while ensuring safety for practical, everyday use. Easy vs. Intermediate vs. Expert Builds: Start with simple projects like planters or dog beds if you’re a beginner. Move to cabinets or lighting fixtures as your skills grow. Personalizing with Paint, Engraving, and Lighting: Add color, monograms, LED strips, or hardware to match your home’s style and give your barrel project a distinct identity. Safety Tips for Food, Pets, and Weather Exposure: Use food-safe finishes, seal sharp edges, and apply waterproof coatings for barrels placed outdoors or used for pet furniture. Where to Buy Barrels, Parts & Kits Finding quality whiskey barrels or parts is key to a successful project. Reliable sources include online platforms like Etsy and Amazon, as well as local distilleries that offer used barrels with character. Decide between full barrels for structural builds or DIY kits for simpler projects; kits often include hardware and instructions. When shopping, check for the condition of the wood, stability of the metal band, and any unpleasant odors. Ensure the barrel suits your intended use, whether for display, storage, or outdoor installation. Maintenance & Longevity Keep your whiskey barrel projects in good condition year-round with proper care techniques suited for both indoor and outdoor environments. How to Weatherproof for Outdoor Use: Apply a clear, UV-resistant sealant to protect the wood. Elevate barrels off the ground slightly to avoid direct moisture exposure. Preventing Mold, Pests, and Rot: Keep barrels clean and dry. Use liners for planters, inspect regularly for insects, and avoid leaving standing water inside. Resealing and Refinishing Every Season: Sand rough or worn areas and reapply protective finishes yearly to maintain appearance and structural integrity over time. Conclusion Now that you’ve seen all these whiskey barrel project ideas, which one are you most excited to try? If you’re building a planter, a mini bar, or something unexpected, you’ve got what you need to get started. I’ve broken everything down so you can feel confident, regardless of your skill level. Remember, even small projects can make a big difference in your home or garden. If you’re looking for more easy DIY tips and ideas, go check out my other posts. I’ve got plenty more waiting for you
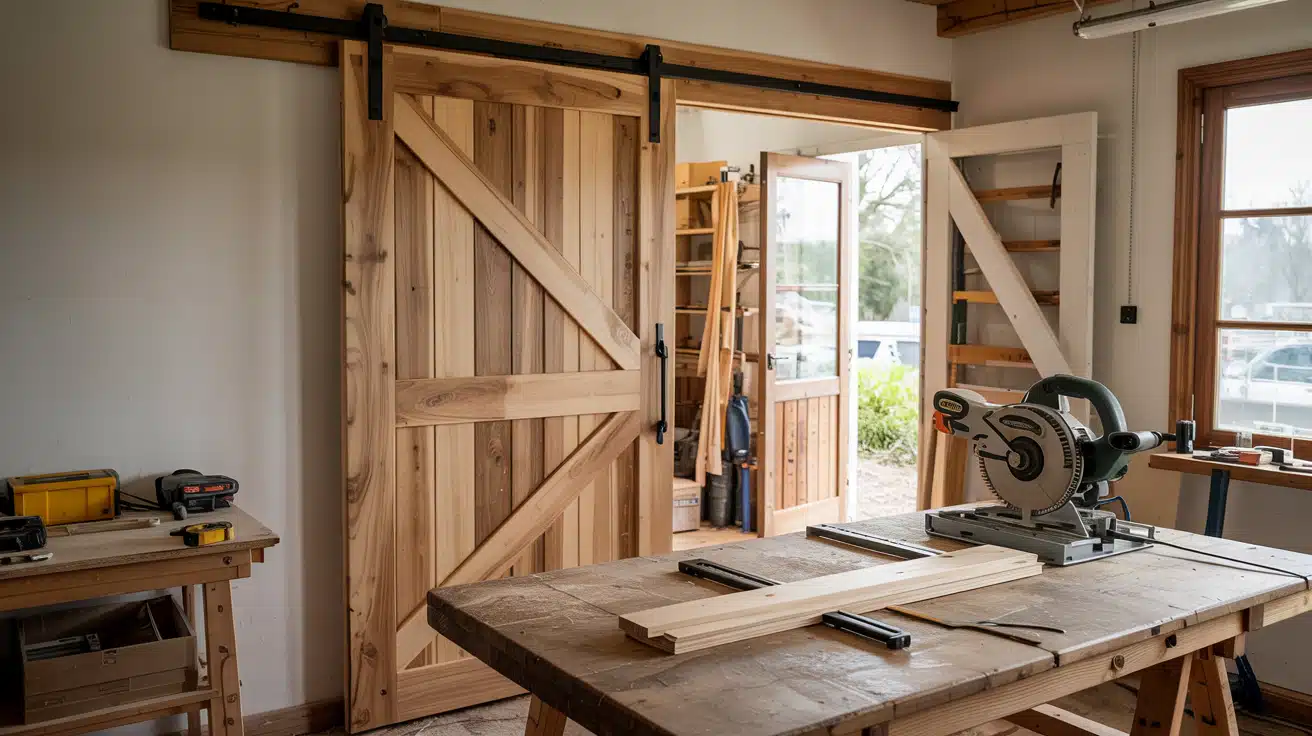
Are you thinking about building a barn door but aren’t quite sure where to start? I get it, it can seem like a big project. You might be wonderingwhat materials to buy, what tools you’ll need, or how to make sure everything lines up just right, and understanding standard door widths can help you plan more accurately. In this post, I’ll show you how to build a barn door from start to finish. You’ll find clear steps, practical tips, and simple options that actually work. Ready to save some money and do it yourself? Let’s get into it. Choosing the Right Barn Door Style When picking your barn door, you’ll want to match the style to your needs. Think about where you’ll install it and how you plan to use the space. Popular Styles (Z-frame, X-frame, flat panel, Dutch) Each barn door style offers a different level of support and simplicity. A Z-frame provides strong bracing, often used where moisture or weight might cause sagging. An X-frame is classic and symmetrical, popular in rustic builds. A flat panel is a clean option using just horizontal planks, often chosen for its minimal layout. Dutch doors are split in half, letting the top and bottom open independently, useful in barns or pet-friendly areas. Interior vs. Exterior Use Cases Interior barn doors are usually lighter, easier to install, and focused on dividing spaces such as bedrooms, closets, or bathrooms. These often slide on tracks and require less insulation or sealing. Exterior barn doors, on the other hand, must withstand moisture, wind, and long-term use. They’re often heavier, use treated wood, and include additional framing support or weatherproofing materials to reduce swelling or movement over time. Step-by-Step Build a Barn Door In this section, I’ll guide you through each part of the build, allowing you to follow along easily. I’ve kept it simple, so you can get it done without hassle. Tools and Materials Checklist Table saw Circular saw / Track saw Sliding compound miter saw Drill / Drill press Brad nailer (18 gauge) Router Orbital sander 120-grit sandpaper 220-grit sandpaper 500-grit sandpaper Flap disc Cutoff saw / Angle grinder Stud finder Measuring tape Straight edge / Spacer board Clamps Shop vac / Air compressor / Leaf blower Spray paint (black satin) Painter’s tape Cardboard (for screws during painting) Rags / Alcohol wipes OSB sheathing panels Cedar fence pickets (5/8″ thick) 1×4 board 3/16″ thick metal flat bar 1¼” brad nails Wood glue / Construction adhesive Wood filler Oil-based polyurethane (ultra-flat sheen) Metal screws Sliding barn door hardware kit Recessed handles Step 1: Measure the Door Opening and Plan the Layout Start by measuring the opening to determine the door size. For double doors, each door should slightly overlap the center and cover the trim if needed. Uses 18½-inch wide doors for a 34-inch opening. This layout allows doors to meet in the center and clear clutter while controlling sound. Planning includes deciding between single, double, or pocket-style layouts based on space and framing. Once sizing is settled, you can plan material cuts and hardware alignment. Step 2: Cut the Back Panels The builder uses 5/8-inch cedar pickets and OSB plywood as the core of each door. After letting cedar boards dry to reduce shrinkage, OSB is cut using a table saw. The rough width is cut slightly oversized, then trimmed to the exact width (e.g., 18 inches) for precision. Height is left slightly long for later adjustment. If needed, flip OSB sheets during cutting. These core panels become the structural base for mounting pickets and support hardware. Step 3: Test Fit and Determine Final Door Height Before final cuts, test-fit the OSB panels to check how the height looks and functions in the actual space. A spacer board helps simulate floor clearance and track height. The final height is chosen to allow smooth sliding and visual balance. This step ensures the doors aren’t too short or tall once installed. Leave room for the mounting board and track, and make sure the top edge aligns well with the backer board and railing placement above the opening. Step 4: Install the Mounting Backer Board To support the track hardware, a 1×4 board is mounted above the opening. Use a stud finder to locate framing for secure anchoring. Sand the board smooth and paint it to match the wall for a clean, low-profile finish. Align the board at the correct height, and if needed, drill extra holes or add blocking behind the drywall for a stronger hold. This board provides critical support for the rail and ensures the doors move safely and evenly. Step 5: Cut and Attach the Cedar Pickets Cut cedar pickets to match the door width. For double doors, lay them out to align grain patterns. Trim the top or bottom boards as needed to fit. You can divide the total height by the number of pickets for uniform sizing. Attach each board to the OSB using wood glue or construction adhesive and 18-gauge brad nails (1¼-inch long). For extra strength, add a center row of nails. Label doors clearly to track left/right sides, tops, and backs. Step 6: Fill Nail Holes and Prep for Metal Trim Use wood filler to cover nail holes, then smooth excess with a damp rag. Avoid over-sanding cedar to preserve natural texture and saw marks. Measure and cut a 3/16-inch thick metal flat bar for trim. Use a metal cutoff saw or angle grinder, then smooth the sharp edges. Cut the top and bottom trim to the door width and the side trim slightly longer to overlap. Lay everything out before painting. Clean metal with alcohol before applying black satin spray paint outdoors. Step 7: Drill and Paint Metal Trim and Screws Use a drill press or standard drill to make holes in the metal bar. Drill three holes in each short piece and seven in long side pieces, spaced evenly. For center-facing door edges, stagger screw positions to prevent bumping. Sand all holes and clean the metal before spray painting. Insert screws into cardboard and give them a few light coats of paint too. Apply two to three thin coats to both metal and screws for a strong, clean finish. Step 8: Final Sanding and Polyurethane Finish Use 120-grit sandpaper on an orbital sander to smooth the door sides and 220-grit to slightly bevel the edges. Lightly sand the surface of pickets to even the texture without removing too much character. Clean all sawdust using compressed air or a blower. Apply oil-based polyurethane (ultra-flat sheen) to highlight the natural knots and grain. Watch for drips on the edges. Let dry, then flip and repeat coats on the other side. Light sanding between coats ensures a smooth final finish. Step 9: Attach Metal Trim to Doors After the polyurethane is fully dry, attach the painted metal trim. Start with the top and bottom pieces, pre-drilling each hole to prevent wood splitting. Use clamps if needed to align the metal perfectly to the edge. Then attach the vertical side bars, overlapping the ends. This step strengthens the edges and gives the doors a finished, professional appearance. Metal trim also helps maintain straight lines over time, especially for doors that are opened and closed frequently. Step 10: Install Sliding Hardware and Handles Mark and pre-drill hardware holes on the door face, 2 inches from each edge. If bolts are too short, router out a recess in the back of the door to seat the bolt heads. Install rollers and recessed handles. Make sure they are aligned and square. To avoid a gap between doors, stagger screw heads on inner edges. Follow the rail kit’s instructions for mounting height and door clearance. Then install the rail, floor guide, door stoppers, and safety pads. Watch the full build in action to see each step come together. Click below to view the complete video walkthrough and results. Finishing Your Barn Door Now that your barn door is built, I’ll guide you through the final touches. You’ll choose how it looks and how well it holds up over time, especially outdoors. Painting or Staining Options Paint or stain can be chosen based on the desired appearance and the space where the door will be used. Stain works well for highlighting the natural wood grain, while paint offers a smooth, solid look. Before applying either finish, sanding the surface is important to ensure good adhesion. The surface should be clean and dry. Using a brush allows for better control around edges. Applying two coats provides stronger coverage and longer-lasting protection. Protective Finishes for Outdoor Use For doors exposed to outdoor conditions, applying a clear protective coat is essential. Exterior-grade polyurethane or water sealers are commonly used to help resist moisture and sunlight. It’s recommended to apply the finish after painting or staining and allow full drying between coats. This process helps reduce the risk of warping, swelling, or cracking caused by weather exposure. Even one proper coat can significantly increase the door’s durability in outdoor environments. Budget and Time Breakdown When you plan your barn door project, it helps to know what you’re spending and how much time you’ll need. I’ll walk you through both so you can prepare well. DIY vs. Store-Bought Comparison Feature DIY Barn Door Store-Bought Barn Door Time Investment Requires several hours of hands-on work Minimal effort, arrives ready to install Customization Full control over design, size, and finish Limited to available styles and sizes Tools and Skills Needed Basic tools and comfort with measurements None required beyond installation Material Selection Choose your own wood and hardware Pre-selected materials Labor You handle everything from cutting to installing Professional finishing and assembly included Flexibility Easily adjust to fit unique spaces May need trimming or adjustment Cost-Saving Tips and Alternative Materials These simple choices can help reduce the cost without affecting strength or function: Use construction-grade pine or spruce instead of cedar or oak Reuse hardware from old doors or cabinets Buy boards in bulk or use off-cuts from other projects Check local salvage yards or community boards for free or cheap materials Skip decorative trim and go with a flat panel layout for fewer cuts and pieces Use screws instead of nails for better strength and flexibility Customization and Style Ideas for Barn Door Once your barn door is installed, you can add personal touches to match your space and preferences. Here are a couple of simple ways to give your door more character. Vintage Finishes, Modern Looks, Chalkboard Inserts Adding your own design elements can make a basic door stand out. For a worn-in look, try distressing the wood with sandpaper or a wire brush before sealing. A more modern style might use clean lines, smooth panels, or matte black hardware. You can also attach a chalkboard panel to part of the door, great for pantries, kids’ rooms, or schedules. These small changes can help your door match different rooms without needing to rebuild it. Using Reclaimed or Eco-Friendly Wood Choosing reclaimed wood or responsibly sourced materials is a smart way to cut down waste and keep costs manageable. Boards from old barns, pallets, or demolished homes often have a unique look and natural wear. Just make sure the wood is clean, dry, and free of pests before using it. Eco-friendly lumber options are also available at many hardware stores if you prefer something new but sustainably produced. Common Mistakes to Avoid A few simple oversights can slow you down or weaken your final result. Here’s what to watch out for before and during your build: Skipping the level check before mounting the track or hinges Using untreated wood for outdoor doors without a protective coat Ignoring stud placement when installing sliding hardware Failing to leave enough clearance between the door and the floor Choosing warped or wet boards that may shift over time Not pre-drilling holes, which can lead to split wood Over-tightening screws, causing hardware to strip or pull loose Conclusion Now that you’ve seen each step, you know how to build a barn door that’s both strong and practical. You’ve got the tools, the process, and the know-how to make it happen. Whether you’re adding it to a shed or inside your home, you can build it your way. Just take your time, follow the steps, and don’t skip the finishing touches. Need more ideas or want to find other DIY projects? Check out the rest of the blog, you’ll find plenty to keep your hands busy.
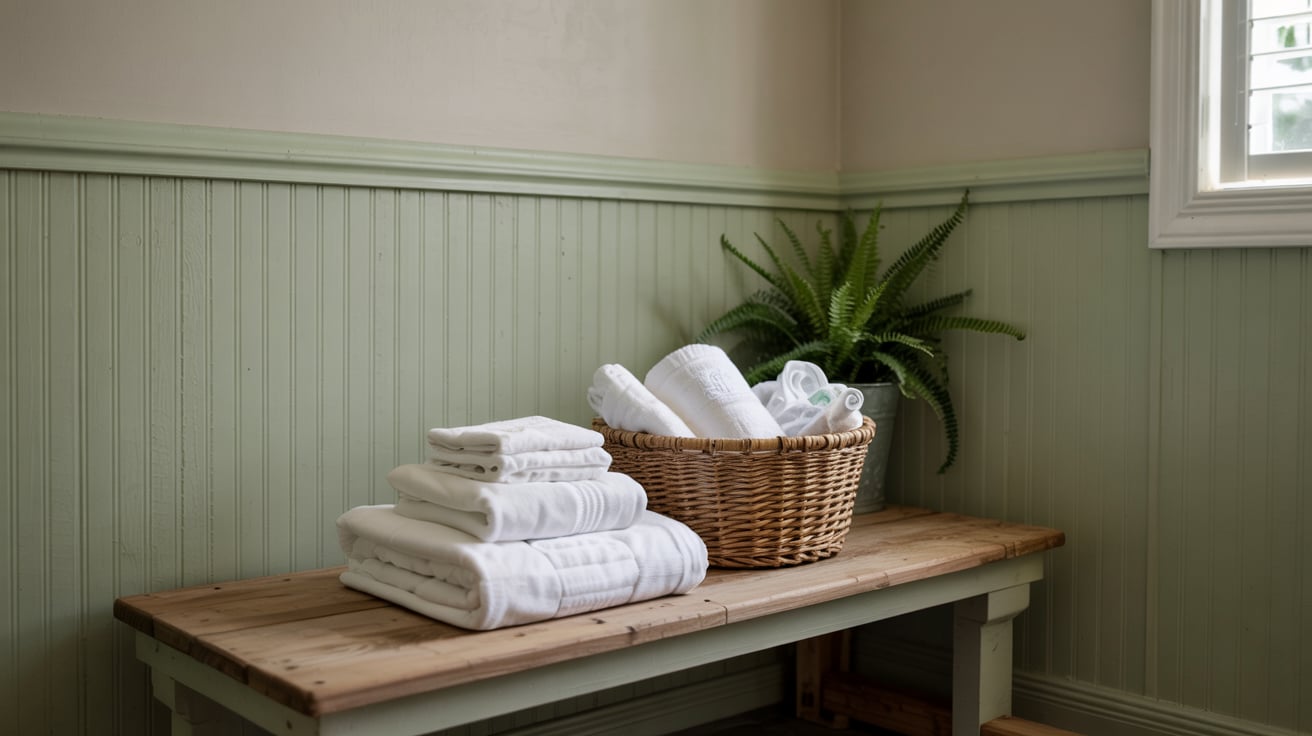
Have you been thinking about giving your space a fresh update without going through a full renovation? I’ve been in that spot too. Adding a green beadboard might be just what you need. It’s a straightforward way to add color, texture, and personality while keeping things simple and functional. In this guide, I’ll show you exactly what green beadboard is, how you can install it yourself, where it looks best in your home, and how to keep it looking great over time. If you’re ready to take on a project that’s both easy and rewarding, let’s get started. What is a Green Beadboard Green beadboard refers to vertically grooved wall paneling painted in various green shades, commonly used to add character and texture to interior spaces. Originating in the 19th century, beadboard was a practical wall finish that protected surfaces while adding visual structure. Over time, it became popular in cottages and traditional homes. The use of green introduces a calm, grounded feel to a room. Earthy tones, such as sage or olive, work especially well in spaces where relaxation, freshness, and a connection to nature are desired. Steps for Installing Beadboard at Home You can easily install green beadboard in your own space by following these steps, which require only a few basic tools. Tools and Materials 4’x8′ beadboard sheets 18-gauge brad nailer and 2” nails Hammer and finishing nails (optional) Stud finder, measuring tape, pencil Jigsaw, table saw, or circular saw Level, painter’s tape Caulk and caulking gun Spackling paste or wood filler 1×4 primed pine (for trim) Outlet extender ring (if needed) Step 1: Cutting Beadboard to Size If full panels are too large for transport, request in-store cutting to accommodate your needs. For a 48″ height, cut 4’x8′ panels in half. This simplifies handling and matches standard wainscot height. Be sure to inspect the edges for consistent grooves to ensure they align when joined. Some stores also offer smaller pre-cut options suited for various wall heights. Step 2: Marking Studs Use a stud finder to locate wall studs. Mark each stud with a small strip of painter’s tape above the intended panel height. This ensures nails are driven into solid support behind the drywall, keeping panels secure. Step 3: Installing the First Panel Place the first panel on top of the baseboard. Using a Brad nailer, drive 2” nails into the marked stud locations. Confirm the panel is level before securing it fully. If using hand tools, attach them with finishing nails, though this takes longer. Step 4: Fitting Partial Panels Measure gaps with a tape measure and mark your cut on the panel. Ensure the groove or rib pattern aligns with the previous panel. Use a table saw, jigsaw, or circular saw to make precise cuts. Dry-fit before securing. Step 5: Making Cutouts for Windows and Outlets Measure carefully around windows or obstacles. Mark vertical and horizontal distances on the panel. For outlets, use double-sided painter’s tape to temporarily attach the cover to the panel’s back, trace the shape, and cut with a multi-tool or jigsaw. Add an extender ring if the outlet sits behind the panel. Step 6: Installing Trim Molding Use 1×4 primed pine for top molding. Measure accurately and cut using a miter saw. Secure trim with brad nails into wall studs. Trim adds a finished edge and conceals any uneven panel tops. Step 7: Filling Gaps and Holes Apply spackling or wood filler to nail holes. Smooth with your finger and sand lightly after drying. For panel seams and corners, use caulk. Cut the tip to a small size and apply with steady pressure. Optionally, use painter’s tape to keep caulk lines neat. Step 8: Final Prep Before Paint Once the paneling, trim, and caulking are finished, lightly sand all surfaces and wipe clean. The panels are already primed so that any standard interior wall paint can be applied directly. Watch the full video tutorial below to see each step in action. Best Rooms to Use Green Beadboard Bathrooms Beadboard is often installed up to 36″–48″ high in bathrooms, offering protection from splashes and visual structure to small spaces. It pairs well with pedestal sinks and vintage or modern fixtures. Combining beadboard with patterned wallpaper or hexagonal tile above creates a two-tone wall effect that’s clean and balanced while also protecting lower walls from moisture. Laundry Rooms Green beadboard is ideal for laundry rooms, especially in homes with moisture concerns. It provides a protective layer over drywall while enhancing visual interest in utilitarian spaces. Choose moisture-resistant panels and pair them with proper caulking and paint for added durability. Whether behind machines or along free walls, this paneling hides scuffs and keeps the space looking fresh with minimal upkeep. Mudrooms & Entryways Mudrooms and entryways benefit from the scuff-resistant, easy-to-clean surface that beadboard provides. When installed at chair rail height or higher, it protects walls from bags, shoes, and coats while giving structure to high-traffic zones. In green tones, beadboard also adds warmth and a sense of order to spaces where functionality is just as important as appearance. Hooks, shelves, or benches pair well with this setup. Choosing the Right Shade of Green When selecting a shade of green for your beadboard, keep a few key points in mind: Sage Green has a soft, muted tone that works well in bathrooms and laundry rooms. It pairs nicely with white trim and marble tile. Olive Green brings an earthy, warm feel, perfect for mudrooms or entryways. It looks great with natural wood and brass accents. Emerald Green offers a rich, bold look, ideal for accent walls or formal spaces. It complements gold accents and dark flooring. Tranquil Green is a cool, pale tone suited for small or relaxed rooms. It blends well with light wood and neutral decor. Meadow Green is a bright, fresh shade that complements kitchens or craft areas well. It pairs best with floral prints and open shelving. Beadboard Types & Materials Understanding the available beadboard options helps you choose a style and material that fits your room’s conditions, budget, and use. Material Description Best Use Notes MDF (Medium Density Fiberboard) Smooth surface, affordable, easy to paint. Dry areas like bedrooms or hallways Avoid in bathrooms or laundry rooms. PVC Water-resistant, lightweight, low-maintenance. Bathrooms, laundry rooms Ideal for humid environments. Wood Natural finish, a classic appearance, and is more expensive. Living rooms, entryways May require sealing in damp areas. Plywood Panels Budget-friendly, available in large sheets, and easy to install. Utility spaces, garages May have visible grain or seams. Peel-and-Stick Vinyl Faux beadboard looks, fast install, minimal tools required. Rentals, quick updates Less durable; not ideal for high-traffic Product Buying Guide for Beadboard When shopping for green beadboard, you’ll want to compare materials, sizing, and finishes to find the best match for your space. Best Retailers & Pricing Familiar sources include major home improvement stores, specialty wall panel providers, and online marketplaces. Most offer a range of materials, from PVC to wood, and some involve cutting services. Retailers may differ in return policies, shipping availability, and panel finish types. Local availability often determines the styles and materials that can be selected. Popular Sizes & Styles Standard beadboard panels are often available in 32″, 42″, or 48” heights with widths up to 96“. Styles include narrow or wide grooves, primed or unfinished surfaces, and decorative edge details. Some panels are tongue-and-groove, while others are flat sheets, affecting ease of installation and seam visibility once mounted on the wall. Peel-and-Stick Options Peel-and-stick beadboard provides a fast, tool-free option for achieving a similar look to traditional paneling. These adhesive panels typically come in vinyl or paper-based materials and are suited for low-moisture areas. They offer flexibility for renters or short-term updates but may lack the texture and durability of true beadboard panels. Maintenance Tips for Beadboard Keep green beadboard looking its best by following a few simple maintenance practices to preserve finish, cleanliness, and durability. How to clean: Wipe with a damp cloth and mild soap. Avoid abrasive scrubbers to prevent surface damage or finish wear. Repainting or sealing: Use quality interior paint for touch-ups. In moisture-prone areas, apply a sealant to protect against water damage. Mold prevention: Ensure proper ventilation. Use mold-resistant materials in bathrooms or laundry spaces and check caulked seams regularly. Summing Up Now that you’ve seen how to choose the right style, install it step by step, and care for your green beadboard, you’re fully equipped to bring this look into your home. I hope this guide has given you the clarity and confidence you need to move forward with your project. If you’re updating one wall or an entire room, you’ve got a smart, stylish option to work with. If you’re ready to keep improving your space, don’t stop here. I’ve put together some simple, helpful tips and how-to guides just for you. Head over to my other posts and find more!





