
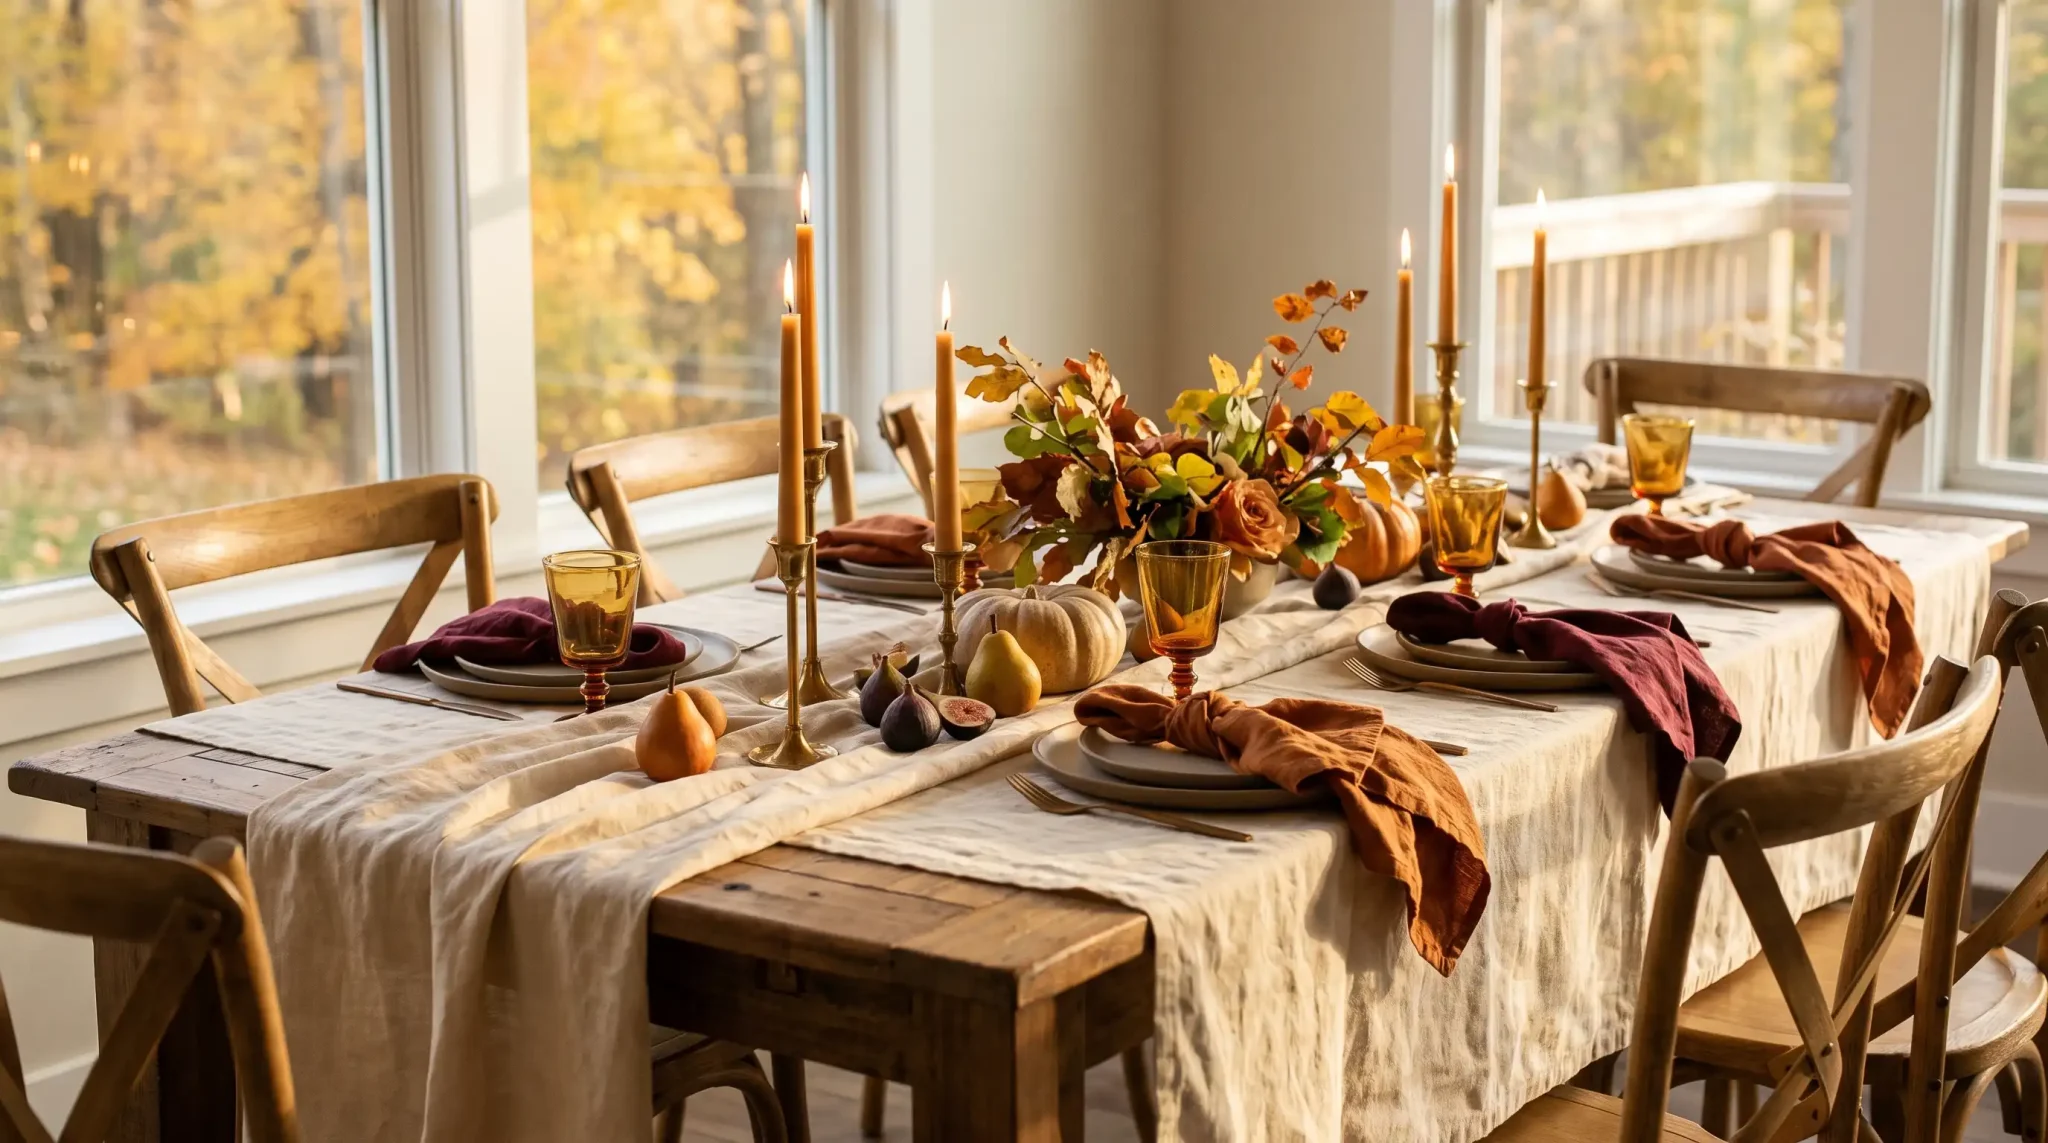
Autumn is one of those seasons that can completely change the mood of a meal before anyone even sits down. A table dressed with softer colors, natural textures, candlelight, and a few seasonal details can make an ordinary dinner feel more thoughtful and inviting. The best fall tablescapes don’t fill every inch with decor; they create a clear mood and leave enough breathing room for the food and conversation to matter. From classic harvest colors to moody, minimal, and unexpected combinations, there are plenty of ways to make a fall table feel personal rather than predictable. What Makes a Good Fall Tablescape? A beautiful fall table usually starts with restraint, not more decor. Pick one mood first, then let the linens, dinnerware, centerpiece, and candlelight support it instead of competing for attention. A well-chosen fall color combination can tie those elements together and give the table a clearer direction. Think in layers rather than individual decorations: a textured base, something natural down the center, and enough open space for the meal itself. 12 Fall Tablescape Ideas for an Inviting Autumn Table Each of these fall tablescape ideas takes a different approach to color, texture, and centerpiece style, so you can find one that actually fits your space and your gathering. 1. Classic Harvest Tablescape Burnt orange, mustard, and warm brown pair naturally with pumpkins, gourds, maple leaves, and simple ceramic dinnerware. Use linen napkins and a low foliage centerpiece to keep the table traditional without overcrowding it. This style works especially well for casual family dinners and early-season gatherings because the colors feel instantly familiar and seasonal. 2. Warm Neutral Fall Table Cream, camel, taupe, and warm brown can make a fall table feel seasonal without using the usual orange-heavy palette. Layer linen napkins, matte ceramics, pale wood, dried grasses, and a few soft-toned pears or gourds to build depth through texture. This softer fall aesthetic works especially well in modern or minimalist dining spaces where the mood comes from tone and material rather than obvious seasonal decor. 3. Moody Burgundy and Plum Tablescape Burgundy, oxblood, and plum create a deeper, more formal look when paired with dark wood, antique brass, and taper candles. Keep dinnerware neutral so the darker colors remain the focal point. This palette is especially effective for evening meals because candlelight enhances the red and purple tones without making the table feel overly dramatic. 4. Rustic Woodland Tablescape Moss, branches, pinecones, wooden chargers, linen, and earthy ceramics create a table that feels as if it were collected from the landscape outside. Keep the greenery loose and low, and mix natural textures rather than adding too many themed decorations. This works best when the wood grain and organic materials remain visible, giving the table a grounded, woodland character without slipping into farmhouse styling. 5. Elegant Green and Gold Fall Table Olive or forest green with cream, brass, and clear glass creates an elegant fall table that avoids the usual orange palette. Use green napkins, brass flatware, simple foliage, and pale dinnerware for contrast. The combination works particularly well for dinner parties because the darker green adds seasonal depth while cream and glassware keep the table light and refined. 6. Vintage-Inspired Fall Tablescape Mix patterned china, mismatched glassware, embroidered linens, and aged brass instead of using a fully coordinated set. A few pieces with patina or wear make the table feel collected over time, not newly styled. Keep the centerpiece low and slightly loose so the vintage pieces stay visible. This approach also works well when your tableware comes from thrift shops, family pieces, or different collections. 7. Apple and Pear Harvest Table Use apples, pears, pomegranates, and a few branches as the main centerpiece instead of pumpkins. Arrange the fruit loosely down the center of the table rather than piling it into one large bowl. Pair it with cream ceramics, linen napkins, and simple candles. This approach is practical because the centerpiece is inexpensive, seasonal, and easy to remove or serve after the meal. 8. Candlelit Autumn Tablescape Let candlelight carry most of the visual impact by using taper candles and small votives with neutral dinnerware and minimal greenery. Vary the candle heights slightly, but keep them low enough that they do not block conversation. Unscented candles are best near food, and spacing them away from dried foliage keeps the arrangement safer while still creating a warm evening atmosphere. 9. Floral Fall Tablescape Dahlias, chrysanthemums, berries, dried grasses, and woody branches create a softer, more romantic fall table. Use several low vessels instead of one tall arrangement so guests can still see across the table. Mixing fresh flowers with dried stems adds seasonal texture and keeps the centerpiece from looking like a spring arrangement in darker colors. 10. Minimalist Fall Tablescape 10. Minimalist Fall Tablescape A minimalist fall table is less about removing everything and more about choosing each piece carefully. Start with one warm autumn tone, then pair it with neutral dinnerware, a simple linen runner, and a few sculptural branches or taper candles. Keep plenty of the tabletop visible so every element has room to stand out. The look feels clean and seasonal without relying on piles of pumpkins, leaves, or extra decor. 11. Outdoor Fall Dinner Tablescape Adapt the same autumn styling to a patio, porch, or backyard table using heavier linens, lanterns, wood, foliage, and candle holders built to handle a breeze. It brings fall entertaining outside the dining room for anyone lucky enough to have the space and weather for it, and a few extra layers, like a throw blanket on each chair, help guests stay comfortable once the sun goes down. 12. Thanksgiving-Ready Fall Tablescape Start with a simple autumn table, then add place cards, extra serving pieces, more formal glassware, and a slightly fuller centerpiece for Thanksgiving. If you want to make the setting feel more holiday-specific, a few thoughtful Thanksgiving table decor details can add warmth without overcrowding the table. Leave enough room for shared dishes, especially if you serve the meal family-style. This approach makes it easy to use the same basic table throughout fall and add a few more formal details for the holiday. 13. Copper and Terracotta Fall Tablescape Terracotta, rust, copper, cream, and warm brown create a warmer, more contemporary alternative to a classic harvest table. Use terracotta plates, rust linens, dried foliage, and copper-toned candleholders, but limit metallic finishes so the table doesn’t look too shiny. Cream napkins and clear glassware help balance the stronger earthy tones and keep the setting visually light. 14. Black and Amber Fall Tablescape Matte black dinnerware or candleholders paired with amber glassware, cream linens, and warm wood creates a dramatic but balanced fall table. Use rust foliage or caramel colored candles to connect the dark base back to the season. The contrast does the work: black provides structure, while amber glass and natural wood prevent the setting from feeling cold or overly formal. 15. Blue and Rust Autumn Tablescape Black gives a fall table strong structure, while amber keeps it from feeling too severe. Pair matte black dinnerware or candleholders with amber glassware, cream linens, and warm wood for a balanced look. Rust foliage or caramel-colored candles can soften the contrast and pull the setting back toward autumn. The combination feels dramatic without becoming cold, making it a strong choice for an evening fall table that still feels warm and inviting. 16. Linen and Dried Grass Fall Tablescape Natural linen, wheat, dried seed heads, neutral ceramics, and light wood create a soft fall look built on texture rather than strong color. Keep dried arrangements short and loose, so they don’t overwhelm the table. This style suits Scandinavian, minimalist, or relaxed modern interiors because the seasonal effect comes from tactile materials and warm neutrals, not themed decor. 17. Candle and Fruit Garland Tablescape Create a long, low centerpiece with apples, pears, figs, pomegranates, olive or eucalyptus branches, and staggered taper candles. Spread the arrangement lengthwise rather than building it up in height to keep sightlines open and leave room for serving dishes. Use fruit in different sizes and colors to create natural variation, and keep candles separated from dry foliage for a safer, more practical setup. How to Build a Fall Tablescape Step by Step Inspiration only gets you part of the way there, since translating a photo you like into an actual table setting takes a bit more structure. Here is a practical sequence for putting any of the looks above into practice. Choose One Color Story: Start with two or three main colors plus a neutral. Resist the urge to add every traditional fall shade just because it is seasonal, since that is usually what makes a table feel cluttered instead of cohesive. Establish the Base With Linens: Choose a tablecloth, runner, placemats, or leave the wood bare, depending on the style you want. This layer sets the tone before anything else goes on the table. Layer the Place Settings: Build from charger or placemat up to the dinner plate, a smaller plate or bowl, a napkin, flatware, and glassware. Working in this order keeps each setting consistent without much extra thought. Build a Low Centerpiece: Flowers, foliage, fruit, pumpkins, branches, or candles all work, as long as the arrangement stays low enough not to block sightlines across the table. Centerpiece height is one of the most common practical issues with fall tablescapes, and keeping it low solves most of them. If you want more visual interest without adding height, spread the arrangement out lengthwise along a runner rather than stacking it vertically in one spot. Add Candlelight and Finishing Details: Finish with taper candles, votives, a napkin detail, place cards, or one small seasonal accent at each setting. Stop once the table feels complete rather than filling every remaining bit of open space. How to Keep a Fall Tablescape Beautiful and Functional A table that photographs well is not always a table that works for an actual meal, and it is easy to prioritize the styling over the people actually sitting down to eat. A few practical guidelines keep both in balance: Leave room for plates and glassware: styling should not crowd out the things guests actually need. Keep centerpieces below sight lines: guests should be able to see and talk to each other across the table. Keep flammable foliage away from candles: dried grasses and greenery can catch fire more quickly than expected. Leave space for shared dishes: family-style serving needs room that a heavily styled table can eat into. Avoid overcrowding individual place settings: too many small objects at each seat makes eating awkward. Use unscented candles near food: strong fragrance can compete with the meal itself. How to Create a Fall Tablescape on a Budget A beautiful fall tablescape does not require buying an entirely new set of dinnerware. Existing white plates work as a neutral base for almost any color story, and swapping out just the napkins or a runner can shift the whole feel of the table for very little cost. Branches, leaves, and seasonal produce gathered outdoors or picked up cheaply at a grocery store make effective centerpieces on their own. Thrifted glassware and candlesticks add character that new, matched sets often lack, and changing a few small accents is usually enough without redoing the whole table. Even one new element, a runner, a set of candles, or a bowl of seasonal fruit, can carry the rest of an existing table into fall. Conclusion A successful fall tablescape comes down to a cohesive color story, a bit of seasonal texture, comfortable lighting, and enough open space for people to actually gather and eat. The prettiest table in the world falls short if it gets in the way of the meal itself. Pick one of the looks above, build it out with the step-by-step approach, and keep function in mind at every stage. The result will feel intentional and inviting, not just staged for a photo. Frequently Asked Questions What Is a Fall Tablescape? A fall tablescape is the overall styling of a dining table for autumn, combining color, linens, dinnerware, a centerpiece, and lighting into one cohesive, seasonal look. How Do You Make a Simple Fall Tablescape? Pick one seasonal color, use plain dinnerware, add a linen runner, and finish with a low centerpiece and a few candles for warmth and atmosphere. What Can I Use for a Fall Table Centerpiece? Seasonal fruit, foliage, branches, dried flowers, pumpkins, or a row of taper candles all work well as long as they stay low and simple. How Do You Decorate a Fall Table Without Pumpkins? Lean on color, linens, candlelight, and natural textures like wood and dried grasses instead, which read as autumnal without a single pumpkin anywhere in sight. How Tall Should a Dining Table Centerpiece Be? Keep it low enough that seated guests can see and talk to each other across the table, generally well below eye level once everyone sits down.
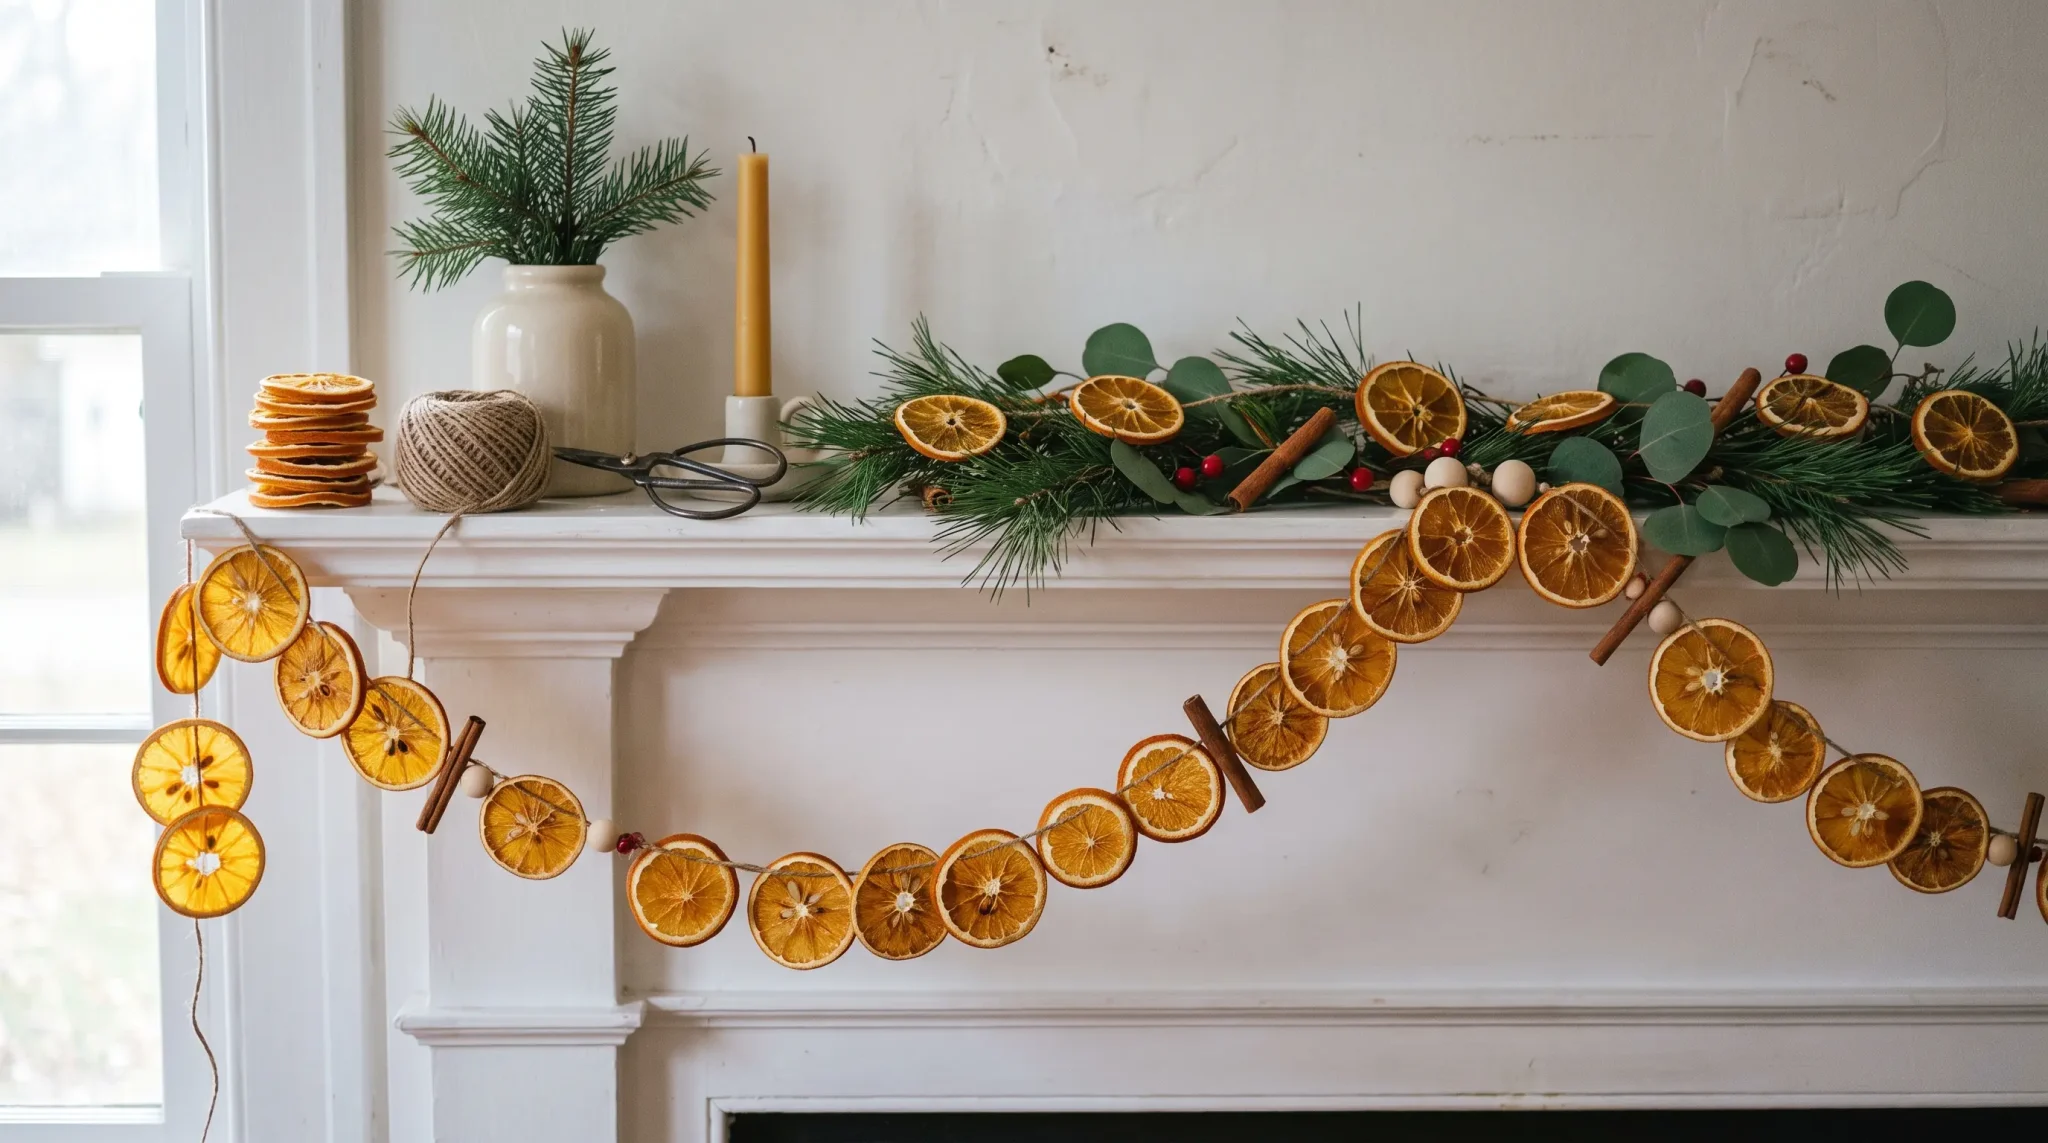
I put off making a dried orange garland for two seasons because it seemed like the kind of project that would eat an entire afternoon. It doesn’t. Once you slice the oranges, the oven does most of the work. The slices don’t need to look perfect, either. Different shades, curled edges, and slightly uneven rounds all add to the appeal. The one thing you can’t be casual about is moisture. A damp center can turn into mold later, so give the oranges plenty of time to dry before you reach for the twine. Get the slicing and drying right, and stringing the garland together is the easy part. What You’ll Need and How Many Oranges to Buy You only need a few basics to get started. The number of oranges depends mostly on how long you want the finished garland to be. 3–4 oranges: for about a 3-foot garland 5–6 oranges: for about a 5-foot garland 6–7 oranges: for about a 6-foot garland Sharp knife or mandoline: for thin, even slices Paper towels and baking sheet: for blotting and drying Parchment paper or wire rack: to prevent sticking Twine, needle, and scissors: for assembling the garland Optional: cinnamon sticks, wooden beads, star anise, or greenery for extra detail Measure the spot where you plan to hang the garland first, and leave a little extra twine for the natural dip and end loops. How to Make Dried Orange Garland Step by Step The slicing takes minutes. Drying takes hours. That is the trade-off with this project, and trying to hurry the second part usually causes most of the problems. Step 1: Slice Them Thin, Not Perfect Cut the oranges into rounds about 1/8 to 1/4 inch thick. Aim for a similar thickness, but forget about perfect circles. A few wonky edges will disappear into the finished garland. A mandoline makes quick work of this, though a sharp knife works just as well. Set aside the tiny end pieces and use the fuller rounds from the middle. Step 2: Blot Before They Hit the Oven Gently press each slice between paper towels. You are not squeezing out the juice; you are just picking up what is sitting on the surface. It takes less than a minute and leaves less moisture for the oven to remove. Step 3: Now Comes the Slow Part Lay the slices in a single layer on a parchment-lined baking sheet, leaving a little space between them. Keep the oven around 200 to 225°F and plan on roughly 3 to 5 hours, turning the slices about once an hour and removing thinner pieces as they finish. Now you may wonder whether to use an oven or dehydrator. An oven is faster at around 3 to 5 hours, while a dehydrator takes about 8 to 12+ hours but provides steadier, lower heat that can help reduce browning. Step 4: Let Them Cool Before You Decide Fresh from the oven, a slice can feel drier than it actually is. Move the oranges to a cooling rack and leave them alone until they reach room temperature. Then check the centers. They should feel dry, not tacky or spongy. Step 5: Give Them a Little More Time If you hope to reuse the garland next season, do not rush straight from the cooling rack to twine. Let the slices rest in a dry place for a few days. If one softens again or you notice moisture, it was not quite finished. Give that piece another spell in the oven or dehydrator. Step 6: Thread Without Cracking the Slices Cut more twine than you think you need. You can always trim the extra later. Make two small holes near the top of each orange, where the fruit is sturdier near the rind. Running the twine through two points helps the slices face forward instead of constantly twisting sideways. Handle them gently here. Dried oranges are fairly sturdy until they suddenly aren’t. Step 7: Space Them by Eye Slide the oranges along the twine until the strand looks balanced. You don’t need to measure every gap. Leave them plain or tuck cinnamon sticks, beads, or greenery between the slices. Finish with a loop at either end and hang the strand with a little natural slack. Give the Basic Garland a Different Look Once you know how to make the basic version, you can change the style without starting from scratch. 1. Add Cinnamon for a Holiday Feel Slip small cinnamon-stick bundles between the orange slices for a more traditional holiday look. The warm brown bark adds contrast against the bright citrus and brings in a subtle seasonal scent. Keep the bundles small so the garland stays balanced and does not sag. 2. Tuck in a Little Greenery A few pieces of pine, spruce, or eucalyptus can make a simple orange strand feel fuller and more layered. Use small sprigs rather than large branches so the greenery does not overwhelm the fruit. Fresh stems will dry gradually, which works naturally with the handmade look. 3. Break Up the Oranges With Wooden Beads Wooden beads are an easy way to create breathing room between the orange slices and give the strand a cleaner rhythm. Unfinished beads work especially well because their natural grain complements the dried fruit. Choose lightweight beads so they do not pull too heavily on the twine. 4. Don’t Stop at Oranges Lemon, grapefruit, and blood orange slices can add more variation in size and color to the garland. Mixing citrus makes the finished strand feel less uniform and a little more interesting. Keep in mind that larger grapefruit slices may need extra drying time before they are ready to thread. How to Keep Dried Orange Garland From Molding Mold usually appears because the slices were not completely dry or the finished garland picked up moisture later. The best prevention happens before you hang it: Give thicker slices extra drying time. Never thread fruit that still feels soft. Let everything cool completely. Keep the finished garland away from damp rooms. Don’t seal questionable slices in plastic. If mold appears later, discard that slice rather than trying to rescue it. How to Store Dried Orange Garland Without Breaking It Do not ball it up with the Christmas lights and hope for the best. Once dried, orange slices can handle hanging surprisingly well, but sharp bends and pressure can crack them. When the season is over: Wrap the garland loosely in tissue paper Lay it flat instead of folding it Use a cardboard box or another breathable container Keep the box somewhere dry and away from heat Avoid trapping the garland inside sealed plastic if you have any doubt about remaining moisture. A shallow box is especially useful because you can lay the whole strand down without forcing bends into the dried slices. Let It Look Handmade There’s something satisfying about decorating with something you made yourself, especially when it feels simple, natural, and a little imperfect. Dried orange garland has that kind of charm. It works just as easily in a quiet fall corner as it does across a Christmas mantel, and every strand ends up looking slightly different. Once it’s finished, all that’s left is finding the right spot for it and enjoying the warm, handmade character it brings to the room. Frequently Asked Questions How long will orange garland last? A fully dried orange garland can last for several years when stored in a cool, dry place away from moisture. What are the uses of a dried orange garland? A dried orange garland can decorate mantels, Christmas trees, windows, stair rails, shelves, doorways, and seasonal table displays. What kind of string to use for orange garland? Use sturdy twine, jute, cotton string, or strong thread that can support dried orange slices without cutting through them.