

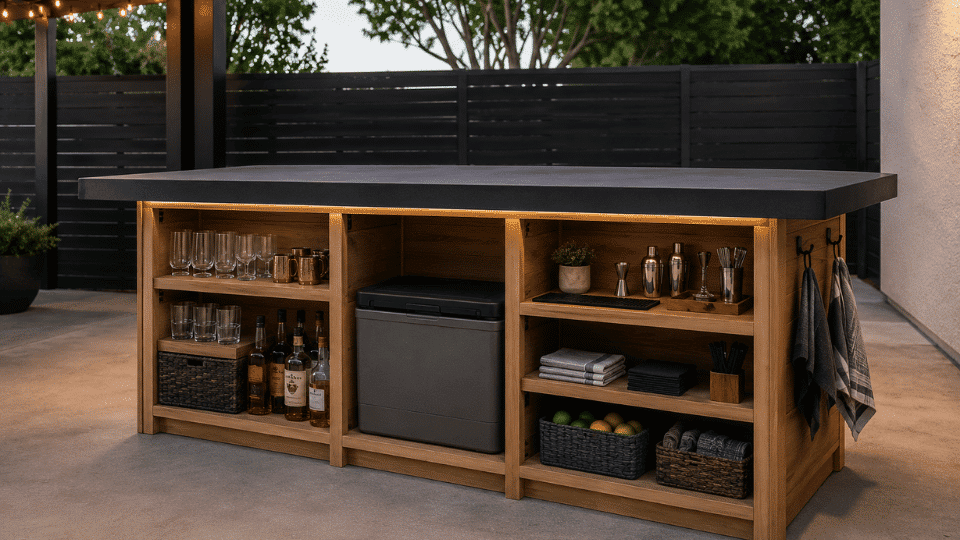


A well-built DIY outdoor bar runs about $400–$800 in materials for a freestanding 72-inch unit, more if you use premium cedar throughout, less if you stick to pressure-treated framing with cedar slats only on the visible faces.
I’ve seen homeowners spend twice that by skipping the planning stage and buying the wrong lumber twice. The build I’m walking through here avoids that.
It uses a strong exterior-grade frame, vertical wood slats over dark backing panels, a sealed countertop, open back storage, and warm under-counter LED lighting. Done right, this is a bar that survives real weather and still looks intentional two winters later.
| Cost Note: Figures in this article are estimates based on national averages as of 2026. Actual costs vary significantly by region, lumber prices, and material choices. Always price your cut list at a local lumber yard before committing to the build. |
| Difficulty | 3/5 — Basic carpentry, no specialist skills needed |
| Time | 1–2 weekends (build) + 1 day (finish and cure) |
| Cost | $400–$800 in materials depending on wood choice |
| Tools Needed | Circular saw or miter saw, drill/driver, clamps, level, tape measure, speed square, sander |
| Skill Required | Intermediate — confident measuring, cutting, and driving screws square |
What This Build Creates
The finished bar is freestanding, approximately 72 inches wide, 24 inches deep, and 42 inches high, proper bar height for standard stools with a 28–30-inch seat. The front and sides have a warm, vertical wood-slat finish over dark backing panels.
The countertop overhangs the frame slightly and is finished with a thick front edge so it reads as a solid slab. The back is open for storage, with two shelves and one open bay sized for a cooler or storage bin. Under-counter LED strip lighting and a black foot rail finish the build.
It sits on a patio, deck, or paved area. It does not belong on grass, more on that under mistakes to avoid.
The One Failure Mode to Know Before You Start
The most common reason DIY outdoor bars look rough after one season: unsealed wood. Not just the faces but the cut ends, the undersides, the corners, the hidden frame members.
Raw end grain is the first place water gets in, and once it’s in, it works fast. Seal everything before assembly where you can, and again after final assembly where you can’t reach it earlier.
That’s the step most people skip because it’s tedious and invisible. It’s also the step that determines whether this bar looks good in year three or starts delaminating by year two.
| Pro Tip: Pre-seal all cut ends with a penetrating outdoor wood sealer before assembly. Once the frame is together, you won’t reach half these surfaces. A foam brush and five minutes per board before you build saves you a resealing job next spring. |
Materials and Cut List
The quantities below are based on the 72 × 24 × 42-inch finished size. Buy 10–15% extra on lumber for trimming, ripped pieces, and spacing adjustments.
Pressure-treated lumber is the right call for the hidden frame. It handles ground moisture and repeated wet/dry cycles without degrading.
Cedar is the better choice for the visible slats because it takes stain well, has natural rot resistance, and looks warmer than treated wood.
| Material | Cut Size | Qty | Use |
|---|---|---|---|
| 2×4 pressure-treated or exterior-grade lumber | 72 in | 4 | Long sides of top and bottom frames |
| 2×4 exterior-grade lumber | 21 in | 8 | Short sides of top/bottom frames and side rails |
| 2×4 exterior-grade lumber | 40½ in | 8 | Corner posts and mid-span support posts |
| 2×4 exterior-grade lumber | 69 in | 3 | Front and back horizontal support rails |
| 1×2 or 1×3 lumber | Custom | 4–6 | Back shelf support cleats |
| Exterior plywood (¾ in) | 72 × 38 in | 1 | Front backing panel |
| Exterior plywood (¾ in) | 24 × 38 in | 2 | Side backing panels |
| Exterior plywood or sealed boards | Custom | 2 shelves | Lower and middle back shelves |
| Cedar slats (1×2 or 1×3) | 38 in tall | 40–45 | Front slatted finish |
| Cedar slats (1×2 or 1×3) | 38 in tall | 24–30 | Side slatted finish |
| Countertop base (2× lumber or ¾ in plywood laminated) | 76 × 29 in | 1 | Main countertop base |
| Countertop edge trim | 76 in front, 29 in sides | 3 | Thick countertop edge profile |
The countertop base is the one place to spend more time than you think it needs.
A single layer of ¾-inch plywood will flex over a 76-inch span. Either laminate two layers or use solid 2× material ripped and glued side by side.
The edge trim is what makes it look like a slab, add a 1½-inch thick face on the front and sides, and nobody will know it’s plywood underneath.
Hardware, Finishes, and Accessories
| Category | What to Buy |
|---|---|
| Fasteners | Exterior-grade coated screws (2½ in for frame, 1¼ in for slats and panels) |
| Countertop finish | Dark charcoal, black, or concrete-look outdoor coating — apply 2 coats minimum |
| Wood finish for slats | Warm exterior stain + outdoor sealer rated for UV exposure |
| Backing panel finish | Black or charcoal exterior paint before slats go on |
| Lighting | Outdoor-rated warm white LED strip (2700–3000K) with weatherproof power supply |
| Foot rail | Black tubular steel foot rail kit, mounted to the lower front frame |
| Optional hardware | Bottle opener, side hooks, magnetic bar tool holder |
The LED strip color temperature matters more than most people realize. Warm white at 2700–3000K reads like candlelight and makes the cedar slats glow at night.
Anything above 4000K pushes into cool white territory, and the whole setup starts looking like a work light instead of a bar.
Step-by-Step DIY Outdoor Bar Build
Step 1: Mark the Footprint
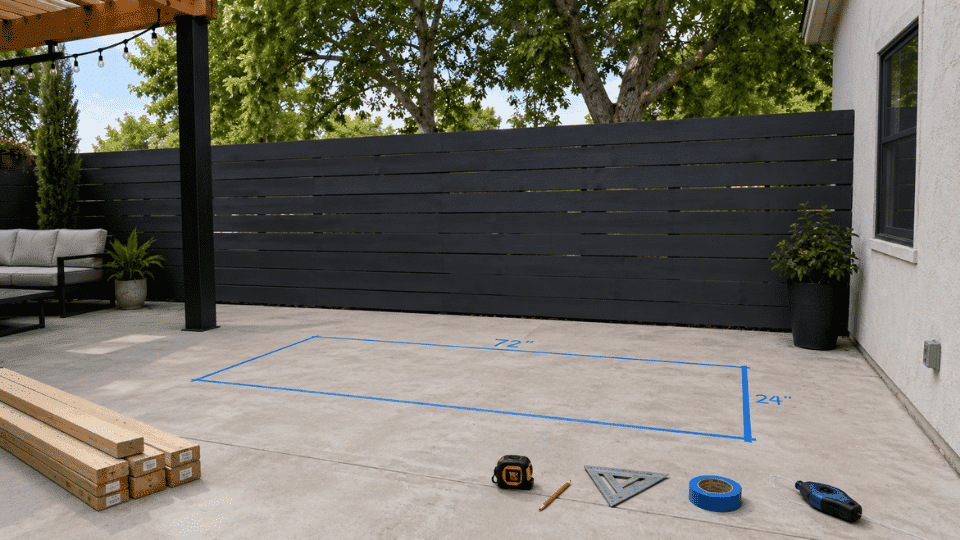
Mark a 72 × 24-inch rectangle on the patio, deck, or pavers where the bar will live. Keep the front — the slatted side — facing the seating area. Confirm the surface is flat with a long level. A half-inch of slope across 72 inches is manageable with shims; more than that and the frame will rack.
Step 2: Build the Main Timber Frame
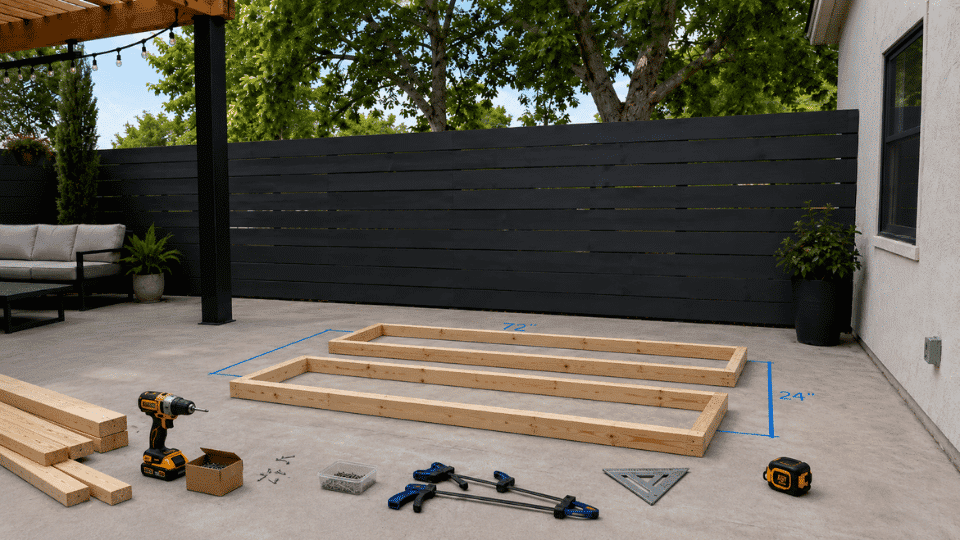
Build the bottom rectangle first using the 72-inch and 21-inch 2×4s. Set it flat on the ground and confirm it’s square — diagonal measurements should match within ⅛ inch. Build an identical top rectangle.
Then stand the eight vertical posts between them: four corners and four mid-span supports. Screw everything tight, recheck square and level, and brace it diagonally with a clamp across the frame while the structure sets.
At this stage you should have a rigid open box. If it flexes when you push it, the problem is easier to fix now than after panels go on.
Step 3: Add Horizontal Support Rails
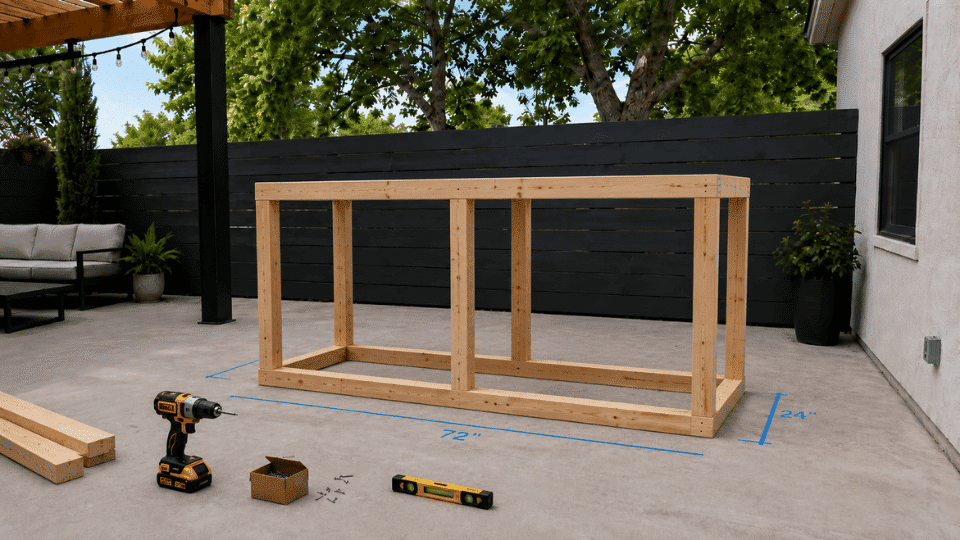
Run the three 69-inch horizontal rails across the front and back of the frame at mid-height and at the shelf positions. Add 21-inch side rails at matching heights.
These rails carry the panel weight, give the shelves something to land on, and eliminate flex in the long front span. A 72-inch frame without mid-span support will visibly bow over time as wood moves through seasons.
Step 4: Attach the Dark Backing Panels
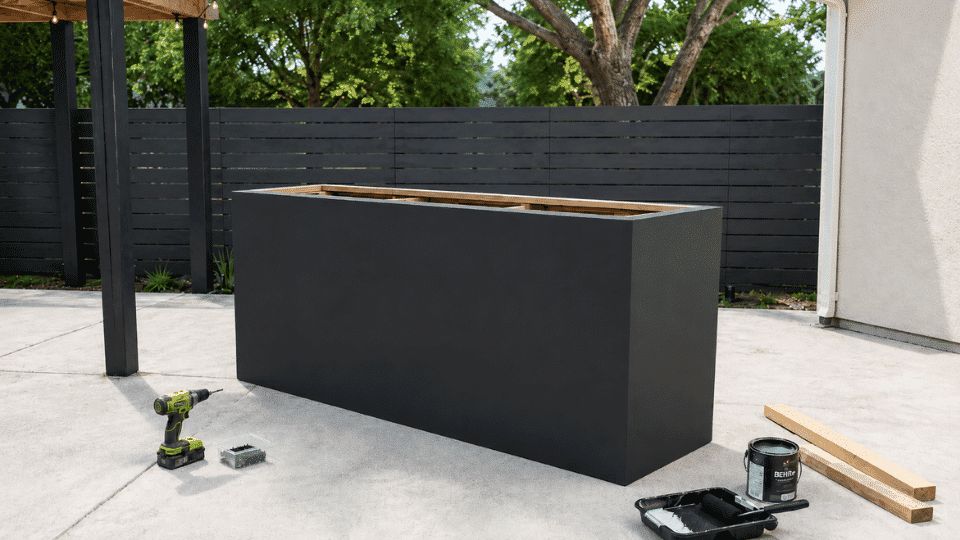
Cut and fit the exterior plywood panels to the front and both sides of the frame. Before you screw them in, paint them black or dark charcoal on the face side.
The dark color shows through the gaps between slats and is what gives the finished front its depth. Skip this step and the gaps will expose raw plywood, which looks unfinished and holds water.
Two coats of exterior paint is enough — the slats protect the panel face from direct weather.
Step 5: Install the Vertical Cedar Slats
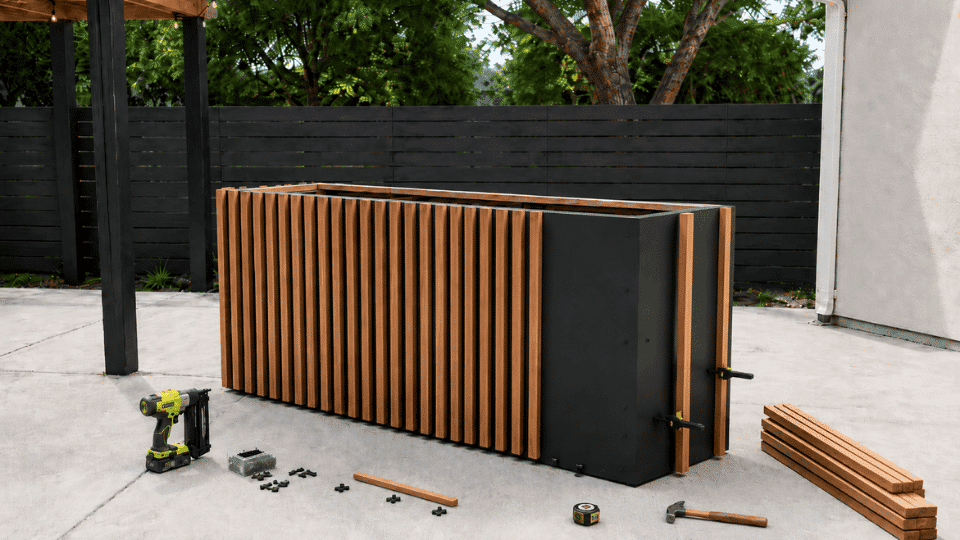
Start at the center of the front panel and work outward, using a consistent spacer — a ¼-inch scrap of plywood works fine — between each slat.
Starting from the center keeps the pattern symmetrical even if the last slat on each end needs to be ripped slightly. Continue the same treatment around the sides. Use 1¼-inch exterior screws through the slat face into the backing panel and into any support rail behind it.
This is the step where the bar starts to look like something. The warm cedar grain against the dark backing is most of the visual result.
Step 6: Add the Back Shelves
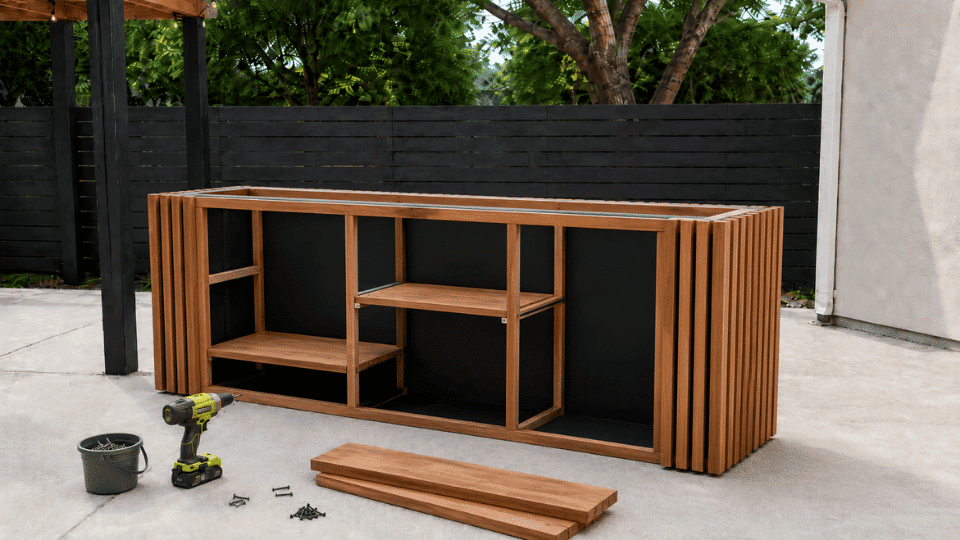
Screw the shelf support cleats to the inside of the back frame rails.
Set the lower shelf 6–8 inches from the ground — high enough to clear puddles, low enough for a full-size cooler in the open bay beside it. Set the middle shelf at whatever height your bottles and glassware need.
Keep one bay at least 18 inches wide and 15 inches clear for the cooler. Seal all shelf boards on all six sides before installing them. Shelves in outdoor builds take the most moisture abuse of any part of the structure.
Step 7: Install the Countertop
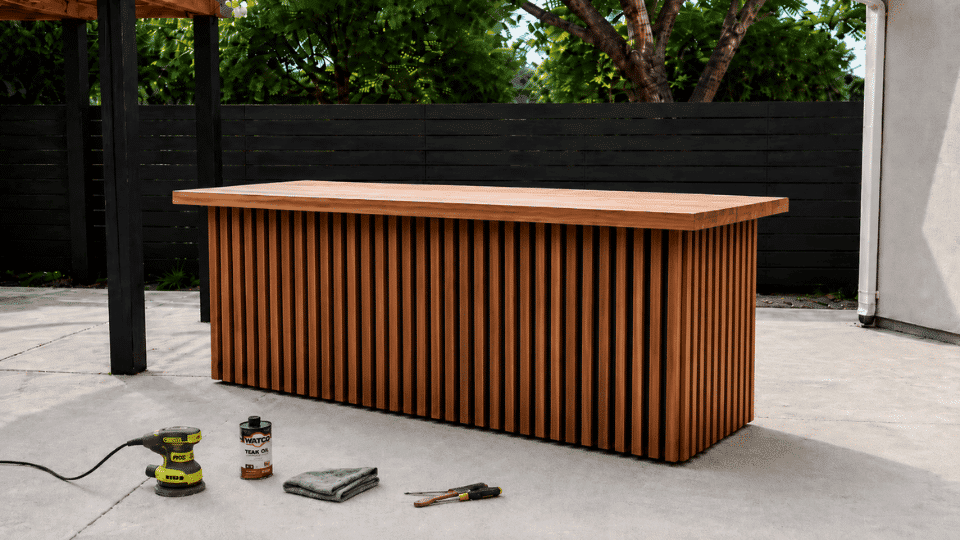
The countertop base is 76 × 29 inches, overhanging the 72 × 24-inch frame by 2 inches front and back and 2 inches per side.
Attach the 1½-inch thick edge trim flush to the bottom of the base on the front and both sides to create the slab profile.
Secure the assembly from underneath using screws up through the top frame into the countertop base. At 42 inches tall with the countertop in place, the bar is at proper serving height.
Step 8: Finish All Surfaces
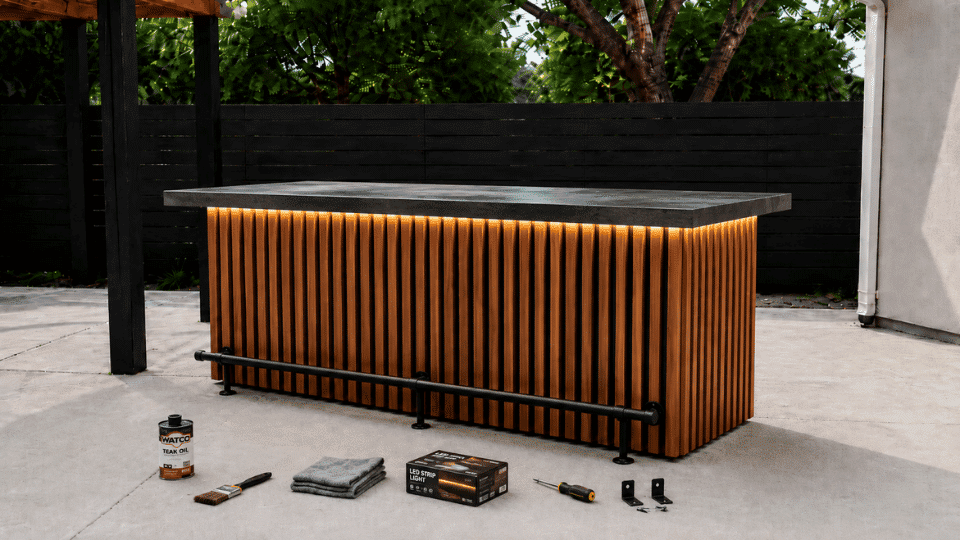
Sand the cedar slats to 120 grit, knock off the sharp corners on the slat edges, then apply two coats of warm exterior stain.
Apply the dark countertop coating in two coats, feathering the edges over the trim. Seal everything from countertop face and edges, slat faces and any unsealed backs, the top of the frame underneath the counter where water will pool. Give the sealer 48 hours to cure before use.
Once the finish is dry, mount the LED strip on the underside of the countertop lip. Route the wire down the back corner of the frame to the power supply.
Mount the black foot rail 6–8 inches from the ground on the front lower frame using the included hardware.
Step 9: Style the Finished Bar
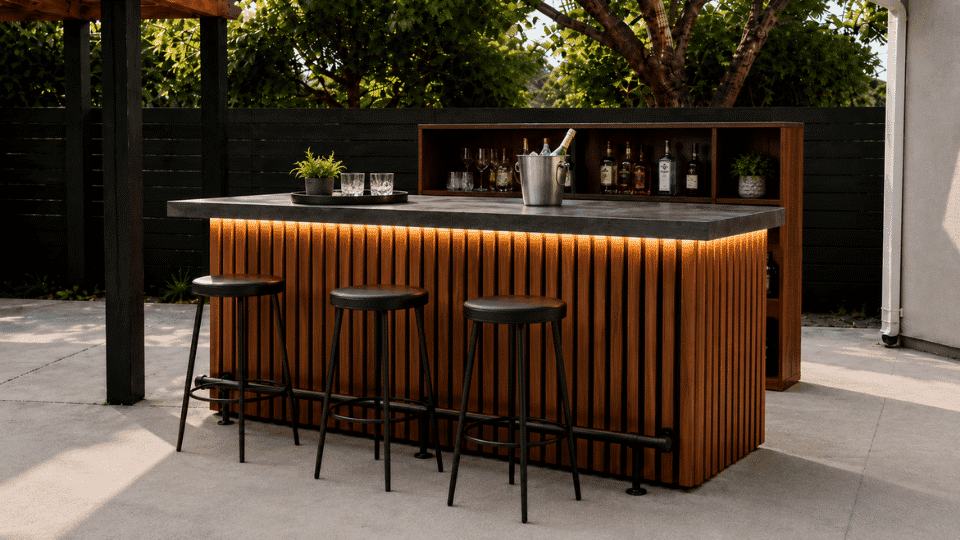
Two or three stools spaced 24 inches apart work well for a 72-inch bar.
Set a tray, a few glasses, an ice bucket, and one or two bottles on the counter just enough to look ready, not enough to look crowded.
Add a small potted plant or two at one end. The bar does the heavy visual lifting already; the styling just activates it.
Outdoor Bar Ideas to Personalize the Build
The base build is the structure. These additions change how the bar is used and how it reads in the space — each one is a one-day job once the main build is done.
Add a Wall Shelf Behind the Bar
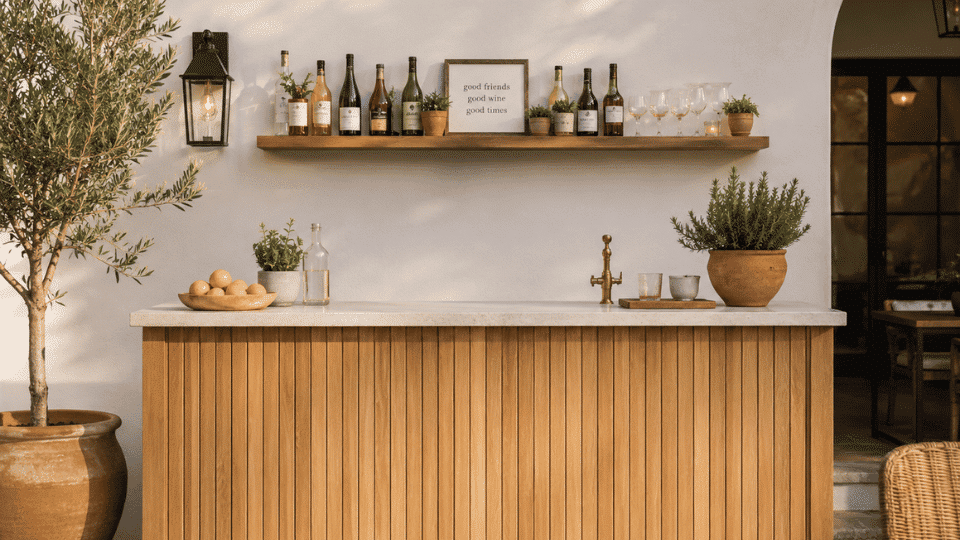
A narrow wall-mounted shelf behind the bar gives bottles and glasses a home and creates a proper backdrop. Useful if the bar sits against a fence or exterior wall.
Keep it shallow like 6–8 inches deep, so it doesn’t compete with the counter workspace. Seal it the same way as the main build.
Use a Removable Ice Bucket
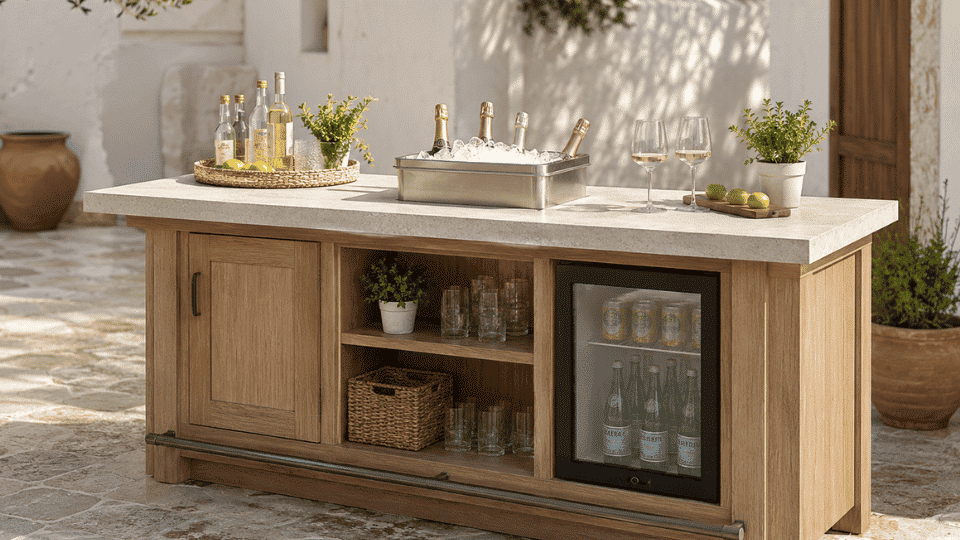
A removable ice bucket avoids the plumbing and drainage problems of a built-in sink while giving the bar a functional serving feature. Stainless steel holds cold better than plastic alternatives. It sits on the counter during use and goes in the back shelf bay when the bar is idle.
Add a Narrow Backsplash Ledge
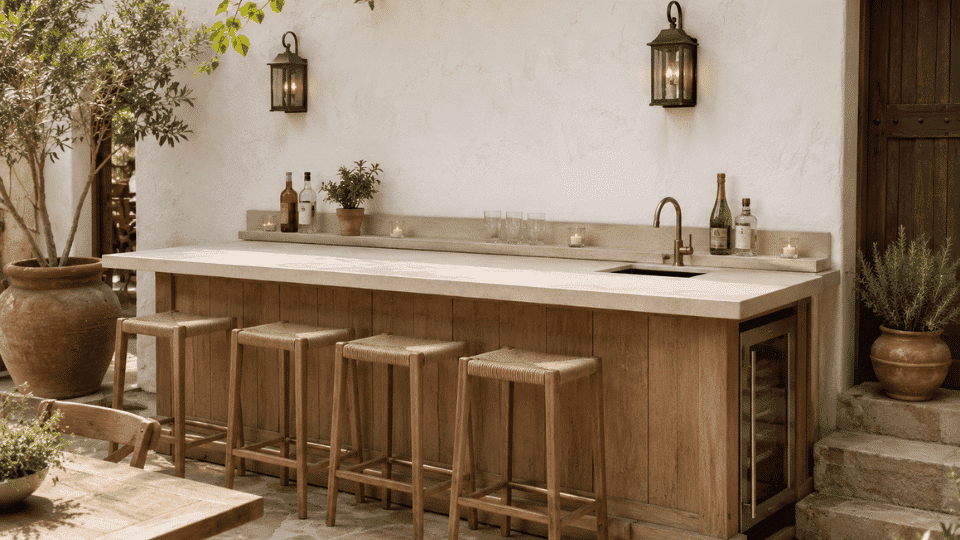
A 4-to-6-inch ledge running the full back width of the countertop adds a small display shelf without reducing usable counter space. Useful for bottles, garnishes, or a few candles.
Seal the ledge with the same countertop coating so it handles spills the same way the main surface does.
Style With Potted Herbs
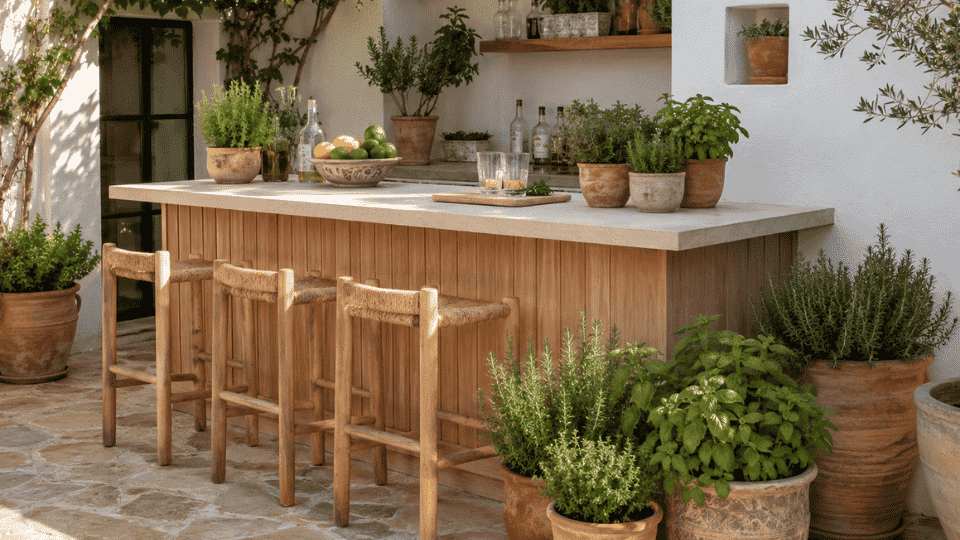
Mint, rosemary, and thyme in terracotta pots beside the bar serve two functions: they look right against the warm cedar, and they’re actually useful at a bar.
Keep them on the counter only if you have counter space to spare — they’re better placed on an adjacent surface or the ground beside a stool.
Match Your Stools to the Build
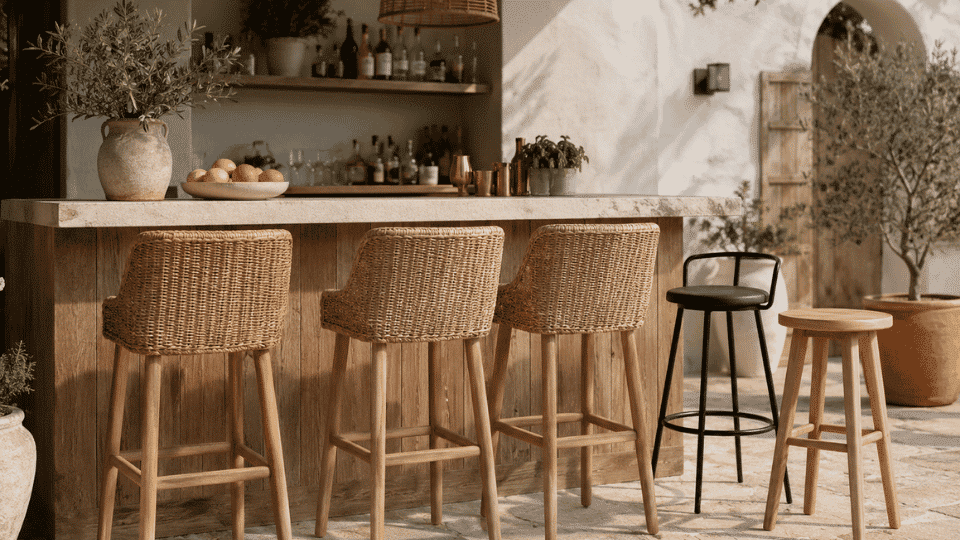
For a 42-inch bar, you need stools with a seat height of 28–30 inches, any lower and the counter is in your armpits.
Black metal stools read modern and clean against the cedar slats. Woven stools push the look warmer and more casual. What to avoid: anything plastic, anything with a seat height labeled for a 36-inch counter, anything that won’t survive being left outside.
If you want stools that hold up the same way the bar does, look for aluminum or powder-coated steel frames with a weather-rated seat material.
The outdoor bar stools at Minimal & Modern include weather-rated options in the right height range.
Add Lighting Around the Bar Zone
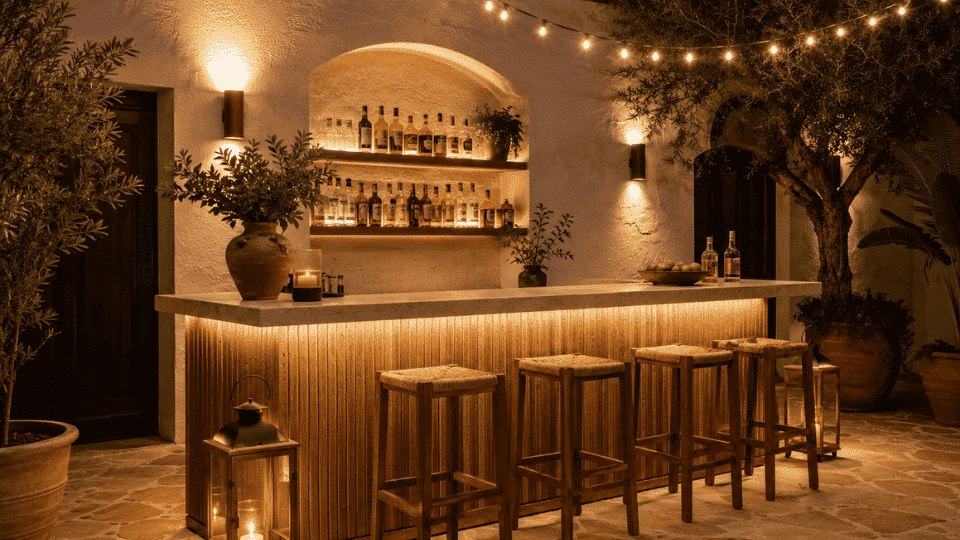
The under-counter LED handles the bar itself. String lights above define the zone. Solar lanterns on the ground or on nearby surfaces add layers of light at different heights.
The goal is a warm ambient glow, not a single bright source. If you’re building on a covered patio or under a pergola, a wall-mounted fixture at the back of the bar zone completes the setup and adds task light for pouring.
Mistakes That Show Up Two Winters Later
Most of these aren’t obvious at build time. They’re the kind of failure you notice a year or two in, when it’s already a bigger fix than it should have been.
- Building on grass or soil: Wood that sits on ground contact wicks moisture from below continuously. The base frame rots from the bottom up, and you won’t notice until it’s structural. Use a paved or composite base, or set the bar on adjustable post bases that keep the frame off the surface.
- Skipping exterior-grade fasteners: Standard interior screws rust through in one season in a wet climate. Exterior-coated screws cost a few dollars more per box. Use them on every single connection.
- Leaving raw end grain exposed: End grain absorbs water 40–50 times faster than face grain. Seal cut ends with penetrating sealer before or immediately after cutting, every piece.
- A countertop that’s too thin across the span: A single ¾-inch plywood panel over 76 inches will deflect visibly over time. Either laminate two layers or use solid 2× material and add the thick edge trim.
- LED strip visible from the front: Mount it under the countertop lip recessed at least 1½ inches, not flush to the front edge. If you can see the strip from the seating position, it’s poorly positioned — move it back.
- No airflow around a mini-fridge: If you plan to add a mini-fridge in the open bay, leave 2–3 inches of clearance on the sides and back. A fridge with no airflow runs hot and fails early.
- Unsupported long front span: A 72-inch front frame needs at least two mid-span posts and two horizontal rails to stay rigid. One post at center is not enough over time as wood expands and contracts seasonally.
Frequently Asked Questions About DIY Outdoor Bars
These are the questions that come up most often once the build is underway, usually when someone is at the lumber yard or halfway through the frame.
What is the standard height for a DIY outdoor bar?
42 inches is the standard. That matches most bar stools with 28–30-inch seat heights and puts the counter at a comfortable working height for standing adults. A 36-inch counter requires shorter stools and reads more like a table, usable, but not a bar.
What wood is best for an outdoor bar build?
Pressure-treated lumber for the hidden frame, it handles moisture and ground proximity without degrading. Cedar for the visible slats, it takes stain well, resists rot naturally, and looks better than treated wood. Seal both regardless of species.
How cheap can you build a DIY outdoor bar?
A basic version using pressure-treated framing and construction-grade cedar slats comes in around $400 for a 72-inch unit. The cost climbs to $600–$800 if you use clear-grade cedar throughout, a commercial foot rail kit, and a pre-made concrete countertop coating rather than painted plywood.
Can I leave a DIY outdoor bar outside year-round?
Yes, if properly sealed and placed on a solid surface. A covered patio or pergola significantly extends the finish life. In harsh freeze-thaw climates, a fitted outdoor cover over winter will protect the countertop seams and any exposed end grain from moisture intrusion.
Do I need outdoor bar plans before I start?
A dimensioned sketch is enough for this build — you don’t need formal plans. Draw the frame members with labeled lengths, mark your shelf positions, and note the countertop overhang. Print the cut list from this article. That’s all the planning a straightforward freestanding bar needs.
How do I stop an outdoor bar from wobbling?
Build the frame square from the start, drive every screw tight, and include all mid-span posts and horizontal rails. If the bar still moves after assembly, add a diagonal brace inside the back panel — a 2×4 running corner to corner kills the racking immediately.
Does an outdoor bar countertop need to be waterproof?
Yes. Rain, spills, condensation from ice buckets, and cleaning all attack an unsealed top. Apply a waterproof exterior coating to the top surface, all four edges, and any seams. Reapply annually or whenever the surface shows signs of wear — water beads on a sealed top, soaks in when it needs recoating.
Final Verdict
For $400–$800 in materials and two weekends of work, this outdoor bar build delivers something that costs $1,500–$2,500 if you bought it pre-made.
And most of what’s available pre-made won’t hold up outdoors as well as a properly sealed frame-and-cedar build. The design is not complicated. The sealing is not complicated. What trips most people up is skipping steps, usually the sealing and the mid-span supports.
If you build the frame square, seal every cut end before assembly, and add the horizontal rails where the instructions say to, this diy outdoor bar will still look right in year four.
Before you buy anything, price your cut list at a local lumber yard because cedar prices vary significantly by region, and knowing your actual materials cost before you start avoids the most common budget surprise.





