

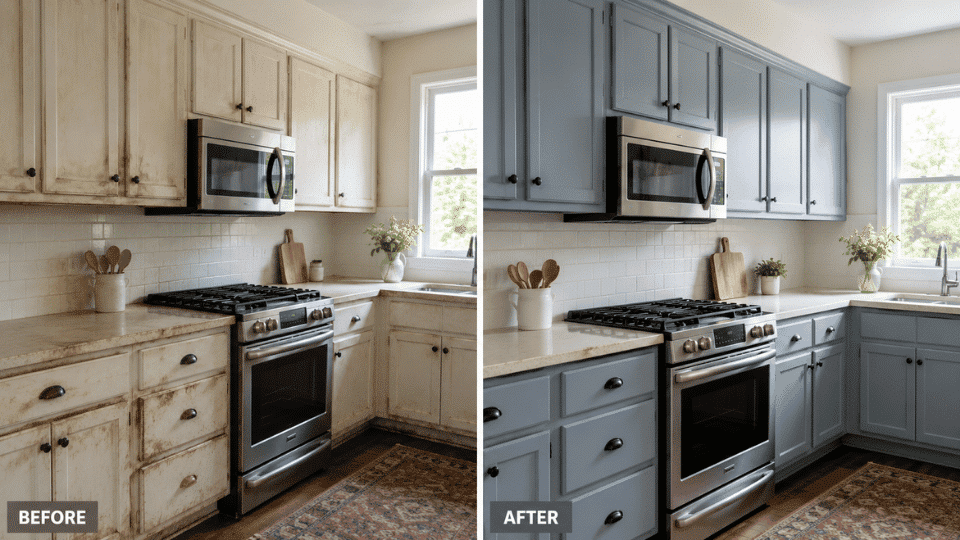
The first time I cleaned our kitchen cabinet doors with a Magic Eraser, I thought I was being efficient. I came away with a dull, flat patch right in the center of the door that looked nothing like the surrounding finish. That patch is still there. Knowing how to clean painted cabinets the right way starts with understanding what painted surfaces can and can’t handle, because most of the damage people cause happens before the grease is even gone. This is a low-difficulty task, but it’s easy to do wrong. Here’s what the whole job involves before you start: Difficulty 1 out of 5 — patience matters more than skill Time 10 minutes for a quick wipe-down; 30–45 minutes for a full deep clean Cost $5–$20 for supplies most people already have at home Tools Needed Microfiber cloths, mild dish soap, warm water, white vinegar (optional), soft detail brush Skill Required Beginner — no experience needed beyond knowing how to wring out a cloth properly The steps below follow one rule: start with the gentlest method, check whether it worked, and only move to something stronger if it didn’t. That order protects the finish every single time. What Goes Wrong Before You Even Start Most finish damage on painted kitchen cabinets happens in the first 60 seconds of cleaning. These are the three failure points worth knowing before you pick up anything. Using the wrong tool. Magic Erasers are a very fine abrasive. On matte or eggshell painted finishes they dull the sheen and can strip thin layers of paint with almost no pressure. Rough sponges and regular dishcloths can leave visible scratch patterns on softer finishes. Microfiber cloths only — this is non-negotiable. Leaving the surface wet. Painted wood doesn’t respond well to moisture sitting on it for even a few minutes. The wood underneath can swell, the paint can soften at the edges, and corners begin to peel. Every single cleaning step in this guide ends with a dry cloth. That step is not optional. Jumping straight to strong cleaners. Bleach, ammonia-based sprays, and oven cleaners can strip or discolor a painted finish in one use. The instinct when you see heavy grease is to reach for something powerful — but dish soap and warm water will handle most of it. Degreaser only comes in when that fails. How to Clean Painted Kitchen Cabinets: Step-by-Step Different problems need different levels of cleaning. Work through these in order and stop as soon as the problem is resolved. Escalating to something stronger than you need is how most finish damage happens. 1. Everyday Marks and Fingerprints Fresh fingerprints and light marks on painted cabinet doors come off with the lightest method first. Step 1: Dampen a microfiber cloth with warm water. Wring it well — damp, not dripping.Step 2: Wipe the marked area in small, even strokes without pressing hard or scrubbing in the same spot repeatedly.Step 3: If the mark stays, mix a few drops of mild dish soap into warm water until it lightly suds.Step 4: Wipe again with the soapy cloth, then remove any soap residue with a second cloth dampened with clean water only.Step 5: Dry the painted surface immediately with a dry cloth. Do not let any moisture sit. Pro Tip: Avoid scrubbing back and forth in the same spot. Short strokes in one direction reduce friction on the painted finish and protect the sheen over time. 2. Grease Buildup on Painted Cabinet Doors Grease needs something that cuts residue without being harsh on the paint. Dish soap handles most of it — reach for vinegar only if soap doesn’t work after one attempt. Step 1: Mix a few drops of mild dish soap into warm water until it lightly suds.Step 2: Wipe the greasy cabinet area gently with a damp microfiber cloth. Pay attention to the area around handles and directly below hinges, where buildup concentrates first.Step 3: Rinse with a second cloth dampened with clean water only — this removes soap residue that can dull the finish if left behind.Step 4: Dry the surface immediately with a soft dry cloth.Step 5: For sticky grease that didn’t respond, try a 50/50 mix of warm water and white vinegar. Apply, wipe, rinse, and dry right away. Pro Tip: Test vinegar on a hidden area first — inside the door frame or behind a lower cabinet — and wait 5 minutes before applying it more broadly. Some painted finishes react to the acidity. 3. Yellowing on White or Light-Painted Cabinets Yellowing on painted cabinets is two different problems that need an honest look before you start scrubbing. Surface yellowing from grease film and cooking residue is cleanable. Paint that has chemically yellowed from age, heat, smoke, or sunlight is not fixable through cleaning — no product will reverse it. Before you start, run a fingertip across the surface. If it picks up a slight waxy or oily film, cleaning will help. If the surface is smooth but still yellow, that’s the paint itself. Step 1: Wash the yellowed area with warm water and mild dish soap on a damp microfiber cloth.Step 2: Wipe in small sections. Keep the cloth damp, not soaking wet.Step 3: Rinse with a clean, damp cloth to remove soap and any loosened residue.Step 4: Dry immediately before moisture settles into the edges or seams of the cabinet door.Step 5: If the yellow is still visible after drying, try diluted white vinegar on the same area. Rinse and dry right away. Note: If the paint has yellowed from age, prolonged heat near the stove, or smoke, cleaning will not restore it. Touch-up paint or a full cabinet repaint is the honest next step. If you’re weighing whether it’s worth the cost, see our breakdown of the cost to paint kitchen cabinets before deciding. 4. Stubborn Buildup That Needs a Cabinet Degreaser If the painted surface near the stove is tacky, visibly darkened, or has a thick film that doesn’t respond to soap or vinegar, you’re dealing with baked-on grease. This is the last escalation before repainting, and the product and dilution both matter. Original Krud Kutter, diluted at roughly one part product to three parts water, is the one I’d use here. Apply it to the cloth first — never directly to the cabinet. Work in small sections, follow with a rinse cloth, and dry immediately. Never let any degreaser sit on a painted surface without wiping it off quickly. Pro Tip: Always test a diluted degreaser on a hidden spot — the inside face of a lower cabinet door works well — and give it 5 minutes before applying to a visible area. Even gentle degreasers can dull certain painted finishes. The Faster Way to Clean Painted Cabinets After the First Time Here’s what I figured out after doing this a second time: most of the hard cleaning only needs to happen once. What actually keeps painted kitchen cabinets clean long-term is wiping them down quickly — about 30 seconds with a lightly dampened microfiber cloth — twice a week around handles and below the stove hood. Grease that’s been sitting for three days comes off easily with water and soap. Grease that’s been baking on near the stove for three months is the cleaning problem that sends people looking for degreasers and wondering whether the cabinets need repainting. A dedicated microfiber cloth kept near the stove, used specifically for cabinet wipe-downs, makes this automatic. You don’t need soap every time — warm water on the cloth and a quick pass over the high-touch areas is enough between deeper cleans. The full dish-soap routine becomes a monthly task instead of a weekly emergency. Products Worth Using (and What to Skip) The best cleaner for painted kitchen cabinets is almost always the simplest one you have available. Moving to something stronger only makes sense when the gentler option has genuinely failed — not just because the grease looks bad. What I’d Use Dawn Dish Soap — A few drops in warm water handles most everyday grease and fingerprints on painted cabinet surfaces. This is the first tool, not a last resort. Original Krud Kutter — Useful for heavy, baked-on grease near the stove. Always dilute it well (1:3 with water) and test on a hidden spot before using it broadly on painted cabinetry. Distilled White Vinegar — Mixed 50/50 with warm water, a good step up from dish soap for greasy film on painted wood cabinets. Rinse and dry immediately after every use. E-Cloth or Scotch-Brite Microfiber Cloths — The only cloths worth using on painted cabinetry. Rough sponges and regular dishcloths leave micro-scratches that accumulate over time and dull the finish. OXO Soft Detail Brush — Useful for cleaning around hardware, hinges, and trim grooves where a cloth won’t fit without applying awkward pressure. What I’d Skip Some of these look like reasonable cleaning choices. On a painted wood surface, they cause more damage than the grease they were meant to remove. Magic Eraser: A very fine abrasive. Dulls or visibly strips painted finishes, especially on matte and eggshell cabinet paint. I found this out the hard way — that dull patch is still there. Steel wool or abrasive scrub pads: Will scratch and roughen the painted surface permanently. Bleach or ammonia-based sprays: Too harsh for most painted finishes — risk of discoloration and chemical damage to the paint layer. Oven cleaner or powdered abrasive cleaners: Made for completely different surfaces. These will damage cabinet paint quickly and visibly. Oil polish or wax: Leaves a film that attracts dust and creates a maintenance cycle that makes the cabinetry harder to clean over time, not easier. Keeping Painted Cabinets Clean: Do’s and Don’ts These habits are worth more than any deep clean you’ll do twice a year. Grease wiped off within 24 hours takes 30 seconds. Grease baking near the stove for six months is the cleaning problem that tests every method in this guide. Do Don’t Wipe spills the same day they happen Let water sit on the cabinet doors Use a soft microfiber cloth Use rough scrub pads or a Magic Eraser Wipe around handles twice a week Wait until the grease turns tacky and dark Dry cabinet surfaces after every cleaning Leave soap or vinegar residue on the surface Test any new cleaner on a hidden area first Apply a strong product directly to a visible area Keep steam and heat away from cabinet doors Position appliances so heat blows onto the cabinetry Do quick, frequent wipe-downs Skip regular maintenance until buildup forces a deep clean The entry that matters most is wiping the area around handles and directly below the stove hood twice a week. That single habit catches grease before it has time to bond to the paint. Everything else on the list is supporting maintenance. Frequently Asked Questions These are the questions that come up most once people have already tried dish soap and are wondering what to do next. What is the best way to clean painted kitchen cabinets? Warm water and a few drops of mild dish soap on a microfiber cloth, applied gently, rinsed with a second damp cloth, and dried immediately. This handles most everyday cleaning on painted kitchen cabinets without any risk to the finish. Move to vinegar or a diluted degreaser only if that doesn’t work. What to clean painted cabinets with to avoid damaging the paint? Microfiber cloths, mild dish soap, warm water, and diluted white vinegar are the safest options in that order. Avoid Magic Erasers, abrasive pads, bleach, ammonia-based cleaners, and anything oil-based. The cloth type matters as much as the product you use. How do I clean painted kitchen cabinets with grease buildup? Start with dish soap and warm water. If that doesn’t remove the grease, try a 50/50 vinegar and water solution, rinse, and dry right away. For heavy, baked-on buildup near the stove, use Original Krud Kutter diluted 1:3 with water — always test on a hidden area first. How do I clean white painted cabinets that have yellowed? Wash with dish soap and warm water first. If the yellowing improves, it was surface grease or residue. If it doesn’t change after cleaning and drying, the paint has chemically yellowed from age, heat, or smoke. No cleaner reverses that — touch-up paint or a full repaint is the realistic fix. What to use to clean painted kitchen cabinets without stripping the finish? Dish soap, warm water, and a microfiber cloth. Keep the cloth damp rather than wet, use light pressure, and dry immediately after cleaning. Avoid bleach, Magic Erasers, and concentrated degreasers on any painted wood cabinet surface. How do you clean painted wood cabinets near the stove? Wipe them down with a damp cloth after every few cooking sessions — that’s the actual answer. For existing buildup, use diluted white vinegar or a diluted degreaser, test first, and dry immediately. Preventing grease from baking on causes far less finish damage than cleaning it after the fact. How do you remove sticky residue from painted cabinets? Start with warm water and dish soap. If stickiness persists after cleaning and drying, try diluted vinegar. Note that newly painted cabinets can feel tacky for up to 30 days while the paint finishes curing — that stickiness is normal and will resolve on its own without cleaning. How often should you clean painted kitchen cabinets? A quick wipe-down around handles and near the stove twice a week with a barely-damp cloth. A full soap-and-water clean once a month. Cleaning with soap more frequently than that accelerates finish wear. Frequent light wipe-downs are a better habit than infrequent heavy cleans. Final Verdict If I were starting this again, the Magic Eraser wouldn’t come anywhere near our cabinet doors. Dish soap and warm water on a microfiber cloth solves most of what you’ll actually encounter when learning how to clean painted cabinets. Grease that doesn’t respond to that gets a 50/50 vinegar solution, rinsed and dried right away. Heavy, baked-on buildup near the stove and only that gets a diluted degreaser, tested on a hidden spot first. If you’re dealing with yellowing that doesn’t lift after cleaning, the paint has aged past what any cloth can fix; at that point, understanding what painting cabinets actually involves is a more useful next step than buying another cleaning product. Start gentle, dry everything immediately, and stop before you reach for something that can’t be undone.

Walls don’t usually look dirty in one go. A faint smudge near a switch, a bit of kitchen grease, or a light scuff in the hallway builds up slowly until it starts standing out more than expected. I’ve noticed this in my own space too, where I didn’t realize how much those small marks were changing the feel of a room until light hit the wall the wrong way. Understanding how to clean painted walls properly matters when I don’t want to risk patchy paint or dull spots after wiping. The focus here stays on simple methods, safe steps, and habits I use to keep walls clean without damaging the finish. Understanding Your Wall Before Cleaning Understanding the wall before cleaning makes a big difference in results. Painted drywall vs textured walls respond differently, with textured surfaces holding more dust and needing a gentler approach. Old paint vs fresh paint also changes how much moisture or pressure the surface can handle, since older paint may wear faster while fresh paint is still settling. Even location matters, as high-traffic vs low-contact areas tend to collect more marks and need more frequent care. Freshly painted walls also need patience because new paint needs full curing time before any washing. Light dusting can be done early, but full cleaning should only happen once the paint has fully set to avoid streaks or surface damage. How to Clean Painted Walls: Step by Step Cleaning painted walls works best when done in a simple order that protects the paint while still removing everyday dirt, stains, and marks without leaving streaks or uneven spots. Step 1 – Dust the walls: Remove spider webs and surface dust using a dry cloth or vacuum brush so dirt doesn’t turn into streaks later. Step 2 – Prepare cleaning mix: Mix a small amount of dish soap with warm water in a spray bottle. Step 3 – Apply correctly: Spray at an angle instead of directly on the wall to avoid over-wetting and streaking. Step 4 – Clean in sections: Use a damp microfiber mop or cloth and clean in small areas with smooth up-and-down motions. Step 5 – Rinse often: Keep rinsing the mop or cloth in clean water to prevent spreading dirt. Step 6 – Spot clean stains: Use a gentle foaming cleaner for tough marks like crayon or scuffs, then wipe softly. A careful step-by-step approach like this keeps painted walls looking even and fresh while preventing common cleaning mistakes that damage the finish over time. Stain-Specific Cleaning Methods for Painted Walls Different wall stains need different cleaning approaches, and using the wrong method can damage paint. These simple steps help handle common marks safely and effectively. 1. Grease Stains (Kitchen Walls) Grease stains are common in kitchen areas where cooking oil and steam slowly settle on painted surfaces. These marks can look dark and sticky, but they can usually be removed with a gentle cleaning approach without harming the paint finish. Materials required: Mild dish soap, warm water, soft sponge, microfiber cloth, clean towel How to clean: Mix dish soap with warm water in a bowl Dip a soft sponge and wring out excess liquid Gently wipe the greasy area in light strokes Repeat if needed without scrubbing hard Wipe with a clean damp cloth to remove residue Drying tip: Pat dry with a soft towel to avoid water marks and keep the surface even. 2. Crayon or Marker Stains Crayon and marker stains often appear in homes with kids and can seem stubborn, especially on light-colored walls. These marks sit on the surface of paint and need a gentle lifting method instead of harsh scrubbing to avoid damaging the finish or creating dull patches. Materials required: Baking soda, water, soft cloth, small bowl, microfiber towel How to clean: Mix baking soda with a small amount of water to form a paste Apply the paste gently over the stained area Dab softly using a cloth instead of rubbing Repeat lightly if the mark remains Wipe clean with a damp cloth Drying tip: Let the area air dry completely before checking if a second round is needed. 3. Scuff Marks From Shoes or Furniture Scuff marks are usually caused by shoes, chairs, or furniture rubbing against walls. These marks are often surface-level and can be removed without any liquid cleaner, making them one of the easiest wall stains to fix when handled properly. Materials required: Dry microfiber cloth, sponge eraser How to clean: Start with a clean dry microfiber cloth Rub the scuff gently with light pressure Use a sponge eraser for tougher marks if needed Avoid adding water or liquid cleaners Repeat lightly until the mark fades Drying tip: No drying needed; just ensure the wall stays dry and untouched after cleaning. 4. Food or drink spills Food and drink spills can leave noticeable marks on painted walls if not cleaned quickly. These stains can soak into the surface slightly, so fast action helps prevent discoloration and makes removal much easier without affecting the paint layer. Materials required: Mild dish soap, warm water, soft cloth, microfiber towel How to clean: Dip a soft cloth into warm soapy water Blot the spill gently instead of rubbing Lift the stain slowly using repeated dabbing Wipe the area with a clean damp cloth Repeat if any residue remains Drying tip: Dry immediately using a soft towel to avoid sticky patches or water spots. 5. Smoke or dull wall marks Smoke stains or dull patches usually develop over time due to cooking fumes or indoor smoke exposure. These marks create a faded or yellowish look on walls and need gentle cleaning to restore surface clarity without damaging paint sheen. Materials required: Mild diluted degreaser, sponge, clean water cloth, soft towel How to clean: Dilute a gentle degreaser with water Apply lightly using a soft sponge Wipe the area gently without scrubbing Remove residue using a clean damp cloth Repeat only if necessary for stubborn marks Drying tip: Wipe dry immediately with a soft towel to prevent streaking or uneven finish. Knowing the right method for each stain keeps painted walls clean, consistent, and damage-free, helping maintain a smooth finish without unnecessary effort or repainting. What Cleaning Methods Should Be Avoided Some cleaning habits seem harmless but can slowly damage painted walls. Avoiding a few common mistakes helps keep the paint finish smooth and consistent after every clean. Too much water on walls: Can seep into paint layers, causing streaks, swelling, or long-term surface damage. Harsh scrubbing tools: May scratch the paint or remove it, leaving uneven and visible marks. Bleach or ammonia cleaners: Can fade color, weaken the finish, and cause dull patches on most painted surfaces. Magic erasers with pressure: Can polish the surface, creating shiny spots especially on matte paint. Colored cloths that bleed dye: May transfer color onto light walls and leave permanent stains. Avoiding these mistakes helps maintain paint quality, prevents uneven patches, and keeps walls looking clean, smooth, and well-maintained after every cleaning session. Common Problems and Fixes While Cleaning the Walls Walls can sometimes show issues even after cleaning, and most of them come from small mistakes in technique or tools. Knowing these helps fix the problem quickly and avoid repeat damage. Problem Cause Fix Streaky walls Too much soap or residue Wipe again with clean water Dirty smears Reusing unclean cloth Rinse or change cloth often Uneven drying marks Air drying unevenly Dry with soft towel immediately Shiny patches Over-scrubbing paint Use light pressure only Paint dull spots Harsh cleaning products Switch to mild soap solution Color fading patches Strong chemicals used Avoid bleach or ammonia cleaners Understanding these common issues helps correct cleaning mistakes early and keeps painted walls looking smooth, balanced, and consistently fresh after every wash. Maintenance Routine For Cleaned Walls of Your Home Keeping painted walls clean doesn’t need constant effort, but a simple routine helps maintain a fresh look and prevents buildup of dust, stains, and marks over time. Regular cleaning depends on how much each space is used and exposed to dirt or grease. Kitchen: Every 1–2 months since cooking oil, steam, and splashes build up quickly on walls. Hallways: Every 3–4 months because high foot traffic leads to frequent scuffs and fingerprints. Bedrooms: 2–3 times a year as these areas stay relatively low on dirt and only need light dusting and occasional spot cleaning. Following this schedule helps prevent heavy staining, reduces deep cleaning efforts, and keeps paint looking even and well-maintained throughout the year. Signs the Wall Needs Repainting Instead of Cleaning Not every wall problem can be fixed with cleaning. Sometimes the paint itself reaches a point where washing no longer improves the look and repainting becomes the only practical option. Permanent stains: Marks that stay visible even after repeated cleaning attempts usually mean the stain has set into the paint layer. Paint peeling: Flaking or peeling areas show surface damage that cleaning cannot repair. Shine patches after cleaning: Uneven glossy spots often appear after over-scrubbing and cannot be blended back. Color fading: Walls that look dull or uneven in tone have lost their original finish over time. When these signs appear, cleaning can only do so much, and repainting helps restore an even, fresh surface that looks clean and consistent again. Pro Tips for Cleaning Painted Walls A few simple habits can make wall cleaning easier and help protect paint from damage over time. These quick tips improve results without extra effort. Clean from bottom up for heavy stains: This helps control drips and prevents dirty streaks running down the wall. Change water frequently: Fresh water stops dirt from being spread back onto already cleaned areas. Use natural daylight when possible: Better lighting helps spot missed marks and uneven cleaning. Avoid cleaning on humid days: Slow drying in humidity can increase streaking and water marks. Keep edges and corners for last: These areas collect more dust and need separate attention after main cleaning Following these small but effective tips keeps painted walls cleaner for longer, reduces mistakes, and helps maintain a smooth, even finish after every cleaning. Frequently Asked Questions Can sunlight exposure affect how clean walls look after washing? Yes, direct sunlight can highlight streaks, water marks, or uneven patches after cleaning. It is better to inspect walls under natural but indirect light to ensure an even finish and spot any missed areas more clearly. Is it safe to clean walls near electrical switches and outlets? Yes, but extra care is needed. Always avoid excess moisture and never spray directly. Use a lightly damp cloth instead and ensure the area stays dry to prevent any risk of damage or electrical issues. How to clean high walls without using a ladder? A long-handled sponge mop or extendable microfiber duster works well for high walls. These tools allow controlled cleaning from the floor, reducing the need for climbing and improving safety during the process. Do painted walls attract more dust after cleaning? Walls do not attract more dust after cleaning, but residue from soap or improper drying can make dust stick faster. Proper rinsing and thorough drying help maintain a cleaner surface for longer periods. Can room ventilation affect wall cleaning results? Yes, good ventilation helps walls dry evenly and prevents moisture buildup. Poor airflow can lead to streaks or damp spots, so keeping windows open during and after cleaning improves overall results. Final Thoughts Walls stay in better shape when cleaning is done with the right steps instead of rushing or using harsh methods. I’ve noticed in my own space how small changes like using mild solutions, soft tools, and proper drying can prevent paint damage and keep the finish even. You’ve seen how everyday marks, stains, and buildup don’t need aggressive scrubbing when handled the right way. In my experience, most wall issues come from simple mistakes rather than tough stains. That’s why I shared what I follow in my own routine for how to clean painted walls safely. Try these tips in your space and notice the difference. Share your thoughts in the comments and check out other cleaning guides for more help!
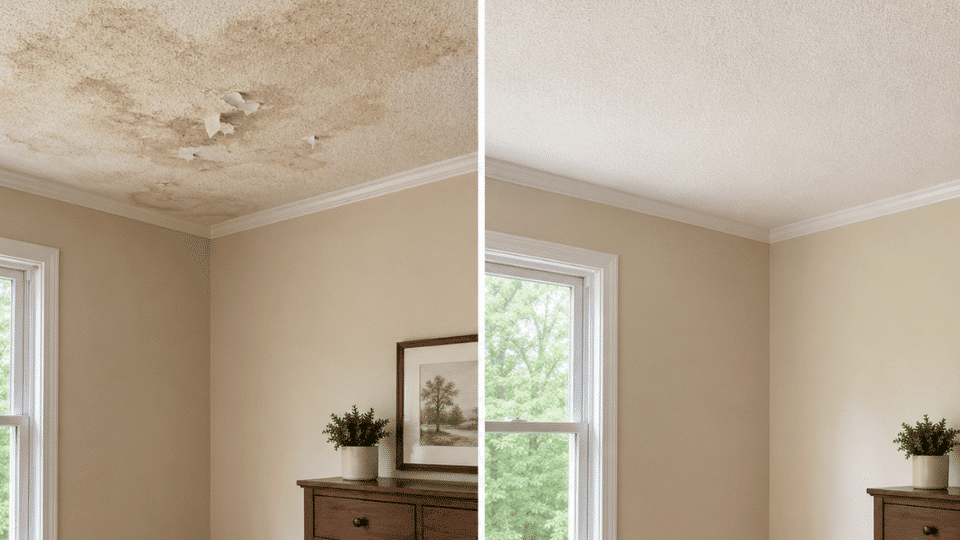
You look up one morning, and there it is, a brownish ring spreading quietly across your ceiling, looking like it has been there longer than you noticed. A water stain on ceiling surfaces is one of those home problems that feels minor until it isn’t. I’ve been through this repair twice. The first time, I painted over it immediately, and the stain came back within two weeks, darker than before. The second time, I followed every step correctly, dry time, stain-blocking primer, and the repair held. The difference wasn’t the paint. It was the order of operations. What you’ll find here: how serious the stain actually is, every common cause, a step-by-step repair process with material costs, how to spot an active leak, cleaning alternatives, and how to stop it from coming back. Difficulty 2 of 5, basic prep work, one tricky ceiling coat Time Half a day for the repair; 24–48 hours total, including dry time Cost $50–$150 for materials if the source is already fixed Tools Needed Step ladder, putty knife, sandpaper, brush or roller, drop cloth Skill Required Beginner, no specialist tools needed Is a Water Stain on the Ceiling Serious? Yes, it can be, and it deserves more than a coat of paint. A stain indicates water reached a surface it shouldn’t have. Often, what appears on the ceiling is just the visible tip of moisture traveling through your home’s structure. Behind that ring, there could be damp insulation, softened drywall, or early mold development. Unaddressed leaks can lead to mold growth, drywall deterioration, peeling paint, ceiling sagging, and electrical hazards if moisture contacts wiring or fixtures. Long-term water can also cause structural damage. The severity of a stain depends on its size, moisture feel, location, and whether it’s active or changing. A dry, stable stain from a previous leak is less urgent than a growing, damp, musty patch. Always check the source before painting over it; this is essential advice for every homeowner. Common Causes of a Water Stain on the Ceiling A water stain can come from several parts of the home, so its location, timing, and shape often help narrow down the source. Roof Leaks: Check attic for roof stains after rain or snow; inspect shingles, flashing, pipe boots, skylights, vents, valleys, and gutters for leaks. Plumbing Leaks: When a stain forms below a bathroom, kitchen, or laundry area, a plumbing leak is often the cause due to dripping supply lines, drainpipes, corroded joints, or loose fittings that may take weeks to cause visible damage. Bathroom Leaks: Failed caulk, cracked grout, leaking shower pans, overflowing tubs, or deteriorating toilet wax rings can cause water damage to floors and ceilings. HVAC Leaks: Air conditioning systems produce condensate, which can overflow or leak due to clogged drains, overflowing drip pans, or poor duct insulation, especially during the cooling season. Condensation: Not all stains come from leaks; condensation in poorly ventilated bathrooms, kitchens, and laundry rooms causes faint patches, damp spots, or mildew-like discoloration, not brown rings. Skylight, Chimney, or Exterior Water Intrusion: Improper flashing on skylights and chimneys often causes ceiling water damage, hidden from view and hard to confirm without inspection. Finding the source first keeps the repair from becoming temporary. Once the cause is fixed, cleaning, priming, and repainting can last longer. How to Fix a Water Stain on the Ceiling The safest repair starts with the moisture source, then moves to cleaning, sealing, and repainting once the ceiling is fully dry. Materials Required Having the right materials helps prevent the stain from bleeding through fresh paint and keeps the repair cleaner from start to finish. Material Estimated Price Recommended Brand/Product Step ladder $45–$130 HBTower Step Ladder Drop cloth $8–$25 Trimaco Canvas Drop Cloth Gloves and safety glasses $10–$25 3M Safety Glasses Putty knife $5–$12 Warner Putty Knife Spackle or drywall compound $6–$18 3M High Strength Small Hole Repair Sandpaper $5–$15 Fandeli Sandpaper Sheets Stain-blocking primer $12–$35 Zinsser Cover Stain Ceiling paint and roller $25–$60 Pro Grade Paint Roller Kit Step 1: Find and Fix the Moisture Source Before anything else touches the ceiling, the source needs to be identified and resolved. Check the area directly above the stain, attic, bathroom floor, plumbing lines, or HVAC equipment Look for damp insulation, dripping pipes, cracked caulk, or overflow signs If the source is unclear, a moisture meter can help locate active dampness Fix or replace whatever is causing the water entry before continuing Do not move to the next step until the source is confirmed as resolved Step 2: Dry, Clean, and Prep the Area Once the leak is fixed, the ceiling needs to be fully dry; this is non-negotiable. Use fans, open ventilation, or a dehumidifier to pull moisture out. Rushing this step traps moisture under the repair, causing it to resurface. When dry, wipe the stained area with a damp cloth and mild detergent to remove dust, residue, and surface grime, then let it dry again. Followed by using a putty knife to gently scrape away any peeling paint, bubbling texture, or loose plaster, being careful not to damage solid drywall nearby. Step 3: Patch Any Damage Patch ceiling damage carefully before priming, since weak or uneven areas can make the final repair look uneven. Fill small cracks or holes with spackle or drywall compound. Apply the filler evenly over the damaged area. Let it cure completely before sanding. Sand the patched area until it feels smooth and level. Use a drywall patch for larger soft or sagging sections. Avoid using the compound alone if the ceiling board has lost its integrity. Step 4: Apply Stain-Blocking Primer This step is where most DIY ceiling repairs go wrong. Standard primer and regular paint will not seal a water stain; the brown or yellow residue left in the drywall will bleed right back through, sometimes through multiple coats of paint. Use an oil-based or shellac-based stain-blocking primer specifically. Apply it over the entire stained and patched area, extend slightly beyond the visible ring edge, and let it dry fully , usually 1–2 hours for oil-based products, less for shellac , before painting. If you’re wondering whether acrylic paint alone offers water resistance, the short answer is that it doesn’t seal existing stains , primer does the sealing, paint does the finish. Step 5: Repaint the Ceiling Apply flat ceiling paint only after the primer has dried fully. Feather the edges into the surrounding surface so the repaired area blends naturally. If the existing ceiling paint has faded or the patched section is large, repaint the entire ceiling rather than spot painting. This creates a cleaner, smoother, and more even finish. Quick Fixes for a Water Stain on the Ceiling If the stain is small, dry, and the leak has already been fixed, you may not need a full ceiling repair right away. A few quick fixes can improve the look of the area before you commit to patching or repainting the whole ceiling. Use this table to choose the right quick fix based on what the stain looks like. Situation Quick Fix Best For Light surface stain Wipe with mild soap and water, then let dry Fresh, minor marks Yellow or brown dry stain Apply stain-blocking primer, then repaint Stains that show through cleaning Mild mildew-like discoloration Use equal parts vinegar and water, then dry fully Light mildew marks Stubborn dark spot Test 3% hydrogen peroxide, blot gently, then dry Older or harder stains Stain near a leak source Stop and fix the leak first Any damp or changing stain Soft, sagging, or bubbling ceiling Call a professional Possible drywall or structural damage Once you know which fix fits your stain, follow the same rule every time: fix moisture first, dry the ceiling fully, then clean, prime, and paint only if needed. Other Ways to Remove a Water Stain from the Ceiling Painting is not always the first option. Small, dry stains on light ceilings may improve with careful cleaning methods. Bleach and Water Method: A diluted bleach solution (roughly one part bleach to three parts water) can lighten dry stains. Lightly mist, let dry, and repeat if needed. Ventilate the room and protect your eyes and skin. Vinegar and Water Method: Equal parts white vinegar and water can help with mild discoloration or mildew-like marks. Spray or dab lightly, let it sit briefly, then wipe and allow the ceiling to dry fully. Hydrogen Peroxide Method: Three percent hydrogen peroxide can work on stubborn spots or mildew-prone discoloration. Test a small hidden area first, then apply lightly and blot rather than scrub. When Cleaning Is Not Enough: Dark, old, or recurring stains almost always need primer and paint. Cleaning may reduce the visible mark, but it cannot seal discoloration that has absorbed into drywall or ceiling texture. If the stain comes back after cleaning, reach for the stain-blocking primer. These methods work best on dry, minor stains. If discoloration persists or recurs, sealing and repainting are usually the better repair. How to Tell If It Is an Active Leak Before treating the stain as cosmetic damage, check whether moisture is still entering the ceiling or the leak has already stopped. New or Active Stain Old or Dry Stain Stain is visibly growing or spreading Stain size and color are stable Color is darkening Ceiling surface feels firm and dry Ceiling feels damp, soft, or spongy No musty odor present Paint is bubbling, or drywall is swelling No dripping, bubbling, or swelling Water is actively dripping Moisture readings are normal Musty or mildew smell is present No smell detected Stain appears or worsens after rain, shower use, or AC running The original source has already been repaired If any signs are present in the active column, the repair cannot start yet. Call a roofer, plumber, HVAC technician, or leak detection professional if the source is unclear. When the ceiling is sagging, water is visibly dripping, mold has appeared, or the stain sits near electrical fixtures, getting professional help quickly matters. How to Prevent Future Ceiling Leaks and Stains Prevention depends on controlling moisture before it reaches the ceiling, especially around roofs, bathrooms, plumbing lines, and HVAC equipment. Maintain the Roof: Inspect shingles, flashing, vents, skylights, chimneys, and gutters at least once a year and after major storms. Keep gutters clear, so water runs cleanly away from the roofline. Check Plumbing Regularly: Look under sinks, around toilets, near tubs, and below appliances for slow drips or damp cabinet floors. Replace failing caulk early and pay attention to changes in water pressure or unexplained damp smells. Service HVAC Systems: Clear condensate drain lines, inspect drip pans, and confirm ductwork insulation is intact. Annual HVAC maintenance is one of the most cost-effective ways to prevent moisture problems above ceilings , issues that are often invisible until a stain appears. If you’re building or renovating a space with HVAC overhead, the planning considerations for sunroom additions cover condensation and moisture management in enclosed ceiling spaces as well. Reduce Indoor Humidity: Run exhaust fans consistently in bathrooms, kitchens, and laundry rooms. In persistently damp areas, a dehumidifier can prevent condensation from forming on cooler ceiling surfaces. Regular checks help stop small moisture issues early, before they turn into ceiling stains, drywall damage, or expensive leak repairs. Frequently Asked Questions Can you paint over a water stain on the ceiling without primer? No. Paint alone does not seal water stains. The mineral residue and wood tannins absorbed into the drywall bleed back through regular paint, sometimes through several coats. A stain-blocking primer, either oil-based or shellac-based, must go on first. Why does a ceiling water stain keep coming back? A recurring stain almost always means one of three things: the leak is still active, the ceiling wasn’t fully dry before painting, or the wrong primer was used. Recheck the moisture source before repainting again. How long does a ceiling need to dry before painting after a leak? At minimum 24–48 hours for minor staining, and several days to a week for a ceiling that was significantly wet. Use a moisture meter to confirm dryness, touch alone isn’t reliable for drywall that absorbed water deeply. Does the color of a ceiling water stain tell you anything? Yes. Yellow or brown staining typically comes from water carrying minerals or rust through drywall layers. Dark marks, black spots, or fuzzy patches suggest mold or mildew, which changes both the urgency and the approach, mold needs to be treated, not just painted over. What is the best primer for covering water stains on a ceiling? Shellac-based primers (Zinsser BIN is the standard recommendation) or oil-based stain blockers (Zinsser Cover Stain, Kilz Original). Water-based “stain-blocking” primers work for light discoloration but often fail on heavy water stains, oil or shellac is more reliable on severe marks. Can a ceiling water stain be a sign of mold? Yes. If the stain has a dark border, smells musty, or shows fuzzy texture, mold may be present. Mold behind drywall requires more than a surface repair, the affected area may need to be cut out and replaced, and the source of ongoing moisture addressed first. How much does it cost to fix a water-stained ceiling? DIY materials run $50–$150 for a standard repair once the leak is fixed. Professional ceiling repair ranges from $200–$500 for small sections and $500–$1,500+ for larger areas requiring drywall replacement or mold remediation. The Final Step A water stain on ceiling surfaces is never just a paint problem. In my experience with home repairs, the stains that come back, sometimes twice, sometimes more, almost always return because the moisture source wasn’t fully confirmed or the ceiling was repainted too quickly. Treat the stain as a moisture warning first and a cosmetic issue second. Check how serious it is, identify the source, fix it, let the ceiling dry completely, then clean, prime with a stain-blocking product, and repaint properly. Keep up with roof, plumbing, bathroom sealing, and HVAC maintenance to reduce the chances of it happening again. Take a close look at the stain, check whether it’s damp, whether it’s growing, and what sits above it. Drop your stain location or situation in the comments if you want a second opinion.
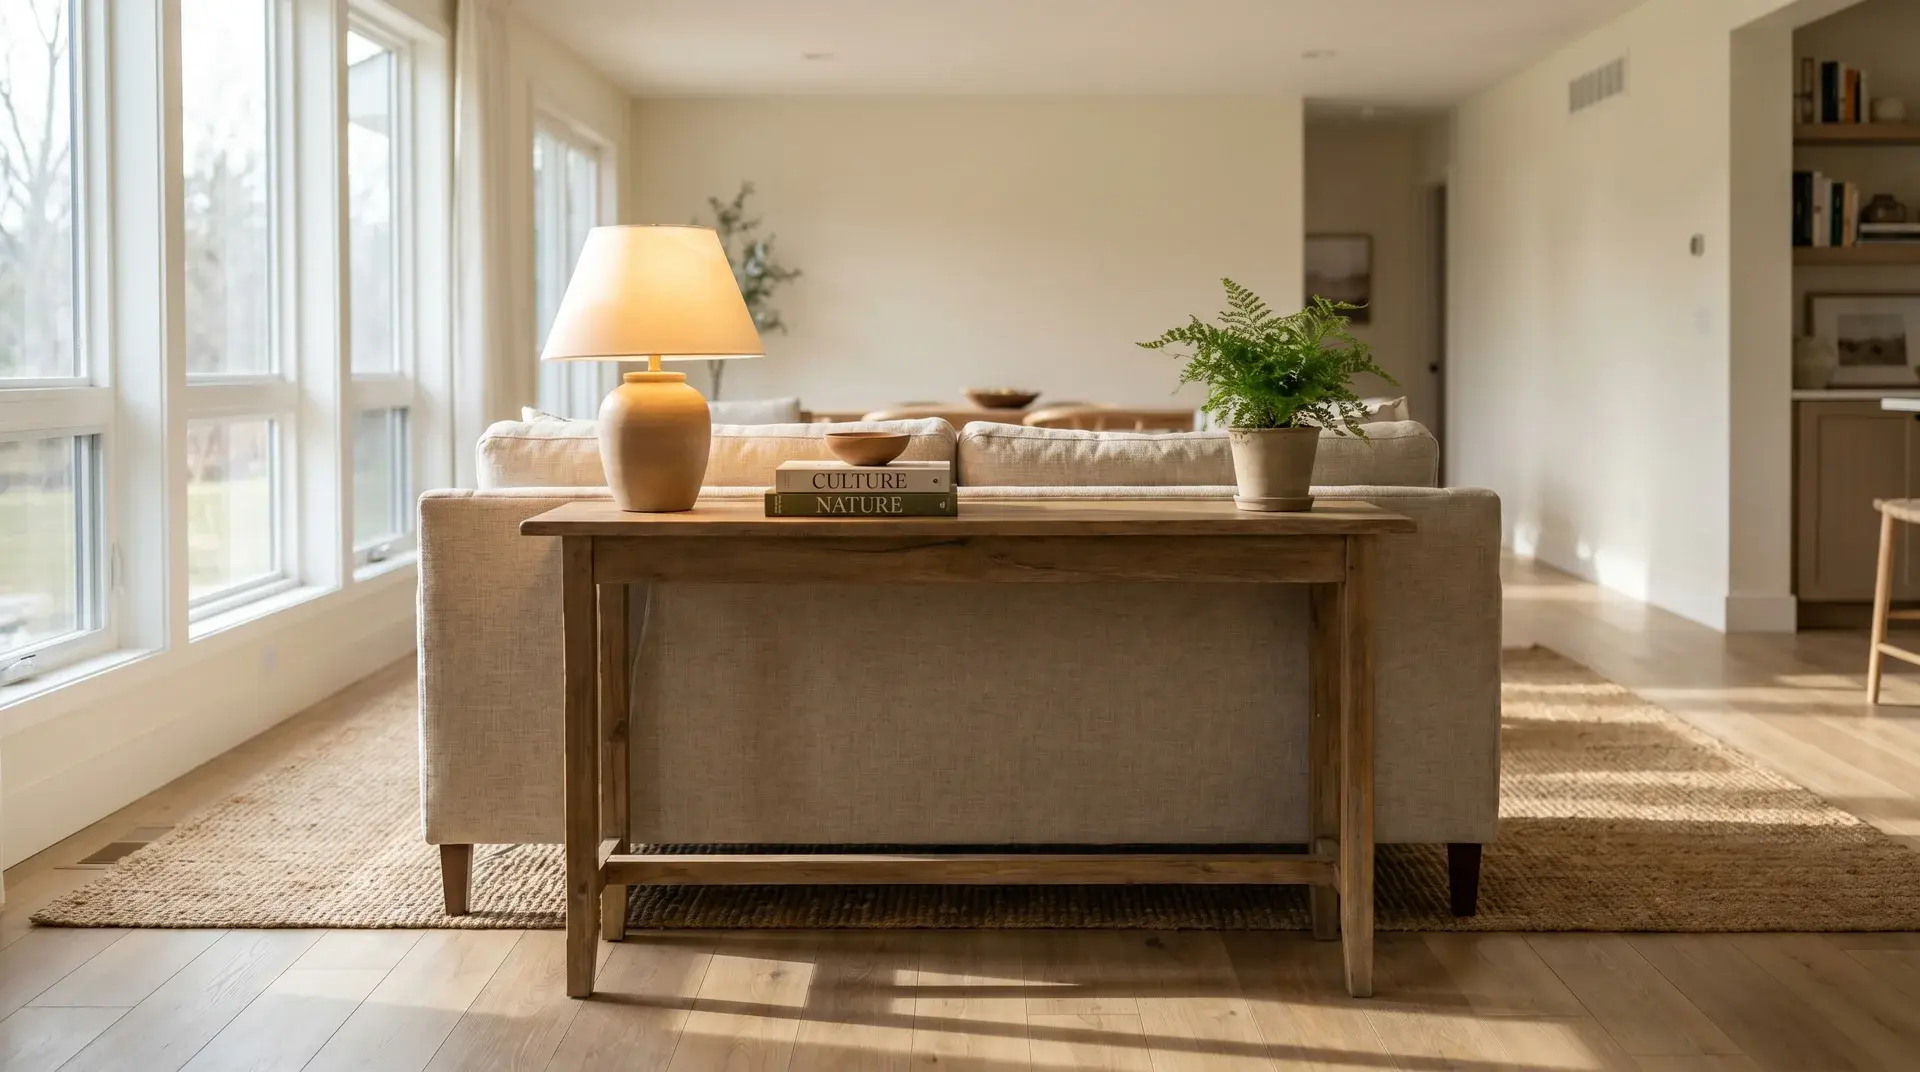
The space behind a floating sofa is one of the most overlooked layout problems I run into. The sofa looks fine from the front. From behind, it looks unfinished like someone moved in but didn’t finish the room. A sofa table solves that. It gives the back of the couch a clear edge, a surface, and sometimes storage, without adding a piece of furniture that fights the room. A sofa table is a long, narrow table that sits directly behind a sofa. It typically runs level with the sofa back or 1 to 2 inches lower, and most models range from 48 to 72 inches in length and 10 to 18 inches deep. That slim footprint is what separates it from other table types, it fits behind seating without blocking the walkway. In open-plan living rooms, a sofa table behind the couch also marks the edge of the living zone. It separates the seating area from the dining area, kitchen, or entry path without needing a wall to do it. That’s a layout job a lamp on the floor cannot do. Typical Length 48 to 72 inches (half to two-thirds of sofa length) Typical Depth 10 to 18 inches (10 to 12 inches for tight walkways) Typical Height Level with sofa back or 1 to 2 inches lower Also Called Couch table, behind-the-couch table, sofa console table Primary Placement Behind a sofa or sectional, especially when the back faces a room The table above covers the basics. The rest of this article covers which type of sofa table fits which room problem – and how to choose the right one without wasting space or money. Sofa Table vs Console Table, Coffee Table, and End Table These four table types look similar in furniture stores. The difference is where they sit and what work they’re doing. A sofa table is built for the space behind a couch. A console table is a broader category, the same shape, but meant for hallways, entryways, or any wall that needs a surface. The terms overlap, which is why many listings use both. If it’s going behind a sofa specifically, sofa table is the more accurate search term. Table Type Where It Goes What It Does Key Difference Sofa Table Behind a sofa or sectional Adds a surface, lighting, and storage to the back of seating Height and depth are sized specifically for behind-couch placement Console Table Entryway, hallway, or against a wall Drop zone, decor anchor, or storage piece Same shape, broader placement options Coffee Table In front of the sofa Holds drinks, remotes, books, and trays Lower profile, made for daily arm-reach use End Table Beside a sofa or chair Keeps a lamp, glass, and phone within reach Small, meant for one side of a seating piece The practical takeaway: if the problem is the exposed sofa back in an open room, a sofa table solves it directly. A console table could work in the same position, but size it like a sofa table – same height, same depth, same length rules – or it will look awkward. What a Sofa Table Is Used For I use five tests before recommending a sofa table for any room. If the piece doesn’t solve at least two of these, the room usually doesn’t need one. 1. Filling the Exposed Back of a Floating Sofa This is the most common reason. When a sofa sits away from the wall – in an open-plan room, a studio, or any layout where the back of the couch is visible from another area – that back edge looks unfinished. A sofa table behind the couch closes that visual gap and gives the sofa a defined boundary. 2. Adding a Surface for Lighting End tables only reach the sides of a sofa. If the reading or ambient light needs to come from behind – which is often better for open rooms – a sofa table is the only practical place to put a lamp without running a cord across the floor. 3. Dividing an Open-Plan Room In rooms without walls between the living area and dining area, a sofa table acts as the boundary marker. The sofa faces the room; the table defines its edge. This works better than a rug alone because it reads clearly from the kitchen or dining zone. If you’re working through a full open-plan arrangement, the small living room layout guide covers zone separation in detail. 4. Providing Accessible Storage Remotes, chargers, blankets, and books collect near every sofa. A sofa table with shelves or drawers gives those items a home within arm’s reach, without requiring a separate storage piece in the room. 5. Creating a Charging Station Some sofa tables include built-in outlets and USB ports. In apartments or family rooms where the sofa floats far from a wall outlet, this solves a wiring problem that otherwise means a cord running across open floor. Types of Sofa Tables: Matched to Room Problems The right type depends on what the room actually needs. Here’s how to match the problem to the piece. Standard Sofa Table A flat top, four legs, nothing extra. This is the right choice when the room needs a surface and nothing else – a lamp, a tray, a few books. It sits quietly behind the sofa without pulling attention from the seating area. I default to this type in rooms that are already well-organized; adding storage here just creates more places for clutter to land. Material: Wood, metal, or wood-and-metal mix Best for: Rooms that need a clean surface, not additional storage Sofa Table With Shelves Open shelves below the tabletop hold baskets, books, and folded blankets. This works in rooms where everyday items pile up but a full cabinet would feel heavy. Keep in mind that open shelves show everything – this type rewards tidiness. Confirm the depth stays under 14 inches or it starts to feel like a bookcase, not a table. Material: Wood, metal frame with wood shelves, or rattan Best for: Rooms that need accessible storage without a large cabinet Sofa Table With Drawers Drawers keep remotes, chargers, cords, and mail out of sight. This is the version I recommend for family rooms – it resets easily at the end of the day because there’s a place for everything. Before buying, check that the drawers open fully without hitting the back of the sofa cushions. Material: Solid wood, engineered wood, or painted wood Best for: Family rooms and homes with high daily item turnover near the sofa Sofa Table With Outlets Built-in outlets and USB ports solve the cord problem in rooms where the sofa sits far from the wall. The lamp, phone, and tablet all have power without cords running across the floor. Measure the distance from the nearest wall outlet before choosing this type – the table still needs to plug into something. Material: Wood or metal with integrated power strip Best for: Apartments and family rooms where the sofa floats away from outlets Sofa Table With Stools Stools tuck under the table and pull out when someone needs a seat or a surface for a laptop or snacks. This type earns its footprint in studios and small apartments where a table and extra seating need to share one piece. Confirm there is enough clearance to pull stools out fully without bumping the back of the sofa. Material: Wood, metal, or mixed with sturdy stools Best for: Studios, small apartments, and open-plan rooms that need flexible seating Slim or Narrow Sofa Table At 10 to 12 inches deep, a narrow sofa table fits behind a couch in spaces where a standard depth would close off the walkway. This is the version to choose when the path behind the sofa is less than 36 inches wide. It still holds a lamp and a tray – it just doesn’t crowd the floor. Material: Metal, slim wood, or wood-and-metal mix Best for: Narrow rooms, apartment layouts, and any walkway under 36 inches behind the couch Storage Sofa Table Combines shelves and drawers into one piece. This is the version that makes sense in a family room with kids, where blankets, games, books, and remotes need multiple homes. Open shelves on the bottom for baskets, a drawer or two for smaller items. It’s the most functional type – also the heaviest, so check weight if you move furniture often. Material: Wood or engineered wood with mixed storage Best for: Family rooms with high storage demand and frequent daily use Live-Edge Sofa Table The natural outer edge of the wood slab is kept intact, so each table has a different shape. This looks best in rooms with warm or natural materials throughout. Since the table itself is a feature, keep styling minimal – a lamp, a bowl, one plant. This type works well in rustic, farmhouse, and warm modern rooms. Material: Solid wood slab, usually with metal legs Best for: Rustic, farmhouse, natural, or warm modern rooms Glass Sofa Table A glass top reads as lighter than solid wood or stone, which helps in small rooms that already have heavy furniture. It doesn’t visually break the room the way an opaque piece can. Choose tempered glass with rounded edges, especially in homes with kids or pets. Material: Tempered glass with metal or wood legs Best for: Small or modern rooms with heavier existing furniture Metal Sofa Table Open metal legs keep the floor visible, which helps in smaller rooms. Metal is also easy to clean – useful in high-traffic areas or homes with pets. Most metal sofa tables pair with a wood or glass top, which softens the industrial feel if that’s not the room’s style. Material: Steel or iron, usually with a wood or glass top Best for: Modern, industrial, and high-use rooms where durability matters Rattan or Cane Sofa Table Rattan and cane bring softness to rooms where solid wood or metal feels too heavy. Good in sunrooms, coastal rooms, and casual living spaces. Keep it away from damp areas or anywhere it takes regular hard use – cane scratches and bends under sustained weight. Material: Rattan, cane, or wood with woven details Best for: Coastal, boho, farmhouse, and casual living rooms Stone-Look Sofa Table Faux marble and concrete-look tops carry more visual weight than glass or slim wood. This helps in larger living rooms where the sofa back looks too light or where the room reads as underfurnished. Real stone is available but adds significant weight – verify load capacity before ordering if the floor is on an upper level. Material: Faux marble, stone-look laminate, concrete-look, or real stone Best for: Larger living rooms and formal sitting areas How to Choose the Right Sofa Table Size comes first. Every other decision – material, storage type, style – is easier once you know the table fits the space. Here’s the process I use: Step 1: Match the Height The table should sit level with the sofa back or 1 to 2 inches lower. Measure from the floor to the top of the sofa cushions – that number is your ceiling. A table that sits several inches higher than the sofa back draws attention to itself; one that sits too low disappears visually and wastes the surface. Step 2: Set the Length A sofa table that spans the full length of the sofa tends to look too symmetrical – like a ledge, not a piece of furniture. Aim for half to two-thirds of the sofa length. For an 84-inch sofa, that means a table between 42 and 56 inches long. This gives the sofa visual breathing room on each side. Step 3: Check the Depth Against the Walkway The path behind a sofa needs at least 24 to 30 inches of clear walking space. Measure from the back of the sofa cushions to the nearest wall or furniture. Subtract your table depth from that number. If the result is under 24 inches, choose a slim sofa table at 10 to 12 inches deep instead of a standard 14 to 18 inches. For more on clearance paths and how they affect furniture placement in open-plan rooms, the minimalist living room guide covers the 30-inch rule in detail. Step 4: Decide on Storage Before Style The biggest mistake I see is choosing a table for how it looks on a product page, then realizing there’s nowhere to put the remotes. Answer this first: what items currently pile up near the sofa? Remotes and chargers need drawers. Blankets and books work on open shelves. If the answer is “nothing, the room is tidy,” a standard top is enough. Step 5: Check Edge Safety if You Have Kids or Pets Rounded corners and a stable base matter more in active households than most furniture guides admit. Glass sofa tables with sharp corners and narrow legs get knocked over. If there are kids or large dogs in the house, eliminate those options first before comparing anything else. Sofa Table Materials: What to Know Before Buying The material determines how the table holds up over time, not just how it looks on delivery day. Here’s the honest breakdown: Material Durability Maintenance Best Room Type Solid Wood High – scratches but refinishes Occasional oiling or waxing Most rooms; warmest finish Engineered Wood (MDF/Veneer) Medium – chips on edges under impact Wipe clean; avoid standing water Budget rooms with low daily wear Metal High – scratches but wipes clean Minimal; occasional polish on brass Modern, industrial, high-traffic rooms Tempered Glass Medium – strong but chips at edges Fingerprints visible; needs frequent wiping Small rooms where visual lightness helps Rattan/Cane Low to medium – scratches easily Dusting; keep dry Casual, coastal, and seasonal rooms Faux Stone / Concrete-Look Medium – surface-level scratching possible Wipe clean; check weight before upper floors Larger or formal living rooms Solid wood is the most forgiving over time – you can sand and refinish a scratch that would permanently damage engineered wood. If the budget is tight, metal frames with wood tops split the difference well. Sofa Table Styling: What Actually Stays Tidy Styling a sofa table is easier when you start with function and add decor second – not the other way around. Most sofa table styling that looks cluttered within a week was styled backwards. One Tall Piece as the Anchor Start with one tall piece on one end: a lamp, a tall vase, or a ceramic candleholder over 12 inches. This gives the table a clear vertical anchor. Everything else stays lower. Without an anchor, the table reads flat regardless of how many objects are on it. A Tray for Daily Items Remotes, coasters, and phone chargers belong in a tray, not loose on the surface. A tray groups small items into one visual unit and makes the whole table easier to clear – you lift the tray, not six individual things. A 12- to 14-inch rectangular tray in a natural material (wood, rattan, or matte ceramic) works in most living rooms. Vary the Heights Three items at the same height read as a lineup, not a composition. Combine a tall lamp with a medium-height vase or plant and a low stack of books or a shallow bowl. Behind a floating sofa, keep the tallest piece under 30 inches so it doesn’t obstruct sightlines from across the room. One Plant or Fresh Stems A single plant softens the surface, especially on metal or glass tables that read cold without organic material. A small pothos in a terracotta pot on one end is enough. If you travel frequently or forget to water, dried stems in a simple bud vase require nothing. Leave One Open Spot A surface that’s fully covered is a surface that stops working. Leave at least one-third of the table top open for a book, a glass, or a phone. That gap also makes the styled pieces look more deliberate – crowded surfaces look accidental even when each item was chosen intentionally. Do You Actually Need a Sofa Table? Not every living room does. A sofa table earns its place when it solves a specific problem. Here’s a quick check: Get a sofa table if: Skip it if: The back of your sofa is fully visible from another area The sofa is pushed against a wall You need a lamp behind the seating area You already have enough table surface nearby Small items pile up near the sofa with nowhere to go The room already has adequate storage The sofa separates two zones in an open-plan room The room feels full and adding furniture would crowd it There is at least 24 inches of walkable space behind the sofa The path behind the sofa is already tight If the room meets two or more of the left column conditions, a sofa table will likely improve both function and layout. If the sofa is against the wall and storage isn’t a problem, there’s no layout reason to add one. Common Sofa Table Mistakes These are the five errors I see most often – all fixable before purchase: Wrong height: Buying a table 4 or 5 inches taller than the sofa back. It looks like a bar table was placed behind a couch. Always measure the sofa back height first. Too long: A table that matches the sofa’s full length looks like a shelf, not furniture. Stay within two-thirds of the sofa length. Too deep for the walkway: An 18-inch-deep table in a narrow passage behind the sofa blocks movement. Measure the clearance before deciding on depth. Overloading the top: Six items that all compete for attention read as clutter. One anchor piece plus a few supporting objects is the right limit. Unfinished back panel: If the sofa floats and the table back faces the dining or kitchen area, make sure the table looks finished from that side. Some console-style pieces have a raw back edge meant to sit against a wall. Frequently Asked Questions These are the questions that come up most often once someone has measured their space and is deciding whether to commit. What is a sofa table called? It goes by several names: sofa table, couch table, behind-the-couch table, sofa console table, or console table. All describe the same piece – a narrow table placed behind a sofa. What is the difference between a sofa table and a console table? Console table is a broader category covering any long, narrow table used in hallways, entryways, or against walls. A sofa table is a console table sized and positioned specifically for behind a sofa – similar shape, specific placement. How tall should a sofa table be? Level with the sofa back or 1 to 2 inches lower. Measure from the floor to the top of the sofa cushions – that’s your maximum table height. Most sofa tables run 28 to 32 inches tall, which suits standard sofas with 30-inch back heights. How long should a sofa table be relative to the sofa? Half to two-thirds of the sofa length. For an 84-inch sofa, target 42 to 56 inches. A table matching the full sofa length looks rigid; one significantly shorter looks undersized. Can a sofa table work with a sectional? Yes, on the straight back section. Measure the linear run of the sofa back that faces a room or walkway and size the table to fit that segment – not the full sectional perimeter. What can I use instead of a sofa table? A slim console table, low bookshelf, narrow storage bench, or cube shelf unit all work behind a sofa. The best alternative depends on whether you need a surface, storage, or both. How deep should a sofa table be for a narrow walkway? 10 to 12 inches. Measure the clear space behind the sofa and leave at least 24 to 30 inches of walking clearance. Anything over 14 inches deep starts to feel like furniture, not a background piece. Should the back of a sofa table look finished? Yes, if it faces a room. Floating sofas expose the table back to views from the kitchen or dining area. Choose a table finished on all sides, or check that the product description confirms a finished back panel. Final Verdict: Does Your Room Need a Sofa Table? If your sofa floats in an open room and the back edge looks unfinished, a sofa table is the most direct fix. Measure the sofa back height, confirm at least 24 inches of walkable clearance behind it, then choose the type that matches your actual storage need – not the one that looks best in a product photo. For most rooms, a standard or slim sofa table in solid wood or a metal-and-wood combination is the right starting point. Put a lamp on one end, a tray for daily items on the other, and leave at least a third of the top clear.
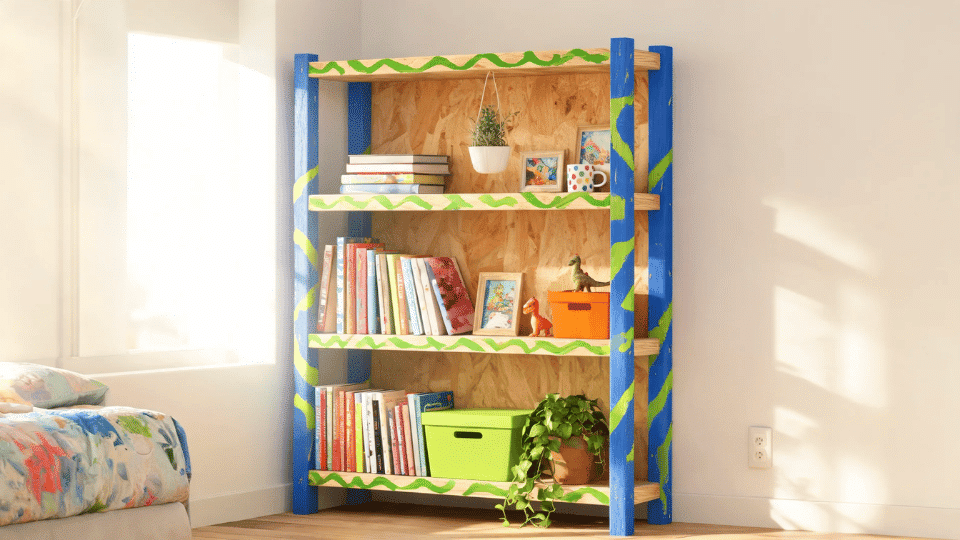
Learning how to build a bookshelf is a useful project because it gives you storage, display space, and room to play with color. This DIY bookshelf is a small wooden piece with open shelves and a bold two-color painted pattern, made for a pop maximalist bedroom. I’m keeping the structure simple, but the finish will feel fun, expressive, and personal. My version uses basic boards, screws, glue, primer, and paint. You’ll get the final size, supplies, cut list, build steps, paint plan, beginner tips, design variations, and common questions before starting. What You’re Getting Into Before You Build a Bookshelf This DIY bookshelf takes a weekend, costs $70–$100 in materials if you already own a drill, and sits at a solid beginner level. I’ll be straight with you: the build itself is not hard. The part that trips people up is the paint pattern at the end, and only because they rush it. Get that right, and you’ll have something that looks intentional, not just assembled. The finished piece is 36 inches high, 28 inches wide, and 10 inches deep, with two fixed middle shelves giving you three open storage bays. It’s sized for a bedroom reading corner or desk area, not a wall-to-wall statement, but a real, practical piece you can actually fill. Difficulty 2 out of 5, straight cuts, basic joinery, beginner-friendly Time One weekend (4–6 hours build, drying time between) Cost $70–$100 with tools already owned; $150–$200 if buying a drill and clamps Tools Needed Drill, saw or store cutting service, measuring tape, speed square, clamps, sandpaper, paintbrush or small roller, painter’s tape Skill Required Beginner, no joinery experience needed The most common failure point with this build is buying warped boards and not checking them before you leave the hardware store. Look down each board lengthwise before it goes in your cart. A twisted side panel will fight you at every step. That’s the thing I’d go back and tell myself first. Tools and Materials Needed to Build a Bookshelf You only need basic supplies for this build. Keep the wood simple, use the same board depth throughout, and let paint create the main personality. Supplies and Tools Item Why You Need It Measuring tape To measure boards and shelf placement Pencil To mark cuts, shelf lines, and screw spots Saw or store cutting service To cut the boards to size Drill To make pilot holes and drive screws Speed square To keep shelf lines and corners straight Clamps To hold boards steady while attaching them Paintbrush or small roller To apply primer, paint, and pattern details Painter’s tape To create clean color blocks or stripes Wood glue To strengthen the joints Wood screws To hold the bookshelf together Wood filler To cover screw holes before painting Sandpaper To smooth cut edges and fill holes Primer To help paint cover evenly Interior paint To create the two-color maximalist finish Clear topcoat Optional, for extra protection Lumber and Paint Quantities For this build, you need three 6-foot 1×10 pine boards. From those three boards, you’ll cut: two side panels at 36 inches, one top and one bottom panel at 28 inches each, and two middle shelves at 26.5 inches. The middle shelves are shorter because they sit inside the two side panels — account for this before you cut. The back panel is thin plywood cut to fit the full rear of the frame. Material Quantity Size or Notes 1×10 pine boards 3 boards 6 feet long each Side panels 2 pieces 36 inches each Top panel 1 piece 28 inches Bottom panel 1 piece 28 inches Middle shelves 2 pieces 26 1/2 inches each Wood screws 1 box 1 1/4-inch screws Primer 1 small can Enough for one thin coat Paint color 1 1 quart Main bookshelf color Paint color 2 1 sample pot or small can Pattern or accent color Pine is the right call for a first build: it’s widely available, easy to cut, and takes paint well. Just know that softer pine dents more easily than plywood under heavy loads. If you’re planning to store a full collection of hardbacks across all three shelves, plywood panels would give you more sag resistance over time. For the mix of books, decor, and boxes that most bedroom shelves hold, pine handles it well. To learn more about how different wood species behave under load over time, the guide to the best types of wood for furniture breaks it down by species. How to Build a Bookshelf Step by Step This tutorial keeps the build simple but provides enough detail for beginners to avoid guessing. Follow the order carefully so the frame stays correct, the shelves sit level, and the painted finish looks intentional. Step 1: Cut and Label the Boards Cut the boards using the cut list, or ask the hardware store to cut them for you. You’ll need two side panels, one top panel, one bottom panel, two middle shelves, and one thin plywood back panel. Once the pieces are ready, label each one with a pencil on the inside face. Mark the side panels, top, bottom, shelves, and back panel. This keeps the build organized and prevents mixing up similar pieces during assembly. Step 2: Mark the Shelf Placement Lay both side panels next to each other on a flat surface, with the bottom ends lined up. Use a measuring tape to mark the positions of the bottom, top, and two middle shelves. Draw straight guide lines across both panels with a speed square. Marking both side panels together helps the shelf heights match. Keep the shelf openings close to 10 inches so the finished bookshelf can hold books, boxes, and decor. Step 3: Drill Pilot Holes Drill pilot holes through the side panels where the top, bottom, and middle shelves will attach. Line the holes up with the center of each board end, and keep them away from the very edges. Pilot holes help guide the screws and reduce splitting, which is helpful when working with pine. They also make assembly easier because the screws will pull the boards together more smoothly and with less force. Step 4: Build the Outer Rectangular Frame Attach the top and bottom boards between the two side panels to create the outer rectangular frame. Add a thin line of wood glue at each joint, then drive screws through the side panels into the ends of the top and bottom boards. Work on the floor or a large table so the frame stays steady. Tighten the screws slowly, and make sure the board edges stay flush as the rectangle comes together. Pro Tip: Measure both diagonals of the outer frame after the screws are in. If they match, the frame is square. If they don’t, loosen the screws slightly, nudge the frame until the diagonals are equal, then re-tighten. Step 5: Attach the Middle Shelves Slide the first middle shelf into place along the marked guidelines. Add wood glue to both ends, then hold or clamp the shelf to prevent it from shifting. Drive screws through the side panels and into the shelf ends. Repeat the same process for the second shelf. Before fully tightening the screws, check that each shelf lines up with the pencil marks. Wipe away extra glue with a damp cloth before it dries. Step 6: Attach the Plywood Back Turn the bookshelf carefully so the back side faces up. Place the thin plywood back panel over the rear of the frame and line it up with the outside edges. Attach it with small screws or finishing nails around the outer frame and into the shelf backs. This back panel helps the bookshelf feel more finished and reduces side-to-side movement. Make sure the panel sits flat before adding the last few fasteners. Step 7: Fill, Sand, and Prime the Bookshelf Fill screw holes, nail holes, and small gaps with wood filler. Let it dry fully, then sand those areas smooth. Sand the cut edges and any dried glue marks. Wipe dust off with a dry cloth. Apply one thin coat of primer across the entire piece, sides, shelves, front edges, and plywood back- and let it dry completely before painting. Skipping primer on bare pine usually shows up as uneven coverage on the first paint coat, especially on end grain, and it matters even more if the wood has any prior stain or finish, since paint over stained wood behaves differently than bare pine. Step 8: Paint the Main Color and Add the Pattern Paint the bookshelf with your main color first. Use two thin coats instead of one heavy coat, and let each coat dry before adding the next. Once the base color is dry, add the second-color pattern. You can use painter’s tape for wide stripes, checkerboard blocks, or clean shelf borders. For waves or arches, draw a light pencil guide first. Keep the pattern bold but controlled, so the final piece feels playful and intentional. Step 9: Seal, Cure, and Place the Bookshelf A clear topcoat is optional, but worth adding on a bedroom shelf that will hold books with sharp spines or boxes that slide in and out regularly. Apply in thin layers and let each cure fully. After painting, give the piece at least 24–48 hours before loading it. Fresh paint scuffs even when it feels dry to the touch. When placing it, put the heavier books on the bottom shelf for stability, use a wall anchor if children or pets are in the room, and take your time when you decorate the finished shelves. The styling is what makes the paint pattern pay off. How Much Does It Cost to Build a Bookshelf? The cost depends mostly on whether you already own a drill and clamps. The materials alone, including wood, fasteners, primer, and paint, run about $70–$100 for this size. Add $50–$80 if you need to buy basic tools. Line Item Low End High End What Drives the Variation Pine boards (3 boards, 6 ft) $25 $45 Grade, knot count, and regional lumber pricing Plywood back panel $10 $20 Whether you buy a full sheet or a cut-off Screws, glue, and wood filler $10 $18 Brand and whether you already have some Sandpaper $4 $8 Pack size Primer $8 $15 A small can is enough for one thin coat Paint (2 colors) $15 $30 A quart for the main color, a sample pot for the accent Clear topcoat (optional) $10 $25 Brand and finish type Estimated total (tools owned) $82 $161 Lower end is realistic if you already own a drill The biggest variable most guides skip: store cutting fees. If you don’t own a saw and the hardware store charges per cut, budget an extra $5–$15 depending on the number of pieces. Most big-box stores cap the fee or offer the first few cuts free — it’s worth asking before you assume you need to buy a saw for a single project. Beginner Tips for a Better Bookshelf These tips are not extra steps. They are simple checks that help the bookshelf come together cleaner, straighter, and safer. Choose straight boards. Look down each board before buying it. Avoid boards that twist, curve, or have deep cracks. Keep the design one size. Use the same board depth for the whole build. This makes measuring and assembly much easier. Mark both side panels together. This keeps the shelf lines even and helps prevent one side from sitting higher than the other. Do not skip pilot holes. They reduce splitting and make screws easier to drive straight, especially near board ends. Use glue and screws together. Glue adds strength, while screws hold the bookshelf firmly in place as it dries. Paint in thin coats. Thick paint can drip, stay tacky, or hide your pattern edges. Thin coats look cleaner. Let the paint cure before styling. Books can scratch fresh paint, even when the surface feels dry. Keep heavy items low. Put larger books and storage boxes on the bottom shelf so the bookshelf feels more stable. Design Variations for the Same Bookshelf These ideas use the same basic bookshelf build, but the finish and styling change the mood. Not every version needs to be maximalist. 1. Literature-Heavy Bookshelf For a book-focused version, use a deep color like forest green, oxblood, navy, or warm brown. Keep the paint finish more classic, with maybe one contrast color on the shelf edges or inside panels. Style it with novels, poetry, essays, annotated paperbacks, brass bookends, and a small reading lamp. This version feels full and personal, but more library-inspired than loud or playful. 2. Mystic Bookshelf For a mystic version, choose a dark base color like plum, midnight blue, charcoal, or black-green. Add small painted details, such as moons, stars, arches, or soft waves, using gold, silver, lilac, or teal. Style it with tarot decks, candles, crystals, astrology books, incense holders, and metallic frames. This version feels moody, layered, and calm rather than bright pop maximalist. 3. Pop Maximalist Bookshelf For the main pop maximalist look, use a bold base color and a strong second-color pattern. Try hot pink with orange waves, cobalt with lime stripes, or lilac with red checkerboard corners. Style it with graphic novels, colorful book spines, glossy decor, framed postcards, and patterned boxes. This version should feel playful, bright, and expressive while maintaining a single clear paint pattern. 4. Soft Colorful Bookshelf For a softer version, choose colors like butter yellow, sage, coral, powder blue, or warm cream. Add a small painted detail, such as scalloped edges, shelf-border lines, or a contrast interior. Style it with journals, romance novels, ceramics, plants, framed photos, and woven baskets. This version still feels creative, but it is gentler and easier to blend into a calm bedroom. Common Mistakes to Avoid These mistakes are easy to make during a first build. Checking them early can save time and make the finished bookshelf feel sturdier. Mistake Why It Causes Problems Better Choice Buying warped boards Shelves may not sit evenly Choose straight pine boards Skipping pilot holes Wood can split near the edges Drill before adding screws Not checking the square The frame can lean or twist Measure both diagonals Using too many paint ideas The design can look messy Choose one clear pattern Painting too thickly Paint may drip or stay sticky Use thin coats Loading shelves too soon Fresh paint can scratch Let the paint cure first A beginner bookshelf does not need to look machine-made. It should feel sturdy, smooth enough to use, and finished with care. Frequently Asked Questions How much weight can this DIY bookshelf hold? This bookshelf can hold regular books and small decor, but it is not meant for very heavy loads. Spread weight across the shelves, and keep the heaviest items near the bottom. Can I build this bookshelf in a rental apartment? Yes, but protect the floor with a drop cloth while building and painting. If you cannot drill into the wall, use removable furniture safety straps where allowed. How do I clean a painted bookshelf? Use a soft, dry cloth for dust. For marks, wipe gently with a slightly damp cloth and mild soap. Avoid rough scrubbers because they can dull the paint. Happy Reading A painted bookshelf is a useful way to practice measuring, drilling, assembly, and finishing without taking on a huge project. Once you learn how to build a bookshelf, you can change the color, pattern, or shelf size in later builds. This DIY bookshelf keeps the wooden structure simple, while the two-color paint makes it feel bold and personal. I like that it works as storage and decor at the same time. My best advice is to choose straight boards, check the frame before adding shelves, and let the paint cure well. Try the build, then make the pattern your own.

A well-built DIY outdoor bar runs about $400–$800 in materials for a freestanding 72-inch unit, more if you use premium cedar throughout, less if you stick to pressure-treated framing with cedar slats only on the visible faces. I’ve seen homeowners spend twice that by skipping the planning stage and buying the wrong lumber twice. The build I’m walking through here avoids that. It uses a strong exterior-grade frame, vertical wood slats over dark backing panels, a sealed countertop, open back storage, and warm under-counter LED lighting. Done right, this is a bar that survives real weather and still looks intentional two winters later. Cost Note: Figures in this article are estimates based on national averages as of 2026. Actual costs vary significantly by region, lumber prices, and material choices. Always price your cut list at a local lumber yard before committing to the build. Difficulty 3/5 — Basic carpentry, no specialist skills needed Time 1–2 weekends (build) + 1 day (finish and cure) Cost $400–$800 in materials depending on wood choice Tools Needed Circular saw or miter saw, drill/driver, clamps, level, tape measure, speed square, sander Skill Required Intermediate — confident measuring, cutting, and driving screws square What This Build Creates The finished bar is freestanding, approximately 72 inches wide, 24 inches deep, and 42 inches high, proper bar height for standard stools with a 28–30-inch seat. The front and sides have a warm, vertical wood-slat finish over dark backing panels. The countertop overhangs the frame slightly and is finished with a thick front edge so it reads as a solid slab. The back is open for storage, with two shelves and one open bay sized for a cooler or storage bin. Under-counter LED strip lighting and a black foot rail finish the build. It sits on a patio, deck, or paved area. It does not belong on grass, more on that under mistakes to avoid. The One Failure Mode to Know Before You Start The most common reason DIY outdoor bars look rough after one season: unsealed wood. Not just the faces but the cut ends, the undersides, the corners, the hidden frame members. Raw end grain is the first place water gets in, and once it’s in, it works fast. Seal everything before assembly where you can, and again after final assembly where you can’t reach it earlier. That’s the step most people skip because it’s tedious and invisible. It’s also the step that determines whether this bar looks good in year three or starts delaminating by year two. Pro Tip: Pre-seal all cut ends with a penetrating outdoor wood sealer before assembly. Once the frame is together, you won’t reach half these surfaces. A foam brush and five minutes per board before you build saves you a resealing job next spring. Materials and Cut List The quantities below are based on the 72 × 24 × 42-inch finished size. Buy 10–15% extra on lumber for trimming, ripped pieces, and spacing adjustments. Pressure-treated lumber is the right call for the hidden frame. It handles ground moisture and repeated wet/dry cycles without degrading. Cedar is the better choice for the visible slats because it takes stain well, has natural rot resistance, and looks warmer than treated wood. Material Cut Size Qty Use 2×4 pressure-treated or exterior-grade lumber 72 in 4 Long sides of top and bottom frames 2×4 exterior-grade lumber 21 in 8 Short sides of top/bottom frames and side rails 2×4 exterior-grade lumber 40½ in 8 Corner posts and mid-span support posts 2×4 exterior-grade lumber 69 in 3 Front and back horizontal support rails 1×2 or 1×3 lumber Custom 4–6 Back shelf support cleats Exterior plywood (¾ in) 72 × 38 in 1 Front backing panel Exterior plywood (¾ in) 24 × 38 in 2 Side backing panels Exterior plywood or sealed boards Custom 2 shelves Lower and middle back shelves Cedar slats (1×2 or 1×3) 38 in tall 40–45 Front slatted finish Cedar slats (1×2 or 1×3) 38 in tall 24–30 Side slatted finish Countertop base (2× lumber or ¾ in plywood laminated) 76 × 29 in 1 Main countertop base Countertop edge trim 76 in front, 29 in sides 3 Thick countertop edge profile The countertop base is the one place to spend more time than you think it needs. A single layer of ¾-inch plywood will flex over a 76-inch span. Either laminate two layers or use solid 2× material ripped and glued side by side. The edge trim is what makes it look like a slab, add a 1½-inch thick face on the front and sides, and nobody will know it’s plywood underneath. Hardware, Finishes, and Accessories Category What to Buy Fasteners Exterior-grade coated screws (2½ in for frame, 1¼ in for slats and panels) Countertop finish Dark charcoal, black, or concrete-look outdoor coating — apply 2 coats minimum Wood finish for slats Warm exterior stain + outdoor sealer rated for UV exposure Backing panel finish Black or charcoal exterior paint before slats go on Lighting Outdoor-rated warm white LED strip (2700–3000K) with weatherproof power supply Foot rail Black tubular steel foot rail kit, mounted to the lower front frame Optional hardware Bottle opener, side hooks, magnetic bar tool holder The LED strip color temperature matters more than most people realize. Warm white at 2700–3000K reads like candlelight and makes the cedar slats glow at night. Anything above 4000K pushes into cool white territory, and the whole setup starts looking like a work light instead of a bar. Step-by-Step DIY Outdoor Bar Build Step 1: Mark the Footprint Mark a 72 × 24-inch rectangle on the patio, deck, or pavers where the bar will live. Keep the front — the slatted side — facing the seating area. Confirm the surface is flat with a long level. A half-inch of slope across 72 inches is manageable with shims; more than that and the frame will rack. Step 2: Build the Main Timber Frame Build the bottom rectangle first using the 72-inch and 21-inch 2×4s. Set it flat on the ground and confirm it’s square — diagonal measurements should match within ⅛ inch. Build an identical top rectangle. Then stand the eight vertical posts between them: four corners and four mid-span supports. Screw everything tight, recheck square and level, and brace it diagonally with a clamp across the frame while the structure sets. At this stage you should have a rigid open box. If it flexes when you push it, the problem is easier to fix now than after panels go on. Step 3: Add Horizontal Support Rails Run the three 69-inch horizontal rails across the front and back of the frame at mid-height and at the shelf positions. Add 21-inch side rails at matching heights. These rails carry the panel weight, give the shelves something to land on, and eliminate flex in the long front span. A 72-inch frame without mid-span support will visibly bow over time as wood moves through seasons. Step 4: Attach the Dark Backing Panels Cut and fit the exterior plywood panels to the front and both sides of the frame. Before you screw them in, paint them black or dark charcoal on the face side. The dark color shows through the gaps between slats and is what gives the finished front its depth. Skip this step and the gaps will expose raw plywood, which looks unfinished and holds water. Two coats of exterior paint is enough — the slats protect the panel face from direct weather. Step 5: Install the Vertical Cedar Slats Start at the center of the front panel and work outward, using a consistent spacer — a ¼-inch scrap of plywood works fine — between each slat. Starting from the center keeps the pattern symmetrical even if the last slat on each end needs to be ripped slightly. Continue the same treatment around the sides. Use 1¼-inch exterior screws through the slat face into the backing panel and into any support rail behind it. This is the step where the bar starts to look like something. The warm cedar grain against the dark backing is most of the visual result. Step 6: Add the Back Shelves Screw the shelf support cleats to the inside of the back frame rails. Set the lower shelf 6–8 inches from the ground — high enough to clear puddles, low enough for a full-size cooler in the open bay beside it. Set the middle shelf at whatever height your bottles and glassware need. Keep one bay at least 18 inches wide and 15 inches clear for the cooler. Seal all shelf boards on all six sides before installing them. Shelves in outdoor builds take the most moisture abuse of any part of the structure. Step 7: Install the Countertop The countertop base is 76 × 29 inches, overhanging the 72 × 24-inch frame by 2 inches front and back and 2 inches per side. Attach the 1½-inch thick edge trim flush to the bottom of the base on the front and both sides to create the slab profile. Secure the assembly from underneath using screws up through the top frame into the countertop base. At 42 inches tall with the countertop in place, the bar is at proper serving height. Step 8: Finish All Surfaces Sand the cedar slats to 120 grit, knock off the sharp corners on the slat edges, then apply two coats of warm exterior stain. Apply the dark countertop coating in two coats, feathering the edges over the trim. Seal everything from countertop face and edges, slat faces and any unsealed backs, the top of the frame underneath the counter where water will pool. Give the sealer 48 hours to cure before use. Once the finish is dry, mount the LED strip on the underside of the countertop lip. Route the wire down the back corner of the frame to the power supply. Mount the black foot rail 6–8 inches from the ground on the front lower frame using the included hardware. Step 9: Style the Finished Bar Two or three stools spaced 24 inches apart work well for a 72-inch bar. Set a tray, a few glasses, an ice bucket, and one or two bottles on the counter just enough to look ready, not enough to look crowded. Add a small potted plant or two at one end. The bar does the heavy visual lifting already; the styling just activates it. Outdoor Bar Ideas to Personalize the Build The base build is the structure. These additions change how the bar is used and how it reads in the space — each one is a one-day job once the main build is done. Add a Wall Shelf Behind the Bar A narrow wall-mounted shelf behind the bar gives bottles and glasses a home and creates a proper backdrop. Useful if the bar sits against a fence or exterior wall. Keep it shallow like 6–8 inches deep, so it doesn’t compete with the counter workspace. Seal it the same way as the main build. Use a Removable Ice Bucket A removable ice bucket avoids the plumbing and drainage problems of a built-in sink while giving the bar a functional serving feature. Stainless steel holds cold better than plastic alternatives. It sits on the counter during use and goes in the back shelf bay when the bar is idle. Add a Narrow Backsplash Ledge A 4-to-6-inch ledge running the full back width of the countertop adds a small display shelf without reducing usable counter space. Useful for bottles, garnishes, or a few candles. Seal the ledge with the same countertop coating so it handles spills the same way the main surface does. Style With Potted Herbs Mint, rosemary, and thyme in terracotta pots beside the bar serve two functions: they look right against the warm cedar, and they’re actually useful at a bar. Keep them on the counter only if you have counter space to spare — they’re better placed on an adjacent surface or the ground beside a stool. Match Your Stools to the Build For a 42-inch bar, you need stools with a seat height of 28–30 inches, any lower and the counter is in your armpits. Black metal stools read modern and clean against the cedar slats. Woven stools push the look warmer and more casual. What to avoid: anything plastic, anything with a seat height labeled for a 36-inch counter, anything that won’t survive being left outside. If you want stools that hold up the same way the bar does, look for aluminum or powder-coated steel frames with a weather-rated seat material. The outdoor bar stools at Minimal & Modern include weather-rated options in the right height range. Add Lighting Around the Bar Zone The under-counter LED handles the bar itself. String lights above define the zone. Solar lanterns on the ground or on nearby surfaces add layers of light at different heights. The goal is a warm ambient glow, not a single bright source. If you’re building on a covered patio or under a pergola, a wall-mounted fixture at the back of the bar zone completes the setup and adds task light for pouring. Mistakes That Show Up Two Winters Later Most of these aren’t obvious at build time. They’re the kind of failure you notice a year or two in, when it’s already a bigger fix than it should have been. Building on grass or soil: Wood that sits on ground contact wicks moisture from below continuously. The base frame rots from the bottom up, and you won’t notice until it’s structural. Use a paved or composite base, or set the bar on adjustable post bases that keep the frame off the surface. Skipping exterior-grade fasteners: Standard interior screws rust through in one season in a wet climate. Exterior-coated screws cost a few dollars more per box. Use them on every single connection. Leaving raw end grain exposed: End grain absorbs water 40–50 times faster than face grain. Seal cut ends with penetrating sealer before or immediately after cutting, every piece. A countertop that’s too thin across the span: A single ¾-inch plywood panel over 76 inches will deflect visibly over time. Either laminate two layers or use solid 2× material and add the thick edge trim. LED strip visible from the front: Mount it under the countertop lip recessed at least 1½ inches, not flush to the front edge. If you can see the strip from the seating position, it’s poorly positioned — move it back. No airflow around a mini-fridge: If you plan to add a mini-fridge in the open bay, leave 2–3 inches of clearance on the sides and back. A fridge with no airflow runs hot and fails early. Unsupported long front span: A 72-inch front frame needs at least two mid-span posts and two horizontal rails to stay rigid. One post at center is not enough over time as wood expands and contracts seasonally. Frequently Asked Questions About DIY Outdoor Bars These are the questions that come up most often once the build is underway, usually when someone is at the lumber yard or halfway through the frame. What is the standard height for a DIY outdoor bar? 42 inches is the standard. That matches most bar stools with 28–30-inch seat heights and puts the counter at a comfortable working height for standing adults. A 36-inch counter requires shorter stools and reads more like a table, usable, but not a bar. What wood is best for an outdoor bar build? Pressure-treated lumber for the hidden frame, it handles moisture and ground proximity without degrading. Cedar for the visible slats, it takes stain well, resists rot naturally, and looks better than treated wood. Seal both regardless of species. How cheap can you build a DIY outdoor bar? A basic version using pressure-treated framing and construction-grade cedar slats comes in around $400 for a 72-inch unit. The cost climbs to $600–$800 if you use clear-grade cedar throughout, a commercial foot rail kit, and a pre-made concrete countertop coating rather than painted plywood. Can I leave a DIY outdoor bar outside year-round? Yes, if properly sealed and placed on a solid surface. A covered patio or pergola significantly extends the finish life. In harsh freeze-thaw climates, a fitted outdoor cover over winter will protect the countertop seams and any exposed end grain from moisture intrusion. Do I need outdoor bar plans before I start? A dimensioned sketch is enough for this build — you don’t need formal plans. Draw the frame members with labeled lengths, mark your shelf positions, and note the countertop overhang. Print the cut list from this article. That’s all the planning a straightforward freestanding bar needs. How do I stop an outdoor bar from wobbling? Build the frame square from the start, drive every screw tight, and include all mid-span posts and horizontal rails. If the bar still moves after assembly, add a diagonal brace inside the back panel — a 2×4 running corner to corner kills the racking immediately. Does an outdoor bar countertop need to be waterproof? Yes. Rain, spills, condensation from ice buckets, and cleaning all attack an unsealed top. Apply a waterproof exterior coating to the top surface, all four edges, and any seams. Reapply annually or whenever the surface shows signs of wear — water beads on a sealed top, soaks in when it needs recoating. Final Verdict For $400–$800 in materials and two weekends of work, this outdoor bar build delivers something that costs $1,500–$2,500 if you bought it pre-made. And most of what’s available pre-made won’t hold up outdoors as well as a properly sealed frame-and-cedar build. The design is not complicated. The sealing is not complicated. What trips most people up is skipping steps, usually the sealing and the mid-span supports. If you build the frame square, seal every cut end before assembly, and add the horizontal rails where the instructions say to, this diy outdoor bar will still look right in year four. Before you buy anything, price your cut list at a local lumber yard because cedar prices vary significantly by region, and knowing your actual materials cost before you start avoids the most common budget surprise.
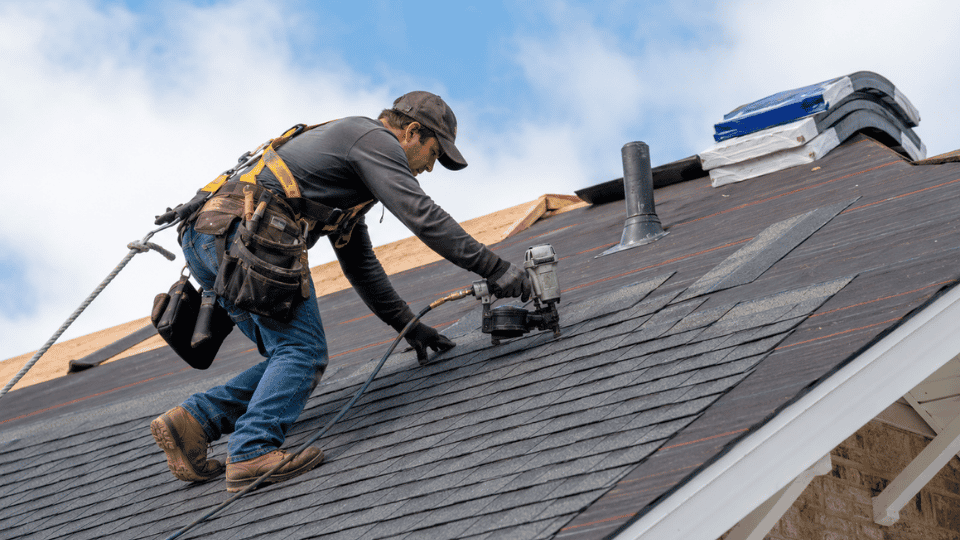
Roof replacement cost runs between $8,000 and $22,000 for most US homeowners using asphalt shingles, and the final number almost never matches the first number a contractor quotes. The gap isn’t random. It comes down to three line items that most initial bids don’t surface: pitch, decking damage, and what gets lumped into “miscellaneous.” This guide breaks down the actual cost structure by size, material, and region. It also tells you exactly which variables push your quote up and which ones are negotiable before you sign anything. Cost Note: Figures in this article are estimates based on national averages (Angi/HomeAdvisor 2026 cost data, NAHB). Actual costs vary significantly by region, contractor, materials, and project scope. Always get at least three quotes before committing to any project above $1,000. Average Roof Replacement Cost by Home Size Your home’s square footage and your roof’s actual surface area are two different numbers. Pitch multiplies the surface beyond your footprint, and overhangs add more. A 2,000 sq ft home with a medium pitch can have 26 to 32 roofing squares once the geometry is accounted for, and roofing is priced by the square (one square equals 100 sq ft of roof surface, not floor area). Home Size (sq ft) Estimated Roof Squares Estimated Cost Range 1,000 to 1,500 12 to 18 $5,500 to $10,000 1,500 to 2,000 18 to 25 $8,000 to $14,000 2,000 to 2,500 25 to 32 $11,000 to $18,000 2,500 to 3,000 32 to 40 $14,000 to $22,000 3,000+ 40+ $20,000 to $35,000+ These ranges assume standard architectural asphalt shingles, a moderate pitch, and a single-story structure. Premium materials, steep pitches, or significant decking damage will push costs higher, sometimes by 20 to 40 percent. Before calling contractors, run a quick self-estimate: multiply your home’s footprint (length x width) by a pitch multiplier (1.15 for low, 1.25 for medium, 1.41 for steep), then add 10 to 15 percent for waste. At $450 to $550 per square installed for architectural shingles, a reasonable national mid-market figure for 2026, that gives you a working baseline. A 1,800 sq ft home at medium pitch comes to roughly 25 squares, or $11,000 to $14,000 before permits and decking. Roof Replacement Cost by Material Material selection is the biggest single lever in roof replacement cost outside of square footage. Here’s how the most common options compare on installed price per square and realistic lifespan: Roofing Material Cost Per Square (Installed) Lifespan 3-tab asphalt shingles $300 to $450 15 to 20 years Architectural asphalt shingles $400 to $600 25 to 30 years Premium / designer asphalt $500 to $800 30 to 40 years Metal (steel panels) $700 to $1,400 40 to 70 years Standing seam metal $1,200 to $2,000 50 to 70 years Cedar shake $900 to $1,600 20 to 30 years Concrete tile $900 to $1,500 40 to 50 years Clay tile $1,200 to $2,500 50 to 100 years Slate $1,500 to $4,000+ 75 to 150 years Synthetic slate or shake $700 to $1,200 30 to 50 years Architectural asphalt shingles are the right choice for most homeowners. They cost 20 to 30 percent more than 3-tab but carry longer warranties and hold up significantly better over time. Metal roofing costs more upfront but often makes financial sense in high-wind, hail-prone, or extreme-climate regions where asphalt shingles degrade faster. The math only works in metal’s favor if you plan to stay in the home long enough to recoup the premium, typically 15 to 20 years. What Drives the Final Roof Replacement Cost The material and square count set the baseline. These are the variables that routinely move the final invoice away from the initial quote, sometimes by thousands of dollars. Roof Pitch and Complexity Steeper roofs require safety equipment, slower crew movement, and more labor hours per square. A simple gable roof prices differently than one with dormers, multiple valleys, hips, or skylights, even when the square footage is the same. Two 25-square roofs can have a $4,000 labor difference based entirely on shape. Always ask for the per-square labor rate broken out from the material cost. Tear-Off and Disposal Removing one layer of asphalt shingles is straightforward. Two or more layers, which many older homes have, adds labor time, dumpster weight, and disposal fees. Some local codes prohibit adding a third overlay, making removal mandatory. Ask whether tear-off, dumpster rental, and debris cleanup are included in the quote or billed separately. Underlayment Underlayment sits between the deck and the outer roofing material. Felt paper is the lower-cost option; synthetic underlayment costs more but provides better moisture resistance and durability. In colder climates, ice-and-water barrier is often required along eaves and valleys. This line item can add $500 to $1,500 to a standard job and should appear explicitly in any detailed quote. Flashing Flashing seals roof joints around chimneys, skylights, vents, and sidewalls. Poor flashing is one of the most common causes of leaks, not the shingles themselves. Ask specifically whether existing flashing will be reused, repaired, or fully replaced. Reusing 15-year-old flashing on a new roof is a cost cut that typically shows up as a callback within three years. Ventilation Blocked soffits, missing ridge ventilation, or insufficient attic airflow will shorten the lifespan of new shingles. If ventilation is inadequate, a roofer should flag it during the estimate rather than after install. Skipping the upgrade saves money upfront and costs it back within five to eight years of premature shingle degradation. Decking Condition This is the line item that surprises homeowners most. Rotted or water-damaged plywood can’t be seen until tear-off is complete, which is why it almost never shows up in the initial quote. Contractors typically charge $60 to $100 per sheet for replacement. On a large roof with significant moisture damage, that can add $1,500 to $3,000 to the final invoice. Ask for the per-sheet decking rate in writing before signing anything. Permits Most jurisdictions require a permit for full roof replacement. Permit costs vary by location and project size, typically $150 to $500, and the paperwork process can also affect scheduling. Confirm whether the contractor pulls the permit or whether you’re responsible. Any quote that doesn’t address permits at all is worth questioning. Where Budgets Go Wrong I’ve seen homeowners budget carefully for the per-square rate and get surprised by everything else. These are the line items most likely to inflate your final invoice above the initial quote: Decking replacement: Not visible until tear-off. Get the per-sheet rate in writing. It’s the single biggest source of invoice surprises. Layered tear-off: Two or more existing shingle layers add time and disposal cost that low bids often exclude. Flashing replacement: Often treated as optional when it shouldn’t be. Full replacement adds $300 to $800 but protects a $12,000 investment. Ventilation upgrades: A necessary cost on older homes, but one that some contractors defer because it adds scope to the conversation. Dumpster and cleanup: Should be included but often isn’t itemized in base quotes. Confirm in writing. Roof Replacement Cost by Region Labor rates, material costs, and permitting fees vary enough that the same architectural shingle installation can cost $9,000 in Alabama and $20,000 in California. Region matters as much as material type when you’re setting a budget. Similar cost patterns apply to other large home projects. The same regional variation shows up in sunroom addition costs, where labor accounts for a significant share of the spread. Region States Estimated Cost Range Northeast NY, MA, CT, NJ $12,000 to $25,000+ West Coast CA, WA, OR $12,000 to $22,000+ Mid-Atlantic VA, MD, PA $10,000 to $18,000 Midwest IL, OH, MI $9,000 to $17,000 Southeast GA, AL, TN $7,500 to $14,000 South Central TX, AR, OK $7,000 to $13,000 Hawaii N/A Well above national average Regions with frequent storm activity, including the Gulf Coast, Tornado Alley, and Atlantic hurricane zones, often see elevated labor demand and compressed availability following major weather events. If your roof needs replacement but isn’t actively failing, scheduling outside of post-storm seasons can improve both availability and price. What Homeowners Are Saying A thread in r/Roofing asking what to expect for a roof replacement on a 2,000 sq ft home in Jacksonville drew a range of honest responses. Commenters quickly flagged that a 2,000 sq ft footprint doesn’t equal 20 roofing squares, since pitch and waste push the number higher, with one commenter calculating roughly 25.7 squares at a 6/12 pitch. Cost estimates ranged from $350 to $400 per square to $12,000 to $18,000 total, depending on region and scope. That gap is exactly what I see in practice. The difference between what homeowners expect to pay and what they actually pay almost always comes down to pitch, waste factor, and decking repairs that nobody budgeted for. Getting the per-square rate and the per-sheet decking rate in writing before signing anything closes that gap considerably. Roof Repair vs. Roof Replacement Not every roofing problem is a full replacement. The decision comes down to age, damage extent, and the honest math between repair cost and replacement cost. Situation Recommended Action Estimated Cost Isolated leak, 1 to 5 shingles affected Repair $150 to $600 Flashing failure, no structural damage Repair or reseal $200 to $500 Granule loss in multiple areas Evaluate age first Varies Roof under 15 years old, limited damage Repair $500 to $2,500 Roof 20+ years old, widespread damage Replacement Full project cost Multiple leak points, sagging, or rot Replacement Full project cost Preparing home for sale, roof near end of life Replacement often advised Full project cost The benchmark I use: if repair costs exceed 50% of a full replacement, especially on a roof older than 15 years, replacement makes better long-term financial sense. You’re paying repair prices to extend a roof that’s already in the last quarter of its life. This same cost-versus-lifespan logic applies to other major home projects. If you’re weighing significant exterior improvements alongside the roof, the cost breakdown for house additions follows a similar structure, with permit costs, regional labor variation, and scope creep as the main variables. How to Compare Quotes Before Hiring Getting three quotes only helps if each contractor is pricing the same scope. A lower bid isn’t a better deal if it leaves out flashing, ventilation, decking repair rates, permits, or cleanup. What to Ask Your Contractor Before Signing How many roofing squares are you pricing? Home square footage and roof square footage are not the same. Get the exact number. What is your per-sheet rate for decking replacement? This is the single most important number to have before damage is found at tear-off. Is tear-off, dumpster rental, and cleanup included? These should be included. Confirm it in writing. Will the flashing be replaced or reused? Reusing old flashing on a new roof is a false economy. Who pulls the permit, and is the fee included in this quote? Red Flags in a Roofing Quote Vague scope: “New roof” with no material spec, no square count, no flashing or underlayment listed No license or insurance: Creates personal liability if something goes wrong on your property No decking repair rate: The most common source of invoice surprises Pressure to sign quickly: A decision rushed in your direction benefits the contractor, not you Very low bid with no explanation: Something is missing from the scope. Find out what before you sign. Ways to Lower Roof Replacement Cost Compare at least three written estimates from licensed local contractors Match scope before comparing totals so every bid includes the same materials and work Choose architectural asphalt shingles if upfront cost matters and premium materials aren’t needed Replace before leaks spread to decking, insulation, or framing. Deferred replacement is more expensive, not less. Ask about off-peak scheduling if you have flexibility. Post-storm seasons drive up demand and price. Check insurance eligibility after hail, wind, or storm damage before paying out of pocket Frequently Asked Questions These are the questions I hear most from homeowners who’ve already got a quote in hand and aren’t sure whether to trust it. How much does a roof replacement cost for a 1,500 sq ft house? Expect $7,000 to $12,000 for a standard architectural shingle replacement on a 1,500 sq ft home with a moderate pitch. That covers roughly 18 to 22 squares installed. Decking damage, steep pitch, or premium materials will push costs higher. How much do roofers charge per square? Most licensed contractors charge $400 to $600 per square installed for architectural asphalt shingles, including labor and materials. 3-tab shingles run $300 to $450 per square. Metal roofing starts at $700 per square and goes significantly higher for standing seam. What is the average cost of roof replacement in 2026? The national average for a full asphalt shingle roof replacement sits around $11,000 to $14,000 for a standard single-story home. That covers materials, labor, tear-off, and standard project costs, but not significant decking repairs or premium upgrades. Is it cheaper to repair or replace a roof? Repair is cheaper short-term. But if the roof is over 15 years old and repair costs exceed 50% of replacement cost, full replacement is typically the better financial decision. Partial repairs on an aging roof tend to chase the next failure point. How much is a new roof per square foot? Asphalt shingle roof replacement runs $4 to $6 per square foot installed for most homes. A 2,000 sq ft roof surface (not floor area) costs $8,000 to $12,000 in materials and labor before permits, disposal, and decking work. Does roof replacement increase home value? A new roof improves buyer confidence, supports a cleaner inspection report, and removes a negotiation point in a sale. Return on investment varies by market and material, but replacing a failing roof before listing is generally expected by buyers, not rewarded with a dollar-for-dollar premium. What time of year is cheapest to replace a roof? Late fall and winter tend to offer the most contractor availability and occasionally better pricing, as long as you’re outside of post-storm demand spikes. Avoid scheduling during or immediately after major storm events in your region, when compressed availability inflates quotes. Final Verdict The $8,000 to $22,000 range for asphalt shingle roof replacement is real, and where your project lands inside that range is decided by pitch, decking condition, and what the contractor left out of the initial bid. Before you sign anything, get the per-sheet decking rate and confirm that tear-off, flashing, and permits are included in the scope. Those three questions close most of the gap between a quoted price and a final invoice. Get at least three written estimates, compare them line by line against the same scope, and ask specifically about the one number that almost never shows up in a first quote: what does decking replacement cost per sheet if it’s needed? Cost estimates based on Angi/HomeAdvisor 2026 national averages and NAHB residential construction data. Verify current pricing with local contractors and suppliers before budgeting.
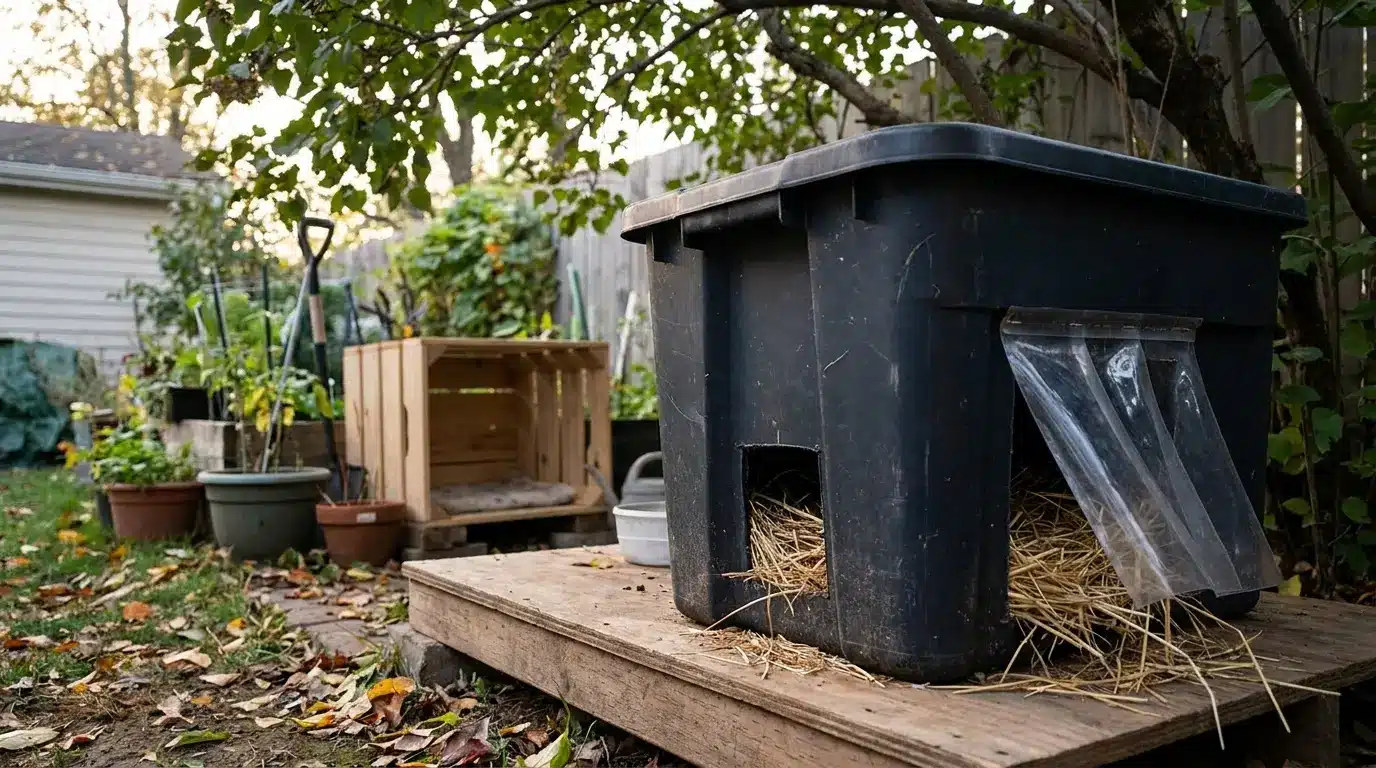
A DIY outdoor cat house that keeps rain out and holds warmth sounds simple. In practice, most first builds fail at the same three points: the bedding gets wet from the bottom up, the entrance lets cold air pour straight in, and the shelter sits directly on ground that pulls heat away all night. Fix those three things before you cut anything, and the rest falls into place. This guide covers the double plastic bin build that most people should start with, plus a full wooden build for anyone who wants something that lasts more than one winter. You’ll get the steps, the supplies, the sizing logic, and the honest mistakes to skip the first time around. Difficulty 2/5 – straightforward cuts and assembly, no advanced tools needed Time 1–3 hours (bin build) or a full weekend (wooden build) Cost $15–$40 (bin build) or $80–$180 (wooden build) Tools Needed Box cutter or jigsaw, tape measure, duct tape or staple gun, marker Skill Required Beginner – the bin build genuinely needs no prior experience Before picking a build type, understand what the shelter actually needs to do. A feral cat shelter should trap body heat, shed rain, resist wind, stay clean to maintain, and sit above cold or wet ground. Every decision below traces back to those five requirements. Which DIY Outdoor Cat House Build Is Right for Your Situation There are three real options. The bin build is right for most people. The wooden build is right if you want something that survives two winters without replacement. The foam cooler option is a short-term emergency fix, not a long-term solution. Build Type Best For Cost Range Durability Build Time Double plastic bin Most readers – first build, multiple cats $15–$40 1–2 seasons with care 1–2 hours Wooden insulated shelter Year-round use, long-term colony care $80–$180 3–5+ years sealed well Full weekend Foam cooler shelter Emergency cold weather, same-day setup $10–$20 One season – cracks under UV 30 minutes A foam cooler shelter gets a cat through a cold night, but the material degrades quickly outdoors and isn’t worth rebuilding. Use it to buy time while you build something more solid. How to Build a DIY Outdoor Cat House: Double Plastic Bin Method This is the build I’d start with if I were doing it now. You need two bins – one large to act as the outer shell, one smaller to sit inside as the sleeping chamber – plus foam insulation to fill the gap between them. The layered design is what makes it work: the outer bin blocks wind and rain, the insulation layer traps warmth, and the inner bin keeps the sleeping area snug and easy to clean. Supplies for the Bin Build One large plastic storage bin (18–25 gallon) with a lid – Rubbermaid or HDX polypropylene hold up better in cold than Sterilite, which tends to crack One smaller plastic bin or styrofoam cooler to fit inside the large bin with a 2-inch gap on all sides Rigid foam insulation board (or bubble insulation like Reflectix) cut to fill the gap Loose straw for bedding – not hay, not blankets, not towels (see below) Box cutter or jigsaw Heavy duct tape or Gorilla tape Marker and ruler Two bricks, wooden blocks, or a small pallet to raise the shelter Optional: a short length of vinyl or rubber to make a door flap Pro Tip: Straw, not hay. Hay absorbs moisture and turns cold and moldy. Loose straw stays drier and lets cats burrow down into it, which is exactly how they hold body heat through a cold night. Alley Cat Allies and the Feral Cat Coalition of Oregon both make this the first rule of outdoor cat shelter bedding. Step 1. Mark and Cut the Entrance On the large outer bin, mark an entrance rectangle on one of the short ends. Keep it 5 to 6 inches wide and 5 to 7 inches tall, positioned about 2 inches up from the bottom edge – the slight height keeps rain from pooling at the threshold and blowing straight in. Cut with a box cutter; if the plastic is thick, heating the blade briefly with a lighter makes the cut cleaner. Make the same size cut in the smaller inner bin, aligned to match the outer opening. Both cuts need to line up when the bins are stacked. Step 2. Cut and Fit the Insulation Measure the floor, walls, and lid of the inner bin, then cut rigid foam or bubble insulation to fit each surface. Foam board works better than bubble wrap because it won’t compress over time and lose its insulating value. Tape each piece into place inside the outer bin before nesting the inner bin in. The goal is a snug layer on all sides, with no large air gaps. Air gaps feel like insulation but actually let cold circulate. Step 3. Nest the Inner Bin Place the inner bin inside the outer bin so the two entrance holes line up. If the inner bin sits too low, add a piece of foam under it as a floor pad. Pack any remaining gaps around the sides with cut foam offcuts – this is where most of the warmth gets lost if it’s left loose. Don’t worry about a perfect finish; the cats don’t care. Focus on blocking air movement. Step 4. Tape the Seams and Lid Run a strip of duct tape around the joint where the outer bin’s lid meets the body. The lid on most bins doesn’t seal tightly enough to keep rain out through a storm. Don’t seal the lid permanently – you need to open the shelter to replace bedding. The tape here is weatherproofing, not bonding; it peels away for cleaning and goes back on afterward. Step 5. Add the Door Flap A loose flap cut from a vinyl placemat, heavy rubber mat, or thick plastic sheeting reduces the cold air entering through the entrance. Tape it across the top of the hole on the outside so it swings freely. This is the step most people skip and then wonder why the shelter feels drafty. One catch: some cats won’t use a shelter with a flap until they’ve checked it out. Tape the flap open for two or three days when you first set the shelter out, then let it fall into place once the cat is used to going in and out. Step 6. Add Straw Bedding and Raise the Shelter Fill the inner bin with 3 to 4 inches of loose straw – enough for the cat to push down into it, not so much that the space feels cramped and the cat can’t turn around. Set the shelter on two bricks, a pallet, or a stack of wooden boards. Getting it 3 to 4 inches off the ground is enough to stop cold from wicking up through the base and to keep the underside dry after rain. How to Build a Wooden DIY Outdoor Cat House The wooden build takes longer and costs more, but it holds up in a way that plastic doesn’t. A well-sealed timber frame with OSB sheathing, foam insulation, plywood interior lining, and roofing felt on top should last several winters without the lid cracking or the sides warping. This is the build to choose if you’re caring for a colony long-term. Before choosing your lumber, it’s worth knowing how different boards behave outdoors – our guide to the best types of wood and their uses covers how species and engineered boards like OSB and plywood hold up over time. Here’s the material list based on the cat shelter build: Scrap 2×4 boards for the main frame 2×6 or 2×8 boards, ripped down if needed Extra siding pieces for the outside walls Foam board insulation for added warmth Plywood pieces for panels or support areas 1-inch wood strips for smaller framing parts Particle board for covering sections, if available Old pallet wood or other spare boards Deck railing spindles or thin wood pieces for roof supports A strong ridge beam, such as poplar or maple Ondura roofing panels for the roof Wood stain or weatherproof sealer Blankets, straw, or bedding for the inside Screws or nails to hold everything together Optional plastic strips for the door openings Most of the shelter can be made from leftover wood and spare materials, so you do not need everything to match perfectly. The main goal is to make it strong, dry, and safe for outdoor cats. 1. Plan a Safe Outdoor Cat Shelter Start by deciding what the shelter needs to do. It should give outdoor cats a dry, quiet, and protected place to rest. Since it will stay outside, it needs to handle cold air, rain, snow, and other animals. A simple plan makes the build easier. Think about the size, where the doors should go, and how the cats will move through the shelter before you start cutting wood. 2. Build a Simple Frame with Two Doors A rectangular frame works well because it is easy to build and gives the cats enough room inside. Add one entrance and one exit so the cats never feel trapped. This is especially helpful for outdoor cats because they like having a quick way out if another animal comes close. The frame does not have to be perfect, but it should be strong enough to hold the walls and roof. 3. Use Baffles to Block Wind and Cold Inside the shelter, add small divider walls near the doors. These baffles let the cats walk in and out, but they stop wind from blowing straight into the sleeping area. This makes the shelter warmer and more comfortable without making it hard for the cats to use. It is a simple idea, but it adds a lot of protection. Small details like this can make the space feel much safer. 4. Finish the Inside for Comfort Once the frame is ready, make the inside cozy and easy to use. Add blankets, bedding, or soft material where the cats can curl up and rest. If there are small raised spots or ledges, cats may enjoy sitting there too. Keep the inside dry and simple so it is easy to clean later. A good shelter should feel safe, warm, and calm without being crowded or hard to maintain. 5. Add the Roof and Set It Up Finish the shelter with a strong roof that keeps rain and snow out. Overlap the roofing pieces so water runs off instead of leaking inside. A small overhang above the doors can also help keep the entrances dry. After that, place the shelter in a quiet outdoor spot and let the cats find it at their own pace. Food nearby may help, but patience matters most Watch the video for a step-by-step walkthrough of the full wooden build: How Big Should an Outdoor Cat House Be? Smaller is warmer. A shelter that fits one or two cats snugly traps far more body heat than a large box with a lot of empty air. The cat should be able to walk in, turn around, and lie down – but it shouldn’t be able to stand up fully with space to spare. That extra height is dead air the cat has to heat all night. Cat Count Best Setup Why It Works 1 cat Small insulated bin, roughly 14″ x 16″ interior Body heat fills the space quickly 2 cats Slightly larger inner chamber, 16″ x 20″ or similar Cats share warmth; snug still beats spacious 3+ cats Two or three separate shelters rather than one large one Multiple small shelters are warmer than one large shelter and reduce territorial conflict Not all feral cats in the same colony will share a shelter willingly, even when they feed together. Building two smaller shelters is usually more effective than building one large one. Where to Place a DIY Outdoor Cat Shelter Placement determines whether the shelter gets used. Cats are more likely to accept a new shelter if it sits near a path or resting spot they already use. A corner against a wall or fence works better than an open location – the solid backing reduces the number of directions a cat has to watch, which matters for skittish ferals. This is the same logic behind positioning any outdoor structure: tucking it against an existing feature in the yard rather than floating it in open space. Our outdoor deck ideas guide covers how to use existing structures to anchor outdoor projects – worth reading if you’re thinking about making the cat shelter part of a larger yard setup. Keep the entrance facing away from prevailing wind and not directly toward the main human foot traffic area. Avoid spots where rainwater pools. Raising the shelter on bricks helps, but a persistently wet location stays wet through and around the base regardless. The shelter should sit somewhere that drains cleanly after rain, has some natural cover overhead if possible, and gives the cat at least one clear exit direction from the entrance. Weather Setup: Cold, Rain, Wind, and Snow The same shelter behaves differently depending on the weather coming at it. These adjustments take a few minutes and make a real difference in how warm the interior stays. Cold weather: Pack the straw full enough that the cat disappears into it when it lies down. If the shelter has a flap, make sure the flap is in place. Insulation does more work when the air gap around it is sealed. Rainy weather: Angle the shelter entrance slightly downward at the front edge – just enough that any water that enters runs out rather than pooling at the threshold. Check the seam tape after heavy rain; once the tape fails, water follows the seam into the insulation layer, and the shelter loses most of its warmth. Windy weather: Turn the entrance to face away from the wind direction. Add weight – a flat stone or brick on top of the lid – to stop the shelter from shifting or tipping. A shelter that moves when a cat is inside will not get used twice. Snowy weather: Check the entrance daily during snowfall. Snow packs into the entrance and can trap a cat inside or lock it out. A short tube entrance – a cylinder cut from a plastic container taped to the bin opening – keeps snow from blocking the hole from the outside. Mild weather: Keep the shelter shaded so it does not overheat during the day. Check for ants, fleas, and rodents more frequently when food is placed nearby, and replace the straw if it feels even slightly damp – mild weather doesn’t dry it out the way cold nights do. Maintaining the Shelter Through the Season A shelter that hasn’t been checked in three weeks is often wet inside and useless. The bedding absorbs moisture from the cat’s breath, condensation on the plastic walls, and any small leaks at the seams. Replace straw whenever it feels damp or compressed – compressed straw has no insulating value left. The Humane Society recommends shelters small enough to retain body heat, while the Hundred Cat Foundation recommends removing all old straw in late spring, letting the shelter air out fully, then refilling with fresh dry straw before the first cold nights in fall. That seasonal reset also gives you a chance to check the foam for compression, the tape for failures, and the plastic for cracks. A cracked bin base will let water in from the ground no matter how well you seal the lid. Check Interval What to Check Weekly Straw dryness, lid seal, entrance blockage, pests near the shelter After every storm Seam tape, base position, bedding wetness, entrance clearance Each season change Full straw replacement, foam condition, lid fit, plastic integrity Replace the shelter If you find mold, soaked insulation, cracked base, or a lid that no longer seals Maintenance is the part most guides skip. A wet shelter is worse than no shelter – a cat that curls up in cold damp straw loses body heat faster than one sleeping in a dry exposed spot. Troubleshooting: When the Shelter Isn’t Working Most problems have a straightforward fix once you know where to look. If a cat has stopped using the shelter or refuses to start, run through this list before rebuilding. Problem Likely Cause Fix Cat won’t enter Flap feels unfamiliar or the shelter is in a new location Tape the flap open for 3–5 days; place a small amount of catnip near the entrance, not inside Straw is wet Water entering through seam, base, or entrance; shelter too low Re-tape all seams, raise the base, angle the entrance slightly downward at the lip Shelter feels cold inside Too much empty space, foam has compressed, or there’s an air gap Add more straw, replace compressed foam, seal any gaps around the lid and entrance edges Water enters at the doorway Entrance faces rain or wind direction Rotate the shelter so the entrance faces away from prevailing weather; add a short covered tunnel extension if needed Shelter shifts or tips Wind, uneven base, or no weight on the lid Place a flat stone or brick on top of the lid; re-level the base blocks Insects or rodents Food placed too close, or damp bedding is attracting pests Move feeding station at least 10 feet away; replace straw and let shelter air out before refilling If a cat stopped using a shelter that was working, check the bedding first. Damp or soiled straw is almost always the reason before any structural problem is. When a DIY Cat House Isn’t Enough An outdoor cat shelter helps healthy adult cats manage cold nights and wet weather. It doesn’t replace veterinary care for sick or injured cats, it can’t protect kittens in extreme cold, and it doesn’t help in flood-prone areas where the ground itself becomes the problem. If a cat appears weak, injured, or unable to stay warm despite a dry shelter, contact a local rescue group, TNR program, or vet rather than modifying the shelter further. If a cat can safely come indoors – even to an enclosed porch, basement, or garage – that’s a better option than an outdoor shelter for any cat that’s already showing signs of cold stress. Frequently Asked Questions About DIY Outdoor Cat Houses Here are the questions I hear most often from people who’ve got materials on the workbench and a skeptical feral cat watching from twenty feet away. How do you build an outdoor cat house for winter? Use a double-bin design with rigid foam insulation between the layers, a small 5–6 inch entrance, loose straw bedding inside the inner chamber, and the whole shelter raised on bricks or a pallet. The layered insulation and small entrance are what make the difference in cold weather – not the size of the bin. How do you make an outdoor cat house out of wood? Build a timber frame, sheath it with OSB, fill the wall cavities with 25 mm foam insulation, line the interior with 6 mm plywood, cover the roof with felt on top of OSB, and seal all exterior joints. Fit a cat flap to the front opening and seal the cladding and roof edges before the first rain hits. How do you insulate an outdoor cat house? Rigid foam board is the most reliable option. It doesn’t compress over time, doesn’t absorb moisture, and provides consistent R-value even when the temperature drops sharply. Fill all gaps – a few loose foam offcuts in an air gap do almost nothing useful. How do you heat an outdoor cat house without electricity? Insulation and body heat together are enough for healthy adult cats in most US climates. A snug shelter with straw bedding, rigid foam insulation, a flap-covered entrance, and no unnecessary air space inside will hold a cat’s body heat effectively through most cold nights without any powered heating. What do you put in an outdoor cat house? Loose straw only. Not hay, not blankets, not towels, not fleece. Fabric and hay both absorb moisture and get cold. Loose straw compresses slightly under the cat’s weight and stays dry much longer. Replace it when it starts to feel damp or flat – it loses its insulating value quickly after that point. Should an outdoor cat house have one door or two? One door holds warmth better. Two doors make sense if predator activity in your area is high – a second exit prevents a cat from being cornered inside. If you add a second entrance, keep both openings small to limit drafts and reduce access for larger animals. Final Verdict Yes – if you do it right and actually maintain it. The double-bin diy outdoor cat house is one of the most effective cold-weather options for community cats, and I say that having seen what happens when it’s built well versus when it’s slapped together with a single bin and a fleece blanket inside. The wooden build is worth the extra weekend if you’re caring for a colony year-round and want something that doesn’t need replacing every spring. Start with the bin version, get the sizing and bedding right, raise it off the ground, and check the straw after every storm. That’s the build that keeps working. If you’re new to this, cut the entrance hole in a spare bin first to get the feel of it – then build the real one.

