


I think a bedroom should feel like a retreat, not an overcrowded storage space. If you’re anything like me and want comfort without the chaos, a cozy minimalist bedroom can give you both. I focus on keeping only what I truly need, adding warmth with textures and lighting, and using open space to create a calm, balanced feel. I’ll share practical ideas for picking colors, choosing furniture, and adding small details that make a big impact. By the end, you’ll have the inspiration and tools to design a bedroom that’s peaceful, inviting, and simple to maintain. Ready to see what can make the biggest difference? Understanding a Cozy Minimalist Bedroom A cozy minimalist bedroom mixes the warmth of comfort with the simplicity of minimal design. It focuses on essentials, clean lines, and functional pieces, while using soft textures, warm colors, and thoughtful details to keep the space inviting. Unlike strict minimalism, which can feel stark, it balances openness with warmth. Compared to “maximal coziness,” it avoids clutter and excess decor. The result is a calm, low-maintenance room that feels both stylish and classic, offering a restful retreat that’s easy to keep organized and enjoyable in every season. Minimalist Room Inspiration Taken for Cozy Bedrooms Minimalist room design focuses on clean lines, open layouts, and purposeful furniture. In a bedroom, this means keeping only what you truly need, allowing space for relaxation rather than storage. A cozy minimalist bedroom uses these same principles but adds warmth through soft textures, layered lighting, and muted tones. You can borrow ideas from other minimalist spaces, like a living room’s low-profile furniture, an office’s hidden storage, or a guest room’s uncluttered surfaces, and adapt them with cozy elements that make the bedroom feel personal and restful. Design Principles for Cozy Minimalism Cozy minimalism blends simplicity with warmth, creating a space that feels both open and inviting. Here are the key design principles to guide your bedroom style: Keep the Essentials Only Focus on keeping only what you use and love in your bedroom. Remove unnecessary items, organize storage, and keep surfaces clear to maintain openness. Choose multi-functional furniture such as storage beds, nesting tables, or ottomans with hidden compartments to maximize utility while reducing clutter. This approach makes your space easier to clean and keeps it visually calm. Choose a Warm Neutral Color Palette Start with soft whites, beige, or muted earth tones for the base of your room. These colors keep the space feeling open and relaxed. Add warmth through subtle accent shades like terracotta, muted olive, or soft blush in throw pillows, rugs, or bedding. This balance creates a soothing atmosphere while keeping the minimalist structure intact, ensuring comfort without clutter. Layer Textures for Warmth Use a mix of linen, cotton, knits, and natural wood to bring dimension into your space. Combining textures adds interest without adding clutter or bold patterns. Limit yourself to three to four different textures to keep the look cohesive. For example, pair a linen duvet with a chunky knit throw and a wooden headboard for visual depth and cozy appeal. Minimalist Bedroom Ideas Minimalist bedroom ideas focus on clean lines, essential furniture, and calming colors to create a simple, functional, and inviting space. Here are some inspiring ideas to help you create a clean, calming space without losing comfort or personality: 1. Neutral Foundation Start with calming base colors like soft white, beige, or muted gray to create an open, airy feeling. These shades set a clean backdrop that works with a variety of textures and materials. Keeping the palette neutral ensures your room remains classic and easy to adapt with small changes over time, while still feeling warm and inviting. 2. Textured Bedding Choose bedding made from linen, cotton, or other natural fabrics for comfort and breathability. Layer a lightweight quilt with a chunky knit throw to add depth without creating clutter. Textures give a minimalist bedroom dimension, making it cozy while maintaining simplicity. Stick to two or three texture types to avoid overwhelming the clean, calming look you’re aiming for. 3. Minimalist Bed Frame Opt for a simple bed frame with clean lines, such as a low platform or light wood design. Avoid bulky headboards or intricate details that disrupt the minimalist look. This kind of frame allows bedding, textures, and other cozy details to stand out. It also keeps the visual focus on the room’s openness and balance rather than heavy furniture. 4. Decluttered Surfaces Keep nightstands, dressers, and shelves free from excess items. Limit visible decor to just a lamp, clock, or small plant. This not only creates a sense of order but also makes the room easier to clean. A clutter-free space encourages relaxation and helps your mind switch off at the end of the day, making the bedroom a true retreat. 5. Layered Rugs Add warmth and visual interest by layering rugs in your bedroom. Start with a large, flat-weave or jute base, then top it with a softer rug like wool or cotton. This creates depth and comfort underfoot while keeping decor minimal. Layering rugs works especially well in larger rooms, breaking up open floor space without cluttering the design. 6. Natural Wood Elements Introduce wood furniture or accents to bring organic warmth into the space. Light or medium wood tones work best in cozy minimalist designs. Wooden bed frames, side tables, or shelving help balance the clean lines of minimalism with natural textures. These elements ground the space, making it feel more inviting and balanced without relying on extra decorative objects. 7. Greenery for Freshness Add a touch of life with indoor plants like snake plants, pothos, or a small fiddle leaf fig. These bring natural color and soften the room without crowding it. Even a single plant can make a minimalist bedroom feel fresher and more welcoming. Place greenery on a windowsill, dresser, or nightstand to enjoy the visual and air-quality benefits. 8. Statement Lighting Use lighting as both a design feature and a tool for creating the right atmosphere. Choose a pendant lamp, wall sconce, or sculptural table lamp to add visual interest without adding clutter. Include a mix of ambient lighting for overall brightness and task lighting for reading or specific activities. Warm-toned bulbs create a soft glow, while dimmable options give you control over the mood. Lamps with fabric shades can diffuse light gently, making the room feel cozy and restful. The right lighting balances style with function, enhancing both the look and comfort of your bedroom. 9. Hidden Storage Solutions Maintain a minimalist look by keeping storage out of sight. Use storage beds, under-bed bins, or built-in drawers to keep essentials organized without visual clutter. Closed storage keeps the room feeling calm and spacious while still being highly functional. This approach works especially well for small bedrooms where every inch of space needs to serve a purpose. 10. Soft Curtains Hang light, flowing curtains made from linen or cotton to let in natural light while providing privacy. Soft curtains add texture without overwhelming the space, making the room feel cozy yet open. Choose neutral shades that complement your wall color for a seamless look. Floor-to-ceiling curtains can also make the room appear taller and more balanced. 11. Simple Wall Art Select one or two pieces of artwork instead of filling every wall. Large framed prints or neutral abstract designs work well in minimalist bedrooms. Keeping wall art simple ensures it complements the room rather than dominating it. Choose pieces with colors or textures that tie into your bedding and decor for a cohesive, balanced design. 12. Functional Nightstands Pick nightstands that are practical yet minimal, with one drawer or an open shelf for essentials. Avoid overloading them with decor to keep the look clean. Matching nightstands on each side of the bed can add balance, while floating designs create an airy feel. A well-chosen nightstand adds storage without interrupting the minimalist flow of the room. 13. Accent Pillows with Purpose Limit your accent pillows to two or three, focusing on varied textures instead of bold patterns. Use them to add warmth and comfort while keeping the bed looking neat. Neutral shades work best, but you can add subtle color for contrast. The key is to maintain balance so pillows improve the design rather than overwhelm it. 14. Understated Mirrors Incorporate a mirror to add light and create the illusion of more space. Choose simple frames in wood or metal to keep the design minimal. A round wall mirror or leaning floor mirror works well in a cozy, minimalist bedroom. Mirrors improve brightness, especially in smaller spaces, without adding clutter or distracting from the overall design. 15. Minimal Decor Shelf Keep shelves clean and uncluttered with only a few meaningful items, such as a candle, a small stack of books, or a plant. Open shelving can easily become cluttered, so be selective about what you display. This approach maintains the minimalist style while still giving the room a personal touch. Less is more when it comes to shelf styling. 16. Monochrome Layers Use varying shades of the same color for bedding, rugs, and decor to add depth without complexity. This creates a cohesive, calming look that still feels visually interesting. For example, layer cream, beige, and tan in a neutral palette. The monochrome effect helps maintain the minimalist feel while adding enough variation to keep the space from feeling flat. 17. Cozy Reading Nook Set up a small reading corner with a comfortable chair, a floor lamp, and a soft throw blanket. Keep it simple so it blends with the rest of the room’s design. This nook provides a cozy spot to relax without disrupting the minimalist flow. It works especially well in larger bedrooms with extra space to create functional zones. Seasonal Cozy Minimalism Cozy minimalism can adapt beautifully with the seasons, keeping your bedroom fresh and inviting year-round. Here are some ways to make seasonal updates while staying simple: Winter Warmth: Layer chunky blankets, thick duvets, and textured rugs to trap heat. Add plush accents like flannel sheets or faux fur throws for extra comfort. Summer Lightness: Swap heavy bedding for breathable linen or cotton sheets, and replace thick curtains with airy, sheer panels. Use lighter color accents and add greenery to keep the room fresh. Small Bedding Switches: Changing your bedding with the season, lighter layers in summer, thicker ones in winter, keeps the look fresh without major redecorating. Furniture & Decor Checklist A well-planned furniture and decor checklist can make creating a cozy minimalist bedroom much easier. Here are the essentials to keep your space functional and inviting: Essentials: Bed frame (solid wood or upholstered with clean lines) High-quality mattress 2 matching nightstands Soft, neutral bedding Minimal dresser or wardrobe Optional Comforts: Area rug or layered rugs Accent chair or reading nook Decorative pillows and throws (limited to 2–3) Low-maintenance indoor plants Soft, layered lighting (lamp, sconce, or pendant) Cozy Minimalist Bedroom Ideas by Room Size Your bedroom’s size can shape how you approach cozy minimalism. Here are ideas tailored for small, medium, and large rooms to help you make the most of your space: Small Bedrooms In smaller spaces, choose furniture that serves multiple purposes, like storage beds or folding desks. Keep layouts open by avoiding oversized pieces that block natural movement. Use under-bed bins or drawers to store linens, clothes, or seasonal items out of sight. This approach keeps the room uncluttered, maximizes every inch, and makes the space feel warmer while still being cozy. Medium to Large Bedrooms Larger rooms benefit from clearly defined zones, such as a reading nook or small workspace. Use rugs or furniture placement to separate these areas while keeping the overall design cohesive. Scale decor to fit the room’s proportions, avoiding small accents that get lost in open space. This layout ensures the bedroom feels balanced, functional, and inviting without overcrowding it. Budget-Friendly Cozy Minimalist Tips You don’t need a big budget to create a cozy minimalist bedroom. Here are some simple, affordable tips to bring warmth and calm to your space without overspending: DIY Headboards: Build your own headboard using plywood, reclaimed wood, or padded fabric panels. This adds comfort and style while saving money. Affordable Bedding Upgrades: Swap old bedding for neutral, high-quality basics like cotton or linen. Even a new duvet cover can refresh the entire room. Thrift and Upcycle Strategies: Shop secondhand stores for solid wood furniture, then sand and repaint for a fresh look that fits a minimalist style. Cozy Minimalist Bedroom Shopping Guide Shopping for a cozy minimalist bedroom is about choosing pieces that combine comfort, function, and lasting quality. For splurge items, invest in essentials that will serve you for years, such as a solid wood bed frame, a high-quality mattress, or premium bedding. These have the greatest impact on both comfort and durability. You can find long-lasting options at furniture retailers like West Elm,Pottery Barn, or Crate & Barrel. For savings, look at budget-friendly decor accents like throw pillows, rugs, and lamps from IKEA, Target, or Wayfair. Thrift stores, Facebook Marketplace, or local antique shops are great for finding unique pieces at a low cost. If possible, choose sustainable options such as organic cotton bedding from Coyuchi or Parachute Home, reclaimed wood furniture from Etsy sellers, or energy-efficient lighting from Home Depot or Lowe’s. Focusing on fewer, better-quality items ensures your bedroom stays uncluttered, comfortable, and classic, without overspending. Common Mistakes to Avoid Avoiding these mistakes ensures your cozy minimalist bedroom stays balanced, functional, and inviting without straying from its clean design principles: Overdecorating and Losing Minimalism: Adding too many accessories or furniture pieces can make the room feel cramped. Keep only what’s necessary to maintain visual calm. Using Too Many Colors: Multiple bold colors can overwhelm the space. Stick to a cohesive palette of neutrals with one or two subtle accents. Over-relying on White Without Warmth: All-white rooms can feel cold. Add warmth with wood accents, soft lighting, and layered textures to keep the space inviting. By keeping these mistakes in mind, you’ll maintain a cozy minimalist bedroom that feels intentional, comfortable, and true to the style you want to achieve. Conclusion For me, a cozy minimalist bedroom proves you don’t have to give up comfort to keep things simple. I’ve learned you can have a space that feels warm, organized, and classic without letting clutter take over. The ideas I’ve shared here are where I’d start: colors, textures, and furniture that work together naturally. I like to pick changes that make sense for my space and my lifestyle, then ease into them one step at a time. Even one small, thoughtful change has made a big difference for me. If you’re ready for more inspiration, take a look at other blogs on the website; you might spot the perfect idea for your next project!

Ever walk into your room and think, “I have no clue how to make this look good?” I totally get it! Decorating can feel overwhelming when you’re unsure where to start. But here’s what I’ve learned: once you figure out your personal style, decorating becomes way easier and actually fun. This interior design quiz helps you discover what style fits you best. Maybe you love cozy farmhouse looks, or sleek modern vibes, or something completely different. Once you know your style, shopping becomes simple. No more wandering around stores confused! Your quiz results will guide you to pick the right furniture, colors, and decorations that actually work together. Want to find your decorating style and make your space amazing? Why Take the Interior Design Quiz? Taking an interior design quiz is like having a shortcut to decorating success. Instead of wandering around stores feeling confused and buying random stuff that doesn’t match, you’ll know exactly what you’re looking for. This saves you tons of money on decorating mistakes and makes shopping way less stressful. You’ll finally have confidence in your choices instead of second-guessing everything you pick. The best part? Your home will actually feel like you, not just some random Pinterest board you copied. Plus, it speeds up the whole decorating process. Instead of spending months trying to figure out what you like, you get clear direction right away. It’s basically like having free advice from a personal decorator! How the Interior Design Quiz Works So, how does this interior design style quiz actually work? It’s easier than you think! Quick and easy format: You’ll answer simple multiple-choice questions by choosing between room photos, picking favorite colors, or deciding how you want your space to feel. It only takes 5-10 minutes to complete. Your answers reveal patterns: The quiz looks at what you consistently choose, whether you pick warm, cozy options or clean, simple styles, to figure out what really speaks to you. Get matched to your style: These patterns connect to specific design categories, giving you a clear picture of your true decorating style instead of just guessing what you might like. Ready to discover what style fits you perfectly? Let’s dive in! This is where the magic happens; you’re about to find out which decorating style matches your personality and makes your heart happy. Your perfect home style is waiting for you! Start the Quiz Now Ready to stop feeling confused about decorating and start creating a space you absolutely love? Try these quizzes below to discover your perfect interior design style! In just 5 minutes, you’ll have the answers you need to transform your home with confidence. Designer Society of America Havenly Cristina Cleveland Ongrid Design Spoak Decorilla Your dream home is just one home decor style quiz away. Pick your favorite and start decorating with confidence today! Each quiz offers a different approach to finding your style. Once you finish, you’ll finally know exactly what to look for and how to create a space that truly feels like home. What Your Quiz Results Mean Wondering what your quiz results actually mean for your space? Here’s your style breakdown! Each style has its own personality and tells a story about who you are. Let’s dive into what makes each one special and how you can bring it to life in your home. 1. Modern Minimalist You love spaces that feel calm and clutter-free. Think clean lines, white and gray colors, and furniture that actually does something useful. Your motto is “less is more.” You’d rather have one amazing couch than five okay pieces. You like everything to have its place, and you’re not into lots of decorations or busy patterns. 2. Cozy Farmhouse You’re all about making your home feel warm and welcoming. You love wood furniture, cozy blankets, and vintage pieces that tell a story. Your color palette includes creams, soft blues, and warm grays. You probably dream of shiplap walls, mason jar lights, and furniture that looks like it’s been loved for years. 3. Bohemian You march to your own beat and love mixing different patterns, textures, and colors together. Your space feels relaxed and collected from travels and adventures. Think colorful rugs, plants everywhere, and furniture from different eras all hanging out together. Rules? You don’t need them. 4. Mid-Century Modern You’re drawn to the cool furniture from the 1950s and 60s, those sleek shapes and angled legs. You love warm wood tones mixed with bold accent colors like orange or teal. Your space feels both retro and fresh, with statement pieces that make people say, “Wow, where did you get that?” 5. Coastal You want your home to feel like a permanent vacation by the beach. Light blues, whites, and sandy colors evoke happiness. You love natural textures like rattan and linen, plus anything that reminds you of ocean breezes and sunny days. Now that you know your style, you’re ready to create a home that’s totally and perfectly you! Next Steps After Taking the Quiz Now that you know your style, it’s time to make it happen! Start shopping with your quiz results as your guide. Look for stores that carry your style, like Target for farmhouse looks or IKEA for modern pieces. Create a Pinterest board or save photos that match your results to avoid distractions from other content. If you want help from a pro, find a designer who gets your style. You don’t have to hire them for everything, just the tricky stuff. Remember, your style can change over time! Keep your space feeling fresh by switching out pillows, blankets, or wall art each season. This way, you can try new things without redoing your whole room. The key is sticking to your main style but adding a few updates. Conclusion Finding your decorating style doesn’t have to be a guessing game anymore. This interior design quiz gives you the clarity I know you need to shop smart, decorate with purpose, and create a home that truly feels like you. No more wandering around stores confused, or buying things that don’t work together. You now have a roadmap for every decorating decision I used to struggle with, too. Here’s a pro tip I’ve learned: life changes, and so does your style! Got married? Had kids? Moved to a new place? I suggest coming back and retaking the quiz. Your answers might surprise you, and that’s totally normal. Ready to transform your space? Your perfect home is waiting, and it all starts with knowing your style.

I’ve seen how choosing the right exterior brick and paint color combinations can feel overwhelming; there are just so many options. Pick the wrong one, and your home can feel off. Pick the right one, and it can completely change the look and improve curb appeal. Today, I’ll walk you through the different types of brick, the paint colors that pair best with each, and some simple tips to help you avoid common mistakes. You’ll also get easy, proven combinations that make your home feel fresh, balanced, and inviting. Let’s find the perfect match for your brick and create a look you’ll love for years. Identifying Your Brick Type and Color Before choosing paint colors, it’s important to take a close look at the brick itself. Most homes use red, brown, white, or gray brick. Red is the most common, often with a warm orangey tone. Brown can range from light tan to deep chocolate, white is usually cream or off-white, and gray varies from pale silver to rich charcoal. Brick color and texture play a big role in how paint will look. Rough brick reflects light differently from smooth surfaces, and even “red” brick often has flecks of orange, brown, or purple. It also helps to think about your home’s style, the look of nearby houses, and your surroundings. Shade from large trees or nearby buildings can change how colors appear throughout the day. Exterior Brick and Paint Color Combinations Choosing the right colors for your home’s exterior can feel hard. But picking colors that look good together doesn’t have to be scary. Here are some easy combinations that work well: 1. Classic Red Brick + Crisp White Trim This timeless combination is a favorite for many homeowners. Red brick paired with white paint creates a clean, welcoming look that never feels outdated. The white trim highlights your windows and doors, making them stand out beautifully. It works for almost any home style and always gives off a fresh, inviting vibe. 2. Weathered Gray Brick + Sage Green Accents Gray brick has a calm, soothing feel. When you add soft green paint, it blends naturally with trees and plants. These exterior brick paint color ideas are perfect for homes surrounded by gardens, making the exterior feel like part of the landscape. It’s subtle yet full of charm, creating a peaceful, well-balanced appearance for your property. 3. Warm Tan Brick + Deep Navy Blue Tan brick brings a cozy, friendly energy. Pairing it with deep navy blue adds a refined touch without being overwhelming. This color mix works well for both traditional and newer homes. It feels safe yet still interesting, offering a nice balance between comfort and style while adding depth and visual interest to your exterior. 4. Charcoal Brick + Cream Paint Charcoal brick looks sleek and modern, but it can feel intense on its own. Cream paint softens the look, keeping it fresh and inviting. Together, they create a clean, updated appearance that works well for minimalists. This pairing is perfect for anyone who loves simple, contemporary design with a hint of warmth and approachability. 5. Rustic Orange Brick + Forest Green Orange-red brick has a natural warmth that feels inviting. Forest green paint brings in an earthy, woodsy feel. This mix works beautifully for homes with plenty of plants or trees nearby. It has a cozy, cabin-like style that feels connected to nature while still looking unique and full of character from the street view. 6. Light Gray Brick + Burgundy Red Light gray brick is soft and easy on the eyes. Burgundy paint adds a bold, dramatic twist without overwhelming the overall look. This combination works especially well for traditional homes, offering a mix of classic appeal and a confident pop of color that stands out in a tasteful, well-balanced way for lasting curb appeal. 7. Honey-Colored Brick + Slate Blue Golden-toned brick has a sunny, cheerful warmth. Slate blue paint cools the look just enough for balance. Together, they create a cozy yet calming feel. This pairing is versatile, making it a great option for many home styles. It’s a safe choice that still has enough personality to keep things visually interesting and welcoming. 8. Dark Brown Brick + Soft Yellow Dark brown brick feels grounded and solid. Adding soft yellow paint brightens the mood and makes the home more cheerful. This pairing has a friendly, welcoming feel that reminds people of sunshine and comfort. It’s a great choice if you want your exterior to feel both sturdy and warm without losing its inviting appearance. 9. Salmon Pink Brick + Deep Teal Salmon pink brick offers a playful, unexpected appeal. Deep teal paint adds richness, creating a look that’s unique yet sophisticated. This combo is perfect for homeowners who want their property to stand out without being flashy. It feels fresh, artistic, and memorable, giving your home a distinctive personality that draws attention in the best way. 10. Black Brick + Warm Beige Black brick creates a bold, modern statement. Warm beige paint softens it, adding friendliness without losing style. This mix feels sleek and high-end, perfect for contemporary homes. It works well if you want a dramatic look with just enough warmth to keep it welcoming, making your house feel both stylish and approachable to visitors. 11. Buff Brick + Plum Purple Buff brick, with its neutral light brown tone, is a versatile base. Plum purple paint adds unexpected richness, making the home stand out tastefully. This color combination feels special and refined without being over the top. It’s perfect for anyone who wants a neutral foundation with a bold, eye-catching accent that feels sophisticated and memorable. 12. White-Washed Brick + Dusty Rose White-washed brick gives a soft, weathered feel that’s relaxed and timeless. Pairing it with dusty rose paint adds a gentle, romantic touch. This combination works beautifully for cottages or garden-style homes, especially when surrounded by flowers. It creates a warm, inviting exterior that feels personal and welcoming, perfect for anyone who loves a softer look. Take your time, look at samples in different light, and pick what feels right for you and your family. Paint Colors for Different Types of Brick Every brick color has its own personality. Finding the right paint to go with your brick is like finding the perfect friend; they should bring out the best in each other. Red brick house trim colors are bold and strong. White paint is the best choice because it makes the red really stand out. Black paint looks fancy and dramatic. Gray paint is safe and modern; it makes the red calmer. Navy blue paint looks classy and works great with windows and doors. White brick goes with almost any color. You can try lots of different paint colors. Deep blue makes it look fresh and clean. Forest green gives it a natural feel. Warm colors like orange or yellow make it cozy. Even bold colors like purple work if you want something special. Brown and tan bricks feel warm and earthy. They work best with natural colors. Soft cream or beige paint keeps everything calm. Light pastels like pale yellow or soft pink are sweet and gentle. Olive green paint looks like trees and grass. Soft gray can work too if you want something more modern. Gray brick is cool and modern. It works with both dark and bright colors. Charcoal or black paint makes it look expensive and sleek. Warm colors like orange or red make it more friendly and welcoming. Bright white keeps it clean and simple. Cream adds just a little bit of warmth. Calm and peaceful? Pick colors that match that feeling, and your house will look just right. Tips for Choosing the Right Paint Color Combination Picking paint colors for your home doesn’t have to be hard. These simple tips will help you choose colors that look great and make you smile every day: Consider Your Roof and Trim: Look at your roof color first, it’s like the hat on your house. If your roof is dark, pick lighter paint colors to balance things out. If your roof is light, you can go darker. Climate Considerations: Where you live really matters for paint colors. Hot and sunny places work best with light colors. Light colors bounce heat away and keep your house cooler. This saves money on air conditioning, too. Test Before You Commit: Never pick paint from just a tiny color card. Paint looks totally different on your real house in real light. Buy bigger samples and paint them on your walls. Check how they look in the morning, afternoon, and night. Take your time picking colors. The right choice will make your house feel perfect for you. Common Mistakes to Avoid Even good homeowners can slip up when picking colors. One big mistake is using too many. If you have more than three, your house can look messy. Keep it simple so your brick stands out. Another mistake is ignoring the style of your home. A Victorian house needs different colors from a ranch. Match the colors to the style you already have. Lastly, avoid covering up the brick’s natural beauty with loud or harsh colors. The brick should be the main focus, not the paint. Choose shades that make it look even better. When the colors work with your brick, your home will look friendly, balanced, and easy on the eyes. Conclusion The right exterior brick and paint color combinations can completely change how your home looks and feels. By understanding your brick type, testing colors in real light, and matching shades to your home’s style, you can create a look that’s welcoming and classic. Think about what mood you want to create: warm and cozy, modern and sleek, or fresh and bright, and choose colors that bring that vision to life. Remember, keeping it simple often makes the biggest impact. Take your time, trust your instincts, and enjoy the process. For more ideas and inspiration to help with your next home project, check out my other blogs.

Ever walked into a room and instantly felt relaxed? That’s the magic we’re after when you mix cozy vibes with cool style. Right now, everyone wants their space to look good AND feel amazing – and honestly, why shouldn’t you have both? I’m going to show you super-easy cozy aesthetic room ideas that won’t cost you a fortune or take forever to pull off, perfect for creating a chill aesthetic room. We’ll talk about simple stuff like adding soft blankets, picking the right lights, and arranging things so your room feels like your personal retreat. No fancy design degree needed – just practical tips that actually work for you. Think your room could use some cozy magic? Let’s make it happen together. What Are Cozy Aesthetic Room Ideas? Creating a cozy room is easy when you focus on making it warm and comfortable. Start by using soft lighting like lamps, string lights, and candles instead of bright overhead lights. Add lots of soft things like fuzzy blankets, fluffy pillows, and soft rugs in warm colors like cream, light green, or dusty pink. Bring in plants and wooden furniture to make the room feel natural. Make a comfy reading spot with a soft chair and good light. Put up pictures, books, and things you love to make the space feel like yours. Add curtains to the windows to make everything feel warmer and cozier. The best cozy rooms have lots of soft textures and warm colors that make you want to relax and stay awhile. What Makes a Room Feel Cozy and Look Good? Your bedroom should feel like your favorite place to relax. The secret? It’s all about the lighting, textures, and colors. The 3 Main Parts of a Cozy Bedroom To make your room cozy, start with: Warm lighting – Use lamps, string lights, or candles. They give off a soft glow that feels calm, not harsh. Soft textures – Think fluffy pillows, fuzzy blankets, and thick rugs. These feel good and make the room feel inviting. Calming colors – Try soft shades like cream, warm gray, sage green, or blush pink. These colors help you feel relaxed and peaceful. When you mix these three things, your bedroom turns into a space that feels safe, soft, and welcoming, similar to a light academia style that blends comfort with a calm, timeless look. Why the Small Details Matter Little things can change how your whole room feels. Matching picture frames with your nightstand, picking throw pillows that go with your walls, or choosing the right lamp can make everything feel like it fits together. When your decorations and colors work as a team, your room looks more balanced, and it just feels right. In the end, a cozy bedroom isn’t about buying fancy stuff—it’s about how everything feels together. Start small and make it a space you actually enjoy spending time in. Cozy Bedroom Aesthetic Room Ideas for Every Style No matter what style you love, you can make your room cozy and beautiful. Each decorating style has its own special way to create warmth and comfort. Minimalist and Cozy Keep things simple with neutral colors like white, beige, and gray. Use clean furniture without lots of decoration, but add soft blankets and pillows in layers to make it cozy. The key is having fewer things but making sure they’re all soft and comfortable. 1. Soft Neutrals With One Accent Hue Stick to whites, creams, and beiges for most of the room, then add one soft color, like sage green or dusty blue, for a few items like a pillow or small vase. This keeps your space minimal but adds just enough personality to feel warm and intentional without going overboard on color or clutter. 2. Low Bed With No Headboard Ditch the bulky headboard and keep your bed low to the ground for a laid-back, open feel. Add plush pillows and a folded blanket at the foot to make it cozy. The simple frame and extra floor space help your room breathe while still feeling like a soft place to land. 3. Tone-on-Tone Bedding Layers Layer bedding in slightly different shades of the same color, for example, light beige sheets, a warm tan duvet, and soft brown throw pillows. The similar tones create depth without visual noise, and the layering keeps things cozy while sticking to a clean, neutral palette that feels restful. 4. Bare Walls With One Statement Piece Keep most of the walls empty and hang just one simple artwork or photo in a neutral frame. This adds a personal touch without making the room feel crowded. Choose something calm, like a nature print or abstract shapes, to match the cozy, minimalist style. 5. Linen Bedding for Effortless Texture Swap crisp sheets for linen bedding in off-white or sand tones. Linen has a natural texture that wrinkles softly, adding character without extra layers. It looks effortless and feels airy, especially in a minimalist room that relies on texture instead of bold design choices. 6. Corner Reading Nook With Floor Cushion Turn a quiet corner into a cozy reading spot using just a soft floor cushion, a small lamp, and a neutral throw. No big chairs or shelves needed. It adds personality to your room while sticking with the minimalist theme, simple, intentional, and comforting. 7. Floating Nightstands Use wall-mounted nightstands instead of bulky furniture. They free up floor space and keep the look clean. Add a small lamp, book, or candle on top. Paired with cozy bedding, these tiny touches help your space feel open but still lived-in and warm. 8. Monochrome Wall Art Grid Create a mini gallery wall using 2–4 matching black-and-white prints in simple frames. Hang them evenly spaced for balance. This adds visual interest without overwhelming the room. Stick to calming images like clouds, ocean waves, or simple line drawings to match the cozy vibe. 9. Minimalist Canopy Frame Use a simple metal canopy bed frame without fabric drapes. The shape adds structure and style without heaviness. Paired with soft bedding and neutral tones, it feels clean and cozy at the same time. You get visual interest while staying true to a minimalist look. 10. Small Plant on a Wooden Stool Add one potted plant, like a snake plant or pothos, on top of a natural wood stool. It brings life and softness to your room without creating clutter. The stool adds texture, the plant adds color, and together they create a warm, minimal touch that’s easy to maintain. Boho Cozy Vibes Add macrame wall hangings, lots of green plants, and fairy lights everywhere. Use warm-colored bedding like orange, red, and gold. Mix different patterns and textures to create a relaxed, artistic feel that’s perfect for hanging out. 1. Layered Bedding With Earth Tones Use bedding in warm shades like rust, mustard, and burnt orange. Add a mix of woven, fringe, and velvet throw pillows in different sizes. Drape a patterned quilt at the foot for texture. This setup brings warmth, depth, and that relaxed boho vibe while keeping the bed the cozy centerpiece of the room. 2. Macrame Wall Above the Bed Hang a large macrame piece above your headboard or bed for a handmade, earthy feel. Pick one with knotted patterns and soft fringe. It adds movement and a boho touch without needing loud colors. Pair it with natural textures like rattan or light wood for a grounded, calming look. 3. Hanging Rattan Chair in the Corner Add a hanging rattan chair with a soft cushion and throw blanket. It’s perfect for reading or relaxing and brings a playful, cozy twist. Place a plant or lantern nearby for extra mood. This piece stands out without overpowering the room’s chill, bohemian style. 4. Floor Pillows and Layered Rugs Scatter a few large floor pillows with tribal or Moroccan prints. Layer them with a colorful woven rug over a neutral jute rug. This adds softness underfoot and invites lounging. The mix of textures and patterns gives the space an artsy, free-spirited feeling that’s very boho. 5. Fairy Lights Around the Window Drape string lights around the window frame or canopy bed to create a soft glow at night. Choose warm white or golden tones for the most cozy effect. These lights give your room a dreamy feel while replacing harsh overhead lighting with something more magical and relaxing. 6. Woven Baskets for Plants and Storage Use woven baskets to hold your potted plants or blankets. Their natural texture adds warmth, and they help keep things tidy. Group a few on the floor or under a bench to mix function and style. It’s a great way to stay cozy while still embracing boho’s love of nature. 7. Gallery Wall With Mixed Frames Create a gallery wall using mismatched wood and gold frames. Fill them with art prints, dried flowers, or line drawings. This adds a personal, creative vibe to your space and keeps the boho spirit alive. You don’t need perfect symmetry imperfection adds charm in this style. 8. Beaded Curtain for Closet or Doorway Swap your closet door or entry curtain with a vintage-style beaded curtain. It adds movement, sound, and a little nostalgia to your space. Choose warm-toned beads or earthy shades to match your bedding and furniture. It’s a fun detail that brings both texture and personality. 9. Dreamcatcher Over a Mirror or Shelf Hang a handmade dreamcatcher over a mirror or shelf corner. Pick one with feathers, beads, and natural fibers. It adds spiritual and artistic energy without taking up much space. This little touch ties into boho themes of protection, nature, and mindfulness while looking beautifully layered. 10. Tapestry as a Headboard or Accent Wall Use a large boho tapestry with rich patterns and warm colors as a headboard or behind your bed. This fills the wall space while adding depth and coziness. Choose one with mandalas, paisleys, or sun symbols to set the tone. It’s easy to swap out with the seasons, too. Cottagecore Comfort Fill your room with floral prints on pillows, curtains, and bedding. Add vintage touches like old books, antique frames, and lace doilies. Create a cozy reading corner with a soft chair and good lighting where you can relax with a book. 1. Floral Patchwork Quilt and Ruffled Bedding Use a floral patchwork quilt layered over ruffled white or pastel bedding. This gives your room a soft, old-fashioned charm. Add a few mismatched floral pillows to bring out the cozy, lived-in feeling. The combination of patterns, light colors, and fabric layers brings a classic cottage feel that feels warm and welcoming. 2. Lace Curtains With a Breezy Look Hang sheer lace curtains that gently sway in the breeze when the windows are open. Choose delicate floral or scalloped lace designs in white or ivory. They soften the light beautifully and add vintage charm without being heavy. It’s a simple way to make your space feel airy, romantic, and old-world cozy. 3. Antique Dresser With Mismatched Knobs Place a vintage wooden dresser in the room, even one with wear or chipped paint. Swap some drawer knobs with ceramic or brass ones in different styles. It creates a collected-over-time feel that fits cottagecore perfectly. Top it with lace doilies, dried flowers, or a small stack of old books. 4. Bedside Table With Stacked Books and Oil Lamp Use a small wooden table beside your bed to hold a stack of vintage books, a candle or oil lamp, and a floral teacup. This charming setup adds personality while keeping everything functional. It feels like something from a countryside cottage, simple, useful, and beautifully nostalgic. 5. Soft Armchair With Crocheted Blanket Create a cozy corner with a vintage-style armchair and a soft crocheted or knitted blanket draped over the back. Add a floral cushion for extra comfort. This space is perfect for reading, writing, or daydreaming. It blends warmth and softness with that classic country feel, cottagecore is all about. 6. Gallery Wall of Pressed Flowers and Sketches Make a small gallery wall using pressed flower frames, botanical prints, and hand-drawn sketches. Use vintage-style gold or wooden frames. Hang them in a loose, natural layout. The artwork brings nature indoors and adds a gentle, romantic charm that’s right in line with the cottagecore mood. 7. Wicker Baskets With Embroidered Linens Use wicker baskets to hold folded quilts, handmade embroidered linens, or small crafts. Tuck them under a bench or by the bed. These add warmth, texture, and country character. They also keep your space tidy while staying true to the cozy, homemade style of cottagecore design. 8. Bed Canopy Made From Light Muslin Fabric Drape a soft white or ivory muslin fabric above the bed to form a gentle canopy. Let it hang loosely from ceiling hooks or a hoop. It adds instant softness and a fairy-tale feel to the room. Pair it with floral bedding and simple lighting to complete the look. 9. Vintage Mirror With Floral Frame Hang a vintage-style mirror with a carved floral or gold-painted frame. Place it above a dresser or by a window to reflect light and open up the space. It’s a small touch that adds charm and a bit of faded glamour that fits perfectly with the cottagecore vibe. 10. Windowsill With Wildflowers and Teacups Decorate your windowsill with a mix of fresh or dried wildflowers in tiny glass bottles. Add a floral teacup, a candle, or a small stack of books. These little vignettes make your space feel thoughtful and peaceful, like a countryside retreat where every detail has meaning. Scandinavian Simplicity Combine white walls with light wood furniture for a clean, natural look. Add warm textiles like wool blankets and cotton pillows. Keep windows uncovered to let in lots of natural light that makes everything feel fresh and airy. 1. White Walls and Light Oak Bed Frame Start with crisp white walls and add a simple light oak bed frame with no headboard or a slim one. Pair it with white or beige bedding and just one or two soft cotton pillows. This setup creates a peaceful, airy feeling that’s open and bright, true to the clean style of Scandinavian bedrooms. 2. Bare Windows With White Linen Curtains Let natural light flood the room by keeping the windows bare or using lightweight white linen curtains. These curtains gently filter sunlight while keeping the look fresh and open. The airy fabric softens the space without blocking light, adding to the simple and calm feel of Scandinavian design. 3. Minimalist Nightstand With a Simple Lamp Use a clean-lined wood nightstand in ash or birch. Top it with a simple globe lamp or warm Edison bulb. Keep the surface clear except for a small book or ceramic dish. The look stays functional yet visually clean, letting the natural materials shine without extra decor. 4. Soft Gray Wool Blanket at the Foot of the Bed Add a soft gray wool blanket folded neatly at the foot of the bed. The muted tone adds quiet contrast against white bedding, and the texture brings warmth. It’s a small detail that keeps the space feeling cozy without losing the room’s clean and structured look. 5. Single Artwork With Neutral Frame Hang one piece of minimalist art above the bed, like a black-and-white sketch or soft-toned abstract print. Use a thin, light wood or white frame. It adds just enough personality without crowding the wall, keeping the focus on simplicity and balance. 6. Built-In Storage Bench With Clean Lines Place a built-in or slim wood storage bench at the foot of the bed. Choose one in a light finish with no visible hardware. It adds storage without bulk and keeps visual clutter low. Top it with a thin cotton cushion for comfort. 7. White Rug With Subtle Texture Lay down a soft, low-pile white or cream rug with subtle geometric or woven texture. It adds softness underfoot without drawing attention. This kind of rug grounds the space while keeping it light and open, an ideal balance in Scandinavian style. 8. Floating Shelves With Everyday Items Install one or two light wood floating shelves above the bed or by the window. Display just a few practical items, like a small plant, a folded throw, or a candle. These shelves offer function and light decor while staying true to clean, uncluttered design. 9. Accent Chair in Natural Fabric Add a single accent chair with a light wood frame and natural fabric cushion, something in linen or canvas. Place it near the window or in a quiet corner. It adds a cozy touch for reading or relaxing while blending with the room’s soft, simple palette. 10. Soft Lighting With Paper or Linen Shade Use soft, diffused lighting like a paper lantern or a linen-shaded floor lamp. Avoid harsh bulbs or metal shades. These natural materials create a warm glow and soften the room’s feel. The look stays relaxed and minimal while still feeling warm and comfortable. Dark Academia Aesthetic Use moody lighting from desk lamps and candles to create a scholarly atmosphere. Add rich textures like velvet pillows and leather book covers. Fill corners with stacks of books and create study areas that feel like an old library. 1. Velvet Bedding and Dark Wood Bed Frame Choose velvet bedding in deep tones like forest green, burgundy, or navy. Pair it with a dark-stained wood bed frame. This combination creates a moody, luxurious feel that fits perfectly with the Dark Academia style. Add a few antique-looking pillows to complete the scholarly, old-world vibe without going overboard. 2. Desk by the Window With Green Reading Lamp Set up a wooden writing desk near a window, topped with a green-shaded banker’s lamp. Add a leather journal, an ink pen, and a small candle for ambiance. This setup feels like a private study nook from an old university, perfect for late-night writing or reading by soft, focused lighting. 3. Gallery Wall of Vintage Portraits and Sketches Fill one wall with mismatched frames holding old portraits, botanical sketches, and pencil drawings. Stick to sepia tones, black-and-white, or faded colors. Use ornate or weathered frames to enhance the vintage library vibe. This adds a scholarly and slightly mysterious tone to your room, without feeling overly curated. 4. Leather-Bound Books in Stacks and Shelves Gather vintage or leather-bound books and place them on open wood shelves or stacked neatly on the floor. Choose classic literature titles or old encyclopedias. Their worn spines, gold details, and deep colors instantly give your room that timeless, bookish feel Dark Academia thrives on. 5. Cozy Armchair With Throw and Floor Lamp Place a plush armchair in a corner with a textured throw blanket and a brass floor lamp nearby. Use warm, low lighting to set a cozy mood. This is your quiet space for reading or listening to classical music. Choose furniture with curves and dark wood legs for extra depth. 6. Candles on Trays With Dried Flowers Use brass or dark ceramic trays to hold pillar candles in cream or deep colors. Surround them with dried roses, eucalyptus, or sprigs of lavender. Place them on a dresser or side table. The flickering candlelight and vintage floral touches create a moody, romantic feeling—perfect for studying or winding down. 7. Layered Curtains in Deep Neutrals Hang layered curtains in shades like charcoal, olive, or chocolate brown. Use heavy fabrics like velvet or thick cotton to block light and add richness. These curtains frame your window like a gothic novel scene, adding drama without being flashy. They also make your room feel like a private retreat. 8. Vintage Clock or Typewriter Display Add a vintage clock or old typewriter on a shelf or desk. These items serve as functional decor and conversation pieces. Their antique look ties into the academic, nostalgic feel. Surround them with a few books, candles, or a plant in a clay pot for a balanced touch. 9. Dark Wood Bookshelf With Brass Accents Use a tall, dark wood bookshelf with brass or gold hardware. Fill it with worn novels, journals, and a few artifacts, like a magnifying glass or hourglass. Keep the styling neat but layered. This bookshelf becomes a centerpiece that feels like it belongs in an old library or scholar’s quarters. 10. Earth-Toned Bedding With Plaid Throw Stick to bedding in earth tones, like rust, olive, or brown, and top it with a plaid wool throw. This classic pattern adds just enough visual texture. Keep the sheets simple and natural. It all works together to feel grounded, warm, and ready for curling up with a classic novel on a rainy day. Conclusion Making your room cozy is all about adding things that make you feel happy and relaxed. You don’t have to stick to one style; mix your favorite ideas to create a space that truly feels like yours. Even the smallest changes, like a soft pillow, a warm lamp, or photos that make you smile, can totally shift the vibe. Start with what you already have and slowly add things that make you want to stay in and unwind. Whether you’re into simple, peaceful setups or bright, playful ones, there’s no wrong way to get cozy. Want more cozy room ideas? Check out the other posts for fun, easy tips!

I’ve always seen a fireplace as more than just a way to keep warm, but it can truly be the heart of a living room. If you’ve been thinking about how to make yours both stylish and practical, modern built-ins around your fireplace might be exactly what you need. They provide storage, a space to showcase your favorite pieces, and a focal point that captures the eye. I’ll share ideas for every style, from sleek floating shelves to inviting window seating, along with tips for picking materials and layouts that suit your space. By the end, you’ll have plenty of inspiration to create a look that’s functional, stylish, and completely your own. How to Plan Built-Ins Around a Fireplace Planning built-in shelves around a fireplace starts with accurate measurements to maintain balance and safety. Measure the height and width of the wall, leaving 2-4 inches between the fireplace and the units for heat clearance, and keep shelves within a reachable height of about 7 feet. Choose durable materials that fit your style, such as solid wood or plywood for strength, MDF for a budget-friendly painted finish, and heat-resistant options if they’re close to the firebox, pairing them with hardware that complements the room. Finally, decide between a symmetrical layout with matching sides for a clean, balanced look or an asymmetrical design for a modern, relaxed feel, and test your layout with tape or a sketch before you build. Modern Built-In Fireplace Ideas for Every Space Modern fireplace built-ins bring both style and function to your living space. A fireplace with built-ins can store everyday items, display your favorite pieces, and turn the fireplace into a natural focal point. Here are some ideas to help you choose a design that works best for your home: 1. Minimalist White Cabinets with Hidden Storage White cabinets create a clean and bright appearance that works in almost any living room. Using push-to-open doors means there are no handles to break the smooth surface. The hidden storage helps keep the area tidy by concealing items you don’t want on display. This design is best if you want a simple, uncluttered look. 2. Floor-to-Ceiling Floating Shelves Floating shelves from floor to ceiling give the wall a tall, open feel. They’re great for holding books, plants, or decorative objects. The wall space between shelves can stay light and airy, especially if painted a lighter shade. This style works well if you want to display more items without using bulky furniture. 3. Black Matte Built-Ins for a Bold Contrast Matte black cabinets or shelves stand out against light walls. They make the fireplace area feel more defined and modern. This style pairs nicely with metal accents like brushed gold or chrome. It’s a good choice if you want the fireplace wall to have a strong visual presence. Adding built-in lighting can make the dark finish stand out even more. 4. Asymmetrical Layout with One Side Open Shelving Having built-ins on one side and open space on the other creates a relaxed, modern feel. It’s useful for rooms with windows or doors close to the fireplace. The open side can hold artwork or a plant to balance the design. This layout works well when you want storage without making the wall feel heavy. 5. Fluted Panel Built-Ins Fluted panels add gentle texture to the wall without looking busy. They can be used on cabinet doors or as part of the shelving. The lines create visual interest and give a custom finish. This style blends well in both warm and cool color schemes. They also work nicely with painted or stained finishes, giving you flexibility in design. 6. IKEA Billy Bookcase Hack with Custom Trim You can use affordable IKEA bookcases and add trim to make them look built-in. Painting them the same color as the wall helps them blend seamlessly. It’s a budget-friendly way to get a polished finish. This works best if you want modern style without a high cost. Adding custom hardware or lighting can make the finished piece feel more upscale. 7. Built-Ins with Integrated TV Mount Mounting the TV in the built-in keeps cables hidden and the wall organized. The shelves or cabinets around it can hold media equipment or decor. This design creates a single focal point for both the fireplace and TV. It’s ideal for small living rooms that need one main feature wall. Choosing heat-safe materials ensures the TV and built-ins stay protected over time. 8. LED-Lit Shelves for a Modern Glow Adding LED lights to the shelves creates a warm glow in the evenings. The light highlights books, artwork, or decorative items without overpowering the room. You can choose warm or cool tones depending on your style. This design works well in living rooms that double as evening relaxation spaces. Installing dimmable lighting gives you more control over brightness and mood. 9. Metal and Wood Mixed Shelving Combining wood shelves with a slim metal frame gives a balanced, modern-industrial style. The wood keeps it warm, while the metal adds structure. It’s a durable option that works well for heavy books or decor. This style fits in both modern and transitional homes. Mixing finishes, like black metal with light oak, can make the design stand out even more. 10. Glass-Front Cabinet Built-Ins Glass doors let you display items while keeping dust away. You can choose clear glass for a full view or frosted for a softer look. This is a good option for displaying glassware, ceramics, or books. It keeps the space looking neat and intentional. Adding interior lighting can make the displayed items more eye-catching. 11. Open Shelves with Cabinet Base Storage Shelves above hold decorative items, while cabinets below hide clutter. This setup keeps daily items out of sight while still offering display space. The combination makes it easy to keep the room looking clean. It’s a smart choice for family living rooms. Using matching finishes for both shelves and cabinets creates a coordinated look. 12. Stone Accent Surround with Built-Ins Adding stone around the fireplace gives texture and depth. Built-ins on each side balance the look and add storage. The stone can be light or dark depending on the style you want. This is a sturdy and lasting design choice. Pairing the stone with simple, clean-lined cabinetry keeps the overall look modern and balanced. 13. Floating Cabinet Units Under Shelves Mounting cabinets above the floor creates a lighter, more open feel. The shelves above can hold decor while the cabinets store everyday items. This style works well in modern and minimalist homes. It’s also easier to clean underneath. Choosing a floating design with hidden brackets enhances the sleek, uncluttered look. 14. Neutral-Toned Built-Ins for a Soft Modern Look Cabinetry in beige or taupe blends into the wall and feels calm. It’s easy to match with different furniture and decor styles. This design works well if you want a timeless, low-contrast look. It’s also less likely to feel dated over time. Adding subtle texture, like wood grain or matte finishes, can make the cabinets feel more refined. 15. High-Gloss Cabinetry for a Luxe Feel Glossy finishes reflect light and make the room feel brighter. They are also easy to wipe clean, making them practical for everyday use. This works well in smaller rooms that need more light. It’s a simple way to add a bit of elegance to a modern space. Pairing glossy cabinetry with minimal hardware keeps the look sleek and uncluttered. 16. Fireplace with Built-In Window Seating A bench under the windows next to the fireplace creates a cozy corner. Built-in drawers under the seat add extra storage. This setup is great for reading or enjoying the warmth of the fire. It also makes use of otherwise empty wall space. Adding cushions and throw pillows can make the seating area even more inviting. 17. Modern Farmhouse Built-Ins White shaker-style cabinets paired with black handles bring a farmhouse feel with a modern touch. Wood shelving or accents can add warmth. This design works well in open living spaces. It’s a style that feels both comfortable and current. Pairing it with neutral wall colors helps the built-ins stand out without overwhelming the room. 18. Slim Vertical Shelves Tall, narrow shelves make use of tight spaces beside the fireplace. They’re perfect for a few books, vases, or plants. This design helps fill empty space without making the wall feel crowded. It’s great for small or narrow rooms. Using adjustable shelves allows you to change the display to suit different items over time. 19. Built-Ins with Artwork Niche Above Fireplace Leaving a space for artwork above the fireplace keeps the design focused. It can also be used as a mirror or a family photo. The surrounding built-ins frame the piece and make it stand out. This setup works well in both modern and classic homes. Adding lighting above the niche can make the featured piece even more eye-catching. 20. Textured Wood Veneer Built-Ins Wood veneer adds warmth and a natural touch to modern spaces. Lighter tones work for an airy look, while darker tones feel richer. The texture makes the wall more interesting without being busy. It’s a durable and attractive choice. Pairing wood veneer with simple shelving keeps the overall design balanced and clean. 21. Two-Tone Built-Ins Use one color for the lower cabinets and another for the upper shelves. This breaks up the wall and adds visual interest. It works well if you want a modern style without going all one color. The combination can also help balance light and dark tones in the room. Choosing finishes that complement the rest of the decor will make the design feel cohesive. 22. Minimalist Open Cubby Shelves Small, evenly sized cubbies keep items organized and easy to see. They work on books, baskets, or decorative pieces. This style looks neat and is easy to maintain. It’s great for people who like a simple, organized display. Using matching storage bins can help keep the look even cleaner and more uniform. 23. Curved Edge Built-Ins Rounded corners make built-ins feel softer and more relaxed. They’re a good option if you want a modern design that’s also family-friendly. Curves can help the units blend better with the rest of the room. This design works well in open living spaces. Pairing curved edges with smooth finishes increases the gentle, flowing look. 24. Floor-to-Ceiling Tile Surround with Side Built-Ins Tiling around the fireplace makes it a standout feature. Built-ins on each side keep the wall balanced and functional. Tile is also easy to clean and long-lasting. This works well in both modern and transitional rooms. Choosing a tile pattern or texture that complements the cabinetry can tie the whole wall together. 25. Backlit Niche Shelves Recessed shelves with lights behind them create a warm, inviting glow. They’re great for showing off art, plants, or collectibles. The backlighting makes the display stand out even at night. This design adds a subtle modern touch. Using dimmable lights lets you adjust the brightness for different moods, making the space versatile for both daily living and special occasions. 26. Built-Ins with Sliding Doors Sliding doors save space and hide storage areas. They’re useful in small rooms where swinging doors might get in the way. The doors can be wood, glass, or even metal for different looks. This keeps the design flexible and practical. Adding soft-close hardware makes them smoother and quieter to use, while also extending the life of the doors. 27. Integrated Desk with Fireplace Built-In Wall Combining a desk with the built-in wall makes the space multi-functional. It’s great for home offices, homework areas, or creative workstations. Shelves above can hold books, files, or decorative items for a personal touch. This setup is a smart way to make the most of limited space while keeping the room cohesive. 28. Corner Fireplace Built-Ins Wrapping built-ins around a corner fireplace takes advantage of challenging layouts. Cabinets and shelves can be custom-fitted to work with the angles of the wall. This design works in both small and large rooms. It helps the fireplace feel integrated into the overall room design. Adding lighting or contrasting finishes can make the corner feature stand out even more. 29. Built-Ins Framing Double-Sided Fireplace Built-ins on both sides of a two-sided fireplace provide storage and symmetry. They work especially well in open floor plans where the fireplace connects two spaces. Shelving can display books, decor, or personal collections. This approach makes the fireplace a striking central feature from multiple views. 30. Minimal Shelf + Fireplace Combo Using just one or two slim shelves keeps the design simple and uncluttered. This is perfect for displaying a few carefully chosen items. The minimalist approach helps keep the focus on the fireplace itself. It works best in modern or small spaces where clean lines are a priority. 31. Patterned Back Panel Shelves Adding wallpaper or textured panels to the back of shelves brings depth and personality. Patterns can be subtle for a soft touch or bold for a statement look. This is an easy way to refresh built-ins without replacing them. It’s also a fun way to change the style seasonally. Coordinating the pattern with other room elements helps create a unified, balanced design. 32. Built-Ins with Wine Storage Including wine racks or cubbies in the built-ins is perfect for entertaining. It keeps bottles neatly stored and within easy reach. This feature works well in open living and dining areas. It adds a mix of function and personality to the design. Pairing the wine storage with glassware shelves can create a complete mini bar setup. 33. All-Black Built-Ins with Brass Hardware Matte black cabinets paired with brass handles create a sleek yet warm style. The brass adds just enough shine for contrast without being overwhelming. This combination works well with wood or neutral furniture. It’s a bold choice that still feels inviting. Adding accent lighting can highlight the hardware and improve the overall look. 34. Built-Ins with Planter Shelf Section A dedicated space for plants brings life and color to the built-ins. The shelf can hold one large planter or several smaller ones. Greenery helps soften the clean lines of modern designs. This approach works in both casual and formal rooms. Choosing plant varieties that match the room’s light conditions will keep the display looking fresh year-round. 35. Rustic Wood Beam with Modern Built-Ins A rustic wood beam mantel adds warmth to sleek, modern cabinets. The mix of materials creates a balanced style that blends old and new. The beam can be left natural or stained to match other wood tones in the room. This design works especially well in a transitional living space. If your style is modern, classic, or somewhere in between, a fireplace with built-ins can add lasting warmth, functionality, and style, making it a feature you’ll appreciate every day. Safety Considerations for Fireplace Built-Ins When designing a fireplace with built-ins, safety should always be a top priority. Following proper guidelines will help protect your home and ensure your built-ins last for years. Here are some key considerations to keep in mind before starting your project: Maintain proper heat clearance: Keep built-ins at least 2–4 inches away from the fireplace or follow the manufacturer’s specific clearance instructions. Allow for ventilation: Make sure there is space for air to circulate so heat does not build up inside cabinets or shelving. Use heat-resistant materials: Choose non-combustible or heat-tolerant materials like stone, tile, metal, or high-quality plywood with heat-safe finishes. Protect electronics and decor: Avoid placing heat-sensitive items, such as TVs or delicate artwork, too close to the firebox. Follow local building codes: Check regulations in your area to make sure your design meets safety requirements. Taking these precautions will help your fireplace built-ins stay safe, functional, and beautiful for the long term Wrapping Up Modern built-ins around a fireplace can completely change how your living space looks and works. With the right design, you can add useful storage, highlight your style, and make your fireplace the true centerpiece of the room. Now that you’ve seen different ideas and tips, think about which ones fit your home best and how you might bring them to life. Choose materials that will last and layouts that suit your room’s shape and size. A thoughtful design will give you both beauty and practicality for years to come. If you’re looking for more inspiration, check out my other posts for fresh ways to make every corner of your home stylish and functional.

I used to walk through my house feeling bored by the same cluttered rooms and dull walls. But I figured out you don’t need to spend a fortune to make your home feel fresh. Small upgrade tricks for the home make a big difference, like painting one wall, moving furniture, or adding a few plants. These simple tweaks made it feel like I had hired a designer. The best part? I did most of it myself on weekends; no contractor was needed. And it actually adds value to your home. Want to know the budget-friendly tricks that changed everything? I’ll share the exact upgrades that turned my space from blah to “wow.” Why Use Upgrade Tricks for Your Home? Upgrade tricks are cheap and easy. Instead of paying thousands for contractors, anyone can make their house look awesome for like $20. Plus, when people fix up their homes, they’re worth more money later. The coolest part is doing it yourself – it feels really good when friends ask, “Wow, how’d you do that?” You can start painting on Saturday morning and have a totally different room by lunch. It’s way more fun than just wishing your house looked better. And you learn tons of useful skills that help fix other stuff too. Best of all, these tricks make houses feel like they’re really yours instead of just some boring place where you live. Quick Home Upgrades Inside and Out My house used to look super boring inside and out. I mean, really boring. Plain white walls made my rooms feel empty and blah, and when people drove by, they probably didn’t even notice my house. But I found some easy ways to make everything look way better without spending tons of money. You don’t need to hire painters or make a huge mess to fix this. There are simple tricks that can make any room look totally different in just one weekend. Paint the Front Door a Bold Color This is one of the easiest upgrades that make a huge difference. A bright blue, red, yellow, or green door instantly makes a house look more interesting. You just need one small can of paint that costs about $15. The whole job takes maybe two hours. Pick any color that looks good with the house. Replace House Numbers and Door Hardware New house numbers from the store cost around $10. Adding a matching doorknob makes the entrance look much nicer. These tiny changes have a big impact on how well a house is put together. You just need a screwdriver, and it takes about 20 minutes to finish. Upgrade Outdoor Lighting Fixtures Old porch lights can make a house look dated. A new fixture costs around $30 and can be installed using YouTube videos for help. Modern lighting makes the entrance look welcoming and updated, especially at night. It gives a modern and upgraded look. Add Planters or DIY Window Boxes Window boxes made from wood cost about $20 each when filled with flowers. They add color and make a house look alive. Big pots placed by the front door work just as well for people who don’t want to build anything. Even artificial plants can look good and require no care. Use Peel-and-Stick Wallpaper for a Feature Wall This stuff is amazing because it’s super easy to put up and take down. You just peel off the back and stick it on the wall. No glue, no mess, no problem. One wall with cool patterns or colors can make the whole room look awesome. You can get rolls for about $30, and they cover a big area. Paint Interior Doors in a Contrasting Shade Most people never think about painting the doors inside their house, but it looks so cool. Try dark doors in a light room or bright colored doors for fun. One small can of paint costs about $15 and covers several doors. You can finish the whole thing in one afternoon, and suddenly your house looks way more interesting. Add Simple Wainscoting or Board and Batten These are just fancy names for putting wood strips on your walls. Wainscoting goes on the bottom half of the walls. Board and batten make tall lines that make rooms look bigger. You can buy the wood at any hardware store for under $100 per room. It sounds hard, but it’s really just measuring and nailing wood to walls. It makes any room look fancy and finished. List of Kitchen Upgrades on a Budget Kitchens cost a lot of money to fix up. Most people think they have to tear everything out and buy all new stuff. But that’s crazy expensive! You can make your kitchen look awesome with small changes that don’t cost much money. Swap Out Cabinet Hardware This is super easy and cheap. New handles and knobs cost about $3 each at the store. Just unscrew the old ugly ones and put on the new pretty ones. It takes maybe one hour for your whole kitchen. You can go from old gold ones to cool black ones, or pick bright colors. Your cabinets will look brand new, even though they’re the same old cabinets. Install Under-Cabinet LED Lighting These little lights stick under your cabinets and make everything look fancy. You can get ones that run on batteries, so you don’t need to mess with wires or call an electrician. They cost about $25 and stick on in 10 minutes. Your counters will glow like those fancy cooking shows on TV. Paint or Reface Cabinet Doors Don’t buy new cabinets – just paint the ones you have! Sand them a little bit, then paint them with special cabinet paint. A can of paint costs about $50, but new cabinets cost thousands. You can also buy just new doors and keep your old boxes. Either way works great and saves tons of money. Add Open Shelving for Style and Storage Take off some cabinet doors and put up shelves instead. Show off your nice plates or cool coffee mugs. Shelves are cheap – about $15 each – and make your kitchen feel bigger. Plus, you can grab stuff easier instead of digging around in dark cabinets. Small Bathroom Upgrades That Impress I hate my small bathroom. It feels tiny and ugly, and I bump into everything when I’m trying to get ready. I used to think I needed to rip out the whole bathroom to fix it. But that costs way too much money! I found out you can make your small bathroom look really good with just a few easy changes. Replace the Mirror with a Framed One Those plain mirrors that come with bathrooms are so boring. They make everything look cheap. Get a mirror with a nice frame around it – it makes the whole bathroom look way better right away. You can find good ones at stores like Target for about $30. Just take down the old ugly one and hang up the pretty new one. Black frames look modern, and wood frames look cozy. Upgrade the Faucet and Cabinet Knobs Old faucets and drawer pulls make bathrooms look really old and gross. New ones aren’t expensive – about $40 for a faucet and $3 each for knobs. You can put in most faucets yourself with regular tools. Make sure everything matches – if you get a silver faucet, get silver knobs too. It makes your bathroom look like those nice hotel bathrooms. Add a Peel-and-Stick Backsplash These fake tiles are awesome because they look real but stick on super easily. No cutting weird shapes, no messy glue, no nothing. They cost about $25 for enough tiles to go around your sink. You can get white subway tiles that look clean, or fun colorful ones. Just peel and stick them right on your wall. Use a Curved Shower Rod for Space Illusion Regular shower rods are straight and make tiny bathrooms feel even smaller. Curved ones push your shower curtain out so you have more room to move around. They cost about $15 and take like 10 minutes to put up. Your shower feels way bigger, and you don’t feel so squished in there. Smart Storage and Space Hacks I never have enough places to put my stuff. My house is always messy and cluttered, but I don’t have room for big furniture. I used to think I just had to deal with all the mess everywhere. Then I learned some really cool tricks to make more storage space without using up my floor. Add Floating Shelves in Nooks and Corners: Empty corners and weird spaces don’t have to stay useless. Floating shelves in those spots create tons of places to put things. Use Over-the-Toilet Storage Units: The space above the toilets is usually empty and wasted. Tall storage units that fit right over the toilet cost about $50. They provide three shelves for towels, extra toilet paper, and bathroom supplies. Install Entryway Hooks and Bench: Dumping coats and backpacks on the couch makes everything look messy and creates lost items. This creates a spot to hang up coats and sit down to take off shoes. With just a few smart changes, you can turn cluttered chaos into a home that feels tidy, open, and easy to live in. Lighting and Electrical Boosts Bad lighting makes my rooms look terrible. My house has those old, ugly light fixtures that make everything look yellow and dim. I used to think I needed to call an electrician for everything, but I found out I can actually fix most lighting problems myself pretty easily. Replace Old Light Fixtures with Modern Ones Old light fixtures are the worst. They make rooms look cheap and outdated. New ones cost about $30-100 and make rooms look completely different. Most new fixtures just screw into the same spot as the old, ugly one. You turn off the power, unscrew the old one, and put in the new one. Add Dimmer Switches in Key Rooms Regular light switches just turn lights on or off. That’s boring! Dimmer switches let you make lights brighter or softer depending on what you’re doing. They cost about $15 each and go right where your old switch was. Bedrooms and living rooms with dimmers feel so much better. Use Smart Bulbs for Custom Ambiance Smart bulbs are really cool. They screw into any regular light like normal bulbs, but you can control them with your phone. You can make them any color or brightness you want. They cost about $10-15 each but last forever. Make them warm yellow when you’re relaxing or bright white when you’re doing homework. Some can even turn red or blue for parties. Final Touches That Add Big Style I’ve done all the big upgrades, but my house still doesn’t feel quite right. It looks better, but something is missing. Then I realized it’s the little details that make a house feel finished and put-together. These tiny changes don’t cost much, but they make everything look way more expensive. Replace Old Blinds with Roman Shades or Curtains: Old plastic blinds make houses look cheap, even after everything else gets fixed. Roman shades cost about $25 each and make a huge difference. Add Rugs to Anchor Spaces: Rugs actually make rooms feel complete. Without rugs, furniture just floats around looking weird. Area rugs cost about $50-100 each, and suddenly, rooms have a purpose. Swap Out Old Switch Plates and Outlet Covers: This sounds super boring, but old, yellowed switch plates make everything look gross. New white or colored ones cost about $2 each and take 30 seconds to change. These small finishing touches are what separate okay houses from houses that look really put-together and expensive. Conclusion You don’t need to spend a lot or hire pricey pros to make your house feel better. Small upgrades, like painting your front door or swapping cabinet handles, can completely change the vibe. My home feels fresher, works better for my family, and it’s gaining value too. The best part? I can start this weekend with one easy project. Once I see the results, I’ll want to keep going. Every dream home starts with one small change, and I’m finally making mine happen. Want more simple-to-upgrade tricks for your home without blowing your budget? Check out other home improvement blogs packed with affordable tips for every room.

I’ve had those moments where I walk into my bathroom and the tile just feels outdated. It’s still in good shape, but the style is tired. When I wanted a quick, affordable refresh, painting my bathroom tile floor turned out to be the perfect solution. It’s a simple DIY project that can make a huge difference, without removing a single tile. I’ll walk you through how to prep the surface, choose the right tools, and apply the paint step by step. I’ll also share tips I’ve picked up to avoid common mistakes and keep the finish looking fresh. Let’s find out together if a painted tile floor can really stand the test of time. What to Know Before Painting Bathroom Tile Floors Painting tile floors can be a smart and budget-friendly way to refresh your bathroom, especially if the tiles are in good condition. It works best in low-traffic or guest bathrooms, or when you want a short-term makeover without the cost of new flooring. Some of the main benefits include low cost, easy DIY steps, and flexible design options. But it’s not without drawbacks. It requires proper prep and may wear faster in high-use or wet areas. You should avoid painting if your tiles are damaged, constantly damp, or if you want a long-term solution with no maintenance. In the right situation, with the right materials and prep, painting tile floors can be a great solution. Step-by-Step Guide to Painting Bathroom Tile Floors Painting bathroom tile floors can be a budget-friendly way to refresh your space without a full remodel. By the end, you’ll see a dramatic paint-over-tile before and after transition, dull, outdated tiles become a fresh, modern surface that brightens up the entire space. Here’s a step-by-step guide to help you do it right: Tools Required Before you begin, gather the right tools to make the job easier and neater. These basic items help you prep, paint, and clean up efficiently: Degreasing cleaner Sponge or scrub brush Clean water & clothes 120 or 220 grit sanding block Mini roller Angled brush or small paintbrush Painter’s tape (optional) Stencil (optional) Water-based polyurethane or topcoat Ventilation tools (e.g., fan) Step 1: Deep Clean the Surface Before you paint, the tile needs to be completely clean. Dirt, soap scum, and grease can prevent the paint from adhering properly. Use a strong degreasing cleaner to scrub the surface well. Rinse everything with clean water and let it dry fully before moving on. Step 2: Protect the Surrounding Areas Before you open your paint, tape off anything you don’t want painted, like the base of the toilet, the vanity, and the walls. If there’s any old caulk around the toilet or tub, remove it now. This gives you clean edges and helps the paint stay where it belongs. Step 3: Apply the Base Coat Using a high-quality brush, begin by trimming around the edges of the floor. Then grab a ⅜ inch nap roller to cover the rest of the tile in small, manageable sections. Work from one side of the room to the door so you don’t trap yourself inside. The paint is low-odor and easy to roll on. Just make sure to apply it evenly without overloading your roller. After your first coat, let it dry for six hours. During this time, only walk on it with socks to avoid scuffing. Once those six hours are up, apply a second coat in the same way, brush the edges, and roll the rest. Allow it to dry overnight before stenciling. Step 4: Apply the Top Coat After the stencil layer dries for two hours, it’s time to seal everything in. Use Rust-Oleum’s top coat and a ¼ inch nap roller for best results. Apply it just like the base coat trim, then roll. One coat is enough for most bathrooms, but you can add a second coat for extra durability. This top layer protects your floor from scratches and wear. Step 5: Let the Paint Cure Fully The final step is curing. While paint may feel dry to the touch in a few hours, full curing takes longer. Wait 24 to 48 hours before stepping on the floor, and give it up to 7 days to fully cure. During this time, avoid getting the surface wet or putting anything heavy on it. Heat and humidity can also affect how fast the paint cures, so keep the room well-ventilated. And that’s it, once everything’s cured, you’ll have a bathroom tile floor that looks brand new, all without breaking the bank or tearing anything out. If you’d like to follow along with a visual tutorial, you can watch it here: Tips for Best Results A few smart tips can make your painted tile floor look better and last longer. Painted tile floors need patience and attention to detail. Rushing the process or skipping steps can lead to chipping, peeling, or uneven color. Here are some tips to help your project go smoothly: Work in small sections: This gives you more control and helps you keep edges clean while the paint is still wet. Use light, even coats: Thick coats can bubble or peel. Thin layers dry better and give smoother results. Avoid high-humidity days: Moist air slows down drying and can affect how the paint sticks. Choose a dry day with good airflow. Don’t skip primer: Primer is what makes the paint last. Without it, the paint may peel within weeks. Learn from real DIYers: Many bloggers and YouTubers share their results after 1, 3, or even 5 years. Their reviews can help you avoid mistakes and pick the right products. Following these tips gives you the best chance at a durable, great-looking finish that holds up in your bathroom. How Long Will Painted Bathroom Tile Last? Painted bathroom tile can last anywhere from one to five years, depending on how well it’s prepped and how much daily use it gets. In low-traffic areas like guest bathrooms, the finish may stay smooth for years. But in busy bathrooms with lots of foot traffic, water, or steam, the paint may start to wear down sooner, especially near sinks, tubs, and entry points. Moisture, strong cleaning products, and skipped prep steps are the main reasons paint fails early. If the floor wasn’t cleaned, sanded, and primed properly, it won’t hold up well. The good news is that you can touch up small chips or worn spots by sanding lightly, repainting the area, and letting it cure. With the right care and maintenance, a painted tile floor can keep looking fresh much longer than you might expect. How to Maintain Your Painted Tile Floor To keep your painted tile floor looking good, clean it gently and regularly. Use a damp mop with mild soap or a pH-neutral cleaner. Avoid steam mops, as high heat can weaken the paint and shorten its lifespan. Stick to soft cloths, microfiber pads, or sponge mops to avoid scratching the surface. Avoid soaking the floor or letting water sit for too long. Good ventilation helps the floor dry faster and keeps moisture from building up. If your bathroom has poor airflow, consider using a fan or leaving the door open after showers to reduce humidity. Do not use bleach, harsh chemicals, or abrasive scrubbers, as they can wear down the paint and cause it to peel. Even “tile-safe” cleaners meant for glazed surfaces might be too strong for painted floors. Always test a small area first if you’re unsure about a product. If you start to see dull spots, chipping, or color fading in high-traffic areas, it may be time for a quick touch-up. Lightly sand the worn area, clean it, and reapply paint and sealer as needed. Regular care and gentle cleaning can keep your painted floor looking great for years without the need for a full redo. Common Mistakes and How to Avoid Them Even a small mistake can lead to peeling, chipping, or uneven results. Here are the most common issues people run into and how to prevent them. Skipping prep: Not cleaning or sanding properly is the fastest way to ruin a paint job. Dirt, grease, or a slick surface will stop the paint from sticking. Using the wrong paint type: Regular wall or latex paint won’t hold up on tile. Always use tile-specific or epoxy-based paint made for floors and moisture. Overloading the paint roller: Too much paint can cause drips, bubbles, and uneven coverage. Light, even coats work best and dry more smoothly. Inadequate drying time: Rushing between coats or walking on the floor too soon can cause smudging or peeling. Always follow the dry and cure times on the label. Applying sealant too soon: If you add a topcoat before the paint is fully dry, it can trap moisture and ruin the finish. Let the paint cure before sealing. Taking your time and following the right steps will save you from most problems and give you a smoother, longer-lasting result. Conclusion I’ve found that painting bathroom tile floor can totally change the feel of a space, without the stress (or cost) of a full remodel. Now that you know what tools to use, how to prep, and what to avoid, you’re set up to tackle this project with confidence. Taking the time to prep properly really does make a difference, and a little patience goes a long way in making those results last. You’ve got what you need to nail this project, whether it’s a clean white finish or a bold design. If you want to know what else you can tackle around the house, check other blogs on the website for more DIY guides.
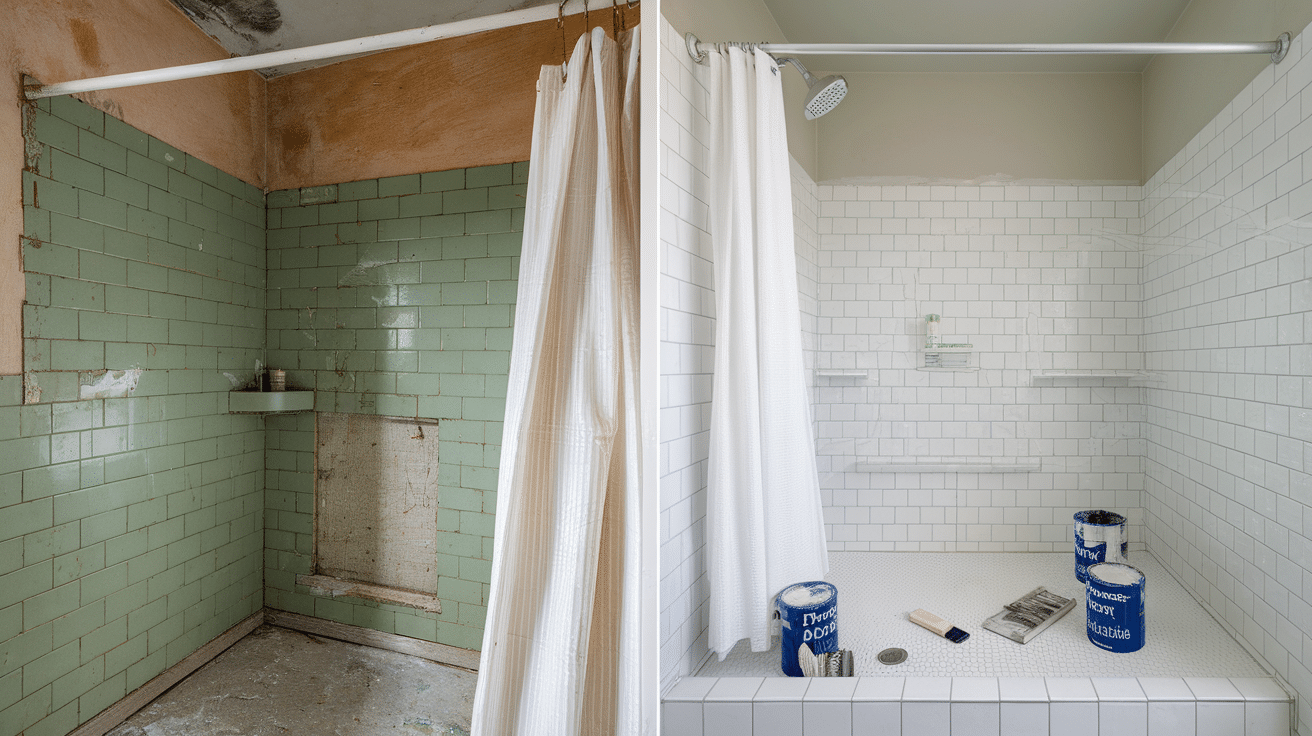
Tired of those ugly bathroom tiles? Here’s your fix. Let me guess, every time you step into your shower, those old tiles make you cringe. But is painting shower tile actually worth doing? Trust me, when you’re looking at spending thousands to rip out old tiles, a $50 paint job starts sounding pretty smart. Here’s the thing, though. I’ve seen way too many people mess this up and end up with paint peeling off after a few weeks. That’s why I’m sharing exactly what works: the right paint, the simple steps that anyone can follow. Ready to love your bathroom again without emptying your wallet? Why Painting Shower Tiles Makes Perfect Sense Replacing bathroom tiles is expensive and messy. Homeowners face thousands of dollars in costs, weeks of construction, and contractors tracking dirt throughout the house. Painting tiles offers a complete bathroom makeover for $30-50, compared to $3,000-8,000 for a full replacement. The math is simple. This project can be completed over a weekend. No jackhammers, no dust, no living without a shower for weeks. The process involves cleaning, priming, and painting. If the color becomes outdated in a few years, simply paint over it again. This flexibility doesn’t exist with ceramic tiles. When done correctly, painted tiles last 3-5 years before needing touch-ups. This durability exceeds most expectations for a DIY paint project. Tile painting isn’t just about cost savings – it’s about achieving the desired bathroom aesthetic without major construction disruption. Is Painting the Shower Tile Worth It? The decision to paint tiles depends on specific bathroom conditions and renovation goals. When It Makes Sense Tile painting works best in specific situations where the benefits outweigh the risks. Budget renovations are the perfect scenario for tile painting. When a full bathroom remodel isn’t financially feasible, paint transforms the space for under $100. Quick fixes for rentals benefit from this approach. Property owners can update outdated bathrooms without major capital investment, and tenants can improve their living space with landlord approval. Outdated or ugly tile colors get a second life through paint. Those avocado green or harvest gold tiles from decades past can become modern and stylish again. These scenarios make tile painting a smart choice that delivers real value. When You Should Avoid It Certain conditions make tile painting a recipe for failure. Poor ventilation creates problems for painted tiles. Bathrooms without proper exhaust fans trap moisture, leading to paint failure and potential mold issues. Cracked or damaged tile won’t hold paint properly. These surface imperfections need repair before painting, or the paint will fail at weak points. High-traffic showers without sealing plans face rapid wear. Daily use requires proper sealing and maintenance to prevent paint from chipping and peeling. Skip tile painting if any of these red flags apply to avoid wasted time and money. Pros and Cons Pros Cons Low costs (typically under $100) Risk of peeling over time Customizable colors Moisture issues can cause failure Fast bathroom refresh (about a weekend) Lower resale appeal compared to new tiles Quick DIY-friendly project May not add property value like ceramic tile installations What Kind of Tile Paint Works Best in Bathrooms? The paint you choose decides if your project looks great for years or starts peeling in a few months. Paint Types to Use Not all paints can handle bathroom moisture and daily use. Epoxy paint is the toughest option. It’s waterproof and creates a hard finish that won’t chip or peel easily. Think of it like a protective shell over your tiles. Latex or acrylic paint works fine for areas that don’t get wet often, like walls far from the shower. These paints are easier to work with and come in more colors. Specialty tile paints like Rust-Oleum Tub & Tile are made just for bathrooms. Companies like Valspar also make these. They’re stronger than regular paint but easier to use than epoxy. Enamel paint gives a glossy, hard finish that’s great for high-moisture areas. It takes longer to dry but creates a smooth surface that’s easy to clean and resists water damage. Pick your paint based on how wet the area gets and how much use it sees. How to Paint Shower or Ceramic Tile Here’s the exact process that transformed ugly brown tiles into a bright, modern shower. Step 1: Remove or Protect Fixtures Remove plumbing fixtures or tape around them carefully. The paint used in this project is really hard to clean up, so protecting fixtures saves significant time and hassle later in the process. Step 2: Deep Clean the Tiles Clean the tile like it has never been cleaned before. This deep cleaning step is absolutely crucial for proper paint adhesion and ensures long-lasting, professional-looking results on your shower surfaces. Step 3: Apply Bonding Primer (Two Coats) Use Insl-X Stix acrylic waterborne bonding primer; this is the secret to project success. Apply the first coat thoroughly, then add a second coat for complete, even coverage on glossy tile surfaces. Step 4: Protect Surrounding Areas Before starting the actual painting process, tape and use plastic sheeting to cover the bathtub and other finished surfaces. This careful preparation prevents accidental paint splatters and protects your investment. Step 5: Paint with Oil-Based Enamel Apply high-quality satin oil-based enamel paint in your chosen color. I recommend Behr Premium oil-based satin enamel, which cures to a hard, durable finish and effectively resists household chemicals. Follow these steps exactly, and you’ll get the same dramatic transformation shown in the video. The above video provides a thorough guide through every step of painting shower and ceramic tiles that last long. Also, with the help of this, you’ll know how to paint a ceramic tile as well. Painted Bathroom Tile Maintenance Tips Taking care of painted tiles is easy when you know what to do. How to Prevent Peeling A few simple habits keep your paint job looking good for years. Let the paint cure for 5-7 days before using the shower normally. This gives the paint time to get really hard and stick to the tiles properly. When cleaning, avoid scrubbing too hard; instead, use gentle soap and soft cloths, as rough sponges can scratch the paint off. If you live in a humid area or frequently use the shower, you may need to apply a new coat of sealer annually to prevent water from seeping under the paint. Do these things, and you won’t have paint peeling off your tiles. How Long Does Painted Tile Last? Most people get 2-5 years out of painted tiles before needing to redo them. How long yours lasts depends on a few things. If your bathroom has good air flow and you did a great job prepping the tiles, you’ll get closer to 5 years. But if it’s really steamy in there and lots of people use the shower every day, you might need to repaint sooner. Just plan on touching up or repainting every few years, and you’ll always have nice-looking tiles. Bathroom Tile Paint Ideas to Try 1. Solid Color Update Sometimes, keeping it simple works best. White paint makes dark bathrooms brighter and small spaces look bigger. It also makes everything feel cleaner and fresher. Black might sound scary, but it looks really cool and modern. Navy blue gives your bathroom that relaxing spa feeling without being too crazy or bold. 2. Two-Tone or Border Patterns Using two colors is easy, but it looks like you hired a pro. Try painting tile “rugs” by making rectangles of different colors on your floor or walls. You can also paint borders around the room, like making the bottom rows one color and everything else another color. 3. Stenciled Designs Stencils help you make fancy patterns even if you can’t draw. Moroccan patterns have cool curvy shapes that make your bathroom feel like a fancy hotel. Geometric designs use triangles, circles, or diamonds for a modern look that’s really popular right now. You can even use stencils to make fake grout lines so painted tiles look like the real thing. 4. Painted Faux Terrazzo or Stone Look Make your tiles look like expensive stone with some simple tricks. Use a sponge or splatter paint to copy the look of real stone or terrazzo floors. Earth colors like tan and brown make it look natural, while gray and white give it a modern feel. 5. Color Fade Effects Create a smooth color change that looks super trendy. Start with a dark color at the bottom and slowly make it lighter as you go up the wall. Try dark blue fading to light blue, or gray fading to white. You can even do sunset colors like orange blending into pink for something really fun. Mistakes to Avoid These three mistakes will mess up your project before you even finish. Painting floor tiles – Don’t paint tiles on the floor. People walk on them every day, which makes the paint chip off really fast. Water sits on floors longer, too, so the paint bubbles up and peels. Using the wrong paint type – Don’t use regular wall paint in your bathroom. It can’t handle all the steam and water, so it’ll start peeling in no time. Skipping cure time – Don’t use your shower right after painting. The paint needs 5-7 days to get really hard and stick properly. Avoid these three things, and your painted tiles will actually last. Conclusion Ready to Give Your Bathroom a Makeover? Painting shower tile isn’t for everyone, but if your bathroom has good airflow, solid tiles, and you’re willing to prep it right, it can work wonders. For around $50, you can skip the expensive remodel and finish this project in a weekend. Just don’t cut corners. If you skip the bonding primer or rush the prep, the paint won’t last. My advice? If your setup checks out, stop overthinking and get started. The results are worth it. Want more simple updates that won’t drain your wallet? Check out other posts for smart, budget-friendly bathroom upgrades.

The right paint color has completely changed how my bedroom feels. When it seemed too bright, a little cold, or just not “me,” finding the right shade made it restful and a true reflection of my style. I’m sharing my favorite relaxing master bedroom paint ideas that have helped me unwind and sleep better. I’ll also give you simple tips I’ve used for mixing colors, picking the right finish, and steering clear of common mistakes. Every idea comes from real-life experience, not just theory, shaped by working with shades like Natural Choice paint. Whether you love soft blues, earthy neutrals, or gentle, nature-inspired greens, you’ll find something that works. Let’s pick the color that makes your bedroom feel more like your own calm, cozy space. Relaxing Master Bedroom Paint Ideas Choosing the right paint color for your master bedroom can set the tone for how you relax and recharge, whether you prefer lighter tones or deeper shades like Soot paint. Here are some master bedroom color ideas to help create a space that feels calm, cozy, and truly yours: 1. Pale Sky Blue This soft, airy blue brings the peace into your room. It creates a light, open space that feels fresh and clean. You can use it for all walls or just a feature wall to keep things bright without feeling plain. Soft, sheer curtains in a matching tone can add a layered effect. It also works well with light woven rugs or subtle striped patterns for a coastal touch. 2. Sage Green Sage green has a natural, grounded quality that’s ideal for rest. Its muted tone works in both bright and dim spaces, creating an easy sense of balance. Pair it with woven rugs, rattan chairs, or soft beige bedding, it complements wooden furniture and plants, making the room feel connected to nature. You can keep it minimal for a clean feel or layer in patterns for interest. 3. Warm Beige Warm beige makes a bedroom feel instantly welcoming. It carries a gentle warmth without looking heavy, making it perfect for restful spaces. This color pairs well with off-white, cream, and warm wood tones. It also adapts easily to different decor styles, from modern to farmhouse. Adding textured bedding or a patterned rug can give the room more depth. 4. Lavender Mist Lavender mist brings a soft, soothing presence to the bedroom. It’s light enough to keep the space open while adding a gentle touch of color. Works well with white, silver, or cream accents for a calm, airy look. If you prefer warmth, mix it with soft beige or light wood. This shade is especially nice in spaces where you want a dreamy, evening-ready feel. 5. Off-White with Warm Undertones An off-white with warm undertones creates brightness without the stark feel of pure white. It works well in smaller rooms, making them appear larger and more open. Pairs beautifully with natural textures like linen bedding or wicker baskets. The warmth in the tone keeps the space inviting, even in cooler lighting. It’s versatile enough to suit almost any bedroom style. 6. Dusty Rose Dusty rose is a muted pink that adds a soft, calming touch without feeling overly sweet. It works well with vintage accents like brass lamps or antique-style mirrors. Pair it with crisp white trim for a clean contrast or layer with cream bedding for a softer effect. This color also works beautifully alongside muted greens for a natural palette. It’s warm enough for winter but still fresh in summer, making it a year-round favorite. 7. Slate Gray Slate gray brings a grounded, restful energy to the bedroom. Its depth makes it ideal for creating a cocoon-like feel, especially in larger spaces with plenty of natural light. Use crisp white bedding to keep it fresh or add texture with knitted throws and cushions. Metallic accents, like brushed nickel lamps, add a modern touch. For a softer look, mix it with light wood furniture. 8. Pistachio Green Pistachio green has a light, cheerful quality that lifts the mood while staying calming. It pairs easily with white trim, pale wood, or light gray bedding. This shade suits both modern and farmhouse styles, making it very versatile. Add potted plants or leafy artwork to enhance its natural feel. It works well in both sunlit and shaded rooms. 9. Pale Aqua Pale aqua blends the freshness of green with the serenity of blue. It creates a breezy, coastal-inspired mood, especially in rooms with lots of sunlight. Pair it with white or sandy beige accents for a relaxed, beachy look. Keep decor light and uncluttered to let the color shine. Works beautifully with natural textures like seagrass rugs or linen curtains. 10. Greige (Gray + Beige) Greige is a balanced mix of gray and beige, offering warmth and softness in one shade. It’s versatile enough to work with both cool and warm accents. Use it with white trim for a clean, modern look or layer with natural fabrics for coziness. Works well in minimalist spaces but can also suit traditional styles. It’s a dependable base color for changing decor over time. 11. Muted Coral Muted coral adds a gentle warmth with just a hint of vibrancy. It’s softer than bright pink or orange, making it easy to live with. This color works well with neutral bedding and gold or bronze fixtures. Pair it with light wood for a balanced, welcoming look. Ideal for adding personality without overpowering the room. 12. Alabaster White Alabaster white is a creamy, soft white that brightens a room without feeling harsh. It’s perfect for small bedrooms or spaces with limited natural light. Pair it with warm wood tones for a cozy feel or keep it crisp with pale gray accents. It’s a timeless shade that works with almost any style. You can easily change the room’s look by swapping accessories. 13. Dusty Blue Dusty blue is muted yet rich enough to give the room character without feeling heavy. Its calming quality makes it a great choice for both traditional and modern spaces. Pair it with white trim for a crisp contrast or combine it with navy for a subtle, layered look. It works beautifully with soft textures like cotton, wool, or linen to create a comfortable and inviting feel. 14. Mocha Taupe Mocha taupe offers warmth and sophistication in one shade. It’s deeper than beige but still soft enough for a restful space. Use it with cream or ivory bedding for a gentle contrast that feels balanced. Gold or bronze accents can add subtle elegance without making the room feel formal. This color works especially well with plush fabrics like velvet or chenille for a cozy yet refined feel. 15. Spring Mint Spring mint is a light tone that keeps the space open and breezy, making it perfect for smaller rooms or spaces that need a lift. Pair it with white or pale wood furniture for a clean, easy look. Lightweight fabrics like cotton or linen help keep the room feeling cool and relaxed. You can also add potted plants or leafy prints to complement its fresh, natural vibe. 16. Buttercream Yellow Buttercream yellow adds warmth without being overly bright. It has a soft, inviting quality that’s ideal for morning light. Pair it with white trim and natural wood for a sunny yet gentle feel. Works well in both traditional and cottage-style bedrooms. A cheerful choice that still encourages relaxation. 17. Cool Lilac Cool lilac offers a hint of purple softened by blue undertones, creating a calm and airy feel. Works beautifully with white furniture and silver accents for a fresh look. Keeps the room feeling light while still adding personality. Add soft fabrics and gentle lighting for a spa-like atmosphere. This shade suits both modern and classic styles. 18. Pebble Gray Pebble gray is a soft, natural neutral that’s easy to decorate around. It can be warm or cool depending on your lighting and the accents you choose, making it highly versatile. Pair it with white linens for a crisp, clean look or use warm wood furniture to add depth. This shade works just as well in a minimal, uncluttered space as it does in a layered, textured design. 19. Cloud White Cloud white is a barely-there shade that keeps the room feeling bright and airy. Its subtle softness makes it more inviting than pure white. Works well with muted pastels or soft grays for a gentle palette. Pair it with natural textures like jute or wool for added warmth. It’s a flexible choice for any style of bedroom. 20. Earthy Clay Earthy clay adds depth and a natural feel to the bedroom. Its warm tone works beautifully with woven fabrics and rustic wood. Ideal for creating a cozy, layered look. Pairs well with cream or deep beige for a balanced feel. Perfect for a space that feels connected to the outdoors. 21. Sea Salt Blue Sea salt blue mixes blue and green for a refreshing yet calming effect. Works well in coastal or spa-inspired bedrooms. Pair it with white trim and light wood furniture for a breezy feel. Add soft fabrics like linen or cotton to keep it comfortable. A great choice for a light but soothing space. 22. Muted Mustard Muted mustard offers warmth without being too intense. Its earthy tone pairs well with cream, taupe, or gray. Use it on an accent wall for subtle drama or throughout the room for a cozy atmosphere. Works well with mid-century or eclectic decor. Keeps the room feeling inviting all year. 23. Dusty Lavender Dusty lavender adds a soft, muted charm that feels both calming and inviting. It works equally well in rooms filled with natural light or in spaces with a cozier, dimmer atmosphere. Pair it with white bedding for a clean, crisp look, or bring in gold accents for gentle warmth. This color also pairs nicely with light wood and neutral fabrics, keeping the room balanced. 24. Willow Green Willow green is a deep, earthy shade that brings a sense of quiet strength to the bedroom. It works best in larger rooms or spaces with good natural light, where its richness can stand out without feeling heavy. Pair it with beige, cream, or soft taupe to create a balanced look. Natural textures like linen bedding, woven rugs, or wooden accents enhance its organic feel. 25. Mushroom Gray Mushroom gray blends taupe and gray for a warm, welcoming tone that works in almost any bedroom. Use white or cream bedding for a soft, layered look, or add deep browns for a cozier effect. This shade feels relaxed yet refined, making it perfect for everyday comfort. Natural textures like wool throws or woven rugs can add depth without overpowering the color. 26. Cool Beige Cool beige carries a subtle gray undertone that gives it a modern, fresh feel. It’s perfect for rooms that need a neutral base with a bit of personality. Pair it with black or crisp white for a clean contrast, or bring in blush tones for gentle warmth. This shade suits minimalist spaces but still works with layered, cozy designs. 27. Light Denim Blue Light denim blue is casual and approachable, bringing a lived-in comfort to the bedroom. It adds depth without making the space feel dark, making it a great middle-ground color. It works beautifully with white bedding and simple furniture for a fresh look. You can add patterned cushions or striped throws to keep it playful. 28. Ivory Cream Ivory cream has a soft glow that instantly brightens a bedroom without being stark. Its gentle warmth pairs effortlessly with wood tones, metals, and natural fabrics. Suitable for both modern and traditional styles, this shade is incredibly versatile. Layer bedding in similar tones for a seamless, relaxing feel. It’s an easy backdrop for changing decor throughout the seasons. 29. Terracotta Blush Terracotta blush offers an earthy warmth softened by a touch of pink. It brings a grounded yet inviting feel to the bedroom. You can pair it with rustic wood, woven accents, and neutral bedding. Works equally well in modern boho or desert-inspired spaces. Adding textured cushions or throws gives the room a richer, more layered look. 30. Moonlight Gray Moonlight gray is a light, silvery shade that feels calm and airy. Its soft reflective quality helps brighten the space without adding glare. Works well with blues, lavenders, and crisp whites for a dreamy, coordinated palette. Use gentle, diffused lighting to highlight its subtle sheen. This color creates a quiet backdrop that encourages rest and relaxation. A thoughtful paint choice can completely change how your bedroom feels. The right shade sets the tone for rest, comfort, and a space that feels truly your own. Choosing the Right Paint for Your Master Bedroom Before you choose a color, it’s important to think about how it will look and feel in your space. The right undertone, lighting, and finish can make a big difference. Even if two colors look similar, their undertones can change the mood of the room. Warm undertones include hints of yellow, red, or orange, a range you’ll notice in the Alpaca paint review. These make the room feel cozy and welcoming. Cool undertones have blue, green, or purple tints. These help create a calm, peaceful vibe. How to test them: Paint small swatches on different walls Check how they look in morning and evening light Compare them with your furniture and bedding Always test before committing to a full wall. What looks good on a sample card can feel totally different in your space. Room Lighting Considerations Light can change how paint looks, depending on the time of day and the light source. Natural daylight shows the truest version of a color Warm artificial light (like soft white bulbs) can make colors look more yellow or orange Cool artificial light (like daylight LEDs) may bring out blue or gray tones Try checking your paint samples in both daylight and at night. This helps you see how the color shifts. Paint Finishes for a Relaxing Look Paint finish affects not just how your walls look, but also how they feel in the room. Here are some common finishes and how they work in a bedroom: Flat/Matte: Soft, non-reflective finish. Hides wall flaws. Great for a cozy look Eggshell: Has a slight sheen. More durable than flat but still soft-looking Satin: Smooth and a bit shiny. Easier to clean. Best for high-traffic bedrooms or kids’ rooms For a peaceful space, stick with flat or eggshell. They keep things calm and quiet, visually. Relaxing Paint Color Combinations Tips Blending the right paint shades can bring style to your master bedroom. Soft, muted tones are a great base for calm bedroom paint colors. Use gentle wall shades with creamy or warm white trim to keep the space feeling bright and smooth while adding just enough contrast. Create a focal point with an accent wall by choosing a deeper, muted version of your main color, like pairing soft sage walls with a rich olive green accent. Go for two-tone walls to add interest without clutter by painting the lower half in a deeper shade (like mushroom gray) and the upper half in a light neutral (like ivory or pale taupe), separated by a chair rail or molding. Stick to low-contrast combinations if you want a more seamless look, or mix textures like matte and satin finishes for subtle variety. These layered approaches help maintain a relaxing feel while making your bedroom look intentional and visually balanced. Common Paint Mistakes to Avoid A peaceful bedroom starts with the right paint choices. Avoiding these common mistakes can help keep your space calm, cozy, and visually balanced: Choosing colors that are too bold: Bright or loud shades can feel energizing or overwhelming, exactly the opposite of what you want in a restful space. Ignoring natural light: A color might look perfect in-store, but it can appear too dark or dull at home. Always test paint in your room’s actual lighting. Skipping undertone checks: Warm and cool undertones affect the mood. Make sure your wall color complements the trim, furniture, and lighting. Using high-sheen finishes: Glossy finishes reflect too much light and can feel harsh. Stick to flat, matte, or eggshell for a softer look. Painting all walls the same color: Too much of one color can feel flat or dull. Break it up with trim, accents, or a two-tone combo for visual flow. Smart paint choices make all the difference when creating a bedroom that feels truly restful and inviting. Conclusion I’ve seen in my own home how much a paint color can change the mood of a room. Now that you’ve got these relaxing master bedroom paint ideas, you have plenty of ways to make your space feel more peaceful and personal. I like to test a few shades before deciding, mix in calming color combinations, and avoid small painting mistakes that can turn into big frustrations later. Even a tiny change like going a shade softer or choosing a better finish has made a huge difference in how my bedroom feels day to day. If you want more color tips, design ideas, or simple home upgrades, check out other blogs on the website!

Getting ready to move into your dorm? I remember how confusing it felt trying to figure out what to bring. You might be asking yourself the same thing right now. The right college dorm essentials can make your room feel cozy, help you stay neat, and make daily life easier. I’ll share what really helped me and what you’ll actually use. I’ll walk you through simple storage ideas, everyday must-haves, and small comforts that make a big difference. I’ve kept it easy to follow, so you don’t waste money or space. If you want your dorm to feel like your own, this is where to start. How to Plan Your Dorm Move-In the Smart Way Before you pack up your whole room, take a few minutes to plan. Trust me, it saves a lot of trouble later. Think about what you’ll really use. That’s your starting point. Your dorm room list should focus on dorm room essentials. Next, talk to your roommate. You don’t both need a microwave or a rug. Sharing can save money and space. Also, check your college’s housing rules. Some schools don’t allow things like candles, certain lights, or big appliances. It’s smart to bring just the basics at first. You can always grab extra stuff later. If something is heavy or hard to pack, consider shipping it or purchasing it after you’ve moved in. This keeps your trip smoother and less crowded. Planning early, talking things out, and keeping it simple make move-in day way easier and way less stressful. The Complete College Dorm Essential Checklist Getting ready for college? One of the most important things is packing smart. You don’t want to forget the things you’ll use every day or pack stuff you don’t need. Use this list to cover all the basics: 1. Bedding & Comfort A good night’s sleep starts with the right setup. Your bed is where you’ll relax, nap, and recover from long days. Bring these items to make it soft, clean, and warm every night: Twin XL sheets (2 sets) Pillows Mattress pad Comforter or duvet Soft blanket A few cozy extras (like a stuffed animal or body pillow) You’ll be glad you packed extra sheets and pillows, especially during laundry day or cold nights. These basics make your dorm bed feel more like home and help you rest well. 2. Bath & Hygiene College bathrooms are usually shared. That means you need your own set of personal care items. It’s best to stay organized and clean, so make sure you have the following: 2–3 bath towels A few washcloths Shower caddy Shower shoes (flip-flops work too) All your toiletries (toothbrush, soap, shampoo, etc.) A robe A small basket or bin to hold your stuff These will make your daily routine faster and smoother. A robe keeps you covered walking to and from the shower, and shower shoes protect your feet. Keep everything in one place with your caddy. 3. Desk & Study Supplies You’ll be doing a lot of reading, writing, and studying in your dorm. Setting up a workspace that helps you focus is really important. Here’s what to pack: Desk lamp Extension cord Power strip Laptop and mouse Paper and pens Headphones Lap desk (for bed studying) Rolling cart for extra storage Having these study tools nearby keeps you from running around looking for things. Good lighting and working outlets help you stay focused and get things done faster. 4. Storage & Organization Dorm rooms are small. That’s why storage matters a lot. You’ll want to use every bit of space smartly. These things help you stay tidy and keep your room from getting messy: Bins that slide under your bed Hanging shelves Over-the-door hooks or pockets Slim hangers Wall hooks and command strips Dividers for your drawers You’ll save so much time when your stuff has a place. With bins, hooks, and shelves, you won’t lose track of what you have, and your room will feel less cluttered. 5. Kitchen & Appliances Even if you have a dining plan, you’ll still need snacks and drinks in your room. Some small appliances and dishes can make things a lot easier. Check your college’s rules first, then bring: Mini fridge Microwave Dish set (plate, bowl, cup, utensils) Sponge and dish soap Reusable water bottle Snacks for late-night study time When you’re hungry or in a hurry, you’ll be glad you brought these. Keeping food fresh and having your own dishes saves time and money, and helps you avoid extra trips outside. 6. Cleaning & Laundry You’ll need to keep your space clean. No one’s going to do it for you. And laundry piles up fast. These things will help you stay ahead of the mess: Laundry hamper or bag Laundry detergent and dryer sheets Cleaning wipes Small vacuum or broom Clean spaces feel better to live in and help you focus. Having a hamper keeps clothes off the floor, and quick-clean tools help you handle spills or dirt without stress. 7. Health & Safety Accidents happen, so it’s smart to be ready. You also want to keep your things safe. These items will help you take care of small problems and protect your stuff: First-aid kit Tool kit (screwdriver, scissors, tape) Lockbox or small safe for your papers and valuables You might not use these every day, but when you do need them, they’re a lifesaver. A safe spot for your ID, meds, or cash is always a good idea. 8. Personal Touches & Extras Dorms can feel a bit plain. A few personal items make the space more comfortable and fun. Use things that reflect you but don’t take up too much space: Small fan Alarm clock Mirror Wall art or posters Photos of family and friends Fake plants or real ones, if you can take care of them Air freshener A rug or a mat for your floor These items don’t just look nice; they also make your room feel familiar. They can help with homesickness and give you a cozy spot to hang out. 9. Essentials Most Students Forget These items don’t seem important until you need them. They’re easy to forget, but they really help with daily life. Make sure to include them: Surge protector (lots of plugs in one) Bed risers (to make room under your bed) Night light or a lamp that turns on when you move Umbrella and rain boots, or a jacket Extra phone charger A few quarters or a laundry card Packing these extras means fewer last-minute trips to the store. They help you stay comfy, dry, and charged, without missing a beat. Having the right supplies makes dorm life way easier. Check things off as you go, and you’ll feel more ready when move-in day comes. What Not to Bring to Your Dorm Moving into your dorm is exciting, but don’t overpack. Leave big furniture like couches or bulky chairs at home. Most dorms are small and already have the basics. Avoid bringing kitchen appliances like toasters, hot plates, or air fryers; most are not allowed. Don’t bring candles or incense, they’re fire hazards. Skip the huge TV; your laptop is enough. Keep clothes to a minimum, only what you wear often. Don’t pack too many decorations; they take up space and add clutter. Avoid bringing large amounts of food as it goes bad fast. And skip expensive items like jewellery or designer gear; things can get lost or stolen. Keep it simple, save space, and only bring what you truly need. Dorm Room Setup Tips for a Smooth Move-In Moving into your dorm can feel overwhelming, but these simple tips will make the process much easier. You can turn a chaotic move-in day into a smooth and organized experience. Clean First: Give the room a quick clean before unpacking to help you feel more settled in your new space. Storage Solutions: Use bins, shelves, and under-bed storage to keep things organized and save precious dorm room space. Make Your Bed: Set up your bed first so you have a comfortable place to sit while organizing everything else. Coordinate with Roommate: Talk with your roommate ahead of time to avoid bringing duplicate items like mini fridges or coffee makers. Use Command Hooks: Hang decorations and essentials with command hooks to avoid damaging walls and losing your security deposit. Following these steps will help you create a comfortable living space quickly and efficiently. Take your time with each step and enjoy making your dorm room feel like home. Conclusion Now that we’ve gone through the college dorm essentials together, I hope you feel more ready and less stressed about your move. When I was getting ready for dorm life, having a simple list made things so much easier and now you’ve got one too. Think about what you’ll use every day and what will help you feel more at home in your space. Don’t worry about making it perfect. Just bring what makes sense for you. One last tip I learned: keep your go-to stuff in one spot so mornings aren’t a mess. If this helped, I’ve got more blogs full of useful advice. Go take a look and get even more ready for life!