

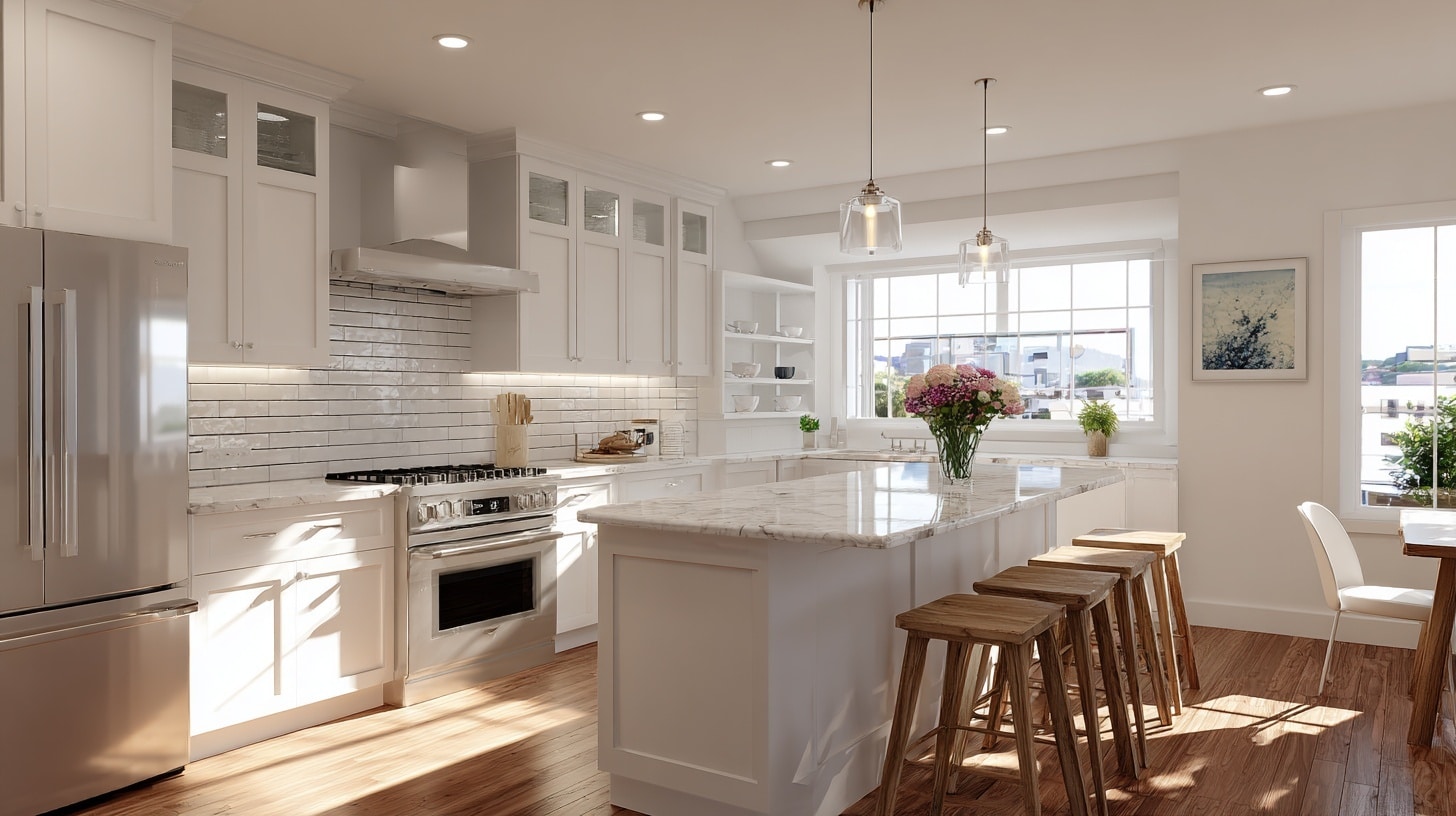
If you’ve been wondering about the 12×12 kitchen remodel cost, it can be hard to find clear answers. Prices vary widely, and when I first started researching, the range of numbers felt overwhelming. You want to make smart choices, but there are so many factors to think about: materials, labor, layout changes, and even where you live, along with details like popular granite colors. I’ll walk you through real cost ranges, the key factors that can change them, and some before-and-after examples I’ve found helpful, so you can plan your remodel with confidence. Average Cost of a 12×12 Kitchen Remodel Remodeling a 12×12 kitchen in 2025 typically costs between $18,000 and $42,000, depending on materials, labor, and the scope of work. A mid-range remodel averages around $26,960. Measured by square footage, budget projects usually cost $100–$125 per sq. ft., mid-range remodels run $200–$250 per sq. ft., and high-end projects can exceed $300 per sq. ft. These estimates include cabinetry, countertops, flooring, appliances, and labor. This cost range gives you a clear view of what’s realistic for your kitchen, so you can choose a remodel tier that fits your goals. Factors and Cost Breakdown for a 12×12 Kitchen Remodel Knowing the factors that influence cost and how expenses break down can help you plan a 12×12 kitchen remodel that fits your budget. Here’s what to consider: Scope of Work The size and complexity of your remodel have a major impact on costs. Minor updates, such as painting cabinets, replacing fixtures, and adding a backsplash, typically cost $10,000–$15,000. A full gut renovation with layout changes, premium materials, and new appliances can reach $30,000–$42,000. Larger projects require more labor, materials, and time, significantly increasing both the total price and the per-square-foot cost. Material Quality Material choices directly affect cost and durability. Stock, semi-custom, and custom cabinets vary widely in cost; see the cost by remodel type table for ranges. Countertops, flooring, and fixtures also come in a range of options, from budget-friendly to high-end, influencing both appearance and lifespan. Labor Costs Labor makes up 25–35% of a remodel budget. In 2025, rates range $75–$150 per hour in metropolitan areas and $50–$90 per hour in rural locations. Specialized tasks, such as custom carpentry or intricate tile installation, can cost more but ensure better quality. Total labor costs for a 12×12 remodel often fall between $4,500–$12,000, depending on complexity, scope, and the expertise of the professionals you hire. Location Where you live plays a major role in cost. In 2025, a 12×12 kitchen remodel in the New York metro area can exceed $40,000, while similar work in the Midwest may cost $25,000–$35,000. This difference is often due to higher labor rates, increased demand, higher permit costs, and shipping fees for materials in urban areas compared to smaller cities or rural regions. Appliances Appliance pricing depends on brand, features, and efficiency. Budget models cost $100–$1,000 each, mid-range options run $1,000–$3,000, and high-end appliances can exceed $10,000. When selecting appliances, consider their performance, energy efficiency, and lifespan. A higher upfront investment can sometimes save money in the long term by reducing energy use and extending the period before a replacement is needed. Backsplash & Fixtures Backsplashes cost between $500–$1,700, depending on material choice, design complexity, and installation method. Fixtures, such as sinks and faucets, range from $100–$1,000 each, with costs rising for premium finishes and advanced features. While these items may be smaller parts of the remodel, they have a significant impact on both the overall function and the final appearance of your kitchen. DIY vs. Professional Completing some work yourself can reduce labor costs by as much as 30%. DIY-friendly tasks include painting, assembling cabinets, or installing a simple backsplash. However, plumbing, electrical, and structural work should be handled by licensed professionals to ensure safety and compliance with building codes. A blended approach, using DIY for basic work and professionals for complex jobs, often offers the best balance between savings and quality. Cost by Remodel Type Remodel costs vary widely based on finish quality, material selection, and project scope. This table compares budget, mid-range, and high-end options, with example upgrades to help you visualize each tier: Remodel Type Total Cost Range Example Upgrades Budget $18,000 – $22,500 Painted cabinets, peel-and-stick backsplash, and LED lighting Mid-Range $28,800 – $33,000 Undercabinet lighting, tile backsplash, stainless steel appliances High-End $43,200+ Layout changes, island with seating, built-in wine fridge This breakdown helps you compare tiers and choose one that aligns with your priorities and budget. Before and After 12×12 Kitchen Remodel Examples These real-life remodel examples show how different budgets and styles change a 12×12 kitchen while meeting various design goals: 1. Budget Remodel Under $15K This cost-friendly update included painting existing cabinets, installing laminate countertops, and adding a peel-and-stick backsplash. All labor was handled as a DIY project, significantly reducing expenses. While budget appliances were used, the changes refreshed the space’s appearance and functionality without major structural work. Perfect for homeowners wanting a fresh look without the financial commitment of a large-scale renovation. 2. Mid-Range Refresh at $25K This remodel introduced semi-custom cabinets, quartz countertops, and a sleek tile backsplash. Updated mid-range appliances improved performance and efficiency. Lighting upgrades, including under-cabinet fixtures, brightened the space while creating a modern feel. The project balanced quality and cost, offering long-lasting materials and stylish features without reaching high-end prices, making it ideal for homeowners who want a noticeable change that remains budget-conscious. 3. High-End Remodel at $45K This upscale renovation featured custom cabinetry, professional-grade appliances, and natural stone countertops. Layout adjustments improved traffic flow and added storage, while premium finishes created a polished appearance. High-quality materials ensured durability, and modern conveniences enhanced daily use. This type of remodel suits homeowners looking for a statement kitchen that combines functionality with long-term investment value, particularly for properties aiming to stand out in competitive real estate markets. 4. Vintage to Modern for $20K Dated wood paneling was removed to open up the space visually. Shaker-style cabinets replaced older units, and durable vinyl plank flooring was installed for easy maintenance. New hardware and energy-efficient appliances completed the change. This remodel preserved beauty where possible but focused on practical updates, giving the kitchen a fresh, inviting look without exceeding a moderate budget. 5. Coastal Style Upgrade for $30K This remodel brought a light and breezy look with white cabinetry, a butcher block island, and a subway tile backsplash. The layout stayed the same to control costs, while mid-range appliances and open shelving added both function and character. This style works well for homeowners seeking a bright, relaxed atmosphere that feels updated yet welcoming, especially in coastal or casual home settings. 6. Rustic Farmhouse Look for $28K Reclaimed wood elements, open shelving, and an apron-front sink defined this farmhouse-style remodel. Black hardware and durable stone-look countertops provided contrast and practicality. The project balanced rustic beauty with modern convenience, using mid-range appliances and a mix of natural textures. This approach is ideal for those who want a warm, inviting kitchen that blends style with day-to-day functionality. 7. Minimalist Makeover at $18K This remodel focused on clean lines and uncluttered surfaces, using flat-front cabinets and quartz-look laminate countertops. Stainless appliances added a sleek touch, while neutral colors kept the design classic. Costs were kept low by maintaining the existing layout and limiting structural changes. This style suits homeowners who value simplicity, efficiency, and a low-maintenance kitchen environment without sacrificing modern appeal. 8. Luxury Entertainer’s Kitchen for $60K Designed for hosting, this remodel featured double ovens, a waterfall quartz island, and a built-in wine fridge. Custom cabinets provided ample storage, and high-end appliances ensured performance for large gatherings. The open layout connected the kitchen to the living areas, making it both functional and social. This option is perfect for homeowners who entertain frequently and want a showpiece kitchen. 9. Space-Optimized Remodel for $22K This remodel maximized storage with pantry cabinets, pull-out shelving, and a multi-functional island. Durable tile flooring and mid-range appliances kept costs manageable while enhancing practicality. The layout was refined to improve workflow, making the most of every square foot. This approach is ideal for smaller households or those who need efficient use of space without overspending. How to Save Money on a 12×12 Kitchen Remodel You can keep costs down without sacrificing style by reusing your existing cabinets and giving them a fresh finish instead of replacing them. Shopping seasonal sales for appliances, fixtures, and materials often delivers major savings. Mixing one or two high-impact features with more affordable finishes creates a balance between cost and style. Hiring contractors during their off-season may lower labor rates. Finally, DIY-friendly tasks, such as painting or installing a backsplash, can reduce labor expenses by up to 30%, leaving more budget for essential upgrades. Return on Investment (ROI) A 12×12 kitchen remodel can return about 50–70% of its cost in increased home resale value. The key is planning with long-term appeal and function in mind. Neutral, durable finishes and a practical layout help attract future buyers while maintaining everyday usability. Even if you’re not planning to sell soon, these updates can improve your daily experience in the kitchen. By choosing upgrades with broad appeal, you can protect your investment and ensure that your remodel delivers lasting benefits well beyond the initial project. Final Thoughts Now you have a clear picture of the 12×12 kitchen remodel cost and the key factors that shape it. You’ve seen how materials, labor, and even location can make a big difference. I’ve shared examples so you can picture what’s possible in your own space, plus tips to stretch your budget without cutting quality. If you’re ready to take the next step, start by listing your must-have upgrades and comparing them to your budget range. From there, you can decide to DIY, hire a pro, or mix the two. And if you want more ideas, check out my other kitchen remodel guides; they’ll help you plan with confidence.
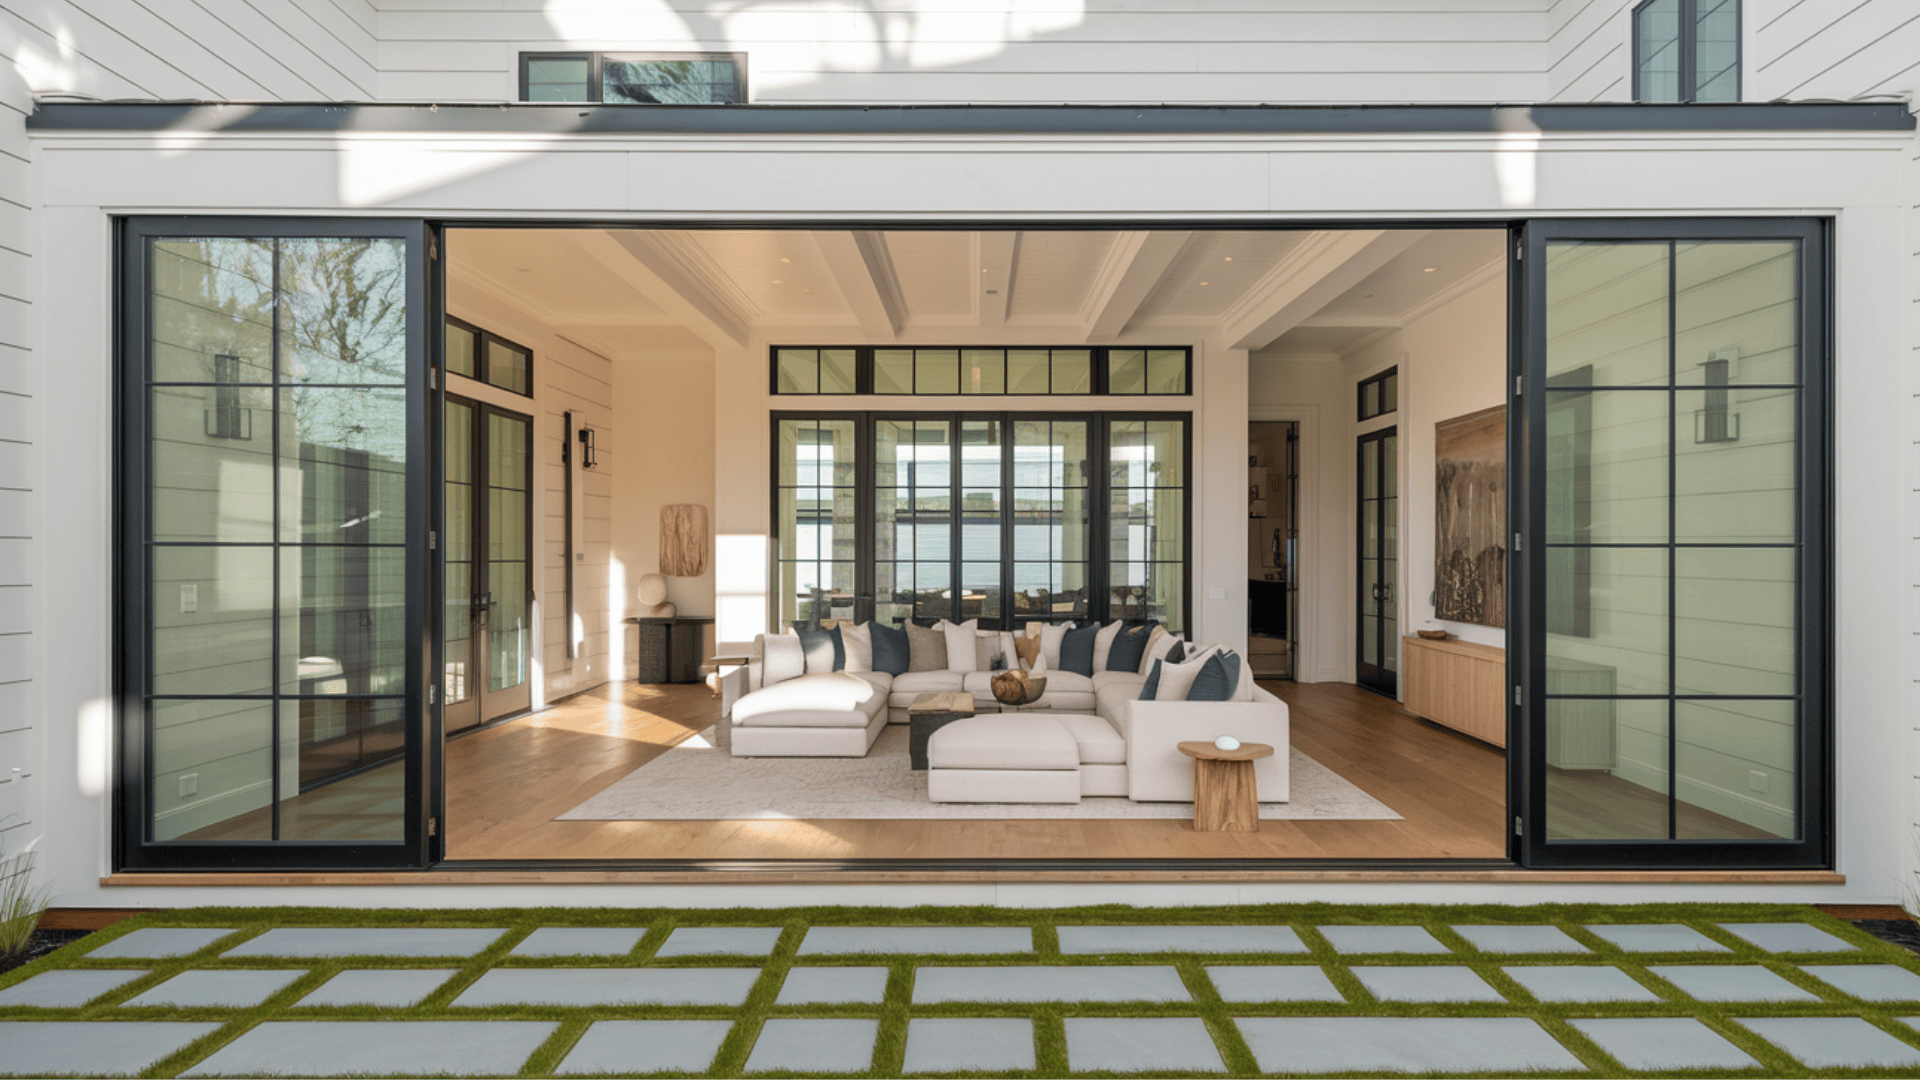
When I first looked into adding space to my home, I had no idea what it might cost. Maybe you’re in the same spot, imagining an extra bedroom, a larger family room, or the kitchen you’ve always wanted. The truth is, a room addition can be a great upgrade, but the cost can vary a lot. If you’re unsure how to budget or what to expect, this will help. You’ll learn the average room addition cost, how size and room type affect the price, what real homeowners have spent, and smart ways to save without cutting corners. By the end, you’ll know what to consider before calling a contractor. So, how much could your new space cost? Let’s find out. Average Room Addition Costs at a Glance The cost of a room addition typically ranges from $21,000 to $100,000, with most homeowners spending around $48,000-$50,000. On a per-square-foot basis, costs run $80 to $300, with the majority falling between $125 and $250/sq. ft., while high-end or complex projects. Small additions of about 120 sq. ft. often range from $12,500 on the low end to $18,000-$30,000 mid-range, and $36,000–$45,000+ for high-end finishes. Medium additions of 240 sq. ft. typically cost $25,000 low-end, $36,000-$55,000 mid-range, and $72,000-$85,000+ high-end. Large additions of 400 sq. ft. generally start at $50,000 low-end, $80,000-$90,000 mid-range, and can reach $100,000-$160,000+. Key factors influencing price include room size and complexity, type of room (with kitchens and bathrooms costing more due to plumbing and electrical), materials and finishes, labor rates, permit and inspection fees, site preparation, and utility hookups. In rare cases, luxury primary suites, home offices, or upscale bathroom additions can cost $130,000-$250,000+, but this is not the norm for most projects. House Addition Cost Typically, the cost falls between $35,000 and $160,000 for all types and sizes. Standard single-room additions typically range from $21,000 to $100,000, with many basic projects landing around $48,000–$50,000. Cost per square foot is one of the best ways to compare: Typical range: $125–$250/sq. ft. Low end: $80–$100/sq. ft. (basic finishes, rural areas) High end: $300+/sq. ft. (urban areas, complex designs, premium finishes) Here are average costs that range for common house addition types, from basic bedrooms to full primary suites: Addition Type Typical Cost Range Small bedroom $20,000–$50,000 Bathroom $30,000–$90,000+ Kitchen $50,000–$125,000+ Living/Family room $30,000–$80,000 Primary suite $90,000–$175,000+ Sunroom $25,000–$70,000 Basement conversion $30–$50/sq. ft. (basic finish) Several key factors influence the cost of a house addition, and understanding them helps you plan your budget. Here are some of them: Size and scope: Larger, more complex builds cost more. Room type: Kitchens, baths, and accessory dwelling units (ADUs) are the most expensive. Materials and finishes: Custom or luxury choices increase totals quickly. Labor rates: Higher in cities like NYC, SF, and Seattle; lower in the Midwest and South. Permits, inspections, and site prep: Can add thousands to your project. Structural work: Foundation upgrades, roof tie-ins, and blending old with new add hidden expenses. Start with the national averages to set a baseline. Then, compare your planned room size and type to more detailed cost breakdowns. This helps you build a realistic budget before requesting contractor quotes. Real Homeowner Experiences & Community Insights Hearing from homeowners who have completed additions can give you a realistic picture of what to expect. These real stories highlight how costs often shift from the first quote to the final bill. 12×12 Bedroom Addition A Midwest homeowner planned a 144 sq. ft. bedroom with basic finishes. The initial quote was $22,000, but upgraded windows, better flooring, and extra outlets pushed the final cost to $28,500. Even small upgrades can add thousands to your budget. 20×20 Family Room In Texas, a 400 sq. ft. family room was quoted at $65,000. Unexpected foundation work and HVAC changes increased the total to $78,000. Hidden structural issues are common; plan a contingency fund. Kitchen Extension A California homeowner budgeted $95,000 for a kitchen extension. Premium appliances, custom cabinets, and high-end finishes raised the final cost to $128,000. Upgrades and custom work can increase your budget by 20–30%. Factors That Influence Room Addition Cost Several factors can affect how much you’ll pay for a room addition. Knowing these will help you set a realistic budget: Size and complexity: Larger builds or designs with complex layouts cost more to construct. Room type: Kitchens and bathrooms cost more than bedrooms or living rooms due to plumbing and electrical work. Materials and finishes: Premium flooring, fixtures, and custom-built elements raise the total. Labor rates and location: Urban areas often have higher labor and material costs than rural or suburban regions. Permits and code compliance: Meeting local building codes and passing inspections adds to the expense. Site preparation and demolition: Clearing the space, removing old structures, or grading land can add thousands. Custom features: Built-ins, specialty lighting, and unique architectural elements increase both time and cost. The more specialized your addition, the higher the cost. Balancing your wish list with your budget is key to keeping expenses in check. Room Addition Timeline The time needed for a room addition depends on the size and complexity of the project. A small bedroom or home office can take 4-8 weeks, while a bathroom addition usually runs 8-12 weeks. Kitchens often require 10-16 weeks, and larger spaces like a family room or multi-room addition may take 12-20 weeks. Complex projects, such as a primary suite, can extend to 16-24 weeks or more. Delays can add significant costs. Longer build times may mean higher labor expenses, rising material prices, or extra permit renewal fees. In some cases, you might also need temporary housing if parts of your home are unusable. Planning for a realistic schedule and allowing a buffer for setbacks can help you stay on budget and reduce stress during construction. Planning Checklist A smooth room addition starts with a clear plan. Use this checklist to keep your project on track from start to finish. Apply for the required permits early and schedule inspections at key stages. Choose licensed, insured professionals and check references before signing agreements. Decide on finishes, fixtures, and other materials in advance to avoid delays. Set a realistic timeline with clear checkpoints for each phase of construction. Following a checklist helps you stay organized, avoid delays, and keep your project within budget. Cost-Saving Strategies Experienced contractors say a few smart decisions can help you cut costs without sacrificing quality. You should consider these strategies for cost-saving: Building up instead of out: Adding a second story can be cheaper than expanding the footprint, especially when lot space is limited. Off-season construction: Scheduling work in the contractor’s slow season can lead to better pricing and availability. Reusing or recycling materials: Salvaging doors, fixtures, or trim from your own home or resale shops can save money and add character. Getting multiple quotes: Comparing at least three detailed bids helps you find the best value and avoid overpriced proposals. Negotiating labor contracts: Clear agreements on payment terms, timelines, and included work can prevent cost overruns. Careful planning and smart choices can make a big difference in keeping your addition on budget. Conclusion Adding more space to my home was exciting, but I quickly learned that knowing the room addition cost ahead of time made all the difference. Now you’ve seen how size, type, materials, and location can influence the price, and how other homeowners have handled their budgets. With that knowledge, you can plan smarter, avoid costly surprises, and make choices that work for your needs. I always recommend setting a realistic budget, keeping a contingency fund, and hiring experienced contractors. Even small upgrades can add big value when done right. If you’re ready to move forward, check out my other posts for more home improvement tips and ideas to help you create a space you’ll love while staying within budget. Frequently Asked Questions How can I finance a room addition? Common options include home equity loans, home equity lines of credit (HELOC), cash-out refinancing, and personal loans. Some homeowners also use renovation-specific financing programs. Can I live in my home during a room addition project? In many cases, yes. However, large or complex additions, especially kitchens or major structural changes, may require temporary relocation for safety and convenience. What’s the difference between a room addition and a bump-out? A bump-out expands an existing room without adding a full separate structure, making it smaller and less expensive than a full addition.
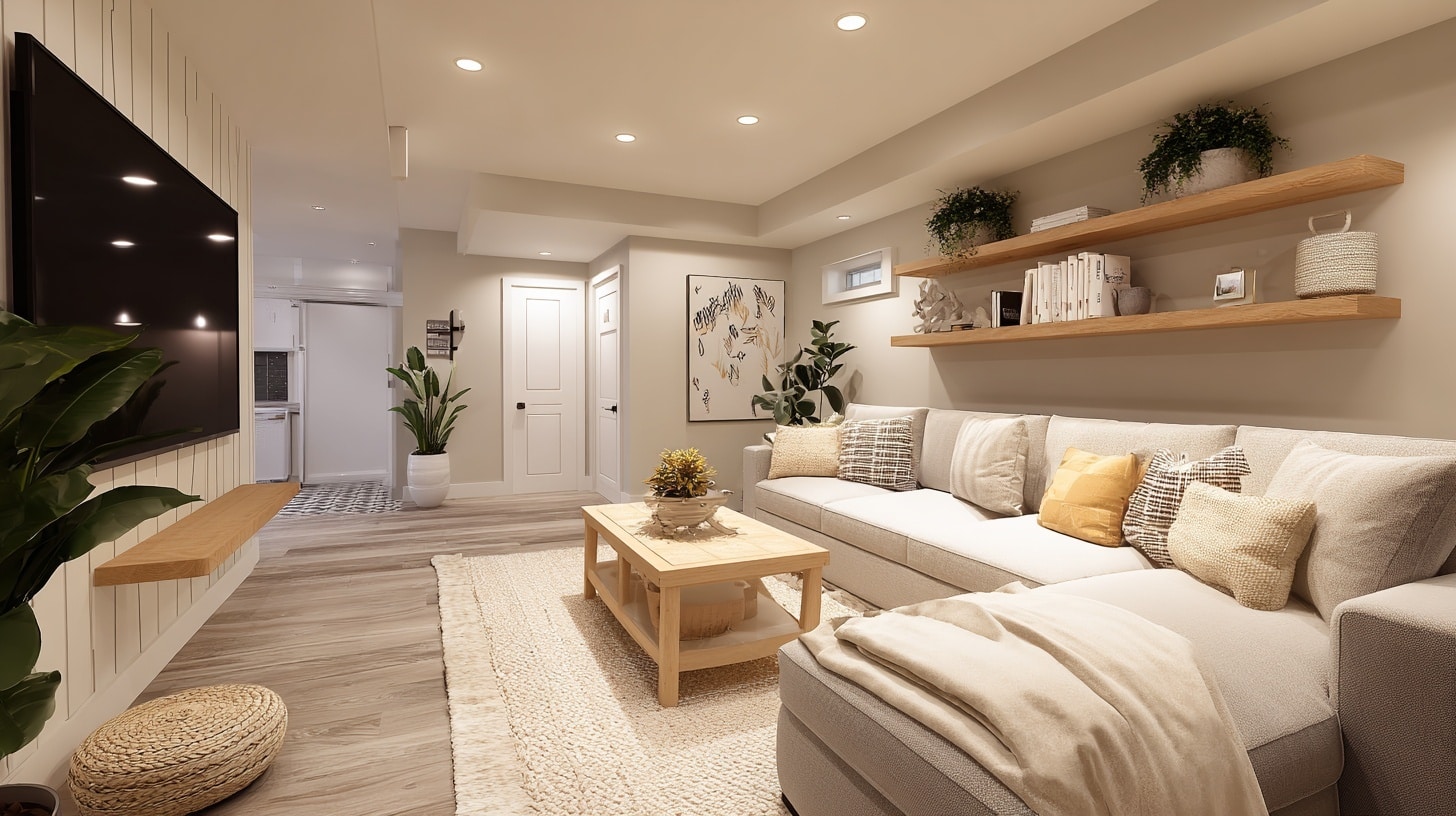
Thinking about upgrading your basement but not sure what it might cost? I get it, figuring out your basement remodel cost can feel overwhelming. Your price will depend on the size of your space, the materials you choose, and the scope of work you require. In this post, I’ll break down average costs, explain the main factors that affect your budget, and share real examples for different basement sizes. You’ll also see how you can save money without sacrificing quality, so you can set a realistic budget and move forward with confidence. What’s the Average Basement Remodel Cost? The average basement remodel cost varies widely, typically ranging from $20 to $75 per square foot, depending on materials, labor, and project scope. For a complete remodel, small basements may cost $11,000–$30,000, while large or complex spaces can exceed $150,000. Nationally, most homeowners spend between $22,000 and $34,000 for mid-range finishes and layouts. Your final price will also depend on factors such as waterproofing needs, electrical or plumbing upgrades, and local permit requirements. Understanding these averages helps set realistic expectations and budget effectively before gathering quotes from contractors or planning any do-it-yourself remodeling work. Basement Renovation Cost Multiple elements contribute to basement renovation cost, including size, materials, project scope, labor rates, permits, and regional variations. Here’s what to consider before starting your project: 1. Size of the basement The size of your basement is one of the biggest cost drivers in any renovation. Larger basements require more flooring, drywall, paint, lighting, and labor hours, which increases the total expense. Smaller basements may be cheaper overall, but could have a higher cost per square foot if the project involves custom layouts or complex design features. Knowing your exact square footage helps you estimate baseline costs before adding upgrades, finishing touches, or additional rooms that expand the scope of the project. 2. Materials & finishes Your choice of materials and finishes greatly affects the basement renovation cost. Standard options like laminate flooring and basic lighting fixtures cost less than hardwood, tile, or custom cabinetry. Similarly, simple painted drywall is cheaper than paneling or decorative wall treatments. Even small changes, such as upgrading countertops or selecting higher-end plumbing fixtures, can increase costs significantly. It’s essential to balance style preferences with budget limits to avoid overspending. Comparing prices from multiple suppliers can also help lower costs without sacrificing overall quality. 3. Scope of work (bathroom, kitchen, living space) The more functional areas you include, the higher your renovation cost will be. Adding a bathroom requires plumbing, ventilation, and fixtures, which can be costly. A basement kitchen involves electrical wiring, plumbing, appliances, and cabinetry. Expanding living areas with entertainment systems or built-ins increases expenses as well. Each added function also adds complexity to permits, inspections, and labor coordination. Defining your scope clearly at the planning stage helps avoid surprise costs and ensures your budget aligns with your project goals. 4. Labor costs by trade Labor makes up a large portion of the basement renovation cost, and rates vary depending on the trade. Electricians, plumbers, carpenters, and painters each have different hourly rates, often influenced by local demand and skill level. Specialized tasks, such as custom carpentry or tile installation, generally cost more per hour. Using licensed professionals ensures the work meets building codes, but their fees will be higher. Understanding the typical labor rates in your area helps create a more accurate budget for the project. 5. Permits and inspections Many basement renovations require permits for electrical, plumbing, or structural changes. Permit fees vary by location but can add $500–$2,000 to your budget. In addition, most municipalities require inspections to ensure the work meets safety and building code standards. Failing to obtain proper permits can lead to costly fines or having to redo work. Including permit and inspection costs in your initial budget planning helps prevent delays and ensures your renovation is completed legally and safely from start to finish. 6. Waterproofing & foundation repairs Waterproofing and foundation work can be a major hidden cost in basement renovations. Addressing leaks, cracks, or drainage problems before finishing walls and floors prevents future water damage. Common waterproofing solutions include sealants, drainage systems, and sump pumps, while foundation repairs may require structural reinforcement. Costs vary depending on the severity of the issue and the method used. Skipping this step can lead to costly repairs later, so it’s best to address these problems before starting cosmetic improvements or installations. 7. Location-based variations Where you live plays a big role in the basement renovation cost. Urban areas with high labor demand may have higher contractor rates, while rural areas may have fewer specialists available. Material costs can also vary based on shipping distances and supplier availability. Local building codes and permit requirements can further impact the budget. Understanding these regional differences helps you set realistic expectations and plan accordingly. Always compare quotes from multiple local contractors to ensure you’re getting fair pricing for your area. Basement Remodel Cost by Size Costs vary significantly by square footage. Below are examples with typical inclusions, finish levels, and regional price comparisons for each size category: 1. Finish Basement Cost for 700 sq ft A 700 sq ft basement remodel typically costs $14,000–$24,500 for basic, $24,500–$38,500 for upgraded, and $38,500+ for luxury finishes. Basic projects might include one living area, basic flooring, and painted walls. Upgraded remodels often add improved lighting, quality flooring, and minor built-ins. Luxury versions may feature a small bathroom, custom cabinetry, or premium flooring. Costs are lower in rural Midwest areas and higher in major coastal cities. 2. Finish Basement Cost for 1200 sq ft For 1200 sq ft, expect $24,000–$42,000 for basic, $42,000–$66,000 for upgraded, and $66,000+ for luxury finishes. Basic layouts usually include an open living space and storage areas. Upgraded designs may feature a guest bedroom, wet bar, or improved lighting. Luxury options often include a bathroom, entertainment center, or kitchenette. Regional differences are notable; smaller cities in the South may charge far less than metropolitan markets like New York or San Francisco. 3. Finish Basement Cost for 1500 sq ft A 1500 sq ft basement remodel can range from $30,000–$52,500 for basic, $52,500–$82,500 for upgraded, and $82,500+ for luxury finishes. Basic remodels often include open space and basic flooring. Upgraded versions may add a full bathroom, multiple rooms, and quality materials. Luxury remodels could feature a full kitchen, high-end flooring, custom lighting, and built-ins. Pricing is typically lower in low-cost regions and significantly higher in high-demand urban areas. 4. Finish Basement Cost for 1000 sq ft A 1000 sq ft basement remodel typically costs $20,000–$35,000 for basic finishes, $35,000–$55,000 for upgraded, and $55,000+ for luxury. Basic layouts may include an open living space and standard flooring. Upgraded designs could add a small bedroom or office, better lighting, and mid-range flooring. Luxury versions may feature a bathroom, wet bar, or premium finishes. Costs can be $5,000–$8,000 lower in rural Midwest markets and $8,000–$12,000 higher in large coastal cities. 5. Finish Basement Cost for 2000+ sq ft For very large basements of 2000 sq ft or more, expect $40,000–$70,000 for basic, $70,000–$110,000 for upgraded, and $110,000+ for luxury remodels. Basic layouts might offer an open recreation area and storage. Upgraded remodels could add multiple bedrooms, bathrooms, or entertainment zones. Luxury spaces may include full kitchens, home theaters, gyms, or custom finishes. Pricing is notably lower in smaller cities or rural regions and can be $20,000–$40,000 higher in high-demand urban markets. Comparison Table: Basement Remodel Cost by Size and Finish Level Basement remodel costs can vary greatly depending on the size of the space and the level of finish you choose. Here’s a comparison table to guide you: Basement Size Basic Cost Range Upgraded Cost Range Luxury Cost Range Midwest Average Coastal City Average 700 sq ft $14k–$24.5k $24.5k–$38.5k $38.5k+ -$4k avg +$6k avg 1000 sq ft $20k–$35k $35k–$55k $55k+ -$5k avg +$8k avg 1200 sq ft $24k–$42k $42k–$66k $66k+ -$6k avg +$9k avg 1500 sq ft $30k–$52.5k $52.5k–$82.5k $82.5k+ -$7k avg +$12k avg 2000+ sq ft $40k–$70k $70k–$110k $110k+ -$10k avg +$20k avg Use these figures as a guide, but always get local quotes for the most accurate basement remodel cost estimates. Cost-Saving Strategies Reducing basement remodel expenses is possible with careful planning and smart choices. Start by sourcing materials from multiple suppliers to compare prices and take advantage of sales or clearance items. Incorporating prefabricated elements, like prebuilt cabinets or wall panels, can cut labor time and reduce installation costs. Consider a phased remodeling approach, completing essential work first and adding upgrades later as your budget allows. Always gather multiple quotes from contractors to find the best balance between quality and price. These strategies, when combined, can help you maintain high standards while keeping your overall renovation costs under control. DIY vs. Professional Remodel Choosing between DIY and hiring professionals affects cost, timeline, and quality. This comparison shows key differences for basement remodeling projects: Aspect DIY Approach Professional Remodel When DIY Makes Sense Small cosmetic updates, painting, and flooring Large structural changes, complex installations Tasks to Leave to Pros Electrical work, plumbing, and load-bearing walls Specialized trades ensure safety, code compliance Cost Comparisons Lower upfront cost, possible mistakes Higher upfront cost, better long-term quality Use DIY for simple updates, but hire licensed professionals for complex work to ensure safety, quality, and long-term value. ROI and Resale Value of a Basement A well-planned basement remodel can boost your home’s value by 50%–75% of the renovation cost, depending on market conditions. For example, a $40,000 remodel might increase resale value by $20,000–$30,000. Factors influencing ROI include the quality of materials, functionality added, and regional real estate trends. Adding living space, a bathroom, or a rental unit typically yields higher returns. Market demand for finished basements in your area also plays a big role. To maximize resale value, focus on improvements that appeal to a wide range of buyers and enhance the home’s overall livability and practicality. Common Mistakes to Avoid Avoiding common mistakes during a basement remodel can save money, prevent delays, and ensure long-term satisfaction with the finished space. Here are some common mistakes to watch out for before you get started: Underestimating permits: Skipping or underbudgeting permits can cause fines, project delays, and required rework to meet building codes. Ignoring waterproofing: Overlooking water issues can lead to mold, structural damage, and costly repairs after the remodel is complete. Over-customizing for resale: Highly personalized designs may reduce buyer interest and limit your home’s appeal to a broader market. By avoiding these mistakes, you can keep your basement renovation on budget, on schedule, and aligned with the vision you have for your space. Basement Remodel Cost Calculator An interactive basement remodel cost calculator can help you estimate expenses based on your location, basement size, and project scope. By entering details like square footage, desired finishes, and additional features, you can generate a personalized cost range. These calculators often include regional labor rates and material pricing, making estimates more accurate. They’re a valuable starting point for budgeting, allowing you to compare scenarios and adjust plans before contacting contractors. Using this tool helps you set realistic expectations and avoid unpleasant budget surprises. Conclusion From my experience, basement remodel costs depend on several factors: square footage, finish level, location, and even local labor rates. If you understand the typical price ranges and know where you can save, you’ll be able to make smarter choices for your project. I suggest using these details to compare your options and get accurate quotes from contractors in your area. When you plan it well, a basement remodel can increase your home’s value and give you a space you’ll truly enjoy for years. If you’re looking for more ideas and practical tips to guide you through your next home project, check out other home improvement guides on the website!

Have you ever thought why some people’s flower arrangements look fresh for weeks while yours droop after just days? I’m excited to teach you exactly how to cut flowers for a vase like a florist does. Most people make simple mistakes that kill their beautiful blooms before they even get started. You’ll find the secret timing that makes flowers last much longer than you ever imagined possible. I’ll show you which tools actually work and which ones secretly damage your precious stems. You’ll learn why the way you handle flowers right after cutting makes all the difference. Let’s turn you into a flower-cutting master who creates arrangements that make everyone stop and stare. Why Flower Cutting Technique Matters The way you cut a flower stem makes a huge difference in how long it stays beautiful. A clean, sharp cut creates an open pathway for water to flow up into the petals. When you use dull scissors or crush the stem, you block this water highway completely. Think of it like drinking through a straw that’s been pinched shut at the bottom. Your flower can’t get the water it desperately needs to stay fresh and colorful. A properly angled cut also prevents the stem from sitting flat against the vase bottom. This keeps water flowing freely and stops bacteria from building up around the cut area. Good cutting technique doubles your flowers’ lifespan. How to Cut Flowers for A Vase: Step-By-Step Guide I’ll guide you through cutting flowers with basic tools (like clean secateurs and a water bucket). You’ll find the perfect timing and methods that make your fresh blooms last longer in vases. Step 1: Pick Flowers Early Morning or Evening The best time to cut flowers is early in the morning or later in the evening when the weather is cooler. Cooler air helps the plants stay hydrated and reduces stress on the stems. Avoid cutting flowers during the middle of the day when the sun is strongest. Flowers picked in cooler conditions last longer in a vase and keep their shape, color, and freshness better than those picked in heat. Step 2: Cut at the Right Stage of Bloom Don’t pick flowers that are already fully open. Choose ones just beginning to open or those that are slightly cracked. Pollinated or mature flowers won’t last long after cutting because their life cycle is almost done. Picking flowers at the early bloom stage ensures they continue opening in the vase and stay fresh longer. The goal is to catch them before bees visit, so they hold their shape and color better. Step 3: Use Sharp, Clean Secateurs Always use clean and sharp bypass secateurs when cutting flowers. Dull blades can crush stems and block water flow, which causes early wilting. Sharp tools help you make clean cuts that allow better water absorption. Cleaning your secateurs also prevents the spread of disease between plants. A clean, angled cut keeps the stem open longer, helping the flower stay hydrated, upright, and healthy for several more days in your arrangement. Step 4: Place Stems in Cool Water Right Away As soon as you cut a flower, place it in a clean bucket filled with cool water. Even a few minutes without water can dry out the stem. Put the bucket in a shaded or cool spot so the flowers can rest. Cooling helps lower their temperature and prevent wilting. Let the stems sit for a few hours or overnight so they can soak up water and prepare for your final vase display. Follow Along: How to Cut Flowers for a Vase For more information, visit Bloom & Gray – Flower Farm How to Keep Cut Flowers Fresh Longer Your beautiful flowers don’t have to wilt after just a few days with proper care. These simple tricks help extend their life and keep them looking gorgeous in your vase: Remove wilted petals and leaves daily: Pull off any brown or droopy parts so the flower puts energy into healthy petals instead. Add flower food or a pinch of sugar to the water: This gives your blooms the nutrients they need to stay vibrant and strong. Keep your vase away from air vents and fans: Moving air dries out petals faster and makes flowers wilt much sooner than normal. Mist the petals lightly with a spray bottle: A gentle water spray keeps them hydrated from the outside, especially on hot days. Use a clean vase and wash it between flower changes: Bacteria from old water can kill new flowers before they even get a chance to bloom. These easy steps take just a few minutes each day but make your flowers last much longer. Your extra care will reward you with beautiful blooms that brighten your home for weeks. What Not to Do When Cutting Flowers Even experienced gardeners make simple errors that can quickly ruin their beautiful flower arrangements. Learning what not to do saves you time, money, and keeps your blooms looking perfect. Here’s what to avoid when cutting flowers: Cutting stems underwater or in the sink creates air bubbles inside, blocking water from reaching the flower head properly. Using hot or warm water in your vase causes heat shock to the stems, making flowers wilt faster than cold water ever could. Placing different flower types together without research can be harmful since some flowers release chemicals that kill other varieties sooner. Forgetting to condition stems before arranging by jumping straight into design work stresses the flowers and shortens their lifespan unnecessarily. Avoiding these common errors makes the difference between flowers that last days versus weeks in your home. Small changes in your routine lead to much better results and happier, healthier blooms every single time. Final Thoughts Your flower-cutting skills can help you enjoy a garden-fresh look in your home all year long. I’ve shared everything you need to know about how to cut flowers for a vase successfully. You now understand the perfect timing, proper tools, and gentle techniques that keep blooms looking amazing. Remember that even small changes in your routine can double or triple your flowers’ lifespan. Fresh flowers bring joy and color into any space when you treat them with the right care. Don’t let another beautiful bloom go to waste because of simple mistakes you can easily avoid. Your blooms will thank you by staying gorgeous longer, so comment below and share your flower-cutting experiences with everyone!
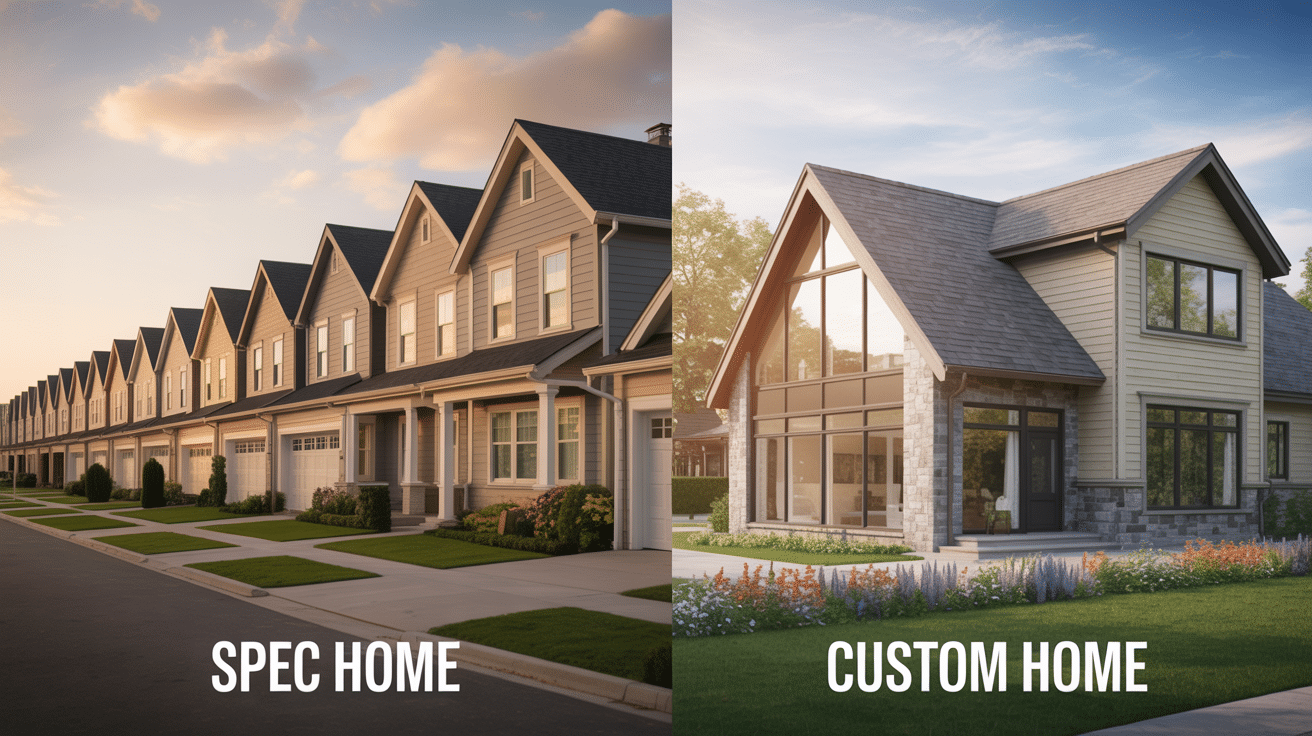
Buying a house is a huge step, and it’s normal to feel nervous. When it’s time to choose, you’ll likely face two main paths: a spec home, which builders finish before a buyer comes along, or a custom home, designed and built just for you. Each option has pros and cons that affect cost, timeline, and how well the home fits your lifestyle. In this post, I’ll break down the difference between spec home vs custom home so you can make the choice that works best for your needs and long-term happiness. Which one feels like the right fit for you? Spec Home vs Custom Home Let me break this down in a simple way so you can see the biggest differences between spec homes and custom homes. Feature Spec Home Custom Home Build timeline Short Long How much can you change Not much A lot Know what you’ll pay Pretty sure Could change Picking what it looks like Very little You choose everything When can you move in Right away or soon After it’s all built This table makes it easy to see the big differences between these two types of homes. Spec homes are like buying something that’s already made; it’s faster and you know what you’re getting, but you can’t change much. Custom homes are like ordering something special just for you; it takes longer and might cost more than you first thought, but you get exactly what you want. Which column sounds better to you so far? What Is a Spec Home? A spec home is a house that builders make before anyone buys it. It’s like when a store makes cookies and puts them on the shelf, hoping someone will want to buy them. The builder doesn’t know who will live there; they just build it and hope it sells. Here’s what you need to know about spec homes: Standard floor plans: The builder uses the same basic house design repeatedly. It’s like using the same recipe to make lots of cookies. You can move in fast: Since the house is already built or almost done, you won’t have to wait very long to move in. Maybe just a few weeks or months. You can’t change much: If you buy early, you might get to pick your paint colors or what your kitchen cabinets look like. But you can’t move walls around or add rooms. Think of it like buying a ready-made pizza instead of making your own from scratch. Pros and Cons of a Spec Home Let me show you the biggest ups and downs of building spec homes so you can see if it’s right for you. Category Pros Cons Time Move in fast Can’t change the layout Choices Less stress Might not fit your needs Money Costs less May settle for an okay location Price Know what you’ll pay Limited options As you can see, spec homes are great if you want something quick and simple, but they might not work if you have specific needs or dreams for your home. What Is a Custom Home? A custom home is a house that gets built just for you from the very beginning. It’s like having someone make you a one-of-a-kind birthday cake instead of buying one from the store. You get to pick everything, from where the rooms go to what color the walls are. Here’s what makes custom homes special: Unique layouts: You can put rooms wherever you want them. Want a huge kitchen? You got it. Need an extra bedroom for your hobby room? No problem. The house gets designed around how your family actually lives. You control everything: You pick the floors, the cabinets, the light switches, even where the electrical outlets go. If you can dream it, you can probably build it. Takes a long time: Since they’re building your house from scratch, it usually takes about a year or more before you can move in. You have to be patient. Think of it like ordering a pizza with exactly the toppings you want instead of just picking one off the menu. Pros and Cons of a Custom Home Here’s what you need to know about building a house made just for you. Category Pros Cons Time Built exactly right Takes a long time Choices You control everything Lots of decisions Money Get what you pay for Costs more Price Pick your budget The budget might change Custom homes let you build exactly what you want, but you’ll need more time, money, and patience to make it happen. Spec vs Custom Home Cost Breakdown Let’s talk about money – because that’s probably what you’re most worried about. How Much You’ll Pay Upfront. Spec homes usually cost $150,000 to $400,000. Custom homes start around $200,000 but can go way higher, sometimes $500,000 or more. Getting a Loan. Spec homes are easy; the bank can see the finished house. Custom homes need a special construction loan first, then switch to a regular loan when done. Banks often want more money down. What Your House Will Be Worth Later. Spec homes keep their value well since they have popular features. Custom homes might be worth more if you picked smart upgrades, but harder to sell if you built something too personal. The bottom line? Spec homes cost less to start, but custom homes might be worth more later. Which Option Is Right for You? Choosing between a spec home and a custom home depends on what you need most right now. If you need to move quickly due to work commitments or an upcoming apartment lease, consider a spec home, as it’s ready to go quickly. When you’re on a tight budget, spec homes are a cost-effective option that won’t surprise you with unexpected bills. Some people get stressed picking between tons of different tiles and paint colors, so spec homes feel easier. Others love choosing every little thing and want their house to be perfect for their family. Just think about what matters most to you right now. Wrapping It Up Now that I’ve walked you through the big differences between spec home vs custom home, you can see the trade-offs more clearly. A spec home gets you moved in fast and usually costs less, but you can’t change much. A custom home lets you design every detail, but it takes longer and can cost more. If I were in your shoes, I’d think hard about what matters most right now. Do you need to move quickly? Are you trying to save money? Or do you have a vision for your dream home? There’s no wrong choice, only what’s right for you. Talk it over with your family, then check out other guides to make house-hunting easier.
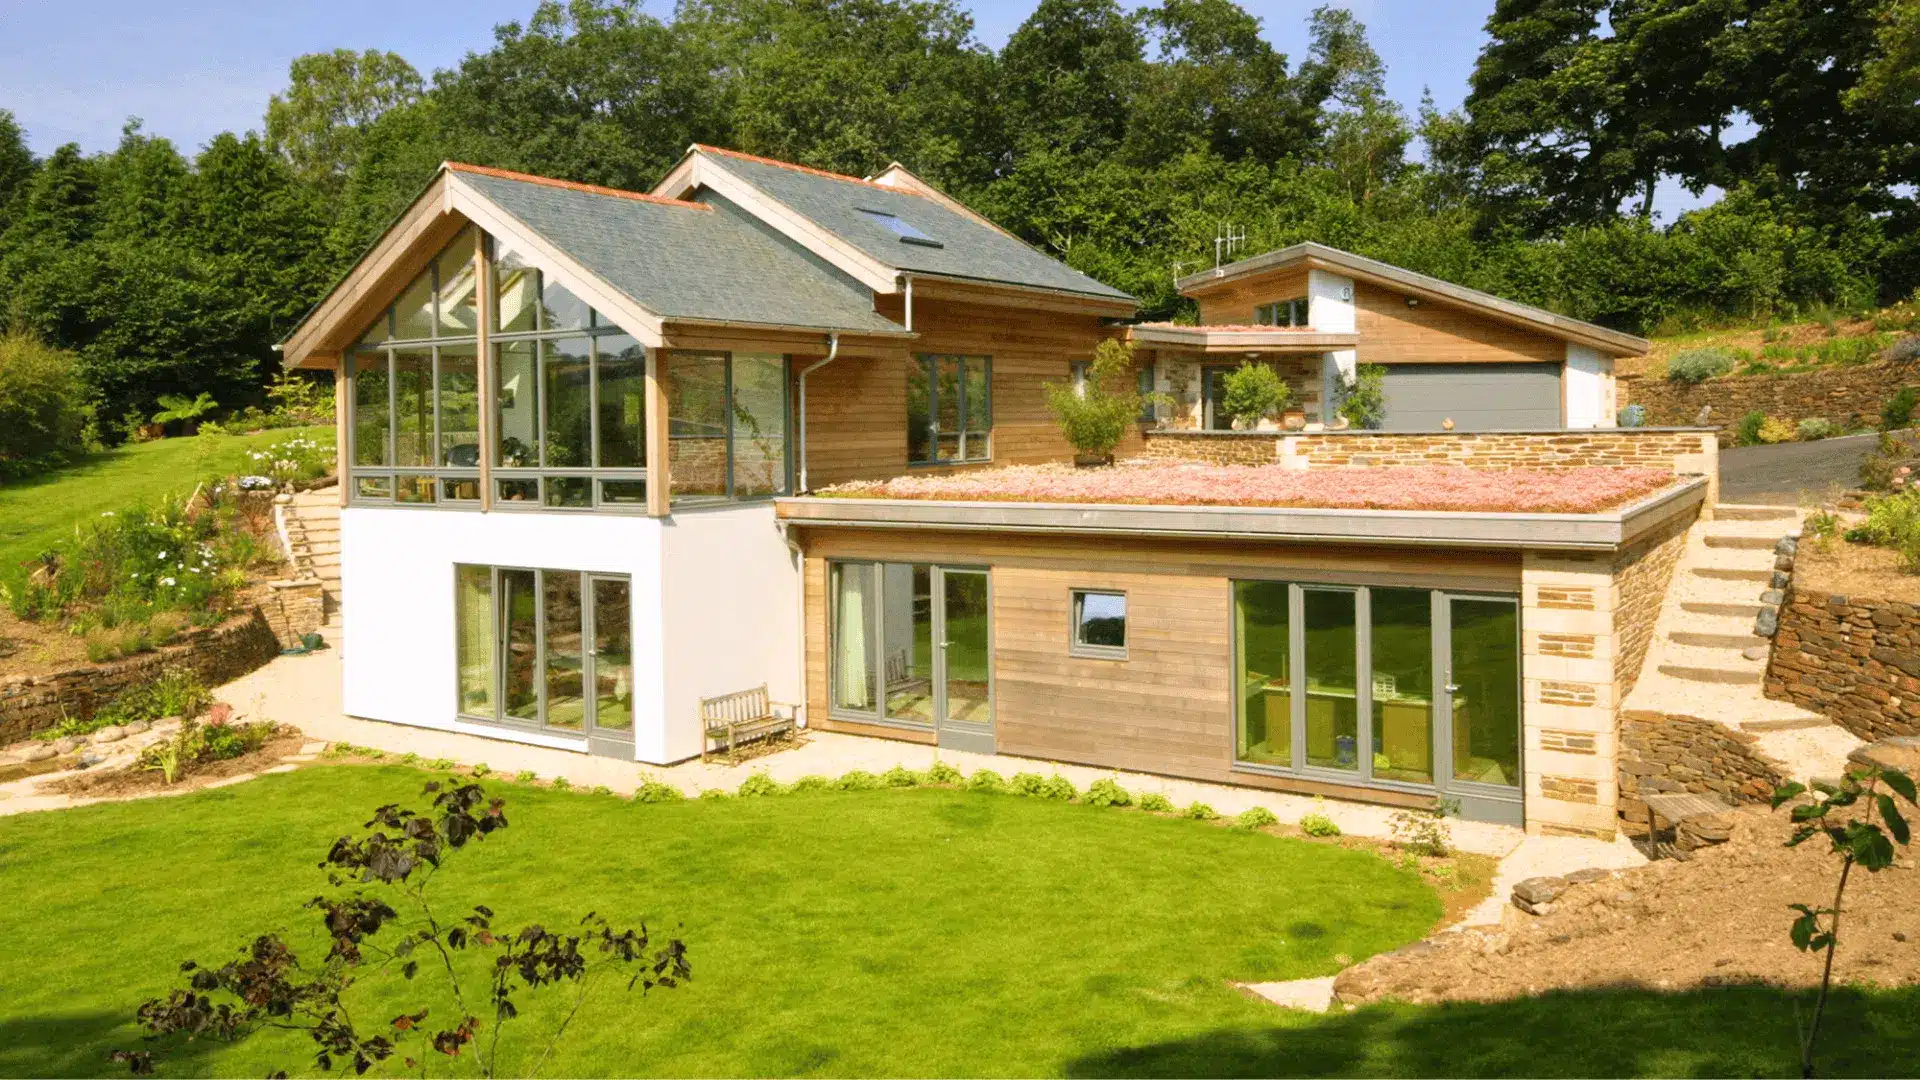
When I first thought about building my home, I had no idea where to begin. Maybe you’re asking yourself, “I want to build a house on my land. Where do I start?” I understand. With so many steps and decisions, it can feel overwhelming. With the right plan, you can turn an empty lot into a finished home without unnecessary stress. I’ll guide you through checking if your land is ready, choosing the right builders, and avoiding common mistakes. You’ll also find real stories and practical tips to help you make smart choices. If you’re ready to turn your land into a home, keep reading. If I Want to Build a House on My Land. Where Do I Start? Building a home on your own land starts with confirming it’s build-ready through a land survey, soil testing, and zoning checks. This is a critical first step when you plan to build your own house, making sure the site meets all legal and structural requirements. Next, secure financing, understand total costs, and plan a realistic budget and timeline. Work with an architect or builder to design a home that suits your lifestyle and site conditions, then obtain all required permits before breaking ground. Prepare the site by clearing, grading, and setting proper drainage, followed by constructing the foundation, framing, and roofing. Once the structure is weatherproof, install essential utilities like plumbing, electrical, and HVAC systems. Complete interior and exterior finishes, schedule final inspections to ensure code compliance, and once approved, you can move into your newly completed home. How To Build Your Own House: A Step-by-Step Guide Building a home on your own land can be exciting, but it requires careful planning and clear steps to avoid costly mistakes. Here’s a simple breakdown to help you get started: Step 1: Check if the Land is Buildable Start by verifying zoning rules, building codes, and whether your lot is in a flood zone. Confirm access to utilities like water, sewer, and electricity. If not available, plan for a well and septic system to meet your needs. Step 2: Prepare the Site Clear vegetation, level the ground, and build up a compacted pad to ensure proper drainage. Set up your permit box, porta-potty, and any required safety measures. Consider installing cameras or security to protect materials on site. Step 3: Lay the Foundation Form and pour the footings, add rebar for structural strength, and rough in plumbing and water lines before the slab is poured. In some areas, concrete block walls may be added for hurricane resistance. Step 4: Build the Structure Frame the house, set the trusses, and install the roof to make the structure weather-tight. Complete rough plumbing, electrical wiring, and HVAC ductwork during this stage before insulation and drywall. Step 5: Install Utilities & Exterior Protections Connect the home to public utilities or install the well, pressure tank, and septic system. Add gutters, extended downspouts, and grading to move water away from the foundation and protect the pad. Step 6: Finish and Inspect Add flooring, cabinetry, fixtures, siding, and paint to complete the home. Landscape the yard, schedule all required inspections, obtain your certificate of occupancy, and move in. By following these steps in order, you’ll stay organized, meet local requirements, and move into a well-built home that’s ready to last for years. For a detailed overview, watch this video: How to Check If Your Land is Ready for Building Before starting construction, it’s important to make sure your property can legally and safely support a home. Begin by confirming zoning regulations and building codes with your local planning department to make sure your intended use is allowed. Check for easements, deed restrictions, or HOA rules that could limit your design or placement. Next, arrange a land survey to establish boundaries and identify any encroachments. Conduct a soil test to determine the soil’s load-bearing capacity and drainage quality. This will guide your foundation design. Evaluate utility access for water, sewer, electricity, and gas; if unavailable, plan for a well, septic system, or alternative power sources. Finally, review environmental and topographical factors, such as flood zones, slope, and drainage patterns, which can affect both construction costs and long-term maintenance. By addressing these checks early, you’ll avoid costly surprises and make sure the land is truly build-ready. Best Tips for Working with Builders and Contractors Working with the right builder or contractor can save you time, money, and stress. These tips will help you choose the right professional and maintain a smooth working relationship: Research and Verify Credentials: Look for licensed, insured builders with proven experience in projects like yours. Check references, read reviews, and visit past or active job sites to assess quality. Set Clear Expectations Upfront: Discuss your budget, project timeline, and desired outcomes before signing a contract. Ensure all details, from materials to payment schedules, are documented in writing. Communicate Regularly: Schedule consistent check-ins to track progress and address questions early. Use photos, site visits, or reports to stay informed without micromanaging. Understand the Contract: Review every clause carefully, especially regarding change orders and additional costs. Knowing what’s included prevents unexpected expenses later. Build a Respectful Relationship: Be professional, responsive, and open to their expertise. A cooperative approach often leads to better solutions and smoother problem-solving. By choosing the right builder and fostering open communication, you can keep your project on schedule, control costs, and get the results you envisioned. Should You Build or Buy? Pros and Cons Choosing between building a new home and buying an existing one comes down to your priorities, budget, and timeline. This table highlights the main pros and cons of each option: Option Pros Cons Build a Home Full control over design, layout, and featuresEverything is brand Potential for better energy efficiency and lower maintenance early on Longer timeline to completeHigher risk of cost overrunsPossible delays from labor or material shortages Buy an Existing Home Faster move-in, often within weeksEstablished neighborhoods with amenities and landscaping, initial planning required May need to compromise on design or locationPotential repairs and updates neededOlder systems may mean higher maintenance costs If you value customization and modern features, building might be worth the wait. If you want speed and convenience, buying could be the better fit. Stories of Turning Land into a Home Andre Ewert, Former Real Estate CEO and Investor (1983–2009) He shared the story of a friend in Mexico who, with no money for a larger home, began by simply drawing plans for a house on his land. A chance encounter with a neighbor led to funding once the build was 80% complete, and through savings, credit, and persistence, he finished the home before the program closed. Robert Bernard Sawyer, AIA: Architect He described the “pod concept,” which involves starting with a small, expandable core structure to keep costs low. Inspired by Frank Lloyd Wright’s 1940s Usonian houses, this approach uses affordable materials and sustainable features like solar and greywater systems. With planning and the willingness to start small, anyone can gradually create a functional, lasting home. Common Mistakes to Avoid Even with the best planning, certain oversights can delay your project or increase costs. Knowing these common mistakes will help you avoid unnecessary setbacks. Skipping a Land Survey: Failing to confirm property boundaries can lead to disputes with neighbors and costly adjustments during construction. Overlooking Soil and Site Conditions: Poor soil, drainage issues, or steep slopes can require expensive foundation changes if not addressed early. Not Checking Zoning and Permits: Starting work without proper approvals can result in fines, delays, or even demolition orders. Underestimating the Budget: Ignoring hidden costs like utility connections, site prep, and permit fees can strain finances before the project is complete. Choosing the Wrong Builder: Hiring without checking credentials, references, and past work can lead to quality issues and missed deadlines. Neglecting Future Maintenance Needs: Designing without considering upkeep, such as drainage systems or durable exterior materials, can cause long-term problems. By planning carefully, working with trusted professionals, and addressing potential issues early, you can keep your build on schedule and within budget. Conclusion Building a home can seem like a big challenge, but with the right steps, it’s completely manageable. By now, you know how to check if your land is ready, plan your budget, work with builders, and avoid costly mistakes. If you’ve been asking yourself, “I want to build a house on my land. Where do I start?” this gives you a clear path forward. Start small, plan carefully, and take each step as it comes. Stay flexible, keep communication open, and make choices that work for your long-term needs. For more ideas and practical tips to support your project, check out my other posts on home building, design, and maintenance.
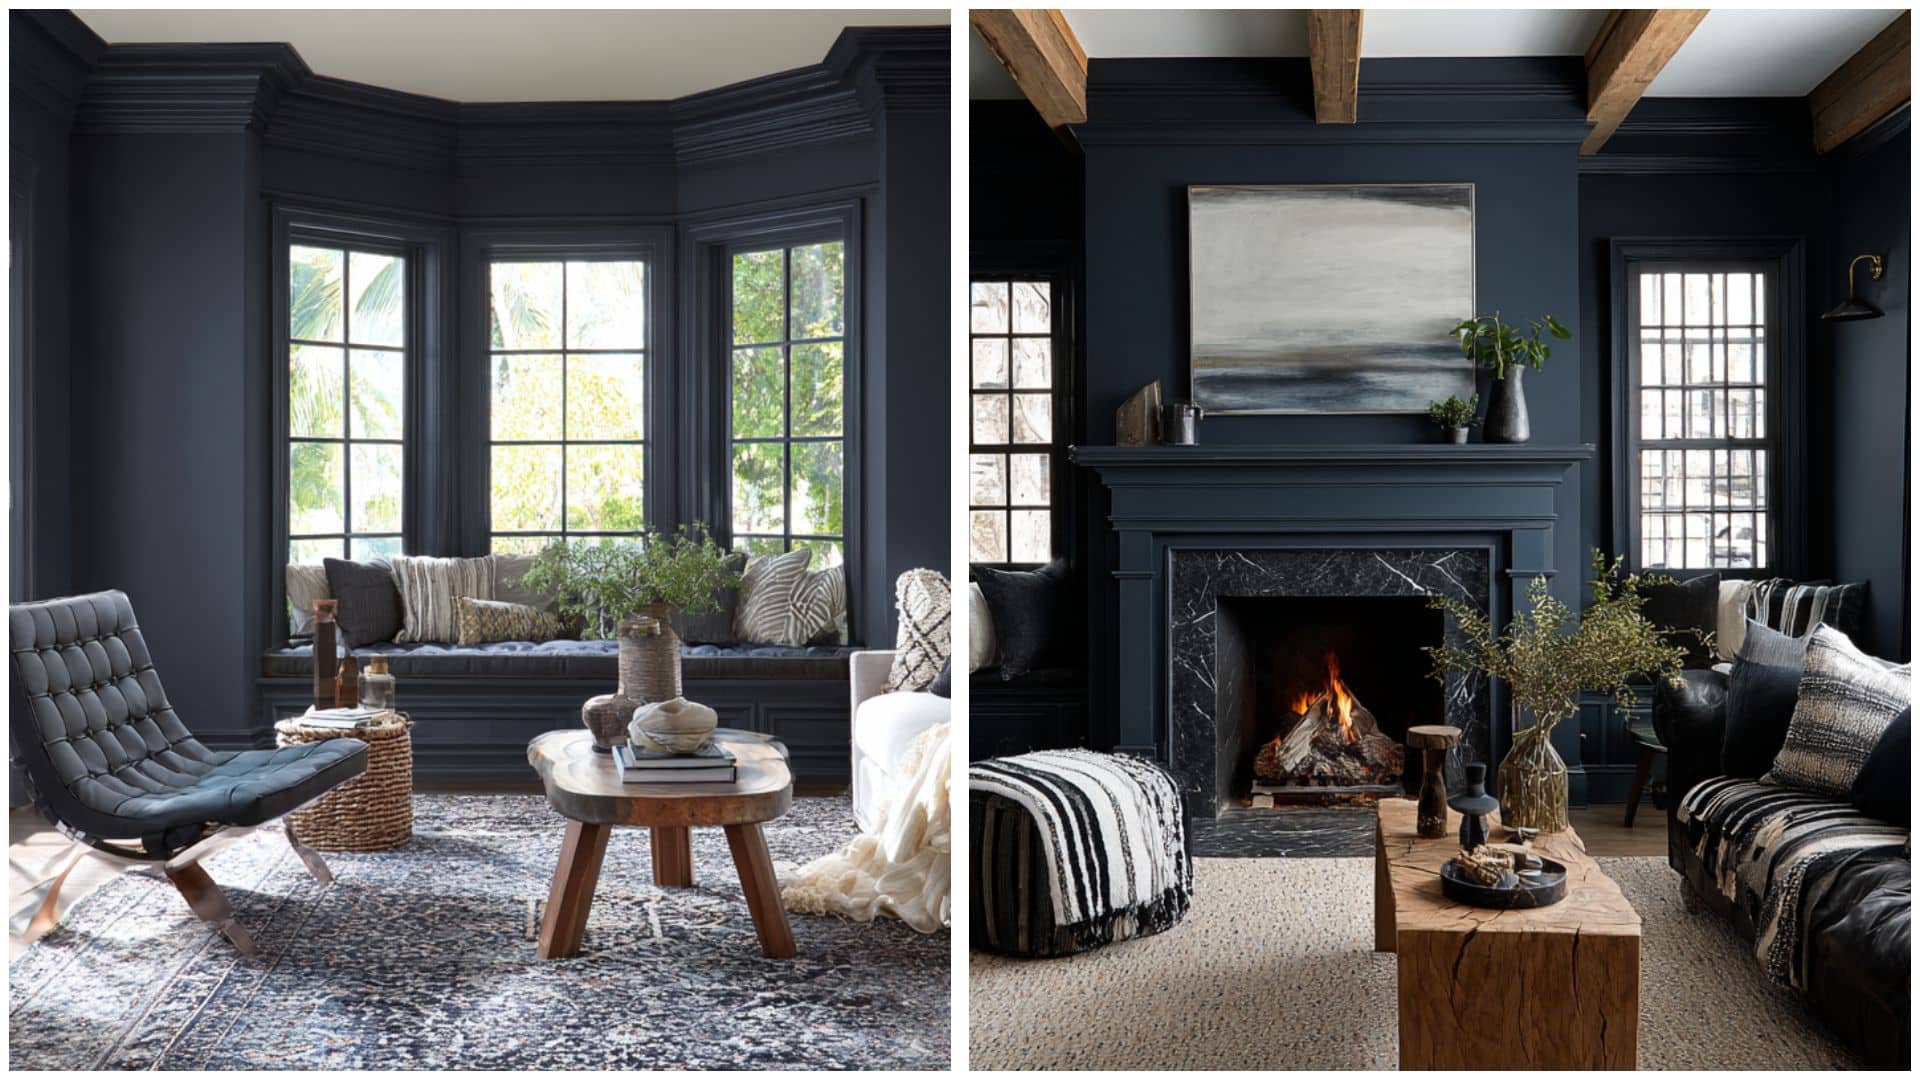
I’ve gone back and forth more than once between Benjamin Moore Hale Navy and Sherwin-Williams Naval for painting projects. These two gorgeous navy blues are among the most popular dark paint colors that homeowners love using today. Both colors bring refinement and style to any room, but they each have their own special personality and class, much like tones such as Smoky Blue SW 7604 that offer a softer take on deep blues. I created this comparison to help you understand which navy blue fits your space and decorating dreams perfectly. You’ll learn how these colors behave in different lighting, which rooms they work best in, and what colors pair beautifully with each shade. Get ready to find your perfect navy blue match! Color Comparison: Hale Navy vs. Naval Both Benjamin moore Hale Navy (HC-154) and Sherwin-Williams Naval (SW 6244) are popular dark blue paint colors that work well in many different rooms. These rich blues create calming spaces while adding refinement to your home decor. Hale Navy has a softer, more muted blue tone with subtle gray undertones that feel gentle and welcoming. This color works beautifully with white trim and creates a classic look in bedrooms and living rooms. Naval is a deeper, more intense blue with stronger pigments that make a bold statement in any space. This darker shade works especially well as an accent wall or in rooms with plenty of natural light for a dramatic effect, and it pairs nicely with lighter neutrals like Moonshine Benjamin Moore for balance. Color Terminologies and Undertones Understanding the technical specifications of these two popular navy paint colors helps you make the right choice for your space. These details highlight the key differences between the Naval and the Hale Navy, which affect their appearance in your room: Color LRV Hex Code RGB Values Undertones Sherwin-Williams Naval (SW 6244) 4 #2F3D4C 47, 61, 76 Blue with subtle maritime undertones Benjamin Moore Hale Navy (HC-154) 8.36 #434B56 67, 75, 86 Blue with charcoal undertones Naval has a very low LRV, making it an intensely dark color that absorbs most light, while Hale Navy has a slightly higher LRV, making it somewhat lighter but still a dark color. These technical differences help explain why the colors appear different on your walls and work better in certain lighting conditions. How Hale Navy and Naval Look in Different Spaces These two navy colors perform differently depending on which room you choose to paint in your home. Understanding how each color works in various spaces helps you pick the right shade for your specific needs. Here’s how the Hale Navy and Naval work in various spaces: Living Room Hale Navy offers similar enlightenment with a softer approach that works better in various lighting conditions. It creates depth without being too intense, making it perfect for larger wall areas in living rooms. Naval creates a dramatic focal point when used on an accent wall behind your couch or fireplace. The deep color makes lighter furniture and artwork pop against its rich backdrop, but might feel overwhelming in smaller spaces. Bedroom Hale Navy feels more relaxing and peaceful in bedrooms, creating a calming atmosphere perfect for rest. Its softer tone works well on multiple walls without overwhelming the room with darkness. Naval brings bold drama to bedrooms, working especially well behind headboards as a statement wall. The intense color creates a cocooning effect that some people love for their sleeping retreat space. Bathroom Hale Navy performs better in most bathroom sizes because it reflects more light while maintaining refinement. It creates a calming, spa-like atmosphere without making the space feel too closed in. Naval works best in larger bathrooms with excellent lighting, creating a spa-like luxury feel. However, it can make smaller powder rooms feel cramped and dark if not used carefully with proper lighting. Kitchen Hale Navy offers a refined style that works better in smaller kitchens or galley layouts. It provides depth and classiness while maintaining a more approachable feel for everyday cooking and family gatherings. Naval makes an attractive statement on lower cabinets or kitchen islands, hiding fingerprints well in busy cooking spaces. The dramatic color needs plenty of lighting to prevent the kitchen from feeling too dark and closed off. Color Pairing of Both Blues Both Naval and Hale Navy work beautifully with different color palettes that bring out their unique undertones. Choosing the right companion colors helps these navy shades shine in your home decorating projects. Here’s how they compare: Sherwin-Williams Naval (SW 6244) Naval’s deep maritime character with subtle blue hues creates a urbane backdrop that pairs beautifully with both warm and cool colors. The color’s low light reflectance makes it perfect for creating dramatic contrast with lighter shades. Its rich depth brings out the best in crisp whites, soft neutrals, and warm earth tones throughout your home. Icicle (SW 6238): A cool, crisp white that creates a surprising contrast Ramie (SW 6156): A warm beige that softens Naval’s intensity Roycroft Suede (SW 2842): An earthy brown that complements maritime undertones Benjamin Moore Hale Navy (HC-154) Hale Navy’s charcoal influences with blue hues offer versatility that works with both contemporary and traditional color schemes. The subtle gray qualities make it easier to pair with various neutrals and accent colors. Its balanced depth allows for flexible decorating while maintaining refinement in any room setting you choose. Coventry Gray (HC-169): A light gray that echoes Hale Navy’s undertones White Dove (OC-17): A soft white that balances the navy perfectly Lenox Tan (HC-44): A warm neutral that adds cozy contrast Glacier White (OC-37): A clean white for crisp, modern pairings Hale Navy vs. Naval: How to Decide Choosing between these two popular navy colors depends on your specific room and personal style preferences. Sherwin-Williams Naval (SW 6244) works best when you want to make a bold, dramatic statement in spaces with plenty of natural light. Its deeper tone creates a unique contrast but needs careful planning to avoid overwhelming smaller rooms. Benjamin Moore Hale Navy (HC-154) offers more flexibility for everyday living spaces because it feels less intense than Naval. It works well in various lighting conditions and room sizes without feeling too dark or heavy. Both colors create refined, classy looks that work with many decorating styles. Consider your room size, lighting, and how bold you want the space to feel. Benjamin Moore Hale Navy: Similar Colors from Sherwin-Williams Finding similar colors from different paint brands helps when you prefer a specific manufacturer or need better availability. These Sherwin-Williams alternatives offer comparable looks to Benjamin Moore Hale Navy for various projects: Sea Mariner (SW 9640): Often used as a close substitute for Hale Navy, especially for exterior projects where the result is almost identical Charcoal Blue (SW 2739): A deep blue-gray paint that is often listed by online color converters as a substitution for Hale Navy, though it has stronger violet undertones Indigo Batik (SW 7602): A bit lighter and brighter than Hale Navy with an LRV of 8, straddling the navy blue and regular blue line Sea Serpent (SW 7615): A dark, muted blue-green with stronger green undertones than Hale Navy, but often used as a substitute Naval (SW 6244): While not exactly similar, it’s frequently compared to Hale Navy as both are popular navy colors, though Naval is darker and more purely blue Keep in mind that no Sherwin-Williams color perfectly matches Hale Navy’s unique undertones and characteristics. Testing samples in your specific lighting conditions will help you choose the best alternative for your space. Can You Use Both Hale Navy and Naval in the Same Home Using both Hale Navy and Naval in the same home is definitely possible with careful planning. These colors work well together because they share similar blue undertones and complement each other nicely. You can use Naval in larger, well-lit spaces like living rooms for dramatic impact. Then use Hale Navy in smaller areas like bedrooms or bathrooms where you want enlightenment without overwhelming darkness. The key is creating visual flow by separating the colors with neutral hallways or different floor levels. Both colors pair with similar accent colors, so your decorating scheme stays coordinated throughout the house. Frequently Asked Questions Which navy paint is better for cabinets? Hale Navy is often easier to use on cabinets because it feels slightly softer and more flexible. Naval can also look beautiful, but it creates a stronger, darker statement. In smaller kitchens, test both colors on cabinet doors before choosing. Does Hale Navy look black at night? Hale Navy can look very dark at night, especially in rooms with weak lighting. However, it usually keeps a soft blue-gray look under warm lamps. Good lighting helps the color stay rich instead of reading flat, muddy, or nearly black. Does Naval look too dark on walls? Naval can feel very dark on full walls because it has a low LRV. It works best in rooms with strong natural light, layered lamps, or lighter furniture. If the room is small or dim, use Naval as an accent instead. What trim color works with both navy paints? Soft white trim works well with both Hale Navy and Naval. White Dove, Pure White, and similar warm whites can create clean contrast without feeling too stark. Avoid overly cool whites if your room already feels cold or shadowy. Which navy is better for exterior doors? Both can work well on exterior doors. Naval gives a bold, classic front-door look, while Hale Navy feels slightly softer and more traditional. Test each color outside because sunlight, shade, brick, siding, and trim can change how navy paint appears. Can I use navy paint in a low-light room? Yes, but use it carefully. In low-light rooms, navy paint can feel heavier than expected. Choose Hale Navy for a softer look, or use Naval on one feature wall. Add warm lighting, pale fabrics, mirrors, and light trim for balance. What flooring looks best with navy walls? Navy walls pair well with warm oak, walnut, natural wood, light neutral carpet, and soft beige tile. Warm flooring helps balance the cool depth of navy paint. Very cool gray floors may need brass, cream, or wood accents to soften the room. Should I use matte or satin finish? Use matte or eggshell for walls if you want a smooth, softer look. Satin or semi-gloss works better for cabinets, doors, and trim because those areas need more durability. Dark navy paint can show marks, so choose the finish based on use. Final Thoughts Now you have all the essential information about Benjamin Moore Hale Navy or Sherwin-Williams Naval to make the right choice. I’ve shown you how these navy blues differ in darkness, undertones, and performance across various rooms in your home. If you choose the softer grace of Hale Navy or the bold drama of Naval, both colors create beautiful, classy spaces. Remember that testing paint samples in your actual lighting conditions always gives you the best results before making your final decision. Your dream navy blue from Sherwin-Williams is ready to make your room look incredible, so drop a comment below about which shade you love most!

