

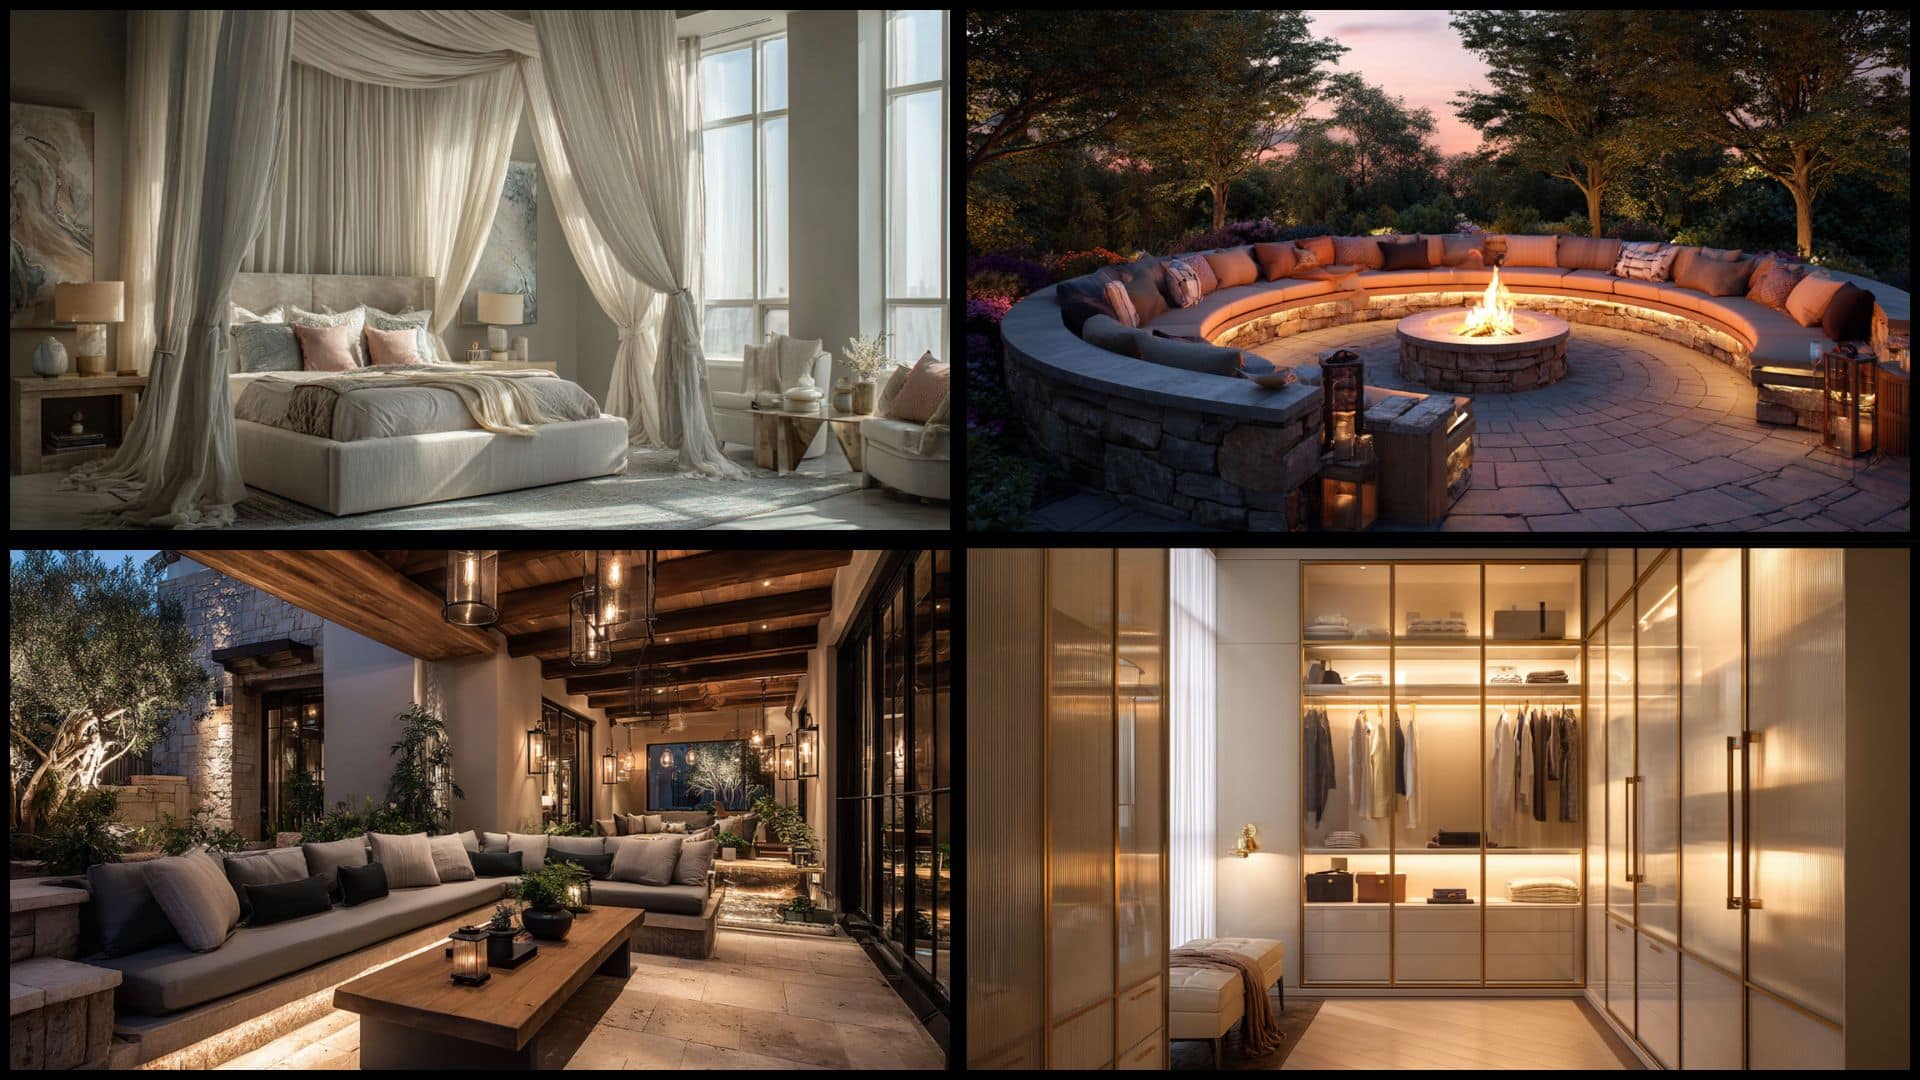
I’ve noticed that designing a home that feels high-end isn’t really about how much you spend; it’s about the choices you make. You’ll see that true style is in the details, like textures, proportions, and how each piece works with the next. Today, I’ll show you luxury home decor ideas that focus on both comfort and refinement, creating spaces that are beautiful but still easy to live in. By layering materials, choosing classic finishes, and adding thoughtful design touches, you can bring a polished, inviting feel to any room. Even small updates, when chosen with care, can make a lasting difference and turn daily living into something special. What Makes Home Decor Feel Luxurious? Luxury in home decor isn’t only about spending more money; it’s about creating a space that feels intentional and refined. Every detail plays a role, from the textures under your hand to the way light fills the room. Natural materials such as marble, wood, silk, and linen add depth and character. They bring a sense of weight and quality that instantly elevates a room. When paired thoughtfully, these materials create harmony rather than clutter. Luxury also comes from balance. A home feels inviting when comfort meets style. Layered fabrics, bold artwork, and soft, flattering lighting all work together to craft a polished space. The result is a home that feels personal, welcoming, and unforgettable. Luxury Home Decor Ideas for You to Try Here are some easy ways to make your home feel more stylish and inviting. These luxury decor ideas show how small changes can add comfort and a touch of style: 1. Statement Chandelier A statement chandelier becomes the centerpiece of a living or dining area, drawing the eye upward with its crystal, glass, or metal finish. Positioned centrally with dimmable bulbs, it balances grandeur and flexibility, shifting easily between warm brightness and soft intimacy. 2. Marble Coffee Table Marble coffee table brings classic appeal with its polished surface and distinctive veining, making every piece unique. More than furniture, it serves as functional art. Styled with minimal decor like a vase or sculptural bowl, it stays refined and durable for years. 3. Velvet Sofa A velvet sofa adds depth, texture, and rich softness to any living space. Its surface shifts with light, creating a dynamic, ever-changing look. Bold jewel tones make a statement, while soft neutrals paired with metallic accents bring long-lasting sophistication. 4. Oversized Wall Art An oversized artwork transforms an empty wall into a striking focal point, instantly giving the room a gallery-like feel. Whether abstract or scenic, its sheer scale makes a bold statement. Place it in a highly visible spot and keep décor minimal to let it shine. 5. Custom Built-In Shelving Custom built-in shelves combine storage with style, seamlessly integrating into the construction for a polished, functional design. They advance any room by making the space feel intentional and outlined. Add lighting to showcase books, art, or décor, or paint them in a contrasting tone for visual impact. 6. Sculptural Floor Lamp A sculptural floor lamp doubles as lighting and a statement piece, coordinating form with function. Its bold curves or striking shapes scintillate interest while enhancing the room’s vibe. Place it in a visible corner or entryway, and pair it with warm bulbs to amplify its artistic presence. 7. Sculptural Dining Chairs Dining chairs with sculptural silhouettes bring personality and artistry to your space. Their unique shapes naturally kick-start conversation before the meal begins. Mixing two designs at the same table creates a curated look, while quality materials ensure comfort matches their striking visual impact. 8. Glass-Enclosed Wine Wall A glass-enclosed wine wall turns your collection into a bold centerpiece, combining storage with design. Clear panels display each bottle while protecting them from dust and contact. Add backlit shelving to highlight labels, creating a warm glow that advances both casual meals and special occasions. 9. Floor-to-Ceiling Drapes Tall drapes in rich fabrics like silk or linen add instant grandeur while elongating the room’s proportions. Their height draws the eye upward, creating a more open, graceful atmosphere. Choose deep jewel tones or soft neutrals to complement your palette, while their flowing texture frames windows with warmth and refinement. 10. Statement Pendant Cluster Clustered pendant lights instantly command attention, upgrading the ceiling into an artistic feature. Their varying heights add rhythm and movement, while metallic finishes or glass globes amplify the glow. Together, they create a refined focal point that feels intentional, dramatic, and luxuriously designed. 11. Canopy Bed with Sheer Drapes A canopy bed makes the bedroom feel cozy and special, quickly becoming the main feature of the space. Its tall frame adds height and balance, while soft sheer drapes let in gentle light. Use neutral or pastel fabrics to keep the room calm and relaxing. 12. Silk or Linen Duvet Cover High-quality fabrics like silk or linen feel soft, breathable, and naturally regulate temperature year-round. Their smooth texture adds refinement to bedding while ensuring comfort. Neutral or muted tones keep the design versatile, allowing accent pillows or throws to shift easily, creating a layered yet balanced look. 13. Custom Walk-In Closet Doors Frosted glass or paneled doors leading to a walk-in closet upgrade the transition between spaces. They signal refinement and intention. Add sleek handles in metallic finishes to complement your palette. Backlighting inside the closet creates a glowing reveal when opened. 14. Inset Wall Lighting Inset wall lighting provides a refined alternative to bedside lamps, freeing nightstands from clutter while adding a custom, upscale feel. Adjustable placement with dimmers offers both reading light and ambient glow, creating a warm, hotel-inspired atmosphere that improves comfort and promotes the bedroom’s design. 15. Upholstered Wall Panels Upholstered wall panels bring texture, comfort, and sound insulation, making the bedroom feel calm and inviting. Solid velvet or linen panels create a refined finish, while tufting or patterns add dimension. This treatment transforms the bed wall into a striking focal feature. 16. Designer Bedside Tables Designer bedside tables crafted from stone, metal, or rare woods introduce unique character and refined craftsmanship. They double as storage and statement pieces. Pair them with complementary lamps or décor, creating a bedside setup that feels both purposeful and visually striking. 17. Foot-of-the-Bed Bench with Storage A foot-of-the-bed bench combines practicality and style, offering hidden storage for pillows or blankets while doubling as seating. Upholstered in fabrics matching your bedding or palette, it ties the room together, improving flow and functionality with a polished, intentional trace. 18. Freestanding Tub with Floor-Mount Faucet A freestanding tub makes the bathroom feel like a spa and quickly becomes the main feature of the room. Its open design feels light and spacious, and adding a floor-mount faucet in gold, black, or nickel makes every bath feel more relaxing. 19. Heated Towel Rack A heated towel rack keeps towels warm, fresh, and dry, adding daily comfort to showers and baths. Opt for a streamlined, wall-mounted design in chrome or matte black to suit your fixtures, placing it near the tub or shower for ease and style. 20. Double Vanity with Marble Countertop A double vanity provides personal space for two while maintaining symmetry and balance. Extra storage helps keep surfaces organized and clutter-free. Topped with a marble slab, it offers lasting durability, with soft veining adding subtle texture that enriches the bathroom’s refined atmosphere. 21. Frameless Glass Shower Enclosure A frameless glass shower enclosure makes the bathroom feel open and bright with a smooth, seamless look. It shows off tilework and fixtures while staying clean and simple. Strong tempered glass adds durability, and the minimal hardware in brushed or polished finishes keeps the style modern. 22. Recessed Shower Niche with Accent Tile A recessed shower niche gives you handy storage while also adding style to the shower. Lining it with bold or patterned tile makes it stand out as a design feature. It removes the need for bulky shelves and keeps the space neat, organized, and attractive. 23. Custom Arched Doorway with Metal Inlay A custom arched doorway with a brass, bronze, or black steel frame makes the space feel grand and lasting. The curve softens the look, while metal details show craftsmanship. Adding large handles or pivot doors turns a simple entry into a bold design feature. 24. Marble or Stone Accent Wall A marble, travertine, or onyx accent wall in the entryway gives the space an instant touch of style. The natural veining looks like artwork, and backlighting can make it glow. This one feature adds texture and richness, making the hallway feel more welcoming and impressive. 25. Kinetic Sculpture Installation A kinetic sculpture hanging from the ceiling brings motion and art to a hallway. Light air currents move its shape, creating shifting shadows on the walls. Made from metal, glass, or wood, it keeps the space feeling lively, interesting, and fresh. 26. Covered Patio Lounge A covered patio lounge lets you enjoy the outdoors in any season while staying protected from the weather. Weatherproof furniture with thick cushions adds comfort, while lanterns and textiles bring warmth. This sheltered setup balances function and coziness, creating an outdoor retreat you’ll use year-round. 27. Outdoor Kitchen with Pizza Oven An outdoor kitchen with a built-in pizza oven makes entertaining fun and memorable. Stainless steel counters and appliances are easy to clean, while built-in storage keeps tools and firewood tidy. This setup combines style and function, turning the outdoor space into a perfect gathering spot. 28. Fire Pit Seating Circle A fire pit seating circle creates a natural spot for gathering outdoors in the evenings. Stone or brick benches give it a lasting feel, while cushions and blankets add comfort. The warmth and glow make the space cozy and welcoming for year-round conversations with family and friends. 29. Water Wall Feature A water wall adds movement and a soothing sound to outdoor spaces. The gentle flow creates a calming backdrop that helps block everyday noise. Built with stone or textured concrete for strength, and enhanced with lighting, it becomes a peaceful focal point in the landscape. 30. Hanging Daybed Swing A hanging daybed swing creates a cozy spot in a shaded corner, perfect for reading or relaxing. Thick outdoor cushions and strong chains keep it safe, while extra pillows add comfort. This suspended retreat combines style and relaxation, turning the space into a luxurious outdoor escape. 31. Hidden Door Bookcase A hidden door bookcase adds both storage and a touch of mystery, hiding a passage behind shelves filled with books or decor. Built to sit flush with nearby cabinets, it blends in until opened. Adding lighting or bold paint inside makes it an exciting and functional surprise. 32. Luxe Reading Nook A built-in window seat with plush upholstery makes a corner into a luxury retreat. It frames the view while offering comfort. Add layered pillows, a throw, and subtle wall lights. This nook creates intimacy while enhancing the bedroom’s sense of leisure. 33. Metallic Accent Wall A metallic accent wall creates understated drama, reflecting light for dynamic shifts throughout the day. Finishes like brushed gold, bronze, or silver add subtle luxury without overwhelming the room. Best used on smaller walls, it delivers sophistication and richness while maintaining balance in design. 34. Smart Glass Wall Panel A smart glass wall changes from clear to frosted with the flip of a switch, giving privacy when needed. It separates rooms while still keeping the space open. This modern feature combines technology with style, making it both useful and eye-catching. 35. Oversized Indoor Plant in Designer Pot A large indoor plant instantly brings life and freshness to a room. Placed in a stylish pot, it doubles as decor and pairs well with furniture and finishes. Set near natural light, it softens hard lines and adds a simple yet luxurious touch. 36. Floating Staircase with Glass Railings A floating staircase with glass railings makes the space feel open and bright by letting light pass through. Wood or metal steps add contrast and keep the look modern. With minimal surroundings, the staircase becomes a bold centerpiece that combines function with style. 37. Statement Room Divider A statement divider separates areas without fully closing them off. Designs made of wood slats, glass, or metal let light pass through while adding style. Used between seating, dining, or work spaces, it creates separation while still keeping the room open and modern. 38. Illuminated Glass Floor Panel A statement divider helps define different areas without shutting them off completely. Made from wood slats, glass, or metal, it lets light flow through while adding style. Placed between dining, seating, or work areas, it offers separation and also works as a design feature. 39. Suspended Indoor Garden A suspended indoor garden brings greenery overhead, freeing up floor space and softening the layout. Hanging plants add color, freshness, and movement. With built-in watering and grow lights, it’s easy to maintain and turns the room into a lush, modern retreat. 40. Hidden Drop-Down Projection Screen A drop-down projection screen stays hidden until you need it, keeping the room neat and modern. With the push of a button, the space turns into a private theater. Paired with built-in speakers and a hidden projector, it offers a luxury movie experience without clutter. Seasonal Styling Tips Refreshing your decor with the seasons keeps your home feeling new and inviting. Small changes each quarter add style without the need for a complete redesign. Here are some styling tips that might help you with your project: Spring: Bring in soft pastels, fresh flowers, and light fabrics to brighten up your rooms. These touches add freshness and energy, creating a cheerful atmosphere after the long winter months. Summer: Use airy curtains, woven textures, and bright accents to keep spaces light and breezy. Outdoor-inspired pieces like coastal artwork or glass details help interiors feel cool, open, and relaxed. Fall: Add cozy layers with warm-toned throws, textured pillows, and subtle metallic accents. Seasonal touches like dried arrangements or patterned rugs bring depth and comfort as cooler weather arrives. Winter: Switch to plush fabrics, rich colors, and soft lighting for a warm retreat. Candles, layered blankets, and darker accents create a calm, inviting setting perfect for the colder months. These simple updates allow your home to shift naturally with the seasons, keeping it stylish and comfortable year-round without major effort. Final Thoughts I’ve found that luxury home decor ideas go beyond adding expensive furniture or bold designs. You’ll notice that true luxury comes from balance, where comfort, materials, and design flow together naturally. I’ve seen how small details like layered lighting, rich textures, or unique architectural elements can make a room feel extraordinary without overwhelming it. You’ll get the best results when you choose pieces that reflect your style but also keep your home warm and livable every day. If you’re ready for more inspiration, read my other blogs on the website. You’ll find plenty of ideas with practicality to help your home feel more personal!
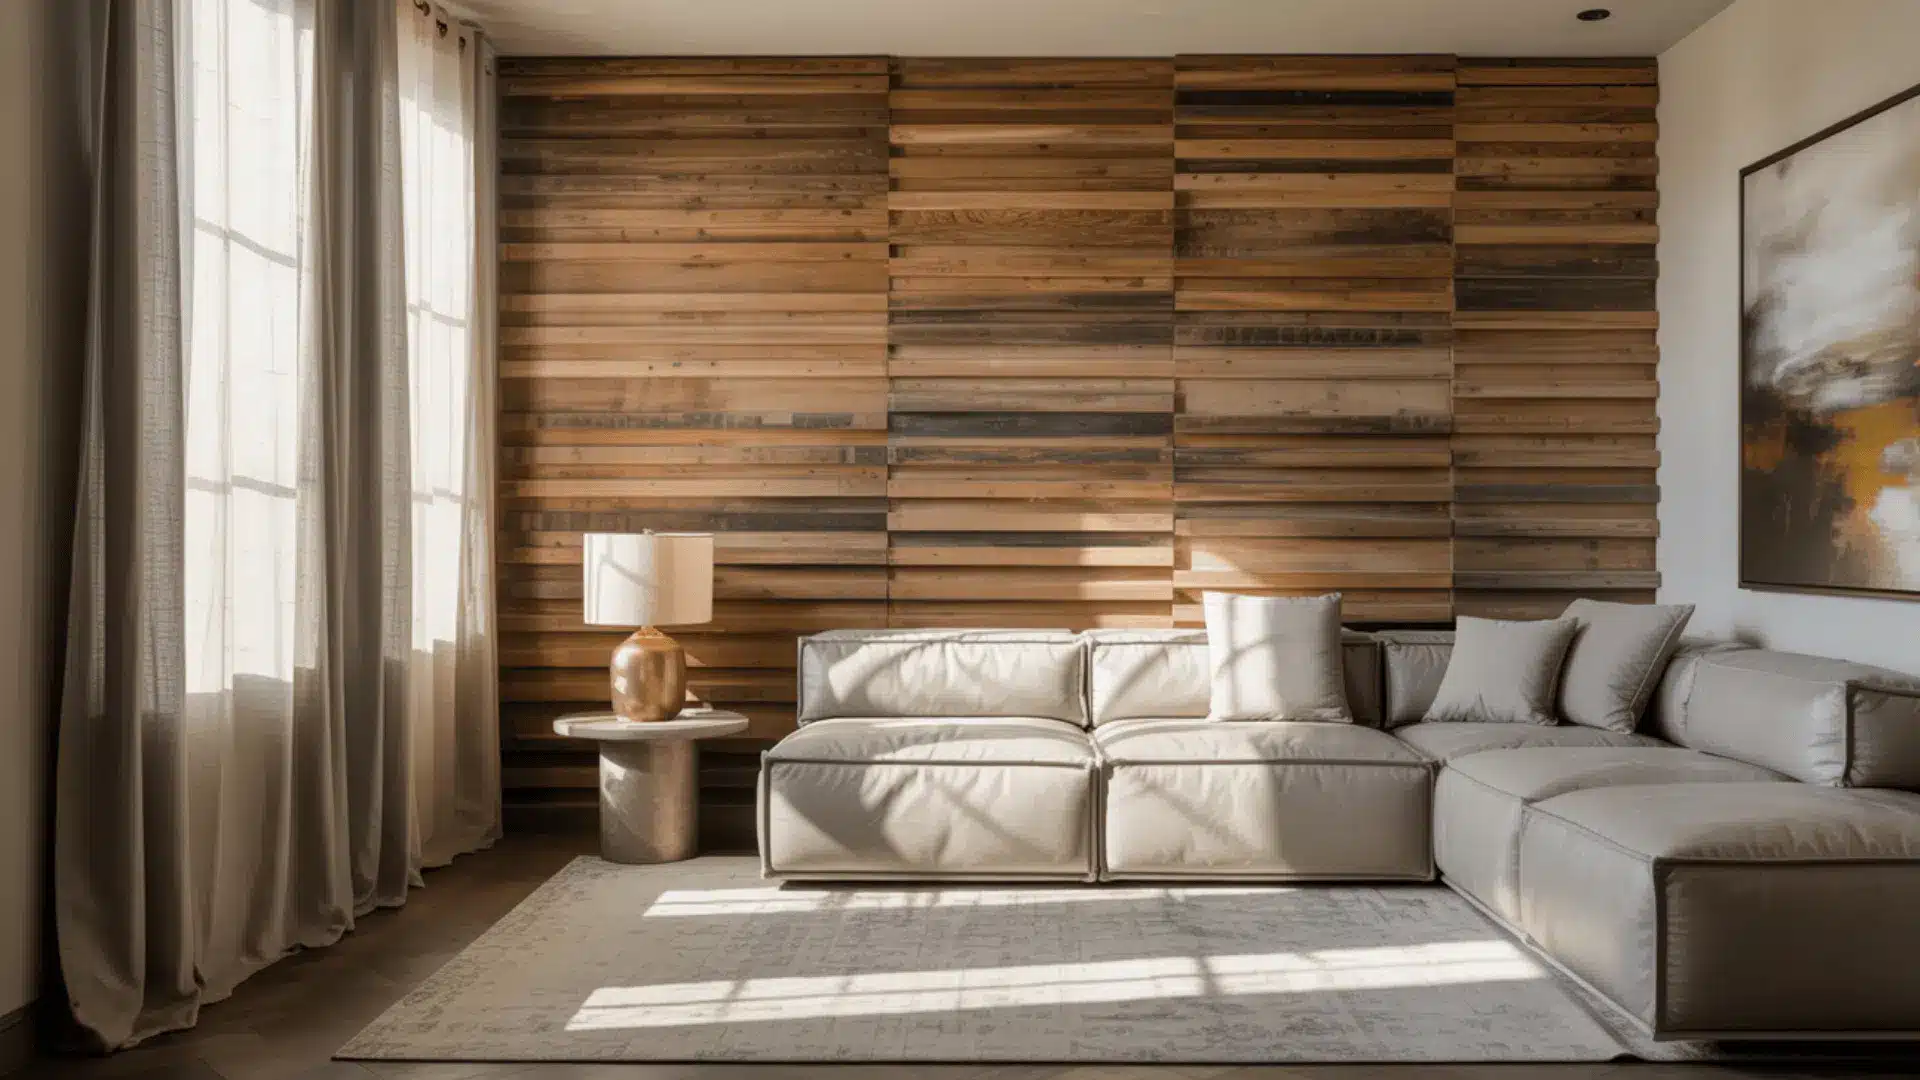
When I wanted to refresh my walls without taking on a big remodel, I found out about wood slat walls, and they completely changed the look of my space. Maybe you’ve been thinking the same thing, looking for a way to add texture, warmth, and character while keeping the design modern and versatile. Today, I’ll share interior wood slat wall ideas for every room, from bedrooms and family spaces to kitchens and home offices. You’ll also get practical tips on materials, finishes, lighting, and maintenance so you can plan with confidence. Let’s dig in. Why Choose a Wood Slat Wall? Wood slat walls add warmth and texture, making rooms feel more inviting. They can also improve acoustics by reducing echo, especially with an acoustic backing. Their versatile look works well with modern, rustic, Scandinavian, or mixed interiors, giving you both style and function in one feature. They’re also easy to adapt to any space. You can use them to make a bold statement or to add subtle detail, depending on the color, finish, and pattern you choose. Top Interior Wood Slat Wall Ideas to Try From bold feature walls to subtle accents, these ideas will inspire you to find the perfect fit for your space and personality. Living Room Feature Walls 1. Vertical oak slats behind a TV: Clean vertical lines create a sleek, modern backdrop that frames your entertainment area. The upward direction draws the eye, making the room feel taller. 2. Fireplace framed with slats: Surrounding your fireplace with wood slats softens its appearance and adds a cozy touch. The natural tones complement the warmth of the fire, creating an inviting atmosphere. 3. Slats with LED backlighting: Installing LED lighting behind wood slats creates a stunning glow that highlights texture and depth. This effect adds a modern edge and can serve as ambient lighting in the evenings. 4. Two-tone striped slats: Alternating colors or finishes in your slat design breaks up monotony and adds visual interest. The stripes can be subtle for a refined look or bold for dramatic contrast. 5. Black-painted accent slats: Bold black slats make a dramatic statement while enhancing a room’s modern or industrial vibe. The dark tone contrasts beautifully with lighter walls and furniture. Bedroom Accent Walls 6. Walnut slat headboard wall: A wall of rich walnut behind your bed adds depth and warmth to your bedroom. The dark tones create a cozy, intimate feel, while the natural wood grain offers timeless elegance. 7. Headboard with slat wall: Combining a built-in headboard with vertical or horizontal slats creates a cohesive look. It’s both functional and stylish, offering back support while framing the bed. 8. Gradient-painted slats: A gradient effect moves from one shade to another, creating a calming, artistic feature. This technique works well in bedrooms where you want a soft, relaxing atmosphere. 9. Whitewashed coastal slats: A whitewashed finish keeps the wood grain visible while giving it a light, airy feel. This style is perfect for coastal or farmhouse themes, making the bedroom feel brighter and more open. 10. Gold-trimmed wood slats: Adding thin gold accents between slats brings a touch of glamour without overwhelming the room. This detail works especially well in contemporary bedrooms, catching light and adding sophistication. Dining Room Designs 11. Chevron dining room wall: Angled wood pieces form a modern chevron pattern that feels bold yet balanced, making the dining area stand out. This design brings movement and rhythm to the room and works especially well in contemporary or transitional homes. 12. Reclaimed rustic kitchen slats: Weathered boards bring warmth and character into the kitchen, adding history through their natural imperfections. They complement farmhouse, rustic, or even industrial spaces, creating a cozy and inviting cooking area. 13. Half-height breakfast nook slats: Slats installed halfway up create separation without closing off the nook, keeping it open yet defined. This design makes small dining corners feel cozy while also being cost-friendly since it uses less material. 14. Angled geometric slats: Slats arranged in angled and geometric shapes create a playful, eye-catching effect that feels dynamic. This works well in modern or eclectic interiors and can be enhanced by mixing different colors or wood tones. 15. Wood and stone mixed wall: Pairing wood slats with stone creates a rich contrast that adds depth and natural texture to the space. This combination gives dining rooms a warm yet upscale look, blending rustic charm with modern sophistication. Entryway & Hallway Statements 16. Horizontal pine hallway slats: Horizontal lines make narrow halls appear wider and more open, helping small spaces feel less confined. Light-colored pine enhances brightness and keeps the area feeling fresh and airy. This design works especially well in modern or Scandinavian interiors. 17. Open slats in entry divider: Open slats separate the entry from living areas without blocking light or airflow, keeping spaces connected yet defined. They create a welcoming first impression while still offering subtle privacy. This is a great option for open floor plans. 18. Slats framing a window: Placing slats around a window highlights the natural view while adding architectural detail. The design draws attention to daylight and creates a framed effect that feels intentional. It’s a stylish way to enhance both light and texture in an entryway. 19. Curved wall with slats: A slatted design that follows the curve of a wall softens the overall look and feels custom-made. The rounded effect adds movement and depth, turning a plain wall into a standout feature. It works especially well in hallways with unique architecture. 20. Pastel-painted playroom slats: Soft pastel tones on slats bring playfulness and color to spaces used by kids most. The design makes the room feel cheerful while still keeping the natural wood visible. It’s an easy way to combine durability with a fun, creative vibe. Home Office & Workspaces 21. Dark-stained office slats: Dark-stained wood creates a warm and professional backdrop that feels grounded and focused. The rich tones add depth to your office, making it an ideal choice for workspaces where concentration and style matter. 22. Floating desk on slat wall: A floating desk mounted on a slat wall saves space and gives the room a clean, modern look. The design feels minimal yet functional, making it great for small offices or multipurpose rooms. 23. Slats framing wall art: Slats placed around artwork add structure and guide the eye directly to the piece. This subtle framing effect makes art stand out while blending seamlessly into the overall wall design. 24. Matte and glossy mixed slats: Combining matte and glossy finishes on slats creates a subtle contrast that feels modern and dynamic. The play of light across the textures adds interest without overwhelming the space. 25. Acoustic music room slats: Acoustic wood slats help reduce echo and improve sound quality in spaces used for music or podcasts. They also add a stylish, functional element that makes the room both practical and visually appealing. Acoustic & Functional Walls 26. Felt-backed acoustic slats: The felt backing absorbs sound, reducing echo and making rooms quieter and more comfortable. This design works well in offices, bedrooms, or living rooms where sound control is important. It adds both function and style to the wall. 27. Acoustic slats in theater: Installing acoustic slats in a home theater improves sound clarity while minimizing noise transfer to other rooms. The slats also bring a polished, professional look, enhancing both performance and design. 28. Slats with hidden storage: Wood slats can cleverly conceal cabinets or shelves, creating a seamless wall with built-in functionality. This design keeps clutter out of sight while maintaining a sleek, modern appearance. 29. Slats with built-in planters: Integrating planters within slats allows greenery to become part of the wall itself. This saves floor space while adding natural beauty, making the room feel fresh and lively. 30. Slats with a hidden door: Slats can disguise doors to closets or private rooms, creating a smooth, uninterrupted surface. The hidden design adds intrigue while keeping the overall look clean and modern. Creative Patterns & Layouts 31. Alternating wide/narrow slats: Using a mix of wide and narrow slats creates rhythm and variety, turning a plain wall into something engaging. This approach adds dimension and keeps the design visually interesting without being overwhelming. It’s a flexible style that works with many types of decor. 32. Diagonal feature slats: Slanted slats bring energy and movement to a space, breaking away from traditional straight lines. They’re perfect for accent walls where you want a bold, modern statement that draws attention. This design is especially striking in entryways or living rooms. 33. Herringbone narrow slats: Narrow slats arranged in a herringbone pattern offer timeless appeal with a sense of craftsmanship. The design feels refined and works well in both traditional and modern interiors. It adds a classic look that never goes out of style. 34. Mixed-width modern slats: Combining slats of different sizes makes the wall feel casual yet intentional. This layout adds texture and personality, making it suitable for relaxed living areas or creative spaces. It’s a simple way to give walls more character without extra cost. 35. Double-layered slats: Overlapping slats in two layers create shadows and depth that change with the lighting. This design feels dynamic and sophisticated, adding a subtle 3D effect to the wall. It’s ideal for feature walls where you want a dramatic impact. Lighting-Enhanced Designs 36. Backlit media room slats: Adding LED backlighting behind slats creates dramatic mood lighting in entertainment spaces. The glow highlights the wood texture while doubling as ambient light for movies or gatherings. It’s an easy upgrade that instantly feels high-end. 37. Recessed-lit slat wall: Recessed lighting tucked between slats softly highlights their texture without harsh glare. This effect makes the wall stand out while keeping the atmosphere calm and inviting. It works especially well in bedrooms and lounges. 38. Black slats with brass lights: Dark slats paired with brass fixtures create a bold contrast that feels modern yet warm. The metallic accents add elegance and reflect light beautifully against the deep wood tone. This pairing adds both drama and refinement to a room. 39. Slats over mirrored panels: Placing slats over mirrors reflects light and gives the illusion of more space. This trick works especially well in smaller rooms, making them feel brighter and more open. It also adds a layered effect that feels stylish and unique. 40. Ceiling-to-wall slats: Extending slats from the wall onto the ceiling visually connects surfaces for a seamless look. This design makes the room appear taller and more spacious while adding a custom touch. It’s especially effective in modern open-plan spaces. Bathroom & Spa Spaces 41. Bamboo slats in bathroom: Bamboo is naturally resistant to moisture, making it ideal for humid environments like bathrooms. The light tone adds a clean, refreshing look while holding up well to daily use. It’s a sustainable choice that keeps the design both stylish and practical. 42. Walnut slats in bathroom: Dark walnut slats bring depth and warmth, creating a spa-like luxury feel. Their rich tones pair well with stone or tile, turning the bathroom into a relaxing retreat. This combination makes the space feel elevated and indulgent. 43. Ash slats with wine display: Ash wood slats paired with a wine display add an upscale touch, working perfectly in a wet bar or spa-inspired corner. The light color keeps the space elegant yet welcoming. It’s an unexpected pairing that brings a modern twist. 44. White slats with wood edges: Painting slats white while leaving the edges natural creates a striking contrast. This design balances crisp modern style with the warmth of wood, making the bathroom feel both fresh and inviting. The subtle detail adds character without overwhelming the space. 45. Slatted barn door face: Adding slats to a barn door gives it texture and style while keeping it highly functional. It’s a smart way to blend rustic charm with modern detail in a small or large space. The design also works as a statement feature in open areas. Furniture-Integrated Slats 46. TV cabinet built into slats: A built-in TV cabinet combines storage seamlessly into the slat wall design. This keeps media equipment organized while maintaining a clean, modern look in the living area. It’s an ideal choice for minimalist homes where clutter-free style matters. 47. Floating shelves on slat wall: Floating shelves installed directly on slats provide functional storage without overpowering the design. They highlight the wall’s texture while keeping the space light and uncluttered. This setup works well for displaying books, art, or decor accents. 48. Pivoting privacy slat panel: A pivoting panel of slats allows flexible separation between rooms or zones. It offers privacy when needed while still letting air and light pass through when left open. The feature adds versatility to multipurpose spaces or open layouts. 49. Slatted room divider: A slatted divider defines different areas of a space without closing them off completely. It’s a practical solution for open layouts, keeping spaces connected but distinct. The divider also doubles as a stylish design feature on its own. 50. Extra-wide bold slats: Using extra-wide slats creates strong lines that make a big visual impact. The chunky design feels dramatic and modern, making the wall an instant focal point. This bold style is perfect for accent walls in large, open rooms. Color & Finish Variations 51. Ombre-stained slats: A gradual shift from light to dark tones gives the wall a soft, modern effect. This technique adds depth and visual flow, making the design feel artistic yet subtle. It works especially well on feature walls where you want a gentle statement. 52. White slats on dark wall: White slats placed against a dark wall create a crisp, dramatic contrast. The look draws the eye immediately and works well in modern or minimalist interiors. This design makes the room feel bold while still clean and balanced. 53. Maple slats with cork: Combining maple wood with cork inserts brings warmth and texture to the surface. The mix feels unique and tactile, offering both visual interest and sound absorption. It’s a practical choice for offices or living rooms that need comfort and style. 54. Painted gradient slats: A smooth fade of painted colors turns the wall into an artistic feature. This design works best in creative spaces or bedrooms where a calming, soft transition is desired. The effect adds personality without being too overpowering. 55. Painted pastel slats: Soft pastel shades instantly brighten the room and bring a cheerful atmosphere. This approach adds playful color while keeping the natural slat structure visible. It’s perfect for nurseries, playrooms, or any space that needs a lively touch. Where to Buy Panels and Materials Finding the right panels or materials is key to getting the look you want. Here are a few popular options, along with their pros and cons: Home Depot: Wide selection of wood types and finishes, with in-store pickup options. Prices are competitive, but custom styles may be limited. Etsy: Offers unique, handmade panels you won’t find in big stores. Quality can vary, so check reviews before ordering. Woody Walls: Specializes in premium wood slat panels, including acoustic designs. Higher cost, but excellent build quality. The Wood Veneer Hub: Known for modern, ready-to-install panels. Shipping can be pricey, but product variety is strong. Choose a supplier that matches your style, budget, and installation needs to get the best results. Conclusion The right interior wood slat wall ideas can completely change how a room feels, adding warmth, texture, and modern style without a full remodel. From bedrooms to open living rooms and even spa-inspired bathrooms, there’s a design that works for every space. With proper finishes and simple upkeep, your slat wall will stay beautiful for years. Even one feature wall can make a big impact, turning a plain room into a standout. If you’re ready for more inspiration, check out my other blogs for practical design tips and home improvement ideas you can use right away.
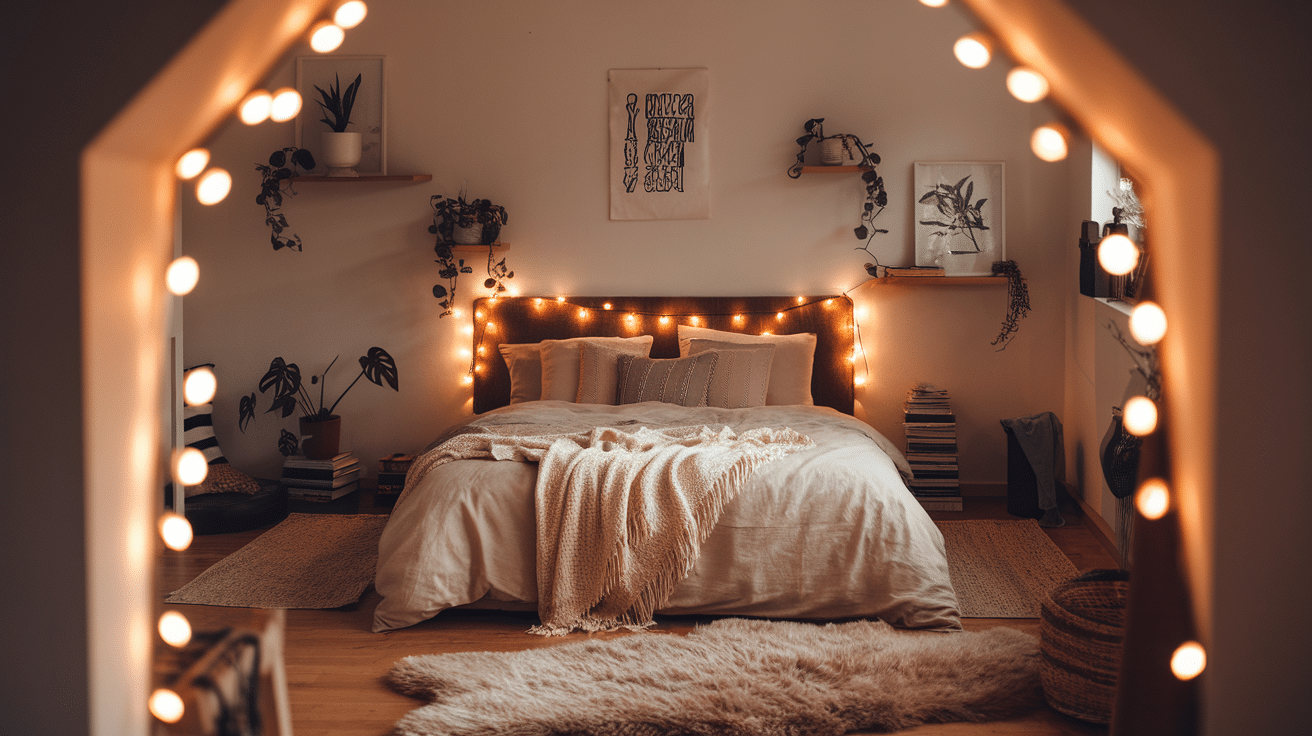
Ever walked into your room and felt stressed instead of relaxed? I totally get it. Your bedroom should be your escape, not another source of chaos. That’s why I’m obsessed with creating a chill aesthetic room, and it’s easier than you think. A chill room isn’t just about looking cool on social media. It’s about simple things: soft lighting that doesn’t hurt your eyes, keeping noise down, adding cozy textures everywhere, and ditching the clutter that makes your brain go crazy. I’m going to show you exactly how I upgraded my own space into the ultimate chill zone. I’ll cover easy lighting hacks, simple ways to cut noise, and my favorite tricks for staying organized. Ready to create your perfect calm space? A chill aesthetic room is a calm, cozy space designed with soft lighting, minimal clutter, and relaxing textures. It focuses on comfort, simple design, and creating an environment that helps you unwind and feel at ease. What is a Chill Aesthetic Room? From working on room setups and testing different layouts, I’ve seen how small changes like lighting, textures, and layout can completely change how a space feels. A chill aesthetic room is your bedroom turned into the perfect hangout spot. It’s where you can relax, feel good, and worry-free. Think of it like making a cozy fort, but one that actually looks cool too. Here’s what makes it awesome: it feels super comfy and looks great at the same time. Most rooms are either messy and comfortable or pretty but not fun to hang out in. A chill room gives you both. This style is perfect for students who need a calm place to study and chill. It works great if you’re renting and can’t change much. Chill Aesthetic Room at a Glance Focus: Calm, comfort, and simplicity Key Elements: Soft lighting, textures, minimal clutter Style: Cozy, relaxed, and personal Budget Friendly: Yes, easy to create with simple upgrades Best For: Bedrooms, study spaces, rental rooms Key Elements That Make a Room Feel Chill Creating a chill room is like following a recipe. You need the right elements to get that relaxed feeling. If you’re trying to create that kind of space, here are the key things that really make a room feel chill: 1. Soft, Warm Lighting Harsh overhead lights are the enemy of chill vibes. I swap out bright white bulbs for warm yellow ones that make everything feel cozy. String lights are my go-to; they’re cheap, easy to hang, and instantly make any room feel magical. LED strips behind your bed or desk add a cool glow without being too bright. And if you’re allowed, candles are amazing for creating that perfect, relaxed mood. 2. Cozy Textures and Fabrics This is where the comfort really happens. I pile on soft throw blankets, add fluffy rugs that feel good under your feet, and layer my bed with tons of pillows. The key is mixing different textures – maybe a chunky knit blanket with smooth cotton sheets. Everything should make you want to touch it and sink right in. 3. Neutral and Muted Color Palette Bright neon colors might be fun, but they don’t help you relax. I stick with calm colors like soft browns, gentle grays, or light pastels. Think of colors you’d see in nature; they automatically make your brain feel more peaceful. You don’t have to paint walls; just choose bedding, pillows, and decorations in these calming shades. 4. Minimal Clutter Nothing kills chill vibes like a messy room. I keep surfaces clean and put things away in cute storage baskets or boxes. It’s not about having nothing, it’s about having everything in its place. When your room looks organized, your mind feels more relaxed, too. 5. Personal Touches This is what makes your room actually yours. I hang up posters of things I love, add some easy-care plants, and keep my favorite books where I can see them. Little things like photos with friends or cool art prints make the space feel personal without making it cluttered. Get these five things right, and you’ll have a room that feels like your own personal chill zone. Chill Aesthetic Room Ideas for Inspiration If your room feels too loud, busy, or just not your vibe, it might be time for a change, especially if you enjoy styles like the light academia aesthetic. These chill room ideas can help you turn your space into something that feels calm, cool, and easy to be in: 1. Boho-Cozy Mix This style feels free and relaxed. Add woven rugs, green plants everywhere, and macramé wall hangings for texture. It’s like bringing nature and adventure inside your room without spending tons of money. 2. Soft Pastel Haven Think cotton candy colors, pale pinks, soft creams, and gentle purples. Add fairy lights all around, and you get a room that feels like sleeping on a cloud. Perfect if you want something sweet and dreamy. 3. Earthy and Minimal My favorite for small spaces. Use wood shelves, brown pillows, and beige bedding. Everything looks clean and peaceful together. It’s simple yet never boring, and you can’t go wrong with the colors. 4. Dark and Moody Don’t fear dark colors. Deep greens and navy blues make rooms feel cozy and safe, like being wrapped in a blanket. Add soft lighting and you’ve got the perfect evening hangout spot. 5. Plant Lover’s Retreat Turn your room into a mini jungle with hanging plants and trailing vines. Create a plant wall with shelves. Plants clean the air and make everything feel fresh and alive. Taking care of them is relaxing, too. 6. Minimalist Chill Keep it super simple with white and neutral colors, clean surfaces, and soft lights. Great if too much stuff makes you feel overwhelmed. This style helps your brain relax and focus better. 7. Retro Chill Bring back the fun with lava lamps, cool tapestries, and funky rugs. Add a record player if you can find one. It’s like stepping back to when things were groovy and totally relaxed. 8. Trippy Chill Go wild with LED lights that change colors, neon signs, and bold posters. This style makes your room feel like a fun escape from boring everyday life. Perfect for creative types who love color. 9. Cozy Cottagecore Chill Create that old-fashioned, homey feeling with soft quilts, gentle flower patterns, and warm table lamps. It’s like living in a cozy storybook cottage where everything feels safe and peaceful. 10. Nature-Filled Chill Bring outdoors inside with plants everywhere, wood furniture, and earthy browns and greens. It feels like camping but with a comfy bed. Great if you love spending time outside but want indoor comfort. Budget-Friendly Tips for a Chill Aesthetic You don’t need a big budget to make your room feel calm and cozy. With a few smart moves, you can create a chill space without spending much at all. Now that you’ve got some ideas in mind, let’s talk about how to make it happen without spending too much: Thrift Store Finds: Thrift stores are gold mines for chill room stuff. I’ve found amazing vintage lamps, soft blankets, and cool picture frames for just a few dollars. DIY Decor: Making your own decorations is fun and cheap. Paint mason jars for flower vases or fairy lights. Create wall art by painting simple shapes or framing magazine pages. Affordable Lighting Options: Good lighting doesn’t have to cost much. String lights from the dollar store work just as well as expensive ones. Rearrange What You Already Have: Sometimes just moving things around can make your room feel brand new. Try switching the layout, moving your bed, or swapping items between rooms. Use Nature for Decor: Grab a few small branches, pinecones, or flowers from outside and place them in a jar or on your shelf. It’s free, looks cool, and brings a calm feeling to your space. Secondhand Apps and Free Stuff: Check apps like Facebook Marketplace, OfferUp, or your neighborhood groups. People often give away stuff for free or sell things super cheaply. With these tricks, you can create your perfect chill space without spending your whole allowance, similar to other cozy aesthetic room ideas that focus on comfort and simplicity. Conclusion I’ve found the best chill vibes come from how I feel when I walk in, not just how it looks in photos. I use ideas like these as a starting point, then mix in my own personality. If I want bright colors instead of neutrals, I add them. If I’m obsessed with vintage band posters, I hang them proudly. My room should tell my story and make me smile every day. For me, a true chill room is where I can relax and be myself. For easy, budget-friendly decorating tips, check out other blogs on the website! Frequently Asked Questions How can I make my room feel more chill? You can make your room feel more chill by adding warm lighting, reducing clutter, using soft fabrics, and choosing calming colors. What colors work best for a chill room? Neutral tones, soft pastels, and earthy colors work best because they create a peaceful and relaxing environment. Can I create a chill room on a budget? Yes, you can create a chill room using affordable lighting, DIY decor, and rearranging what you already have. What is a chill aesthetic room? A chill aesthetic room is a calm and cozy space designed with soft lighting, minimal clutter, and comfortable textures to help you relax. What lighting is best for a chill room? Warm lighting, string lights, and soft lamps work best because they create a cozy and relaxing atmosphere.
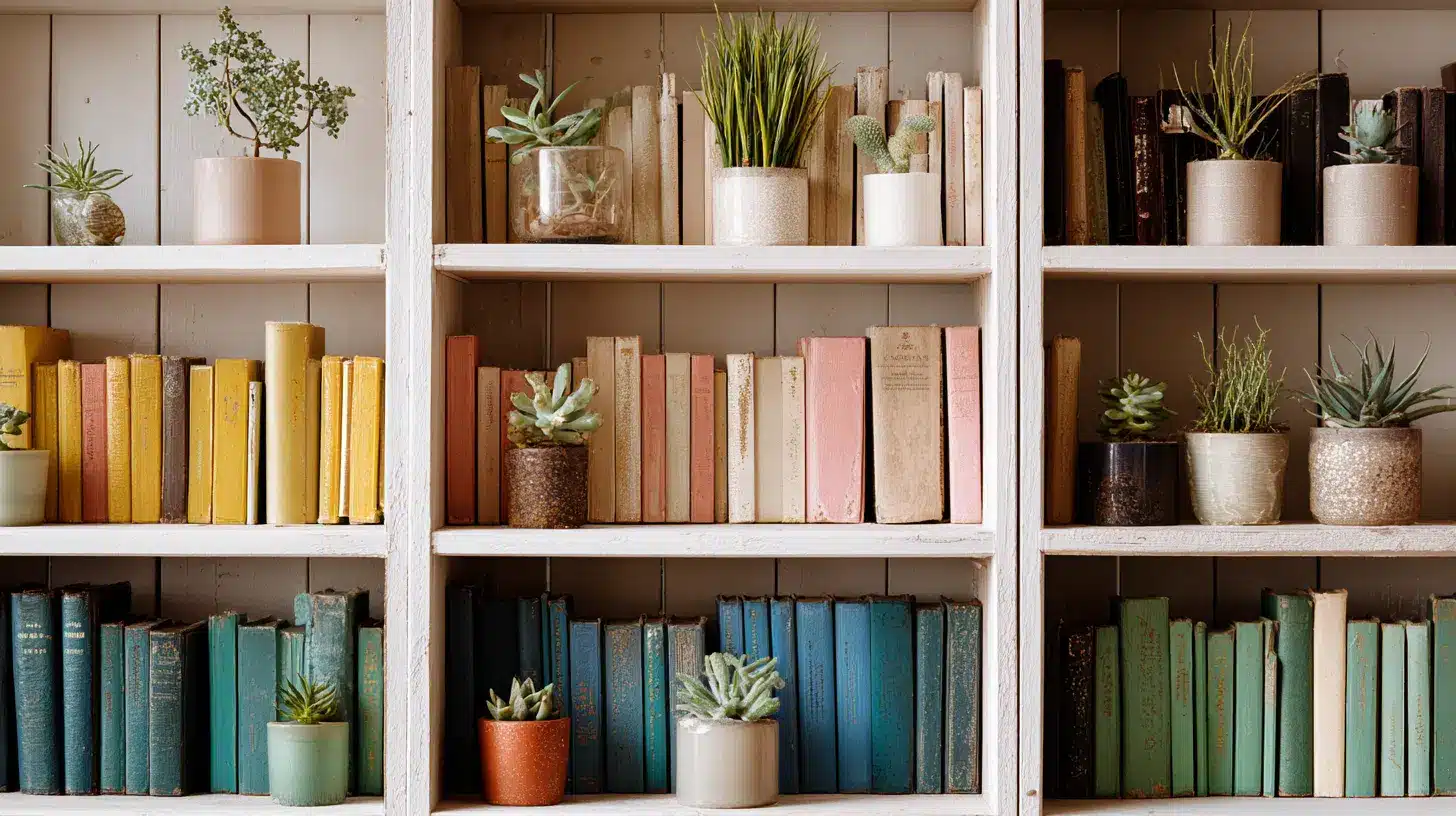
Do you dream of having a cozy reading room or a cozy home library? I know I do. There’s something so relaxing about having your own quiet corner where you can escape with your favorite books and just relax. The idea sounds absolutely simple, but I’ll be honest, getting started can feel pretty overwhelming, especially if you’re like me and don’t have much space or aren’t sure where to begin. With a few simple and creative ideas that I’ve found over the years, you can design a space that’s comfortable, personal, and totally inviting. From smart storage solutions that actually work to comfy seating that makes you want to curl up for hours, it’s honestly easier than you think to create your own little book paradise. Reading Room: Cozy Home Library Ideas to Try If you love getting lost in books, a cozy reading room can make the experience even better. Here are some home library ideas you can try to create a space that feels warm, quiet, and inviting: 1. Window Nook with Cushions Turn a sunny window into a cozy reading nook. Add a sturdy bench or seat under the window and top it with soft, oversized cushions in calming colors. Place a warm throw nearby for chilly mornings. Keep a small basket close to store your favorite books. Natural light makes daytime reading relaxing, while the outside view adds a refreshing backdrop. Extra Tip: On rainy or cloudy days, hang blackout curtains or heavy drapes. Close them for a warm, cocoon-like feel that makes every page feel even more magical. 2. Wall-to-Wall Bookshelves Turn an empty wall into your own mini home library. Install sturdy shelves that reach from floor to ceiling and fill them with your favorite books. Mix in small décor pieces to keep the look fun and fresh. Create simple sections for fiction, non-fiction, or favorite authors to stay organized. A wall full of books instantly adds warmth and character to your home while giving you easy access to your next read. Extra Tip: Add a rolling ladder for a classic “library feel.” Go for dark wood shelves with brass ladder details to give your space a timeless touch. 3. Under-the-Staircase Library Make use of the unused space under your stairs by turning it into a hidden home library. Add shelves or small cubbies to store your books neatly. Place a comfy pouf, beanbag, or armchair nearby for a cozy reading nook. It’s a perfect secret spot for both adults and kids to enjoy quiet time. Extra Tip: Install soft LED lights or a tiny wall sconce under the stairs. It creates a warm glow, perfect for late-night reading plans. 4. Corner Armchair Retreat Pick a quiet corner in your home and turn it into a relaxing reading retreat. Place a big, comfy armchair with soft cushions and add a cozy throw for extra comfort. Keep a side table nearby for your coffee, tea, or snacks. Add a small shelf or basket to store your current reads. By choosing a low-traffic area, you create a peaceful space where you can focus and recharge. Extra Tip: Use an adjustable reading lamp for evening sessions. A soft, warm light keeps the mood cozy while protecting your eyes from strain. 5. Vintage Library Cabinet Repurpose an old cabinet into a stylish home library. Choose one with glass doors so your favorite book covers stay visible and dust-free. Organize your books by color, genre, or even your reading mood. Mix in personal touches like framed photos, plants, or candles to make it unique. The vintage beauty adds character to your home while keeping your collection organized and easy to browse. Extra Tip: Label your shelves with small brass tags or handwritten cards. It gives your reading nook a classic library feel and makes finding books simple. 6. Loft Library Turn your loft into a peaceful reading hideaway, away from the noise of the main living space. Add low bookshelves along the walls to keep your books organized. Place a cozy sofa or daybed with soft cushions for long, relaxing reading sessions. This upgraded spot gives you privacy and a quiet escape to enjoy your favorite stories. Extra tip: If possible, add a skylight to fill the loft with natural light. On clear nights, you can even stargaze while taking reading breaks. 7. Built-in Banquette Seating Transition a simple wall into a comfortable reading nook with a built-in bench under shelves. The long, cushioned seat lets you stretch out with your favorite book. Shelves above the bench keep your collection within easy reach. Choose durable and easy-to-clean fabrics for the cushions so the setup lasts longer. This idea works perfectly in dining areas, sunrooms, or wide hallways. Extra tip: Add hidden drawers under the bench to store blankets, pillows, or snacks for cozy afternoons. 8. Reading Alcove Create a quiet and private corner by tucking a seat between two tall bookshelves. Use a built-in bench or place a small loveseat between the shelves. Add throw pillows for extra comfort and warmth. This semi-enclosed design blocks distractions, making it perfect for focused reading. Extra tip: Add soft wall sconces or a hanging pendant for warm lighting. For extra privacy, hang sound-absorbing curtains on each side of the alcove. 9. Dual-Purpose Library & Office Make the most of your space by combining a home office with a cozy mini library. Place your desk on one side for focused work. Line the opposite wall with bookshelves for your reading collection. This layout lets you switch easily between tasks and relaxation without leaving the room. Extra tip: Use a rotating desktop bookshelf to keep your favorite references close by while working. 10. Ladder Shelf Display Ladder-style shelves are a stylish and simple way to showcase your books. Their open, angled design looks modern and fits against almost any wall. Mix your books with decor like framed photos, plants, and candles for a balanced look. This setup keeps the room airy and organized while showing off your personality. Extra tip: Add small potted plants or trailing ivy for a pop of greenery and freshness. 11. Library by the Fireplace Turn your fireplace wall into a cozy reading zone. Frame the fireplace with bookshelves, either built-in or freestanding. Place a comfy armchair or loveseat nearby for the perfect reading spot. The warmth and crackling sounds make this setup inviting and relaxing. It works beautifully in living rooms, adding charm and functionality. Extra tip: Store firewood in the lower shelves or matching baskets for a rustic and practical touch. 12. Murphy Bed Reading Nook Make the most of a guest room by turning it into a dual-purpose space. Use a Murphy bed that folds away when not in use. Add a chair, loveseat, and bookshelves to create a cozy reading nook. When guests arrive, simply pull the bed down, and the room changes into a welcoming space. Extra tip: Keep a small stack of light novels, short stories, or travel guides for your guests to enjoy. 13. Children’s Library Corner Create a fun little reading zone just for kids. Use low, easy-to-reach bookshelves filled with colorful picture books and early chapter books. Add a soft rug where they can sit, read, and relax. Scatter stuffed animals to make the space extra cozy. This setup motivates kids to read independently and gives them their own mini library. Extra tip: Use wall decals or themed wallpaper forests, castles, or outer space to make it feel like stepping into a storybook. 14. Plant-Filled Library Bring life to your reading area by blending books and greenery. Place small potted plants on shelves between stacks of books. Use medium plants on tables and tall ones in empty corners for balance. Greenery adds freshness, improves air quality, and creates a calming feel. Extra tip: Go for low-maintenance plants like pothos, snake plants, or ZZ plants. They thrive indoors and require very little care. 15. Gallery-Style Library Wall Turn your library into an art display that shows off your personality. Mix books with framed artwork, prints, or personal photos. Alternate shelves of books with gallery-style arrangements for a curated look. Perfect for showcasing both your literary and artistic sides. Extra tip: Swap artwork seasonally, travel photos in summer, cozy winter prints later to keep your library wall feeling fresh. 16. Cozy Floor Pillows Library Create a relaxed reading space with oversized pillows and poufs. Ditch chairs and pile up soft floor cushions for a casual setup. Arrange pillows in a circle or near a low table for group reading. Perfect for family story time, kids’ book clubs, or just lounging with a novel. Extra tip: Use washable pillow covers to make cleanup easy, especially if kids and snacks are involved. 17. Rustic Wood Shelves Add a farmhouse touch to your reading space with open wooden shelves and black iron brackets. The natural wood grain brings warmth, while the open design keeps the area light and airy. Arrange books with vintage pieces like candle holders, pottery, or globes. This mix creates a cozy, collected-over-time feel. Extra tip: Mix horizontal and vertical book stacks for a casual, lived-in look. 18. Minimalist Library Create a calm and clutter-free reading corner with floating shelves and sleek furniture. Stick to a neutral color palette to keep the space soothing and simple. Display only your favorite or most beautiful books. Store the rest neatly out of sight to avoid clutter. This style keeps the focus on your books and the joy of reading. Extra tip: Place a small tray nearby for your coffee or tea without breaking the minimalist environment. 19. Rotating Mirror Screen Nook Install a three-panel mirror screen that can rotate and fold, creating privacy while also making your reading space feel larger and brighter by reflecting light around the room. Mirrors bounce natural light into every corner of your reading area Creates the illusion of a much larger library space Extra tip: Choose mirrors with decorative frames or add removable frosting spray in patterns during different seasons, snowflakes in winter, flowers in spring, for varied privacy levels and seasonal charm. 20. Book Tower Column Make your books part of your décor by stacking them vertically into a “book tower.” It’s a fun and space-saving way to display your collection. Use sturdy, similar-sized books to keep the tower stable. Place it in a corner, next to a chair, or even in your hallway. Extra tip: Add a small lamp, plant, or sculpture on top to make it look polished and stylish. 21. Wall-Mounted Reading Lights Install adjustable wall-mounted lights for better reading comfort. They save floor space and let you direct light exactly where you need it. Perfect for late-night readers who don’t want to brighten the whole room. Reduce eye strain and create a cozy, focused reading spot. Extra tip: Go for dimmable bulbs to switch between a bright study light and a soft evening glow. 22. Library Ladder Loft Bed Make the most of small spaces with a loft bed and mini library combo. Add sturdy built-in shelves or cubbies under the bed for book storage. Create a cozy reading nook beneath the sleeping area. Perfect for small bedrooms, studio apartments, or shared spaces. Extra Tip: Hang fairy lights under the bed for a warm, magical glow that makes bedtime reading extra inviting. 23. Cozy Library Rug A plush area rug can completely change your reading space. Adds warmth and comfort underfoot. Helps reduce noise and makes the nook feel cozier. Visually defines the reading area, even in open rooms. Extra Tip: Choose a patterned rug to hide stains and wear while adding style and personality to your library. 24. Reading Pod or Egg Chair Bring comfort and fun into your library with a pod chair or egg-shaped chair. Its enclosed shape creates a private, cozy spot for reading. Perfect for both kids and adults. Adds a unique focal point to your library space. Extra Tip: Place a soft blanket and oversized cushion inside for ultimate comfort during long reading sessions. 25. Modern Glass Door Shelves Upgrade your reading area with glass-fronted bookshelves for a sleek, modern feel. Keeps books protected from dust while showing off their covers. Complements minimalist and contemporary décor. Adds a clean, polished look to any reading space. Extra Tip: Install LED strip lighting inside the shelves to highlight special editions and turn your book collection into a statement display. 26. Library Workshop Table Create a multifunctional library table setup for family and friends. Use it for book club meetings, puzzles, or game nights. Makes your library a social space while keeping books nearby. Choose comfortable seating to motivate longer stays. Extra Tip: Keep coasters and portable chargers on the table so guests can relax and enjoy uninterrupted reading or conversations. 27. Built-In Wall Library Convert a blank wall into a library with custom-built shelves from floor to ceiling. This setup maximizes storage while giving your space a stylish, polished look. Keep the design symmetrical for a neat, formal look. Mix open shelves and closed cabinets if you want both display and hidden storage. The tall shelves make the room look bigger and more classy. Extra tip: Add a sliding library ladder for easy access and a classic “old-world library” feel. 28. Canopy or Tent Reading Area Turn a corner into a dreamy reading nook with a canopy or sheer draped fabric. It instantly makes the space cozy, soft, and inviting. Place floor cushions or a beanbag inside for comfy seating. Layer blankets and pillows for extra warmth and relaxation. This setup is perfect for kids and adults who want a private escape. Extra tip: Keep a small lamp, a basket of books, and snacks nearby so you never have to leave your cozy spot. 29. Sliding Shelves or Secret Door Add some mystery to your library with sliding shelves or a hidden door disguised as a bookshelf. It’s both practical and fun, perfect for concealing storage or a private reading room. Great for mystery lovers and fans of unique designs. Creates a secret, exciting element in your space. Extra tip: Store your mystery, thriller, or action books behind the hidden door for a playful, themed touch. 30. Reading Bench with Storage Combine comfort and function with a built-in bench that has cubbies or drawers underneath. It’s a perfect solution for small spaces and multipurpose rooms. Add thick cushions on top for a cozy reading seat. Use the storage below to keep books, blankets, or board games neatly tucked away. This design works great under windows, along walls, or at the foot of the bed. Extra tip: Keep your current reads and a soft throw right on the bench for quick, comfy access. 31. Color-Coded Shelves Make your library a work of art by arranging books by spine colors. The result is a pretty rainbow effect that adds life and personality to the room. Perfect for modern and eclectic spaces. Instantly makes your collection Instagram-worthy. Extra tip: Fill small gaps with decor pieces like candles, vases, or framed art in matching shades to keep the look cohesive and stylish. 32. Mobile Library Cart Keep your favorite books and essentials within reach with a wheeled library cart. It’s versatile, practical, and ideal for small spaces. Move it easily between rooms or use it in shared spaces. Organize it into tiers: Top shelf for current reads Middle shelf for magazines Bottom shelf for tea, candles, or blankets Extra tip: Personalize your cart with stickers, nameplates, or small décor items to make it uniquely yours. 33. Wrapped Balcony Library Turn your balcony into a cozy outdoor library by adding waterproof shelves and comfy seating. This setup is perfect if you enjoy reading while soaking in fresh air and sunshine. Use weather-resistant cushions and throws for extra comfort. Choose a hammock, chair, or bench that invites long, relaxing reading sessions. Add small potted plants for a refreshing feel. Extra tip: Hang outdoor string lights along the railing or overhead for a dreamy evening reading experience. 34. Reading Room with Bunk Seats Create a fun, multi-level reading space with staggered, upholstered bunk-style seats. This idea works beautifully for family rooms or spaces where several people want to read together. Each seat feels private but keeps you connected with others. Use soft, supportive cushions for maximum comfort. Choose warm, cozy colors to make the room inviting. Extra tip: Dedicate one bunk for nap time. Add pillows and blankets to make it a perfect mini retreat. 35. Book-Shaped Shelving Make your reading room playful with creative, book-shaped shelves. These shelves look like stacked books, adding personality and beauty to your space. Perfect for kids’ libraries or eclectic home décor. Combine storage with style by mixing books and decorations. Include fun elements like framed quotes, quirky bookmarks, or literary figurines. Extra tip: Use bright colors for the shelves to make them stand out as a bold design feature. 36. Library with a Coffee Nook Take your home library to the next level by pairing it with a cozy coffee nook. Imagine sipping your favorite drink while getting into your favorite book! Set up a small espresso machine or French press nearby. Include mugs, spoons, and coffee essentials in a compact corner. Add a small shelf for tea bags, biscotti, and other snacks. Extra tip: Keep a comfy chair nearby so you can enjoy a café-like reading experience at home. 37. Reading Nook Under a Skylight Transition your attic or sloped-roof room into a dreamy skylight reading nook. Natural light streams in, creating the perfect atmosphere for reading and relaxing. Add a built-in window seat or a soft sofa beneath the skylight. Use light-colored cushions to make the space feel open and airy. Include blackout shades to control brightness on sunny days. Extra tip: Place a small side table nearby for your books, tea, or reading glasses, making your nook extra functional. 38. Multi-Level Shelf Islands Create a cozy reading area by using free-standing shelving “islands” to divide your space. These shelves are perfect for storing books, plants, and décor while keeping the room open and airy. Great for open-plan homes or studio apartments. Helps separate spaces without building walls. Makes the room functional while keeping it stylish. Extra tip: Hide a Bluetooth speaker inside one of the shelves to enjoy soft music, podcasts, or audiobooks while you relax. 39. Sensory Reading Tube Install a large fabric or cardboard tube (like a play tunnel) in your reading corner, lined with soft fabric and pillows to create a cozy reading cave. The enclosed space helps with focus and blocks visual distractions Great for people who need sensory regulation while reading Easy to customize with different fabrics, colors, and textures Extra tip: Add texture strips inside velvet, corduroy, or faux fur that you can touch while reading to help with concentration and stress relief. 40. Library with Smart Lighting Make your reading room smarter with adjustable smart lighting. You can change the brightness and color to match your mood or activity. Use soft, warm tones for cozy evening reads. Brighten the lights for focused reading sessions. Set up custom modes for relaxing or hosting friends. Extra tip: Program a special “reading mode” for the perfect light balance, not too dim, not too bright. 41. Book Display Ledges Turn your books into wall art with slim, wall-mounted display ledges. They let you showcase your favorite covers beautifully while keeping the space minimal and stylish. Place books face-forward for an artistic effect. Great for small spaces and modern designs. Keeps your books easily accessible and visually appealing. Extra tip: Rotate the displayed books every month to keep your reading nook fresh and inspiring. 42. Reading Mood Board Wall Design an interactive inspiration wall using cork boards, magnetic strips, or pegboards where you can pin reading goals, book recommendations, favorite quotes you’ve found, and photos from literary locations you want to visit. Pin up handwritten notes about books you loved or want to remember Create seasonal reading challenges or themed book lists Display bookmarks, literary event tickets, or author signatures as personal mementos Extra tip: Use different colored pins or ribbons to categorize items: red for “must-reads,” blue for “completed favorites,” green for “quotes that inspire me.” 43. Giant Bean Bag Library Make your library extra cozy by placing a giant bean bag in the center of the room. It’s perfect for curling up with your favorite book and offers comfort for both kids and adults. Creates a relaxed and dreamy feel. Works well in modern, casual, or playful reading rooms. Promotes long reading sessions without feeling cramped. Extra tip: Keep a mini side table nearby for your coffee, tea, or reading glasses. It adds convenience while maintaining the laid-back feel. 44. Illuminated Shelf Alcoves Upgrade your reading area with LED strip lighting behind or under your shelves. The soft glow highlights your books while creating a warm, inviting atmosphere. Perfect for late-night reading without straining your eyes. Adds depth and style to your library design. Keeps the ambiance cozy instead of overly bright. Extra tip: Opt for warm light tones to make your reading space feel soothing and comfortable. 45. Rotating Book Rack Bring a classic touch to your reading nook with a rotating book rack. It’s a smart and stylish way to organize your collection without taking up much space. Holds dozens of books in a compact format. The spinning design makes browsing effortless. Perfect for small rooms or minimalist setups. Extra tip: Organize your rack by genre, author, or theme so you can quickly find your next great read. Practical Tips for Making It Yours Now that you’ve seen all these ideas, you might be feeling a little overwhelmed, and that’s totally normal. The key is to start simple and build your perfect reading space gradually. Here are some tips to make your space personal: Start with the basics and add special touches over time. You don’t need to create a Pinterest-perfect library overnight. Begin with good seating and lighting, then slowly add books, décor, and personal touches that make the space uniquely yours. Consider your lifestyle when choosing ideas. If you have small kids, those beautiful white floating shelves might not be the most practical choice right now. If you move frequently, focus on portable solutions like ladder shelves and mobile carts rather than built-ins. Budget-friendly options can be just as beautiful as expensive custom solutions. Thrift stores, garage sales, and DIY projects can help you create an amazing reading space without breaking the bank. Think about maintenance, too. A reading space should be relaxing, not stressful. Choose solutions that are easy to clean and organize so you can spend more time reading and less time tidying up. Don’t forget about storage for things other than books. You’ll want somewhere for reading glasses, bookmarks, notebooks, and maybe some cozy blankets. A small basket or side table can make all the difference in keeping your space functional. Wrapping It Up I’ve always felt that a reading room or a cozy home library should be more than just a corner; it should be a little space that feels like yours alone. The good news is, creating one doesn’t have to be costly or complicated. Start with the essentials: a comfortable chair or cushioned seat and good lighting. From there, layer in small touches that bring you comfort, maybe a blanket you love, a plant for freshness, or artwork that makes you smile. Each detail adds to the feeling of ease and belonging. Your reading spot doesn’t need to be perfect; it just needs to feel right for you. Which idea are you most excited to bring into your own space?
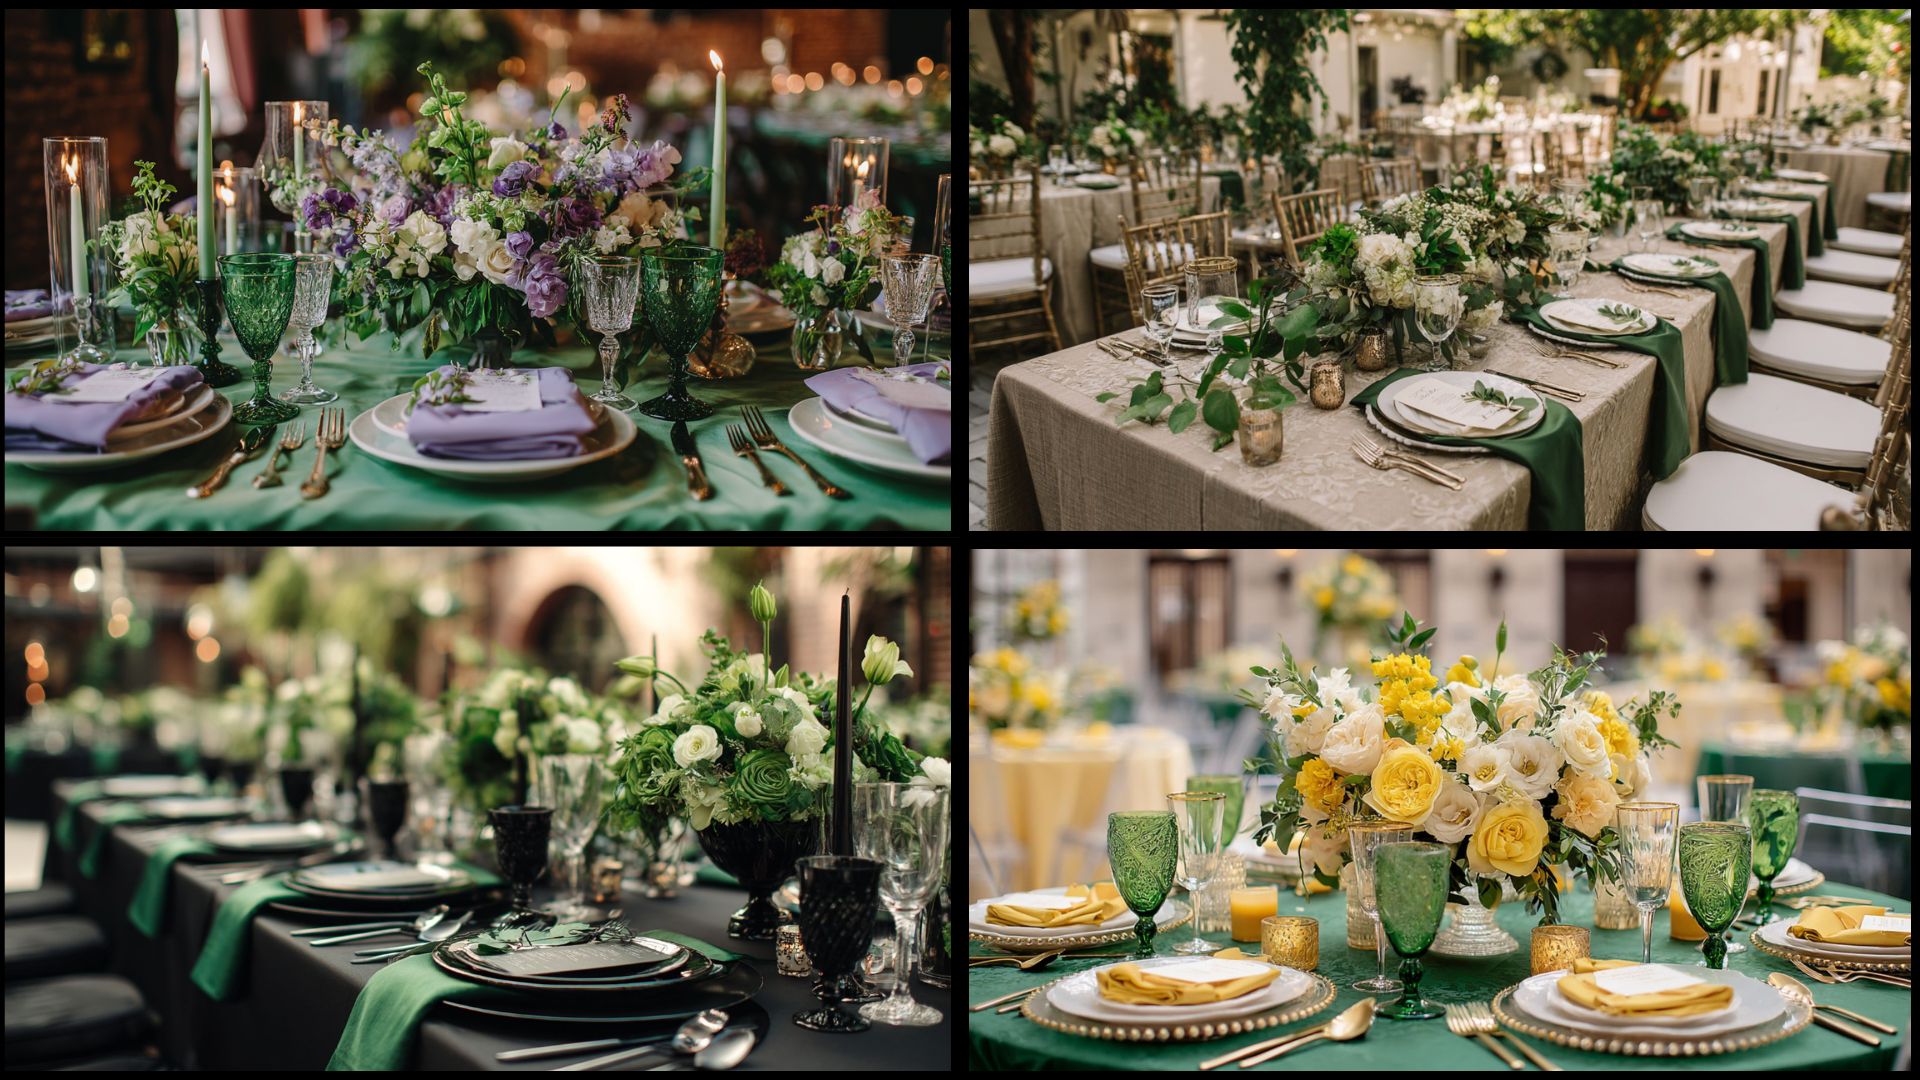
Are you looking for a wedding color that’s both trendy and classic? Emerald green wedding colors might be the perfect match for you. This stunning shade brings life and energy to any celebration, while remaining classy and luxurious. Emerald green means love, rebirth, and unlimited possibilities for your new journey together. I love how this color works with almost any other shade you can imagine. It fits perfectly with romantic garden parties or fancy ballroom receptions. You can make it soft and dreamy or bold and dramatic. This versatile color photographs beautifully, creating memories that last forever. Get ready to fall in love with emerald green magic! Why You Should Choose Emerald Green? Emerald green is one of nature’s most beautiful colors. It represents growth, peace, and new beginnings in your marriage. This rich color has meant good luck and prosperity in many cultures for centuries. I love how emerald green works for any wedding style you have in mind. It looks stunning in classic church weddings with gold accents and white flowers. Modern couples can pair it with sleek silver or copper for a fresh look. Rustic weddings shine when you mix emerald with natural wood and cream colors. The best part is that emerald green photographs beautifully in any season. Spring brings out its freshness, summer makes it pop, fall adds warmth, and winter creates a sense of classiness. Your wedding photos will look amazing no matter when you say “I do.” Emerald Green Wedding Color Combinations Emerald green is rich, classic, and pairs beautifully with many other colors. From soft pastels to bold jewel tones, it can create a wedding palette that feels both fresh and classic. Here are some stunning color combinations to inspire your wedding palette: 1. Emerald Green and Gold Emerald green and gold create a graceful and luxurious look. The green adds depth, while gold accents bring warmth. This combination works great for formal weddings. Gold can be used in tableware, candleholders, and invitations. Velvet or satin fabrics will complement the rich tones of emerald and gold, giving the setting a regal feel. Decor Tip: Add gold accents with metallic vases or frames to improve the classiness of emerald green. 2. Emerald Green and White Emerald green and white create a fresh, clean look. The simplicity of white balances the vibrant green. This combination works well for both outdoor and indoor weddings. Consider using white flowers, such as lilies or roses, alongside emerald green tablecloths. Lightweight fabrics like chiffon and linen will add an airy feel. Decor Tip: Use white candles in glass holders to bring warmth and balance to the emerald green theme. 3. Emerald Green and Champagne Emerald green and champagne brings a soft, romantic vibe. The champagne tones act as a neutral backdrop to emerald’s boldness. Consider using champagne-colored linens, and emerald bridesmaid dresses will pop beautifully. Satin or silk materials complement this pairing perfectly. Champagne provides a subtle glow, while emerald remains the focal color. Decor Tip: Incorporate champagne-colored glassware for a light touch that complements the emerald accents without overshadowing them. 4. Emerald Green and Navy Blue Emerald green and navy blue form a rich, deep combination. Navy gives a calming effect that complements emerald’s vibrancy. Pair navy table runners with emerald centerpieces, and use navy napkins to contrast. Wool or heavy cotton fabrics will improve the mood, giving the wedding a cozy, formal feel. Decor Tip: Use navy blue drapes or chair covers to create a formal, yet inviting space with emerald highlights. 5. Emerald Green and Blush Pink Emerald green and blush pink create a soft and feminine atmosphere. The pale pink adds warmth, complementing the emerald’s richness. This pairing works well for a spring or summer wedding, with blush florals like peonies. Use airy fabrics like tulle or lace for a dreamy, romantic feel. Decor Tip: Incorporate blush pink roses into your centerpieces for a light touch that pairs well with emerald green. 6. Emerald Green and Silver Emerald green and silver provide a sleek and modern look. Silver’s cool tone contrasts beautifully with the warmth of emerald green. This combination is ideal for winter weddings or evening events. Consider using silver chargers or cutlery alongside emerald decor for a refined setting. Decor Tip: Silver candelabras or metallic table runners will add a modern touch to emerald-themed decor. 7. Emerald Green and Burgundy Emerald green and burgundy create a bold, striking contrast. Burgundy’s deep red tone complements emerald’s richness, making for a dramatic effect. This combination suits a fall or winter wedding. Velvet or silk fabrics enrich the luxurious feel, making everything from seating to floral arrangements stand out. Decor Tip: Burgundy flowers, such as dahlias, add a dramatic effect when paired with emerald green accents for a bold, beautiful look. 8. Emerald Green and Ivory Emerald green and ivory offer a refined appearance. Ivory tones soften the brightness of emerald, creating a balanced visual. Perfect for any season, this pairing complements lace or satin fabrics well. Use ivory tablecloths or chair covers to create a serene, classic atmosphere. Decor Tip: Add ivory floral arrangements, like orchids, for a lavish contrast to the boldness of emerald green. 9. Emerald Green and Dusty Rose Emerald green and dusty rose offer a romantic and soft look. The muted rose balances the emerald’s depth while adding warmth. Consider using dusty rose table settings, napkins, or florals to complement emerald dresses. Velvet or chiffon will bring out the softness and depth of the pairing. Decor Tip: Dusty rose ribbon or candles can tie together the emerald decor, adding a gentle, warm touch. 10. Emerald Green and Peach Emerald green and peach create a refreshing, joyful combination. The peach tones add warmth, lightening the emerald’s depth. This pairing is perfect for a spring or summer wedding, especially with peach-colored flowers like roses or carnations. Use lighter fabrics, such as linen, to keep the feel breezy. Decor Tip: Peach-colored linens or balloons can add a fun, casual vibe that complements emerald accents. 11. Emerald Green and Coral Emerald green and coral bring a lively, deep contrast. Coral’s bright, warm tones complement the richness of emerald, making the color truly stand out. This combination works for both indoor and outdoor weddings, with coral flowers adding a burst of color. Silk or satin fabrics bring a luxurious feel. Decor Tip: Coral place settings or chair covers will add an extra layer of brightness next to emerald green. 12. Emerald Green and Lavender Emerald green and lavender create a soft and dreamy look. Lavender adds a cool, calming element that pairs well with emerald’s boldness. This combination works beautifully for spring weddings. Consider incorporating lavender florals or accents into your decor, paired with silk or chiffon fabrics. Decor Tip: Lavender ribbons or accents in the bouquet can tie everything together, adding a gentle contrast to emerald green. 13. Emerald Green and Black Emerald green and black create a dramatic and bold contrast. Black adds refinement and makes emerald pop. This combination works great for evening weddings or formal events. Consider using black tablecloths or black accents with emerald florals and lighting. Decor Tip: Black candles or glassware will add sleekness and grace to the emerald green theme. 14. Emerald Green and Taupe Emerald green and taupe offer a neutral, understated look. The soft taupe tones allow emerald to stand out, while still maintaining a calm atmosphere. Ideal for rustic or nature-inspired weddings, this pairing works well with linen and burlap materials for a relaxed vibe. Decor Tip: Taupe-colored linens or chair sashes will soften the bold emerald green without detracting from the color’s vibrancy. 15. Emerald Green and Plum Emerald green and plum create a deep, rich, and regal combination. Plum adds depth, while emerald keeps the look fresh and vibrant. This pairing works beautifully for fall or winter weddings. Consider using rich velvet or satin to complement the luxurious tones. Decor Tip: Plum florals like calla lilies will add a touch of mystery next to emerald green decor for a striking look. 16. Emerald Green and Light Gray Emerald green and light gray provide a modern and balanced contrast. Light gray’s soft tones complement emerald’s vibrancy, creating a peaceful and lavish atmosphere. Ideal for a minimalist or modern wedding, light gray linens or napkins will pair perfectly with emerald accents. Decor Tip: Light gray table runners or napkins will subtly soften emerald green accents, creating a well-balanced, modern feel. 17. Emerald Green and Soft Yellow Emerald green and soft yellow offer a fresh and cheerful look. Yellow adds brightness and warmth to emerald’s richness. This pairing works well for a spring wedding, with sunflower or daisy flowers. Cotton or linen materials will bring a light and airy vibe to the decor. Decor Tip: Soft yellow flowers or candles will add a sunny touch, creating a cheerful contrast to emerald accents. 18. Emerald Green and Copper Emerald green and copper offer a warm, rustic appeal. The deep tones of emerald contrast beautifully with the warmth of copper. This combination is perfect for a fall wedding, with copper decor and metallic touches. Use copper candleholders or tableware for a cozy, earthy look. Decor Tip: Copper chargers or vases will add a warm metallic touch to the emerald theme, creating an inviting setting. 19. Emerald Green and Mint Emerald green and mint create a refreshing, cool combination. The mint balances the emerald’s intensity with a lighter, calming effect. This works well for a spring or garden wedding, with mint-colored floral arrangements or accents. Soft fabrics, such as chiffon or organza, improve the light feel. Decor Tip: Mint-colored napkins or ribbons will add a cool touch that complements emerald’s deep tones perfectly. What Not to Do with Emerald Green Wedding Colors While emerald green can make your wedding look stunning, there are a few mistakes that can take away from its beauty. Avoid these common pitfalls to keep your palette balanced and stylish. 1. Don’t overuse emerald green: Use it as an accent or main shade, but balance it with neutrals or complementary colors.2. Avoid clashing tones: Stay away from colors that fight with emerald green, like overly bright neons.3. Don’t forget lighting effects: Emerald green can look different under warm or cool lighting, so test your palette in your venue’s lighting.4. Avoid too many textures in the same shade: Mixing too many emerald fabrics (satin, velvet, chiffon) can feel overwhelming.5. Don’t skip seasonal awareness: Some color pairings work better in certain seasons, so plan accordingly.6. Avoid mismatched accessories: Choose décor, shoes, and jewelry that complement rather than compete with the green. By steering clear of these mistakes, you’ll let emerald green shine while keeping your overall wedding look cohesive, classy, and memorable. Final Words Emerald green wedding colors offer limitless possibilities for creating your dream wedding day. You can mix and match any of these combinations to find the perfect match for your style. This amazing color works in every season and with every wedding theme you love. I hope these ideas inspire you to experiment with various shades and textures. Your emerald green wedding will be stunning, no matter which path you choose. Each combination brings its special delight and personality to your big day. The possibilities are truly limitless when you start experimenting with these gorgeous color pairings. Ready to start planning your colorful celebration? Share your favorite emerald green combo in the comments below!
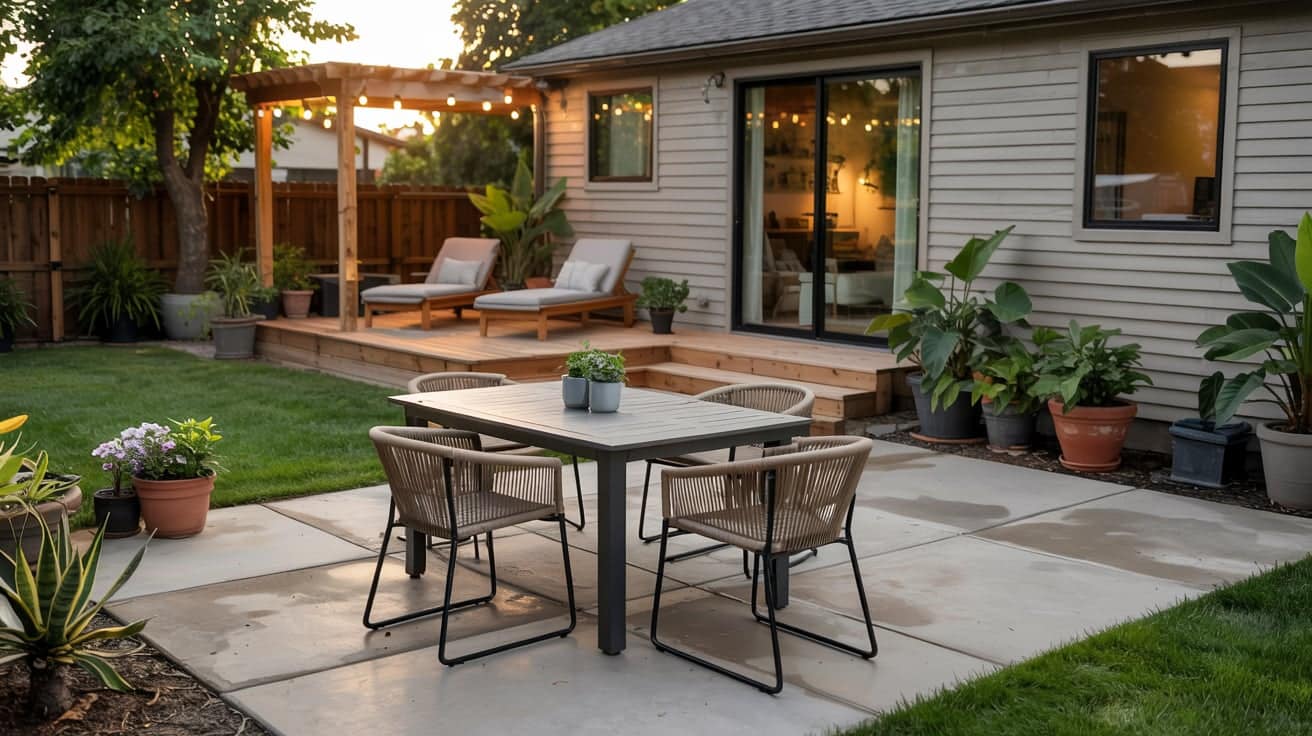
I used to go back and forth between building a patio or a deck, but I realized I didn’t have to pick just one. If you want an outdoor space that’s both functional and comfortable, perfect for everything from family dinners to lazy weekend lounging, a concrete patio and wood deck combination could be exactly what you need. I’ll share what I’ve learned about how this setup works, the design ideas that inspired me, building tips I wish I knew earlier, and the cost factors to plan for. If you’re tackling it as a DIY project or bringing in a contractor, you’ll have the info to make smart choices and avoid mistakes. Let’s start creating a space that fits your lifestyle. Combining Concrete Patios with Wood Decks for Functional Outdoor Spaces A concrete patio and wood deck combo is a backyard layout that combines both materials to create distinct outdoor zones. The concrete portion is often used for dining, grilling, or placing heavy furniture, while the wood deck provides a warmer surface for lounging or relaxing. This combination works well in various yard sizes and terrains, offering both durability and texture contrast. It allows homeowners to define spaces for different uses while using the strengths of each material for comfort, function, and long-term use. Concrete Patio and Wood Deck Combo Ideas Looking to make the most of your outdoor space? These practical and visually engaging combinations offer structure, variety, and comfort by blending durable concrete with warm, natural wood decking: 1. Side-by-Side Split Layout This layout separates your outdoor space into two clear zones: one with a concrete patio for dining or grilling and the other with a wood deck for lounging or casual seating. It’s ideal for creating a functional division without building walls or barriers. This design works exceptionally well in medium-to-large yards, helping you assign specific activities to each surface. It also gives you flexibility to decorate each area based on how you plan to use it, while keeping a clean and uncluttered look. 2. Floating Wood Deck Over Concrete Slab This idea involves installing a raised wood platform over an existing concrete patio. It’s a cost-effective solution for updating old or worn-out concrete surfaces without demolition. The wood sits slightly elevated, improving drainage and allowing airflow underneath. This approach adds warmth to the space, improves foot comfort, and offers a quick visual refresh. It’s perfect for DIY enthusiasts who want a fresh look without starting from scratch, and it works especially well in rental properties or on a limited renovation budget. 3. Multi-Level Terrace Combo A multi-level design separates your concrete patio and wood deck by elevation, making it ideal for sloped or uneven yards. One level can serve as a dining or fire pit area, while the other supports lounge chairs or planters. The step-down effect adds structure and helps create a natural flow across your yard. This approach also enhances the sense of space by visually breaking up a large area. With the proper lighting and railing, it can also improve safety and comfort. 4. Curved Concrete Patio with Square Deck Using a rounded or curved concrete shape alongside a square or rectangular deck introduces visual contrast that makes each surface stand out. The soft, flowing shape of the patio blends well with garden features or green spaces, while the geometric deck offers a stable base for furniture. This pairing works beautifully in contemporary or transitional yard designs and gives you freedom to soften the space without overcomplicating construction. The layout also encourages traffic flow around the yard more naturally. 5. Fire Pit on Concrete, Seating on Deck Place a fire pit or chiminea on the non-combustible concrete patio and arrange outdoor seating on the adjacent wood deck. This idea makes the most of each material’s strength and ensures safety around open flames. It’s perfect for entertaining and encourages gathering in one area while keeping a cozy, relaxed atmosphere on the deck. The setup also creates a natural anchor point in the backyard, drawing guests toward the fire without cluttering the entire space with heavy furniture. 6. Wraparound Deck + Inset Patio A wraparound wood deck framing a sunken or inset concrete patio provides a visually rich layout that balances structure and flow. The center patio becomes a focal point, ideal for a dining set, small garden, or hot tub, while the surrounding deck serves as a transition or seating area. This design feels enclosed but still open to the rest of the yard. It’s beneficial for maximizing space in smaller backyards while offering flexibility for future upgrades like built-in benches or planters. 7. Minimalist Concrete Pad + Floating Steps Pairing a smooth concrete pad with floating wood steps adds a modern touch with clean lines and separation between elements. This setup is ideal for homeowners seeking a sharp, understated layout that highlights architectural form. Floating steps also improve airflow and prevent moisture buildup around the foundation. If you’re creating access to a sliding door or leading to a detached space, this design offers simplicity and low maintenance while still delivering visual structure and ease of movement. 8. Pergola on Deck, Grill on Patio Install a pergola over your wood deck for shade and relaxation, while placing your grill or cooking station on the concrete patio. This layout keeps smoke and heat away from seating areas and defines different functions in the yard. It’s practical for hosting events or family meals and prevents wear on the wood from cooking-related activities. The division also helps organize your space, so guests can gather comfortably in one spot without getting in the way of meal prep or cleanup. 9. Concrete Borders Framing a Deck Frame your wood deck with a border of poured concrete to create contrast and structure. This design technique helps prevent grass overgrowth, defines the edge of the deck, and offers space for planters, lighting, or steps. The crisp perimeter also protects the deck’s foundation by improving drainage. It’s instrumental in minimalist or contemporary settings where clean edges and functional finishes matter. You can stamp or stain the concrete for added texture or visual interest while maintaining low maintenance. 10. Seamless Composite Deck into Polished Concrete Blend a composite wood deck into a polished concrete patio using aligned levels, color-coordinated tones, and matching edges. This high-end look works well in modern homes where clean surfaces and smooth transitions are key. Composite materials reduce maintenance while offering uniform appearance and durability. The polished concrete extends the sleek finish, reflecting light and expanding visual space. Together, they create an organized, low-maintenance layout that works beautifully for outdoor lounges, poolside seating, or open-concept backyard entertainment. 11. Detached Deck Nestled in Patio Install a freestanding wood deck platform within a larger concrete patio for a distinct contrast in material and elevation. This approach creates a “zone within a zone,” helpful in separating private seating or adding variation in a flat landscape. The wooden insert can host a bistro table, sectional, or lounge area, while the surrounding concrete keeps things grounded and practical. It’s a clever solution for creating spatial depth without changing your yard’s overall footprint, especially in open-plan outdoor designs. 12. Outdoor Shower on Concrete + Deck Changing Area Use concrete as a base for an outdoor shower to prevent water pooling and damage, then add a connected wood deck as a dry changing area. This pairing is ideal for beachside homes, pool zones, or backyard spas. The concrete handles constant moisture without warping, while the deck offers a warmer, barefoot-friendly surface to dry off. You can also add hooks, benches, or towel racks for convenience. It’s a space-efficient solution that mixes comfort with purpose. 13. Garden Path to Raised Deck Overlook Build a narrow concrete path leading through your garden toward a slightly styled wooden deck at the far end. This design invites movement through the landscape, creating a sense of destination. The raised deck offers a peaceful vantage point for reading or morning coffee away from high-traffic zones. It’s especially effective in long or deep yards and can be customized with lighting, flower beds, or a trellis. The separation adds visual rhythm and encourages exploration of the whole yard. Building a Deck on a Concrete Patio: A Step-by-Step Guide Building a wood deck over a concrete patio can extend the life of your outdoor space. This guide breaks down each stage to help you plan, construct, and protect your structure effectively. Step 1: Prep and Evaluation Start by inspecting the concrete slab for cracks, uneven areas, and drainage issues. Use a level to assess the slope and ensure proper water runoff away from your home. If the slab is damaged or unlevel, it may require repairs or a leveling compound before construction begins. Planning the deck height and checking for any obstacles like vents or fixtures is essential. This step ensures a stable base for your framing and long-term durability. Step 2: Building Process Begin by laying out the frame using pressure-treated wood rated for ground contact. Secure the joists with anchors or adjustable post bases to avoid direct contact with the concrete. Maintain proper joist spacing, typically 16 inches on center, for stability and uniform support. Use galvanized fasteners or deck screws to resist corrosion. Ensure all structural elements are square and level before attaching the decking boards. Proper framing is the foundation of a safe, lasting deck. Step 3: Waterproofing and Durability Tips Install flashing where the deck meets the home to divert water and prevent leaks. Use spacers or composite deck blocks to lift framing off the concrete surface, reducing the risk of moisture absorption. Consider an under-deck drainage system to protect the structure and create dry storage space below. Choose moisture-resistant decking materials like composite or hardwood to improve longevity. Proper waterproofing reduces maintenance and helps the deck withstand seasonal weather changes. Step 4: Safety & Code Compliance Check local building codes for requirements regarding railing height, stair dimensions, and deck load capacity. Permits may be needed depending on the size and height of your deck. Install guardrails and handrails where necessary and ensure steps meet regional safety standards. Leave appropriate gaps between boards for water drainage. Meeting code not only provides safety but also helps avoid fines or rework in the future. Always prioritize structural integrity and user protection. DIY vs. Hiring a Contractor Choosing between building the combo yourself or hiring a contractor depends on your experience, time, and the complexity of your yard. Deciding between a DIY build and hiring a contractor will shape your project’s cost, timeline, and results. Here’s what to consider before making the choice: Factor DIY Contractor Tools Needed Must own or rent Provided by the contractor Skill Level Basic carpentry required Professional expertise Time Slower, weekends, or longer Faster, managed timeline Complexity Best for simple builds Handles advanced or sloped layouts Drainage & Slope It may not be easy to address Expert handling of grading and runoff Permits/Code DIY responsibility Contractor-managed Cost Lower upfront Higher, includes labor and warranty Cost Breakdown and Budget Planning Understanding the full cost and creating a clear budget will help you avoid surprises and keep your project on track. Here’s how to plan your expenses: Concrete Patio Costs Concrete patios vary in price depending on the finish. Bare broom-finished surfaces are more affordable, while stamped or stained options cost more due to added labor and materials. Surface area, accessibility, and prep work also influence total cost. Keep in mind that additional features like curves, borders, or thickness adjustments may require a higher investment and more planning. Wood Deck Costs The type of wood or composite material you choose affects cost and maintenance. Pressure-treated wood is a standard entry-level option, while hardwoods or composites offer greater durability with less upkeep. The layout complexity, railing requirements, and hardware choices also influence costs. Larger decks or those with unique shapes or levels may require more framing materials and labor. Combo Project Cost Examples The total cost of a combined patio and deck setup depends on the size of each section, site conditions, and regional labor rates. For example, a flat backyard with minimal prep work may cost significantly less than one with grading needs or drainage concerns. Including stairs, lighting, or built-in features also increases pricing. Always evaluate material, design, and site conditions together. Bonus Tool: Interactive Budget Estimator An online budget estimator helps you plan by adjusting square footage, materials, and layout types. Use it to input your desired dimensions and see how material choices affect total cost. This tool can guide early decisions and help determine whether DIY or hiring a pro fits your budget. It’s designed to offer flexible projections, not fixed quotes. Furnishing and Landscaping the Combo The right furniture and landscaping can tie your patio and deck combo together, making it both functional and visually appealing. Here’s how to style the space: Layout Tips Designate each surface based on intended use. Place dining tables, grills, or kitchen stations on the concrete for stability and heat resistance. Use the wood deck for casual seating, loungers, or a fire-free lounge zone. Keep pathways clear and ensure enough space for movement between zones to make the entire layout feel connected and functional. Decor Integration Use neutral or coordinating colors to link the deck and patio areas. Add large planters along edges or transitions to soften the material shift. Outdoor rugs can help define lounge or dining zones, while matching cushions, furniture finishes, and accessories tie everything together. Natural elements like plants and stones can also create a cohesive look across surfaces. Lighting Suggestions Combine different types of lighting to ensure usability after dark. Deck post lights provide subtle illumination along railings or stairs. Wall-mounted sconces can light up your patio area, especially near doors or seating. Add solar-powered path lights to highlight walkways or garden edges. Consider string lights or lanterns for ambiance, especially above lounge or dining zones. Maintenance Tips for Longevity Proper care will keep your patio and deck combo looking great and performing well for years. Here are some maintenance tips to help extend its lifespan: Clean Surfaces Regularly: Sweep away debris, hose down dirt, and use gentle cleaners for stains on both wood and concrete. Seal Wood Annually: Apply a quality sealant to protect against moisture, UV rays, and surface cracking. Inspect for Damage: Check for loose boards, cracks, or signs of rot. Address small issues before they become major repairs. Maintain Drainage: Ensure water flows away from the deck and patio. Clear drains and avoid pooling to protect both materials. Protect During Harsh Weather: Cover furniture, remove snow promptly, and use breathable covers to shield surfaces from seasonal damage. Reapply Concrete Sealant as Needed: Concrete should be resealed every few years, depending on traffic and exposure. With regular upkeep, your patio and deck will stay safe, attractive, and ready to enjoy season after season. Conclusion Now that I’ve given you a solid understanding of how a concrete patio and wood deck combo works, you can start planning a space that suits your style and needs. If you go the DIY route or bring in a pro, the right layout, materials, and upkeep will keep your outdoor area looking great and functioning well for years. I’ve shown you layout ideas, building steps, cost tips, and even furniture suggestions, so you have all the basics covered. Just remember, every great space starts with a thoughtful plan. Want more help turning ideas into action? Check out more blogs on the website for guides, tips, and inspiration you can use!
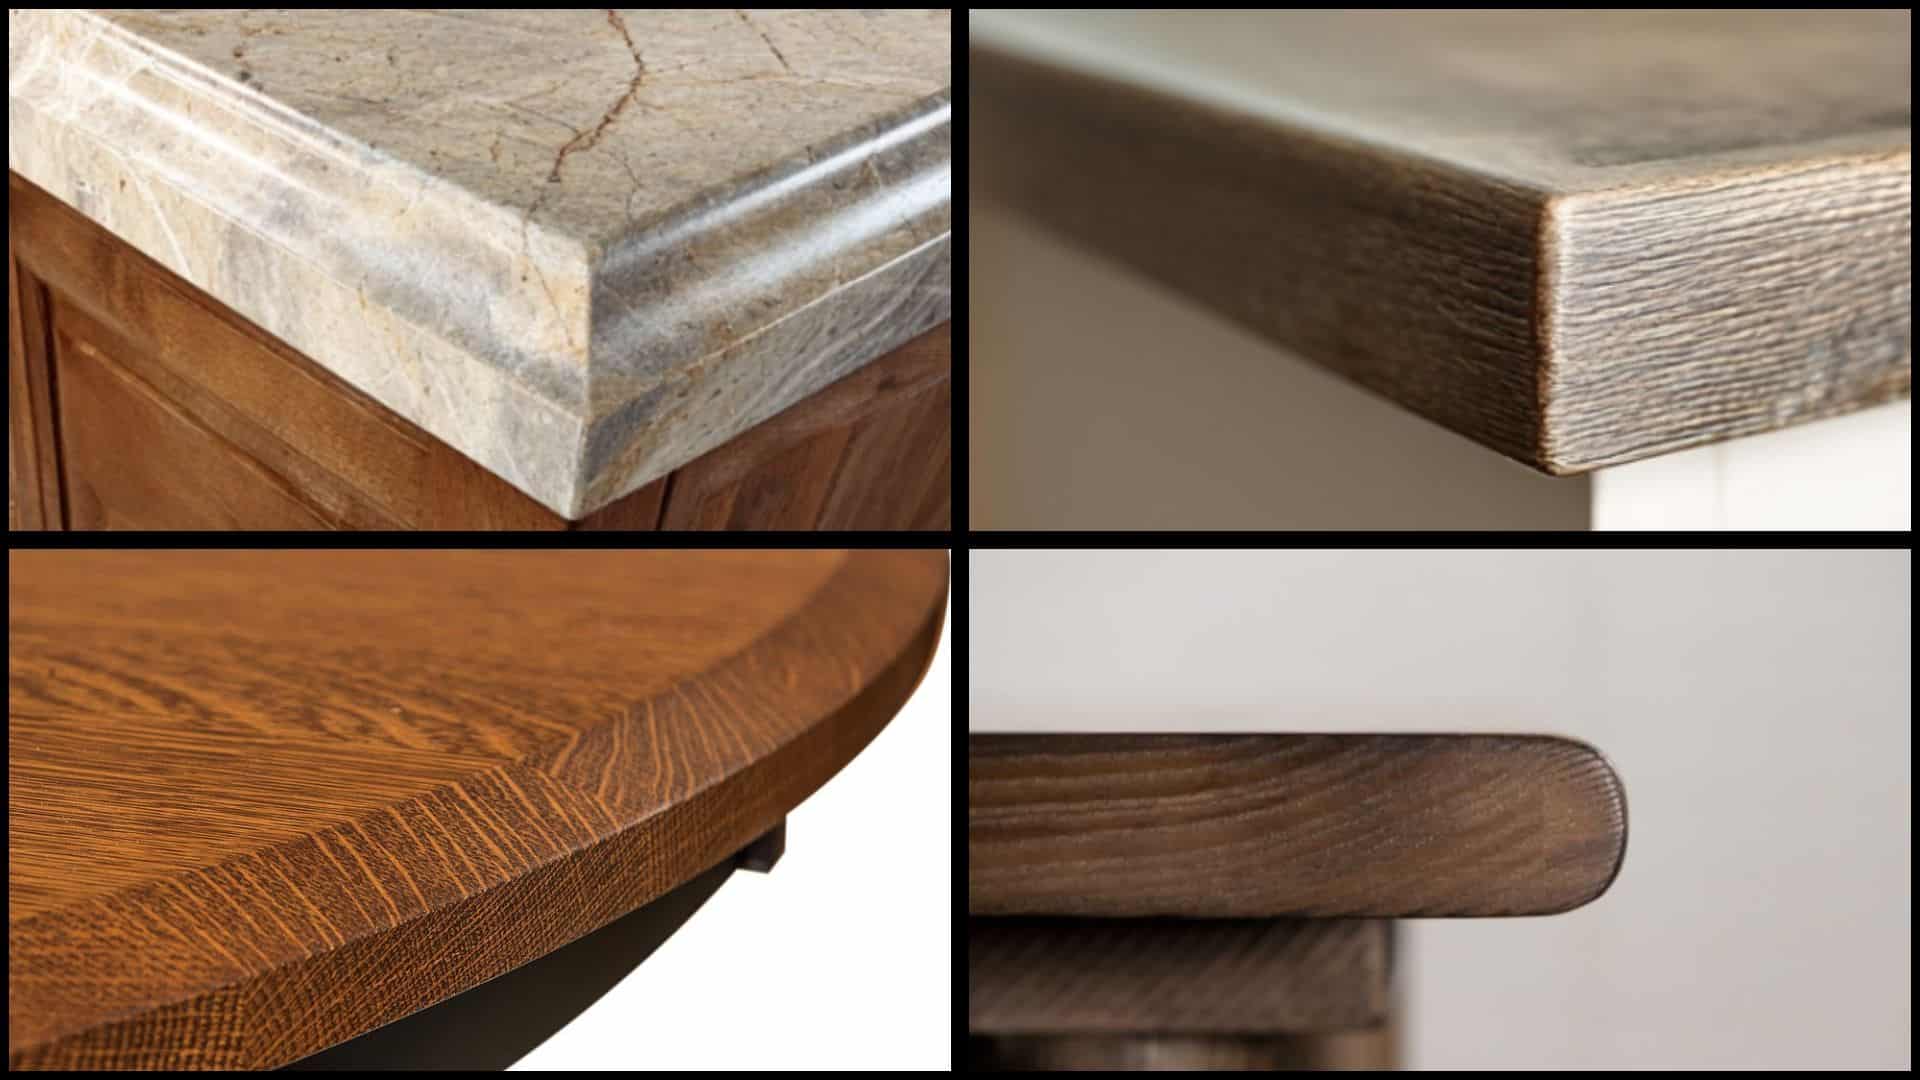
Have you ever noticed how some tables instantly catch your eye while others just mix into the background? The secret often lies in the table edge profiles that frame your furniture piece. These shaped edges are like the perfect outfit accessory that completes your entire look. Table edge profiles determine how your table feels, looks, and fits into your home decor style. I’m here to help you find the different edge types that can convert any ordinary table. You’ll learn how to pick the perfect edge for your space, family needs, and personal taste. Get ready to find the secret that turns ordinary tables into stunning centerpieces that everyone will admire! Why Table Edge Profiles Matter for Your Home Different edge shapes can completely change how your table looks and feels in your space. A sleek, angled cut makes any room feel more modern and urbane. Traditional curved designs bring classiness that complements formal dining rooms perfectly. Safety becomes really important when you have kids running around your home. Rounded corners eliminate sharp edges that could cause injuries during playtime. These soft shapes also feel more comfortable when you lean against the table. Some edge designs last much longer than others in busy households. Thicker, rounded shapes resist chipping and damage better than thin, sharp corners. You can make your table truly unique by choosing an edge shape that matches your style. Types of Table Edge Profiles I’ve found that you have many different edge shapes to choose from when designing your perfect table. You’ll see that each type brings its own special look and benefits to your furniture piece. Here are some common types to help you find the right style for your project: 1. Straight Edge Profile The straight edge gives you a clean, no-nonsense look that works with almost any decor style. This simple design costs less to make and fits perfectly in modern homes. You can easily match straight edges with sleek furniture and minimalist room designs. The sharp lines create a professional appearance that looks great in offices, too. This edge works best when you want your table to blend seamlessly with contemporary surroundings. 2. Bullnose Edge Profile Bullnose edges feature a smooth, rounded curve that feels soft and safe to touch. Families with young children love this design because it eliminates dangerous, sharp corners completely. The rounded shape also feels more comfortable when you rest your arms on the table. This edge gives your table a friendly, welcoming appearance that works in casual dining rooms. You can find bullnose edges on many kitchen islands and breakfast tables. 3. Beveled Edge Profile Beveled edges create an angled cut that adds instant sophistication to any table design. The slanted surface catches light beautifully, making your table look more expensive than it is. This edge works perfectly with both traditional and modern furniture styles throughout your home. The angled cut also makes the table appear thinner and more elegant from the side. Beveled edges require more skill to create but deliver stunning visual results. 4. Chamfered Edge Profile Chamfered edges feature a small, angled cut that softens the sharp corner without rounding it fully. This versatile design complements both rustic farmhouse tables and sleek modern pieces. The subtle angle adds visual interest without being too bold or attention-grabbing for your space. Chamfered edges are easier to create than complex curves, yet they still appear more finished than straight cuts. This edge strikes the perfect balance between simple and sophisticated design elements. 5. Waterfall Edge Profile Waterfall edges create a flowing, continuous curve that looks like water cascading over the table surface. This dramatic design makes any table the centerpiece of your room, boasting a stunning visual appeal. High-end restaurants and luxury homes often opt for waterfall edges due to their impressive, sculptural appearance. The smooth curve requires expert craftsmanship but creates an unforgettable focal point in any space. This edge works best with premium materials like marble or high-quality hardwood. 6. Coved Edge Profile Coved edges curve inward toward the table surface, creating a gentle, vintage-inspired look throughout your space. This classic design adds character and charm to farmhouse, cottage, and traditional dining room settings. The inward curve creates interesting shadows and highlights that change throughout the day with natural lighting. Coved edges work beautifully with distressed finishes and antique-style furniture pieces in your home. This edge brings warmth and personality to any table design you choose. NOTE: Many furniture makers can create custom edge designs that perfectly match your exact vision and style preferences. How to Choose the Right Table Edge Profile Start by looking at your room’s overall style and picking an edge that matches perfectly. Modern rooms work best with straight or beveled edges, while traditional spaces love curved designs. Think about how you use your table every day before choosing the prettiest option. Kitchen islands need durable edges that can handle daily cooking and cleaning activities. Different materials work better with specific edge shapes than others in your home. Wood handles intricate curves beautifully, while glass presents a stunning appearance with simple, clean lines. Safety should be your top priority if you have young children or pets in the home. Rounded edges, such as those found in bullnose designs, eliminate sharp corners that could cause injuries during playtime. Popular Materials for Table Edge Profiles The material you choose for your table’s edge profile affects both its appearance and durability. Here are some popular options to consider for different styles and uses: Material Edge Profile Options Best For Wood Classic and versatile, offering a range of edge profiles from simple to intricate Traditional and modern homes Glass Clean lines with options for sharp or soft edges Contemporary and minimalist spaces Stone/Marble Luxury materials with unique edge profile possibilities High-end kitchens and formal dining rooms Metal Modern, sleek profiles that enhance industrial styles Industrial and contemporary designs The right material choice will depend on your budget, style preferences, and how you plan to use your table. Take time to feel different materials in person before making your final decision. Maintenance and Care for Table Edges Taking good care of your table edges will keep them looking beautiful for many years to come. Different edge types require different care methods to maintain optimal condition. Here are some simple maintenance and care tips to follow: Use placemats and coasters to prevent scratches on beveled or straight edges from dishes and glasses. Wipe down all edge types with a soft, damp cloth, avoiding harsh chemicals that can damage finishes. Check rounded edges, such as bullnose, regularly for minor damage that can worsen if left untreated. Reapply wood stain, glass polish, or stone sealer every few years to maintain your edge’s original appearance. Regular maintenance prevents small problems from becoming expensive repairs later on. A little daily care goes a long way in preserving your table’s beauty and value. Wrapping It Up Choosing the right table edge profiles can completely change your furniture from ordinary to extraordinary in amazing ways. You now know how different edges affect safety, style, and durability in your home environment. The perfect edge profile balances your personal taste with practical needs like child safety and daily use. I hope this guide helps you make smart choices that create beautiful, functional furniture for the years ahead. Don’t be afraid to mix different edge styles throughout your home to create visual interest and personality. Your tables should reflect who you are and make every meal feel special and memorable. Ready to start your edge makeover? Share your favorite edge style in the comments below!
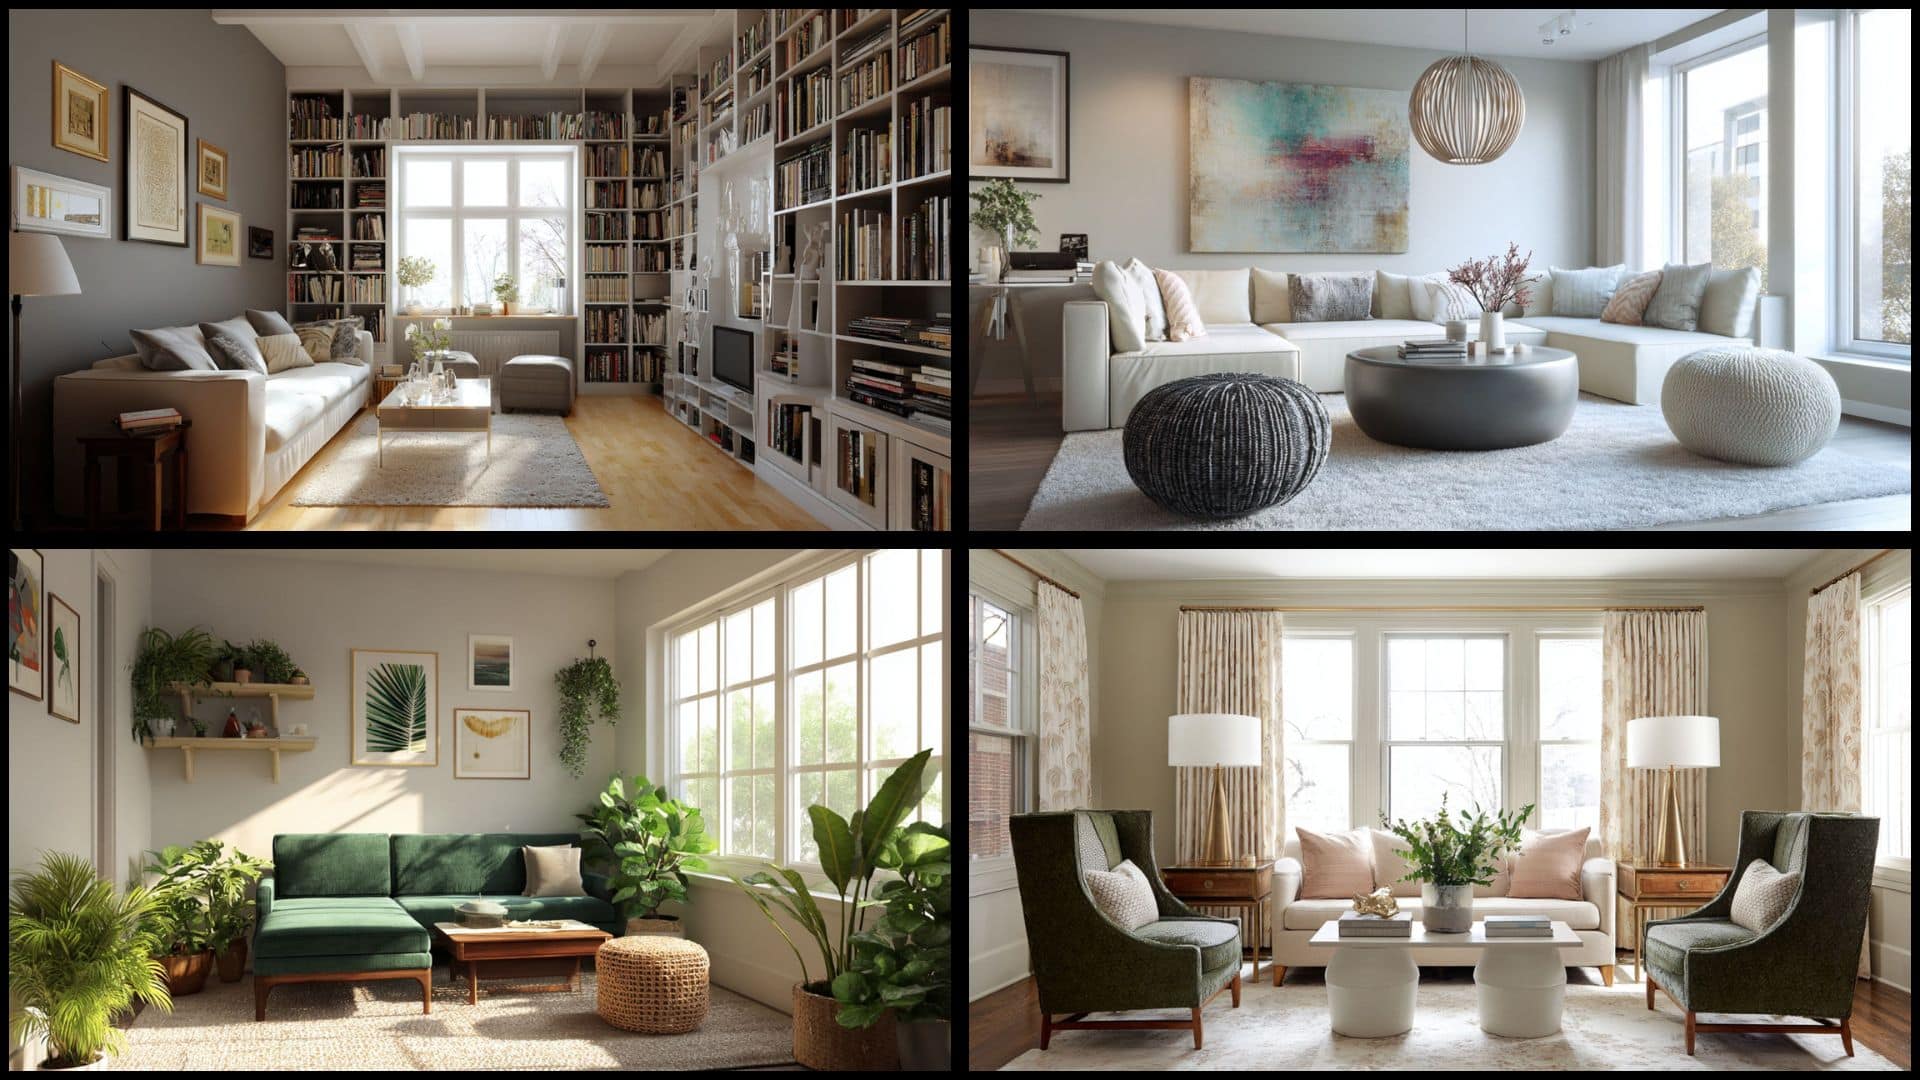
Does your front door open straight into a cramped living room that feels stuck and lifeless? The relationship between your front door and the living room has a direct impact on how energy flows through your entire home. When energy gets blocked at the entrance, it creates a domino effect of stagnant vibes throughout your space. I’ll show you how incorporating the elements of feng shui can convert your small area into a peaceful sanctuary using smart layout ideas, similarto how a long rectangular living room setup improves flow in tricky spaces. You’ll find practical solutions for common small living room challenges that work in tight spaces while optimizing energy flow. Ready to turn your cluttered corner into a zen zone that welcomes good energy every single day? Understanding Front Door Feng Shui Basics Your front door is the primary point of entry for your home. All good energy, called “chi,” flows through this entrance first. When chi enters smoothly, it brings positive vibes to your entire living space. Your front door acts like the “mouth of chi” for your home. Just like you breathe through your mouth, your house receives energy through its main entrance. This energy then moves through your rooms, affecting how you feel inside. Many people make simple mistakes when their front door opens right into a small living room. They place furniture directly in front of the door, blocking energy flow. Others create cluttered walkways that confuse the chi as it enters. Some position mirrors facing the door, bouncing good energy back outside. Assessing Your Current Small Living Room Layout Your living room holds clues about how energy moves through your space. A quick assessment reveals what’s working and what needs fixing. Here’s how to assess your layout effectively: Stand at your front door and look straight ahead: Notice what catches your eye first and whether you can see a clear path into the room. In compact homes, using low ceiling design tricks can also help the space feel more open as you refine your layout. Walk the same route you take every day: Pay attention to spots where you bump into furniture or feel squeezed between objects. Check for energy dead zones: Look for dark corners, areas behind doors, or spaces where activity is minimal. Count how many things block your main walkway: Include furniture legs, storage boxes, pet beds, and anything else in your path. Identify where clutter gathers most: Notice which surfaces collect mail, keys, clothes, or other daily items without being put away. These simple observations reveal exactly where energy becomes stuck or flows freely. Now, you can start making changes that make a difference in how your space feels. Practical Layout Solutions for Small Living Rooms Smart furniture placement can change your cramped living room into a peaceful, flowing space. I’ll show you some solutions based on feng shui principles that work perfectly in small areas without breaking your budget: 1. Position Furniture to Face the Door Position your main seating so it faces the door to create a welcoming and secure atmosphere. This arrangement not only provides a clear view of the entrance but also fosters a sense of control. It helps you stay aware of the energy entering the room and allows you to interact with it, making the space feel more inviting and balanced. 2. Use Symmetry for Balance Placing matching items, such as two chairs or lamps, on either side of the room can help create balance. Symmetry encourages peace and calmness, giving the room a more orderly and peaceful feel. It ensures that no side of the room feels too heavy or cluttered while also pleasing the eye. This simple adjustment can significantly improve the overall flow of energy in the room. 3. Keep Pathways Clear Keeping the pathways in your living room clear of obstructions allows energy to flow freely and improves the space’s flow. Make sure there’s enough room to move easily between furniture pieces. When pathways are clear, the room feels more open and spacious, and you can enjoy a sense of freedom. This simple Feng Shui tip helps create a less cluttered and more welcoming environment. 4. Use Multi-Functional Furniture Opt for furniture that serves multiple purposes, such as a sofa bed or a coffee table with storage, to maximize space. Multi-functional pieces allow you to store items out of sight, keeping the room less cluttered. They also help to maintain balance in a small space, making the room feel more spacious while offering flexibility and practicality without sacrificing style or comfort. 5. Use Mirrors Strategically Mirrors can expand a small space by reflecting light and adding depth, but be mindful of where you place them. Avoid placing mirrors directly across from the door, as they can reflect positive energy out of the room. Instead, position them to reflect natural light or interesting focal points. Mirrors help brighten and visually open up the space, creating a sense of calm and balance. 6. Soften Edges with Curves Sharp, angular furniture can disrupt the natural flow of energy, so opt for pieces with rounded edges or soft curves instead. Soft curves help promote a calming and smooth energy, making the room feel more inviting. This change can soften the overall atmosphere, making the space feel more relaxed. Incorporating rounded shapes also helps to avoid harsh energy and encourages gentle movement throughout the room. 7. Place Plants to Add Vitality Introduce greenery by placing plants in corners or near windows to bring life and vitality to the room. Plants are believed to attract positive energy, known as Chi, into space. They not only improve air quality but also add natural beauty and tranquility. Well-maintained plants can help the room feel fresher, more vibrant, and more peaceful, making them an essential element of Feng Shui. 8. Incorporate Natural Elements Bring in natural elements like wood, bamboo, or stone to ground the room’s energy and create a connection with nature. These materials are calming and promote stability, adding warmth and a sense of comfort to the room. They help balance the flow of energy, making the space feel more peaceful and less artificial. Natural elements also encourage grounded, earthy vibes that improve a balanced atmosphere. 9. Add Soft Textures for Comfort Adding soft textures, such as plush cushions, rugs, and throws, creates a cozy and inviting atmosphere in your living room. These textures not only make the space feel more comfortable but also help to soften the energy. Fabrics like cotton, wool, or velvet encourage relaxation and a sense of warmth. Textures can also balance the harder surfaces in the room, promoting a peaceful and restful environment. 10. Ensure Good Airflow Good airflow is essential for maintaining a fresh and vibrant energy in the room. Open windows regularly to let in fresh air, or consider using an air purifier to improve air quality. When air circulates well, the room feels more alive and inviting. Proper airflow reduces any stagnant or heavy energy, helping the room feel fresher, more energizing, and conducive to relaxation. 11. Incorporate a Sense of Height Introduce vertical elements like tall plants, shelves, or artwork to create a sense of height and depth. Adding height draws the eye upward, making the room feel more spacious and less cramped. Vertical features also help boost the room’s energy, creating a feeling of openness. This simple change can improve the room’s overall balance and flow, preventing the space from feeling too boxed in or flat. 12. Limit Electronics in the Living Room While electronics like TVs and gadgets are important, limiting their presence can improve the room’s energy. Excessive electronics can cause distractions, draining energy and reducing calmness. Place electronics in a designated area to keep the focus on relaxation and comfort. Reducing the number of gadgets in the room creates a more peaceful and uncluttered environment, which supports a balanced flow of energy throughout the space. 13. Focus on the Center of the Room Keep the center of the room open and free from clutter to encourage energy flow. An open center allows Chi to circulate naturally, creating balance and a feeling of spaciousness. It also prevents any stagnant energy from building up, ensuring the room stays vibrant and positive. Keeping the center clear makes the space feel more inviting, organized, and open, helping to achieve a pleasant atmosphere. 14. Place the Sofa Against a Solid Wall Position your sofa against a solid wall to create a sense of support and stability in the room. This placement helps you feel more grounded and secure, creating a peaceful and calming atmosphere in the room. It’s an important Feng Shui tip that promotes confidence and comfort. The solid wall behind you gives a feeling of support, ensuring you feel protected and in control within the space. 15. Use a Round Coffee Table A round coffee table promotes smooth energy flow by eliminating sharp corners that can block energy. The circular shape encourages open communication and connection between people. Unlike square or rectangular tables, round tables allow energy to circulate easily, creating a more welcoming space. This simple addition can make the room feel more relaxed and inviting, encouraging positive interactions and a sense of fluid energy throughout the space. Color and Lighting Strategies Colors and lighting work together to create the perfect mood in your small living room. Here are simple ways you can use both to make your space feel bigger and more peaceful: Start with earthy tones, such as beige and soft browns, to ground your space naturally. Balance warm colors like reds with cool blues and greens for a balanced effect. Add vibrant accent colors through pillows or artwork to bring life to the room without overwhelming it. Soft lighting from table lamps creates a cozy atmosphere that harsh overhead lights can’t match. Natural light is your best friend, so keep windows clear and use light curtains. These simple changes make your room feel more open, welcoming, and energized while maintaining that peaceful feng shui flow. Storage and Decluttering Solutions Too much stuff blocks good energy from flowing through your small living room. Smart storage keeps your space organized while maintaining that peaceful feng shui feeling. Here are some solutions to keep your space tidy and functional: Use hidden storage solutions: Choose ottomans with storage inside, coffee tables with drawers, or sofas with built-in compartments for blankets and books. Adopt vertical storage: Install floating shelves on walls, use tall bookcases, or hang baskets to store items without taking up floor space. Keep surfaces clear: Maintain clean countertops, side tables, and coffee tables by putting items away immediately after using them each day. Declutter regularly: Go through your belongings monthly, donate items you don’t use, and resist buying new things that don’t serve a purpose. Incorporate baskets and trays: Group similar items together in attractive containers that coordinate with your decor while keeping everything tidy and accessible. These simple storage tricks help energy move freely while keeping your essentials within reach. Your living room will feel more spacious and calm when everything has its proper place. Common Mistakes to Avoid Even small feng shui mistakes can block good energy and make your living room feel cramped. Here are the biggest errors people make when arranging their small spaces: Placing couches, chairs, or tables directly in front of the entrance creates an energy traffic jam that makes guests feel unwelcome. Adding too many mirrors, plants, crystals, and decorations at once makes your room feel cluttered instead of peaceful. Forgetting to consider which life areas your furniture affects can accidentally block prosperity, relationships, or health energy. Pushing all furniture against the walls seems logical for small spaces, but it actually makes the room feel disconnected and prevents cozy conversation areas. Avoiding these simple mistakes helps your small living room feel more spacious and welcoming. Your space will have better energy flow when you keep these common pitfalls in mind. Frequently Asked Questions Can a rug improve front door feng shui? Yes, a rug can help define the entry area and slow energy as it enters the room. Choose a size that does not block the door swing. Natural textures, soft colors, and clean edges work best in small living rooms. Should the TV face the front door? A TV can face the front door, but it should not dominate the first view when you enter. If possible, balance it with art, plants, or soft lighting nearby. This helps the room feel calmer instead of focused only on electronics. Is a console table good near the entrance? Yes, a narrow console table can work well near the front door if it does not block movement. Use it for keys, a small lamp, or one decorative piece. Keep the surface clear so the entrance feels organized and welcoming. What should I avoid behind the front door? Avoid shoes, bags, boxes, laundry, or bulky furniture behind the front door. These items can make the entry feel cramped and difficult to use. Keep the door area open so it can swing freely and the room feels easier to enter. Can wall art help a small living room? Yes, wall art can help guide the eye and make a small living room feel more finished. Choose calm images, soft colors, or nature-inspired prints. Avoid overly busy artwork near the entrance because it can make the room feel visually crowded. How do I handle no entryway space? If you have no entryway, create a small landing zone with a slim shelf, hooks, or a basket. Keep it simple and tidy. Even a tiny defined area helps separate the front door from the living room and improves daily function. Are dark colors bad for feng shui? Dark colors are not always bad, but they can make a small living room feel heavier if overused. Use them in small accents, like pillows, frames, or decor. Balance darker tones with natural light, soft textures, and lighter wall colors. Can scent improve living room energy? Yes, light natural scents can make the living room feel fresher and more welcoming. Try mild options like lavender, citrus, cedar, or eucalyptus. Avoid strong artificial fragrances, especially near the front door, because they can feel overwhelming in a small space. Final Words Your front door feng shui small living room layout doesn’t have to feel impossible anymore. Remember that clear pathways, clever furniture placement, and balanced colors create the foundation for great energy flow. Even the tiniest spaces can become peaceful havens when you apply these simple feng shui principles correctly. Good energy flow is possible in any space, no matter how cramped it feels right now. Start with just one simple change today, like clearing your entrance pathway or moving that chair blocking your door. Your living room will thank you with better vibes, and you’ll feel the difference immediately. Please drop a comment below and tell me which feng shui tip you’re trying first!

