

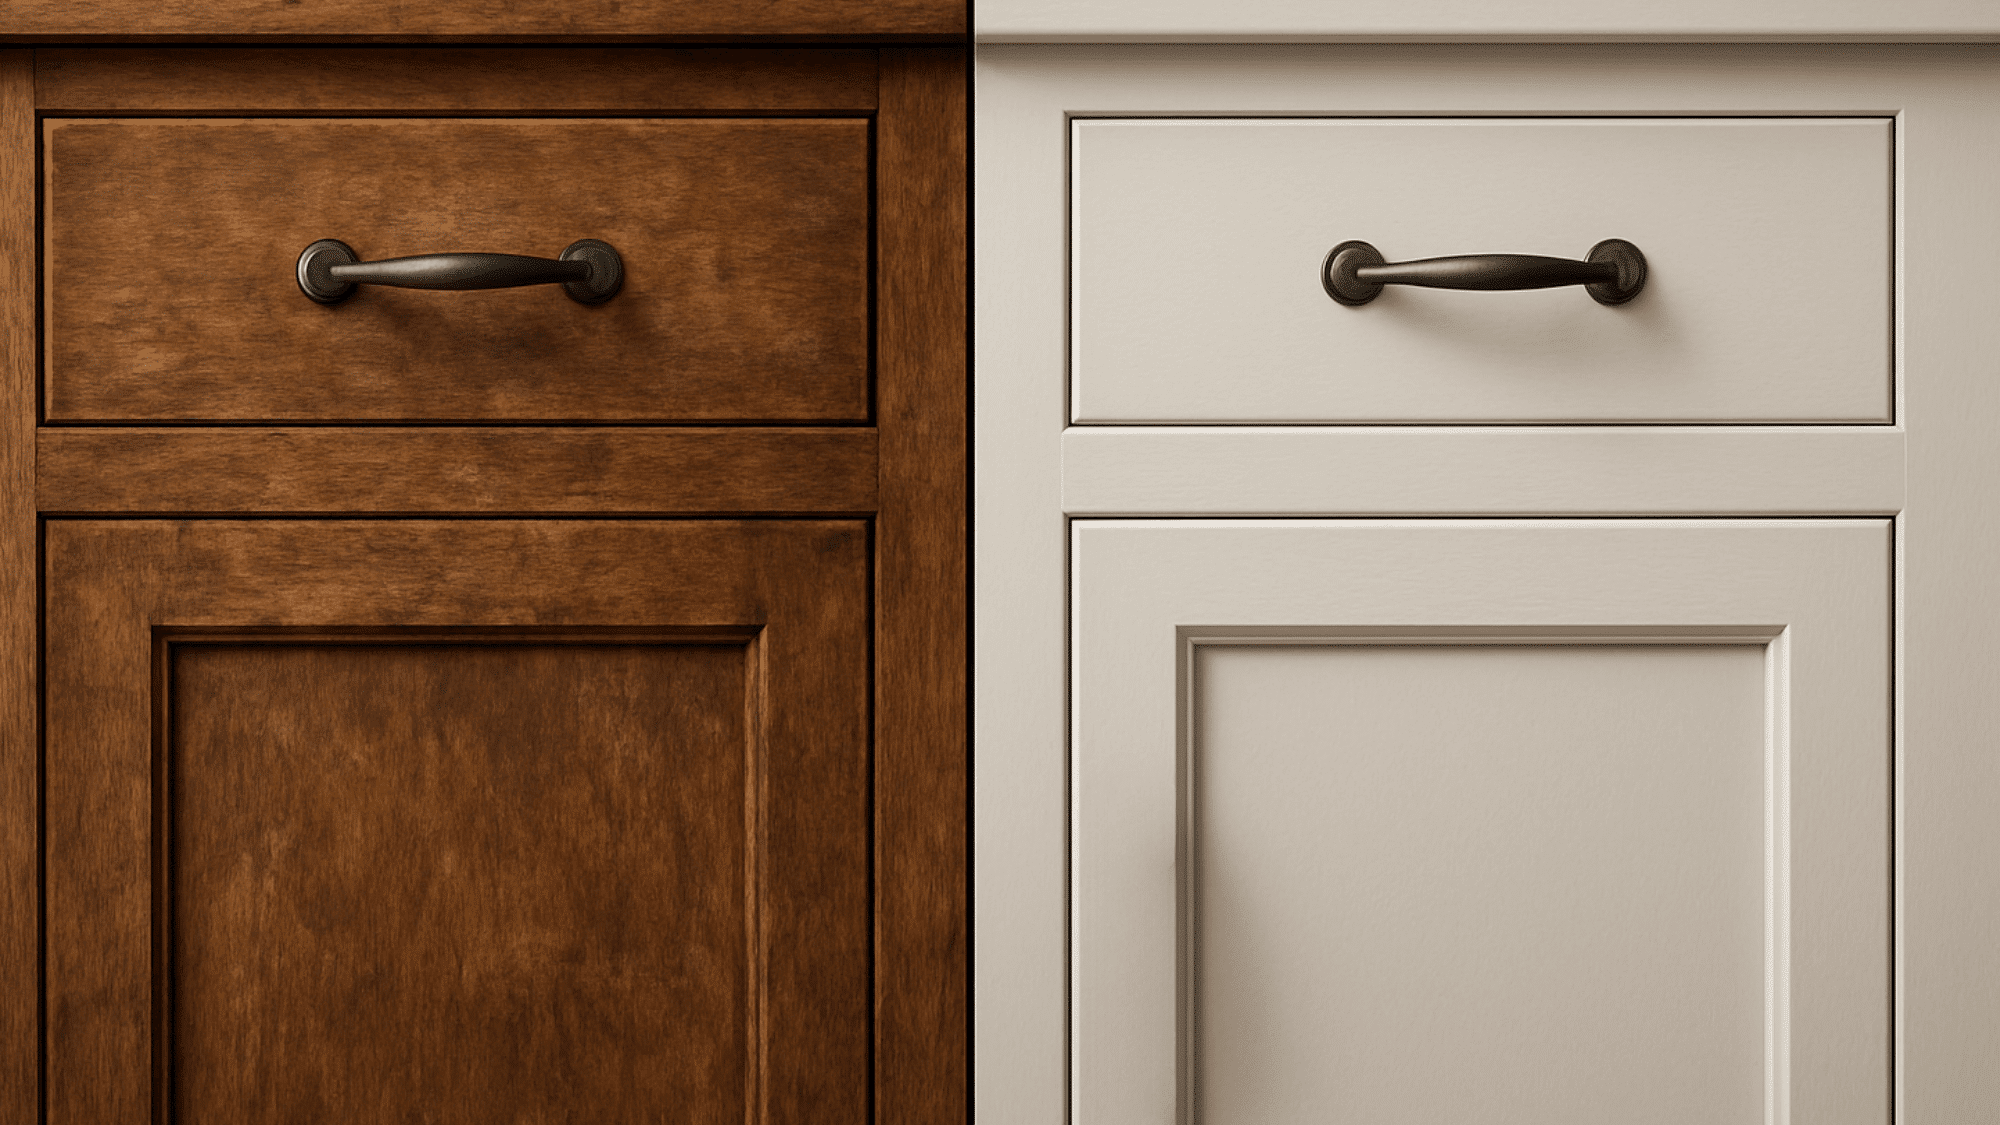
Painting over stained wood can feel scary at first, like the paint might peel right off the next day. I’ve been there. The good news is you can paint over stained wood without stripping it, and you can still get a strong, clean finish if you prep it the right way. In this blog, I’ll walk you through the steps to tell what kind of stain or finish you’re dealing with, the quick DIY tests, and the full step-by-step process to clean, degloss, prime, and paint for a durable result. I’ll also cover when you can skip sanding, the best primer choices to stop bleed-through, and simple fixes for common problems like peeling or yellow stains showing through. Can You Paint Over Stained Wood? Good news: you can absolutely paint over stained wood without stripping the stain first. The key is proper preparation, cleaning the surface, roughing it up a bit, and using a stain-blocking primer to prevent bleed-through and peeling. This works great for updating trim, doors, cabinets, and furniture without the mess of chemical strippers. Is It Advisable to Paint Over Stain? The Pros Painting over stain beats stripping in several ways: Much faster than chemical stripping or heavy sanding Way less messy (no gooey stripper, no sawdust everywhere) Perfect for giving tired trim, cabinets, and furniture a fresh look Saves money on refinishing supplies and labor The Cons Skip the proper steps, and these problems pop up: Peeling and chipping happen when paint can’t grip the slick surface underneath Yellow or brown bleed-through ruins light paint colors when tannins seep up Fish-eyes and craters appear when silicone polish contaminates the paint The good news? All these problems are preventable with proper prep. Identify What You’re Painting Before grabbing a brush, spend two minutes figuring out what’s actually on your wood. This determines which prep steps matter most. What Kind of “Stain” is It? There are two main situations: Penetrating stain or dye soaks into the wood. When you run your hand over it, you can feel the wood grain. The surface might feel slightly rough or natural. Film-forming finish on top means there’s a protective coating, such as polyurethane, varnish, lacquer, or shellac, over the stain. This creates a smooth, sealed surface that paint struggles to grip. Quick Tests (Simple, DIY-Friendly) Try these at-home tests: Test How to do it What to look for What it means Wax Test Scrape gently with your fingernail or a coin somewhere hidden, or lightly sand a small area. Soft, non-wood shavings come off or sandpaper “gums up” quickly. There’s likely wax on the surface (the paint/primer may not stick until the wax is removed). Water Bead Test Put a drop of water on the surface and watch it for a minute. The water beads up and sits there instead of soaking in. The wood is sealed with a finish (like poly/varnish/lacquer), so use de-glossing and primer for good adhesion. Tannin Risk Check Identify the wood type, look for knots, and note stain color. Oak/mahogany, visible knots, and very dark stain. Higher chance of tannin/stain bleed-through, so use a stain-blocking primer (shellac or oil-based). How to Paint Over Stained Wood: DIY Guide Ready to refresh stained wood without peeling or scratches, follow these simple prep-and-paint steps to lock in stains, boost adhesion, and get a tough, smooth finish. Materials and Tools Needed TSP cleaner and rag/sponge for washing. Liquid deglosser (sanding deglosser). Sanding block (fine to medium grit).(mentioned as optional but recommended) Stain‑blocking primer/sealer suitable for glossy stained/varnished wood. Quality paint (e.g., cabinet/trim enamel like Sherwin‑Williams ProClassic or equivalent). Paint brush (high‑quality angled sash brush, e.g., Purdy) and foam roller for flat areas. Paint additive like Floetrol (helps reduce brush marks).(optional) Wood filler/patching compound for holes or dings (optional but suggested). Glaze for highlighting details (optional) and water‑based clear coat/topcoat for protection. Tack cloth or clean brush to remove dust. Step 1: Clean the Stained Wood Thoroughly Mix TSP cleaner with water according to the product directions.f Use a rag or sponge dipped in the TSP solution to scrub all stained/varnished trim or wood surfaces, focusing on greasy areas like kitchens. Wipe until the surface feels clean and dull, then let it dry completely; the video shows how dirty the water becomes, stressing that grease and grime must be removed so primer and paint can adhere properly. Step 2: Degloss and Light Sand After cleaning and drying, lightly scuff the surface with a sanding block, especially on edges and any rough spots; this is not heavy sanding, just enough to scratch the gloss. Apply a generous amount of liquid deglosser over all stained/varnished areas using a rag or sponge, working it in to remove the sheen and improve adhesion. Allow the deglosser to work per product instructions; the video emphasizes using “a lot” of deglosser and getting it into all areas, especially if you are minimizing sanding. Step 3: Apply Stain‑Blocking Primer Once the surface is deglossed and dry, apply a stain‑blocking primer/sealer labeled for use over stained or varnished wood. Brush or roll on a uniform but not overly thick coat, just enough to give the paint something to grip while covering the stain color. At this stage, fill nail holes or minor defects with wood filler and let them dry before or right after priming, as suggested in the video. Step 4: Lightly Sand Primer and Remove Dust After the primer dries, inspect for imperfections like raised fibers or rough spots; lightly sand these areas with the sanding block to smooth the surface. Once sanding is done, remove all sanding dust using a brush, vacuum, or tack cloth so nothing loose remains on the surface; the video shows dust on the tape as a warning that paint will not adhere to dusty areas. Step 5: Prepare Paint and Tools for a Smooth Finish Add a small amount of Floetrol (or similar paint conditioner) to the paint if desired, especially for darker paints, to reduce brush marks; follow the product directions and note it can slightly lighten darker colors. Use a high‑quality brush (such as a Purdy angled brush) for detailed or profiled areas and a good foam roller for flat sections to minimize streaks and roller texture. Choose a durable trim/cabinet paint (such as a water‑based enamel) designed explicitly for woodwork and cabinets, which significantly improves long‑term durability. Step 6: Paint the Wood Cut in and cover detailed or narrow areas with the quality brush, working the paint into grooves and profiles. Use the foam roller on larger flat areas to level the paint and reduce visible brush marks, blending brush and roller sections while the paint is still wet. Allow the first coat to dry thoroughly, then add a second coat if needed for full coverage and an even finish (the video focuses on technique rather than coat count, but two coats are typically standard). Step 7: Apply Glaze to Highlight Details Once the paint is fully dry, apply a glazing product to the detailed areas to make grooves and edges stand out; the video shows “edge glazing” but does not go into the technique. Wipe or brush the glaze so it settles into details, then remove excess according to the glaze product directions; this step is decorative and optional. You can watch and follow this video for more detailed tutorial by da P.A: Can You Paint Over Stained Wood without Sanding? Yes, you can, but with a catch. On glossy or film-finished surfaces, paint adhesion is less reliable without some roughening. Think of it like trying to stick tape to glass versus tape to cardboard. Best compromise: Use liquid deglosser to chemically dull the surface, plus add a light scuff-sanding in high-wear spots (edges, corners, handles). “No-Sand” Scenarios Where People Succeed Some situations naturally work better: Matte or flat finishes that are already slightly rough Surfaces with existing texture or wear patterns Using specialty bonding paints (still recommend stain-blocking primer if there’s bleed risk) What’s the Best Primer for Painting Over Stained Wood? If you want paint that sticks and stays clean-looking, the right stain-blocking primer stops bleed-through, locks in tannins, and gives your topcoat a smooth base. 1. Best Overall Shellac-based stain-blocking primer is the best choice for most projects. It handles tannins, unknown finishes, and weird situations without complaint. Dries fast (usually one hour), seals everything, and works under any paint type. Popular brands include BIN and Cover Stain. 2. When Oil-Based Primer Makes Sense Choose oil-based stain-blocking primer for: Heavy stain bleed risk (very dark stains, high-tannin woods) Outdoor projects with weather exposure Situations where you can handle stronger odors and longer dry times Oil-based primers block stains extremely well but need good ventilation and take longer to dry (4-6 hours or more). 3. When Water-Based Primers are Okay Water-based primers work fine only if the bleed risk is low and you’re certain about what finish you’re dealing with. For most stained wood projects, shellac or oil-based is the safer bet. Better to overdo it on the primer than redo the whole project when stains bleed through. Troubleshooting Common Problems Problem Signs Causes Fix Stain/Tannin bleed Yellow/brown spots Weak primer block Spot-prime (stain-blocking), dry, repaint Peeling/scratching Chips/lifts easily No de-gloss, oil/wax, rushed dry Sand, clean, re-prime, repaint Fish-eyes/craters Round holes Silicone polish Strip/sand, solvent clean, restart Brush marks/orange peel Lines/texture Thick coats, rushing Thin coats, better tools, sand lightly, dry fully Pro Tips for a Factory-Smooth Finish Sanding happens at multiple stages. Even when “optional,” a light scuff between coats makes everything go more smoothly. Pros sand more than DIYers realize. Multiple thin coats beat one thick jacket every time. Thin coats dry faster, level better, and avoid drips. Plan for 2-3 coats of paint minimum. Cure time isn’t the same as dry time. Paint might feel dry after a few hours, but a full cure takes days or even weeks, depending on the product. Handle painted surfaces gently during this period. Choose the right sheen to hide prep flaws. Darker colors and flatter sheens (satin, eggshell) hide imperfections better than light colors with high gloss. Read the paint can instructions. Manufacturers know their products best. Follow recoat windows and compatibility recommendations. Final Takeaway Painting over stained wood isn’t hard, but it does reward patience. When I take time to clean off grime, dull the shine, and use a true stain-blocking primer, the paint goes on smoother and holds up much longer. If I rush or skip steps, that’s when I see chips, scratches, or those annoying yellow-brown spots creeping through. So my final advice is simple: prep first, paint second, and let each layer dry like it should. Also, remember that “dry” isn’t the same as “fully cured,” so I try to treat cabinets, trim, and doors gently for a few days. The extra effort up front saves you from doing the whole job twice. So, grab your primer, pick your paint color, and try these steps on a small test area today, then keep going with confidence.
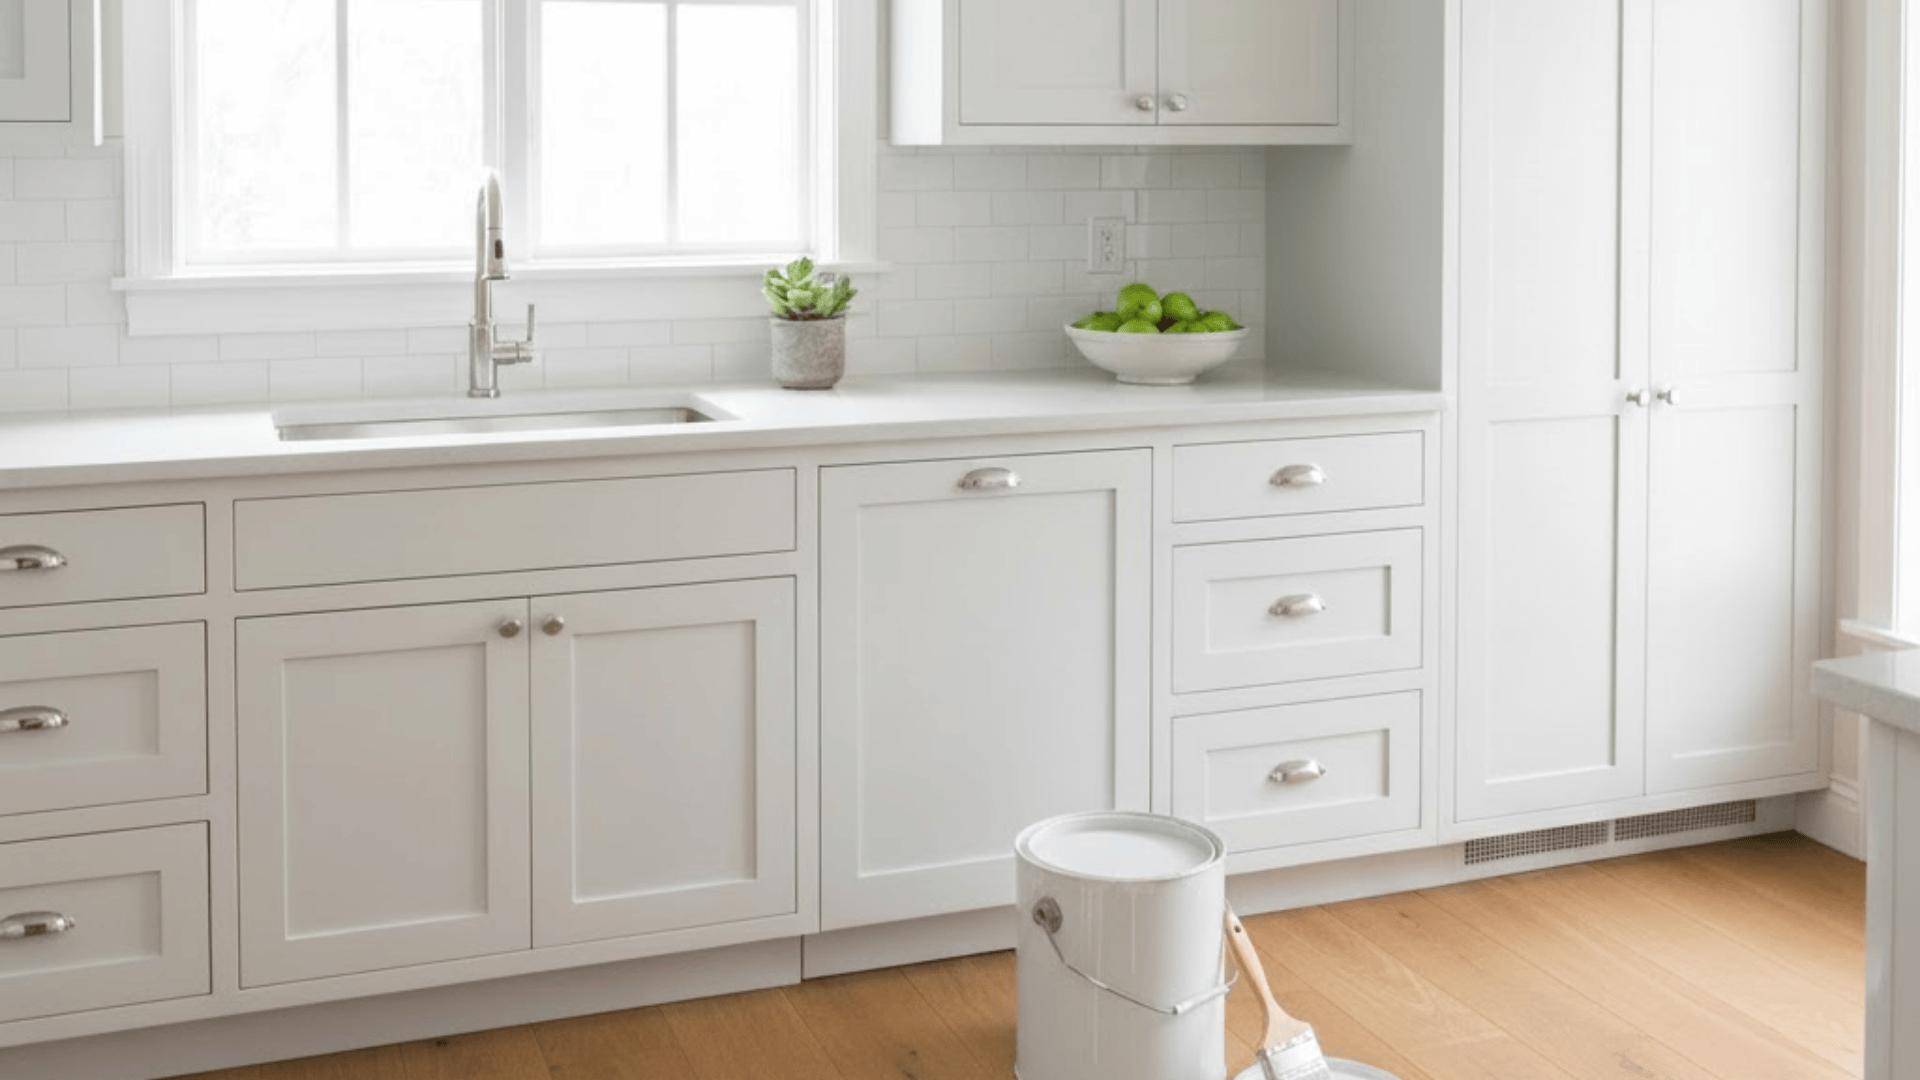
Planning a kitchen makeover and thinking about the cost to paint kitchen cabinets before you start your project? Understanding cabinet painting expenses helps you budget correctly and avoid surprise bills halfway through the renovation process. I know kitchen updates can drain your wallet fast, so knowing exact costs matters more than ever. Your total expenses depend on whether you hire professionals or tackle the painting yourself. Professional painters bring expertise and efficiency, while doing it yourself saves money but demands significant time and effort. Getting accurate price estimates before starting prevents budget disasters and helps you plan your kitchen changeover realistically. Let me show you exactly what you’ll spend and where your money goes. All costs mentioned are estimated averages and may vary based on your location, kitchen size, cabinet condition, materials chosen, and specific contractor rates in your area. What Goes Into the Cost of Painting Kitchen Cabinets? Painting kitchen cabinets involves two main expense categories: labor costs and materials like paint, primer, and supplies. Labor typically makes up the biggest chunk of your total cost, especially when hiring professional painters for the job. Material expenses include paint, brushes, rollers, sandpaper, cleaner, and protective gear you need for the entire project. Hardware removal, surface preparation, and multiple paint coats all add time and expense to the overall project. Understanding these basic cost components helps you plan your budget and decide your next steps moving forward. Let me break down what you’ll spend doing it yourself versus hiring a professional painter instead. Average Cost to Paint Kitchen Cabinets Most homeowners spend between $1,500 and $5,000 to paint their kitchen cabinets professionally, depending on kitchen size and project complexity. The national average falls around $3,000 for a standard-sized kitchen with typical cabinet configurations and reasonable condition. Low-end projects with minimal cabinets and basic paint start around $1,000 to $1,500 for budget-conscious homeowners doing simple updates. Mid-range projects with average kitchens, quality paint, and professional prep work typically cost $2,500 to $4,000 for great results. High-end projects with extensive cabinetry, premium materials, and detailed finishing work can reach $5,000 to $7,000 or more. Per-cabinet pricing typically ranges from $75 to $200 per cabinet box. Factors that Affect the Cost of Painting Kitchen Cabinets I’ve found that several key factors determine how much you’ll end up paying for your cabinet painting project. Here’s what impacts your final price: 1. Number of Cabinets and Doors The more cabinets and doors you have, the higher your total painting cost will be overall. Each cabinet door, drawer front, and cabinet box requires individual prep work, painting, and drying time throughout the process. Larger kitchens with extensive cabinetry naturally cost more than small kitchens with just a few cabinets installed. Painters typically charge per door or by linear foot, so counting your cabinets gives accurate estimates upfront. 2. Cabinet Material Different cabinet materials require different preparation methods and paint products to achieve professional-looking results that last for years. Solid wood cabinets are easiest to paint and accept paint well with proper sanding and priming beforehand. MDF cabinets need special primers to seal the porous surface before applying your chosen paint color. Laminate cabinets are trickiest because paint doesn’t adhere well without extensive sanding and specialty bonding primers applied. 3. Paint Type and Finish Oil-based paints cost more than latex paints but provide superior durability and a smoother finish that resists damage. The finish you choose, matte, satin, semi-gloss, or high-gloss, also affects the price and application difficulty significantly. High-gloss finishes require more coats and careful application to look perfect without visible brush strokes showing. Premium paint brands with better coverage and durability cost more upfront but often save money on future repaints. 4. Kitchen Layout and Accessibility Kitchens with tight spaces, high ceilings, or awkward layouts take longer to paint and cost more overall. Painters charge extra when they need special equipment like scaffolding or ladders to reach upper cabinets safely. Island cabinets and corner units require more time and effort to paint all sides thoroughly and evenly. Easy-to-access kitchens with standard layouts cost less because painters work faster without obstacles constantly slowing them down. 5. Local Labor Rates Professional painter rates vary widely depending on where you live and the local cost of living standards. Urban areas with high living costs typically charge more per hour than rural areas with lower expenses. Experienced painters with excellent reputations command higher rates than newer painters just starting their careers in cabinetry. Getting multiple quotes from local painters helps you understand average rates in your area before committing money. Professional vs. DIY Kitchen Cabinet Painting Costs I know choosing between hiring professionals and doing it yourself can feel overwhelming when you’re watching your budget. Here’s how the costs break down for each approach: Cost to Paint Kitchen Cabinets Professionally Professional cabinet painting includes all labor, materials, and expertise to change your cabinets without you lifting a finger. Here’s what you’re paying for when you hire the pros: Category Price (USA) Details Labor & Project Cost $1,500 to $8,000+ Full job from prep to finish. Price changes with kitchen size and complexity. Prep Work Included Cleaning, sanding, small repairs, and masking. Materials $60 to $300 (built into quote) Pros use higher-grade paint and primer. Spray Equipment Included Adds time and setup, but gives a smoother finish. Warranty & Coverage Included Support if anything goes wrong. Professional services remove all the hassle and guesswork from your cabinet painting project completely. You get expert results without spending weekends working on tedious prep and painting tasks yourself. DIY Kitchen Cabinet Painting Cost Breakdown DIY cabinet painting looks cheaper upfront because you only pay for materials and skip labor charges entirely. Here’s what you’ll actually spend doing it yourself: Category Price (USA) Details Paint and Primer $40 to $140 per gallon Most kitchens need 2 to 3 gallons plus primer. Tools & Supplies $75 to $200 Brushes, rollers, tape, sandpaper, cleaning items. Optional Sprayer $40 to $300 Rent or buy for smoother results. Total DIY Range $200 to $800 Typical cost for materials and basic gear. Extra Costs Varies Mistakes, extra paint, and time spent. DIY saves money on labor but requires significant time, effort, and patience to achieve professional-looking results. Be realistic about your skill level and available time before committing to this demanding weekend project. Is Painting Cabinets Worth the Cost? Painting cabinets costs significantly less than replacing them entirely, often saving you thousands of dollars on your kitchen renovation. New cabinets typically cost $5,000 to $25,000 or more, depending on the size, material, and quality you choose. Cabinet painting runs $1,500 to $5,000 for professional work, making it a fraction of replacement costs for similar results. Properly painted cabinets last five to ten years with good care, sometimes longer if you maintain them well. The return on investment is excellent because freshly painted cabinets dramatically update your kitchen’s appearance without major construction. Painting makes sense when your existing cabinets are structurally sound but just look outdated or worn. How to Save Money When Painting Kitchen Cabinets I’ve learned that smart planning and knowing where to splurge versus save can cut your cabinet painting costs significantly. Here are the best ways to keep your project affordable without sacrificing quality: Do Your Own Prep Work: Remove cabinet doors, clean and degrease all surfaces, and sand them yourself to save $500 to $1,000 on professional labor costs. Buy Paint During Sales: Watch for holiday sales at paint stores, where you can get 20-40% off quality cabinet paint and primer. Reuse Existing Hardware: Clean and spray paint your current knobs and pulls instead of buying new hardware that costs $3 to $15 per piece. Paint Only Visible Surfaces: Skip painting cabinet interiors and areas that don’t show to save time, materials, and money without affecting appearance. These money-saving strategies help you stay within budget while still achieving a professional-looking finish that lasts. Remember that cutting corners on essential steps like primer or quality paint will cost you more in repairs later. That’s a Wrap Your kitchen update is within reach now that you know the real cost to paint kitchen cabinets upfront. I’ve watched many homeowners alter their kitchens just by changing their cabinet color without replacing anything structural. These numbers give you a solid starting point for planning your budget without any guesswork or surprises later. Painted cabinets deliver results that make your kitchen feel completely different when you walk in each morning. If you’re planning your next update, take a look at the other guides on the site for clear costs, real tips, and simple decisions that actually help.
I remember standing in the paint aisle thinking every can looked the same. You’ve probably felt that way too. Picking the right color is one thing, but picking the right paint brand is a whole other challenge, something many people run into when trying painting ideas for beginners. That’s why I started paying closer attention to real feedback from people who actually used these products in busy homes, not just in perfect showroom spaces. If you’ve also been unsure about the best paint brands, you’re not alone in wanting clear answers that make your next project easier. You just want paint that looks good, holds up, and doesn’t turn into extra work. So let’s break things down in a simple way that helps you move forward with confidence using the best paint brands. Why Choosing the Right Paint Brand Matters The brand you choose makes a big difference in how your paint job looks and lasts. High-quality paint offers smoother coverage, stronger color, and easier application. It spreads evenly, hides old marks or stains, and needs fewer coats to get a clean finish. Good brands also resist peeling, fading, and scuffing, so your walls stay fresh for years. Lower-quality paints may seem cheaper, but they often require extra layers and touch-ups, which add cost and effort later. A trusted paint brand helps you get better results with less hassle, if you’re repainting one room or your whole home. It’s about finding a balance between price, performance, and how well the paint holds up over time. Why Real Homeowner Feedback Helps When Picking a Paint Brand When you read what actual homeowners report after painting, coverage, stain resistance, how colour looks under real home lights, you get much more useful information than you would from a manufacturer’s marketing. For example, in one Reddit thread titled “Best brand of paint and finish for interior walls” (on r/AskIreland), a user named u/EternalLova shared that they “never painted the interior of a house before,” and asked others for recommendations on good paint brands for modern homes. That kind of real-life conversation often includes follow-up replies describing how certain paints held up after weeks or months, which gives you a clearer sense of what to expect: how many coats are truly needed, whether the finish stayed even, and how fair the real-world coverage was. This guide pulls together those kinds of experiences, from first-time painters to regular homeowners, so you have a realistic basis for choosing paint, not just bright swatches and glossy claims. Top Paint Brands Most Recommended by Real Users These paint brands appear again and again in Reddit threads, DIY groups, and home chats where people share honest results from real rooms. 1. Sherwin-Williams Sherwin-Williams is a popular choice for many homeowners and contractors because it rolls on smoothly, covers well, and holds up over time. Lines like SuperPaint, Cashmere, and Duration are often picked for interior walls because they give even color and better wear in busy rooms. Many users feel Sherwin-Williams performs better than big-box brands. On Reddit, user u/Grolbark said Sherwin-Williams gave smoother rolling and easier cutting than Behr or Glidden, making long paint jobs feel easier. Another user, u/an_actual_lawyer, noted that Sherwin-Williams coatings last longer, cover better, and resist wear more effectively because of stronger formulas and consistent performance across rooms. 2. Benjamin Moore Benjamin Moore is a well-known paint brand that many homeowners and pros use for interior walls, trim, and cabinets. Lines like Regal Select, Aura, Ultra Spec, and Scuff-X are often chosen for good coverage, strong colour, and a smooth finish on both new builds and renovation projects. It sits in the higher price range, but many users feel the finish and durability justify the cost for key rooms. On Reddit, user u/OriginalLight, a designer, said the new Regal Select eggshell has a stronger smell and feels streaky after the reformulation, so they are rethinking their go-to choice. Painter u/Imapainter1956 instead praised Ultra Spec flat and low sheen eggshell for ceilings and walls, calling it a favourite for high-end residential work. 3. Behr Behr is a common choice for DIY painters because it is easy to buy at Home Depot and offers several lines at different prices. Products like Premium Plus, Ultra, Marquee, and Dynasty aim to give decent coverage and colour for walls, trim, and cabinets. Many people use Behr when they want to save money compared with paint-store brands. On Reddit, opinions are mixed. User u/daynares332311 said Behr Premium Plus from 2013 is still holding up well across rooms and cabinets, with no problems cleaning the surfaces. By contrast, u/Raelf64 felt that after using Sherwin-Williams, Behr “is like painting with jello,” while u/Relevant-Register-30 called Behr “decent” and said it has a place alongside their usual Sherwin-Williams work 4. Valspar Valspar is a retail paint brand often chosen because it is easy to get in big-box stores and offers custom colour mixing at the counter. It has several tiers, from cheaper “classic” options to higher-grade lines like Valspar Premium and V700. DIY users often choose it when they want strong colour choice and reasonable results without going to a trade paint store. On Reddit, opinions are split. In r/DIYUK, one decorator (deleted user) called Valspar “crap” and said they prefer Dulux Trade for reliability. By contrast, u/Globehead87 reported a solid finish after three coats of Valspar Premium matt in a busy family living room, and u/Lolabird2112 said V700 covered well in their kitchen and bedroom and was easy to clean. 5. Farrow & Ball Farrow & Ball is a high-priced UK brand often specified by designers for its curated colour card and very matte, soft-looking finishes. It is commonly used on feature rooms, period homes, and trim when clients want a “designer” label. The paint can be fussy: it usually expects the brand’s own primer, more careful prep, and extra coats compared to many trade lines, and the cost per gallon is near the top of the market. In r/paint, several pros were blunt about their frustration. User u/InsufficientPrep (who works for Sherwin-Williams R&D) called F&B “the most over priced product on the market.” Painter u/-St4t1c- described it as “overpriced sludge,” saying it doesn’t level well, has pigment problems, and shows batch-to-batch colour changes. What Homeowners Actually Look For in the Best Paint “Community discussions on reddit show people care about these factors more than anything else.” Key Needs: People want the colour to look right, the walls to stay in good shape, and the job to feel smooth from start to finish. Coverage Check: Many comments compare how well a paint hides older colours in the first or second coat. Cleaning Strength: Homeowners look for finishes that handle wiping without leaving marks. Cost Control: A cheap can that needs three coats is not a real deal, so value matters more than the shelf price. Rolling Feel: Some paints roll smoothly while others feel heavy or dry too fast. Sample Tests: Colours can shift under home lighting, so users often test small samples first. Daily Wear: People want surfaces that hold up during busy days and stay even over time. Ease of Use: A paint that spreads well helps new painters stay comfortable while working. Real User Pros and Cons for Each Paint Brand Homeowners often share clear feedback online, which helps show the strengths and weak points of each paint brand in everyday use. Brand Real User Pros Real User Cons Sherwin-Williams Smooth rolling, strong coverage, handles cleaning well, reliable colour match Higher price, some lines need sales to feel affordable Benjamin Moore Even finish, good adhesion, strong colour, trusted by many pros Some lines feel streaky, smell issues reported, higher cost Behr Easy to buy, wide colour options, decent results for budget projects Thick feel, fast drying, mixed durability feedback Valspar Strong colour choices, good for DIYers, decent coverage in premium lines Coverage varies, bonding issues reported, weaker results on woodwork Farrow & Ball Rich colour look, soft matte appearance, designer appeal Expensive, slow drying, tricky application, batch consistency concerns These pros and cons reflect common themes seen in forums where people compare paint results, tools, and daily performance. Color Accuracy: Which Paint Brands Match Their Swatches Best? Many homeowners pay close attention to how closely a paint matches its sample once it dries on the wall. In community threads, Benjamin Moore is often praised for steady colour results, especially in lines like Aura and Regal Select. Sherwin-Williams also receives positive feedback for colours that stay close to the sample when used in living rooms, bedrooms, and halls. Some brands show more noticeable shifts. Users mention that Valspar and Behr can lean warmer or cooler once dry, especially with lighter shades. People also point out that stronger colours from Farrow & Ball may look different under bright or low lighting. For the most steady results across different rooms, homeowners often rely on Benjamin Moore or Sherwin-Williams. Best Paint Brands by Project Type Different areas of your home need different kinds of paint, so users often choose brands based on how each space handles moisture and daily use. Best Paint for Kitchens Kitchens deal with heat, steam, and frequent cleaning, so users often choose paints that resist marks and stay even after wiping. Many homeowners recommend Benjamin Moore Aura and Sherwin-Williams Emerald because they stay smooth and handle moisture well. These paints can be cleaned often without leaving dull spots. Some people also use Behr Ultra for budget-friendly projects, but they note it may need an extra coat. A tougher finish helps keep kitchen walls clean and steady through busy days. Best Paint for Bathrooms Bathrooms need paint that deals with steam, splashes, and regular wiping. Users often select Sherwin-Williams Duration or Benjamin Moore Aura Bath and Spa because both handle damp spaces without losing their finish. These options stay steady on walls and ceilings and help prevent problems in rooms with low ventilation. Some homeowners also use Behr Marquee for small bathrooms, noting decent moisture resistance. Any bathroom paint should dry fully before use and handle cleaning without leaving shiny or worn areas. Best Paint for Bedrooms Bedrooms benefit from soft, calm colours and a finish that hides small marks. Many users choose Sherwin-Williams Cashmere or Benjamin Moore Regal Select because both give smooth results and steady colour. These paints also help keep walls clean with light wiping when needed. For budget projects, people often mention Behr Premium Plus, which works well with neutral tones. Bedroom walls don’t face heavy moisture or constant scrubbing, so a comfortable application and steady look matter most. Best Exterior Paint Outdoor surfaces deal with sun, rain, and large temperature changes, so users look for long-lasting protection. Many homeowners recommend Sherwin-Williams Duration Exterior or Benjamin Moore Aura Exterior because they keep their colour and resist peeling over time. These paints help shield siding, trim, and doors from harsh weather. Some people also mention Behr Premium Plus Exterior as a lower-cost choice for small areas. A strong exterior paint saves effort in the long run by holding up through changing seasons. Best Paint for Furniture or Cabinets Furniture and cabinets need paint that sticks well and dries hard. Homeowners often choose Benjamin Moore Advance because it levels smoothly and works well on wood. Many painters also use Sherwin-Williams ProClassic for drawer fronts, doors, and built-ins since it dries evenly and holds up to daily touch. Some DIYers mention Behr Cabinet and Trim Enamel as a workable budget choice. A strong bond, smooth finish, and steady colour are the main things people look for in cabinet paint. Ease of Application: What Beginners Should Know About Each Brand Many first-time painters look for paint that rolls smoothly, covers evenly, and gives steady results without extra effort or special tools. Sherwin-Williams: Rolls smoothly, good control for beginners, dries at a steady pace, and is easier to fix small misses. Benjamin Moore: Levels well, strong coverage, may feel thicker, works best with good rollers and slower strokes. Behr: Easy to find, but can feel heavy or dry fast; beginners may need to work in smaller sections. Valspar: Smooth on some walls, but coverage varies; may need extra coats for deeper colours. Farrow & Ball: Can be tricky for new painters; needs careful rolling and steady strokes to avoid patchy areas. What Paint Brand Users Choose Most Often In Reddit paint threads, most pros in the US say they reach for Sherwin-Williams first, with Benjamin Moore close behind. Painters like Sherwin-Williams because the stores are everywhere, contractor discounts are strong, and the range covers residential, commercial, and industrial jobs. Many users feel Benjamin Moore can be slightly higher in quality for certain lines, but it is used more in designer and residential work. Behr often gets labeled as “lower quality for the same price,” so many pros avoid it. Some painters also mention PPG as a solid option, especially for commercial projects. How to Choose the Best Paint Brand for Your Home Picking the right paint brand starts with knowing what your space needs. High-moisture rooms like kitchens and bathrooms usually need stronger lines from Sherwin-Williams or Benjamin Moore because they handle cleaning better. Bedrooms and halls can use softer, smoother paints that focus on steady colour rather than heavy scrubbing. Budget matters too, but users often warn that cheaper paint can take more coats, raising the final cost. You should also think about how comfortable you feel with the application. Some brands roll smoothly while others dry fast and need a quicker technique. Testing small samples helps you see real colour, texture, and coverage before you commit. Final Thoughts I covered what real homeowners like you notice most when choosing paint, from steady colour to smooth rolling and long-term wear. The goal is simple: pick something that saves you time and gives your rooms a clean, steady look without extra effort. When you focus on what matters, the right choice feels much easier. As you plan your project, keep user feedback close. It’s one of the easiest ways to avoid stress and get results you’re proud of, especially when you’re comparing the best paint brands for your space. If you want more simple guides like this, I’d love for you to check out my other blogs and keep exploring what helps you create a home you enjoy.
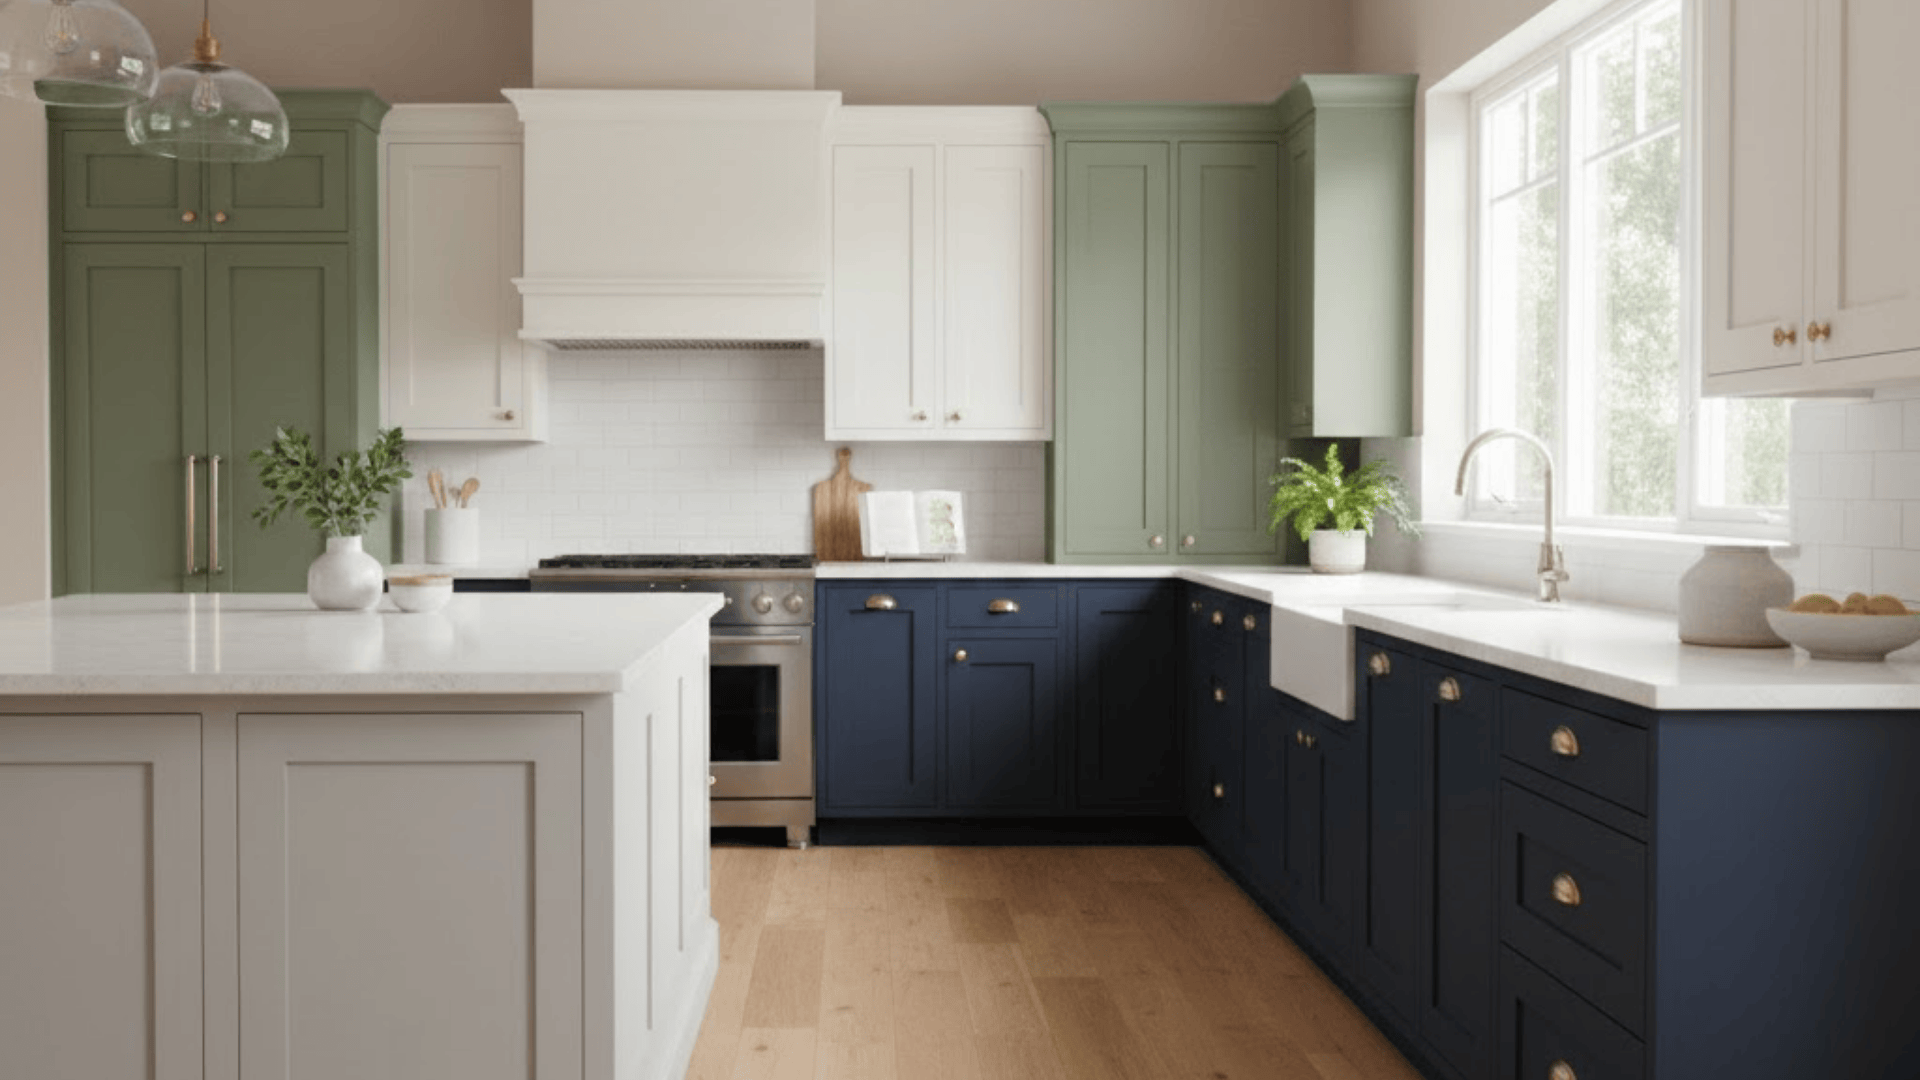
When you update your cabinets, the whole kitchen feels different. It doesn’t matter if the space is small or wide open. The right shade can shift the mood in a way you notice every day. That’s why looking at popular kitchen cabinet colors and how tones connect across a space through Alabaster coordinating colors. In this guide, you and I will walk through shades that are loved right now, why they work, and how to decide what fits your space. You’ll see simple ideas, clear steps, and helpful tips that make the choice easier. By the end, you’ll know which colors make sense for your kitchen. What Colors Are Trending for Kitchen Cabinets? Many kitchens are shifting toward colors that feel warm, calm, and grounded. Some shades open up a space, while others add depth and character. Here are the tone groups showing up the most right now: Warm whites and soft creams Beige, greige, and taupe Light gray and mushroom gray-green Sage, olive, and forest green Navy and deep blue Charcoal and soft black Warm browns and cocoa tones Natural wood and stained wood Soft yellow and powder blue Deep red and wine tones for bold rooms These color families work in many styles and tend to hold up well over time. Popular Kitchen Cabinets Colors that Always Work Neutrals help a kitchen feel fresh and balanced. They fit almost any layout and match a wide range of counters and floors. 1. Warm White Shaker Cabinets Warm white shaker cabinets fit almost any home. The color feels clean but not harsh, and helps small kitchens feel bigger. You can pair warm white with: Light wood floors Soft gray or white counters Simple black or brass pulls This idea works well if you want something safe that still feels fresh and bright. 2. Creamy Off-White With Soft Gold Hardware Creamy off-white cabinets give your kitchen a gentle glow. They suit open layouts and blend easily with warm floors. Add: Soft gold or brushed brass handles Warm white or beige walls Light stone or quartz counters This combo works well if you like a cozy feel without strong contrast. 3. Soft Greige Cabinets in Open Layouts Greige sits between gray and beige, which makes it easy to use with many finishes. It works well in open-plan homes where the kitchen flows into the living room. Try pairing: Greige cabinets Warm white walls Black or bronze hardware This mix feels calm and steady while still giving your room some depth. 4. Light Gray Cabinets with Black Pulls Light gray cabinets bring a neat, simple look to your kitchen. They keep the room feeling open, but add more character than plain white. Pair them with: White walls or tiles Black pulls and knobs Wood stools or shelves This idea fits well in small and medium kitchens that need a gentle contrast. 5. Mushroom Gray-Green for A Calm Space Mushroom gray-green sits between gray, green, and beige. It gives a soft, grounded look. This shade works well with: Warm white or cream walls Light or medium wood floors A stone or stone-look backsplash Use this idea if you want color that still feels neutral and easy to live with. 6. Sage Green Cabinets with Wood Shelves Sage green cabinets bring a nature-inspired feel into your kitchen. Open wood shelves help keep things light and airy. Try: Sage bases and uppers Oak or maple shelves White backsplash tile This mix is great if you want a relaxed, garden-like mood in your space. 7. Olive Green Lowers and White Uppers Olive green lowers add depth, while white uppers keep the room bright. This two-tone layout works very well in long galley kitchens or L-shaped layouts. Combine: Olive green lower cabinets Soft white uppers Warm metal hardware This idea makes your kitchen feel grounded without making it look dark. 8. Deep Forest Green with Stone Counters Deep forest green cabinets suit larger or well-lit rooms. They pair nicely with natural stone. Good matches include: Cream or warm white walls Stone or stone-look counters Wood or stone floors This choice works for homes that want a rich, nature-inspired kitchen with a strong presence. 9. Navy Island in A Mostly White Kitchen A navy island is a simple way to add color without repainting every cabinet. Keep most cabinets white, then paint the island navy. Pair with: White or pale gray uppers Warm wood stools Gold or black hardware This idea pulls the eye to the center of the room and makes the island feel special. 10. All-Navy Cabinets with Warm Metal Details If you love strong color, consider all-navy cabinets. This works best in kitchens with good natural light. Keep the rest of the space light: White or cream walls Pale counters Warm brass or bronze handles The mix feels deep and steady while the light walls stop the room from feeling heavy. 11. Powder Blue Cottage Cabinets Powder blue cabinets give a soft, cottage-like mood. They work very well in small kitchens or older homes. Try pairing: White or off-white walls Butcher block or pale stone counters Simple black, silver, or brass hardware This idea helps your kitchen feel bright, friendly, and relaxed. 12. Soft Yellow Cabinets for a Sunny Feel Soft yellow cabinets can make a kitchen feel bright even on cloudy days. To keep things balanced: Use white walls and tile Choose warm wood or stone counters Add simple black or silver pulls This idea works best in casual, family kitchens that need extra warmth and energy. 13. Charcoal Lowers with Crisp White Walls Charcoal lowers give depth while white walls keep the room bright. This layout is great if you like contrast, but do not want full black cabinets. Combine: Charcoal base cabinets White walls and backsplash Light wood or pale tile floors This idea works in both small and large kitchens when the lighting is strong. 14. Soft Black Cabinets with Wood Accents Soft black cabinets feel bold but still homey when paired with warm wood details. Think: Soft black bases and uppers Wood shelves or a wood island top White or light gray walls This mix suits homes that want a strong, simple look without feeling cold. 15. Two-Tone White and Wood Cabinets Mixing white cabinets with wood lowers or a wood island gives balance and warmth. Try: White uppers Light or medium wood lowers Black or dark bronze hardware This idea is great if you like a clean layout but still want some natural texture. 16. Light Oak Cabinets with White Walls Light oak cabinets are popular again, especially in simple, open kitchens. They bring in gentle warmth and work with many color schemes. Pair with: White or off-white walls Light stone or quartz counters Black, silver, or brass pulls This idea fits very well in homes that lean toward simple, airy rooms. 17. Medium Walnut Stain with Simple Hardware Medium walnut stain adds depth and a classic feel. It suits both older and newer homes. Use: Walnut-stained cabinets Soft white or pale greige walls Simple bar pulls in black or metal This idea is strong enough to stand alone, so keep backsplashes and counters simple. 18. Mixed Green and Wood Cabinets A mix of painted green and wood brings extra character without feeling busy. For example: Sage or olive lower cabinets Wood uppers or wood island White or light gray walls This layout keeps your kitchen grounded, warm, and full of soft contrast. 19. Warm Brown Cabinets with Cream Walls Warm brown cabinets work well if your home already has wood trim or floors. To keep the space from feeling dark: Pick cream or soft white walls Choose lighter counters Add metal or glass lighting This idea is perfect if you want a kitchen that feels steady and inviting. 20. Wine Red Island as a Statement Piece A wine red or deep berry island offers strong color without taking over the whole room. Keep the other cabinets neutral: White, cream, or greige surrounds Simple stone counters Black or brass handles This is a nice option if you want something bold that still feels balanced. 21. Teal Cabinets with Simple White Counters Teal cabinets give the room a lively but grounded tone. To make sure the kitchen stays calm: Use white or soft gray counters Keep walls light and plain Choose simple hardware and lighting This idea works best in rooms with good light and not too many patterns. 22. Blue-Gray Cabinets with Stone-Look Tile Blue-gray cabinets sit between blue and gray, which makes them easy to pair. They work well with: Stone or stone-look backsplash Light or medium wood floors Silver or black hardware This idea suits homes that want a quiet color that still feels a bit different from plain gray. 23. Color Pop Inside Cabinets or On Shelves If you are nervous about bold colors on every door, add color inside instead. You can: Paint the inside of glass-front cabinets Add color to the back of open shelves Keep doors and frames neutral This idea lets you enjoy strong shades like teal, yellow, or red, without locking your whole kitchen into one big color choice. How to Choose the Best Cabinet Color for Your Kitchen Choosing the right cabinet color is much easier when you follow a few clear steps. Step 1: Choose the mood you want: Soft greens and greige create a calm space, white and cream feel bright, and navy or deep green bring a bold tone. Match the mood to your home’s style. Step 2: Study light and room size: Small or dim kitchens usually look better with light colors, while larger or sunlit rooms can handle deeper shades without feeling tight. Step 3: Match cabinets to fixed surfaces: Busy stone works best with calm tones. Plain counters can support deeper shades. Make sure the undertones fit your floors. Step 4: Think about cleaning and wear: Mid-tones and satin or semi-gloss finishes hide marks better than very light or dark shades. Step 5: Test your top colors: Paint larger samples and check them in morning and evening light. Hold them near your counters and floors before choosing your final shade. With these steps in mind, picking a cabinet color becomes a simple and confident choice. Upcoming Trends to Watch: Cabinet Color Quiet neutrals like gray-green and mushroom bring calm depth to the kitchen without overpowering the space, while rich wine shades add strong, warm color that works well on islands or in moody layouts. Earth tones such as warm brown and taupe are becoming steady favorites, offering a softer feel than cooler grays. Pastels like powder blue and muted yellow are also appearing more often, especially in small areas where a light pop of color feels right. To make these trends last, keep soft shades on main cabinets and use deeper, stronger colors only as accents, making sure the undertones match your floors, counters, and lighting. Common Cabinet Color Mistakes to Avoid A few small oversights can make a big difference in how your cabinets look and feel. Here are key mistakes to avoid: Picking a color only from a tiny swatch: Small chips hide how a color looks on large doors. Always test bigger painted samples. Ignoring undertones and lighting: Colors can shift green, yellow, or pink at home. Check samples next to floors, counters, and backsplash in real light. Going too dark in a dim room: Deep shades in a low-light kitchen can feel tight. Keep most cabinets light and use dark tones only in small areas. Choosing a trend that doesn’t fit the house: Some viral colors fight with your trim and layout. Soften the shade or limit it to an island or feature run. Forgetting about finish (sheen): Matte hides flaws but is harder to wipe. Satin or semi-gloss usually cleans better on busy kitchen cabinets. If you watch for these small issues ahead of time, picking a cabinet color feels clearer and far less stressful. Bottom Line Now you’ve seen how many shades can shape a kitchen and how each one creates a different mood. This guide walked through popular kitchen cabinet colors, ideas that fit many homes, simple steps for choosing a shade, and a few mistakes to avoid. As you look at your own kitchen, you’ll have a clearer sense of what matches your light, layout, and daily routine. Your choice only needs to make sense for you. If you want more home ideas or support for your next project, feel free to check out my other posts.
Looking for a paint finish that works in almost every room without constant maintenance? Satin finish paint might be exactly what your walls need. When I first started decorating my home, I remember standing in the paint aisle feeling completely overwhelmed. After experimenting with various finishes throughout my house, I discovered one that consistently delivered the results I wanted. The right finish can transform how your space looks and functions. Your painting project deserves careful consideration before you open that first can. Let’s find out why this particular finish has become such a popular choice for homeowners. What is Satin Paint? Satin paint sits right in the middle of the paint finish spectrum. It has more shine than flat or matte paint but less gloss than semi-gloss or high-gloss finishes. Think of it as having a soft, smooth sheen that catches light gently. The finish looks almost like satin. When light hits a satin-painted wall, you’ll notice a subtle glow rather than a mirror-like reflection. This makes satin paint incredibly versatile for different rooms in your home. It’s not too shiny and not too dull. The balanced sheen level gives walls a polished look without being overpowering. Most people describe satin paint as having a velvety, pearl-like appearance that adds depth to any color. Characteristics of Satin Paint 1. Sheen and Appearance Satin paint gives your walls a soft, gentle glow that’s not too shiny or too flat. The finish catches light beautifully without looking overly polished or slick. This balanced sheen adds depth to your wall colors while keeping things sleek and understated. It’s perfect for rooms where you want a subtle sophistication without going bold. The pearl-like luster works with any decorating style you choose. 2. Durability Satin paint holds up incredibly well against everyday wear and tear that happens in busy homes. It resists scuffs, stains, and dirt better than flat or eggshell finishes do. High-traffic areas like hallways and kitchens benefit most from satin’s tough surface. The finish is more durable than matte but easier to maintain than high-gloss. Your walls stay looking fresh for years with minimal touch-ups needed. 3. Easy to Clean Satin paint wipes clean easily when spills or smudges happen on your walls. The smooth surface resists moisture and doesn’t absorb stains as flatter finishes do. You can use a damp cloth to remove marks without damaging the paint underneath. This makes satin ideal for kitchens, bathrooms, and kids’ rooms that need frequent cleaning. The finish bounces back quickly after washing without losing its original sheen. 4. Versatility Satin paint works beautifully on almost any surface you need to cover in your home. It adheres well to drywall, wood, metal, and even previously painted surfaces without issues. You can use it in bedrooms, living rooms, trim, doors, and cabinets with excellent results. The finish flawlessly adapts to both modern and traditional decorating styles. This flexibility makes satin paint a wise choice for whole-house painting projects. Where to Use Satin Finish Paint? I’ve used satin paint in almost every room of my home over the years. Figuring out where it works best has saved me time and money on repaints. Let me show you where satin finish really shines: Best Rooms for Satin Paint Certain rooms in your home benefit more from satin paint than others. The finish handles specific challenges like humidity and frequent cleaning exceptionally well. Consider using satin paint in these key areas: Bathrooms for steam resistance: Satin repels water vapor and condensation better than flat paint while wiping clean after showers. Kids’ rooms and playrooms: The washable surface handles sticky fingers, crayon marks, and toy scuffs without permanent damage. Home offices and study areas: Satin provides a professional look that’s sophisticated enough for video calls and focused work. These rooms get the most benefit from satin’s unique combination of beauty and toughness. You’ll appreciate how well the finish holds up over time in these spaces. Outdoor Uses for Satin Paint Satin paint isn’t just for interior projects anymore. It performs surprisingly well on exterior surfaces that face harsh weather conditions. Here’s how to use satin paint outside your home: Exterior trim and shutters: Satin holds up better than flat paint outdoors while avoiding the intense shine of high-gloss finishes. Porch columns and railings: The finish protects wood from moisture damage and sun exposure without requiring constant maintenance. Front doors and entryways: Satin creates an inviting entrance that looks polished but not overly glossy or commercial. Outdoor satin paint has come a long way in recent years, with better weather resistance. Many homeowners now prefer it over traditional gloss finishes for a more modern look. Satin Paint vs. Other Finishes: Which is Right for You? Feature Matte Paint Satin Paint Semi-Gloss Paint Gloss Paint Sheen Level No shine, flat appearance Soft, subtle sheen Noticeable shine, reflective High shine, mirror-like finish Light Reflection Absorbs all light Gentle light reflection Moderate to bright reflection Intense light reflection Durability Low, shows wear easily Moderate to high High, very tough Extremely high, most durable Cleaning Ease Difficult, not washable Easy, wipes clean Very easy, scrub-resistant Easiest, highly scrub-resistant Moisture Resistance Poor, absorbs moisture Good resistance Excellent resistance Best resistance available Hides Imperfections Best at hiding flaws Moderate hiding ability Shows some imperfections Highlights all surface flaws Overall Look Classy, urbane Balanced, versatile Polished, clean Bold, dramatic Price Range Most affordable Mid-range pricing Slightly more expensive Most expensive option Satin paint gives me the best balance for most projects. It handles daily life without looking too formal or requiring constant touch-ups like matte finishes do. Downsides of Satin Finish Paints Satin paint isn’t perfect for every situation, and knowing its limitations helps you make better choices. Here are the main challenges I’ve noticed with satin finish: Shows wall imperfections: The subtle sheen reflects light just enough to highlight dents, bumps, and uneven patches on your walls. Touch-ups can be tricky: Blending new paint into existing satin surfaces often leaves visible patches that don’t match the surrounding area perfectly. Not glossy enough for some projects: If you want a high-shine, dramatic look for furniture or trim, satin’s moderate sheen might feel too understated. Requires proper wall preparation: You’ll need to patch, sand, and prime surfaces more carefully than with flat paint to avoid visible flaws. These downsides don’t make satin paint a bad choice overall. I still use it frequently because the benefits outweigh these minor inconveniences for most of my painting projects. How to Choose the Right Paint Finish for Your Project? Picking the right paint finish depends on where you’re painting and how that space gets used daily. Start by thinking about how much traffic the room gets and whether moisture is an issue. High-traffic areas like hallways need durable finishes, while bedrooms can handle softer sheens. Consider the lighting in your space since natural light shows imperfections more than artificial light does. Look at your wall’s current condition, as rough surfaces require flatter finishes to hide flaws. Think about your decorating style and whether you want subtle elegance or bold drama. Satin paint works beautifully for most projects because it balances durability with appearance perfectly. Match your finish to both the room’s function and your personal taste for best results. Application Tips for Satin Finish Paint Getting a professional-looking satin finish requires some preparation and the right painting techniques. I’ve learned these tips through plenty of trial and error over the years. Follow these steps for the best results with satin paint: Clean and prime your walls thoroughly: Wash surfaces with soap and water, let them dry completely, then apply primer to ensure even paint adhesion. Sand down any rough spots: Use fine-grit sandpaper to smooth bumps and imperfections since satin’s sheen will highlight every flaw on your walls. Use quality rollers with medium nap: A good roller applies satin paint evenly without leaving texture marks, and medium nap works perfectly for most walls. Work in small sections with wet edges: Paint one area at a time and blend into wet paint to avoid visible lap marks or streaks. Allow proper drying and curing time: Wait at least two hours between coats and give the paint a full week to cure before cleaning or heavy use. Rushing through prep work always shows up in the final result. Taking the time with these steps ensures your satin finish looks smooth and professional every single time. Final Words You now understand everything about satin finish paint and how it compares to other options. I’ve found that choosing the right finish from the start saves so much time and frustration. My advice? Start with one room that sees the most activity in your daily life. This finish takes the guesswork out of decorating while giving your walls the protection they need. One thing I’ve learned: proper prep work makes any finish look professionally done. Check out other paint and home guides on the website to help you pick colors, finishes, and tools with confidence.
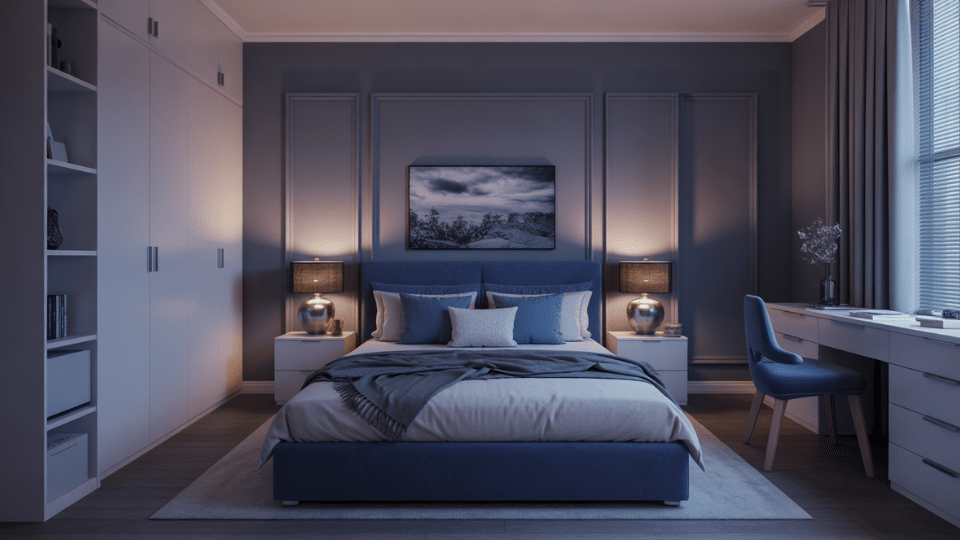
The right bedroom color directly impacts sleep quality and mood. Cool tones like blues and greens activate the parasympathetic nervous system, lowering heart rate and promoting relaxation, while warm neutrals create cocoon-like comfort. But the same paint looks completely different depending on whether your room faces north, south, east, or west. This guide shows how to choose colors that work in real conditions, not just staged photos. It covers how natural light shifts paint throughout the day, which shades expand small or dark spaces, and how to match colors to your desired mood, calm, cozy, airy, or boho. You’ll also learn which colors encourage restful sleep versus ones that overstimulate, plus testing methods to avoid regret. Best Bedroom Paint Colors Beyond Boring Regulars While beige and white remain safe defaults, they’re not the only, or even the best, options for creating a restful, stylish bedroom. 1. Soft Cool Gray Soft cool gray is ideal for bedrooms because it feels clean and calming without turning stark or industrial. These shades usually have a slight blue undertone that keeps walls feeling fresh and airy, especially in rooms with natural light. Soft cool grays balance warm furniture, wood floors, and layered textiles while remaining neutral enough for long-term use. They create a peaceful backdrop that supports rest without feeling flat or overly modern. Benjamin Moore Stonington Gray (HC-170) and Sherwin-Williams Repose Gray (SW 7015) soften bedrooms with a balanced gray that avoids cold undertones. 2. Smoky Lavender Gray Smoky lavender gray blends gray with muted purple undertones for a bedroom color that feels gentle and graceful. Unlike traditional lavender, this version stays grounded and neutral, making it easier to live with long-term. It adds softness and visual interest without overwhelming the space. These shades work especially well in bedrooms that need warmth but should still feel calm and grown-up rather than decorative. It is frequently cited as one of the best colors for a bedroom. Those who want a hint of personality without sacrificing serenity. Benjamin Moore Gray Lavender (2112-60) and Sherwin-Williams Gris Morado (SW 9156) introduce subtle purple warmth while staying muted and sleep-friendly. 3. Muted Navy Muted navy creates a cozy, cocooning effect that works well in larger bedrooms or as an accent wall behind the bed. These shades are softened with gray so they feel restful rather than bold or dramatic. Muted navy pairs beautifully with white bedding, warm woods, and brass or matte black accents. It adds depth and grace while still supporting a calm, sleep-focused atmosphere. Benjamin Moore Hale Navy (HC-154) and Sherwin-Williams Naval (SW 6244) deliver rich depth without overwhelming bedroom walls. 4. Mushroom Taupe Mushroom taupe sits comfortably between gray and beige, making it a flexible and timeless bedroom neutral. It carries subtle warmth without reading yellow and subtle coolness without feeling stark. This balance makes it ideal for bedrooms with mixed finishes or changing light throughout the day. Mushroom taupe feels grounded and calming, offering more character than standard beige while remaining easy to decorate around. Benjamin Moore Revere Pewter (HC-172) and Sherwin-Williams Accessible Beige (SW 7036) create a grounded neutral that avoids traditional beige tones. 5. Pale Silver Pale silver is a light gray with a gentle reflective quality that helps brighten bedrooms without feeling cold. It works especially well in smaller rooms or spaces with limited natural light. These shades improve white trim and soft textiles while keeping the room feeling open and restful. Pale silver adds polish and calm without introducing strong contrast, making it a safe but better bedroom wall color choice. Benjamin Moore Silver Satin (OC-26) and Sherwin-Williams Crushed Ice (SW 7647) brighten bedrooms with a soft, light reflective gray. 6. Washed Charcoal Washed charcoal offers depth without heaviness by softening traditional charcoal with gray undertones. It works well in bedrooms meant to feel cozy and enveloping, especially when paired with light bedding and warm accents. This shade adds contrast and grace while still feeling breathable. Used thoughtfully, washed charcoal turns a bedroom into a retreat without creating a dark or closed in feeling. Benjamin Moore Chelsea Gray (HC-168) and Sherwin-Williams Peppercorn (SW 7674) add depth while remaining soft enough for bedroom spaces. 7. Muted Plum Muted plum brings warmth and personality without leaning bold or dramatic. These shades are softened with gray or brown undertones, making them feel calm and mature. It creates a cozy and slightly romantic atmosphere, securing its spot among the best bedroom colors for a moody yet restful vibe. Benjamin Moore Shadow (2117-30) and Sherwin-Williams Mature Grape (SW 6286) introduce softened purple depth suited for restful bedrooms. 8. Soft Clay Gray Soft clay gray blends gray with subtle earthy warmth inspired by natural clay and stone. It feels grounded and calming without reading beige or orange. This shade works well across different lighting conditions and pairs easily with both cool and warm decor. In bedrooms, soft clay gray creates a relaxed, natural backdrop that feels cozy yet modern, making it ideal for layered textures and neutral color palettes. Benjamin Moore Balboa Mist (OC-27) and Sherwin-Williams Agreeable Gray (SW 7029) balance warmth and neutrality for versatile bedroom walls. 9. Cool Off-White This paint offers brightness without the harshness of pure white. These shades include subtle gray or blue undertones that prevent yellowing and keep bedrooms feeling crisp and airy. Cool off whites make rooms feel larger and work well with bold headboards, textured bedding, or darker furniture. They are ideal for minimalist or transitional bedrooms where calm and lightness are priorities. Benjamin Moore White Dove (OC-17) and Sherwin-Williams Snowbound (SW 7004) replace stark white with a softer, cooler brightness. 10. Stormy Blue Gray Stormy blue gray blends blue and gray to create a soothing, atmospheric bedroom color. It feels calm and balanced without leaning coastal or overly cool. These shades shift subtly throughout the day, adding depth without visual noise. Stormy blue gray pairs well with white linens, soft woods, and muted metals, making it an excellent choice for bedrooms designed for relaxation and visual quiet. Benjamin Moore Silver Chain (2132-60) and Sherwin-Williams Misty (SW 6232) create a tranquil blue-gray ideal for sleep-focused spaces. 11. Pale Putty Pale putty is a light neutral that blends gray and beige in a restrained, natural way. It adapts easily to changing light and surrounding decor, making it a dependable bedroom wall color. Pale putty feels soft, calm, and subtle, allowing furniture and textiles to stand out. It is ideal for bedrooms where you want warmth and neutrality without committing to a strong undertone. Benjamin Moore White Sand (OC-10) and Sherwin-Williams Worldly Gray (SW 7043) offer a flexible neutral that stays calm in varied lighting. How to Test Bedroom Paint Colors Properly Choosing paint from tiny store chips guarantees disappointment; colors change drastically under real lighting conditions. Proper testing prevents costly mistakes. Sample Patches: Paint large swatches (2×2 feet minimum) directly on walls. Tiny chips don’t show how color behaves across surfaces. Check at Different Times: Observe morning light, afternoon sun, and evening lamps. Colors shift throughout the day. Warm vs Cool Lighting: Test under both warm bulbs (2700K-3000K) and cool daylight to see artificial lighting effects. Shortlist Method: Narrow to 3-4 favorites, live with samples for 3-5 days, eliminate options that don’t perform consistently. Bottom Line At the end of the day, I don’t think there’s one “perfect” bedroom color for everyone. The best choice is the one that fits your room and helps you feel good when you walk in. If your bedroom gets cool light, warmer shades can make it feel more welcoming. If it gets intense sun, softer cool tones can keep it balanced. And if your room is small or dark, you now know which colors can help it feel more open or more cozy on purpose. Before you commit, test a few samples on your wall and check them from morning to night. So, pick your top 3 shades today and start testing, then share your favorite in the comments!
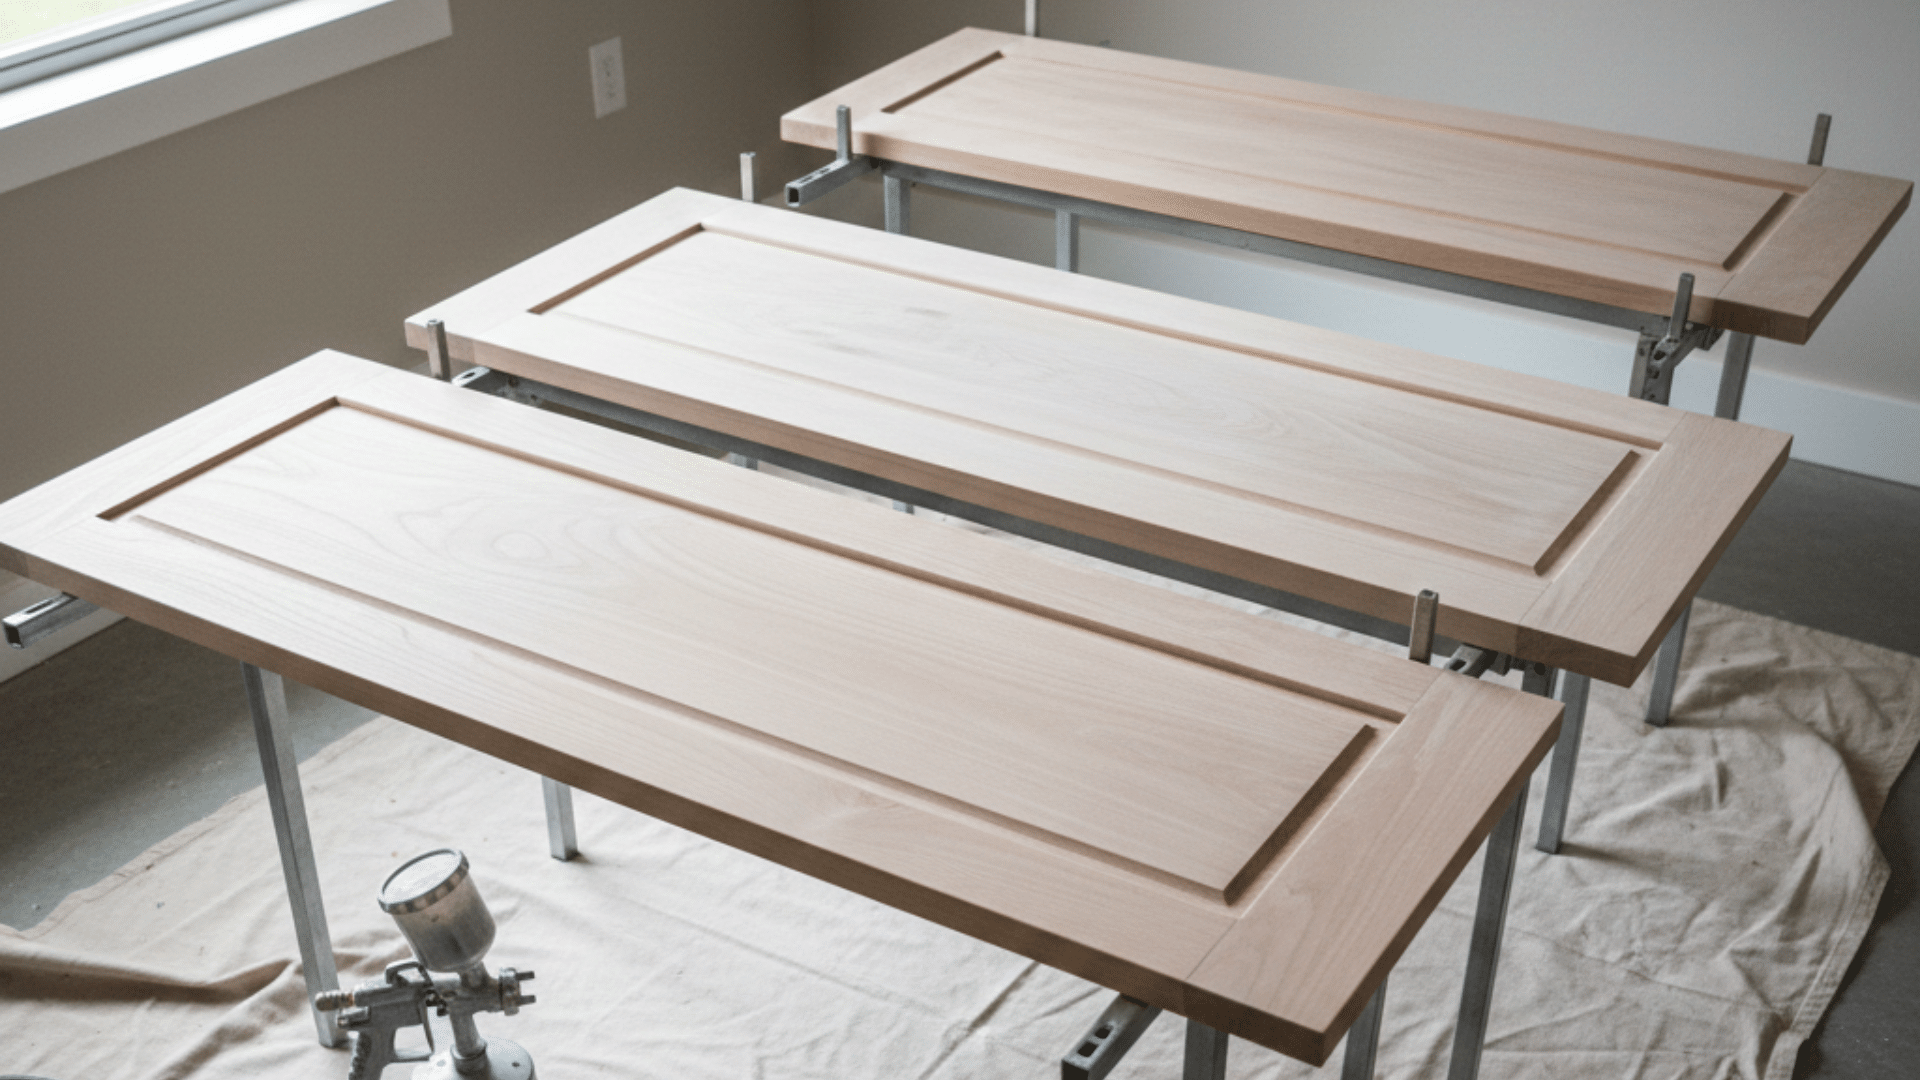
I remember the first time I saw bare wood cabinets and wondered if painting them would really hold up. You might be staring at unfinished cabinets right now, thinking the same thing. The good news is that how to paint unfinished cabinets is much more straightforward than dealing with old, greasy finishes. Raw wood gives you a clean starting point, but it also comes with its own set of concerns, like sanding, sealing, and drying time. This becomes important when comparing milk paint vs chalk paint for the final finish. Getting those parts wrong can lead to rough surfaces or easy damage later. I want to walk you through what actually works, what causes trouble, and how to avoid common slip-ups when tackling how to paint unfinished cabinets from start to finish. Can You Paint Unfinished Cabinets Successfully Yes, you can paint unfinished cabinets and get strong, long-lasting results with the right process. Unfinished cabinets are raw wood, which means there is no old finish to strip or remove first. That alone makes the job simpler than repainting existing cabinets. Paint and primer bond better to bare wood, so adhesion issues are less common when prep is done correctly. For beginners, unfinished cabinets are often a better starting point. You are not fighting grease buildup, glossy coatings, or unknown products used by the manufacturer. You start with a clean surface and build from there. As long as you sand properly, use a solid primer, and apply paint in thin coats, results can look clean and even. Mistakes are also easier to fix on raw wood, which helps reduce stress during the project. Step-By-Step Guide To Painting Unfinished Cabinets Follow a clear process that covers setup, sealing, sanding, painting, and protection so unfinished cabinets dry smooth, resist damage, and look consistent from door fronts to cabinet boxes after installation. Gather Your Materials Unfinished cabinet doors and cabinet boxes Sanding sealer Paint sprayer (critter-style or similar) Air compressor Cup hooks Drill or driver Steel wool pad Extra-fine sanding block 220-grit sandpaper Clean cloth or rag Wood filler Polycrylic clear finish Respirator or mask Step 1: Set up Cabinet Doors for Spraying Start by preparing the cabinet doors so they can be sprayed evenly on all sides. Screw cup hooks into hidden edges of each door. Place them at the top for wall cabinets and at the bottom for base cabinets so holes are never visible later. Hang the doors on a rack or temporary frame with enough spacing to avoid contact. This setup keeps doors off flat surfaces, prevents sticking, and allows paint to flow smoothly around edges, corners, and details without missed spots. Step 2: Apply Sanding Sealer Load sanding sealer into the sprayer and set air pressure just under 30 PSI. Spray an even coat across the door faces, moving slowly and keeping the sprayer steady. Focus on grooves, corners, and edges where raw wood absorbs more product. The sealer fills open pores and creates a smoother base for paint. Take time during this step since uneven sealing can show later. Let the sealer dry fully before touching or sanding the surface. Step 3: Smooth the Surface After Sealing After the sealer dries, the wood surface will feel rough. This happens because moisture causes wood fibers to rise. Lightly smooth the surface using a steel wool pad with gentle pressure. If certain areas still feel uneven, switch to an extra-fine sanding block or 220-grit sandpaper. Use only one or two light passes to avoid removing too much sealer. Once smooth, wipe everything with a clean cloth to remove dust before painting. Step 4: Apply the First Paint Coats Before spraying, test the sprayer pattern and pressure on scrap material. Apply the first paint coat using slow, even passes. Keep a steady distance and overlap slightly to avoid streaks. Let the first coat dry fully, then apply a second coat the same way. At this stage, sanding is not needed yet. These first coats build coverage and start leveling the surface. Allow proper drying time before moving on to inspection or extra prep steps. Step 5: Inspect and Re-Seal if Needed Once two paint coats are dry, inspect the surface closely under good lighting. If the surface looks uneven or needs more smoothness, apply another coat of sanding sealer. This extra layer helps paint level better and improves surface consistency. After drying, lightly smooth the surface again using a pad or fine sandpaper. Keep pressure light and focus on feel, not appearance. Clean all dust thoroughly before moving forward to prevent texture issues. Step 6: Sand Before the Final Paint Coat Before applying the last paint coat, lightly sand the surface using an extra-fine sanding block or 220-grit sandpaper. This step removes minor texture and helps the final coat lay flat. Sand just enough to smooth the surface without cutting through paint layers. Flip the doors and repeat on the back side, which is often rougher due to the panel material. Wipe everything clean so no dust remains before spraying the final coat. Step 7: Apply Protective Clear Finish Load polycrylic into the sprayer and lower the air pressure slightly since the product is thinner than paint. Spray an even coat across all painted surfaces. This layer protects the paint from scratches and wear. After the first coat dries, apply a second coat for added durability. Keep movement steady and avoid heavy buildup. This step is critical for long-term performance, especially in kitchens where cabinets face frequent contact and cleaning. Step 8: Final Dry and Inspection After all coats are applied, allow cabinets to dry fully in a clean, dust-free area. Once dry, inspect the surface by touch and under strong lighting. Check for smoothness, even coverage, and consistent finish across doors and trim. Compare results from different angles to confirm uniform appearance. After proper drying time, the cabinets are ready for installation and normal use without sticking, scratching, or surface damage. For a complete walkthrough of the whole process, check out the video tutorial below: What Unfinished Cabinets Really Are Unfinished cabinets are made from raw wood that has not been sealed, painted, or coated at the factory. The surface feels dry and slightly rough because the wood pores are open. This allows primer, sealer, and paint to soak in and bond directly to the material. Prefinished cabinets are different. They already have a factory-applied coating, which may include stain, paint, or a clear layer. That surface is smooth and sealed, so new paint does not bond as easily without extra prep. With unfinished cabinets, there is no old coating to remove or strip first. This makes them easier to work with, especially for painting projects. The results depend heavily on proper sanding, sealing, and coating steps to control absorption and surface texture. Best Primer and Paint by Cabinet Material Different cabinet materials absorb coatings in unique ways, so choosing the right primer and paint helps avoid surface issues and uneven results. Oak Cabinets Oak has an open grain and natural tannins that can rise through paint layers if not controlled. A stain-blocking primer is critical here, especially for lighter paint colors. Many DIY users report yellow or brown marks appearing days later when this step is skipped. Apply at least one solid primer coat and allow full drying before sanding lightly. Some projects benefit from a second primer coat for added protection. Taking time at this stage prevents future touch-ups and helps the paint layer stay even and stable over time. Maple And Birch Cabinets Maple and birch have tighter grain patterns, which makes them easier to coat evenly. The surface does not absorb as much product, so thin, controlled coats work best. A high-quality bonding primer helps paint grip without creating texture. Light sanding between coats keeps the surface flat and consistent. Many users recommend avoiding heavy rollers on these woods, since excess paint can leave subtle ridges. Patience with drying time improves the final look and reduces the need for extra coats later. MDF Cabinets MDF cabinets are common but can cause issues along edges and cut areas. These spots absorb moisture quickly and may swell if not sealed well. A dedicated primer designed for MDF or raw fiberboard works best. Apply extra attention to edges, corners, and routed details, sealing them before full coats. Users often report rough edges after the first coat, which can be fixed with light sanding once dry. Proper sealing early helps prevent long-term wear and surface breakdown. Choosing the Right Tool for Cabinet Painting The tool you choose affects how smooth the cabinets look and how long the work takes. Brushes give the most control and work well for edges, corners, and detailed areas. Rollers cover flat surfaces faster and help keep coats even when used correctly. Sprayers create the smoothest finish but require more setup, space, and practice. Many people combine tools, using a brush for details and a roller or sprayer for larger areas. The best option depends on skill level, workspace size, and the finish goal. Picking the right tool early helps reduce mistakes, saves time, and improves final results. Dry Time vs. Cure Time Cabinets often seem finished long before the paint is actually dry. The table below breaks down each stage clearly so timing mistakes are easier to avoid: Stage What Is Happening How It Feels Typical Time Range What To Avoid Initial Dry Surface moisture evaporates Dry to the touch 1–8 hours Touching, stacking, light pressure Recoat Ready Paint can accept another coat Slightly firm 4–24 hours Heavy sanding, hardware install Handling Dry Surface holds light contact Mostly firm 24–48 hours Hanging doors, tightening screws Early Cure Paint begins to harden below the surface Firm but flexible 3–7 days Cleaning, bumping edges Full Cure Paint reaches full strength Hard and durable 14–30 days Aggressive cleaning, impact Paint dries from the outside in. Even when cabinets feel dry, deeper layers stay soft. Waiting through full cure time prevents dents, scratches, and sticking doors that often show up days later. Should You Paint Before or After Installation Many forum users suggest painting cabinet doors before installation when space allows. This method gives better access to edges and reduces the risk of drips or missed spots. Hanging doors flat or on hooks also helps paint settle evenly. Painting after installation can make sense when cabinets are already mounted or space is limited. This option avoids extra handling and reduces the chance of dents during transport. For beginners, painting doors first and boxes in place often works best. It keeps the process manageable while limiting touch-ups later. The right choice depends on workspace, time, and comfort level, but careful handling and proper drying matter more than timing. Common Mistakes and How to Fix Them These issues come up often during cabinet painting, and most can be corrected with simple adjustments, patience, and practice. Skipping sanding between coats: Light sanding smooths the texture and helps the next coat settle evenly. Applying thick coats: Thin coats dry better and reduce runs, drag marks, and uneven buildup. Ignoring dust control: Cleaning surfaces between steps prevents grit from getting trapped in paint layers. Rushing dry time: Extra wait time helps avoid dents, scratches, and doors sticking together. Poor edge prep: Sealing and smoothing edges early prevents rough spots and early wear. Addressing these problems early saves time, reduces rework, and helps cabinets hold up better during daily kitchen use and cleaning. Conclusion Painting cabinets from raw wood takes patience, but the process is very manageable with the right order and timing. Proper setup, sealing, sanding, and drying all play a role in how the finish holds up over time. When each step is handled carefully, the results feel solid and consistent, not fragile or rushed. If there is one takeaway to remember, it is that waiting between stages matters just as much as the products used. I hope this breakdown made how to paint unfinished cabinets feel clearer and less stressful. If you want more home improvement help, take a look at other blogs on the site and keep building confidence with your next project.
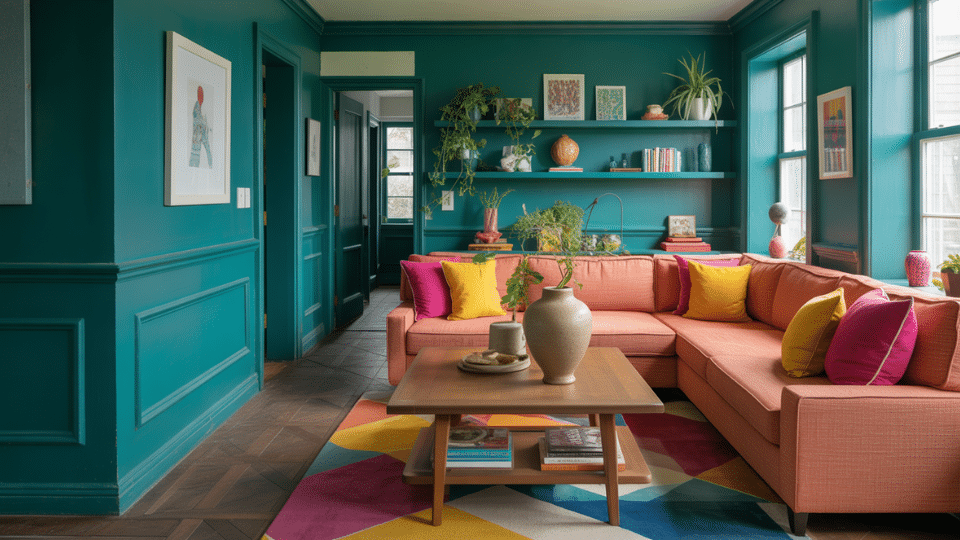
Pinterest makes it look simple: paint the walls and the trim the exact same color, and boom, instant “designer home.” But I’ve learned this trend can go two ways. In the right room, it looks clean, modern, and calm. In the wrong room, it can flatten beautiful details and make the space feel cheap or heavy. In this post, I’ll help you decide if this look fits your home. We’ll go over the quick one-sentence test, the rooms where it works best, and the times it fails hard. I’ll also break down the best sheen combos, plus real execution tips that prevent repainting regrets. Starting View on the Matter Painting walls and trim the same color works brilliantly in modern, architecturally simple spaces. It fails spectacularly in traditional homes with detailed trim profiles. The one-sentence test that’ll save you time? If your trim has intricate molding, raised panels, or dentil details, basically anything you’d point out to a guest, don’t paint it the same color as your walls. That trim exists to be noticed. This approach shines when your home has plain, flat trim and you want a clean, minimalist aesthetic. It’s perfect for contemporary spaces where architecture plays a supporting role to furniture and art. But if you’re living in a Craftsman bungalow or Victorian with original millwork, painting everything one color is like putting a paper bag over a sculpture. The rest of this post will show you exactly when to embrace this trend and when to run from it. When Painting Walls and Trim the Same Color Works Painting your walls and trim the same color works when your home has clean lines, tight spaces, or you want a calm backdrop that lets furniture shine. 1. Modern Homes with Simple Architecture This painting style works best in newer homes built after the 1990s with simple, flat trim. These houses were designed for this look, so you’re just making them better instead of fighting their style. The smooth color makes everything flow nicely. But here’s the truth: this doesn’t work well when you try it on older, traditional houses with fancy details. Older homes with decorative trim need color contrast to look their best Flat, simple trim pieces work perfectly with matching wall colors New-style houses are built ready for this single-color approach 2. Small Rooms with Lots of Trim Bathrooms and entryways packed with doors, windows, and trim benefit from using one color. Your eyes don’t jump around, counting all the different white pieces anymore. It won’t make the room bigger, but it definitely makes it feel less messy. All those trim pieces stop fighting each other for your attention. Less visual mess when the trim doesn’t stand out separately Cramped spaces feel calmer without different colors breaking things up Multiple doors and windows blend instead of competing 3. When You Want Backgrounds to Disappear If you have cool furniture, bold artwork, or eye-catching decorations, matching the wall and trim color creates a perfect backdrop. Your architecture steps back and lets your stuff shine. But stick with light neutrals like white, soft gray, or beige. Dark colors like navy, dark green, or charcoal make rooms feel heavy and gloomy, not classy. Your furniture and art get more attention without the trim competing Light neutral colors are essential; dark ones feel oppressive The room becomes a simple canvas for displaying your belongings When the Same Paint on Walls and Trim Fails Hard Using the same paint on walls and trim fails when your home has detailed architecture, imperfect trim, or low light, because flaws stand out and rooms feel heavier. 1. Historic or Period Homes Craftsman, Victorian, and Colonial houses have special architectural styles where the trim is meant to stand out. Crown molding, thick baseboards, and detailed trim add value to your home. Painting everything one color looks like a cheap, quick fix, not a real update. White or cream trim against colored walls respects the original design and makes your house look more expensive. Fancy trim details actually increase your home’s value Contrasting trim keeps the classy look these houses should have One color makes it look cheap instead of well-designed 2. The Damaged Trim Trap Here’s a myth you need to forget: matching colors don’t hide damage, they show it off. Different colored trim gives your eyes something else to look at, so flaws blend in. Same color plus different shine levels make every dent, gap, and rough spot super obvious. If your trim is damaged, fix it first or use contrasting colors that naturally hide imperfections. Color differences help minor damage fade into the background Different shine levels actually highlight surface problems Contrasting colors naturally forgive what matching colors expose 3. Dark Colors in Already-Dark Rooms Rooms facing north with dark walls and dark trim feel like caves, not cozy spaces. Dark single-color schemes only work in rooms flooded with sunlight. In dim rooms, dark colors soak up what little light you have, making ceilings seem lower and walls feel closer. Use white or cream trim in dark spaces to bounce light around and keep the room from feeling crushing. Lots of natural light is required for dark colors to work Rooms with little light need bright trim to feel open Dark colors everywhere create a suffocating feeling without enough brightness Should Walls and Trim Have the Same Sheen? You have two sheen approaches. Here’s the honest comparison: most people should use different sheens, but decide for yourself based on your situation. Factor Same Sheen (Flat/Eggshell Everywhere) Different Sheens (Satin Walls + Semi-Gloss Trim) Look Seamless, editorial, gallery-like Subtle definition, still monochrome Best For New construction, minimal traffic Real homes with kids, pets, and normal wear Maintenance Harder to clean, touch-ups visible Semi-gloss wipes clean, forgiving Durability Shows every imperfection and scuff Hides minor flaws, more resilient My Pick Only if obsessed with perfection Recommended for 90% of people Use proper primer on each surface; drywall and wood absorb differently. Test both the wall and the trim in your actual room before committing to gallons. Execution Tips that Actually Matter These execution details separate successful monochrome rooms from expensive regrets. Follow these rules before you buy a single gallon: Test both surfaces by painting large patches on walls and trim, then live with them for 2-3 days to observe color changes in morning and evening light, not just store fluorescents. Go lighter than expected; a room in one color appears darker and more overwhelming than sample chips or test squares. Don’t forget the doors; paint them the same color as the trim to avoid breaking the effect. Skip choosing warm whites or off-whites with careful attention to undertones, as purple undertones in greige can dominate your space. These aren’t optional nice-to-knows. Skipping any of these four steps is how people end up repainting within six months. Learn from their mistakes. What the Public Has to Say About Walls and Trim Paint Many users in the Reddit thread “trim same color as walls??” pushed back against the designer-driven trend of monochrome rooms. Painters called it overused, warning it only works in specific spaces like studies with built-ins, while full-home “color drenching” can look sterile or even cheap. Others emphasized style mismatch, noting the OP’s Craftsman/Victorian leanings clash with minimalist color-matching. A few defended it but stressed the differences and careful color selection. Personally, I think Reddit’s skepticism is justified. Monochrome trim works, but only when architecture supports it. For most homes, contrast delivers more character and fewer regrets. The 60-Second Decision Framework Not sure if this look is right for your space? Use this quick checklist: Paint Walls and Trim the Same Color If: ☐ Your home was built after 1990 with simple, flat trim profiles☐ You’re going for minimalist, Scandinavian, or modern aesthetics☐ The room is small with multiple doors, windows, and visual clutter☐ Your trim is plain contractor-grade boards with no decorative details Absolutely Don’t Do It If: ☐ You have Victorian, Craftsman, Colonial, or any historic trim profiles☐ Your trim is damaged, dinged up, or low-quality (same color highlights flaws)☐ The room already feels dark with low ceilings☐ You’re using bold or saturated colors like navy or charcoal Final Thoughts Painting walls and trim the same color isn’t good or bad on its own. It all comes down to your home, your light, and how much character your trim already has. I’ve seen this look feel calm and expensive in simple, modern spaces. I’ve also seen it erase charm in homes that deserved contrast. Trends come and go, but good design lasts longer than a Pinterest save. Take your time, test first, and be honest about your space. Not sure what direction fits your space? The other paint guides on this site walk through color, trim, and finish choices in plain terms.

