


Want to turn your living room into a cozy, warm, aesthetic living room that actually feels like home? Creating that perfect warm atmosphere doesn’t require expensive furniture or a complete renovation of your entire space. I know how overwhelming it can feel when you’re trying to make your living room feel inviting and comfortable. A cozy, warm aesthetic living room focuses on comfort, warmth, and creating a space where people naturally want to gather. Your living room should be a place where you actually want to spend time rather than just pass through. Let me show you exactly how to create that warm, welcoming space you’ve been dreaming about. The Appeal of a Cozy Warm Aesthetic in Living Rooms I believe living rooms need warmth more than any other space because that’s where we actually live and spend time. Your living room is where you relax after long days, gather with family on weekends, and unwind with friends. A comfy, warm farmhouse living room using beige tones, natural textures, and soft decor makes these moments feel even better and more special. Cool, stark spaces might look impressive in photos, but feel uninviting when you’re trying to relax and be comfortable. Warm colors, soft textures, and cozy elements create an atmosphere that naturally encourages people to settle in and stay awhile. The living room should feel like a hug, not a showroom you’re afraid to touch or use daily. Cozy Warm Aesthetic Living Room Ideas to Try I believe creating a cozy, warm living room is easier than most people think when you know the right elements. Here are tried-and-true ideas that convert any living room into a warm, inviting space: 1. Warm Beige Layered Living Room Your cozy, warm beige living room looks refined with different beige shades creating depth throughout the space. Paint walls soft beige, choose a beige sofa, and hang matching curtains reaching the floor. Layer chunky knit throws, linen pillows, and a jute rug to prevent flatness. The finished space appears warm and inviting, with each texture catching light differently as the day progresses. 2. Soft Farmhouse Living Room with Slipcovered Seating Choose white or cream slipcovered sofas and armchairs that create a relaxed farmhouse vibe. Add a distressed wood coffee table and simple greenery in ceramic vessels for genuineness. The space looks lived-in and adorable, perfect for families who actually use their living room daily. Everything feels practical yet welcoming, with washable covers making life easier when messes happen. 3. Cozy Warm Living Room with Balanced Negative Space I’ve learned that leaving space makes rooms feel warmer because it lets you appreciate what’s there without overwhelm. The room looks intentional when you resist filling every surface and corner with furniture or decorative items constantly. Allow breathing room around furniture groupings and keep some walls bare so eyes can rest between focal points. The negative space makes your warm elements stand out and creates a peaceful atmosphere, inviting relaxation. 4. Cozy Living Room with a Large Neutral Area Rug The space looks pulled together when one oversized rug anchors all your furniture perfectly. Choose a rug large enough that your sofa, chairs, and coffee table all rest on it entirely. Go for neutral tones like cream or beige in wool or jute that add warmth underfoot. Everything appears more spacious and intentional, with furniture visually connected. 5. Living Room with a Warm Wood Coffee Table A solid wood coffee table in walnut or oak becomes the natural focal point, warming your space instantly. Place it centrally in front of your sofa and style it simply with a plant and books. The rich wood grain adds character and organic warmth that balances cooler elements like metal or glass. Your room immediately feels more grounded and complete. 6. Warm Aesthetic Living Room with Linen Curtains The space looks airy and sleek with floor-length linen curtains in cream or oatmeal filtering light beautifully. Hang curtain rods near the ceiling and let the fabric puddle slightly on the floor. Natural linen moves gently when windows open, adding life and softness to the room. Light filters through the fabric during the day, creating a warm glow. 7. Earth-Tone Accent Living Room Your room looks grounded with terracotta, clay, and muted brown accents throughout the neutral space. Keep walls beige or cream, then add warmth through rust-colored pillows, clay pots, and woven textiles. Use wooden bowls and natural materials to reinforce the earthy feeling you’re creating. The palette feels cohesive and calming without overwhelming your senses. 8. Cozy Reading Corner Living Room My friend always says, “A home without a reading nook is just a house,” and she’s right. The corner looks inviting with a comfortable armchair, a small side table, and a dedicated reading lamp. Add a soft throw blanket and keep a basket of books within easy reach. This dedicated spot becomes the room’s most cherished area where you escape screens. 9. Warm Beige Living Room with Textured Walls Change plain walls with limewash or plaster that adds dimension and makes beige look refined. The textured surface catches light differently throughout the day, creating subtle shadows and depth. Apply the texture yourself with special rollers or hire professionals for more complex finishes. Your walls look intentional and high-end, proving neutral colors can feel urbane. 10. Comfy Living Room with Overstuffed Seating The room looks inviting with deep, plush sofas that beg you to sink in and stay awhile. Choose pieces with soft, rounded arms and thick cushions that prioritize comfort over sleek modern lines. Add plenty of throw pillows for back support and lounging that feels luxurious. Your space becomes an actual living room where people actually relax. 11. Farmhouse Living Room with Woven Baskets Natural woven baskets in seagrass or rattan make the room look tidy yet casual, with practical storage everywhere. Place large baskets beside sofas for blankets, tuck medium ones under tables for magazines, and use small ones on shelves. The organic texture softens modern furniture and hard surfaces while keeping clutter hidden. Everything appears organized and approachable. 12. Warm Living Room with Wood Ceiling Beams The room looks architecturally interesting with wood beams overhead, bringing warmth to a surface people often overlook. Install real beams for genuineness or faux beams that look convincing and mount more easily. Choose warm wood tones that complement your furniture and flooring below for a cohesive design. The beams draw eyes upward and make even high ceilings feel cozier. 13. Cozy Living Room with Layered Throw Blankets Your space looks lived-in and welcoming with multiple blankets draped across sofas, chairs, and folded in accessible baskets. Mix chunky knits, soft fleece, and woven cotton for visual variety that appears intentionally curated. Keep them within reach so everyone actually uses them instead of treating them like untouchable decorative accessories. The layered look makes people want to curl up immediately. 14. Neutral Living Room with Soft Patterned Pillows The sofa looks styled but calm with subtle patterns like checks or stripes mixed among solid neutral pillows. Balance patterned pieces with solid ones in coordinating colors to prevent visual chaos that overwhelms the space. Stick to consistent color palettes so everything feels cohesive instead of randomly thrown together. Your seating area appears interesting enough to avoid blandness. 15. Warm Aesthetic Living Room with a Fireplace Focus The room looks centered and inviting, with all seating arranged to face the fireplace as the focal point. Style your mantel and add candles or logs in the heart, even if the fireplace doesn’t work. Hang artwork or a mirror above to extend the visual importance of this feature. The fireplace becomes the heart where everyone naturally gathers. 16. Living Room with Soft Rounded Furniture Your space looks gentle and approachable with curved sofas, circular ottomans, and tables featuring soft edges. These rounded shapes create a welcoming atmosphere that is also safer if you have young children. Mix curves with some straight lines to maintain structure and prevent the room from feeling too soft. Everything feels relaxed rather than stiff. 17. Cozy Living Room with Mixed Wood Tones The room looks collected and layered with light oak, medium walnut, and warm pine finishes used throughout. Use different wood tones in your coffee table, side tables, and shelving instead of matching everything perfectly. Make sure all woods have warm undertones rather than mixing warm and cool tones. Your space appears gathered over time. 18. Farmhouse Living Room with Soft Checked Textiles Your room gains farmhouse appeal when you introduce subtle plaid or check patterns through pillows, throws, or curtains. The checks look classic and timeless, adding visual interest without overwhelming your neutral color scheme throughout the room. Choose patterns in cream, beige, tan, and soft gray rather than bold colors that compete inappropriately. The checkered textiles feel nostalgic and cozy, reminiscent of simpler times and comfortable country living that everyone craves. 19. Farmhouse Living Room with Vintage Accents I love hunting for vintage finds because, as my grandmother used to say, “Old things have stories to tell.” The room looks collected and personal with antique frames, weathered wood, and aged ceramics from flea markets. Place vintage books on your coffee table and old crocks on shelves to add character. Your space feels unique and full of stories. 20. Cozy Living Room with Layered Lighting Zones The room looks intimate and intentional, with multiple light sources creating separate zones instead of harsh overhead lighting. Place table lamps on end tables, floor lamps beside chairs, and small accent lights on shelves. Use dimmer switches to adjust brightness based on time of day or desired mood. Your space glows with soft pools of light, creating cozy pockets. 21. Warm Living Room with a Neutral Gallery Wall The wall looks curated with wood-framed artwork in beige, cream, and brown tones arranged together thoughtfully. Use similar wood finishes for cohesion rather than mixing metals or colors randomly throughout the display. Choose abstract pieces, landscapes, or photography featuring warm neutrals that complement your existing scheme perfectly and beautifully. The gallery becomes a focal point, adding interest without introducing loud colors that disrupt the calm atmosphere. 22. Living Room with a Soft Upholstered Ottoman Your space feels inviting when you replace complex coffee tables with a large upholstered ottoman instead of traditional options. Choose one in linen or velvet in a neutral shade that coordinates with your existing furniture beautifully and seamlessly. The ottoman provides flexible seating and a safer surface than hard tables for families with children everywhere. Style the top with a tray holding candles or books for functionality. 23. Cozy Living Room with Natural Fiber Decor The room looks organic with jute, sisal, and seagrass elements woven throughout the space, adding natural texture. Add these materials through rugs, baskets, planters, or wall hangings that bring warmth effortlessly and beautifully. Natural fibers soften hard surfaces and modern furniture while adding an earthy quality that makes spaces feel calm. Everything creates a relaxed atmosphere, connecting your indoor space to the natural world outside your windows. 24. Warm Living Room with Muted Green Accents I’ve found that olive or sage green accents breathe life into beige spaces without disrupting calm feelings. Your room looks fresh with muted green pillows, blankets, or plants in green pots, adding subtle color. These gentle tones complement warm neutrals beautifully and prevent everything from feeling too monotone or boring. The subtle green feels natural and organic, like bringing the outdoors inside your cozy living space. 25. Comfy Living Room with Low Furniture Profile The space looks relaxed when you choose sofas, chairs, and tables with lower profiles instead of tall pieces. Lower furniture makes ceilings feel higher while creating a casual vibe that encourages complete relaxation throughout the day. Sitting closer to the ground creates intimacy that makes conversation easier and more natural among family and guests. Your room appears more spacious, with nothing towering overhead, making the space feel cramped. 26. Warm Living Room with Floor Cushions or Poufs Add floor seating with large cushions or poufs that make the room feel relaxed and approachable for everyone. The space looks laid-back, perfect for families with kids who naturally gravitate toward sitting on the floor. Choose poufs in neutral fabrics or jute that add texture while providing extra seating for gatherings and parties. Toss them around the coffee table or in corners where they’re accessible but not blocking pathways. 27. Farmhouse Living Room with a Soft Neutral Sectional The room looks anchored with a large neutral sectional designed for lounging and gathering together throughout the day. Choose a sectional in cream, beige, or soft gray that accommodates family and guests easily and comfortably. The generous seating makes your space the natural gathering spot where everyone wants to spend relaxing time. Style it with throw pillows and blankets to maximize comfort and maintain that farmhouse appeal perfectly. 28. Warm Living Room with Soft Window Seating Create a window spot by placing a cushioned bench or chair near natural light coming in throughout the day. Layer the seating with soft pillows and keep a throw blanket nearby for chilly mornings or evenings. The area looks intentional, becoming a favorite perch for morning coffee or watching the world outside your window. Natural light makes this spot feel warm and connected to the outdoors throughout the day. 29. Cozy Living Room with Subtle Texture-on-Texture Styling Your space looks rich when you layer bouclé, knit, linen, and wool textures without introducing any color contrast. The monochromatic approach keeps everything calm while varied textures prevent the room from looking flat or dull. Mix smooth linen curtains with chunky knit throws, a bouclé chair, and wool pillows in similar tones. The depth comes from how light plays across different surfaces rather than from competing bright colors. 30. Warm Aesthetic Living Room with Antique Lighting My grandmother used to say, “Good lighting is like a warm hug for your room,” and she was right. The space glows with vintage-style lamps or sconces that cast warm light from decorative bases with character. Choose fixtures with brass, bronze, or weathered metal finishes that add patina and warmth to your walls. Use warm-toned bulbs in all fixtures to enhance the cozy atmosphere during evening hours beautifully. 31. Living Room with Warm Neutral Built-In Shelves Style built-in shelves with pottery, books, and wooden accents that create a curated look without overwhelming everything. The shelves look balanced when you group similar items together and leave some empty space for breathing. Mix vertical books with horizontal stacks, add small plants, and incorporate wooden bowls for texture and warmth. Everything appears collected over time, giving your room depth and a genuine personality. Cozy Warm Aesthetic Living Room Mistakes to Avoid I’ve seen so many people accidentally sabotage their cozy living room goals by making a few common design mistakes. Avoiding these missteps helps you create the warm, inviting space you’re dreaming about without wasting time or money. Here are the biggest mistakes to watch out for: Using Cool Tones: Gray, blue, and stark white paint or furniture make your room feel cold and uninviting instead of warm. Too Much Minimalism: Removing too many items leaves your space feeling empty and sterile rather than cozy and lived-in throughout. Overcrowding the Space: Cramming too much furniture or decor into your room makes it feel cluttered and chaotic instead of comfortable. Harsh Overhead Lighting: Relying only on bright ceiling lights creates a cold atmosphere instead of the warm glow you’re trying to achieve. Skipping Soft Textures: Using only hard surfaces like leather, metal, or glass without adding soft textiles makes the room feel unwelcoming. Catching these mistakes early saves you from having to redo your entire room later when it doesn’t feel right. Pay attention to these common pitfalls, and your living room will feel warm and cozy from the start. Final Thoughts Your dream cozy, warm aesthetic living room is within reach now that you know what actually works and what doesn’t. I hope these ideas inspire you to start making small changes that add up to big improvements. Your living room deserves to feel warm and inviting rather than cold and sterile like a showroom. Remember that creating a cozy, warm living room happens gradually, not overnight, so be patient with yourself. Start with one or two changes and keep adding warmth until your space feels just right. Ready to start creating your dream cozy, warm, aesthetic living room? Share your favorite tip in the comments below!

Feeling overwhelmed by too many color choices when designing your space or project? A minimalist color palette simplifies everything by focusing on just a few intentional colors. I used to struggle with picking colors until I learned how powerful simplicity can be. Minimalist palettes create calm, make spaces feel larger, and reduce visual clutter instantly. You don’t need design experience to use these color combinations successfully. Each palette works for interiors, websites, fashion, branding, or any creative project you tackle. Understanding which colors pair well together saves time and eliminates guesswork. This approach helps you create beautiful, cohesive designs without stress or confusion. The Basics of Minimalist Color Schemes A minimalist color palette strips away the extra and focuses on just a few carefully chosen colors. When I first found minimalism, I realized it’s all about simplicity, functionality, and keeping things neutral. You won’t find busy patterns or clashing bright colors here. Instead, soft whites, grays, beiges, and subtle earth tones create the foundation. These colors bring instant calm and clarity to any space or design. Sometimes a bold accent like black or navy adds just enough contrast without feeling overwhelming. The beauty lies in using fewer colors more intentionally. Minimalist palettes make rooms feel bigger, cleaner, and more peaceful. They help your mind relax because there’s less visual noise competing for attention. Beautiful Minimalist Color Combinations for Every Project I spent years experimenting with colors before understanding what makes minimalist palettes truly work. Each combination below uses just a few colors to create maximum impact and tranquility. Palette 1: Quiet Morning Colors: Soft White, Misty Gray, Light Taupe These three colors combine like a calm, foggy morning. The soft white keeps everything feeling light and open. Misty gray adds just enough depth without being too dark or heavy. Light taupe brings a touch of warmth that makes the whole combination feel cozy. Together, they create a peaceful, clean look that never feels boring or cold. Palette 2: Gentle Waves Colors: Powder Blue, White Sand, Foggy Grey I painted my home office with this palette, and it instantly felt more relaxing. The powder blue is so soft it barely registers as a color. White sand keeps everything bright and airy throughout the space. Foggy grey grounds the palette without adding any harshness. The combination flows together smoothly, like gentle ocean waves rolling onto shore. Palette 3: Dune Breeze Colors: Warm Beige, Sandy Brown, Ivory This palette wraps around you like warm sunshine on desert sand. Warm beige forms the foundation with its earthy, comfortable feel. Sandy brown adds just a bit more richness and depth. Ivory lightens everything up and keeps it from feeling too heavy. The three colors work together to create a naturally cozy atmosphere. Palette 4: Urban Fog Colors: Charcoal Grey, Mist White, Slate Blue Charcoal grey brings refinement and strength to this modern combination. Mist white softens the darkness and adds breathing room between colors. Slate blue introduces a subtle, cool tone that feels both calm and contemporary. These colors balance industrial edge with peaceful simplicity. The result feels sleek and polished without being cold. Palette 5: Soft Linen Colors: Light Ivory, Pale Beige, Cloud White Light ivory creates a gentle warmth that feels welcoming and natural. Pale beige adds slightly more depth while staying incredibly soft and subtle. Cloud white brightens the whole palette without feeling stark or clinical. All three colors mix so smoothly you barely notice where one ends and another begins. It’s like wrapping yourself in the softest blanket. Palette 6: Calm Stone Colors: Cool Gray, Pebble, Off-White Cool gray establishes a solid, grounding base for this combination. Pebble adds texture and interest with its slightly warmer neutral tone. Off-white lifts everything and prevents the palette from feeling too heavy. The colors work together like smooth stones stacked in perfect balance. They create strength and serenity at the same time. Palette 7: Frosted Blush Colors: Blush Pink, Soft Gray, White Mist Blush pink adds gentle warmth that feels welcoming without being overly sweet. Soft gray balances the pink and keeps it graceful and mature. White mist brightens everything while maintaining that dreamy, smooth quality. The three colors merge like morning light filtering through frosted glass. It’s delicate but never feels fragile or overdone. Palette 8: Natural Slate Colors: Slate Gray, Soft Stone, Frost White Slate gray provides depth and creates a strong foundation for this palette. Soft stone warms things up just enough to prevent coldness. Frost white adds necessary brightness and keeps the darker tones from overwhelming. The combination feels solid and reliable, like natural rock formations. It creates a urbane look that still feels approachable. Palette 9: Desert Mist Colors: Warm Taupe, Sandy Beige, Soft White I chose this palette for my living room because it feels like perpetual golden hour. Warm taupe brings that sun-baked, earthy quality that feels instantly comfortable. Sandy beige adds richness without going too dark or heavy. Soft white keeps everything feeling fresh and prevents the warmth from becoming overwhelming. The colors flow together like desert landscapes at sunset. Palette 10: Whispering Gray Colors: Light Charcoal, Soft Ash, Snow White Light charcoal creates depth without feeling too dark or dramatic. Soft ash sits perfectly in the middle, bridging the gap between dark and light. Snow white adds brightness and keeps the whole palette feeling clean and modern. The contrast between these grays feels urbane and intentional. Together, they create a polished look that works anywhere. Palette 11: Golden Hour Colors: Warm Gold, Soft White, Light Gray I used this palette for my bedroom accent wall, and it completely changed the space. Warm gold adds just enough richness and grace without being flashy. Soft white keeps everything feeling light and airy. Light gray balances the warmth and adds refinement. The combination feels like that perfect moment when sunset light fills a room. Palette 12: Quiet Forest Colors: Moss Green, Deep Forest Green, Light Beige Moss green creates a soft, earthy foundation that feels organic and natural. Deep forest green adds depth and richness to the combination. Light beige lightens everything and prevents the greens from feeling too heavy. These colors work together like walking through a peaceful woodland. The palette feels grounded and connected to nature. Palette 13: Pure Slate Colors: Dark Slate, Cool Grey, Pale White Dark slate provides a strong, dramatic foundation for this monochromatic palette. Cool grey softens the darkness while maintaining that urbane edge. Pale white adds necessary contrast and breathing room between the darker tones. All three shades work together to create depth and interest. The result feels modern, polished, and intentionally minimalist. Palette 14: Winter Breeze Colors: Cool Blue, Frost White, Light Slate Cool blue brings a crisp, refreshing quality that feels clean and energizing. Frost white adds airiness and makes everything feel more spacious. Light slate grounds the cooler tones and adds subtle complexity. Together, these colors feel like breathing in fresh winter air. The palette is refreshing without being too cold or harsh. Palette 15: Minimal Indigo Colors: Indigo Blue, Soft Gray, White Smoke Indigo blue creates a rich, striking foundation that feels both bold and calm. Soft gray balances the intensity of the blue perfectly. White smoke adds lightness and keeps the deeper colors from overwhelming. The combination feels confident and urbane without being loud. It creates visual interest while staying true to minimalist principles. Palette 16: Soft Ember Colors: Warm Red, Soft Ash, Snow White Warm red adds energy and warmth in a subtle, controlled way. Soft ash tones down the red and creates a urbane balance. Snow white keeps everything feeling fresh and prevents the warmth from becoming too much. These colors work together to create gentle energy. The palette feels alive without being overwhelming or aggressive. Palette 17: Quiet Earth Colors: Earthy Brown, Olive Green, Pale Sand I chose this palette for my studio because it makes me feel instantly grounded. Earthy brown creates a solid, comfortable foundation that feels natural. Olive green adds life and freshness while staying muted and calm. Pale sand lightens everything and ties the whole combination together. The colors feel like they came straight from nature itself. How to Incorporate a Minimalist Color Palette in Your Design Projects Understanding how to apply these simple color schemes helps you create cohesive, impactful work. Here’s how to use minimalist colors in various design areas: Design Area Where to Use Color Approach Implementation Tips Visual Balance Home Interior Design Living rooms, kitchens, bedrooms, bathrooms Neutral walls with simple furniture and natural accents Paint walls in soft neutrals, choose furniture in complementary muted tones Add texture through wood or metal finishes, limit accent colors to 1-2 per room Graphic and Web Design Websites, apps, digital interfaces, social media Limited palette with strategic whitespace Use 2-3 core colors consistently across pages Pair with clean typography and simple icons, ensuring good contrast for readability Fashion and Apparel Design Clothing, accessories, complete outfits Neutral bases with optional bold accents Build around beige, gray, white, or black foundations Add one statement piece or keep entirely monochromatic for a classy style Branding and Logo Design Company logos, business cards, marketing materials Two or three signature brand colors Choose colors reflecting brand personality and values Ensure logo works in color and black-and-white, keep design clean and recognizable I’ve used these exact approaches across my own design projects with consistently great results. The simplicity makes every project feel more intentional and polished without extra effort. Tips for Creating Your Own Minimalist Color Palette Learning these simple principles helped me create balanced, cohesive color schemes that actually work. Here’s how to build your perfect minimalist palette: Start with a Neutral Base: Begin with whites, grays, or beige as your foundation since they create calm and let other elements shine. Use Accent Colors Sparingly: Choose only one or two accent colors that complement your neutral base without overwhelming the simplicity. Consider Natural Elements: Bring in earthy tones like wood browns or stone grays to create a grounded, balanced feel that connects to nature. Think About Lighting: Remember that natural and artificial light dramatically change how colors appear throughout the day in your space. These guidelines make creating your own palette much easier and less overwhelming. The key is adopting simplicity and resisting the urge to add unnecessary colors to your scheme. Final Thoughts A minimalist color palette changes how you approach design by removing unnecessary complexity and confusion. These simple schemes prove that limiting colors actually increases visual impact and creates better results. I still use these exact palettes whenever I need clean, urbane design solutions quickly. Remember that successful minimalism comes down to choosing fewer colors and using them more intentionally. Your spaces and designs will feel more cohesive, peaceful, and professionally polished immediately. Start experimenting with these palettes and notice how much easier design decisions become. Which minimalist color palette caught your eye? Share your favorite in the comments below!
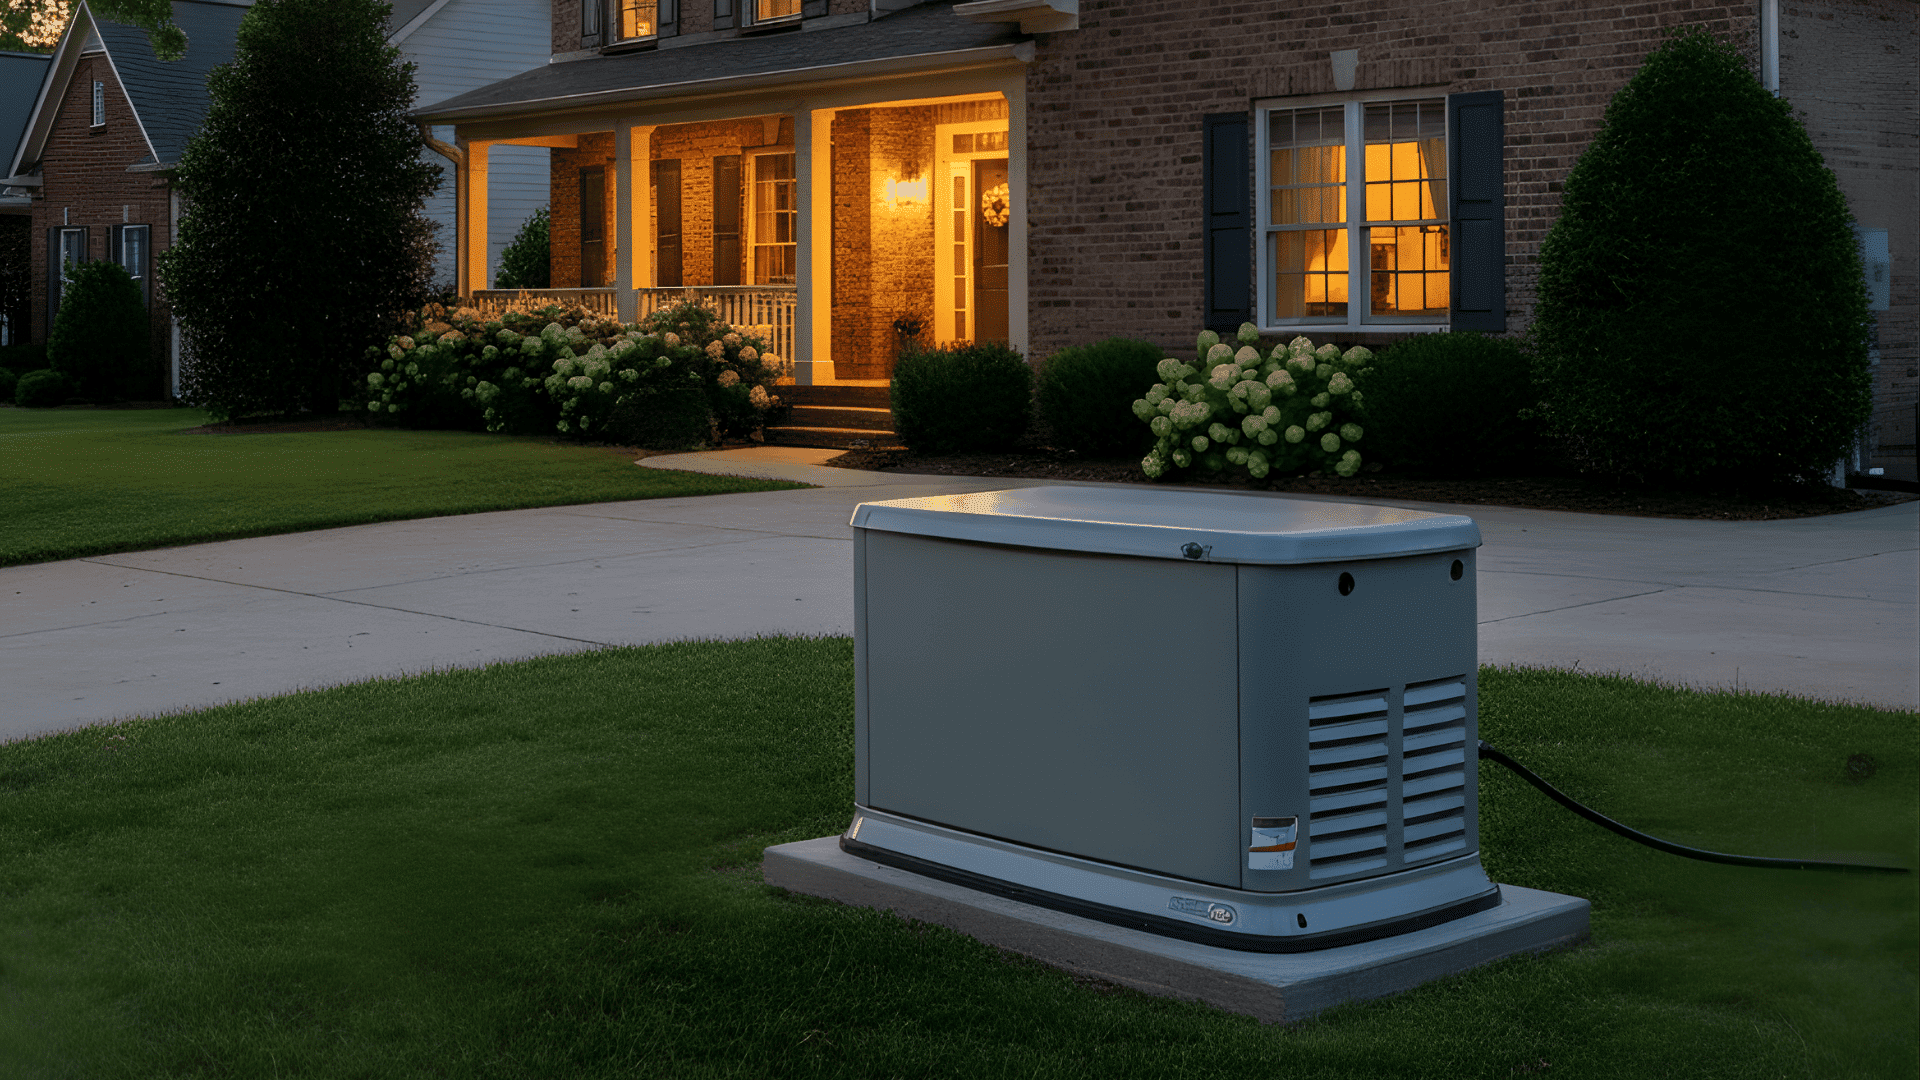
Power outages are a headache. The lights go out, the fridge is full, and you start wondering what size generator to run a house so things can keep moving. It feels like a big decision, but it does not have to be confusing. In this guide, I will walk through the basics together in simple steps. You will learn how to pick your backup plan, understand the main types of generators, and add up the watts you actually need. You will also see which appliances matter most, what can go wrong with sizing, and how to stay safe. By the end, you’ll be much clearer about what makes sense for your home. Start With Your Backup Plan: Basics, Comfort, or Whole Home Before checking watt numbers, decide how much of your home you want to keep running during an outage. This quick chart makes the choice easier: Backup level What It Helps You Do Common Things You Can Run Essentials only Keep food safe, stay connected, and have basic lighting Refrigerator and or freezer, a few lights, Wi Fi router, phone charging, garage door opener, medical devices (if needed) Comfort backup Add a few daily-use items so home life feels steadier Microwave or coffee maker, a few more rooms of lights, TV or computer, sump pump or well pump, furnace blower (for homes with gas heat) Whole home backup Cover most of the home during longer outages Most circuits in the panel are for bigger loads like HVAC, pumps, and more outlets, and automatic switching with a transfer switch Once you know your backup level, sizing a generator becomes much simpler because you can focus only on the loads that match your plan. The Three Main Types of Generators Different generator types work better for different homes and outage plans. Even if two models have the same watt rating, they can feel very different to use. These three options cover most needs, from basic backup to almost normal life during a power cut. 1. Portable Generators Portable generators are rolled out, started by hand, and refueled as needed. They work well for short outages and basic loads like lights, the fridge, and Wi-Fi. Cost factors: you pay for the generator, heavy-duty cords, a safe home inlet (if you use one), and fuel cans. Upfront cost is low, but you do more work during an outage. 2. Inverter Generators Inverter generators are a quieter kind of portable unit, often used for laptops, routers, TVs, and small appliances. They give steady power and are easier on electronics. Cost factors: you pay for the inverter unit, cords or inlet, maybe a kit to link two units, and fuel. They usually cost more than basic portables but are quieter and smoother. 3. Standby Generators Standby generators sit outside the home and turn on by themselves when the power fails. They can handle bigger loads, including many circuits and HVAC in some setups. Cost factors: you pay for the generator, transfer switch, installation labor, gas or propane line work, pad, and permits. You also pay for fuel and service, but daily use is very easy. How to Calculate What Size Generator to Run a House This simple method helps you size a generator the same way many buying guides and electricians do. Follow these short steps to get a clear number if you are wondering what size generator for house loads you really need. Step 1: List what you want to run at the same time: Make two lists so your plan stays realistic. Must run: fridge, freezer, Wi Fi, some lights, medical device (if needed) Nice to run: microwave, TV, dishwasher, extra lights, window AC. You can rotate loads when needed, such as using the microwave briefly, then turning it off. Step 2: Find running watts and starting watts: Running watts are for normal use. Starting watts are the short surges needed to start motors. These matter most for items like fridges, freezers, sump pumps, well pumps, AC units, and some tools. Step 3: Add up your total running watts: Only include the items you will use at the same time. Leave out anything you plan to rotate. Step 4: Add the biggest surge, then add a safety buffer: Find the item with the highest starting watts and add that to your running total. After that, add a buffer of about 20% to 25% so the generator is not working at its limit. The Appliances that Usually Decide Your Generator Size Some appliances barely change your generator needs. Others can raise the size a lot, especially when they have motors or heating elements. Here are the items that affect generator size the most: Central AC units: need a strong surge to start and steady power to run Well pumps and sump pumps: motor loads that may use 240V and cycle on and off Electric water heaters, stoves, and dryers: large heating loads that can overwhelm small generators Furnace blowers in gas heat systems: needed to push warm air through the home These loads shape your final generator size more than simple items like lights or phone chargers. Decide early which of these you want to keep running during an outage, then size the generator around them. Generator Size Guidelines by Use Case Before picking a generator, it helps to match your backup goal with a size range that fits what you plan to run. This chart gives a clear starting point if you want to know what size generator do I need for my house in real. Use case/household type Typical generator size Usually covers What can push it higher Essentials only About 5,000–8,000 watts Fridge or freezer, lights in a few rooms, router, phone charging, TV, or a laptop Adding a sump pump, adding a well pump, using a microwave often Comfort backup About 8,000–12,000 watts (more if pumps or AC run) Essentials plus more lights and outlets, microwave in short bursts, one pump (depending on surge) Large well pump, bigger window AC, running many kitchen items at once Whole home backup About 15–25 kW for many homes (more for larger homes) Most circuits, central AC in many setups, several big loads running together Multiple AC units, many large appliances, a higher number of 240V loads Square footage alone is not enough. Two homes of the same size can need very different generator sizes based on HVAC, pumps, and the appliances you plan to use. Important Generator Safety Tips Before you even think about starting or sizing a generator, take a minute to walk through these safety basics. Carbon monoxide: Never run a generator indoors or in a garage, and keep it well away from doors and windows. Use carbon monoxide alarms inside the home. Electrical: Never plug a generator into a wall outlet. Use a transfer switch or interlock fitted by a qualified electrician to avoid backfeeding. Operation: Let the unit cool before refueling, use outdoor-rated cords, keep it dry, and stay within its rated load. With these rules in mind, the rest of your generator planning becomes safer and much easier to manage. Generator Sizing Errors to Avoid Many people end up with the wrong generator because of a few common sizing errors. Keeping these points in mind makes your choice much more reliable. Choosing a generator based only on square footage: appliance loads matter far more than home size. Ignoring starting watts for motors: items like fridges, pumps, and AC units need a surge to start. Running central AC with other big appliances: this can overload smaller generators very quickly. Using the generator at full load with no buffer: always leave extra room so the unit can handle spikes. Overlooking 240V loads: some pumps and HVAC systems need more power than standard outlets. Thinking gas heat uses no electricity: the furnace blower still needs power to move warm air. Avoiding these mistakes helps you pick a generator that handles your real needs without strain or surprises. Bottom Line Choosing what size generator to run a house becomes much easier once you break the process into simple steps. You looked at your backup plan, checked the types of generators, and learned how running watts and starting watts shape your final choice. You also saw how certain appliances can change the size you need and why safety rules matter every time you use a generator. Now you have a clear path to find a generator that fits your home and daily needs without guessing. If you want more help with home guides and easy tips, feel free to check out my other posts on the site.

If your lights flickering in house has you confused, I get it. One minute, everything looks normal. Next, a room starts pulsing or dimming, and your mind goes to worst-case scenarios. In this guide, I’ll help you figure out what’s going on without taking unsafe risks. You’ll learn the most common causes, from a loose bulb or bad dimmer match to overloads, water trouble, and utility issues. You’ll also see how patterns point to causes. I’ll share the warning signs that mean you should call a licensed electrician fast, plus simple checks you can do first. By the end, you’ll know what to watch, what to try, and what to report if you need help. Is Light Flickering in House Dangerous? Flickering lights in the house are not always an emergency, but they should never be ignored. Sometimes it is just a loose bulb. Other times, it warns about heat, loose wiring, or a bigger power issue that can damage your home. Watch for these serious signs: Burning or hot plastic smell near outlets, switches, or the electrical panel Buzzing or crackling sounds from fixtures, switches, or the panel Outlets, switches, or the panel feeling warm or hot to the touch Breakers tripping again and again Lights flickering in many rooms at the same time Some lights are dimming while others get brighter at the same time If any of these show up with flickering lights, do not push your luck. Turn off power to the problem area if it is safe to do so, stay away from hot or damaged parts, and call a licensed electrician as soon as possible. Common Causes of Flickering Lights in the House Before you fix anything, it helps to understand the most common reasons lights start to flicker so you can trace the problem with less guesswork. 1. Loose or Worn Light Bulb A loose or tired bulb is one of the simplest reasons for lights flickering in the house. You may see a flicker in only one fixture, or when someone walks above it. Tip: Turn the light off, tighten the bulb, and replace it if the flicker stays. 2. Bulb and Socket Mismatch Not every bulb seats well in every socket, especially in older fixtures. A poor fit can cause random flicker right after a new bulb is installed. Tip: Use the correct base size and never force a bulb that feels wrong or wobbly. 3. Dimmer and LED Mismatch Older dimmers often do not work smoothly with LED bulbs. You may notice flicker only on low settings or only in dimmer rooms. Tip: Use dimmable LED bulbs and an LED-rated dimmer, and keep one bulb brand on each dimmer when possible. 4. Overloaded Circuit If too many heavy appliances share one circuit, voltage can dip whenever something starts. Lights may dim, then return to normal, especially during busy times. Tip: Move heaters, AC units, and other big loads to different circuits and avoid running them all at once. 5. Unbalanced or Wobbly Ceiling Fan A shaking fan can loosen wires in the fan box and make its light flicker. You might see wobble and hear a light thump as it runs. Tip: Balance the fan with a kit, and if the light still flickers, have an electrician check the wiring. 6. Loose Connections or Wiring Problems Loose wires can heat up, which is more dangerous than the flicker itself. You may notice flicker in several fixtures on the same circuit, plus buzzing at outlets or switches. Tip: Do not open boxes or keep testing. Call a licensed electrician quickly. 7. Water Leaks or Moisture Damage Water near wiring can cause a short flicker when the area gets wet, then stop as it dries. This often shows up near bathrooms, kitchens, or laundry areas. Tip: Fix the leak first, then have an electrician inspect any nearby lights and wiring. 8. Voltage Changes and Utility Supply Issues Sometimes the cause sits outside your home. Wind, storms, or damaged lines can make many rooms flicker at once, and neighbors may notice the same thing. Tip: Check your utility company’s outage page and call them if the problem seems widespread. 9. Panel, Breaker, or Main Neutral Issues When multiple lights flickering in house happens across many circuits, the problem may be near the main panel, meter, or service connection. You might see some rooms dim while others brighten. Tip: This is not DIY work. Call both the utility company and a licensed electrician. How to Read Flickering Light Patterns in Your Home When lights flicker, the pattern tells a lot about what might be wrong. Use this table to sort out whether you are dealing with a small issue or something more serious. Flicker Pattern Most Likely Causes Safe Steps to Try Only one light flickers – Loose bulb – Worn bulb – Faulty socket – Switch issue – Loose connection inside that fixture – Turn the light off and tighten the bulb – Swap in a new bulb – If on a dimmer, test with a higher dimmer level – If the socket looks dark, cracked, or melted, stop and call an electrician Several lights flicker in one room – One circuit overloaded – Loose wire feeding that room – Wiring issue in the switch box – Unplug heavy items and test again – Avoid running big appliances on that circuit – If lights still flicker, call a licensed electrician Multiple lights flickering in the house (whole-home flicker) – Loose neutral or hot at service – Utility supply issue – Loose panel connections – Main breaker or meter problem – Write down when the flicker happens and what is running – Call the utility if neighbors see a flicker too, or if it started after a storm – Call a licensed electrician if it seems limited to your home If the table points to whole-home flicker or wiring issues, it is safer to pause DIY work and let a licensed electrician and, if needed, the utility company check the system. What Community Users Say About Whole-House Flicker Homeowners in a Reddit discussion about lights flickering throughout an entire home describe lights dimming and brightening in every room, even when only a few fixtures are on. Electricians in the replies say the most common cause is a loose or bad neutral at the service or from the utility, not a simple bulb issue. Some people later found arcing and loose screws on the main breaker or heat damage on the neutral. Many pros suggest calling the power company first, then an electrician, because whole-house flicker often starts at the service connection, not inside one circuit. Step-by-Step Troubleshooting Flickering Lights in the House Before calling for help, you can follow a few simple steps to narrow down the cause and understand what’s happening in your home. Step 1: Note When and Where It Happens Write down which rooms flicker, what time it happens, what appliances are on, and if there’s wind or storms. Also note if some lights dim while others brighten. This simple log helps an electrician spot patterns quickly. Step 2: Check Bulbs and Dimmers Tighten the bulb in the flickering light, then swap it with a new one if needed. If the light is on a dimmer, use a dimmable LED and try a higher dimmer setting. Changes here can show a simple bulb or dimmer issue. Step 3: Turn Off Heavy Appliances Turn off the AC for a bit and avoid running the microwave, heater, or vacuum. Watch the lights while these are off. If flicker improves, the circuit may be carrying too much load and needs a better layout. Step 4: Look, Touch, and Smell (Safely) Do not open the panel. Look for dark marks or cracked plates, gently touch covers to check for warmth, and sniff for a burning smell. If anything seems wrong, stop testing and call a licensed electrician right away. Step 5: Match the Problem to the Right Help If homes nearby flicker too, call the utility company first. If only your home flickers in many rooms, call an electrician. If flicker happens after storms or near leaks, you may need both the utility (or plumber) and an electrician. Special Flickering Cases that Come up A Lot Some flicker issues show up a lot, especially after LED swaps, homework, or in older houses. This compact table helps you match your situation fast. Situation Common signs Best next step LEDs flicker after bulb change Old dimmer, mixed LED brands, low-quality bulbs Use dimmable LEDs, switch to an LED-rated dimmer, and keep one bulb type per dimmer Flicker after renovation Starts right after repairs, near the worked-on area Have an electrician check connections in that area Older home wiring Frequent flicker, warm outlets, old panel, breakers trip Schedule an electrical inspection If your issue fits one of these rows, it often needs more than a quick bulb swap, so getting it checked early is the safer move. Wrap-Up If you’ve been dealing with lights flickering in house, I hope this guide gives you a clear path forward. You now know what small fixes you can try on your own and what signs point to deeper trouble. You also learned how to read flicker patterns, when to call your utility company, and when your home needs a licensed electrician. Your home should feel steady and safe, and simple steps can help you figure out what’s going on before things get worse. Want to stay ahead of home problems? Check out other home maintenance guides on the website to keep your house safe, efficient, and stress-free year-round.
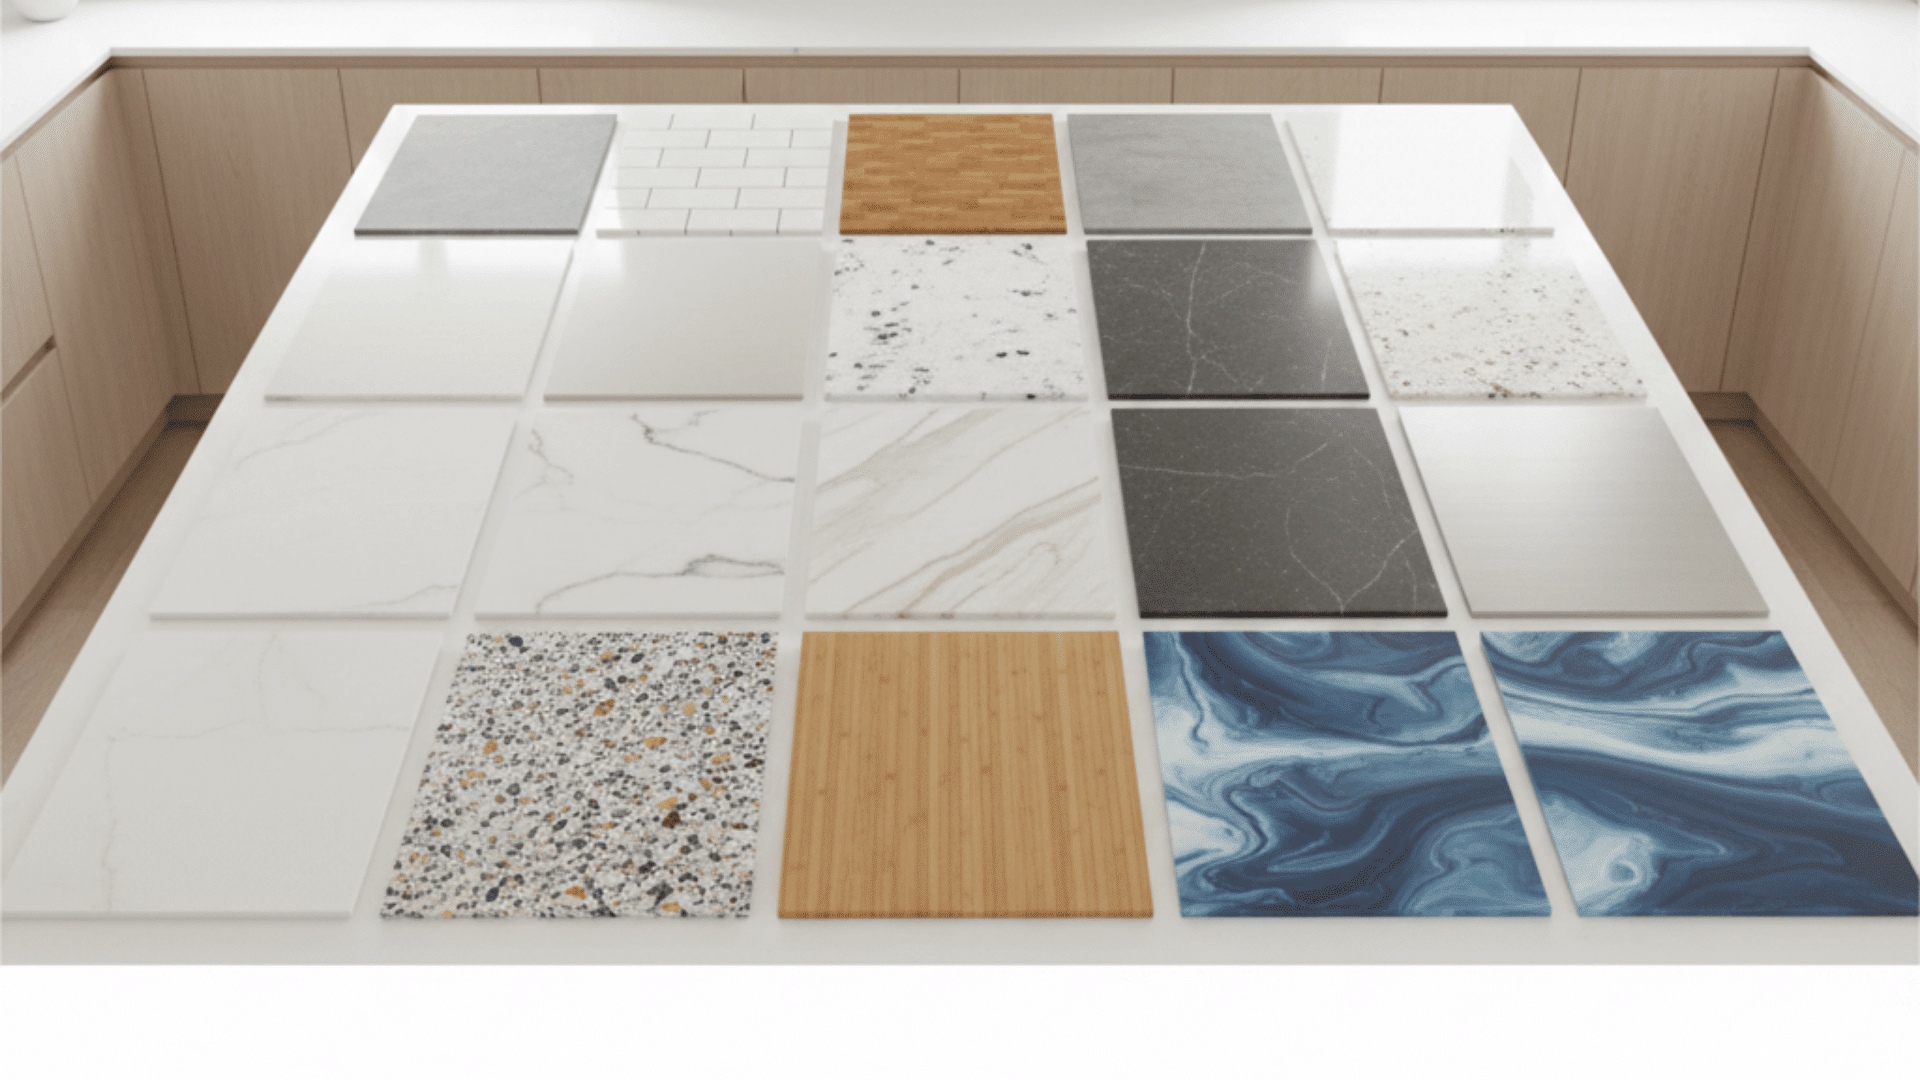
Choosing from types of countertop materials can feel confusing because everything looks great in photos. But what really matters is how it works in your everyday life, like hot pans, spills, kids, heavy cooking, and how much cleaning you’re willing to do, especially when comparing options like these popular granite colors. In this guide, I’ll walk you through the main countertop options, what each one is best for, the biggest pros and cons, and the care level you should expect. By the end, you’ll be able to compare your choices quickly and pick the one that fits your budget and your routine. Why Your Countertop Choice Matters Every Day Once your new counters are in, you’re going to see and touch them all day long, when you make coffee, pack lunches, cook dinner, or clean up after a late-night snack. Unlike paint or decor, this is not something you’ll swap out next year if you change your mind. If the surface stains easily, shows every scratch, or needs more care than you expected, you’ll feel it daily. That’s why looking past the pretty photos and thinking about how each material behaves in a real kitchen matters this much. With that in mind, let’s look at the specific materials one by one and see what they’re really like to live with. Different Types of Countertop Materials Before choosing a countertop, it helps to understand how different materials compare in cost, durability, and upkeep. Here’s a quick breakdown of the most common options and what you can expect from each: 1. Laminate Countertops Laminate is a layered countertop surface made by bonding a printed decorative sheet to a core, often particleboard or MDF. Many modern laminates are designed to mimic stone, wood, or concrete, so you can get the look without the high price. Pros Cons Lowest cost option for tight budgets Can scorch or bubble with hot pans Many colors and patterns (stone-look options too) Scratches and chips, especially at edges and seams Easy daily cleaning with mild soap and water Water can seep into joints and cause swelling Lightweight, often easier to install than stone Big damage is tough to fix; sections may need replacement Care tips: Use a cutting board and trivets every time. Wipe standing water fast, especially near the sink and seams. 2. Tile Countertops (Ceramic or Porcelain) Tile countertops are built using individual ceramic or porcelain tiles set on a base with grout lines between them. You can go simple with classic squares or create a custom look with patterns, textures, and bold colors. Pros Cons Handles heat well, so hot dishes are less of a worry Grout stains and traps crumbs, needs more scrubbing Lots of design options with sizes, colors, and finishes Tiles can chip or crack if heavy items drop Single tiles can be replaced without redoing everything Grout lines make the surface less smooth for wiping or dough Great for handmade or artistic kitchen styles Ignoring grout care can make it look worn over time Care tips: Seal grout if recommended. Clean grout regularly with gentle products and avoid harsh abrasive scrubbers. 3. Butcher Block Countertops Butcher block is made from strips or blocks of wood glued together, usually maple, oak, walnut, or birch. It gives a warm, natural feel that many people love, especially in farmhouse or cozy kitchens. Pros Cons Warm, inviting look that softens the kitchen Needs regular oiling or sealing to prevent drying and stains Scratches and dents can be sanded and refinished Water can cause swelling or dark marks near sinks Quieter than stone, less clanking from dishes Heat can burn it, and it may need sanding to fix Great for prep work and daily chopping comfort Shows wear faster in busy kitchens, and patina builds over time Care tips: Oil it on a schedule. Wipe water quickly, don’t let wet towels sit on it, and always use trivets for hot cookware. 4. Solid Surface (Acrylic) Countertops Solid surface is a man-made material, often acrylic or acrylic blends, made into sheets. A big selling point is that seams can be minimized and sinks can sometimes be integrated for a smooth, clean look. Pros Cons Seamless, clean look for modern kitchens Scratches more easily than stone; avoid cutting directly Easy wipe-down cleaning for daily mess Hot pans can scorch or warp the surface Light scratches can be buffed out Some styles look less natural up close Many calm, uniform color options Heavy impacts can leave marks, though repairs are often possible Care tips: Use trivets, cutting boards, and non-abrasive cleaners. Treat it gently around heat. 5. Concrete Countertops Concrete countertops are cast or poured to fit your kitchen layout. They can be tinted, textured, or finished in different ways. Because concrete is naturally porous, it is typically sealed to protect it. Pros Cons Highly customizable (color, thickness, edges, details) Can crack if the installation is poor or the home shifts Unique modern, industrial look Needs sealing and sometimes waxing Very durable when installed and sealed properly Can stain if sealer wears down or spills sit Feels custom-built, not mass-produced Heavy material usually needs a skilled installer Care tips: Follow the sealer schedule. Wipe spills quickly and avoid harsh, acidic cleaners that can damage the finish. 6. Granite Countertops Granite is a natural stone cut into slabs. Each slab is different, so you get natural pattern movement and color variation. Granite is often chosen because it balances durability with a timeless look. Pros Cons Handles everyday heat well Often needs sealing to help prevent stains Strong against scratches and daily wear Some patterns can look busy in small kitchens Many natural colors and patterns Poor installation can lead to stress cracks Seen as a valuable home upgrade Cutting on it can dull knives Care tips: Seal if recommended. Clean spills quickly, especially oils and dark liquids, and use a cutting board to protect knives. 7. Marble Countertops Marble is a natural stone known for soft veining and a luxury feel. Many people love the look, but it needs more careful habits compared to harder stones. Pros Cons Classic, high-end look Acidic foods can cause etching (dull spots) Stays cool, great for baking work Scratches more easily than granite or quartzite Handles heat fairly well (trivets still smart) Often needs sealing and quick cleanup to prevent stains Unique natural veining and premium feel Patina develops in busy kitchens, but not everyone likes it Care tips: Use cutting boards, wipe acidic spills fast, and seal on schedule so stains don’t set in easily. 8. Quartz Countertops Quartz countertops are made by combining crushed quartz with resins and pigments to form a slab. Since it is engineered, it can offer consistent patterns and colors, and it is typically non-porous. Pros Cons Non-porous, resists common stains well Hot pans can damage the resin (use trivets) Low maintenance, usually no sealing Some budget patterns look less natural up close Many styles, from solid colors to marble-look Seams depend on layout and slab size Durable for daily family use Strong sunlight may affect some colors over time Care tips: Use trivets for hot cookware. Clean with mild soap and water and avoid harsh, abrasive cleaners. 9. Quartzite Countertops Quartzite is a natural stone formed from sandstone under heat and pressure. It is often confused with quartz because of the name, but quartzite is natural, while quartz is engineered. Pros Cons Very scratch-resistant, handles heat well Often needs sealing, can stain if unsealed Natural marble-like movement with stronger performance Usually pricier than granite, and many mid-range options Great natural stone choice without marble’s softness Fewer pattern options than engineered quartz Care tips: Seal on schedule. Wipe spills quickly, especially oils, sauces, and dark liquids. 10. Soapstone Countertops Soapstone is a natural stone with a smooth, soft feel and deep, moody tones. It is known for its ability to handle heat, plus it develops character as it ages. Pros Cons Very heat-friendly and often resists stains well Softer stone, scratches more easily than granite or quartzite Rich, cozy look that improves with time Can darken unevenly with oiling, limited dark color range Scratches can often be sanded out, and patina is normal Not ideal if you want an “always new” look Care tips: Sand small scratches if needed. Oil it if you want a darker, more even tone, and use cutting boards for daily prep. 11. Stainless Steel Countertops Stainless steel countertops are metal surfaces often wrapped over a wood base. They are common in professional kitchens because they are hygienic and easy to sanitize. Pros Cons Very hygienic and easy to sanitize Shows fingerprints, smudges, and water spots Handles heat well for fast cooking routines Scratches and small dents can happen Water-safe, works well near sinks It can be noisy with dishes and pans Clean modern look for minimalist or industrial kitchens May feel too “commercial” in traditional spaces Care tips: Wipe with a microfiber cloth. Clean with the grain and use gentle cleaners to avoid dulling the finish. 12. Porcelain and Ultra-Compact Countertops These are dense, factory-made slabs designed for high durability. They often come in modern styles that mimic marble, concrete, or stone, and some lines are known for strong performance. Pros Cons Strong resistance to heat, stains, and scratches Often higher cost than standard options Thin, modern profiles for a sleek look Edges can chip if hit hard, especially corners High-end designs, including marble-look patterns Installation needs experience and careful handling Some options handle UV well in bright spaces Chips can be noticeable depending on the pattern Care tips: Avoid heavy impact on edges and corners. Follow the brand’s cleaning recommendations and use cutting boards as a habit. 13. Recycled Glass Countertops Recycled glass countertops are made from glass pieces set into a binder, usually cement-based or resin-based. The result is a surface with a unique, light-catching look that can feel modern and artistic. Pros Cons Eco-friendly option using recycled materials Can chip on edges if hit hard Unique sparkle look, no two slabs are the same Quality depends on the binder and brand Resists many stains when sealed properly Some types need sealing, especially cement-based ones Great for modern, statement designs Repairs can be noticeable Care tips: Use cutting boards and trivets. Follow the sealing and cleaning guidance from the manufacturer. 14. Bamboo Countertops Bamboo countertops are made from laminated bamboo strips. They have a clean, natural look similar to wood, but bamboo is a fast-growing material, so it’s often chosen for a more eco-friendly vibe. Pros Cons Warm, natural look with a lighter feel Needs sealing to handle water and stains More sustainable than many hardwoods Scratches and dents are like other wood surfaces Lighter than stone, easier to handle Heat can scorch; trivets are important Can be refinished depending on the finish Color may shift slightly over time in light Care tips: Keep it sealed, wipe water fast, and recoat or oil when the finish starts to wear. 15. Resin or Epoxy Countertops Resin or epoxy countertops are made by coating an existing surface or creating a layered top using epoxy resin. People often choose it for bold, glossy looks, creative colors, and “marble-style” effects on a budget. Pros Cons Bold custom looks for less than stone Scratches show, especially on glossy finishes Seamless look with many color options Heat can damage or discolor it Good for budget makeovers and DIY Installation mistakes are hard to fix Resists stains well when cured It can turn yellow over time, especially in sunlight Care tips: Always use trivets and cutting boards. Clean with gentle products and avoid abrasive scrubbers. Choosing the Right Countertop Material Before you choose a color or pattern, focus on these quick factors so the countertop fits your daily routine: Cooking habits: If you cook often, plan for heat. Pick a surface that handles warmth well and still use trivets as a smart habit. Spill level: If spills might sit for a bit, lean toward less porous materials. If you choose porous surfaces, be ready for sealing and faster cleanup. Maintenance comfort: Some materials need sealing or oiling. If you want simple care, choose a low-maintenance surface. Look and consistency: Natural stone has more variation and movement. Engineered surfaces tend to look more uniform and predictable. Real budget: Factor in more than the slab. Edges, cutouts, seams, delivery, and installation can change the final price a lot. Wrapping Up Choosing between different types of countertop materials comes down to how you want your kitchen to function five or ten years from now, not just how it looks today. Think about long-term wear, resale value, and how much effort you realistically want to put into upkeep. A surface that fits your habits will always feel like the better investment, even if it costs a little more upfront. When performance, maintenance, and style line up with your routine, you avoid daily frustration and costly replacements later. Take a final look at your priorities, narrow your top two choices, and visit a showroom to see them in person before making your decision.
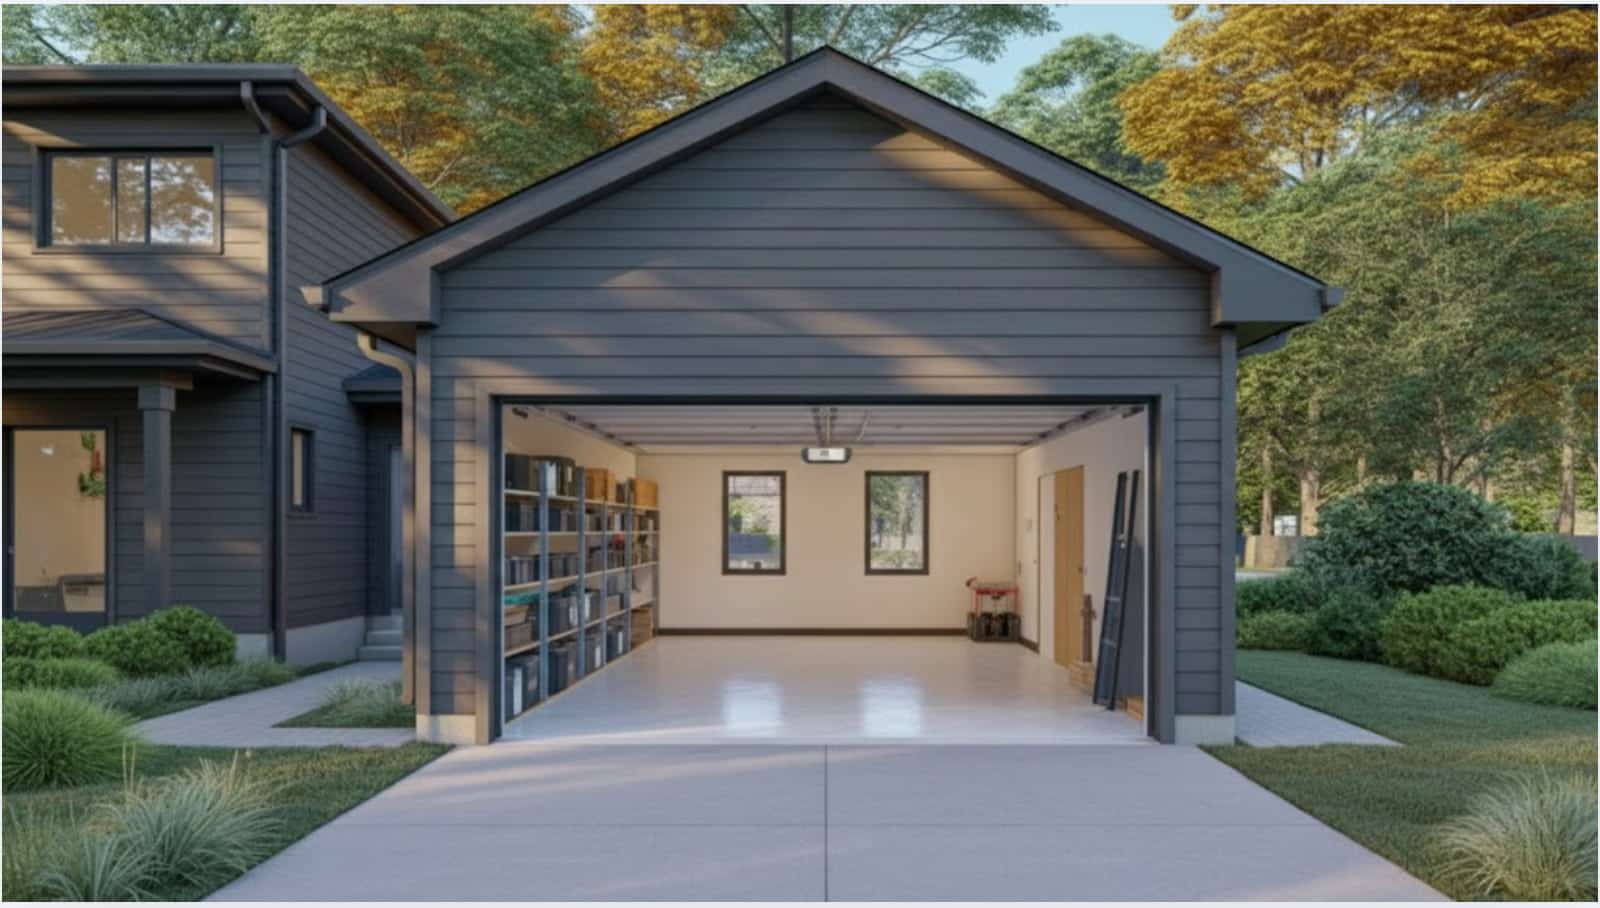
Want to finally park your car in an actual garage instead of playing Tetris with storage boxes? You just need smart garage addition ideas and a solid plan. I love having space that fits real life. A garage can do more than hold a car. It can store tools, support hobbies, or even double as a workspace. That flexibility makes daily life easier. When I talk to contractors, I slow down. Their ideas might be good, but I want to understand my options first. Making an informed choice feels better than rushing in. I’ve seen neighbors skip planning and regret it. The right garage addition ideas balance practical needs with creative solutions and can even increase your home’s value Why I Think You Should Consider a Garage Addition I’ll be honest with you, adding a garage wasn’t on my radar until I realized how much stuff I was cramming into every corner of my house. The benefits go way beyond just having a place to park. Extra storage space means you can finally clear out that spare bedroom you’ve been using as a junk room. Your home becomes more functional overnight. I’ve noticed that properties with good garage space sell faster in my neighborhood, which makes sense. Buyers want turnkey homes that work for modern life. If you work from home, having a separate workspace above your garage can significantly improve productivity and mental health. The physical separation between home life and work life matters more than I ever expected. Plus, if you’re into cars, woodworking, or any hobby that needs space, a garage addition gives you room to actually pursue those interests without taking over the entire house. Types of Garage Additions Each option I’m about to share works for different situations and budgets. I’ll give you the facts so you can decide what works best for your property. 1. Attached Garage Extension Sometimes the simplest answer is the best one: just make your existing garage bigger. Here’s what you need to know: Expands current footprint for additional vehicle or storage capacity Costs typically range from $20,000 to $50,000, depending on size Maintains roof connection with existing structure for seamless integration Works well for homes with adequate side yard space Can accommodate extra parking, workshop area, or dedicated storage zones Often, the most cost-effective option, since foundation and walls already exist This approach makes sense if you already like where your garage sits and just need more room to work with. 2. Above-Garage Living Space I find this option fascinating because you’re building up instead of out, which is perfect for smaller lots. Let me break down the details: Creates a bonus room above the existing or new garage structure Investment ranges from $60,000 to $200,000 based on finish level Perfect for a home office, studio apartment, or guest suite with a private entrance Requires structural support calculations for the second-story weight load Adds significant value since you’re essentially adding livable square footage Provides rental income potential if designed as a separate apartment Needs proper insulation to separate the living space from the garage temperature fluctuations You’re getting two improvements in one: parking below and a living space above that serves multiple purposes over time. 3. Detached Garage Addition Sometimes you want the garage completely separate from your main house, and that’s perfectly fine. Here’s what makes this option work: Stands alone from the primary residence with an independent structure Costs generally range from $20,000 to $50,000 for basic construction Ideal for RV storage, workshop, or hobby space without noise concerns Offers flexibility in placement based on property layout and access needs Can serve as a future guest house or rental with proper planning Requires separate utility connections if you want power and water I like this option when you want a clear separation between your living areas and workspace, or when the property layout favors it. Building any of these takes planning, but I’ve seen homeowners successfully complete each type. Creative Ideas for Your Garage Space Let me share some approaches that go beyond basic parking and storage. These are real solutions I’ve seen work: 1. Multi-Functional Garage Spaces The best garage additions I’ve toured do double or triple duty, and that’s where the real value comes in. You might park your car there at night, but use half the space as a home gym during the day. I’ve set up my garage so one bay holds the car while the other serves as my woodworking shop. The key is proper organization, and maybe some portable equipment you can move around. 2. Home Office and Workspace Solutions You can add a desk in your garage during business hours, then park your car there in the evening, so you can just roll into the office chair to the side. It’s about being creative with layout. Install good climate control if you’re spending real time out there, because working in extreme temperatures gets old fast. Think about what you actually do with your time, then design space that supports those activities. 3. Smart Storage That Maximizes Every Inch Vertical space is your secret weapon in any garage, and most people completely waste it. You should install some ceiling-mounted racks that can hold all your camping gear, holiday decorations, and other stuff you need only twice a year. That will free up wall space for tools and equipment you use weekly. Custom cabinetry isn’t cheap, but it makes such a difference when everything has a designated spot. 4. Organizing Awkward Items and Equipment You can find garage-specific storage systems that handle awkward items like ladders, bikes, and sports equipment. Install heavy-duty wall hooks to keep large items off the floor and free up valuable space. Magnetic strips hold small metal tools right where you need them. The goal is to get as much as possible off the floor so you keep the space open and usable. 5. Building Green with Eco-Friendly Features Garage additions create good opportunities to build more sustainably. Solar panels on the garage roof can help offset energy costs without affecting the look of your main living areas. Proper insulation matters more than most people expect. It keeps the space comfortable year-round and reduces heating and cooling waste. Use LED lighting throughout since it lasts longer and uses less power. Smart building choices today lower long-term energy use and reduce environmental impact. Design Considerations that Actually Matter Before you start building, I want you to think through these practical elements that make or break a garage addition. Good design isn’t about making things fancy, it’s about making them work: Lighting and Electrical Setup Getting the power and lighting right from the start makes your garage actually usable for real work and projects year-round. Here’s what I recommend focusing on: Install multiple outlets along walls at workbench height for power tools and chargers Consider LED shop lights for bright, energy-efficient workspace illumination throughout the space Add motion-sensor lights near entries for hands-free convenience when carrying items Plan for 240V outlets, in case you might want electric vehicle charging capability later These electrical choices seem minor now, but they make a huge difference in how you actually use the space daily. Structural and Storage Solutions The physical details determine whether your garage looks like part of your home or an obvious add-on that hurts value. Here’s what will help you: Match siding materials and colors so the addition looks original to your house Coordinate rooflines carefully to avoid awkward transitions that scream afterthought Install epoxy-coated floors that resist stains and clean up easily with simple mopping Build in wall-mounted storage before you move anything in to maximize usable floor space I’ve learned that getting these details right from the start saves you from expensive fixes later. Don’t cut corners on the basics that you’ll interact with every single day. Key Considerations Before You Start Getting the planning right prevents expensive mistakes and legal headaches down the road. I learned these lessons by watching others struggle, so let me save you the trouble. Here’s what you need to know: Check local zoning laws for setback requirements and obtain all necessary permits before construction starts Schedule required inspections at appropriate project stages and verify HOA rules if applicable Interview at least three licensed contractors with garage addition experience, and actually call their references Verify current insurance coverage and contractor licensing before signing any agreements Research property value impact, garage additions typically return 65-80% of investment at resale Keep documentation of all permits and work for future sale and property tax assessment purposes Get detailed written quotes breaking down materials and labor separately, never pay more than 10-20% upfront Planning takes time but saves money and stress when done right. I spent weeks researching before breaking ground, and looking back, that preparation made all the difference in how smoothly everything went. Budgeting and Cost Breakdown I know talking about money can feel uncomfortable, but having real numbers helps you plan properly. Here’s what different garage additions actually cost: Addition Type Cost Range What Affects the Price Timeline Attached Extension $20,000 – $50,000 Square footage, foundation work, materials 4-8 weeks Above-Garage Living Space $60,000 – $200,000 Finish level, plumbing, HVAC systems 8-16 weeks Detached Garage $20,000 – $50,000 Foundation type, utility connections, and distance 6-12 weeks Foundation Work $3,000 – $12,000 Soil conditions, drainage, and size 1-2 weeks Electrical & Lighting $1,500 – $8,000 Outlet quantity, 240V circuits, fixtures 3-5 days Premium Doors & Windows $2,000 – $15,000 Door type, window count, insulation rating 1-2 weeks Built-In Storage Systems $1,000 – $12,000 Custom vs. prefab, materials, complexity 1-3 weeks Site Preparation $2,000 – $15,000 Grading needs, tree removal, drainage fixes 1-4 weeks These numbers reflect what I’ve seen in the current market, though your actual costs depend on location and specific choices. I financed mine through a home equity line of credit for flexibility. Common Mistakes to Avoid When Adding a Garage Here are mistakes you’d better avoid: Skipping required permits creates serious problems when you sell or need insurance claims processed later. Underestimating total costs is incredibly common. Always add 15-20% to your budget for unexpected issues. Choosing the cheapest contractor often results in lower-quality work that requires expensive repairs within just a few years. Poor ventilation systems lead to moisture problems and rust that damage stored items. Not matching your home’s style significantly hurts the addition’s resale value. Blocking natural light to the main living areas creates regrets people face daily. Forgetting about future needs, such as electric vehicle charging, means missing the chance to install capacity while walls are open. These mistakes cost real money and create lasting problems you’ll regret. Think long-term about how this changes your property’s flow and function. Planning ahead prevents regrets that last for decades. Wrapping Up Your home is definitely missing something if you haven’t considered a garage addition yet. The extra space and functionality are the foundation, but without proper planning, your addition might stay just average. I’ve learned that homeowners who don’t settle for shortcuts end up with spaces that serve them for decades. Take time to think through which garage addition ideas fit your actual lifestyle. Work with experienced professionals who understand local codes and quality construction methods. Get multiple quotes and don’t rush the planning phase. Years from now, your family will thank you for creating a space that adds real value to daily life. Drop a comment below and tell me what you’re planning for your property.

Ever felt confused when your locksmith starts explaining what needs fixing on your door lock today? Understanding the parts of a door lock helps you make smarter decisions about repairs, replacements, and home security, just like knowing the basics, such as generator size for a house, helps with home planning. I know locks look complicated with all those tiny pieces working together inside that metal casing. Breaking down each component makes it easy to see how everything connects and functions as one system. Knowing the parts of a door lock saves you money because you can identify problems yourself before calling for help. You’ll feel more confident talking with locksmiths and choosing the right locks for your home or business. Let me walk you through each part so you never feel lost again. Main Parts of a Door Lock Explained I know door locks seem complicated, but they’re actually made up of just a few key components working together. Understanding these basic parts helps you know how your locks function and when they might need repair. Here are the main parts you’ll find in most standard door locks: 1. Key The key is the tool you use to unlock and lock your door by inserting it into the keyhole. Each key has a unique pattern of cuts and grooves along its blade that match the lock’s internal pins. When you insert the correct key, those cuts align the pins at exactly the right height inside. This alignment allows the lock cylinder to turn freely and release the locking mechanism that holds your door. 2. Lock Cylinder (Core) The lock cylinder, also called the core, is the round part inside your lock where you insert the key. This cylinder contains all the moving parts, like pins and springs, that make the locking mechanism work properly. It’s one of the most important parts because it determines if your door opens or stays locked securely. The cylinder rotates when the correct key is inserted, which triggers the bolt to move in or out. 3. Pins (Driver Pins and Key Pins) Lock pins are small metal pieces inside the cylinder that come in two types: driver pins and key pins. These pins sit in vertical shafts and rest on top of each other in pairs throughout the cylinder. When the wrong key is used, the pins remain misaligned and block the cylinder from turning at all. The correct key pushes each pin pair to the exact height where they meet at the shear line. 4. Plug The plug is the inner rotating part of the cylinder that holds the key pins and turns when unlocked. It sits inside the cylinder housing and can only rotate when all pins align correctly at the shear line. When you insert the correct key, it lifts the key pins to the perfect height inside the plug. This alignment frees the plug to rotate smoothly, which moves the bolt mechanism and unlocks your door. 5. Housing (Shell) The housing, or shell, is the outer casing that holds all the internal lock components together in one piece. It keeps the cylinder, pins, springs, and other parts protected from damage and appropriately aligned for smooth operation. Strong housing material like solid brass or steel resists drilling, prying, and other forced entry attempts that damage locks. Quality housing ensures all internal parts stay in perfect alignment for years of reliable lock performance. Door Lock Parts You See on the Door I’m sure you’ve noticed the lock parts on your door that you interact with constantly throughout the day. These visible exterior and interior components connect to the hidden mechanisms working inside your door and lock body. Here’s what you’ll see on the surface: 6. Door Knob or Lever Handle Door knobs are round handles you twist to open doors, while levers are flat handles you push down instead. Knobs require you to grip and turn them with your hand, which can be harder for some people. Levers are easier to operate because you just push down with your hand, elbow, or even forearm. Both knobs and levers connect to a spindle that runs through the door and activates the latch mechanism. When you turn or push them, the spindle rotates and retracts the latch so the door opens. 7. Rosette or Escutcheon Plate The rosette or escutcheon plate is the decorative metal piece that sits around the doorknob or keyhole. It covers the rough hole cut into your door where the lock hardware is installed and mounted securely. This plate provides extra stability by distributing the pressure when you turn the knob or insert keys. It also makes your door look finished and professional instead of showing exposed holes or raw edges. Quality plates are made from strong metal that won’t bend, crack, or break with regular daily use. 8. Thumb Turn The thumb turn is a small rotating knob found on the interior side of deadbolts and some door locks. You twist this knob with your thumb or fingers to lock or unlock the door from inside. It’s used instead of requiring a key on the interior side, making it faster to lock up. Thumb turns are especially useful in emergencies when you need to exit quickly without fumbling for keys. They provide convenient one-handed operation while keeping the exterior side secure with a keyed cylinder that requires authorization. Internal Parts of a Lock That Make It Work These internal mechanisms work behind the scenes every single time you lock or unlock your door throughout the day. Here’s what’s working inside: 9. Latch The latch is the metal piece that extends from the door into the strike plate on the frame to keep your door closed. A spring latch retracts automatically when you turn the handle and springs back out when you release it. A dead latch doesn’t retract on its own and stays in place until you manually move it with the lock. Spring latches are convenient for everyday use but provide less security than dead latches. 10. Deadbolt A deadbolt is a solid metal bar that slides deep into the door frame for maximum security and protection. Unlike spring latches that retract easily, deadbolts must be manually locked and unlocked with a key or thumb turn. The bolt extends at least one inch into the frame, making it extremely difficult to force open the door. Deadbolts add extra security because they can’t be pushed back by sliding a credit card or a thin tool. 11. Spindle The spindle is a metal rod that runs through the door and connects the interior and exterior handles together. When you turn either handle, the spindle rotates and activates the latch mechanism inside the door lock. This rotation causes the latch to retract into the door so it can open without any resistance. The spindle must be the correct length to fit your door’s thickness, or it won’t work properly. 12. Strike Plate The strike plate is the metal piece screwed into the door frame that receives the latch or deadbolt. It has a hole or opening where the bolt slides in when the door closes and locks securely. Proper alignment between the strike plate and lock is crucial, or your door won’t close or lock correctly. A reinforced strike plate with long screws that reach the wall studs dramatically increases your door’s security. Parts of a Door Lock by Lock Type Different lock types have unique components beyond the basic parts all locks share. Here’s how lock parts vary by design: Lock Type Main Components Unique Features Deadbolt Lock Key cylinder, bolt, thumb turn (single-cylinder) or second key cylinder (double-cylinder), strike plate, housing A single-cylinder lock has a thumb turn inside; a double-cylinder lock requires a key on both sides for higher security. Knob Lock Round knob, spring latch, lock cylinder, spindle, interior push-button lock, rosette plates Push-button allows locking without a key; spring latch retracts automatically when the knob turns. Lever Handle Lock Lever handle, spring latch, lock cylinder, spindle, mounting plates, and interior lock mechanism Lever design requires less grip strength; the same internal parts, but a different handle shape. Smart Door Lock Motor, circuit board, battery compartment, keypad/touchscreen, deadbolt, cylinder (backup), strike plate, WiFi/Bluetooth module Motor moves bolt electronically; circuit board processes codes; batteries power everything; traditional parts provide backup. I recommend choosing your lock type based on what you actually need, like deadbolts for exterior doors, knob and lever locks for interiors, and smart locks when you want keyless convenience. Common Door Lock Problems Caused by Faulty Parts I’ve noticed that most lock problems trace back to just one or two worn or damaged parts. Here are the most common issues and what’s actually causing them: Worn-Out Lock Cylinder: Keys become harder to insert or won’t turn smoothly when the cylinder pins wear down over time. Misaligned Strike Plate: Your door won’t close properly, or the latch won’t catch when the strike plate shifts out of alignment. Broken Latch or Deadbolt: The door won’t stay closed, or feels loose when the latch spring breaks or the bolt gets stuck. Loose Door Knob or Lever: The handle wiggles or spins freely without retracting the latch when internal screws loosen or the spindle breaks. Catching these problems early saves you money and prevents getting locked out of your home unexpectedly. Most of these issues can be fixed quickly by tightening screws, realigning parts, or replacing the specific damaged component. When to Repair vs. Replace Door Lock Parts? Deciding whether to repair or replace your lock parts depends on the extent of damage and your security needs. Minor issues like loose screws, misaligned strike plates, or worn keys can usually be fixed quickly and inexpensively. You can often repair these problems yourself with basic tools and a little patience to save money. However, broken cylinders, cracked housing, or severely damaged internal mechanisms typically require complete lock replacement for proper security. If your lock has been tampered with, forced, or shows signs of break-in attempts, replace it immediately. Old locks that stick constantly or require excessive force should also be replaced rather than repaired repeatedly. Safety always comes first, so when in doubt about your lock’s integrity, choose replacement over temporary repairs. Frequently Asked Questions How often should door locks be checked? Check your door locks every few months, especially on exterior doors. Look for loose handles, sticking keys, slow bolts, or uneven closing. A quick check helps you catch small issues before they become lockouts, broken hardware, or bigger security problems. Can weather affect door lock parts? Yes, weather can affect locks over time. Moisture can cause rust, while heat and cold can cause doors to expand or contract. This can throw the latch or strike plate out of line. Exterior locks need extra care because they are exposed to rain, dust, humidity, and temperature fluctuations. Why does my key get stuck in the lock? A key can get stuck because of dirt, worn pins, a bent key, or a dry cylinder. Do not force it, since that can break the key inside. Try gentle movement first. If it keeps happening, the lock may need cleaning, lubrication, or replacement. What is the best lubricant for door locks? Use a graphite-based or dry lock lubricant for most door locks. These products reduce friction without leaving a sticky mess. Avoid heavy oils because they can collect dirt inside the cylinder. Too much buildup can make the key harder to turn later. Are all door lock parts universal? No, door lock parts are not always universal. Size, brand, backset, door thickness, and lock type can all affect fit. A knob, latch, or cylinder from one lock may not work with another. Always check the measurements before buying replacement parts. Can I replace only one part of the lock? Yes, you can replace one part if the rest of the lock is still in good shape. Common part replacements include cylinders, strike plates, latches, and screws. If several parts are worn or the lock feels weak, replacing the whole lock is usually safer. Why does my door lock feel loose? A loose lock is often caused by worn screws, a loose mounting plate, or movement inside the handle set. Sometimes the spindle or latch is wearing out, too. Tightening visible screws may help, but if the handle still shifts, the inner parts may need attention. Do interior doors need strong locks? Interior doors usually do not need the same strength as exterior doors. Privacy locks work well for bedrooms and bathrooms, while closets may only need simple passage knobs. For home offices, storage rooms, or shared spaces, a stronger keyed lock may be a better choice. Wrapping Up Your doors are the first line of defense for your property, so keeping locks in good shape matters. Remember that quality parts last longer and provide better security than cheap alternatives that break down quickly. Regular maintenance, such as cleaning cylinders and tightening screws, helps prevent the most common lock problems you might face later. Minor fixes today prevent expensive emergency locksmith calls when something breaks at the worst possible time tomorrow. Which lock part surprised you the most? Share your thoughts or questions in the comments below!
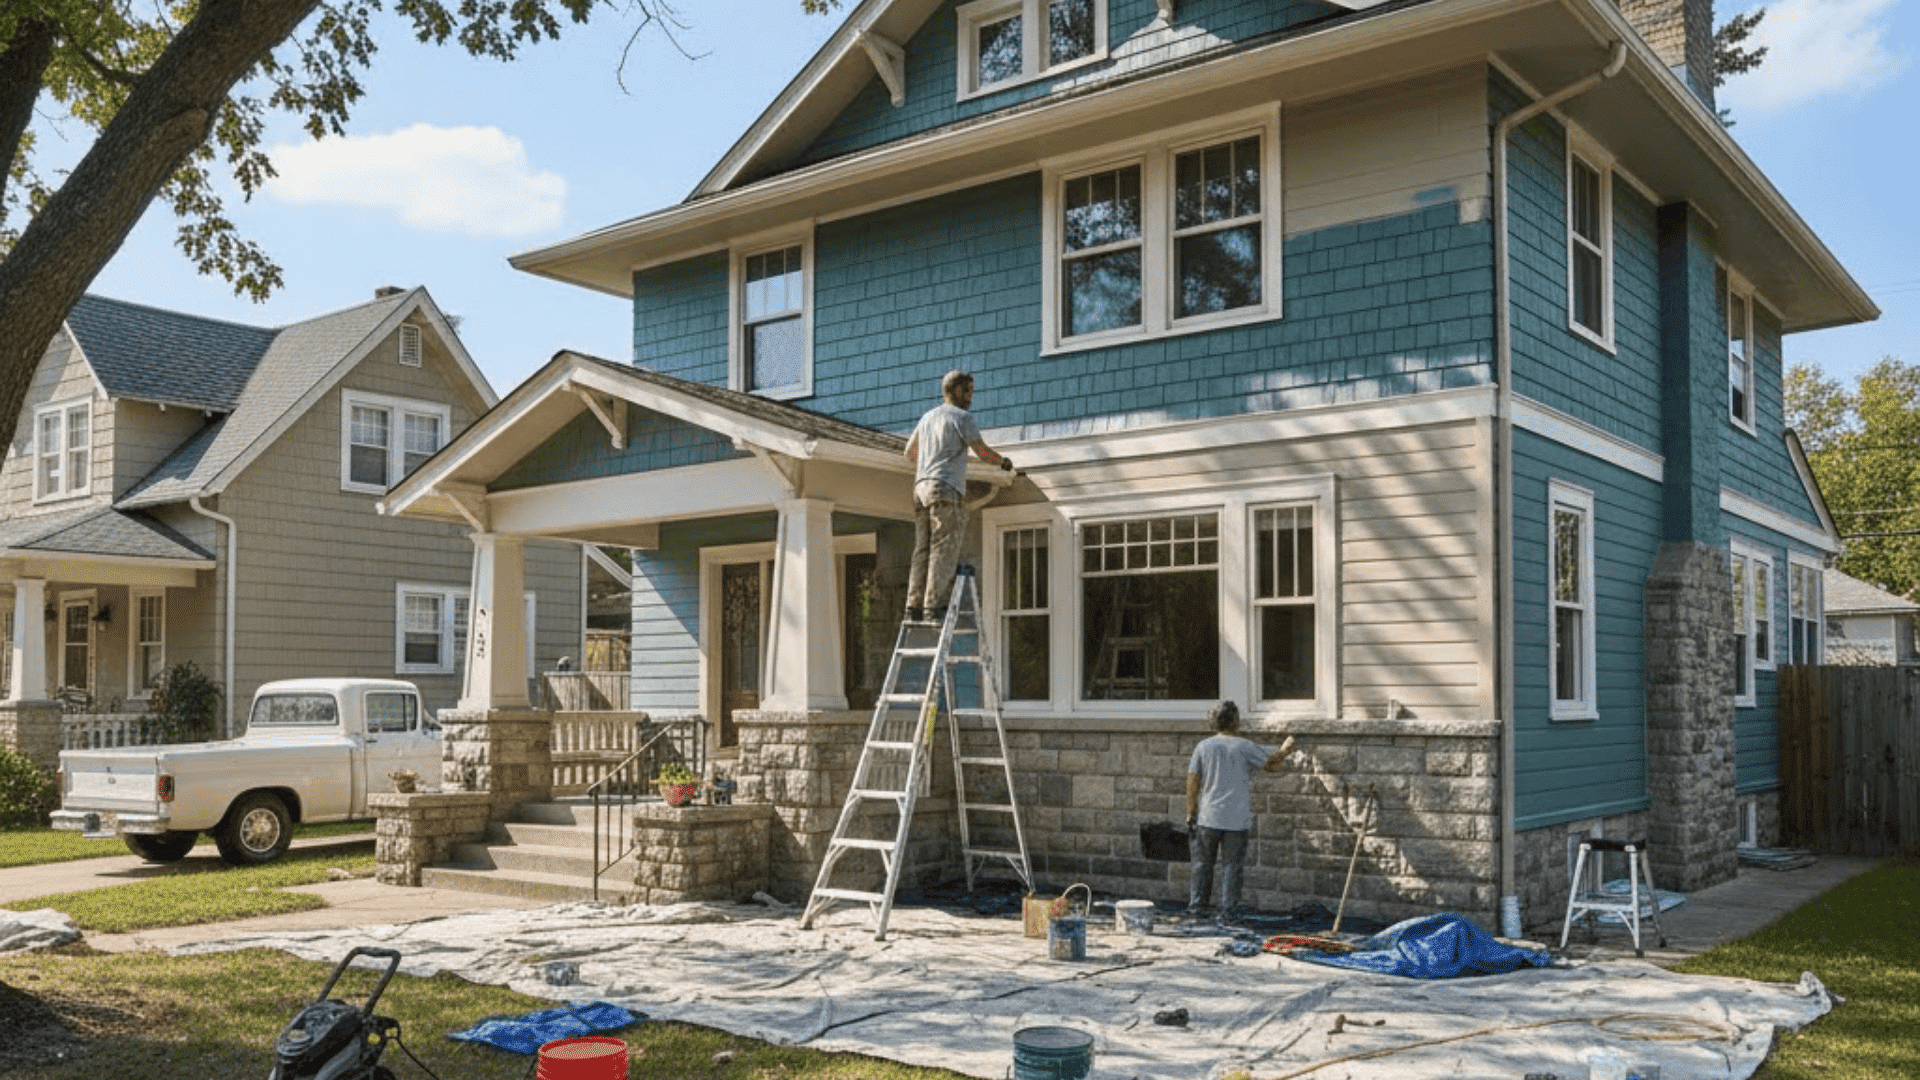
Ever look at your faded siding and think, “Okay… but what’s this actually going to cost me?” In this guide, I’ll walk you through the real cost to paint the exterior of a house in simple terms. You’ll see how your home’s size, siding, stories, and prep work change the final price. You’ll also learn basic price ranges by siding type and home size, plus how to estimate your own budget before you call a painter. We’ll compare DIY vs. hiring a pro, share easy ways to save money, and discuss how often you really need to repaint your exterior so you can plan ahead with confidence. A Simple Way to Estimate Your Budget for the Exterior Paint A good estimate starts with a few basic steps. These steps help you get close to the cost even before you speak with a contractor. Step 1: Estimate Your Paintable Square Footage. Paintable area is not the same as indoor square footage. It includes walls, trim, and any areas that need coating. A quick way to estimate: Measure the length of each side of the home Multiply by the height of each wall Subtract large windows and doors If the home has many bump-outs or angles, the final number may be a little higher. Step 2: Choose a Cost Range. Exterior paint jobs fall into three basic levels. Pick the range that matches the home’s condition. Level What It Includes Cost Range (Per Sq Ft) Basic Light prep, simple siding, single coat Low range Standard Normal prep, two coats, average siding Mid range Premium Heavy prep, tall homes, detailed trim High range Higher ranges often reflect more prep time, taller walls, or detailed trim work. Step 3: Example Cost Estimates by Home Size As the home gets larger, you can expect the total cost to rise because painters need more time, more paint, and more setup. 1,500 sq ft: One-story stays mid-range, while two-story costs more due to extra ladder work. 2,000 sq ft: One-story lands in a moderate range, and two homes rise because the upper walls take longer. 2,500 sq ft: One story runs higher overall, and two stories reach the top range due to access and setup time. A second story raises the cost because painters must move carefully on ladders, follow safety steps, and spend more time reaching upper areas. Complete Breakdown: Cost to Paint the Exterior of Your House Before comparing quotes, it helps to see how the total price is divided. The table below shows the main cost areas and the typical share each one adds to the project: Category What It Covers Typical Cost Share Labor Prep work, scraping, caulking, masking, painting, ladder work 50%–70% of the total cost Paint & Materials Primer, exterior paint, caulk, and patching products 15%–25% of the total cost Supplies & Equipment Tape, plastic, rollers, sprayers, ladders, lifts 5%–10% of the total cost Add-Ons Power washing, small repairs, painting shutters, doors, railings Varies by home and extras These pieces shape most of the final price, and seeing them in one place makes each quote easier to understand and compare. Key Factors that Change Exterior Paint Cost Many things can change how much you pay to paint the outside of a home. Painters look at these details during the walkthrough, and each one plays a part in the final number. The points below help you understand what affects your budget the most: 1. Size of the Home The size of the home is one of the biggest cost factors because larger surfaces need more paint and more hours of labor. Extra corners, added sections, and long walls can increase time on ladders and slow down the crew. Bigger projects also need more coats to get full, even coverage. 2. Number of Stories and Access A taller home costs more because painters must work from ladders or lifts. This slows the pace and increases safety steps. Tight side yards, fences, and nearby trees can also make areas harder to reach. When access takes extra time, the final cost usually increases as well. 3. Siding Material Different siding types need different prep and paint methods, which affects price. Vinyl, wood, and fiber cement often fall in the lower or moderate range Brick needs special coatings and extra prep Stucco takes longer due to cracks and its rough surface These small differences can shift the total cost of the project. 4. Condition of the Current Paint Worn or damaged paint adds more prep time, which raises the final price. Peeling spots must be scraped, sanded, and primed before painters can start. If the surface has cracks, soft wood, or rot, repairs must be made first. Better prep leads to smoother results and longer-lasting paint. 5. Trim, Windows, and Details Homes with more trim and windows take longer because each edge must be brushed by hand. Shutters, porch rails, and columns add even more time. These small items seem simple, but they increase the level of detail and slow down progress, which raises the project cost. 6. Number of Coats Most homes need two coats for solid coverage, and that extra layer raises both labor and paint use. A home with dark colors or patchy areas may also need primer. More coats mean more drying time and longer setup, which leads to a higher overall total. 7. Paint Type and Quality Higher-quality exterior paint lasts longer and handles sun, rain, and moisture better. These products cost more, but they also hold color and resist wear. Some coatings are made for specific siding types. Better paint helps delay the next repaint, which can save money over time. 8. Location and Local Labor Rates Prices change from one area to another. Regions with higher living costs often have higher labor rates. Weather also plays a part because harsh heat, sun, or storms can limit painting seasons and raise demand. When demand is higher, painting prices usually rise as well. 9. Repairs, Power Washing, and Extras Extra tasks add to the final number. These may include: Power washing Patch repairs Fixing trim or siding issues Painting shutters, doors, or porch rails Each item adds time to the job. When crews spend more hours preparing the surface, the final cost goes up. 10. Contractor Experience and Warranty Experienced painters may charge more because they offer steady quality, clear prep steps, and strong warranties. A good crew follows a proven process that gives better results and fewer issues later. Very low prices may mean skipped prep work, weak coverage, or no support if problems appear. Exterior Paint Cost by Siding Type The siding on a home has a big effect on the final price because each surface needs a different amount of prep and paint. Some materials are quick to coat, while others take more time, skill, and product. Vinyl or aluminum:$1.50–$3.00 per sq ft (lighter prep and smooth surfaces) Wood:$2.00–$4.00 per sq ft (scraping, priming, and repairs add time) Brick:$2.50–$4.50 per sq ft (needs masonry coatings and careful prep) Stucco:$2.50–$5.00 per sq ft (cracks, texture, and heavy coverage raise cost) Fiber cement:$2.00–$4.00 per sq ft (holds paint well but needs two solid coats) These ranges help you understand why quotes vary so much. Each siding type requires its own process, and the right prep makes the finish last longer. Exterior House Painting Cost by Home Size You can use these examples to understand how size and height change the total cost. Home Size Expected Workload 1,000 sq ft Light workload 1,500 sq ft Moderate workload 2,000 sq ft Higher workload 2,500 sq ft Larger job with more prep 3,000+ sq ft Long project needing full setup If you’d like, this section can also include real dollar ranges for each home size. These examples are general ranges, not exact quotes, because every home has different siding, prep needs, trim details, and access conditions. Actual costs may go higher or lower based on those factors. DIY Exterior Painting or Hiring a Professional DIY exterior painting can save money on small homes, but it takes a lot of time and effort. You need to handle scraping, patching, taping, and ladder work on your own. The cost of paint, tools, and rentals can also add up fast. Many homeowners struggle to get a smooth finish while dealing with weather changes and long drying times. Hiring a professional removes most of that pressure. A crew manages prep, repairs, equipment, and safety, which leads to steady progress and a cleaner final look. Pros move faster, especially on homes with tall walls, peeling paint, or detailed trim. While the upfront price is higher, the results usually last longer and require less work from you. Budget Tips to Lower Your Exterior Paint Cost Small steps can make a noticeable difference in your total cost. A few tasks done ahead of time and some smart planning can help keep the project within your budget without lowering the quality of the finish. Handle simple prep, like light cleaning, trimming shrubs, or moving outdoor furniture Schedule the project during slower seasons when crews may be more flexible Choose mid-range paints that offer solid coverage and last across many seasons Combine siding, trim, and door painting to reduce setup time and improve efficiency These small choices help the painter work faster, use time wisely, and focus on areas that matter most, which can reduce your overall cost while keeping the results looking clean and fresh. How Often Should You Repaint Your Exterior? Repaint timing depends on the siding and the weather your home faces. Each material ages at a different pace, so the timeline can vary from home to home. Wood: every 3–7 years, depending on sun and moisture Vinyl or aluminum: every 5–10 years, mostly due to fading Stucco: every 5–7 years, since cracks and texture show faster Fiber cement: every 7–10 years, thanks to strong paint hold Brick coatings: every 10–15 years, based on climate and surface condition These timelines are general guidance, and checking your siding once a year helps you spot early signs that it may be time to repaint. Wrapping Up Understanding the cost to paint the exterior of the house gives you a clearer path forward. You now know how size, siding, prep work, and labor all play a part in the final price. You also learned how to estimate your own budget, compare quotes, and decide if DIY or a pro makes more sense for your home. I hope this helps you feel more sure about your next steps. Your home’s exterior is a big part of your daily view, and getting it painted the right way can make planning much easier. If you want more tips, guides, or simple ideas for your home, feel free to check out my other posts on the website.
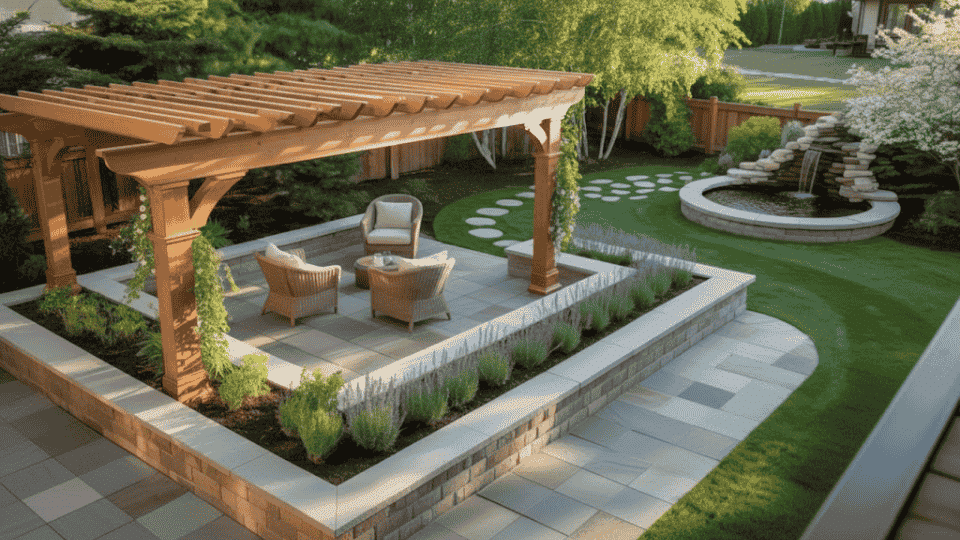
Ever had a contractor quote you a backyard remodel cost that made your jaw drop? I’m guessing that’s exactly why you’re here reading this, and I bet you’re someone who wants to understand every dollar before committing to a project. From the outside, backyard remodels look straightforward, but I’ve watched too many homeowners dive in without understanding the real cost, only to hit surprise expenses halfway through that derail everything. The total depends on your yard’s size, the features you want, the materials you choose, and local labor rates. But don’t worry, your backyard fairy is here, and I’ll help you by breaking down the actual cost factors of a backyard remodel so you can budget smartly from day one and avoid costly surprises. Understanding the Basics of Backyard Remodel Costs Before you pull out your wallet, let me walk you through what actually goes into a backyard remodel. I’m talking about the real work that needs to be done, not just the pretty finished product you see in magazines. Most projects start with demolition and removal, getting rid of what’s already there. That old concrete patio? It needs to go. The patchy grass won’t grow, right? Time to rip it out. You might need to haul away an old shed, clear out years of accumulated debris, or remove tree stumps. Then comes the fun part: installing new features like patios, gardens, outdoor kitchens, or fire pits. Each of these tasks carries its own price tag, and they add up faster than you’d think. Key Factors that Drive Your Backyard Remodel Cost It’s hard to price out backyard remodels, especially when certain factors consistently push budgets higher. Understanding these variables helps you estimate costs more accurately: Yard size: A 500-square-foot space costs significantly less than a 2,500-square-foot area across all tasks Site accessibility: Tight spaces that block equipment access drive labor costs up quickly Disposal requirements: Hauling concrete, dirt, and debris to dumps adds fees that vary by location Regional labor rates: Urban contractors charge more per hour than rural professionals Project complexity: Custom designs and intricate patterns require more skilled labor hours Material quality: Natural stone runs higher than concrete pavers, and premium plants cost more than basic varieties Knowing these cost drivers lets you make informed choices about where to spend and where to save on your project. Backyard Removal and Cleanup Costs Understanding the financial commitment of each demolition and preparation task helps you budget accurately and avoid surprises during your backyard transformation: 1. Lawn and Debris Removal Costs Removing existing grass typically costs $1.14 – $1.78 per sq ft, with dense root systems pushing prices higher. Budget $500 to $1,500 for a typical 500-square-foot yard. Professional debris removal averages $200–$500 per truckload for a ¼-acre yard, while heavily overgrown areas can reach $800–$1,600 or more, depending on load size. 2. Concrete and Shed Demolition Costs Breaking up concrete costs $2 to $6 per square foot, depending on thickness and reinforcement. Expect $585 to $2,790 for a 1,000-square-foot patio removal. Shed removal costs range from $600 to $2,000, depending on size and material. Concrete pads beneath sheds add $200 to $500 to the cost of complete demolition. 3. General Yard Cleanup Costs Cleaning a quarter-acre lot costs $200 – $600 and includes weeding, trash removal, and debris hauling. Heavily wooded lots with thick leaf buildup require more hours than open lawns. Regularly maintained yards typically stay near $215, while neglected properties can reach $465, depending on vegetation density and accessibility challenges. Installation and Feature Addition Costs Beyond demolition and cleanup, I think your backyard remodel requires smart investments in new features, plants, and structures to create a functional outdoor oasis: 1. Landscaping and Planting Costs Installing plants and greenery forms the foundation of most backyard remodels. Here’s what you can expect to spend on professional landscaping services: Small annuals: $5 each for seasonal flowers and ground cover plants Mature trees: $50+ depending on species, size, and root ball dimensions Professional labor: $50 to $150 per hour for experienced landscapers Cost per square foot: $4.50–$17 for typical landscaping work Full installation: $3,300–$13,200 average for complete yard landscaping Getting detailed quotes that separate plant costs from labor helps you identify where to save money by strategically purchasing materials yourself. 2. Hardscaping Installation Costs Patios, walkways, and retaining walls create structure and functionality in your outdoor space. Understanding hardscaping costs helps you plan features that fit your budget: Material and installation: $10 to $30 per square foot combined Concrete pavers: Lower end of price range, budget-friendly option Natural flagstone: Higher costs due to material premium and installation complexity Professional labor: $50 to $75 per hour, added to material expenses Design complexity: Simple rectangular layouts cost less than custom curves and patterns Simple concrete paver patios remain budget-friendly, while custom flagstone designs with curves and intricate patterns command premium prices for both materials and skilled labor. 3. Outdoor Structures Adding permanent structures such as pergolas, gazebos, and outdoor kitchens creates defined spaces for entertaining and relaxing. These investments vary widely based on size and features: Basic pergola or gazebo: $2,000 to $5,000 for standard designs Outdoor kitchens: $7,000–$35,000+ depending on appliances and finishes Built-in grills: Add $1,500–$5,000 to your outdoor kitchen budget Countertops and sinks: Increase costs based on the material quality chosen Premium finishes: Custom structures with high-end appliances and integrated utilities represent the largest investments Custom outdoor structures with premium finishes, integrated utilities, and high-end appliances represent the largest single investment in most backyard remodel projects after the initial demolition. 4. Irrigation and Drainage Systems Proper water management protects your landscaping investment and prevents costly damage. Installing irrigation and drainage systems ensures your backyard stays healthy and functional year-round: Sprinkler system installation: $1,800–$3,500 for average-sized yards Drip irrigation: $300–$1,200 for targeted watering in garden beds French drain installation: $2,000–$6,000, depending on length and depth Drainage solutions: Vary based on yard slope and water pooling severity Smart controllers: Add $100–$300 but save on water bills long-term Investing in proper drainage prevents foundation damage, standing water, and plant loss, making it worth the upfront cost for long-term yard health and maintenance savings. These additional investments complete your backyard remodel and create a space you’ll use and appreciate for years to come. Prioritize features based on your lifestyle and budget constraints. Ways to Save on Your Backyard Remodel Cutting costs doesn’t mean sacrificing quality; it means being smart about where you spend. I have found several reliable ways to keep your backyard remodel cost reasonable without ending up with a space you’re unhappy with. Here are some money-saving strategies: Get three quotes minimum: Contractor prices vary wildly for the same work, so comparison shopping pays off Buy materials yourself: Purchasing pavers, plants, or lumber directly cuts out contractor markups of 20-40% Rent equipment: A concrete saw or sod cutter rental for a day costs less than hiring someone Handle your own cleanup: Clearing debris and pulling weeds yourself eliminates hundreds of dollars in labor charges Time your project right: Contractors offer better rates during their slow season, typically late fall and winter Start small: Complete your remodel in phases over multiple years to spread out the financial burden Do demo work yourself: Breaking up small concrete areas or removing an old shed saves significant labor costs Remember that DIY work trades your time for money. If you’re spending three weekends on a task a pro could finish in a day, calculate what your time is worth before deciding. Planning Your Backyard Remodel Budget Creating a realistic budget starts with understanding typical cost ranges for your yard size. I’ve broken down average expenses to help you plan accordingly and anticipate what different project scales require: Yard Size Budget Range Typical Inclusions Small (500-1,000 sq ft) $3,000 – $10,000 Basic cleanup, simple patio, minimal planting Medium (1,000-2,500 sq ft) $10,000 – $50,000 Multiple features, moderate hardscaping, and landscaping Large (2,500+ sq ft) $50,000 – $100,000 Complex designs, pools, outdoor kitchens, extensive work Extra Large (5,000+ sq ft) $70,000-$150,000+ Full estate landscaping, multiple structures, luxury amenities Premium Estate (1+ acre) $150,000-$300,000+ Complete outdoor living spaces, high-end materials, custom everything Add-ons such as swimming pools ($32,000–$60,000), fire pits ($300–$2,500), going fancier to $ 5,000, or deck installation ($1,000 – $11,500+) fall outside these base ranges. I always recommend padding your budget by 10-15% for unexpected issues; something always comes up during construction. Disclaimer: These prices are estimates and may vary by location, season, and market conditions. Always check with local contractors and suppliers for accurate, up-to-date pricing specific to your area before starting your project. Common Mistakes to Avoid Knowing what not to do saves you as much money as knowing what to do. I’ve watched homeowners make these mistakes repeatedly, and they’re completely preventable with a little forethought. Here’s what you can’t do: Skipping permits: Fines exceed permit costs, and you’ll eventually need them anyway for legal compliance Choosing the cheapest bid: Lowest quotes often mean cut corners or surprise fees appearing later Ignoring drainage: Poor drainage causes flooding and foundation damage, costing thousands to repair Overbuilding: Installing unused features wastes money better spent on daily-use amenities you’ll actually enjoy No written contract: Verbal agreements inevitably lead to disputes over scope, timeline, and payment Forgetting utilities: Hitting buried gas or electric lines during excavation creates expensive, dangerous situations Always verify that contractors are licensed and insured. Checking references takes thirty minutes but prevents months of headaches. Wrapping Up The backyard remodel cost you’ll pay depends entirely on your choices, but now you’ve got realistic numbers to control your spending instead of guessing blindly. I’ve provided the actual pricing for removal, installation, and features so you can build a budget that works for your situation. Start by measuring your yard and separating must-haves from nice-to-haves. Get at least three contractor quotes, ask every question that pops into your head, and never rush decisions under pressure. Phasing your remodel over time spreads costs and lets you adjust as you learn what works. Your backyard should bring daily joy, not financial regret from overspending or cheap shortcuts.
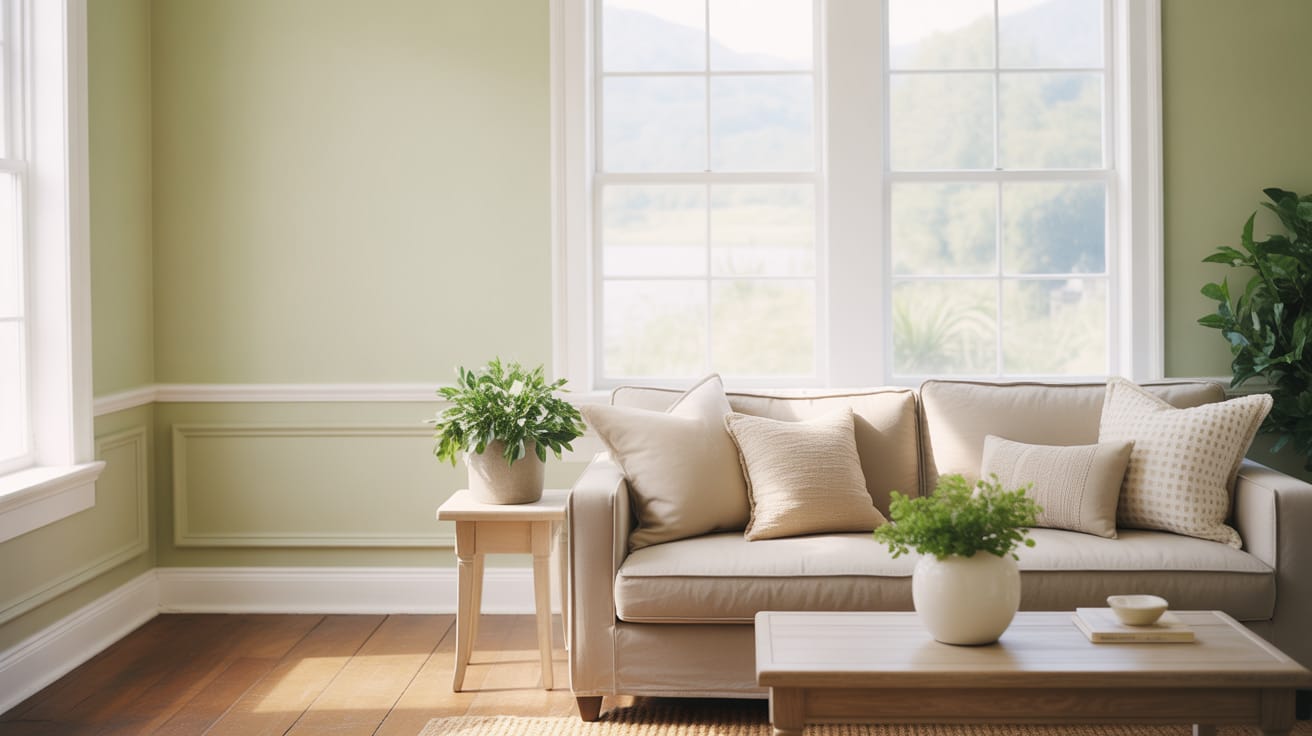
Healing Aloe by Benjamin Moore feels and looks exactly as it sounds: healing and aloe. This soft green-gray hits that rare spot where it feels calming without putting you to sleep. As someone who loves nature themes and cool tones, this color is the dream. If you’ve been saving Instagram posts or pinning serene spaces on Pinterest, you’ve definitely seen this shade. I’m walking you through the full breakdown of Healing Aloe: what makes this color work, where it actually looks good, how to test it without the mess, and what you’ll pay when you’re ready to commit. Let’s figure out if Healing Aloe Benjamin Moore deserves a spot on your walls. Healing Aloe (BM 1562) is a soft green-gray paint color with blue undertones and an LRV of 66. It works best in bedrooms, bathrooms, and living spaces where a calm, nature-inspired look is needed without going too bold. Getting to Know Healing Aloe Benjamin Moore Color Code: 1562 Benjamin Moore referenceLRV: 66 Light-medium depthCollection: Classic Colors Standard BM paletteUndertones: Green-gray with blue influence. Shifts with lightingBest Rooms: Bedrooms, bathrooms, and living rooms. Works across spaces Healing Aloe (1562) comes from Benjamin Moore’s Classic Colors collection, and it’s basically what happens when green decides to chill out. The green base gets softened by gray and touched with blue, so you’re not getting anything loud or bright. I’d call it a cool-leaning color that feels more like a breath of fresh air than an actual statement. It doesn’t scream “look at me” when you walk into a room. Instead, it just makes everything feel cleaner and more open. The muted green tone works with modern farmhouse, coastal, transitional, and even minimalist spaces. If you want something that reads neutral but isn’t another shade of beige or gray, this is it. The color family sits best with sage green paint colors and seafoam comfortably without landing fully in either camp. How Healing Aloe Looks in Different Rooms So, I have seen Healing Aloe in five different spaces in my and my friends’ homes, and each room brings out something different in the color. Here’s what actually works: 1. Healing Aloe in Bedrooms I once painted my guest bedroom in Healing Aloe, and it immediately felt like a spa retreat. The soft green-gray created a restful backdrop that didn’t compete with the white bedding or the wood furniture. Small bedrooms benefit because it doesn’t close in the space. Large primary bedrooms look equally good since the color feels intentional without being heavy. Pair it with linen curtains, a jute rug, and simple brass fixtures. I kept the trim in Chantilly Lace for contrast, and the whole room just breathes better now. 2. Healing Aloe in Bathrooms Bathrooms are where Healing Aloe Benjamin Moore really shines. A friend of mine used it in a powder room with white subway tile, and I love how fresh it feels. The color pairs beautifully with marble countertops and chrome or brushed-nickel fixtures. It gives you that clean, spa-like vibe without feeling cold or clinical. Even in a windowless half bath, the color doesn’t look muddy or dark. If you’re doing a full bathroom renovation, consider it for the walls while keeping the vanity and tile neutral. 3. Healing Aloe in Living Rooms Living rooms need a color that can handle different lighting throughout the day, and Healing Aloe does exactly that. I tested it in an open-concept space with south-facing windows, and it stayed soft all day long. The green-gray acts as a quiet background for neutral sofas, wood coffee tables, and colorful throw pillows. It doesn’t fight for attention, but still gives the room more personality than plain white or gray. If you have a lot of natural wood trim or built-ins, this color complements them without clashing. 4. Healing Aloe in Kitchens Kitchens can go two ways with Healing Aloe: walls or cabinets. I personally love it as a wall color in kitchens with white or wood cabinets, and it adds just enough color without overwhelming the space. The soft green pairs well with brass hardware, black accents, or even stainless steel. If you’re feeling bolder, Healing Aloe kitchen cabinets in a matte finish look modern and fresh. Just make sure your countertops are neutral, white quartz, or butcher block; both work. Keep upper cabinets white if you’re going green on the lowers. 5. Healing Aloe in Nurseries and Kids’ Rooms Healing Aloe works beautifully in nurseries and kids’ rooms because it’s calming without feeling babyish. The soft green-gray grows with your child, so you won’t need to repaint in a few years. I’d suggest pairing it with white cribs, natural-wood dressers, and simple blackout curtains for nap time. If you’re decorating a nursery, keep the furniture light and add pops of color through bedding, rugs, or wall art. For older kids’ rooms, Healing Aloe walls provide a neutral backdrop that complements evolving interests and decor. Pair it with White Dove trim and keep the ceiling white to maintain brightness. Where Healing Aloe Works Best Bedrooms where a calm, restful tone is needed Bathrooms for a spa-like, clean feel Living rooms needing soft color without heaviness Kitchens with white or wood cabinetry This helps narrow down if it fits your space before testing samples. Healing Aloe Benjamin Moore Undertones and Lighting This color shifts noticeably throughout the day. Understanding undertones and light reflectance helps predict how it performs in your space. How Undertones and Light Change Healing Aloe Element Character Conditions Green-Gray-Blue Base Soft, muted foundation Shifts based on exposure Morning to Afternoon Brighter, greener tones Early daylight through warm sun Evening Hours Softer, gray-blue read Dusk and artificial lighting LED Bulbs Warm: neutral / Cool: bluer 2700K-3000K vs bright white LRV of Healing Aloe The LRV is 66, reflecting substantial light while maintaining wall presence. This medium-light rating works in small rooms and large open spaces without washing out. Southern exposure intensifies green throughout the day. Northern light cools it toward blue-gray. Western afternoon light adds warmth and softness, making the read more neutral. Test samples at different times and locations before committing to this shade. Healing Aloe Sampling Options Before you commit to a gallon, it’s smart to test Healing Aloe in your own space. Light, room size, and surrounding colors can all affect how it looks: Peel-and-Stick Samples The easiest way to try Healing Aloe without making a mess is with peel-and-stick samples: Order from Samplize or SamPaint; they’re removable, repositionable, and damage-free. Stick samples on at least two different walls to compare how light hits each surface. Check them in morning and evening light to see how the undertones shift throughout the day. Move them around to test near windows, in corners, and next to your furniture or trim. They’re reusable, so you can test in multiple rooms without buying separate samples for each space. The color accuracy is solid, and you avoid wasting leftover paint or dealing with cleanup. Stick samples on different walls and check them in morning and evening light to see how the undertones shift. Traditional Sample Cans If you prefer the old-school route, small sample cans let you paint larger test areas: Pick up a sample can from Benjamin Moore retailers for $5-$8, enough to cover about 16 square feet. Paint at least a 2×2-foot section on two different walls: one with direct light and one without. Use a small foam roller for smooth, even coverage that mimics the final coat’s appearance. Let it dry completely before judging; wet paint always looks darker and richer than the dried finish. Leave your sample up for at least 48 hours, and check it in the morning, afternoon, and at night. Compare it against your trim color, flooring, and furniture to see if it works with your existing setup. The color will look darker when wet, so give it time to dry before making any decisions. Healing Aloe Benjamin Moore Price Guide I bought Healing Aloe in different sizes and finishes over the years. Prices vary by product line and where you shop, but here’s what you’ll find consistently across stores: Size Product Line Price Range Sample All lines $5 – $8 Quart ben Interior $21.99 Quart Regal Select $29.99 Gallon ben Interior $47.99 Gallon Regal Select $72.99 Gallon Aura/Aura Bath & Spa $89.99 Matte and eggshell finishes cost about the same. Semi-gloss runs a few dollars more. I used Aura for high-traffic areas because the coverage and durability are noticeably better. For bathrooms, Aura Bath & Spa offers better moisture and mildew resistance than cheaper lines. Where to Buy Healing Aloe Benjamin Moore Healing Aloe is widely available through multiple channels, each offering distinct advantages. Whether you prefer an in-person consultation or the convenience of online shopping, you’ll find options that fit your timeline and budget for this popular Benjamin Moore shade. Where to Purchase: BenjaminMoore.com: Online ordering with store pickup or delivery; check local stock before visiting Samplize: Peel-and-stick samples with fast shipping; mess-free testing on your walls Sam’s Paint: Reusable, repositionable peel-and-stick samples for flexible color testing Amazon: Various sizes from authorized sellers; verify authenticity before purchasing Local Hardware Stores: Sample cans and sometimes full gallons; convenient for same-day needs For the most accurate color matching and personalized finish recommendations, visiting a physical retailer remains the superior choice. Staff expertise helps ensure you select the right sheen and product type for your specific project requirements. Styling and Pairing Tips for HealingAloe Benjamin Moore This soft sage-green shade pairs beautifully with both warm and cool tones, making it ideal for coordinating multiple spaces throughout your home. Here are some common pairings: Category Best Options Effect Trim Colors Chantilly Lace, Simply White, White Dove Creates crisp or softer contrast depending on the choice Adjacent Rooms Gray Owl, Classic Gray, Pale Oak Maintains neutral flow or adds warmth between spaces Accent Colors Navy blue, blush, terracotta, black metal Adds depth, warmth, or modern contrast Flooring Light oak, medium walnut, white/gray tile Keeps spaces airy or adds richness Decor Elements Linen textures, ceramic planters, brass fixtures, natural wood Complements the organic quality of the shade This gentle hue works effortlessly as your base. Keep styling minimal with natural materials and textures. Healing Aloe handles the heavy lifting, creating a calm backdrop that lets your furniture and accents shine without competing for attention. Comparing Healing Aloe to Similar Benjamin Moore Shades Healing Aloe shares characteristics with several Benjamin Moore greens and grays, but each offers distinct differences in tone, depth, and versatility worth considering. Similar Benjamin Moore Colors: Gray Owl (2137‑60): Cooler and grayer with less green; functions as true neutral Palladian Blue (HC‑144): More blue than green; brighter and reads aqua in strong light Silver Sage (506): Warmer with stronger sage presence; less gray overall Saybrook Sage (HC‑114): Richer, deeper sage; works better for accent walls Calm (2111‑70): Similar softness but leans bluer; creates a cooler atmosphere November Rain (2142‑60): Grayer base with minimal green; closer to true gray Tea Light (471): Lighter and softer with barely-there green; more delicate One close Sherwin-Williams alternative is Sherwin-Williams Rosemary, which has a deeper green tone and slightly more saturation. Healing Aloe strikes the ideal balance between these options, offering enough color interest without overwhelming spaces. Its medium LRV and balanced undertones make it more adaptable than alternatives. Similar Colors from Other Paint Brands If you love Healing Aloe but prefer shopping with other paint brands, several comparable soft sage-green options deliver a similar calming vibe across various manufacturers. Comparable Shades from Other Brands: Sherwin‑Williams Contented(SW 6191): Soft green‑gray with similar undertones; slightly warmer in northern light. Behr Mild Mint (PPU11‑12): Cool sage with gray base; comparable LRV and neutral quality. Valspar Panacea (6002‑3A): Muted green‑gray; leans slightly more aqua in bright conditions. Farrow & Ball Vert de Terre (No. 234): Sophisticated sage‑gray; deeper and more pigmented overall. These alternatives match Healing Aloe’s serene character and adaptability. Test samples in your specific lighting conditions to find your ideal soft sage-green shade. Final Thoughts Healing Aloe by Benjamin Moore is one of those rare colors that works in almost any room without feeling overdone. I’ve used it, tested it, and watched it shift through different lighting conditions, and it keeps showing up as a reliable, calming choice that doesn’t get old. If you’re tired of staring at white walls but not ready for anything loud or bold, this soft green-gray is your middle ground. Grab a peel-and-stick sample or pick up a sample can from your local Benjamin Moore store. Test it on your walls, check it in your actual lighting, and live with it for a few days to see if it feels right. It might give you a new perspective on colors. Drop a comment below, and share your thoughts on Healing Aloe by Benjamin Moore. Frequently Asked Questions Is Healing Aloe warm or cool? Healing Aloe is a cool-leaning color with green, gray, and soft blue undertones. What is the LRV of Healing Aloe? The LRV of Healing Aloe is 66, making it a light to medium paint color that reflects a good amount of light. Does Healing Aloe look more green or gray? It depends on lighting, but it usually reads as a balanced green-gray with subtle blue shifts. What trim color goes with Healing Aloe? Chantilly Lace, White Dove, and Simply White work well for trim. Is Healing Aloe good for small rooms? Yes, its higher LRV helps reflect light, making small rooms feel more open.

