


Standing in the lighting aisle, holding two bulb boxes that look nearly identical, one says “cool white,” the other “daylight”, and you realize nobody ever actually explained the difference. The numbers on the packaging mean nothing without context. Cool white vs daylight feels like a minor question until you install the wrong bulb and your living room starts to feel like a dentist’s waiting room. Color temperature shapes how a room feels, not just how bright it looks. The right lighting choice plays a huge role in setting the mood, particularly in a minimalist kitchen design style, where simplicity and function come first. I’ve watched people redo entire lighting setups after understanding just this one thing; the difference is always immediate. This breaks down each temperature range, what it does to a space, and which rooms it belongs in. What Are Light Bulb Color Temperatures? Light bulb color temperature is measured in Kelvin (K), a number that tells you how warm or cool a light source appears. It has nothing to do with how hot the bulb gets physically. It’s purely about the tone of the light it produces. The scale runs from 1000K to 6500K. Lower numbers produce a warm, amber-toned glow. Higher numbers push toward a crisp, blue-white light. Most home lighting ranges from 2700K to 6500K, covering everything from soft warmth to sharp daylight brightness. What most people don’t realize is that color temperature doesn’t just affect visibility; it directly influences how a room feels, how alert or relaxed you are, and even how well you sleep. Cool White vs Daylight vs Warm White vs Soft White: What’s the Difference? All four terms describe the same thing, the tone of light a bulb produces, but each sits at a different point on the Kelvin scale with a distinctly different effect on a room. 1. Soft White (2700K) Soft white is the warmest option on the scale, the closest match to a traditional incandescent bulb. It produces a gentle, yellow-toned glow that feels familiar and easy on the eyes. Best suited for bedrooms and living rooms where comfort matters more than brightness. It promotes rest and works best in rooms used in the evening. 2. Warm White (2700K – 3000K) Warm white sits at the cozy end of the spectrum, slightly cleaner than soft white but still unmistakably warm. It creates an inviting, relaxed atmosphere without feeling dim or dull. Ideal for dining rooms, lounges, and bedrooms. If you want a space to feel welcoming rather than clinical, warm white is the default choice. 3. Cool White (4000K – 5000K) Cool white produces a bright, neutral light with a subtle blue undertone. It’s noticeably crisper than warm white without feeling as intense as full daylight. Best for kitchens, offices, and bathrooms where clarity and focus take priority over atmosphere. I’d describe it as the most versatile functional lighting option for most homes. 4. Daylight (5000K – 6500K) Daylight is the brightest and most intense option available. It mimics natural outdoor light with a sharp, blue-white tone that maximizes visibility. Best reserved for garages, workshops, study rooms, and home offices. It’s excellent for detailed work and reading, but in the wrong room, it can make a space feel cold and unwelcoming. Understanding where each type sits on the scale makes every lighting decision significantly easier; the difference between a room that feels right and one that never quite does often comes down to this. Color Temperature Comparison Table Color Temperature Kelvin Range Best For Room Type Mood Soft White 2700K Warmth and relaxation Bedrooms, Living Rooms Cozy, Relaxing Warm White 2700K – 3000K Inviting, casual warmth Dining Rooms, Lounges Calm, Welcoming Cool White 4000K – 5000K Task-oriented, clarity Kitchens, Bathrooms, Offices Focused, Alert Daylight 5000K – 6500K Precision tasks, natural lighting Garages, Workspaces, Study Rooms Energizing, Sharp How Light Temperature Affects Your Space and Mood Choosing the right Kelvin range goes beyond aesthetics; it directly shapes how you feel in a room, much as selecting the best types of wood for furniture can influence the overall look and feel of your space. The temperature of your light is one of the most powerful and most overlooked design decisions you can make: Cool White Lighting for Modern Spaces: Cool white creates an alert, focused atmosphere that suits clean, modern interiors and signals productivity to your brain. Daylight for Task-Oriented Activities: Daylight mimics a bright afternoon outdoors, keeping your mind sharp and your eyes accurate for precision tasks. Warm White for Inviting Atmospheres: Warm white creates a sense of safety and calm, ideal for rooms designed for rest and conversation. Soft White for Rest and Comfort: Soft white is the gentlest option, reducing stimulation and encouraging your body to naturally shift into rest mode. Getting your light temperature right does not require an expensive renovation or a designer’s eye. Once you match the right Kelvin range to each room’s purpose, the difference in how the space feels becomes immediately noticeable. Color Rendering Index (CRI): The Number People Always Skip Kelvin tells you the tone of light, but CRI tells you how accurately that light shows the true color of everything in the room. The scale runs from 0 to 100, with 100 corresponding to direct sunlight. Two bulbs at the same Kelvin can look identical on packaging but perform very differently in a real room. Under high CRI light, food looks more appetizing, fabrics read true, and skin tones look natural. At low CRI, everything looks slightly off, in a way hard to name. For living spaces, aim for a CRI of 80 or higher. For kitchens, bathrooms, and art studios, 90 or higher is the right threshold. How to Choose the Right Bulb Color Temperature Getting this right doesn’t require expertise; it just requires asking the right questions about the room before you reach for a bulb. That’s genuinely all it takes. Identify the room’s purpose: Tasks need cooler light, rest needs warmth. The room’s function answers the question instantly. Check natural light: Dark rooms need slightly cooler temperatures to compensate. Bright rooms can afford warmer bulbs without feeling dim. Always choose LED: They cover every color temperature, use 80% less energy, and last far longer than any alternative. Check lumens, not wattage: Lumens measure actual brightness. Match lumens to room size, not the number on the box. Once these four things are honestly considered together, the right bulb stops being a guess and becomes a straightforward decision you won’t need to revisit. Common Mistakes When Choosing Bulb Color Temperatures Most lighting problems aren’t about the bulb’s quality; they’re about the wrong temperature in the wrong room. These are the mistakes that cause it: Mistake Why It’s a Problem How to Fix It Mixing warm and cool bulbs in the same room Clashing tones make the space feel unsettled and visually inconsistent Keep all bulbs in one room within 500K of each other Ignoring the effect on sleep Cool or daylight bulbs suppress melatonin and silently disrupt sleep quality Use soft white 2700K in any room used before bed Using one temperature throughout the entire home No single temperature works everywhere; rooms feel either clinical or too dim Zone your home; warm for rest areas, cool for task spaces These mistakes are easy to make and just as easy to correct. The fix in every case costs nothing more than swapping one bulb for a better-matched one. Top 5 Tips for Optimizing Your Home Lighting Don’t use daylight bulbs in bedrooms: they can make the room feel too harsh and disrupt your relaxation. Focus on lighting tasks: Use Cool White (4000K-5000K) for kitchens and offices to stay alert. Warm up dining rooms: Warm White (2700K-3000K) will make your meals more inviting. Layer your lighting: Use multiple bulbs with different color temperatures for different areas of the room. The Bottom Line Lighting is one of those things you stop noticing when it’s right, and can’t stop noticing when it’s wrong. I hope this made the cool white vs daylight and warm white vs soft white decisions feel less confusing. The Kelvin scale isn’t complicated once you connect it to how a room gets used. Warm temperatures belong where you rest. Cool temperatures belong where you work. Getting that balance right makes a genuine difference to how each room feels day to day. You don’t need to overhaul everything at once; start with one room. If this helped, share it with someone who’s been living under the wrong bulb for too long. Drop any questions in the comments below. Frequently Asked Questions Can color temperature affect eye strain? Yes. Cool and daylight bulbs can cause eye strain during long exposure. Warmer temperatures are significantly gentler on the eyes over extended periods. Do LED bulbs accurately maintain their Kelvin rating over time? Most quality LEDs do. Cheaper bulbs can shift slightly warmer as they age, which is worth considering when buying budget options. What color temperature works best for content creation? Daylight (5000K–6500K) is the standard choice. It renders colors most accurately and closely matches the natural light that cameras are typically calibrated for. Does color temperature change when you dim a bulb? Most standard LEDs maintain their Kelvin rating at every dim level, but warm-glow dimmable bulbs shift toward warmer tones as brightness drops. What color temperature is best for children’s rooms? Warm white (2700K–3000K) for sleeping areas. A slightly cooler option around 3500K works for study or play zones within the same room. Can you mix cool white and daylight bulbs in the same room? Technically, yes, but the color gap creates visual tension. Stick to one temperature for main lighting and use the other only in separate zones.
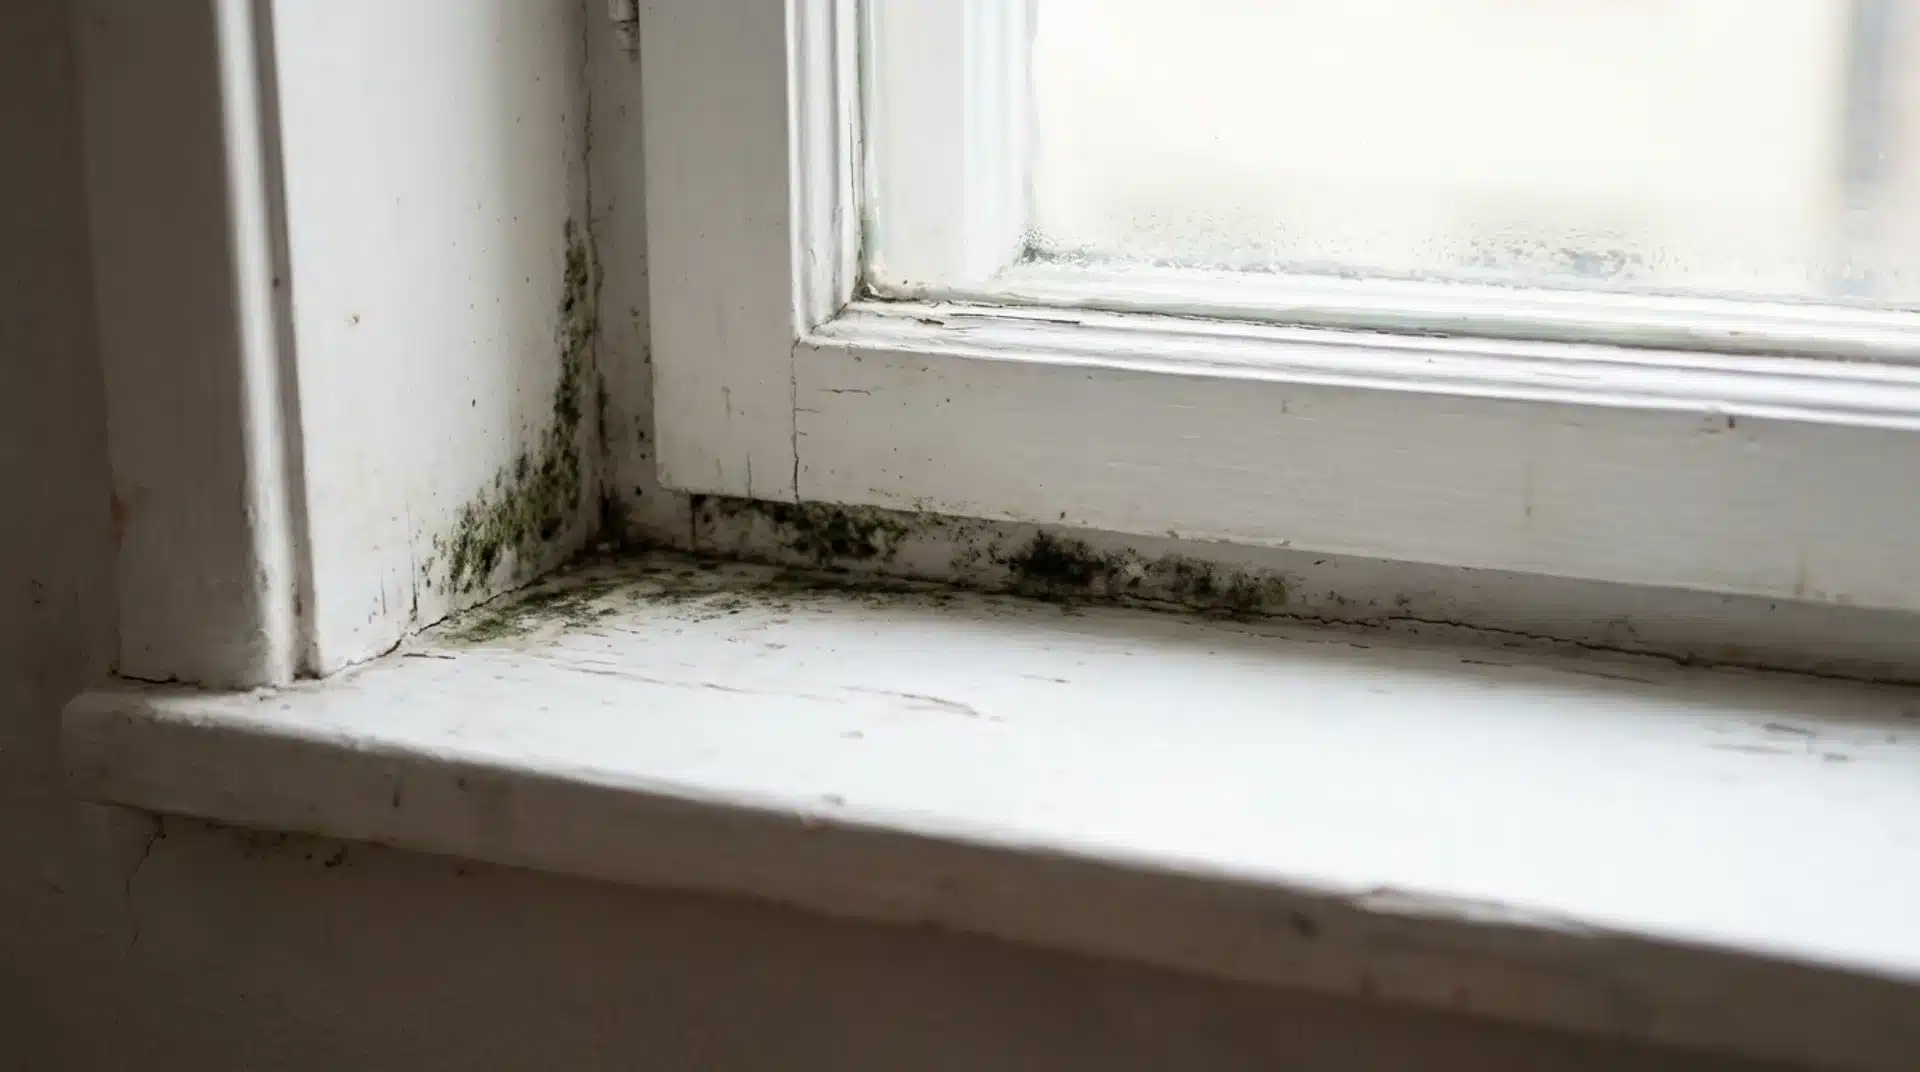
Home projects have a way of revealing problems you did not plan for, and mold on window sills is one of the most common. In my home, it appeared after a wet winter on a north-facing window that had gone unchecked for months. It looked minor at first, but left alone, it spread quickly and became far harder to shift. As someone who handles most home maintenance personally, the key was finding methods that work without expensive products or specialist help. Today, I’ll cover the causes, the health risks, the most effective cleaning methods, and prevention steps that hold up, all practical enough to take on yourself. What Is Mold on Window Sills? Black mold on window sills is a fungal growth that develops when moisture accumulates on or around window surfaces and is left undisturbed long enough for spores to take hold. It typically appears as black, green, grey, or white patches and carries a distinct musty odor that worsens in enclosed spaces. Window sills are a prime target because they sit directly where warm indoor air meets cold glass surfaces, creating the condensation that mold needs to survive. Mold does not just sit on the surface. On porous materials like wood and drywall, it sends hyphae (root-like structures) deeper into the material, which is why surface wiping alone rarely solves the problem long-term. Not all black mold is the toxic Stachybotrys chartarum; most window sill mold is allergenic rather than toxigenic, but any indoor mold warrants prompt removal regardless of species. Why Does Mold Keep Growing on Window Sills? Window sills are highly prone to moisture buildup, which allows mold to return repeatedly. The main cause is condensation, where warm indoor air meets cold glass, forming water droplets on the sill. This is more common in winter, especially in areas with high humidity, like kitchens and bathrooms. Poor ventilation traps damp air near windows, while older or poorly insulated windows increase condensation. Hidden leaks, such as cracked caulking or loose seals, can also let moisture in unnoticed, prolonging the problem. Beyond condensation, a few lesser-known factors contribute: Window plants: increase local humidity through watering and transpiration Dust buildup: provides food for mold growth Curtains or blinds: trap cold, damp air near the glass HVAC airflow: blowing warm air toward windows increases condensation cycles Fixing the moisture source, not just cleaning, is the key to stopping mold from coming back. How to Clean Mold from Window Sills The right cleaning method depends on how severe the growth is and what surface you are working with. These four solutions cover everything from light early-stage patches to heavy, established mold. Method 1: White Vinegar Solution White vinegar is the gentlest starting point for light or early-stage mold. The natural acidity cuts through surface growth without damaging painted or wooden window sills, and it is safe to use in any room without heavy ventilation requirements. Ingredients: Undiluted white vinegar, spray bottle, stiff-bristled brush, rubber gloves, microfiber cloth Step 1: Pour undiluted white vinegar into a spray bottle. Diluting it reduces the acidity needed to kill mold Step 2: Spray directly and generously onto the mold patch, ensuring full coverage Step 3: Leave it to sit for a minimum of 10 minutes without wiping Step 4: Scrub firmly with a stiff-bristle brush using small circular motions Step 5: Wipe away residue with a damp cloth and dry the surface completely Method 2: Hydrogen Peroxide Spray Hydrogen peroxide works well on painted wood and porous surfaces where bleach risks stripping the finish or causing discoloration. It effectively handles moderate mold growth, leaves minimal residue after rinsing, and produces far fewer fumes than stronger solutions. Ingredients: 3% hydrogen peroxide, water, spray bottle, scrub brush, rubber gloves, microfiber cloth Step 1: Mix equal parts 3% hydrogen peroxide and water in a spray bottle Step 2: Apply the mold patch to the affected area, covering the entire area Step 3: Leave the solution to sit for 10–15 minutes Step 4: Scrub with a brush, paying close attention to grooves or textured areas Step 5: Wipe clean with a damp cloth and dry the sill fully before closing the window Method 3: Baking Soda Paste Baking soda paste is best suited for stubborn staining that has set into the surface. It is fully non-toxic and safe in households with children or pets, and it draws out residual moisture from the sill while it works. Ingredients: Baking soda, water, mixing bowl, stiff brush or old toothbrush, damp cloth Step 1: Mix baking soda with a small amount of water in a bowl to form a thick, spreadable paste Step 2: Apply the paste over the stained area, pressing it in slightly for better contact Step 3: Leave it to sit for 5–10 minutes Step 4: Scrub with a brush or toothbrush, working the paste into the surface Step 5: Rinse away completely with a damp cloth and dry the area well Method 4: Bleach Solution Bleach is the strongest option here and should be used only on non-porous surfaces, such as tile, sealed stone, or plastic frames. Reserve it for heavy, established mold growth where gentler methods have not worked. Always use full protective gear with windows fully open. Important: Bleach kills surface mold effectively but cannot penetrate porous materials. On wood or drywall, it removes the color while leaving the root structures intact, so mold regrows quickly. Never mix bleach with ammonia, vinegar, or any other cleaner. The combination produces toxic gases. Ingredients: Household bleach, water, mixing container, rubber gloves, safety goggles, N95 mask, cloth Step 1: Mix one part bleach with ten parts water in a container Step 2: Apply using a cloth, never spray directly, as fumes concentrate quickly in enclosed spaces Step 3: Leave the solution on the surface for 10 minutes Step 4: Scrub the area firmly, then rinse with clean water Step 5: Dry the surface completely and keep the window open for at least an hour after finishing After every clean: Dry the sill thoroughly with a fresh cloth. Leftover moisture restarts the growth cycle fast. Where possible, leave the window open for at least an hour so the surface airs out fully. Which Method Is Right for You? Mold Severity Surface Type Best Method Light / early-stage Wood, painted, any White Vinegar Moderate Painted wood, porous Hydrogen Peroxide Stubborn staining Any (non-bleach-sensitive) Baking Soda Paste Heavy / established Tile, sealed stone, plastic/vinyl only Bleach Solution Do not mix methods. Never combine vinegar with bleach or hydrogen peroxide; combining vinegar with hydrogen peroxide creates a corrosive peracetic acid, and combining vinegar with bleach releases toxic chlorine gas. Use one method per session. Long-Term Habits to Keep Mold Away for Good Keeping mold away permanently means addressing the conditions that allow it to return: moisture, airflow, and surface protection. These are the habits worth building into a regular routine: Use a dehumidifier to keep indoor humidity between 30–50%, below this range, mold spores struggle to settle on any surface Reseal window frame caulking annually, even small cracks quietly let water in long before any visible damage appears Upgrade to double glazing or apply insulating film to reduce the temperature difference that causes condensation on the glass Apply mold-resistant primer and semi-gloss paint after any deep clean. This creates a surface that actively repels moisture rather than absorbing it Pull heavy curtains back during the day to stop fabric trapping moisture directly against the glass overnight From my experience, these actions slot into a routine without demanding much attention. No single habit does everything, but stacking two or three of them together, particularly humidity control and window sealing, removes the core conditions mold depends on to grow back. Black Mold vs. White Mold: What’s the Difference? Not all window sill mold behaves the same way. The type present affects the severity of the health risk, the cleaning method required, and whether professional help is needed. Here are the differences: Factor White Mold Black Mold Appearance Powdery, flat, white or grey patches Dense dark patches, black, dark green, or brown Growth stage Early stage, surface-level Established, penetrates deeper into the material Health impact Mild irritation in sensitive individuals Stronger respiratory symptoms with prolonged exposure Cleaning method Basic solutions, vinegar or baking soda Stronger solutions are required, such as hydrogen peroxide or bleach Professional help Rarely needed for small patches Recommended for large, recurring, or persistent patches How to Tell if It Might Be Toxic Black Mold (Stachybotrys chartarum)? Toxic black mold has a distinctly slimy or wet texture, a strong earthy smell even when dry, and typically requires continuous moisture exposure (72+ hours) and cellulose-rich materials like drywall or untreated wood to establish. If the growth is on a vinyl or glass surface, it is almost certainly not Stachybotrys — that species needs porous organic material to take hold. If you’re unsure, contact a professional for identification before disturbing the colony. If the patch is large, keeps returning after cleaning, or is visibly dark and dense, professional remediation is the safer option over attempting removal without proper equipment. Health Risks Worth Taking Seriously Mold on windows is not simply unpleasant to look at. Exposure to household mold over time can cause a range of health issues, and the severity depends on the mold type, the length of exposure, and individual sensitivity. What prolonged exposure can lead to: Respiratory irritation: persistent coughing, wheezing, and shortness of breath in enclosed rooms Allergic reactions: sneezing, itchy eyes, and a constantly runny nose that does not respond to typical remedies Asthma flare-ups: mold spores are a well-documented asthma trigger, particularly in children and elderly residents Headaches and fatigue: often linked to consistently poor indoor air quality Skin irritation: direct contact with active mold patches can cause redness or itching on sensitive skin The symptoms above are easy to dismiss as seasonal allergies or general fatigue, which is why mold exposure often goes unaddressed. If symptoms consistently worsen at home but clear up elsewhere, the air quality in your space is worth investigating. When to Seek Professional Help Most window sill mold responds well to household cleaning methods. However, certain situations call for professional assessment. If the affected area is larger than ten square feet , the mold has likely spread into the wall structure where surface cleaning cannot reach. Recurring mold that returns within weeks of cleaning, even after addressing moisture sources, points to a hidden leak or structural dampness requiring proper diagnosis. Any growth identified as black mold or Stachybotrys should be handled by a certified specialist, as disturbing large colonies without containment spreads spores rapidly. If household members are experiencing persistent respiratory symptoms that ease up away from home, professional remediation is worth prioritizing over repeated DIY attempts. When hiring a mold remediation company, look for professionals who use containment barriers and HEPA filtration during removal. Conduct post-remediation air testing to confirm clearance, and identify and seal the moisture source, not just remove the visible mold. A quote that skips the moisture diagnosis is one worth questioning. Frequently Asked Questions Is it safe to stay in a room with window sill mold? Short exposure is usually tolerable for healthy adults, but long-term presence can affect air quality. Children, the elderly, and individuals with breathing issues should avoid prolonged exposure. Can you just paint over the window sill mold? Painting over mold traps it beneath the surface, allowing it to continue growing. It usually reappears quickly. Always clean and treat the surface fully before applying any primer or paint. How often should window sills be cleaned? Clean window sills every two to four weeks. During colder or humid periods, check more often and remove moisture early to prevent buildup and visible mold development. Does vinegar or bleach work better for mold? Vinegar works well on wood and preserves finishes, but needs time. Bleach suits non-porous surfaces but doesn’t penetrate deeply. For wood, peroxide or baking soda paste is more effective. How do you stop mold from coming back after cleaning? Fix the moisture source first, such as sealing gaps or improving insulation. Keep humidity low, remove condensation regularly, and use mold-resistant coatings to reduce future growth. Can mold on window sills spread to walls? Mold spores can travel and settle on nearby surfaces. On materials like drywall, growth can extend inside walls, making recurring issues a sign that deeper inspection is needed. Final Thoughts Dealing with mold on window sills does not have to be a recurring problem. With the right cleaning method matched to the severity of the growth and a consistent approach to moisture control, it becomes manageable rather than dreaded. I think the homes that stay clear treat this as an ongoing maintenance routine, not a one-time crisis clean. Address the moisture source, apply the appropriate solution, protect the surface afterward, and check in regularly. That combination handles the problem at every stage, before it starts, while it is present, and long after it has gone. Hope your black mold says adios to you forever. Drop a comment below and let me know which method worked best for you.
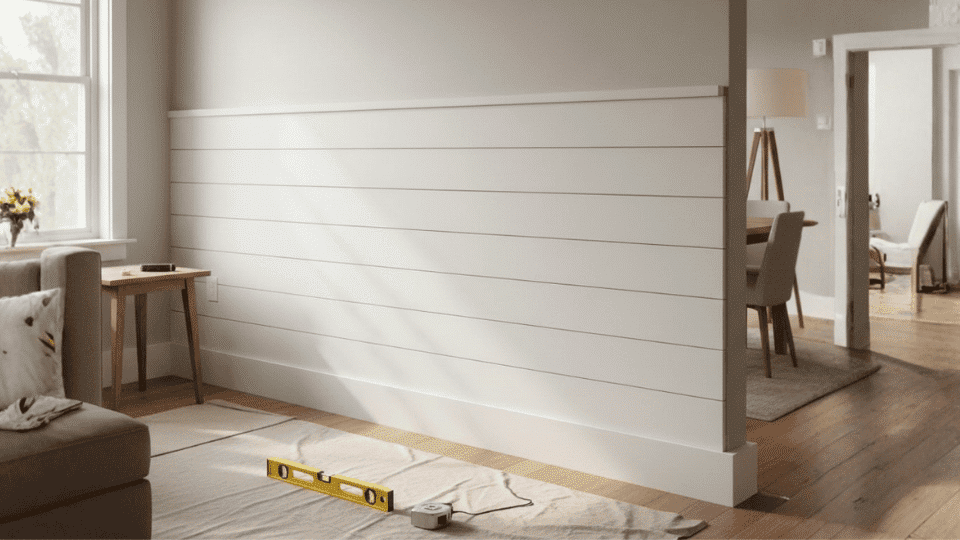
If you want to add a touch of rustic style to your home, a shiplap half wall is a great choice. If you’re updating your bathroom, kitchen, or living room, installing a shiplap half wall can bring warmth and character to any space. It’s also a clever way to add visual interest while choosing the right colors to maximize a small space. I’ll guide you through the step-by-step process of installing a shiplap half wall. You’ll get all the helpful tips you need to make sure your DIY project goes smoothly. From gathering materials to the final touches, I’ll cover everything. By the end, you’ll feel ready to take on this project with confidence. Shiplap Half-Wall Basics You Should Know A shiplap half wall is a stylish design feature that covers the lower portion of a wall with shiplap boards, leaving the upper part exposed. It’s a popular choice for adding texture and character to rooms like kitchens, bathrooms, or entryways. This design is a staple in rustic cabin-inspired bathroom designs while maintaining a clean, modern feel. Shiplap half walls can also serve as functional dividers in larger spaces, offering both aesthetic appeal and structure. They are easy to install, making them a great DIY project for those looking to refresh a room’s style quickly. Step-by-Step Guide to Installing a Shiplap Half Wall Now that you know what a shiplap half wall is, let’s dig into the installation process. I’ll walk you through each step so you don’t feel stuck at any point. You can follow along and build your shiplap wall with more confidence and fewer mistakes Gather Your Materials Getting everything ready before you start saves time and keeps your work smooth from beginning to end. Shiplap boards (usually 6-inch wide) Nails or screws Level Saw or miter saw Measuring tape Pencil Caulk Trim for edges Safety goggles and ear protection Having tools within reach helps you stay focused and avoid stopping halfway through the installation process. Taking a few minutes to check your materials also reduces mistakes and makes the whole setup easier and safer. Step 1: Measure and Mark the Wall Start by measuring the height of your half wall. Typically, this is between 36 and 42 inches from the floor, but adjust based on your room’s design. Use a pencil to mark the height all around the room, then use a level to ensure the lines are even. Next, mark the studs along the wall using your stud finder to help you attach the shiplap securely. Step 2: Cut the Shiplap to Size Cut the shiplap boards to the required lengths using a saw. If you’re cutting across the grain, a miter saw will give you the cleanest cuts. Double-check your measurements before cutting to ensure each board fits perfectly. For corners or tricky areas, like around light switches or outlets, use a jigsaw to make the necessary cuts. Always measure twice and cut once! Step 3: Install the First Board Once you have your first board ready, position it at the bottom of your marked line and check for level. It’s crucial to make sure the first board is level since this will affect the alignment of all the following boards. Nail or screw it into place, securing it along the studs. Use a pneumatic nail gun or a hammer and nails to fasten it firmly to the wall. Step 4: Continue Installing the Boards Start installing the next shiplap board, ensuring it fits snugly against the previous one. As you go, keep checking each board with a level to ensure the shiplap stays straight. You can either nail the boards into place through the tongue or use nails to fasten them from the side, depending on the type of shiplap you’re using. Keep the boards aligned with your marked line. Step 5: Finish with Trim and Caulk Once all the shiplap boards are in place, it’s time to finish the edges. Add trim or baseboards around the half wall to cover any rough edges. Use caulk to fill any visible gaps between the boards and along the trim. This will give your shiplap half-wall a clean, polished look. Finally, paint or stain the shiplap if desired, to match your home’s décor and give it that perfect finishing touch. How to Prep Your Wall Before Installing Shiplap From my experience, prep is where most people go wrong. If you take a few minutes to check your wall properly, you’ll avoid problems later and get a cleaner final result. Uneven or damaged drywall: Shiplap doesn’t hide major bumps or holes — it follows the contour of the wall beneath it. Patch and sand any significant imperfections first. Existing baseboards: You’ll need to decide whether to remove them or work around them. Removing baseboards gives a cleaner result; working around them requires precise cuts at the bottom row. Outlets and switches: Turn off the circuit before working near them. You may also need to add outlet extenders once the shiplap adds thickness to the wall. Standard outlet extenders (about $2 each at any hardware store) handle this easily. Moisture or mold: If you’re installing in a bathroom or kitchen, inspect for any moisture damage behind the drywall first. Installing shiplap over a wet wall traps the problem Types of Shiplap: Which One Should You Use? I’ve tried different types over time, and you’ll notice each one works better in certain spaces. This will help you pick the right option based on your needs and budget. Type Best For Avg. Cost (per sq ft) Notes Real pine shiplap Authentic farmhouse look $1.50–$3.00 May need priming; can warp in humid rooms MDF shiplap boards Painted finishes, dry rooms $0.80–$1.50 Budget-friendly; not suitable for bathrooms Primed pine boards (DIY shiplap) Custom sizing, tight budgets $1.00–$2.00 Rip 1×6 or 1×8 boards yourself for the gap effect PVC/composite shiplap Bathrooms, laundry rooms $2.00–$4.00 Moisture-resistant; more expensive I used primed pine boards for my living room project; they’re easy to paint and hold up well. For my friend’s bathroom remodel, I recommended PVC shiplap instead, and it was the right call. Moisture warped a couple of her pine test pieces within a few weeks Benefits of Installing a Shiplap Half Wall I like this upgrade because it adds both style and function without much effort. You’ll see how it improves your space while staying easy to maintain and use daily. Adds Rustic Charm and Character: Shiplap brings a rustic, timeless charm to any room, adding texture and depth while complementing a range of interior styles, from modern to farmhouse. Affordable and Easy Update: Shiplap is a cost-effective, DIY-friendly option that requires minimal tools, offers great value, and transforms your space quickly without breaking your budget. Acts as a Functional Divider: A shiplap half wall provides privacy while maintaining an open feel, helping to define spaces in open-concept areas without closing them off entirely. Customizable Finishes: Shiplap is highly customizable, allowing you to paint or stain it to match your decor, offering endless style options to suit your home. Low Maintenance and Durability: Shiplap is easy to maintain, durable, and resistant to wear, making it an ideal choice for high-traffic areas like kitchens and bathrooms. In conclusion, a shiplap half wall offers a stylish, affordable, and low-maintenance upgrade, making it a great addition to any room in your home. Common Mistakes to Avoid I’ve seen small mistakes ruin the final look, even after good effort. If you watch out for these, you’ll save time, avoid rework, and get a much better finish. Improper Measuring: Not measuring properly can lead to uneven boards or gaps between them, ruining the final look. Excessive Adhesive: Overloading with too much adhesive can cause boards to shift or leave unsightly marks on the wall. Skipping Preparation Steps: Skipping steps like marking studs or leveling the first board can lead to crooked walls and difficulty with installation. Not acclimating to the wood: Wood expands and contracts with temperature and humidity. Let your boards sit in the room where they’ll be installed for 24–48 hours before cutting and nailing. Skipping this step, especially in humid climates, can cause boards to buckle or gap after installation. Forgetting outlet extenders: Shiplap adds 3/4 inch or more of thickness to your wall. If existing outlets are flush with the original wall, they’ll now be recessed. Outlet box extenders are cheap and easy to install; forgetting them is a code issue and a safety hazard. Using the wrong caulk: Use paintable, flexible latex caulk — not silicone. Silicone can’t be painted and doesn’t grip painted surfaces well. To avoid these mistakes, take your time, double-check measurements, and follow each step carefully. Proper preparation ensures a smooth and successful installation. Final Thoughts Now that you have a full guide to installing a shiplap half wall, you should be ready to take on your own project. With the right materials and a little patience, you can transform your space in no time. Remember, it’s all about measuring twice and cutting once, so take your time and enjoy the process! Whether you’re adding shiplap to your living room or creating a stylish accent in your kitchen, this project will give your home a charming, timeless look. If you have any questions or need help along the way, feel free to reach out. I’m here to help! Ready to get started? Grab your tools and make your shiplap dream wall a reality today! Frequently Asked Questions Do I need to remove baseboards before installing shiplap? Not necessarily, but removing them gives the cleanest result. If you leave them in place, you’ll need to scribe or notch your bottom board to fit around them. Most DIYers find it easier to pop the baseboards off, install the shiplap, then reinstall the baseboards at the bottom. Can shiplap go directly over drywall? Yes. You don’t need to remove drywall; shiplap installs directly over it, nailed into the studs behind. Just make sure your drywall is in good condition with no major moisture damage. What’s the right gap between shiplap boards? Typically 1/16 to 1/8 inch. A nickel is a common spacer; it’s just the right thickness to create that signature shadow gap. Some people prefer a tighter fit (using a penny) for a more modern look. Should I paint shiplap before or after installing it? Both approaches work. Painting before installation makes it easier to get clean coverage on the edges and the back. But if you’re painting after, you have better control over consistency across the whole wall. I personally paint after installation, one coat of primer, two coats of finish paint, and caulk the gaps last.
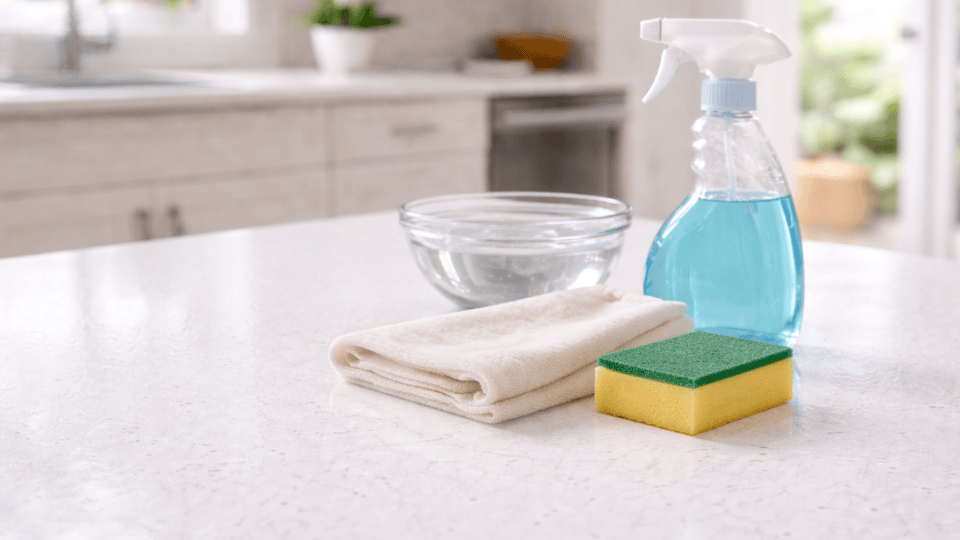
Quartz countertops have a way of making a kitchen look effortlessly clean, until one wrong product leaves a dull, streaky mess that will not budge. Knowing how to clean quartz countertops the right way is what separates a surface that stays beautiful for years from one that quietly deteriorates. The good news is that quartz is actually very easy to maintain when you know what to do. Here, I will show you exactly how to clean quartz countertops step by step. You will learn the safest cleaning method, the best cleaners to use, and what products you should avoid. I will also explain how to remove stains, grease, and sticky spills without harming the surface. By the end, you will know how to keep your quartz countertops clean, shiny, and looking great for years. Why Quartz Countertops Need Special Cleaning? Quartz countertops are not the same as natural stone, like granite or marble . They are made from crushed quartz minerals, mixed with resins and pigments. This mix creates a strong, smooth, non-porous surface. Because of this structure, quartz does not readily absorb liquids, which helps prevent stains and bacterial buildup. However, the resin that holds the material together can react to harsh cleaners or strong chemicals. That is why gentle cleaning methods work best for quartz surfaces. Engineered quartz contains about 90% natural quartz and 10% polymer resins and pigments. The resin layer keeps it non-porous but also makes it sensitive to certain products. While quartz is durable and stain-resistant, it can still lose shine or become damaged if you use rough scrubbers or strong cleaning products. Using mild cleaners helps keep the surface clean and protected. One more thing worth knowing: unlike granite or marble, quartz never needs to be sealed. The non-porous resin surface makes sealants unnecessary, and applying one can actually leave uneven residue as it wears off in high-traffic areas. What You Will Need to Clean Quartz Countertops You do not need anything fancy to keep quartz countertops looking their best. Most of these items are already sitting in your kitchen or bathroom: Dry cloth, paper towel, or soft brush Small bowl or sink with warm water Mild dish soap Soft cloth or non-abrasive sponge Microfiber cloth or soft towel These are simple, everyday items that get the job done without risking any damage to your surface. Once you have everything ready, the actual cleaning process is quick and straightforward: How to Clean Quartz Countertops: Step-By-Step Cleaning Quartz Does Not Require Complicated Products or Tools. a Simple Routine Can Keep the Surface Fresh and Safe. Follow These Steps to Clean Your Countertops the Right Way without Damaging the Finish: Step 1: Clear the Countertop Surface Start by Removing Crumbs, Dust, and Loose Debris from The Countertop. You Can Use a Dry Cloth, Paper Towel, or A Soft Brush to Sweep Everything Away. This Step Helps Prevent Scratching While You Clean. Small Particles Can Act Like Grit when Rubbed Across the Surface. Clearing the Counter First Makes the Rest of The Cleaning Process Safer and More Effective. Step 2: Use Warm Water and Mild Dish Soap Fill a Small Bowl or Sink with Warm Water and Add a Few Drops of Mild Dish Soap. Dip a Soft Cloth or Sponge Into the Mixture and Gently Wipe the Countertop. Dish Soap Works Well Because It Removes Grease, Food Spills, and Everyday Dirt. Avoid Strong Cleaners, as they can, over time, affect the Resin Used in Quartz Surfaces. Step 3: Wipe with A Soft Cloth or Sponge Use a Soft Cloth or Non-Abrasive Sponge to Wipe the Surface Evenly. Move in Gentle Circular Motions so The Soap Can Lift Dirt and Residue. Avoid Using Rough Scrubbers or Scouring Pads Because They May Dull the Finish. Soft Materials Clean the Surface Effectively While Keeping the Countertop Smooth and Shiny. Step 4: Dry with A Microfiber Cloth Finish by Drying the Countertop with A Microfiber Cloth or Soft Towel. Drying Helps Prevent Water Spots and Streaks. Microfiber Cloths Work Well Because They Absorb Moisture and Leave the Surface Smooth. Taking a Minute to Dry the Counter Also Helps Keep the Shine and Gives Your Kitchen a Clean, Polished Look. How to Remove Tough Stains from Quartz Countertops While everyday soap and water work for most situations, some stains need a more targeted approach. The table below outlines the safest and most effective methods for common tough stains. Stain Type What to Do When to Use This Method Dried-On Food or Gum Use a plastic scraper or a credit card edge at a low angle. Clean residue with warm soapy water. Avoid metal tools. Use this method when residue has hardened and cannot be wiped away easily. Coffee, Wine, or Tea Spray a mix of equal parts rubbing alcohol and water. Let it sit 1–2 minutes, then wipe with a soft cloth. Best for pigmented stains that leave behind visible discoloration. Grease or Cooking Oil Apply dish soap directly, wait 30 seconds, and wipe clean. Use a stone-safe cleaner for heavy buildup. Ideal for oily spots that feel slick or leave a dull film on the surface. Permanent Marker or Ink Dab rubbing alcohol with a soft cloth. Rinse afterward. Repeat if needed, but avoid harsh solvents. Use this approach for ink marks or dye-based stains that don’t come off with basic cleaning. By following these methods, you can remove tough stains effectively while preserving the finish and durability of your quartz countertops. Tips to Keep Quartz Countertops Looking New Quartz Countertops Can Stay Smooth and Bright for Many Years with Simple Daily Habits. Small Preventive Steps Help Protect the Surface and Reduce the Need for Heavy Cleaning. Wipe Spills Quickly: Clean Spills as Soon as They Happen to Prevent Stains or Sticky Residue. Quick Wiping Also Stops Liquids from Drying on The Surface and Leaving Marks. Use Cutting Boards when Preparing Food: Always Place a Cutting Board on The Countertop While Chopping or Slicing. This Helps Prevent Scratches and keeps the Quartz Surface Smooth and damage-free. Use Trivets for Hot Pots and Pans: Place Hot Cookware on Trivets or Heat Pads Instead of Directly on The Countertop. High Heat Can Affect the Resin and Cause Surface Damage. Avoid Dragging Heavy or Rough Objects: Sliding Heavy Appliances, Pots, or Containers Across the Surface May Create Scratches. Lifting Items Instead of Dragging Them Helps Protect the Countertop Finish. Clean the Surface Regularly: Regular Cleaning with Warm Water and Mild Dish Soap Helps Remove Grease, Crumbs, and Daily Dirt. Consistent Cleaning Keeps Quartz Countertops Fresh and Well-Maintained. Use coasters under glasses: condensation from cold drinks can leave mineral rings over time that are difficult to remove. Limit direct sun exposure where possible: prolonged UV rays can gradually dull or fade the quartz surface over time. Following These Simple Habits Helps Protect Your Quartz Countertops from Damage. A Little Daily Care Can Keep the Surface Looking Clean, Smooth, and Well-Maintained for Years. How to Disinfect Quartz Countertops Safely Quartz countertops are easy to keep clean, but disinfecting them the right way matters just as much as regular cleaning. The good news is that you do not need harsh chemicals to get the job done effectively: Use a diluted rubbing alcohol solution or quartz-safe disinfectant wipes for safe and effective germ removal. Lightly spray or wipe the surface, then use a soft cloth to spread the disinfectant evenly across the countertop. Let it sit for a short moment before wiping clean; this gives the disinfectant time to work properly. Avoid bleach, ammonia, and other strong chemicals, as they can break down the quartz resin and dull the finish over time. In my experience, disinfecting after food prep makes the biggest difference in keeping countertops hygienic long term. A simple routine like this takes less than a minute and keeps your surface looking as good as the day it was installed. Lysol disinfectant sprays and wipes that do not contain harsh chemicals are generally safe for quartz. Always check the label and rinse the surface with clean water after use. Products containing bleach, ammonia, or high concentrations of alkaline ingredients should always be avoided. Cleaning Products You Should Never Use on Quartz Quartz countertops are strong, but some cleaners can still damage the surface. Knowing what to avoid helps protect the finish and keeps your countertops looking smooth and clean. Product to Avoid Why to Avoid Common Examples Safe Alternative Abrasive Scrubbers Scratches the surface and dulls the finish Steel wool, scouring pads Soft cloth or non-abrasive sponge Oven Cleaners Too harsh, leaves permanent marks Easy-Off, heavy-duty degreasers Mild dish soap and warm water Vinegar and Acidic Cleaners Breaks down resin and reduces shine Vinegar, lemon-based sprays pH-neutral stone cleaner High-Alkaline Cleaners Causes fading and uneven surface areas Heavy-duty bathroom cleaners Mild soap and water Bleach and Ammonia-Based Cleaners Strips resin finish and dulls the surface Windex, concentrated bleach Diluted rubbing alcohol Paint Removers and Solvents Etches and permanently discolors quartz Nail polish remover, acetone Rinse immediately with clean water Wax and Polish Products Builds up residue and dulls appearance Furniture polish, countertop wax Dry microfiber cloth only Avoiding These Products Helps Your Quartz Countertops Last Longer. Using Mild Soap, Warm Water, and Soft Cloths Is Usually the Safest Way to Clean Them. Common Quartz Countertop Cleaning Mistakes to Avoid Taking care of quartz countertops is simple, but small cleaning mistakes can slowly affect their look and durability. Being aware of these habits helps you maintain a smooth and polished surface for years. Using harsh chemicals: Strong cleaners like bleach or ammonia can slowly break down the resin that binds quartz, leading to dull spots and long-term surface damage. Scrubbing with rough materials: Abrasive pads or steel wool can leave tiny scratches on the surface, making the countertop lose its smooth finish and natural shine over time. Letting spills sit too long: Liquids like coffee, wine, or oil can seep in and leave stains or sticky residue if not cleaned up quickly and properly. Placing hot items directly: Putting hot pots or pans on quartz can damage the surface finish and may even cause discoloration due to sudden heat exposure. Ignoring regular cleaning: Skipping daily wipe-downs allows dirt and grime to build up, making the countertop harder to clean and maintain later. Using too much cleaner: Overuse of cleaning products can create a cloudy film on the surface, detracting from the clean, polished look of quartz countertops. By avoiding these common mistakes and sticking to gentle cleaning habits, you can keep your quartz countertops looking fresh, clean, and well-maintained for a long time. Cleaning Quartz Countertops in the Bathroom The same rules apply in bathrooms, but a few specific situations come up more often there. Toothpaste, makeup, and hair products can all leave residue that builds up if not wiped regularly. For toothpaste and soap scum, warm soapy water and a soft cloth work well. For makeup stains or foundation smudges, a small amount of rubbing alcohol on a soft cloth lifts the pigment effectively without harming the surface. Nail polish remover (acetone) should never be used on or near quartz, as it can permanently etch the resin. If nail polish lands on the countertop, remove as much as possible with a plastic scraper, then treat the residue with a quartz-safe cleaner. Bathroom counters also tend to stay damp longer than kitchen counters. Wiping the surface dry after use prevents water spots from hard minerals building up over time, which become increasingly difficult to remove the longer they sit. Frequently Asked Questions Can you use vinegar on quartz countertops? No, it is best to avoid vinegar on quartz countertops. Vinegar is acidic and can slowly damage the resin that holds the surface together, causing dullness over time. Is baking soda safe for quartz? Yes, baking soda can be used occasionally for tough stains. However, it should be applied gently as a paste and not scrubbed aggressively to avoid scratching the surface. How often should you clean quartz countertops? You should wipe quartz countertops daily with mild soap and water to remove dust, spills, and grease. Regular cleaning helps maintain shine and prevents buildup. Can quartz countertops stain permanently? Quartz is stain-resistant but not completely stain-proof. If spills like coffee, wine, or oil are left too long, they may leave marks. Cleaning quickly helps prevent permanent stains. Can a scratched quartz countertop be repaired? Minor scratches can sometimes be buffed out by a professional. Deeper scratches are harder to fix and usually require expert repair, as DIY methods can worsen the surface. Final Shine Keeping quartz countertops clean does not have to feel complicated. I always tell people that a simple routine works best. Warm water, mild soap, and a soft cloth can handle most messes you see every day. When spills happen, wiping them quickly can prevent stains and keep the surface looking fresh. It also helps to avoid harsh chemicals, rough scrubbers, and strong cleaners that can dull the finish over time. A few simple habits can protect your countertops and make cleaning much easier. Once you understand how to clean quartz countertops, maintaining them becomes simple. If this guide helped you, consider sharing it with someone who wants an easier way to care for their kitchen surfaces.

