

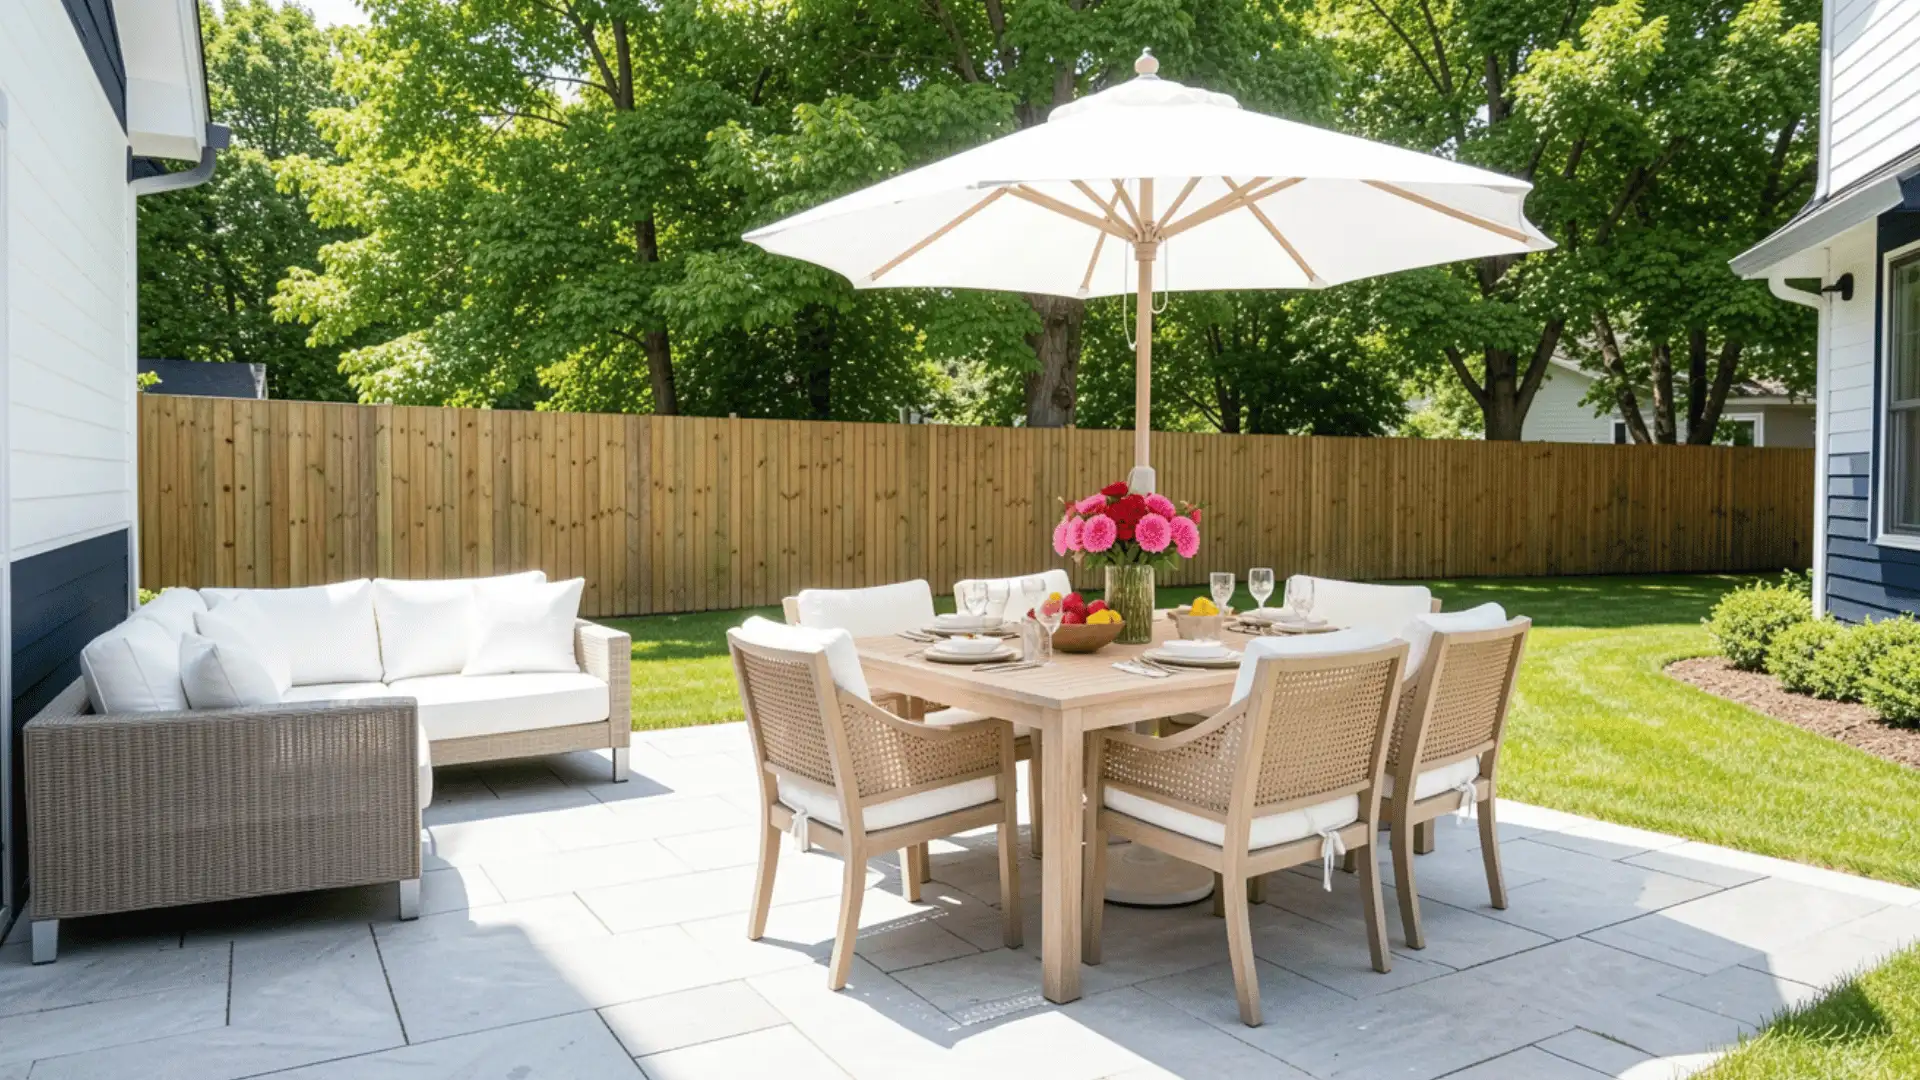
Does your backyard feel unfinished, even when everything is technically there? I’ve had that feeling too, and that’s exactly why outdoor deck ideas matter more than most people think. You want a space that looks good, feels comfortable, and actually fits the way you live, but a lot of deck inspiration is either too expensive, too impractical, or too generic to use. That’s where the right ideas make a difference. A thoughtful deck can give you a place to relax, host, eat, or simply enjoy being outside more often. Here, you’ll find creative setups, garden-friendly designs, styling tips, material guidance, and budget ideas to help you shape a deck that feels right for your home. The Importance of Outdoor Decks A deck is more than just a wooden platform outside your home; it’s an extra living space. Think of it as another room, but with fresh air and sunshine. A well-built deck gives you a place to eat, relax, and spend time with family and friends outside. It also makes your home look more beautiful and can even raise its value. According to Remodeling Magazine’s Cost vs. Value Report, a wood deck addition recoups around 50–75% of its cost at resale, making it one of the more financially sound outdoor improvements you can make Buyers love a great outdoor space! Beyond looks and money, a deck simply makes life better. You get to enjoy nature without giving up your comfort. If you’re sipping your morning coffee or hosting a summer barbecue, your deck becomes the heart of your outdoor lifestyle. It connects your home to your garden in the most natural, enjoyable way possible. Note: One thing I tell every client before we sketch a single line: think about how you’ll use it at 7 a.m., at noon, and at 9 p.m. A deck that only works for summer evening entertaining is a deck you’ll use 12 times a year. Design for all three moments, and you’ll use it year-round Innovative Garden Deck Ideas to Blend with Nature Create a seamless connection between your deck and garden with ideas that combine greenery, structure, and natural elements. If you love the open-concept feel of an interior barndominium, these creative ways to blend your deck into your outdoor surroundings will help you achieve that same airy flow. 1. Deck with Succulent Rock Garden Surround your deck with a rock garden packed with colorful succulents for an effortlessly modern look. Succulents are low-maintenance, drought-tolerant, and come in stunning shapes and shades. The rocks add texture and structure, creating a clean, polished border. This combo works great for busy homeowners who want beautiful outdoor curb appeal without spending hours on weekly garden upkeep. I installed this exact border for a client in a dry-summer climate who didn’t want irrigation. Two years in, the rockscape still looks immaculate with zero watering beyond the first season. 2. Deck with Raised Flower Beds and Pathways Build raised flower beds along the sides of your deck and connect them using stone or gravel pathways. This creates a structured, organized garden design that feels intentional and stylish. The pathways guide guests naturally through the space, while the flower beds add bursts of seasonal color. It’s a simple way to make your deck feel like part of a larger, well-planned landscape. 3. Deck with Outdoor Bathtub and Garden Views Upgrade your deck into a private spa retreat by adding an outdoor bathtub with direct views of your garden. There’s something incredibly relaxing about soaking in warm water while surrounded by nature. Use wooden or copper tubs for a rustic, luxurious feel. Add potted plants or flower borders nearby to complete the look and make every bath feel like a five-star outdoor experience. 4. Deck with Fruit Tree Overhead Canopy Plant fruit trees near or above your deck to grow a natural canopy that offers both shade and beauty. As the trees mature, they create a lush, living ceiling above your outdoor space. In season, you’ll enjoy fresh fruit right from your deck. It’s a sustainable and beautiful design choice that combines practicality with natural beauty, making your deck feel like a hidden garden escape. Pro tip: Choose semi-dwarf varieties like dwarf apple or patio peach if you want canopy coverage within 3–5 years without roots that heave your decking boards later. 5. Deck with Mosaic Tiled Flooring and Planters Add personality to your deck with colorful mosaic tile flooring that catches the eye and sets a vibrant mood. Accent the tiles with bold, overflowing planters along the deck’s edges for a Mediterranean or bohemian feel. Your deck floor becomes a standout feature with this approach. It works especially well in smaller spaces where one standout design choice can make the whole area feel stunning, similar to the ornate detailing found in modern Spanish-style homes. 6. Deck with Lavender Hedge Surround Plant a fragrant lavender hedge around the perimeter of your deck to create a calming, aromatic retreat. Lavender’s purple blooms are visually stunning and naturally repel insects, making outdoor time more enjoyable. The gentle scent promotes relaxation and sets a peaceful tone for your outdoor space. It’s a low-maintenance, high-impact planting choice that adds both beauty and function to any deck design. 7. Deck with Sunken Lounge Area A sunken lounge area within your deck creates an intimate, cozy feeling that standard flat decks simply can’t match. By dropping a section of the deck a few inches below the main level, you define a natural gathering space. Add plush cushions, low tables, and surrounding plants to enhance the cozy vibe. It’s a unique architectural detail that gives your outdoor space real personality and depth. One thing to plan for: sunken areas need excellent drainage. I always route a small drain channel beneath the sunken platform before framing, you end up with a puddle after rain. 8. Deck with Tree Bench Around Trunk Build a circular wooden bench that wraps around an existing tree trunk on or near your deck. This clever design uses nature as the centerpiece while adding extra seating for guests. It creates a beautiful focal point in your garden and makes great use of space. The bench can be stained or painted to match your deck, giving everything a cohesive, polished, and thoughtful look. Important: Leave 2–3 inches of clearance between the bench and the trunk so the tree can grow without the structure constraining it. 9. Deck with Living Fence of Ivy Use ivy or other climbing plants to grow a lush living fence around your deck for natural privacy. As the plants grow, they form a thick green wall that softens the look of any hard fence or railing. It’s an eco-friendly privacy solution that also adds incredible beauty. Over time, the ivy creates a cottage-like, enchanting atmosphere that makes your deck feel like a secret garden hideaway. 10. Deck with Mossy Stone Path and Seating Nook Connect your deck to the garden with a winding mossy stone pathway that leads to a small, tucked-away seating nook. This design creates a sense of journey and discovery in your outdoor space. The nook, surrounded by greenery and soft lighting, becomes a perfect spot for quiet reading or morning coffee. Together, the path and nook make your backyard feel larger and more thoughtfully designed. 11. Deck with Outdoor Yoga Space Dedicate a section of your deck to a peaceful yoga and meditation zone. Use bamboo flooring for a natural, grounding feel underfoot. Add rolled mats, a small water feature, and garden views to complete the calming atmosphere. Morning yoga sessions become something you’ll genuinely look forward to every day. This idea is perfect for wellness-focused homeowners who want their outdoor space to nurture both body and mind. 12. Deck with Vegetable Planter Boxes Line the edges of your deck with planter boxes filled with fresh vegetables, herbs, and edible plants. This turns your deck into a functional kitchen garden right outside your back door. Tomatoes, peppers, lettuce, and herbs thrive in raised planters with good sunlight. It’s a rewarding, practical, and beautiful addition that brings the joy of homegrown food to your daily outdoor living experience. One of mine replaced a full railing run with cedar planter boxes at the same height. She now harvests salad greens from her deck rail three seasons a year. The structural impact is basically zero, and the visual payoff is enormous. 13. Deck with Pergola and Curtain Drapes Install a wooden or metal pergola over your deck and hang soft, flowing curtain drapes for shade and style. The drapes can be pulled open or closed depending on the weather or privacy needs. This design adds a resort-like, romantic feel to any outdoor space. Pair with string lights and potted plants for maximum impact. It’s one of the easiest ways to elevate a plain deck dramatically. Material note: Use solution-dyed acrylic fabric (brands like Sunbrella are the industry standard) for drapes that resist fading and mildew. Canvas and standard outdoor polyester both degrade quickly in UV-heavy climates. 14. Deck with Multi-Tiered Water Feature Add a cascading, multi-tiered water feature beside or within your deck to bring soothing sounds and movement to your space. The gentle sound of flowing water naturally creates a calming atmosphere perfect for unwinding after a long day. Water features also attract birds and add a luxurious focal point. Choose stone, wood, or modern metal finishes to match your overall deck style and garden aesthetic. 15. Deck with Greenhouse Attached Attach a small greenhouse directly to your deck to create a seamless indoor-outdoor growing experience. This setup lets you tend to plants year-round regardless of the weather outside. The glass walls of the greenhouse add architectural beauty and allow natural light to flood both spaces. Walk straight from your deck into your growing space; it’s a dream setup for plant lovers and avid gardeners alike. 16. Deck with Hanging Lanterns and Forest Vibe String hanging lanterns across your deck and surround the space with dense, lush plants to create a magical forest atmosphere. As the lanterns glow at dusk, the whole deck upgrade into an enchanting, storybook setting. Mix different plant heights and textures to build a layered, immersive look. This idea works beautifully for evening entertaining or simply creating a personal outdoor retreat you’ll never want to leave. 17. Deck with Wood and Rope Details Incorporate natural wood and rope into your deck’s railings, furniture, or decorative details for a rustic, nautical-inspired aesthetic. A thick rope wrapped around posts or used as a railing adds organic texture and a coastal charm. Paired with weathered wood tones, this look feels relaxed, warm, and genuinely unique. It’s a great fit for beach houses, lakeside cottages, or anyone who loves that laid-back, seafaring design style. 18. Deck with Vertical Herb Garden on the Wall Mount vertical herb garden panels or pocket planters on the walls of your deck for a space-saving, functional display. Grow basil, mint, rosemary, thyme, and more within arm’s reach of your outdoor dining area. Fresh herbs are always available for cooking, making this both a practical and beautiful addition. The lush greenery also softens hard walls, adding life and color to every corner of your deck. 19. Deck with Tropical Bamboo Fencing Install bamboo fencing around your deck to create an instant tropical, zen-inspired atmosphere. Bamboo is durable, eco-friendly, and grows incredibly fast, making it a sustainable fencing choice. The natural golden tones of bamboo pair beautifully with wooden decking and tropical plants. Add a few large leafy plants inside the fence line, and you’ll feel like you’ve escaped to a private resort every time you step outside. 20. Deck with Built-In Outdoor Bar with Greenery Build a stylish bar directly into your deck’s structure and surround it with trailing plants, herbs, or flower boxes. A built-in bar saves space, looks polished, and instantly makes your deck the go-to spot for entertaining. Add bar stools, pendant lighting, and a small drink fridge to complete the setup. The greenery softens the look and keeps the bar area feeling fresh, lush, and connected to your garden. 21. Deck with Elevated Walkway to Secret Garden Build a raised wooden walkway that extends from your deck and leads guests to a hidden garden tucked away in your backyard. The element of discovery makes this design incredibly special and memorable. Line the walkway with lanterns, flowers, or hanging plants for a dramatic, fairy-tale effect. This is a wonderful way to use unused backyard space while adding depth, character, and a real sense of adventure to your outdoor area. 22. Deck with Living Roof and Solar Panels Top your deck’s pergola or cover with a green living roof planted with sedum or other hardy ground covers, and integrate solar panels for an eco-forward design. The living roof insulates, reduces rainwater runoff, and looks stunning from above. Solar panels offset your energy use, making the whole setup sustainable and forward-thinking. This is the perfect choice for environmentally conscious homeowners who want beauty and responsibility in one design. 23. Deck with Colorful Outdoor Rugs and Potted Plants Layer bright, patterned outdoor rugs across your deck and scatter a variety of potted plants throughout the space for instant texture and vibrancy. This is one of the most affordable ways to refresh a tired-looking deck without any construction. Mix bold colors with trailing greenery for a playful, welcoming atmosphere. Change the rugs seasonally to keep things fresh and new throughout the year without a major renovation investment. 24. Deck with Wooden Swing and Garden Surround Hang a sturdy wooden swing from a pergola or overhead beam on your deck, surrounded by a lush, flowering garden. There’s a timeless, nostalgic joy to swinging gently outdoors while being surrounded by nature. This idea works for families, couples, or anyone who wants a relaxed, whimsical touch in their outdoor space. Pair with climbing roses or jasmine nearby to add fragrance and old-world garden charm to the whole area. 25. Deck with Privacy Walls of Tall Grasses Use tall ornamental grasses or dense bamboo plantings to create natural privacy walls along the edges of your deck. Unlike wooden fences, living walls breathe, move in the breeze, and evolve beautifully with the seasons. Varieties such as pampas grass and fountain grass offer incredible texture and height. This design gives you seclusion without making the space feel enclosed, keeping your deck feeling open, organic, and connected to the surrounding landscape. 26. Deck with Wooden Slat Partitions and Hanging Planters Install wooden slat partitions to create zones or visual separation on your deck, then hang planters filled with colorful flowers or fresh herbs from the slats. The partitions add architectural interest and a modern, clean aesthetic. The hanging planters bring life, color, and fragrance to the vertical space you might otherwise leave empty. Together, this pairing creates a layered, thoughtful design that feels curated, cozy, and genuinely inviting. 27. Deck with Interactive Garden Sculptures Place eye-catching garden sculptures or interactive art installations near your deck to add an artistic, playful dimension to your outdoor space. Sculptures can be made from metal, stone, driftwood, or recycled materials, giving you endless style options. Interactive pieces like wind chimes, kinetic spinners, or water sculptures engage the senses and spark conversation. Inspiring Backyard Deck Ideas for Every Style and Budget No matter your taste or budget, your backyard deck can become your favorite spot at home: here are 26 inspiring ideas to help you design a space that’s completely your own. Multi-level decks deserve a special mention. Across the dozens of decks I’ve designed, multi-level layouts consistently get the most use. Separating dining from lounging, even by just a single step, dramatically changes how people move through and inhabit the space. If your yard has any natural grade change, use it. 28. Cozy Corner Deck with Fire Pit A small corner deck with a built-in fire pit is one of the most inviting outdoor setups you can create. Arrange comfortable seating in a circle around the fire for a warm, intimate gathering space. It doesn’t need to be large to feel special. Even a compact corner changes into the perfect evening hangout spot where family and friends love to gather, relax, and connect. Gas vs. wood-burning: Gas fire pits offer instant, clean flames and are simpler for HOA-regulated neighborhoods. Wood-burning pits deliver that campfire smell and crackling sound that guests genuinely love, but check your local ordinances first. 29. Deck with Outdoor Kitchen and Dining Area Take your entertaining to the next level by combining a fully equipped outdoor kitchen with a generous dining area on your deck. Install a grill, countertop, sink, and storage for a setup that rivals your indoor kitchen. Add a long dining table nearby for family-style meals under the open sky. This design makes hosting easy, fun, and incredibly memorable for every guest you invite over. Material tip: Use composite decking specifically around cooking zones. It resists grease stains and doesn’t require annual re-sealing the way pressure-treated wood does. 30. Deck with Retractable Roof and Dining Set A retractable roof gives you the best of both worlds: open sky on sunny days and solid cover when the weather turns. Pair it with a stylish outdoor dining set for a space you can use year-round. No more canceling outdoor dinners because of unpredictable weather. This smart, flexible design is ideal for homeowners who want to get the most out of their deck in every season. 31. Deck with Outdoor Reading Nook Carve out a quiet corner of your deck as a dedicated reading nook. Use a built-in bench or a deep armchair, add thick cushions, a small side table for your drink, and a little shade overhead. Surround it with potted plants for a cozy, private feel. This simple setup turns any unused deck corner into a peaceful personal sanctuary you’ll look forward to every single day. 32. Deck with Spiral Staircase to Rooftop Lounge Add drama and function to your home with a spiral staircase that winds up from your deck to a rooftop lounge area. The upper level offers a private escape with elevated views of your neighborhood or garden. It’s a bold architectural feature that adds real wow factor to your home. Furnish the rooftop with comfortable seating and soft lighting for a truly stunning outdoor retreat. Before you build: rooftop decks almost always require a structural engineering review to confirm your home’s roof or flat surface can bear the live load. This is non-negotiable; work with a licensed contractor. 33. Deck with Wooden Bar and Entertainment Zone Build a stylish wooden bar into your deck to create a dedicated entertainment zone for hosting guests. Add bar stools, pendant lighting, a mini fridge, and open shelving for drinks and glassware. This setup makes every gathering feel like a special occasion. Whether it’s a summer party or a casual Friday night, your outdoor bar becomes the natural gathering point everyone gravitates toward all evening long. 34. Deck with Elevated Lounge and Floor Cushions Raise a section of your deck to create an elevated lounge platform and fill it with oversized floor cushions for a relaxed, bohemian feel. Low seating encourages people to kick back and truly unwind. Mix warm-toned fabrics, lanterns, and trailing plants to improve the laid-back atmosphere. This design feels effortlessly cool and works beautifully for casual outdoor evenings with close friends and family. 35. Deck with LED-Lit Steps and Railing Install LED strip lighting along your deck’s steps and railings to create a modern, polished look that also improves nighttime safety. The soft glow adds depth and style to the entire space after dark. Choose warm white for a cozy ambiance or cool tones for a sleek, contemporary feel. It’s a relatively affordable upgrade that completely changes how your deck looks and functions in the evenings. In my experience, post-cap lights and under-rail LED strips give the most impact per dollar. Stair riser lighting is the single best safety upgrade on decks with more than three steps, particularly for households with older family members or young children. 36. Deck with Hammock and Tropical Surround Hang a wide, comfortable hammock between deck posts or a pergola frame and surround the area with lush tropical plants. Palms, banana trees, and large-leafed plants instantly create a vacation-like atmosphere right in your backyard. It’s the ultimate relaxation setup perfect for lazy afternoons, afternoon naps, or simply disconnecting from a busy day. This idea brings resort-style comfort to your everyday outdoor living space. 37. Deck with Floating Wooden Slats and Integrated Seating Use floating wooden slats as the primary design element of your deck for a sleek, modern aesthetic. The horizontal lines create a clean, architectural look that feels fresh and current. Integrate built-in seating benches along the edges to keep the space streamlined and clutter-free. This minimalist approach is ideal for homeowners who love contemporary design and want a deck that feels curated, intentional, and effortlessly stylish. 38. Deck with Poolside Lounge and Umbrellas Design your deck as a poolside lounge by lining it with comfortable reclining chairs and large umbrellas for shade. Use weather-resistant materials that can handle splashes and constant sun exposure. Add a small side table between each chair for drinks and sunscreen. This classic setup turns your pool area into a resort-worthy retreat where family and guests can relax, sunbathe, and enjoy the water all day. Material note for pool decks: lighter-colored decking materials stay noticeably cooler underfoot in full sun. Darker composite boards can become uncomfortably hot, especially for bare feet on a poolside deck. 39. Deck with Built-In Sofa and Fire Pit Build a permanent L-shaped or U-shaped sofa directly into your deck structure and center a fire pit in the middle of the seating arrangement. This creates a symmetrical, polished look that’s also incredibly functional. The built-in nature of the seating means no furniture to move or store. It’s a design that works beautifully year-round, especially on cool evenings when the fire brings everyone naturally together. 40. Deck with Sliding Glass Doors to Backyard Install wide sliding glass doors between your indoor living area and your deck to create a seamless indoor-outdoor connection. When the doors are open, the two spaces become one expansive area perfect for entertaining or family life. Natural light floods your interior, and the transition between inside and outside feels effortless. This architectural upgrade significantly enhances the functionality and perceived size of your overall living space. 41. Deck with Raised Platform and Outdoor Dining Area Elevate your dining experience by building a raised deck platform dedicated entirely to outdoor meals. The slight elevation separates the dining space from the rest of the yard, giving it a defined, intentional feel. Add a large table, comfortable chairs, and overhead string lights to complete the look. Whether it’s a weeknight family dinner or a weekend gathering, this setup makes every outdoor meal feel like a special occasion. 42. Deck with Swinging Lounge Chair Install a hanging swinging lounge chair from a pergola beam or sturdy overhead structure on your deck. It’s a playful, eye-catching piece that doubles as the most popular seat in the house. Adults love the gentle rocking motion as much as kids do. Choose a cushioned, weather-resistant swing chair in a bold color or natural tone to complement your deck’s overall design and make the space feel uniquely yours. 43. Deck with Stone Wall and Modern Lighting Build a dramatic stone feature wall along one side of your deck, then pair it with sleek, modern light fixtures for a bold design statement. The rugged texture of stone contrasts beautifully with clean, contemporary lighting. This combination of natural and modern elements creates a sophisticated outdoor atmosphere that feels high-end without being overdone. It’s a striking backdrop for outdoor dining, lounging, or simply enjoying a quiet evening outside. 44. Deck with Transparent Glass Railings Replace traditional wooden or metal railings with frameless glass panels to maintain unobstructed views of your garden or landscape. Glass railings create an open, airy feel and give your deck a sleek, upscale appearance. They’re also incredibly durable and easy to clean. This is a particularly smart choice for decks with beautiful views that you don’t want interrupted. The result is a modern, polished outdoor space that feels open and expansive. 45. Deck with Built-In Pizza Oven and Barbecue Take outdoor cooking seriously by incorporating a built-in pizza oven and barbecue station directly into your deck design. These permanent fixtures make outdoor entertaining effortless and genuinely impressive. Add counter space, a prep area, and bar seating nearby so guests can watch and participate in the cooking experience, turning every gathering into a fun, memorable event. 46. Deck with Pet-Friendly Area and Fence Design a dedicated section of your deck specifically for your pets by adding a secure fence, non-slip flooring, and a shaded resting spot. Pets deserve to enjoy the outdoors safely, and a fenced deck area gives them freedom without the worry. Include a water bowl station and a comfortable bed or mat. This thoughtful addition makes your outdoor space work for the whole family, furry members included. 47. Deck with Gravel Pit and Outdoor Seating Surround your deck with a decorative gravel pit that visually grounds the structure and adds a natural, textured border. Place weather-resistant chairs and a low table within or around the gravel area for casual outdoor seating. The gravel reduces maintenance, improves drainage, and creates a clean, polished look. This low-cost landscaping technique gives even the simplest deck a well-designed, intentional appearance that ties the whole backyard together beautifully. 48. Deck with Outdoor Lounge Chairs and Table Keep it simple and functional with a spacious deck furnished with multiple lounge chairs and a central outdoor table. This straightforward setup is perfect for everyday use, morning coffee, afternoon reading, or casual outdoor dining. Choose comfortable, weather-resistant furniture in neutral tones for a timeless look. Sometimes the best deck design is the one that prioritizes comfort and ease of use above all else, and this delivers exactly that. 49. Deck with Custom Tile Flooring and Planters Upgrade your deck’s visual appeal with custom-designed tile flooring in a pattern or color that reflects your personal style. Tiles are durable, easy to clean, and completely change the look and feel of an outdoor space. Add decorative planters around the edges filled with seasonal flowers or greenery to soften the hard surfaces. Together, custom tiles and lush planters create a deck that feels both polished and inviting. 50. Deck with Enclosed Screen Porch and Dining Area Add a screened enclosure to your deck to create a protected outdoor dining area that keeps bugs and harsh weather at bay. This setup extends the usable season of your deck significantly, perfect for humid climates or areas with heavy insects. Furnish it with a dining table, comfortable chairs, and soft lighting to create a cozy, enclosed space that still feels connected to the outdoors. 51. Deck with Vintage Garden Furniture Give your deck timeless charm by furnishing it with vintage-style garden pieces like wrought-iron chairs, ornate tables, and classic benches. Pair with floral cushions, string lights, and potted topiaries for a romantic, old-world garden atmosphere. Vintage furniture pieces are often incredibly durable and only get more beautiful with age. This design aesthetic is perfect for homeowners who love classic style and want their outdoor space to feel warm and storied. 52. Deck with Large Decking Tiles and Planters Use large-format decking tiles in stone, porcelain, or composite materials to give your deck a sophisticated, high-end appearance. The oversized tiles create a seamless, expansive look underfoot that instantly elevates the entire space. Place statement planters at key points around the deck to bring in natural greenery and contrast with the clean tile surface. It’s a simple yet impactful design formula that works across many different outdoor styles. 53. Deck with Spiral Pathway to a Garden Sanctuary Design a curved or spiral pathway that begins at your deck and winds through your backyard to a secluded garden sanctuary. This creates a sense of journey and quiet discovery in your outdoor space. Line the path with lanterns, low-growing plants, or stepping stones for a magical, intentional feel. The sanctuary at the end, whether a bench, a fountain, or a garden nook, becomes your personal place of peace. How to Style and Decorate Your Outdoor Deck Styling your deck is just as important as building it: these 5 practical tips will help you turn any deck into a beautifully decorated outdoor living space. Choose Right-Sized Furniture: Always match furniture scale to your deck size. Oversized pieces overwhelm small decks, while tiny furniture makes large decks feel empty and incomplete. Layer Your Lighting: Combine string lights overhead, LED strip lighting along railings, and lanterns at ground level to create a warm, multi-dimensional ambiance after dark. Add Planters Strategically: Place tall planters at corners and smaller ones along edges to frame the space, add natural color, and soften hard structural surfaces beautifully. Use Outdoor Rugs to Define Zones: Lay an outdoor rug under your seating or dining area to anchor the space and make your deck feel like a cozy indoor room. Accessorize with Weatherproof Pillows: Add bold, patterned weatherproof cushions and throw pillows to instantly inject personality, comfort, and a pulled-together style into your deck. A well-styled deck doesn’t require a big budget or a complete redesign: even small decorative changes can completely change the way your outdoor space looks and feels every day Essential Deck Materials: Which One is Right for You? Before you start building your dream deck, having the right materials on hand makes all the difference: here are 7 essential materials you’ll need to get started. Decking Boards: The main surface material of your deck, available in wood, composite, PVC, or tile options. Deck Framing Lumber: Structural beams and joists that form the skeleton and support the entire deck. Concrete or Footings: Used to anchor deck posts securely into the ground for long-lasting stability. Deck Screws and Fasteners: Weather-resistant hardware that holds all your decking boards and frame together firmly. Deck Posts and Railings: Vertical supports and safety railings that define the deck’s edges and add style. Waterproof Sealant or Stain: A protective coating applied to wood surfaces to prevent moisture damage and fading. Gravel or Drainage Material: Placed beneath the deck to improve drainage and prevent ground moisture from rising. Wind Up Creating a space you enjoy outside comes down to simple choices that match how you live. I’ve seen how the right layout, seating, lighting, and materials can turn even a basic deck into something you use every day. These outdoor deck ideas go beyond looks. They help you build a space for relaxing, hosting, or spending quiet time. When you focus on what you need instead of copying trends, the result feels more natural and useful. I’ve learned that starting with how you want to use the space makes planning easier. Take a few ideas from this list, test them in your space, and see what works. If something stands out, try it and keep improving your setup over time.

Concrete cracks have a way of showing up at the worst time, right before a gathering or when the home repair list is already long. A thin line across the driveway or a wider gap in the garage floor both raise the same question: how much will this cost? Based on my research and what most homeowners report, concrete crack repair costs can vary widely depending on the severity and type of repair needed. Knowing where your situation falls helps you budget before calling a contractor, ask the right questions, and avoid getting caught off guard when estimates arrive. Let me walk you through the typical pricing, common repair methods, and the key factors that push costs up or down. Understanding Concrete Cracks and Repairs Concrete crack repair is the process of sealing, filling, or stabilizing cracks in concrete surfaces to restore their functionality and prevent further damage. Cracks can form in driveways, patios, sidewalks, garage floors, and foundations, and not all of them are equal in severity. Some are purely surface-level, caused by minor shrinkage, while others signal more serious structural concrete damage that needs professional attention. The repair method used depends heavily on the crack’s size, depth, and location. Catching the problem early is what keeps repair costs manageable. Waiting too long usually means a small sealing job turns into a full resurfacing or slab replacement project, which costs significantly more. Factors That Cause Concrete Cracks Understanding why concrete cracks helps explain why repair costs vary so much from one job to the next. The cause often determines the repair method required: Concrete shrinkage: As concrete cures, it naturally contracts, creating hairline cracks on the surface Temperature fluctuations: Concrete expands in heat and tightens in cold. Repeated cycles put stress on the slab Shifting soil: Unstable ground beneath a slab can cause uneven settling, leading to cracking Heavy loads: Driveways and garage floors bearing the weight of vehicles over time develop pressure cracks Poor installation: Concrete poured without proper reinforcement or allowed to cure too quickly tends to crack prematurely Tree root growth: Roots pushing up under sidewalks or patios can fracture even well-laid concrete Knowing the root cause behind a crack is useful before calling a contractor. It gives you a better sense of what repair method fits and what the job might involve beyond the surface. Average Concrete Crack Repair Cost Below is a combined cost table covering flat-rate and per-foot pricing to help you find a clear reference point before budgeting: Repair Type Average Cost Range Pricing Method Minor crack repair $50 – $150 Per crack Moderate crack repair $150 – $400 Per crack Large structural crack repair $400 – $1,000+ Per crack Minor crack sealing $3 – $12 Per linear foot Professional crack repair $15 – $18 Per linear foot Concrete leveling $3 – $25 Per sq ft Concrete resurfacing $3 – $5 Per sq ft Slab replacement $2,000 – $15,000+ Per project As a general rule, longer and deeper cracks cost more to fix, both because more material is needed and because the labor time increases with complexity. Common Concrete Crack Repair Methods Here are the four most commonly used approaches. Concrete crack repair methods vary in complexity and price, so matching the right technique to the crack type is key. 1. Crack Filling or Sealing This is the most straightforward repair option. A flexible sealant or filler is applied directly into the crack to prevent water and debris from getting in. It works best for minor surface cracks that have not penetrated deeply into the slab. Costs typically range from $50 to $200, making it the most budget-friendly professional option. 2. Epoxy Injection Epoxy injection is used for cracks that run deeper into the concrete and need structural reinforcement. The epoxy is pumped under pressure into the crack, bonding the two sides together once it cures. This method is common for foundation crack repair and costs between $300 and $900 per crack. It is more involved than surface sealing but delivers a stronger, longer-lasting result. 3. Polyurethane Injection Polyurethane foam is injected into cracks to stop active water leaks and stabilize the concrete. It expands as it cures, filling irregular gaps that epoxy might miss. This method is especially useful for basement and foundation cracks where moisture is a problem. Expect to pay between $300 and $800, depending on the crack size and the amount of material needed. 4. Concrete Leveling (Mudjacking or Foam Lifting) When a slab has sunken or shifted unevenly, leveling becomes necessary before or alongside crack repair. Either a slurry mixture (mudjacking) or expanding foam is injected beneath the slab to lift it back into position. This method applies to driveways, sidewalks, and patios and costs between $500 and $6,000 based on the size of the area being lifted. Choosing the right repair method from the start avoids repeat work and helps the fix hold up over time, especially in areas exposed to weather or heavy use. Typical Cost of Concrete Crack Repair Repair pricing shifts depending on whether you are looking at crack size or the specific surface being repaired. Both factors matter when estimating the cost of a job. Getting a clear picture of what falls under each category helps you set realistic expectations before requesting quotes. Cost by Crack Size Crack size is one of the first things a contractor looks at when estimating a repair. Knowing the general price ranges by crack size helps you anticipate costs before getting a quote: Hairline cracks: These are surface-level and mostly cosmetic. Repair costs typically run $50–$150 using crack fillers or sealants Medium cracks (up to ½ inch wide): These require deeper sealing or injection. Expect to pay $150 – $400, depending on length and depth Large or structural cracks: Cracks this size often point to soil movement or slab failure. Repairs start at $400 and can climb well beyond that if reinforcement or leveling work is required Crack width alone does not tell the full story; depth and length are just as important when a contractor calculates the final price. Cost by Surface Area Where the crack sits on your property affects both the repair method and what you end up paying. Different surfaces come with different labor demands and material requirements: Driveways: Crack sealing costs $0.50 to $3 per linear foot; resurfacing runs $3 to $5 per square foot; full replacement averages $6,900 for a standard driveway Garage floors: Sealant or epoxy injection is the common fix, costing $10–$20 per linear foot Patios and sidewalks: Surface patching or sealing usually costs between $150 and $800, depending on the extent of the damage Surface location also affects labor pricing. Garage floors and basements are often harder to access and prepare, which can increase overall costs. Additionally, if the surface is painted, removing the paint from concrete is crucial to ensure proper adhesion and prevent peeling, which could compromise the durability of the repair. DIY Concrete Crack Repair Cost Smaller, non-structural cracks are well within reach for a DIY fix. Hardware stores carry several product types suitable for surface crack repair that do not require professional tools or skills: DIY Product Average Cost Best For Concrete crack filler $5 – $20 Hairline and small surface cracks Concrete patch kits $20 – $50 Wider or shallower surface cracks Epoxy repair kits $25 – $100 Deeper non-structural cracks DIY repairs work well when the crack is cosmetic and stable. If the crack is growing, wider than half an inch, or located near a foundation wall, a professional assessment is worth the cost before attempting any fix on your own. Tips for Managing Concrete Crack Repair Costs A few practical steps can keep repair costs from climbing higher than they need to. Small decisions made early, such as addressing a minor crack or comparing contractor quotes, can lead to real savings: Repair early: Small cracks cost far less to fix than structural damage. Acting quickly saves money Check drainage: Water pooling near a crack will cause repairs to fail. Fix drainage before patching Get multiple quotes: Labor rates vary by region, so comparing two or three estimates helps you find a fair price Ask about the method upfront: Knowing whether a contractor plans to seal, inject, or level helps you compare quotes accurately Bundle repairs: Multiple cracks on the same surface done in one visit usually cost less per crack than separate trips Taking a proactive approach to concrete maintenance is almost always cheaper in the long run than waiting until the damage becomes unavoidable. Common Mistakes to Avoid When Repairing Concrete Cracks Skipping a few basic steps can turn a straightforward repair into a repeat job that costs twice as much the second time around. Here are the few common mistakes: Common Mistake Explanation Recommended Action Ignoring small cracks Hairline fractures can widen over time due to water infiltration and freeze-thaw cycles. Inspect regularly and fill early using a suitable filler. Using the wrong repair product Surface sealants over deep cracks won’t hold; the product must match the crack type. Match the repair product to the crack depth and type. Skipping surface prep Concrete must be clean, dry, and free of loose debris; poor preparation leads to poor adhesion. Clean, dry, and remove loose debris before repair. Attempting structural repairs Foundation cracks and major slab damage require professional help; misjudging their severity can worsen the damage. Hire a professional for structural assessment and repair. Avoiding these mistakes upfront saves you both the cost of redoing the work and the frustration of watching a repair fail within a season or two. Frequently Asked Questions Why does my repaired concrete crack keep coming back? The underlying cause was not addressed. Shifting soil, tree roots, or water pressure cannot be fixed by surface sealing alone. Diagnose the cause before attempting any repair. Does homeowners’ insurance cover concrete crack repair? Sudden damage like falling trees or vehicle impact may be covered. Gradual deterioration and normal settling are almost always excluded. Check your specific policy before assuming any coverage. What is the best time of year to repair concrete cracks? Spring and fall are ideal; temperatures between 50 and 70 degrees allow even curing. Late fall scheduling often means lower contractor pricing due to reduced labor demand. Final Thoughts Concrete crack repair costs depend on crack size, repair method, surface location, and local labor rates. Minor repairs can cost under a hundred bucks as a DIY fix, while professional work on structural damage can run into the thousands. From my experience researching this, the simplest advice holds true: act early. A small crack sealed now is far cheaper than a shifted slab or a weakened foundation down the road. Knowing what drives concrete crack repair pricing helps you make smarter decisions, whether you grab a patch kit or call a contractor. Have questions or dealt with a tricky repair on your property? Drop them in the comments below.
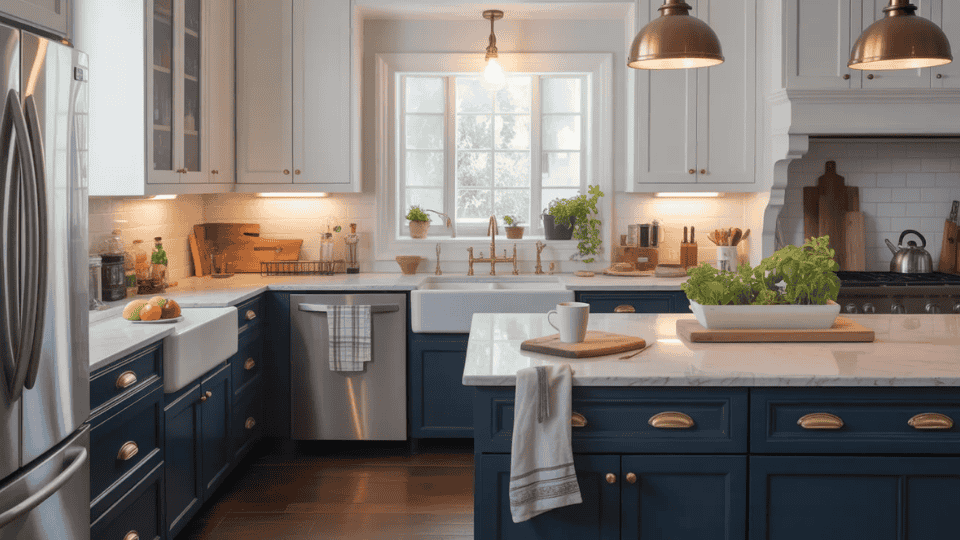
Picking a cabinet color sounds simple until you realize how quickly trends can date a kitchen. I’ve seen beautiful spaces feel outdated in just a few years because the color choice didn’t hold up. If you’re searching for timeless kitchen cabinet colors, you’re likely trying to avoid that exact mistake. The challenge is knowing which colors actually last and which ones only look good for now. Small differences in tone, lighting, and materials can completely change the outcome. Here, you’ll find cabinet colors that stay relevant over time, why they work, and how to choose one that fits your kitchen without second-guessing later. The Key Traits of Timeless Kitchen Cabinet Colors Classic kitchen cabinet colors share a few consistent traits that help them stay relevant over the years: Neutral or Nature-Based Tones: Colors like white, soft gray, green, and wood tones feel balanced and easy to live with. Easy Pairing: They work well with different countertops, backsplashes, and hardware without clashing. Adaptable Across Styles: These colors fit modern, traditional, and transitional kitchens without needing changes. Balanced Undertones: They don’t lean too warm or too cool, which helps them stay flexible in different lighting. Consistent Appeal: They show up in real homes repeatedly, not just short-term design trends. A word on what isn’t timeless: Wood cabinet stains with heavy red, orange, or honey undertones, think cherry, golden oak, and dark ebony, trend hard and date fast. I’ve watched clients repaint perfectly functional cabinetry simply because the stain tone stopped feeling current. If you’re committed to wood, mid-tone browns with minimal grain drama, like a clean maple or walnut, age the most gracefully. But painted cabinets in the right neutral give you the most long-term flexibility. Timeless Kitchen Cabinet Colors These kitchen cabinet colors stay relevant year after year. I like how they give your space a clean, lasting feel. You’ll find them easy to match with different counters, backsplashes, hardware, and styles, no matter how your taste changes over time. The right kitchen cabinet styles can make all the difference in achieving a timeless look. 1. Classic Duo: White Cabinets and Wood Island This combination balances lightness and warmth, creating a kitchen that’s both fresh and grounded. Why it works: White cabinets paired with a wood island create a bright, warm, and balanced space. Best with: Quartz or stone countertops, matte black or brushed brass hardware, light wood/tile flooring. Before/After: Before, your kitchen might feel too sterile, but after, this combination brings warmth without sacrificing that fresh, open vibe. Longevity: It’s an enduring choice that also boosts resale value, making it a safe long-term investment. This pairing provides timeless balance that will keep your kitchen feeling welcoming and relevant for years. 2. Bold Balance: White Uppers and Navy Lowers For a kitchen that feels bold yet airy, this pairing strikes a perfect balance of contrast and lightness. Why it works: Navy lowers, grounds the kitchen with depth, while white uppers maintain lightness and openness. Best with: Light stone or marble countertops, brass or polished gold hardware, subway or zellige tile backsplash. Before/After: Before, your kitchen may feel a bit plain, but after, this combo offers the perfect balance of light and dark. Longevity: Navy is a deep neutral that has lasting appeal, making it a versatile option for the long term. 3. Sharp Contrast: White Uppers and Charcoal Lowers For a more dramatic, sleek kitchen, this pairing offers high contrast while maintaining a light and open feel. Why it works: The contrast between white and charcoal adds drama while keeping the space open and light. Best with: Light quartz or concrete countertops, matte black hardware, light wood or polished tile flooring. Before/After: Before, your kitchen might feel too neutral, but after, this sharp combination introduces depth and focus. Longevity: The modern yet timeless contrast ensures it remains stylish for years. This combination adds a striking element to the kitchen while keeping it balanced and inviting. 4. Refined Edge: Greige Cabinets and Matte Black Hardware This pairing offers understated sophistication with a modern twist, creating a versatile and chic kitchen. Why it works: Greige cabinets with matte black hardware offer an elegant and refined look with subtle contrast. Best with: White or light gray quartz countertops, wood open shelving, large-format tile or hardwood flooring. Before/After: Before, the kitchen could feel too warm or too cool, but after, this combo strikes the perfect balance between the two. Longevity: This pairing works well across various kitchen styles and won’t feel dated. 5. Statement Center: Navy Island and White Perimeter Cabinets Create a focal point in your kitchen with a bold navy island, while the white cabinets keep the space feeling open and balanced. Why it works: A navy island acts as the kitchen’s center of attention, with white cabinets maintaining an airy feel around it. Best with: Light marble or quartz countertops on the perimeter, contrasting dark stone or butcher block on the island. Before/After: Before, your kitchen might lack a focal point, but after, the navy island draws attention, while the white perimeter keeps it light. Longevity: This high-impact look will never feel out of place and adds a custom, high-end feel. 6. Organic Balance: Sage Green Cabinets and Wood Accents This combination brings a natural, peaceful vibe to the kitchen, making it feel grounded and welcoming. Why it works: Sage green and wood accents create a calming, natural space that feels easy to live with. Best with: Butcher block or light wood countertops, stone or terracotta flooring, warm metal hardware. Before/After: Before, your kitchen might feel too cool, but after, the sage and wood bring warmth and comfort. I’ve seen sage green become a clear favorite, and it holds up better than most trend-based colors. Muted shades with gray undertones age best and are the ones clients continue to love years later. 7. Grounded Luxury: Walnut Cabinets and White Countertops This combination blends rich wood tones with bright countertops to create a kitchen that’s both luxurious and well-balanced. Why it works: Walnut’s deep tones contrast beautifully with white countertops, creating a luxurious and balanced feel. Best with: White or cream walls, matte black or brushed brass hardware, large-format stone or tile flooring. Before/After: Before, your kitchen might feel dark, but after, the white countertops lighten the space, making it feel open and balanced. 8. Crisp and Current: White Oak Cabinets and Black Hardware For a modern kitchen with natural warmth, this combination balances the best of both worlds with white oak and bold black hardware. Why it works: White oak provides a warm backdrop, while black hardware adds a sharp, modern edge. Best with: White or light gray countertops, large-format tile or light wood flooring, open shelving. Before/After: Before, your kitchen might feel too minimal, but after, the blend of oak and black hardware creates a bold yet inviting space. Longevity: White oak and black hardware remain stylish and adaptable, ensuring this design stands the test of time. This combination adds a natural yet contemporary feel, perfect for any modern kitchen that values warmth and style. 9. Quietly Enduring: Cream Cabinets and Warm Wood Flooring For a comfortable, classic kitchen, this combination creates a welcoming and timeless atmosphere. Why it works: Cream cabinets paired with warm wood flooring create a harmonious, inviting space that feels timeless. Best with: Brushed gold or bronze hardware, stone or marble countertops, soft white or linen-toned walls. Before/After: Before, your kitchen might feel a bit cold, but after, the cream and wood bring warmth and comfort without being overwhelming. 10. Soft Gray Cabinets and Marble Countertops For a refined, serene kitchen, this combination of cool tones offers a sophisticated, luxurious atmosphere. Why it works: Soft gray cabinets paired with marble countertops create a cool, sophisticated vibe that enhances the space without being overpowering. Best with: Polished chrome or brushed nickel hardware, white or light gray walls, large-format marble or porcelain tile flooring. Before/After: Before, your kitchen might lack a polished feel, but after, the gray and marble create a high-end, curated look. 11. Dramatic Flip: Black Lower Cabinets and White Uppers This twist on the traditional design gives your kitchen a bold edge while still feeling airy and open. What makes it stand out: Dark lower cabinets provide structure and weight, while white upper cabinets maintain lightness and visual space. Best paired with: Clean, light countertops (think quartz or marble), matte black or brushed metal hardware, warm wood or neutral tile flooring. Before/After: Before, your kitchen might feel flat, but after, the high contrast brings a sense of boldness and intentional design. 12. Moody Restraint: Charcoal Cabinets and Light Quartz Countertops For a kitchen that feels both deep and inviting, this combination contrasts dark cabinetry with light, reflective surfaces. Why it works: Charcoal cabinets add depth and mood, while light quartz countertops lift the space and provide brightness. Best paired with: Warm metal hardware (brass, gold, or copper), natural wood accents, light or neutral tile flooring. Before/After: Before, the kitchen might feel too dark, but after, the light quartz lifts the charcoal and adds warmth, preventing the space from feeling enclosed. Longevity: This blend of dark and light ensures that the look feels balanced over time, never too bold or too subdued. 13. Understated Warmth: Mushroom Cabinets and Brass Hardware Navy and gold bring a touch of luxury to your kitchen, creating an elevated atmosphere without feeling overwhelming. Why it works: Navy is bold but not too overpowering, and paired with warm gold hardware, it becomes a standout combination. Best paired with: Soft marble or cream-colored countertops, light walls, and natural wood accents. Before/After: Before, the space may feel too minimalist, but after, this striking combination adds warmth and a sense of elegance that doesn’t overwhelm. Longevity: The pairing of navy and gold has been a classic in design for centuries, ensuring its relevance over time. 14. Regal Pairing: Navy Cabinets and Gold Hardware Navy and gold bring a touch of luxury to your kitchen, creating an elevated atmosphere without feeling overwhelming. Why it works: Navy is bold but not too overpowering, and paired with warm gold hardware, it becomes a standout combination. Best paired with: Soft marble or cream-colored countertops, light walls, and natural wood accents. Before/After: Before, the space may feel too minimalist, but after, this striking combination adds warmth and a sense of elegance that doesn’t overwhelm. Longevity: The pairing of navy and gold has been a classic in design for centuries, ensuring its relevance over time. This rich duo feels grand yet approachable, giving your kitchen a regal flair that will remain appealing for years to come. 15. Natural Drama: Forest Green Cabinets and Warm Wood Shelving Nature, with this earthy combination of deep forest green and wood, brings an organic but polished look to your kitchen. Why it works: Forest green cabinets add a deep, rich tone, while warm wood shelving softens the intensity, making the space feel balanced. Best paired with: Stone or marble countertops, brushed brass or antique hardware, terracotta flooring. Before/After: Before, the kitchen may feel overly formal, but after, the natural wood adds warmth and softness, grounding the green. 16. Layered Neutral: Greige Perimeter Cabinets and Dark Island The combination of light greige cabinets with a contrasting dark island introduces depth and texture, creating a space that’s both calm and visually engaging. What makes it stand out: The subtle greige perimeter cabinets allow the dark island to serve as a strong focal point, adding dimension to the space. Best paired with: Warm countertops, matte black or aged brass hardware, and wood accents to tie the look together. Before/After: Before, your kitchen might feel flat, but after, the dark island adds a sense of depth while keeping the perimeter light and airy. This understated, layered look will continue to stand out without feeling outdated, providing an elegant contrast. 17. Classic Edge: White Cabinets and Soapstone Countertops Soapstone countertops paired with bright white cabinetry offer a visually rich and timeless combination that exudes effortless charm. What makes it special: The matte texture of soapstone contrasts perfectly with the brightness of white cabinets, creating an elegant yet grounded space. Best paired with: Brushed nickel hardware, light walls, and wood flooring. Before/After: Before, the space might feel too stark, but after, the soapstone brings texture and warmth, softening the white cabinets. This classic combination feels both fresh and grounded, making it a perfect kitchen style for the long haul. 18. Light and Airy: Light Oak Cabinets and White Backsplash This light, airy combination of oak cabinets and a crisp white backsplash creates a calm, Scandinavian-inspired look that feels fresh and open. What makes it stand out: Light oak cabinets add warmth and texture, while the white backsplash reflects light, creating an open, inviting space. Best paired with: Light countertops, matte black or brushed brass hardware, wood or neutral-toned flooring. Before/After: Before, your kitchen might feel overly minimalist, but after, the oak adds depth, creating a light, natural look that never feels too stark. 19. Grounded Modern: Taupe Cabinets and Black Hardware This warm, contemporary pairing adds a touch of sophistication with taupe cabinets and bold black accents, creating a calm yet modern atmosphere. What makes it special: The taupe cabinetry offers warmth, while the black hardware adds contrast and modern flair. Best paired with: White or warm quartz countertops, open wood shelving, large-format tile or matte stone flooring. Before/After: Before, your kitchen might feel too neutral, but after, the black hardware adds definition, creating a sharp yet warm design. Longevity: This blend of soft warmth and strong contrast ensures the look remains appealing for years. The taupe and black combination gives your kitchen a modern, grounded feel, ensuring it looks stylish and current for the long run. 20. Soft Contrast: Two-Tone Greige and White Cabinets For a refined look, this soft two-tone pairing combines the understated elegance of greige with the freshness of white, creating a balanced and relaxed kitchen. What makes it stand out: Greige and white cabinets offer a harmonious contrast, making the space feel open and inviting while still offering visual depth. Best paired with: Warm quartz or marble countertops, brushed brass or matte black hardware, wood flooring. Before/After: Before, your kitchen may feel too neutral, but after, the greige and white bring a level of contrast that adds subtle elegance. This pairing stays relevant, offering a balanced and approachable design for any space. 21. Rustic Modern: Navy Cabinets and Butcher Block Counters For a kitchen that balances boldness with natural warmth, navy cabinets and butcher block counters create a cozy, grounded feel with plenty of personality. What makes it special: Navy cabinets provide depth, while butcher block countertops introduce a warm, organic element to the space. Best paired with: Brass or unlacquered hardware, white or cream walls, open shelving. Before/After: Before, the space might feel too formal, but after, the butcher block adds a rustic charm, softening the boldness of the navy. 22. Open and Stylish: White Cabinets and Glass Upper Doors For a kitchen that feels open, fresh, and curated, glass upper cabinets allow you to showcase your personal style while keeping the space airy. What makes it stand out: Glass upper cabinets break up the visual monotony of all-white cabinetry, adding depth without introducing color. Best paired with: White or light quartz countertops, brushed nickel or polished chrome hardware, subway tile backsplash. Before/After: Before, your kitchen might feel flat, but after, the glass doors open up the space and add personality without overwhelming it. 23. Bold Anchor: Black Island and White Cabinets This dramatic design places a strong emphasis on the island, with a contrasting black island surrounded by light white cabinets to create a striking visual impact. What makes it special: The black island acts as the centerpiece of the kitchen, creating a strong focal point without overwhelming the space. Best paired with: Waterfall marble or light quartz on the island, matte black hardware, warm wood flooring. Before/After: Before, your kitchen might lack a sense of focus, but after, the black island grounds the space, while the white cabinets keep it open and fresh. 24. Warm Divide: Natural Wood Lower Cabinets and Painted Uppers For a kitchen that balances warmth and lightness, natural wood lower cabinets paired with painted upper cabinets create a balanced and organic design. What makes it stand out: The natural wood at counter level adds texture and warmth, while painted uppers keep the space feeling fresh and clean. Best paired with: Stone or quartz countertops, matte black or brushed brass hardware, white or soft greige walls. Before/After: Before, the space might feel flat, but after, the contrast between the wood lowers and light uppers creates visual interest and balance. Cabinet Colors That Tend to Date Quickly Understanding what ages badly is just as useful as knowing what lasts. From both my own consulting work and what I see consistently in the homes of new clients seeking updates, these are the cabinet colors and finishes most likely to feel tired within a decade: Cherry and red-toned wood stains: The warm, reddish undertone reads as heavily period-specific; it’s the finish most often cited by designers as a dating factor in kitchens from the late 1990s and early 2000s. Cool gray with blue or purple undertones: The dominant gray trend of the 2010s is already looking dated in markets that moved on. Gray with a green or warm undertone holds better. High-gloss cream or ivory with pink undertones: Reads as a specific era (early 2000s) and clashes with most modern countertop materials. Trendy colors without tonal grounding: Terracotta, cobalt, and similar bold cabinets can look wonderful for a season but require full replanning when the adjacent trend moves on. Heavily bleached or ebony-stained wood: Both extremes of the wood stain spectrum have trended hard and faded. The moderate middle of the range ages most gracefully. None of this means those colors are wrong for your kitchen; if you love them and plan to stay long-term, personal resonance matters more than resale logic. But if longevity is the goal, these are the ones to approach with caution How to Choose the Right Cabinet Color for Your Kitchen With so many kitchen cabinet colors to consider, narrowing it down takes more than picking a favorite. Here’s what actually helps: Start with lighting: Natural light shifts color throughout the day. Test samples in morning and evening light before committing. Match with existing countertops and floors: The cabinet color needs to work with what’s already fixed, not the other way around. Think about how long you’ll stay: Shorter stay? Lean toward broadly appealing neutrals. Long-term home? There’s more room for personal expression. Test on large boards: A small paint swatch tells very little. Paint a large board and prop it against the actual cabinets. Don’t choose based on social media alone: Trending kitchen cabinet colors on feeds often look very different in real-life lighting and space. The right color is one that works for the specific kitchen, not just the one that looks best on a screen. Once you’ve picked a color, you may want to check the kitchen island height to ensure your design flows well. The Bottom Line Choosing cabinet colors that last comes down to understanding what works beyond trends. I’ve seen how the right mix of tone, material, and balance keeps a kitchen feeling fresh without constant updates. The combinations that hold up best are easy to pair, adapt across styles, and stay steady in different lighting. That’s what makes timeless kitchen cabinet colors worth choosing. The strongest designs follow tonal logic, where the warmth or coolness of cabinets connects with flooring, hardware, or countertops. That connection makes the space feel intentional. When you focus on this, you avoid second-guessing later. Take time to test options in your space and go with what feels right. Frequently Asked Questions Which cabinet colors age poorly? Colors like cherry wood with heavy red tones, cool grays with blue or purple undertones, and high-gloss finishes often look outdated quickly and don’t complement other materials well. How do I choose the right cabinet color? Consider your kitchen’s lighting, existing materials, and how long you plan to stay in your home. Test samples in real conditions to see how they look throughout the day. What’s the best way to test a cabinet color? Paint a large board with your color choice and place it against your cabinets. Test it in different lighting throughout the day to see how it looks in various conditions. How can I make sure my cabinet color won’t go out of style? Select colors that are neutral, adaptable, and easy to pair with other materials. Colors like white, soft gray, and nature-based shades remain relevant across time and trends. What makes a kitchen cabinet color timeless? Timeless cabinet colors are neutral or nature-based, easy to pair with various materials, and have balanced undertones. They stay versatile across styles and hold up well over time.
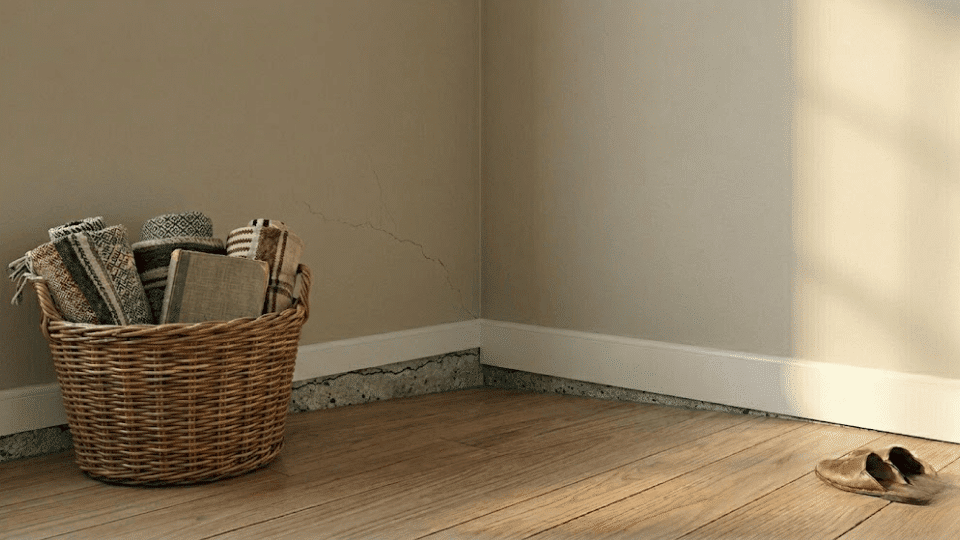
A sinking foundation tends to announce itself quietly, a door that won’t close right, a hairline crack along the baseboard, a floor that feels slightly off underfoot. By the time most people notice something is wrong, the settling has already been going on for a while. The good news is that foam jacking foundation repair is often far less invasive and less expensive than most expect. I’ve seen people assume the worst and end up with a same-day fix. My goal here is to break down what polyurethane foam actually does beneath a settling slab, where it works well, where it falls short, what it realistically costs, and how to find a contractor who’s actually worth trusting with your foundation. What Is Foam Jacking? Foam jacking is a foundation repair method where polyurethane foam is injected through small drilled holes into the voids beneath a settling or sinking concrete slab. Once it enters, it expands, filling gaps, stabilizing loose soil, and lifting the slab back toward its original position. The foam cures in as little as 15 to 30 minutes and can support between 6,000 and 14,000 lbs per square foot once set. What I think makes it genuinely practical is its lightweight design. Unlike heavier slurry-based methods, it doesn’t pile additional stress onto soil that’s already compromised. Holes are drilled, foam is pumped in, holes are patched, and in most cases, you’re walking on it the same day. What Foam Jacking Can and Can’t Fix Not every sinking slab is a foam jacking job. Knowing the difference upfront saves you time, money, and the frustration of a repair that doesn’t hold. Here’s where it works well, and where it doesn’t. Where Foam Jacking Works Foam jacking performs best when the concrete itself is structurally sound, and the problem is what’s happening underneath it. Cases that tend to respond well include: Settled or sinking slab foundations with identifiable voids beneath Sunken garage floors caused by soil erosion or poor original compaction Uneven driveways or concrete flatwork adjacent to the home’s foundation, where creative modern driveway ideas can improve both function and appearance. Void filling under concrete caused by water washout or soil shrinkage Minor-to-moderate settlement where the slab hasn’t cracked through or broken apart Where Foam Jacking Won’t Work Foam jacking stabilizes what’s there; it can’t fix structural issues or correct an ongoing problem with the ground itself. It’s the wrong call when: The foundation slab has significant structural cracking or has begun to break apart Active soil movement is still occurring (expansive clay, ongoing erosion) Settlement occurs due to unrepaired plumbing leaks, leading to foam eventually being compromised by water. Voids are too large or too deep for foam expansion to fill reliably The foundation requires underpinning with piers to reach stable load-bearing soil Foam Jacking vs. Other Options Foam jacking isn’t the only way to address a settling foundation, and it’s not always the right one. Here’s how it stacks up against the three most common alternatives. Method Works Best on Cost Range Advantage Limitation Polyurethane Foam Jacking Moderate settling, intact slab, identifiable voids $5–$25/sq ft Lightweight, fast cure, same-day use Won’t fix active movement or severe structural failure Mudjacking Larger areas, budget-conscious repairs $3–$6/sq ft Lower upfront cost, proven method Heavy, adds load to compromised soil; can re-settle Pier/Pile Systems Serious structural settlement $1,000–$3,000+ per pier Permanent stabilization addresses the root cause Most invasive and expensive option Full Replacement Severely cracked or broken foundation $50–$75/sq ft Clean slate, long-term fix Highest cost, most disruptive, long curing time Foam jacking sits in the middle, not the cheapest, but significantly less invasive and faster than the heavy-duty options. If your slab is still largely intact and the soil beneath it is the problem, it’s a strong candidate. What Does Foam Jacking Cost? Understanding foam jacking costs helps you set realistic expectations before getting quotes. Prices can vary widely, so knowing the baseline and key drivers gives you better control. Average Cost of Foam Jacking Foam jacking for foundation repair usually ranges from $2,000 to $7,500 for most homes. On a per-square-foot basis, expect $5 to $25, depending on job size. Smaller areas often cost more per square foot, while larger projects reduce that rate. Labor makes up about 40–60% of the total cost, covering inspection, setup, drilling, and injection. The remaining cost mostly comes from polyurethane foam, which is priced higher than traditional materials. Factors That Affect Foam Jacking Costs Several factors can shift your final quote up or down: Area size: Larger jobs cost more overall but often less per square foot Void depth and severity: Deeper gaps need more foam, increasing cost Accessibility: Tight or interior spaces can add 20–50% to labor costs Soil conditions: Weak or shifting soil may need extra stabilization Location: Labor rates vary, with urban areas usually costing more Most contractors also charge a minimum fee of $300 to $700, regardless of project size. What the Process Looks Like If you’ve scheduled a foam jacking appointment, here’s what to expect on the day so you can tell whether the job is being done properly. Initial assessment: The technician walks the area, checks elevation levels, and identifies injection points before any drilling begins. Drilling: Small holes (roughly the size of a penny) are drilled through the slab at calculated intervals. Foam injection: Polyurethane is pumped in under controlled pressure; it expands to fill voids and lift the slab. Monitoring: The crew tracks slab elevation during injection to avoid over-lifting. This is where experience matters most. Hole patching: Injection holes are filled, and the surface is cleaned up. Cure and walkthrough: Foam sets in 15–30 minutes. The contractor should walk you through what was done and flag anything that needs monitoring. A typical residential job takes a few hours. If a contractor rushes through the assessment or skips the monitoring step during injection, that’s a problem worth raising before they leave. How Long Does It Last? Done right, foam jacking can last 10 years or more; some installations hold significantly longer. The foam itself is durable; it’s moisture-resistant, doesn’t wash out over time the way mudjacking slurry can, and holds its structural integrity well. What actually determines longevity isn’t the material; it’s whether the underlying cause of the settling was addressed. If water is still pooling against your foundation, if drainage hasn’t been corrected, or if soil movement is ongoing, the repair will eventually lose ground. Foam jacking fixes the symptom effectively. The soil and water conditions around your foundation determine whether that fix holds for a decade or needs to be revisited in a few years. How to Vet a Contractor This is where many homeowners move too fast. Foundation repair isn’t something to decide on solely based on price. A few checks here can save you from bigger issues later. Start with licensing, insurance, and certifications. Confirm general liability and workers’ compensation coverage, and verify with your state board. Certifications like SPFA or BHA’s CSRS show added training. Check track record and compare quotes. Review complaint patterns, not just ratings. Get at least three detailed estimates. Avoid single-number pricing. Before committing, ask about foam type and strength, lifting control method, warranty details, and the full scope of drainage work included. A rushed quote without proper measurements is a clear red flag that warrants walking away. Taking an extra day or two to vet your contractor properly can save you thousands down the road. How to Prevent Future Foundation Settling Preventing foundation settling comes down to controlling water and soil movement around your home. Taking small steps early can help you avoid costly repairs later. Maintain proper drainage around your home. Make sure water flows away from the foundation, not toward it. Poor drainage is one of the main causes of soil movement and settling issues. Keep soil moisture consistent. Dry soil shrinks, while overly wet soil expands. Water your yard evenly during dry periods to reduce stress on your foundation. Manage gutters and downspouts well. Clean them often and extend downspouts at least a few feet away from your home to prevent water buildup near the base. Use smart landscaping techniques. Avoid planting large trees too close, and ensure grading slopes away from your foundation to limit long-term soil pressure. Taking these steps helps you stay ahead of foundation problems. A little maintenance now can protect your home’s structure and save you from major repairs later. Final Words Foundation settling isn’t always the crisis it feels like, but it does deserve a straight answer, not a guessing game. Foam jacking foundation repair handles a specific set of problems well: voids beneath intact slabs, moderate settlement, and situations where the concrete itself is still sound. It won’t address active soil movement or structural failure, and the price range is wide enough that an itemized quote is always necessary. The real strength of polyurethane foam lies in what it doesn’t do: it doesn’t overload compromised soil, doesn’t take days to cure, and doesn’t require tearing anything apart. If this helped clarify where you stand, drop a comment below with any questions, or pass it on to someone dealing with a settling slab. Frequently Asked Questions Can you do this yourself? Rental equipment for foam jacking isn’t available to the public in most areas, and injection pressure requires calibrated machinery. This one needs a licensed contractor; there’s no real DIY version. Does your insurance cover foam jacking? Usually not. Insurers classify foundation settling as normal wear and tear. The exception is if a covered event, like a burst pipe, directly caused the damage. Always check your specific policy. Is the foam safe around plumbing or drinking water? Reputable contractors use foam certified to NSF/ANSI 61 standards, meaning it’s approved for contact with drinking water. Ask your contractor for product certification before work begins. What if the slab sinks again? Retreatment is possible and typically costs less than the initial job, since the contractor already knows the site. Longevity improves significantly when drainage issues are fixed alongside the repair. How will I know if the lift actually worked? Doors and windows that were sticking should close more smoothly. Gaps along baseboards should visibly reduce. A good contractor will show you before-and-after elevation readings before leaving.