

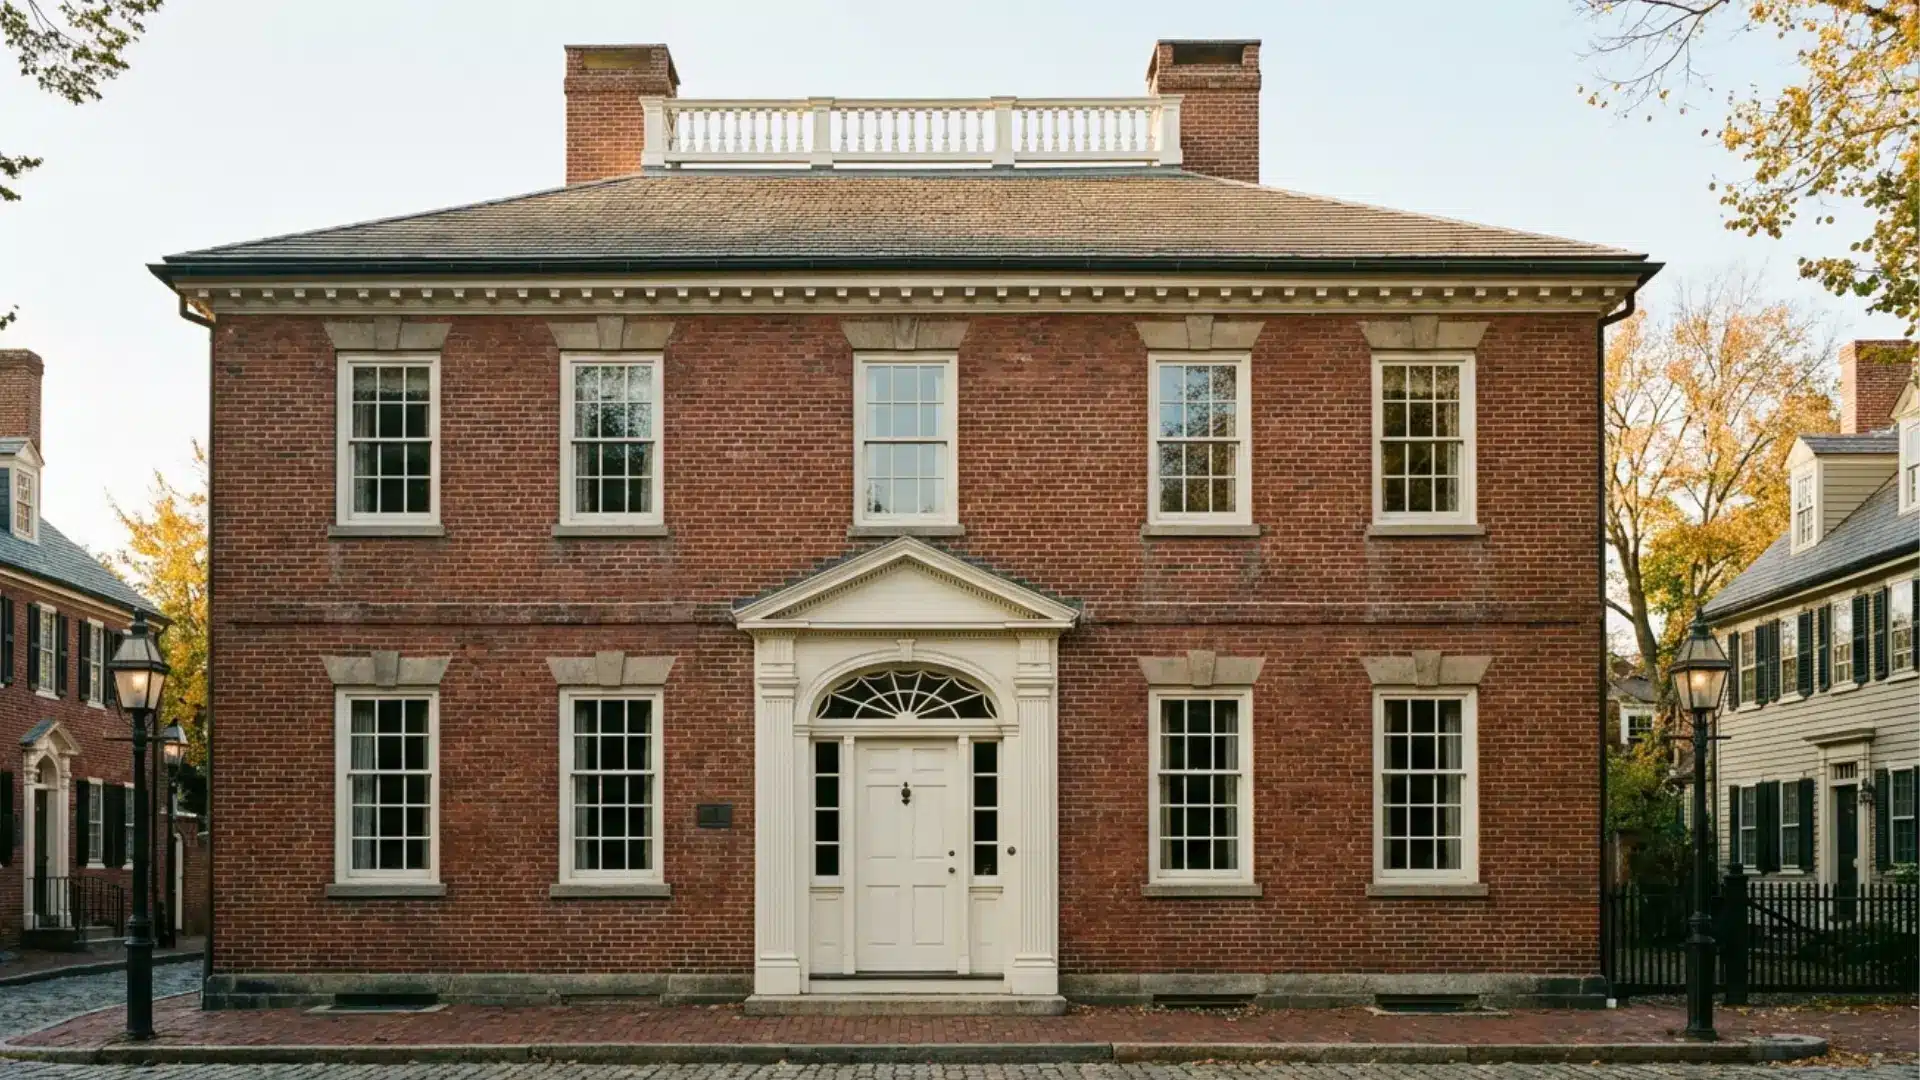
Have you ever stood in front of an old American home and felt a kind of quiet order, as if everything were exactly where it should be? I noticed it the first time I walked through a preserved Federal-era neighborhood in Salem, Massachusetts. The homes weren’t grand or showy. They were composed. Every window, every roofline, every doorway sitting in perfect relationship to everything else. This guide explains the origins and design features of federal architecture, helping you easily recognize the style. What Is a Federal Style House? Before diving into details, it’s important to grasp what distinguishes Federal architecture as a style, not just a period. A Federal-style house is a building from the first architectural movement to arise in the newly independent U.S., and was popular from 1780 to 1830. Emerging from Georgian architecture, it incorporated Greek and Roman influences, resulting in a lighter, more elegant look with less ornamentation and precise proportions. Characterized by symmetrical facades, centered entrances, low-pitched roofs, fanlights, sidelights, and restrained details, it draws heavily on the work of Scottish architect Robert Adam, earning the nickname ‘Adam Style.’ Unlike Georgian, it’s a refined evolution: thinner moldings, delicate motifs, and a lighter touch. Historical Context and Evolution of Federal Architecture Federal architecture didn’t appear out of nowhere. It was a direct response to a political moment. After the Revolution, a young country needed buildings that projected confidence, stability, and civic identity, without borrowing too heavily from British traditions. Architects like Charles Bulfinch in Boston and Samuel McIntire in Salem shaped what that looked like in practice. Their work set the template that spread across New England, the Mid-Atlantic, and beyond. 1. Colonial Architecture (1600s–1770s): Practical above all else. Homes were built to function, using whatever local materials were available. Decorative detail was minimal.2. Georgian Architecture (1725–1800): More formal and symmetrical, with classical cornices and heavier ornamentation. A step toward grandeur, though still rooted in British influence.3. Federal Architecture (1780–1830): A lighter, more refined version of Georgian. Neoclassical motifs replaced heavy trim. Fanlights, elliptical details, and elegant entryways became the signature.4. Greek Revival Architecture (1830–1860): Bolder and more monumental. Columns, temple facades, and a heavier classical hand replaced Federal restraint. Federal sits in the middle of that arc, between the practicality of Colonial design and the drama of Greek Revival. That in-between quality is exactly what gives it its character. Characteristics of Federal Architecture A client asked why a Federal home “feels different” from other historic styles before understanding what to look for. I said: because every element is in conversation with every other; nothing is accidental. Here’s what to look for: 1. Symmetrical Facades The facade is where Federal design announces itself most clearly. Windows and doors are arranged in a balanced, centered layout, typically a five-bay configuration with the entrance at the middle. Unlike Georgian homes where symmetry feels imposed, Federal symmetry feels inherent. The proportions are worked out so precisely that the facade reads as a single composed unit. 2. Building Form and Massing Federal homes are usually two or three stories, square or rectangular in plan, with clean, uncluttered lines. The massing is deliberate, with no unnecessary projections and no decorative excess. The form itself carries the visual weight. 3. Entryway Design The front door is the focal point. Above it, a fanlight, semi-circular or elliptical, lets light into the entry hall. Narrow sidelights flank the door on either side, reinforcing the vertical axis and the home’s overall symmetry. Door surrounds are classical but never heavy. The detailing is precise without being fussy. This is one of the easiest ways to distinguish a Federal home from a Georgian one: the Georgian entry tends to feel more muscular; the Federal entry feels more refined. 4. Roof Styles Low-pitched side-gabled or hipped roofs are standard. Overhangs are minimal. The roofline remains quiet, keeping the eye on the facade. Chimneys, when present, are placed symmetrically. If you’re already familiar with hip roof construction, you’ll recognize the form immediately on many Federal homes; it was a practical and visually clean choice for the period. 5. Window Design Double-hung sash windows are most common, with thin muntins that create a lighter grid pattern than earlier multi-pane Georgian windows. More elaborate Federal homes may include Palladian windows or arched elliptical openings, particularly on upper floors or stair landings. Window placement is never arbitrary. Each opening is sized and spaced to reinforce the overall compositional order. 6. Decorative Motifs Federal ornament is neoclassical but restrained. Common motifs include swags, garlands, urns, medallions, sunbursts, eagles, and elliptical forms, references to ancient Greek and Roman design filtered through an American sensibility. The key word is restraint. These elements appear at doorways, cornices, and interior plasterwork, not everywhere at once. Federal Style House Features The residential version of Federal architecture translates all of these principles into livable spaces. What’s worth noting is how consistently the same values, order, proportion, restraint, carry from the street facade all the way through to the interior. Exterior: Materials and Facade Building Materials: Brick dominated in cities like Boston, Philadelphia, and Baltimore. Painted clapboard was more common across New England and rural areas. Stone appeared in regions where it was locally abundant. Facade Composition: Balanced proportions, smooth wall surfaces, centered entrance, and evenly spaced windows, all working together as a unified whole. Entryway Details: Fanlight above the door, sidelights on either side, and a classical door surround that draws attention without overpowering the facade. Roof and Chimneys: Low-pitched hipped or side-gabled roof with minimal overhang, chimneys placed to mirror each other. Windows and Trim: Double-hung sash windows with thin muntins; occasional Palladian or elliptical windows on grander homes; neoclassical motifs, swags, urns, eagles, used selectively on cornices and surrounds. Interior Features of a Federal Style House Step inside a Federal home and the exterior logic continues. Rooms are placed to either side of a central hallway, creating a clear axis through the house. Everything is planned around symmetry and formal sequence. Floor Plans: Central hallway with rooms arranged symmetrically on both sides, typically two rooms deep. The layout reflects both social convention and classical planning principles. Architectural Details: Refined staircases with delicate balusters, classical mantels framing fireplaces, plaster cornices and ceiling medallions, and door surrounds with pilasters or entablatures. Furniture and Decor: Federal interiors pair well with neoclassical American furniture, think Hepplewhite and Sheraton styles, that echo the same emphasis on lightness, proportion, and restrained ornament. Tip: To identify a Federal style house, look for the combination of a symmetrical five-bay facade, centered fanlight entry with sidelights, low-pitched roof, and thin-muntin sash windows. Neoclassical motifs, urns, swags, eagles, medallions, should appear selectively, not everywhere. The overall impression should be elegant and ordered, not ornate. Materials Used in Federal Style Houses Material choices in Federal homes were driven by what was locally available, what the climate demanded, and what the homeowner could afford. Despite those variables, the results shared a consistent character: durable, well-crafted, and visually clean. Brick: The material of choice in urban centers. Dense, formal, and long-lasting, well suited to the civic ambitions of Federal-period builders. Many surviving Federal townhouses in cities like Salem and Alexandria are brick. Clapboard Siding: Standard across New England. Wood-framed and painted white or light colors, clapboard Federal homes have a crisp, orderly look that holds up well in the historic streetscapes of towns like Newburyport and Portsmouth. Stone: Used regionally where quarried stone was accessible. Stone Federal homes are less common but retain all the characteristic proportions and detailing of the style. Wood Trim and Millwork: High-quality hardwood for doors, window casings, staircases, and interior moldings. The craftsmanship in Federal millwork is often extraordinary, thin, precise profiles that required skilled hands to execute. Plaster: Interior walls and ceilings were finished in plaster, which allowed for decorative work: ceiling medallions, friezes, and cornices that gave Federal interiors their characteristic refinement. Federal Style vs. Other Architectural Styles Federal architecture sits at a pivot point in American design history, after the Georgian period and before Greek Revival took over. That position shapes how it compares to each neighboring style. Feature Federal Style Georgian Colonial Colonial Revival Greek Revival Time Period 1780–1830 1725–1800 1600s–1770s 1880–1950s 1830–1860 Appearance Light, refined Formal, heavy Simple, functional Mixed traditional Bold, monumental Symmetry Strong Strong Moderate Strong Strong Ornamentation Delicate Heavy Minimal Moderate Bold Entry Design Fanlights, sidelights Simple classical Plain Revived historic styles Large columns, grand Roof Style Low-pitched Medium-pitched Steep/simple Varied Low-pitched Windows Sash, elliptical Multi-pane Small Larger, mixed Large, rectangular Columns Minimal Occasional Rare Sometimes used Prominent Motifs Swags, urns, eagles Classical trim Limited Mixed styles Greek temple forms The Federal style house occupies a specific lane: more polished than Georgian, less theatrical than Greek Revival. It’s the style that figured out how to be both civic and livable, which is probably why so many Federal homes have survived in such good condition. Common Mistakes to Avoid When Identifying a Federal Style House Even experienced observers misread Federal homes. Here’s where identification tends to go wrong: Confusing Federal with Georgian: Both are symmetrical, but Georgian homes carry heavier cornices, thicker moldings, and denser ornament. Federal homes feel lighter. If the detailing looks muscular, it’s probably Georgian. Relying on one feature: A fanlight alone doesn’t confirm Federal. Look for the full combination, fanlight, sidelights, low-pitched roof, five-bay facade, thin-muntin windows, before drawing a conclusion. Missing regional variation: A Federal brick townhouse in Baltimore looks quite different from a clapboard Federal home in coastal Maine. Same principles, very different materials and scale. Confusing Colonial Revival with original Federal: From the 1880s onward, Colonial Revival builders borrowed Federal details liberally. A home with Federal-looking features built in 1910 is almost certainly Colonial Revival, not Federal. Discounting altered homes: Replacement windows, added porches, and modernized facades are common on historic homes. Don’t dismiss a property based on surface changes, look at the underlying structure and proportions. Expecting grandeur: Many Federal homes were modest. Scale doesn’t determine the style, proportion and detail do. Where Federal Style Houses Are Best Preserved Federal residential streetscapes survive in greatest concentration along the northeastern seaboard, with a few notable clusters further south. These cities are worth knowing whether you’re visiting, researching, or evaluating a period property. City / Neighborhood State Notable Example Why It Stands Out Salem & Newburyport Massachusetts Gardner-Pingree House (1804) Samuel McIntire’s finest residential work, intact Federal streetscapes Beacon Hill Boston, MA Harrison Gray Otis House (1796) Dense concentration of Federal brick rowhouses; open to the public Old Town Alexandria, VA Lee-Fendall House (1785) Strong Mid-Atlantic Federal vernacular; primarily brick construction South End & Strawbery Banke Portsmouth, NH Moffatt-Ladd House (1763) Range of Federal scales from modest clapboard to formal commissions Historic District Charleston, SC Nathaniel Russell House (1808) Finest Southern Federal example: elliptical freestanding staircase Frequently Asked Questions How do I know if a historic home is actually Federal period or a later revival? Check the construction date first. Original Federal homes were built between roughly 1780 and 1830. A home built after 1880 with Federal-looking details is almost certainly Colonial Revival. Local historic registries and deed records can confirm the actual build date. Can a Federal-style house have an addition or renovation and still be considered Federal? Yes. Preservation standards focus on retaining the character-defining features, facade composition, entryway details, window placement, and interior trim. A well-executed addition that doesn’t compromise those elements doesn’t disqualify the home from its Federal classification. What exterior paint colors are typical for Federal-style homes? Off-whites, soft yellows, pale grays, and muted earth tones were most common. Brick homes were often left unpainted, with white trim. Bold or saturated colors are not consistent with the period’s restrained aesthetic. Is the Adam Style the same as Federal architecture? Largely yes. The Adam Style refers to the influence of Scottish architect Robert Adam, whose neoclassical vocabulary, elliptical motifs, delicate ornament, and refined plasterwork were the primary inspiration for American Federal architecture. In the U.S., “Federal” is the standard term, but both describe the same design tradition. Conclusion A federal-style house is what happens when a young country decides that how it builds reflects what it’s saying about itself. The symmetry wasn’t just aesthetic; it was a statement about order, reason, and civic ambition. Federal architecture managed something genuinely difficult: it created a distinctly American design language by refining, rather than copying, what came before it. Lighter than Georgian, more human-scaled than Greek Revival, it remains one of the most livable and visually coherent styles in the American residential canon. Whether you’re touring a historic district, evaluating a period property, or simply trying to make sense of what you’re looking at on a quiet New England street, knowing the federal house style gives you a new way to read the built environment around you.
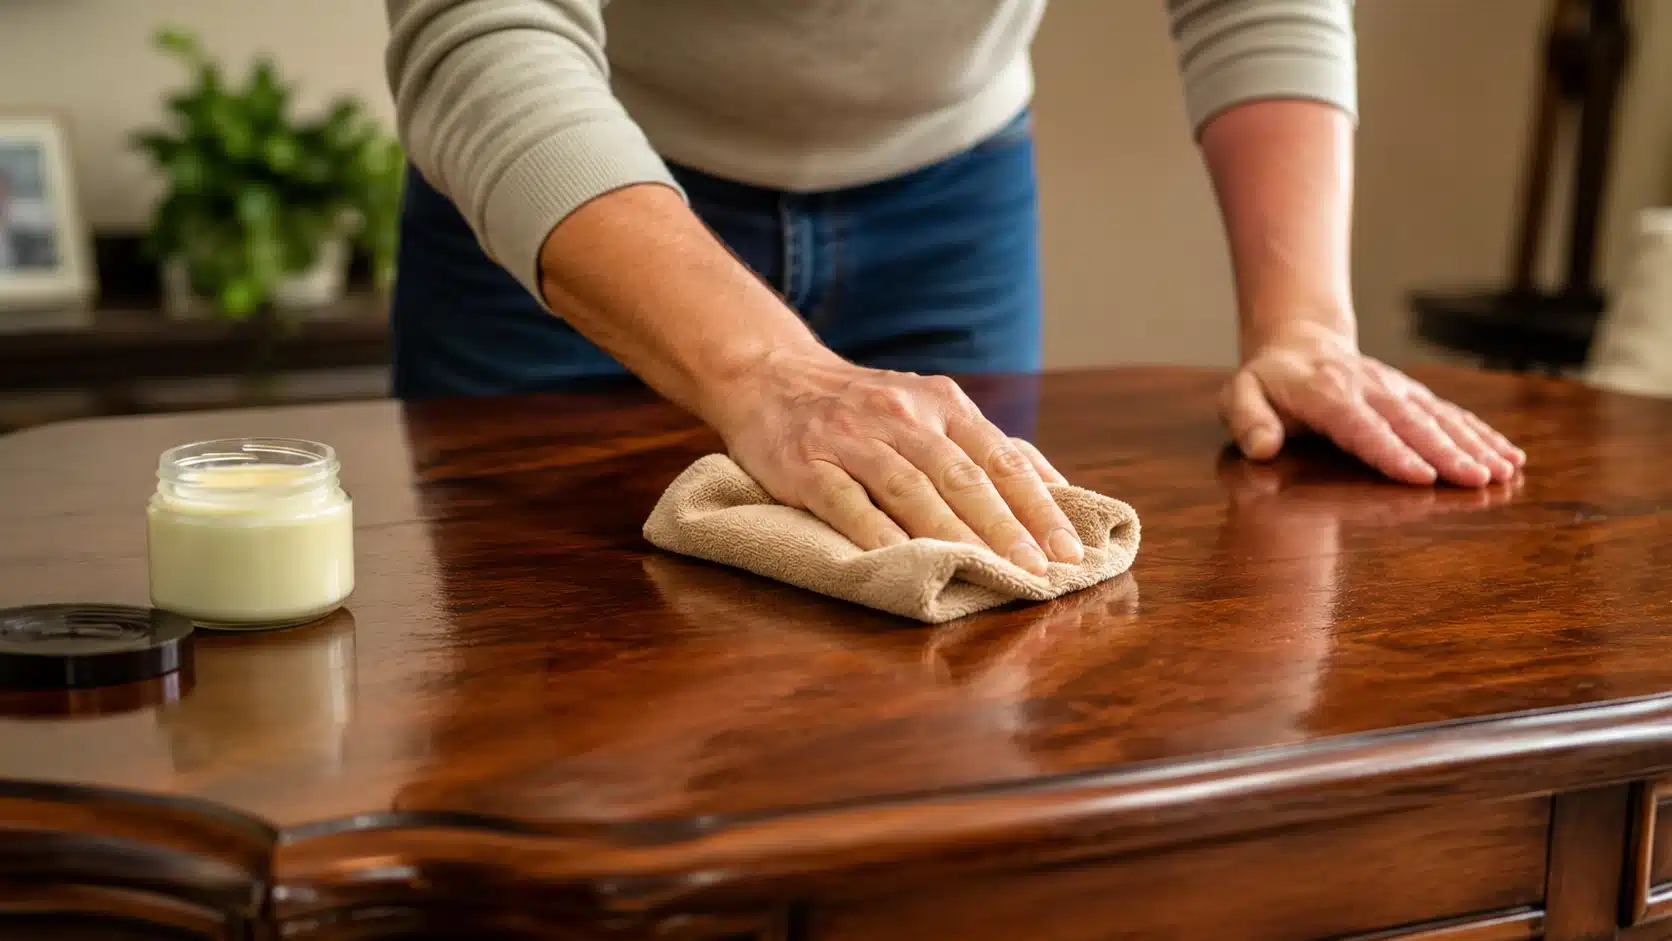
My rule for wood furniture care is simple: clean first, polish second. Skipping that order is where most mistakes start. When you rub polish into a dusty, sticky, or greasy surface, you trap the grime instead of removing it. The wood can end up looking dull, cloudy, or streaky even after you put in the work. A good polish should refresh the finish, not cover dirt. Today I will show you how to polish wood furniture the right way, from the first wipe-down to the final buff. You will learn how to clean, choose a polish, apply it lightly, and keep the surface smooth without overusing the product. Identify Your Finish Before You Open Anything The finish determines the product. Using the wrong polish on the wrong finish causes cloudiness and is hard to fix. Test with mineral spirits; residue indicates wax, while no change suggests lacquer, polyurethane, or varnish. Oil finishes are matte; a drop of linseed oil will bead if cured.Wood polish affects the surface, not the wood. Most furniture, whether solid oak, walnut, or a veneered piece, has a clear topcoat, lacquer, or oil finish already applied. Finish Type How to Identify Best Polish Type Avoid Lacquer / Polyurethane Hard surface; mineral spirits test shows no change Liquid spray or cream polish, light application Heavy wax can cloud the surface Wax finish Soft sheen; mineral spirits lifts residue onto cloth Paste wax, pure beeswax or carnauba Spray polishes and oil mixes, both strip wax Oil finish Matte look; linseed oil beads rather than absorbs Feed-and-wax products; orange oil conditioners High-gloss sprays create buildup on oiled wood Antique / shellac Amber tone; warm, hand-rubbed appearance Pure beeswax paste only, applied very sparingly Anything with silicone, contamination is very hard to reverse Note: Many budget spray polishes contain silicone, which offers instant shine but hampers future refinishing due to bonding issues. Check labels carefully. Supplies You Need Before You Start Keep your setup simple so the process stays clean, safe, and easy to control. These basic supplies help you clean, apply product, fix light marks, and buff properly: Dry microfiber cloths, at least two, one for applying, one for buffing Mild dish soap and warm water Soft cotton cloth for cleaning Furniture polish, wax polish, or a light homemade mix, matched to your finish type A wood touch-up marker for minor scratches, addressed before polishing Optional: gloves, pure beeswax, orange oil polish for drier wood How to Polish Wood Furniture: Step-by-Step Polishing works best when you prepare the surface first. Follow these six steps in order so the wood looks clean, smooth, and evenly finished without streaks or buildup. Step 1: Dust the Surface Properly Start with a dry microfiber cloth and wipe with the grain, not across it. Dust may look harmless, but tiny grit can scratch the finish once you begin rubbing. Pay close attention to carved details, joints, legs, and edges where dirt tends to settle. For tight spots, use a clean, dry paintbrush first. This protects the wood finish and gives your furniture polish a cleaner surface. Step 2: Clean the Wood Before Polishing Dusting removes loose dirt, but it does not remove fingerprints, food film, or oily buildup. Use a barely damp cloth for light cleaning, then dry the surface right away. For sticky spots, mix a few drops of mild dish soap with warm water. Wipe in small sections and dry each one fully. Avoid soaking the surface. Clean wood furniture responds better to polish and helps prevent cloudy buildup. Step 3: Fix Marks Before You Polish Do not polish over marks and sticky areas. Polish can make dull spots stand out more. For white water rings, try a small amount of non-gel toothpaste or petroleum jelly, then wipe and buff dry. For light scratches, rub a walnut or pecan kernel along the mark. Use a matched touch-up marker for deeper lines. Fixing surface scratches first gives the wood polish a smoother result. Step 4: Choose the Right Polish Pick the polish based on the furniture finish and age, use the identification table above if you are not sure what you have. Spray or liquid polish works for lacquered and polyurethane-finished pieces that need a quick refresh. Wax polish suits older or antique furniture because it lasts longer and gives a deeper, softer shine. Homemade oil mixes can work on sealed wood, but too much leaves a sticky film and attracts dust. Test any furniture polish in a hidden spot first to protect the wood surface. Step 5: Apply Polish the Right Way Apply polish to the cloth, not directly to the wood. Work in small areas and rub with the grain using light, even pressure. You only need a thin layer. Too much product can leave streaks or a greasy feel. Follow the product label if it says to wait before buffing, some wax products need 2 to 3 minutes to begin setting before the cloth will pick up the excess cleanly. Careful polish application helps create an even wood shine without extra residue. Step 6: Buff Until the Surface Feels Dry Buffing creates the final look, so do not rush it. Use a clean, dry microfiber cloth and work over each polished area. Start with small circular motions to lift extra residue, then finish with long strokes along the grain. Keep going until the surface feels smooth, not oily. Check from a low angle with a light source raking across the surface to catch any streaks before you move on. A surface that still looks slightly cloudy needs more buffing, not more product. Proper buffing prevents furniture polish buildup over time. How Often Should You Polish Wood Furniture? You should dust wooden furniture weekly because removing dust is the easiest way to protect the finish. It only takes a minute and helps stop grit from scratching the surface. Clean spills, fingerprints, and sticky marks as soon as they appear, then dry the wood thoroughly to prevent moisture from remaining on the finish. Use furniture polish every two to three months, or only when the surface starts to look flat, dry, or dull. Polishing too often is one of the biggest mistakes. Each use leaves a thin layer behind, and those layers can build into a cloudy or tacky film over time. Good wood furniture care means polishing when the piece needs it, not every time you clean. How to Polish Specific Wood Furniture Pieces Different furniture pieces need different care. A table, chair leg, carved detail, or naturally polished surface all need a lighter hand, a clean cloth, and patient buffing. A piece with a cracked finish or deep gouges needs the finish stripped and reapplied before any surface product will be effective. The right furniture polish, used lightly and buffed fully, leaves wood looking refreshed without product buildup. 1. How to Polish a Wooden Table Wooden tables accumulate food film, hand oils, dust, and drink rings more quickly than most furniture. A light polish works best because flat tops show streaks, haze, and buildup quickly: Clear surface: Remove dishes, decor, mats, and papers before cleaning or polishing. Clean edges: Wipe the table edge and apron where oils and crumbs often collect. Use less: Apply a small amount of polish to the cloth, not the tabletop. Follow grain: Rub with the grain using light, even pressure across the full surface. Buff center: Spend extra time where hands, plates, and cups most often touch. Wait before use: Let the table sit for 30 minutes before replacing items. 2. How to Polish Wood Chair Legs and Carved Pieces Chair legs, grooves, and carved wood need careful work because polish can gather in tight spaces. Too much product dries white, sticky, or uneven in detailed areas: Dust grooves: Use a soft dry brush to remove dust from carved lines first. Fold cloth: Wrap a microfiber cloth tightly around your fingers for better control. Use sparingly: Add only a small amount of polish to avoid residue buildup. Work short: Polish in small strokes that follow the carving or wood grain. Press gently: Push the cloth into details without forcing product into cracks. Buff details: Use a clean corner of a cloth to remove excess polish from the grooves immediately, before it sets. 3. How to Polish Wood Furniture Naturally Natural polish can work for sealed lacquer or polyurethane finishes when used lightly. It is not right for every finish, avoid oil mixes on wax finishes, shellac, or any piece you plan to refinish, so test first and avoid using oils too often: Mix lightly: Use one part white vinegar with three parts olive oil. Try lemon: Swap vinegar for lemon juice for a fresher scent. Test first: Apply a small amount on a hidden area before treating the piece. Use little: Put a few drops on the cloth instead of soaking the wood. Buff fully: Keep wiping until the surface feels dry, not oily. Watch haze: Stop using oil mixes if the finish looks cloudy or tacky. Common Wood Polishing Mistakes That Dull Furniture Over Time Small polishing mistakes can leave wood looking cloudy, greasy, or scratched. Most problems come from too much product, poor cleaning, rough cloths, or not buffing long enough: Mistake Why It Dulls Furniture Better Approach Polishing dirty wood Traps dust, oil, and grime under polish Clean and dry the surface first Using too much polish Leaves a sticky film that collects dust Apply a thin layer only Spraying wood directly Creates uneven wet spots and buildup Put polish on the cloth Using rough cloths Can scratch or haze the finish Use clean microfiber cloths Using silicone-based sprays Embeds silicone into the finish; makes refinishing very difficult later Check labels before use; avoid products listing silicone or dimethicone Mixing products Layers can react or turn cloudy Remove old buildup before switching Skipping buffing Leaves residue on the surface Buff until the wood feels dry Good polishing is more about control than product. Use less, clean first, buff longer, and let the wood tell you when it needs another round. Tips to Keep Wood Furniture Looking Good Between Polishes Good daily care helps wood stay clean, smooth, and bright between polish sessions. These habits reduce fading, water marks, heat damage, scratches, and finish cracking over time: Limit sunlight: Keep wood furniture out of direct sunlight when possible. UV exposure can fade the finish and cause the topcoat to crack, this is one failure mode that polish cannot reverse once it starts. Use surface protection: Place coasters, placemats, and felt pads under cups, plates, lamps, decor, and anything that could scratch surfaces. Wipe spills fast: Use a dry cloth right away, and wipe with the grain so moisture does not sit on the surface. Avoid direct heat: Do not place hot mugs, pans, or dishes on wood. Heat can leave white marks or blister the finish. Control humidity: Keep room humidity steady where possible. Large humidity swings can make wood move and crack the finish at joints and edges. Between polishes, prevention matters most. Protect the surface, clean small messes quickly, and keep heat, sun, and moisture away from the wood whenever you can. Frequently Asked Questions How do you tell if your wood furniture has a wax finish versus a lacquer finish? Rub a small hidden spot with a cloth lightly dampened with mineral spirits. If the surface becomes slightly tacky or a residue lifts onto the cloth, it likely has a wax finish. If nothing changes, it is probably lacquer, polyurethane, or a conversion varnish. This step takes 30 seconds and tells you exactly which type of polish to reach for. Can polishing fix a finish that has turned white or cloudy? If the cloudiness is product buildup, wiping with diluted white vinegar (one part vinegar to five parts water), drying fully, and then polishing lightly often clears it. If the cloudiness is moisture trapped in the finish layer itself, polishing will not fix it; the finish needs professional attention or reapplication. Can you polish wood furniture with olive oil? A light application occasionally works on sealed lacquer or polyurethane finishes, but olive oil is not suitable for wax finishes, shellac, or any piece you plan to refinish. It can darken lighter finishes and attract dust over time. Always buff until the surface feels completely dry, not greasy at all. How do you remove furniture polish buildup from wood? Wipe the surface with a cloth dampened with diluted white vinegar (1 part vinegar to 5 parts water). Work with the grain in small sections and dry immediately after each pass. This lifts most product buildup without damaging the underlying finish. Once fully dry, apply a thin fresh coat of the appropriate polish and buff well. Final Thoughts Knowing how to properly polish wood furniture yields surprisingly subtle results, which is the main point. A clean, lightly polished, and fully buffed surface looks elegant without haze, sticky residue, or a greasy sheen that misguides the light. Begin by identifying the finish before applying any product. Match the polish to the finish type, apply it to a cloth rather than directly on the surface, and check the label for silicone. This contamination is difficult to undo. My routine is simple: dust weekly, clean as needed, and use furniture polish every two to three months or when the wood appears flat. Use small amounts and buff thoroughly; the finish will remain clean for years without buildup from overapplication. Ensure surfaces are clean, match the product, and buff until the cloth is clean. Let me know if this was helpful.

