


Have you ever turned on the shower and noticed the water spraying everywhere except where you need it? It usually means your showerhead needs a good clean. If you’re wondering how to clean a showerhead buildup the easy way, this guide will walk you through it. Shower heads get clogged when hard water leaves mineral buildup behind. Soap scum can stick around the nozzles, too. Over time, moisture can also lead to mold or a musty smell. I’ll show you three simple ways to fix it: The Baggie Soak Method, Detach & Deep Clean, and The Natural Scrub Method. You’ll know which method best fits your shower. Why Should You Clean Your Shower Head Regularly? Cleaning your showerhead regularly helps keep the water flowing evenly and prevents mineral buildup from blocking the spray holes. Over time, hard water, soap scum, and moisture can accumulate inside and around the showerhead, leading to reduced water pressure, uneven spray patterns, and stains. Regular cleaning can also help reduce mold and mildew growth, especially in humid bathrooms. A clean shower head not only works better but can also make your showers feel more comfortable. It may even help extend the life of the fixture by preventing buildup from becoming difficult to remove. Spending a few minutes on routine cleaning can save you from dealing with stubborn clogs and deeper cleaning later. Signs Your Shower Head Needs Cleaning Your showerhead may need cleaning when the water flow starts to change or the surface looks dirty. These signs usually mean that mineral buildup, grime, or mold may be blocking the spray holes. Weak water pressure can mean the spray holes are clogged. Water spraying in odd directions often means that buildup is blocking some nozzles. White, chalky buildup is usually a sign of hard-water minerals. Brown or green stains can come from rust, minerals, or old buildup. A musty smell may mean mold or mildew is growing around the showerhead. Uneven water flow may mean some spray holes are blocked. If you notice any of these signs, a quick clean can help your showerhead work better and feel fresher. How Often Should You Clean a Showerhead? You should lightly clean your showerhead once a week to prevent buildup from getting worse. A vinegar soak once a month is a good way to keep the spray holes clear and the water flowing well. For a deeper clean, remove and clean the showerhead every 3 to 6 months. If you have hard water, you may need to clean it more often because mineral buildup can form faster. Method 1: How to Clean a Shower Head If your showerhead looks cloudy, crusty, or the water sprays in odd directions, I’d start here. A simple bag-and-vinegar trick that helps loosen limescale in about 30 minutes using common household items. This is the easiest method because you do not need to remove the showerhead: Step 1: Fill a Plastic Bag With Vinegar Take a sturdy plastic bag and pour enough white vinegar into it to cover the showerhead. You do not need to fill the whole bag. Just add enough so the spray holes will sit inside the liquid. White vinegar works well because it helps break down the white, chalky buildup caused by hard water. Hold the bag upright while filling it so it does not spill before you place it over the showerhead Step 2: Place the Bag Over the Shower Head Carefully lift the vinegar-filled bag and slide it over the showerhead; secure it with a rubber band, hair tie, or zip tie. Make sure the nozzles are fully covered by the vinegar. This part matters because the vinegar needs to come into direct contact with the clogged spray holes. If your showerhead is larger, use a bigger bag. Adjust the bag slowly so it sits well and does not pull too hard on the shower pipe. Keep the opening of the bag near the shower arm. Let It Soak for 30 Minutes Step 3: Remove the Bag Carefully After soaking, hold the bag with one hand and remove the band with the other. Lower the bag slowly so the vinegar does not spill on you or the floor. Pour the used vinegar down the drain. You may see small bits of buildup in the liquid, which means the soak helped loosen the clog. Wipe the showerhead with a damp cloth to remove any vinegar residue on the outside. Step 4: Run Hot Water Through the Shower Head Turn on the shower and let the hot water run for a minute or two. This helps flush out loosened buildup from the spray holes. You may notice the water pressure looks better right away. If some holes are still blocked, gently rub them with your fingers or use an old toothbrush. Do not use sharp metal tools because they can damage the nozzles. Finish by wiping the showerhead dry with a clean cloth. Best For: This method is best for light to moderate mineral buildup on the shower head, fixed shower heads that are hard to remove, and regular monthly cleaning to keep water flowing well. Pro Tips Do not soak brass, nickel, or gold finishes for too long. Use warm vinegar to help loosen buildup faster. Add baking soda after soaking for extra scrubbing power. For more details, refer to the video below. Method 2: Detach & Deep Clean This method is best when your showerhead is badly clogged, and a simple soak does not fix it. By removing the showerhead, you can clean both the inside and the outside more thoroughly. I’d use this method when the water pressure is very low or the showerhead hasn’t been cleaned in months. Cleaning Instruction: Turn off the shower before you start. Unscrew the showerhead by hand, or use pliers if it feels stuck. Wrap a cloth around the showerhead before using tools to protect the finish. Place the showerhead in a bowl filled with white vinegar. Let it soak for several hours or overnight for heavy buildup. Scrub the inside and outside with an old toothbrush. Use a toothpick to clear blocked spray holes gently. Rinse the showerhead well with warm water. Screw the showerhead back onto the shower arm. Run water for a few minutes to flush out loose dirt and buildup. Best For: Severe clogging that blocks the spray holes | Very low shower pressure | Hard water buildup on the showerhead | Showerheads that have not been cleaned in months. Pro Tips: Check the washer or filter screen while the showerhead is removed. Replace worn washers if you notice leaks after reattaching them. Note: Avoid harsh cleaners on coated finishes can cause damage. Method 3: The Natural Scrub Method This method is great when your showerhead only needs a quick clean. I’d use it for light stains, small spots, or weekly upkeep. It is also a good choice for delicate finishes because you can clean it gently without soaking the showerhead for long. Cleaning Instruction: Mix baking soda with a little water to make a thick paste. Apply the paste to the showerhead with your fingers or a soft cloth. Gently scrub the showerhead with an old toothbrush. Focus on the nozzles and stained areas where buildup collects. Wipe the showerhead with a damp cloth. Run warm water for a minute to rinse the paste away. Dry the showerhead with a microfiber cloth to prevent water spots. Best For: Quick refreshes between deeper cleans | Mild stains on the showerhead | Weekly maintenance to prevent buildup | Showerheads with delicate finishes. Pro Tips: Add a small amount of vinegar for tougher spots. Dry the showerhead after cleaning to slow future buildup. Note: Do not use rough scrubbers because they can scratch the finish. Which Method Is Best for You? Here’s a simple table to help you pick the best method based on how dirty or clogged your showerhead is. Method Best For Why Choose It The Baggie Soak Method Light to moderate mineral buildup, fixed shower heads, and monthly cleaning It is easy, quick, and you do not need to remove the showerhead Detach & Deep Clean Severe clogging, very low water pressure, and heavy hard water buildup It gives the showerhead a deeper clean, both inside and out. The Natural Scrub Method Quick refreshes, mild stains, weekly upkeep, and delicate finishes It is gentle, simple, and good for keeping buildup from getting worse. If you are not sure where to start, I’d choose the Baggie Soak Method first. It works well with most showerheads and helps you see if a deeper clean is needed later. What Not to Use on a Shower Head Some cleaners and tools can damage your showerhead or make cleaning unsafe. I’d avoid these items to prevent scratching the finish, damaging the spray holes, or creating strong fumes. Do not mix bleach with vinegar because it can create unsafe fumes. Do not use steel wool, as it can scratch the showerhead’s finish. Do not use harsh abrasive powders because they can wear down coated surfaces. Do not use strong acids because they may damage metal or special finishes. Do not use undiluted chemical cleaners because they can be too harsh. Do not use sharp metal tools on spray holes because they can bend or damage them. A gentle cleaner, a soft brush, and regular upkeep are usually enough to keep your showerhead clean and working well. How to Prevent Future Buildup? To prevent future buildup, try to keep your showerheads as dry and clear as possible between cleans. After each shower, wipe the showerhead with a soft cloth so water droplets do not dry on the surface and leave mineral spots. This small habit can slow down white chalky buildup, especially if your home has hard water. If you deal with hard water often, a water softener can help reduce mineral buildup before it reaches your showerhead. You can also install a shower filter to catch some minerals and other particles. After cleaning, run hot water through the showerhead for a minute to flush out any loose dirt or buildup. For regular upkeep, rub the nozzles once a week with your fingers, a soft cloth, or an old toothbrush. This helps keep the spray holes open and stops clogs from forming. Keep the bathroom fan on or open a window after showers to lower the moisture. Good airflow helps prevent musty smells, mold, and mildew around the showerhead. Frequently Asked Questions How do you remove mineral buildup from a showerhead? Soak the showerhead in white vinegar to loosen the mineral buildup. You can use the baggie method if it is still attached, or remove it for a deeper soak. After soaking, scrub the nozzles with an old toothbrush and run warm water to rinse. How to clean the buildup inside the showerhead? Remove the showerhead and place it in a bowl of white vinegar for several hours. After soaking, scrub the inside opening with a small brush. Rinse it well with warm water, then reattach it and run the shower to flush out loose buildup. How to decalcify a showerhead without removing it? Fill a plastic bag with white vinegar and place it over the showerhead. Make sure the nozzles are covered. Secure the bag with a rubber band and let it sit for about 30 minutes to a few hours. Remove the bag, scrub gently, and rinse. How often should I replace the mineral balls in my showerhead? Replace the mineral balls according to the product instructions, as each showerhead filter is different. Many need to be replaced every few months, depending on water use and water quality. If water flow drops, odor returns, or the balls look worn, it may be time. Do I need to descale my showerhead? Yes, you should descale your showerhead if the water pressure is weak, the spray holes look blocked, or you see white, chalky buildup. Descaling helps remove mineral deposits and keeps the water flowing evenly. A monthly vinegar soak is usually enough for regular care. To Sum Up Now you know how to clean the showerhead buildup without making the job feel hard. I’d start with the Baggie Soak Method because it works well with most showerheads and doesn’t take much time. It is a simple fix when you notice light buildup, weak spray, or water going in different directions. If your showerhead is badly clogged or the water pressure feels very low, Detach & Deep Clean is the better choice. It lets you clean both the inside and the outside more thoroughly. For quick touch-ups, The Natural Scrub Method is great for light stains, weekly upkeep, and delicate finishes. Try to clean your showerhead once a month. A little care can help keep the water flowing better and stop buildup from getting harder to remove later.
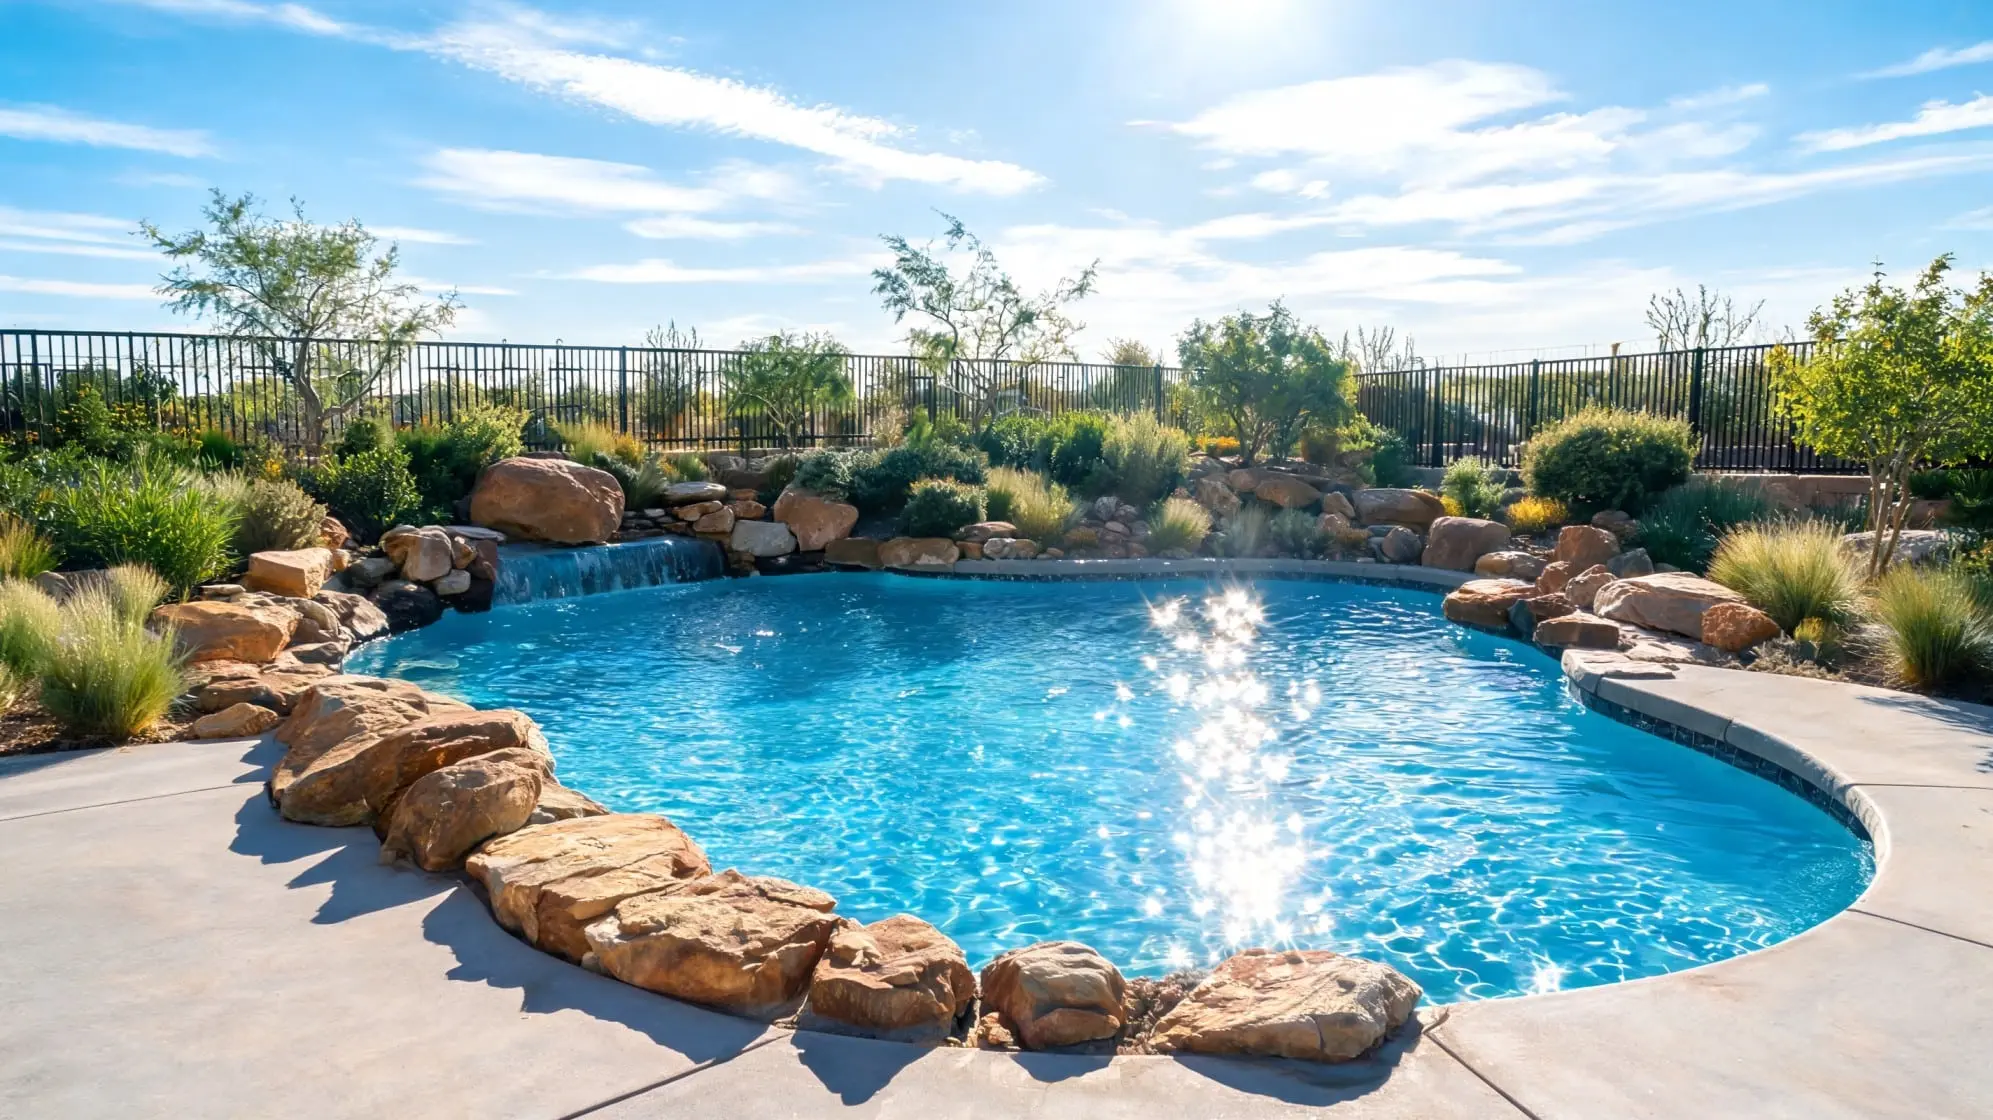
Have you ever looked at your pool and felt like the edges need something more than plain concrete or patchy grass? I’ve seen how the right rocks can make a pool area feel cleaner, calmer, and easier to care for. When you plan landscaping around a pool with rocks, you need more than a pretty color. You also need a safe footing, good drainage, and materials that hold up around water, sun, and pool chemicals. I’ll walk you through the best rock types, smart design ideas, plant pairings, installation tips, and common mistakes to avoid. You’ll get simple ideas you can use to shape your pool area with more comfort and less upkeep overall. What Rocks Work Best Around a Pool? Choosing the right rocks around a pool is not just about how they look. You also want materials that feel safe underfoot, handle water well, stay in place, and match the style of your yard. Here are the best rock options to use around a pool and where each one works best: River rock: best for soft borders, garden beds, and natural pool edges. Pea gravel: best for drainage zones and budget-friendly paths. Crushed granite: best for walkways, modern yards, and low-maintenance ground cover. Flagstone: best for pool decks, stepping stones, patios, and paths. Travertine: best for hot climates because it stays cooler underfoot. Slate: best for a darker, high-end look, but it needs proper installation. Boulders: best for focal points, waterfalls, privacy, and natural edges. Basalt or granite: best for saltwater pools and durable modern designs. The best choice depends on how you use the space. Smooth rocks work well near bare feet, flat stones are better for walking areas, and larger rocks can add shape, privacy, or a natural focal point. For the best results, mix two or three rock types rather than using a single material throughout. Landscaping Around Pool with Rocks Ideas Rock landscaping can make your pool area feel more finished, natural, and easy to care for. The right mix of stones can shape the space, guide foot traffic, improve drainage, and add style without needing much upkeep. 1. River Rock Border Around the Pool A river rock border is one of the easiest ways to make a pool edge feel soft and finished. Use smooth, rounded stones around planting beds, curved pool edges, or empty strips where grass does not grow well. The rocks create a clean break between the pool deck and the landscape without feeling too formal. Add metal, stone, or concrete edging to keep the rocks in place and stop them from washing into the pool. Mix two sizes of river rock to create a natural shape, then add low-growing plants for color and texture. Styling tips: Use mixed tan, gray, or white river rocks for a natural look. Add black metal edging for a cleaner finish. Pair with ornamental grasses or low shrubs. Keep rocks a few inches below coping height. Best for: Natural pool designs, coastal yards, and relaxed backyard pools. 2. Flagstone Stepping-Stone Path A flagstone stepping-stone path provides the pool area with a natural walkway without making the yard feel overly paved. Use large, flat stones to connect the patio, pool gate, outdoor shower, garden, or seating area. Leave small gaps between each stone and fill them with pea gravel, crushed rock, or low ground cover. This keeps the path stable while still feeling relaxed. Flagstone works well because each piece has a slightly different shape and tone. It also gives guests a clear place to walk, which helps protect grass and planting beds. Styling tips: Use larger flagstones for safer barefoot walking. Fill gaps with pea gravel or creeping ground cover. Keep stone spacing even for easy steps. Match the flagstone tone with your pool coping. Best for: Natural pool designs, rustic yards, garden-style pool areas. 3. Boulder Waterfall Feature A boulder waterfall can turn one side of the pool into a strong focal point. Place large boulders in a natural cluster, then let water spill over them into the pool or a small catch basin. Use smaller rocks near the base so the feature does not look too staged. Add ferns, palms, or grasses around the edges to soften the stone and make it feel part of the yard. This idea works best when the pool has curves, since the rock shape blends well with a freeform layout and nearby planting beds. Styling tips: Use odd-numbered groupings of boulders for a natural shape. Add smaller stones at the base to hide gaps. Place tropical plants behind the rocks for depth. Use warm lighting to highlight the water at night. Best for: Freeform pools, tropical pool areas, natural pool designs. 4. Crushed Granite Poolside Ground Cover Crushed granite is a smart choice for poolside areas where grass looks patchy or needs too much care. It creates a neat ground cover that handles heat, foot traffic, and water better than many soft surfaces. Use it around lounge chairs, in side yards, in garden beds, or in spaces between pavers. Light gray, tan, or gold granite works well in sunny areas because it feels calmer and does not hold as much heat as dark stone. Add edging around the space so the granite stays in place and does not spread onto the pool deck. Styling tips: Choose lighter granite in hot, sunny yards. Use firm edging to hold the material in place. Pair with large pavers for a clean walking path. Keep loose granite away from pool steps. Best for: Low-water yards, modern pools, narrow poolside spaces. 5. Desert-Style Rock Garden A desert-style rock garden is a strong choice if you want a pool area that looks clean and needs less water. Start with tan gravel or decomposed granite as the base, then add large boulders for shape and height. Pair the rocks with agave, cactus, yucca, aloe, or ornamental grasses. Keep plant spacing open so each plant has room to stand out. This style works well in hot, dry areas because it does not rely on a lawn. It also keeps the pool area simple, warm, and easy to maintain. Styling tips: Use tan, gold, or rust-colored gravel. Add two or three large boulders instead of many small rocks. Choose drought-friendly plants with bold shapes. Leave open space so the design does not feel crowded. Best for: Dry climates, desert pools, low-maintenance yards. 6. Modern Black Basalt and Concrete Design Black basalt and concrete create a clean, modern pool setting with strong contrast. Use black basalt pebbles or crushed basalt in narrow beds beside concrete pavers, coping, or a smooth pool deck. Keep the shapes straight and simple so the space feels planned, not busy. Add a few upright grasses, boxwood, or sculptural plants to break up the dark stone. This idea works best when you want a sharp, polished look. It also pairs well with rectangular pools, white walls, glass fencing, and simple outdoor furniture near shaded seating areas. Styling tips: Use basalt in narrow borders instead of large open areas. Pair black stone with white walls or pale concrete. Add simple plants with upright shapes. Avoid dark stone in areas where people walk barefoot often. Best for: Modern pools, rectangular pools, clean backyard layouts. 7. Rock Retaining Wall With Planters A rock retaining wall with planters is a smart way to handle a sloped yard near the pool. Use stacked stone, natural boulders, or cut stone blocks to hold soil in place and create raised planting areas. The wall adds height, while the planters soften the hard edge with grasses, lavender, small shrubs, or trailing plants. This design is useful when water runs toward the pool or when the yard feels uneven. Keep the wall low and layered if you want a natural look, or use cleaner stone cuts for a modern space. Styling tips: Use plants that will not drop too many leaves into the pool. Keep the wall height balanced with the pool size. Add soft grasses to break up the stone. Use matching stone for steps or nearby edging. Best for: Sloped yards, natural pool designs, layered landscapes. 8. Dry Creek Bed Near the Pool A dry creek bed adds movement to the pool landscape while helping with drainage. Use river rock, cobbles, and a few larger boulders to form a shallow, curved channel that guides rainwater away from the pool. The bed should look like water could naturally flow through it, even when it is dry. Place larger stones along the edges and smaller rocks in the center. Add grasses or drought-friendly plants nearby to soften the shape. This idea works especially well in yards with runoff, slopes, or wet spots after rain and storms. Styling tips: Curve the creek bed instead of making it straight. Use three rock sizes for a more natural look. Place boulders at turns for visual weight. Add plants along the edges, not in the water path. Best for: Natural pool designs, sloped yards, drainage-focused landscapes. 9. Poolside Fire Pit With Stone Seating A poolside fire pit with stone seating makes the pool area useful after swimming hours. Use gravel or crushed rock under the seating zone to create a dry, low-care base. Place larger stones, seat walls, or stone benches around the fire pit to frame the space. Keep enough distance from the pool edge so people can move safely between the water and the fire area. This design works best when the seating feels connected to the pool but not crowded. Add simple lighting so the space feels safe and calm at night. Styling tips: Use gravel under seating to reduce mud and weeds. Keep the fire pit away from splash zones. Add seat cushions for comfort. Use low lighting along the path from the pool to the fire pit. Best for: Entertainment-focused yards, large pool areas, and evening use. 10. Tropical Rock-and-Plant Border A tropical rock-and-plant border works well when you want the pool to feel lush and relaxed. Use large boulders as anchor points, then fill the gaps with river rock, palms, ferns, elephant ears, or bright flowers. A small fountain or low waterfall can make the border feel more like a resort pool without taking over the yard. Keep the planting beds full but not messy, and leave enough room for pool access. This idea works best with curved pools because the rocks and plants can follow the shape naturally and softly. Styling tips: Use boulders at corners or curves for structure. Add palms or tall plants behind smaller greenery. Use river rock as mulch around tropical plants. Keep plants trimmed so they do not crowd the pool edge. Best for: Tropical pools, freeform pools, lush backyard designs. 11. Low-Maintenance Gravel and Paver Layout A gravel-and-paver layout is a clean option for small yards, narrow poolside areas, and spaces where mowing is difficult. Use large concrete, stone, or porcelain pavers as the main walking surface, then fill the gaps with pea gravel or crushed rock. This gives the area a finished look without adding a full patio. Keep the joints even so the design feels neat and easy to walk across. It also helps with drainage, reduces lawn care, and works well beside lounge chairs, fences, or outdoor showers in tight spaces. Styling tips: Use large pavers for a safer walking surface. Keep gravel gaps narrow near the pool edge. Match the paver color with the pool coping. Add edging so gravel does not spill into the lawn or pool. Best for: Small yards, side yards, narrow pool areas. These rock landscaping ideas work best when you match the material to how the pool area is used. Smooth stones are better near bare feet, flat stones work well for paths, and larger rocks help shape the space. A simple mix of rocks, plants, edging, and good drainage can make the pool area look cleaner and feel easier to maintain. How to choose the right rocks for your pool area? The best rocks for your pool area should match how you use the space. Think about comfort, drainage, heat, pool type, and the style of your yard before choosing a material. For barefoot comfort: choose river rock, flagstone, travertine, or smooth pebbles because they feel better underfoot and are safer around wet pool areas. For drainage: Use pea gravel, crushed granite, river rock, or decomposed granite to help water move through the ground rather than collect near the pool. For hot climates: Pick light-colored stone, travertine, or pale gravel because they stay cooler than dark rocks in direct sun. For saltwater pools: choose harder stones like granite or basalt because they hold up better to salt, moisture, and pool chemicals. For modern yards: Use basalt, slate, gray gravel, concrete pavers, and simple boulders for a clean, sharp, and organized look. For natural yards: Go with river rock, boulders, flagstone, native grasses, and curved borders to create a softer, more relaxed pool setting. The right choice comes down to balance. A good pool rock design should look nice, feel safe, drain well, and be easy to maintain over time. Rocks to avoid around pools Not every rock is a good fit for pool areas. Some stones can feel sharp under bare feet, hold too much heat, create glare, or wash into the pool and equipment. I would recommend that, before choosing a material, you consider safety, comfort, cleaning, and how close the rock will be to the water. Sharp crushed rock in barefoot walking zones. Very dark stones in full sun because they can get hot. Loose gravel too close to the pool edge because it can enter the water. Soft porous stones near saltwater pools unless sealed. White rock in full sun if glare is a concern. Small gravel near pool equipment, if it can wash into drains or filters. The safest choice is a rock that stays in place, feels comfortable, and handles pool water well. Avoid materials that create extra cleaning, heat, glare, or filter problems, especially near the pool edge and walking zones. Pool Rock Landscaping by Design Style I like this section because it helps you move from “which rock looks good?” to “which rock fits my pool style?” Use the table below to match the rock, plants, and layout with the kind of pool area you want to create. Pool style Best rocks and materials Best plant pairings Design feel Natural pool River rock, boulders, flagstone, curved stone borders Native plants, ornamental grasses, low shrubs Soft, organic, and relaxed Modern pool Basalt, black pebbles, gray gravel, and concrete pavers Simple grasses, boxwood, sculptural plants Clean, sharp, and minimal Tropical pool Boulders, river rock, waterfall stones, natural pebbles Palms, ferns, large leafy plants, bright flowers Lush, resort-like, and calming Desert pool Tan gravel, decomposed granite, large boulders Succulents, cactus, agave, yucca Warm, dry, and low-maintenance Mediterranean pool Travertine, light stone, gravel, terracotta accents Lavender, olive trees, rosemary, small shrubs Warm, classic, and inviting Coastal pool Beach pebbles, light stone, pale gravel, driftwood accents Beach grasses, palms, dune-style plants Breezy, soft, and beach-inspired Family pool Smooth rocks, flagstone, slip-safe pavers, stable gravel Low-maintenance shrubs, soft grasses Safe, open, and easy to use A good pool design does not need too many materials. Pick one main rock, one accent stone, and a few plants that match the style. This keeps the space clean, safe, and easy to maintain. Best Plants to Pair with Rocks Around Pool Ideas Ornamental grasses: Add soft movement around rocks and work well in modern, natural, and low-maintenance pool designs. Succulents: Pair well with gravel, boulders, and desert-style pool areas because they need little water and stay neat. Lavender: Adds color, scent, and a soft Mediterranean feel beside light stone, gravel, or travertine. Agave: Creates a bold shape beside boulders, tan gravel, and desert-style rock beds. Yucca: Works well in dry pool landscapes and adds height without needing much care. Palms: Give the pool area a tropical feel and look great with river rock, boulders, and waterfalls. Hydrangeas: Add full blooms and color beside smooth stones, light gravel, and coastal-style pool borders. Native grasses: Blend well with river rock, boulders, and curved beds while needing less care once established. Rosemary: Adds greenery, scent, and structure near Mediterranean pool designs with gravel or stone edging. Note: Choose plants that do not drop too many leaves into the pool. Installation Tips for Landscaping Around Pool Good installation helps your rock landscaping stay neat, safe, and easy to care for. Before placing any stone, think about weeds, drainage, edging, and how people will move around the pool. Add landscape fabric under gravel: This helps reduce weeds and keeps the gravel from sinking into the soil. Use edging around rock areas: Edging keeps rocks from spreading into the pool, lawn, patio, or walking paths. Slope the ground away from the pool: A gentle slope helps rainwater drain away rather than collect near the pool’s edge. Use larger rocks near drainage zones: They are less likely to be washed away during heavy rain or runoff. Keep loose gravel away from pool steps: Small stones near steps or shallow lounging areas can fall into the pool and make the area feel unsafe underfoot. Leave access around pool equipment: Keep the area around pumps, drains, and filters clear so cleaning and repairs stay easy. When installed well, rocks should stay in place, drain properly, and make the pool area safer to use. A little planning at the start can prevent weeds, washouts, and extra cleanup later. Maintenance Tips for Landscaping Around Pool Rock landscaping is easier to maintain than grass, but it still needs light care to stay clean. Regular checks help keep the pool area fresh, safe, and free from weeds or buildup. Rinse decorative rocks as needed: A quick rinse removes dust, pollen, and dirt, helping the rocks keep their color. Remove leaves early: Clear leaves before they break down and stain the rocks or attract pests. Refill thin gravel areas: Add more gravel once or twice a year where the layer starts to look patchy. Pull weeds while they are small: Early weed removal keeps roots from spreading through the rock bed. Check edging after heavy rain: Make sure borders are still holding rocks in place after storms or runoff. Clean algae from shaded rocks: Damp, shady areas can grow algae, so clean them before they become slippery. Re-seal porous stone as needed: Stones such as travertine, limestone, or slate may require sealing to protect against stains and water damage. With simple upkeep, rock landscaping can stay attractive for years. Check the area often, fix small issues early, and your pool border will be much easier to manage. Common Mistakes to Avoid Rock landscaping around a pool should look good, but it also needs to feel safe and work well with water, heat, and foot traffic. These common mistakes can make the space harder to clean, less comfortable, or more expensive to fix later. Choosing rocks by color alone: A rock may look good in photos, but it also needs to be safe, durable, easy to clean, and suited to your climate. Ignoring how hot the surface gets: dark stones can heat up quickly in full sun, making the pool area uncomfortable for bare feet. Using sharp gravel where people walk barefoot: Rough crushed rock can hurt feet, so keep it away from steps, paths, and lounging areas. Skipping edging: Without edging, rocks can spread into the pool, lawn, patio, or garden beds. Mixing too many rock colors: Too many colors can make the pool area look busy, so stick to one main rock and one accent stone. Placing messy plants too close to the pool: Plants that drop leaves, flowers, or seeds can increase pool-cleaning work. Forgetting drainage: Poor drainage can lead to puddles, shifting rocks, weeds, and soil washing into the pool area. Not checking saltwater compatibility: Some soft or porous stones can stain, wear down, or need sealing near saltwater pools. Avoiding these mistakes will help your pool area stay cleaner, safer, and easier to maintain. Choose rocks for comfort, drainage, heat, and long-term use, not just for how they look on the first day. Frequently Asked Questions What are the latest trends in pool landscaping? Current pool landscaping leans toward natural stone, native planting, water-wise beds, soft curves, outdoor lighting, and spaces for sitting, dining, or cooking. Many designs also use rock borders, boulders, and simple water features to make the pool feel connected to the yard. What not to plant around a pool? Skip plants that drop lots of leaves, fruit, seed pods, thorns, or sticky sap. I would also avoid fast-spreading roots near paving and pool plumbing. Messy plants can clog filters, stain stone, and add extra cleaning after wind, rain, or heavy use. How to landscape around a pool on a budget? Start with one small zone instead of changing the whole yard at once. Use pea gravel, crushed granite, river rock, or mulch-style rock beds. Reuse existing pavers, add simple edging, choose small plants, and leave bigger features like waterfalls for later. How to make your pool look expensive? Keep the design simple and neat. Use one main stone, one accent stone, clean edging, soft lighting, and matching furniture. Add large planters, trim messy plants, hide equipment, and keep the pool deck clean. Small details often make the biggest difference. What is a cowboy tub? A cowboy tub is a stock tank used as a small backyard pool. It is usually a round galvanized steel tub, often set on level ground with a pump or filter. People like it because it costs less and fits smaller yards. What is a ghost pool? A ghost pool is not a common term for a backyard pool. It may refer to abandoned or hidden pools in local history, travel, or art projects. For home design, use clearer terms like natural pool, dark-bottom pool, plunge pool, or reflective pool. Landscaping Around Pool with Rocks Landscaping around a pool with rocks is a simple way to make your outdoor space look cleaner, feel more natural, and need less daily care. The best results come from choosing rocks that match how you use your pool, not just how they look. Smooth river rock, flagstone, travertine, gravel, boulders, and granite can all work well when placed in the right spots. You can use them for borders, paths, drainage, planting beds, waterfalls, or quiet seating areas. I always suggest considering comfort, heat, safety, water flow, and upkeep before choosing a material. Add the right edging, pair rocks with low-mess plants, and avoid sharp or loose stones near walking zones. With the right plan, landscaping around pool with rocks can make your pool area safer, easier to maintain, and more enjoyable year-round.
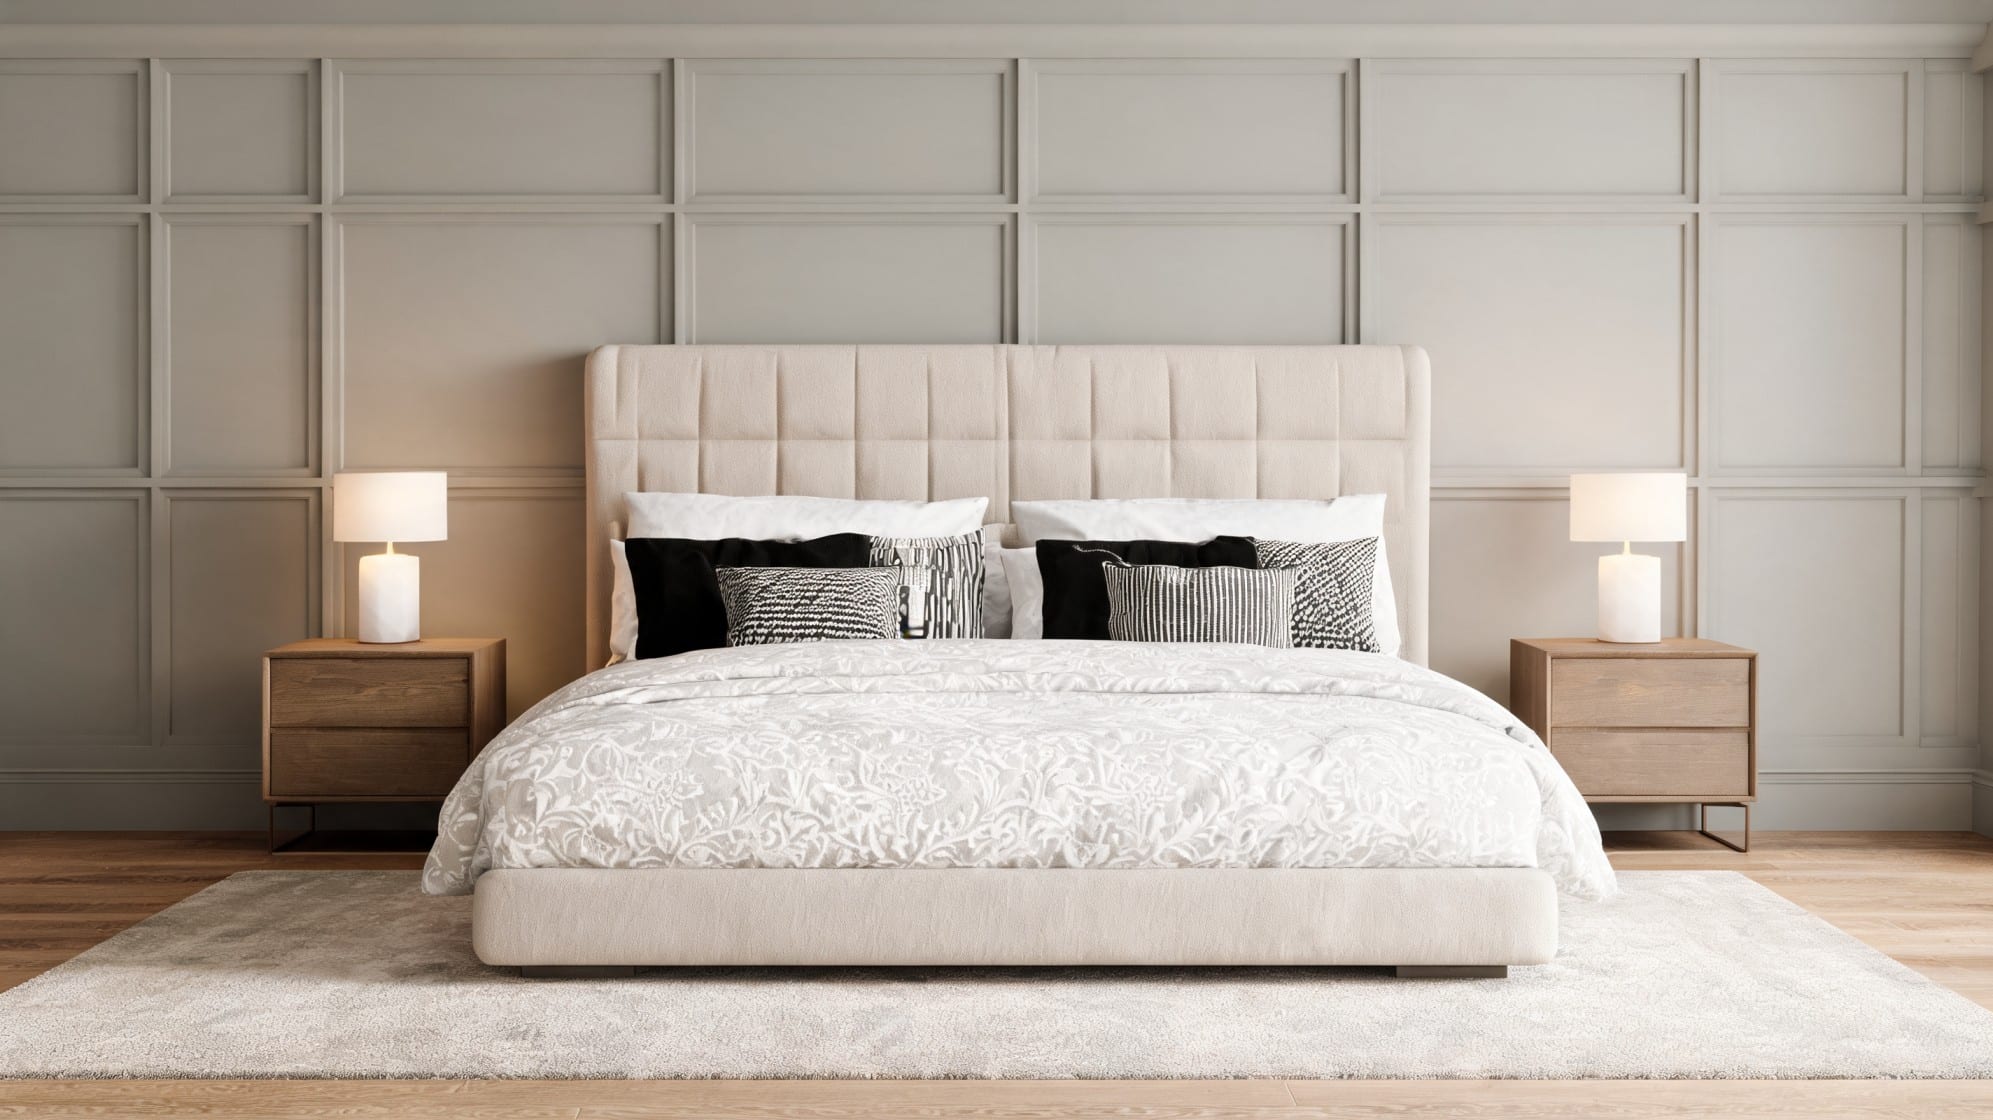
A plain wall can make a room feel empty, even when the rest of the space looks nice. I’ve seen how a simple DIY board and batten wall can change that feeling fast. It adds shape, detail, and texture without needing a full room makeover. Board-and-batten is also a good DIY project because the design is simple. You do not need fancy cuts for many styles. You need careful measuring, straight boards, clean spacing, and a smooth paint finish. I’ll walk you through what board and batten is used for, which styles you can try, the best materials, design ideas, common mistakes, and tips for making your wall look professional. What Is Board and Batten Used For? One of the main reasons people add board-and-batten is to create an accent wall. A bedroom wall behind the bed, a dining room wall, or an entryway can look more finished with this trim. It gives the room a focal point without adding too much decor. Board and batten can also make a room feel more custom. Basic drywall can look flat, but trim adds depth. Once the wall and boards are painted the same color, the whole wall can look built-in. This is why many people use it when they want a high-end look on a smaller budget. It can also help protect lower walls in busy areas. In entryways, hallways, mudrooms, and dining rooms, walls can get scuffed by shoes, bags, chairs, and everyday traffic. A half-wall board-and-batten design can help cover and protect those areas. This wall style works in many rooms. You can use it in bedrooms, bathrooms, hallways, dining rooms, offices, nurseries, and entryways. It can feel soft and cozy in a bedroom, clean and bright in a hallway, or bold and dramatic in a dining room. Types of Board and Batten You Can DIY There are many board-and-batten styles you can try at home. Some are very simple, while others need more planning. The best style depends on your room, your wall size, and the look you want. Classic vertical board and batten: This style works well in bedrooms, entryways, bathrooms, and hallways. It gives the wall a clean look without feeling too busy. Half-wall board and batten: This is a great choice for dining rooms, hallways, and entryways. You can paint the trim one color and leave the upper wall plain, or you can add wallpaper above it for more detail. Full-wall board and batten: This style makes a stronger statement. It works well behind a bed, behind a sofa, or in a home office. If your room feels plain, a full-wall design can make it feel more finished. Grid board and batten: This style looks clean and balanced. It works well in modern rooms, bedrooms, and living rooms. It takes more measuring, but the final look can feel very polished. Square board and batten: This design feels bold and neat. It is a good choice if you want a wall that looks planned and symmetrical. Geometric board and batten: This style is popular for bedrooms, nurseries, and accent walls. It needs more cutting and planning, so it may be better if you already feel comfortable with DIY projects. Thin batten modern style: This gives the wall a sleek look. It works well in simple, modern rooms where you want texture without heavy detail. Wide batten farmhouse style: It uses wider boards and often feels warmer and more rustic. This works well with soft whites, warm neutrals, wood furniture, and cozy decor. How to Do Board and Batten Step by Step If you’ve never added trim to a wall before, board and batten can still feel like a doable first project. I like this style because it looks custom. You do not need to rush it. When you take it one step at a time, the wall starts coming together in a simple and satisfying way. Here’s how you can build a clean DIY board and batten wall from start to finish: Step 1: Prep the Wall Clear the wall first so you have a clean space to work. Remove pictures, hooks, outlet covers, and anything leaning against the wall. Wipe the surface with a damp cloth to remove dust and dirt. Fill any holes, dents, or rough areas with wall filler, then sand them smooth once dry. Check the baseboard, corners, and nearby trim, as bumps can prevent boards from sitting flat. Good prep helps the boards attach more securely and gives your finished board-and-batten wall a cleaner, smoother look overall before installing any trim. Step 2: Paint the Wall and Boards Paint the wall and boards before installing them to make the final finish easier. Use the same color on the wall and boards if you want a smooth, built-in look. Roll paint over the wall first, then paint the front and sides of each board. Let the paint dry fully before moving ahead. This helps cover tight corners that may be hard to reach later. You may still need small touch-ups at the end, but this step gives you a cleaner start and saves effort during installation later on too. Step 3: Attach the Boards on Edges of Wall Start by attaching boards around the outside edges of the wall. These boards create the frame for the full design and help guide the rest of the project. Place boards along the left side, right side, top, and bottom if your layout needs a full border. Add a thin line of adhesive to the back, press the board into place, and check it with a level. Once it is straight, nail it securely. This frame keeps the board and batten pattern neat and balanced from the very beginning of installation. Step 4: Cut the Battens Measure the open spaces inside your frame before cutting the battens. Do not assume every space is the same, because walls, floors, and ceilings can be slightly uneven. Mark each batten length clearly on the board before cutting. Make slow, careful cuts so the ends stay clean. After cutting, hold each piece against the wall to check the fit. If a batten is too long, trim it little by little. A good fit helps each board sit flat and keeps the design polished and clean after everything is fully painted. Step 5: Install Vertical Battens Install the vertical battens first if your design includes both vertical and horizontal pieces. Line each batten up with the marks you made on the wall. Add adhesive to the back, press it into place, and use a level to make sure it is straight. Nail it once it lines up correctly. Keep the spacing even from one batten to the next. Step back often to check the full wall. Straight vertical battens make the design look clean, balanced, and professional when the full wall is complete and painted later. Step 6: Install Horizontal Battens After the vertical battens are in place, install the horizontal battens. Measure the spaces between the vertical boards because each section may be slightly different. Cut each horizontal piece to fit its own spot. Add adhesive to the back, press it into place, and nail it when it lines up well. Use a level so each piece stays straight and does not tilt. These horizontal battens finish the pattern and create a clean grid or panel look, depending on the style you want for your finished board and batten wall. Step 7: Fill Gaps and Nail Holes Once all boards are installed, fill the nail holes with wood filler or spackle. Press the filler into each hole, then scrape away extra so the surface stays smooth. Use paintable caulk along the edges where the boards meet the wall, corners, and trim. Smooth the caulk with your finger or a simple caulk tool. Let everything dry fully before sanding. This step hides small gaps and nail marks. It helps your board-and-batten look clean, finished, and more professional once the final coat of paint dries. Step 8: Paint the Wall With Board and Battens Finish by painting the wall, boards, and battens together for a smooth final look. Use a brush around board edges, corners, seams, and tight areas. Then use a roller on the wider sections of the wall. Apply thin coats so the paint does not drip or look heavy. Let the first coat dry before adding another coat if needed. Check for missed spots once the paint dries. Touch up small areas with a brush. Replace outlet covers, clean the space, and enjoy the finished wall for a fresh, polished result. For more details, refer to the video below. Best Material for DIY Board and Batten The material you choose can affect the cost, appearance, and lifespan of your board-and-batten wall. Some materials are easier to paint. Some are better for moisture. Some are cheaper for large walls. Material Best For Main Benefit MDF boards Smooth indoor walls Affordable and easy to paint Pine boards Real wood look Stronger and more natural PVC trim Bathrooms and damp spaces Handles moisture better Plywood strips Budget projects Covers large walls for less Pre-primed trim Faster painting Saves prep time For most beginner projects, MDF or pre-primed trim is the easiest choice. If you are working in a bathroom, PVC trim may be better. If you want a real wood look, pine is a good option. Board and Batten DIY Inspiration/Ideas Board and batten can fit many rooms and styles. You can keep it bright and simple, or you can use a dark paint color for a bold look. The best idea depends on the mood you want in the room. 1. Half-wall board and batten in a hallway Half-wall board-and-batten works well in a hallway because it adds detail without making the space feel narrow. It also helps protect the lower wall from shoes, bags, and daily traffic. Keep the top portion simple so the hallway still feels open and bright. This idea is great if you want a clean look that feels custom but not too heavy. Styling Tips: Paint the lower trim white and the upper wall warm beige. Add framed art above the trim for interest. Use a runner rug to soften the space below. 2. Board and batten with wallpaper above Board-and-batten with wallpaper above adds more character to the room while keeping the lower wall neat. The trim adds structure, and the wallpaper brings color, pattern, or texture. This idea works well in powder rooms, dining rooms, nurseries, and entryways. Choose a simple batten layout so the wallpaper can stand out without making the room feel too busy, crowded, or hard to style. Styling Tips: Pair floral wallpaper with soft white trim for charm. Use striped wallpaper on a taller wall for a taller look. Match one wallpaper color to the trim paint neatly. 3. Grid board and batten behind a bed A grid board and batten behind a bed can make the bedroom feel more finished and cozy. The square or rectangle pattern works like a large headboard, so you may not need much wall art. It adds depth behind the bed while keeping the room clean and calm. This idea looks especially good when the bed is centered on the wall and the spacing feels even and balanced overall. Styling Tips: Paint the grid wall soft white or gray. Add matching nightstands for balance. Use simple bedding to keep it calm and relaxed. 4. Floor-to-ceiling board and batten in an office Floor-to-ceiling board-and-batten in an office can make the room feel focused, polished, and more personal. Since the trim covers the full wall, it creates a strong backdrop behind a desk or reading chair. This idea also works well for video calls because the wall looks neat without needing much extra decor, art, or shelving. Styling Tips: Paint it deep green, charcoal, or warm white for mood. Add a wood desk for warm contrast and texture. Keep shelves simple so the wall stands out clearly in the room beautifully. Board and Batten vs. Wainscoting Wainscoting and board-and-batten are often used in similar rooms, so it is easy to mix them up. Both add detail to walls, and both can make a room look more finished. Still, they are not exactly the same. Feature Wainscoting Board and Batten Common height Usually lower wall Half-wall or full-wall Look Often more traditional Modern, farmhouse, or classic Styles Beadboard, raised panel, picture frame Vertical, grid, square, geometric DIY level Depends on the style Often beginner-friendly Best rooms Dining rooms, hallways, bathrooms Bedrooms, entries, offices, halls Both options add depth, detail, and a finished look. If you want a classic lower-wall design, wainscoting may be a good fit. If you want simple lines and easy cuts, board-and-batten may be better. Common Board and Batten DIY Mistakes to Avoid A board-and-batten wall can look great, but small mistakes can show once the paint goes on. The good news is that most of these mistakes are easy to avoid if you plan first. Not measuring the full wall first is one of the biggest mistakes. This helps you plan spacing and avoid ending with odd gaps at the edges. Using uneven spacing can make the wall look off. Step back and look at the layout before you start nailing boards in place. Forgetting outlets and switches can create problems. Look at every outlet, switch, vent, and wall feature before you choose your spacing. Skipping caulk can make the wall look unfinished. Even if boards seem tight, small gaps can show after paint. Using boards that are too thick can make the trim stick out too far. Choose boards that match the size of the room and existing trim. Not checking for level is another common issue. This helps the full design stay clean. Painting before filling nail holes can leave visible marks. Fill the holes first, let the filler dry, sand it smooth, then paint. Choosing the wrong material for damp rooms can cause damage later. MDF may swell if it gets too much moisture. For bathrooms or laundry rooms, PVC or sealed wood is usually a better choice. Tips for Making a DIY Board and Batten Look Professional You do not need to be an expert to make board-and-batten look good. The cleanest projects usually come down to careful measuring, straight lines, smooth seams, and patient painting. Sketch the layout before cutting so you can see the pattern clearly. Use a level for every board so the design stays straight. Keep spacing even so the wall looks balanced. Caulk every seam so small gaps disappear. Sand filler smooth so nail holes do not show through the paint. Paint the wall and boards the same color for a built-in look. Use semi-gloss or satin paint for easier cleaning in busy areas. Match the style to the room so the wall feels natural. A simple sketch can help more than you think. Draw the wall, mark the boards, and note outlets or switches. This helps you spot problems before cutting any trim. Frequently Asked Questions What is a cheaper alternative to board-and-batten? A cheaper alternative is using MDF strips, plywood strips, or thin lattice trim instead of solid wood boards. You can also paint the wall first and add only battens, skipping full backing boards. This keeps the look neat while lowering material costs for a small DIY project. Can I DIY board-and-batten siding? Yes, you can DIY board-and-batten siding, but exterior work requires more care than indoor wall work. Use weather-safe materials, plan for water drainage, seal every joint, and follow local building rules. If the wall affects your home’s outer protection, get help from a skilled installer. Is board-and-batten outdated in 2026? No, board-and-batten is not outdated in 2026 when used with clean spacing, simple colors, and a planned layout. Recent design sources still list wall paneling, vertical designs, and board-and-batten accent walls as active 2026 trends. Keep it balanced, not overdone. What are the disadvantages of board-and-batten? The main disadvantages are cost, measuring time, wall prep, and extra cleaning around trim edges. If spacing is uneven or boards are not level, the wall can look messy. In damp rooms, the wrong material may swell. Good planning helps avoid most of these problems. Final Thoughts Board and batten is a simple way to add style to your home. It can make a plain wall feel warmer, cleaner, and more finished without needing a large renovation. It also works with many home decor styles. You can make it feel modern with thin battens and a dark color. You can make it feel farmhouse with wider boards and warm white paint. You can make it feel classic with half-wall trim in a dining room or hallway. If you are new to DIY, start with one accent wall. A bedroom wall, hallway wall, or entryway is a good place to begin. Choose a simple vertical design before trying a grid or geometric layout.
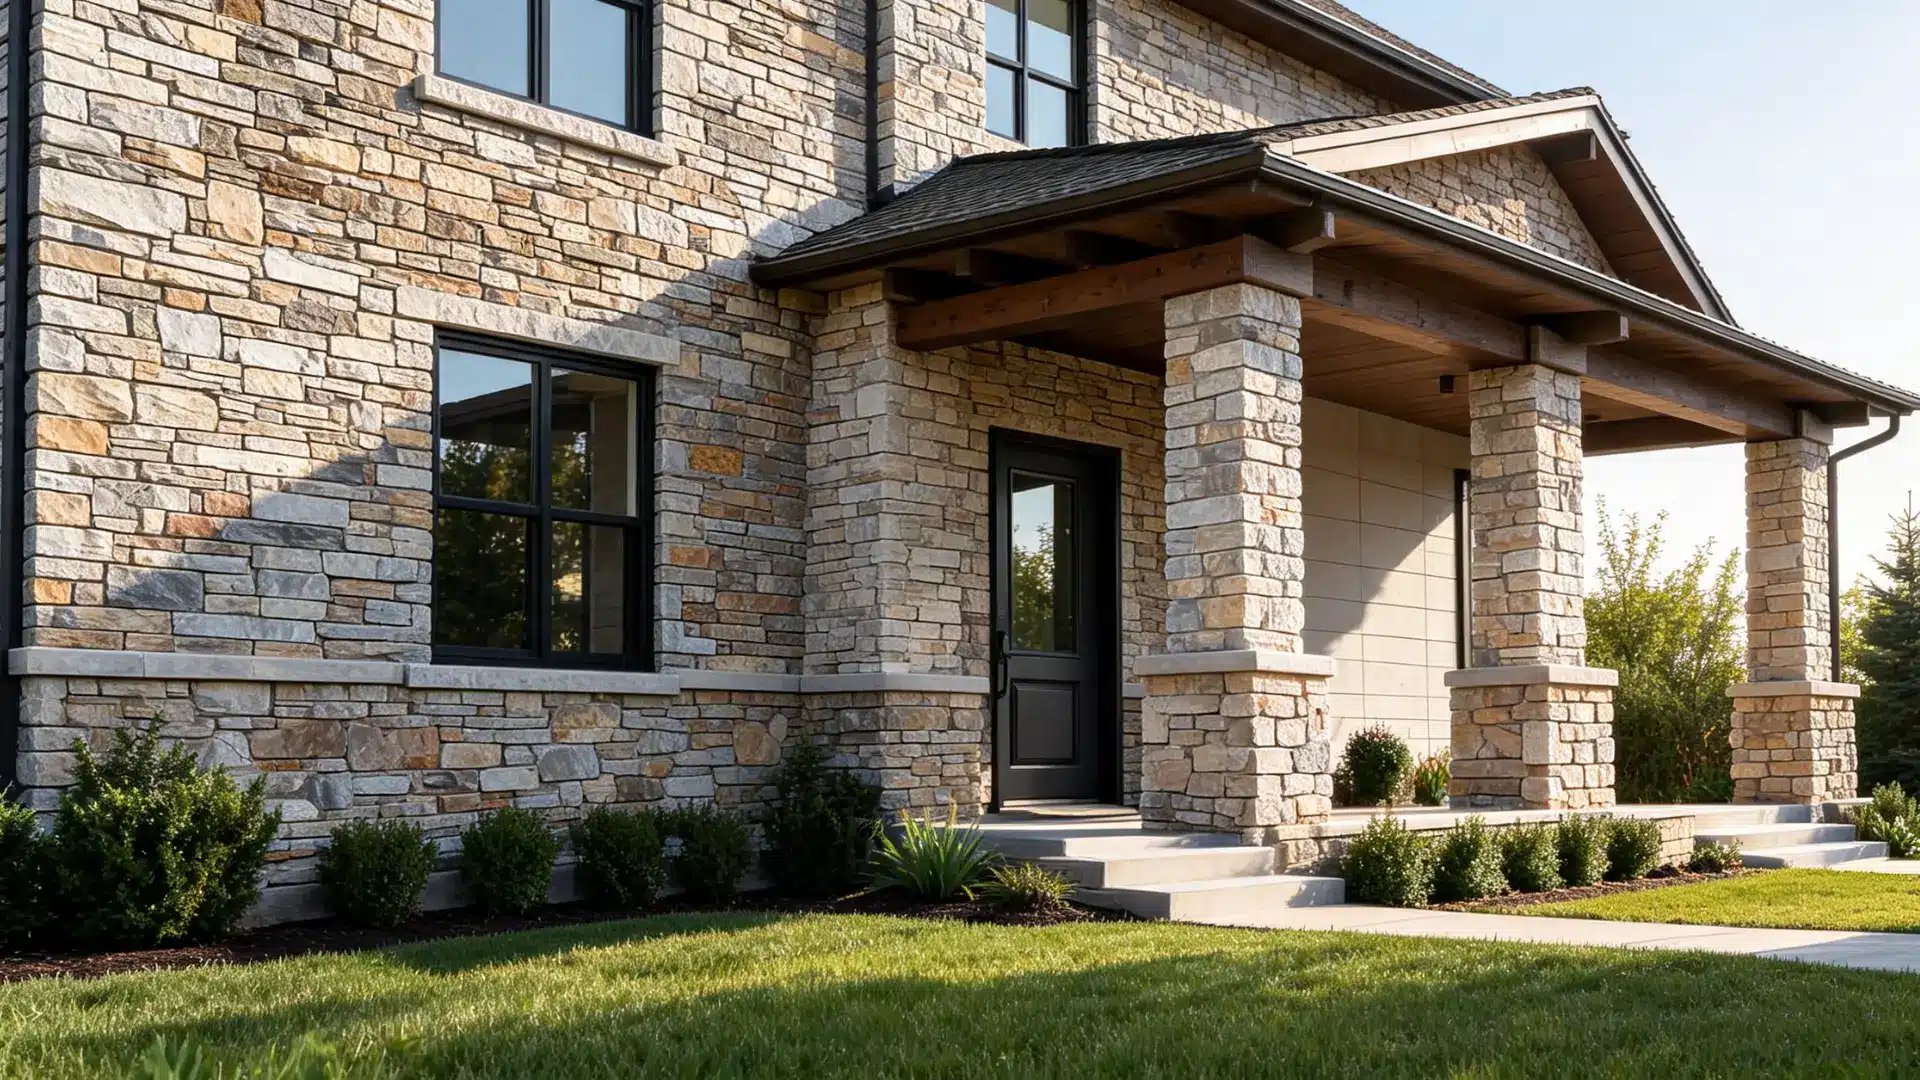
Choosing the right types of exterior stone for a home can change the look, strength, and maintenance needs of a home’s exterior walls. Some stones are better for full facades, while others work best on porch columns, chimneys, lower walls, or small accents. Natural stone gives the most real texture and color variation. Manufactured stone veneer is lighter and often easier to install. Faux stone panels are useful for quick updates, but they may not have the same depth as real stone or cement-based veneer. I would start by comparing each stone based on appearance, durability, climate suitability, and maintenance requirements. That makes it easier to choose a stone that fits the home instead of picking only by color. Understanding Stone Veneer Siding for House Exteriors Stone veneer siding is a lightweight exterior cladding material designed to replicate the appearance of natural stone while reducing cost, weight, and installation complexity. It is widely used in residential architecture to improve curb appeal without requiring full masonry construction. Available in both natural thin-cut veneer and manufactured forms, it offers design flexibility while maintaining a realistic stone finish. Homeowners often choose stone veneer for its ability to suit both modern and traditional styles. It can be applied to exterior walls, entryways, columns, and accent sections to create a strong sense of visual depth. Unlike full stone, it does not need heavy structural support, making it suitable for renovations and new builds. Its durability, variety of textures, and weather resistance make it a practical long-term exterior design choice. Types Of Exterior House Stone And Where They Work Best The most common types of exterior house stone include granite, limestone, sandstone, slate, quartzite, fieldstone, cobblestone, travertine, marble, basalt, schist, manufactured stone veneer, and faux stone panels. Each option has a different style, weight, cost level, and care needs. This section covers the main query first. Use it to compare the features, benefits, best uses, and drawbacks of each exterior stone type before moving into cost, climate, and design details. 1. Fieldstone Fieldstone is a naturally irregular stone collected directly from fields or riverbeds. It creates a rustic and organic exterior look with unmatched variation in shape and tone. It is often used in cottages, farmhouses, and heritage-style homes where natural texture is preferred over uniformity. Fieldstone blends well with landscapes and garden walls, making it a popular, timeless choice for exterior façades seeking natural character and visual depth. Benefits: Strong visual appeal, blends with nature, highly durable Best Climate: Temperate and cold regions Drawbacks: Difficult installation, higher labor cost, uneven fitting 2. Granite Granite is one of the hardest natural stones used in exterior construction. It has a dense crystalline structure that gives it extreme durability and resistance to weather damage. Its speckled surface adds a premium, polished appearance to home exteriors. Granite is widely used in modern and traditional architecture where long-lasting performance and low maintenance are key priorities for homeowners. Benefits: Extremely durable, low maintenance, weather-resistant Best Climate: Hot, cold, and extreme weather zones Drawbacks: Expensive, heavy, difficult to install 3. Limestone Limestone is a soft, sedimentary stone known for its smooth texture and neutral beige or cream tones. It creates a clean, elegant exterior suitable for both modern and classic homes. Over time, limestone develops a natural patina that enhances its character. It is widely used in residential façades where subtle beauty and balanced aesthetics are preferred over bold textures. Benefits: Elegant look, easy to shape, timeless appeal Best Climate: Dry and moderate climates Drawbacks: Sensitive to acid rain, needs sealing, stains easily 4. Sandstone Sandstone is a sedimentary rock composed of compacted sand grains, giving it a textured, grainy surface. It comes in warm shades like red, yellow, and brown, making it ideal for earthy architectural styles. Sandstone is commonly used in Mediterranean and rustic homes. Its natural warmth enhances exterior appeal, especially in designs that aim for a welcoming and grounded visual effect. Benefits: Attractive natural look, good insulation, versatile design use Best Climate: Dry, warm, and semi-arid regions Drawbacks: Porous, absorbs water, needs sealing 5. Slate Slate is a fine-grained metamorphic stone known for its layered structure and deep dark tones. It is commonly used in modern homes for a sleek and dramatic exterior finish. Slate naturally splits into flat sheets, making it ideal for structured wall cladding. Its resistance to water and weather changes makes it a reliable option for long-term exterior applications. Benefits: Waterproof, durable, modern aesthetic Best Climate: Rainy and cold regions Drawbacks: Can chip easily, higher installation cost 6. Travertine Travertine is a limestone-based stone with natural pores and soft beige tones. It is widely used in Mediterranean-style homes for its warm and relaxed appearance. \The porous surface helps regulate heat, making it suitable for sunny climates. Travertine adds a luxurious yet natural feel to exterior walls and poolside areas, enhancing overall architectural harmony. Benefits: Heat-resistant, stylish, natural texture Best Climate: Hot and dry climates Drawbacks: Requires sealing, porous structure absorbs moisture 7. Quartzite Quartzite is a very hard metamorphic stone formed from sandstone under heat and pressure. It often has a subtle sparkle due to quartz crystals within its structure. This stone is used in premium exterior designs where durability and visual elegance are important. Quartzite is resistant to scratches and weather damage, making it suitable for long-term installations. Benefits: Extremely durable, scratch-resistant, elegant appearance Best Climate: All climates Drawbacks: Expensive, difficult to cut 8. Basalt Basalt is a dense volcanic stone with a dark, uniform appearance. It is commonly used in contemporary architecture for clean, minimal exterior designs. Its strong structure allows it to withstand harsh weather conditions without degradation. Basalt provides a bold contrast when paired with glass or metal elements in modern home exteriors. Benefits: Strong, low maintenance, modern look Best Climate: All climates, especially extreme conditions Drawbacks: Heavy, limited color variation 9. Bluestone Bluestone is a dense natural stone with blue-grey tones that create a calm and balanced exterior look. It is often used in patios, walkways, and façade accents. Bluestone is highly durable and performs well under freeze-thaw cycles, making it suitable for colder regions. Its natural color variation adds subtle depth to exterior surfaces. Benefits: Durable, slip-resistant, visually balanced Best Climate: Cold and temperate regions Drawbacks: Can fade slightly over time, heavy material 10. Cobblestone Cobblestone consists of naturally rounded stones that have been used in exterior builds for centuries. In modern residential applications, it works best as an accent, wainscoting, column bases, chimney surrounds, rather than full wall coverage. The rounded shape creates significant texture and visual weight, which can overwhelm large flat surfaces. If you’re comparing cobblestone pathways to other hard surface options, modern driveway materials cover the cost and durability trade-offs in more detail. Cobblestone is extremely durable once set, it just needs mortar joints monitored over time. Benefits: Extremely durable, historic appearance, strong texture Best Climate: All climates Drawbacks: Difficult installation, uneven surface 11. River Rock River rock is naturally smoothed stone shaped by flowing water over time. It has soft edges and neutral tones that create a calming exterior effect. It is commonly used in landscaping, accent walls, and decorative features. River rock blends naturally with outdoor environments, making it ideal for eco-inspired home designs. Benefits: Natural look, decorative appeal, weather-resistant Best Climate: All climates Drawbacks: Not suitable for structural walls, loose fitting 12. Flagstone Flagstone consists of flat, layered stones used in irregular patterns for exterior surfaces. It is popular in patios and garden walls due to its natural, earthy appearance. Flagstone offers design flexibility and blends well with outdoor landscapes. It offers durability while maintaining a natural handcrafted aesthetic. Benefits: Natural look, versatile, slip-resistant Best Climate: Dry and moderate climates Drawbacks: Uneven surface, needs leveling 13. Soapstone Soapstone is a smooth, soft stone with muted grey tones and a silky feel. It is less commonly used for full exteriors but works well in accent areas. Over time, it darkens and develops a rich patina. Soapstone offers a subtle, refined appearance that suits minimalist architectural designs. Benefits: Heat-resistant, elegant finish, unique aging Best Climate: Moderate climates Drawbacks: Soft and prone to scratches, limited structural use 14. Marble Veneer Marble veneer is a thin-cut layer of natural marble used for exterior cladding, offering a high-end appearance without the heavy structural load of full marble blocks. It is commonly applied in accent walls, luxury façades, and premium residential designs. The material delivers elegant veining patterns and a polished visual effect. It reduces installation complexity while still maintaining a refined architectural finish suitable for decorative exterior applications. Benefits: Luxury appearance, lightweight structure, premium aesthetics Best Climate: Dry, low-moisture, and protected exterior areas Drawbacks: High cost, sensitive to weather exposure, requires maintenance 15. Coral Stone Coral stone is a naturally porous limestone formed from ancient coral reef deposits. It features a light, textured surface that works especially well in coastal and tropical architectural designs. This stone reflects sunlight effectively, helping reduce heat absorption in exterior walls. It is widely used in beach-style homes, resorts, and warm climates where cooling performance and natural aesthetics are both important design priorities. Benefits: Heat reflective, cooling effect, coastal visual appeal Best Climate: Tropical, coastal, and hot, humid regions Drawbacks: Highly porous, needs sealing, prone to moisture absorption 16. Split-Faced Stone Split-faced stone is created by cleaving natural blocks to reveal a raw, uneven surface. That exposed interior face creates strong shadow depth and textural contrast, the main design appeal in contemporary and commercial-influenced residential architecture. For a fireplace accent wall carried through to the exterior, the visual connection works well; exterior and interior accent wall ideas show how that material continuity plays out in real homes. The rough texture makes cleaning more effort than flat-faced stone, use a soft brush and stone-safe cleaner rather than pressure washing, which can dislodge mortar from irregular joints over time. Benefits: Strong depth effect, modern aesthetic, visual contrast Best Climate: Suitable for all climate conditions Drawbacks: Difficult cleaning, uneven installation, maintenance challenges 17. Tumbled Stone Tumbled stone is a natural stone that is mechanically treated to soften edges and create an aged, weathered appearance. It is widely used in traditional, rustic, and farmhouse-style exteriors where a timeless look is preferred. The softened texture allows easy blending with surrounding materials like wood and brick. It offers a lived-in, historic feel that enhances architectural warmth and character in exterior designs. Benefits: Rustic charm, timeless look, easy material blending Best Climate: Moderate and stable climate regions Drawbacks: Limited modern appeal, reduced sharp detailing 18. Manufactured Stone Veneer Manufactured stone veneer is engineered using cement, aggregates, and pigments to replicate the appearance of natural stone. It is lightweight, cost-effective, and widely used in modern residential and commercial construction. The material ensures consistent color and texture across large surfaces, making installation predictable and efficient. Benefits: Affordable, lightweight, consistent appearance Best Climate: Suitable for most climates Drawbacks: Less natural variation, may fade over time 19. Stone Cladding Panels Stone cladding panels are pre-fabricated exterior systems designed for fast installation on building façades. These panels reduce labor time and provide a uniform stone-like finish across large surfaces. The system enables shorter construction timelines while maintaining a visually structured exterior that mimics traditional stone installations, with greater efficiency. Benefits: Quick installation, uniform finish, lightweight system Best Climate: Urban and suburban environments Drawbacks: Limited design flexibility, slightly artificial appearance 20. Engineered Stone Panels Engineered stone panels are precision-manufactured slabs designed for modern architectural exteriors. They deliver consistent patterns and clean surface alignment, making them ideal for contemporary and commercial-style homes. These panels are often used in large façade applications where uniformity is preferred over natural variation. Benefits: Seamless finish, fast installation, modern aesthetic Best Climate: Suitable for all climates Drawbacks: Expensive, lacks natural variation 21. Faux Stone Siding Panels Faux stone siding panels are synthetic exterior materials designed to imitate natural stone at a lower cost. They are lightweight, easy to install, and often used in renovation or DIY projects. These panels are made from polymer or composite materials that replicate stone textures and patterns. They provide a quick visual upgrade for exterior walls without requiring heavy masonry work or structural reinforcement. Benefits: Budget-friendly, easy installation, lightweight design Best Climate: Mild to moderate weather conditions Drawbacks: Lower durability, artificial appearance, limited lifespan. Where Exterior Stone Works Best Around the House Stone doesn’t have to cover the entire exterior to do its job. In most cases, targeted stone application looks more deliberate and costs significantly less than full coverage. The zones where it contributes most are porch bases, columns, chimneys, entryways, garage surrounds, and foundation walls. These are the areas where stone adds genuine structural visual weight without making the exterior feel overdone. Stone also performs well in outdoor living zones, patios, pool houses, outdoor kitchens, and garden walls. For patio and pathway decisions specifically, the cost comparison between stone, pavers, and concrete surfaces is worth working through before committing; stamped concrete versus pavers breaks down the real cost difference. Choose materials that can handle moisture, cleaning, and UV exposure for these exterior placements. The most effective placement repeats the stone in one or two zones rather than spreading it across every surface. That creates visual cohesion without the exterior feeling like a showroom sample board. Stone Veneer Siding Ideas for House Exteriors Stone veneer’s design range is wide enough that it suits both subtle accent work and bold full-façade treatments. These applications cover the most commonly requested exterior stone configurations, from minimal to comprehensive. Stacked stone entry wall to anchor the front elevation with a strong focal point Full accent façade on the street-facing elevation for bold exterior presence Garage front cladding to break up plain siding runs across the widest part of the home Mixed material exterior combining stone with wood, stucco, or brick and paint combinations Column wrap design for added depth and visual structure at entries and covered porches Lower wall veneer base to ground the exterior and reduce visual height on tall elevations Chimney stone cladding for a classic finish that carries from the roofline to the ground Window border accents for subtle detailing without committing to a full façade application Outdoor living wall for patio zones that carry the exterior material into functional outdoor space Modern monochrome veneer in dark slate or basalt tones for contemporary residential exteriors Each of these works best when the stone profile, color, and texture connect to at least one other exterior material, roof color, siding, trim, or door, rather than sitting as a standalone decision. Grout, Color, And Finish Choices Grout can change the read of a stone wall more than most people expect. Two homes using the same stone profile will look significantly different if one uses matching grout and the other uses high-contrast grout. Matching grout softens the wall and reads as more continuous. Contrasting grout emphasizes each individual stone piece, which works well with fieldstone and cobblestone but can feel busy with smaller ledgestone or stacked profiles. Stone color should connect to what’s already on the home, roof tone, siding, trim, gutters, and walkway material. A roof with strong color variation is easier to carry when the stone is calmer. A plain siding field opens up more room for a textured or color-varied stone. Planning paint costs alongside stone placement is worth doing early in the exterior design process; exterior house painting costs cover the full picture for budgeting both together. Tip: Always view stone samples outdoors, not in a showroom. Morning light, afternoon sun, overcast sky, and proximity to roof color all change how a stone reads in practice. What looks warm inside a store may look yellow against a grey roof. This is especially true for stones with subtle undertones, travertine, limestone, and certain manufactured veneers can shift significantly between lighting conditions and seasons. How To Choose The Best Exterior House Stone Start with climate, then choose the style. A stone that cannot handle the local weather is not the right choice, even if the color looks good. Next, decide between natural stone, manufactured stone veneer, and faux panels. Natural stone gives the most real texture. Manufactured veneer gives a stone look while weighing less. Faux panels are best for fast, lightweight updates. Then look at maintenance. Granite, quartzite, slate, and basalt are better for lower upkeep. Limestone, sandstone, travertine, marble, and many veneers require more attention to sealing and moisture control. Stone Type Best For Climate Fit Maintenance Level Granite Full façades, long-term build All climates Low Quartzite Premium exteriors All climates Low Slate Modern cladding, rainy regions Cold and rainy Low-medium Basalt Contemporary exteriors All climates Low Limestone Classic façades Dry, moderate Medium-high Sandstone Warm, earthy styles Dry, semi-arid Medium Travertine Mediterranean style, hot climates Hot and dry Medium Fieldstone Rustic, farmhouse exteriors Temperate, cold Medium Manufactured Veneer Most residential projects Most climates Low-medium Faux Stone Panels DIY, budget renovations Mild to moderate Low The right stone should fit the home, the climate, the budget, and the level of maintenance you are willing to handle. Common Mistakes To Avoid With Exterior House Stone Exterior stone is a long-term choice, so it is worth avoiding mistakes before installation begins. Many issues arise from choosing by color alone, skipping water control, or using too many materials on a single facade. Choosing The Wrong Stone for Climate: Porous stone in wet or freezing areas can stain, crack, or wear faster. Skipping Drainage Details: Stone veneer still needs water barriers, flashing, and a safe way for moisture to escape. Using Too Many Exterior Materials: Stone, brick, siding, trim, roofing, and doors should work together rather than compete. Choosing From A Tiny Sample: Small samples may not show the full color range or texture variation. Forgetting Corners: Corners make veneer look finished and should be included in the estimate. Overusing Stone: A balanced accent often looks better than covering every visible wall. Ignoring Grout Color: Grout can soften or sharpen the final look, so choose it with the stone sample. Good exterior stone should look like part of the original design. If it feels added on, the color, profile, or placement may need to be simplified. Frequently Asked Questions How does exterior stone affect home insulation and energy efficiency? Stone adds thermal mass, which helps regulate indoor temperatures by absorbing heat during the day and releasing it at night. Dense stones like granite and quartzite provide more meaningful thermal performance than lightweight veneer or faux panels, which have less mass and therefore less buffering effect. Can exterior stone be painted or stained for a different look? Staining or tinted sealing is the safer option, it can subtly shift the color while preserving breathability. Painting natural stone is generally a poor choice because it can trap moisture in the stone, leading to cracking, spalling, and mildew. Once painted, getting back to bare stone is a significant removal job. What is the average lifespan of manufactured stone veneer versus natural stone? Natural stone installed correctly can last 50 to 100 years or more. Manufactured stone veneer typically runs 20 to 40 years depending on material quality, installation accuracy, and weather exposure. The installation quality matters as much as the material, poorly installed natural stone will fail faster than well-installed manufactured veneer. How do you prevent moss, mold, or algae growth on exterior stone walls? Proper drainage behind the stone is the first line of defense. For porous stones like sandstone, limestone, and travertine, regular sealing closes the surface pores that organic growth colonizes. Trim vegetation back from stone walls and clean with a stone-safe antifungal solution when growth appears, pressure washing works on dense stones but can damage mortar joints in textured or irregular applications. Are there eco-friendly or sustainable options for exterior house stone? Reclaimed natural stone is the most sustainable choice, it avoids quarrying entirely. Locally sourced stone reduces transport emissions significantly. Some manufactured veneer products use recycled aggregates. For patio and pathway applications, understanding the full environmental and cost picture of each material helps; paver installation costs include material sourcing context worth reviewing. Can exterior stone be installed over existing brick or siding? Yes, but it requires proper surface preparation. A water-resistive barrier, furring strips or metal lath, and strong mortar bond are all necessary. Lightweight manufactured veneer and faux panels are the most practical retrofit options. Full natural stone over existing siding may require structural reinforcement, get a structural assessment before committing to the weight load. Sum Up Picking the right types of exterior house stone can make a huge difference in how your home looks and performs. I hope this guide has helped you see the key differences between natural stone, manufactured veneer, and faux panels, along with their costs, benefits, and ideal climates. You now know which stones suit modern, rustic, or classic homes, and how to consider maintenance and installation. With this information, you can make choices that balance beauty, durability, and practicality. If you’re planning your next exterior project, try comparing samples outdoors and see which stone fits your home best, then share your results or questions with others.
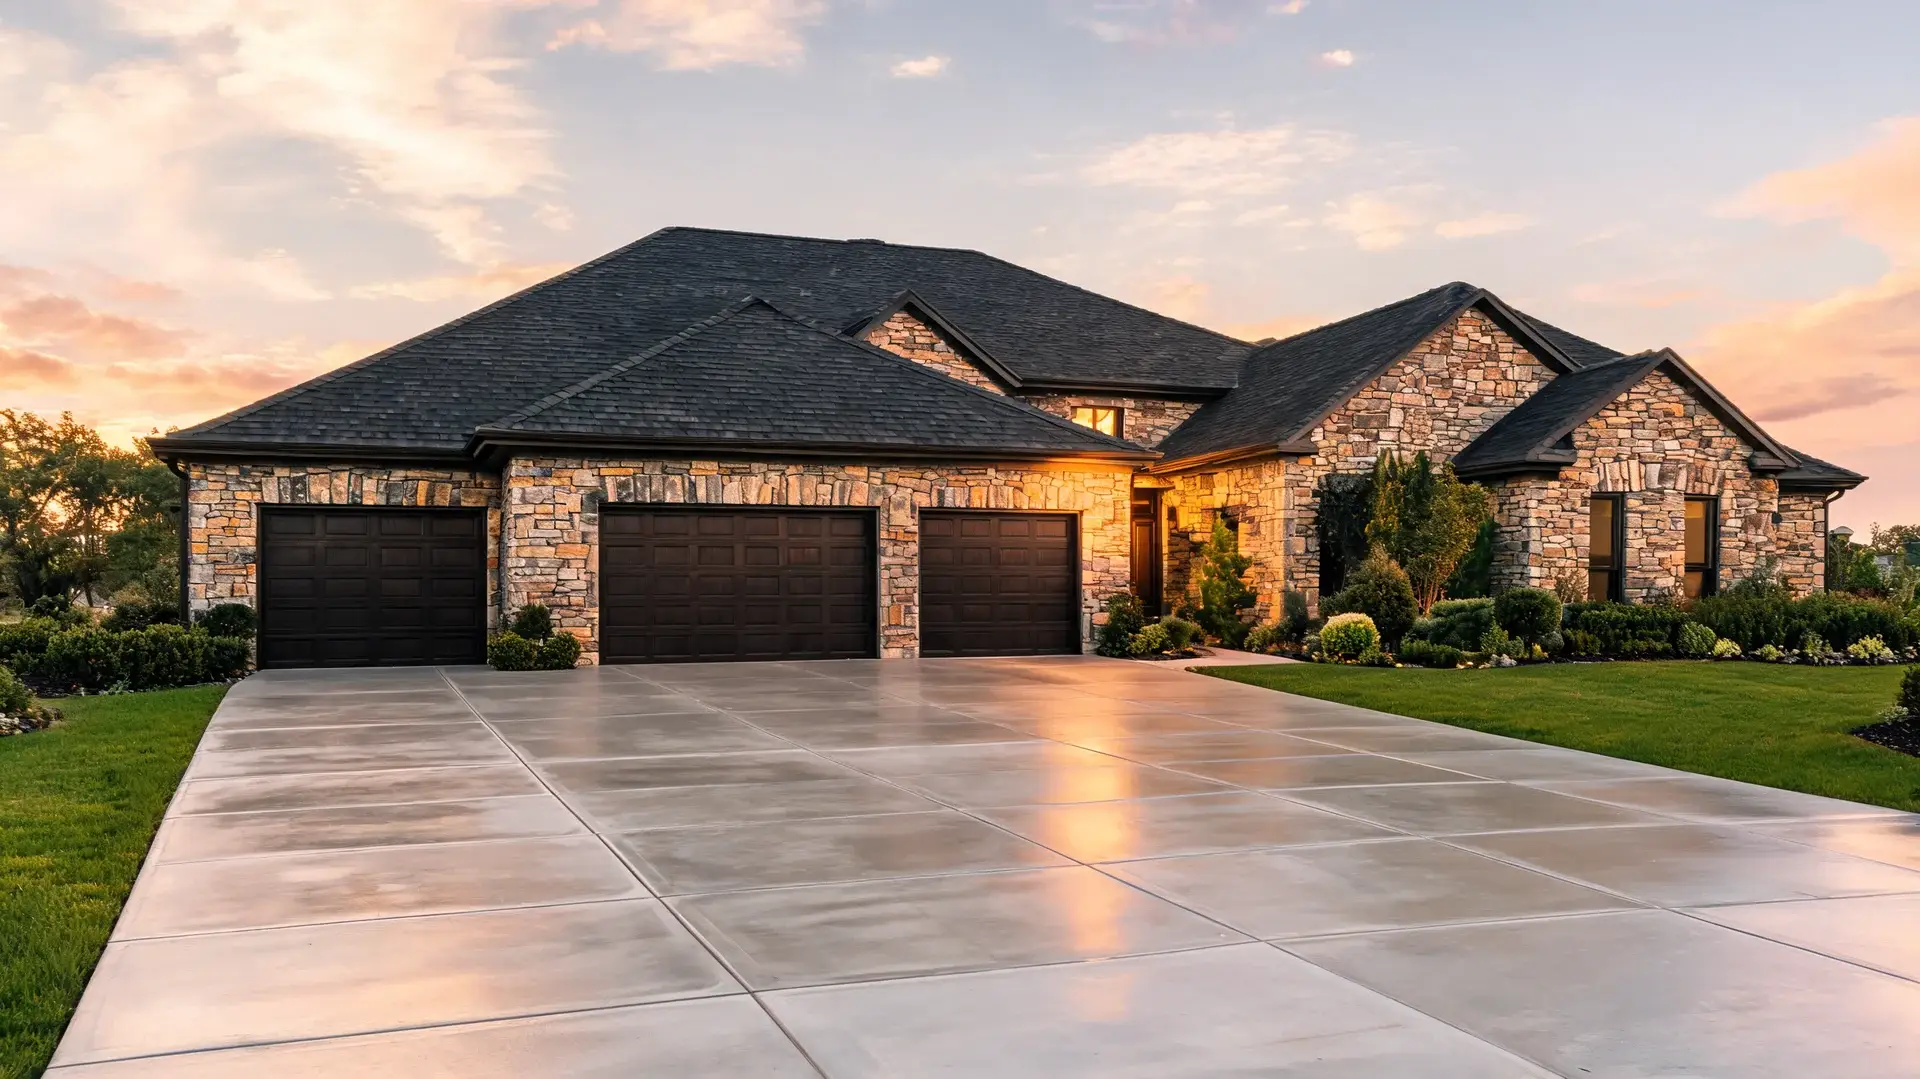
The outside of a home tells a story before anyone even knocks. Having spent years paying close attention to how front yards, driveways, and entries shape the first impression of a house. I can say that astamped concrete driveway is one of the most impactful upgrades a homeowner can make to the outside of their property. It brings the look of stone, brick, or slate without the cost and labor of laying each piece by hand. But the pattern is only part of the decision. The base, the sealer, the drainage, and the installer behind it all matter just as much, and that is exactly what this covers. Cost Note: Figures in this article are estimates based on national averages. Actual costs vary significantly by region, contractor, materials, and project scope. Always get at least three quotes before committing to any project above $1,000. Is a Stamped Concrete Driveway Worth It? A patterned concrete driveway sits between plain concrete and individual pavers. It gives you more design choices than a flat gray slab, but it does not repair as easily as separate blocks. That is the tradeoff you should understand first. It can be a good fit if you want a front driveway that looks more finished than asphalt, gravel, or plain concrete. It can also help your driveway match stone, brick, siding, trim, or walkway details around the house. Still, the finish is not only about the pattern. The base must be stable. Water must drain away. Control joints need smart placement. The sealer should suit the slope and local weather. If those parts are rushed, the driveway can crack, fade, stain, or feel slick. Advantages of a Stamped Concrete Driveway The biggest benefits come from its design range, front-yard value, and lower cost compared with some higher-end materials. 1. More Design Choices Plain concrete is useful, but it can look basic. Using concrete stamps adds pattern, texture, and color so the driveway feels more connected to the rest of the home. You can choose slate, cobblestone, brick, flagstone, ashlar stone, wood plank, or a softer stone texture. The color can stay quiet with gray, tan, beige, or brown, or it can use darker accents when the home exterior supports them. 2. Lower Cost Than Pavers Real pavers, brick, and stone use separate pieces. Each piece needs placement, leveling, and joint work. A stamped concrete surface is poured as one slab, then patterned while it is fresh. That reduces labor compared with setting individual pieces like pavers, though the final price still depends on the driveway size, base work, color, border details, and local labor rates. 3. Better Curb Appeal I have seen too many homes where the interior is beautifully finished but the driveway looks like an afterthought, cracked gray concrete that undercuts the whole first impression. A stamped finish ties the garage, walkway, porch, and landscape edges together in a way plain surfaces simply cannot. I always recommend keeping the color close to the home’s existing materials so the driveway supports the exterior rather than competing with it. 4. Good for Large Driveways Large driveways need patterns with the right scale. Ashlar stone, slate, large flagstone, cobblestone, and seamless stone textures all work well because they do not feel too small from the street. A border can frame a wide surface and create a cleaner edge where the driveway meets grass, mulch, or a walkway. Disadvantages of a Stamped Concrete Driveway The drawbacks are mostly tied to cracks, repairs, sealing, traction, and the skill needed during installation. Visible Cracks: Concrete can crack due to soil movement, loads, poor prep, weather, or aging. Control joints guide crack locations but can’t prevent all. On stamped surfaces, cracks are more visible as they cross the pattern, whereas on plain concrete they are less noticeable. Hard-to-Match Repairs: A patch is hard to hide because the surface is already changed by sun, tires, weather, and sealer wear. Even careful repairs may appear slightly different, especially on front driveways visible from the street daily. Regular Sealing: Sealer guards the driveway against tires, oil, dirt, sun, rain, and snow, preventing fading and staining. If it appears dull or water no longer beads, reseal. Most stamped driveways need resealing every two to three years depending on sun, traffic, and sealer type. Slippery Finish Risk: A glossy sealer looks attractive but can reduce grip when wet, which is concerning on sloped driveways, in rainy climates, and during icy winters. A low-sheen sealer with a grip additive is safer and still looks finished. Not DIY-Friendly: Stamping relies on precise timing: the concrete must be firm enough for the pattern but soft enough for the impression. A full driveway requires a coordinated crew, sufficient mats, release material, and finishing skill. A small backyard test slab is a safer initial attempt than a visible front driveway. Stamped Concrete Driveway vs. Other Driveway Materials Before choosing a surface, look beyond the first price. Consider how each option handles daily use, repairs, weather, upkeep, and appearance from the street. Driveway Material What It Does Well Where It Falls Short How It Compares With Stamped Concrete Plain concrete Simple, clean, and usually lower in cost Basic look with fewer design choices Stamped concrete looks more finished, but costs more and needs sealing Asphalt Works well for long driveways and tighter budgets Limited color and pattern choices Stamped concrete gives more curb appeal, but asphalt is often cheaper upfront Pavers Easier to repair in small sections Higher labor cost and possible weed growth between joints Stamped concrete gives a similar patterned look in one slab, but repairs are harder to match Brick Classic look with real individual pieces Can shift, settle, or cost more to install Stamped concrete can copy a brick look with fewer pieces, but brick may be easier to repair Gravel Low upfront cost and useful for rural homes Can spread, rut, and need regular leveling Stamped concrete looks cleaner and is easier to clear, but gravel costs less Natural stone Strong real-material look Higher material and labor cost Stamped concrete can give a stone-like look for less, but real stone may age better Choose stamped concrete when you want a planned, finished surface without the cost of real stone, brick, or full paver work. Choose plain concrete or asphalt when price is the priority. Choose pavers or natural stone when easy individual repairs or real material matter more, though paver installation per square foot can shift that decision quickly. Best Pattern by Driveway Type Use this table if you are stuck between two patterns. It ties the choice to your driveway shape, home style, and practical needs. Driveway Type Best Pattern Choice Why It Works Wide front driveway Ashlar stone or large flagstone Larger shapes look more balanced from the street Curved driveway Cobblestone or seamless slate These patterns work well with bends and soft edges Modern home Seamless stone or slate The surface looks clean without too many lines Brick home Brick border or cobblestone The pattern connects with the home’s brick tones Sloped driveway Light texture with low-sheen sealer Grip matters more when water runs across the surface Long driveway Simple pattern with border only Keeps cost and pattern repeat under control Once you narrow the pattern by driveway type, check it against your home color, slope, and budget. A good pattern should look natural from the street and still hold up to daily use. Best Stamped Concrete Driveway Design Ideas The best design fits the house, not just the driveway. Start with the home color, roof, garage door, trim, walkway, and yard. Then choose a pattern and concrete stamp type that supports those details. Stamp mat size matters too. Larger mats suit wide driveways because small repeating patterns can feel busy at scale. Flexible mats help near garage doors, curves, steps, and corners. Seamless texture skins are useful when you want a softer stone-like surface without strong pattern lines across the whole area. 1. Cobblestone Pattern A cobblestone pattern works well for traditional homes, brick homes, cottage-style homes, and curved driveways. It gives the surface an older stone path character without the cost or labor of real cobbles. Gray, brown, charcoal, and soft tan shades tend to look better than bright colors, which can feel out of place against classic architecture. Best for: Traditional homes | Brick homes | Colonial-style exteriors Installer note: Use this pattern where the driveway has enough width so the repeated shapes do not feel crowded. 2. Slate Pattern A slate pattern suits modern homes, stone-front homes, and driveways where you want texture without heavy lines. Good colors include soft gray, charcoal, beige, greige, and tan. A low-sheen sealer keeps the surface closer to a natural stone finish, which I prefer over a high-gloss coat on this pattern, the shine tends to look artificial against the natural texture of the slate impression. Best for: Modern homes | Stone-front homes | Clean front entries Installer note: Ask for a test area or past project photo in the same sealer finish before approving the final look. 3. Brick Pattern A brick pattern suits homes with brick exteriors, warm trim, red-toned roof details, or a traditional front yard. It can cover the full driveway or work only as a border around a simpler center field. Muted red, clay, brown, and charcoal tones read more naturally than bright red, which tends to compete with the house rather than complement it. Best for: Brick homes | Classic exteriors | Driveway borders Installer note: Keep the color softer than the house brick so the driveway does not compete with the exterior. 4. Ashlar Stone Pattern Ashlar stone gives the driveway the look of cut, fitted stone pieces arranged in a structured pattern. It works especially well on large driveways because the shapes are scaled to feel balanced across a wide surface. Mixed gray, tan, and brown tones add depth without making the slab look flat or uniform. Best for: Large driveways | Stone exteriors | Wide garage fronts Installer note: Choose larger stamp mats for wide areas so the scale looks right from the street. 5. Seamless Stone Texture A seamless stone texture suits modern homes and wide driveways where you want depth without a repeating grid. Because there are no defined edges between pattern pieces, it is also more forgiving of minor layout imperfections during installation than a strict brick or cobblestone grid. Best for: Modern homes | Wide concrete areas | Softer stone looks Installer note: This is a safer choice when you want texture without strong lines across the whole driveway. 6. Borders and Bands Borders and bands add a sense of structure to long or wide driveways without stamping the entire surface with a complex pattern. They can frame the edge, define the apron near the garage, or connect the driveway to the walkway. A darker border against a lighter center field tends to look clean and intentional, but adding too many color zones makes the layout feel busy. Best for: Long driveways | Simple center fields | Garage aprons Installer note: Keep the border detail clear and the center field calmer so the driveway does not look overdone. How to Pick the Right Color Palette I always start with the house when choosing driveway color. The roof, siding, brick, stone, trim, garage door, and walkway should all be taken into account. A driveway covers a large part of the front yard, so the color needs to support the home rather than pull attention away from it. A shade that works beautifully on a small sample can look overwhelming across 400 square feet of slab, always ask for a larger sample or a photo of a finished project in the same color before committing. Home Exterior Good Driveway Colors Best Pattern Match What to Avoid White or cream siding Light gray, warm beige, soft tan Slate, ashlar stone, seamless stone Very dark full-driveway colors that feel too harsh Red brick Charcoal, brown, clay, muted red Brick, cobblestone, ashlar stone Bright red that clashes with the brick Gray siding Charcoal, medium gray, greige, cool tan Slate, seamless stone, large flagstone Flat gray with no contrast Stone front Tan, gray, brown, beige mix Ashlar stone, flagstone, slate Colors that do not appear in the stone Dark exterior Light gray, warm tan, sand, soft brown Seamless stone, slate, border bands Glossy dark finishes on large areas Farmhouse exterior Soft gray, taupe, beige, weathered brown Brick border, slate, cobblestone Heavy black or bright red tones Stamped Concrete Driveway Cost Breakdown A stamped driveway costs more than plain concrete because it requires color, stamping tools, release material, sealing, and skilled labor; any existing driveway removal or resurfacing adds to that figure. Use $8 to $28 per square foot as a planning range. Simple designs sit closer to the lower end, while borders, multiple colors, curves, old driveway removal, and drainage fixes push the total higher. Cost Item Typical Cost Range What It Covers How It Affects Price Old driveway removal $2 to $6 per sq. ft. Breaking and hauling away concrete, asphalt, or pavers Costs more if the old surface is thick, reinforced, or hard to access Base preparation $1.50 to $5 per sq. ft. Grading, compacting, gravel base, and drainage setup Poor base prep can lead to cracks, sinking, and water issues Concrete pour $4 to $10 per sq. ft. Concrete mix, slab thickness, labor, and placement Larger or thicker driveways cost more Color $1 to $4 per sq. ft. Integral color, color hardener, or accent color Multiple colors raise labor and material costs Stamp work $3 to $10 per sq. ft. Pattern mats, border stamps, texture skins, and release material Detailed patterns, borders, and tight areas add labor Control joints $0.50 to $2 per linear ft. Cuts that help guide cracking Needed for a cleaner long-term result Sealer $0.75 to $3 per sq. ft. Clear, matte, low-sheen, or grip-added sealer Better sealer costs more but extends surface life Extra details $5 to $20+ per sq. ft. in detailed areas Borders, bands, apron details, curves, or custom features Raises cost because layout and stamping take more time For a 400 sq. ft. driveway, a basic stamped finish may start around $3,200 to $6,000. A mid-range design with color and a border may land around $6,000 to $9,500. A more detailed design with removal, drainage work, multiple colors, or custom features can go above $10,000. To keep costs manageable, stick to one pattern in the main area, choose one primary color, and reserve detail work for the border or apron only. Maintenance Tips A simple care routine keeps the color, texture, and sealed finish looking good for years. Nothing here is heavy work, it is more about being consistent than being thorough. Sweep often: Remove leaves, dirt, and small debris before they sit long enough to stain the sealed surface. Rinse when needed: A garden hose clears mud, dust, and light buildup before it settles into the texture. Clean oil quickly: Treat oil spots as soon as you notice them. Old stains are much harder to lift from worn sealer. Use mild cleaners: Choose a concrete-safe cleaner. Strong chemicals can break down or dull the sealed finish over time. Avoid metal scraping: Plastic shovels and soft cleaning tools protect the surface from scratches that damage the sealer layer. Use sand in winter: Sand helps with grip on icy days without being as harsh on the surface as deicing salt, which can deteriorate the sealer and affect color over time. Watch for sealer wear: A dull surface or water that soaks in rather than beading is a sign the sealer is breaking down. Plan for resealing: Most stamped driveways need resealing every two to three years, though sun exposure, traffic volume, and sealer quality all affect the timeline. What to Ask a Contractor Before You Hire Stamped work depends on timing, crew size, tools, and finishing skill. A contractor who has done it many times will answer these questions without hesitation. One who has not will show it in vague or evasive answers. Have you installed stamped driveways before, and can I see recent photos? What pattern and stamp size fits my driveway dimensions? How will you prepare the base, and what depth will you compact to? Where will the control joints go, and how will you place them around the pattern? How will water drain away from the finished surface? What sealer will you use, and is a grip additive included? How soon after the pour can vehicles use the driveway? If the answers feel uncertain or rushed, keep looking. The quality of the conversation before the job starts is usually a fair preview of the quality of the work itself. Frequently Asked Questions Does a stamped concrete driveway add resale value to a home? A well-maintained stamped concrete driveway can improve a home’s curb appeal, which does factor into buyer perception and resale value. It is not a guaranteed dollar-for-dollar return, but a driveway that looks finished and well-kept tends to make a stronger first impression than a plain or worn surface, and first impressions matter in real estate. How does stamped concrete hold up in freeze-thaw climates? Freeze-thaw cycles challenge concrete as water seeps into cracks, freezes, expands, and widens them. Sealed driveways resist this better but require resealing and sand, not salt, in winter. In harsh climates, plain concrete or pavers often age better. Is stamped concrete slippery when wet? It can be, especially with a high-gloss sealer. A low-sheen sealer with a grip additive substantially reduces this risk. On sloped driveways, this is a non-negotiable specification, not a cosmetic preference. What is the difference between integral color and color hardener in stamped concrete? Integral color is mixed into the concrete batch before pouring, ensuring the color runs through the entire slab. If the surface chips or cracks, the color remains visible underneath. Color hardener is broadcast onto fresh concrete and pressed in, creating richer tones and a tougher surface, but it only penetrates the top layer. Many installers use both for depth and vibrancy. How long does a stamped concrete driveway last? A stamped concrete driveway can last 25 years or more with proper installation and regular sealing. The surface underneath is still concrete, so longevity depends heavily on the quality of the base, the thickness of the slab, drainage, and how consistently it is maintained. The pattern and color may show wear before the slab itself becomes structurally compromised. Final Thoughts The outside of a home deserves as much thought as the inside, and the driveway is where that exterior story begins. A stamped concrete driveway, done right, with the correct base, proper drainage, a safe sealer, and well-placed control joints, can hold its appearance for decades. The pattern choices offered through concrete stamps mean there is rarely a style mismatch with the house. What matters most is hiring someone who understands both the design side and the structural side. If this helped you think it through, drop a comment below, and if you are weighing other surface options, have a look at how pavers and plain concrete stack up for your specific situation.
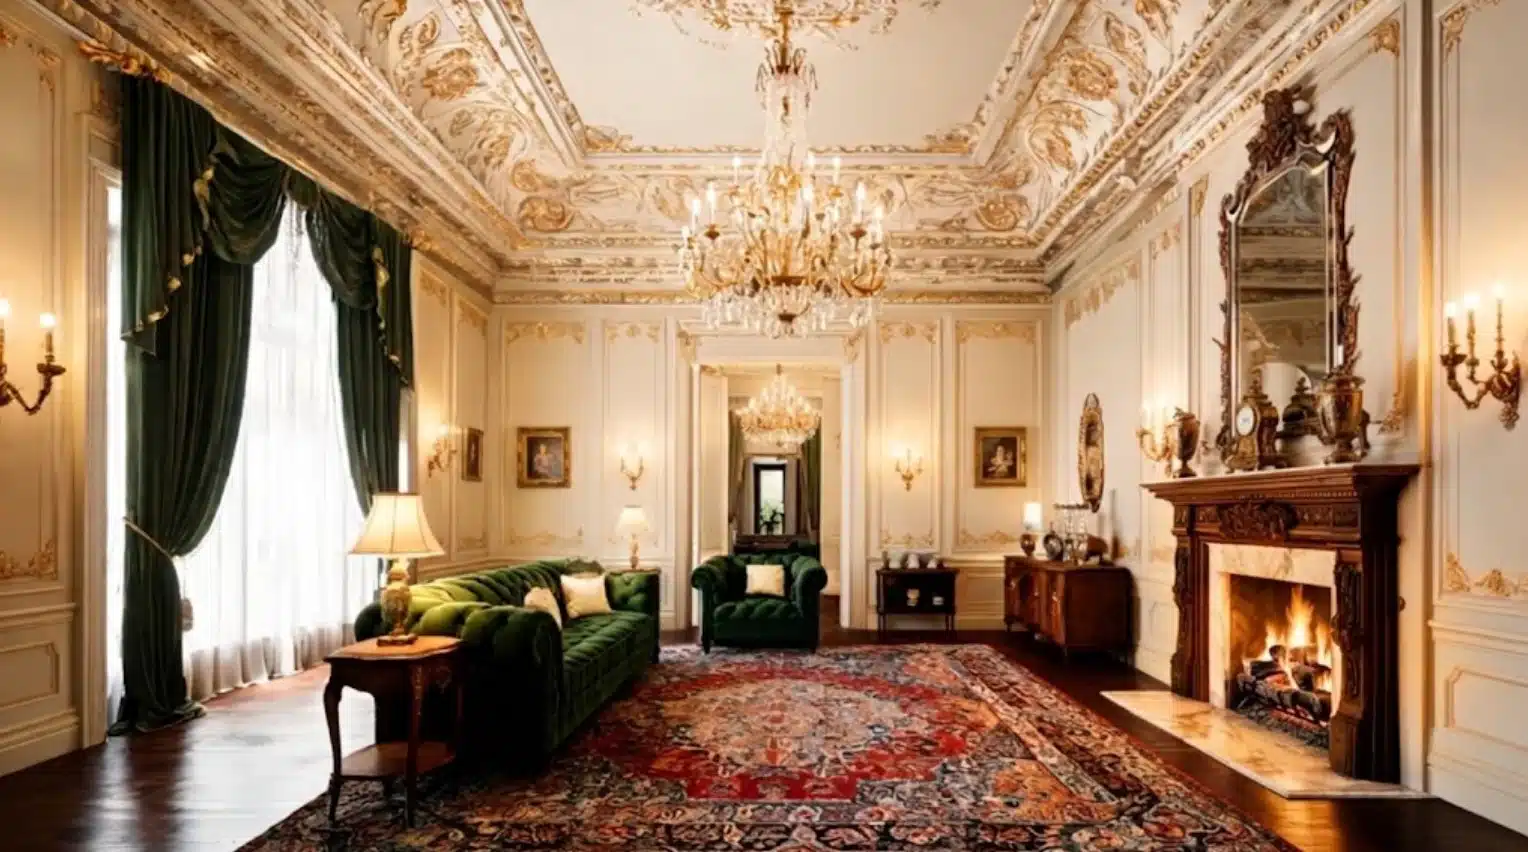
Ever walked into a room and felt like it belonged to another era? I know the feeling; it’s frustrating when you want your home to feel classy and royal but end up stuck with mismatched furniture or bland walls. A Victorian house interior can solve that by blending heritage appeal with modern functionality. I’ve gathered practical ideas you can use to bring warmth, texture, and character into every room. You’ll see how to layer fabrics, choose complementary colors, and highlight architectural details so your space feels enduring yet livable. Understanding Victorian Interior Design The Victorian era, spanning 1837–1901, was a period of rapid industrial innovation and cultural refinement. Homes from this time reflected both personal taste and social status, with ornate details, handcrafted furniture, and intricate wallpapers that showcased exceptional craftsmanship. Each room was designed to impress and tell a story, blending functionality with artistry. Signature architectural elements such as high ceilings, bay windows, decorative cornices, wainscoting, and fireplaces form the foundation of a Victorian interior. These features create a sense of grandeur and set the tone for the overall design. They also provide structure for layering furniture, textiles, and decorative accents. If you live in a mansion or a smaller historic home, understanding these core elements helps you bring authentic period character into your space. Victorian Color Palettes and Materials Choosing the right colors, textiles, and wall treatments is key to capturing the rich, layered look of a Victorian house interior. Jewel tones, luxurious fabrics, and patterned walls create a sense of depth and elegance while allowing you to highlight architectural features and furniture. A deep jewel-toned green paint is a reliable way to anchor a feature wall without committing the whole room. Category Details Tips Jewel-Toned Schemes Deep, saturated hues like emerald green, burgundy, navy blue, and gold Use for feature walls, accent furniture, or statement pieces to add warmth and drama Textiles and Furniture Velvet, brocade, damask, lace; dark woods like mahogany and walnut Layer fabrics on upholstery, curtains, and cushions to create richness and texture Wallpaper and Wall Treatments Floral, damask, and toile patterns Consider an accent wall or full-room coverage, depending on the desired By thoughtfully combining these colors, fabrics, and wall treatments, you can craft a Victorian interior that feels luxurious, inviting, and authentic to the era while remaining functional for modern living. Room-by-Room Victorian Styling Layered lighting, color coordination, and clever use of architectural features allow you to maintain a lived-in feel while highlighting the distinctive characteristics of the Victorian era. 1. Entryways & Hallways Victorian entryways set the tone for your entire home. Highlight staircases, mantels, or stained-glass windows as visual focal points to draw attention to the era’s craftsmanship. Layered lighting, including pendant lights, wall sconces, or antique-inspired fixtures, ensures these spaces feel inviting and well-lit, enhancing the architectural details. Paint balustrades or dado rails in complementary or contrasting colors to define space and add visual interest. Consider adding a small runner rug with intricate patterns to guide guests’ eyes through the hallway, and incorporate a console table with curated accents to create warmth and personality as soon as they enter. 2. Living Rooms Victorian living rooms combine elegance with comfort through carefully layered furniture and textiles. Use tufted settees, velvet armchairs, and clawfoot tables to anchor the space and create conversation areas. Layer Persian rugs, drapes, and fringed lampshades to add richness and texture. Statement art, mirrors, and antique collectibles enhance visual interest while reflecting personal style. Balance ornate pieces with simpler, modern items to prevent overcrowding, and consider window seating or a small reading nook to make the most of natural light. Accessories like decorative pillows or throws can introduce color contrasts and patterns that bring the room together cohesively. 3. Bedrooms Victorian bedrooms are intimate retreats designed to feel both luxurious and personal. Layer quilts, embroidered pillows, and plush throws on beds to create a cozy yet sophisticated look. Custom built-in wardrobes and alcove storage allow you to maintain functionality without sacrificing style. Consider incorporating period-appropriate lighting, such as bedside lamps with fringed shades or an overhead chandelier, to add ambiance. Adding small decorative details, such as an ornate mirror or a vintage dressing table, completes the look while keeping the room inviting and comfortable for daily living. 4. Kitchens Kitchens in Victorian homes balance elegance with functionality. Shaker-style or paneled cabinetry with brass or bronze hardware creates period-authentic charm, while parquet, mosaic, or tiled flooring adds texture, color, and visual interest. Layered lighting plays a key role, combining overhead fixtures with task lighting to brighten work areas while highlighting cabinetry and decorative elements. Open shelving or glass-front cabinets allow you to display fine china or vintage cookware. By carefully planning layout and storage, you can maintain a kitchen that feels spacious, luxurious, and historically inspired, without sacrificing modern usability. 5. Bathrooms Victorian bathrooms are designed to feel luxurious while remaining functional. Freestanding clawfoot tubs, bold backsplash tiles, or statement sinks serve as focal points, bringing both style and elegance to the space. Walls and floors often feature intricate patterns or rich jewel tones, adding visual depth and period authenticity. Vintage-inspired fixtures, such as brass taps, ornate mirrors, and sconces, enhance the historic character while meeting modern needs. If the room is on the smaller side, some small bathroom paint colors can keep the space feeling open even with a deep, patterned floor. Open shelving, built-in cabinets, or glass-front units provide practical storage and an opportunity to display decorative towels, toiletries, or collectibles. 6. Small Spaces Adaptations Adapting Victorian style to smaller rooms requires thoughtful scaling and layering. Use light wall colors to make spaces feel larger, mirrors to reflect light and add depth, and compact furniture to preserve flow. Layered textiles, such as small rugs, cushions, and throws, maintain warmth and richness without overcrowding. Built-in storage and cleverly placed shelving maximize functionality while maintaining historic charm. Focus on key architectural details like cornices, window trim, or fireplaces, and emphasize them with subtle accent colors or lighting. Even in smaller rooms, the right balance of color, texture, and proportion ensures that Victorian elegance shines through. Victorian Lighting and Ambiance Lighting in a Victorian home isn’t just functional; it sets the mood, highlights architectural features, and adds drama to every room. The right combination of fixtures can make your interiors feel warm, inviting, and authentically Victorian. Chandeliers: Central statement pieces for living rooms, dining areas, or grand halls. Wall Sconces: Highlight artwork, fireplaces, or corridors with ambient lighting. Table & Floor Lamps: Add soft, layered lighting for reading nooks and bedrooms. Candlelight Accents: Use candle holders or electric candles for subtle Victorian charm. Layering different light sources ensures a balanced, cozy atmosphere while accentuating furniture, fabrics, and architectural details. Victorian Substyles Explained The Victorian era produced several distinct substyles, each with its own personality. Knowing these substyles helps you choose the right fit for your space, whether that’s dramatic Gothic, refined Eastlake, or a mix of historical charm with modern livability. 1. Gothic Revival Interiors Gothic Revival brings a rich, moody, medieval-inspired style to your home, featuring dramatic pointed arches, cathedral-style windows, and detailed woodwork. This style adds depth, character, and an atmospheric sense of historic grandeur, creating spaces that feel intimate, dramatic, and full of period-inspired elegance. Architectural Features: Pointed arches, cathedral-style windows, and intricate woodwork. Furniture: Dark woods, carved chairs, and sturdy tables. Accents: Wrought iron fixtures, candle holders, and gothic lighting. Ideal Spaces: Libraries, studies, or reading nooks that benefit from intimate, dramatic character. Use Gothic Revival elements sparingly to prevent a space from feeling heavy, and layer with light textiles to maintain balance. 2. Eastlake & Aesthetic Movement The Eastlake Movement substyles emphasize refinement, artistic beauty, and subtle elegance over heavy ornamentation. With geometric furniture, clean lines, and nature-inspired motifs, these styles create balanced, harmonious interiors that feel polished, sophisticated, and thoughtfully curated, allowing furniture and decorative elements to stand out without overwhelming the space. Furniture: Geometric, simple carvings, and clean lines. Motifs: Nature-inspired patterns, Asian influences, and subtle asymmetry. Décor: Art pieces, framed prints, and handcrafted accents. Ideal Spaces: Living rooms, parlors, and dining areas that benefit from sophisticated elegance. These styles emphasize harmony and proportion, letting furniture and décor speak for themselves without overcrowding the room. 3. Blending Modern Elements Modern Victorian design lets you enjoy the classic character of historic interiors while creating functional, livable spaces for today. By blending period features like chandeliers, clawfoot tubs, and detailed woodwork with contemporary furniture, open layouts, and modern finishes, this style achieves a balanced, practical, and visually cohesive home environment. Integrate Fixtures: Chandeliers, clawfoot tubs, or statement lighting with contemporary furniture. Open Layouts: Combine smaller rooms into larger, airy spaces while retaining period details. Color & Texture: Balance jewel tones or rich fabrics with neutral walls and modern materials. Functionality: Incorporate storage solutions, modern appliances, and lighting that complement the Victorian style. Blending modern and historic elements ensures your home feels authentic, practical, and visually cohesive without losing Victorian character. Quick Victorian Substyle Comparison Here’s a simple table to quickly compare the main Victorian substyles, their key features, and the rooms where they work best: Substyle Key Features Ideal Rooms Gothic Revival Pointed arches, dark woods, wrought iron Library, study, reading nook Eastlake Geometric furniture, subtle carvings, nature motifs Living room, dining room Aesthetic Movement Asymmetry, art-focused, Asian motifs Hallways, parlors, and feature rooms This quick reference helps you identify which substyle best fits each area of your home, making it easier to mix or stick to a particular Victorian feel. Outdoor Victorian Design Inspiration Victorian charm isn’t limited to interiors; it can extend beautifully to porches, verandas, and gardens, creating a cohesive look throughout your property. Wraparound porches with carved-wood railings and turned posts add character, while wrought-iron benches or vintage-inspired seating provide inviting outdoor spaces. Terracotta planters, climbing vines, and carefully arranged flower beds bring greenery and texture that complement Victorian interiors, much like what you’ll find in many French cottage ideas, where the same layered, garden-forward approach shows up. Lighting is also key; lantern-style sconces or post lights echo the elegance of indoor fixtures and highlight architectural features. Decorative touches like fountains, statues, or trellises provide visual interest, giving your outdoor areas the same historic elegance and timeless appeal as your interior design. Little-Known Victorian Design Details Before stepping inside to look at colors and fabrics, here are a few surprising details about Victorian design that shaped nearly every room in these grand houses: Good Parlors: Many homes kept a formal parlor reserved for guests, while everyday family life took place in a separate back room. Arsenic Green Wallpaper: Some wallpaper patterns used arsenic-based dye to achieve a vivid emerald shade, despite known health risks at the time. Sunset Windows: Staircase landings often included a small stained-glass window placed to catch colored light at a specific time of day. Hidden Servant Stairs: Narrow back staircases and corridors let household staff move through the home without crossing paths with the family. Tall Mantels: Fireplace mantels were often built above average eye level to showcase imported marble or hand-carved wood detailing. Layered Curtains: Sheer panels against the glass paired with heavy drapes on top gave homeowners control over both light and drafts. These small details show how much thought went into daily life behind Victorian walls, and knowing them makes it easier to pick colors and materials that feel true to the period. Victorian Décor Mistakes to Avoid Even with the best intentions, it’s easy to make design mistakes when decorating a Victorian home. Use this table to identify common pitfalls and practical ways to fix them, keeping your interiors stylish and authentic. Mistake Why It Happens How to Fix It Overcrowding Rooms Victorian style can tempt you to fill every space with furniture and décor. Focus on key statement pieces and leave breathing space. Layer textiles instead of furniture. Mismatched Styles Mixing modern furniture or contemporary colors without cohesion. Balance modern elements with Victorian accents; use a consistent color palette. Heavy Color Misuse Using jewel tones on every wall or surface can overwhelm the space. Reserve bold colors for feature walls, furniture, or accents; pair with neutrals. Ignoring Architectural Details Not highlighting cornices, bay windows, or fireplaces does not lose historic character. Use lighting, paint, or furniture placement to draw attention to key features. Cluttered Accessories Displaying too many small decorative items can feel messy. Select meaningful collectibles, rotate displays, and group items strategically. Following these guidelines helps maintain the elegance and authenticity of your Victorian interiors while avoiding common design missteps. Frequently Asked Questions Can Victorian interiors work with eco-friendly materials? Yes. You can choose sustainably sourced wood, recycled fabrics, and low-VOC paints. Maintaining the Victorian style doesn’t require only traditional materials; eco-conscious alternatives can replicate textures and finishes while reducing environmental impact. How do I maintain antique furniture in a Victorian home? Regular dusting, gentle polishing, and avoiding direct sunlight preserve antique pieces. Use protective pads under objects and maintain stable humidity to prevent wood from cracking or warping, ensuring your furniture stays beautiful for decades. What flooring options suit a Victorian interior besides wood? Patterned tiles, encaustic cement, and luxury vinyl planks that mimic historic designs work well. Layering rugs over these floors can add warmth and texture while maintaining a period-appropriate Victorian feel. How can I introduce color without overpowering a Victorian room? Use accent pieces like pillows, throws, or artwork to introduce pops of color. Feature walls or small furniture items in jewel tones allow vibrancy without overwhelming ornate architectural details or rich textiles. Are Victorian interiors suitable for pet-friendly homes? Yes, with some planning. Choose durable fabrics like velvet blends or patterned rugs, protect wood surfaces with pads, and select furniture that balances elegance with practicality to accommodate pets safely. Does Victorian style work in a small apartment? Yes, if you scale it down. Stick to one or two statement pieces, keep wall colors lighter, and save the boldest jewel tones for accents rather than full rooms, so the space still feels open. Final Reflections A Victorian house interior comes together through layering, not addition. If you only take one thing from this guide, let it be the small-space lesson: light walls, a mirror placed to catch the window, and one or two architectural details picked out in color will read as Victorian far more convincingly than filling every surface with them. Start with a single room and a single architectural feature, whether it’s a fireplace, a bay window, or a run of cornice, and build the color and textiles around that one thing before you touch anything else. Drop a comment below and tell me if you are a big fan of Gothic or Classic Victorian.
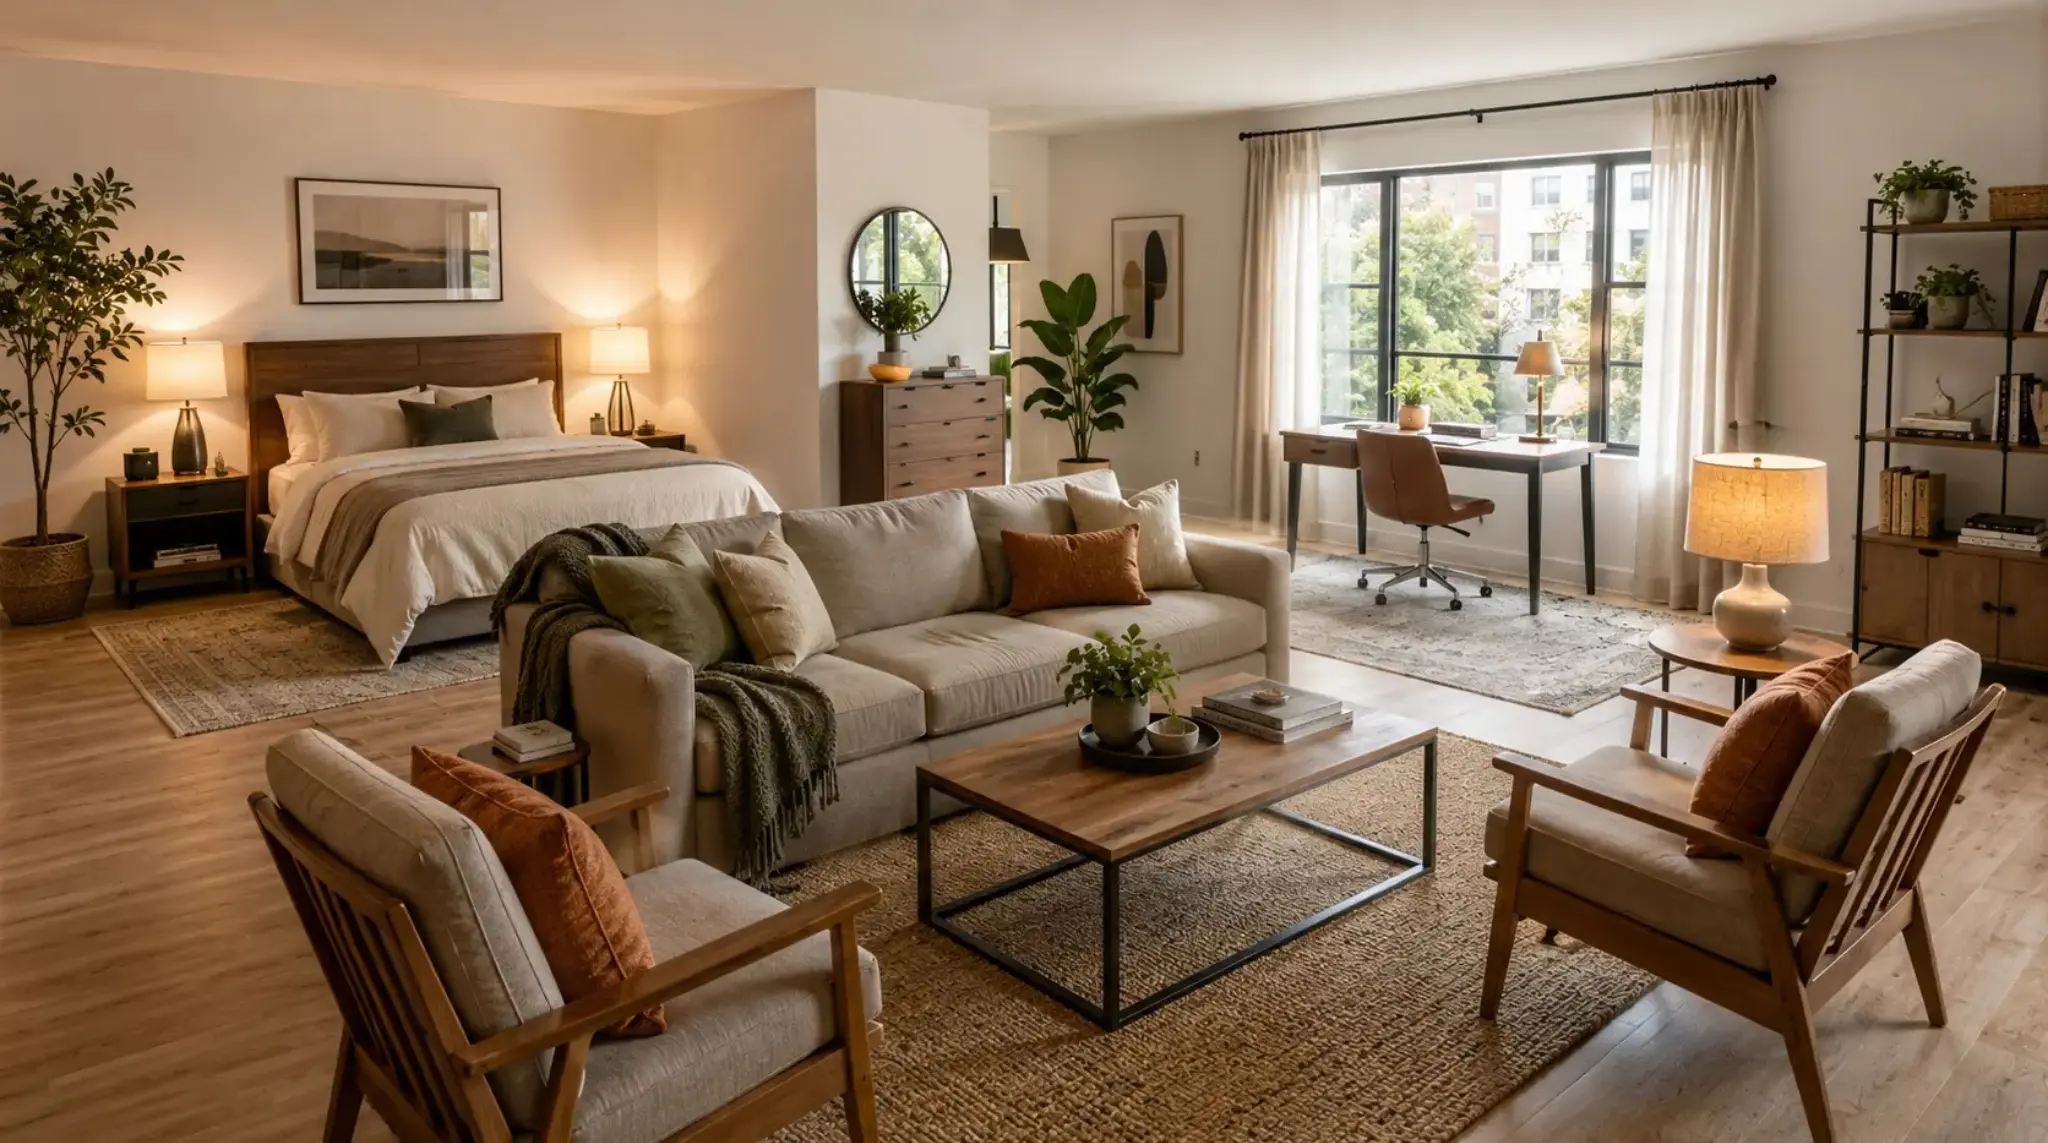
A room can have nice furniture and still feel wrong. Sometimes the sofa blocks the path. Sometimes the bed takes over the whole space. Sometimes a long room feels like a hallway with chairs. That is why room layout ideas matter before color, wall art, or new furniture. I like starting with the way the room needs to work each day, because that makes every choice easier. Your dream room should feel comfortable, useful, and easy to move through. Once the purpose is clear, you can place the largest pieces first, fix awkward corners, and build a room that feels good from the moment you walk in. I also keep comfort first. Let the Room’s Daily Job Decide the Layout Before moving anything, decide what the room needs to do most often. A living room for movies needs a different setup than one made for guests. A bedroom with a desk needs a clear sleep area and a separate work spot. A kids’ room needs open floor space. A gaming room needs screen comfort, cable control, and chair space. Write down the top three uses of the room. Keep the list simple. For example, your bedroom may need to support sleep, study, and storage. Your living room may need space for a TV, guests, and reading. Once you know this, the layout stops feeling random. Start with the biggest piece. In a living room, that is usually the sofa. In a bedroom, the bed is the focus. In a study room, the desk is. Place that item first, then add smaller pieces around it. Measure the Space Before Moving Furniture A good layout starts with real numbers. Guessing can lead to blocked doors, tight corners, and furniture that feels too large. Measure the room before you move heavy items or buy anything new. Measure: Each wall Doors and door swings Windows Closets Outlets Radiators Built-ins Main furniture pieces Take photos from each corner. This helps you see what the room looks like from different points. You can also use painter’s tape on the floor to mark where a sofa, bed, desk, or table might go. If the taped shape feels too tight, the furniture will likely feel too tight, too. How to Do a Living Room Layout Makeover Step by Step A cluttered, badly laid out living room is usually a sequence problem, not a furniture problem, since most people move one piece at a time instead of starting clean. Clear the room first, sort what stays and what goes, and measure the empty space before anything comes back in. From there, follow these steps. Identify the main walking path: Map the route from the entry to the sofa, TV, or exit, and keep it at least 30 to 36 inches wide. Pick one focal point: Choose the fireplace, TV, window, or largest wall, and build everything else around that single point. Place the largest piece first: Position the sofa or sectional relative to the focal point before anything else goes back. Tape out the footprint. Mark the sofa and coffee table positions with painter’s tape, then walk through them before moving the real furniture. Add secondary seating and the coffee table: Angle the chairs toward the focal point, and leave about 18 inches between the sofa and the table. Reintroduce storage and lighting with a purpose: Bring back only pieces that solve a clutter problem you noticed earlier, and add a lamp beyond the main ceiling light. Size the rug and do a final walk-through: Choose a rug large enough for the front legs of the furniture to sit on, then walk the room as you would on a normal day, adjusting one piece at a time. This takes longer than rearranging piece by piece, but it’s the difference between a living room that looks fine in photos and one that holds up to daily use. Room Layout Ideas for Every Space The best layouts start with how a room is used each day. These room layout ideas can help create better flow, improve comfort, and make every square foot work harder. 1. Balanced Seating Layout Best for: Square or medium living rooms This layout works well for square or medium-sized living rooms. Place a sofa across from two chairs, then add a coffee table in the center. Use side tables near the seats so people have a place for drinks, books, or lamps. This setup feels calm because both sides of the room carry similar weight. It is also great for talking with family or guests. If the room feels too formal, soften it with a round table, a textured rug, or chairs angled slightly inward. 2. TV-Focused Layout Best for: Family rooms, TV rooms, and casual living rooms A TV-focused setup is best for movie nights, weekend lounging, and daily family use. Place the sofa across from the TV, then angle extra chairs toward the screen. Keep the screen away from harsh window glare if you can. Leave a clear path beside or behind the seating. This keeps people from walking between the sofa and the screen all the time. Add closed media storage if remotes, wires, games, or chargers make the wall feel messy. 3. Conversation Layout Best for: Guest-friendly living rooms and no-TV sitting rooms If your room is mostly for guests, arrange seats so people face each other. A sofa with two chairs works well. Four chairs around a central table can also feel warm and relaxed. Keep the table close enough for everyone to reach. Add lamps near the seating, not just one ceiling light. This layout works best when the TV is not the main feature. It helps the room feel more personal and less like a waiting area. 4. Fireplace Layout Best for: Living rooms with a fireplace. A fireplace can make furniture placement easier because it already gives the room a strong center, though it’s easy to get wrong. This awkward living room layout with a fireplace breakdown shows a few common ways that happen. Place the sofa facing or angled toward it. Add chairs on either side to create a comfortable group. If the TV is also in the room, place it beside the fireplace if the wall allows it. Mounting it above the fireplace can work, but only when the height feels comfortable. A rug under the seating area helps the group feel connected. 5. Window-Facing Layout Best for: Rooms with large windows, views, or window nooks If your room has a large window or a nice view, use it as the main feature. Face the seating toward the window instead of hiding it behind furniture. Keep bulky pieces away from the glass so natural light can enter the room. A window nook can become a small reading spot with a chair, bench, lamp, and small table. Low storage works well under a window because it keeps the wall useful without making the room feel heavy. 6. Open-Center Small Room Layout Best for: Small living rooms, small bedrooms, and rental rooms Small rooms often feel better when the center stays open. Place larger furniture along the cleanest walls and keep the main path clear. Choose fewer pieces instead of filling every corner. Furniture with legs can make the floor look more open. Wall shelves, slim tables, and nesting tables also help. A mirror near natural light can make the room feel brighter. The key is to give your eyes and feet a clear path. 7. Corner Seating Layout Best for: Small rooms, studio corners, and compact bedrooms A corner layout is useful when the room has limited floor space. Place a chair, small sofa, desk, or reading seat in a corner, then build around it. This frees the middle of the room for movement. Use a floor lamp, a corner shelf, or a small side table to make the corner more useful. Avoid oversized pieces that block the path. This works well in small bedrooms, studio rooms, and compact living rooms. 8. Storage-First Layout Best for: Bedrooms, kids’ rooms, and busy living rooms If a room always feels messy, plan storage before styling. Think about what lands on the floor, bed, sofa, or desk every day. Then place storage near that exact spot. Use closed cabinets, storage beds, baskets, benches, and wall shelves. In a bedroom, under-bed drawers can hold extra bedding or clothes. In a living room, a storage ottoman can hide throws, remotes, and games. A tidy layout feels easier to enjoy. 9. Two-Zone Long Room Layout Best for: Long living rooms, long bedrooms, and open-plan spaces. Long rooms can feel awkward when all the furniture is lined up. If the room is also long and rectangular with a TV involved, a simple understanding of a long rectangular living room layout with a TV can walk through a few zoning options in more detail. Break the space into two zones instead. One end can be for seating, and the other can be for reading, work, play, or dining. Use rugs to mark each zone. Keep the walking path clear from one end to the other. Avoid placing every item against the same wall. This gives the room shape and keeps it from feeling like a hallway. 10. Across-the-Width Narrow Layout Best for: Narrow living rooms and tight rectangular rooms A narrow room needs furniture that works across the width, not only along the length. Place a sofa or pair of chairs across the shorter side when possible. This helps stop the tunnel effect. Choose slim arms, open legs, and smaller tables. Round or oval tables are easier to move around than sharp corners. Wall lights can also save floor space when floor lamps make the room feel tight. 11. Bed-as-the-Focus Bedroom Layout Best for: Main bedrooms and guest bedrooms Most bedrooms work best when the bed is the main feature. Place it on the strongest full wall, ideally where it does not block windows, closets, or doors. Leave space on both sides if the room allows it. Add nightstands, lamps, and a rug to complete the bed area. If one side is tighter, use a wall shelf instead of a full nightstand. This gives the bedroom a clear starting point. 12. Small Bedroom Layout Best for: Small bedrooms, student rooms, and rental rooms In a small bedroom, place the bed along the longest wall or in the position that leaves the clearest path to the door and closet. Two nightstands are nice, but one can work if space is tight. Use wall shelves instead of large dressers when possible. Add under-bed storage for items you do not need every day. Keep the floor as open as you can. Soft lamps can make a small room feel calmer at night. 13. Study and Sleep Layout Best for: Teen rooms, student rooms, and work-from-home bedrooms A bedroom that also works as a study space needs clear zones. Place the bed in the calmest part of the room. Put the desk near natural light if possible, but avoid glare on the screen. Use a small shelf, rug, or lamp to separate the desk from the bed. Keep books, chargers, and work items close to the desk so they do not spread across the room. This helps the room feel less busy. 14. Teen Dream Room Layout Best for: Teen bedrooms and personal rooms A teen room often needs space for sleep, study, storage, and personal space. Start with the bed, then add a desk, storage, and a chill corner if space allows. Use shelves for books, photos, sports items, crafts, or collectibles. Add soft lighting near the bed and desk. Keep storage simple so cleaning does not feel hard. Bedding, posters, lamps, and a carpet or rug can change the room without a full makeover. 15. Gaming Room Layout Best for: Gaming bedrooms, hobby rooms, and media rooms A gaming room needs comfort and order. Place the desk where screen glare is low. Leave enough space for the chair to move back without hitting the bed, wall, or storage unit. Keep cables grouped with clips, sleeves, or a cable box. Use shelves for consoles, headphones, books, and collectibles. Add lighting behind the screen or near shelves, but keep it easy on the eyes. Comfort matters more than filling the room. 16. Cozy Reading Corner Layout Best for: Bedroom corners, living room corners, and window spots Even a small corner can become a quiet reading spot. Use a comfortable chair, a small table, a lamp, and a shelf. Place it near a window if the light is good. Add a soft rug or throw if the space feels bare. Keep the setup simple. A reading corner should not need much furniture. It just needs a clear purpose and a place to sit without distractions, and browsing reading nook ideas can help narrow down a layout that fits the space. 17. Flexible Multi-Use Layout Best for: Studio apartments, guest rooms, and shared rooms Shared rooms, guest rooms, studio apartments, and small homes need flexible zones. Use rugs, shelves, curtains, or lighting to separate each area without adding walls. Choose furniture that can do more than one job. A daybed can work for seating and sleep. A foldable desk can save space. A storage bench can hold items and offer extra seating. Keep the main walking path open so the room still feels easy to use. Room Rules and Layout Tests Before moving furniture, use these quick rules to check if the layout will feel comfortable and easy to use. Rule Quick Use Main walkways Keep 30 to 36 inches clear Sofa to coffee table Leave about 18 inches Bedside space Keep 24 inches if possible Desk chair space Leave 30 inches or more Dining chair space Keep about 36 inches for pull-out Rug size Place the front furniture legs on the rug Painter’s tape Mark the furniture size before moving pieces Paper sketch Map doors, windows, outlets, and furniture Free room planner Test layouts in 2D or 3D These small checks can help you spot layout problems before you lift, shift, or buy anything new. Common Mistakes to Avoid Before choosing any layout, check these common mistakes so the room does not feel cramped, blocked, or hard to use. Buying furniture before measuring the room Blocking doors, windows, closets, or outlets Pushing every furniture piece against the wall Using too many items in a small space Choosing a rug that is too small for the seating area Ignoring storage needs for everyday items Creating narrow or awkward walking paths The best layouts feel easy to walk through, sit in, clean, and use. Frequently Asked Questions What if a door opens into the furniture? Move the largest piece away from the door swing first. If that is not possible, use slimmer furniture near the entry. The door should open fully without hitting a chair, table, bed, or storage unit. How do I place furniture around a radiator? Keep fabric, wood, and storage pieces away from direct heat. Use the radiator wall for low decor only if airflow stays open. A nearby chair can work, but avoid blocking heat from entering the room. What if outlets are in the wrong spot? Use cord covers, cable clips, or a floor outlet cover to keep wires safer and neater. Do not stretch cords across walkways. If a desk or TV needs power, place it near the safest outlet. How can renters test changes without damage? Use painter’s tape, removable hooks, freestanding shelves, and plug-in lights. Test furniture positions before buying anything large. For wall decor, choose light pieces and renter-safe strips that remove cleanly when used correctly. What should I do with an off-center window? Balance the wall with furniture rather than forcing perfect symmetry. A chair, plant, lamp, or narrow shelf can fill the empty side. Keep the window clear enough for light, curtains, and daily use. Final Thoughts The best room layout ideas make your space easier to live in, not just nicer to look at. Start with the room’s main job, measure the walls, choose one clear focal point, and move the largest piece first. I always think a room feels better when every item has a reason to be there. Your dream room does not need to be costly or full of new furniture. It needs comfort, clear paths, useful storage, and details that feel like you. Try one change today, such as moving a chair, testing a rug spot, or clearing a walkway, then adjust until the room feels right. Start small and notice the difference. Drop a comment below and let me know how your layout turned out.

