

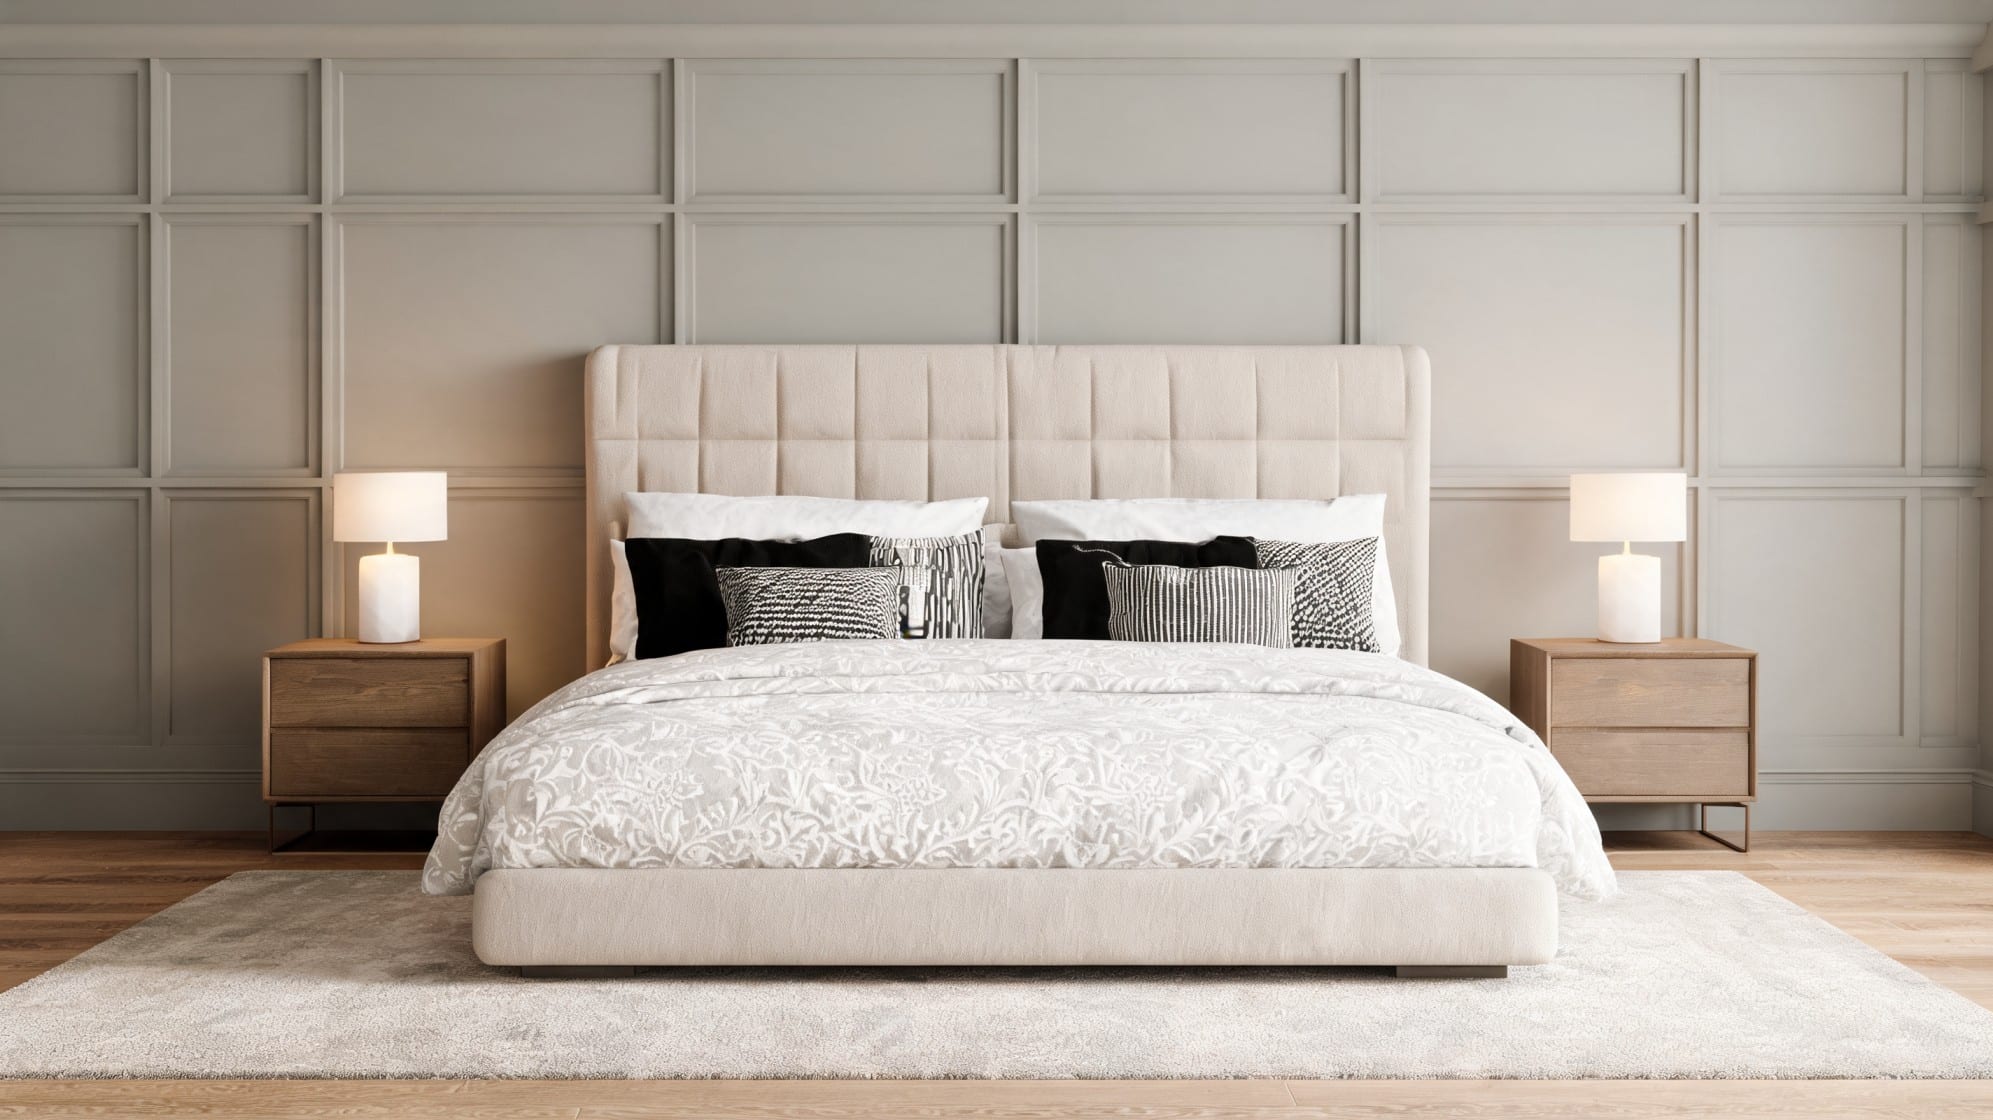


A plain wall can make a room feel empty, even when the rest of the space looks nice. I’ve seen how a simple DIY board and batten wall can change that feeling fast. It adds shape, detail, and texture without needing a full room makeover.
Board-and-batten is also a good DIY project because the design is simple. You do not need fancy cuts for many styles. You need careful measuring, straight boards, clean spacing, and a smooth paint finish.
I’ll walk you through what board and batten is used for, which styles you can try, the best materials, design ideas, common mistakes, and tips for making your wall look professional.
What Is Board and Batten Used For?
One of the main reasons people add board-and-batten is to create an accent wall. A bedroom wall behind the bed, a dining room wall, or an entryway can look more finished with this trim. It gives the room a focal point without adding too much decor.
Board and batten can also make a room feel more custom. Basic drywall can look flat, but trim adds depth.
Once the wall and boards are painted the same color, the whole wall can look built-in. This is why many people use it when they want a high-end look on a smaller budget.
It can also help protect lower walls in busy areas. In entryways, hallways, mudrooms, and dining rooms, walls can get scuffed by shoes, bags, chairs, and everyday traffic. A half-wall board-and-batten design can help cover and protect those areas.
This wall style works in many rooms. You can use it in bedrooms, bathrooms, hallways, dining rooms, offices, nurseries, and entryways. It can feel soft and cozy in a bedroom, clean and bright in a hallway, or bold and dramatic in a dining room.
Types of Board and Batten You Can DIY
There are many board-and-batten styles you can try at home. Some are very simple, while others need more planning. The best style depends on your room, your wall size, and the look you want.
- Classic vertical board and batten: This style works well in bedrooms, entryways, bathrooms, and hallways. It gives the wall a clean look without feeling too busy.
- Half-wall board and batten: This is a great choice for dining rooms, hallways, and entryways. You can paint the trim one color and leave the upper wall plain, or you can add wallpaper above it for more detail.
- Full-wall board and batten: This style makes a stronger statement. It works well behind a bed, behind a sofa, or in a home office. If your room feels plain, a full-wall design can make it feel more finished.
- Grid board and batten: This style looks clean and balanced. It works well in modern rooms, bedrooms, and living rooms. It takes more measuring, but the final look can feel very polished.
- Square board and batten: This design feels bold and neat. It is a good choice if you want a wall that looks planned and symmetrical.
- Geometric board and batten: This style is popular for bedrooms, nurseries, and accent walls. It needs more cutting and planning, so it may be better if you already feel comfortable with DIY projects.
- Thin batten modern style: This gives the wall a sleek look. It works well in simple, modern rooms where you want texture without heavy detail.
- Wide batten farmhouse style: It uses wider boards and often feels warmer and more rustic. This works well with soft whites, warm neutrals, wood furniture, and cozy decor.
How to Do Board and Batten Step by Step
If you’ve never added trim to a wall before, board and batten can still feel like a doable first project. I like this style because it looks custom.
You do not need to rush it. When you take it one step at a time, the wall starts coming together in a simple and satisfying way.
Here’s how you can build a clean DIY board and batten wall from start to finish:
Step 1: Prep the Wall
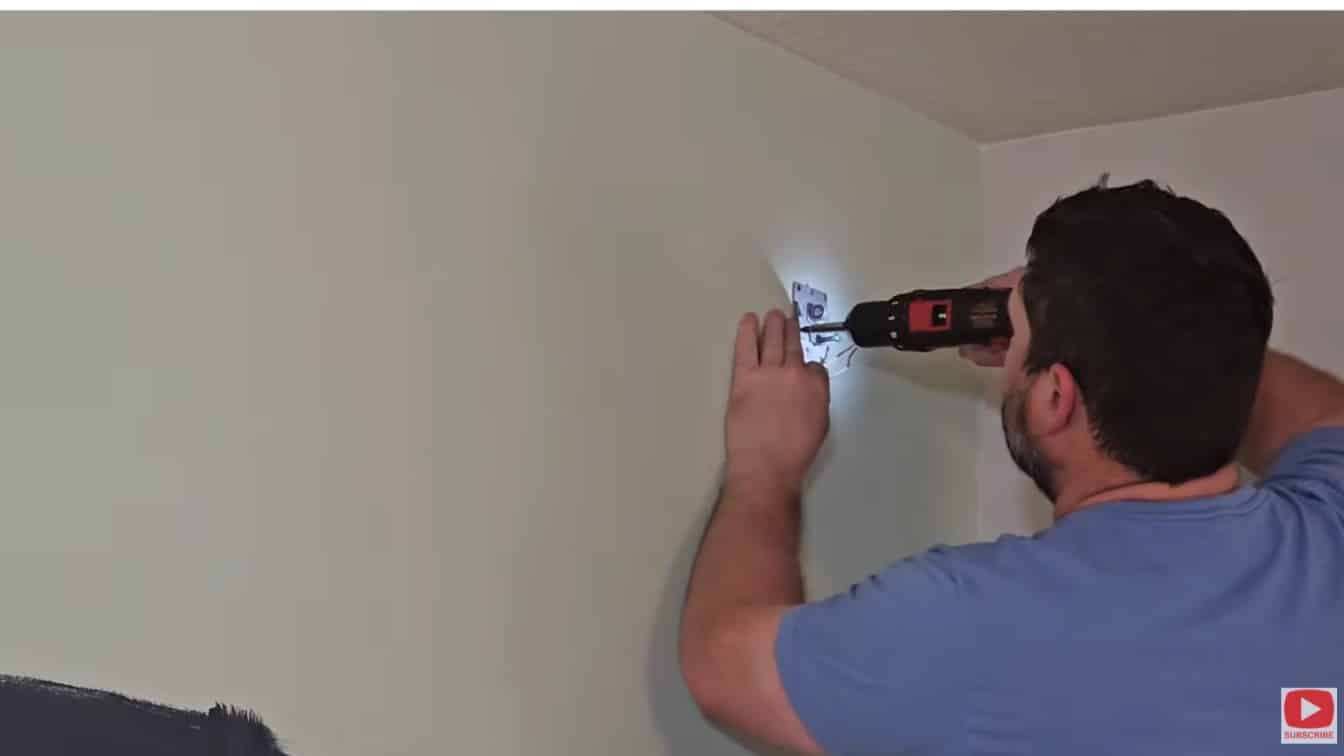
Clear the wall first so you have a clean space to work. Remove pictures, hooks, outlet covers, and anything leaning against the wall. Wipe the surface with a damp cloth to remove dust and dirt.
Fill any holes, dents, or rough areas with wall filler, then sand them smooth once dry. Check the baseboard, corners, and nearby trim, as bumps can prevent boards from sitting flat.
Good prep helps the boards attach more securely and gives your finished board-and-batten wall a cleaner, smoother look overall before installing any trim.
Step 2: Paint the Wall and Boards
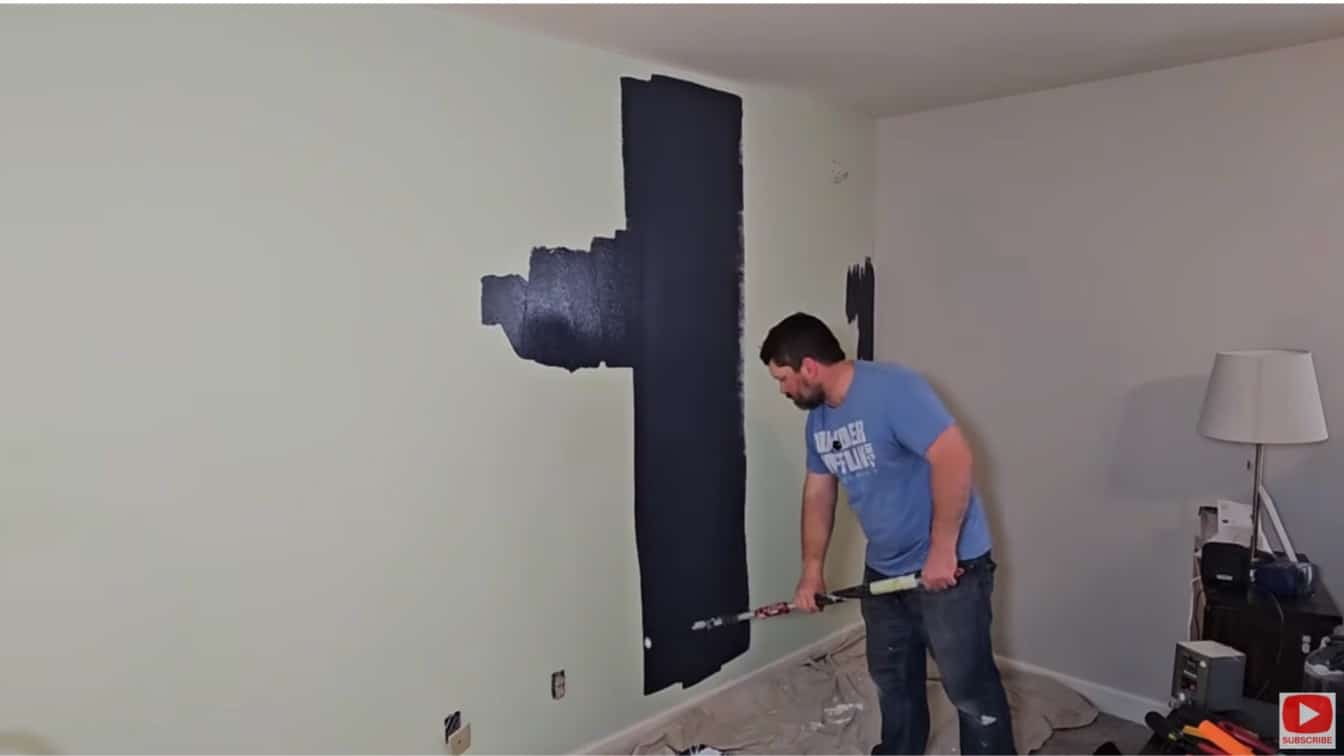
Paint the wall and boards before installing them to make the final finish easier.
Use the same color on the wall and boards if you want a smooth, built-in look. Roll paint over the wall first, then paint the front and sides of each board.
Let the paint dry fully before moving ahead.
This helps cover tight corners that may be hard to reach later. You may still need small touch-ups at the end, but this step gives you a cleaner start and saves effort during installation later on too.
Step 3: Attach the Boards on Edges of Wall
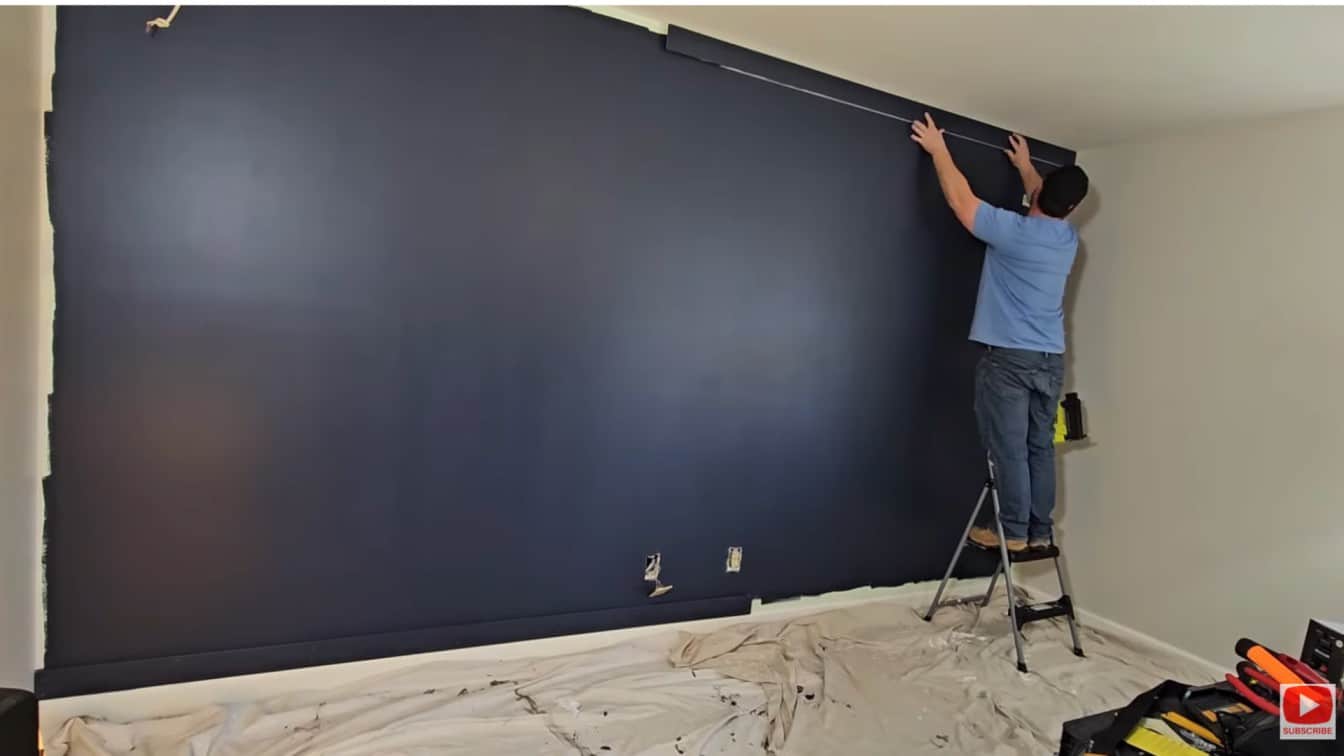
Start by attaching boards around the outside edges of the wall. These boards create the frame for the full design and help guide the rest of the project.
Place boards along the left side, right side, top, and bottom if your layout needs a full border. Add a thin line of adhesive to the back, press the board into place, and check it with a level.
Once it is straight, nail it securely. This frame keeps the board and batten pattern neat and balanced from the very beginning of installation.
Step 4: Cut the Battens
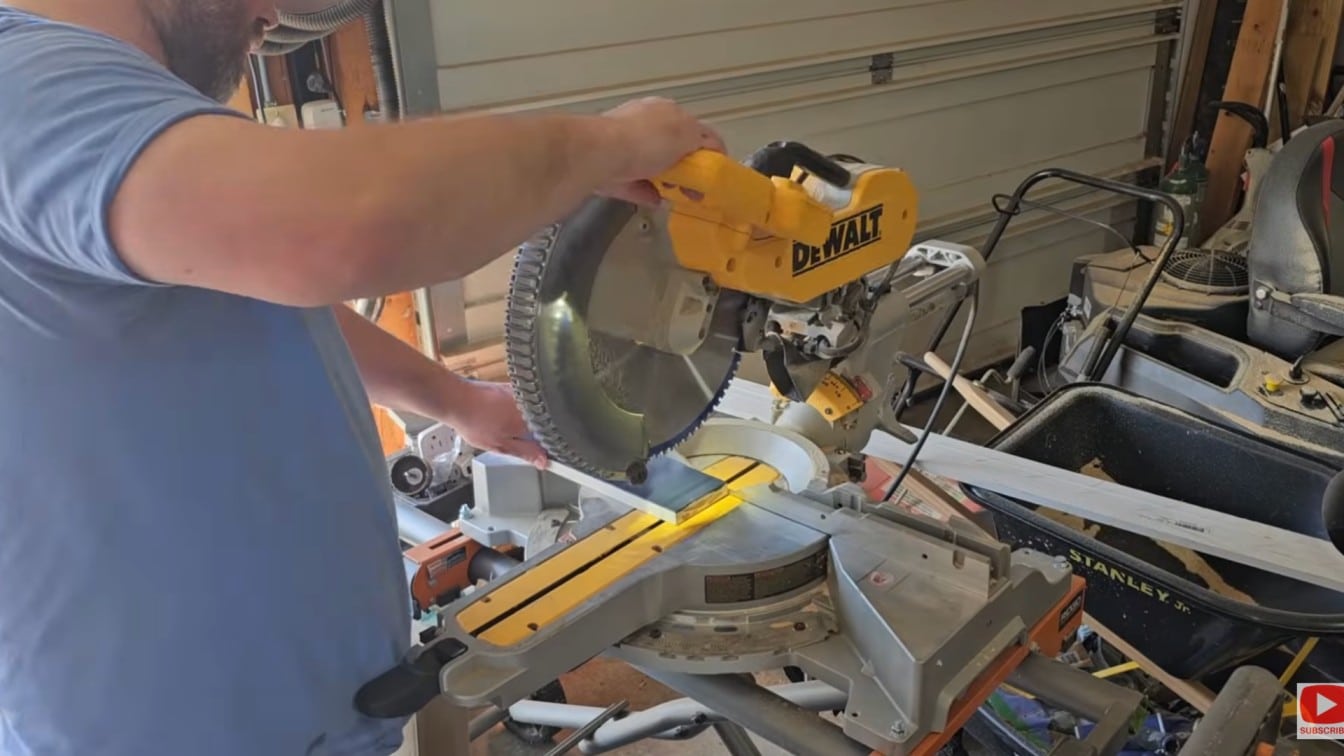
Measure the open spaces inside your frame before cutting the battens. Do not assume every space is the same, because walls, floors, and ceilings can be slightly uneven.
Mark each batten length clearly on the board before cutting. Make slow, careful cuts so the ends stay clean. After cutting, hold each piece against the wall to check the fit.
If a batten is too long, trim it little by little. A good fit helps each board sit flat and keeps the design polished and clean after everything is fully painted.
Step 5: Install Vertical Battens
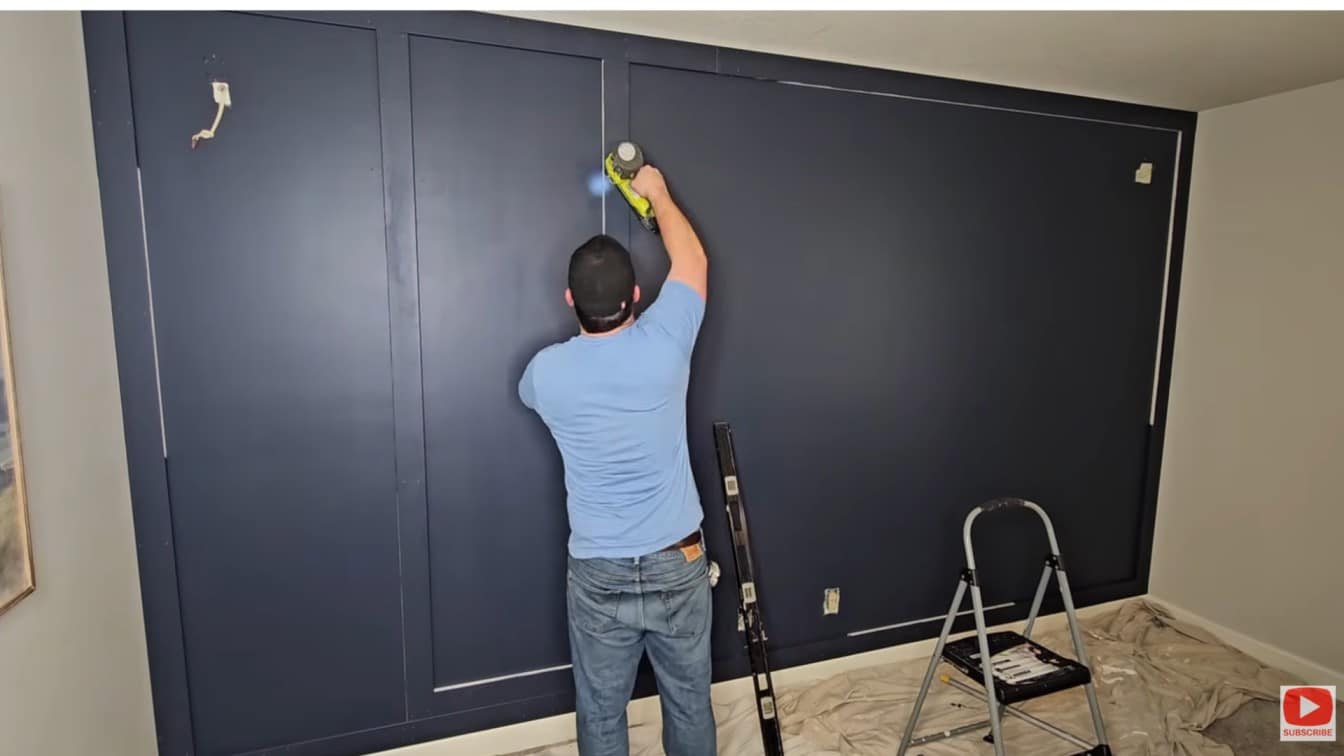
Install the vertical battens first if your design includes both vertical and horizontal pieces. Line each batten up with the marks you made on the wall.
Add adhesive to the back, press it into place, and use a level to make sure it is straight. Nail it once it lines up correctly. Keep the spacing even from one batten to the next.
Step back often to check the full wall. Straight vertical battens make the design look clean, balanced, and professional when the full wall is complete and painted later.
Step 6: Install Horizontal Battens
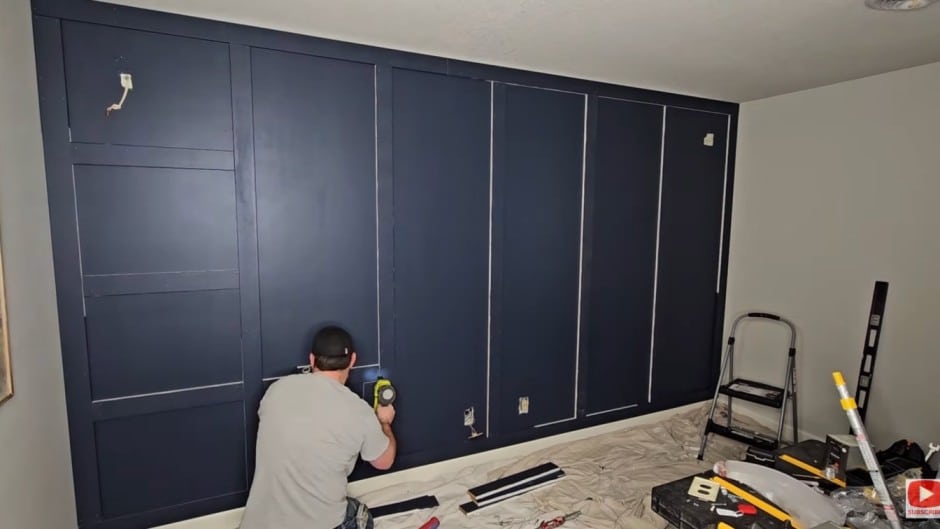
After the vertical battens are in place, install the horizontal battens. Measure the spaces between the vertical boards because each section may be slightly different.
Cut each horizontal piece to fit its own spot. Add adhesive to the back, press it into place, and nail it when it lines up well. Use a level so each piece stays straight and does not tilt.
These horizontal battens finish the pattern and create a clean grid or panel look, depending on the style you want for your finished board and batten wall.
Step 7: Fill Gaps and Nail Holes
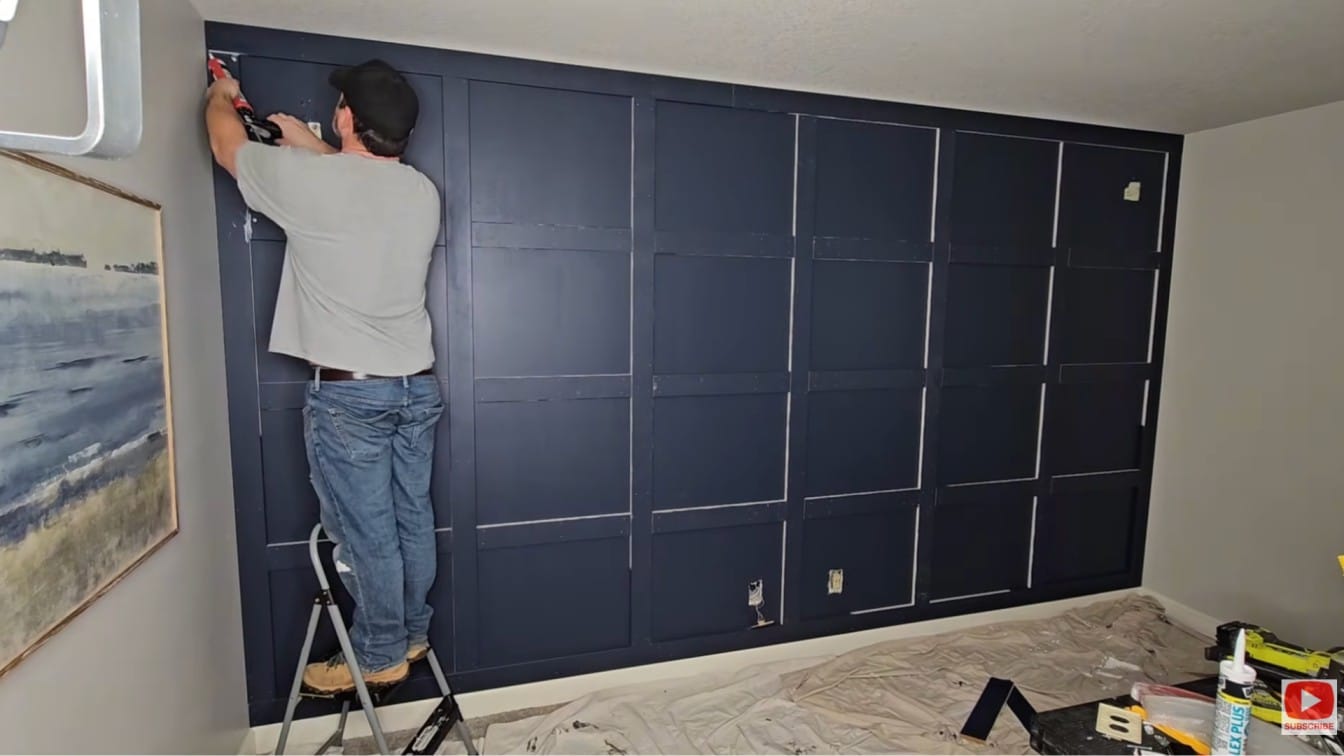
Once all boards are installed, fill the nail holes with wood filler or spackle. Press the filler into each hole, then scrape away extra so the surface stays smooth.
Use paintable caulk along the edges where the boards meet the wall, corners, and trim. Smooth the caulk with your finger or a simple caulk tool. Let everything dry fully before sanding.
This step hides small gaps and nail marks. It helps your board-and-batten look clean, finished, and more professional once the final coat of paint dries.
Step 8: Paint the Wall With Board and Battens
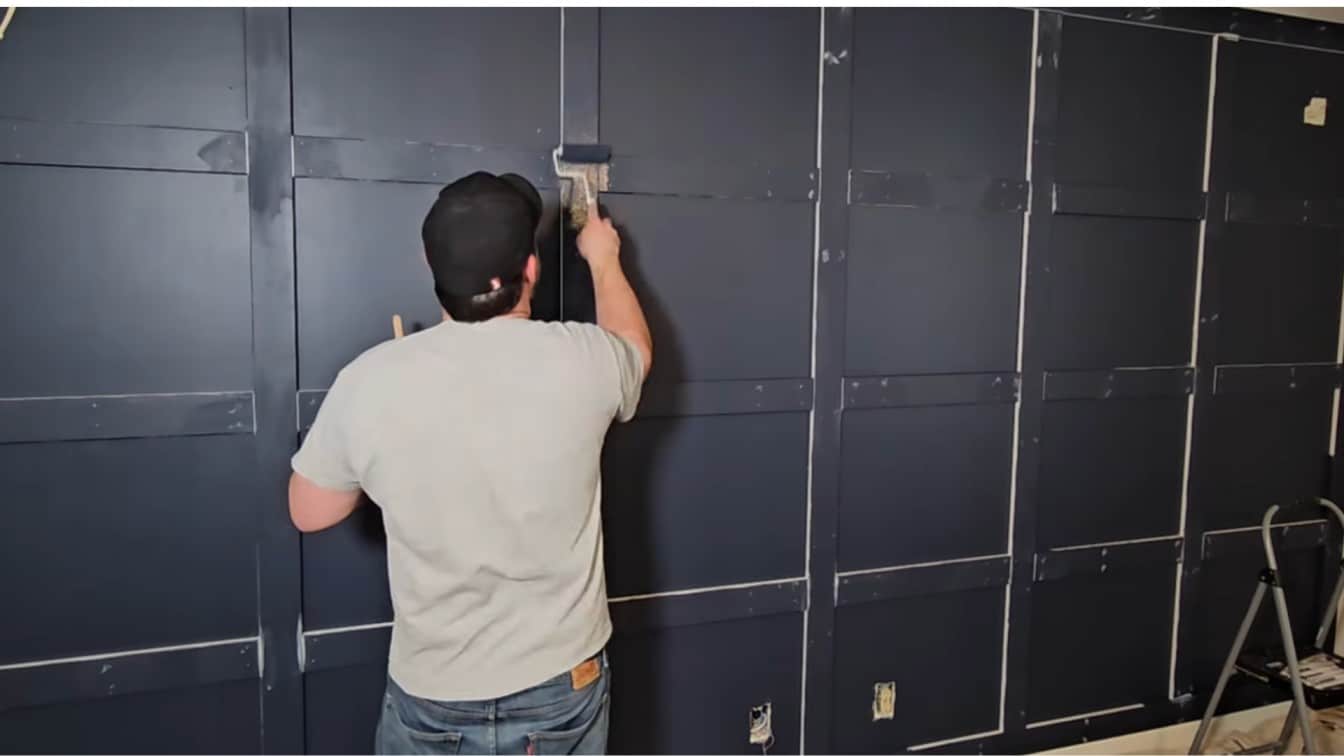
Finish by painting the wall, boards, and battens together for a smooth final look. Use a brush around board edges, corners, seams, and tight areas. Then use a roller on the wider sections of the wall.
Apply thin coats so the paint does not drip or look heavy. Let the first coat dry before adding another coat if needed. Check for missed spots once the paint dries. Touch up small areas with a brush.
Replace outlet covers, clean the space, and enjoy the finished wall for a fresh, polished result.
For more details, refer to the video below.
Best Material for DIY Board and Batten
The material you choose can affect the cost, appearance, and lifespan of your board-and-batten wall. Some materials are easier to paint. Some are better for moisture. Some are cheaper for large walls.
| Material | Best For | Main Benefit |
|---|---|---|
| MDF boards | Smooth indoor walls | Affordable and easy to paint |
| Pine boards | Real wood look | Stronger and more natural |
| PVC trim | Bathrooms and damp spaces | Handles moisture better |
| Plywood strips | Budget projects | Covers large walls for less |
| Pre-primed trim | Faster painting | Saves prep time |
For most beginner projects, MDF or pre-primed trim is the easiest choice. If you are working in a bathroom, PVC trim may be better. If you want a real wood look, pine is a good option.
Board and Batten DIY Inspiration/Ideas
Board and batten can fit many rooms and styles. You can keep it bright and simple, or you can use a dark paint color for a bold look. The best idea depends on the mood you want in the room.
1. Half-wall board and batten in a hallway
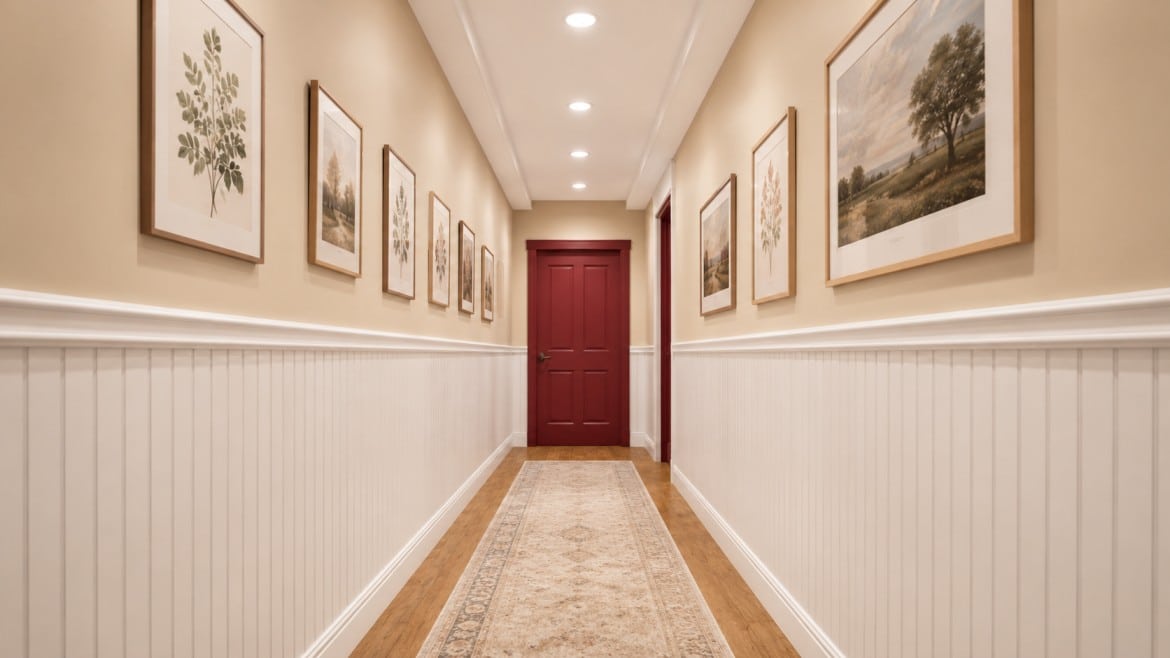
Half-wall board-and-batten works well in a hallway because it adds detail without making the space feel narrow.
It also helps protect the lower wall from shoes, bags, and daily traffic.
Keep the top portion simple so the hallway still feels open and bright. This idea is great if you want a clean look that feels custom but not too heavy.
Styling Tips:
- Paint the lower trim white and the upper wall warm beige.
- Add framed art above the trim for interest.
- Use a runner rug to soften the space below.
2. Board and batten with wallpaper above
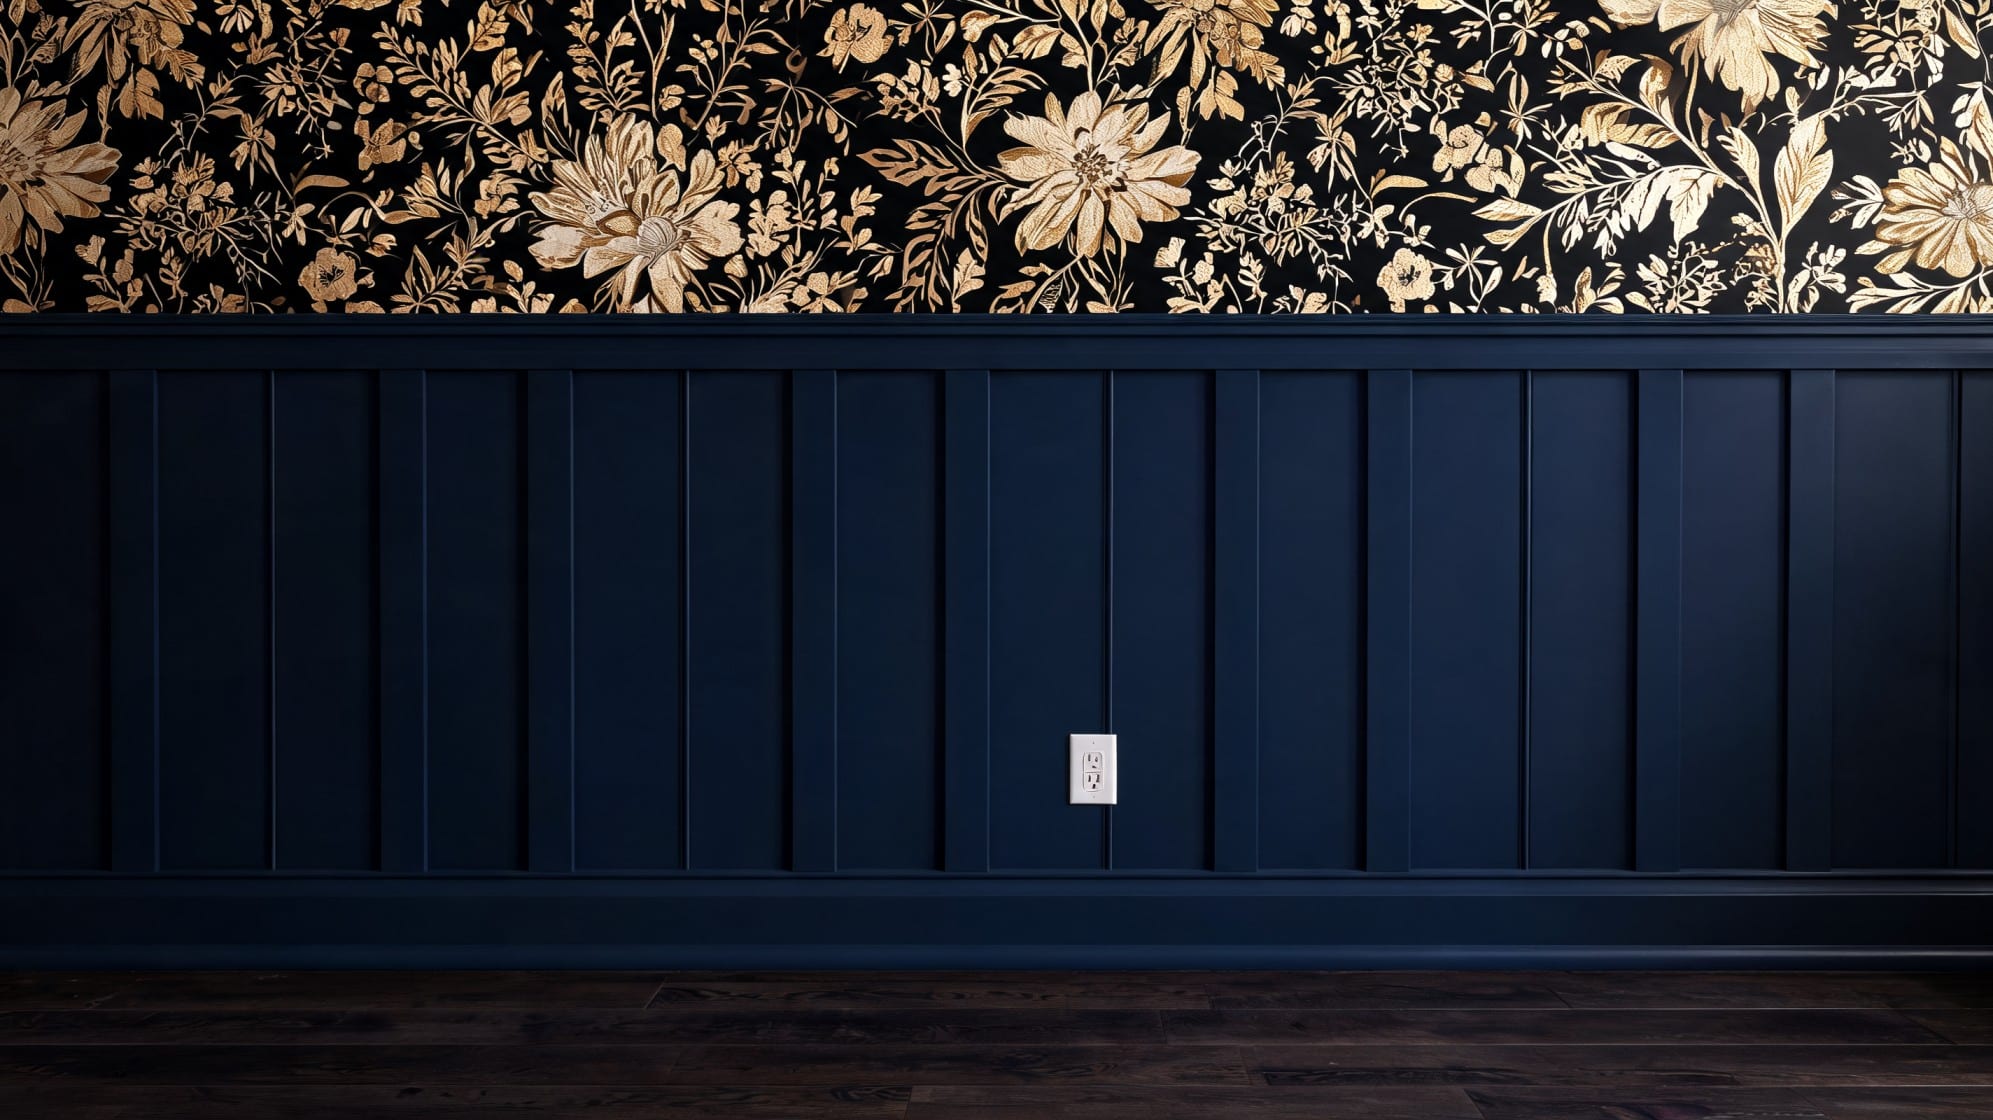
Board-and-batten with wallpaper above adds more character to the room while keeping the lower wall neat.
The trim adds structure, and the wallpaper brings color, pattern, or texture. This idea works well in powder rooms, dining rooms, nurseries, and entryways.
Choose a simple batten layout so the wallpaper can stand out without making the room feel too busy, crowded, or hard to style.
Styling Tips:
- Pair floral wallpaper with soft white trim for charm.
- Use striped wallpaper on a taller wall for a taller look.
- Match one wallpaper color to the trim paint neatly.
3. Grid board and batten behind a bed
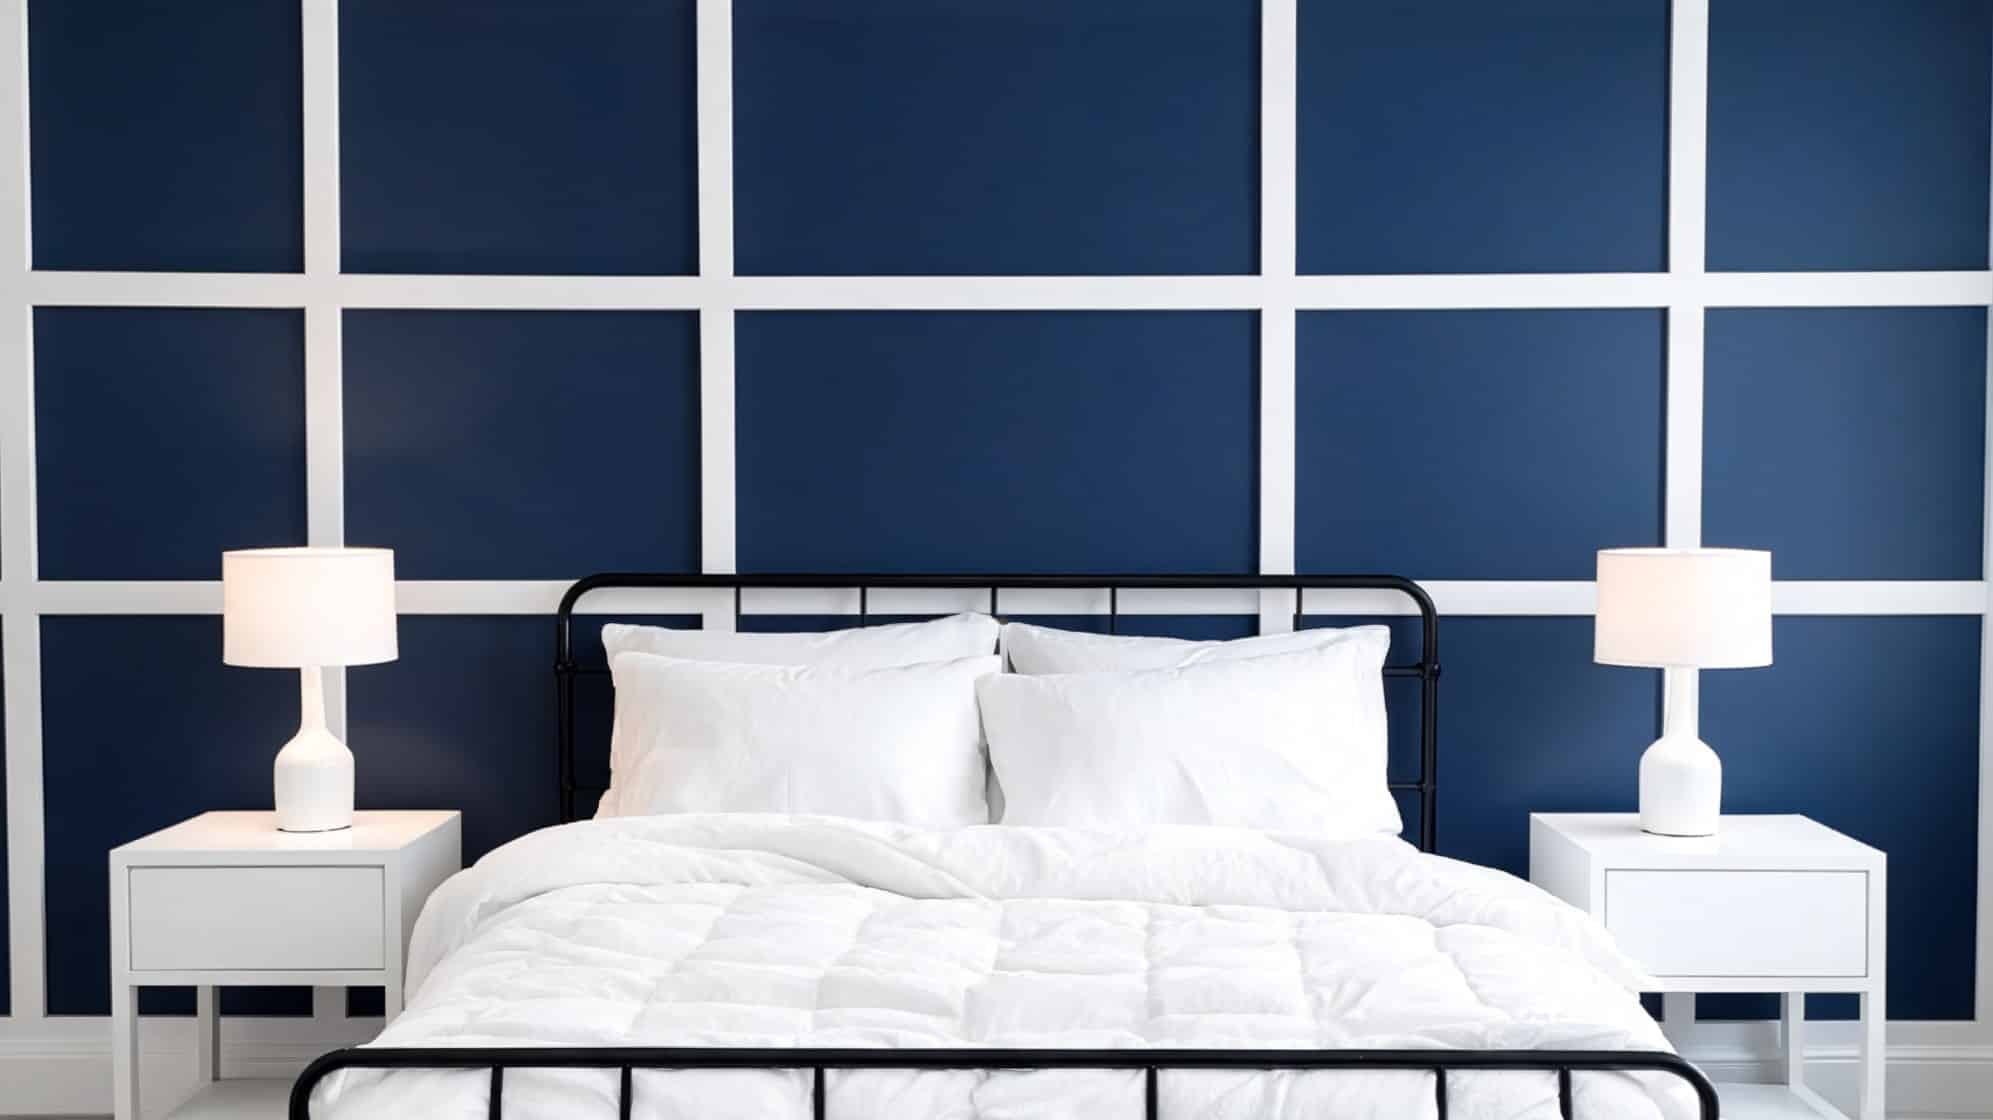
A grid board and batten behind a bed can make the bedroom feel more finished and cozy.
The square or rectangle pattern works like a large headboard, so you may not need much wall art.
It adds depth behind the bed while keeping the room clean and calm. This idea looks especially good when the bed is centered on the wall and the spacing feels even and balanced overall.
Styling Tips:
- Paint the grid wall soft white or gray.
- Add matching nightstands for balance.
- Use simple bedding to keep it calm and relaxed.
4. Floor-to-ceiling board and batten in an office
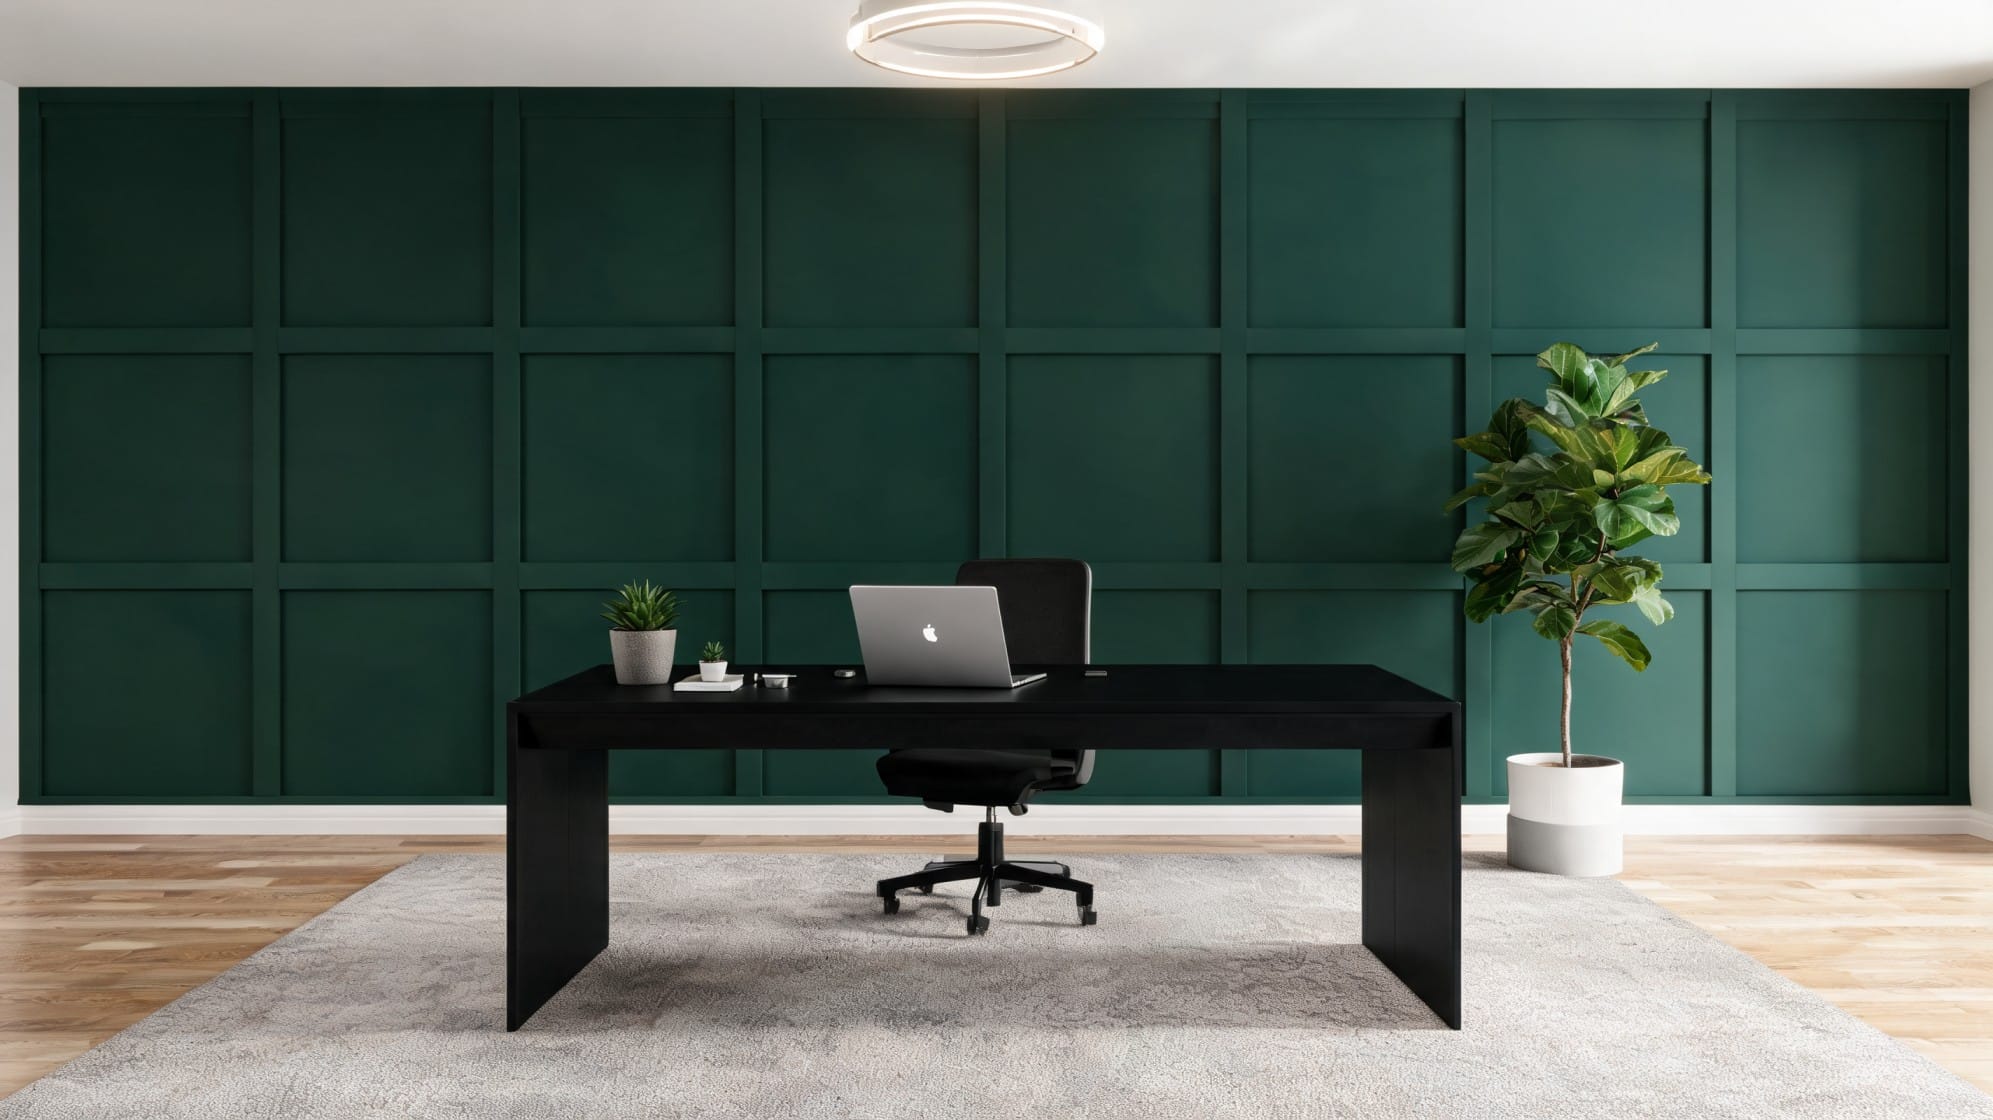
Floor-to-ceiling board-and-batten in an office can make the room feel focused, polished, and more personal.
Since the trim covers the full wall, it creates a strong backdrop behind a desk or reading chair.
This idea also works well for video calls because the wall looks neat without needing much extra decor, art, or shelving.
Styling Tips:
- Paint it deep green, charcoal, or warm white for mood.
- Add a wood desk for warm contrast and texture.
- Keep shelves simple so the wall stands out clearly in the room beautifully.
Board and Batten vs. Wainscoting
Wainscoting and board-and-batten are often used in similar rooms, so it is easy to mix them up. Both add detail to walls, and both can make a room look more finished. Still, they are not exactly the same.
| Feature | Wainscoting | Board and Batten |
|---|---|---|
| Common height | Usually lower wall | Half-wall or full-wall |
| Look | Often more traditional | Modern, farmhouse, or classic |
| Styles | Beadboard, raised panel, picture frame | Vertical, grid, square, geometric |
| DIY level | Depends on the style | Often beginner-friendly |
| Best rooms | Dining rooms, hallways, bathrooms | Bedrooms, entries, offices, halls |
Both options add depth, detail, and a finished look. If you want a classic lower-wall design, wainscoting may be a good fit. If you want simple lines and easy cuts, board-and-batten may be better.
Common Board and Batten DIY Mistakes to Avoid
A board-and-batten wall can look great, but small mistakes can show once the paint goes on. The good news is that most of these mistakes are easy to avoid if you plan first.
- Not measuring the full wall first is one of the biggest mistakes. This helps you plan spacing and avoid ending with odd gaps at the edges.
- Using uneven spacing can make the wall look off. Step back and look at the layout before you start nailing boards in place.
- Forgetting outlets and switches can create problems. Look at every outlet, switch, vent, and wall feature before you choose your spacing.
- Skipping caulk can make the wall look unfinished. Even if boards seem tight, small gaps can show after paint.
- Using boards that are too thick can make the trim stick out too far. Choose boards that match the size of the room and existing trim.
- Not checking for level is another common issue. This helps the full design stay clean.
- Painting before filling nail holes can leave visible marks. Fill the holes first, let the filler dry, sand it smooth, then paint.
Choosing the wrong material for damp rooms can cause damage later. MDF may swell if it gets too much moisture. For bathrooms or laundry rooms, PVC or sealed wood is usually a better choice.
Tips for Making a DIY Board and Batten Look Professional
You do not need to be an expert to make board-and-batten look good. The cleanest projects usually come down to careful measuring, straight lines, smooth seams, and patient painting.
- Sketch the layout before cutting so you can see the pattern clearly.
- Use a level for every board so the design stays straight.
- Keep spacing even so the wall looks balanced.
- Caulk every seam so small gaps disappear.
- Sand filler smooth so nail holes do not show through the paint.
- Paint the wall and boards the same color for a built-in look.
- Use semi-gloss or satin paint for easier cleaning in busy areas.
- Match the style to the room so the wall feels natural.
A simple sketch can help more than you think. Draw the wall, mark the boards, and note outlets or switches. This helps you spot problems before cutting any trim.
Frequently Asked Questions
What is a cheaper alternative to board-and-batten?
A cheaper alternative is using MDF strips, plywood strips, or thin lattice trim instead of solid wood boards. You can also paint the wall first and add only battens, skipping full backing boards. This keeps the look neat while lowering material costs for a small DIY project.
Can I DIY board-and-batten siding?
Yes, you can DIY board-and-batten siding, but exterior work requires more care than indoor wall work. Use weather-safe materials, plan for water drainage, seal every joint, and follow local building rules. If the wall affects your home’s outer protection, get help from a skilled installer.
Is board-and-batten outdated in 2026?
No, board-and-batten is not outdated in 2026 when used with clean spacing, simple colors, and a planned layout. Recent design sources still list wall paneling, vertical designs, and board-and-batten accent walls as active 2026 trends. Keep it balanced, not overdone.
What are the disadvantages of board-and-batten?
The main disadvantages are cost, measuring time, wall prep, and extra cleaning around trim edges. If spacing is uneven or boards are not level, the wall can look messy. In damp rooms, the wrong material may swell. Good planning helps avoid most of these problems.
Final Thoughts
Board and batten is a simple way to add style to your home. It can make a plain wall feel warmer, cleaner, and more finished without needing a large renovation.
It also works with many home decor styles. You can make it feel modern with thin battens and a dark color. You can make it feel farmhouse with wider boards and warm white paint. You can make it feel classic with half-wall trim in a dining room or hallway.
If you are new to DIY, start with one accent wall. A bedroom wall, hallway wall, or entryway is a good place to begin. Choose a simple vertical design before trying a grid or geometric layout.





