


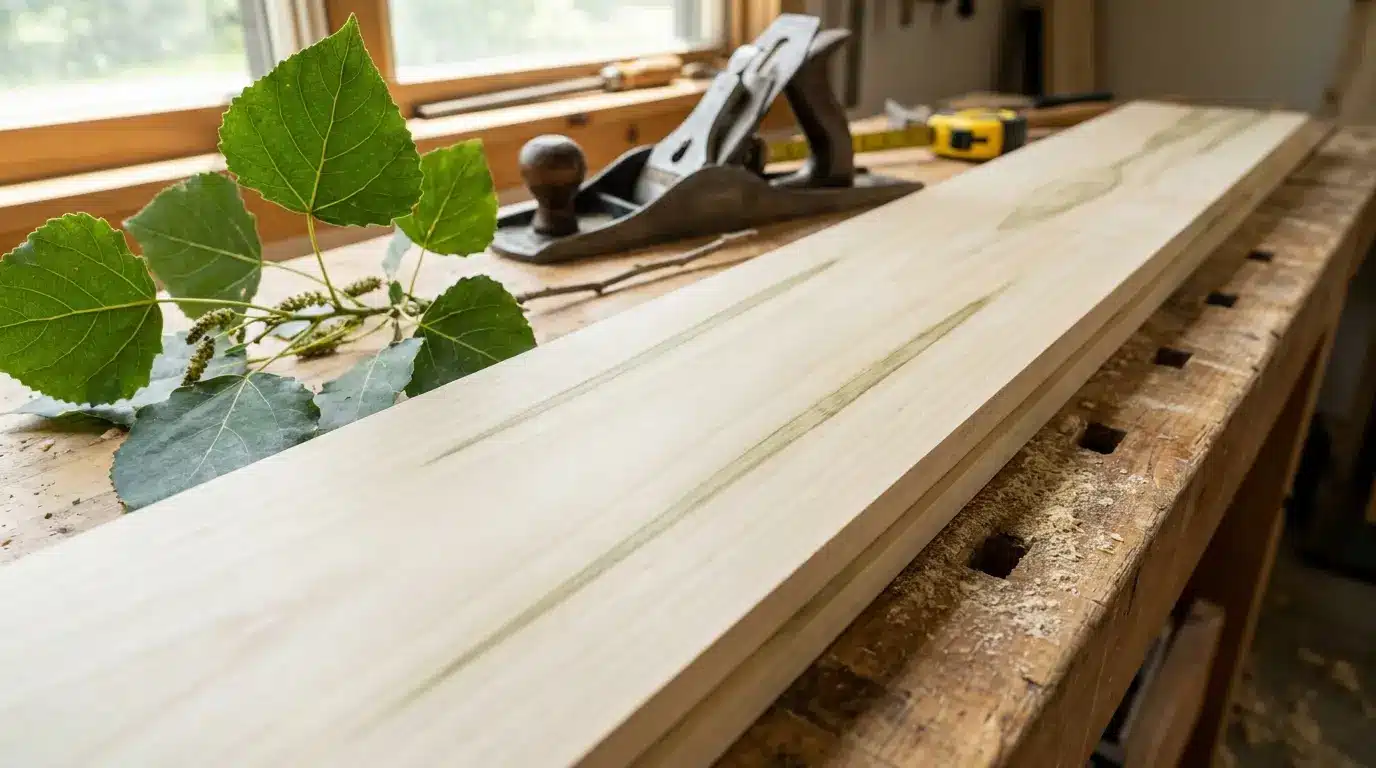
Poplar wood Value Classification Hardwood Janka hardness 540 lbf Common nicknames Tulip poplar, yellow poplar, whitewood Best for Painted furniture, frames, trim, plywood Not ideal for Flooring, cutting boards, outdoor furniture With more than 20 years of woodworking experience in carpentry and custom furniture, I have seen how different woods perform in real-world projects and which lower-cost options are actually worth using. Yes, poplar is a hardwood. It comes from a broadleaf tree rather than a conifer, which is why it’s classified as such. Still, its Janka hardness rating is much lower than woods like oak or maple, so it dents and scratches more easily. That is why poplar often causes confusion at the lumberyard. Although it is technically a hardwood, it behaves more like a softer wood in everyday use. Why Poplar Counts as a Hardwood The hardwood and softwood labels do not describe how hard a wood feels to the touch. Hardwood comes from angiosperms, flowering trees that drop their leaves each fall. Softwood comes from gymnosperms, mostly cone-bearing evergreens like pine, spruce, and cedar. Poplar flowers every spring and sheds its leaves every autumn. That single trait places it in the hardwood group, no matter how soft the milled lumber feels. Most lumber sold as poplar actually comes from the tulip tree, or Liriodendron tulipifera. American yards almost always stock this wood as poplar, even though true Populus trees, like aspen and cottonwood, also exist. Pine, fir, and cedar never enter this conversation, since they grow cones instead of flowers. Density and weight play no part in the classification at all. How to Identify Poplar Wood If you already own a board and want to confirm the species, follow these steps. Check the color: Poplar sapwood runs creamy white in most boards you encounter. Its heartwood shifts from pale yellow-brown to olive green, sometimes within the same board. Check the grain and texture: The grain remains straight and even, with a fine-to-medium texture, similar to oak or ash. Look for mineral streaks: Some boards pick up green, gray, or purple streaks as the tree grows. Woodworkers call this rainbow poplar, and it often sells at a premium. Compare the weight: Hold a poplar board next to an oak board of the same size. The poplar will feel noticeably lighter almost right away. What Poplar Wood is Used for Builders reach for poplar all the time, just not always where you can see it. 1. Furniture and Frame Parts These sit under upholstery or paint, where appearance is not important to the buyer. Among the types of wood for furniture, poplar is commonly used for hidden frames because it is lightweight, affordable, and easy to work with. Builders choose it for furniture supports since the frame stays concealed after assembly. Its low weight also helps reduce shipping costs on large orders. 2. Paint-ready Cabinets and Trim Cabinets, shelves, and trim take a smooth coat once primed properly. Millwork, molding, and door parts often use poplar, too, since most are painted rather than left natural. The straight grain helps paint sit evenly across long trim runs. Many kitchen cabinet makers use poplar for face frames before painting the whole piece. 3. Plywood Core Material Plywood cores gain lightweight strength from poplar without adding much extra bulk. This makes plywood easier to install without giving up rigidity. Manufacturers like poplar cores because they resist warping better than some softwood alternatives. This keeps plywood sheets flat during storage and shipping. 4. Pallets and Crates These rely on poplar for its low cost and light weight during transport. Poplar boards withstand repeated loading without breaking down quickly. Shipping companies also value how easily poplar takes nails and staples. Its lightweight also keeps freight costs down for large shipments. 5. Small Hobby Builds Carved signs, wooden toys, and photo frames made at home often use poplar. Its soft texture makes hand carving easier for beginners. Poplar also holds paint and varnish well on finished projects. Painters favor poplar because it holds a clean, even coat without much prep work. Carpenters like it because it rarely splits when nailed close to an edge, even on thin trim pieces. Why Poplar Feels Softer than Other Hardwoods The Janka scale ranks wood hardness by pressing a steel ball into a board until it embeds halfway. Poplar scores 540 pounds of force, compared to 1,290 for red oak, 1,450 for maple, and 1,010 for walnut. Even Douglas fir, a softwood commonly used for house framing, rates around 700 on the Janka hardness scale, making it harder than poplar. This lower Janka rating helps explain why poplar is easy to cut, shape, and work with in a workshop. A quick comparison clears up why poplar confuses so many buyers. Trait Hardwood Softwood Tree type Angiosperm, flowering Gymnosperm, cone-bearing Leaves Broad, drop each fall Needles, mostly evergreen Common examples Oak, maple, poplar Pine, cedar, fir Typical density Usually higher Usually lower Exceptions Poplar, balsa Douglas fir, yew Density sits in the usual column for a reason. Poplar and balsa are both hardwoods that score low on the Janka scale. Douglas fir and yew are softwoods that hold up better than people expect. The tree’s method of reproduction determines the label, not how the board feels in your hand. Poplar Compared to Other Common Hardwoods A side-by-side table makes these differences easier to see than raw numbers alone. Wood Janka hardness Durability Best use Poplar 540 lbf Low to moderate Painted furniture, frames, trim Black cherry 950 lbf Moderate Fine furniture, cabinets Black walnut 1,010 lbf High Furniture, veneer, gun stocks Red oak 1,290 lbf High Flooring, cabinets, trim Hard maple 1,450 lbf Very high Flooring, butcher blocks Poplar sits at the bottom of this list on hardness, but it also costs noticeably less than the others. For painted or hidden work, like frames or trim, that price gap usually favors poplar. For daily use in the open, such as a dining tabletop, oak or maple makes more sense. Is Poplar a Durable Hardwood Durability depends on how you use the wood, not just its hardwood label. Indoors, poplar lasts for years, especially once painted or sealed. It works well for modularfurniture, cabinet parts, and frames where heavy impact is limited. It dents more easily than oak or maple, so it struggles on floors or tabletops. Furniture frames, cabinet boxes, and trim rarely take hard hits, making poplar a practical choice for these applications. Regular dusting and occasional waxing help painted poplar furniture maintain its finish longer. Outdoors, poplar breaks down quickly without a sealed finish. With the right protection, it can still perform well for suitable projects. A fresh coat of paint or sealant every few years helps keep outdoor pieces protected. Poplar’s Limits Worth Knowing No single wood species works for every job, and poplar has a few clear limits worth knowing. Dents and scratches under everyday use, making it a poor fit for tabletops or floors with regular traffic. Blotches when stained, unless you apply a pre-stain wood conditioner first to even out absorption. Rots fairly quickly outdoors without a sealed finish over the top. Carries none of the natural rot resistance found in cedar or redwood. Needs a sealed finish before it faces rain, sun, or ground contact. Frequently Asked Questions Is it okay to burn poplar in a wood stove? Yes, seasoned poplar can be burned in a wood stove. It lights easily but burns faster and produces less heat than denser hardwoods. Is poplar better than pine? Poplar is usually better for indoor furniture because it is smoother and has less resin. Pine is often preferred when you want a stronger grain and a rustic look. Which variety of poplar is best? Tulip poplar is one of the best varieties for woodworking because it is lightweight, easy to shape, and widely available. The best type depends on the project. What is the lifespan of a poplar tree? Most poplar trees live for about 30 to 50 years. Some healthy varieties may survive for 100 years or longer in suitable conditions. How fast can a poplar tree grow? Poplar trees are fast-growing and may grow about 3 to 5 feet each year. Growth depends on the variety, soil, sunlight, and water supply. Is Poplar the Right Choice? Picking poplar comes down to what the finished piece needs to survive over time. Choose poplar for painted furniture, hidden frames, interior trim, and budget builds where looks matter more than raw toughness. Skip it for flooring, cutting boards, or any surface that sees daily wear without a protective coat. Its lower price beats oak, maple, or walnut whenever a project calls for paint over a natural wood look. A first apartment bookshelf, a painted nightstand, or a set of interior door trim all fit this description well. If the piece stays indoors under a coat of paint or primer, poplar rarely disappoints the person who picked it.
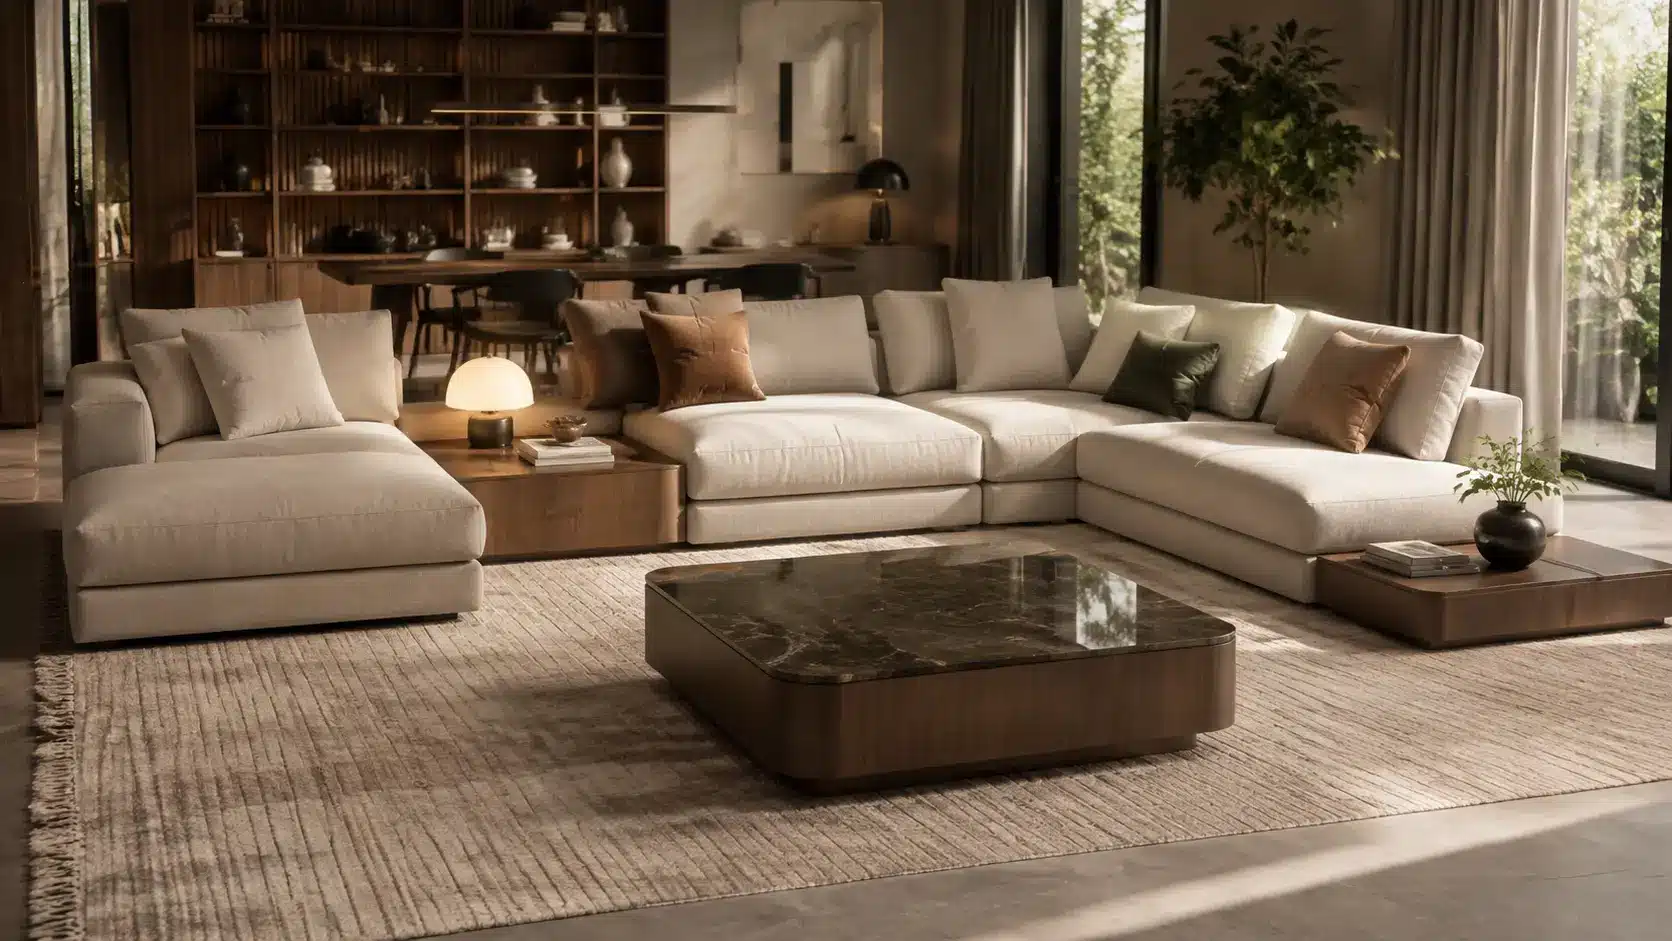
Most furniture is built for a fixed room in a fixed life. Buy a sofa, put it against the wall, leave it there for a decade. That approach works until the room changes, the family grows, or the apartment gets smaller, and the sofa suddenly does not fit through the door. Modular furniture was designed around that problem. Instead of one rigid piece, you get a system of components that can be rearranged, expanded, or scaled down as your space and needs shift over time. This blog covers what modular furniture actually is, the main types available, how it differs from sectional furniture, what it typically costs, and what to check before buying a system for your home. What is Modular Furniture? Modular furniture is built from separate, standardized units called modules that can be combined, rearranged, or expanded to fit different spaces and needs. Instead of buying one fixed piece, you assemble a system from individual components. A modular sofa might include armless seats, corner pieces, and ottomans that can be arranged in dozens of layout combinations. The same logic applies to shelving, storage, beds, and office furniture, where each module functions independently yet connects seamlessly with others. A modular shelving unit, for example, might start as a single small cube and later grow into a full wall of connected storage without replacing the original piece. Why Modular Furniture is Popular Now Modular furniture has moved well beyond a niche design trend to become a genuine market force, backed by real numbers. The U.S. modular furniture market reached $24.3 billion in 2025 and is projected to continue growing steadily through 2035, driven largely by shrinking home sizes and rising urban living costs. Younger buyers and small families are a major part of this shift, favoring pieces that combine practicality with style over furniture that locks them into one fixed layout. Demand from offices and co-working spaces has also added to the momentum, as businesses look for seating and desk systems that can be rearranged as teams and layouts change. This mix of residential and commercial demand is why modular furniture, once a mid-century design idea, has become an everyday shopping category rather than a specialty product. What are the Features of Modular Furniture True modular furniture is defined by four core traits that make it function as a system rather than just a collection of matching pieces. Each unit is built to standardized dimensions, so modules from the same collection connect without gaps or mismatched heights. Those same pieces can be rearranged into different configurations, an L-shape one month and a straight line the next, without buying anything new. Any individual module, such as an armless chair, also serves as standalone furniture when separated from the rest of the set. And because you can add new units later, the system grows with your space and needs rather than becoming obsolete when either changes. What are Types of Modular Furniture Modular design shows up in more categories than most people realize, well beyond the living room sofa. 1. Modular Sofas and Sectionals Armless chairs, corner units, chaises, and ottomans that combine into custom layouts. These pieces can be used as a sofa and a separate chair, or linked into a full sectional, depending on the room. Many systems also include a chaise module that can be moved to either end of the sofa. Best for: living rooms and shared spaces that need flexible seating arrangements. 2. Modular Shelving and Storage Systems Stackable cubes, adjustable shelves, and cabinets that expand as your storage needs grow. New units can be added on top of or beside existing ones without replacing what you already own. Some systems also allow shelves to be repositioned within the same frame as needs change. Best for: closets, home offices, and rooms that need storage to scale over time. 3. Modular Bed Systems Wall beds with built-in cabinetry, desks, or sofas that fold away when not in use. These systems allow a single room to function as a bedroom at night and an office or living space during the day. Some designs fold up vertically, while others tuck into a cabinet unit along the wall. For studios or smaller layouts, space-saving furniture can complement modular bed systems by maximizing available space and improving everyday functionality. Best for: studio apartments and guest rooms that double as other spaces. 4. Modular Office Furniture Desks, partitions, and seating systems designed to be reconfigured as office layouts change. Teams can shift from private desks to open collaboration areas without buying new furniture each time. Panels and dividers can also be added or removed to adjust privacy levels within a shared space. For home setups, minimalist home furniture choices can complement modular systems by creating flexible work areas with practical desk and storage solutions. Best for: co-working spaces and offices that frequently rearrange teams or layouts. How Much Does Modular Furniture Cost Pricing varies widely, but general market patterns give a useful starting point. Budget modular pieces, such as a single armless chair or storage cube, often start at $200 to $400 per module. Mid-range modular sectionals and shelving systems typically run $800 to $2,500 for a full set, depending on size and material. Higher-end designer modular systems, especially from brands rooted in the Eames and Nelson design tradition, can run well above that range. These figures reflect general retail patterns rather than a single fixed price, since cost depends heavily on materials, brand, and module count. What are the Benefits of Modular Furniture Modular furniture earns its popularity by solving problems that fixed furniture simply cannot. Space efficiency is usually the first draw, since modules can be rearranged or scaled down to suit furniture ideas for compact homes and multi-purpose rooms. That same setup gives you flexibility over time, letting the same pieces adapt as your needs shift, whether that is a growing family or a home office turning into a guest room. There is a cost angle too. Buying one module at a time spreads the expense, and you can replace a damaged piece individually rather than buying an entirely new set. That same modularity also makes moving day easier, since smaller pieces are far simpler to carry through narrow doorways and staircases. Modular Furniture Design Ideas for Every Home Beyond the showroom, modular design shows up in everyday settings where flexibility solves a real, ongoing problem. Micro-apartments and studio units: Wall beds and fold-away desks let one room serve as a bedroom, office, and living space depending on the time of day. Co-working offices: Movable desks and partitions let a single floor plan shift between quiet workstations and open team areas within the same day. Rental homes: Renters use modular pieces to furnish a space without committing to furniture that will not fit their next apartment. Growing families: Modular kids’ furniture, like bunk systems that separate into two beds, adapts as children grow or siblings need their own space. Hospitality and healthcare settings: Lobbies and waiting areas use modular seating to reconfigure layouts for events, social distancing needs, or changing foot traffic. How to Choose Modular Furniture for Your Space Picking the right system takes a bit more thought than a standard furniture purchase. Measure your room and doorways first, since modular pieces must still fit through hallways and entryways during delivery. Check how the modules connect, whether through clips, brackets, or simple friction fit, since sturdier connectors tend to hold up better over years of rearranging. Confirm that individual modules can be purchased separately later, in case you want to expand the set or replace a worn piece down the road, and stick to one collection or line rather than mixing modules from different product lines, since fabric and finish rarely match exactly across collections Modular Furniture vs. Sectional Furniture These two terms are constantly confused, so it helps to draw a clear line between them. Knowing the difference makes it easier to find the right product and avoid buying something that doesn’t meet your actual needs. Feature Modular Furniture Sectional Furniture Scope Covers sofas, shelving, beds, and office systems Refers specifically to seating Layout Can be split, expanded, or rearranged freely Arranged into an L-shape, U-shape, or straight line Relationship The broader category One specific type of modular seating Note: Every sectional is modular, but not everything modular is a sectional. Pros and Cons of Modular Furniture Most articles on this topic only list benefits, so here is a fairer, two-sided look. Modular furniture solves real problems, but it also comes with trade-offs worth knowing before you buy. Looking at both sides together gives a clearer picture than either list on its own. Pros Cons Rearranges to fit different rooms and layouts Can feel less structurally solid than one-piece furniture Damaged modules can be replaced individually Matching fabric or finish on future add-ons can be tricky Scales up or down as your space changes Larger systems can be complex to assemble Often easier to move through doorways in pieces Connector hardware can loosen over time with heavy use Weighing both sides against how you actually plan to use the furniture is the best way to decide if it fits your space. No single pro or con should decide the outcome, since the right answer depends on the specific room and household. Frequently Asked Questions Which brand is considered the best for modular sofas? Brands like Burrow, Lovesac, West Elm, and IKEA are highly regarded for modular sofas due to their quality, flexibility, and design options. Do modular couches stay together? Most modular couches use clips, brackets, or locking systems. These connectors prevent the individual sections from separating during use. What is the 4-inch rule for furniture? The 4-inch rule applies to the height of furniture seats. Sofas, chairs, and ottomans should have seat heights within four inches of one another. What furniture store has the best-quality furniture? The best furniture store depends on your needs and budget. Compare materials, construction, warranties, and customer reviews before purchasing. Does Walmart have quality furniture? Walmart offers several reliable and affordable furniture options. However, quality varies depending on the brand, materials, seller, and product. Final Thoughts Modular furniture solves a real problem for a country living in smaller spaces than it used to, but it works best when chosen with intention rather than picked for flexibility alone. Understanding the actual differences between modular and sectional pieces, knowing the honest trade-offs, and checking how well a system can grow with you make the difference between furniture that adapts to your life and furniture that just sits there looking flexible. The right modular setup should feel less like a compromise and more like furniture built for how you live.
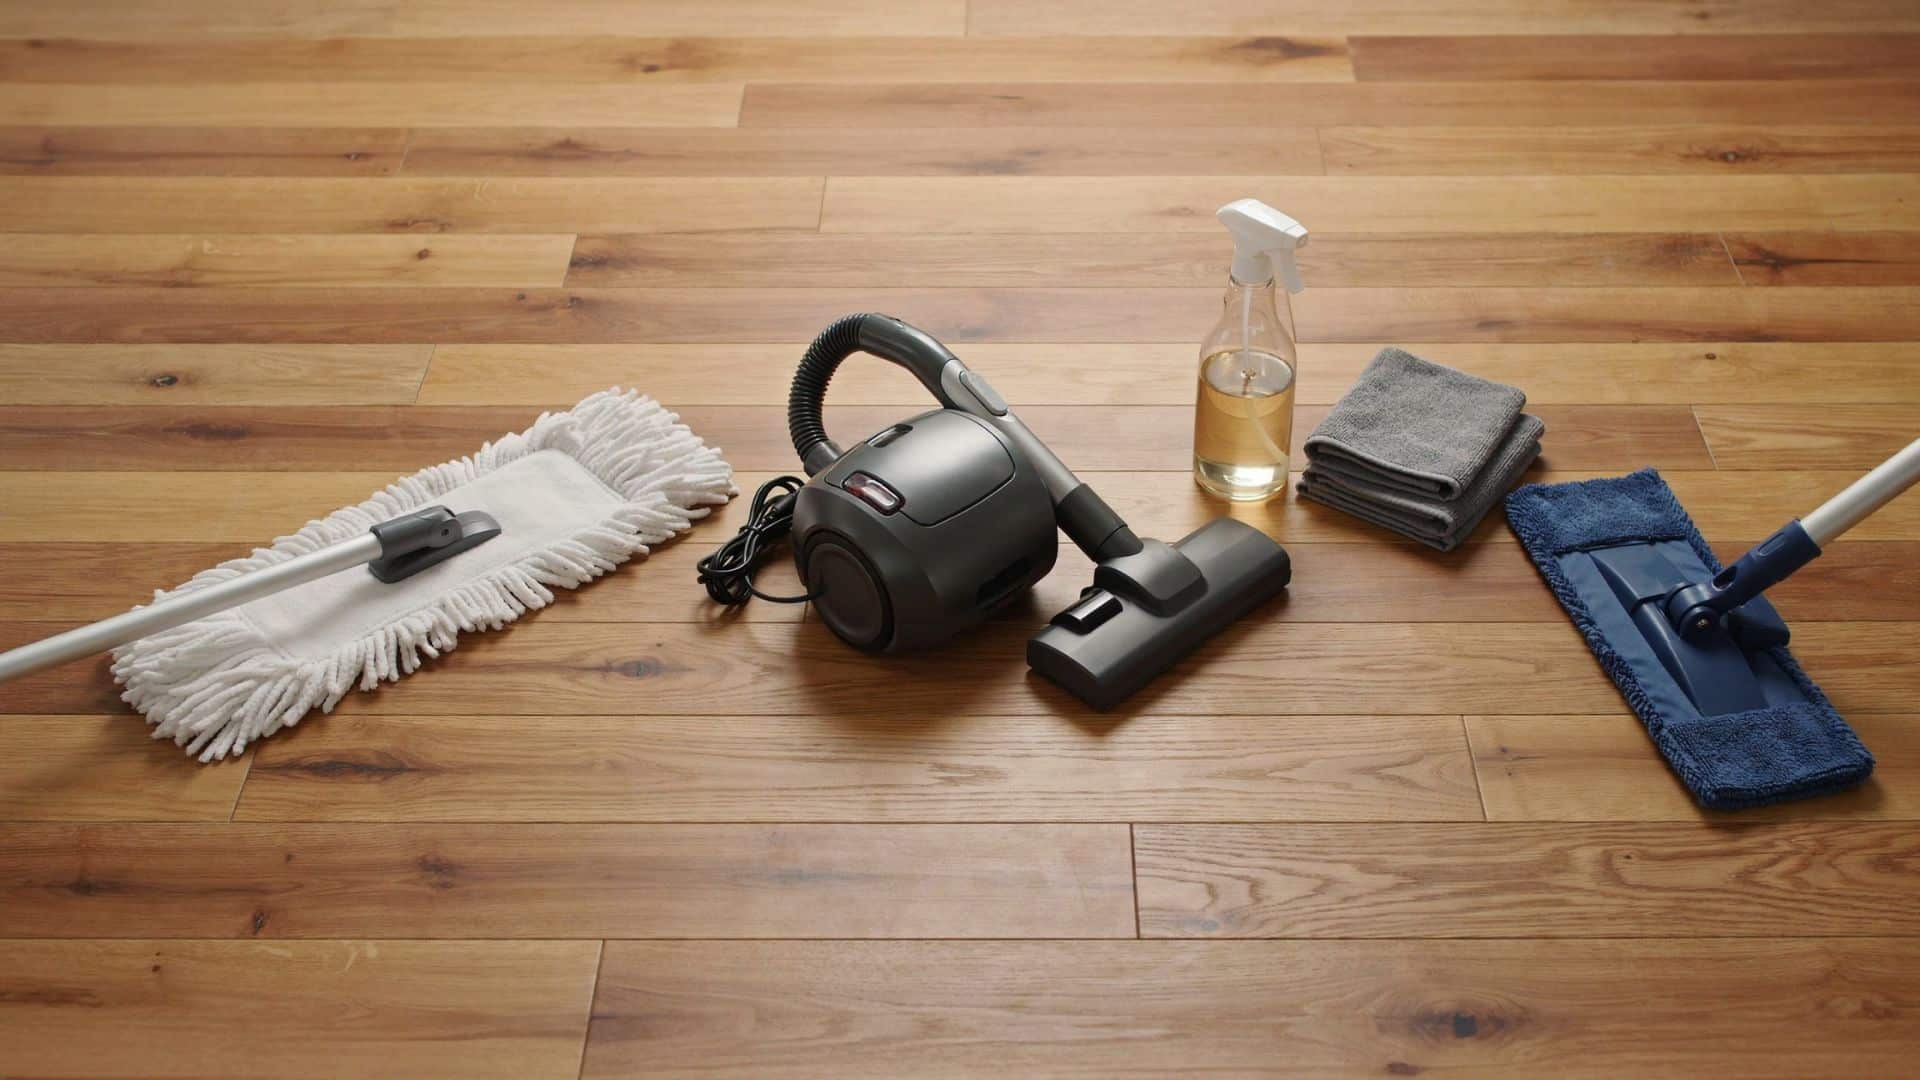
Hardwood floors add warmth and value to a home, but their finish can wear down quickly without proper care. Dust, grit, excess moisture, and the wrong cleaning products often cause scratches, dullness, and surface damage. Keeping hardwood floors clean starts with simple habits. Remove debris before mopping, use a cleaner suited to the floor’s finish, and avoid soaking the wood. The right tools and cleaning routine help protect the finish while keeping the surface looking fresh. Essential Tools and Cleaner for Hardwood Floors Before cleaning hardwood floors, gather the right tools and products to avoid scratches, residue, and moisture damage. The items below help remove dirt safely while protecting different floor finishes. Tool / Care Item How to Use It Microfiber mop Picks up dust and grime without scratching the finish, making it a safe choice for regular hardwood floor cleaning. Soft-bristle broom and microfiber cloths Remove loose dirt and handle spills, corners, and small cleaning areas quickly. Hardwood-safe vacuum Use the bare floor setting, turn off the beater bar, and choose soft attachments to prevent scratches and scuffs. pH-neutral hardwood cleaner Choose a water-based cleaner that matches your floor’s finish. Avoid harsh chemicals and residue-forming products that can dull or damage the surface. Know your floor finish. Polyurethane floors handle light damp cleaning, while oil, wax, and water-based finishes require specific products and care methods. Control moisture Use a spray bottle or a lightly damp mop instead of soaking the floor, as excess water can cause swelling or damage. Using the correct tools and controlling moisture make routine cleaning safer and more effective. Always match your cleaning method to your floor’s finish to prevent unnecessary damage. How to Clean Hardwood Floors Step by Step Before you start cleaning, it helps to follow the right order to protect your hardwood finish. The process begins with removing dirt and buildup, then moves through careful mopping, drying, and maintenance steps that keep floors looking clean without exposing them to excess moisture. 1. Remove Dirt and Stubborn Buildup First, remove dust, pet hair, and loose debris using a microfiber mop, soft broom, or hardwood-safe vacuum. For high-traffic areas, use a microfiber cloth with hardwood cleaner to lift stubborn dirt. Gently clean between floorboards with a soft attachment, avoiding excess moisture that can seep into seams. 2. Prepare the Cleaning Solution Always follow the cleaner’s instructions instead of adding extra product. Too much solution can leave behind a sticky film that attracts more dirt and makes the floor look dull. Spray a light mist over a small area rather than soaking the surface. 3. Damp Mop the Floor Use a mop that feels slightly damp, not wet. Work in small sections so moisture does not sit on the wood for too long. Rinse the mop regularly, or replace the microfiber pad when it gets dirty, to avoid spreading grime across the floor. 4. Dry the Floor Properly After cleaning each section, wipe away leftover moisture with a dry microfiber cloth or make a dry pass with your mop. Removing excess water helps protect seams and prevents issues like swelling or warping. 5. Restore Shine After Cleaning If your hardwood looks dull after cleaning, the issue may be a worn finish rather than leftover dirt. Hardwood polish can temporarily improve the appearance, but it does not repair damaged coatings. Floors with heavy wear may need professional refinishing to restore their original look. 6. Maintain Clean Floors Between Deep Cleanings Regular maintenance keeps hardwood floors cleaner and reduces the need for frequent wet cleaning. Sweep high-traffic areas often, place mats near entrances, use furniture pads to prevent scratches, and clean spills as soon as they happen to protect the finish. How to Clean Different Types of Hardwood Floors Sealed Hardwood Floors: Most modern hardwood floors are sealed with polyurethane. Use a damp mop with a pH-neutral cleaner and avoid harsh products that can damage the finish. Unfinished Hardwood Floors: Without a protective coating, hardwood is more susceptible to moisture damage. Use dry cleaning methods and avoid excess water to prevent stains or warping. Engineered Hardwood Floors: The thin layer of real wood over a composite core requires careful moisture control. Use minimal liquid and avoid soaking the surface. Older Hardwood Floors: Older finishes may react differently to cleaners. Test products in a hidden area first and use gentle cleaning methods on worn or aged floors. What Not to Use on Hardwood Floors Before cleaning hardwood floors, knowing what to avoid is just as important as knowing what to use. Certain products and cleaning methods can damage the finish, trap moisture, or create buildup that affects the floor’s appearance over time. Keep these common mistakes in mind to protect your hardwood investment. Avoid Excess Water: Standing water can seep into seams, causing swelling, warping, or cupping. Use a lightly damp mop instead of a wet one. Avoid Steam Cleaners: Steam adds heat and moisture that can penetrate between boards, damaging the wood or subfloor. Avoid Harsh Chemicals: Bleach, ammonia, and abrasive cleaners can dull or strip the hardwood finish. Avoid Wax and Oil-Based Products on Certain Finishes: These products can leave buildup on modern polyurethane floors and affect future refinishing. Always check your floor’s finish first. Common Mistakes When Cleaning Hardwood Floors One of the most common hardwood floor cleaning mistakes is mopping before removing dust and debris, as grit can scratch the finish during cleaning. Using the wrong mop can also cause problems, with abrasive materials damaging the surface and overly wet mops increasing the risk of moisture. Avoid cleaning with water too frequently, as repeated exposure to moisture can wear down the finish over time. Clean spills quickly, since liquids left sitting can seep into the wood and cause water stains or surface damage. Conclusion Keeping hardwood floors looking good comes down to gentle tools and the right cleaner for your finish. Keeping moisture to a minimum every time you clean matters just as much. None of this requires anything complicated, just a routine you actually stick to. A little consistency now saves you from a much bigger refinishing job later. It keeps the floor looking like the investment it was. Frequently Asked Questions What is the best thing to wash your hardwood floors with? Use a microfiber mop with a pH-neutral hardwood floor cleaner recommended for your finish. Avoid excess water and harsh cleaners that can damage the protective coating. Can I use Swiffer wet cloths on hardwood floors? You can use Swiffer wet cloths on some sealed hardwood floors if you use them lightly, but avoid leaving moisture behind. Always check your flooring manufacturer’s recommendations first. What do professional cleaners use on hardwood floors? Professionals typically use microfiber mops and hardwood-safe, pH-neutral cleaners designed for the floor’s specific finish. They focus on low-moisture methods to protect the wood. What is the best homemade cleaner for hardwood floors? A simple, damp microfiber mop is often the safest homemade option for many sealed hardwood floors. Avoid vinegar mixtures, as they may dull or weaken some finishes over time. Is Murphy’s Oil Soap good for wood floors? Murphy’s Oil Soap can be used on some finished wood surfaces, but it may leave residue on certain hardwood floors. Check your finish type and the manufacturer’s care instructions before using it regularly.
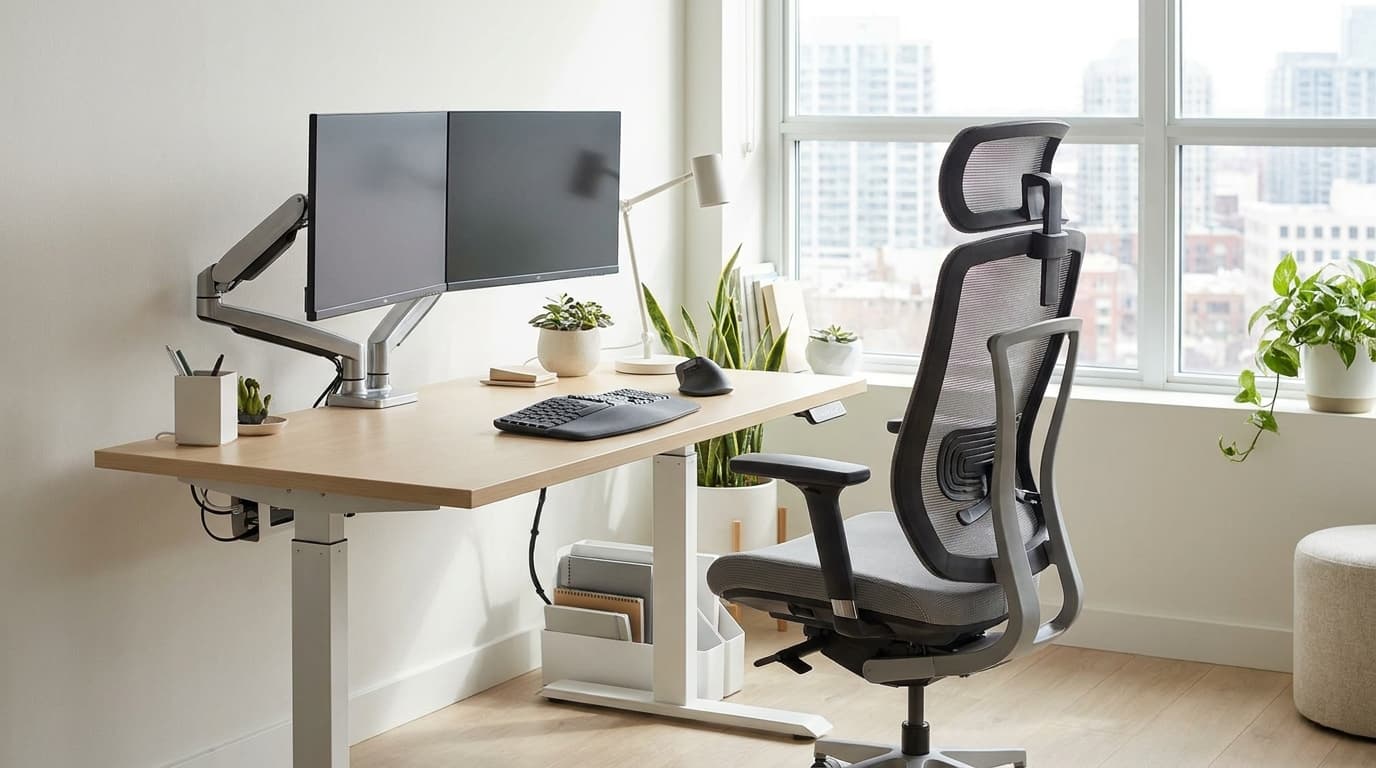
Quick Answer: Ergonomic furniture is the type of furniture that is built to match the natural shape and movement of your body. It supports good posture, reduces pain, and helps you sit or stand comfortably for long hours. This is the furniture that adjusts to fit you, not the other way around. It supports your spine, wrists, and legs in a natural position. Working from home or sitting at an office desk both carry the same risk. The right pieces can lower your chance of pain and injury. Ergonomic furniture helps create a more comfortable workspace by improving posture, reducing strain, and making long hours of sitting easier on your body. From adjustable desks to supportive chairs, small changes can make a noticeable difference in daily comfort. What is Ergonomic Furniture? Ergonomic furniture is designed around the science of human movement and body mechanics. It follows the principles of ergonomics, the study of how people interact with their environment. Each piece aims to reduce physical stress on the body during everyday tasks. A regular chair forces you to adapt to its shape, but an ergonomic chair adapts to yours. This furniture keeps your joints in neutral positions. It reduces pressure on your spine and prevents repetitive strain injuries. Long hours at a desk feel less taxing when your setup supports your body correctly. The table below breaks down common types. It shows what each one offers. Furniture Type Key Ergonomic Feature Main Benefit Ergonomic Chair Adjustable lumbar support and seat height Reduces lower back pain Standing Desk Height adjustment for sitting or standing Cuts down sedentary time Ergonomic Keyboard Split or curved design Lowers wrist and hand strain Monitor Arm Adjustable height and angle Prevents neck and eye strain Footrest Angled support for feet Improves leg circulation How Furniture Uses Ergonomic Principles to Support the Body Ergonomics is the science of designing things around how the human body moves and works. It looks at posture, comfort, and movement patterns. Furniture makers use these principles to create pieces that fit the human body. The result is less strain and more support during daily tasks. Good furniture design puts this science into practice. 1. Core Principles of Ergonomics Ergonomic furniture design rests on four core principles. Each one addresses a different source of daily strain, from posture to movement. A well-built chair, desk, or keyboard follows all four at once. 2. Proper Body Alignment Good furniture helps keep your spine, neck, shoulders, and hips aligned. It prevents your body from twisting into awkward angles. This alignment lowers the risk of long-term pain. 3. Adjustability This furniture adapts to different body types and heights. A chair might offer adjustable seat height and lumbar support. A desk might raise or lower to match your reach. 4. Comfort and Support This principle focuses on reducing pressure points. It supports areas that carry the most strain during long hours of use. Soft, shaped surfaces reduce fatigue over time. 5. Ease of Movement Good design lets you shift positions naturally. It encourages healthy movement instead of sitting still for hours. Small posture changes throughout the day protect your joints. What are the Different Types of Ergonomic Furniture Ergonomic furniture comes in several forms, each built for a specific part of your workspace. Some pieces support your seating, while others manage your desk height or screen position. Knowing the main types helps you build a setup that covers your whole body. Below are the pieces most people add first. 1. Ergonomic Office Chairs A good chair is often the first upgrade people make, and for good reason. Look for a seat height you can adjust to match your desk. Lower back support should move up or down to fit your spine. Armrests that shift in height and width keep your shoulders relaxed. Seat depth matters too, since a seat that is too long or short can cut off circulation behind your knees. Breathable fabric keeps you cool during long sessions. 2. Height Adjustable Desks A desk that allows you to switch between sitting and standing gives you more freedom throughout the day. Switching positions cuts down the hours you spend sitting still. Pairing an adjustable desk with the right minimalist home office furniture lets you position your screen and keyboard to suit your height, not a fixed standard. Switching positions cuts down the hours you spend sitting still. Different users benefit in different ways. Taller or shorter people get a desk that actually fits them. Anyone with back pain gets a break from sitting all day. 3. Ergonomic Keyboard and Monitor Setups Your hands and neck need support too, not just your back. A keyboard placed too high or too low forces your wrists into an awkward bend. Split or curved keyboards keep your wrists at a more natural angle. Your monitor should sit at eye level, so you avoid tilting your neck up or down. Getting this height and angle right reduces neck strain and wrist fatigue during long work sessions. 4. Ergonomic Home Office Furniture Remote workers face the same strain as office employees, often with less space to fix it. Compact ergonomic desks fit small rooms without giving up adjustability. A supportive chair matters just as much at home as it does in an office. Look for setups built for smaller spaces that still let you adjust height and support. A healthy home workspace protects your body just as well as a corporate one What are the Benefits of Ergonomic Furniture Choosing the right furniture pays off in ways beyond simple comfort. It changes how your body feels at the end of a workday. It can also affect how well you focus and how much you get done. 1. Improves Posture and Body Alignment Standard furniture often lets you slouch without realizing it. Ergonomic pieces guide your body into a straighter, more balanced position. Over weeks of use, this can train you to sit and stand with better alignment. Small daily corrections add up to a real change in posture. 2. Reduces Neck, Back, and Shoulder Strain Poor desk setups are a common cause of daily aches. A screen placed too low or a chair with no support forces your muscles to compensate. Proper height and support take that pressure off your neck, back, and shoulders. Many people notice less soreness within the first few weeks. 3. Increases Comfort During Long Work Hours Long shifts at a desk feel very different with the right setup. Adjustable features let you fine-tune your chair and desk to your own body. That personal fit makes hours at your desk feel less draining. Comfort during the day can also mean less stiffness once you stand up. 4. Supports Productivity and Focus Discomfort pulls your attention away from your work. Shifting in your seat or rubbing a sore neck breaks your concentration. A comfortable setup removes that distraction. Staying focused gets easier when your body isn’t fighting your furniture. 5. Encourages Healthier Movement Sit-stand desks and adjustable chairs make it easier to change position throughout the day. Small shifts, like standing for a call or adjusting your seat, keep your body from staying still too long. This kind of movement supports circulation and joint health. Over time, it can lower the risk of stiffness tied to long, fixed sitting. Ergonomic Furniture vs Regular Furniture At first, ergonomic and regular furniture can look similar. The real difference shows up in how each one treats your body. Regular furniture follows one fixed shape for everyone. Ergonomic furniture adjusts around the person using it. That gap becomes clear once you compare the two side by side. Feature Ergonomic Furniture Regular Furniture Adjustability Multiple adjustments Limited options Body Support Designed around human posture General comfort Customization Fits individual users Fixed dimensions Long-Term Use Better suited for extended use May cause discomfort over time How to Choose Ergonomic Furniture Picking the right piece takes a bit more effort than grabbing what is on sale. A few practical steps can help you avoid a poor fit and wasted money. Test the piece before you buy: Sit in the chair or try the desk height in a showroom if one is nearby. Many online retailers also offer trial periods, so check the return policy first. A short test run tells you more than any spec sheet. Check for recognized certifications and real reviews: Standards like BIFMA testing help verify durability and safety for office furniture sold in the United States. Reviews from real buyers often reveal how a piece holds up after months of daily use. Set a realistic budget before you shop: Decide which features matter most to you, such as adjustable height or lumbar support. This helps you avoid paying extra for features you will not use. Think about your room layout and space: Measure your area before ordering large items like a standing desk. Furniture for small spaces often includes compact desk alternatives worth considering first. A well-made ergonomic desk still needs to fit your room and its outlets. Frequently Asked Questions What is the Main Purpose of Ergonomic Furniture? Ergonomic furniture supports your body’s natural posture. It reduces strain on your spine, neck, and joints during long hours of use. Is Ergonomic Furniture Good for Back Pain? Yes, it can help. Adjustable lumbar support and proper seat height ease pressure on your lower back. Do Ergonomic Chairs Really Make a Difference? Yes, they do. A chair with adjustable height, armrests, and lumbar support can reduce daily aches within weeks. What Should I Look for in an Ergonomic Desk? Look for height adjustability first. A desk that shifts between sitting and standing supports better posture and movement. Is Ergonomic Furniture Expensive? Prices vary widely. Many budget options offer solid adjustability without the cost of premium brands. Final Thoughts Ergonomic furniture supports your body instead of working against it. From chairs to desks to monitor arms, each piece helps reduce strain. The right setup can ease back pain, improve posture, and keep you comfortable through long work hours. Choosing ergonomic furniture depends on your habits and body. Test adjustability, match pieces to your daily routine, and prioritize quality materials over price alone. A thoughtful setup today can protect your health for years of desk work ahead.
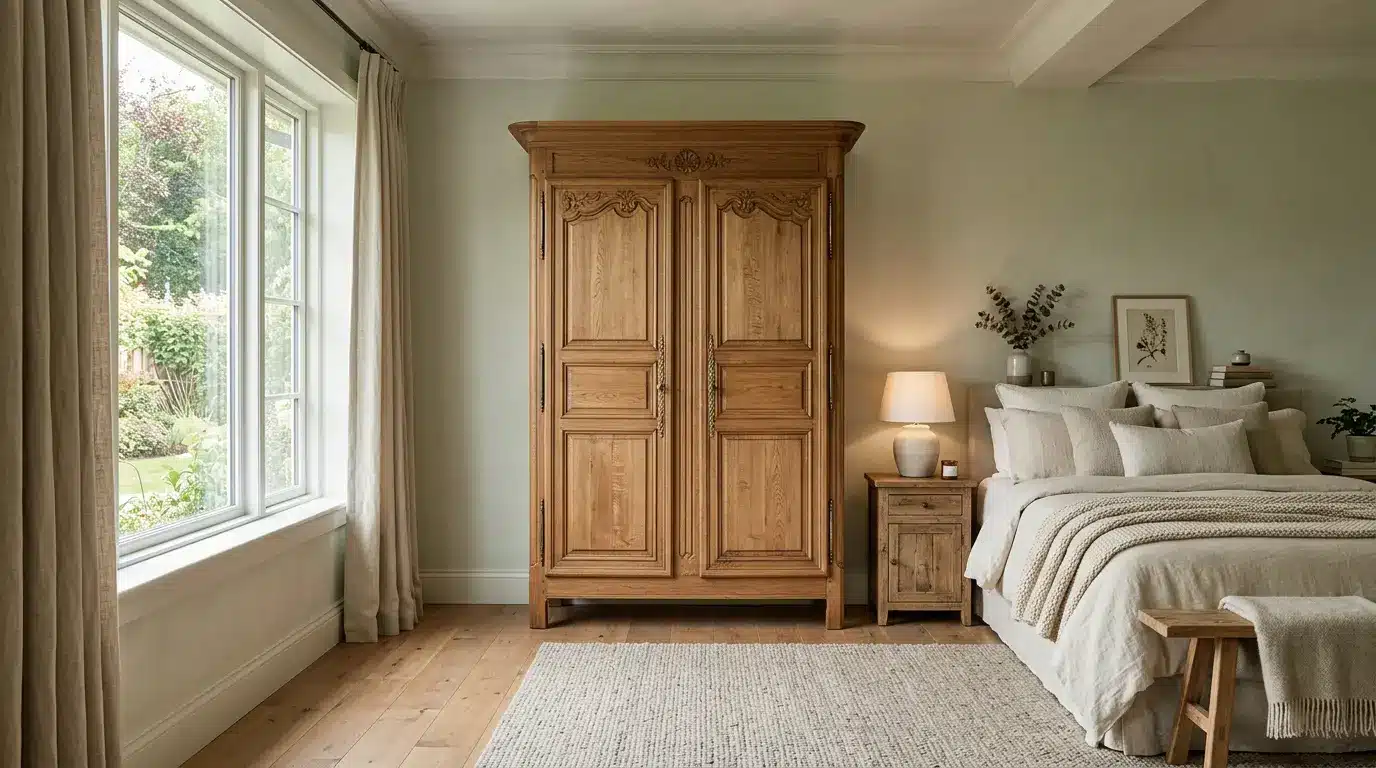
Quick Answer: An armoire is a freestanding storage cabinet used for clothes, linens, electronics, office supplies, or everyday items. It works as a flexible alternative to built-in storage and can be placed in bedrooms, living rooms, offices, or entryways. An armoire is a tall, freestanding storage cabinet built with doors and, traditionally, a good deal of carved wood detail. Unlike built-in closets, an armoire gives homeowners storage they can move, replace, or repurpose as their needs change, which is exactly why the piece has stuck around for centuries while so many other furniture trends have come and gone. Most versions include a full-height design with a mix of shelves, drawers, hanging rods, or compartments inside. The word itself comes from French furniture tradition, tracing back to the Old French armarie, which originally meant a cabinet for storing weapons. Designer Tip: An armoire should do more than solve a storage problem. Its size, finish, and placement need to balance the proportions of the room it sits in, or it ends up feeling like an afterthought rather than a piece of furniture. History and Origins of Armoires Armoires were not originally designed as bedroom furniture. The name comes from the Old French armarie, which traces back to the Latin armarium, meaning a cabinet used for storing weapons, tools, or other valuable items. Early armoires were large, simple storage pieces built mainly for function. Over time, especially during the Gothic and Renaissance periods, artisans began adding carved details, decorative panels, and more refined designs as woodworking techniques improved. By the 17th century, armoires had become symbols of craftsmanship and status in French homes, with makers like André Charles Boulle creating pieces featuring detailed marquetry and intricate carving. This shift from practical storage to decorative furniture is why antique armoires remain valued today. What are the Different Types of Armoires? Armoires come in a variety of designs, and their purpose often depends on their internal construction. Some are designed primarily for clothing, while others work better for linens, electronics, or decorative storage. The right type depends on what you need to store, the size of your room, and your home’s overall style. 1. Wardrobe Armoires Wardrobe armoires are primarily designed for clothing storage and often serve as an alternative to a traditional closet. They usually include a hanging rod for shirts, jackets, and dresses, along with shelves or drawers for folded clothes and accessories. They are especially useful in bedrooms with limited closet space because they provide storage while adding a furniture-like design element. 2. Linen Armoires Linen armoires focus on shelf storage rather than hanging space, making them ideal for towels, bedding, blankets, and table linens. Their enclosed design keeps fabrics protected from dust while giving rooms without built-in linen closets an attractive storage option. They are commonly placed in bedrooms, hallways, or guest areas. 3. Entertainment Armoires Entertainment armoires were originally designed to hide bulky televisions and media equipment behind closed doors. They typically included deep compartments, cable openings, and shelves for electronics. Although less common today, many are still reused for books, games, collectibles, or general living room storage, keeping clutter hidden. 4. Jewelry Armoires Jewelry armoires are compact storage pieces designed to organize smaller accessories. They often include shallow drawers, velvet lined compartments, ring holders, and hooks for necklaces or bracelets. Their slim design makes them a practical choice for bedrooms or dressing areas where regular jewelry boxes may not provide enough space. 5. Antique Armoires Antique armoires are known for their quality construction and timeless appearance. Many are made from solid wood and feature carved details, traditional hardware, and natural aging that gives each piece its own character. They are often used as statement furniture in traditional, vintage, or farmhouse-style interiors. 6. Modern Armoires Modern armoires emphasize simplicity with clean lines, flat-panel doors, and minimal detailing. They are designed to blend into contemporary interiors rather than act as heavily decorative pieces. Many modern versions include adjustable shelves and practical storage layouts, making them suitable for bedrooms, living rooms, and multipurpose spaces. What is an Armoire Used for? An armoire’s role tends to shift depending on which room it lands in, which is part of what makes it such an adaptable piece of furniture. 1. Clothing Storage This is the classic use. Hanging rods hold shirts, dresses, and jackets, while shelves or drawers hold folded sweaters and jeans. A homeowner renovating an older house may choose an armoire specifically because adding a built-in closet would mean cutting into original walls or architectural details worth preserving. 2. Linen Storage The shelving inside many armoires suits bedding, towels, and blankets just as well as clothing, especially in homes with limited linen closet space. 3. Entertainment Storage Older TV armoires were built specifically to hide bulky televisions and media equipment behind closed doors. This use has faded with the rise of flat-screen TVs, though the furniture itself hasn’t gone anywhere. 4. Home Office Storage A closed-door cabinet suits files, office supplies, and books, keeping a home office looking tidy when it’s not in use. 5. Entryway Storage Shoes, bags, and seasonal items all fit comfortably in an armoire placed near a front door, a fairly modern use for a very old piece of furniture. Armoire vs Wardrobe vs Closet The difference between an armoire, wardrobe, and closet often comes down to design, storage style, and use. An armoire is a freestanding piece of furniture with roots in French design, often featuring a mix of hanging space, shelves, and drawers. Wardrobes are also standalone storage units, but they usually focus more on practical clothing storage, especially for hanging garments. Closets, on the other hand, are built into the home and provide permanent storage space. Feature Armoire Wardrobe Closet Type Freestanding furniture Freestanding furniture Built-in storage Design Often decorative or furniture-focused Usually simple and functional Integrated into the room Storage Hanging space, shelves, and drawers Mostly hanging clothing storage Larger storage capacity with shelves and hanging areas Placement Bedrooms or living areas Mostly bedrooms Built into bedrooms or hallways An armoire adds storage with a decorative furniture feel, while a wardrobe focuses mainly on clothing organization. A closet provides the most permanent storage but cannot be moved or easily changed. An armoire can work as a wardrobe, but not every wardrobe has the detailed design or furniture-like character associated with an armoire. Choosing between them depends on your space and needs. Armoires work well in rooms lacking built-in storage or where flexibility matters, while closets suit larger storage needs and permanent organization. How to Choose an Armoire for Your Space Choosing the right armoire is about more than just appearance. Consider your available space, storage needs, interior style, and material quality to find a piece that feels practical and fits naturally into your home. Measure Available Space: Before anything else, measure the height and width of where the armoire will sit, along with door clearance and enough walking space around it once it’s in place. Choose the Right Storage Layout: Decide what you actually need inside. Hanging rods suit clothing, adjustable shelves handle folded items and linens, drawers fit smaller accessories, and open shelving suits books or display pieces. Match Your Interior Style: The style of your armoire should complement the overall look of your room rather than stand out as a separate piece. Traditional interiors pair well with dark walnut armoires featuring carved details and rich wood finishes. Modern spaces usually suit armoires with clean lines, flat panels, and simple finishes that keep the design minimal. Consider Material Quality: Solid wood tends to last longer and holds up better over time, though it comes at a higher price point. Understanding which wood types hold up best for furniture helps narrow the choice, walnut, oak, and mahogany consistently outperform softwoods for pieces that see daily use. Engineered wood offers a more affordable option without sacrificing too much durability for everyday use. Either way, check the hardware quality, since hinges and handles are often the first parts of an armoire to wear out. Where Should You Place an Armoire? 1. Bedroom: Use an armoire as a visual anchor beside the bed or against an empty wall where built-in storage isn’t available. 2. Living Room:A good spot for a piece that doubles as both storage and a design focal point, especially in rooms without built-in shelving. 3. Dining Room:Fits naturally against a long wall, giving the room a furnished, finished look beyond just a table and chairs. 4. Entryway: Positioned near the front door, an armoire can anchor the whole entry the way a console table might, while still hiding everyday clutter behind closed doors. Are Armoires Still Popular Today? Built-in closets have taken over much of the storage role of armoires, which, once filled, naturally reduces how often people reach for one out of necessity. That said, armoires haven’t disappeared. The rise of adaptable, movable furniture has given it something of a second life, particularly in small homes and apartments where built-in storage is limited. Modern armoires today are less about pure necessity and more about combining storage with genuine design intent. People buying one now are often choosing it as much for how it looks as for what it holds. How to Style an Armoire in Your Home An armoire suits a room best when it’s treated as a statement piece rather than something to hide in a corner. Pair it with surrounding furniture that complements its finish, add nearby lighting to highlight its details, and resist the urge to overcrowd the room around it. Updated hardware, like new pulls or hinges, can also refresh an older piece without a full refinish. A few pairings that tend to work well: A vintage armoire in an otherwise modern bedroom, used as a contrast piece A white or painted armoire in a farmhouse interior, keeping the overall palette light A dark walnut armoire in a traditional space, leaning into the furniture’s original character Pros and Cons of Using an Armoire An armoire can add both function and character to a home, but it is not the right storage solution for every space. Its biggest advantage is the flexibility it provides: storage without permanent installation while adding a furniture-like element to the room. However, armoires also take up valuable floor space and may not offer the same capacity as built-in closets. Pros Cons Adds architectural character Takes up floor space Movable storage solution Can be heavy to move Functions effectively without built-ins Holds less than a walk-in closet Serves multiple purposes Requires careful placement planning Understanding both the benefits and limitations helps homeowners decide whether an armoire fits their storage needs, room size, and interior style. Conclusion An armoire is the kind of furniture piece that quietly proves it deserves a spot in the room. It does not need to shout for attention or follow every passing design trend, it simply shows up, holds your things, and somehow makes the space feel more finished. Whether it ends up holding clothes, books, keepsakes, or the mysterious collection of items that need a proper place someday, a well-chosen armoire can become part of your home’s personality. The best pieces are not always the biggest or the most expensive. They are the ones that fit your space, match your style, and make everyday life just a little easier, more than most furniture can claim. Frequently Asked Questions What is the difference between an armoire and a wardrobe? An armoire is usually more decorative and may include shelves, drawers, and hanging space, while a wardrobe is typically designed mainly for hanging clothes. Why is it called an armoire? The word “armoire” comes from the Old French armarie, which originally referred to a cabinet used for storing weapons, tools, or valuable items. What is the English word for armoire? In English, an armoire is generally called a large wardrobe or storage cabinet, though the original French term is commonly used in furniture.
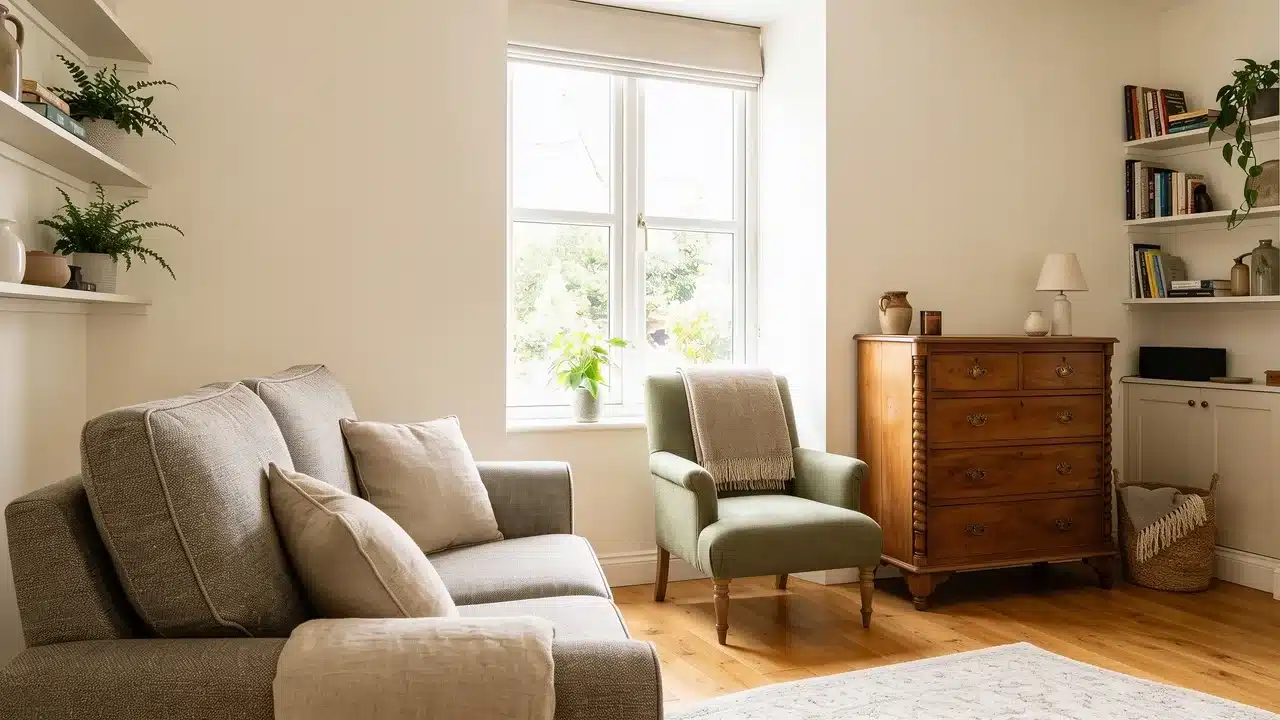
Downsizing comes down to one question, repeated for every room, does this piece earn its spot in the next home? Furniture to keep when downsizing is not always the newest or the largest item you own. It’s the piece that fits the new layout, gets used often, and still means something to you. Cutting back on furniture doesn’t have to mean cutting back on comfort or the pieces that carry real memories. Weigh each item against space, function, build quality, and its personal value, and the smaller home starts to feel like a fit rather than a squeeze. Furniture Worth Keeping When Downsizing Once the evaluation is done, certain furniture categories consistently earn their place in a downsized home. 1. Furniture You Use Every Day A sofa, armchair, dining table, bed frame, dresser, wardrobe, coffee table, or nightstand you reach for every day has already proven its value. Pieces you use daily or near-daily should be your first priority when deciding what to buy. These are the items that shape how comfortable and functional your new home feels from the first day you move in 2. High-Quality Solid Wood Furniture Dressers, cabinets, dining tables, and sideboards are examples of durable furniture that can outlast cheaper counterparts by decades. Oak, walnut, and cherry hold their structure through moves, refinishing, and daily wear. Replacing a well-made solid piece of the same quality usually costs more than keeping and restoring the one you already have. 3. Furniture With Multiple Uses A storage ottoman that works as seating, a footrest, and extra storage all in one uses less floor space. A chest that doubles as a coffee table, a writing desk that fits into more than one room, or a cabinet with flexible storage all follow the same logic. Furniture that adapts to changing needs earns its place after nearly every move. 4. Meaningful Heirloom Furniture Heirloom furniture carries meaning that outlasts its style. A family dining table, antique dresser, or handmade chest deserves space when still in regular use. Condition and fit in the new layout matter as much as the story behind it. Pieces tied to real memories and daily purpose earn their place. 5. Furniture with Built-In Storage Storage matters more once you’ve downsized, since every piece has to pull its own weight. Choosing the right storage solutions for small spaces can help keep a smaller home organized without adding unnecessary furniture. A storage bench by the door, a blanket chest at the foot of the bed, or a dresser and cabinet with deep drawers all keep the home organized without adding a separate storage unit somewhere else 6. Convertible Furniture A piece that serves multiple functions helps a smaller home stay comfortable without an extra room. A sofa bed, or sleeper sofa, combines seating and a guest bed in one piece. A daybed works as everyday seating, and a Murphy bed with a built-in sofa removes the need for a dedicated guest room. 7. Furniture That Fits Your New Home’s Scale Scale gets overlooked more than most. A piece that worked in a larger room can overwhelm a smaller one, even when well made. Apartment-scale sofas, nesting tables, narrow bookcases, and chairs with tapered legs work well in compact rooms. More small space furniture ideas can help create a functional layout without overcrowding the home. Large sectionals, oversized dining sets, and king-size bed frames are the most common mistakes. Which Furniture Should You Let Go While Downsizing? Before moving furniture into a smaller home, review each piece based on fit, function, quality, and personal value. Learning how to declutter before moving can make the downsizing process easier and more intentional. Let Furniture Go If: It creates crowding or makes rooms harder to move through It needs storage space but rarely gets used It no longer suits your current lifestyle or home setup It cannot be repaired, adjusted, or used in any other way You are keeping it only because of guilt or obligation Things to Consider Before Choosing Furniture Before deciding which pieces move with you, a few practical steps make the selection process much more reliable. 1. Measure Your New Space First Room dimensions, doorway widths, and hallway clearances decide whether a piece can even get inside. Measure every room before you commit to keeping anything. Sketch a simple floor plan to scale and place furniture outlines in it before moving day, so you know what fits before the truck is loaded. Check available storage and how much flexibility the layout allows for rearranging later 2. Choose Furniture That Fits Your Life Downsizing is a chance to choose furniture that better suits the way you live today. If you have recently been building a home or adjusting to a new layout, it is also a good time to rethink how much furniture you really need. Consider your daily routines, how often you entertain, and whether your hobbies or priorities have changed. Ask yourself: Do I use this furniture regularly? Does it support my current lifestyle? Would I regret leaving it behind? If the honest answer points toward “no,” that piece becomes a harder case to move. 3. Evaluate Furniture Quality Before Downsizing After years spent looking closely at wood, joinery, and finish work, I’ve learned that build quality is the clearest predictor of whether a piece is worth keeping. Solid wood construction, tight joints, and quality hardware hold up to another move and years of daily use. 4. Separate Sentimental Value from Emotional Attachment Family heirlooms, handmade pieces, and antiques often carry real meaning tied to who made them or what they witnessed. That reason to keep something is valid, as long as the piece still works in your new space and gets used. Keep the pieces that add value to your next home, not the ones you’re holding onto purely out of guilt. Downsizing Furniture Checklist Question Keep or Let Go Does it fit the new home’s layout? Do you use it regularly? Is it built to last through repairs? Does it solve a practical storage or space problem? Does it hold real personal meaning? Should You Replace Some Furniture After Downsizing? Furniture to keep when downsizing should support how you live now, not how you lived in a bigger house. Solid construction, everyday use, and genuine personal meaning are the three things worth considering before anything goes on the truck. Measure everything first, be honest about what you actually use, and keep what still earns its place. A smaller home doesn’t have to feel like a smaller life if every single piece in it is pulling its weight. Walk through each room slowly, imagine the new layout with each piece in place, and let go of anything that no longer fits. Happy Reading The furniture you keep when downsizing should support the way you live now. Choosing pieces with strong construction, practical daily use, and genuine personal meaning helps create a smaller home that still feels complete. From solid wood pieces to flexible storage solutions, each item should have a clear purpose before it takes up floor space. Focus on quality over quantity and keep what truly works for your home. Which piece of furniture are you planning to bring to your new space? Share in the comments below. Frequently Asked Questions How Do You Sell Furniture You Cannot Take with You? Online marketplaces, estate sales, and consignment shops are the most common options. Local buy-and-sell groups also move pieces quickly. Should You Buy New Furniture After Downsizing? Only if existing pieces do not fit the new space. Buying before measuring your new rooms often leads to poor-fitting choices. Is it Worth Reupholstering Furniture Before a Move? Yes, if the frame is solid and the reupholstery cost stays below the price of a comparable replacement piece. Should You Downsize Furniture Before or After Moving? Before. Deciding what stays while you can still measure both homes prevents moving pieces that will not fit the new space. What Should You Do with Antique Furniture That Does Not Fit? Consult an appraiser before selling. Some antiques hold more value than expected and may be worth storing or passing to family.
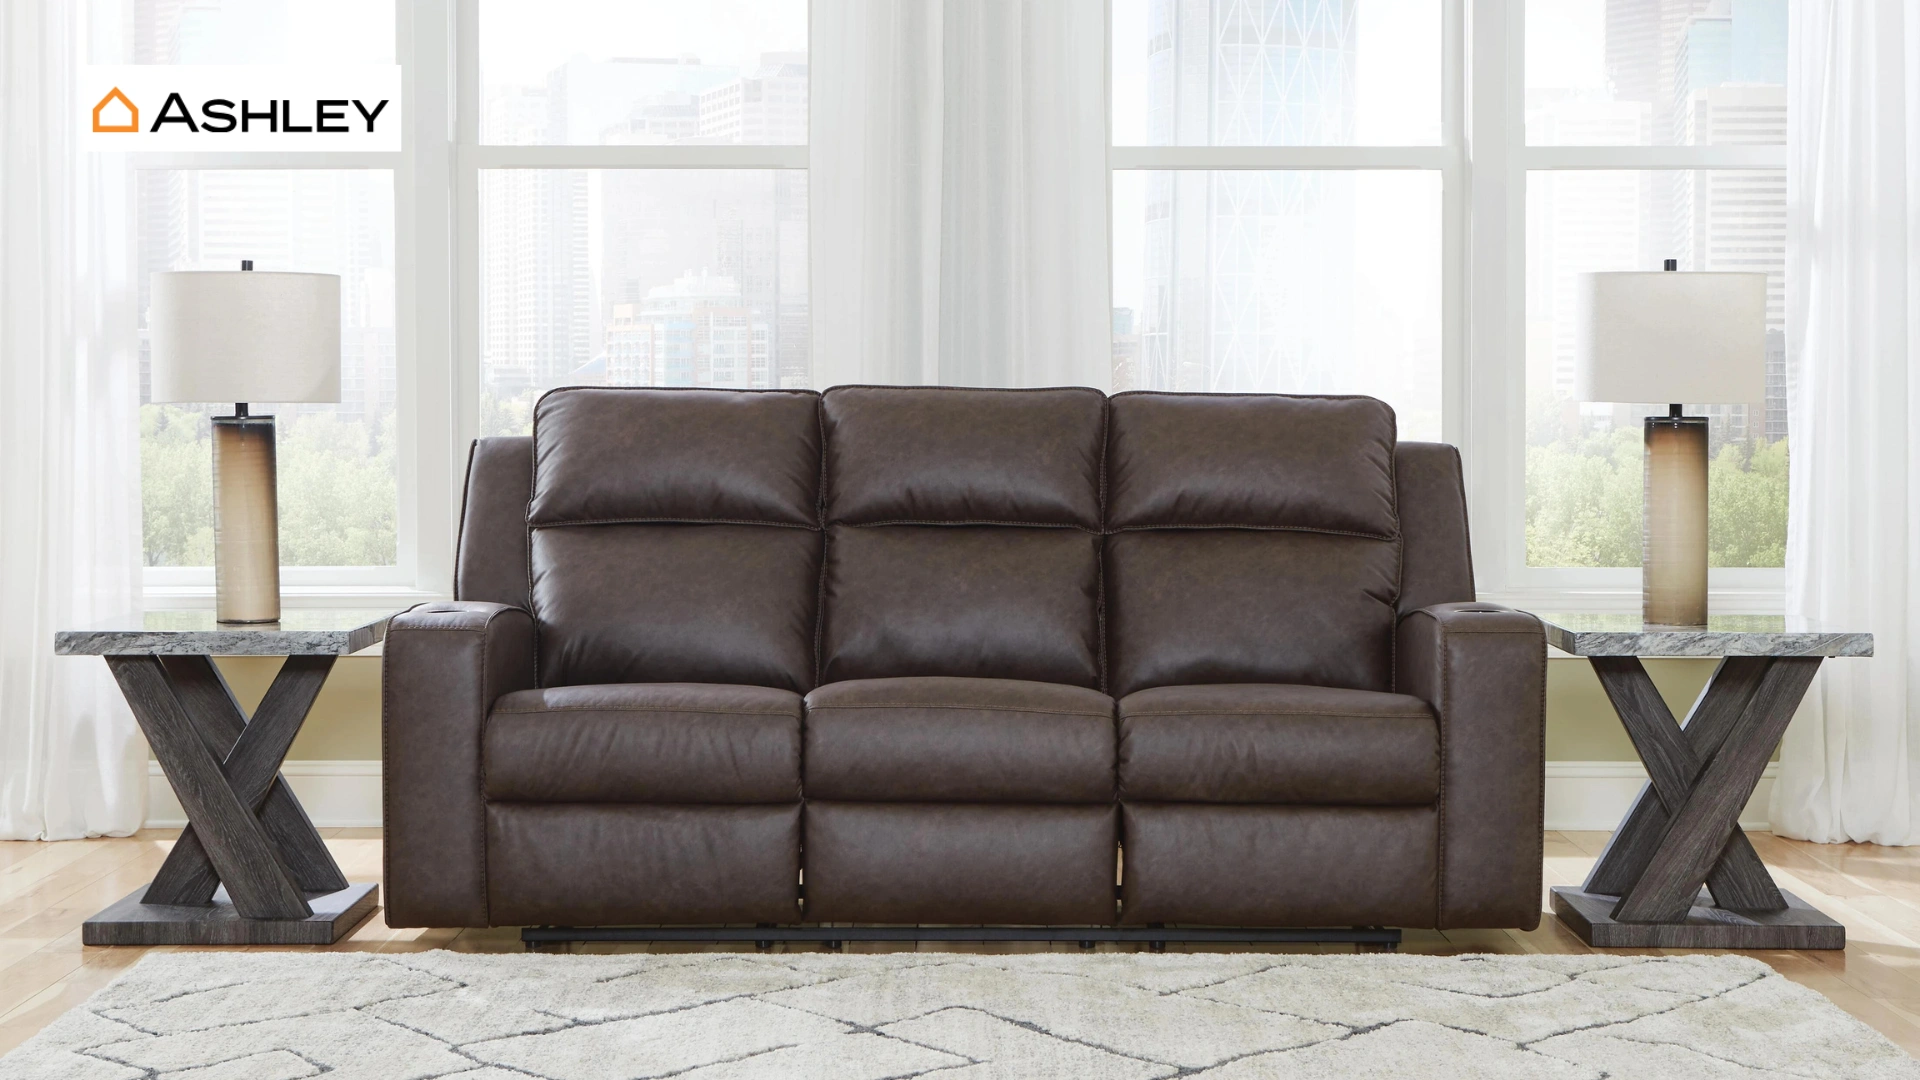
I learned the hard way that choosing furniture is not always as simple as picking the piece that looks best in a showroom. A sofa can feel perfect when you first sit on it, only to lose its shape after months of daily use. That experience led me to the question many shoppers consider before making a purchase, is Ashley Furniture good quality? Furniture quality is rarely a black-and-white decision. The right choice depends on the piece itself, the materials behind it, and the kind of everyday use it needs to handle. A solid dining table and a budget dresser may carry the Ashley name, but they can perform very differently over time. This blog looks beyond the showroom appeal to break down Ashley Furniture’s materials, construction, durability, and the pieces that offer the best value. It will help you understand where the brand performs well and where you may want to be more careful before buying. Is Ashley Furniture Good for Your Home? Ashley Furniture offers decent value if you are shopping on a budget or mid-range price point. It is not built to premium or heirloom standards, and it does not try to be. Some pieces hold up well for years with normal use. Others, especially heavily used sofas and recliners, show wear sooner than buyers expect. The smartest approach is to judge each product on its own. A dining table from one collection can outlast a sofa from another. Look at the specific model, not just the brand name. How Good is Ashley Furniture’s Overall Quality? Image Source: ashleyfurniture.com Quality at Ashley is not one fixed standard. It shifts based on materials, where a piece is made, and how it was built. Two sofas in the same store can perform very differently over time. Materials Used in Ashley Furniture Most Ashley pieces rely on engineered wood, made from particleboard or MDF covered with a wood veneer. Solid wood shows up in select collections, usually at a higher price point. Most Ashley pieces rely on engineered wood, made from particleboard or MDF covered with a wood veneer. Understanding what engineered hardwood is can help you compare its construction, durability, and performance against solid wood options. Solid wood shows up in select collections, usually at a higher price point. Upholstery ranges from polyester fabric to faux leather and genuine leather. Cushion foam density varies too, which affects how long a sofa keeps its shape. Engineered wood keeps prices low and stock full. It works fine for lighter use. It is more prone to moisture damage and chipped edges than solid hardwood. Ashley Furniture Construction Quality Frame strength depends on the model. Better pieces use corner blocking and reinforced joints. Cheaper lines may rely on staples and glue instead of screws. Before buying, check these details in person: Drawers that slide without sticking Joints that feel tight, not wobbly Reinforced corners on frames Clear weight limits listed on the tag Warranty terms in writing Assembly is required for many pieces, and reviewers often mention missing hardware or unclear instructions during delivery. Durability of Furniture Most owners report that Ashley furniture lasts about three to five years under daily use before showing real wear. High-traffic pieces wear out faster than furniture used only now and then. Several factors decide how long a piece will actually last: How often it gets used? Household size Pets and kids in the home Regular cleaning and care The specific materials chosen at checkout Choosing the right piece based on your lifestyle is key to getting better value from Ashley Furniture. Matching the furniture type and materials to your needs can make a noticeable difference in its overall lifespan. Knowing what the most durable furniture material is can also help you choose pieces that better match your expected usage and long-term needs. Choosing the right piece based on your lifestyle is key to getting better value from Ashley Furniture. Matching the furniture type and materials to your needs can make a noticeable difference in its overall lifespan. How Good Are Ashley Furniture Sofas? Image source: ashleyfurniture.com Sofas draw the most questions about Ashley furniture quality, since they see daily use and carry a bigger price tag. 1. Sofa Frame Quality Ashley sofas use a mix of engineered wood and hardwood frames. Corner blocking adds strength at stress points. A well-braced frame is the biggest factor in how long a sofa survives. 2. Cushion Comfort and Longevity Foam density makes or breaks comfort over time. Dense foam holds its shape longer than soft, low-cost foam. Fiber-filled cushions feel plush at first but often flatten faster. A sofa that feels great in the store may not feel the same after two years of daily sitting. Ask about foam density before you buy. 3. Upholstery Options Polyester fabric is common and budget-friendly, but it wears faster under heavy use. Performance fabrics resist stains and hold up better for families with kids or pets. Faux leather is affordable but can crack over time. Genuine leather costs more and lasts longer with proper care. Is Ashley Furniture Good for Bedroom Sets? Bedroom sets are one of Ashley’s strongest categories, mainly because matching collections make furnishing a full room simple. Pros Cons Matching pieces available across complete collections Some pieces use particleboard instead of solid wood More affordable than many custom bedroom sets Drawer hardware may loosen with regular use Wide range of styles and finishes to choose from Heavier pieces can be difficult to move frequently If you plan to stay in one home for years, a bedroom set from Ashley can be a fair trade. If you move often, lighter and more durable options may serve you better. Common Complaints About Ashley Furniture While many pieces perform well for different buyers, some recurring concerns are worth knowing before purchasing. 1. Cushion Sagging and Wear: Sofa cushions lose their shape fastest in homes with daily sitting or kids jumping on furniture. Lower foam density speeds this up. 2. Delivery and Assembly Issues: Customers often mention delayed shipments, missing hardware, and long waits for replacement parts. Checking your order the moment it arrives can save a headache later. 3. Finish and Material Concerns: Some buyers report peeling veneer, surface scratches, and loose hardware after a year or two of regular use. These issues tend to cluster in lower-priced lines rather than higher-tier collections. To be fair, plenty of customers also praise their sales experience and specific sofa or bedroom models. Results vary by product and by store. Which Ashley Furniture Products are Worth Buying? Image Source: ashleyfurniture.com Some Ashley Furniture products offer better value than others depending on how they are built and how often they will be used. Solid dining tables with sturdy leg construction, accent chairs and side tables meant for lighter use, higher-tier collections with denser foam and stronger frames, and performance fabric sofas are generally better choices for long-term value. However, pieces that experience heavy daily use require closer inspection. Sofas and sectionals used regularly, recliners with mechanical parts, entry-level bedroom sets, and furniture requiring extensive at-home assembly may need more careful consideration before buying. Taking a few extra minutes to check materials, construction, and comfort in-store can help you avoid problems later. How to Choose Good Quality Ashley Furniture? Before buying Ashley Furniture, check the materials listed on the product tag or online description to understand what you are paying for. Test cushions in person by sitting on them instead of judging only by appearance, and look for reviews that mention long-term use rather than just delivery experiences. Inspect important details like joints, corners, drawer slides, and overall construction quality. It is also worth comparing the warranty coverage carefully to see what is included. Most importantly, choose furniture based on your household’s needs and daily habits rather than looks alone. Ashley Furniture vs Other Furniture Brands Ashley sits in the middle of the budget furniture market. It costs more than IKEA but usually less than Living Spaces on similar pieces. Brand Sofa Price Bedroom Set Price Ashley Furniture $400 to $1,200 $1,000 to $3,000 IKEA $200 to $1,000 $500 to $1,500 Living Spaces $600 and up $1,500 to $3,000 IKEA, Ashley, and Living Spaces each target different price points and buying preferences, so the best choice depends on budget, material expectations, and how much assembly or customization buyers are comfortable with. IKEA is generally positioned as a more budget-friendly option, with many sofas, beds, and furniture sets available at lower price points. The trade-off is that some pieces use lighter materials, have fixed cushion designs, and require customer assembly. Ashley typically falls into the mid-range category, offering a wider selection of assembled furniture with delivery options. Many pieces feature hardwood components, removable cushions, and product-specific warranties, although materials and construction can vary across collections. Living Spaces often sits in a similar mid-range category, with pricing that can be higher on certain models. Some collections focus on upgraded materials and construction details, while others remain closer to standard furniture offerings. Rather than comparing brands only by price, consider factors such as expected usage, preferred materials, maintenance needs, delivery options, and how long you want the furniture to last. Each brand offers different choices depending on the balance between cost, convenience, and durability you are looking for. Is Ashley Furniture Worth Buying? Ashley Furniture can be a good choice for first-time homeowners furnishing a space on a budget, renters who may move again, or shoppers who want updated styles without paying premium prices. It also works well for buyers who are comfortable replacing furniture every few years rather than investing in pieces meant to last decades. However, shoppers who need heavy-duty furniture for daily family use or want handcrafted, solid wood pieces may find better options elsewhere. The right decision depends on your budget, lifestyle, expected usage, and how long you want the furniture to last. Frequently Asked Questions What is the quality level of Ashley Furniture? Ashley Furniture falls into the affordable to mid-range category. Its quality varies by product, with some collections offering better materials, while entry-level pieces focus more on price and style. Is Ashley Furniture made cheaply? Ashley Furniture uses a mix of materials, including engineered wood, veneers, and some solid wood components. While budget pieces may use lower-cost materials, higher-tier options offer better construction. Is Ashley Furniture better than La-Z-Boy? Ashley Furniture offers more variety and budget-friendly options, while La-Z-Boy is often known for stronger seating comfort and customization. The better choice depends on your priorities, budget, and furniture needs. What are the weaknesses of Ashley Furniture? Common concerns include inconsistent quality between collections, lower durability in some budget pieces, potential cushion wear, and customer service issues reported by some buyers after delivery or repairs. Who has better furniture, Ashley or Wayfair? Ashley Furniture provides more traditional furniture collections with physical stores for testing, while Wayfair offers a wider online selection. Quality depends on the specific product, materials, and manufacturer chosen from each brand.
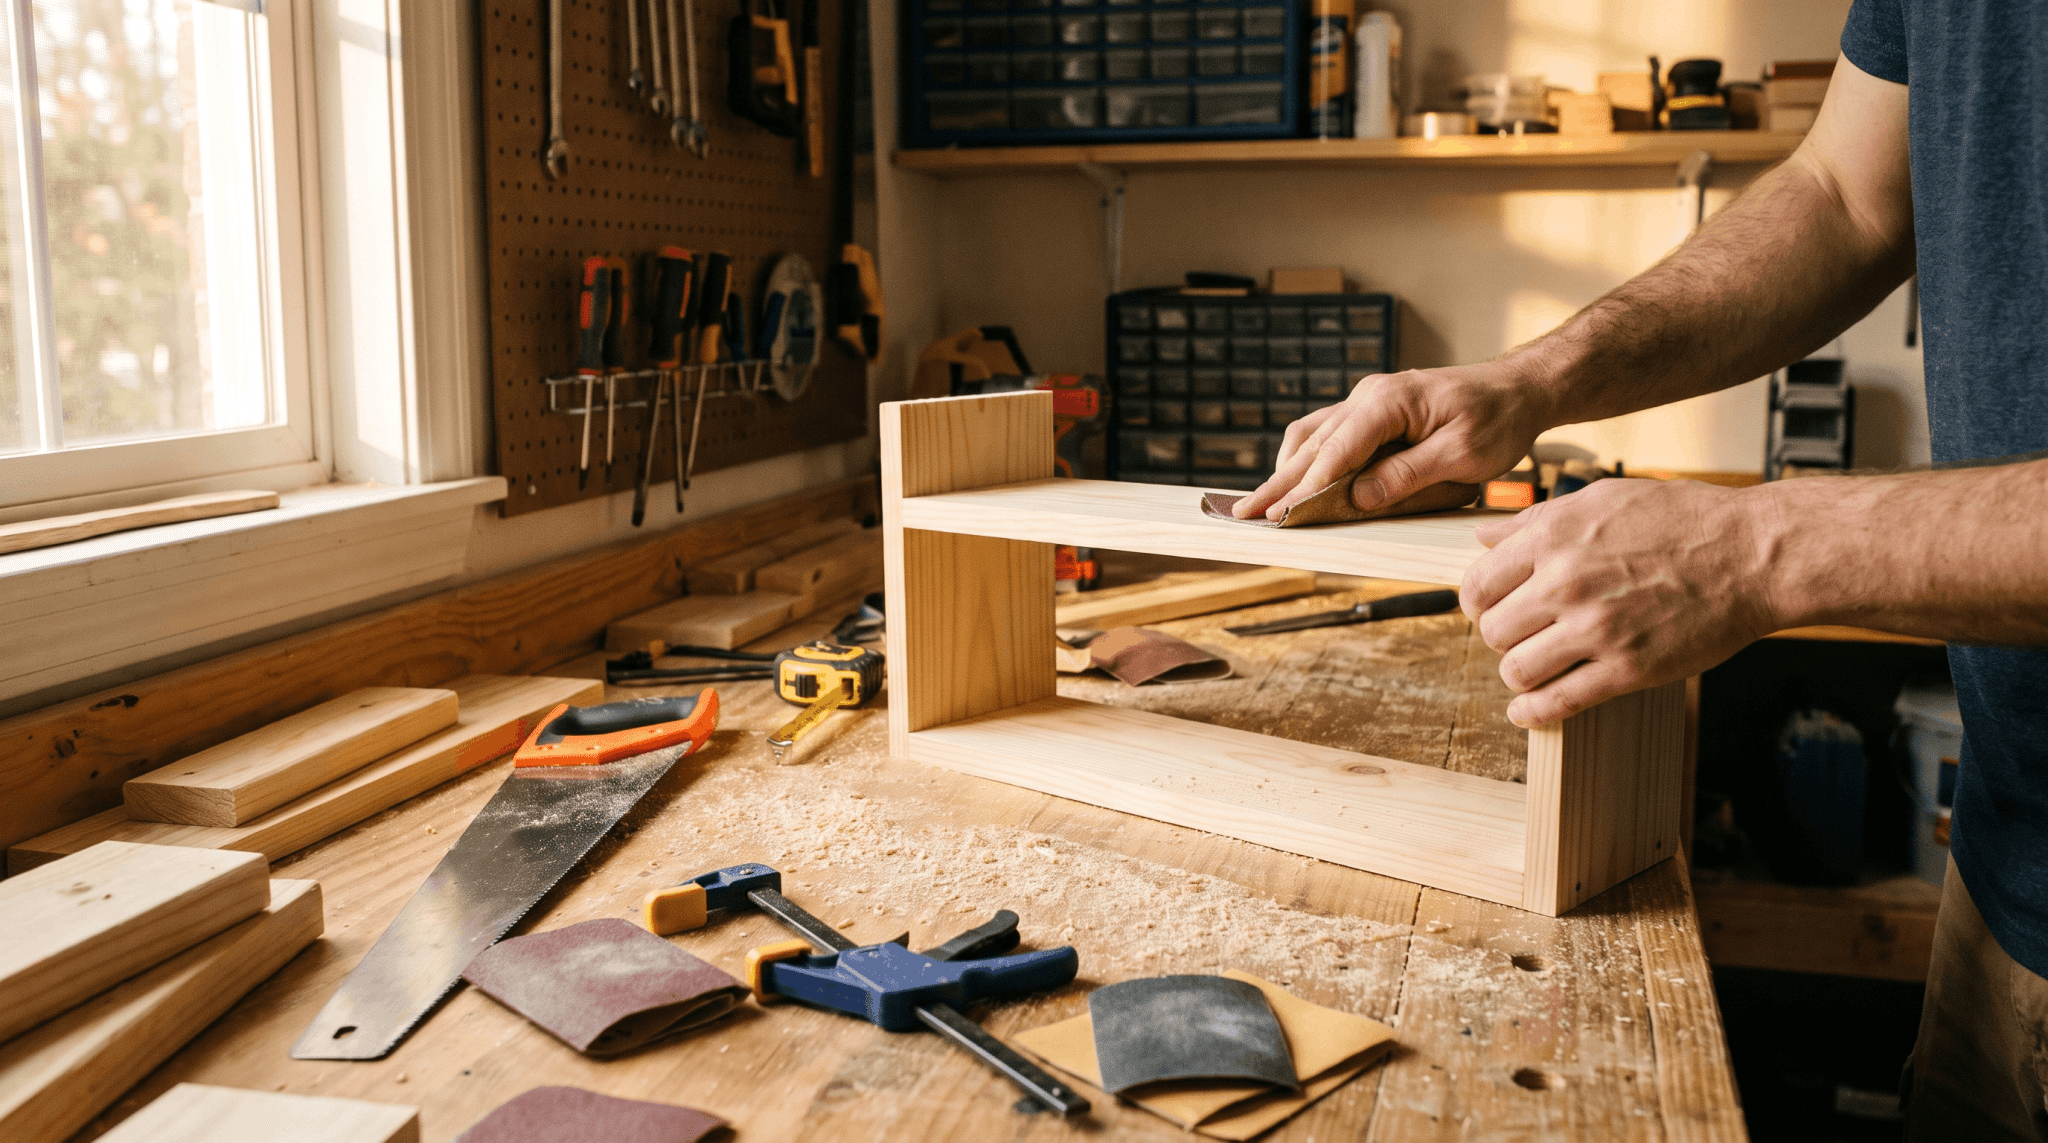
You want to make something with your own hands. But the saws, the jargon, and the fear of wasting wood can make starting feel harder than it should. Maybe you’ve watched a few woodworking videos and closed the tab feeling more confused than before. You do not need a garage full of equipment or years of experience to begin. Plenty of easy woodworking projects need only a few basic tools, affordable wood, and an afternoon of your time. The trick is starting small. A simple build teaches you how to measure, cut, sand, and finish without draining your budget or patience. Each completed piece gives you the confidence to try something slightly bigger. Easy beginner builds, the tools you need, the best wood choices, project costs, skill levels, and safety habits help you create useful pieces from your first cut. Tools You Need for Woodworking Projects You need fewer tools than you might expect to start woodworking. A small starter kit can handle many beginner projects. Start With These Hand Tools 1. Tape measure and pencil 2. Square 3. Hand saw 4. Sandpaper 5. Wood glue and clamps Add These Power Tools Later 6. Cordless drill 7. Jigsaw 8. Circular saw You do not need every tool immediately. Start with tools that match your first few projects. A drill will usually get more use than a specialized tool sitting unused on a shelf. A quick word about budget tools: inexpensive equipment can work well when you are starting. Spend more on tools you use regularly and avoid buying accessories before you know you need them. 11 Easy Woodworking Projects for Beginners Below are twelve simple builds, sorted from quickest to slightly more involved. Each one teaches a skill you can reuse in future woodworking projects. 1. Wooden Cutting Board A cutting board is a simple beginner project that teaches measuring, cutting, and sanding. It takes around 2–3 hours to complete and only requires a hardwood board, smooth edges, and a food-safe mineral oil finish. Materials: Hardwood board, sandpaper, mineral oilTools: Saw, clamps, sanding tools Maple or walnut works well for durability. Avoid rushing the sanding process, as rough edges can affect the final result. 2. Floating Shelf A floating shelf is a practical beginner project that teaches measuring, leveling, and drilling. It takes around 3–4 hours to complete and uses a wooden board with a mounting bracket for a clean, floating look. Materials: Wooden board, mounting bracket, screws, wood finishTools: Drill, level, measuring tape Always locate wall studs before installation to ensure the shelf stays secure. Avoid mounting directly into drywall, as it may not support much weight. 3. Simple Picture Frame A picture frame is a simple beginner project that teaches accurate measuring, cutting, and joining of small pieces of wood. It takes around 2 hours to complete and can be made with four wood strips, glue, and a finish of your choice. Materials: Wood strips, glue, backing board, finishTools: Saw, clamps, sandpaper Reclaimed fence boards or leftover wood pieces can create a unique look while keeping costs low. Start with straight corners before trying angled cuts, as uneven measurements can make the frame difficult to align. 4. Birdhouse A birdhouse is a simple beginner project that teaches basic cutting, assembly, and outdoor woodworking skills. It takes around 2–3 hours to complete and uses small wood panels, fasteners, and an outdoor-safe finish. Materials: Wood boards, nails or screws, outdoor-safe finishTools: Saw, drill, hammer You can paint it or leave the wood natural for a rustic look. Check the correct entry hole size for local bird species before building, as the wrong opening size may make it unsuitable for birds. 5. Key or Mail Holder A wooden key or mail holder is a quick beginner project that teaches basic cutting, drilling, and assembly. It takes around 1–2 hours to complete and can be made with a small wood board, hooks, and screws. Materials: Small wood board, hooks, screwsTools: Hand saw, drill, sandpaper It is a useful entryway organizer and a practical handmade gift. Keep the design simple at first, as adding too many features can make this small project harder than necessary. 6. Wooden Planter Box A wooden planter box is a beginner-friendly project that teaches basic construction and assembly skills. It takes around 3–5 hours to complete and uses simple materials such as wooden boards, screws, and an outdoor-safe finish. Materials: Wood boards, screws, waterproof finishTools: Saw, drill, measuring tape It works well for balconies, patios, and small gardens. Add drainage holes at the bottom to prevent water buildup, as skipping them can damage the planter and affect plant health. 7. Phone Charging Dock A phone charging dock is a small beginner project that teaches precision measuring and simple assembly. It takes around 1–2 hours to complete and is a great way to use leftover wood pieces. Materials: Small wood piece, screws or glue, finishTools: Saw, drill, sandpaper You can customize it with slots for charging cables, headphones, or accessories. Measure the phone slot carefully, as an incorrect size can make the finished dock difficult to use. 8. Wall Tool Organizer A wooden tool organizer is a practical beginner project that teaches layout planning, drilling, and workspace organization. It takes around 3–4 hours to complete and uses a plywood backing board with hooks or storage slots. Materials: Plywood sheet, hooks, screwsTools: Drill, saw, measuring tape Plan the layout before cutting to create a cleaner design and avoid wasted material. Measure your tools first, as poorly sized storage spaces can make the organizer difficult to use. 9. Wine Rack A small wooden wine rack is a beginner project that teaches functional storage design and accurate assembly. It takes around 3–5 hours to complete and can be built as a countertop or wall-mounted rack. Materials: Wood boards, glue, screws, finishTools: Saw, drill, clamps You can customize it with a stain, paint, or accessories like a bottle-opener holder. Measure the spacing carefully, as incorrect sections can prevent bottles from sitting securely. 10. Pallet Wall Shelf A pallet shelf is an affordable beginner project that teaches basic construction while reusing reclaimed wood. It takes around 2–4 hours to complete and uses pallet boards, screws, and a protective finish. Materials: Untreated pallet wood, screws, finishTools: Saw, hammer, sandpaper Clean and sand the wood carefully to remove rough areas and splinters. Always check that pallets are untreated and in good condition, as unsafe wood can create potential problems. 11. Low Side Table A low side table is a beginner-to-intermediate project that builds on skills like assembling surfaces, attaching legs, and applying finishes. It takes around 5–8 hours to complete and uses wood boards, screws, glue, and a protective finish. Materials: Wood boards, screws, glue, finishTools: Saw, drill, clamps Take extra care when cutting and attaching the legs, as equal lengths help prevent wobbling. Check that all pieces fit properly before assembly to avoid alignment issues. Simple Steps to Complete Any Beginner Project The easiest woodworking projects follow the same basic process. Once you understand this workflow, you can apply it to almost any beginner build. Measure and Mark: Accurate measurements are the foundation of every woodworking project. Mark your cutting lines clearly and check your measurements before making any cuts. Cut Your Pieces: Take your time when cutting wood. A slower, controlled cut is usually cleaner than rushing through the process. Dry-Fit Before Assembly: Place your pieces together before adding glue or screws. Dry-fitting helps you find gaps, incorrect measurements, or alignment problems. Glue and Clamp: Apply wood glue evenly, then secure the pieces with clamps as they dry. Do not rush this stage. Strong joints need enough time for the glue to set properly. Sand Smooth: Start with rough sandpaper to remove uneven areas, then move toward finer grits for a smoother surface. Always sand with the direction of the wood grain to create a cleaner finish. Add a Finish: The final finish protects the wood and improves its appearance. Use wood stain for deeper color, paint for customization, mineral oil for food-safe items, or protective coatings for outdoor projects. Safety Tips Every Beginner Should Follow Good habits protect your hands, eyes, and lungs from day one. Wear Eye Protection: Wood chips and small particles can move unexpectedly during cutting and sanding. Safety glasses help protect your eyes from injuries. Use a Dust Mask: Fine wood dust created during sanding can irritate your lungs. A dust mask helps reduce exposure. Clamp Your Work: A secured board is easier and safer to cut. Clamps prevent movement and help create cleaner results. Cut Carefully: Keep your hands away from blade paths and focus on controlled movements rather than speed. Keep Your Workspace Clean: A tidy work area reduces trips, slips, and misplaced tools. Disconnect Power Tools When Changing Parts: Unplug tools before changing blades, bits, or attachments to prevent accidental starts. For additional woodworking safety guidance, the Occupational Safety and Health Administration (OSHA) provides recommendations for safe equipment use and protective practices. Frequently Asked Questions What is the easiest woodworking project for a total beginner? A cutting board, a simple shelf, or a picture frame is a good first project because each teaches important skills like measuring, cutting, sanding, and finishing. Can I do woodworking without power tools? Yes. Many beginner projects can be completed with basic hand tools like a saw, sandpaper, clamps, measuring tape, and wood glue. What wood should a beginner start with? Pine is usually the easiest option because it is affordable, easy to cut, and available at most home improvement stores. Poplar is another good choice. How much does it cost to start woodworking? You can begin with basic hand tools and inexpensive materials for less than $50. You can add power tools later as your projects become more advanced. How long do easy woodworking projects take? Small projects often take a few hours, while larger beginner furniture builds may require an entire weekend. Final Thoughts on Starting Easy Woodworking Projects Easy woodworking projects are a practical way to turn a simple interest into a useful skill. You do not need a large workshop, expensive equipment, or years of experience to make something worthwhile. A few basic tools, affordable wood, and patience are enough to create your first projects. Start with something simple like a cutting board, shelf, or organizer. Each finished piece teaches better measuring, cleaner cuts, and stronger building techniques. Mistakes are part of improving. Every project gives you a chance to learn something new and build more confidence for the next one. Choose a project that fits your current skill level, gather your materials, and start creating one piece at a time.
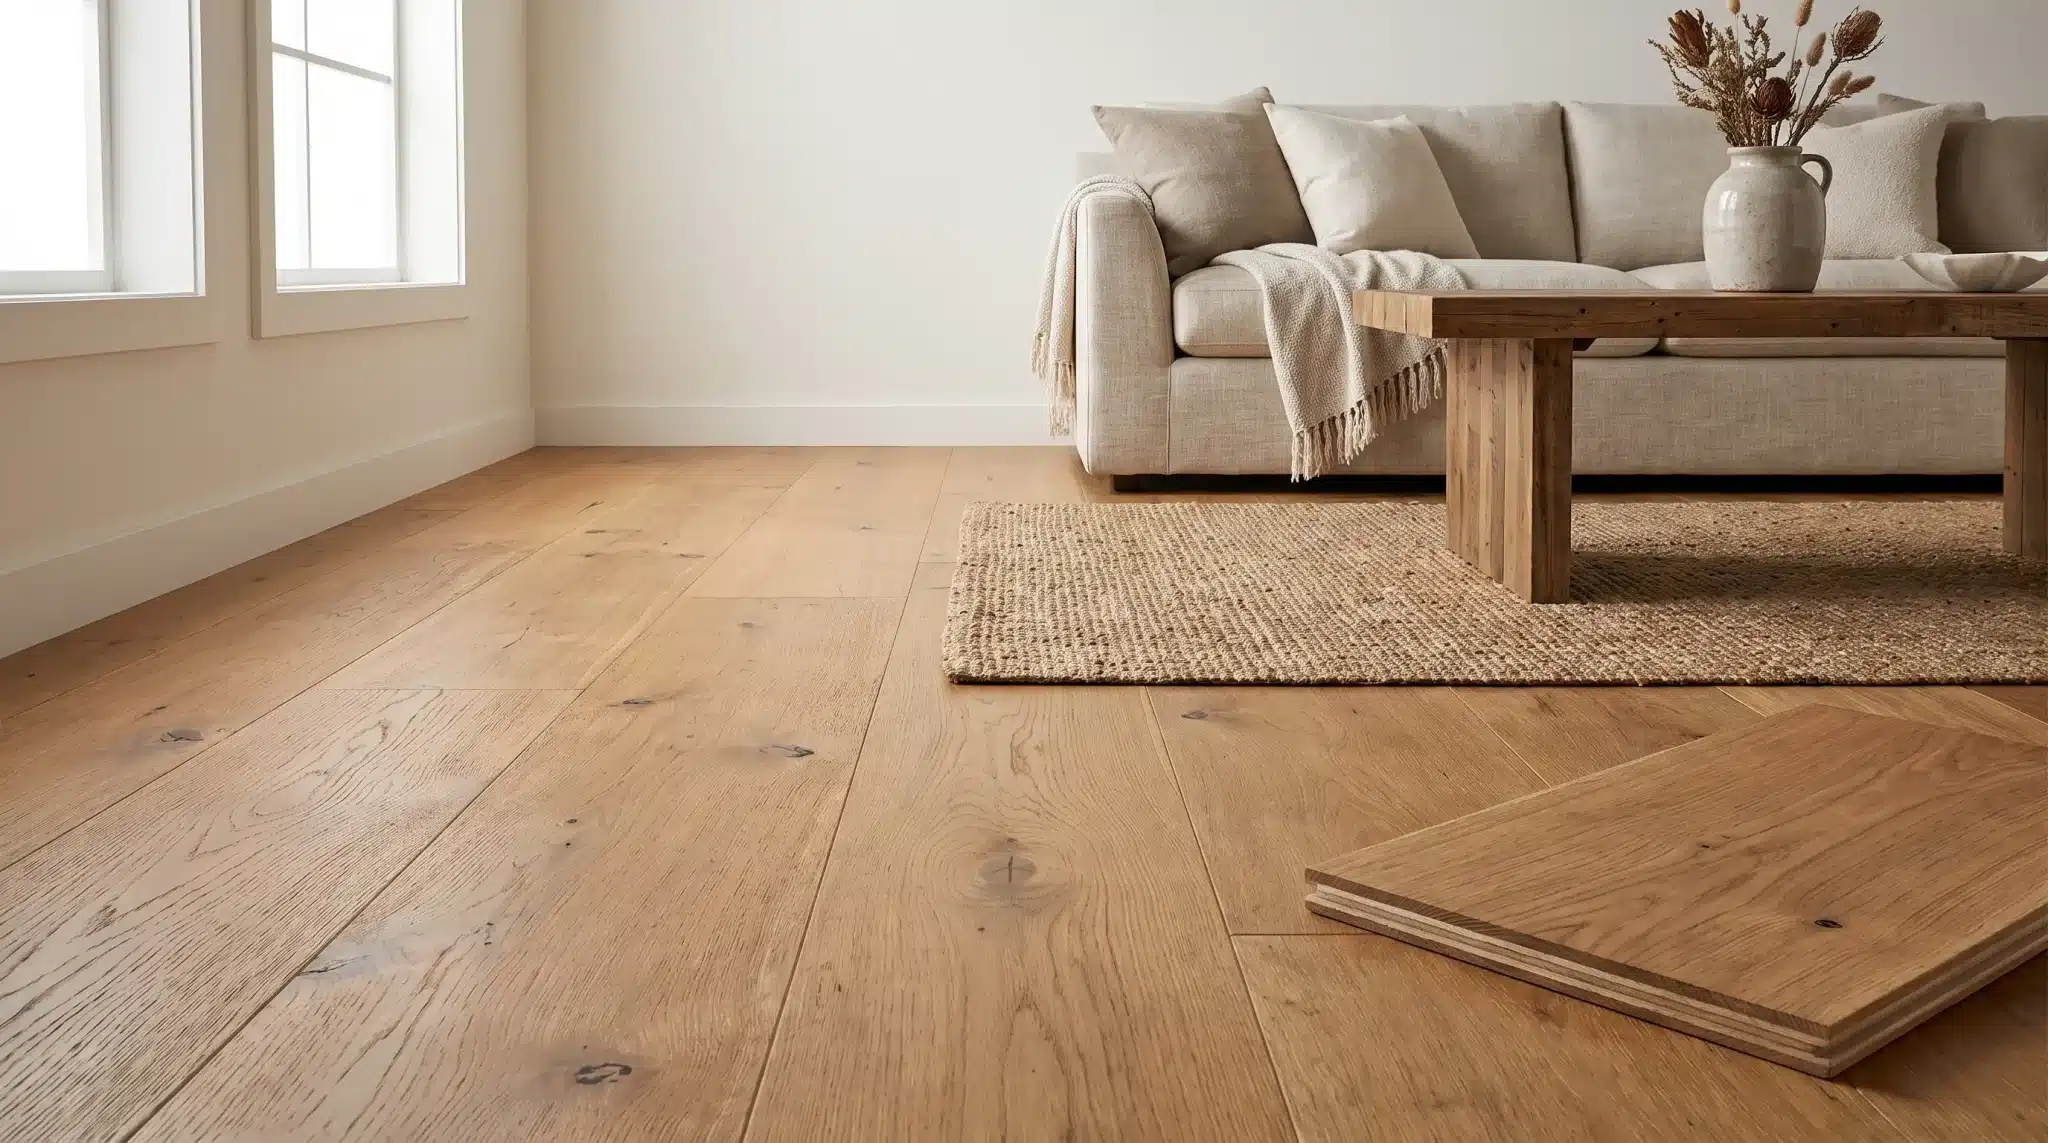
Engineered hardwood is a real wood flooring product made with a thin layer of natural hardwood on top and multiple layers of plywood or composite wood underneath. This layered construction gives it the authentic appearance of solid hardwood while making it more stable against moisture, humidity changes, and temperature fluctuations. I was checking out plank samples at a flooring showroom a few weeks back. One plank looked just like solid hardwood from the top. Then I turned it on its side. The top layer was real wood. But underneath sat several thin layers, glued and pressed together in a cross pattern. After twenty years of working with wood, that was new to me. I asked myself why anyone would build a floor this way instead of cutting one solid piece. Digging into it gave me an answer that made sense. Solid hardwood moves. Humidity and temperature swings make it expand and contract more than most homeowners expect. Engineered hardwood handles those shifts far better. Here, I will walk you through what engineered hardwood is, how it gets made, where it works best, and what to check before you bring it into your own home. What Is Engineered Hardwood? Engineered hardwood is a real wood flooring product. It has a thin layer of genuine hardwood on top and multiple layers of plywood or high-density fiberboard underneath. The top layer is what you see and walk on. It comes from real wood species like oak, maple, walnut, or hickory. This layer gives the floor the same grain patterns and natural look as solid hardwood. The core layers sit below the surface. They are built from sheets of wood placed in opposite directions. This cross-grain structure keeps the floor stable when temperatures and humidity levels shift. Solid hardwood is one piece of wood from top to bottom. Engineered hardwood uses a layered construction to address one of solid wood’s biggest weaknesses: moisture-induced movement. Feature Engineered Hardwood Material Real hardwood veneer over a layered core Construction Multiple cross-grain wood layers bonded together Top Layer Natural wood wear layer Main Benefit Greater resistance to expansion and contraction Best Locations Living rooms, kitchens, basements, concrete slabs, and radiant heat areas Appearance Looks like traditional hardwood flooring Refinishing Depends on the thickness of the hardwood wear layer How Is Engineered Hardwood Made? Engineered hardwood comes together in layers. Each layer has its own job. Once you see how they stack up, the reasons behind the floor’s performance start to make sense. 1. The Hardwood Wear Layer The top layer is a thin slice of real wood. Common species include: Oak Maple Walnut Hickory This layer shapes everything you see. Grain, color, and texture all come from this slice of natural wood. It also decides how many times you can refinish the floor: Thicker veneers allow multiple sanding cycles over the years Thinner veneers may only handle a light recoat 2. Core Layers Build Stability Below the wear layer sits the core. It is built from several sheets of wood or plywood. Each sheet runs its grain in a different direction than the one above it. This cross-grain construction resists the natural push and pull that comes with moisture changes. Solid hardwood shifts with the seasons. It expands in humid months and contracts in dry ones. The engineered core cuts that movement by a wide margin. 3. Factory Finish Protects the Surface Most engineered hardwood floors arrive already finished. Manufacturers apply the coating before the floor ever leaves the factory, usually one of two types: Aluminum oxide coatings UV-cured finishes These factory finishes tend to outlast what most contractors can apply on-site. They stand up better against scratches, scuffs, and daily wear. In my experience, the wear layer thickness is the first thing worth checking. Pair a thick wear layer with a strong factory finish, and you get a floor built to last. How Engineered Hardwood Differs From Solid Wood? Both types use real wood on the surface. But their construction changes where you can install them and how long they last. Feature Engineered Hardwood Solid Hardwood Construction Hardwood veneer over a layered core Single piece of wood Moisture Stability More stable More affected by humidity Installation Areas Above, on, and some below-grade Mostly above-grade Installation Methods Nail, glue, or float Usually nail or staple Refinishing Depends on wear layer thickness Multiple refinishing cycles Cost Often more affordable Usually higher Here’s what these differences mean in practice: Moisture resistance: The layered core lets engineered hardwood handle humidity swings without warping as much as solid wood. Installation flexibility: You can install engineered hardwood below-grade, something solid hardwood cannot handle well. Lifespan: Solid hardwood often outlasts engineered wood since you can sand and refinish it more times. Cost: Engineered hardwood usually costs less upfront, making it a budget-friendly pick for many homes. Both types use real wood on the surface, but their construction changes where you can install them, how they perform over time, and the overall look they create in a room. Beyond choosing between engineered and solid wood, factors like wood tone also affect the final appearance. Light hardwood flooring, for example, can help make smaller rooms feel more open and pair well with a variety of interior styles. Where Can You Install Engineered Hardwood? Engineered hardwood works in more rooms than solid hardwood. Its stable core allows installation in spots where solid wood would be a poor fit. 1. Living Rooms and Bedrooms Living rooms and bedrooms are the easiest places to install engineered hardwood. Foot traffic is moderate, and moisture levels stay low in these areas. The wide range of wood species and plank sizes gives you real design flexibility. You can find an option that fits nearly any room style or color scheme. 2. Kitchens and Dining Areas Kitchens pose a greater moisture risk than other rooms. Engineered hardwood can work in a kitchen with the right care habits. Wipe up spills as soon as they happen. Do not let water sit on the surface. A mat in front of the sink helps protect the floor in that high-use zone. The floor handles normal kitchen activity well when maintained properly. Standing water is the problem to prevent. 3. Basements and Concrete Floors This is one of the biggest advantages engineered hardwood has over solid wood. You can install it directly over a concrete slab. Basements tend to hold more moisture than upper floors. Solid hardwood is not a good fit in that environment. Engineered hardwood tolerates those conditions with proper subfloor preparation. Test the concrete for moisture before installing. A moisture barrier may be needed depending on the results. 4. Over Radiant Heating Systems Radiant heating systems warm floors from below. That steady heat can dry out and damage solid wood over time. Engineered hardwood is more stable under those conditions. Check the manufacturer’s specifications before installing over radiant heat. Not every product is rated for use with it. How Much Does Engineered Hardwood Cost? Materials alone run $3 to $16 per square foot. The quality tier you choose is the biggest driver of that range. Quality Tier Material Cost Per Sq Ft What You Get Budget $2–$4 Common species like oak or hickory, with a thinner wear layer, suit guest rooms or rentals Mid-Range $4–$7 Thicker wear layer, wider species, and width options can often be refinished once High-End $7–$16+ Exotic species, thick veneer, premium factory finish, best for high-traffic rooms Factors Affecting the Cost The price of engineered hardwood varies based on several factors. Understanding what drives cost helps you compare products more fairly. Cost Factor Why It Changes Price Wood Species Rare or exotic woods cost more than common species Wear Layer Thickness More material adds to durability and price Core Construction Multi-ply plywood cores add stability and cost Plank Width Wider planks typically cost more Finish Quality Premium coatings increase protection and price Installation Method Labor costs vary by method The total project cost depends on room size, subfloor preparation needed, and whether you hire a professional installer. Getting quotes from multiple flooring contractors gives you a realistic picture of what to expect. The same applies when comparing flooring options like laminate, where factors such as how much it costs to install laminate flooring and the laminate flooring labor cost per square foot can influence the total project expense. How to Choose Quality Engineered Hardwood? Choosing well means looking past the surface finish and the showroom display. Here is what to pay attention to. 1. Check the Wear Layer Thickness The wear layer is the most important factor when comparing products. It determines both the floor’s longevity and its refinishing potential. Floors with a wear layer under 2mm are on the thinner end. They suit lower-traffic areas where refinishing is less of a concern. Floors with 4mm or more give you a longer lifespan and more refinishing options over time. 2. Look at the Core Construction A multi-ply plywood core is generally more stable than a high-density fiberboard core. Plywood holds fasteners better and performs well in areas with some moisture variation. Ask the retailer or manufacturer what the core is made from. The answer tells you a great deal about how the floor will behave long-term. 3. Consider the Room Conditions Think about where the floor is going before you buy. A basement needs different specifications than a second-floor bedroom. Moisture levels, foot traffic, and sun exposure all affect which product is the right fit. A floor that works well in one room may not be suitable for another. 4. Match the Finish With Your Lifestyle Matte finishes hide everyday scratches better than glossy ones. Wire-brushed or hand-scraped surfaces are forgiving in homes with children and pets. High-gloss finishes show fingerprints and light scratches more easily. They work well in low-traffic spaces where appearance is the main priority. Frequently Asked Questions What Is the Best Cleaner to Use on Engineered Hardwood Floors? The best cleaner for engineered hardwood floors is a pH-neutral hardwood floor cleaner designed for finished wood surfaces. Avoid harsh chemicals and steam cleaners, as they can damage the protective finish. Can You Mop an Engineered Floor? Yes, you can mop engineered hardwood floors, but use a damp microfiber mop rather than a wet one. Excess water seeps into the seams and affects the wood layers. Dry the floor quickly after cleaning. How Long Does Engineered Hardwood Last? High-quality engineered hardwood can last 20 to 50 years or more with proper maintenance. The wear layer thickness, finish quality, installation method, and foot traffic all play a role. Is Engineered Hardwood Real Wood? Yes, engineered hardwood has a real hardwood top layer bonded over a stable multi-layer core. The visible surface is genuine wood, which gives it the same natural grain and appearance as traditional hardwood flooring. Can Engineered Hardwood Be Refinished? Engineered hardwood can be refinished if it has a thick enough hardwood wear layer. Floors with thinner veneers may only support light refinishing or recoating rather than complete sanding. Final Thought Engineered hardwood is a real wood floor. Its layered construction makes it more stable than solid hardwood. Rooms with changing humidity, concrete subfloors, or radiant heat are where it proves its value. The key to choosing the right product is looking past the surface. Wear layer thickness, core construction, and finish quality all affect how the floor holds up over the years. The answer comes down to your room conditions and your long-term plans. It gives you the look of traditional hardwood with better stability across more locations in your home. Take time to compare products before buying. The floor you choose will be part of your home for a long time.
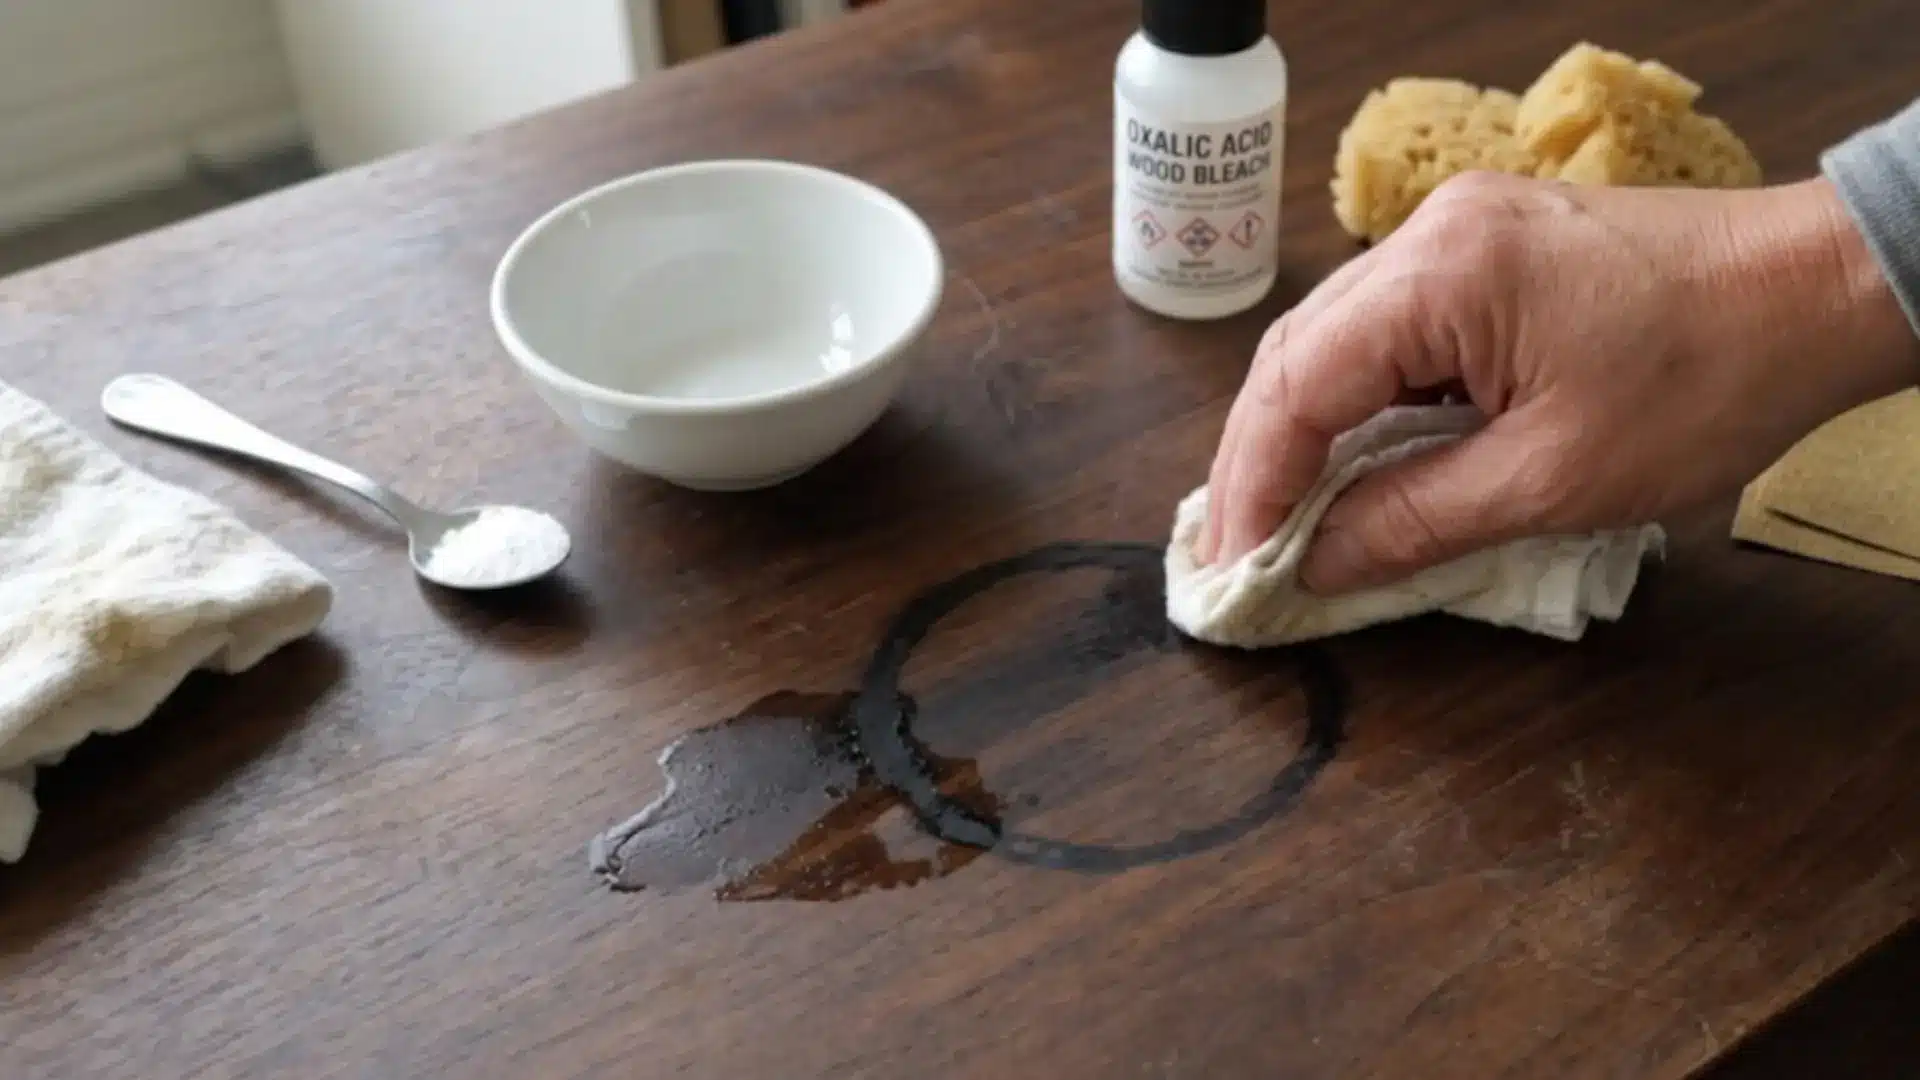
Water rings on a wooden table can ruin the look of an entire room in seconds. Have you ever tried wiping them away only to see the stain still there? It feels frustrating when a clean surface suddenly looks damaged, especially when regular cleaning does nothing. I know how confusing it gets when different fixes online give mixed results and no clear direction. The water stain problem on wood often depends on heat, moisture, and finish type, not just surface cleaning. In this guide, you’ll see how to remove water stains from wood using simple home methods, safe fixes, and practical steps that actually work. How to Remove Water Stains from Wood: What Actually Works If you want to know how to remove water stains from wood, start by figuring out what color the mark is — because white and dark stains behave completely differently and need different approaches. I’ve pulled more than a few water-damaged pieces off job sites over the years, and the most common mistake I see is people trying the same method on every stain regardless of what it is. That’s how you turn a fixable white ring into something that needs sanding and refinishing. The color of the stain tells you how deep the moisture went, and that tells you what will actually clear it. What Causes Water Stains on Wood Surfaces Water stains form when moisture interacts with either the protective finish or the wood itself. White stains appear when water gets trapped under the finish layer, the moisture clouds the coating from below, but the wood underneath is usually untouched. Dark stains are a different problem: those mean water has penetrated past the finish and into the wood fibers, often causing oxidation of the tannins in the grain. Heat makes both worse by opening the finish and allowing liquid to enter faster. The longer moisture sits, the deeper it goes, which is why quick cleanup is worth more than any remedy after the fact. Tannin-rich species like oak, walnut, and cedar are especially prone to dark staining when moisture reaches the wood, because the water reacts with the natural tannins and turns them dark. Pine and other softwoods absorb moisture faster due to their open grain, but the stain chemistry is less dramatic. Understanding this helps you set realistic expectations before you start. Types of Water Stains on Wood: Identify Before You Touch It Before you reach for anything, identify what you’re looking at. The wrong method for the wrong stain type wastes time and risks further finish damage. Stain Type Appearance Cause Difficulty White Ring Cloudy, milky circle on finish surface Moisture trapped under finish from glasses or cups Easy — usually removable with heat or oil Dark Stain Brown or black discoloration in the wood Water penetrated past the finish into wood fibers Hard — may need bleaching, sanding, or refinishing Heat + Moisture Mark Dark or white mark, sometimes with rough texture Hot item combined with condensation breaking down finish Medium — depends on severity and age Finish Damage Dull, patchy areas on a polished surface Long-term moisture exposure weakening the protective coating Medium — often needs polishing or spot refinishing Raw Wood Stain Deep mark on unfinished or bare wood Water absorbed directly into untreated surface Hard — requires refinishing or replacement The stain type determines the method. If you’re looking at a white ring on a sealed dining table, heat or oil will likely clear it. If you’re looking at a black spot on an unfinished piece, you’re looking at a refinishing job — no household remedy will touch that. How to Remove Water Stains from Wood: Four Methods That Work These are the methods I’d walk through in order, starting with the least invasive. Test every method on a hidden area first — the back of a leg, the underside of a leaf. What works on polyurethane can dull an oil finish, and vice versa. 1. Hair Dryer (Best Starting Point for Fresh White Rings) The hair dryer method is a safe and beginner-friendly way to remove light water stains from wood by gently evaporating trapped moisture from the finish layer. It works best when stains are fresh and haven’t deeply set into the wood fibers. Best For: White rings, New cloudy marks, Delicate wood finishes, Small water stains on tables or dressers Start by wiping the wood surface with a soft dry cloth. Remove dust, dirt, or oil buildup so heat can distribute evenly. A clean surface also prevents particles from getting trapped in the finish during heating. Use the lowest heat setting available on your hair dryer. Avoid high heat because it can dry out or crack the wood finish, especially on polished or varnished surfaces. Hold the hair dryer about 6–8 inches away from the stain. This ensures gentle heating instead of direct hot airflow that could damage the wood surface. Keep the dryer moving in slow circular or side-to-side motions. Concentrated heat in one area can cause uneven drying or finish discoloration. Check the stain every 30–60 seconds. As moisture evaporates, the white ring should slowly fade or become lighter. Stop immediately if you notice any surface dulling. Risk Level: Low to medium. This method is fairly safe when used carefully, but too much heat can soften, dull, or damage the finish. 2. Iron Method (Heat Lift for Stubborn White Marks) The iron method is a widely used technique to remove fresh water stains from wood by using controlled heat to pull trapped moisture out of the finish layer. It works best on light surface marks caused by hot cups or recent spills that haven’t deeply penetrated the wood. Best For: White rings, fresh water stains, light cloudy marks, sealed or polished wooden tables, dressers, and cabinets Place a clean cotton cloth over the stained area and set the iron to low or medium heat without steam. Gently move the iron over the cloth in short intervals to avoid overheating the surface. Apply heat evenly across the cloth instead of focusing on one spot. This helps lift moisture gradually without damaging the finish or creating burn marks. Check the stain every few seconds to monitor progress. Stop immediately if the surface starts to feel too hot or shows signs of dulling. Avoid using steam, high heat settings, or direct contact between iron and wood. These can permanently damage the protective finish layer. Repeat the process only in short cycles if needed, allowing the wood to cool between attempts. Risk Level: Medium. Effective for fresh stains, but improper heat use can permanently damage the wood finish. Note: Reddit’s r/howto community has documented this method repeatedly. The consistent report is that it works on white rings, often after two to three short passes, but leaves smudging if pushed too long. Stop when the ring fades — do not try to make it perfect in one session. 3. Mayonnaise or Petroleum Jelly (For Surface-Level Marks on Older Finishes) The mayonnaise method is a popular home remedy that helps reduce white water stains on wood by using natural oils to restore moisture balance in the finish. It works best on surface-level marks caused by glasses or hot dishes. Best For: White rings, light surface stains, polished wooden tables, cabinets, and dressers Apply a small amount of full-fat mayonnaise directly onto the stained area using a soft cloth or fingertip. The oils in mayonnaise help penetrate the finish and loosen trapped moisture. Spread it evenly over the stain in a thin layer. Avoid applying too much, as a thick layer can become messy and harder to clean later. Leave it on the surface for 2–4 hours. For deeper or older stains, it can be left overnight to allow better oil absorption into the finish layer. Wipe the area thoroughly using a clean damp cloth. Make sure no residue is left behind, as it can create stickiness or dull patches. Buff the surface gently with a dry microfiber cloth to restore shine and blend the treated area with the rest of the wood. Risk Level: Low. This method is generally safe but may leave residue if not cleaned properly. 4. Baking Soda Paste (For Mild Marks That Won’t Respond to Heat or Oil) The baking soda paste method is a gentle DIY technique used to remove stubborn water stains from wood by lightly lifting residue from the surface without damaging most sealed finishes. It works best on mild to moderate stains that do not respond to heat or oil-based remedies. Best For: Light dark stains, mild water marks, sealed wooden tables, dressers, cabinets, and slightly older surface stains Mix baking soda with a few drops of water to create a thick paste. Apply it gently onto the stained area using a soft cloth, using light circular motions to avoid scratching the finish. Work slowly and avoid heavy pressure. The mild abrasive nature of baking soda helps lift stain buildup without damaging most sealed wood surfaces. Wipe the area with a clean damp cloth after a few minutes to remove all residue, then dry and buff the surface for a smooth finish. Avoid scrubbing aggressively, as too much pressure can dull or scratch polished or glossy wood finishes. Repeat only if needed, allowing the surface to rest between applications to prevent over-processing. Risk Level: Medium. Safe for most sealed wood surfaces when used lightly, but may damage delicate, glossy, or antique finishes if over-applied. Important: None of the methods above will remove a dark stain that has penetrated into the wood fibers. Commercial wood cleaners may lighten them, but true dark stains, particularly black marks from prolonged moisture or tannin oxidation, require oxalic acid (wood bleach), sanding, restaining, and resealing. That’s a refinishing job, not a cleaning one. Real-Life Advice: What Usually Works Best? In a Reddit r/howto discussion, the original poster had already tried toothpaste, oil and vinegar, and a white ring removal cloth, but the stain was still there. Several people suggested using an iron with a towel between the heat and the wood. The poster later said the ironing trick worked best, though a few smudges remained. Others mentioned mayonnaise for white rings, while some warned that oily fixes can soak into wood and cause problems. The biggest takeaway from real experiences is to start with controlled heat for white marks, avoid rushing through multiple methods, and stop if the stain looks dark, deep, or unchanged after a few careful tries. Commercial Products Worth Considering When home remedies have run out of road, these product types are the next step. They’re faster and more consistent on stubborn or older water stains that household methods can’t fully clear. Product Type What It Does Best Use Effectiveness Wood Restorers Oil-based formulas that revive dull or stained finishes Light to moderate water marks on finished wood High Furniture Polishes Surface cleaners that restore shine and remove mild staining White rings and surface haze Medium Stain Removers Stronger chemical cleaners formulated for deeper marks Older or darker water stains High Wood Oils Lightens deep tannin-based dark stains without destroying wood structure Black marks, tannin oxidation stains, unfinished wood Very High — requires safety precautions Professional Kits Multi-step restoration systems including filler, stain, and finish Severe stains, aged damage, post-sanding repairs Very High Oxalic acid is the one most people skip but shouldn’t overlook for genuinely dark wood stains. It’s the standard in professional refinishing for a reason, it neutralizes the tannin reaction rather than just bleaching over it. Use it with gloves, good ventilation, and follow the neutralizing rinse step exactly as specified on the product label. How to Prevent Water Stains on Wood Prevention is easier than any of the methods above. The finish on your furniture is the only thing standing between the wood and whatever lands on it — protecting that finish is the real job. Use coasters and trivets without exception. Hot cups and cold glasses are the two most common sources of white rings. A coaster costs less than ten minutes of remediation work. Wipe spills immediately. Moisture left for more than a few minutes starts working through some finishes. The faster you act, the less the finish has to absorb. Seal and reapply finish on schedule. Polyurethane and lacquer degrade over time. A surface that was sealed five years ago may no longer be providing the protection it looks like it is. Control indoor humidity. Wood expands and contracts with humidity swings, which opens small cracks in the finish over time. Keeping humidity between 35 and 55 percent extends finish life and reduces stain risk. Polish regularly. Routine polishing maintains the protective layer on many finished surfaces. It’s not a substitute for resealing, but it slows the degradation of the outer coat. These habits matter most on the wood surfaces that see daily use, dining tables, coffee tables, kitchen islands. High-use surfaces need more frequent attention than pieces that sit in a corner. Frequently Asked Questions Does vinegar remove water stains from wood? Vinegar alone can lighten mild surface marks, but it works better combined with olive oil in a 50/50 mix. The acid breaks down mineral deposits; the oil conditions the finish. Apply with the grain and wipe clean after 30 minutes. It won’t touch deep dark stains. Can baking soda remove water stains from wood? Yes, for mild white marks on sealed surfaces. Mix it to a paste, apply with a soft cloth in light circular motions, and wipe clean. Do not use it on glossy or antique finishes — the mild abrasive will dull them. Non-gel white toothpaste works on the same principle. How do you get dark water stains out of wood? Dark stains that have penetrated the wood fibers need oxalic acid (wood bleach), not household remedies. After treatment, the area requires sanding, restaining to match, and resealing. If you’re not comfortable with that sequence, it’s a job for a furniture restoration professional. Does mayonnaise remove water rings from wood? It works on white rings, especially on older lacquer or shellac finishes where heat carries more risk. Apply a thin layer, leave it two to four hours or overnight, then wipe thoroughly clean. Leaving residue behind creates a sticky dull patch that’s a separate problem to fix. Why do water stains come back after cleaning? Usually because moisture is still trapped under the finish, or the surface wasn’t fully dried before it was buffed. Heat or humidity changes can push the mark back to the surface. If a white ring returns after treatment, repeat the heat method and ensure the piece dries completely before reassessing. What type of wood is most resistant to water stains? Hardwoods with tight grain and natural oils — teak, white oak, and walnut — resist moisture penetration better than softer species. Teak in particular contains natural resins that repel water even without an applied finish. Softwoods like pine absorb moisture fastest and stain most readily. Can sunlight remove water stains from wood? Indirect sunlight can sometimes dry a very fresh, shallow white stain over a few days. It is not reliable and should not be the first approach. Direct sunlight causes UV bleaching and can create a discoloration problem worse than the original stain. When should you call a professional restorer instead of using DIY methods? Call a professional when the stain is dark and covers more than a few inches, when the wood feels soft or spongy near the stain, when the finish has visibly cracked or bubbled, or when DIY attempts have left the surface looking worse than the original mark. Summing Up Water stains on wood don’t always mean permanent damage, but they do need the right approach to fix properly. Y ou’ve seen how different stain types react differently and why choosing the correct method matters. Simple heat methods, oil-based fixes, and gentle abrasives can all help depending on how deep the stain has set. The key is to test carefully, avoid rushing, and stop when the surface starts to show any damage or dullness. Knowing how to remove water stains from wood the right way helps you protect furniture and keep surfaces looking clean for longer. Try the method that matches stain type and share your experience or explore wood care tips.
A plain wall can make a room feel empty, even when the rest of the space looks nice. I’ve seen how a simple DIY board and batten wall can change that feeling fast. It adds shape, detail, and texture without needing a full room makeover. Board-and-batten is also a good DIY project because the design is simple. You do not need fancy cuts for many styles. You need careful measuring, straight boards, clean spacing, and a smooth paint finish. I’ll walk you through what board and batten is used for, which styles you can try, the best materials, design ideas, common mistakes, and tips for making your wall look professional. What Is Board and Batten Used For? One of the main reasons people add board-and-batten is to create an accent wall. A bedroom wall behind the bed, a dining room wall, or an entryway can look more finished with this trim. It gives the room a focal point without adding too much decor. Board and batten can also make a room feel more custom. Basic drywall can look flat, but trim adds depth. Once the wall and boards are painted the same color, the whole wall can look built-in. This is why many people use it when they want a high-end look on a smaller budget. It can also help protect lower walls in busy areas. In entryways, hallways, mudrooms, and dining rooms, walls can get scuffed by shoes, bags, chairs, and everyday traffic. A half-wall board-and-batten design can help cover and protect those areas. This wall style works in many rooms. You can use it in bedrooms, bathrooms, hallways, dining rooms, offices, nurseries, and entryways. It can feel soft and cozy in a bedroom, clean and bright in a hallway, or bold and dramatic in a dining room. Types of Board and Batten You Can DIY There are many board-and-batten styles you can try at home. Some are very simple, while others need more planning. The best style depends on your room, your wall size, and the look you want. Classic vertical board and batten: This style works well in bedrooms, entryways, bathrooms, and hallways. It gives the wall a clean look without feeling too busy. Half-wall board and batten: This is a great choice for dining rooms, hallways, and entryways. You can paint the trim one color and leave the upper wall plain, or you can add wallpaper above it for more detail. Full-wall board and batten: This style makes a stronger statement. It works well behind a bed, behind a sofa, or in a home office. If your room feels plain, a full-wall design can make it feel more finished. Grid board and batten: This style looks clean and balanced. It works well in modern rooms, bedrooms, and living rooms. It takes more measuring, but the final look can feel very polished. Square board and batten: This design feels bold and neat. It is a good choice if you want a wall that looks planned and symmetrical. Geometric board and batten: This style is popular for bedrooms, nurseries, and accent walls. It needs more cutting and planning, so it may be better if you already feel comfortable with DIY projects. Thin batten modern style: This gives the wall a sleek look. It works well in simple, modern rooms where you want texture without heavy detail. Wide batten farmhouse style: It uses wider boards and often feels warmer and more rustic. This works well with soft whites, warm neutrals, wood furniture, and cozy decor. How to Do Board and Batten Step by Step If you’ve never added trim to a wall before, board and batten can still feel like a doable first project. I like this style because it looks custom. You do not need to rush it. When you take it one step at a time, the wall starts coming together in a simple and satisfying way. Here’s how you can build a clean DIY board and batten wall from start to finish: Step 1: Prep the Wall Clear the wall first so you have a clean space to work. Remove pictures, hooks, outlet covers, and anything leaning against the wall. Wipe the surface with a damp cloth to remove dust and dirt. Fill any holes, dents, or rough areas with wall filler, then sand them smooth once dry. Check the baseboard, corners, and nearby trim, as bumps can prevent boards from sitting flat. Good prep helps the boards attach more securely and gives your finished board-and-batten wall a cleaner, smoother look overall before installing any trim. Step 2: Paint the Wall and Boards Paint the wall and boards before installing them to make the final finish easier. Use the same color on the wall and boards if you want a smooth, built-in look. Roll paint over the wall first, then paint the front and sides of each board. Let the paint dry fully before moving ahead. This helps cover tight corners that may be hard to reach later. You may still need small touch-ups at the end, but this step gives you a cleaner start and saves effort during installation later on too. Step 3: Attach the Boards on Edges of Wall Start by attaching boards around the outside edges of the wall. These boards create the frame for the full design and help guide the rest of the project. Place boards along the left side, right side, top, and bottom if your layout needs a full border. Add a thin line of adhesive to the back, press the board into place, and check it with a level. Once it is straight, nail it securely. This frame keeps the board and batten pattern neat and balanced from the very beginning of installation. Step 4: Cut the Battens Measure the open spaces inside your frame before cutting the battens. Do not assume every space is the same, because walls, floors, and ceilings can be slightly uneven. Mark each batten length clearly on the board before cutting. Make slow, careful cuts so the ends stay clean. After cutting, hold each piece against the wall to check the fit. If a batten is too long, trim it little by little. A good fit helps each board sit flat and keeps the design polished and clean after everything is fully painted. Step 5: Install Vertical Battens Install the vertical battens first if your design includes both vertical and horizontal pieces. Line each batten up with the marks you made on the wall. Add adhesive to the back, press it into place, and use a level to make sure it is straight. Nail it once it lines up correctly. Keep the spacing even from one batten to the next. Step back often to check the full wall. Straight vertical battens make the design look clean, balanced, and professional when the full wall is complete and painted later. Step 6: Install Horizontal Battens After the vertical battens are in place, install the horizontal battens. Measure the spaces between the vertical boards because each section may be slightly different. Cut each horizontal piece to fit its own spot. Add adhesive to the back, press it into place, and nail it when it lines up well. Use a level so each piece stays straight and does not tilt. These horizontal battens finish the pattern and create a clean grid or panel look, depending on the style you want for your finished board and batten wall. Step 7: Fill Gaps and Nail Holes Once all boards are installed, fill the nail holes with wood filler or spackle. Press the filler into each hole, then scrape away extra so the surface stays smooth. Use paintable caulk along the edges where the boards meet the wall, corners, and trim. Smooth the caulk with your finger or a simple caulk tool. Let everything dry fully before sanding. This step hides small gaps and nail marks. It helps your board-and-batten look clean, finished, and more professional once the final coat of paint dries. Step 8: Paint the Wall With Board and Battens Finish by painting the wall, boards, and battens together for a smooth final look. Use a brush around board edges, corners, seams, and tight areas. Then use a roller on the wider sections of the wall. Apply thin coats so the paint does not drip or look heavy. Let the first coat dry before adding another coat if needed. Check for missed spots once the paint dries. Touch up small areas with a brush. Replace outlet covers, clean the space, and enjoy the finished wall for a fresh, polished result. For more details, refer to the video below. Best Material for DIY Board and Batten The material you choose can affect the cost, appearance, and lifespan of your board-and-batten wall. Some materials are easier to paint. Some are better for moisture. Some are cheaper for large walls. Material Best For Main Benefit MDF boards Smooth indoor walls Affordable and easy to paint Pine boards Real wood look Stronger and more natural PVC trim Bathrooms and damp spaces Handles moisture better Plywood strips Budget projects Covers large walls for less Pre-primed trim Faster painting Saves prep time For most beginner projects, MDF or pre-primed trim is the easiest choice. If you are working in a bathroom, PVC trim may be better. If you want a real wood look, pine is a good option. Board and Batten DIY Inspiration/Ideas Board and batten can fit many rooms and styles. You can keep it bright and simple, or you can use a dark paint color for a bold look. The best idea depends on the mood you want in the room. 1. Half-wall board and batten in a hallway Half-wall board-and-batten works well in a hallway because it adds detail without making the space feel narrow. It also helps protect the lower wall from shoes, bags, and daily traffic. Keep the top portion simple so the hallway still feels open and bright. This idea is great if you want a clean look that feels custom but not too heavy. Styling Tips: Paint the lower trim white and the upper wall warm beige. Add framed art above the trim for interest. Use a runner rug to soften the space below. 2. Board and batten with wallpaper above Board-and-batten with wallpaper above adds more character to the room while keeping the lower wall neat. The trim adds structure, and the wallpaper brings color, pattern, or texture. This idea works well in powder rooms, dining rooms, nurseries, and entryways. Choose a simple batten layout so the wallpaper can stand out without making the room feel too busy, crowded, or hard to style. Styling Tips: Pair floral wallpaper with soft white trim for charm. Use striped wallpaper on a taller wall for a taller look. Match one wallpaper color to the trim paint neatly. 3. Grid board and batten behind a bed A grid board and batten behind a bed can make the bedroom feel more finished and cozy. The square or rectangle pattern works like a large headboard, so you may not need much wall art. It adds depth behind the bed while keeping the room clean and calm. This idea looks especially good when the bed is centered on the wall and the spacing feels even and balanced overall. Styling Tips: Paint the grid wall soft white or gray. Add matching nightstands for balance. Use simple bedding to keep it calm and relaxed. 4. Floor-to-ceiling board and batten in an office Floor-to-ceiling board-and-batten in an office can make the room feel focused, polished, and more personal. Since the trim covers the full wall, it creates a strong backdrop behind a desk or reading chair. This idea also works well for video calls because the wall looks neat without needing much extra decor, art, or shelving. Styling Tips: Paint it deep green, charcoal, or warm white for mood. Add a wood desk for warm contrast and texture. Keep shelves simple so the wall stands out clearly in the room beautifully. Board and Batten vs. Wainscoting Wainscoting and board-and-batten are often used in similar rooms, so it is easy to mix them up. Both add detail to walls, and both can make a room look more finished. Still, they are not exactly the same. Feature Wainscoting Board and Batten Common height Usually lower wall Half-wall or full-wall Look Often more traditional Modern, farmhouse, or classic Styles Beadboard, raised panel, picture frame Vertical, grid, square, geometric DIY level Depends on the style Often beginner-friendly Best rooms Dining rooms, hallways, bathrooms Bedrooms, entries, offices, halls Both options add depth, detail, and a finished look. If you want a classic lower-wall design, wainscoting may be a good fit. If you want simple lines and easy cuts, board-and-batten may be better. Common Board and Batten DIY Mistakes to Avoid A board-and-batten wall can look great, but small mistakes can show once the paint goes on. The good news is that most of these mistakes are easy to avoid if you plan first. Not measuring the full wall first is one of the biggest mistakes. This helps you plan spacing and avoid ending with odd gaps at the edges. Using uneven spacing can make the wall look off. Step back and look at the layout before you start nailing boards in place. Forgetting outlets and switches can create problems. Look at every outlet, switch, vent, and wall feature before you choose your spacing. Skipping caulk can make the wall look unfinished. Even if boards seem tight, small gaps can show after paint. Using boards that are too thick can make the trim stick out too far. Choose boards that match the size of the room and existing trim. Not checking for level is another common issue. This helps the full design stay clean. Painting before filling nail holes can leave visible marks. Fill the holes first, let the filler dry, sand it smooth, then paint. Choosing the wrong material for damp rooms can cause damage later. MDF may swell if it gets too much moisture. For bathrooms or laundry rooms, PVC or sealed wood is usually a better choice. Tips for Making a DIY Board and Batten Look Professional You do not need to be an expert to make board-and-batten look good. The cleanest projects usually come down to careful measuring, straight lines, smooth seams, and patient painting. Sketch the layout before cutting so you can see the pattern clearly. Use a level for every board so the design stays straight. Keep spacing even so the wall looks balanced. Caulk every seam so small gaps disappear. Sand filler smooth so nail holes do not show through the paint. Paint the wall and boards the same color for a built-in look. Use semi-gloss or satin paint for easier cleaning in busy areas. Match the style to the room so the wall feels natural. A simple sketch can help more than you think. Draw the wall, mark the boards, and note outlets or switches. This helps you spot problems before cutting any trim. Frequently Asked Questions What is a cheaper alternative to board-and-batten? A cheaper alternative is using MDF strips, plywood strips, or thin lattice trim instead of solid wood boards. You can also paint the wall first and add only battens, skipping full backing boards. This keeps the look neat while lowering material costs for a small DIY project. Can I DIY board-and-batten siding? Yes, you can DIY board-and-batten siding, but exterior work requires more care than indoor wall work. Use weather-safe materials, plan for water drainage, seal every joint, and follow local building rules. If the wall affects your home’s outer protection, get help from a skilled installer. Is board-and-batten outdated in 2026? No, board-and-batten is not outdated in 2026 when used with clean spacing, simple colors, and a planned layout. Recent design sources still list wall paneling, vertical designs, and board-and-batten accent walls as active 2026 trends. Keep it balanced, not overdone. What are the disadvantages of board-and-batten? The main disadvantages are cost, measuring time, wall prep, and extra cleaning around trim edges. If spacing is uneven or boards are not level, the wall can look messy. In damp rooms, the wrong material may swell. Good planning helps avoid most of these problems. Final Thoughts Board and batten is a simple way to add style to your home. It can make a plain wall feel warmer, cleaner, and more finished without needing a large renovation. It also works with many home decor styles. You can make it feel modern with thin battens and a dark color. You can make it feel farmhouse with wider boards and warm white paint. You can make it feel classic with half-wall trim in a dining room or hallway. If you are new to DIY, start with one accent wall. A bedroom wall, hallway wall, or entryway is a good place to begin. Choose a simple vertical design before trying a grid or geometric layout.
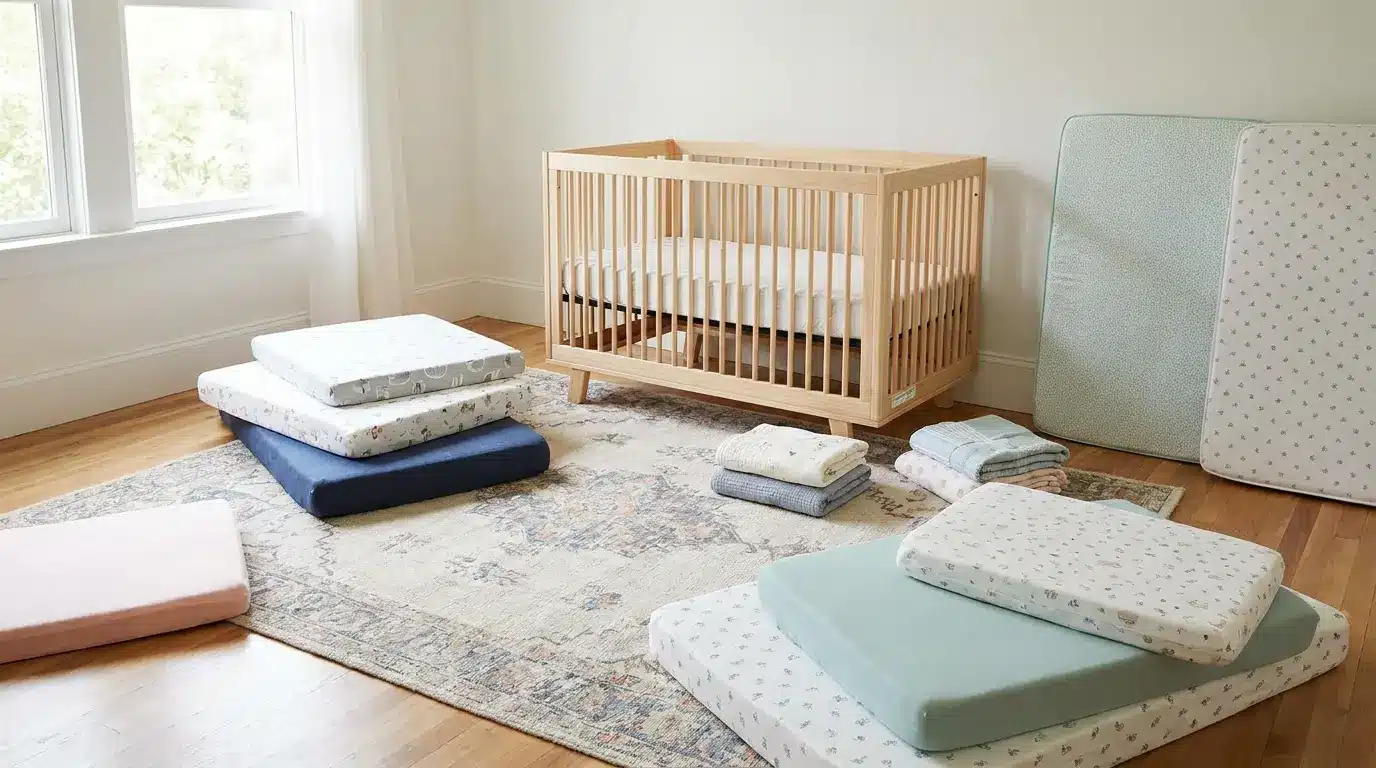
Your baby’s sleep space starts out feeling impossibly small. Then, almost overnight, that crib becomes the center of naps, midnight wake-ups, first rollovers, and eventually a toddler who thinks bedtime is a negotiation. That is why crib mattress size is not a tiny detail to skim past. A crib mattress has to do more than fit the nursery theme. It needs to fit the crib properly, sit flat, feel firm, and leave no unsafe gaps around the edges. I’ve seen plenty of home projects go sideways because someone trusted a label instead of measuring. Nursery setup is no different. Before you buy, here are the crib mattress dimensions that matter and the fit checks I would not skip. Common Size About 28 x 52 inches Fits Full-size cribs and many toddler beds Max Thickness 6 inches Regulated By US Consumer Product Safety Commission (CPSC) What is a crib mattress? A standard crib mattress is designed to fit full-size cribs using regulated safety dimensions so the mattress stays snug and stable inside the frame. The official federal minimum is 27 1/4 inches wide by 51 5/8 inches long, while most retail mattresses are rounded to 28 x 52 inches for simplicity and also limits thickness to 6 inches, enough to keep the crib’s side rails at a safe height above the sleep surface. This sizing is not about convenience. It exists to reduce gaps that could pose entrapment risks or allow the mattress to shift during sleep. A gap larger than two finger-widths between the mattress edge and crib wall is a flag. A properly fitting crib mattress should sit flat without bending or leaving noticeable space along any side. Crib Mattress Dimensions When you are comparing products, the numbers can blur together fast. Keep this chart nearby so you don’t bounce between tabs while trying to decode every mattress listing. Measurement Inches Centimeters Width 27 1/4 to 28 in. About 69 to 71 cm Length 51 5/8 to 52 in. About 131 to 132 cm Thickness 6 in. About 15 cm Common mini crib mattress About 24 x 38 in. About 61 x 97 cm A half inch may not sound like much. In a crib, it matters. A mattress that is too small can leave gaps along the rails or corners. A mattress that is too thick can affect how deep the crib feels once your baby starts sitting, pulling up, or standing. That is why I would treat crib mattress dimensions as a safety check, not just a product detail. How to Measure a Crib for the Right Mattress A correct crib mattress fit starts with accurate crib measurements rather than relying on labels like “standard size.” Small differences in crib manufacturing, frame wear, or design can change the usable interior space enough to affect safety and fit. Measuring the inside dimensions before choosing or using a mattress removes most guesswork and helps match the crib opening to the mattress exactly. It helps to focus only on the interior space where the mattress actually sits. Outer crib dimensions don’t reflect usable room, and even slight irregularities inside the frame can affect how snugly the mattress fits. Along with width and length, mattress height settings also matter because they change how securely the mattress sits as the baby grows and the crib level is adjusted. 1. Inside Width Measurement Measure from one inner rail to the opposite inner rail where the mattress will sit. Take measurements at both the head and foot ends, since older or lower-quality cribs can vary slightly in shape. Always use the smallest recorded width to avoid overestimating the available space. A crib mattress should match this width closely enough that no noticeable side gaps appear once placed inside the frame. 2. Inside Length Measurement Measure from the inside of the headboard to the inside of the footboard. Like width, this should be checked in more than one spot to account for uneven framing. If two measurements differ, the shorter length becomes the reference point. A proper crib mattress should sit fully flush from end to end without forcing or bending inside the frame. 3. Mattress Support Height Check Adjustable mattress levels don’t change mattress size, but they do affect real-world fit and safety. Measure the usable depth at each level if the crib has multiple height settings. As the mattress is lowered for a growing child, stability becomes more important. A correctly sized mattress should remain steady at every support level without shifting or lifting at the edges. Final Fit Comparison Once width, length, and support depth are recorded, compare them directly with the mattress specifications. The goal is a near-exact match with no need to compress, force, or adjust the mattress inside the frame. If even one measurement feels off, it’s safer to recheck the crib dimensions before use. A crib mattress should sit firmly in place on all sides without relying on force or pressure to stay positioned correctly. How to Choose the Right Crib Size for You The right crib size should fit the room, match daily routine, and support safe sleep. A common mistake is choosing the crib based on looks and working backward to the mattress. The practical sequence goes the other direction: space first, then crib type, then mattress fit. When planning a nursery layout, the same logic that applies to bedroom furniture arrangement applies here, clearance paths around the crib matter as much as the crib itself. Start with room dimensions: Measure the nursery, shared bedroom, or sleeping area before choosing a crib. This prevents buying a crib that feels too large, cramped, or hard to move around safely. Match the crib to daily use: Choose a full-size crib if it will be your baby’s main sleep space. A mini crib may work better for small rooms, apartments, or temporary setups — but confirm the mattress size before committing to either. Check the mattress fit: The mattress should sit flat and snug inside the crib. No loose edges, bending, or visible gaps. Think about how long you need it: A convertible full-size crib can extend use into toddler years. A mini crib serves shorter-term needs. Factor that into the upfront cost. Review the crib type: Portable, playard, and shaped cribs often require model-specific mattresses. Do not assume a standard mattress fits every crib style. Keep safety before style: A crib can be well-designed and still create problems if the mattress fit is wrong. Choose one that supports a firm, flat mattress and leaves enough clearance for safe daily use. Once room dimensions, mattress fit, crib type, and long-term use are clear, the choice becomes a straightforward process rather than a guessing game. Standard Cribs vs Other Crib Mattress Sizes Cribs do not all use the same mattress size, even when labels make them sound interchangeable. The word “standard” usually applies only to full-size cribs, not every crib style. Here is how the main crib types differ: Crib Type Mattress Size or Fit What It Means Standard Cribs Usually around 28 x 52 inches This is the most common crib mattress size and fits many full-size and convertible cribs. Still, measure the crib interior to make sure there are no visible gaps. Mini Cribs Usually around 24 x 38 inches These are made for smaller rooms, apartments, or short-term nursery setups. A mini crib mattress should not be used in a full-size crib because it can leave unsafe gaps. Portable Cribs and Playards Model-specific sizing These do not follow one universal mattress size. The mattress should match the exact product model, since small differences in thickness or shape can affect fit. Shaped and Specialty Cribs Custom-shaped mattress Oval, round, and designer cribs usually need a matching mattress from the same brand. These mattresses are not interchangeable with standard or mini crib mattresses. The safest approach is to treat the crib and mattress as a matched pair. A label helps narrow the field, but the crib’s measured interior dimensions should always drive the final decision. The same precision that goes into choosing nursery storage furniture for a small room applies directly to the crib mattress fit. Crib Mattress Safety Measures Parents Should Not Skip Crib mattress safety is not about adding more things; it is about removing the wrong ones. A simple crib is usually the safest option because every extra item in the sleep space increases risk. Before focusing on design or comfort, it is worth locking in the basic safety rules that actually matter in real use. For sleep, keep the crib simple and check these basics: Firm Mattress: A crib mattress should feel firm, not plush. Soft adult-style comfort is not the goal for infant sleep. Flat Surface: The mattress should lie level inside the crib. Do not use wedges, inclines, or rolled blankets to change the sleep angle. Fitted Sheet Only: Use a fitted crib sheet sized for the mattress. Skip pillows, loose blankets, bumpers, quilts, stuffed animals, and sleep positioners. No Extra Toppers: Do not add foam pads or pillow-top layers to soften the mattress. Added layers can change both fit and firmness. Correct Thickness: A full-size crib mattress should not exceed 6 inches in thickness. Thicker does not mean safer or better. Manual Check: If your crib has a manual, read the mattress size section. If the manual is missing, search by the crib model number before buying a mattress. Secondhand cribs and mattresses deserve extra caution. A used crib may be missing parts, and a used mattress may have sagging, hidden moisture damage, or a fit issue that is hard to spot in photos. Once these safety checks are in place, the crib becomes predictable, stable, and easier to trust during sleep. Most issues with crib mattresses do not stem from major mistakes but from small add-ons or overlooked guidelines. Keeping the setup simple, firm, and properly fitted removes most of those risks before they ever show up. Common Mistakes When Choosing a Crib Mattress Most crib mattress problems don’t come from the mattress itself but from incorrect assumptions during selection. A crib can look “standard,” yet still end up with a poor or unsafe fit because of small measurement or compatibility errors. These mistakes are common, but they’re also easy to avoid once you know what to look for. Assuming All Cribs Use Standard Size: One of the biggest errors is assuming every crib fits a 28 x 52-inch mattress. That size only applies to full-size cribs, not mini, portable, or shaped designs. Ignoring Manufacturer-Specific Requirements: Portable cribs, playards, and specialty models often require exact mattress matches from the same brand. Relying Only on Labels Like “Standard Fit”: Terms like “standard fit” or “universal” are not strict guarantees. Different manufacturers may interpret these labels slightly differently. Not Measuring the Crib Interior First: Skipping this step is the most common cause of mismatch. Even new cribs can vary due to manufacturing tolerances. The same care used when measuring a bed frame for the right mattress applies here, interior dimensions, not outer frame size, determine the fit. Overlooking Shape-Based Cribs: oval, round, and custom-designed cribs require exact-match mattresses, but this detail is often overlooked at purchase. Once these common errors are avoided, choosing the right crib mattress becomes a straightforward matching process instead of guesswork. Frequently Asked Questions Is a crib mattress the same size as a twin mattress? No. A twin mattress is significantly larger, roughly 38 x 75 inches compared to a crib mattress at 28 x 52 inches. A standard crib mattress fits cribs and most toddler beds, not twin bed frames. Are crib mattresses and toddler mattresses the same size? Often yes. Many toddler beds are designed to use a standard crib mattress, same 28 x 52-inch dimensions. Check the toddler bed’s instructions before assuming the transition works, since some designs differ slightly. Can I use a mini crib mattress in a regular crib? No. A mini crib mattress is smaller and will leave unsafe gaps inside a full-size crib. The entrapment risk is real. Always use the mattress size listed for your specific crib model. Do all standard crib mattresses fit all cribs? They should fit full-size cribs built to federal guidelines, but you still need to measure. Crib age, brand, and minor production variation can affect the actual interior space. Verify before purchasing. What is the two-finger rule for crib mattress fit? After placing the mattress, press two fingers against the gap between the mattress edge and the crib wall. If more than two fingers fit into that space, the mattress is too small. The fit should be snug enough that a baby cannot wedge a limb into the gap. When should I lower the crib mattress support? Drop the support level before your baby can push up on hands and knees, typically around 5 to 6 months. At the lowest setting, the crib rail should sit well above the top of the mattress so a standing child cannot climb or fall over the side. Final Thoughts Crib mattress size is one of those nursery details that looks simple until you are staring at ten nearly identical options online. Start with the standard crib mattress dimensions, then measure the crib from the inside and check the gap once the mattress arrives. My advice is to be practical, not sentimental, during this part. The crib can be beautiful, but the mattress has to be boring in the best way: firm, flat, snug, and correctly sized. Once that part is right, the crib becomes what it should be: a safer, calmer place for your baby to sleep. If you are still unsure about two sizes or crib types, take a step back and compare them against your crib’s exact inside measurements rather than relying on product labels. That one extra check usually removes most of the confusion before buying.





