

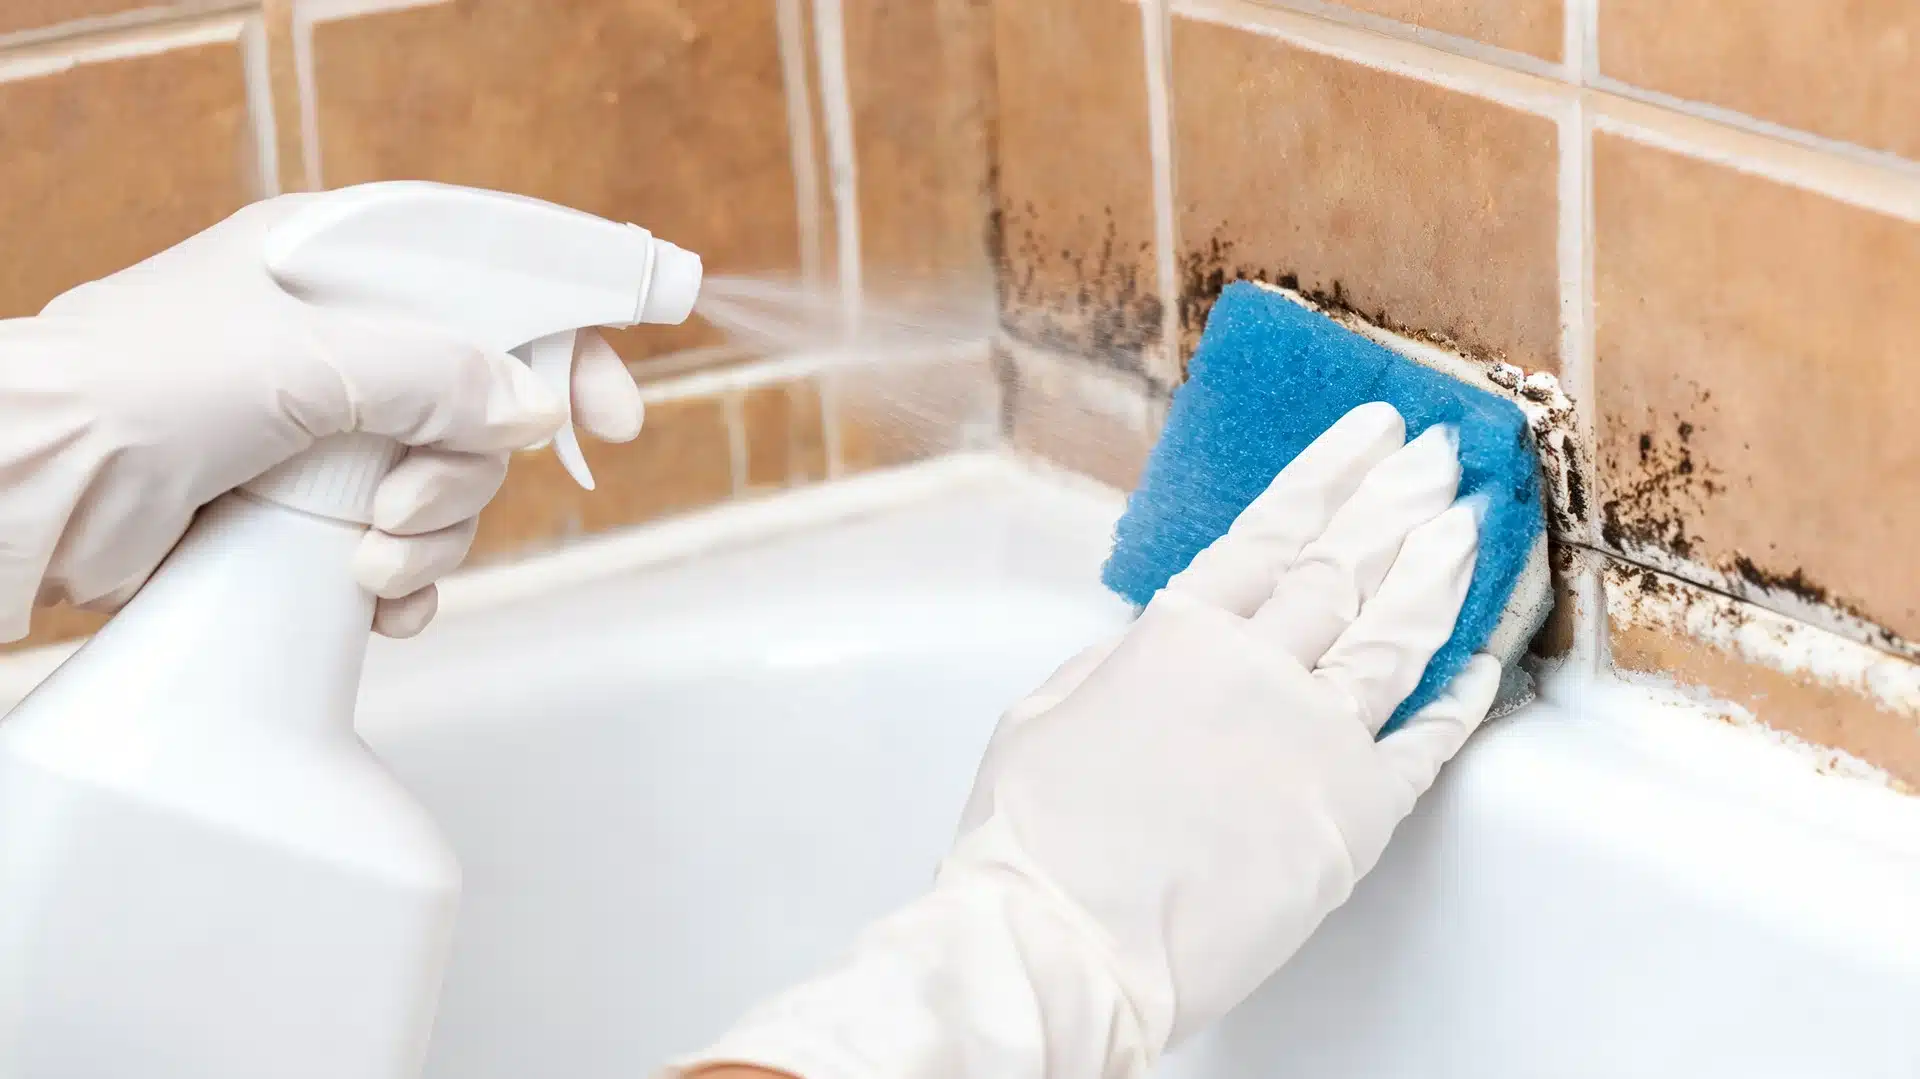
That dark spotting around the grout can make a clean bathroom feel neglected fast. If you are trying to figure out how to remove mold from shower surfaces, the first step is knowing what is safe to use and what might make the problem worse. Shower mold usually grows because moisture, soap residue, and poor airflow give it the right place to spread. I know it can feel annoying when the same spots return after cleaning, but the cause is often easier to fix than it looks. You’ll learn how to spot common mold signs, choose the right cleaner for tile, grout, and caulk, clean safely, and build small habits that help keep the shower drier longer. Is Shower Mold Actually Dangerous, or Just Annoying to Look At? A few dark specks on tile or glass are usually more of an eyesore than a health emergency, and you can often clear them yourself with a cleaner, a stiff brush, and a few minutes of drying time. A mildewy shower curtain or a damp bath mat is even easier: wash it, dry it, done. Pay closer attention when the mold keeps returning within days, the bathroom smells musty even after it has fully dried, or the caulk has gone soft, cracked, or started peeling away from the tile. Loose tiles, staining creeping onto nearby walls, or anyone in the house managing asthma or allergies are all reasons to treat it as more than a cosmetic problem. A dull or stained bathroom floor tile finish nearby can point to the same kind of moisture damage, so it is worth checking both surfaces at once. Shower Mold Types and What’s Actually Growing in There Mold shows up in different colors depending on what it is feeding on, but the root cause is almost always the same combination: leftover moisture and not enough airflow. Knowing which one you are dealing with makes the cleanup faster. Black mold: The most common offender on grout, caulk, and ceiling corners, and it settles wherever water sits the longest. Green mold: Tends to appear near drains and on grout lines where soap scum has had time to build up. Pink or orange film: Usually not true mold but a bacterium (Serratia marcescens) that thrives on soap residue near drains and shower floors, still worth cleaning promptly. White mold: Fuzzy or chalky patches that often hide behind fixtures or in corners with a slow, unnoticed leak. Most of this starts small and stays manageable if you catch it early. A patch that keeps spreading, or a smell that lingers no matter how much you clean, is usually a sign of moisture hiding somewhere you cannot see. How to Remove Mold From Shower Areas Three cleaners handle almost everything a shower can throw at you, and none of them require a trip past the cleaning aisle’s fanciest (and priciest) bottles. The method is always the same shape: apply, let it sit, scrub, rinse, and dry the area completely so moisture has no reason to linger. Task Removing mold from shower tile, grout, glass, and caulk Time 20–90 minutes, depending on how set-in the mold is Tools Spray bottle, stiff grout brush or old toothbrush, gloves, clean cloth Frequency Spot-clean weekly; deep-clean monthly Difficulty Easy ⚠️ Safety Note: Run the bathroom fan or crack a window while cleaning, since vinegar and hydrogen peroxide fumes can irritate eyes and airways in a small space. Never combine bleach with vinegar or ammonia-based cleaners. The mix releases chlorine gas, which is genuinely dangerous to breathe. Use one cleaner at a time and rinse the surface before switching products. Method 1: Vinegar for Deep Penetration Distilled white vinegar is my go-to for grout and tile corners because the acidity loosens mold sitting in porous, hard-to-reach spots, the same way it cuts through a hard-water ring on a faucet. What You Need: distilled white vinegar, a spray bottle, a firm grout brush or old toothbrush, warm water, a clean cloth, and gloves. Pour undiluted vinegar into a spray bottle. Full strength works better on grout and tile edges than a watered-down mix. Saturate the moldy areas, focusing on grout lines, corners, and the spots around fixtures and drains where water sits longest. Let it sit for at least 1 hour so the acid has time to break the mold down. Scrub with the grout brush or toothbrush. Rinse thoroughly with warm water, then wipe dry with a clean cloth. Leave the door or curtain open so the area can air out completely. Best For: grout, tile corners, shower walls, drain areas, and door tracks. Skip it on natural stone like marble, limestone, or travertine, since the acid can etch the surface. Method 2: Hydrogen Peroxide for Stain Removal and Disinfecting When mold has left behind a dark stain rather than just a fuzzy patch, 3% hydrogen peroxide is the better pick, since it lifts discoloration the way a good stain remover saves a white shirt. What You Need: 3% hydrogen peroxide, a spray bottle, a stiff brush, warm water, a clean cloth, and gloves. Spray the moldy area until it is fully wet, including grout lines and stained corners. Let it sit for 20 to 30 minutes. Light bubbling is normal, as the peroxide breaks down buildup on the surface. Scrub with a stiff brush or toothbrush. Rinse with warm water and dry the area completely with a clean cloth. Best For: stained grout, tile, shower corners, and drain areas. For a stubborn stain, sprinkle a little baking soda over the wet, peroxide-soaked grout before scrubbing. The mild abrasion helps lift what the peroxide alone leaves behind. Method 3: Baking Soda Paste for Scrubbing Power Baking soda is the gentlest option here, and it is the one I reach for when mold is tangled up with regular soap scum rather than sitting on its own. What You Need: baking soda, a small bowl, water, a spoon, a stiff brush, warm water, a clean cloth, and gloves. Mix ½ cup baking soda with a few tablespoons of water until it forms a thick paste, adding more baking soda if it feels runny. Apply the paste directly to moldy grout or tile and let it sit for 10 to 15 minutes. Scrub gently with a stiff brush, focusing on grout lines, corners, and shower floors. Rinse well and dry the surface with a clean cloth. Best For: surface mold mixed with soap scum, grout lines, shower floors, and mild odor issues. Quick Cleaner Comparison: What Should You Reach For? Cleaner Best For Avoid Vinegar Grout, tile corners, routine upkeep Natural stone (marble, limestone, travertine) Hydrogen peroxide Stains, disinfecting, caulk Colored fabrics that may fade, so spot-test first Baking soda paste Soap-scum buildup, mild odor, gentle scrubbing Very delicate or scratch-prone surfaces If the mold is light, the baking soda paste is usually enough on its own. Grout and corners tend to respond best to vinegar, and stains call for hydrogen peroxide. That is really the whole playbook for how to remove mold from shower surfaces without overthinking it. Stick to one cleaner per session, and always finish by drying the shower fully. Why Mold Keeps Growing Back in Your Shower Moisture that never fully dries: Steam settles on tile, grout, glass, and caulk after every shower, and mold thrives on surfaces that stay damp. A bathroom fan that is not pulling its weight: A weak exhaust fan or a closed door traps humid air inside, which gives mold exactly the environment it wants. Soap scum and body oils: Mold feeds on this residue the same way it would on any organic buildup, and grout lines collect it fastest. Cracked grout or failing caulk: Water seeps behind damaged grout or caulk and grows mold you cannot see or reach with surface cleaning alone. Installing moisture-resistant beadboard panels along the lower wall is one way to keep water from soaking into the wall itself. Your Shower’s New Maintenance Schedule Mold is genuinely bad at surviving a routine, the same way a great skincare habit beats an occasional splurge product, and a little upkeep after every shower beats one big scrub-down a month. Schedule Quick Tasks After every shower Squeegee glass and tile, run the fan for 20–30 minutes, leave the curtain or door cracked open Weekly Spot-clean grout, wash the bath mat, wipe down corners and caulk lines Monthly Deep-clean grout, check caulk for gaps, clean the exhaust fan cover Yearly Reseal grout if it is due, replace failing caulk, check for any hidden leaks, and consider repainting shower tile if it still looks dull once everything else is clean A dehumidifier earns its keep in a bathroom with weak airflow, and fixing a slow drip around a faucet or showerhead the day you notice it saves you a much bigger cleanup later. If you are rethinking the whole space, better airflow often starts with smarter small bathroom layouts that leave room for the fan and door to actually do their job. When a Mold Problem Needs a Professional, Not a Sponge Call in a mold remediation professional when the mold covers a large area, keeps coming back after repeated cleaning, or the bathroom has a musty smell you cannot trace to a visible spot. These are signs of trouble beyond the surface: Soft or bubbling drywall Tiles that have come loose Staining spreading onto nearby walls or the ceiling Flooring that stays damp with no obvious source A professional can check for damage behind the walls, subfloor issues, plumbing leaks, and failed grout or caulk, and it is worth calling one quickly if anyone in the home has a strong reaction to mold exposure. Frequently Asked Questions Can I shower right after cleaning with vinegar or hydrogen peroxide? Rinse the treated area well and let the bathroom air out for a bit first, especially if fumes are still noticeable. A quick rinse of the cleaner is not the same as a full shower with steam, which can reactivate lingering residue. Will mold come back if I only clean the caulk and skip the grout? Likely, yes. Caulk and grout usually mold at the same time because they sit in the same damp zone, so treating one and ignoring the other just gives the mold a place to regroup. Does a magic eraser work on shower mold? It can lift light surface staining on tile and glass, but it will not reach mold sitting inside porous grout the way a vinegar or peroxide soak does, and the abrasive texture can dull glossy tile over time. Can mold permanently stain grout even after it’s removed? Yes, mold can leave a shadow behind after it is dead and gone, especially on light-colored grout. At that point, a grout stain remover or a fresh coat of grout sealant is a better fix than more scrubbing. Why does my shower smell musty even though I don’t see any mold? The mold is often hiding somewhere you cannot see, like behind a caulk line, under a loose tile, or inside a slow leak near the drain. A lingering smell with no visible source is one of the clearest signs it is time to call a professional. To Sum Up Shower mold is easier to handle when you treat the cause, not just the spots you can see. I’d start with safe cleaning, then make drying and airflow part of your routine. Vinegar can help with grout, hydrogen peroxide can lift darker stains, and baking soda paste can scrub away buildup without harsh fumes. You also want to watch cracked caulk, damp towels, weak fans, and musty smells because they can point to a bigger moisture issue. Learning how to remove mold from shower areas helps you clean smarter and keep the bathroom fresher between deep cleans. Try these tips in your own shower, then share what worked for you in the comments.
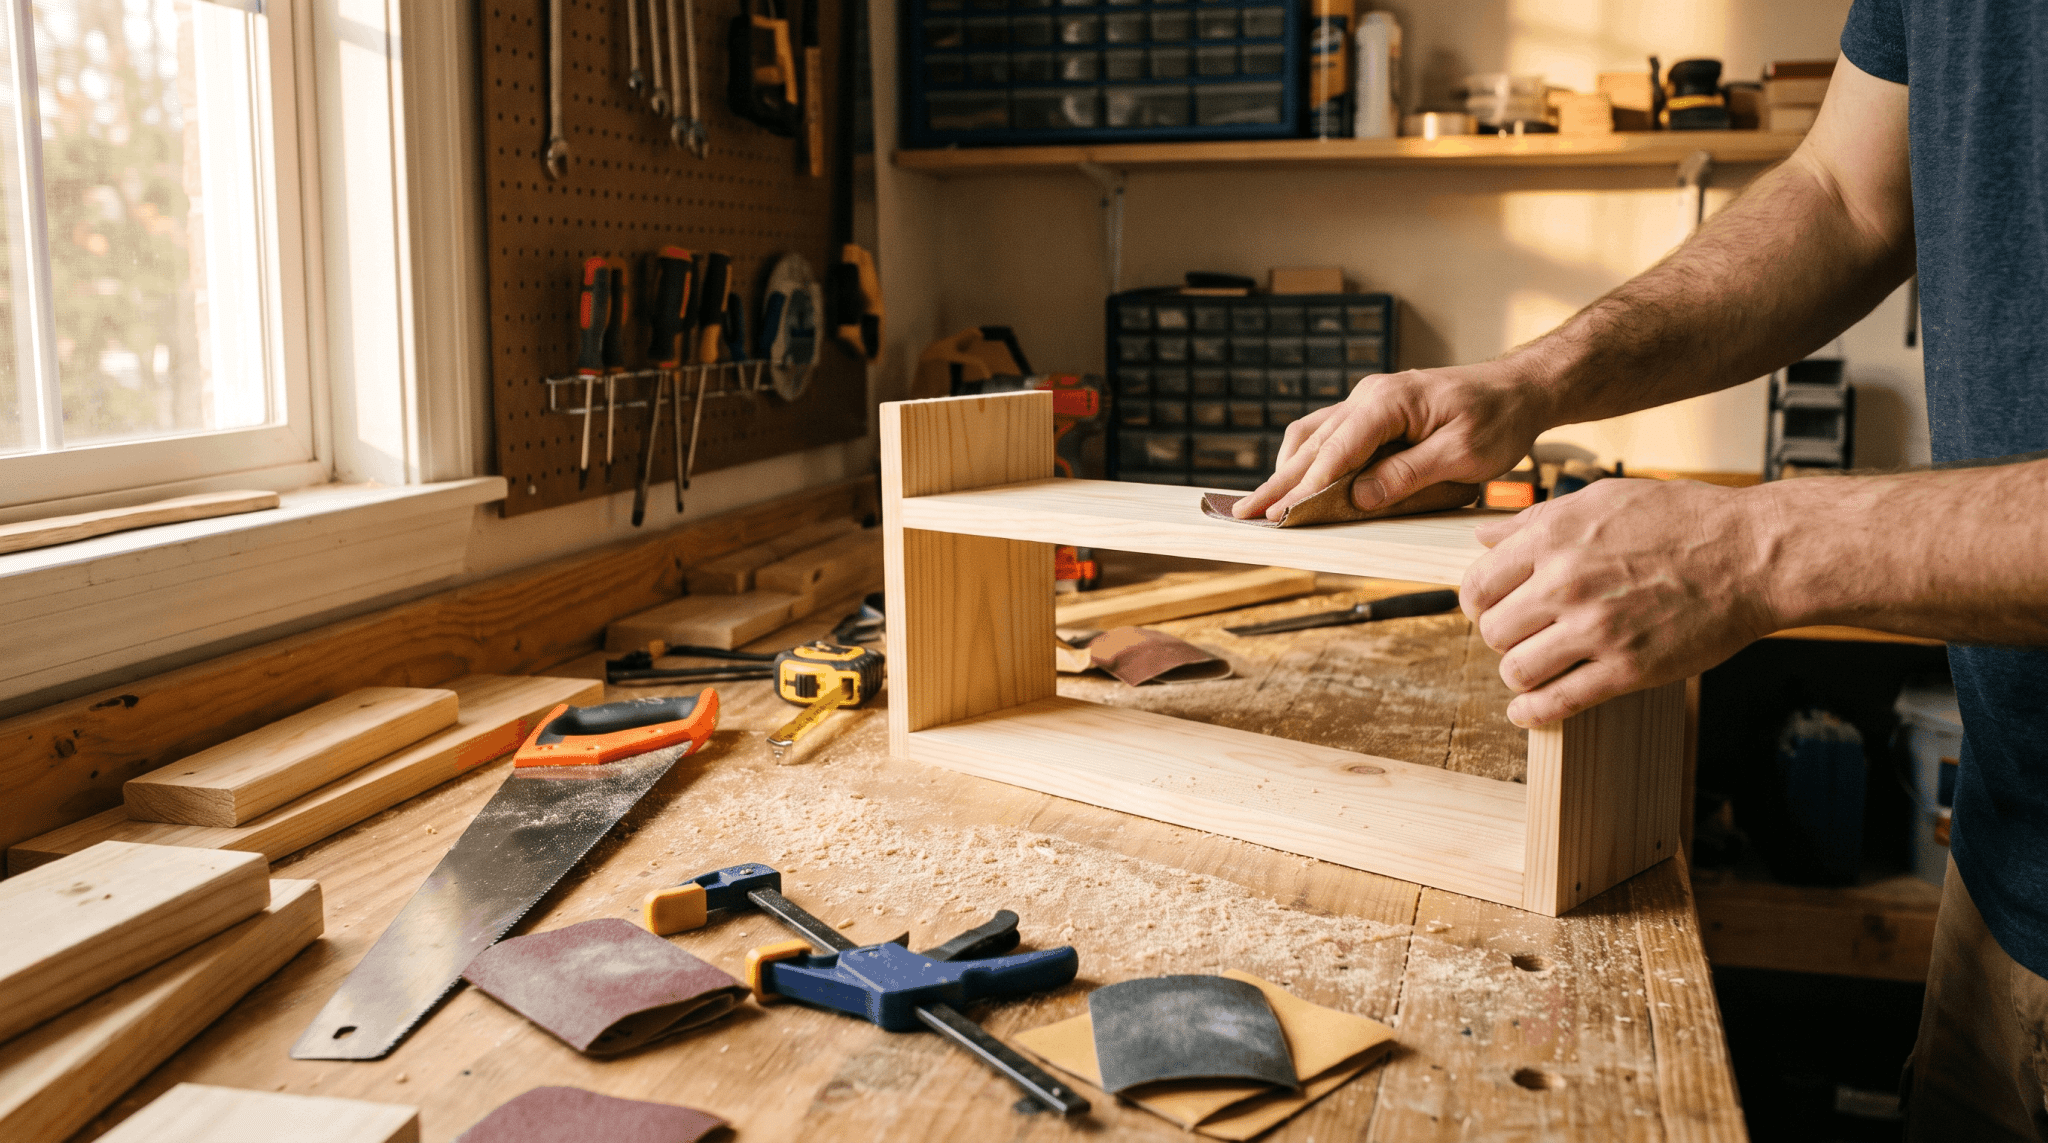
You want to make something with your own hands. But the saws, the jargon, and the fear of wasting wood can make starting feel harder than it should. Maybe you’ve watched a few woodworking videos and closed the tab feeling more confused than before. You do not need a garage full of equipment or years of experience to begin. Plenty of easy woodworking projects need only a few basic tools, affordable wood, and an afternoon of your time. The trick is starting small. A simple build teaches you how to measure, cut, sand, and finish without draining your budget or patience. Each completed piece gives you the confidence to try something slightly bigger. Easy beginner builds, the tools you need, the best wood choices, project costs, skill levels, and safety habits help you create useful pieces from your first cut. Tools You Need for Woodworking Projects You need fewer tools than you might expect to start woodworking. A small starter kit can handle many beginner projects. Start With These Hand Tools 1. Tape measure and pencil 2. Square 3. Hand saw 4. Sandpaper 5. Wood glue and clamps Add These Power Tools Later 6. Cordless drill 7. Jigsaw 8. Circular saw You do not need every tool immediately. Start with tools that match your first few projects. A drill will usually get more use than a specialized tool sitting unused on a shelf. A quick word about budget tools: inexpensive equipment can work well when you are starting. Spend more on tools you use regularly and avoid buying accessories before you know you need them. 11 Easy Woodworking Projects for Beginners Below are twelve simple builds, sorted from quickest to slightly more involved. Each one teaches a skill you can reuse in future woodworking projects. 1. Wooden Cutting Board A cutting board is a simple beginner project that teaches measuring, cutting, and sanding. It takes around 2–3 hours to complete and only requires a hardwood board, smooth edges, and a food-safe mineral oil finish. Materials: Hardwood board, sandpaper, mineral oilTools: Saw, clamps, sanding tools Maple or walnut works well for durability. Avoid rushing the sanding process, as rough edges can affect the final result. 2. Floating Shelf A floating shelf is a practical beginner project that teaches measuring, leveling, and drilling. It takes around 3–4 hours to complete and uses a wooden board with a mounting bracket for a clean, floating look. Materials: Wooden board, mounting bracket, screws, wood finishTools: Drill, level, measuring tape Always locate wall studs before installation to ensure the shelf stays secure. Avoid mounting directly into drywall, as it may not support much weight. 3. Simple Picture Frame A picture frame is a simple beginner project that teaches accurate measuring, cutting, and joining of small pieces of wood. It takes around 2 hours to complete and can be made with four wood strips, glue, and a finish of your choice. Materials: Wood strips, glue, backing board, finishTools: Saw, clamps, sandpaper Reclaimed fence boards or leftover wood pieces can create a unique look while keeping costs low. Start with straight corners before trying angled cuts, as uneven measurements can make the frame difficult to align. 4. Birdhouse A birdhouse is a simple beginner project that teaches basic cutting, assembly, and outdoor woodworking skills. It takes around 2–3 hours to complete and uses small wood panels, fasteners, and an outdoor-safe finish. Materials: Wood boards, nails or screws, outdoor-safe finishTools: Saw, drill, hammer You can paint it or leave the wood natural for a rustic look. Check the correct entry hole size for local bird species before building, as the wrong opening size may make it unsuitable for birds. 5. Key or Mail Holder A wooden key or mail holder is a quick beginner project that teaches basic cutting, drilling, and assembly. It takes around 1–2 hours to complete and can be made with a small wood board, hooks, and screws. Materials: Small wood board, hooks, screwsTools: Hand saw, drill, sandpaper It is a useful entryway organizer and a practical handmade gift. Keep the design simple at first, as adding too many features can make this small project harder than necessary. 6. Wooden Planter Box A wooden planter box is a beginner-friendly project that teaches basic construction and assembly skills. It takes around 3–5 hours to complete and uses simple materials such as wooden boards, screws, and an outdoor-safe finish. Materials: Wood boards, screws, waterproof finishTools: Saw, drill, measuring tape It works well for balconies, patios, and small gardens. Add drainage holes at the bottom to prevent water buildup, as skipping them can damage the planter and affect plant health. 7. Phone Charging Dock A phone charging dock is a small beginner project that teaches precision measuring and simple assembly. It takes around 1–2 hours to complete and is a great way to use leftover wood pieces. Materials: Small wood piece, screws or glue, finishTools: Saw, drill, sandpaper You can customize it with slots for charging cables, headphones, or accessories. Measure the phone slot carefully, as an incorrect size can make the finished dock difficult to use. 8. Wall Tool Organizer A wooden tool organizer is a practical beginner project that teaches layout planning, drilling, and workspace organization. It takes around 3–4 hours to complete and uses a plywood backing board with hooks or storage slots. Materials: Plywood sheet, hooks, screwsTools: Drill, saw, measuring tape Plan the layout before cutting to create a cleaner design and avoid wasted material. Measure your tools first, as poorly sized storage spaces can make the organizer difficult to use. 9. Wine Rack A small wooden wine rack is a beginner project that teaches functional storage design and accurate assembly. It takes around 3–5 hours to complete and can be built as a countertop or wall-mounted rack. Materials: Wood boards, glue, screws, finishTools: Saw, drill, clamps You can customize it with a stain, paint, or accessories like a bottle-opener holder. Measure the spacing carefully, as incorrect sections can prevent bottles from sitting securely. 10. Pallet Wall Shelf A pallet shelf is an affordable beginner project that teaches basic construction while reusing reclaimed wood. It takes around 2–4 hours to complete and uses pallet boards, screws, and a protective finish. Materials: Untreated pallet wood, screws, finishTools: Saw, hammer, sandpaper Clean and sand the wood carefully to remove rough areas and splinters. Always check that pallets are untreated and in good condition, as unsafe wood can create potential problems. 11. Low Side Table A low side table is a beginner-to-intermediate project that builds on skills like assembling surfaces, attaching legs, and applying finishes. It takes around 5–8 hours to complete and uses wood boards, screws, glue, and a protective finish. Materials: Wood boards, screws, glue, finishTools: Saw, drill, clamps Take extra care when cutting and attaching the legs, as equal lengths help prevent wobbling. Check that all pieces fit properly before assembly to avoid alignment issues. Simple Steps to Complete Any Beginner Project The easiest woodworking projects follow the same basic process. Once you understand this workflow, you can apply it to almost any beginner build. Measure and Mark: Accurate measurements are the foundation of every woodworking project. Mark your cutting lines clearly and check your measurements before making any cuts. Cut Your Pieces: Take your time when cutting wood. A slower, controlled cut is usually cleaner than rushing through the process. Dry-Fit Before Assembly: Place your pieces together before adding glue or screws. Dry-fitting helps you find gaps, incorrect measurements, or alignment problems. Glue and Clamp: Apply wood glue evenly, then secure the pieces with clamps as they dry. Do not rush this stage. Strong joints need enough time for the glue to set properly. Sand Smooth: Start with rough sandpaper to remove uneven areas, then move toward finer grits for a smoother surface. Always sand with the direction of the wood grain to create a cleaner finish. Add a Finish: The final finish protects the wood and improves its appearance. Use wood stain for deeper color, paint for customization, mineral oil for food-safe items, or protective coatings for outdoor projects. Safety Tips Every Beginner Should Follow Good habits protect your hands, eyes, and lungs from day one. Wear Eye Protection: Wood chips and small particles can move unexpectedly during cutting and sanding. Safety glasses help protect your eyes from injuries. Use a Dust Mask: Fine wood dust created during sanding can irritate your lungs. A dust mask helps reduce exposure. Clamp Your Work: A secured board is easier and safer to cut. Clamps prevent movement and help create cleaner results. Cut Carefully: Keep your hands away from blade paths and focus on controlled movements rather than speed. Keep Your Workspace Clean: A tidy work area reduces trips, slips, and misplaced tools. Disconnect Power Tools When Changing Parts: Unplug tools before changing blades, bits, or attachments to prevent accidental starts. For additional woodworking safety guidance, the Occupational Safety and Health Administration (OSHA) provides recommendations for safe equipment use and protective practices. Frequently Asked Questions What is the easiest woodworking project for a total beginner? A cutting board, a simple shelf, or a picture frame is a good first project because each teaches important skills like measuring, cutting, sanding, and finishing. Can I do woodworking without power tools? Yes. Many beginner projects can be completed with basic hand tools like a saw, sandpaper, clamps, measuring tape, and wood glue. What wood should a beginner start with? Pine is usually the easiest option because it is affordable, easy to cut, and available at most home improvement stores. Poplar is another good choice. How much does it cost to start woodworking? You can begin with basic hand tools and inexpensive materials for less than $50. You can add power tools later as your projects become more advanced. How long do easy woodworking projects take? Small projects often take a few hours, while larger beginner furniture builds may require an entire weekend. Final Thoughts on Starting Easy Woodworking Projects Easy woodworking projects are a practical way to turn a simple interest into a useful skill. You do not need a large workshop, expensive equipment, or years of experience to make something worthwhile. A few basic tools, affordable wood, and patience are enough to create your first projects. Start with something simple like a cutting board, shelf, or organizer. Each finished piece teaches better measuring, cleaner cuts, and stronger building techniques. Mistakes are part of improving. Every project gives you a chance to learn something new and build more confidence for the next one. Choose a project that fits your current skill level, gather your materials, and start creating one piece at a time.
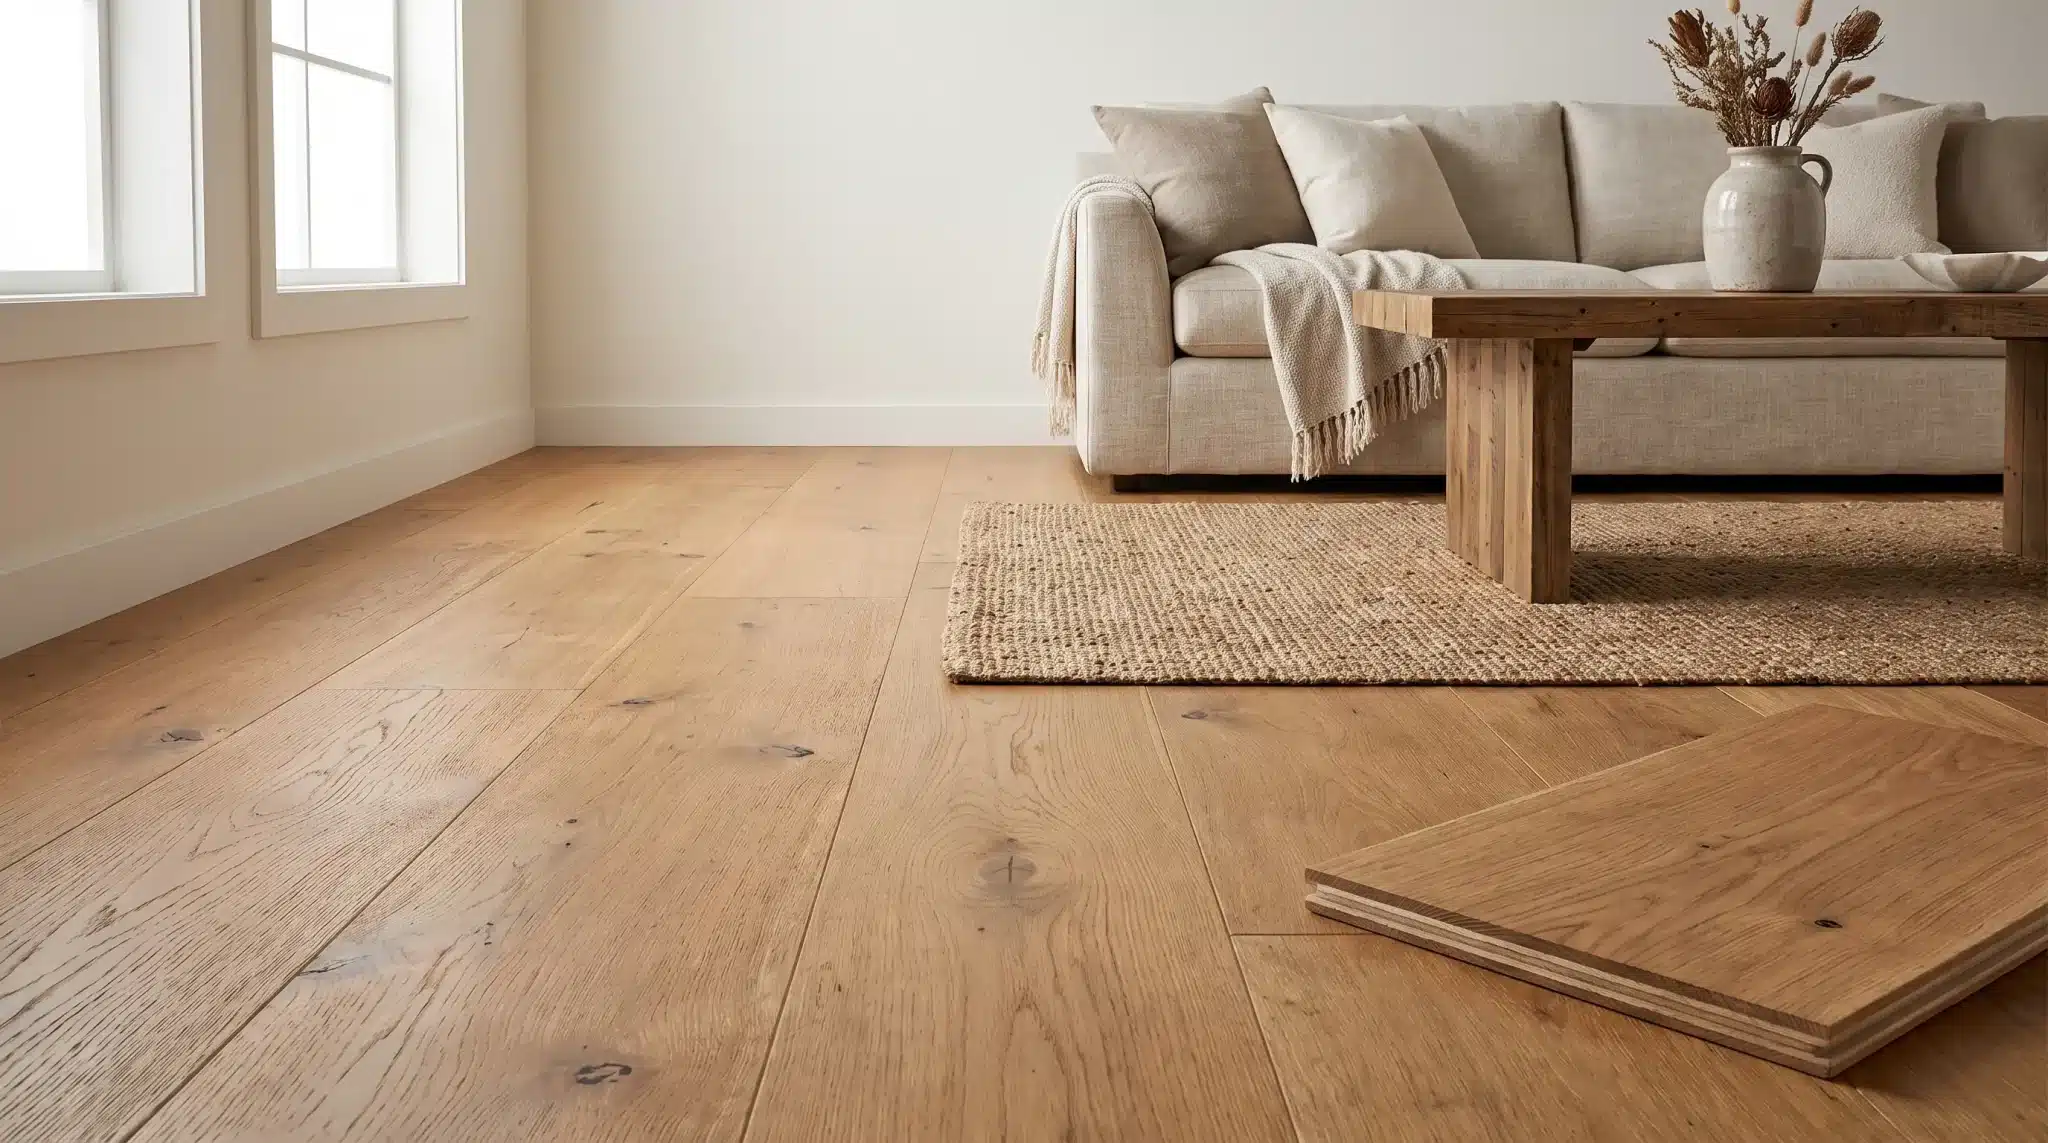
Engineered hardwood is a real wood flooring product made with a thin layer of natural hardwood on top and multiple layers of plywood or composite wood underneath. This layered construction gives it the authentic appearance of solid hardwood while making it more stable against moisture, humidity changes, and temperature fluctuations. I was checking out plank samples at a flooring showroom a few weeks back. One plank looked just like solid hardwood from the top. Then I turned it on its side. The top layer was real wood. But underneath sat several thin layers, glued and pressed together in a cross pattern. After twenty years of working with wood, that was new to me. I asked myself why anyone would build a floor this way instead of cutting one solid piece. Digging into it gave me an answer that made sense. Solid hardwood moves. Humidity and temperature swings make it expand and contract more than most homeowners expect. Engineered hardwood handles those shifts far better. Here, I will walk you through what engineered hardwood is, how it gets made, where it works best, and what to check before you bring it into your own home. What Is Engineered Hardwood? Engineered hardwood is a real wood flooring product. It has a thin layer of genuine hardwood on top and multiple layers of plywood or high-density fiberboard underneath. The top layer is what you see and walk on. It comes from real wood species like oak, maple, walnut, or hickory. This layer gives the floor the same grain patterns and natural look as solid hardwood. The core layers sit below the surface. They are built from sheets of wood placed in opposite directions. This cross-grain structure keeps the floor stable when temperatures and humidity levels shift. Solid hardwood is one piece of wood from top to bottom. Engineered hardwood uses a layered construction to address one of solid wood’s biggest weaknesses: moisture-induced movement. Feature Engineered Hardwood Material Real hardwood veneer over a layered core Construction Multiple cross-grain wood layers bonded together Top Layer Natural wood wear layer Main Benefit Greater resistance to expansion and contraction Best Locations Living rooms, kitchens, basements, concrete slabs, and radiant heat areas Appearance Looks like traditional hardwood flooring Refinishing Depends on the thickness of the hardwood wear layer How Is Engineered Hardwood Made? Engineered hardwood comes together in layers. Each layer has its own job. Once you see how they stack up, the reasons behind the floor’s performance start to make sense. 1. The Hardwood Wear Layer The top layer is a thin slice of real wood. Common species include: Oak Maple Walnut Hickory This layer shapes everything you see. Grain, color, and texture all come from this slice of natural wood. It also decides how many times you can refinish the floor: Thicker veneers allow multiple sanding cycles over the years Thinner veneers may only handle a light recoat 2. Core Layers Build Stability Below the wear layer sits the core. It is built from several sheets of wood or plywood. Each sheet runs its grain in a different direction than the one above it. This cross-grain construction resists the natural push and pull that comes with moisture changes. Solid hardwood shifts with the seasons. It expands in humid months and contracts in dry ones. The engineered core cuts that movement by a wide margin. 3. Factory Finish Protects the Surface Most engineered hardwood floors arrive already finished. Manufacturers apply the coating before the floor ever leaves the factory, usually one of two types: Aluminum oxide coatings UV-cured finishes These factory finishes tend to outlast what most contractors can apply on-site. They stand up better against scratches, scuffs, and daily wear. In my experience, the wear layer thickness is the first thing worth checking. Pair a thick wear layer with a strong factory finish, and you get a floor built to last. How Engineered Hardwood Differs From Solid Wood? Both types use real wood on the surface. But their construction changes where you can install them and how long they last. Feature Engineered Hardwood Solid Hardwood Construction Hardwood veneer over a layered core Single piece of wood Moisture Stability More stable More affected by humidity Installation Areas Above, on, and some below-grade Mostly above-grade Installation Methods Nail, glue, or float Usually nail or staple Refinishing Depends on wear layer thickness Multiple refinishing cycles Cost Often more affordable Usually higher Here’s what these differences mean in practice: Moisture resistance: The layered core lets engineered hardwood handle humidity swings without warping as much as solid wood. Installation flexibility: You can install engineered hardwood below-grade, something solid hardwood cannot handle well. Lifespan: Solid hardwood often outlasts engineered wood since you can sand and refinish it more times. Cost: Engineered hardwood usually costs less upfront, making it a budget-friendly pick for many homes. Both types use real wood on the surface, but their construction changes where you can install them, how they perform over time, and the overall look they create in a room. Beyond choosing between engineered and solid wood, factors like wood tone also affect the final appearance. Light hardwood flooring, for example, can help make smaller rooms feel more open and pair well with a variety of interior styles. Where Can You Install Engineered Hardwood? Engineered hardwood works in more rooms than solid hardwood. Its stable core allows installation in spots where solid wood would be a poor fit. 1. Living Rooms and Bedrooms Living rooms and bedrooms are the easiest places to install engineered hardwood. Foot traffic is moderate, and moisture levels stay low in these areas. The wide range of wood species and plank sizes gives you real design flexibility. You can find an option that fits nearly any room style or color scheme. 2. Kitchens and Dining Areas Kitchens pose a greater moisture risk than other rooms. Engineered hardwood can work in a kitchen with the right care habits. Wipe up spills as soon as they happen. Do not let water sit on the surface. A mat in front of the sink helps protect the floor in that high-use zone. The floor handles normal kitchen activity well when maintained properly. Standing water is the problem to prevent. 3. Basements and Concrete Floors This is one of the biggest advantages engineered hardwood has over solid wood. You can install it directly over a concrete slab. Basements tend to hold more moisture than upper floors. Solid hardwood is not a good fit in that environment. Engineered hardwood tolerates those conditions with proper subfloor preparation. Test the concrete for moisture before installing. A moisture barrier may be needed depending on the results. 4. Over Radiant Heating Systems Radiant heating systems warm floors from below. That steady heat can dry out and damage solid wood over time. Engineered hardwood is more stable under those conditions. Check the manufacturer’s specifications before installing over radiant heat. Not every product is rated for use with it. How Much Does Engineered Hardwood Cost? Materials alone run $3 to $16 per square foot. The quality tier you choose is the biggest driver of that range. Quality Tier Material Cost Per Sq Ft What You Get Budget $2–$4 Common species like oak or hickory, with a thinner wear layer, suit guest rooms or rentals Mid-Range $4–$7 Thicker wear layer, wider species, and width options can often be refinished once High-End $7–$16+ Exotic species, thick veneer, premium factory finish, best for high-traffic rooms Factors Affecting the Cost The price of engineered hardwood varies based on several factors. Understanding what drives cost helps you compare products more fairly. Cost Factor Why It Changes Price Wood Species Rare or exotic woods cost more than common species Wear Layer Thickness More material adds to durability and price Core Construction Multi-ply plywood cores add stability and cost Plank Width Wider planks typically cost more Finish Quality Premium coatings increase protection and price Installation Method Labor costs vary by method The total project cost depends on room size, subfloor preparation needed, and whether you hire a professional installer. Getting quotes from multiple flooring contractors gives you a realistic picture of what to expect. The same applies when comparing flooring options like laminate, where factors such as how much it costs to install laminate flooring and the laminate flooring labor cost per square foot can influence the total project expense. How to Choose Quality Engineered Hardwood? Choosing well means looking past the surface finish and the showroom display. Here is what to pay attention to. 1. Check the Wear Layer Thickness The wear layer is the most important factor when comparing products. It determines both the floor’s longevity and its refinishing potential. Floors with a wear layer under 2mm are on the thinner end. They suit lower-traffic areas where refinishing is less of a concern. Floors with 4mm or more give you a longer lifespan and more refinishing options over time. 2. Look at the Core Construction A multi-ply plywood core is generally more stable than a high-density fiberboard core. Plywood holds fasteners better and performs well in areas with some moisture variation. Ask the retailer or manufacturer what the core is made from. The answer tells you a great deal about how the floor will behave long-term. 3. Consider the Room Conditions Think about where the floor is going before you buy. A basement needs different specifications than a second-floor bedroom. Moisture levels, foot traffic, and sun exposure all affect which product is the right fit. A floor that works well in one room may not be suitable for another. 4. Match the Finish With Your Lifestyle Matte finishes hide everyday scratches better than glossy ones. Wire-brushed or hand-scraped surfaces are forgiving in homes with children and pets. High-gloss finishes show fingerprints and light scratches more easily. They work well in low-traffic spaces where appearance is the main priority. Frequently Asked Questions What Is the Best Cleaner to Use on Engineered Hardwood Floors? The best cleaner for engineered hardwood floors is a pH-neutral hardwood floor cleaner designed for finished wood surfaces. Avoid harsh chemicals and steam cleaners, as they can damage the protective finish. Can You Mop an Engineered Floor? Yes, you can mop engineered hardwood floors, but use a damp microfiber mop rather than a wet one. Excess water seeps into the seams and affects the wood layers. Dry the floor quickly after cleaning. How Long Does Engineered Hardwood Last? High-quality engineered hardwood can last 20 to 50 years or more with proper maintenance. The wear layer thickness, finish quality, installation method, and foot traffic all play a role. Is Engineered Hardwood Real Wood? Yes, engineered hardwood has a real hardwood top layer bonded over a stable multi-layer core. The visible surface is genuine wood, which gives it the same natural grain and appearance as traditional hardwood flooring. Can Engineered Hardwood Be Refinished? Engineered hardwood can be refinished if it has a thick enough hardwood wear layer. Floors with thinner veneers may only support light refinishing or recoating rather than complete sanding. Final Thought Engineered hardwood is a real wood floor. Its layered construction makes it more stable than solid hardwood. Rooms with changing humidity, concrete subfloors, or radiant heat are where it proves its value. The key to choosing the right product is looking past the surface. Wear layer thickness, core construction, and finish quality all affect how the floor holds up over the years. The answer comes down to your room conditions and your long-term plans. It gives you the look of traditional hardwood with better stability across more locations in your home. Take time to compare products before buying. The floor you choose will be part of your home for a long time.
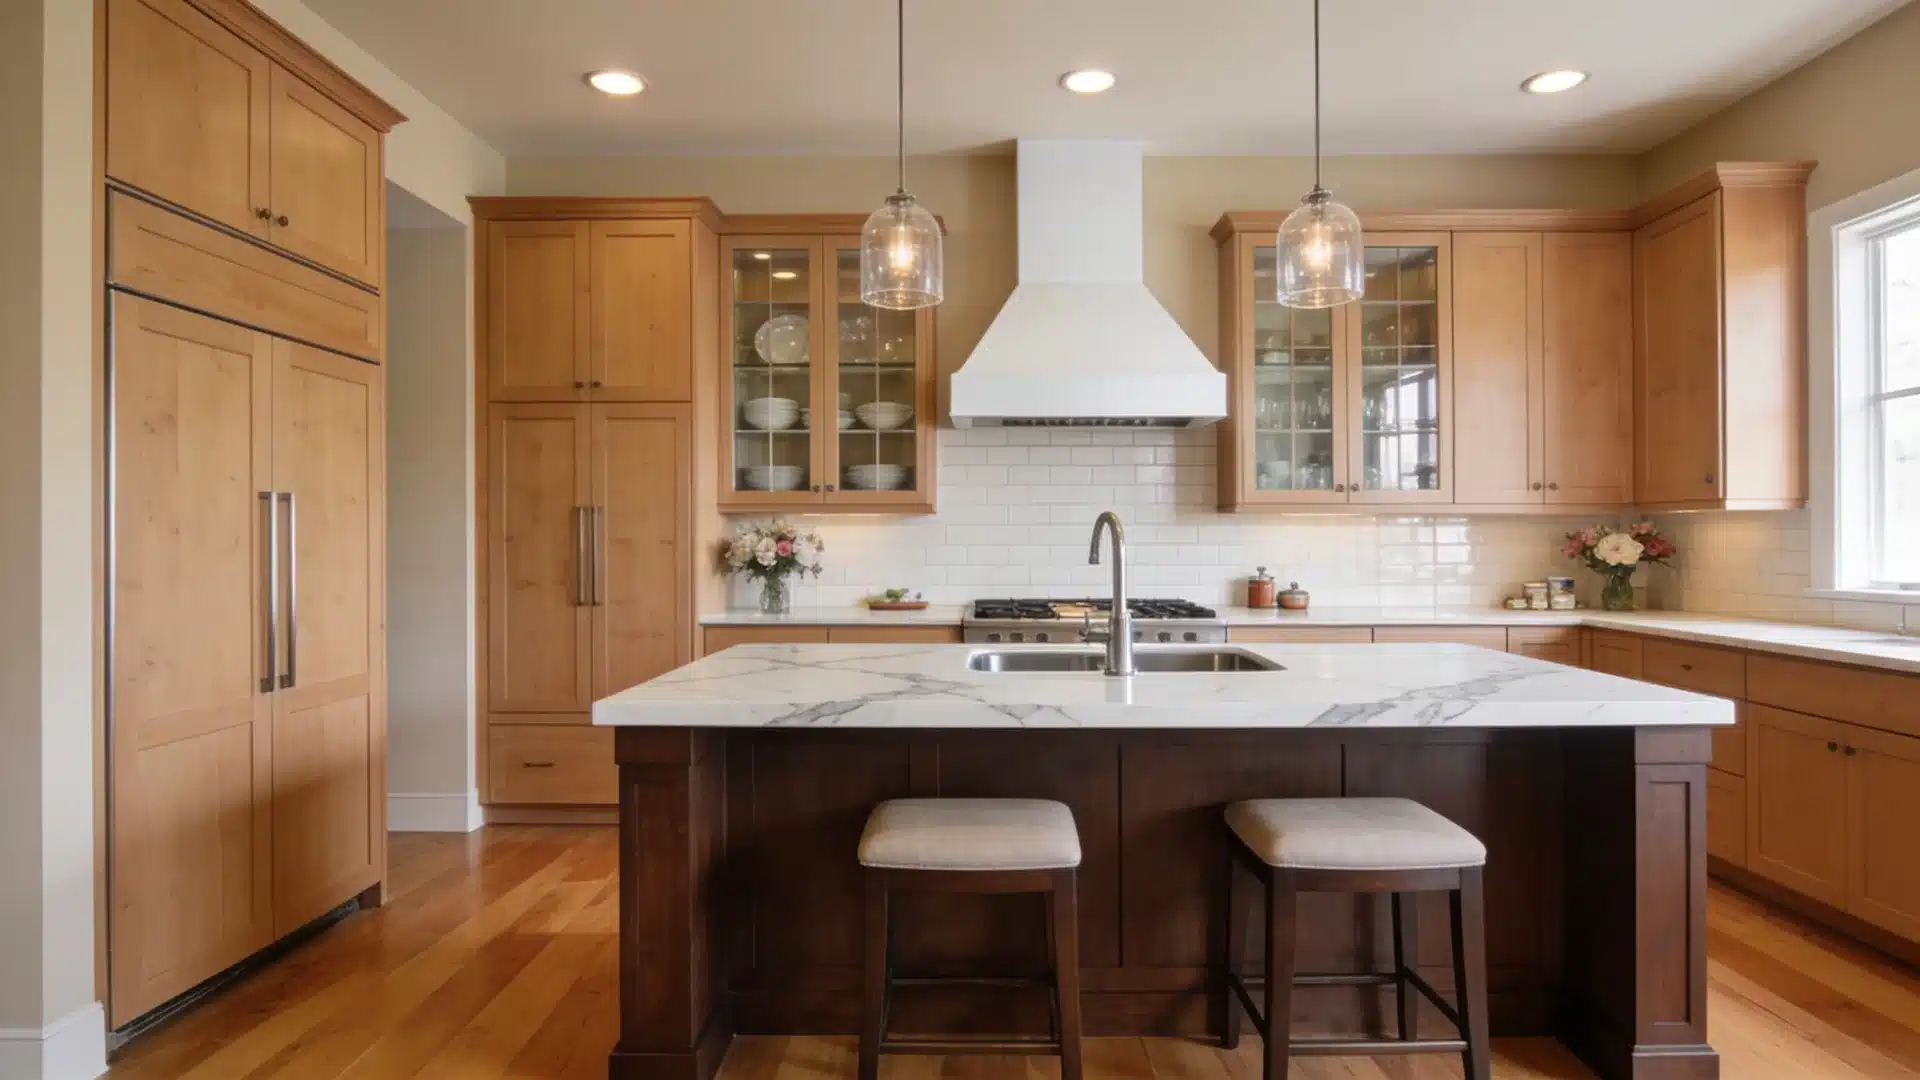
Kitchen remodel prices can feel hard to pin down, especially when every quote seems to tell a different story. If you are asking how much a 10×10 kitchen remodel should cost, the answer depends on the level of finishes, layout changes, and labor involved in your project. I know that number can still feel broad, but it becomes easier once the budget is broken into cabinets, countertops, labor, flooring, appliances, and surprise costs. A 10×10 kitchen may be compact, yet small choices can quickly change the final price. The goal here is to help you read estimates with more confidence and spot where the money really goes before the project begins. Cost Note: Figures in this article are estimates based on national averages and current 2026 tariff data. Actual costs vary by region, contractor, and material sourcing. Always get at least three quotes before committing to any project above $1,000. What a 10×10 Kitchen Really Means A 10×10 kitchen is about 10 feet by 10 feet, or roughly 100 square feet. In remodeling, it’s less a real room shape and more a shared measuring stick. Contractors and cabinet brands use it to estimate cabinet packages, material needs, and labor because it holds still long enough to compare quotes fairly. A typical 10×10 estimate assumes about 20 linear feet of combined cabinet, base, and wall space, so your actual number will vary depending on whether your kitchen needs more or less. A 10×10 kitchen remodel usually includes: Cabinets and hardware Countertops Sink and faucet Appliances Flooring Backsplash Lighting Labor Demo and cleanup That’s the skeleton. What determines whether your total lands near $15,000 or near $55,000 is everything layered on top of it. How Much Should a 10×10 Kitchen Remodel Cost Cabinets, labor, countertops, appliances, and finish details are what actually move the number on your quote. Think of this the way you’d think of a beauty routine: a few items do most of the heavy lifting, and the rest is where you either save or splurge. 1. Cabinets and Hardware Cabinets are almost always the highest single cost in a kitchen remodel, the same way a great coat anchors an outfit and everything else gets built around it. Your price depends on whether you keep the existing boxes, buy stock cabinets, go semi-custom, or go fully custom. If clean lines and hidden hardware appeal to you, leaning into a minimalist cabinet style can actually narrow down this decision rather than complicate it. Hardware matters too. Pulls, knobs, soft-close hinges, and drawer systems add up fast once you start picking finishes. Cabinet Type Estimated Cost Refacing or refinishing $400 to $1,800 Stock cabinets $2,000 to $8,000 Semi-custom cabinets $4,000 to $14,000 Custom cabinets $10,000 to $30,000+ If the boxes underneath are still solid, refacing is the equivalent of a good tailor instead of a whole new wardrobe. If the layout genuinely doesn’t work for how you cook, the replacement earns its price. 2. Countertops Countertop cost depends on material, edge profile choice, thickness, and square footage. A 10×10 kitchen doesn’t need much counter space, but material choice still swings the budget hard. Countertop Material Estimated Cost Laminate $1,000 to $2,500 Butcher block $2,000 to $5,000 Granite or quartz $2,500 to $5,000 Marble, quartzite, or porcelain $3,500 to $7,500+ Quartz and granite tend to be the sweet spot: durable, timeless, and not the thing that blows your budget the way a full marble slab can. If the look still calls to you, a faux marble finish gets you close for a fraction of the price. 3. Appliances A full appliance package (fridge, range, dishwasher, microwave, hood) can eat a large share of the budget fast, especially if you’re replacing everything at once. Appliance Package Estimated Cost Basic package $3,000 to $5,000 Mid-range package $5,000 to $10,000 Premium package $10,000 to $15,000+ Before you buy, confirm whether delivery, installation, haul-away, and hookups are included in the sticker price. That’s usually where the “wait, why is this $400 more” moment happens. 4. Flooring, Backsplash, Lighting, and Fixtures These feel like the accessories of the kitchen, small on paper, but they’re what makes the whole thing look finished instead of half-done. A tile backsplash or a better faucet does for a kitchen what the right lip color does for a whole face: it pulls everything together. Finish Category Estimated Cost Flooring $400 to $2,500+ Backsplash $500 to $3,000+ Lighting and electrical fixtures $1,000 to $5,000 Sink and faucet $500 to $2,500+ This is a good place to control spending without the kitchen feeling unfinished. Pick practical finishes first, then spend more only where the upgrade earns its keep daily. Main Factors That Change the Final Cost Two kitchens with identical square footage can land on very different totals, because what’s happening behind the walls, the material quality, and the local labor market all pull in different directions. 1. Layout Changes Keeping the same layout is the single easiest lever for controlling cost. When the sink, stove, fridge, and dishwasher stay in place, the project requires less plumbing, electrical, and structural work. Move a sink, shift a gas line, or open the kitchen into another room, and you’re bringing in more trades, more labor hours, and often permits. If the layout opens up enough to fit an island, getting the counter height right matters just as much as the square footage. If your layout already works, better storage and finishes usually beat a full rebuild. 2. Material Quality Material choices can quickly turn a remodel from budget-friendly to expensive. Stock cabinets, laminate counters, basic tile, and standard fixtures keep costs down while still looking fresh. Semi-custom cabinets, quartz counters, and better lighting put you in the mid-range. Custom cabinets, premium stone, and designer fixtures raise the number much faster. Spend where it improves daily use, and keep it simple where the upgrade is mostly visual. 3. Labor and Location Labor costs depend heavily on where you live, how busy local contractors are, and how much repair work the kitchen needs beneath the surface. Labor Cost Estimated Range Demo and cleanup $500 to $2,500 Cabinet installation $1,500 to $4,000 Plumbing $1,000 to $4,000 Electrical $1,000 to $5,000 Flooring install $800 to $3,000 Backsplash install $500 to $2,500 Painting and finishing $500 to $2,000 Contractor fee 10% to 20% of the project Older homes tend to reveal their secrets mid-project. Wiring, plumbing, subfloors, and drywall can all need attention beyond the original quote, so budget for surprises the way you’d budget for the fact that your closet always has more clutter than you remember. If the project snowballs into a full-house repaint, the per-room numbers above shift considerably once hallways and bedrooms are added. How Tariffs Can Raise Your Remodel Quote Tariffs are one reason 2026 kitchen remodel prices read higher than older cost guides, and it’s not a small footnote anymore. If suppliers pass those import costs down, your quote rises even if you haven’t changed a single design decision. Cabinet and Wood Product Tariffs Cabinets matter most here because they’re often the biggest line item in a 10×10 kitchen budget. As of 2026, imported wooden kitchen cabinets are subject to a 25% tariff. A planned jump to 50% was delayed and is now scheduled for January 1, 2027, so the 25% rate is what’s actually in effect through the rest of this year. Country-specific rates can run even higher, with cabinets sourced from Vietnam facing a 46% rate, while imported softwood lumber carries a separate 10% tariff. A cabinet package that once cost $3,000 can end up closer to $4,000 once tariffs, freight, and supplier markups are added. Appliance, Steel, and Aluminum Tariffs Appliances can also be affected, since many refrigerators, dishwashers, ranges, and range hoods contain steel or aluminum. A 50% tariff on the steel and aluminum content of several household appliance categories took effect in mid-2025 and has remained a live cost factor since. The exact mechanics of how these duties get calculated have continued to shift through 2026, so ask your retailer directly whether current pricing already reflects the latest tariff structure before you assume a quote is locked in. Before buying, ask whether the appliances are imported, whether the price is locked in, and whether delivery, installation, and hookups are included. Domestic cabinets and appliances can reduce some of this exposure, but compare quality, warranty, and lead time too, not just the tariff line. Permit Costs You Should Plan For Permit and inspection costs depend on your city, the scope of the project, and whether plumbing, electrical, gas, or layout changes are involved. A cosmetic refresh may need almost nothing here. A full remodel usually needs several. Permit or Inspection Item Estimated Cost Basic building permit $100 to $500 Electrical permit $50 to $300 Plumbing permit $50 to $300 Gas line permit $100 to $500 Structural or layout-change permit $500 to $2,000+ Final inspection fees $50 to $250 Total common range $200 to $2,500+ These fees rarely show up in the first quote, so ask before work begins. They protect you later at resale, at inspection, and if you ever file an insurance claim tied to the kitchen. Smart Ways to Lower Your Remodel Cost You can save money without the kitchen feeling cheap. The trick is spending on what affects safety and daily use, and keeping the rest simple: Keep the existing layout to avoid extra plumbing, gas, and electrical work Reface cabinets if the boxes are strong and the layout still works Compare at least three quotes to catch pricing that’s high or unclear Ask for line-item pricing so every cost is easy to review Choose in-stock materials to avoid delays and rush fees Compare domestic and imported cabinets, since tariffs and shipping affect the total Avoid last-minute changes, since they add labor, materials, and delays DIY only the safe tasks, like painting or swapping hardware Don’t cut corners on electrical, plumbing, gas, permits, structural work, or complex cabinet installation. Those are the categories where a cheap fix now becomes an expensive fix later. Hidden Costs Homeowners Often Miss A kitchen remodel looks simple on paper until demo starts and the walls start talking back. Cost Why It Matters Delivery fees May apply to cabinets, counters, appliances, tile, and fixtures Waste disposal Demo debris may need a dumpster or haul-away service Demo surprises Old walls, floors, or cabinets can reveal hidden damage Mold or water damage Leaks can raise repair costs fast Old wiring May need updates for new outlets, lights, or appliances Uneven floors Can make cabinet and flooring installation harder Drywall or subfloor repair Often needed after demo or electrical and plumbing work Temporary kitchen setup A small fridge, microwave, or prep area may add cost 10% to 20% buffer Protects the project if hidden issues appear None of these are avoidable in every case, but they’re much easier to handle when you’ve already set money aside for them. Is a Kitchen Remodel Even Worth the Cost? Yes, when it improves both resale value and how you actually use the space day to day. Buyers notice the kitchen first, the same way people notice a well-organized closet the second they open it. Updated cabinets, counters, appliances, and lighting can make a home feel move-in ready. Minor and mid-range remodels tend to make more financial sense than luxury upgrades, since they cost less and appeal to a wider range of buyers. For daily use, better storage, safer wiring, and newer appliances make cooking and cleaning genuinely easier. Just don’t spend more than your home or neighborhood can support. Sample Budgets for a 10×10 Kitchen Remodel Budget Level What It Can Cover Best Fit $15,000 Same layout, painted or refaced cabinets, basic counters, simple fixtures, light DIY A light refresh when the layout still works $35,000 Stock or semi-custom cabinets, quartz or granite, new appliances, lighting, backsplash, sink, and faucet A mid-range remodel with better function and finishes $60,000+ Custom cabinets, premium counters, upgraded appliances, better storage, possible layout changes Long-term homes or higher-value properties Treat these as a starting point, then compare against a detailed contractor quote so you can see what’s included, what’s missing, and where the number might move. Questions to Ask Your Contractor A kitchen remodel quote can look clear at first, but small details may be missing. Before signing anything, ask direct questions so you know what the price covers and what may cost extra later. Ask these questions before signing so your quote is clear from the start: What is included in the price? Are the cabinets stock, semi-custom, or custom, and where are they made? Does the quote already account for current tariffs? Are delivery, installation, and permits included? How will hidden damage be priced if it turns up mid-project? What is the payment schedule, and what warranty is included? Frequently Asked Questions Does a 10×10 kitchen remodel cost more or less than a full kitchen renovation? A 10×10 remodel is a pricing benchmark, not a smaller project by default. Cost still depends on cabinet grade, materials, and whether the layout changes, not the label itself. What percentage of a 10×10 kitchen budget should go to cabinets? Cabinets typically take up 30% to 40% of the total budget in a 10×10 kitchen, more if you go custom. It’s usually the single largest line item on any quote. Can you write off home remodeling on your taxes? Most remodeling costs aren’t deductible right away for a personal home. Some energy upgrades may qualify for credits, and improvements can affect your cost basis when you sell. Ask a tax professional before claiming anything. What cabinet color is outdated right now? Cool gray, high-gloss white, and heavy espresso can read dated next to older counters. That doesn’t mean avoid them entirely; balanced color, clean hardware, and good lighting matter more than any single trend. Should I remodel now or wait for tariffs to change? Waiting for tariffs to drop is a gamble, since the scheduled 50% cabinet increase is only delayed, not canceled. If your kitchen already needs work, locking in a quote at the current 25% rate is usually the safer move. Final Takeaway A 10×10 kitchen may be small, but the budget can shift quickly once materials, labor, and layout choices come into play. I’d treat the first estimate as a starting point, not the final answer. You’ll get a clearer number when you separate the cost of cabinets, countertops, flooring, appliances, permits, and hidden repairs. Knowing how much a 10×10 kitchen remodel should cost helps you compare quotes, avoid weak budgets, and make smarter choices before work starts. The right plan can keep the project useful, clean, and easier to manage. Try the budgeting tips before getting quotes, and share your remodel questions or plans in the comments.
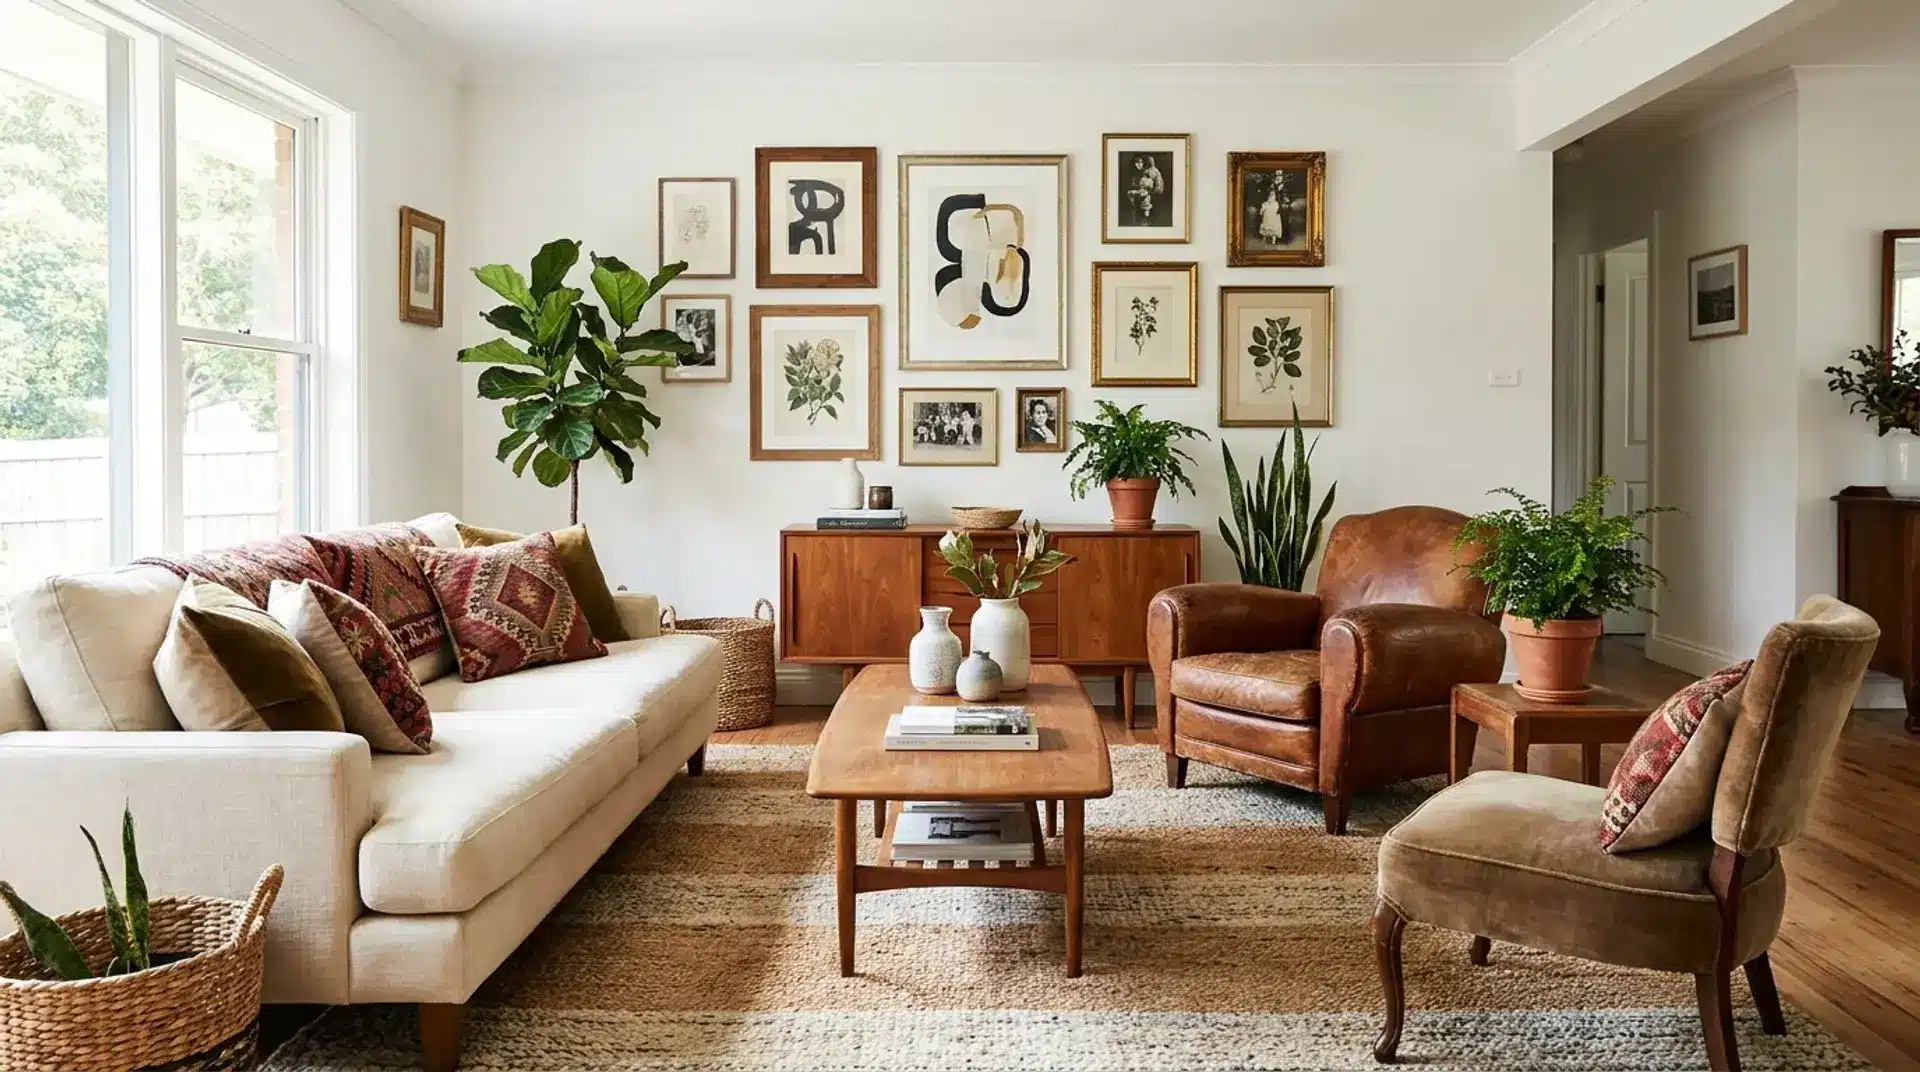
Eclectic interior design blends furniture, colors, textures, and influences from different styles and time periods to create a space that feels balanced, cohesive, and uniquely personal. Rather than following a single design trend, it combines carefully chosen elements that reflect your taste while maintaining harmony throughout the room. The result is a home with character instead of a perfectly matched showroom appearance. In this blog, you’ll learn what defines eclectic interior design, how it differs from bohemian and maximalist styles, and practical tips to incorporate it into your home. We’ll also explore simple, room-by-room ideas to help you achieve the look with confidence. What Is Eclectic Interior Design? Eclectic interior design is one of the most distinctive interior design styles, mixing pieces from different design periods, cultures, and aesthetics into one cohesive room. The word comes from the Greek term eklektikos, which means to select the best of everything rather than sticking to one rigid style. That single idea, selecting freely instead of following rules, is what makes eclectic decorating so popular right now. People are moving away from matched furniture sets. They want rooms that reflect years of collecting, travel, and personal taste rather than a single catalog order. That shift also explains why eclectic style pairs so well with thrifted and vintage finds. A room built this way rarely looks finished in one shopping trip. It grows slowly, piece by piece, as your taste and life change. Key Characteristics of Eclectic Style Design An eclectic room is never random, even though it might look that way at first glance. There is always a plan holding it together behind the mix. A neutral base with one or two accent colors: Walls and large furniture usually stay simple so bold pieces can stand out. Mixed furniture eras: A mid-century chair might sit beside a modern glass table, and that contrast is the point. Layered textures: Velvet, wood, wool, and metal often appear in the same room to add depth. Personal, meaningful objects: Travel finds, family pieces, and art on display give the space its story. Intentional curation: Every item earns its spot. Nothing sits there by accident, even if it looks casual. These traits work together, not separately. Remove the neutral base or the curation, and the room slides toward clutter instead of style. How to Achieve Eclectic Interior Design in Your Home Getting this look right takes a bit of planning, even though the finished room should feel effortless. Start small and build outward rather than buying everything at once. 1. Choose a core color palette first: Pick two or three colors to repeat across rugs, pillows, and accessories. This keeps the whole room feeling connected. 2. Pick one or two focal points: A bold piece of art or a statement chair gives the eye somewhere to land before it wanders to everything else. 3. Mix furniture eras on purpose: Pair an antique dresser with a modern lamp, or a Victorian chair with contemporary art. The contrast should feel deliberate, not accidental. 4. Layer textures with restraint: Combine two or three textures per room, such as wood, wool, and glass, instead of using every material you own. 5. Leave negative space: Empty wall or floor space gives the eye a rest and keeps a busy room from feeling cluttered. Start with large furniture and a neutral backdrop. Add one statement piece next, then layer in textiles, art, and smaller accessories over the course of weeks or months. Eclectic Interior Design Ideas by Room Eclectic interior design works best when each room balances contrast with cohesion. While the core principles remain the same, every space has its own purpose and styling needs. Here are practical ways to bring eclectic charm into different areas of your home. 1. Living Room A well-balanced eclectic living room combines different design eras through furniture, artwork, and accessories while maintaining a unified visual flow. Start with a neutral sofa as the foundation, then build character with layered accents. Add a bold area rug, a vintage coffee table, and a gallery wall featuring artwork in different frame styles and sizes. Mix textures through cushions, throws, and natural materials to create a space that feels inviting, curated, and visually balanced without looking overcrowded. 2. Bedroom An eclectic bedroom blends comfort with personal expression by mixing vintage finds, modern elements, and meaningful décor pieces. Keep the bed as the calming focal point by using simple, neutral bedding. Introduce personality with a patterned throw, mismatched bedside tables, and a statement artwork above the headboard. Layer soft lighting, textured fabrics, and decorative accents to make the room feel warm, comfortable, and thoughtfully collected while maintaining a restful atmosphere. 3. Dining Room An eclectic dining space allows different chair styles, finishes, and decorative elements to work together around a common theme. Create contrast by pairing a modern dining table with chairs from different styles or time periods. Unify the look with a shared color palette, similar upholstery, or coordinated table décor. A striking pendant light, textured rug, or eye-catching centerpiece can complete the space while keeping the overall design cohesive and welcoming. 4. Small Apartment Small, eclectic apartments benefit from thoughtful selections, with each piece of furniture adding function and personality. In compact spaces, focus on quality over quantity. Choose a few standout pieces, such as a statement chair or unique coffee table, instead of filling the room with many small accessories. Keep the color palette consistent, use multifunctional furniture, and add layers through textiles and artwork to create visual interest without making the space feel crowded. How to Design an Eclectic Style Interior on A Budget Creating an eclectic home does not require a large budget or expensive matching furniture sets. Among the many interior design styles, eclectic design stands out for its flexibility, allowing you to mix old and new pieces without following strict decorating rules. Shop Secondhand First: Thrift stores, estate sales, and online marketplaces are great places to find vintage furniture and unique decor pieces at lower prices. Older items often bring more character. Mix High and Low Price Points: Combine one investment piece, such as a statement light fixture or artwork, with budget-friendly cushions, prints, rugs, and accessories to create a stylish balance. Try Small DIY Updates: Refresh existing items with simple changes like new pillow covers, repainting an old dresser, or reframing thrifted artwork to give your room a fresh look. Buy Pieces Slowly: Eclectic spaces naturally develop over time, so there is no need to decorate everything at once. Add meaningful pieces gradually as you discover them. Explore Affordable Sources: Look for unique finds at estate sales, on Facebook Marketplace, at local thrift shops, and at flea markets. These places are ideal for discovering one-of-a-kind furniture. With thoughtful choices and patience, you can create a budget-friendly eclectic space that feels personal, layered, and full of character. Eclectic vs Bohemian vs Maximalist Interior Designs These three styles are often confused because they all mix patterns and reject strict rules. Feature Eclectic Bohemian Maximalist Color palette Neutral base, accent pops Bold, earthy tones Rich, saturated colors Furniture Mixed eras, curated Global, handmade pieces Ornate, statement pieces Structure Balanced, clean lines Organic, flowing Layered, dense Feel Curated art gallery Free-spirited, worldly Bold and abundant Eclectic design tends to feature a neutral color scheme, clean lines, and a few standout pieces. Bohemian style leans into bold, earthy colors, global textiles, and organic, flowing shapes with less structure. Maximalist design pushes further still, filling nearly every surface with pattern, color, and collected objects in a more-is-more approach. If you want a room that feels calm despite the mix, eclectic is the safer starting point. If you want warmth and global flavor, bohemian fits better. My Perspective on Eclectic Room Styling Eclectic style gives you so much freedom, but that doesn’t mean everything works together naturally. One common pitfall is creating too many focal points. When every corner has bold artwork, statement furniture, or eye-catching accessories, the room starts competing with itself, and nothing stands out. Another is skipping a unifying color or theme. Even when mixing styles, repeating colors, textures, or finishes helps the space feel curated rather than chaotic. Overcrowding is another trap. Filling every empty nook with furniture or decor diminishes the impact of each piece. Comfort and function matter too. Furniture that looks stunning but feels awkward or doesn’t suit your lifestyle disrupts the balance. Finally, mixing without intention can make the space feel random instead of thoughtfully layered. The good news is that most mistakes can be fixed without a full makeover. Remove unnecessary pieces, tweak the layout, or introduce a repeated color or texture, and your eclectic room instantly feels more harmonious and inviting. Final Thoughts Eclectic interior design allows you to create a home that feels personal, layered, and full of character by combining different eras, colors, textures, and meaningful pieces. The key is finding balance through a cohesive color palette, thoughtful placement, and a mix of elements that work together rather than compete. This style is not about filling a room with random decor, but about creating a space that reflects your personality and experiences. Whether you are updating a single room or designing an entire home, eclectic style encourages creativity, patience, and intentional choices that make your space feel uniquely yours. Have you tried mixing furniture styles in your own home? Share what worked, or what didn’t, in the comments below. Frequently Asked Questions What Makes A Room Look Eclectic? An eclectic room combines different styles, eras, colors, and textures while maintaining harmony through a shared theme, color palette, or design element. Is Eclectic Interior Design The Same As Bohemian Style? No, eclectic design focuses on a balanced mix of styles, while bohemian interiors usually emphasize layered patterns, natural elements, and a more relaxed, free-spirited look. How Do You Mix Different Furniture Styles In One Room? Combine contrasting furniture pieces by tying them together with similar colors, materials, shapes, or finishes to create a cohesive, intentional look. Can Eclectic Interior Design Work In Small Spaces? Yes, eclectic style works well in small homes when you choose fewer statement pieces, maintain visual balance, and avoid overcrowding the space.

