



That dark spotting around the grout can make a clean bathroom feel neglected fast. If you are trying to figure out how to remove mold from shower surfaces, the first step is knowing what is safe to use and what might make the problem worse.
Shower mold usually grows because moisture, soap residue, and poor airflow give it the right place to spread. I know it can feel annoying when the same spots return after cleaning, but the cause is often easier to fix than it looks.
You’ll learn how to spot common mold signs, choose the right cleaner for tile, grout, and caulk, clean safely, and build small habits that help keep the shower drier longer.
Is Shower Mold Actually Dangerous, or Just Annoying to Look At?
A few dark specks on tile or glass are usually more of an eyesore than a health emergency, and you can often clear them yourself with a cleaner, a stiff brush, and a few minutes of drying time.
A mildewy shower curtain or a damp bath mat is even easier: wash it, dry it, done.
Pay closer attention when the mold keeps returning within days, the bathroom smells musty even after it has fully dried, or the caulk has gone soft, cracked, or started peeling away from the tile.
Loose tiles, staining creeping onto nearby walls, or anyone in the house managing asthma or allergies are all reasons to treat it as more than a cosmetic problem.
A dull or stained bathroom floor tile finish nearby can point to the same kind of moisture damage, so it is worth checking both surfaces at once.
Shower Mold Types and What’s Actually Growing in There
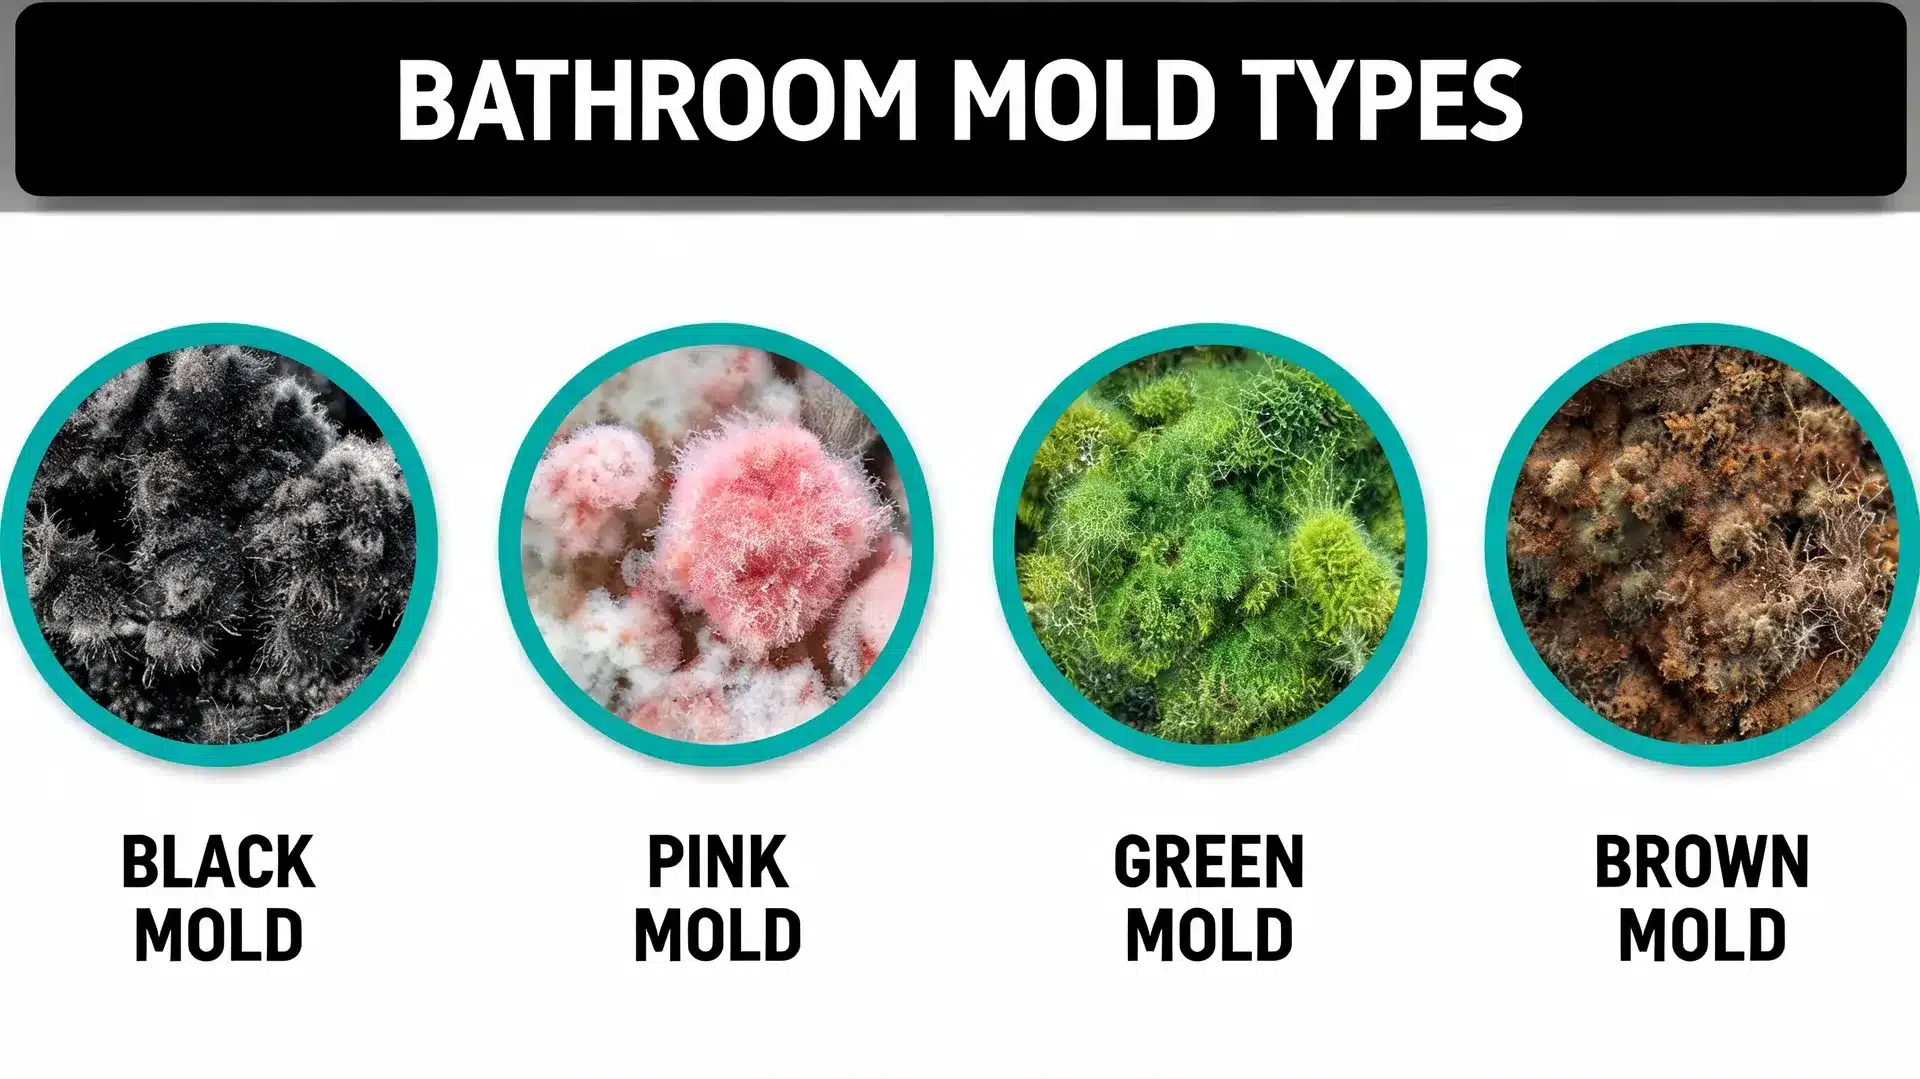
Mold shows up in different colors depending on what it is feeding on, but the root cause is almost always the same combination: leftover moisture and not enough airflow. Knowing which one you are dealing with makes the cleanup faster.
- Black mold: The most common offender on grout, caulk, and ceiling corners, and it settles wherever water sits the longest.
- Green mold: Tends to appear near drains and on grout lines where soap scum has had time to build up.
- Pink or orange film: Usually not true mold but a bacterium (Serratia marcescens) that thrives on soap residue near drains and shower floors, still worth cleaning promptly.
- White mold: Fuzzy or chalky patches that often hide behind fixtures or in corners with a slow, unnoticed leak.
Most of this starts small and stays manageable if you catch it early. A patch that keeps spreading, or a smell that lingers no matter how much you clean, is usually a sign of moisture hiding somewhere you cannot see.
How to Remove Mold From Shower Areas
Three cleaners handle almost everything a shower can throw at you, and none of them require a trip past the cleaning aisle’s fanciest (and priciest) bottles.
The method is always the same shape: apply, let it sit, scrub, rinse, and dry the area completely so moisture has no reason to linger.
| Task | Removing mold from shower tile, grout, glass, and caulk |
| Time | 20–90 minutes, depending on how set-in the mold is |
| Tools | Spray bottle, stiff grout brush or old toothbrush, gloves, clean cloth |
| Frequency | Spot-clean weekly; deep-clean monthly |
| Difficulty | Easy |
| ⚠️ Safety Note: Run the bathroom fan or crack a window while cleaning, since vinegar and hydrogen peroxide fumes can irritate eyes and airways in a small space. Never combine bleach with vinegar or ammonia-based cleaners. The mix releases chlorine gas, which is genuinely dangerous to breathe. Use one cleaner at a time and rinse the surface before switching products. |
Method 1: Vinegar for Deep Penetration
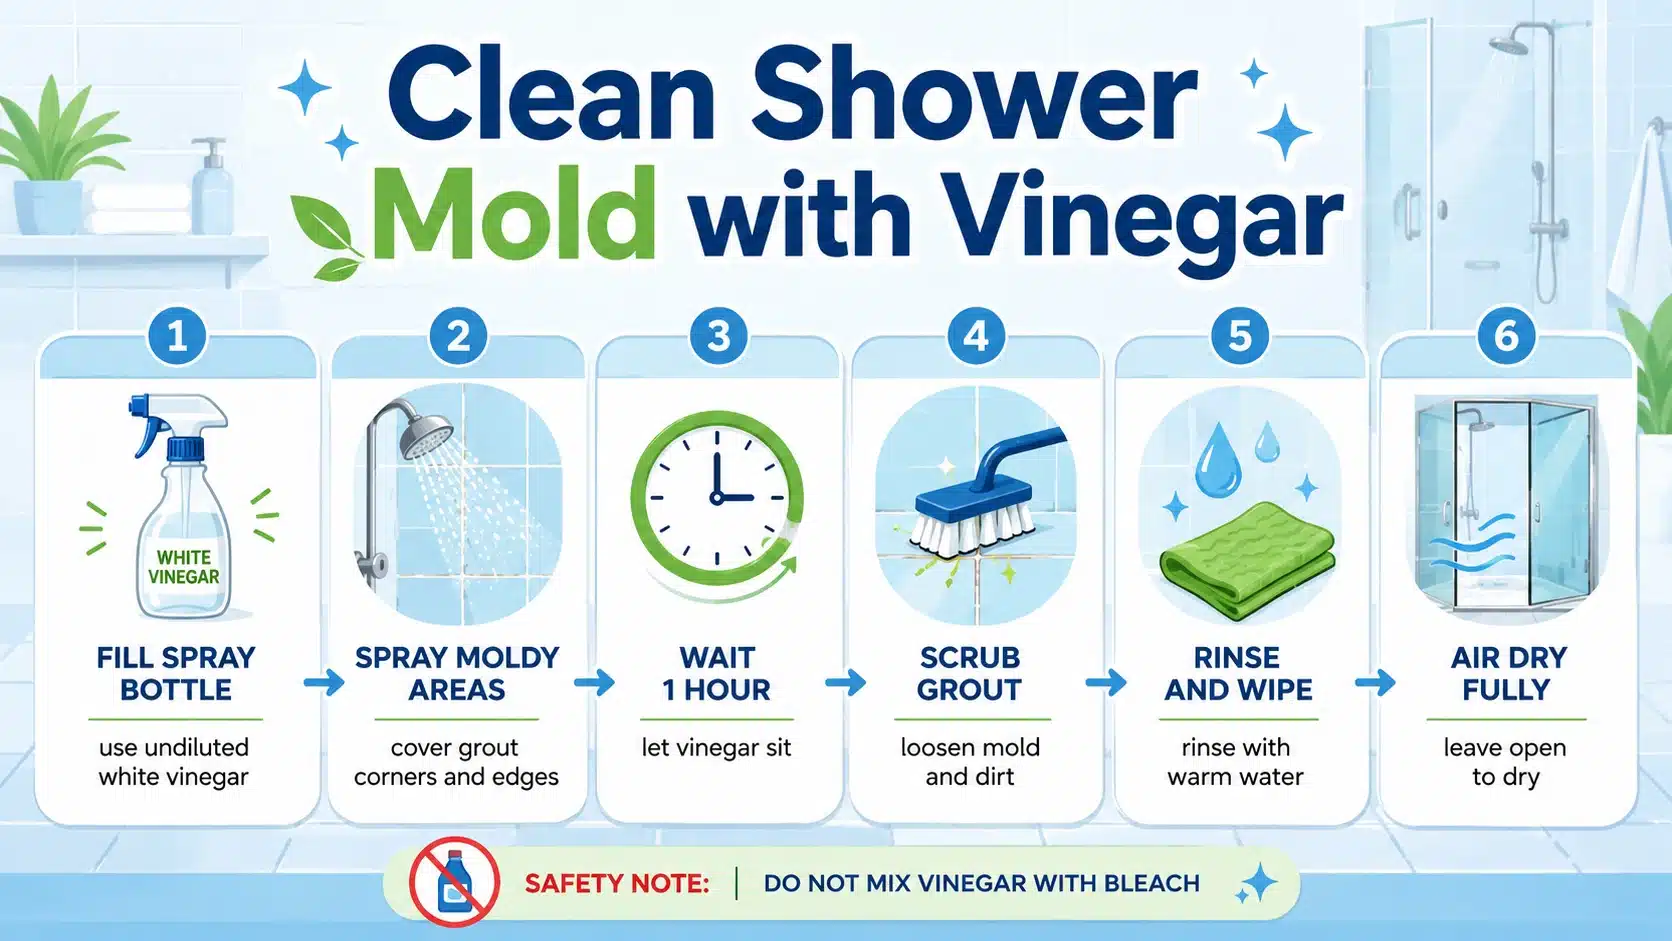
Distilled white vinegar is my go-to for grout and tile corners because the acidity loosens mold sitting in porous, hard-to-reach spots, the same way it cuts through a hard-water ring on a faucet.
What You Need: distilled white vinegar, a spray bottle, a firm grout brush or old toothbrush, warm water, a clean cloth, and gloves.
- Pour undiluted vinegar into a spray bottle. Full strength works better on grout and tile edges than a watered-down mix.
- Saturate the moldy areas, focusing on grout lines, corners, and the spots around fixtures and drains where water sits longest.
- Let it sit for at least 1 hour so the acid has time to break the mold down.
- Scrub with the grout brush or toothbrush.
- Rinse thoroughly with warm water, then wipe dry with a clean cloth.
- Leave the door or curtain open so the area can air out completely.
Best For: grout, tile corners, shower walls, drain areas, and door tracks. Skip it on natural stone like marble, limestone, or travertine, since the acid can etch the surface.
Method 2: Hydrogen Peroxide for Stain Removal and Disinfecting
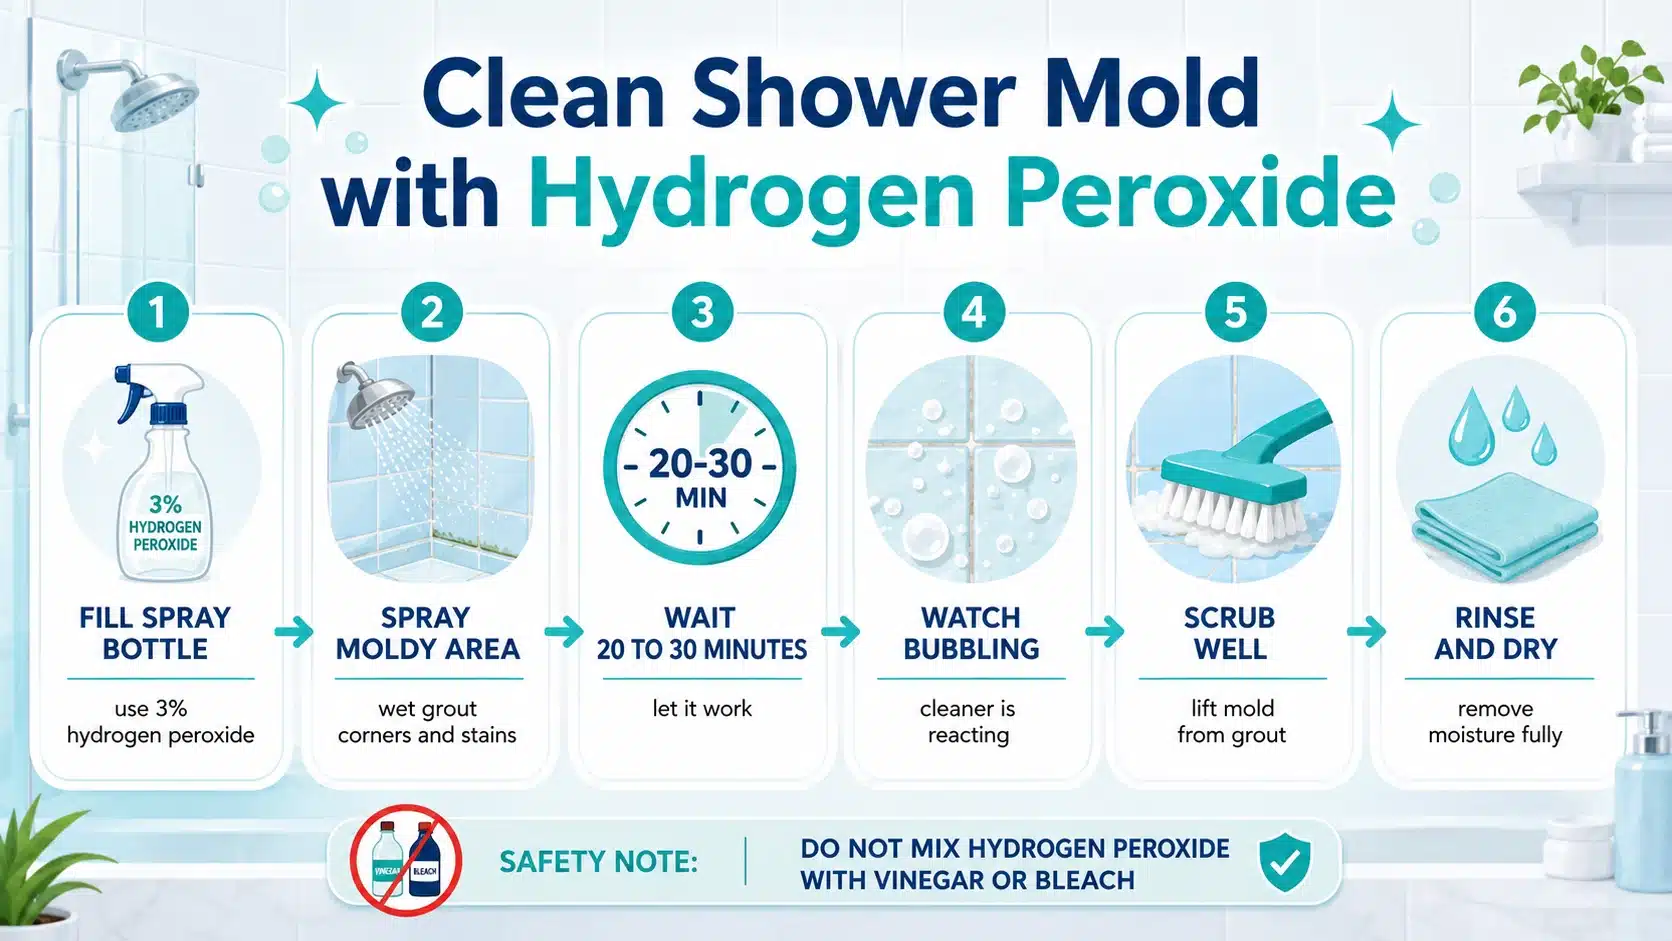
When mold has left behind a dark stain rather than just a fuzzy patch, 3% hydrogen peroxide is the better pick, since it lifts discoloration the way a good stain remover saves a white shirt.
What You Need: 3% hydrogen peroxide, a spray bottle, a stiff brush, warm water, a clean cloth, and gloves.
- Spray the moldy area until it is fully wet, including grout lines and stained corners.
- Let it sit for 20 to 30 minutes. Light bubbling is normal, as the peroxide breaks down buildup on the surface.
- Scrub with a stiff brush or toothbrush.
- Rinse with warm water and dry the area completely with a clean cloth.
Best For: stained grout, tile, shower corners, and drain areas. For a stubborn stain, sprinkle a little baking soda over the wet, peroxide-soaked grout before scrubbing. The mild abrasion helps lift what the peroxide alone leaves behind.
Method 3: Baking Soda Paste for Scrubbing Power
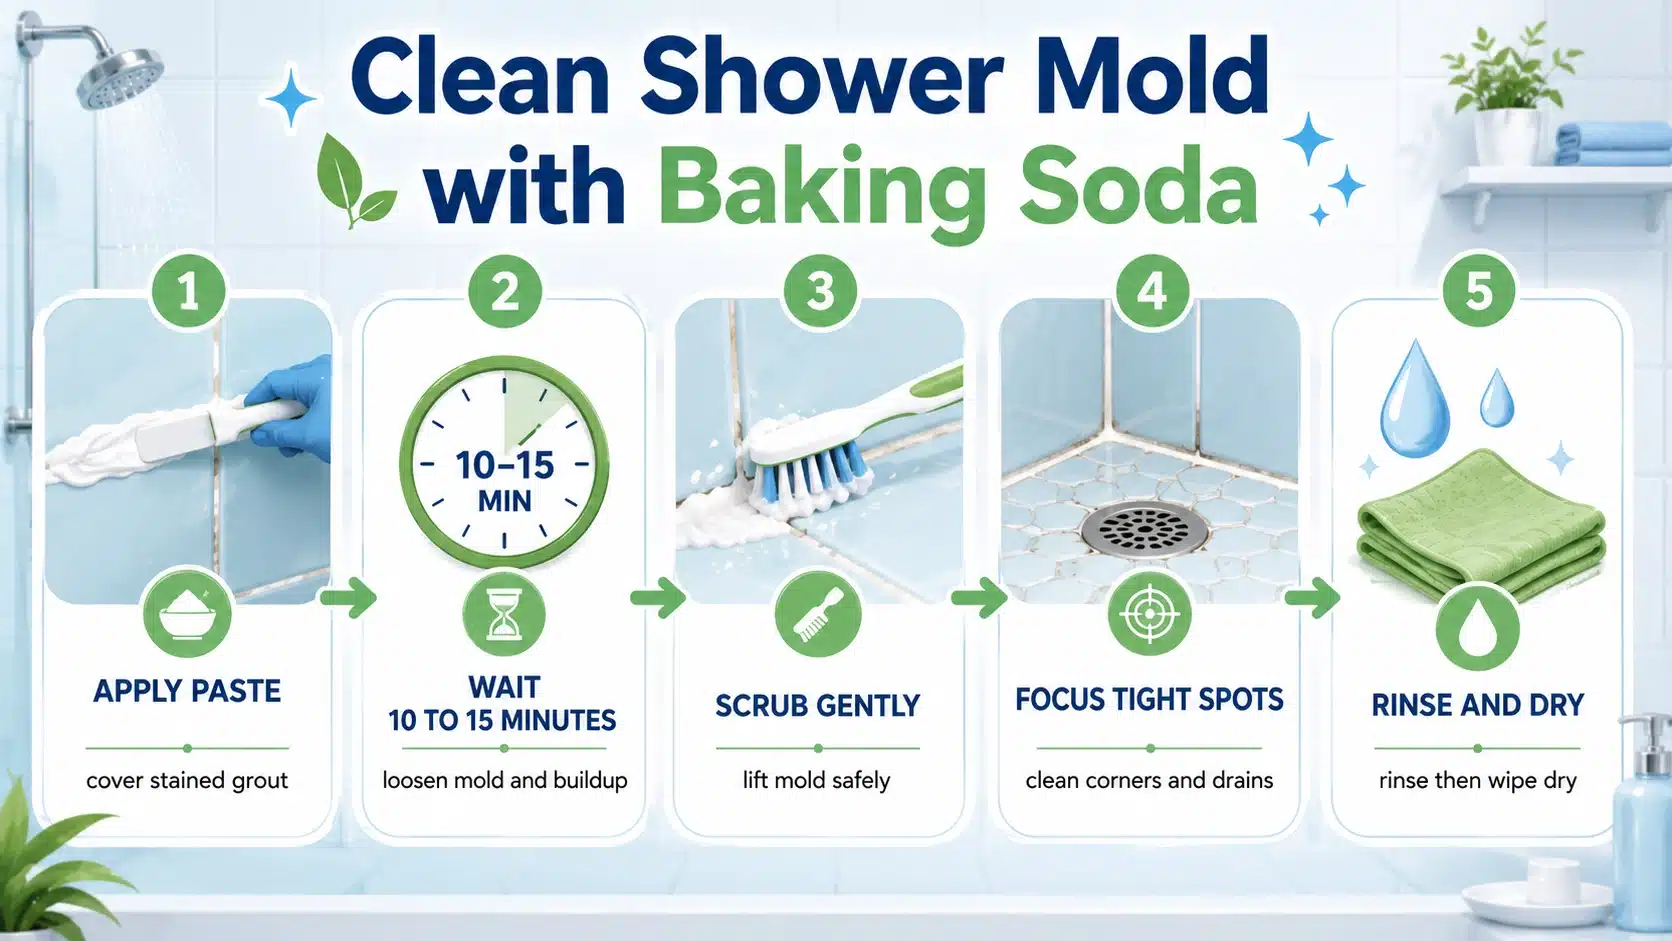
Baking soda is the gentlest option here, and it is the one I reach for when mold is tangled up with regular soap scum rather than sitting on its own.
What You Need: baking soda, a small bowl, water, a spoon, a stiff brush, warm water, a clean cloth, and gloves.
- Mix ½ cup baking soda with a few tablespoons of water until it forms a thick paste, adding more baking soda if it feels runny.
- Apply the paste directly to moldy grout or tile and let it sit for 10 to 15 minutes.
- Scrub gently with a stiff brush, focusing on grout lines, corners, and shower floors.
- Rinse well and dry the surface with a clean cloth.
Best For: surface mold mixed with soap scum, grout lines, shower floors, and mild odor issues.
Quick Cleaner Comparison: What Should You Reach For?
| Cleaner | Best For | Avoid |
|---|---|---|
| Vinegar | Grout, tile corners, routine upkeep | Natural stone (marble, limestone, travertine) |
| Hydrogen peroxide | Stains, disinfecting, caulk | Colored fabrics that may fade, so spot-test first |
| Baking soda paste | Soap-scum buildup, mild odor, gentle scrubbing | Very delicate or scratch-prone surfaces |
If the mold is light, the baking soda paste is usually enough on its own. Grout and corners tend to respond best to vinegar, and stains call for hydrogen peroxide. That is really the whole playbook for how to remove mold from shower surfaces without overthinking it. Stick to one cleaner per session, and always finish by drying the shower fully.
Why Mold Keeps Growing Back in Your Shower
- Moisture that never fully dries: Steam settles on tile, grout, glass, and caulk after every shower, and mold thrives on surfaces that stay damp.
- A bathroom fan that is not pulling its weight: A weak exhaust fan or a closed door traps humid air inside, which gives mold exactly the environment it wants.
- Soap scum and body oils: Mold feeds on this residue the same way it would on any organic buildup, and grout lines collect it fastest.
- Cracked grout or failing caulk: Water seeps behind damaged grout or caulk and grows mold you cannot see or reach with surface cleaning alone. Installing moisture-resistant beadboard panels along the lower wall is one way to keep water from soaking into the wall itself.
Your Shower’s New Maintenance Schedule
Mold is genuinely bad at surviving a routine, the same way a great skincare habit beats an occasional splurge product, and a little upkeep after every shower beats one big scrub-down a month.
| Schedule | Quick Tasks |
|---|---|
| After every shower | Squeegee glass and tile, run the fan for 20–30 minutes, leave the curtain or door cracked open |
| Weekly | Spot-clean grout, wash the bath mat, wipe down corners and caulk lines |
| Monthly | Deep-clean grout, check caulk for gaps, clean the exhaust fan cover |
| Yearly | Reseal grout if it is due, replace failing caulk, check for any hidden leaks, and consider repainting shower tile if it still looks dull once everything else is clean |
A dehumidifier earns its keep in a bathroom with weak airflow, and fixing a slow drip around a faucet or showerhead the day you notice it saves you a much bigger cleanup later. If you are rethinking the whole space, better airflow often starts with smarter small bathroom layouts that leave room for the fan and door to actually do their job.
When a Mold Problem Needs a Professional, Not a Sponge
Call in a mold remediation professional when the mold covers a large area, keeps coming back after repeated cleaning, or the bathroom has a musty smell you cannot trace to a visible spot. These are signs of trouble beyond the surface:
- Soft or bubbling drywall
- Tiles that have come loose
- Staining spreading onto nearby walls or the ceiling
- Flooring that stays damp with no obvious source
A professional can check for damage behind the walls, subfloor issues, plumbing leaks, and failed grout or caulk, and it is worth calling one quickly if anyone in the home has a strong reaction to mold exposure.
Frequently Asked Questions
Can I shower right after cleaning with vinegar or hydrogen peroxide?
Rinse the treated area well and let the bathroom air out for a bit first, especially if fumes are still noticeable. A quick rinse of the cleaner is not the same as a full shower with steam, which can reactivate lingering residue.
Will mold come back if I only clean the caulk and skip the grout?
Likely, yes. Caulk and grout usually mold at the same time because they sit in the same damp zone, so treating one and ignoring the other just gives the mold a place to regroup.
Does a magic eraser work on shower mold?
It can lift light surface staining on tile and glass, but it will not reach mold sitting inside porous grout the way a vinegar or peroxide soak does, and the abrasive texture can dull glossy tile over time.
Can mold permanently stain grout even after it’s removed?
Yes, mold can leave a shadow behind after it is dead and gone, especially on light-colored grout. At that point, a grout stain remover or a fresh coat of grout sealant is a better fix than more scrubbing.
Why does my shower smell musty even though I don’t see any mold?
The mold is often hiding somewhere you cannot see, like behind a caulk line, under a loose tile, or inside a slow leak near the drain. A lingering smell with no visible source is one of the clearest signs it is time to call a professional.
To Sum Up
Shower mold is easier to handle when you treat the cause, not just the spots you can see. I’d start with safe cleaning, then make drying and airflow part of your routine.
Vinegar can help with grout, hydrogen peroxide can lift darker stains, and baking soda paste can scrub away buildup without harsh fumes. You also want to watch cracked caulk, damp towels, weak fans, and musty smells because they can point to a bigger moisture issue.
Learning how to remove mold from shower areas helps you clean smarter and keep the bathroom fresher between deep cleans. Try these tips in your own shower, then share what worked for you in the comments.



