

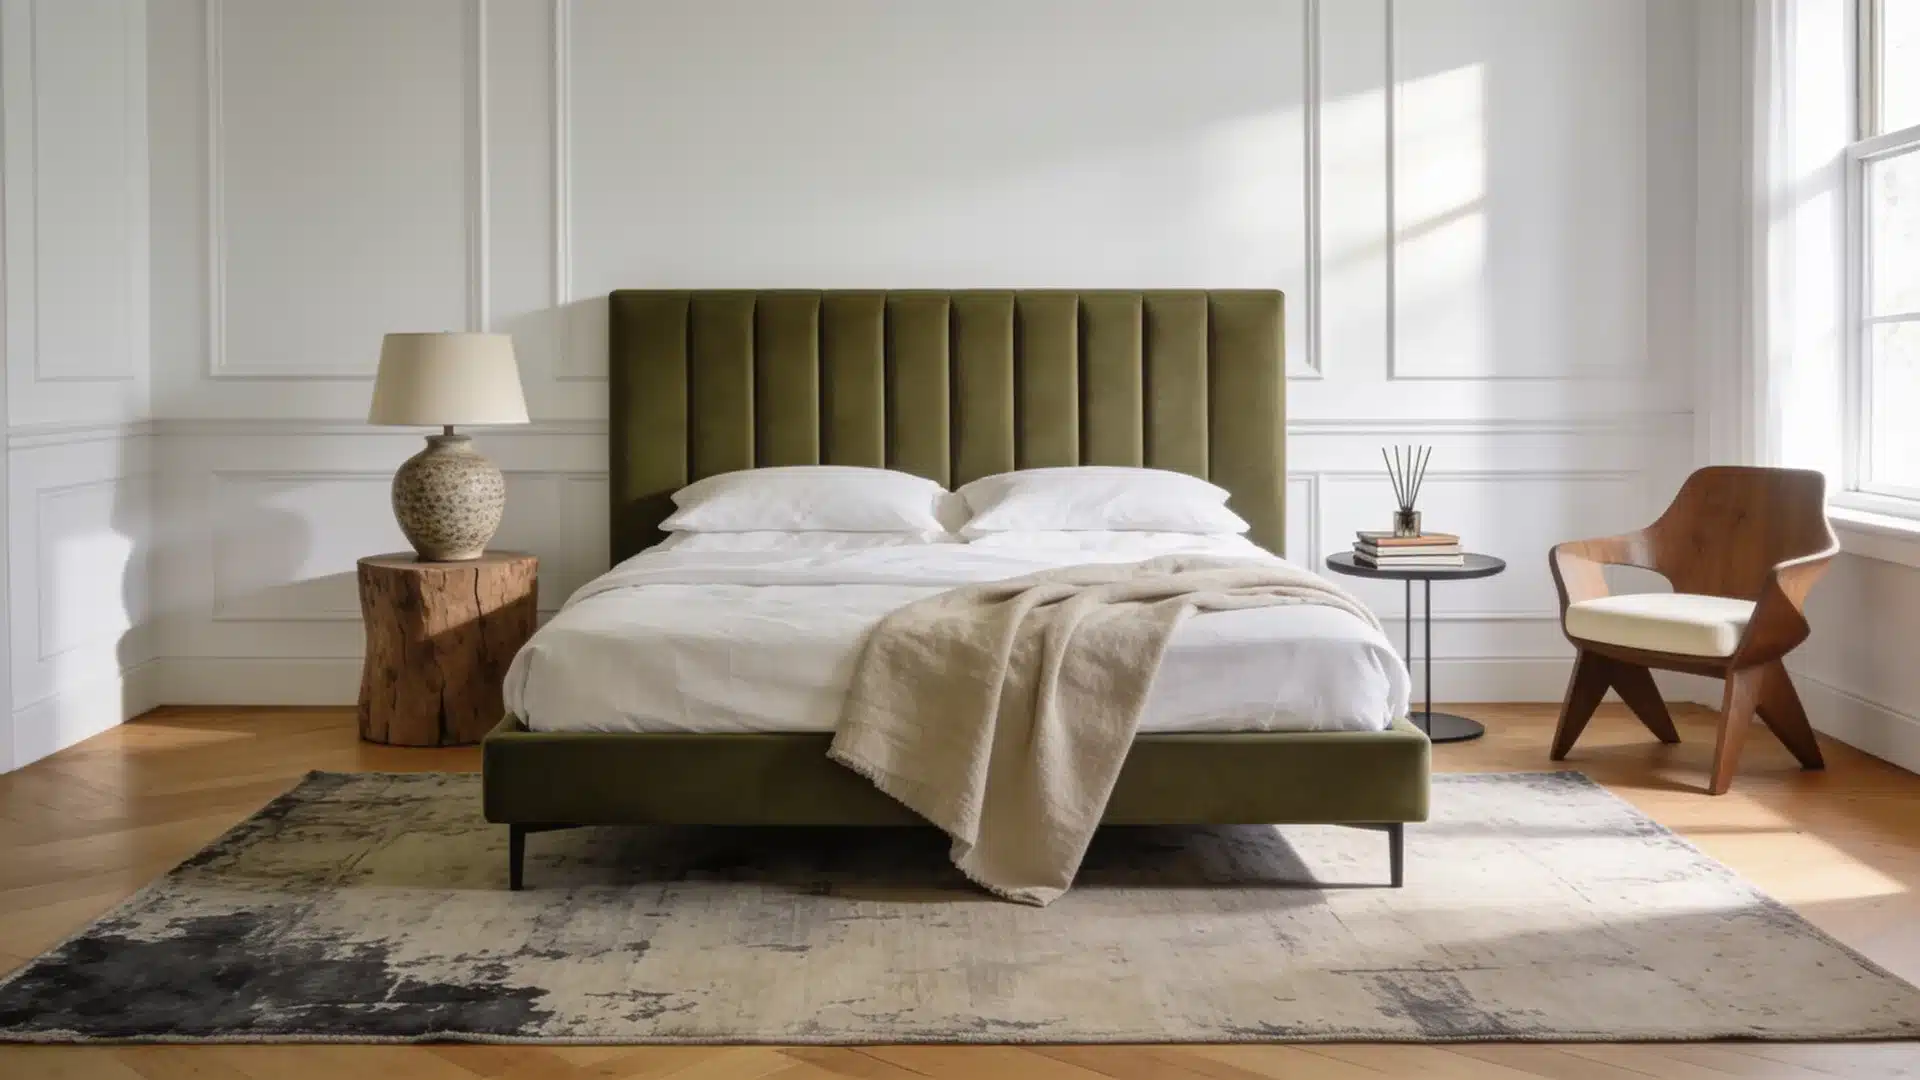
Ever stepped out of bed onto a floor that felt more like sandpaper than a cozy sanctuary? Finding the best carpet for bedrooms involves much more than just picking the softest sample in the showroom. You need something that handles bare feet, resists stains, and won’t flatten out in a year. I have broken down exactly how to match carpet construction and fibers to your actual daily routine. You will find how to evaluate pile heights, choose the right padding, and avoid costly installation mistakes. By the end, you can confidently select a durable, comfortable floor that fits your budget perfectly. Key Qualities of a Bedroom Carpet If you are shopping for the best carpet for bedrooms, softness is the starting point, not the finish line. The bedroom is a low-traffic room, which gives you flexibility that hallways and living rooms don’t. But low traffic doesn’t mean no demand. You still need a carpet that holds up to bare feet every morning, resists allergen buildup, and looks presentable years from now without a full replacement. Room Type Primary bedroom, guest room, kids’ room, or shared space Key Priorities Softness, noise reduction, easy cleaning, durability Best Fiber Nylon (durability), triexta (stain resistance + softness), polyester (budget), wool (premium) Pile Height Medium (most rooms); low (allergies, easy clean); high (primary bedroom comfort) Recommended Padding 7/16-inch rebond or 8 lb density for best support and feel Once you know how your bedroom is actually used, who sleeps there, whether pets come in, and how often you vacuum, the choice between carpet types becomes much more straightforward. Here’s how to match what you need to what the market offers. What to Know Before Comparing Carpet Types for Bedrooms Before comparing plush against textured or nylon against triexta, think about how the bedroom functions day-to-day. A quiet primary bedroom tolerates a softer, thicker pile that would flatten quickly in a high-traffic hallway. A kids’ room, guest room, or bedroom that doubles as a workspace needs something that can withstand more use and clean faster. Also, consider pets, allergies, the direction the room faces, furniture weight, and how often you actually vacuum in your house. Carpet padding matters more than most buyers realize; the right pad changes how a carpet feels underfoot and directly affects how long it lasts. Budget the full picture: carpet material, pad, removal of the old floor, and installation. Skipping any of those line items leads to surprises at the end of the project. Best Carpet Types for Bedrooms Choosing the right bedroom carpet involves more than how a sample feels in the showroom. The carpet type, meaning the construction style, fiber, and pile height, determines what the floor feels like after two years of daily use, not just the day it’s installed. Here’s what each option actually gives you. 1. Plush Carpet Material: Nylon, polyester, or wool Plush carpet has a smooth, dense surface that gets cut to an even height across the whole floor. The result is a velvety feel that works well in traditional, modern, and more formal bedroom designs. The fibers create a warm, cushioned surface that makes getting out of bed more bearable on cold mornings. It performs best in primary and master bedrooms where foot traffic stays light, and comfort is the main job. The trade-off is visibility; plush carpet shows footprints and vacuum lines more readily than textured styles, which bothers some people and doesn’t bother others. Homeowners who want a consistently soft, finished-looking floor and don’t mind a weekly vacuum pass to keep it neat tend to stay happy with plush long-term. 2. Saxony Carpet Material: Nylon, polyester, or wool blends Saxony carpet features upright, dense fibers that give the floor a polished, formal look. It’s a step above plush in refinement and suits guest bedrooms and primary suites where style matters alongside comfort. The thick pile creates a soft, cushioned surface that genuinely feels different underfoot than a mid-grade option. It adds warmth and absorbs sound well, which matters more in bedrooms directly above living spaces. Like plush, the upright fibers will show footprints, but many people appreciate the freshly vacuumed look that it creates. For a bedroom designed to feel welcoming and visually composed, Saxony reliably delivers both. 3. Frieze Carpet Material: Nylon, polyester, or triexta Frieze carpet uses tightly twisted fibers that curl at the tips rather than standing straight up. That curl is what makes it practical, footprints don’t register the way they do on plush, and everyday dirt and wear get hidden in the texture. This makes frieze a strong choice for kids’ bedrooms, teen rooms, and any space that gets more foot traffic than a typical primary bedroom. It still feels soft underfoot, but it holds its appearance longer than looser pile styles under real daily use. For homeowners who want comfort without the visual maintenance that plush requires, frieze tends to be the better long-term call. 4. Textured Carpet Material: Nylon, polyester, or triexta Textured carpet uses fibers cut at slightly different heights, which creates a multi-directional surface that resists showing marks. It’s the most versatile option in the lineup, comfortable enough for a primary bedroom, durable enough for a shared space, and visually flexible enough to work with most bedroom decor. Footprints, vacuum lines, and minor wear don’t register the way they do on plush or Saxony. That practical advantage makes textured carpet a reliable default for family bedrooms, shared kids’ rooms, or any space where appearance needs to stay consistent without constant maintenance. If you can only choose one style that works across multiple bedroom types in your home, textured carpet is the most defensible pick. 5. Low-Pile Carpet Material: Nylon, polyester, wool, or olefin Low-pile carpet has shorter fibers, typically under half an inch, that sit close to the backing. It’s not as cushioned as plush or Saxony, but it’s considerably easier to clean and less likely to trap dust, pet hair, and allergens deep in the pile. That cleaning advantage is the reason allergy-conscious households and pet owners often reach for low-pile first. It’s also a good fit in smaller bedrooms where a thicker carpet would make the room feel heavier and more closed in. The look is clean and understated, which works particularly well with modern and minimalist bedroom layouts. If easy maintenance matters more than maximum softness, low-pile gives you a floor that earns its place practically. With the five main carpet types covered, the next step is matching the right one to how your specific bedroom is actually used. How to Choose the Best Carpet for Bedrooms in Your Home Choosing bedroom carpet gets easier when you match it to the room’s real conditions rather than the softest sample on the rack. Here’s what actually drives the decision. Room Use: Choose softer, thicker carpet for quiet primary bedrooms. Use more durable options for kids’ rooms, guest rooms, or bedrooms that double as workspaces. Fiber Type: Nylon holds up best under wear. Triexta handles stains with built-in resistance and feels soft without requiring a high pile. Polyester works well on a tighter budget. Wool is the premium natural option with real long-term durability. Pile Height: Plush and Saxony maximize comfort. Textured and frieze handle daily use without showing wear. Low-pile keeps cleaning simple. Carpet Padding: Quality padding changes everything; it affects how soft the floor feels, how much sound it absorbs, and how long the carpet lasts. A 7/16-inch rebond pad at 8 lb density is a reliable starting point for most bedrooms. Color Choice: Warm neutrals, greige, taupe, beige, soft brown, hold up across changing decor and don’t show daily wear the way pale or very dark colors do. If you’re still working out the room’s palette, bedroom colors that feel cozy are worth settling before you commit to carpet. Common Mistakes to Avoid When Choosing Bedroom Carpet These are the decisions that look fine in the store and cause regret six months later. Mistake Why It Causes Problems Better Choice Choosing only by softness Soft carpet flattens quickly when the fiber quality is poor, regardless of how new it feels. Balance softness with fiber density and face weight. Skipping quality padding Poor padding makes even good carpet feel thin and shortens its lifespan significantly. Budget for supportive 8 lb rebond padding. Picking very light colors Pale carpet shows stains, dust, and daily marks much faster than medium tones. Use soft neutrals or medium warm tones. Choosing a high pile for messy rooms Thick fibers trap dust, crumbs, and pet hair in ways that short vacuuming passes can’t clear. Use textured, frieze, or low-pile carpet in active rooms. Skipping home samples Showroom lighting changes how carpet color reads, significantly. Test samples in your bedroom under its actual light. Forgetting cleaning needs Some carpets need more frequent vacuuming and spot cleaning than the buyer planned for. Match carpet type to your actual cleaning routine. Avoiding these six mistakes is often the difference between a floor that still looks right five years in and one that needs replacing before it should. These are the questions that come up most often once someone has a sample on the floor and a decision to make. Frequently Asked Questions Will ultra-soft carpets require a special vacuum cleaner? Yes. High-end, ultra-soft carpets (often made with specialized micro-fibers like Caress or Tactesse) are packed so densely that standard heavy vacuums create a tight suction seal against the floor. This makes the vacuum incredibly hard to push and can actually tear out the fine fibers. If you choose an ultra-soft pile, you will need a vacuum with adjustable height settings and vented hulls that allow airflow to bypass the seal. How do I minimize visible seams in a large primary bedroom? Carpet rolls standardly come in 12-foot and 15-foot widths. If your bedroom is larger than these dimensions, seams are inevitable. To keep them hidden: Ensure the installation crew runs the seams parallel to the natural light entering from your primary windows rather than perpendicular to it. Avoid placing seams right at the foot of the bed or directly in the center of high-visibility walking paths. What is “carpet off-gassing,” and how do I prevent it in a sleeping environment? New carpets and paddings can release volatile organic compounds (VOCs) for the first 24 to 72 hours after installation, often causing that distinct “new carpet smell.” If you have respiratory sensitivities, look for carpets tested and labeled with the Carpet and Rug Institute’s Green Label Plus certification. To stay comfortable, plan to ventilate the bedroom with open windows and a fan for at least 48 hours before sleeping in the room. Can I install thick bedroom carpet over radiant floor heating systems? You can, but you have to check the R-value (thermal resistance). Thicker carpets combined with heavy rebond foam padding act as an insulator, blocking the heat from rising into your room efficiently. For radiant heating, keep the combined R-value of your carpet and padding under 2.5. This typically means choosing a low-to-medium pile cut with a thin, dense rubber or felt pad instead of thick foam. Why do some bedroom carpets split or fray right at the doorway? Fraying at the threshold usually happens when installers skip a proper transition strip. The transition between your bedroom carpet and the hallway floor (hardwood, tile, or another carpet) takes the brunt of daily pivoting feet. Ensure your installer uses a solid metal binder bar, Z-bar, or a hidden tack strip transition rather than just cutting the edges flush and tucking them down. Final Thoughts Your bedroom floor should be a comfortable, lasting investment rather than a source of future maintenance regret. I want to ensure you remember that balancing plush softness with the right fiber density, correct pile height, and thick padding makes all the difference over time. Matching your material choices to your actual cleaning habits, family pets, and specific room traffic prevents premature wear and costly early replacements. Armed with these practical insights, you are fully ready to select the best carpet for bedrooms without falling for deceptive showroom tricks. Which carpet style do you think will work best for your home layout? Share your thoughts in the comments below, or check out my related flooring blogs today.
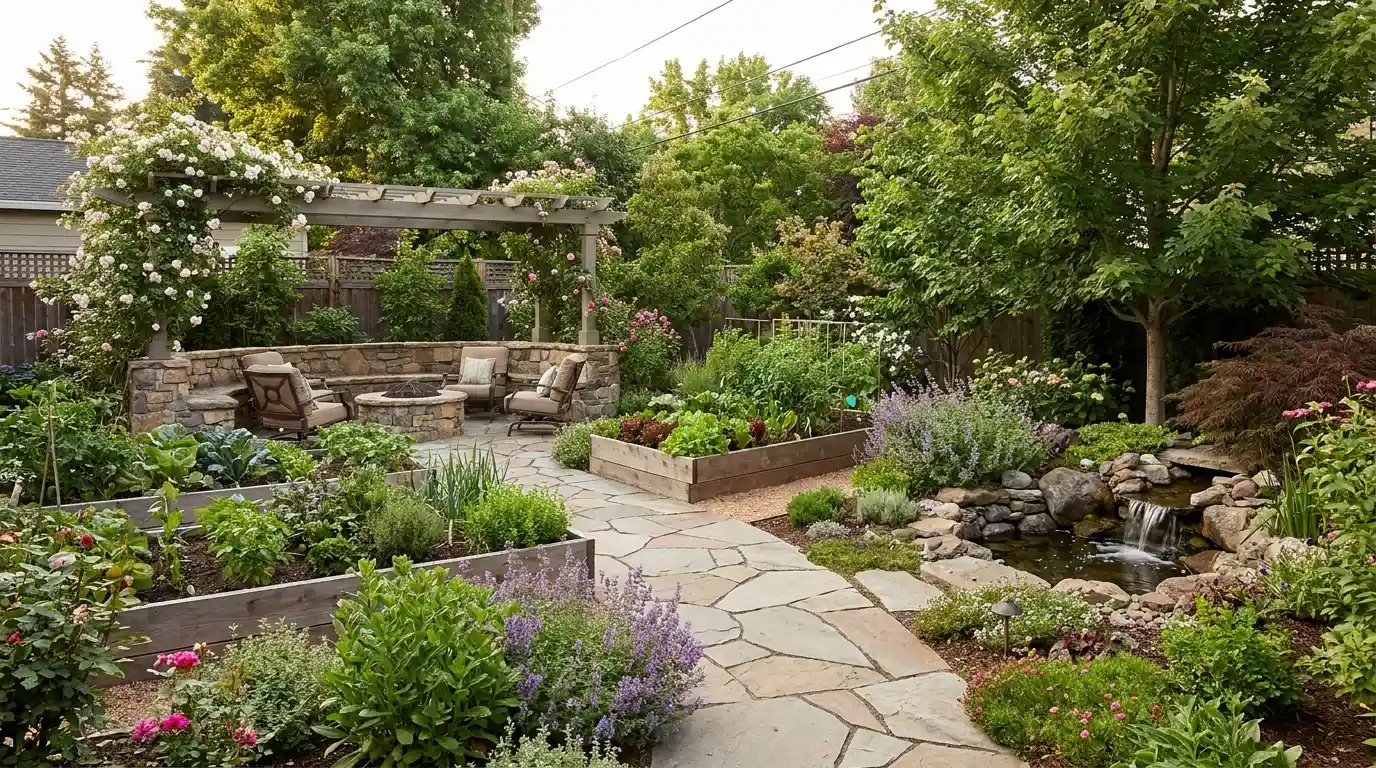
Struggling to make your yard feel organized instead of random? You look at the space and nothing seems to flow or function properly. Most outdoor spaces feel this way when structure is missing before planting starts. Strong garden layout ideas can fix that by turning confusion into a clear plan, especially when you start to plan-a-garden with structure in mind from the beginning. I look at many yards where seating, paths, and beds compete instead of working together. You might be dealing with narrow paths, awkward corners, or areas that never get used. This guide shows how to choose layouts that match your space, use, and conditions. By the end, you will know what fits, what fails, and what to plan first What Makes a Garden Layout Work Well A garden layout works when every part of the space earns its place. Most yards I’ve worked on don’t fail because of bad plant choices. They fail because the structure was never sorted before anything went into the ground. Seating placed too close to a fence. Paths just narrow enough to feel frustrating with a watering can. Beds positioned where water sits after rain. Scale matters as much as shape. Features need to suit the actual yard, not the one in the photo. Oversized beds overwhelm a small garden. A pergola on a 10×10 patio blocks everything it was meant to shelter. Getting the proportions right before spending a cent on materials is the single most useful thing a homeowner can do. Good garden layout ideas also account for the practical load: drainage patterns, maintenance access, storage routes, the line a hose takes from the tap. These aren’t glamorous details, but they’re the ones that determine whether a garden gets used or quietly ignored after the first season. What to Check Before Choosing a Garden Layout Idea The best time to test a layout is before anything is dug, poured, or planted. Here is what I check on every outdoor job before recommending a single design direction: Actual daily use: Decide first whether the space is for quiet mornings with coffee, family meals, growing food, or a play area. A layout that suits all four usually serves none of them well. Sun timing: Check light at the time you’ll actually use the garden. A south-facing seat looks appealing on a plan but becomes unusable in July afternoon heat. Sight lines and privacy: Walk the yard and look at what neighbors, roads, or windows can see before placing seating. A screen added afterward costs more and rarely looks right. Movement width: Mark paths with string and walk them carrying a tray or tool bag. Anything under 36 inches wide creates daily friction. Material durability: Every surface choice should be evaluated by what it looks like after two winters, not just the day it goes in. Gravel, stone, timber, and pavers all behave differently under freeze, thaw, rain, and heavy foot traffic. Plant growth in year two: Sketch the planting at mature size. Shrubs that seem well-spaced at planting can close a path or shade a seating area within 18 months. Garden Layout Ideas That Work in Real Yards What follows are garden layout ideas drawn from real outdoor spaces, not showroom shoots. For each one, I’ve included the practical details that matter most: what fails, what holds up, and what to decide before spending anything. Layout Type Best For Main Material Typical Cost Range Holds Up To Curved Walkway Flat, featureless yards Stone, gravel, brick $8–$25 per linear ft Heavy foot traffic Courtyard Small enclosed spaces Pale paving, pots $3,000–$12,000+ Year-round use Raised Bed Poor soil, slopes Timber, galvanized steel $300–$1,500 per bed Daily harvesting Cottage Border Fence and wall edges Edging, mulch $200–$1,500 Seasonal growth Outdoor Room Larger yards, entertaining Mixed surfaces $2,000–$15,000+ Guest use Vertical Garden Balconies, side yards Wall fixings, planters $500–$3,000 Wind load Island Bed Open lawns, front yards Edging, mulch $300–$2,000 Mowing clearance Sunken Seating Privacy-first spaces Stone, concrete $5,000–$20,000+ Level changes, drainage Water Feature Seating-focused yards Stone, pump, edging $500–$8,000+ Freeze-thaw cycles Rock Garden Dry slopes, poor soil Mixed stone sizes, gravel $500–$3,500 Drought conditions Shade Garden North-facing, under trees Foliage plants, mulch $400–$2,500 Low-light conditions Herb Spiral Near kitchens, patios Stone, brick $200–$1,000 Daily picking Wildlife Garden Suburban yards Native plants, water bowl $500–$3,000 Seasonal cycles Pergola Seating Patios, dining areas Timber, concrete footings $3,000–$12,000+ Wind and snow loads Container Modular Renters, patios, rooftops Pots, quality compost $300–$2,000 Seasonal mobility Linear Grid Path Narrow, rectangular yards Gravel, pavers $500–$3,000 Heavy maintenance use Zen Gravel Low-maintenance courtyards Raked gravel, stone $800–$4,000 Minimal upkeep Use the table above to match your yard’s conditions to a starting layout type before reading the full description. Cost ranges are estimates based on national averages and vary significantly by region, material grade, and labor rates. Verify current pricing with local suppliers before committing to a budget. Cost Note: Several layouts in this guide, including sunken seating, courtyard paving, pergola builds, and water features, commonly exceed $1,000 in total project cost. Figures shown are national estimates. Always get at least three contractor quotes before committing to any structural outdoor work. 1. Curved Walkway Garden A curved walkway garden is the right call when a yard is too flat and predictable to hold attention. The curve needs a reason, though. It should lead past a planted border, toward a seating area, or around a strong focal point. A path that wanders for the sake of it just frustrates people carrying anything heavier than a phone. Stone, brick, gravel, and stepping stones all work. What matters more than material is width. Under 36 inches, and the path starts to feel like a suggestion rather than a route. On slopes, check where water crosses the path before choosing a loose material like gravel, which can track and shift after rain. Turn radius: A curve tight enough to look interesting on paper becomes awkward in practice when you’re carrying a wheelbarrow or plant tray. Keep bends gradual. Material contrast: Gravel beside lawn, brick beside timber, or stone beside planted beds helps the path read clearly without any extra decoration. What fails in year two: Loose gravel migrates into planted beds on even a slight slope. Install a proper edging restraint from the start, not as an afterthought. 2. Courtyard Garden A courtyard garden is built around a central open space, and the enclosed nature of the layout makes it feel sheltered before a single plant goes in. This works well for small urban yards, privacy-first builds, and homes where outdoor living is expected year-round rather than just in summer. The middle holds a paved sitting area, a small tree, or a simple water feature. Around that center, use pots, wall planting, or built-in beds. The common failure mode in courtyard gardens isn’t the planting. It’s heat. An enclosed paved space in full sun traps heat faster than any other layout type. Pale paving and partial overhead shade from a tree or structure makes the difference between a space that gets used every evening and one that empties by 2pm. Wall base clearance: Leave a 2-inch gap between soil and any fence or wall surface. Wet soil held against timber or masonry accelerates rot and damp penetration. Movable accents: Fixed pots in a tight courtyard box you in when guest numbers change or a seasonal plant needs replacing. Choose movable containers for the outer ring. What fails in year two: Pointing between paving units loosens under freeze-thaw cycles. Repoint any gaps in autumn before water gets under the slabs and lifts them. 3. Raised Bed Garden A raised bed garden makes the most sense when the underlying soil is poor, compacted, or prone to waterlogging, or when the yard has an awkward slope. The beds themselves create order without rigidity. Rows, squares, L-shapes, or block arrangements all work. The paths between them are where most planning decisions actually matter, because paths that are too narrow (under 24 inches for a side path, 36 inches for a main route) create daily frustration by the time the plants fill in. Bed height by use: Set beds at 12 inches for ornamentals and 18 to 24 inches for anything you’ll harvest daily. Taller beds are significantly easier on the back. Corner protection: Exposed timber corners take direct hits from wheelbarrows. Galvanized steel corner brackets or a heavier timber grade at corners extends bed life by years. Wet zone separation: Keep thirsty crops in one section of the bed layout rather than spread across all of them. It makes targeted watering faster and keeps path surfaces drier. What fails in year two: Untreated softwood frames can start to show rot at the base after two wet winters. Use pressure-treated lumber rated for ground contact, or cedar and hardwood where budget allows. 4. Cottage Border Garden A cottage border garden works along fences, walls, or the outer edges of a yard. The key variable is depth. A thin line of planting rarely reads as a design choice. It looks like a failed attempt at coverage. A border needs to be at least 36 inches deep to layer properly: tall plants at the back, mid-height in the middle, and low ones softening the front edge. Done with that depth, it can carry significant visual weight without looking overdone. Service access: Leave 12 to 18 inches between the back of the border and the fence. You’ll need this when the fence needs staining, panel replacement, or post repair. Repeat shapes: A border can look wild and informal inside, but repeating one or two leaf shapes or bloom colors throughout keeps it from reading as neglected. Front edge definition: A clean front line using edging or a mowing strip is what separates a cottage border from a messy bed. The interior planting can be as relaxed as you like. What fails in year two: Taller perennials at the back start to flop without staking or support structures. Install grow-through supports in spring before they’re needed, not after they’ve already fallen. 5. Outdoor Room Garden An outdoor room garden divides one larger yard into separate zones with clear purposes. This layout idea is most effective in yards over 1,000 square feet, where a single open space starts to feel undefined. One area for dining on a firm paved surface, another for a reading chair on gravel or decking, a third for planting. The divisions can be hedges, planters, low walls, or a change in level. The risk is over-dividing. Every zone needs a reason to exist and enough space to function comfortably. Surface by activity: Dining needs a firm, level base. A quiet corner can sit on compacted gravel or low-budget decking. Mixing surface types between zones helps define each one without extra structures. Sight line management: Full-height screens create rooms but kill the feeling of space. Mixing low hedging with occasional taller elements gives privacy where it’s needed without boxing everything in. Material limit: No more than three paving or edging materials across the full yard. More than that and the garden starts to feel chopped up rather than intentionally zoned. 6. Vertical Garden A vertical garden uses height when floor space is too limited to plant outward. This works well on balconies, patios, side yards, and fenced gardens where the ground is already spoken for. Wall planters, shelves, trellises, and tall planters are all valid approaches. Beyond small spaces, it also adds visual height to larger gardens that feel flat and undifferentiated at ground level. Fixing strength: A wet planter filled with growing medium is significantly heavier than it looks dry. Fence panels rated for privacy screening are not necessarily rated for that load. Use wall fixings anchored into solid masonry or timber uprights. Shadow direction: Tall wall planting blocks light to anything below it. Check the sun’s path before positioning vertical features where they’ll shade kitchen herbs or lower beds. Drip planning: Wall-mounted planters need a watering strategy built in. Runoff stains light-colored paving and causes watermarks on rendered walls that are difficult to remove later. What fails in year two: Plants establish unevenly in pocket-style wall systems. Lower pockets tend to dry out faster than upper ones. Install drip irrigation from the start rather than relying on hand watering. 7. Island Bed Garden An island bed garden places a freestanding planted area in open lawn or hardstand. It’s the layout idea that makes the biggest visual improvement to the most ordinary yard for the least structural cost. Even one well-sized island bed changes how a flat space reads from the house. The shape can be round, oval, or kidney-shaped. A small specimen tree, shrubs, grasses, and perennials can sit together inside it. The critical difference from a border bed is that an island bed needs to look good from every angle. For yards where region and climate shape the planting choices, the climate-matched landscaping approach is worth reading alongside this layout. Size before digging: Mark the bed outline with a garden hose and live with it for a day before removing any turf. Island beds almost always look smaller outdoors than they do on a drawn plan. Mowing clearance: Leave 12 to 18 inches of clear grass around the outer edge so a mower can pass without scalping curves or hitting edging material. Outer plant selection: The perimeter of an island bed takes more wear than the center. Hose drag, foot scuffing, and pet traffic are all concentrated on that outer ring. Use robust, low-growing plants there. 8. Sunken Seating Garden A sunken seating garden creates a lowered sitting area within the outdoor space. This layout works in yards where ground-level privacy is nearly impossible to achieve without tall screens. By dropping the seating area 18 to 24 inches below the surrounding grade, you get a sheltered feel without blocking the views from inside the house. Low walls, built-in benches, stone steps, and planting around the rim complete the enclosure. This is a higher-investment garden layout idea, and drainage is the detail that decides whether it succeeds in the long term. Drainage first: A sunken area needs a proper drainage channel and outlet designed before any paving goes in. Water sitting at the base of a lowered patio is a structural and usability problem that cannot be fixed cheaply after the fact. Edge visibility: Step lighting, coping in a contrasting tone, or non-slip edge strips make level changes readable after dark. This is a safety detail, not a decorative one. Material climate match: Built-in timber seating at a lower level stays wetter than equivalent ground-level furniture. Hardwood, powder-coated steel, or polished concrete are better choices than softwood for sunken built-ins in most US climates. 9. Water Feature Garden A water feature garden places moving or still water at the center of the layout design. A pond, fountain, stream, birdbath, or simple water bowl all qualify. The value isn’t primarily visual. Sound changes how people use the space. A fountain audible from the seating area masks traffic noise and slows the pace of the garden in a way that no amount of planting does. The placement rule is simple: if you can’t hear it from the main seating area, it’s in the wrong location. Splash zones: Moving water wets surrounding paving. Textured or non-slip stone within 3 feet of any fountain or spillway is a practical safety requirement, not an upgrade. Power routing: If the feature needs a pump, the cable route has to be decided before any paving, edging, or planting is committed to. Retrofitting conduit through a finished garden is expensive and disruptive. Stable edging: Water draws people toward it, especially children. Any surrounding edge needs to feel firm and predictable underfoot. Loose gravel or uneven stepping stones around a pond edge are accidents waiting to happen. What fails in year two: Submersible pumps in small ponds clog with algae and leaf debris faster than most owners expect. A pump filter that can be cleaned without draining the feature is worth specifying from the start. 10. Rock Garden Layout A rock garden layout works where nothing else wants to. Dry slopes, compacted poor soil, sun-baked corners, and awkward edges are all natural fits. Rather than fighting the conditions, a well-built rock garden works with them. The structure is stone, and the planting fills the pockets between. This is one of the lower-maintenance garden layout ideas once established, but it requires careful installation to stay stable. Mixed stone sizes: Large anchor stones give the layout visual weight and structural stability. Smaller gravel fills gaps, locks the structure, and reduces soil erosion on slopes. Angle stones naturally: Stones buried one-third of their depth into the soil look settled. Stones sitting entirely on top look placed. The difference in result is significant. Drought-tolerant planting: Succulents, sedums, thyme, alpine plants, and ornamental grasses suit rock gardens and reduce the maintenance burden. Moisture-hungry plants in a rock garden setting tend to struggle and create gaps. 11. Shade Garden Layout A shade garden layout is the design answer for north-facing walls, spaces under established trees, and narrow side yards that get limited direct light. The approach here is to stop competing with the conditions and to instead build a planting palette that suits them. Foliage texture and structure carry the design through the year rather than seasonal flower color. Map light first: Most shaded areas still receive morning sun or filtered afternoon light through canopy gaps. Knowing exactly which areas get which quality of light changes the plant placement decisions significantly. Soil airflow: Dense shade retains moisture in the soil. Planting too closely in these conditions promotes fungal issues. Space plants further apart than the label suggests and mulch with a coarser material that doesn’t compact. Leaf texture contrast: Broad-leaved hostas, fine-textured ferns, and structured shrubs like viburnum work together to create interest without relying on bloom color, which is unreliable in low-light conditions. 12. Herb Spiral Garden An herb spiral uses a rising circular bed to grow a variety of herbs within a compact footprint. For a yard near a kitchen door where space is limited but daily access matters, this is one of the most practical small-scale garden layout ideas available. The spiral shape naturally creates varying moisture and sun exposure within a single structure. Drier, warmer conditions at the top and cooler, wetter conditions at the base allow for a wider plant range than a flat bed of the same area. Sun-loving herbs at the top: Rosemary, thyme, and oregano want the drier, warmer upper zones. Placing them there isn’t a design choice, it’s a growing condition match. Moisture herbs lower: Basil, parsley, and mint perform better in the cooler, slightly wetter sections at the base of the spiral. Build a solid base: Loosely stacked stone spirals shift within a single growing season. Compacted stone or mortared brick gives the structure the stability it needs to hold planting weight over several years. 13. Wildlife-Friendly Garden Layout A wildlife-focused garden layout supports birds, bees, and beneficial insects without abandoning usability for the household that lives there. The distinction between a wildlife garden and an overgrown yard is structure. Clear paths, defined zones, and deliberate planting choices give the garden enough order to feel intentional while still offering the habitat variety that matters for local ecology. Layered planting zones: Ground cover, shrubs at mid-height, and at least one taller element together create shelter, nesting, and feeding options for a wider range of species than any single plant layer provides alone. Quiet corners: An undisturbed corner with a log pile or dense ground cover is one of the highest-value additions in a wildlife garden. These areas require no maintenance and provide more ecological benefit than most planted features. Avoid over-clean edges: Leaving seed heads on spent plants through winter and not cutting back all growth in autumn supports seasonal feeding cycles for birds and overwintering insects. 14. Pergola Seating Garden A pergola’s framed overhead structure defines a focused outdoor dining or lounging area. The overhead element is what makes this layout idea work: it gives scale and shade to a seating zone without closing it in the way a full room or canopy would. This garden layout suits patios and transitional zones between the house and the rest of the yard, and it allows climbing plants to increase shade coverage as they establish over the first two growing seasons. Beam orientation: Position pergola beams to cut afternoon glare at the time the space will be used most. A dining area used at 6pm in summer needs shade from the west, not the south. Post footing depth: Posts set in concrete to the local frost depth hold in wind and shifting soil. Surface-mounted posts, even on well-anchored brackets, are a compromise on any structure over 10 feet square. Climbing plant guidance: Vines and climbers need attached wire or trellis from day one. Left unguided in the first season, they establish patterns that are difficult to redirect later without damage to the plant or the structure. What fails in year two: Untreated fir or pine joists exposed to rain and sun begin to check (surface crack) within two seasons. Specify pressure-treated timber or naturally durable hardwood for all horizontal members. 15. Container-Based Modular Garden A container-based modular garden replaces fixed beds with movable pots and planters arranged to create a defined outdoor space. This is the practical layout choice for renters, patio gardeners, rooftop spaces, and anyone who can’t or doesn’t want to make permanent changes to the ground. The structure comes from deliberately grouping containers, not scattering them. Height layering: Tall planters at the back or outer edge with lower pots stepping toward the front creates a sense of depth that a flat array of matching pots never achieves. Material consistency: Matching pot material or finish tone across different sizes prevents the collection from looking like a clearance sale. Terracotta, galvanized, or matte powder-coated containers each read as a coherent group. Path clearance: Containers fully planted and watered are much heavier than they appear when placed. Leave clear 24-inch routes between groupings before they’re in position, not after. 16. Linear Grid Path Garden A linear grid path garden structures a yard around straight, consistent walking routes that divide the planting into clean sections. This garden layout idea suits narrow rectangular yards and spaces where an edible or cutting garden needs a clear working structure. The paths define order while the planted sections between them carry the visual interest. The layout also scales easily: adding one more section or extending a path doesn’t require redesigning the whole yard. Consistent path width: All main paths should be the same width, typically 36 inches minimum. Uneven spacing creates a maze-like feel that frustrates movement, especially with a barrow or large container. Wet zone placement: High-water-use planting areas should sit away from the main path routes. Wet paving is a slip hazard and speeds up surface deterioration on most materials. Surface material limit: One material for paths and one for edging keeps a grid layout from feeling fragmented. The strength of a grid design is its clarity, and too many surface changes undermine that. 17. Zen Gravel Garden Layout A Zen gravel garden uses negative space, controlled texture, and a very limited plant selection to create calm in a yard that needs low maintenance above all else. The gravel is the surface, the stone is the structure, and the planting is restrained to two or three deliberate choices. This layout works best in enclosed courtyards, dedicated meditation corners, and front yards where upkeep is limited. Regular raking: Simple raked line patterns keep gravel areas reading as intentional. Without raking, a gravel garden drifts toward looking like an unfinished patio within one season. Limited plant count: Two or three structural plants, placed with space around them, carry more visual impact in this layout than a dozen smaller choices. The space between plants is part of the design. Anchor stones: One or two larger stones with real visual weight hold the entire layout together. Scattered small stones without a focal anchor produce a scattered, unresolved result. How to Match Garden Layout Ideas to Your Style Style should follow structure. The layouts that fail fastest are the ones chosen for aesthetic first and practical reality second. A cottage look requires depth and softness, which means curved paths and layered borders suit it better than strict symmetry. A modern aesthetic needs clean edges and controlled plant palettes, which makes raised beds, courtyard layouts, and sunken seating the right starting points. For hosting, outdoor room layouts give guests clear places to land rather than standing in the center of an undefined space. For calm, water features and Zen gravel layouts slow the pace of a yard in ways that no amount of furniture or planting does. For food growing, the raised bed and linear grid layouts keep production organized enough to actually maintain through a full season. The unifying principle in every case: decide on the layout’s structure before selecting any materials, plants, or finishes. Everything is easier to choose once the shape of the space is resolved. Finishing Details That Support the Layout Finishing details should make the garden’s structure clearer, not compete with it. These are the only additions worth making after the main layout is set: Clean edging: Define beds and paths so the garden’s shape stays readable as plants fill in. This is the one detail that separates a maintained garden from a neglected one at a glance. Low path lighting: Ground-level or step lights near level changes, path turns, and seating make the garden safer and warmer to use after dark without adding visual noise during the day. One firm seating spot: A single useful place to sit, properly positioned for shade, view, and access, is worth more than three decorative seating areas that rarely get used. Consistent container material: Repeating one pot finish or material across loose planters connects them to the broader design rather than making them look accumulated over time. Functional screens only: Privacy screens belong where there’s an actual view or exposure problem to solve. Installed anywhere else, they reduce light and add maintenance without improving the space. Garden Layout Mistakes to Avoid Most garden layout problems are avoidable. Every mistake in the table below is more expensive to fix after the work is done than it would have been to plan around at the start. Mistake What It Does to the Space Better Decision Too many focal points The eye jumps between features and the garden feels busy rather than resolved. Choose one main feature and let every other element support it. Paths under 36 inches wide Feels fine before planting. Becomes frustrating daily once growth fills in from both sides. Set main paths at 36 inches minimum before any plant goes in. Seating placed by aesthetic, not light A chair that sits in full afternoon sun becomes the seat nobody uses by midsummer. Check shade, privacy, view, and access at the time the seat will actually be used. Drainage ignored at planning stage Water finds its own route and usually picks the paving, the path, or the sunken seating area. Map drainage patterns before fixing any surface material or level change. Layout copied from a different-sized yard Features scaled for a larger space make a small yard feel crowded and hard to move through. Match the design to the actual yard’s dimensions, exposure, and daily use pattern. These aren’t theoretical mistakes. Every one of them shows up in real gardens, often within the first two seasons of use. The layouts in this guide are built around avoiding them from the start. Frequently Asked Questions These are the questions that come up most on outdoor jobs once the planning conversation starts moving. How do I plan a garden layout from scratch? Start with how the space gets used, not how it looks. Mark the sun at your typical use time, check drainage by observing the yard after rain, and measure any paths you plan to walk. Sketch zones before committing to any materials. Structure first, planting second. What is the best garden layout for small yards? Raised beds, vertical gardens, and container modular layouts all work well in tight spaces. Each one keeps plants off the main movement route and makes better use of vertical space than ground-level spreading. Choose based on whether the priority is growing food, privacy, or seasonal color. How wide should garden paths be? Main routes need 36 inches minimum to walk comfortably and carry equipment. Side access paths can go down to 24 inches. Anything narrower creates daily friction once plants fill in from the borders on either side. What garden layout is easiest to maintain? A simple raised bed or border layout with clear paths, grouped watering zones, and repeated plant choices requires the least ongoing effort. The fewer materials, the fewer surfaces to maintain. Gravel and edged beds outperform lawn in most low-maintenance comparisons. What is the best material for garden paths? Depends on the climate and use. Gravel drains well but migrates without edging. Compacted crushed stone packs firm and handles freeze-thaw reasonably well. Paving stone or concrete pavers hold up longest to foot traffic but require correct base preparation to avoid heaving in cold climates. How do I divide a garden into sections? Use changes in surface material, low hedging, planted borders, low walls, or a simple path to create section boundaries. Keep the number of dividers proportional to yard size. Three clear zones in a small garden is usually the maximum before it starts feeling cluttered. What plants work best in a shaded garden layout? Hostas, ferns, astilbe, hellebores, and viburnum all perform well in low light. Mixing leaf textures across these creates structure without relying on flowers. Avoid placing light-hungry plants like lavender, rosemary, or most ornamental grasses in consistently shaded positions. Summing Up A well-planned outdoor space works best when structure leads every decision rather than decoration. You get better results when paths, seating, and planting zones are decided before anything is built. I often see gardens improve immediately once layout clarity replaces scattered choices. The right garden layout ideas help you match space, use, and maintenance so the yard stays functional year after year. I want you to think in zones, proportions, and access before choosing materials or plants. That approach keeps your space practical and easier to use in real conditions. Try applying these principles to your yard and see what changes feel most useful. You can adjust as you go, but start with structure first.
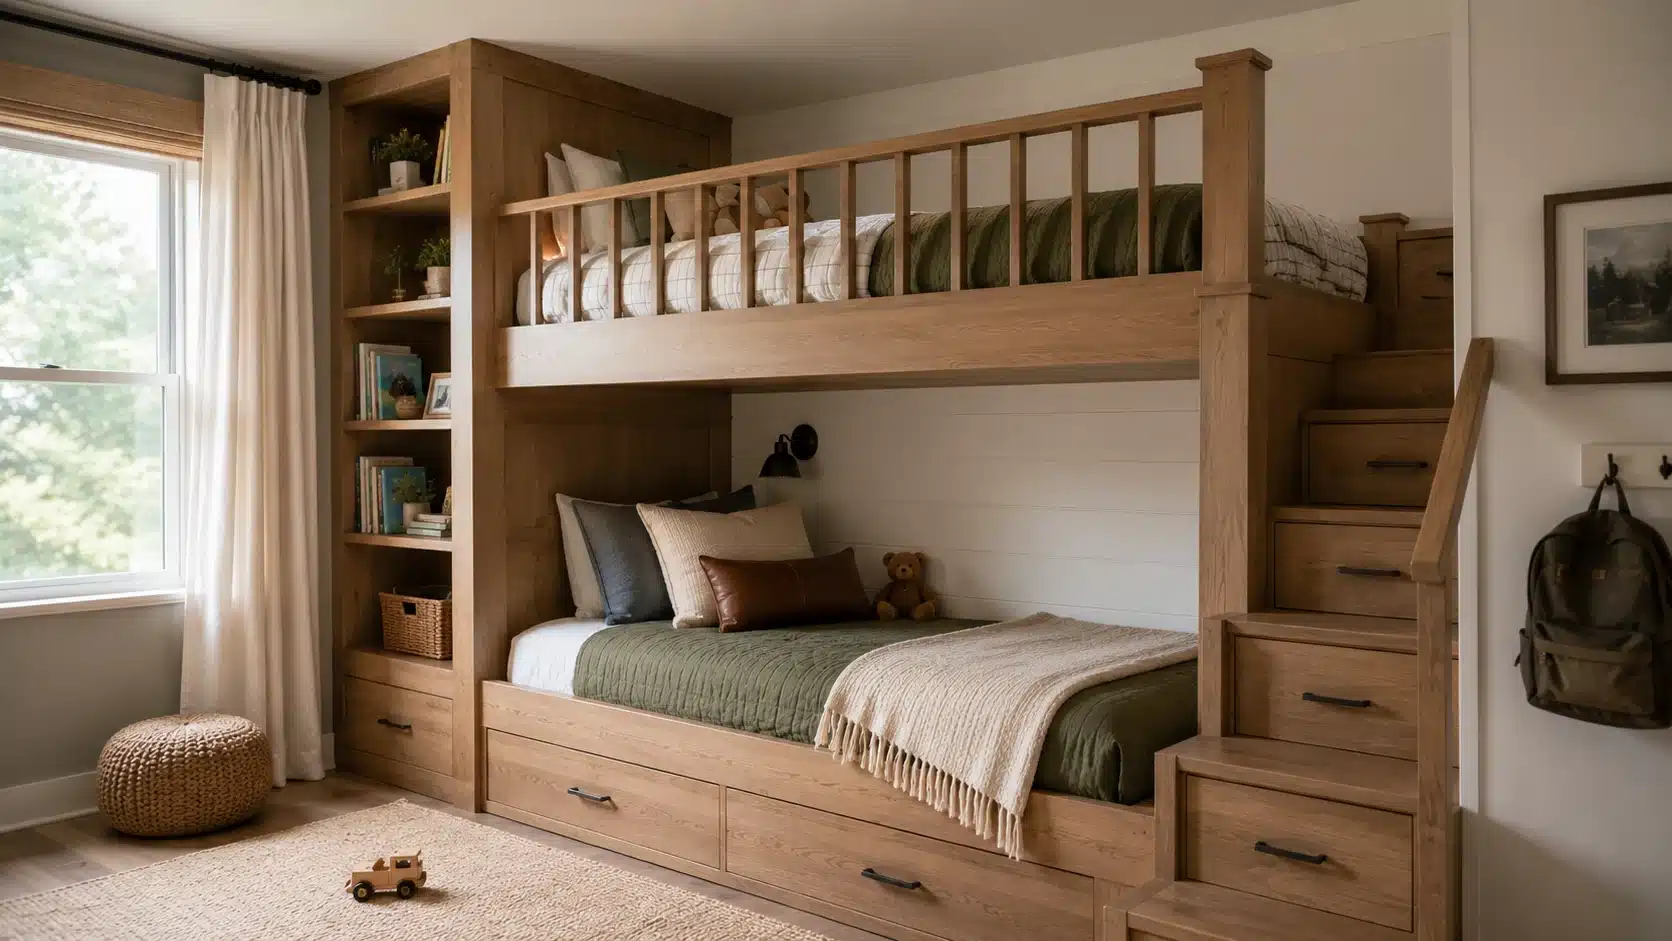
I love a bedroom project that saves floor space and makes the room feel more planned. A good bunk bed can do that in a kids’ room, guest room, cabin, or small bedroom, especially when it looks like it belongs to the wall instead of sitting there as bulky furniture. That is where diy bunk beds need more thought than a saved photo. The goal is not only to stack two mattresses. The better goal is to build something that fits the room, feels safe, adds storage where possible, and has the finished look of real carpentry. If you want a simple frame, structure matters most. If you want the look of built in bunk beds, details like wall fit, trim, panel facing, access, lighting, and paint need to be part of the plan from the start. Before You Build DIY Bunk Beds: What Should You Know? Before choosing a design, start with the room you are trying to improve. A custom bunk should solve a real layout problem, such as a small bedroom, shared kids’ room, awkward wall, guest space, or cabin sleeping area. Measure first, then decide what kind of bunk actually fits. Use this quick planning check before saving plans or buying lumber: Room Size: Measure the wall length, ceiling height, and open floor area. Mattress Fit: Decide on twin, twin XL, full, or mixed mattress sizes first. Access: Choose a ladder, stairs, or built-in steps based on space and age. Anchoring: Find the wall studs before planning any built-in structure. Finish Level: Decide between a simple frame and a full carpentry look with trim. Future Use: Think about whether the room will still need bunks in five years. The best plan is the one that fits the room before it looks good in paint. Once the measurements work, the finish details become easier to choose. Why Do Built In Bunk Beds Look More Finished? Built in bunk beds look more finished because they are planned as part of the room, not just placed inside it. The frame, wall fit, panels, trim, storage, and access all work together to make the bed feel intentional. The biggest difference comes from choosing details before the build starts: Strong Framing: A finished look still starts with structure. Framing often uses 2×4 or 2×6 lumber, with secure attachment to wall studs where the design calls for it. Clean Panel Facing: Plywood, MDF, shiplap, beadboard, or paint-grade boards can cover rough framing and make the bed look like built-in carpentry. Trim And Paint: Baseboards, edge trim, caulk, sanding, primer, and matching paint help the bunk blend into the walls instead of standing apart. Storage That Fits The Room: Stair drawers, cubbies, lower drawers, or side shelves can make the bed more useful, but they need space and clearance planned early. Personal Bed Zones: Small shelves, reading lights, curtains, or niches make each bunk feel more comfortable without adding bulky furniture. Practical Access: A ladder or stair position should feel natural in the room, with enough space to climb, change bedding, and move around. This section supports both planning goals: it shows what creates the custom look readers want, while also helping them compare which bunk bed ideas are worth building before they choose a plan. DIY Bunk Beds Vs Store-Bought Bunk Beds: Which Makes More Sense? Building is not always cheaper, and buying is not always better. The smarter choice depends on whether you need a custom room solution or a quick sleeping setup. Factor DIY Project Store-Bought Frame Cost Can save money if tools and materials are already available Gives a clearer upfront price Fit Works well for odd walls, tight rooms, and custom mattress layouts Usually limited to standard dimensions Look Can create a built-in, wall-to-wall, or finished carpentry style Depends on available retail designs Storage Can include drawers, shelves, cubbies, or stair storage Storage depends on the model Time Needs measuring, cutting, sanding, assembly, and finish work Faster to assemble and use Skill Level Requires basic carpentry confidence Usually requires basic assembly only Best For Custom bedrooms, kids’ rooms, cabins, storage needs, and built-ins Rentals, quick setups, and simple sleeping needs If the room needs a polished wall-to-wall look, building gives you more control. If speed, simplicity, or a tested retail frame matters more, buying may be the cleaner choice. Bunk Bed Ideas And Plans To Compare Before Building A good bunk bed idea should solve a real room problem, not just look nice in a photo. Compare each concept by space, skill level, storage, safety, and whether it works better as a built-in/custom project or a simple freestanding plan. 1. Simple Twin-Over-Twin Bunk Bed A twin-over-twin bunk is the simplest option to build and compare against other plans. It is best for simple freestanding layouts because the structure usually needs two mattress frames, corner posts, guardrails, and a ladder. You can still make it feel custom with paint, matching bedding, or a small shelf, but it will not have the same wall-to-wall finish as built in bunk beds. It is the easiest starting point. 2. Wall-to-Wall Built-In Bunk Bed A wall-to-wall bunk is best for a built-in or custom look. The frame usually connects to the room through studs, panels, trim, paint, and caulk, so it feels like part of the wall instead of separate furniture. This idea works well in kids’ rooms, cabins, and narrow bedrooms, but it needs careful measuring because changing the room later takes more planning, patching, and repair. Best for permanent rooms. 3. Bunk Beds With Stairs A stair bunk is best for custom rooms where storage and safer-feeling access matter more than saving every inch of floor space. The steps can hide drawers, cubbies, or bedding storage, which gives the project a finished carpentry look. It is less ideal for simple freestanding plans because stairs need more lumber, hardware, width, and build time than a straight ladder. Choose it when storage matters as much as sleeping. 4. Bunk Beds With Storage Drawers A bunk with storage drawers is useful for both freestanding and custom designs. It is best when the room has limited closet space and needs hidden storage for sheets, toys, pajamas, or guest supplies. The key is drawer clearance. Before building, check rugs, nearby furniture, closet doors, and walls so the drawers can open fully after the bed is finished. This one is practical without feeling overly complicated. 5. Triple Bunk Beds A triple bunk is best for cabins, vacation homes, large families, and sleepover rooms where sleeping capacity matters most. It can be built vertically, along one wall, or in an L-shape. This is more of an intermediate custom project than a starter freestanding plan because headroom, guardrails, ladder access, mattress support, and room circulation all become harder to plan safely. Choose it only with a very clear plan. 6. L-Shaped Bunk Beds An L-shaped bunk is best for corner rooms or shared bedrooms where one straight wall is not enough. It can feel more custom because the lower bed turns into the room and leaves space for shelves, a desk, or a reading corner. It can be freestanding, but it usually looks better when the corner is planned with trim, lighting, or storage. It works well when the room needs zones. 7. Loft Bed With Desk Below A loft bed with a desk below is best for older kids, teens, and small bedrooms that need a study zone. It is usually a freestanding concept, but it can look custom if you add side panels, shelves, lighting, and matching paint. The main planning details are ceiling height, ladder placement, rail height, and whether the desk area below feels open enough. Good when one room has two jobs. 8. Low Bunk Beds For Younger Kids A low bunk is best for younger kids, smaller rooms, and lower ceilings. It is usually a simple freestanding plan because the shorter height makes the project less visually heavy. You can still add a custom feel with paint, rounded edges, simple trim, or low storage. It should still have proper guardrails, steady access, and mattress support like a taller bunk. This option keeps the room easier to manage. 9. House-Style Bunk Bed A house-style bunk is best for kids’ rooms where the bed should feel playful and designed, not just stacked. It can work as a freestanding frame or a semi-custom feature with wall color, curtains, and trim. Keep the roofline and decorative pieces smooth, secure, and simple. This idea looks custom quickly, but the added shapes should never weaken access or safety. Keep the design playful, not overbuilt. 10. Bunk Beds With Privacy Curtains A bunk with privacy curtains is best for shared bedrooms, guest rooms, or sleepover spaces where each sleeper needs a small personal zone. It works with both freestanding and built-in plans. The custom look comes from matching fabric, simple rods, and neat mounting. Use lightweight curtains that open easily, and avoid loose loops, heavy fabric, or hardware that creates climbing hazards. It adds comfort without changing the main structure. 11. Bunk Beds With Reading Lights A bunk with reading lights is best for custom rooms, older kids, and guest spaces where each bed needs its own function. It can improve both freestanding and built-in designs. Plan lights before closing trim or panels so cords and switches do not look messy. Plug-in or battery lights are easier, while hardwired lighting should be handled by a qualified electrician. It makes bedtime easier without adding storage. 12. Bunk Beds With Built-In Shelves Bunk beds with built-in shelves are best when the room has no space for nightstands. Shelves near each mattress can hold books, glasses, water bottles, or small bedtime items. This idea strongly supports a custom look, especially when shelves are framed into the side panels. Keep them shallow, smooth-edged, and placed where they will not become steps or head-bumping spots. This solves a common problem in tight rooms. 13. Renter-Friendly Built-In Look A renter-friendly built-in look is best when you want custom style without permanent construction. Use a freestanding bunk, removable panels, curtains, matching paint colors, and separate storage pieces to create the feel of built in bunk beds. This is useful for apartments or future room changes. Avoid unsafe wall-attachment shortcuts and follow lease rules before adding anything fixed. It gives style without committing to permanent framing. Choose the design that fits the room first, then style it. A bunk bed that looks perfect online can still fail in real life if the ceiling, ladder, guardrail, mattress, or storage plan does not match the space. How Do You Build DIY Bunk Beds Step By Step? A bunk bed build should follow a measured plan instead of guesswork. This sequence follows a common 2×6 and 2×4 build style, where the frames, slats, legs, supports, and hidden fasteners come together before finishing. Tools You May Need: Measuring And Marking Cutting And Shaping Assembly And Fastening Finishing And Safety Tape measure Circular saw Drill and driver Sander Pencil Table saw, optional Pocket hole jig Safety glasses Clamps Band saw, optional Wood screws or structural screws Hearing protection Straight fence or cutting jig Thickness planer, optional Block plane Paint, stain, wax, or finish of choice Step 1: Prepare The 2×6 and 2×4 Lumber: Start with straight 2x6s and 2x4s because they are affordable, strong, and easy to find. Clean up manufacturer marks, rough ends, and sharp edges before assembly. A planer helps, but sanding or using a block plane can also make the boards cleaner and easier to finish. Step 2: Build The Mattress Frames First: Make the two rectangular mattress frames from 2×6 boards. Pocket holes can speed up the build and keep most screw heads hidden. This step matters because the frames carry the mattresses, so they need to be square, sturdy, and sized correctly before anything else is added. Step 3: Add Cleats and Slats for Mattress Support: Install 2×2 cleats inside each frame so the slats have a solid ledge to rest on. Then cut and fit the slats, usually from 2x4s. The slats should sit evenly and support the mattress without shifting, sagging, or leaving large gaps. Step 4: Build The L-Shaped Corner Legs: Make each leg by joining a 2×4 to a 2×6, forming an L-shaped post. Place pocket holes where the bed frame or ladder pieces will hide them later. This keeps the outside of the bunk cleaner while still giving the structure stronger corner support. Step 5: Use Locating Blocks and Fasten The Frames: Add small blocks to the legs to help position the mattress frames during assembly. Once the frames sit correctly, fasten them from the inside. This keeps visible hardware to a minimum and helps prevent the frame from twisting or racking during use. Step 6: Check Strength, Sand, and Finish: Before painting or staining, check the whole bunk for wobble, shifting, rough corners, and loose fasteners. Add guardrails and access details according to your plan. Sand every edge that hands, feet, bedding, or skin may touch, then apply the finish only after the structure feels solid. This build works best when the hidden structure is planned as carefully as the visible finish. If the bed shifts, racks, or feels loose during assembly, fix that before sanding, staining, or moving it into a bedroom. How Much Do Different Bunk Bed Projects Usually Cost? Exact prices vary with lumber, location, tools, and finish choices, so treat these as planning ranges rather than final quotes. The total usually depends on how much framing lumber, plywood, trim, hardware, paint, and storage detail your design needs. Project Type Estimated Material Cost Why It Costs That Way Simple Twin Bunk $250 to $600 Basic lumber, slats, screws, sanding supplies, and a simple ladder Low Bunk $200 to $500 Smaller frame, less lumber, but still needs rails and strong support Built-In Bunk $700 to $1,800 Framing, plywood or MDF panels, trim, paint, caulk, and wall anchoring Stair Bunk $900 to $2,300 Extra plywood, drawer slides, stair framing, trim, and more hardware Triple Bunk $1,000 to $2,800 More mattress platforms, guardrails, supports, fasteners, and finishing time Renter-Friendly Look $350 to $900 Freestanding frame plus removable panels, curtains, storage, or styling pieces Note: These numbers do not include mattresses, bedding, new tools, delivery fees, or paid labor. I always price the boring supplies too: screws, sandpaper, primer, paint, caulk, extra blades, and mistake boards. Those small items can quietly add more than expected. What Safety Checks Should You Make Before Building A Bunk Bed? Safety planning should happen before the first cut, not after the frame is standing. The U.S. Consumer Product Safety Commission, 16 CFR Part 1513, and 16 CFR Part 1213 outline important bunk bed rules around guardrails, openings, entrapment risks, and warning labels. Plan Guardrails And Mattress Height Together: A thick mattress can reduce how much guardrail protection is left. Follow Top Bunk Age Guidance: The upper bunk is not recommended for children under 6. Avoid Risky Gaps And Openings: Spaces around rails, ends, ladders, and walls should not create entrapment risks. Secure The Frame Properly: Built-ins need strong support, usually into studs. Drywall alone should not carry the structure. Make Climbing Safe: Ladders or stairs should feel steady, smooth, wide enough, and easy to grip. Check Daily Use Details: Leave room for bedding, drawers, vents, windows, outlets, and walkways. A safe bunk bed should feel steady, practical, and easy to use. If anything wobbles, shifts, blocks movement, or feels uncertain, fix that before paint, trim, or styling. Are DIY Bunk Beds Cheaper, And Which Plans Should You Compare First? DIY bunk beds can cost less when the design is simple and you already own the tools. They can cost more when the plan includes stairs, drawers, trim, panels, paint, new tools, or delivery. Before choosing, compare two or three plans by how complete and realistic they are. What To Compare What To Check Finished Size The full bed dimensions, ceiling height, mattress size, and room clearance Cut List A clear lumber list and cut list so you are not guessing during the build Guardrail Plan Top bunk rail height, mattress thickness, and safe gap spacing Ladder Or Stair Design Safe climbing access, floor space, grip, and placement Fastening Details Clear support points, screws, bolts, anchors, or joinery instructions Storage Details Drawers, shelves, stairs, or cubbies that match your budget and skill level Build Vs Buy Decision Build for custom fit and storage. Buy for speed, simpler setup, or tested retail structure A pretty image without measurements is only inspiration, not a build plan. If price and speed matter most, buying may win. If fit, storage, and built in bunk beds style matter more, building can be the better choice. How Can You Make A Bunk Room Feel Custom? A bunk room feels custom when every sleeper has a small, useful zone. You do not need an expensive build for that. The goal is to make the details feel planned, comfortable, and connected to the room. Add Personal Bedside Zones: Place a small shelf near each pillow for books, glasses, a water bottle, or bedtime items. Use Matching Reading Lights: Add simple lights near each bunk so every sleeper has their own usable corner. Blend The Frame With The Room: Paint the bunk the same color as the walls or use trim to cover uneven gaps. Add Privacy Without Clutter: Use lightweight curtains if the room is shared, but keep them easy to open and safe. Control Visual Mess: Use closed storage, simple bedding, and calm colors so the bunk does not overwhelm the room. Make Access Feel Finished: Add a small step light near stairs or ladders if it fits the room safely. This is where a plain build starts feeling like a room feature instead of a large piece of furniture. When Should You Buy Instead Of Build? Buy instead of building when safety, timing, or structure feels uncertain. A solid store-bought frame is better than a homemade bunk that looks nice but wobbles, shifts, or leaves you unsure at bedtime. Buying is usually smarter if you do not have the right tools, cannot secure the frame properly, need a clear adult weight rating, are renting, have a low ceiling, or need the bed immediately. A DIY project should make the room better, not make everyone nervous about using it. Frequently Asked Questions Can a Bunk Bed Be Built Into a Closet Nook? Yes, if the nook has enough width, headroom, ventilation, and safe access. Check wall studs, mattress clearance, lighting, and escape path before planning. Avoid blocking vents, outlets, or windows. A closet-style bunk can look clever, but it still needs proper structure. What Mattress Thickness Works Best For The Top Bunk? A thinner mattress is often better for the top bunk because it helps preserve guardrail height. Always check your plan or bed specifications before buying. If the mattress is too thick, the rail may not protect the sleeper properly during movement at night. How Do You Make Bunk Beds Easier To Make? Use fitted bedding, thinner comforters, and washable layers that tuck easily. Leave enough side access so changing sheets does not become a weekly battle. Built-in bunks look beautiful, but tight wall-to-wall openings can make bedding harder than expected. Can a Bunk Bed Work In a Guest Room? Yes, especially in cabins, vacation homes, or rooms used by families. Choose a sturdy design, clear ladder access, and mattresses that suit the likely guests. If adults may sleep there, pay close attention to structure, comfort, and weight expectations. How Do You Keep a Bunk Room From Feeling Crowded? Use light wall colors, built-in storage, simple bedding, and clear floor space. Avoid oversized ladders, bulky rails, and too many decorative pieces. A bunk room feels calmer when each sleeping space has one shelf, one light, and a place for personal items. Final Thoughts DIY bunk beds work best when the plan starts with the room, not the lumber pile. A strong build should save floor space, fit the mattress properly, give each sleeper a clear zone, and feel steady enough for everyday use. If the goal is a finished carpentry look, built in bunk beds are usually the better design direction. They need more planning, but the result can feel cleaner, more useful, and more connected to the bedroom. Before buying materials, measure the room, compare a few plans, check the safety rules, and decide which built-in details are worth the work. That small pause can save money, time, and a lot of rework.
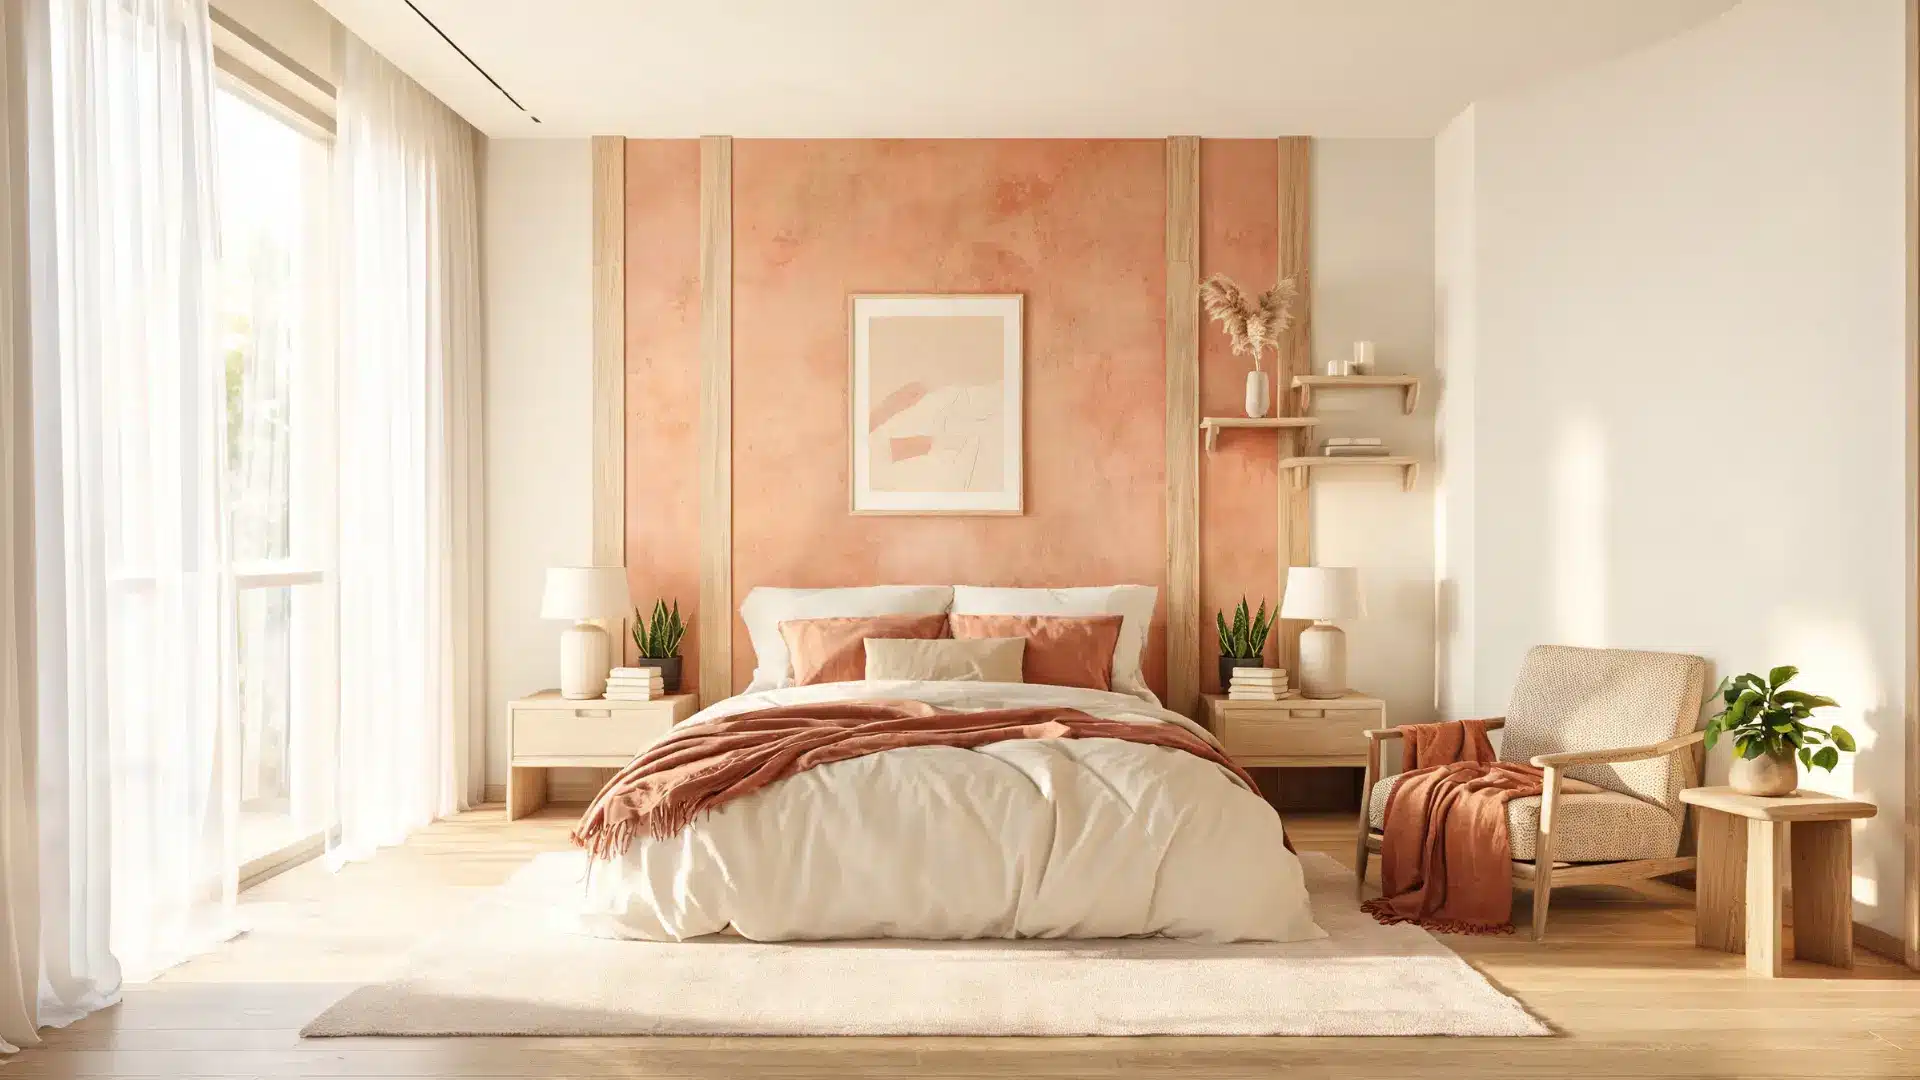
Accent walls can make a room feel stylish or leave it looking tied to an older trend. When I first look at a space, I always think about whether that one wall actually has a purpose or if it’s just filling an empty spot. If you’re asking whether accent walls are out of style, it usually comes down to wanting clarity before choosing a bold paint color. The idea still works, but only when it fits the room properly. A random wall, harsh shade, or flat finish can make a space feel unfinished. A better approach is to highlight something meaningful, such as a bed, fireplace, shelving, or dining area, while keeping everything connected to the rest of the room Are Accent Walls Out of Style? No, accent walls are not out of style. Basic painted accent walls can feel dated when the color is too harsh, the placement feels random, or the wall does not connect with the rest of the room. However, a well-planned accent wall can still look current when it highlights a clear focal point and supports the overall design. A bedroom accent wall, for example, can work well behind the bed because it gives the room structure and helps frame the main furniture piece. Accent walls also feel more updated when they include texture, soft contrast, trim, wallpaper, or a color already used in the space. The goal is not to create one loud wall, but to make the room feel more balanced, finished, and intentional. Room-by-Room Guide for Accent Wall Placement Accent wall placement matters more than the color itself. The right wall should support the way the room is used and help the eye land in a natural place. A random side wall can make the space feel uneven, even if the color is beautiful. Before choosing a wall, look at the room’s main furniture, lighting, and entry point. Ask what the wall is supposed to frame or improve. In some spaces, the answer is clear, such as the wall behind a bed or a fireplace. In others, a softer update, such as wallpaper, trim, or built-ins, may work better than paint alone. 1. Bedroom In a bedroom, the best accent wall is usually the wall behind the bed. This placement frames the bed, grounds it, and gives the room a clear focal point. A dark paint color, soft wallpaper, wood trim, or paneling can all work well here. Avoid choosing a side wall just because it is blank. That can pull attention away from the bed and make the layout feel awkward. Keep bedding, curtains, and decor connected to the wall color. If you’re working through bedroom paint colors that feel cozy, the accent wall choice and the overall palette need to be decided together, not separately. 2. Living Room In a living room, the accent wall should support the main seating area. The best choice is often the fireplace wall, media wall, or the wall behind built-in shelves. This helps the room feel centered and makes furniture placement easier. Avoid painting a random wall behind a sofa if it does not connect to the layout. The color or texture should also work with the rug, sofa, art, and lighting. A living room accent wall looks best when it feels layered, and if the fireplace is the focal point, fireplace accent wall ideas are worth looking at before you commit to paint alone. 3. Dining Room A dining room can handle a stronger accent wall because the space is often used for mood and gathering. The best wall is usually the one behind the dining table, sideboard, or main view from the entry. Wallpaper, limewash, deep paint, or picture-frame molding can make the room feel more finished. Avoid tiny, busy patterns on a large wall because they can feel cluttered. The accent should make the table area feel more intentional, not distract from it. 4. Entryway An entryway accent wall should create a strong first impression without making the space feel crowded. The best wall is usually the first one you see when you walk in. Paint, wallpaper, paneling, or a small gallery wall can work well here. Since entryways are often narrow, avoid very dark colors unless there is enough light. A mirror, console table, hooks, or warm lighting can help the wall feel useful. The goal is to set the tone for the home. 5. Office Or Workspace In an office or workspace, an accent wall should help the area feel focused and calm. The best wall may be behind the desk, behind shelves, or in the camera background for video calls. Muted greens, blues, warm neutrals, wallpaper, or painted built-ins can work well. Avoid colors that feel too loud or distracting during long work hours. If the space is small, color drenching may work better than one sharp accent wall. Keep the design simple, useful, and easy to work around. Why Some Painted Accent Walls Look Dated Painted accent walls often look dated when they feel separate from the rest of the room. A strong color can work, but it needs clear placement, visual support, and a real design purpose. The table below covers the most common problems and what to do instead. What Looks Dated Why It Feels Off What To Do Instead Random empty wall It does not guide the eye toward anything important Choose a wall that frames a bed, fireplace, shelves, dining table, or artwork A color that feels too harsh The shade does not connect with furniture, rugs, curtains, or decor Pick a softer shade or repeat the color in pillows, art, bedding, or accessories Flat paint with no depth The wall can look plain or unfinished without support Add lighting, molding, paneling, shelves, wallpaper, or artwork A wall that fights the layout It pulls attention away from the room’s best feature Stand at the entrance and choose the wall your eye naturally notices first One bold wall in a very pale room The contrast can make the space feel chopped up Use color drenching, softer contrast, or a shade already used in the room A dated accent wall usually does not need a full redesign. Most of the time, it needs better placement, softer contrast, or more support from texture, lighting, and decor. The best accent wall should make the room feel more balanced, not more divided. Why Accent Walls Became Popular in the First Place Accent walls became popular because they offered fast impact with less commitment. They helped people add color, pattern, and personality without repainting or decorating the entire room. This made them useful for quick updates, tight budgets, and spaces that needed a stronger focal point. They Saved Money: One wall costs less to paint, wallpaper, or panel than a full room. They Felt Less Risky: Bold colors and patterns were easier to try in smaller amounts. They Created Focus: They helped frame beds, fireplaces, sofas, shelves, and dining tables. They Defined Open Spaces: They gave open-plan homes clearer zones without adding walls. They Were Easy To DIY: Many accent walls could be finished in a weekend. Accent walls started fading when they were used without purpose. A random painted wall can make a room feel unfinished, especially when the color does not connect to the furniture, lighting, or decor Is A Bedroom Accent Wall Still A Good Idea? A bedroom accent wall is still one of the safest ways to use this idea. The bed already creates a focal point, so the wall behind it has a clear purpose. For a calm bedroom, try a muted green, soft clay, warm taupe, deep blue, or smoky charcoal. These shades feel more current than sharp red, bright teal, or high-gloss black. Texture can also help. Simple wall molding behind the bed can make the room feel finished without needing a bold color. Wallpaper works well too, especially when bedding and curtains stay simple. If your bedroom is small, avoid a color that feels too heavy beside pale walls. A mid-tone shade or soft textured finish can add depth without shrinking the room. For a broader look at master bedroom paint ideas, the same placement principles apply regardless of the specific shade you choose. Better Alternatives To Basic Painted Accent Walls A flat painted wall can still work, but other options may feel more finished. Use this table to compare which update best fits your room. Alternative Best For Why It Works Color drenching Bedrooms, offices, powder rooms Creates a calm, wrapped look with one color family Limewash or textured paint Bedrooms, living rooms, reading corners Adds depth and movement without a busy pattern Wood trim or slat walls Bedrooms, entries, living rooms Gives a plain wall structure and warmth Wallpaper or murals Dining rooms, nurseries, offices, bedrooms Adds pattern, story, and visual interest Painted built-ins Living rooms, offices, fireplaces Adds storage, color, and shape at once These options are useful when a single painted wall feels too flat. Choose the one that fits your room’s size, mood, and budget. Easy Ways To Update An Old Accent Wall An old accent wall does not always need to be removed or fully repainted to feel current again. Small changes can completely shift how the wall fits into the room and how balanced it feels overall. The goal is to make the wall feel intentional, connected, and less like a leftover design choice. In many cases, the fix is not about starting over, but improving what is already there. Soften the paint color if it feels too harsh or heavy. Add trim or molding to give the wall structure and depth. Repeat the wall color in decor, pillows, rugs, or artwork, to create a connection. Improve the lighting so the wall feels highlighted rather than flat or dark. Consider wallpaper instead of plain paint for more texture and interest. Paint built-ins rather than a blank wall to create a stronger, more functional focal point. Quick Decision Table: Keep It, Change It, Or Paint The Whole Room? Use this quick table if you already have an accent wall and cannot decide what to do next. The goal is to judge whether the wall supports the room or makes it feel awkward. Look at placement, color balance, texture, and how the wall works with your furniture before repainting everything Situation Best Choice Why Wall frames a bed or fireplace Keep it It supports the room’s natural focal point Wall feels random Change it The placement is likely the real issue Room feels chopped up Paint the whole room One color may feel calmer and more finished The wall feels too flat Add texture Trim, wallpaper, or limewash can make it feel planned A good wall should make the room easier to understand. If it conflicts with the layout, the design needs to change. Accent Wall Mistakes To Avoid Accent walls can work really well, but small mistakes can throw off the whole room. Here are the ones to avoid: Wrong Wall Choice: Don’t default to the shortest or random wall. Pick one that naturally highlights a bed, fireplace, shelving, or dining table. Color Imbalance: Avoid strong contrast colors unless they are repeated in rugs, pillows, art, or decor pieces. Paint-Only Approach: Don’t rely on paint alone when the space needs depth—add trim, lighting, shelves, or texture. Pattern Overload: Avoid small patterns on large walls, as they can feel busy and visually cluttered from a distance. Poor Lighting Setup: Don’t ignore lighting; deep colors and textured finishes often need sconces, lamps, or picture lights. These simple checks help an accent wall feel intentional, balanced, and well connected to the room. Frequently Asked Questions What is replacing accent walls? Color drenching, textured finishes, wallpaper murals, wood trim, and painted built-ins are the most common replacements. These options add depth throughout the room rather than relying on a single flat wall to carry the entire design. How do you change an accent wall without repainting everything? Use wallpaper, trim, limewash, or add shelves and artwork. These updates refresh the wall while keeping existing paint intact, so the space feels updated without a full repaint. Are accent walls a good option for renters? Yes, but removable options work best. Temporary wallpaper, peel-and-stick panels, or lightweight decals let renters personalize spaces without permanent paint changes or damaging the original wall surface. Should an accent wall be darker or lighter? Either can work, but the shade should relate to the rest of the room. Darker colors add mood and depth, while lighter textured finishes can create visual interest without making a smaller space feel closed in. Do accent walls hurt resale value? They rarely do, as long as the color is tasteful and easy to repaint. Very bold shades, poor placement, or heavy custom finishes may limit buyer appeal in a competitive market. What wall color works best for a bedroom accent wall? Muted greens, warm taupes, soft clay, deep blue, and smoky charcoal all read well in bedrooms. These feel current without being loud. Avoid very bright or high-gloss finishes behind the bed unless the rest of the room can support that contrast. Final Thoughts Accent walls are not gone, but the older approach often needs a rethink. When I look at a room, I still ask the same question you might be thinking-are accent walls out of style, but the answer depends on how the wall works, not the trend. A good accent wall highlights a natural focal point, connects with the room’s colors, and is supported by texture, lighting, art, or furniture. A dated one feels random, too harsh, or flat. I avoid painting a wall just because it is empty, since that rarely adds purpose. Instead, I prefer trim, wallpaper, limewash, or a softer shade. If unsure, test one small change and step back to see how the room feels.
Your baby’s sleep space starts out feeling impossibly small. Then, almost overnight, that crib becomes the center of naps, midnight wake-ups, first rollovers, and eventually a toddler who thinks bedtime is a negotiation. That is why crib mattress size is not a tiny detail to skim past. A crib mattress has to do more than fit the nursery theme. It needs to fit the crib properly, sit flat, feel firm, and leave no unsafe gaps around the edges. I’ve seen plenty of home projects go sideways because someone trusted a label instead of measuring. Nursery setup is no different. Before you buy, here are the crib mattress dimensions that matter and the fit checks I would not skip. Common Size About 28 x 52 inches Fits Full-size cribs and many toddler beds Max Thickness 6 inches Regulated By US Consumer Product Safety Commission (CPSC) What is a crib mattress? A standard crib mattress is designed to fit full-size cribs using regulated safety dimensions so the mattress stays snug and stable inside the frame. The official federal minimum is 27 1/4 inches wide by 51 5/8 inches long, while most retail mattresses are rounded to 28 x 52 inches for simplicity and also limits thickness to 6 inches, enough to keep the crib’s side rails at a safe height above the sleep surface. This sizing is not about convenience. It exists to reduce gaps that could pose entrapment risks or allow the mattress to shift during sleep. A gap larger than two finger-widths between the mattress edge and crib wall is a flag. A properly fitting crib mattress should sit flat without bending or leaving noticeable space along any side. Crib Mattress Dimensions When you are comparing products, the numbers can blur together fast. Keep this chart nearby so you don’t bounce between tabs while trying to decode every mattress listing. Measurement Inches Centimeters Width 27 1/4 to 28 in. About 69 to 71 cm Length 51 5/8 to 52 in. About 131 to 132 cm Thickness 6 in. About 15 cm Common mini crib mattress About 24 x 38 in. About 61 x 97 cm A half inch may not sound like much. In a crib, it matters. A mattress that is too small can leave gaps along the rails or corners. A mattress that is too thick can affect how deep the crib feels once your baby starts sitting, pulling up, or standing. That is why I would treat crib mattress dimensions as a safety check, not just a product detail. How to Measure a Crib for the Right Mattress A correct crib mattress fit starts with accurate crib measurements rather than relying on labels like “standard size.” Small differences in crib manufacturing, frame wear, or design can change the usable interior space enough to affect safety and fit. Measuring the inside dimensions before choosing or using a mattress removes most guesswork and helps match the crib opening to the mattress exactly. It helps to focus only on the interior space where the mattress actually sits. Outer crib dimensions don’t reflect usable room, and even slight irregularities inside the frame can affect how snugly the mattress fits. Along with width and length, mattress height settings also matter because they change how securely the mattress sits as the baby grows and the crib level is adjusted. 1. Inside Width Measurement Measure from one inner rail to the opposite inner rail where the mattress will sit. Take measurements at both the head and foot ends, since older or lower-quality cribs can vary slightly in shape. Always use the smallest recorded width to avoid overestimating the available space. A crib mattress should match this width closely enough that no noticeable side gaps appear once placed inside the frame. 2. Inside Length Measurement Measure from the inside of the headboard to the inside of the footboard. Like width, this should be checked in more than one spot to account for uneven framing. If two measurements differ, the shorter length becomes the reference point. A proper crib mattress should sit fully flush from end to end without forcing or bending inside the frame. 3. Mattress Support Height Check Adjustable mattress levels don’t change mattress size, but they do affect real-world fit and safety. Measure the usable depth at each level if the crib has multiple height settings. As the mattress is lowered for a growing child, stability becomes more important. A correctly sized mattress should remain steady at every support level without shifting or lifting at the edges. Final Fit Comparison Once width, length, and support depth are recorded, compare them directly with the mattress specifications. The goal is a near-exact match with no need to compress, force, or adjust the mattress inside the frame. If even one measurement feels off, it’s safer to recheck the crib dimensions before use. A crib mattress should sit firmly in place on all sides without relying on force or pressure to stay positioned correctly. How to Choose the Right Crib Size for You The right crib size should fit the room, match daily routine, and support safe sleep. A common mistake is choosing the crib based on looks and working backward to the mattress. The practical sequence goes the other direction: space first, then crib type, then mattress fit. When planning a nursery layout, the same logic that applies to bedroom furniture arrangement applies here, clearance paths around the crib matter as much as the crib itself. Start with room dimensions: Measure the nursery, shared bedroom, or sleeping area before choosing a crib. This prevents buying a crib that feels too large, cramped, or hard to move around safely. Match the crib to daily use: Choose a full-size crib if it will be your baby’s main sleep space. A mini crib may work better for small rooms, apartments, or temporary setups — but confirm the mattress size before committing to either. Check the mattress fit: The mattress should sit flat and snug inside the crib. No loose edges, bending, or visible gaps. Think about how long you need it: A convertible full-size crib can extend use into toddler years. A mini crib serves shorter-term needs. Factor that into the upfront cost. Review the crib type: Portable, playard, and shaped cribs often require model-specific mattresses. Do not assume a standard mattress fits every crib style. Keep safety before style: A crib can be well-designed and still create problems if the mattress fit is wrong. Choose one that supports a firm, flat mattress and leaves enough clearance for safe daily use. Once room dimensions, mattress fit, crib type, and long-term use are clear, the choice becomes a straightforward process rather than a guessing game. Standard Cribs vs Other Crib Mattress Sizes Cribs do not all use the same mattress size, even when labels make them sound interchangeable. The word “standard” usually applies only to full-size cribs, not every crib style. Here is how the main crib types differ: Crib Type Mattress Size or Fit What It Means Standard Cribs Usually around 28 x 52 inches This is the most common crib mattress size and fits many full-size and convertible cribs. Still, measure the crib interior to make sure there are no visible gaps. Mini Cribs Usually around 24 x 38 inches These are made for smaller rooms, apartments, or short-term nursery setups. A mini crib mattress should not be used in a full-size crib because it can leave unsafe gaps. Portable Cribs and Playards Model-specific sizing These do not follow one universal mattress size. The mattress should match the exact product model, since small differences in thickness or shape can affect fit. Shaped and Specialty Cribs Custom-shaped mattress Oval, round, and designer cribs usually need a matching mattress from the same brand. These mattresses are not interchangeable with standard or mini crib mattresses. The safest approach is to treat the crib and mattress as a matched pair. A label helps narrow the field, but the crib’s measured interior dimensions should always drive the final decision. The same precision that goes into choosing nursery storage furniture for a small room applies directly to the crib mattress fit. Crib Mattress Safety Measures Parents Should Not Skip Crib mattress safety is not about adding more things; it is about removing the wrong ones. A simple crib is usually the safest option because every extra item in the sleep space increases risk. Before focusing on design or comfort, it is worth locking in the basic safety rules that actually matter in real use. For sleep, keep the crib simple and check these basics: Firm Mattress: A crib mattress should feel firm, not plush. Soft adult-style comfort is not the goal for infant sleep. Flat Surface: The mattress should lie level inside the crib. Do not use wedges, inclines, or rolled blankets to change the sleep angle. Fitted Sheet Only: Use a fitted crib sheet sized for the mattress. Skip pillows, loose blankets, bumpers, quilts, stuffed animals, and sleep positioners. No Extra Toppers: Do not add foam pads or pillow-top layers to soften the mattress. Added layers can change both fit and firmness. Correct Thickness: A full-size crib mattress should not exceed 6 inches in thickness. Thicker does not mean safer or better. Manual Check: If your crib has a manual, read the mattress size section. If the manual is missing, search by the crib model number before buying a mattress. Secondhand cribs and mattresses deserve extra caution. A used crib may be missing parts, and a used mattress may have sagging, hidden moisture damage, or a fit issue that is hard to spot in photos. Once these safety checks are in place, the crib becomes predictable, stable, and easier to trust during sleep. Most issues with crib mattresses do not stem from major mistakes but from small add-ons or overlooked guidelines. Keeping the setup simple, firm, and properly fitted removes most of those risks before they ever show up. Common Mistakes When Choosing a Crib Mattress Most crib mattress problems don’t come from the mattress itself but from incorrect assumptions during selection. A crib can look “standard,” yet still end up with a poor or unsafe fit because of small measurement or compatibility errors. These mistakes are common, but they’re also easy to avoid once you know what to look for. Assuming All Cribs Use Standard Size: One of the biggest errors is assuming every crib fits a 28 x 52-inch mattress. That size only applies to full-size cribs, not mini, portable, or shaped designs. Ignoring Manufacturer-Specific Requirements: Portable cribs, playards, and specialty models often require exact mattress matches from the same brand. Relying Only on Labels Like “Standard Fit”: Terms like “standard fit” or “universal” are not strict guarantees. Different manufacturers may interpret these labels slightly differently. Not Measuring the Crib Interior First: Skipping this step is the most common cause of mismatch. Even new cribs can vary due to manufacturing tolerances. The same care used when measuring a bed frame for the right mattress applies here, interior dimensions, not outer frame size, determine the fit. Overlooking Shape-Based Cribs: oval, round, and custom-designed cribs require exact-match mattresses, but this detail is often overlooked at purchase. Once these common errors are avoided, choosing the right crib mattress becomes a straightforward matching process instead of guesswork. Frequently Asked Questions Is a crib mattress the same size as a twin mattress? No. A twin mattress is significantly larger, roughly 38 x 75 inches compared to a crib mattress at 28 x 52 inches. A standard crib mattress fits cribs and most toddler beds, not twin bed frames. Are crib mattresses and toddler mattresses the same size? Often yes. Many toddler beds are designed to use a standard crib mattress, same 28 x 52-inch dimensions. Check the toddler bed’s instructions before assuming the transition works, since some designs differ slightly. Can I use a mini crib mattress in a regular crib? No. A mini crib mattress is smaller and will leave unsafe gaps inside a full-size crib. The entrapment risk is real. Always use the mattress size listed for your specific crib model. Do all standard crib mattresses fit all cribs? They should fit full-size cribs built to federal guidelines, but you still need to measure. Crib age, brand, and minor production variation can affect the actual interior space. Verify before purchasing. What is the two-finger rule for crib mattress fit? After placing the mattress, press two fingers against the gap between the mattress edge and the crib wall. If more than two fingers fit into that space, the mattress is too small. The fit should be snug enough that a baby cannot wedge a limb into the gap. When should I lower the crib mattress support? Drop the support level before your baby can push up on hands and knees, typically around 5 to 6 months. At the lowest setting, the crib rail should sit well above the top of the mattress so a standing child cannot climb or fall over the side. Final Thoughts Crib mattress size is one of those nursery details that looks simple until you are staring at ten nearly identical options online. Start with the standard crib mattress dimensions, then measure the crib from the inside and check the gap once the mattress arrives. My advice is to be practical, not sentimental, during this part. The crib can be beautiful, but the mattress has to be boring in the best way: firm, flat, snug, and correctly sized. Once that part is right, the crib becomes what it should be: a safer, calmer place for your baby to sleep. If you are still unsure about two sizes or crib types, take a step back and compare them against your crib’s exact inside measurements rather than relying on product labels. That one extra check usually removes most of the confusion before buying.
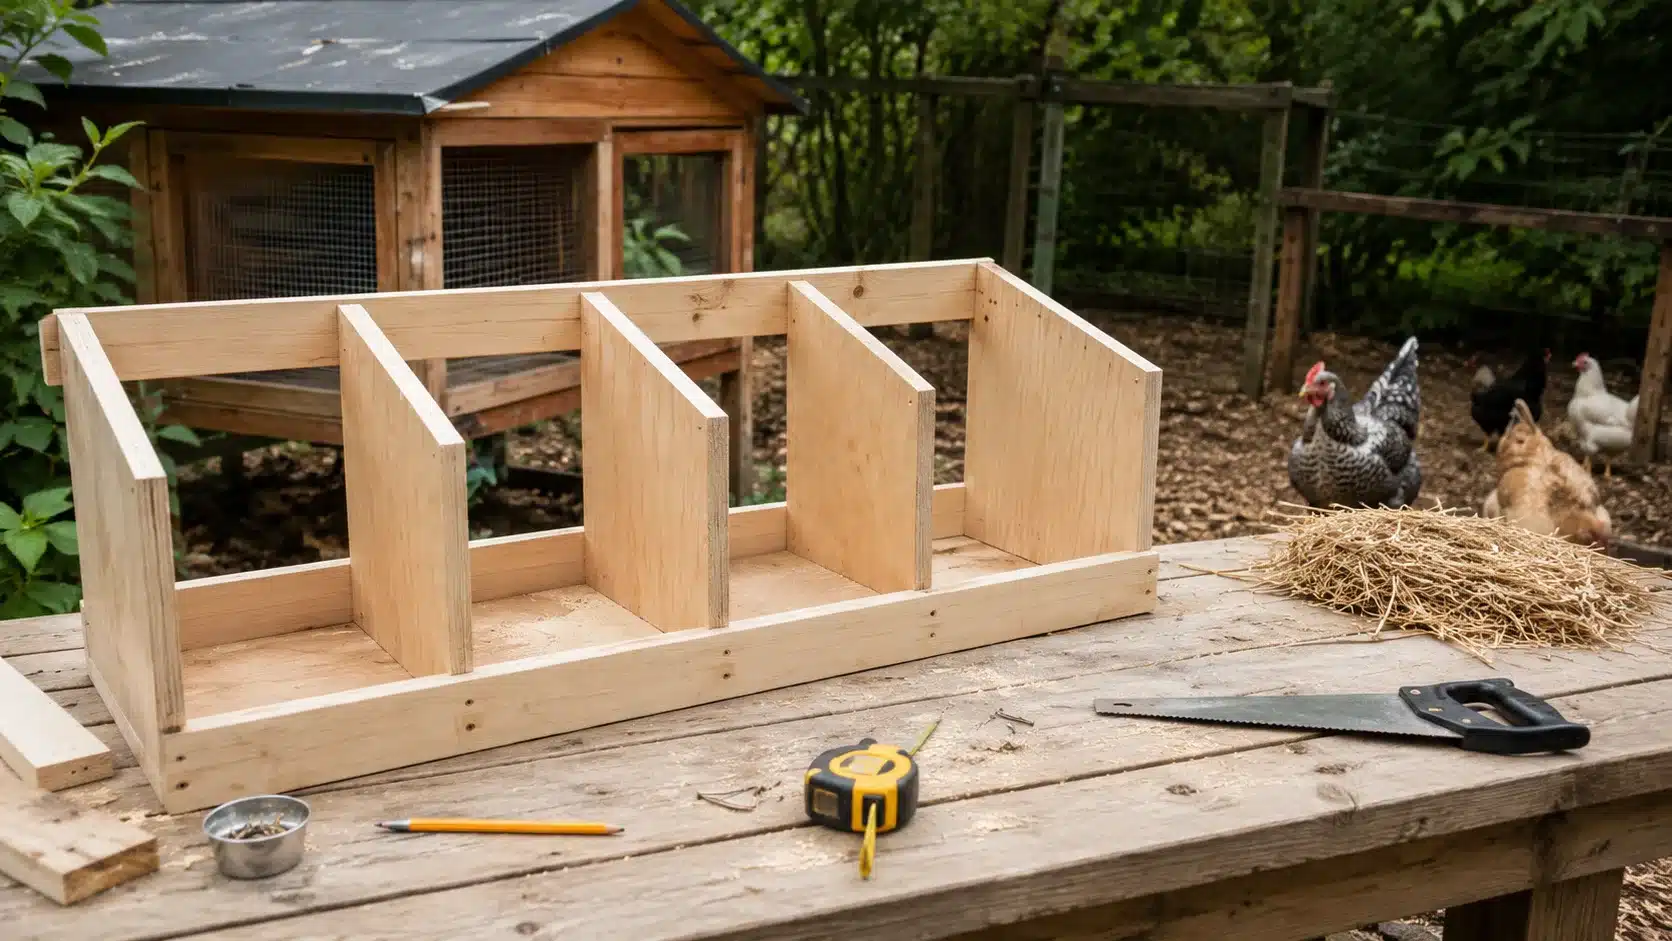
The first time I watched a hen pace around the coop looking for a spot to lay, I thought something was wrong. Turns out, something was, just not with the hen. There was nowhere comfortable, private, or clean enough for her to settle. That was the day I built my first nesting box from leftover plywood and a few screws I found in the garage. It was not fancy. It was not perfect. But by the next morning, she used it, and the egg was clean. That small win is exactly what diy nesting boxes are about. This piece covers what a nesting box needs to do, how to size one correctly, five budget-friendly build methods, smart placement, and how to keep boxes working after the build. Pick one method, gather your materials, and have something functional by Sunday. What Should a Chicken Nesting Box Actually Do? A nesting box gives a laying hen exactly what she is looking for: a quiet, dark, private, and stable space to deposit an egg without being disturbed. When that space exists in the right place inside the coop, hens stop laying in corners, under feeders, or in random bedding piles. Eggs stay cleaner, fewer crack, and collection becomes a quick daily habit instead of a small hunt. The box is not a sleeping space. Hens should roost on perch bars at night, away from the nesting area. A box that becomes a sleeping spot fills quickly with droppings, which dirtier eggs and faster bedding turnover. Keeping roost bars higher than the nesting boxes helps because chickens naturally sleep at the highest available point. A good nesting box passes a simple four-point check: it stays dark and dry inside, sits stable when a hen climbs in, offers easy outside access for egg collection, and takes less than five minutes to clean. What Size Should DIY Nesting Boxes Be? Getting the size right before building saves a lot of fixing later. A box that is too small stresses the hen. One that is too large feels exposed and gets treated as a toilet. The University of Minnesota Extension recommends keeping laying hen housing comfortable, with appropriate space and clean conditions to support consistent egg production. Build Detail Recommended Starting Point Why It Matters Box width and depth About 12 by 12 inches Fits most laying breeds comfortably Box height 12 to 14 inches Enough room without feeling too open Front lip height 3 to 4 inches Keeps bedding and eggs inside the box Hen-to-box ratio One box for every 4 to 5 hens Reduces fighting over the same favorite Bedding depth 2 to 3 inches minimum Cushions eggs and absorbs moisture Placement height 18 to 24 inches from the floor Accessible but not beside the roost mess One note from building a few of these: measure the wall space inside the coop before buying materials. It sounds obvious, but cutting lumber to fit a space you have not measured first is how a Saturday project becomes a Wednesday project. More boxes do not always mean hens spread out evenly. Many flocks still crowd into one preferred box, no matter how many you provide. The ratio above is a starting point, not a guarantee. How to Build DIY Nesting Boxes at Home Every method below works on its own. The approach is simple: pick the one that matches what you already have or can get without a special trip. These are practical homemade diy chicken nesting boxes that any backyard keeper can put together in an afternoon. A reference video will be added under each method for step-by-step visual guidance. 1. 5-Gallon Bucket Nesting Box A clean 5-gallon bucket laid on its side creates a curved, private shape that hens take to quickly. It is one of the fastest diy nesting boxes to set up, needs almost no tools, and costs very little if the bucket is already on hand. It works especially well for small co-ops or anyone who wants a removable, easy-to-clean option. Tools you need: clean 5-gallon bucket, jigsaw or utility knife, sandpaper, drill, screws, scrap wood shelf, bedding Step 1: Clean the bucket: Remove any residue and let it dry fully before use. Step 2: Cut the front opening: Lay the bucket on its side and cut away the upper half of the front, leaving a 3 to 4 inch lip at the bottom. Step 3: Smooth all edges: Sand or file every cut edge so no sharp plastic remains. Step 4: Secure the bucket: Attach it to a wall-mounted shelf or screw it between two sideboards so it stays still. Step 5: Add bedding: Fill with 2 to 3 inches of pine shavings or straw. Step 6: Test stability: Push it firmly and confirm it does not shift when weight is applied. 2. Wooden Plywood Nesting Box This is the standard build most people picture when they think of homemade diy chicken nesting boxes. It takes more steps than the bucket, but the finished box is sturdier, easier to size for multiple hens, and fits better into a permanent coop. Penn State Extension supports 12-by-12-inch box dimensions as a solid starting point for most laying breeds. Tools you need: plywood sheet, 2×4 supports, screws, drill, circular saw or handsaw, tape measure, pencil, sandpaper, bedding Step 1: Measure the coop wall: Note the width, height, and depth available before cutting anything. Step 2: Cut all panels: Cut front, back, bottom, top, and side panels to size. Step 3: Build the frame: Assemble the outer box with screws and check that the corners are square. Step 4: Add dividers: Cut and attach interior dividers to create separate compartments. Step 5: Attach the front lip: Screw a 3 to 4-inch board across the front bottom opening. Step 6: Add a slanted roof: Cut the back panel taller than the front so the lid angles downward, stopping hens from perching on top. 3. Milk Crate Nesting Box A plastic milk crate is one of the most available and free options for a fast setup. It is light, movable, and easy to scrub out. The main thing to fix before use is the floor, since the grid base lets bedding fall through. A scrap wood insert or rubber mat solves that immediately. Tools you need: sturdy milk crate, scrap plywood or rubber mat, zip ties or screws, small front board, bedding Step 1: Choose a strong crate: Pick one with thick walls that does not flex under light pressure. Step 2: Add a solid floor: Cut a plywood or rubber mat insert to fit inside the base. Step 3: Attach a front lip: Zip-tie or screw a short board across the front to hold bedding in. Step 4: Place in a quiet corner: Position it away from drafts and the roost area. Step 5: Secure it: Tie or screw the crate to the wall so it cannot tip sideways. Step 6: Add bedding: Fill with clean shavings or straw and check that the floor insert sits flat. 4. Roll-Away Nesting Box This build is worth the extra effort for anyone dealing with cracked eggs, egg eating, or hens tracking dirt across fresh eggs before collection. The sloped floor lets an egg roll gently into a covered tray at the back right after laying. The slope must be shallow enough that the egg rolls slowly, typically 3 to 5 degrees; otherwise, eggs crack on arrival. Tools you need: plywood, screws, drill, circular saw, indoor-outdoor carpet or nesting mat, egg catch tray, measuring tape Step 1: Build the outer box: Assemble the main box frame at standard 12-by-12 dimensions. Step 2: Cut the sloped floor: Cut the floor panel so it sits at a slight downward angle toward the back. Step 3: Build the egg catch tray: Create a shallow, covered tray that sits below the sloped floor exit point. Step 4: Line the slope: Glue or staple indoor-outdoor carpet or a soft nesting mat across the angled floor. Step 5: Test with a fake egg: Roll a practice egg down the slope before hens use the box. Step 6: Adjust as needed: If the egg rolls too fast or veers sideways, add a small lip guide or reduce the angle. 5. Plastic Storage Bin Nesting Box A thick plastic storage bin is a solid low-effort option when cleaning ease matters most. The smooth walls wipe down in under a minute. The main concern is durability, since thin bins crack under regular use or temperature changes. Choosing a bin with walls at least 4mm thick extends the life significantly. Tools you need: thick plastic storage bin, utility knife or jigsaw, sandpaper, screws, washers, bedding Step 1: Pick a sturdy bin: Press the walls firmly. If they flex easily, choose a thicker bin. Step 2: Cut the front opening: Cut away the upper section of the front panel, leaving a 3 to 4 inch base lip. Step 3: Smooth every edge: Sand or tape any rough cut lines before placing hens near it. Step 4: Mount it securely: Drill through the back panel and screw into the coop wall with large washers to spread the load. Step 5: Add bedding: Fill with clean, dry materials Step 6: Check for movement: Test that the bin does not flex or shift when you press one side. 6. Wooden Pallet Nesting Box Wooden pallets are often free or very cheap, making them a popular option for backyard chicken keepers. The wood is already cut into usable sections, so there is less measuring and fewer materials to buy. This method works well for larger co-ops and anyone who wants sturdy diy nesting boxes without purchasing full plywood sheets. Make sure the pallet is clean and safe for poultry use before building. Tools you need: clean pallet wood, pry bar, hammer, screws, drill, saw, measuring tape, sandpaper, bedding Step 1: Disassemble the pallet: Remove boards carefully and set aside the best pieces. Step 2: Measure and cut panels: Cut the pallet boards into sides, back, floor, and divider sections. Step 3: Build the frame: Assemble the outer structure using screws instead of nails for better strength. Step 4: Add dividers: Create individual nesting spaces based on flock size. Step 5: Install a front lip: Attach a 3 to 4-inch board across the opening. Step 6: Sand rough surfaces: Smooth splinters before adding bedding and introducing hens. 7. Repurposed Cabinet or Drawer Nesting Box Old cabinets, dresser drawers, and storage units can become homemade diy chicken nesting boxes with very little work. The structure is already built, which makes this one of the fastest upcycling projects. It is especially useful for anyone with leftover furniture in a garage, shed, or workshop. The main goal is to create a stable, easy-to-clean nesting area with enough privacy for laying hens. Tools you need: old drawer or cabinet, drill, screws, sandpaper, scrap wood for front lip, bedding Step 1: Inspect the furniture: Remove loose hardware, broken parts, and peeling materials. Step 2: Clean thoroughly: Wash and dry the unit before bringing it into the coop. Step 3: Add a front lip: Attach a short board across the opening to keep bedding inside. Step 4: Secure the unit: Screw it to a wall or stable support so it cannot tip. Step 5: Check for rough edges: Sand any splinters, sharp corners, or damaged wood. Step 6: Add bedding: Fill with clean straw or pine shavings and test accessibility. All five builds can work well once the box feels safe, dry, and simple to maintain. The best build is the one the reader will actually keep clean. Before moving on, placement matters just as much as the build itself. Which DIY Nesting Box Method Should You Choose? The best method depends on what is sitting in the garage, how much cutting feels realistic, and whether the priority is speed, durability, or egg cleanliness. This table gives a fast comparison before the full build steps. Method Best For Watch-Out 5-gallon bucket Beginners, small flocks, renters Must be secured so it cannot roll Wooden plywood box Permanent coop, long-term use Takes more measuring and cutting Milk crate Fast setup, movable use Needs a solid floor insert for stability Roll-away box Dirty eggs, egg-eating issues Slope must be gentle, or eggs crack Plastic storage bin Easy cleaning, quick build Thin bins crack over time; choose thick ones Quick guide: bucket for speed, wood for durability, roll-away for egg protection. For a first build, the bucket or the wooden box covers most backyard setups well. Where Should Nesting Boxes Sit Inside the Coop? A well-built box that sits in the wrong spot gets ignored. Hens need to feel safe inside the box, which means the surrounding area matters as much as the box itself. Good placement checks: Quiet corner: Away from feeders, waterers, and the busiest foot traffic areas Away from roost droppings: Boxes placed directly below or beside roost bars get soiled quickly Moderate height: Between 18 and 24 inches off the floor is accessible without feeling exposed Outside access, if possible: A lid or door that opens from outside the coop makes collection faster and reduces flock stress A common placement mistake is mounting boxes directly under the roost. Droppings fall overnight and cover both the box and any eggs inside by morning. That single change, moving the box away from the roost line, fixes the dirty egg problem for a lot of backyard keepers before any other adjustment is needed. The USDA National Agricultural Library supports providing hens with clean, dry, and well-maintained laying areas to support egg quality and flock health. What Mistakes Make Chickens Avoid Nesting Boxes? Even a correctly sized and well-placed box can sit empty if a few small details are off. These are the most common reasons hens skip the box, along with the fix for each one. Too much light: Hens want privacy when they lay. Add a curtain, reposition the box, or build a partial hood over the opening. Dirty or wet bedding: Replace bedding the moment it feels damp or smells off. Hens will not use a box that does not feel clean. Unstable box: A bucket or bin that shifts when a hen steps in creates a safety signal. Secure every box firmly before introducing hens to it. Placed near roost mess: Move the box to the opposite side of the coop from the roost bars if droppings are landing nearby. No front lip: Without a lip, bedding falls out, and eggs roll to the edge. A simple 3 to 4-inch board screwed across the front fixes this immediately. Hard egg collection: If eggs stay in the box for too long because collection is inconvenient, hens get used to laying elsewhere. Make access easy. Small fixes usually make the biggest difference. Hens may avoid a box because it feels too bright, messy, shaky, or hard to use. Once you correct those details, simple diy nesting boxes often become a comfortable laying spot instead of empty coop furniture. Are DIY Nesting Boxes Better Than Store-Bought Ones? DIY nesting boxes work just as well as store-bought models when they are correctly sized, safely built, and properly maintained. The main advantage of building your own is flexibility: the dimensions, material, number of compartments, and access door placement all fit the actual coop rather than a standard retail design. Store-bought boxes can save time and give a uniform look, which matters to some keepers. The tradeoff is that they may not fit every coop layout, and some are sized for appearance rather than hen comfort. Where DIY sometimes falls short is in access for cleaning. A poorly designed box can trap moisture, hide mites, or make bedding replacement awkward. Planning the cleaning routine before the build, not after, closes that gap. The CDC supports handwashing and surface cleaning when handling backyard poultry and eggs, making an easy-to-clean box design a practical health consideration, not just a convenience. Frequently Asked Questions Can I leave nesting boxes open at night? Boxes should ideally be closed or blocked at night to stop hens from sleeping inside them. Hens sleeping in boxes leave droppings on the bedding and eggs. Roost bars positioned higher than the boxes usually solve this naturally, since hens prefer the highest sleeping spot available. How often should nesting box bedding be fully replaced? Full bedding replacement depends on flock size and how often eggs are collected, but a complete swap every one to two weeks is a reasonable baseline. Spot-clean damp or soiled areas daily during egg collection. Fresh, dry bedding keeps the box inviting and eggs cleaner between full changes. Do nesting boxes need ventilation? Nesting boxes do not need direct ventilation, but the coop itself must have good airflow to prevent moisture buildup, which affects bedding quality inside the boxes. A box that sits in a damp, poorly ventilated coop will develop mold and mite issues regardless of how well it was built. Can I use cardboard boxes as temporary nesting boxes? Cardboard can work as a short-term option if nothing else is available, but it absorbs moisture quickly, cannot be cleaned, and breaks down fast. Replace it with a more durable option within a week or two. A plastic bin, bucket, or crate is a better low-cost alternative that actually lasts. At what age do pullets start using nesting boxes? Most pullets begin laying and using nesting boxes between 18 and 24 weeks of age, depending on breed. Some keepers place a fake egg or golf ball inside the box a week before the expected laying age to guide young hens toward the right spot before instinct fully kicks in. Final Thoughts The best diy nesting boxes are not the ones that photograph well. They are the ones hens use without hesitation, eggs stay clean in, and the keeper does not dread maintaining. Start with the right size, a safe and cleanable material, and a quiet spot away from the roost. Whether the build is a five-minute bucket or a full plywood setup, homemade diy chicken nesting boxes can be finished in a weekend with supplies most people already have around the house. Getting the placement right, adding a proper front lip, and staying consistent with bedding changes will do more for egg quality than any upgrade after the fact. Build it simple, build it stable, and let the hens do the rest. Which method are you planning to try first: bucket, wood, crate, bin, or roll-away? Drop it in the comments so others can see what is working in real co-ops.
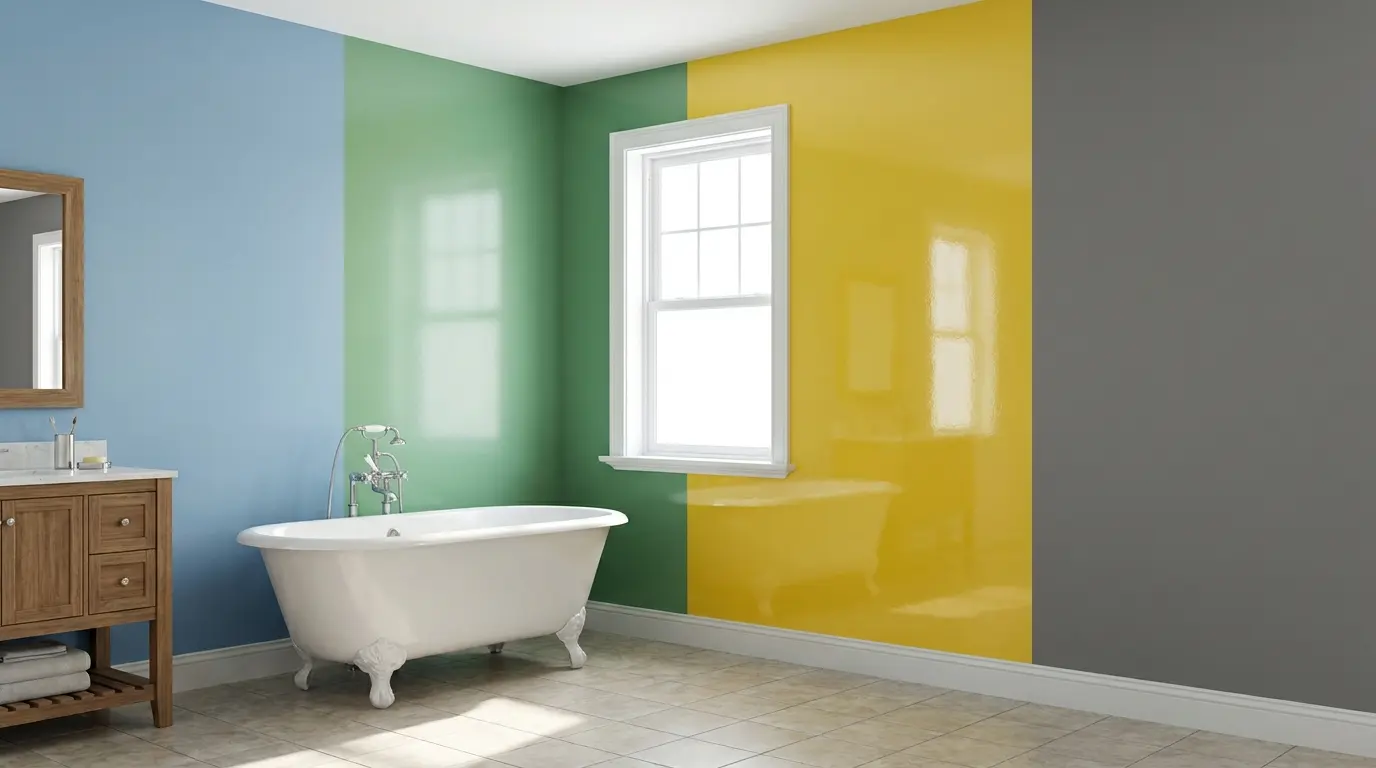
Bathrooms are tricky spaces when it comes to paint. I’ve spent years helping clients pick finishes that last, and I still remember staring at a tiny powder room swatch in the morning light, wondering if semi-gloss would look too harsh. The right paint finish doesn’t just protect walls from moisture; it shapes how a room feels at 7 am versus 7 pm, especially when light shifts across tile, mirrors, and fixtures. If you’re wondering which sheen is best for your walls, trim, or shower area, I’ll break down the pros, cons, and practical tips for selecting the best paint finish for bathroom spaces, including mildew-resistant, washable, and waterproof options. Why Does Paint Finish Matter More in Bathrooms? Paint sheen refers to the level of shine a paint has once it dries, and it plays a bigger role than appearance alone. It directly impacts durability, cleanability, and how well a surface handles moisture. Flat finishes are great at hiding dents and uneven patches, but they tend to absorb moisture and are difficult to wipe clean. Higher-sheen options like satin, semi-gloss, and gloss reflect more light, resist scrubbing, and hold up better in humid conditions, though they can highlight wall imperfections more easily. If you want a deeper look at how each level of sheen performs across different rooms, paint sheen comparisons by room type cover the full range. In bathrooms, this choice becomes especially important because constant steam, condensation, and frequent cleaning put extra stress on walls and ceilings. A poor finish can lead to streaking, peeling, or mildew buildup in corners and near wet zones like sinks and showers. That’s why testing samples in real bathroom lighting matters, sheen can shift noticeably from morning softness to evening glare in humid conditions and under artificial light. Factors That Affect the Right Bathroom Paint Finish Before choosing a finish, look at how the bathroom is used. A powder room without a shower has very different paint needs than a busy family bathroom. The main things to check are: Moisture level: Bathrooms with showers need stronger moisture resistance. Ventilation: Poor airflow makes paint work harder because humidity stays trapped. Surface condition: Glossy finishes can show bumps, patches, and roller marks. Cleaning needs: Busy bathrooms need paint that can handle wiping and scrubbing. Lighting: Bright lights and natural light can make shiny finishes look harsher. Paint location: Walls, ceilings, trim, doors, and cabinets each need a different finish. Once you review these factors, the right finish becomes clearer. You can confidently match sheen to moisture, cleaning, lighting, and the exact surface being painted. Best Paint Finish for Bathroom: Top Recommendations Choosing the right paint sheen is about balancing appearance, moisture resistance, cleanability, and the presence of wall imperfections. I often tell my clients that the wrong finish can make a bathroom look cheap or require a repaint sooner than expected. 1. Gloss & High-Gloss Gloss and high-gloss paints are highly reflective finishes that create a polished, almost glass-like surface. They’re the shiniest options available and have a smooth, sleek appearance. The high sheen makes surfaces extremely resistant towater, soap splashes, and humidity, which is why these paints are most often used for trim, doors, cabinets, or small accent walls near sinks and tubs. Best Use Areas: Cabinetry and trim, Bathroom doors, Small accent walls near moisture-prone areas 2. Semi-Gloss Semi-gloss is a medium-high sheen that balances reflection with subtlety. It’s one of the most popular choices for bathrooms because it combines durability with elegance. Semi-gloss can handle direct water contact, steam, and regular cleaning without peeling or staining. It’s particularly useful around showers, sinks, and backsplashes. For a closer look at how it holds up against satin on interior walls, the difference between satin and semi-gloss is worth reading before you commit to either. Best Use Areas: Shower and bathtub walls, Sink splash zones, Family bathrooms or powder rooms with heavy use 3. Satin Satin has a soft, velvety sheen that reflects light gently. It’s less shiny than semi-gloss, offering a warm, sophisticated look. Satin is moisture-resistant and washable enough for moderate-use walls while hiding minor imperfections better than glossier paints. It strikes a balance between cleanability and soft visual style, which is why it’s often the right call for mid-size or powder bathrooms. If you’re still deciding whether satin fits your specific space, whether satin finish suits your room covers the tradeoffs in more detail. Best Use Areas: Main walls in powder rooms or medium-use bathrooms, Areas not exposed to constant splashing, Low-traffic family bathrooms 4. Matte / Flat Matte or flat paint has little to no sheen, creating a soft, contemporary finish. It’s excellent at hiding imperfections and creating a cozy, modern appearance. Matte finishes absorb moisture and are generally less washable, but in low-humidity powder rooms or small bathrooms with good ventilation, they provide a clean, minimalistic look. The flat versus satin comparison is useful if you’re weighing these two for a powder room or ceiling. Best Use Areas: Powder rooms, Ceilings in bathrooms, Accent walls away from direct water exposure How to Choose the Best Paint Finish for a Bathroom Bathrooms face varying moisture and traffic levels, so choosing the right paint finish ensures durability, easy cleaning, and long-lasting beauty. Identify Moisture Zones: Map high-, moderate-, and low-moisture areas to select finishes that resist water and mildew. Consider Traffic & Cleaning Frequency: Use semi-gloss for heavy use, satin for occasional contact, ensuring surfaces remain cleanable. Assess Wall Imperfections: Flatter sheens hide bumps; glossier sheens emphasize imperfections; test swatches in both morning and evening light. Choose the Right Paint Formula: Select mildew-resistant, waterproof, or scrubbable formulas to match your bathroom’s moisture and cleaning needs. What to Look for Beyond the Finish Beyond the paint finish, the formula you choose matters just as much in a bathroom. Look for mold- and mildew-resistant paint, especially one with antimicrobial additives, because bathrooms hold steam and damp air longer than most rooms. Paint and primer combinations can also improve adhesion, but very humid rooms or damaged walls may still require a separate primer for better grip. VOC levels are another key point. Low-VOC paints are better for enclosed bathrooms because they emit fewer strong odors and are easier to use in small spaces with limited airflow. If you want to understand exactly what VOC content means and how it affects indoor air quality, what VOC in paint actually means explains it clearly. Water-based latex paint is usually the best choice for bathroom walls since it dries faster, cleans up easily, and resists yellowing. Oil-based paint is durable but produces stronger fumes, has a longer drying time, and is less common in modern bathroom projects. Comparing Popular Paint Brands for Bathroom Use Picking the right brand and formulation matters as much as choosing finish and sheen. Some paints are specifically engineered to resist moisture, mildew, and repeated cleaning, which is vital in bathrooms where humidity and condensation are constant. Below are clear, product‑focused pointers to help you choose paint brands that perform well in high‑moisture rooms. Brand & Product Moisture Resistance Mildew Protection Durability Price Benjamin Moore Aura Bath & Spa Excellent Very High Very High Premium Sherwin‑Williams Emerald Interior Excellent Very High Very High Premium Behr Premium Plus Kitchen & Bath Good Good Good Value PPG Diamond Interior Very Good Very Good Very High Mid‑Range Zinsser Perma‑White Excellent Excellent High Budget-Friendly When choosing paint for a bathroom, brand formulation and finish selection go hand in hand. Investing a bit more in a paint designed for humidity pays off with longer life, reduced mildew concerns, and fewer repaints. Pair your chosen brand with the appropriate sheen (semi‑gloss or satin for most walls and high‑moisture zones), and ensure proper surface prep and ventilation for the best results. Common Mistakes When Choosing Bathroom Paint Finish Choosing the wrong paint finish often leads to faster wear, higher maintenance, and unwanted visual issues in bathrooms. A few common errors show up repeatedly during bathroom projects: Using flat paint in high-moisture areas: Flat or matte finishes may look smooth at first, but they absorb moisture easily. In bathrooms with frequent showers, this often leads to stains, peeling, and mildew buildup around corners and ceilings. Choosing gloss for all walls: High-gloss paint is durable, but using it across entire bathroom walls can make imperfections more visible. Uneven patches, roller marks, and surface flaws become more noticeable under bright lighting. Ignoring ventilation conditions: Paint finish performance depends heavily on airflow. Bathrooms with poor ventilation trap humidity, which can damage even mid-sheen paints over time and reduce overall durability. Skipping sample testing in real lighting: Sheen changes appearance under different lighting conditions. A finish that looks balanced in store lighting may appear too shiny or too dull once applied in a bathroom with shifts between natural and artificial light. Overlooking surface preparation: Even the best paint finish will not perform well on poorly prepared walls. Dust, uneven patches, or leftover moisture can affect adhesion and lead to early wear or patchy results. Frequently Asked Questions Can I use the same finish for walls and trim in a bathroom? While it’s possible, semi-gloss or high-gloss is usually the better call for trim because it cleans easily and holds up to direct contact. Satin or semi-gloss works better for walls. Different finishes protect surfaces according to their function and moisture exposure. How does natural light affect the choice of bathroom paint sheen? Natural light changes throughout the day, highlighting imperfections or glare. A satin or soft semi-gloss balances reflection, ensuring walls look smooth in both morning and evening light. Are there eco-friendly or low-VOC options for bathroom paints? Yes, many premium paints, including mildew-resistant formulas, are low-VOC or zero-VOC, reducing odors and toxins while still performing well in humid, high-use bathrooms. Does color choice impact mildew growth in bathrooms? Indirectly, yes. Darker colors show streaks and water marks more clearly, while lighter shades reflect light and make streaks less noticeable. Sheen and ventilation are more important for mildew prevention than color alone. Conclusion Picking bathroom paint is really about choosing what can handle real life, not just what looks good on a color card. I’d choose satin for most walls because it gives you a clean look, better washability, and solid moisture resistance. You can use semi-gloss where water, steam, and daily wiping are major concerns, such as trim, doors, cabinets, and splash zones. Matte or flat finishes should be used in low-moisture areas unless the formula is designed for bathrooms. The best paint finish for bathroom spaces also depends on airflow, surface condition, and how often you clean. When you match the finish to the room, your paint lasts longer and looks better. Try these tips, then share your results or questions in the comments.