


I love a bedroom project that saves floor space and makes the room feel more planned. A good bunk bed can do that in a kids’ room, guest room, cabin, or small bedroom, especially when it looks like it belongs to the wall instead of sitting there as bulky furniture.
That is where diy bunk beds need more thought than a saved photo. The goal is not only to stack two mattresses.
The better goal is to build something that fits the room, feels safe, adds storage where possible, and has the finished look of real carpentry.
If you want a simple frame, structure matters most. If you want the look of built in bunk beds, details like wall fit, trim, panel facing, access, lighting, and paint need to be part of the plan from the start.
Before You Build DIY Bunk Beds: What Should You Know?
Before choosing a design, start with the room you are trying to improve.
A custom bunk should solve a real layout problem, such as a small bedroom, shared kids’ room, awkward wall, guest space, or cabin sleeping area. Measure first, then decide what kind of bunk actually fits.
Use this quick planning check before saving plans or buying lumber:
- Room Size: Measure the wall length, ceiling height, and open floor area.
- Mattress Fit: Decide on twin, twin XL, full, or mixed mattress sizes first.
- Access: Choose a ladder, stairs, or built-in steps based on space and age.
- Anchoring: Find the wall studs before planning any built-in structure.
- Finish Level: Decide between a simple frame and a full carpentry look with trim.
- Future Use: Think about whether the room will still need bunks in five years.
The best plan is the one that fits the room before it looks good in paint. Once the measurements work, the finish details become easier to choose.
Why Do Built In Bunk Beds Look More Finished?
Built in bunk beds look more finished because they are planned as part of the room, not just placed inside it. The frame, wall fit, panels, trim, storage, and access all work together to make the bed feel intentional.
The biggest difference comes from choosing details before the build starts:
- Strong Framing: A finished look still starts with structure. Framing often uses 2×4 or 2×6 lumber, with secure attachment to wall studs where the design calls for it.
- Clean Panel Facing: Plywood, MDF, shiplap, beadboard, or paint-grade boards can cover rough framing and make the bed look like built-in carpentry.
- Trim And Paint: Baseboards, edge trim, caulk, sanding, primer, and matching paint help the bunk blend into the walls instead of standing apart.
- Storage That Fits The Room: Stair drawers, cubbies, lower drawers, or side shelves can make the bed more useful, but they need space and clearance planned early.
- Personal Bed Zones: Small shelves, reading lights, curtains, or niches make each bunk feel more comfortable without adding bulky furniture.
- Practical Access: A ladder or stair position should feel natural in the room, with enough space to climb, change bedding, and move around.
This section supports both planning goals: it shows what creates the custom look readers want, while also helping them compare which bunk bed ideas are worth building before they choose a plan.
DIY Bunk Beds Vs Store-Bought Bunk Beds: Which Makes More Sense?
Building is not always cheaper, and buying is not always better. The smarter choice depends on whether you need a custom room solution or a quick sleeping setup.
| Factor | DIY Project | Store-Bought Frame |
| Cost | Can save money if tools and materials are already available | Gives a clearer upfront price |
| Fit | Works well for odd walls, tight rooms, and custom mattress layouts | Usually limited to standard dimensions |
| Look | Can create a built-in, wall-to-wall, or finished carpentry style | Depends on available retail designs |
| Storage | Can include drawers, shelves, cubbies, or stair storage | Storage depends on the model |
| Time | Needs measuring, cutting, sanding, assembly, and finish work | Faster to assemble and use |
| Skill Level | Requires basic carpentry confidence | Usually requires basic assembly only |
| Best For | Custom bedrooms, kids’ rooms, cabins, storage needs, and built-ins | Rentals, quick setups, and simple sleeping needs |
If the room needs a polished wall-to-wall look, building gives you more control. If speed, simplicity, or a tested retail frame matters more, buying may be the cleaner choice.
Bunk Bed Ideas And Plans To Compare Before Building
A good bunk bed idea should solve a real room problem, not just look nice in a photo. Compare each concept by space, skill level, storage, safety, and whether it works better as a built-in/custom project or a simple freestanding plan.
1. Simple Twin-Over-Twin Bunk Bed
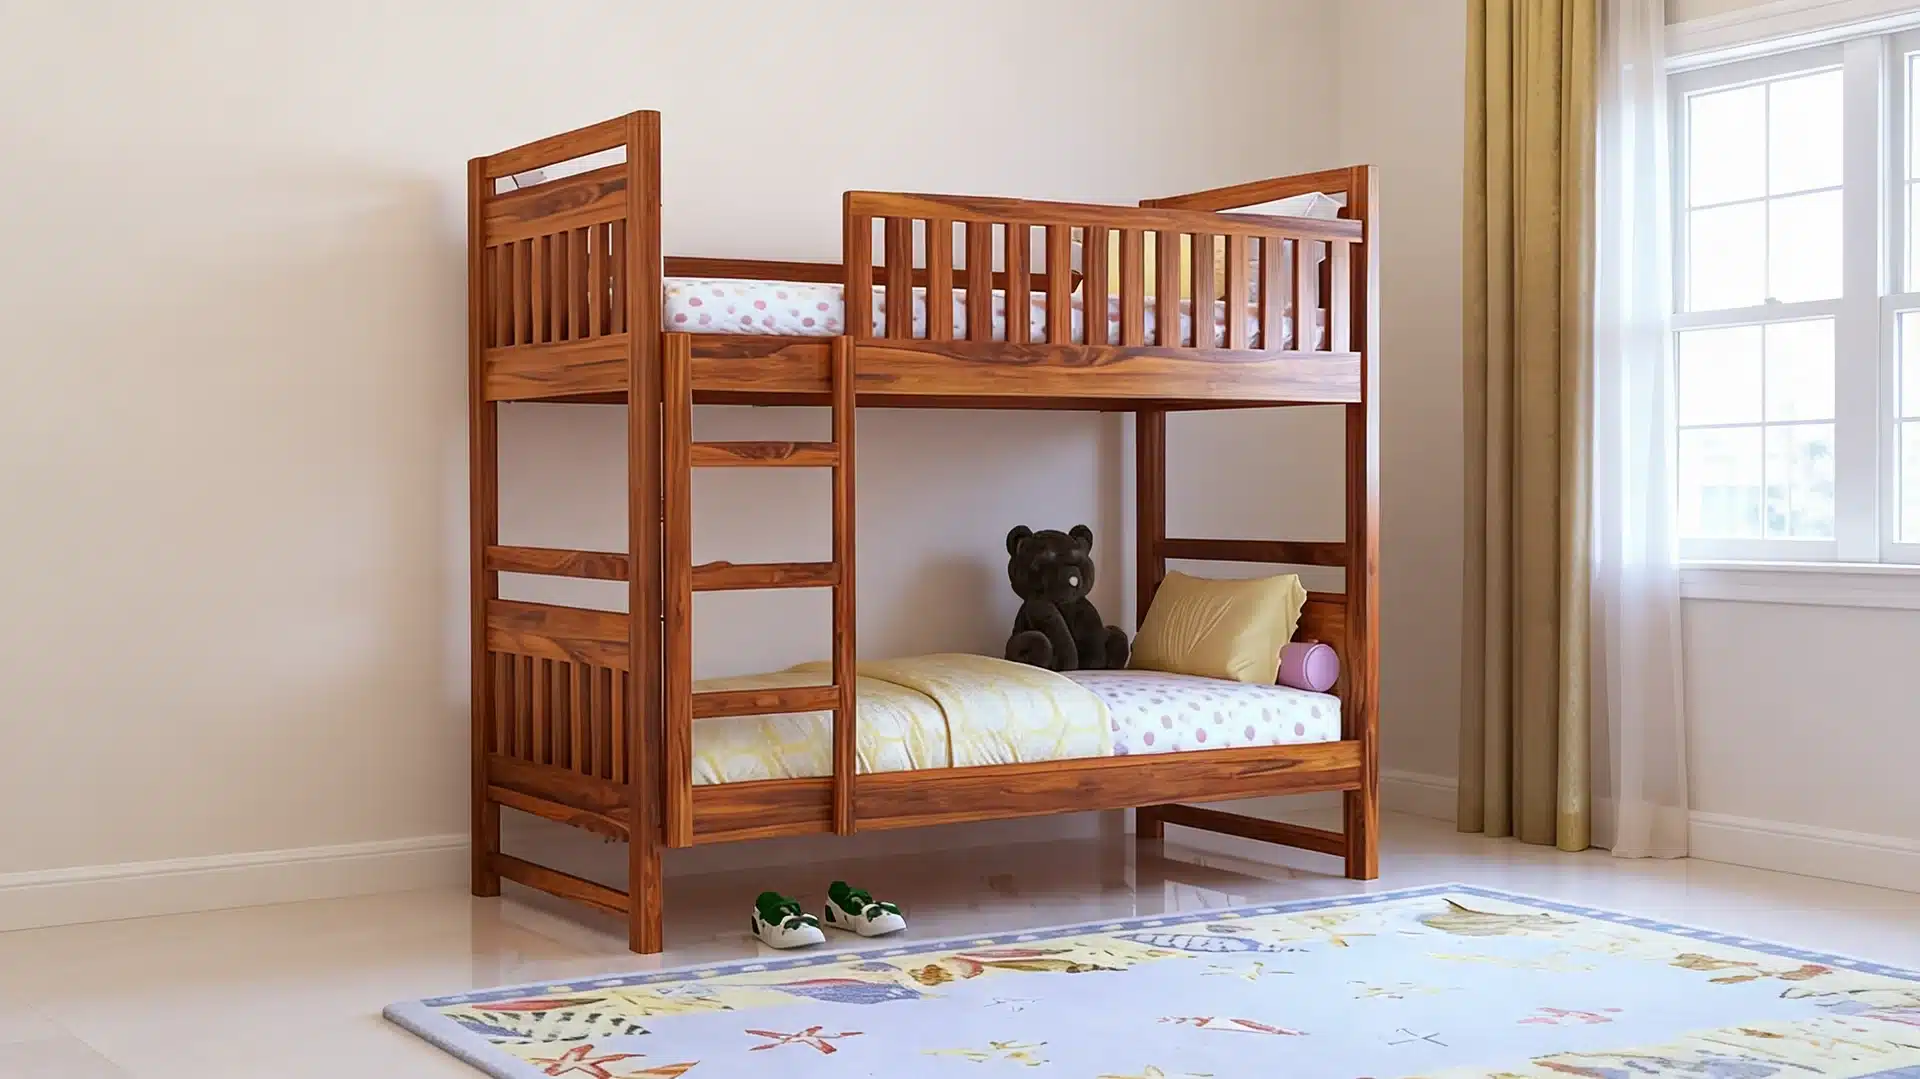
A twin-over-twin bunk is the simplest option to build and compare against other plans. It is best for simple freestanding layouts because the structure usually needs two mattress frames, corner posts, guardrails, and a ladder.
You can still make it feel custom with paint, matching bedding, or a small shelf, but it will not have the same wall-to-wall finish as built in bunk beds. It is the easiest starting point.
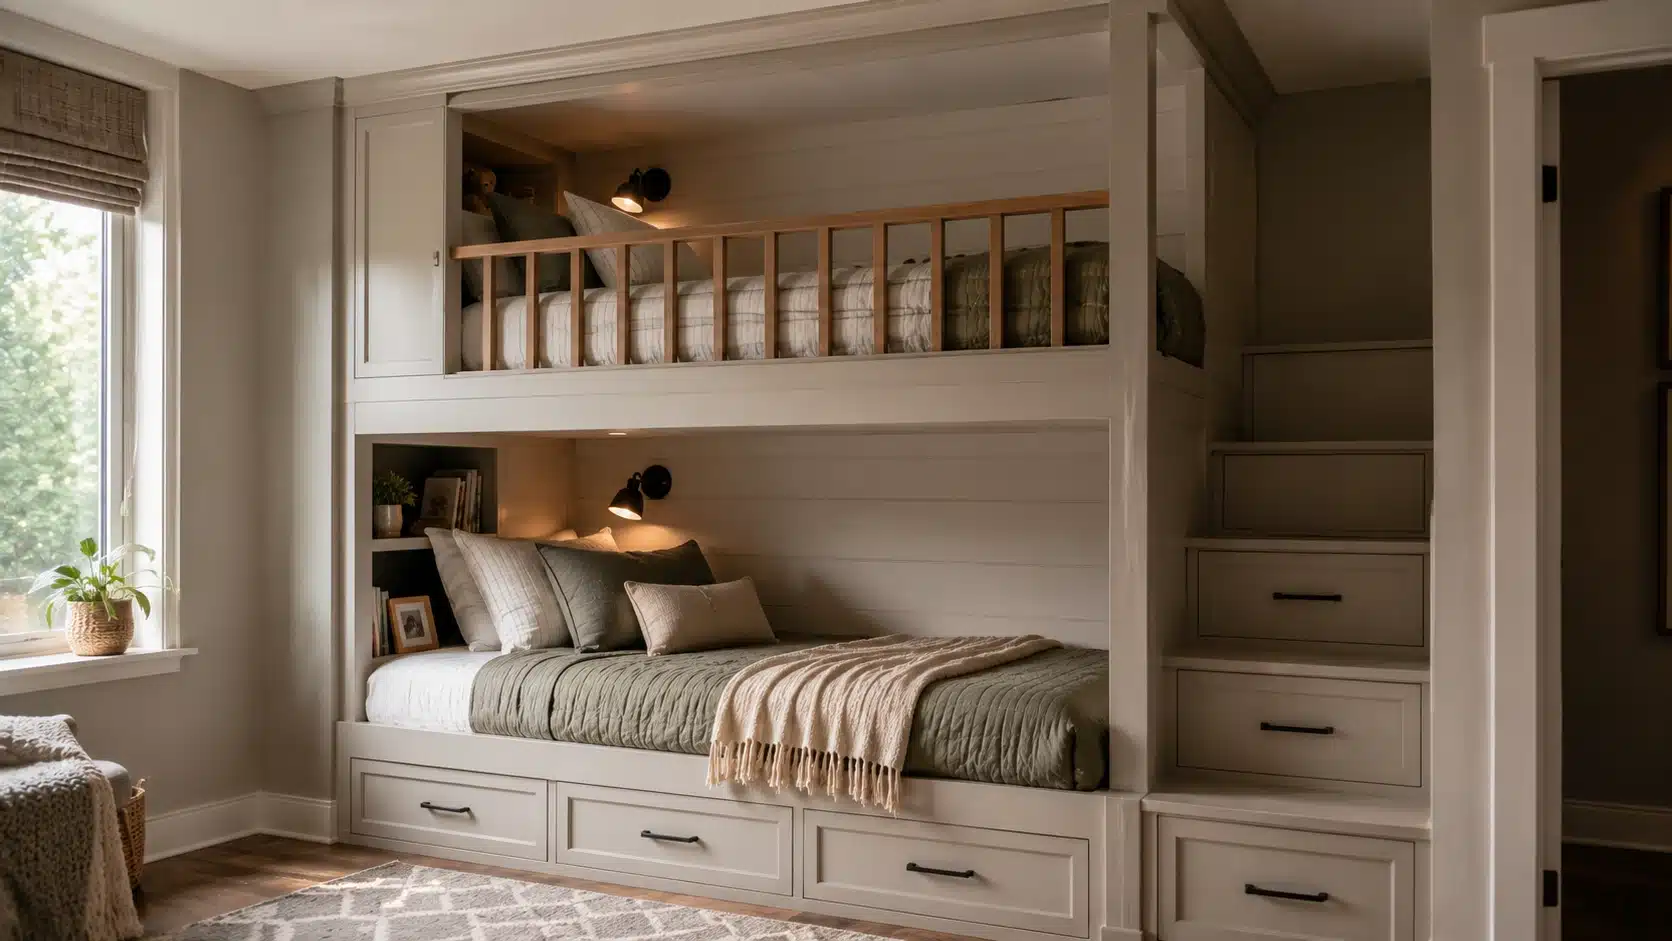
2. Wall-to-Wall Built-In Bunk Bed
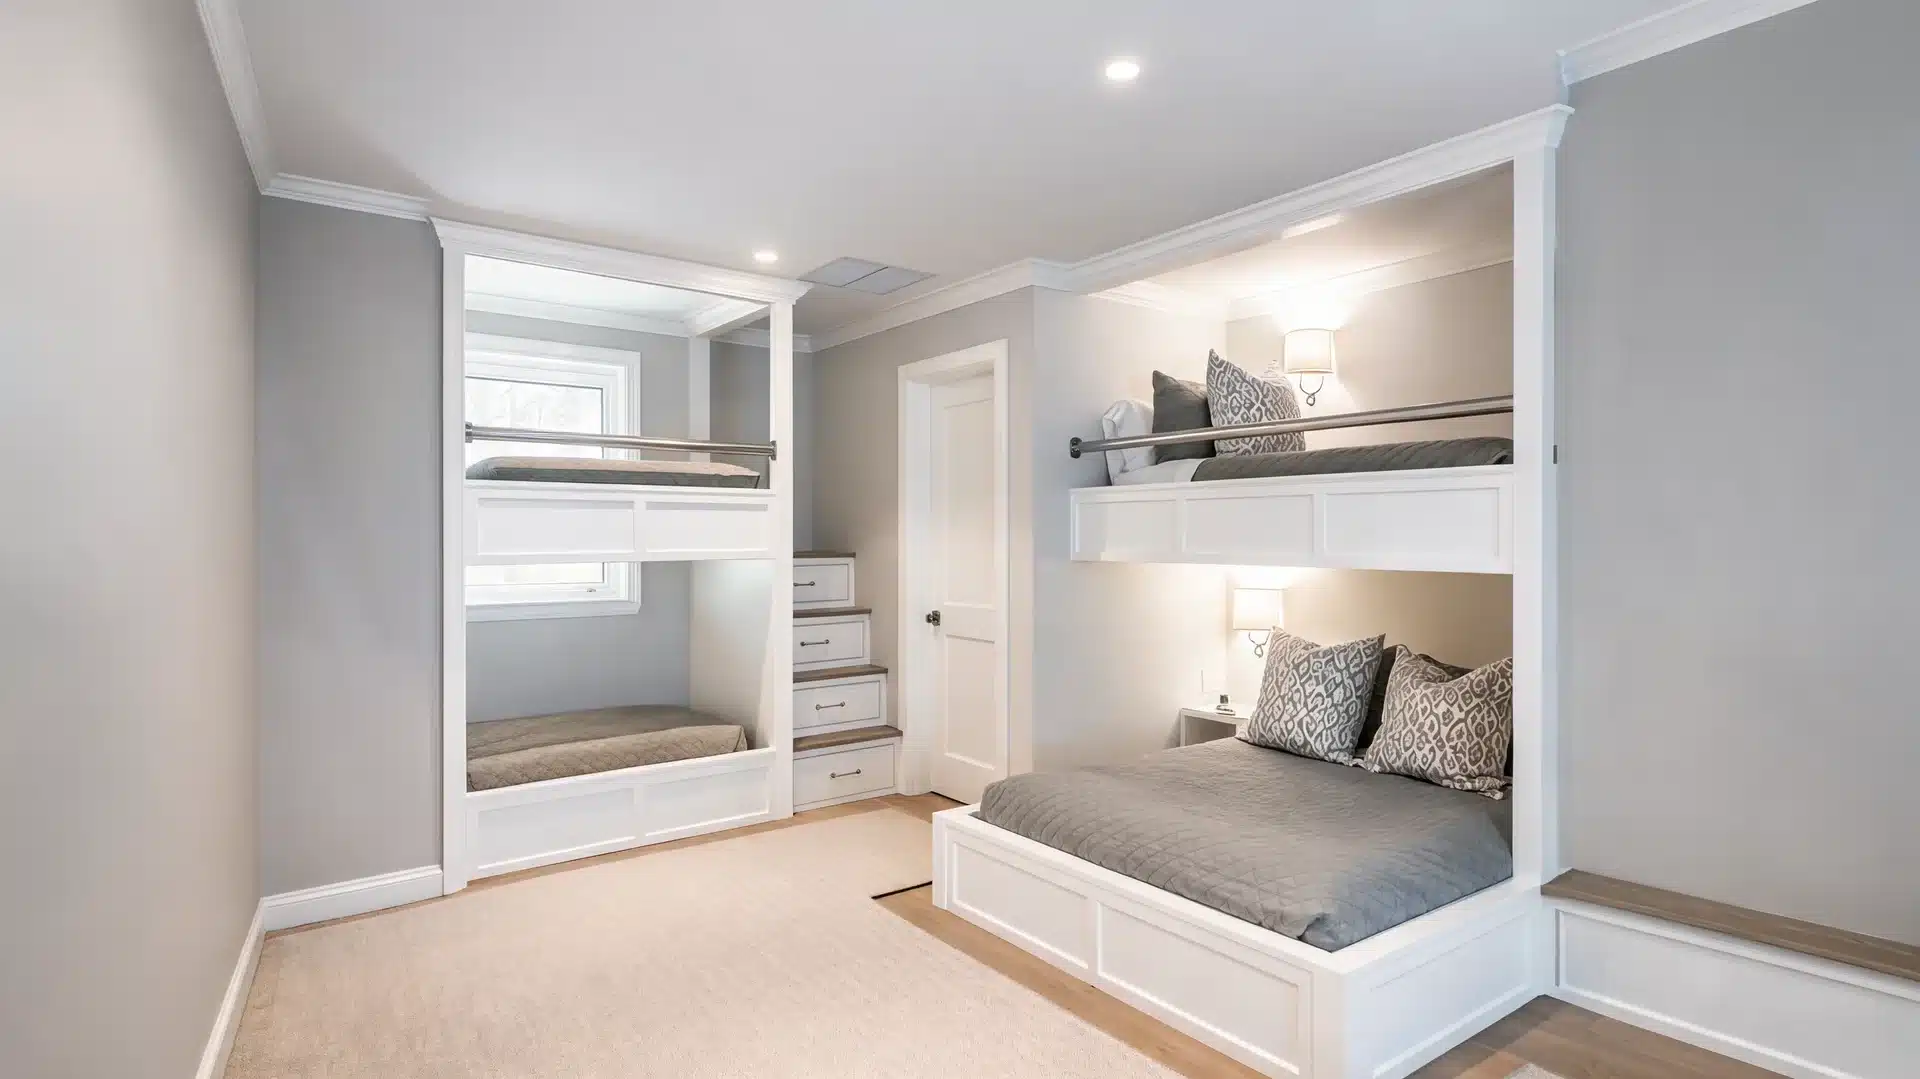
A wall-to-wall bunk is best for a built-in or custom look. The frame usually connects to the room through studs, panels, trim, paint, and caulk, so it feels like part of the wall instead of separate furniture.
This idea works well in kids’ rooms, cabins, and narrow bedrooms, but it needs careful measuring because changing the room later takes more planning, patching, and repair. Best for permanent rooms.
3. Bunk Beds With Stairs
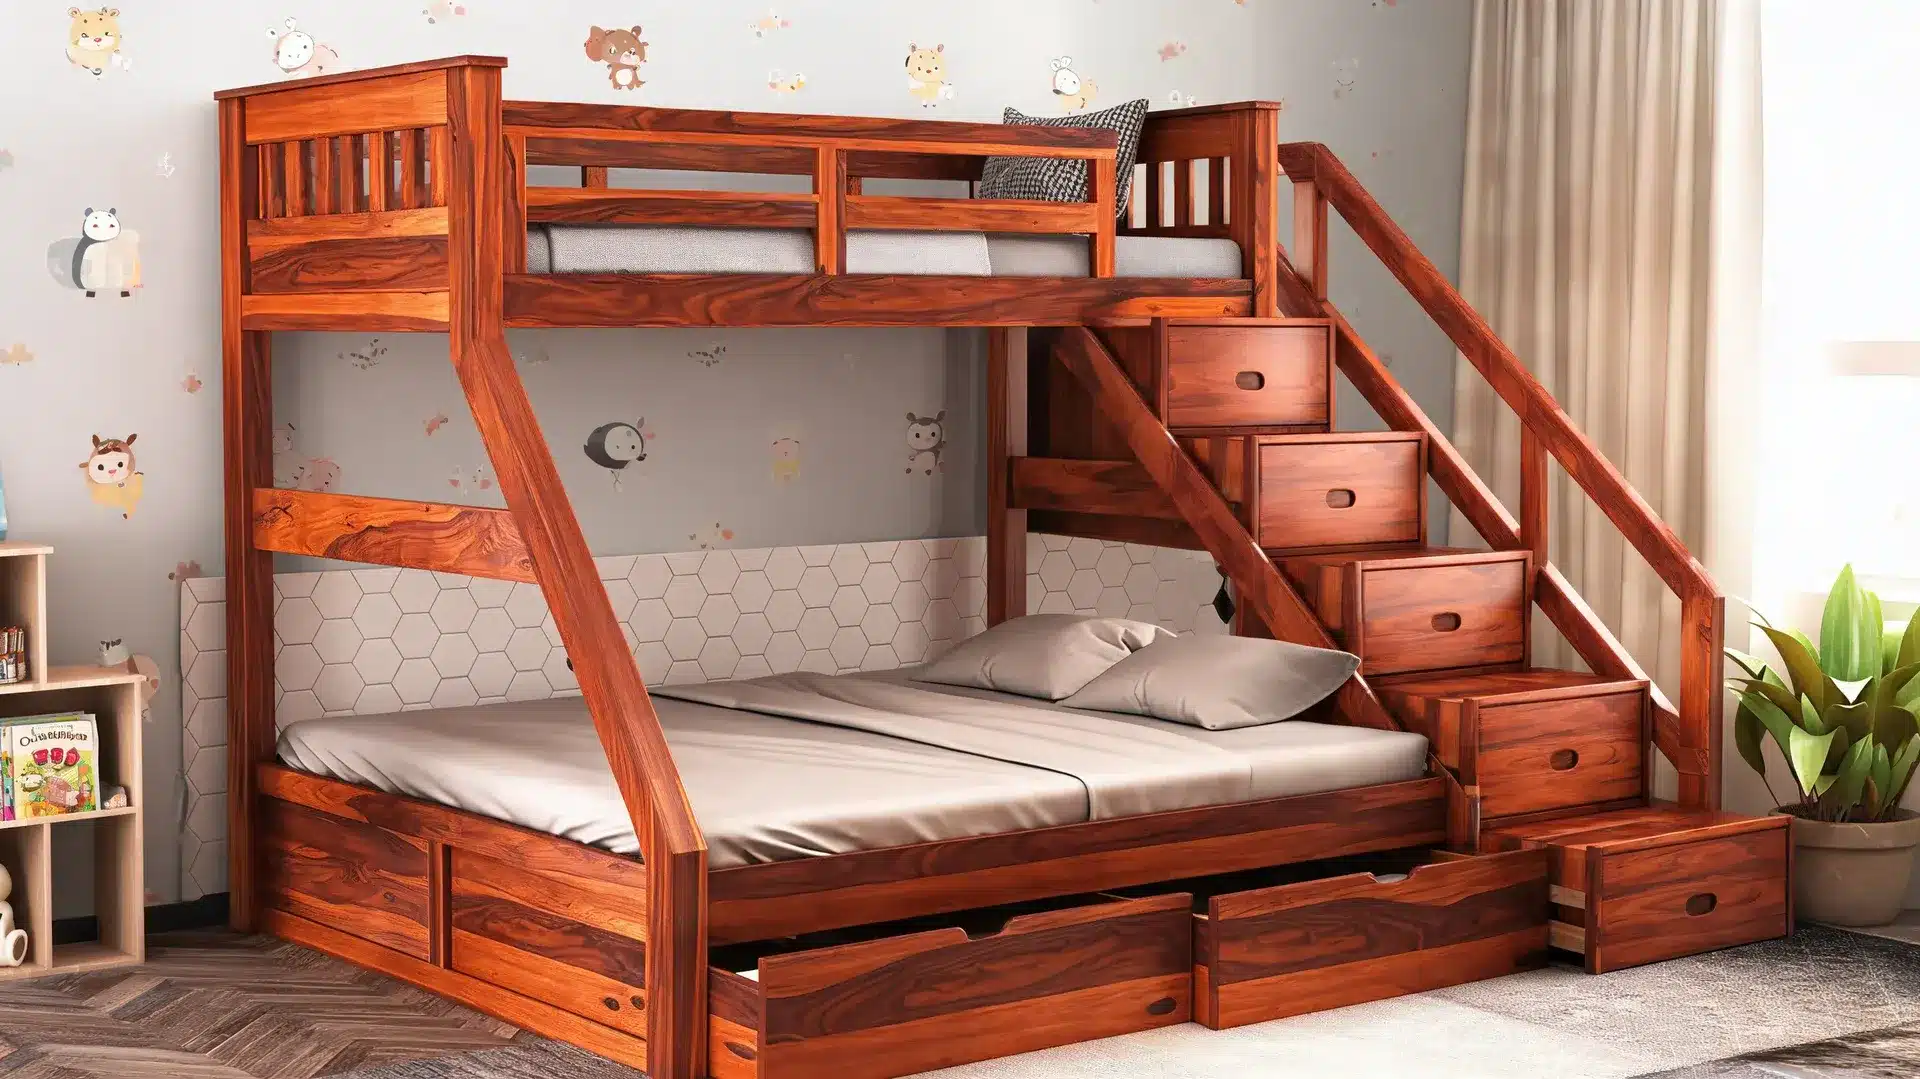
A stair bunk is best for custom rooms where storage and safer-feeling access matter more than saving every inch of floor space. The steps can hide drawers, cubbies, or bedding storage, which gives the project a finished carpentry look.
It is less ideal for simple freestanding plans because stairs need more lumber, hardware, width, and build time than a straight ladder. Choose it when storage matters as much as sleeping.
4. Bunk Beds With Storage Drawers
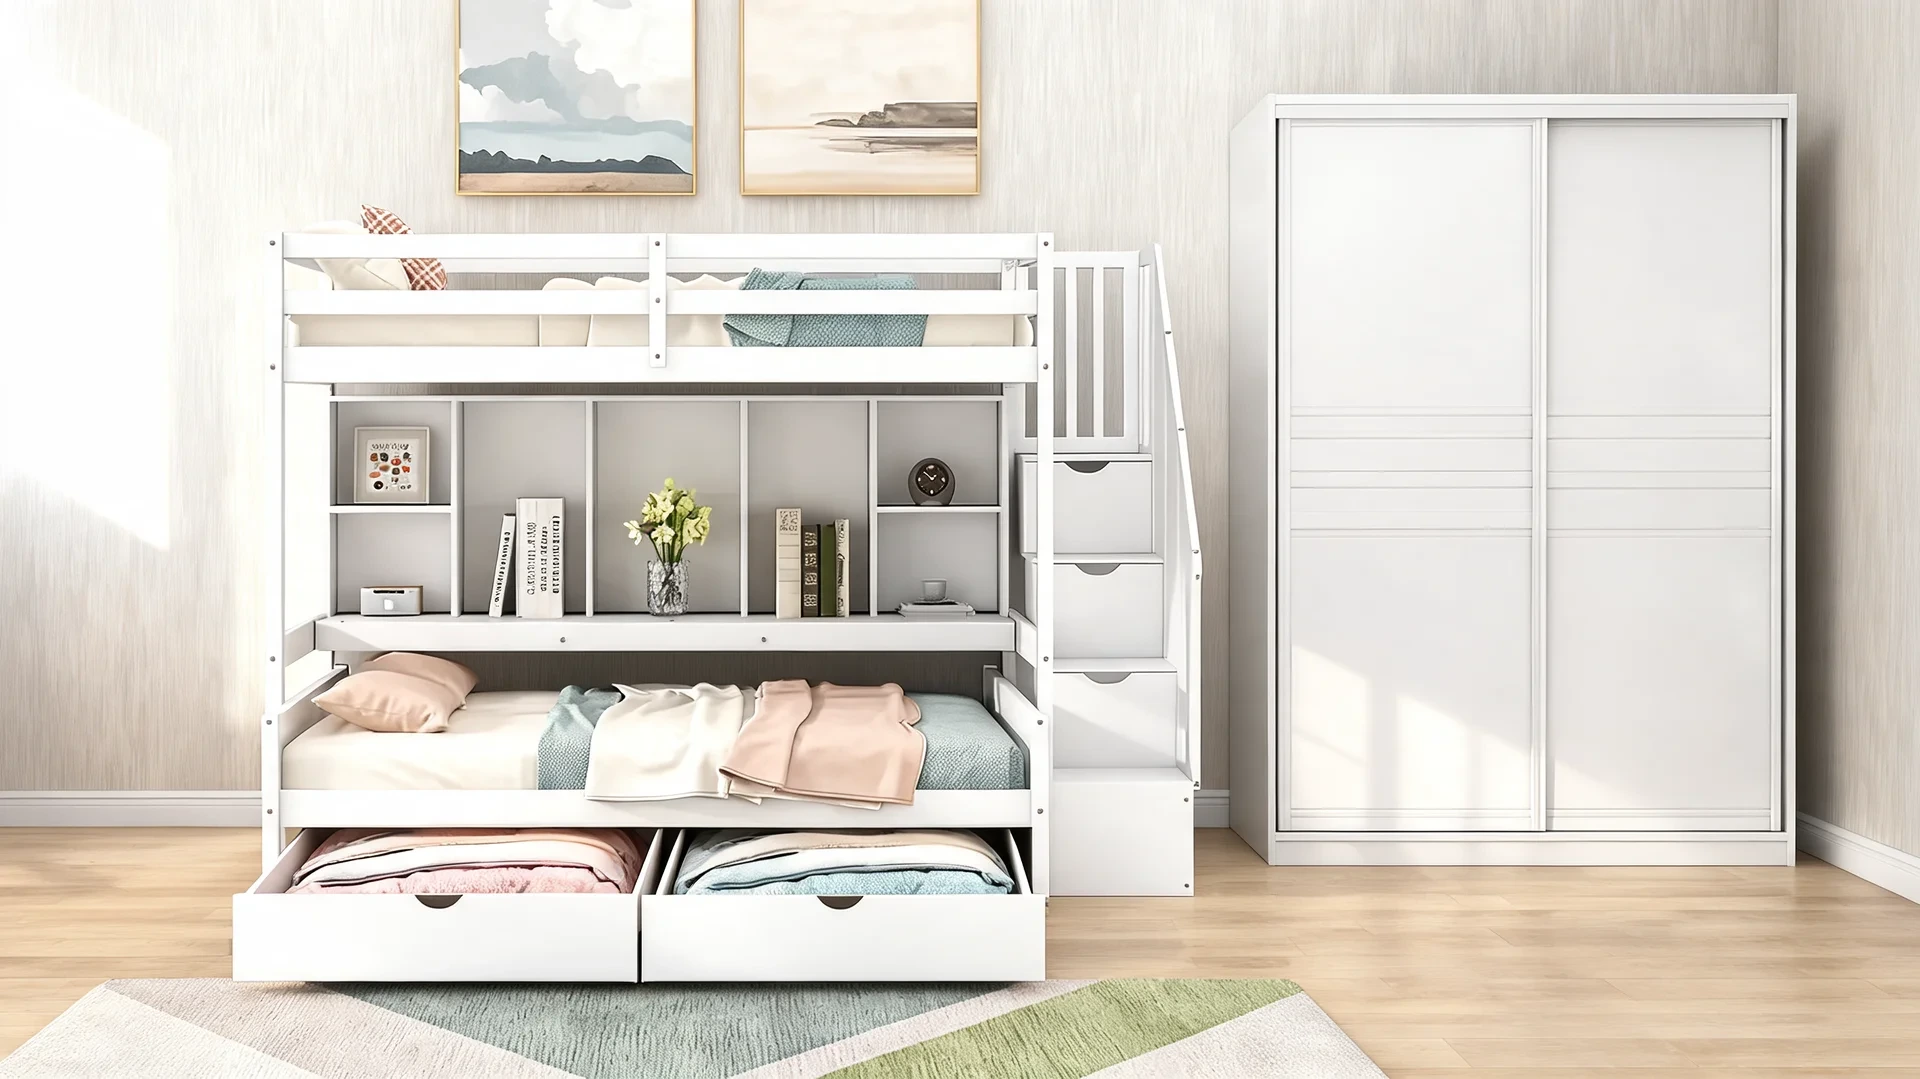
A bunk with storage drawers is useful for both freestanding and custom designs. It is best when the room has limited closet space and needs hidden storage for sheets, toys, pajamas, or guest supplies.
The key is drawer clearance. Before building, check rugs, nearby furniture, closet doors, and walls so the drawers can open fully after the bed is finished. This one is practical without feeling overly complicated.
5. Triple Bunk Beds
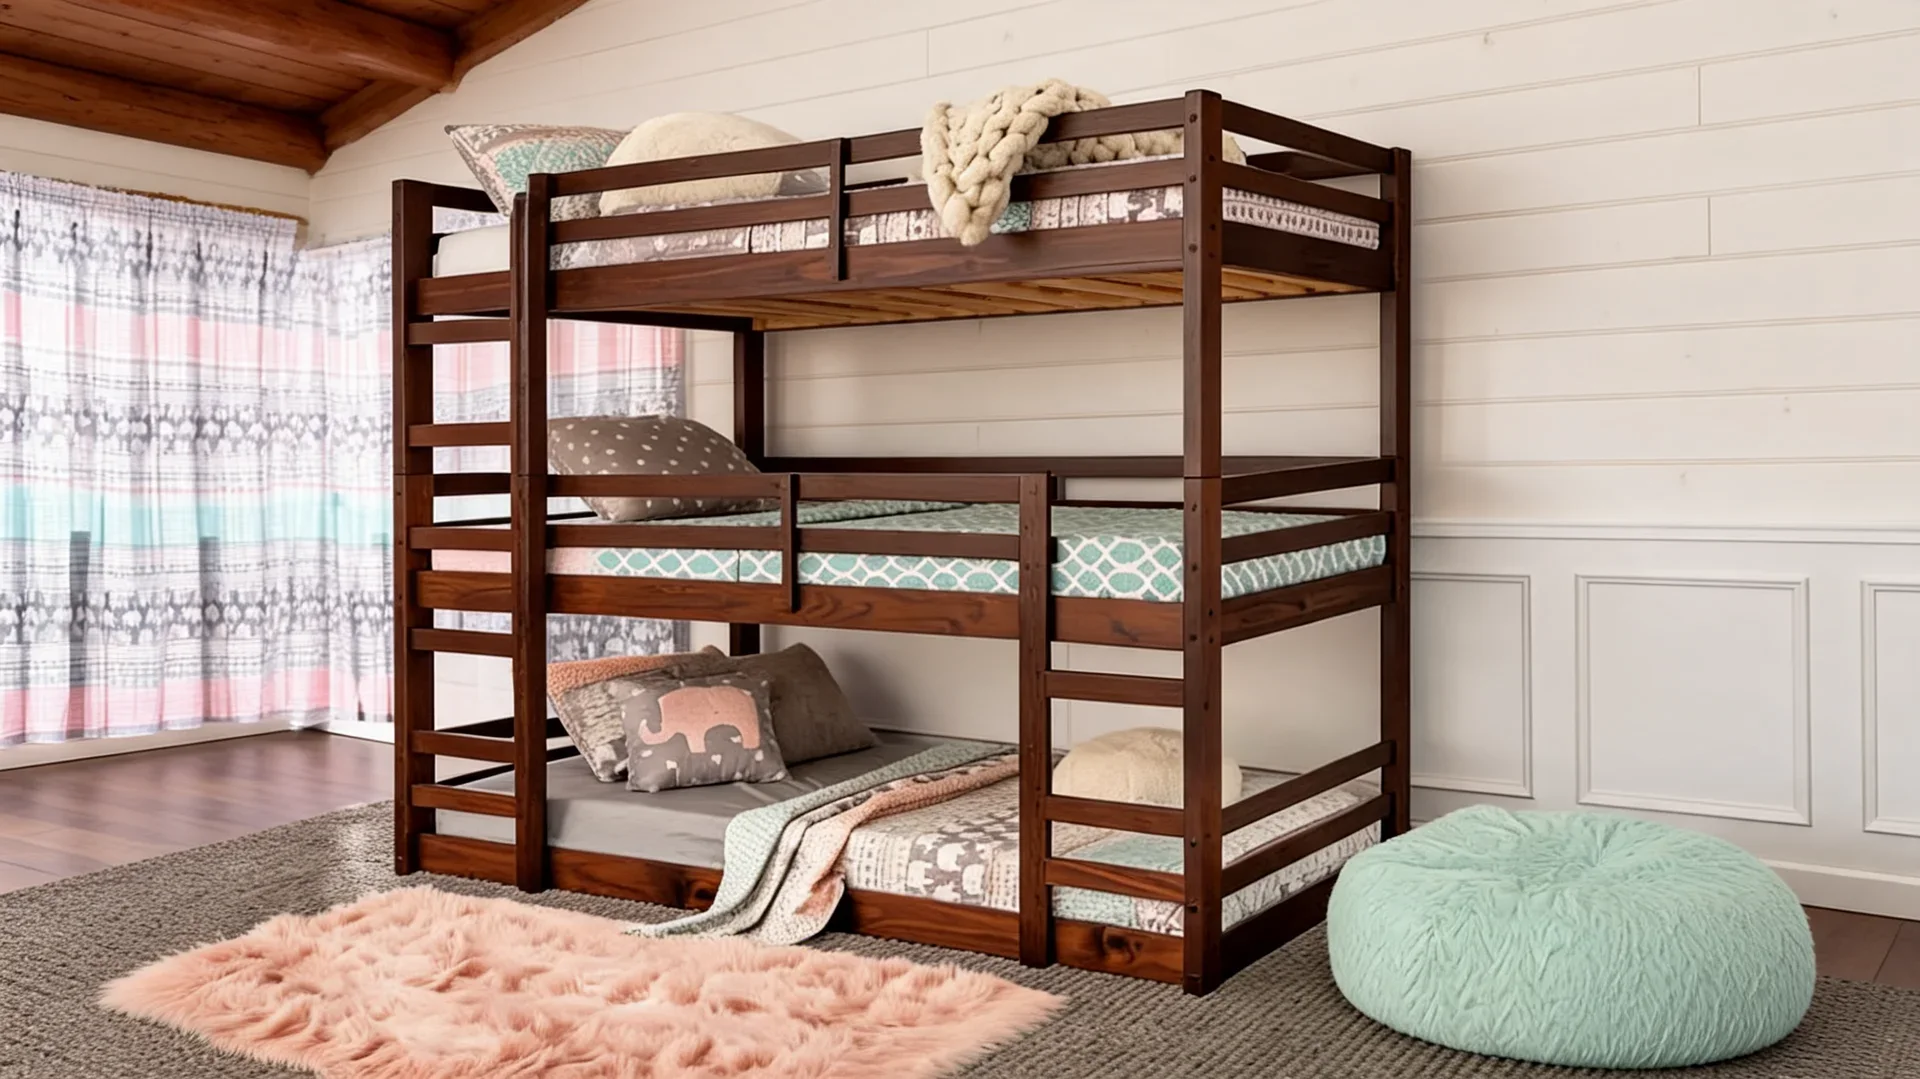
A triple bunk is best for cabins, vacation homes, large families, and sleepover rooms where sleeping capacity matters most. It can be built vertically, along one wall, or in an L-shape.
This is more of an intermediate custom project than a starter freestanding plan because headroom, guardrails, ladder access, mattress support, and room circulation all become harder to plan safely. Choose it only with a very clear plan.
6. L-Shaped Bunk Beds
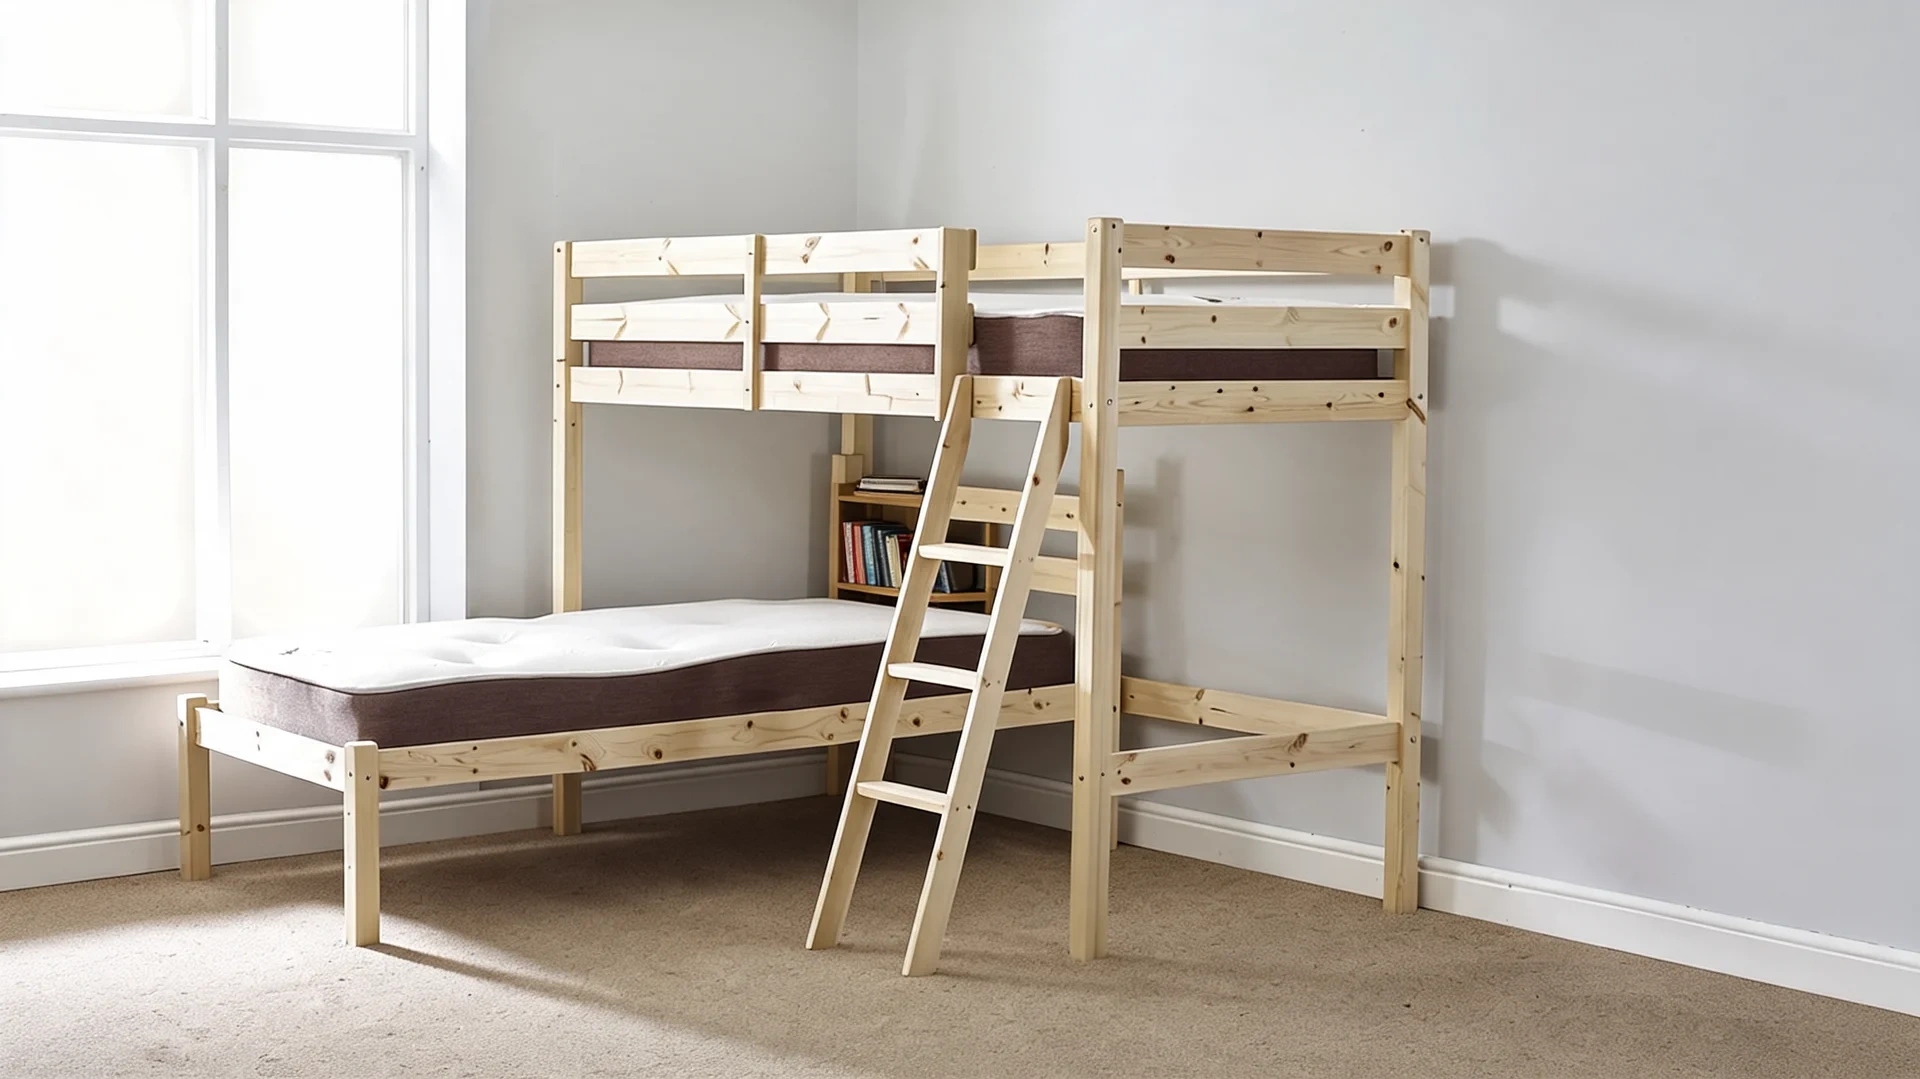
An L-shaped bunk is best for corner rooms or shared bedrooms where one straight wall is not enough. It can feel more custom because the lower bed turns into the room and leaves space for shelves, a desk, or a reading corner.
It can be freestanding, but it usually looks better when the corner is planned with trim, lighting, or storage. It works well when the room needs zones.
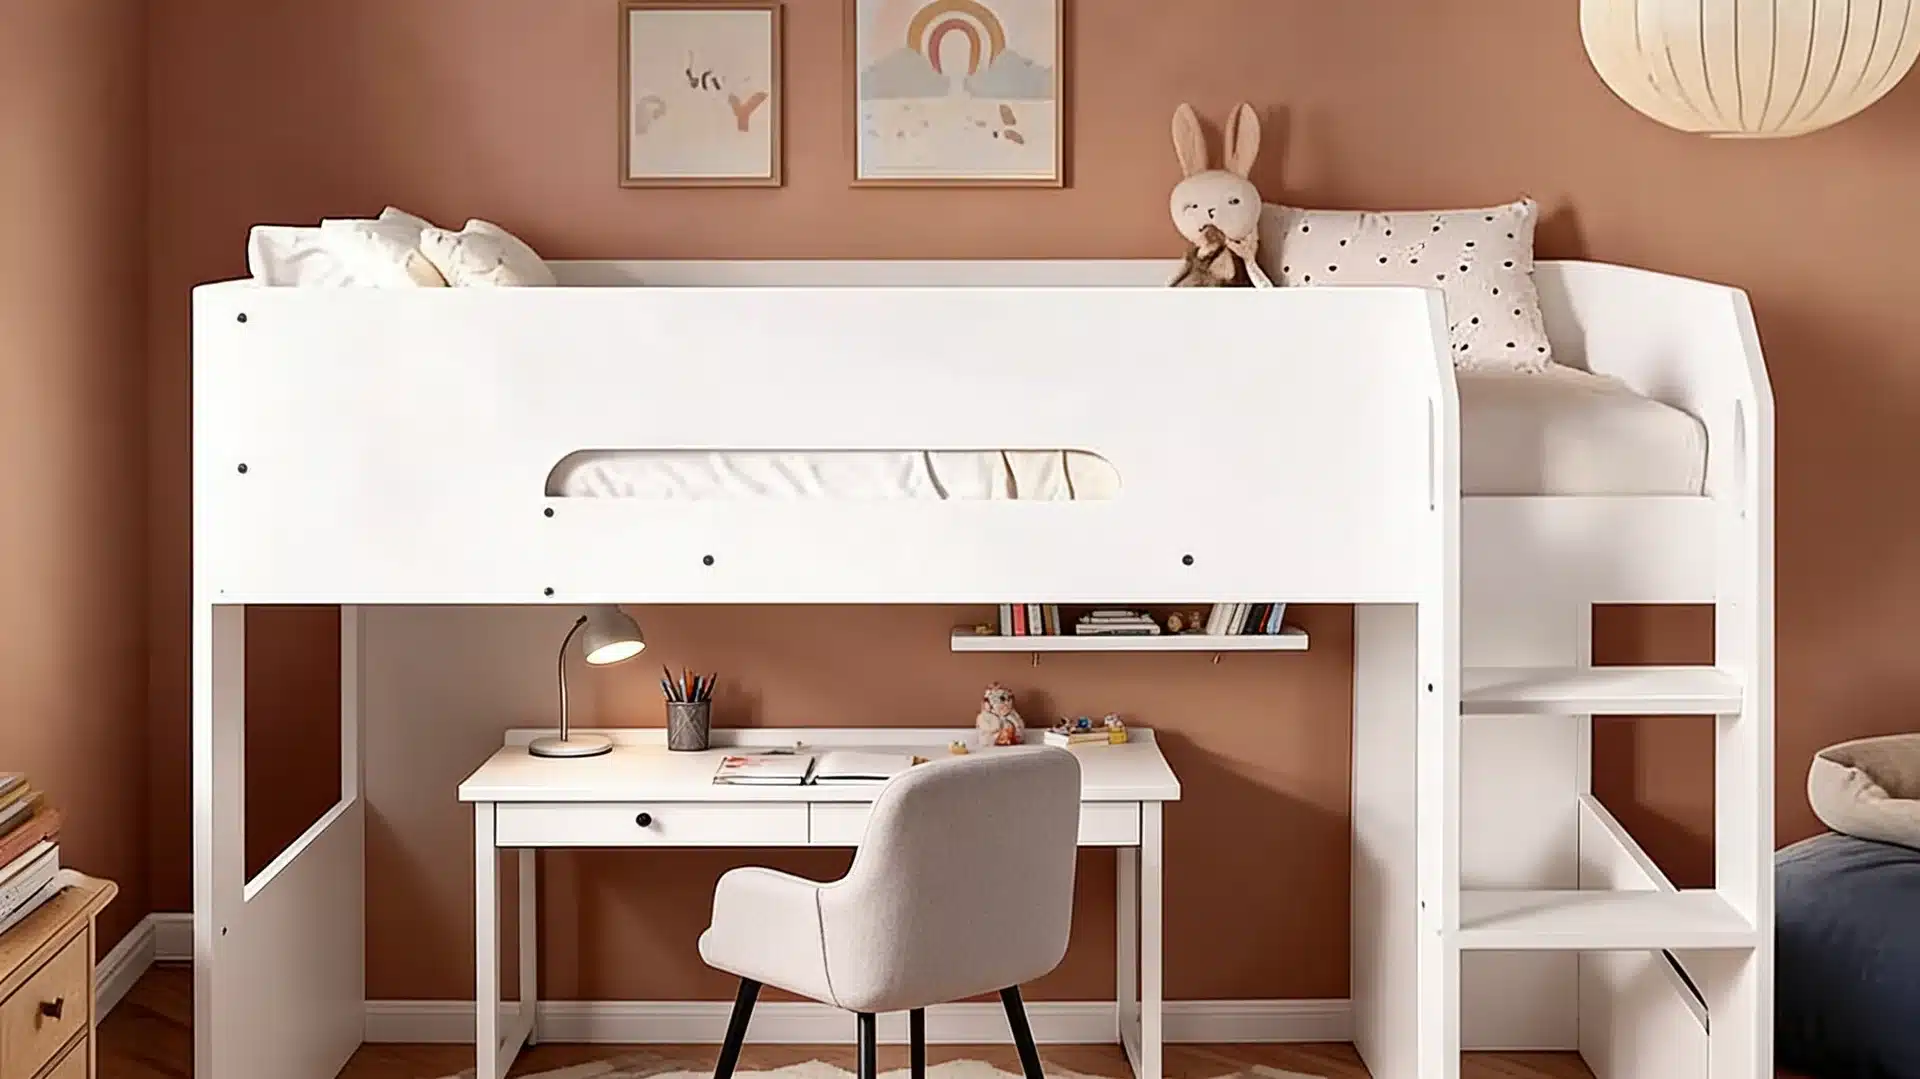
7. Loft Bed With Desk Below
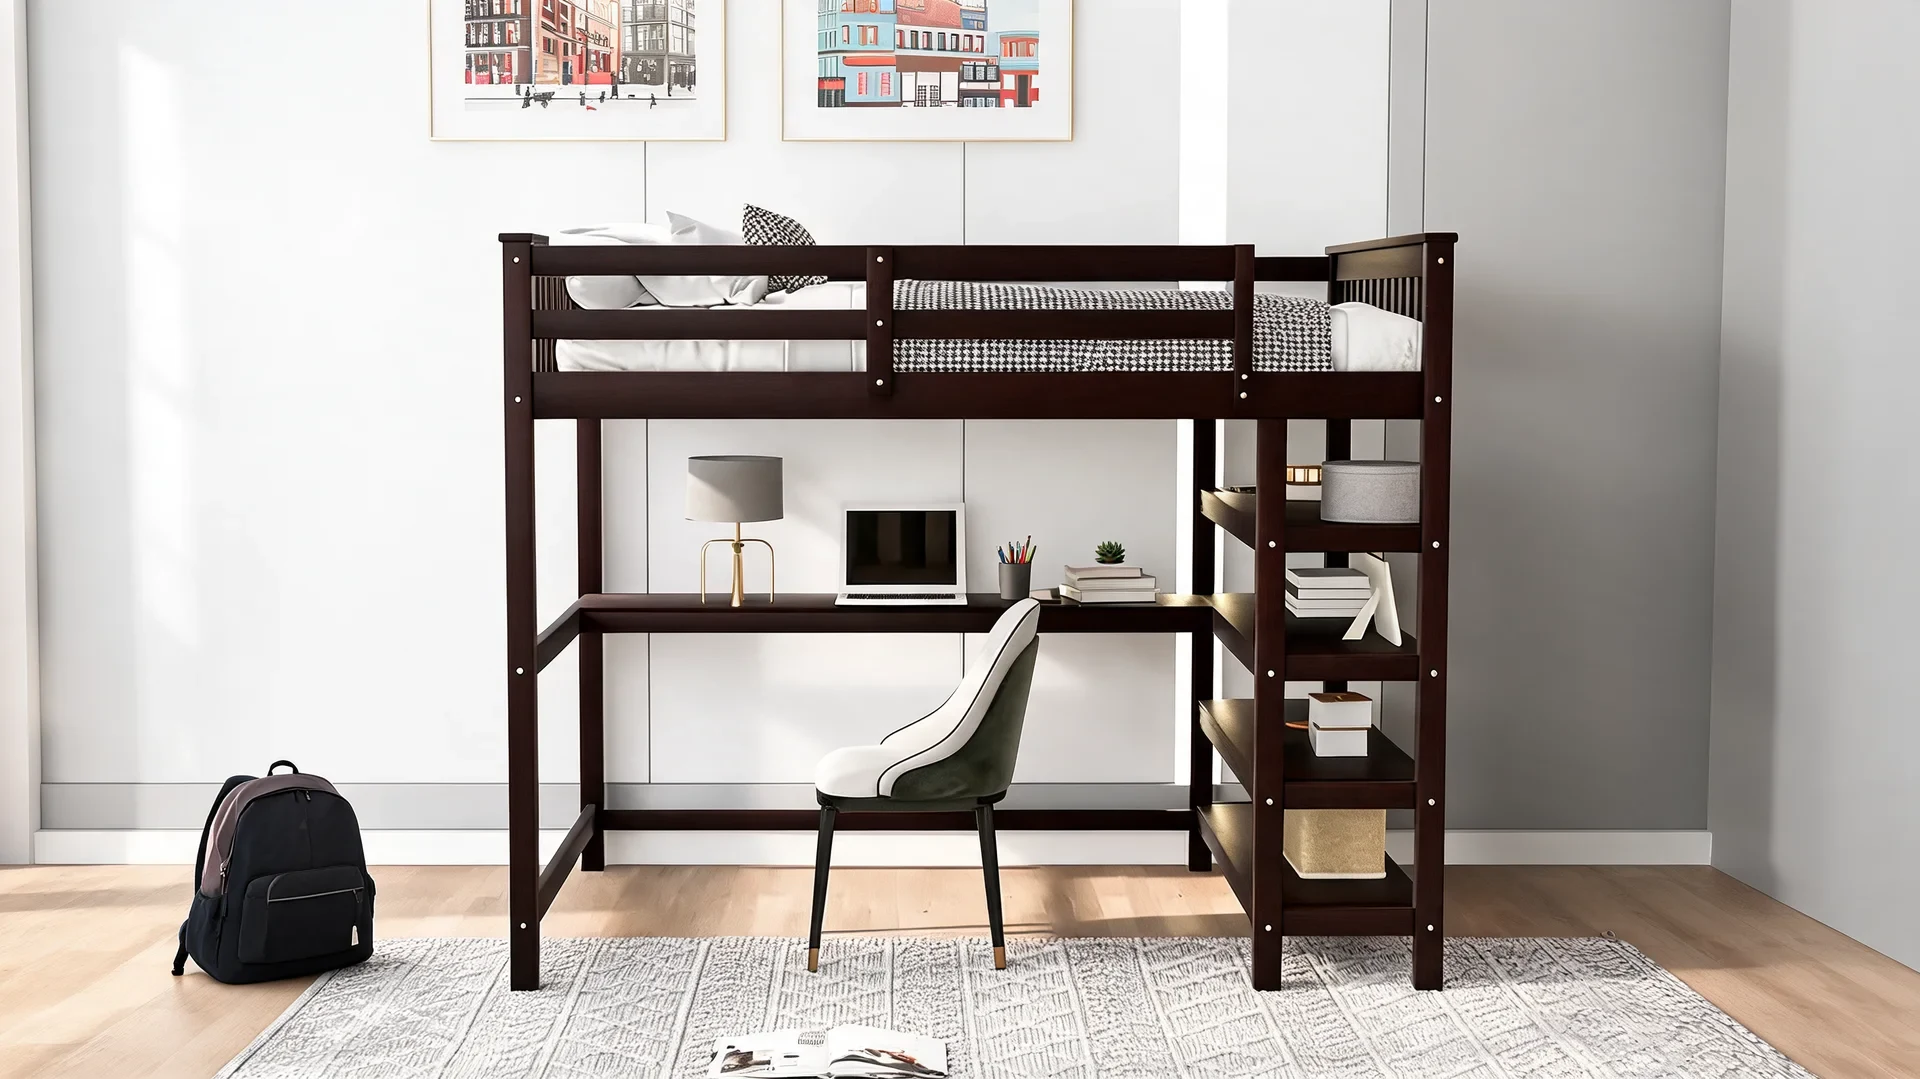
A loft bed with a desk below is best for older kids, teens, and small bedrooms that need a study zone. It is usually a freestanding concept, but it can look custom if you add side panels, shelves, lighting, and matching paint.
The main planning details are ceiling height, ladder placement, rail height, and whether the desk area below feels open enough. Good when one room has two jobs.
8. Low Bunk Beds For Younger Kids
A low bunk is best for younger kids, smaller rooms, and lower ceilings. It is usually a simple freestanding plan because the shorter height makes the project less visually heavy.
You can still add a custom feel with paint, rounded edges, simple trim, or low storage. It should still have proper guardrails, steady access, and mattress support like a taller bunk. This option keeps the room easier to manage.
9. House-Style Bunk Bed
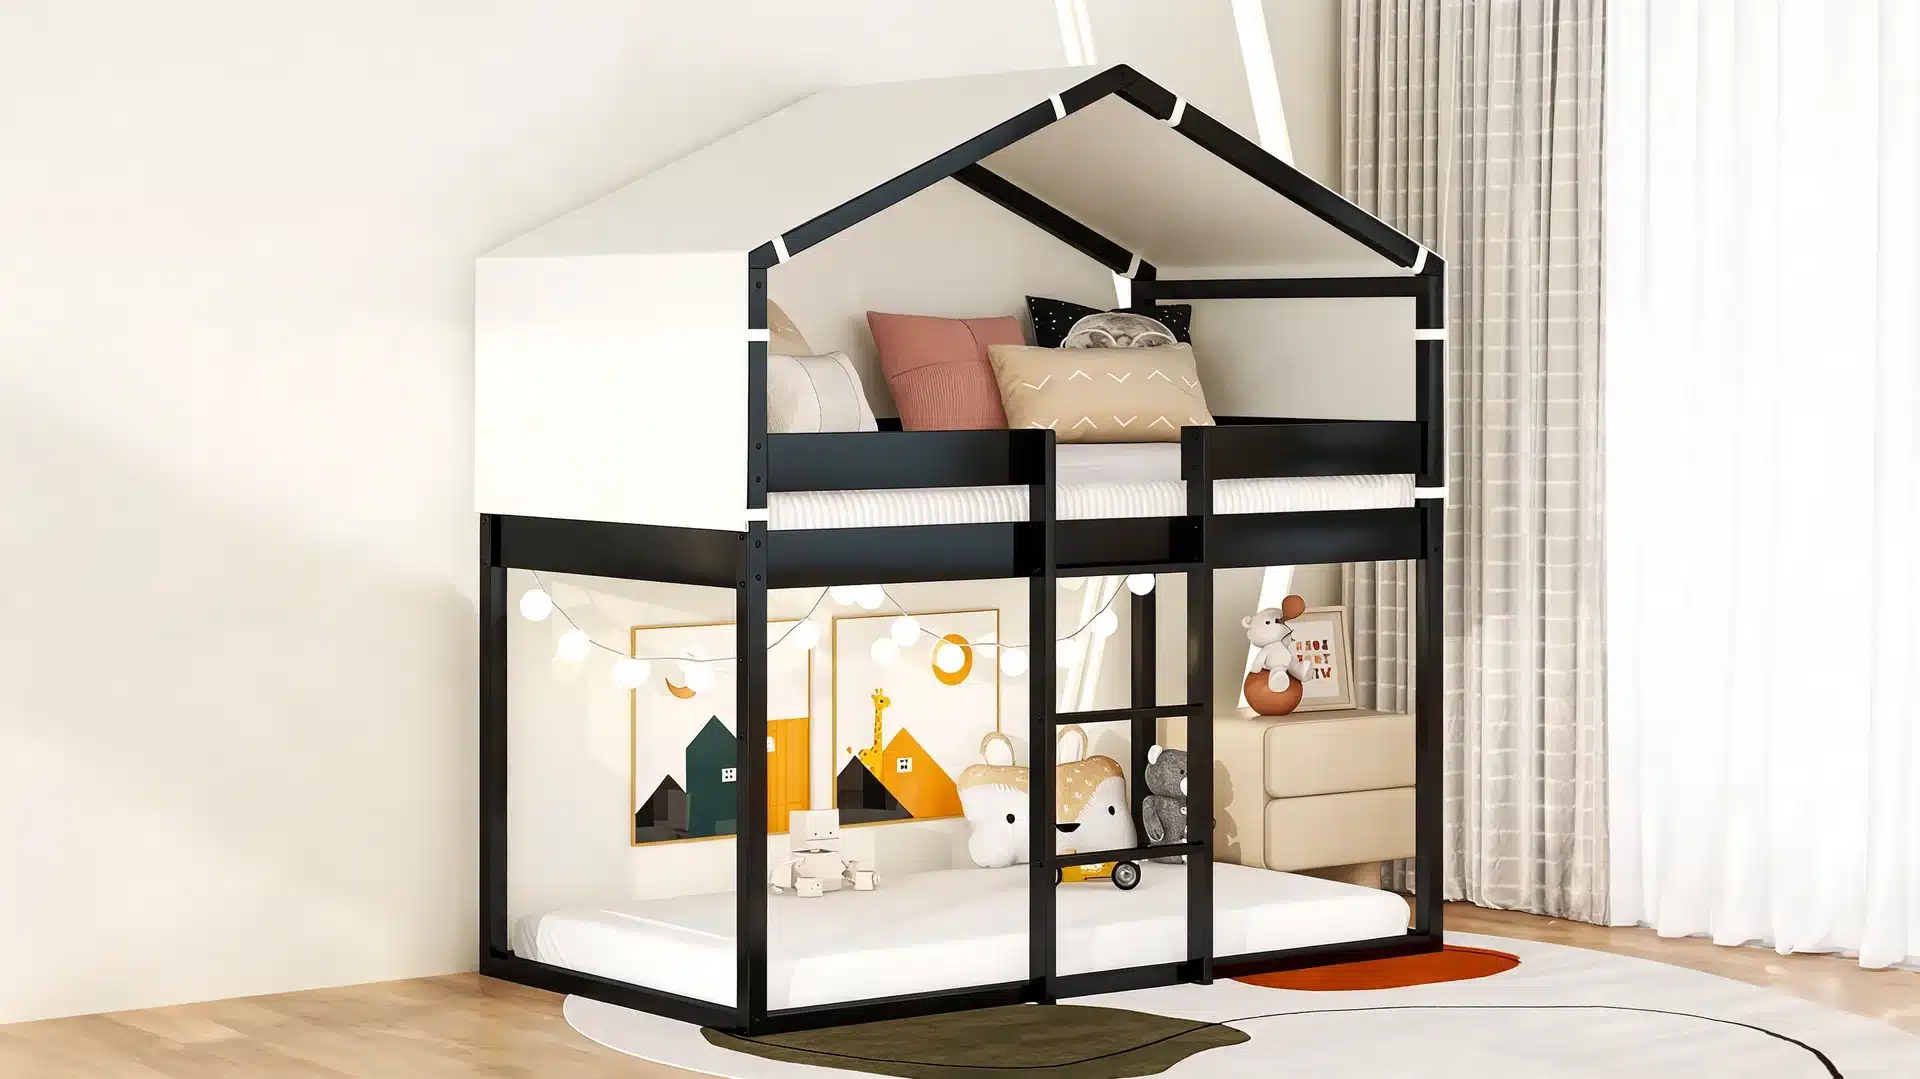
A house-style bunk is best for kids’ rooms where the bed should feel playful and designed, not just stacked. It can work as a freestanding frame or a semi-custom feature with wall color, curtains, and trim.
Keep the roofline and decorative pieces smooth, secure, and simple. This idea looks custom quickly, but the added shapes should never weaken access or safety. Keep the design playful, not overbuilt.
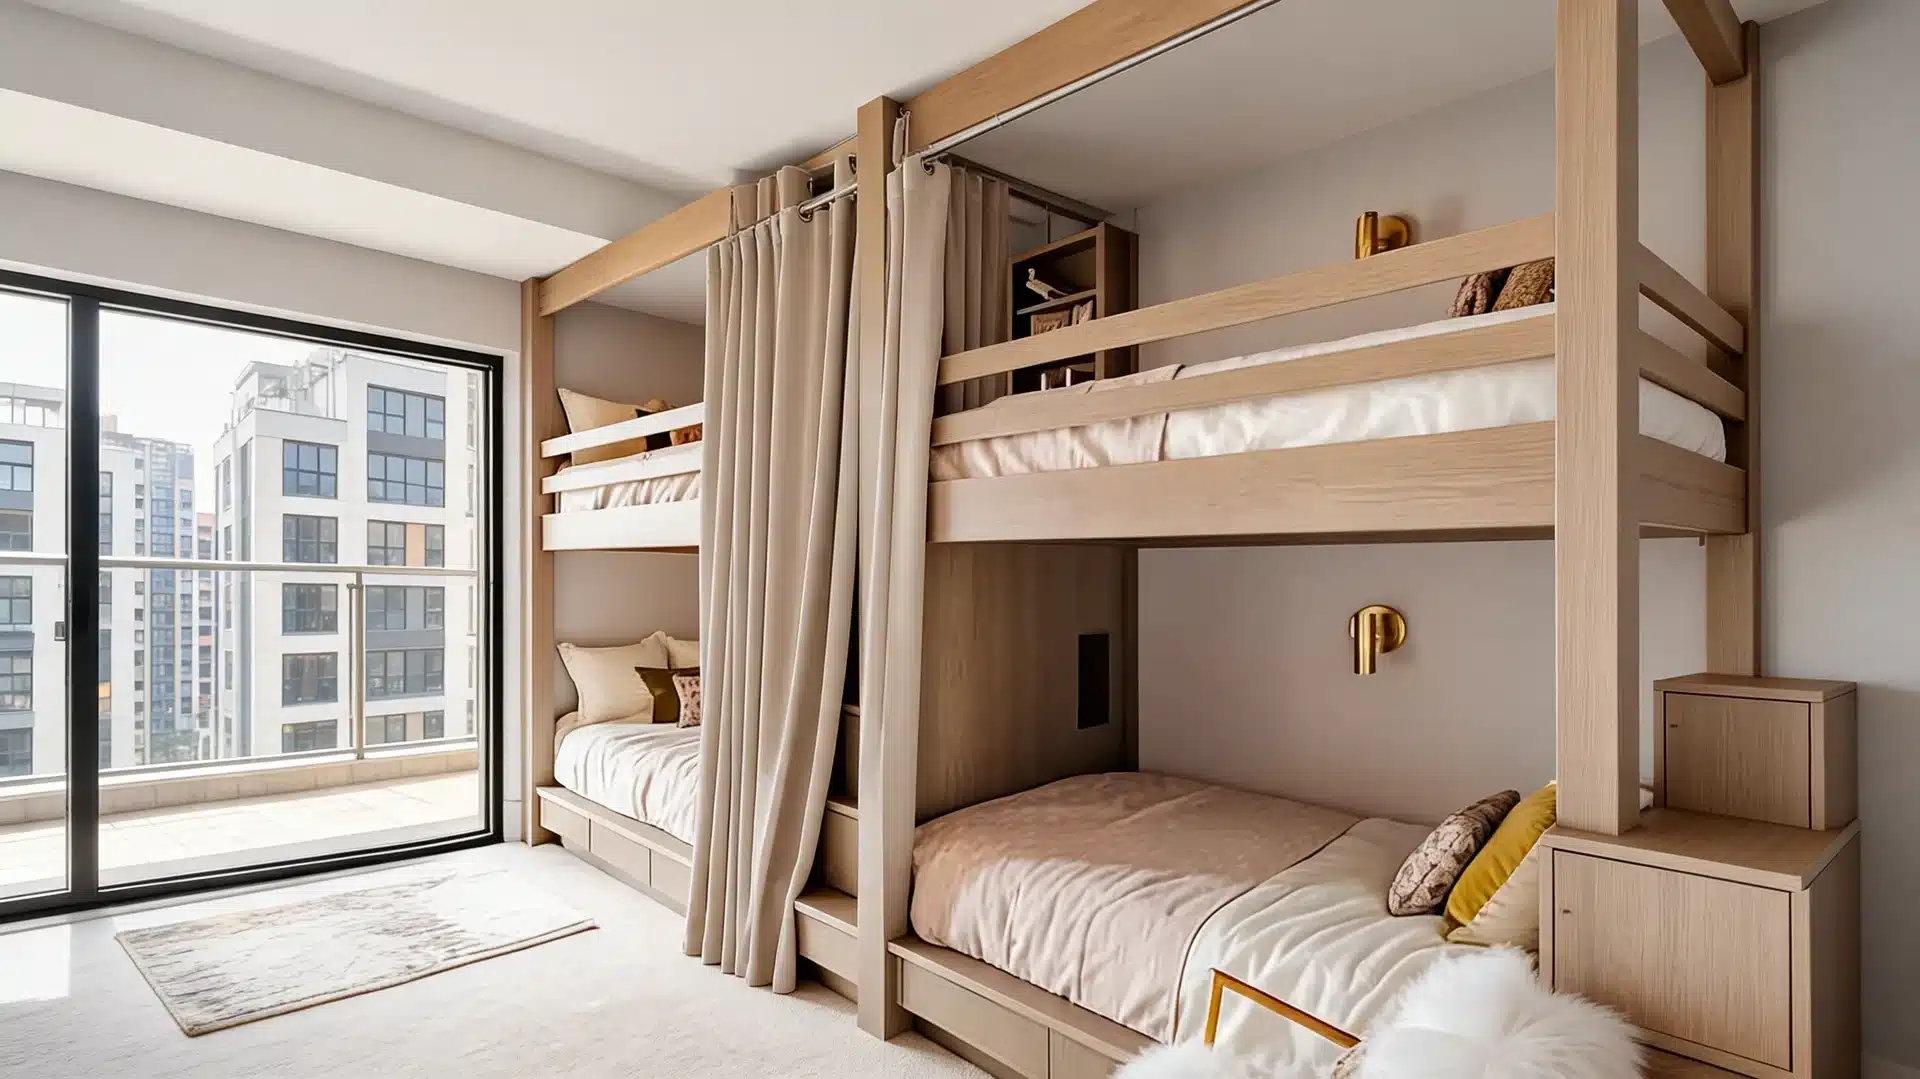
10. Bunk Beds With Privacy Curtains
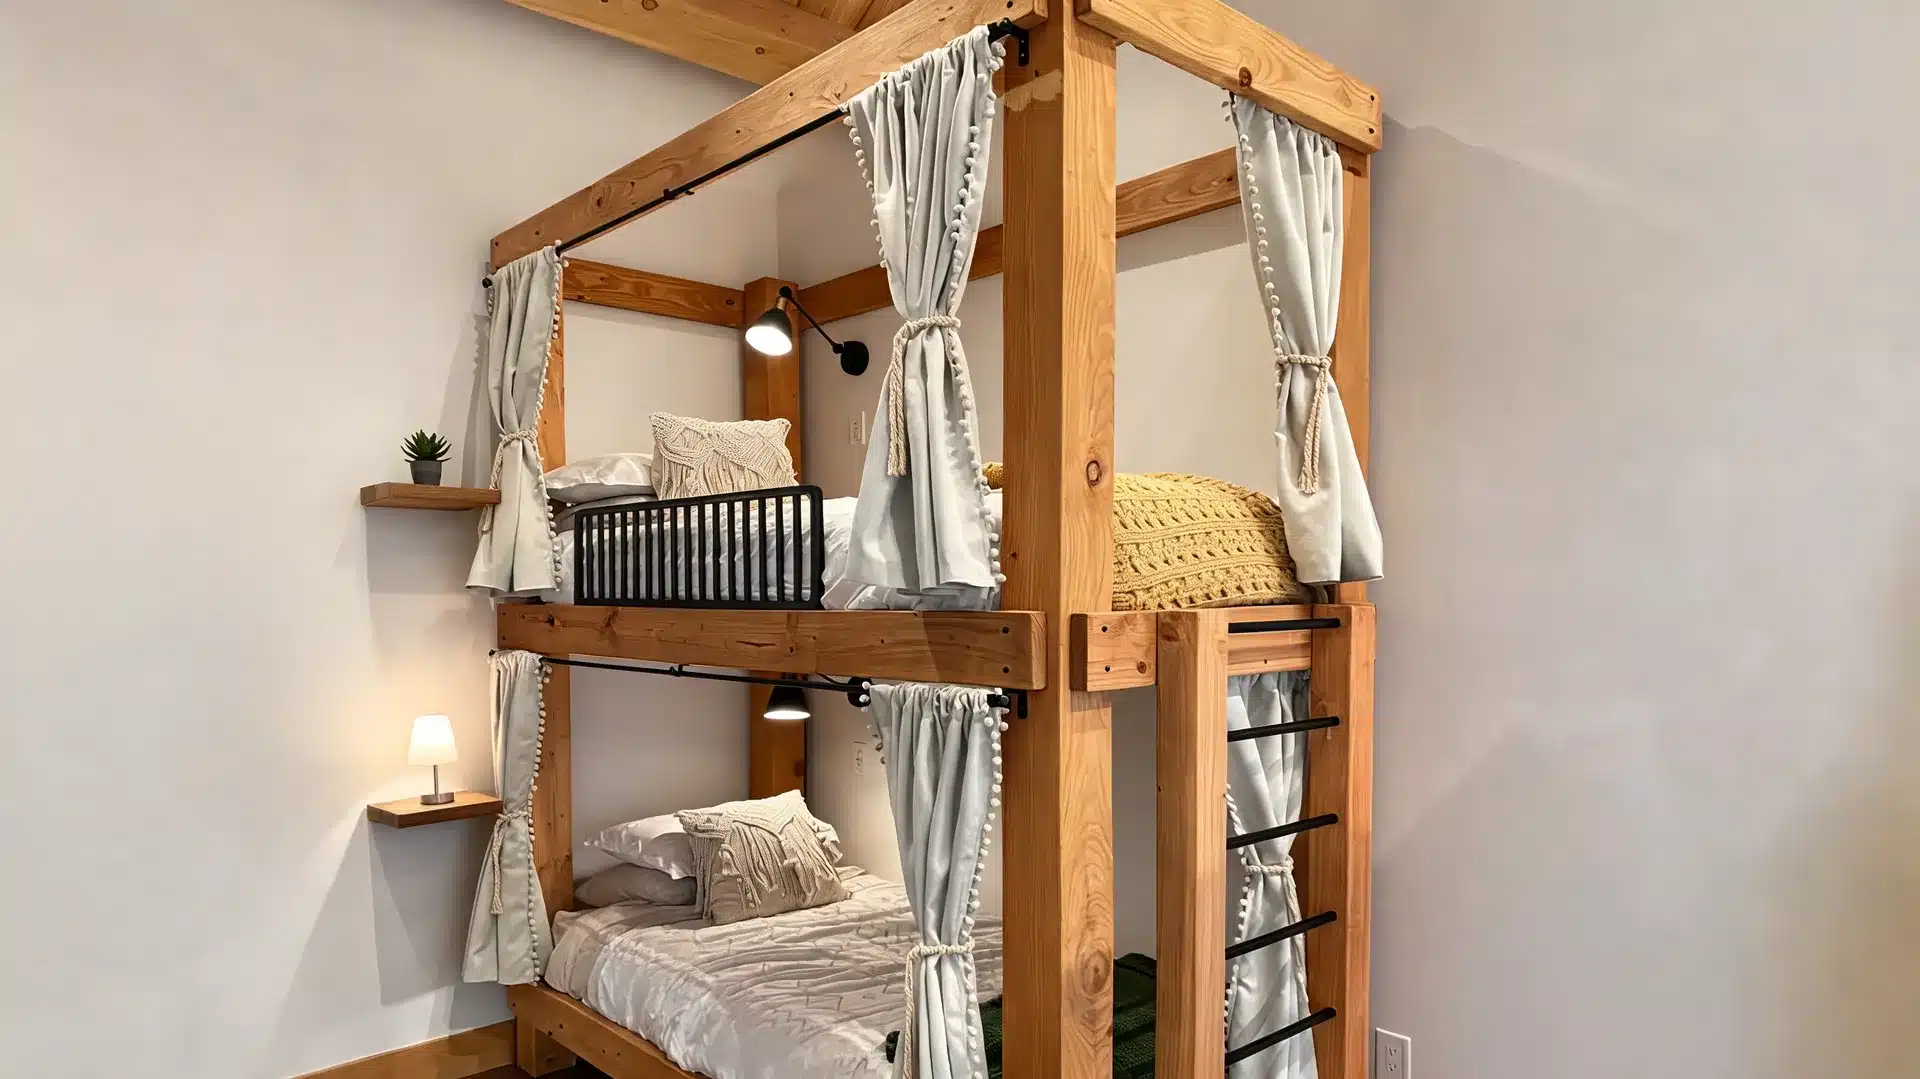
A bunk with privacy curtains is best for shared bedrooms, guest rooms, or sleepover spaces where each sleeper needs a small personal zone. It works with both freestanding and built-in plans.
The custom look comes from matching fabric, simple rods, and neat mounting. Use lightweight curtains that open easily, and avoid loose loops, heavy fabric, or hardware that creates climbing hazards. It adds comfort without changing the main structure.
11. Bunk Beds With Reading Lights
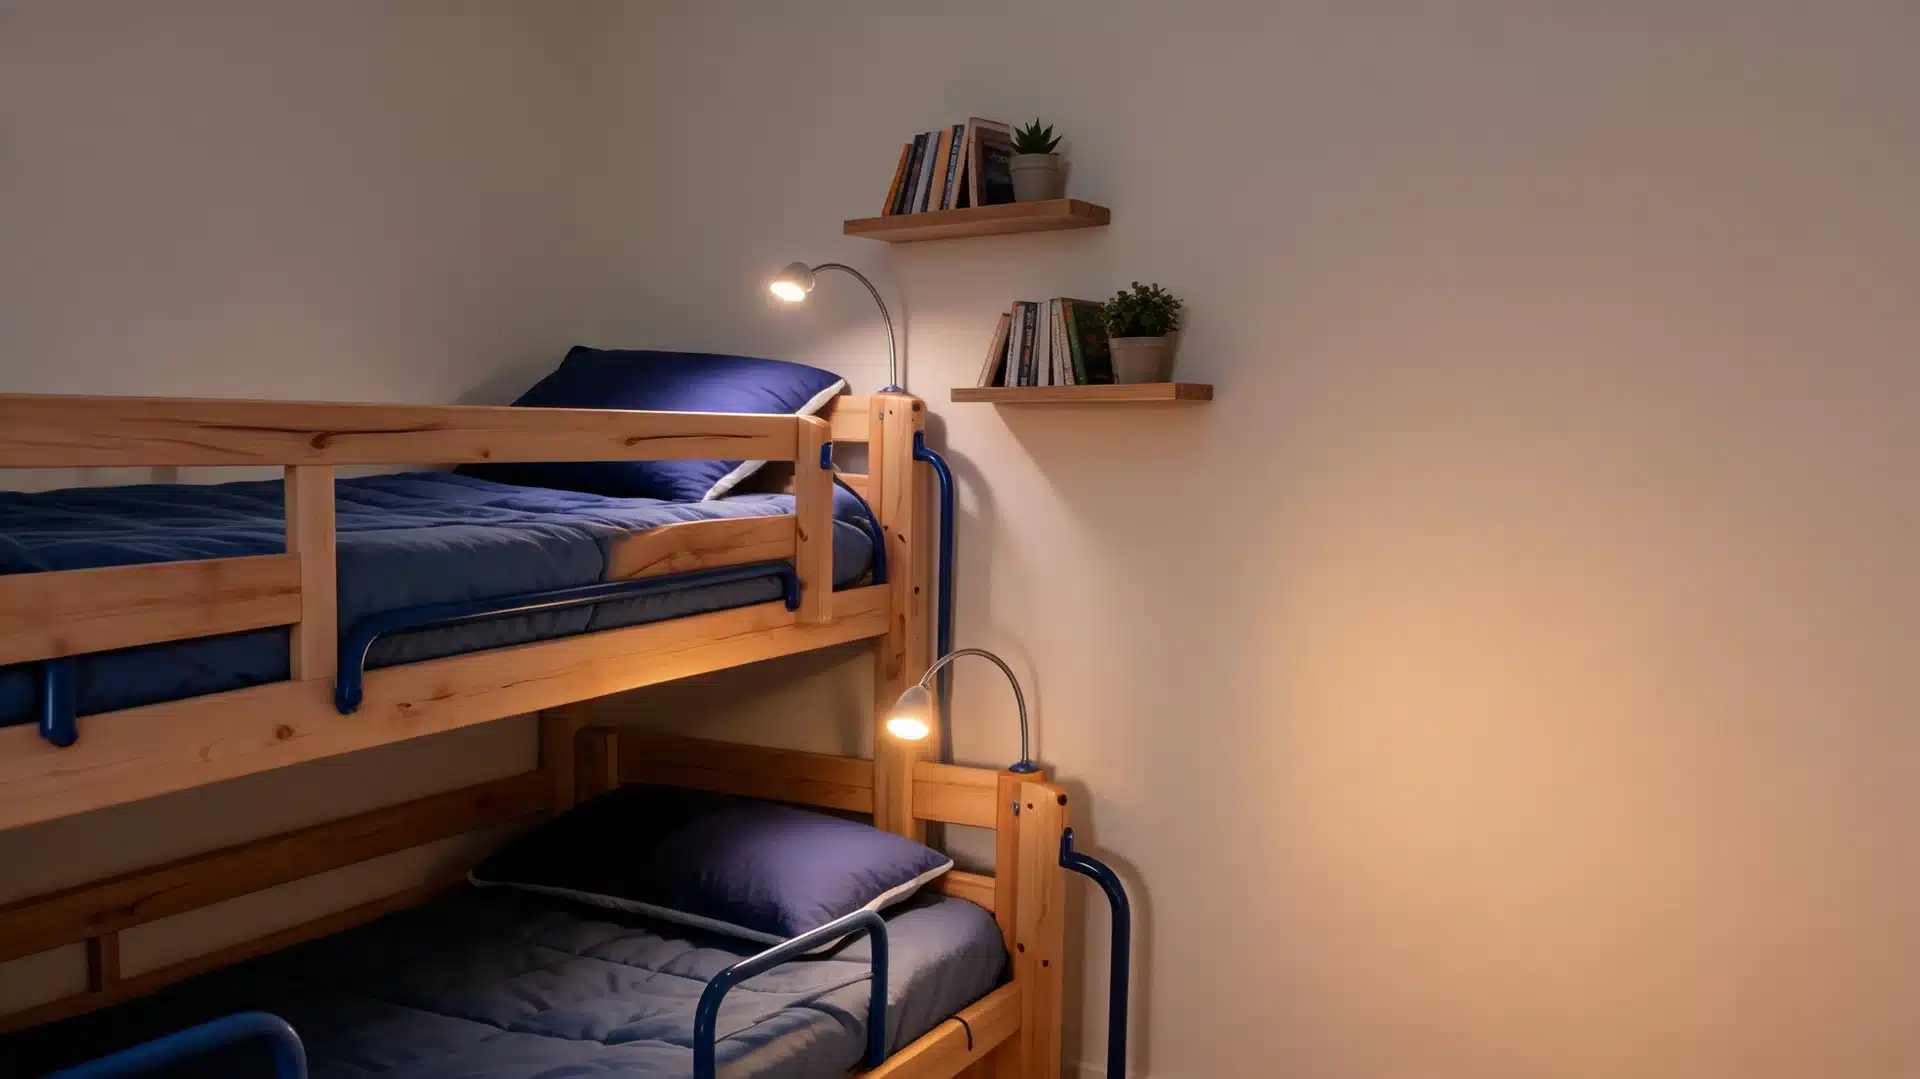
A bunk with reading lights is best for custom rooms, older kids, and guest spaces where each bed needs its own function. It can improve both freestanding and built-in designs.
Plan lights before closing trim or panels so cords and switches do not look messy. Plug-in or battery lights are easier, while hardwired lighting should be handled by a qualified electrician. It makes bedtime easier without adding storage.
12. Bunk Beds With Built-In Shelves
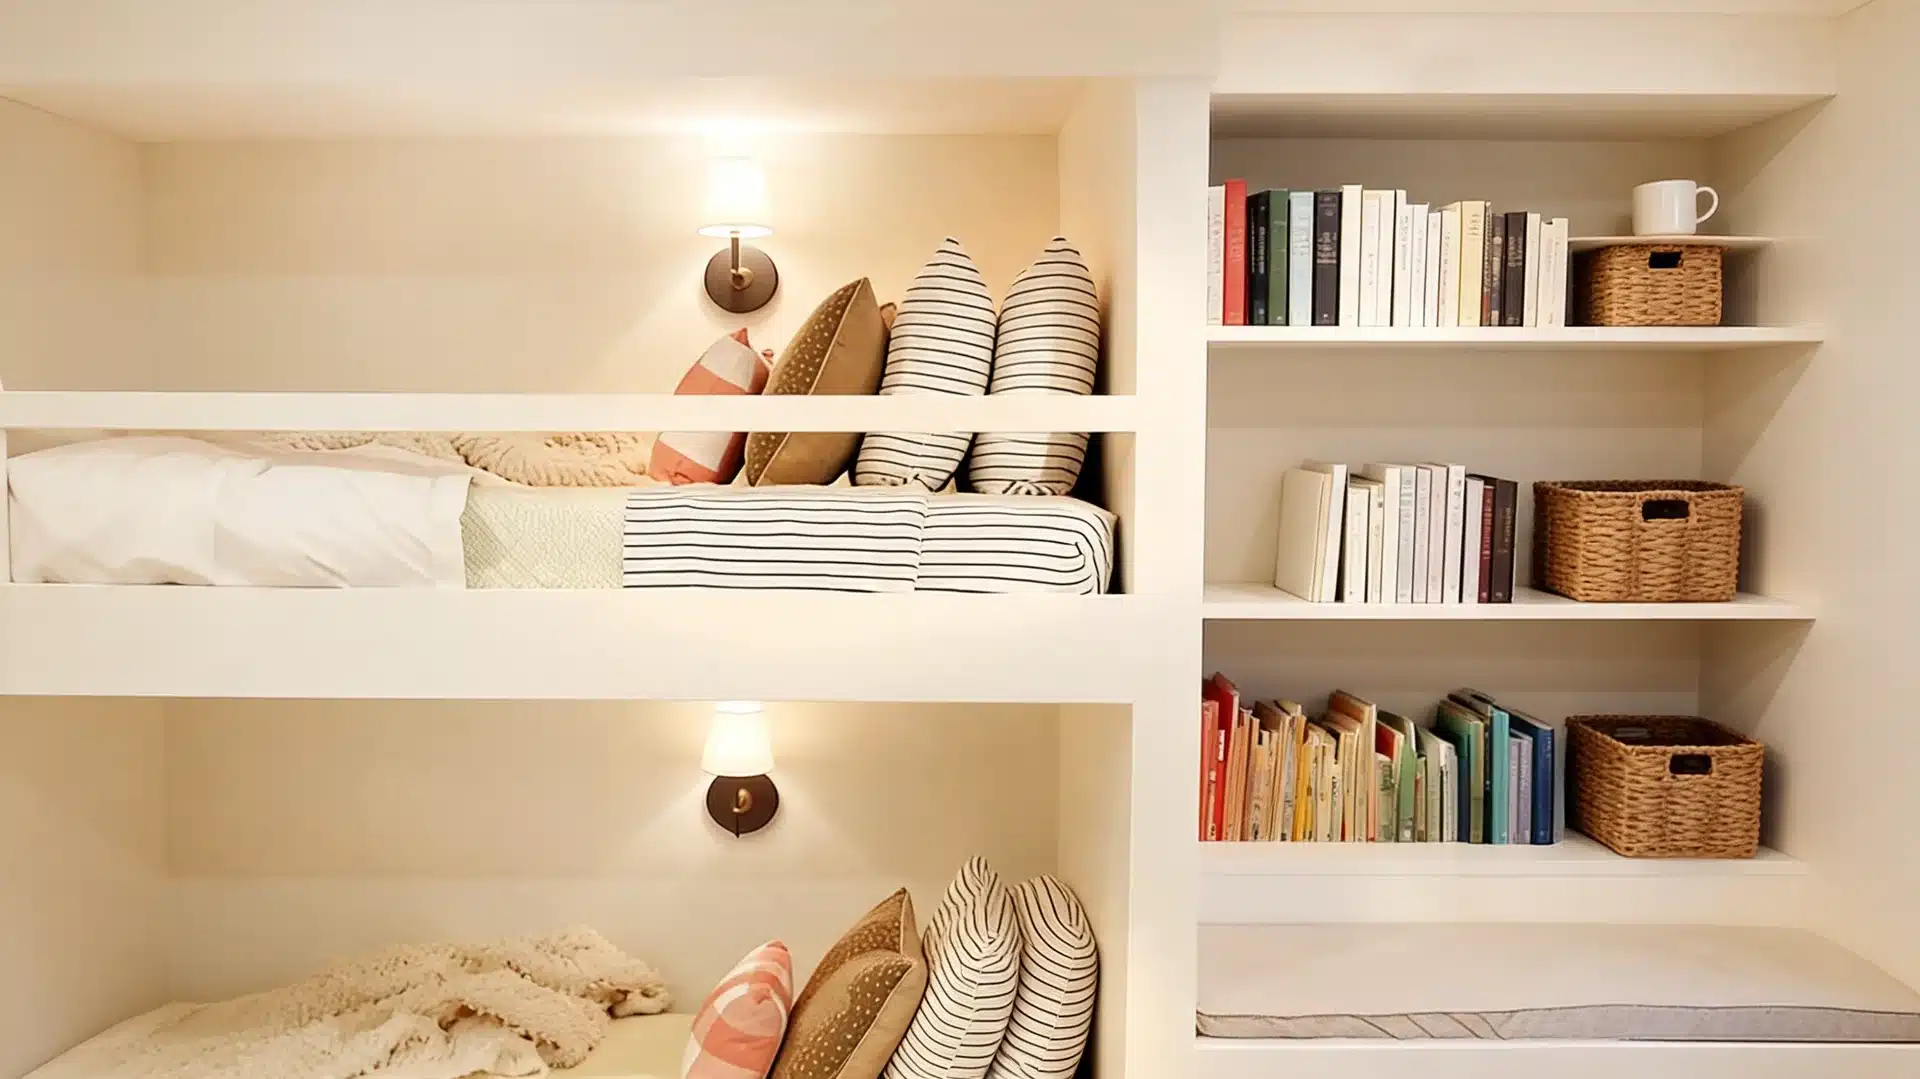
Bunk beds with built-in shelves are best when the room has no space for nightstands. Shelves near each mattress can hold books, glasses, water bottles, or small bedtime items.
This idea strongly supports a custom look, especially when shelves are framed into the side panels. Keep them shallow, smooth-edged, and placed where they will not become steps or head-bumping spots. This solves a common problem in tight rooms.
13. Renter-Friendly Built-In Look
A renter-friendly built-in look is best when you want custom style without permanent construction. Use a freestanding bunk, removable panels, curtains, matching paint colors, and separate storage pieces to create the feel of built in bunk beds.
This is useful for apartments or future room changes. Avoid unsafe wall-attachment shortcuts and follow lease rules before adding anything fixed. It gives style without committing to permanent framing.
Choose the design that fits the room first, then style it. A bunk bed that looks perfect online can still fail in real life if the ceiling, ladder, guardrail, mattress, or storage plan does not match the space.
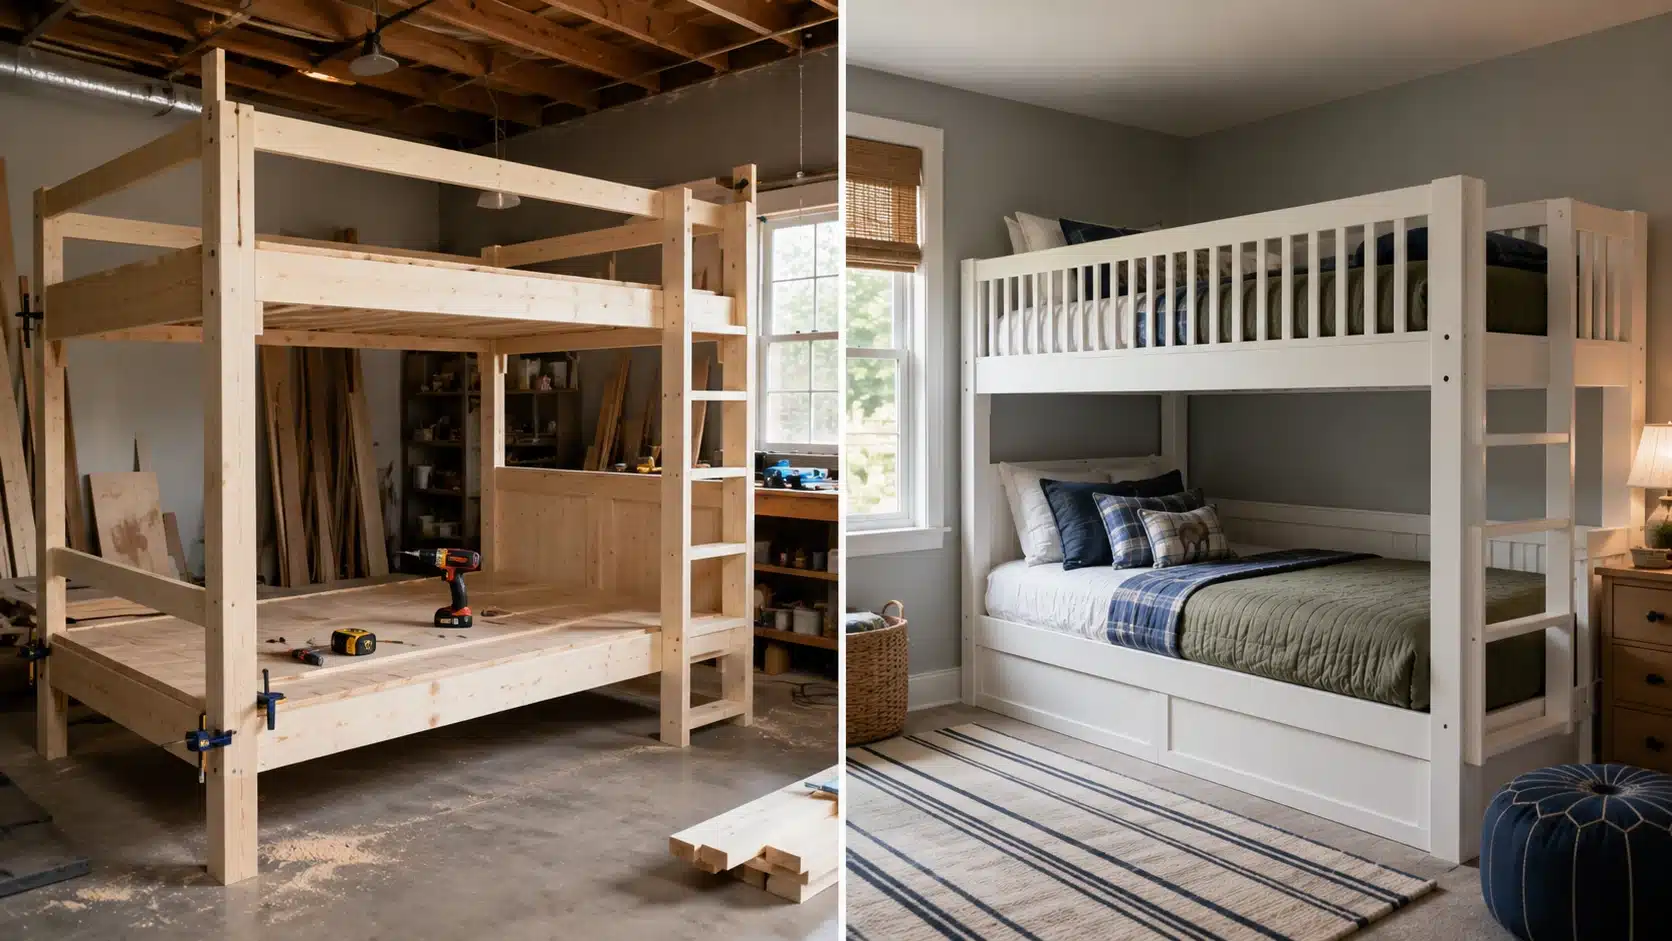
How Do You Build DIY Bunk Beds Step By Step?
A bunk bed build should follow a measured plan instead of guesswork. This sequence follows a common 2×6 and 2×4 build style, where the frames, slats, legs, supports, and hidden fasteners come together before finishing.
Tools You May Need:
| Measuring And Marking | Cutting And Shaping | Assembly And Fastening | Finishing And Safety |
| Tape measure | Circular saw | Drill and driver | Sander |
| Pencil | Table saw, optional | Pocket hole jig | Safety glasses |
| Clamps | Band saw, optional | Wood screws or structural screws | Hearing protection |
| Straight fence or cutting jig | Thickness planer, optional | Block plane | Paint, stain, wax, or finish of choice |
- Step 1: Prepare The 2×6 and 2×4 Lumber: Start with straight 2x6s and 2x4s because they are affordable, strong, and easy to find. Clean up manufacturer marks, rough ends, and sharp edges before assembly. A planer helps, but sanding or using a block plane can also make the boards cleaner and easier to finish.
- Step 2: Build The Mattress Frames First: Make the two rectangular mattress frames from 2×6 boards. Pocket holes can speed up the build and keep most screw heads hidden. This step matters because the frames carry the mattresses, so they need to be square, sturdy, and sized correctly before anything else is added.
- Step 3: Add Cleats and Slats for Mattress Support: Install 2×2 cleats inside each frame so the slats have a solid ledge to rest on. Then cut and fit the slats, usually from 2x4s. The slats should sit evenly and support the mattress without shifting, sagging, or leaving large gaps.
- Step 4: Build The L-Shaped Corner Legs: Make each leg by joining a 2×4 to a 2×6, forming an L-shaped post. Place pocket holes where the bed frame or ladder pieces will hide them later. This keeps the outside of the bunk cleaner while still giving the structure stronger corner support.
- Step 5: Use Locating Blocks and Fasten The Frames: Add small blocks to the legs to help position the mattress frames during assembly. Once the frames sit correctly, fasten them from the inside. This keeps visible hardware to a minimum and helps prevent the frame from twisting or racking during use.
- Step 6: Check Strength, Sand, and Finish: Before painting or staining, check the whole bunk for wobble, shifting, rough corners, and loose fasteners. Add guardrails and access details according to your plan. Sand every edge that hands, feet, bedding, or skin may touch, then apply the finish only after the structure feels solid.
This build works best when the hidden structure is planned as carefully as the visible finish. If the bed shifts, racks, or feels loose during assembly, fix that before sanding, staining, or moving it into a bedroom.
How Much Do Different Bunk Bed Projects Usually Cost?
Exact prices vary with lumber, location, tools, and finish choices, so treat these as planning ranges rather than final quotes. The total usually depends on how much framing lumber, plywood, trim, hardware, paint, and storage detail your design needs.
| Project Type | Estimated Material Cost | Why It Costs That Way |
| Simple Twin Bunk | $250 to $600 | Basic lumber, slats, screws, sanding supplies, and a simple ladder |
| Low Bunk | $200 to $500 | Smaller frame, less lumber, but still needs rails and strong support |
| Built-In Bunk | $700 to $1,800 | Framing, plywood or MDF panels, trim, paint, caulk, and wall anchoring |
| Stair Bunk | $900 to $2,300 | Extra plywood, drawer slides, stair framing, trim, and more hardware |
| Triple Bunk | $1,000 to $2,800 | More mattress platforms, guardrails, supports, fasteners, and finishing time |
| Renter-Friendly Look | $350 to $900 | Freestanding frame plus removable panels, curtains, storage, or styling pieces |
Note: These numbers do not include mattresses, bedding, new tools, delivery fees, or paid labor. I always price the boring supplies too: screws, sandpaper, primer, paint, caulk, extra blades, and mistake boards. Those small items can quietly add more than expected.
What Safety Checks Should You Make Before Building A Bunk Bed?
Safety planning should happen before the first cut, not after the frame is standing. The U.S. Consumer Product Safety Commission, 16 CFR Part 1513, and 16 CFR Part 1213 outline important bunk bed rules around guardrails, openings, entrapment risks, and warning labels.
- Plan Guardrails And Mattress Height Together: A thick mattress can reduce how much guardrail protection is left.
- Follow Top Bunk Age Guidance: The upper bunk is not recommended for children under 6.
- Avoid Risky Gaps And Openings: Spaces around rails, ends, ladders, and walls should not create entrapment risks.
- Secure The Frame Properly: Built-ins need strong support, usually into studs. Drywall alone should not carry the structure.
- Make Climbing Safe: Ladders or stairs should feel steady, smooth, wide enough, and easy to grip.
- Check Daily Use Details: Leave room for bedding, drawers, vents, windows, outlets, and walkways.
A safe bunk bed should feel steady, practical, and easy to use. If anything wobbles, shifts, blocks movement, or feels uncertain, fix that before paint, trim, or styling.
Are DIY Bunk Beds Cheaper, And Which Plans Should You Compare First?
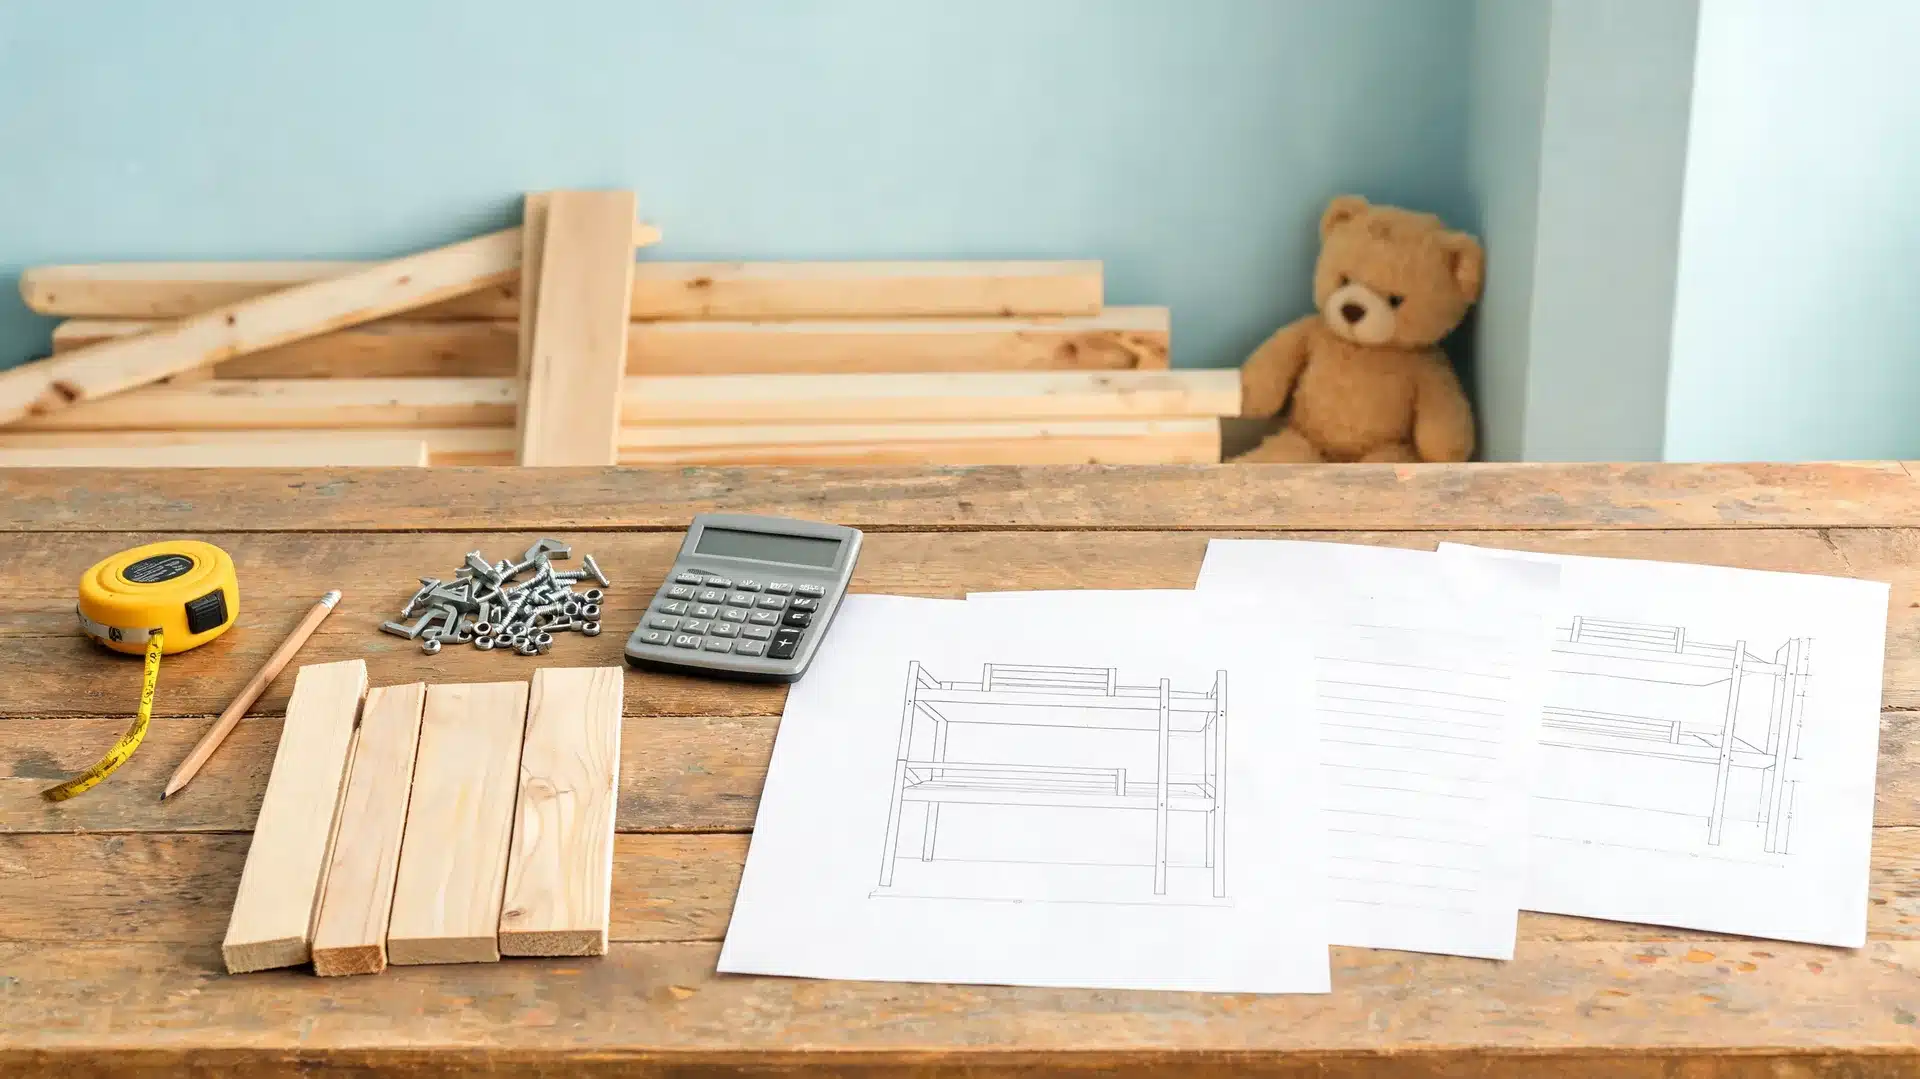
DIY bunk beds can cost less when the design is simple and you already own the tools. They can cost more when the plan includes stairs, drawers, trim, panels, paint, new tools, or delivery. Before choosing, compare two or three plans by how complete and realistic they are.
| What To Compare | What To Check |
| Finished Size | The full bed dimensions, ceiling height, mattress size, and room clearance |
| Cut List | A clear lumber list and cut list so you are not guessing during the build |
| Guardrail Plan | Top bunk rail height, mattress thickness, and safe gap spacing |
| Ladder Or Stair Design | Safe climbing access, floor space, grip, and placement |
| Fastening Details | Clear support points, screws, bolts, anchors, or joinery instructions |
| Storage Details | Drawers, shelves, stairs, or cubbies that match your budget and skill level |
| Build Vs Buy Decision | Build for custom fit and storage. Buy for speed, simpler setup, or tested retail structure |
A pretty image without measurements is only inspiration, not a build plan. If price and speed matter most, buying may win. If fit, storage, and built in bunk beds style matter more, building can be the better choice.
How Can You Make A Bunk Room Feel Custom?
A bunk room feels custom when every sleeper has a small, useful zone. You do not need an expensive build for that. The goal is to make the details feel planned, comfortable, and connected to the room.
- Add Personal Bedside Zones: Place a small shelf near each pillow for books, glasses, a water bottle, or bedtime items.
- Use Matching Reading Lights: Add simple lights near each bunk so every sleeper has their own usable corner.
- Blend The Frame With The Room: Paint the bunk the same color as the walls or use trim to cover uneven gaps.
- Add Privacy Without Clutter: Use lightweight curtains if the room is shared, but keep them easy to open and safe.
- Control Visual Mess: Use closed storage, simple bedding, and calm colors so the bunk does not overwhelm the room.
- Make Access Feel Finished: Add a small step light near stairs or ladders if it fits the room safely.
This is where a plain build starts feeling like a room feature instead of a large piece of furniture.
When Should You Buy Instead Of Build?
Buy instead of building when safety, timing, or structure feels uncertain. A solid store-bought frame is better than a homemade bunk that looks nice but wobbles, shifts, or leaves you unsure at bedtime.
Buying is usually smarter if you do not have the right tools, cannot secure the frame properly, need a clear adult weight rating, are renting, have a low ceiling, or need the bed immediately.
A DIY project should make the room better, not make everyone nervous about using it.
Frequently Asked Questions
Can a Bunk Bed Be Built Into a Closet Nook?
Yes, if the nook has enough width, headroom, ventilation, and safe access. Check wall studs, mattress clearance, lighting, and escape path before planning. Avoid blocking vents, outlets, or windows. A closet-style bunk can look clever, but it still needs proper structure.
What Mattress Thickness Works Best For The Top Bunk?
A thinner mattress is often better for the top bunk because it helps preserve guardrail height. Always check your plan or bed specifications before buying. If the mattress is too thick, the rail may not protect the sleeper properly during movement at night.
How Do You Make Bunk Beds Easier To Make?
Use fitted bedding, thinner comforters, and washable layers that tuck easily. Leave enough side access so changing sheets does not become a weekly battle. Built-in bunks look beautiful, but tight wall-to-wall openings can make bedding harder than expected.
Can a Bunk Bed Work In a Guest Room?
Yes, especially in cabins, vacation homes, or rooms used by families. Choose a sturdy design, clear ladder access, and mattresses that suit the likely guests. If adults may sleep there, pay close attention to structure, comfort, and weight expectations.
How Do You Keep a Bunk Room From Feeling Crowded?
Use light wall colors, built-in storage, simple bedding, and clear floor space. Avoid oversized ladders, bulky rails, and too many decorative pieces. A bunk room feels calmer when each sleeping space has one shelf, one light, and a place for personal items.
Final Thoughts
DIY bunk beds work best when the plan starts with the room, not the lumber pile. A strong build should save floor space, fit the mattress properly, give each sleeper a clear zone, and feel steady enough for everyday use.
If the goal is a finished carpentry look, built in bunk beds are usually the better design direction. They need more planning, but the result can feel cleaner, more useful, and more connected to the bedroom.
Before buying materials, measure the room, compare a few plans, check the safety rules, and decide which built-in details are worth the work. That small pause can save money, time, and a lot of rework.


