


The first time I watched a hen pace around the coop looking for a spot to lay, I thought something was wrong. Turns out, something was, just not with the hen. There was nowhere comfortable, private, or clean enough for her to settle.
That was the day I built my first nesting box from leftover plywood and a few screws I found in the garage. It was not fancy. It was not perfect. But by the next morning, she used it, and the egg was clean. That small win is exactly what diy nesting boxes are about.
This piece covers what a nesting box needs to do, how to size one correctly, five budget-friendly build methods, smart placement, and how to keep boxes working after the build. Pick one method, gather your materials, and have something functional by Sunday.
What Should a Chicken Nesting Box Actually Do?
A nesting box gives a laying hen exactly what she is looking for: a quiet, dark, private, and stable space to deposit an egg without being disturbed.
When that space exists in the right place inside the coop, hens stop laying in corners, under feeders, or in random bedding piles. Eggs stay cleaner, fewer crack, and collection becomes a quick daily habit instead of a small hunt.
The box is not a sleeping space. Hens should roost on perch bars at night, away from the nesting area. A box that becomes a sleeping spot fills quickly with droppings, which dirtier eggs and faster bedding turnover.
Keeping roost bars higher than the nesting boxes helps because chickens naturally sleep at the highest available point.
A good nesting box passes a simple four-point check: it stays dark and dry inside, sits stable when a hen climbs in, offers easy outside access for egg collection, and takes less than five minutes to clean.
What Size Should DIY Nesting Boxes Be?
Getting the size right before building saves a lot of fixing later. A box that is too small stresses the hen. One that is too large feels exposed and gets treated as a toilet. The University of Minnesota Extension recommends keeping laying hen housing comfortable, with appropriate space and clean conditions to support consistent egg production.
| Build Detail | Recommended Starting Point | Why It Matters |
| Box width and depth | About 12 by 12 inches | Fits most laying breeds comfortably |
| Box height | 12 to 14 inches | Enough room without feeling too open |
| Front lip height | 3 to 4 inches | Keeps bedding and eggs inside the box |
| Hen-to-box ratio | One box for every 4 to 5 hens | Reduces fighting over the same favorite |
| Bedding depth | 2 to 3 inches minimum | Cushions eggs and absorbs moisture |
| Placement height | 18 to 24 inches from the floor | Accessible but not beside the roost mess |
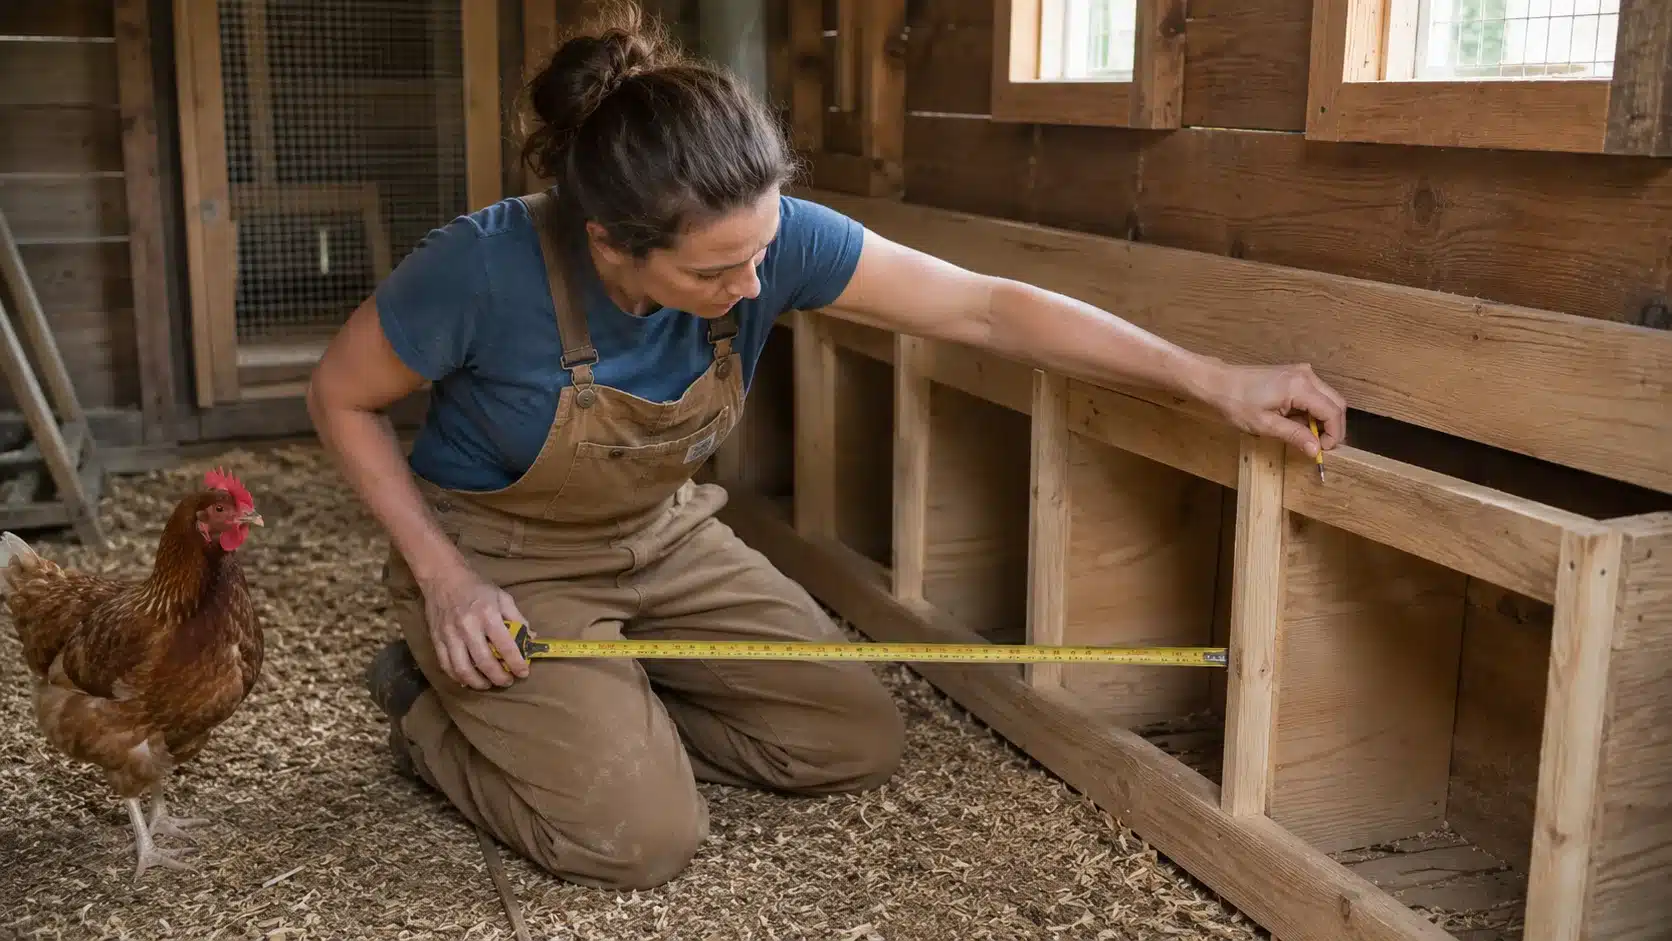
One note from building a few of these: measure the wall space inside the coop before buying materials. It sounds obvious, but cutting lumber to fit a space you have not measured first is how a Saturday project becomes a Wednesday project.
More boxes do not always mean hens spread out evenly. Many flocks still crowd into one preferred box, no matter how many you provide. The ratio above is a starting point, not a guarantee.
How to Build DIY Nesting Boxes at Home
Every method below works on its own. The approach is simple: pick the one that matches what you already have or can get without a special trip.
These are practical homemade diy chicken nesting boxes that any backyard keeper can put together in an afternoon. A reference video will be added under each method for step-by-step visual guidance.
1. 5-Gallon Bucket Nesting Box
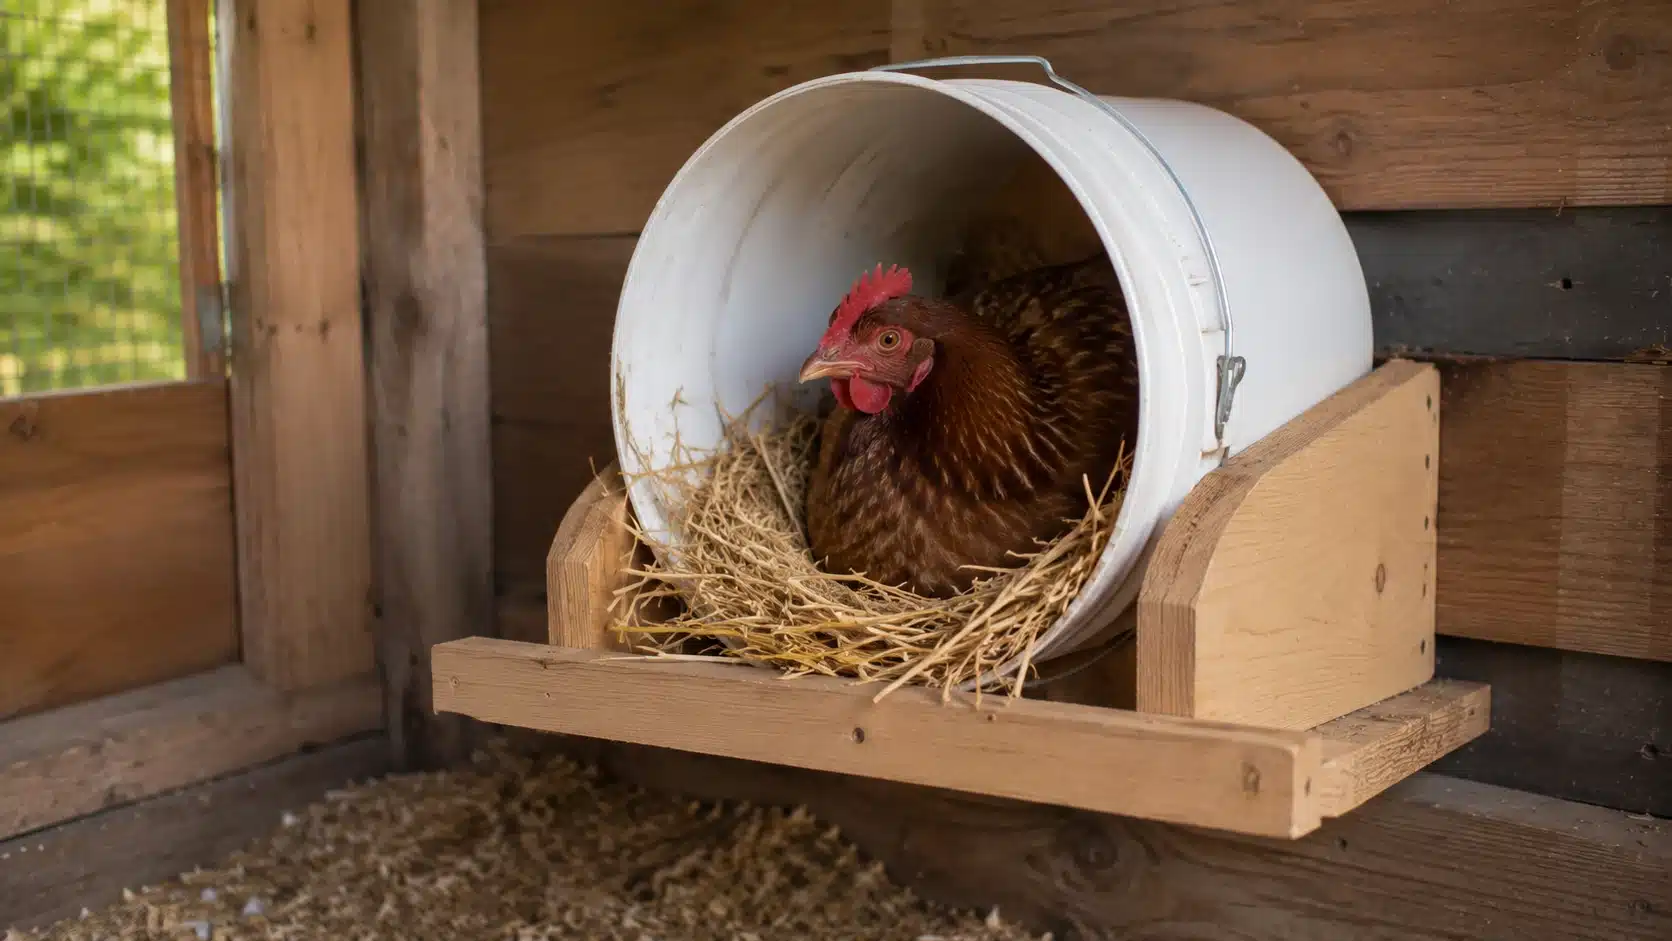
A clean 5-gallon bucket laid on its side creates a curved, private shape that hens take to quickly.
It is one of the fastest diy nesting boxes to set up, needs almost no tools, and costs very little if the bucket is already on hand. It works especially well for small co-ops or anyone who wants a removable, easy-to-clean option.
Tools you need: clean 5-gallon bucket, jigsaw or utility knife, sandpaper, drill, screws, scrap wood shelf, bedding
- Step 1: Clean the bucket: Remove any residue and let it dry fully before use.
- Step 2: Cut the front opening: Lay the bucket on its side and cut away the upper half of the front, leaving a 3 to 4 inch lip at the bottom.
- Step 3: Smooth all edges: Sand or file every cut edge so no sharp plastic remains.
- Step 4: Secure the bucket: Attach it to a wall-mounted shelf or screw it between two sideboards so it stays still.
- Step 5: Add bedding: Fill with 2 to 3 inches of pine shavings or straw.
- Step 6: Test stability: Push it firmly and confirm it does not shift when weight is applied.
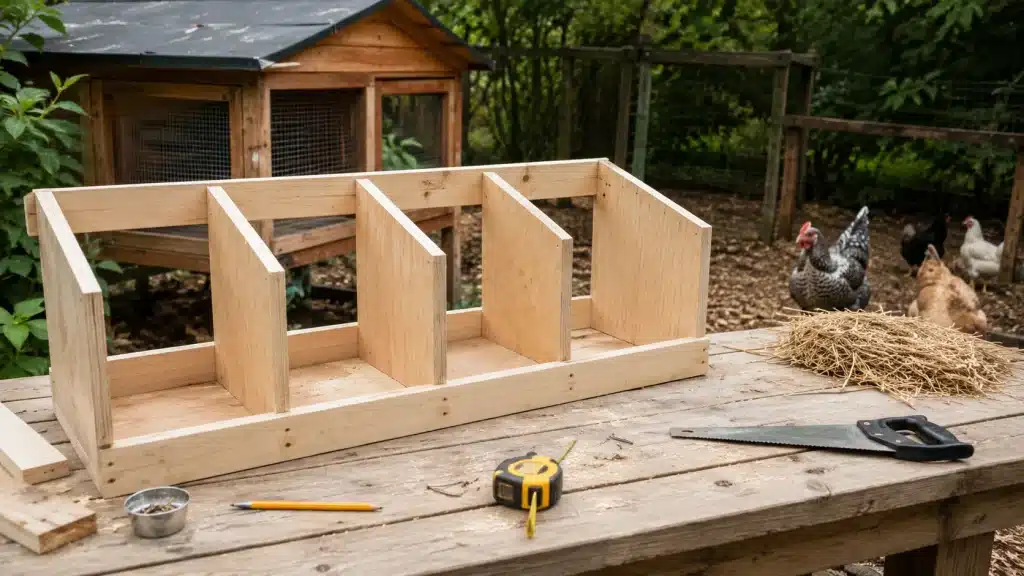
2. Wooden Plywood Nesting Box
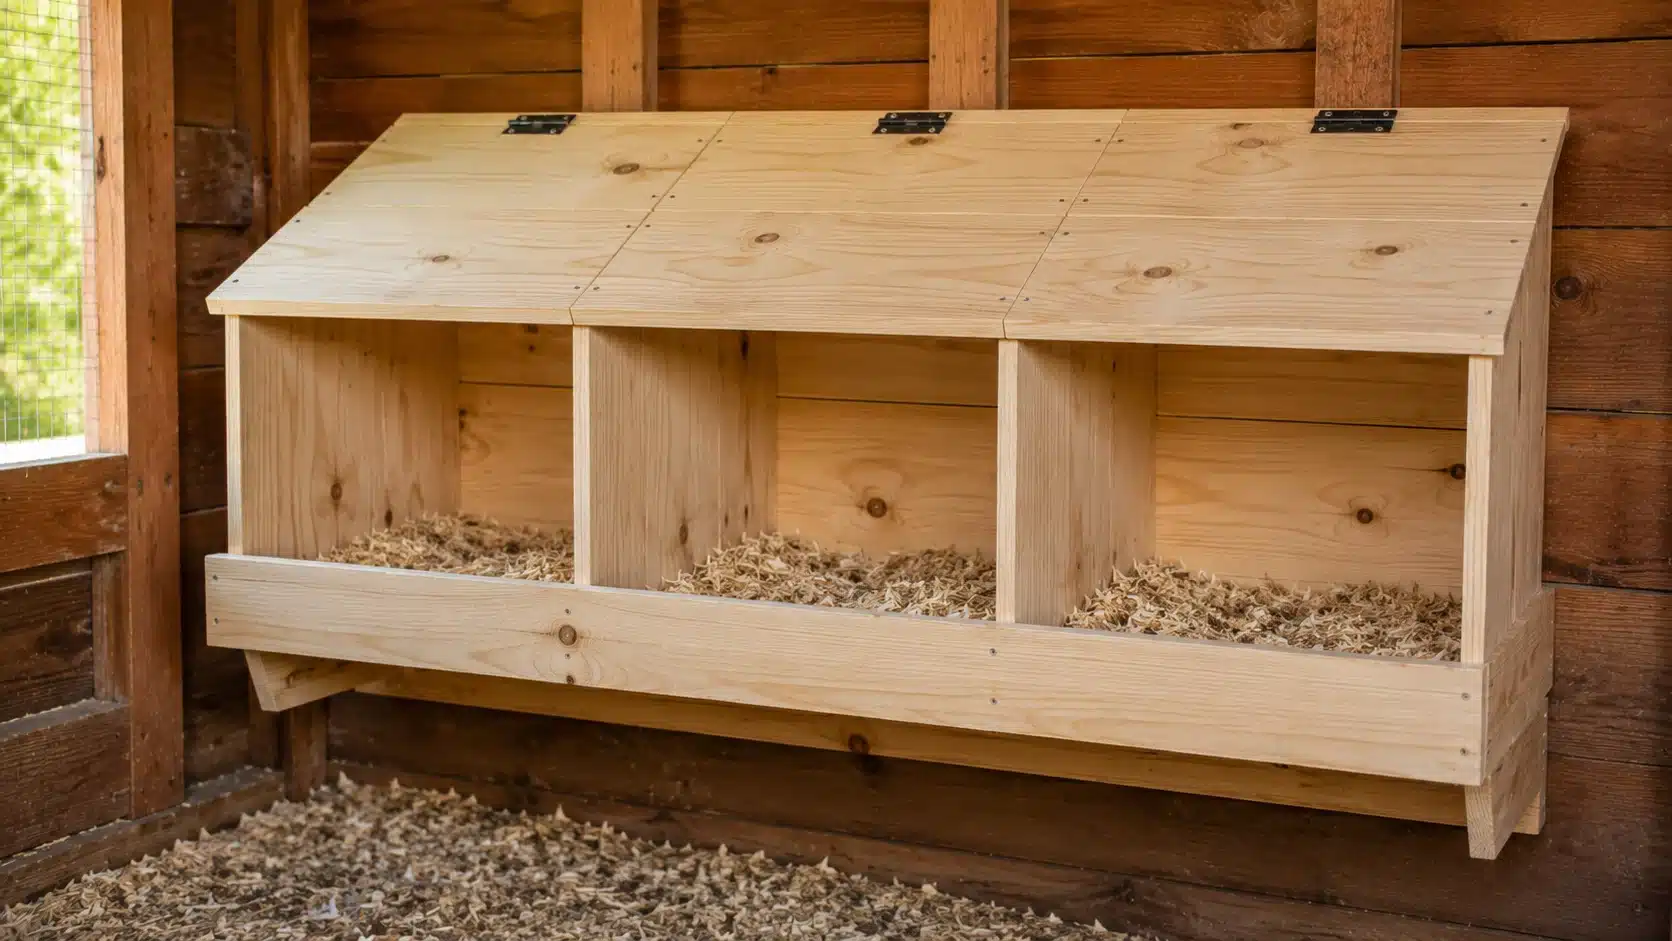
This is the standard build most people picture when they think of homemade diy chicken nesting boxes.
It takes more steps than the bucket, but the finished box is sturdier, easier to size for multiple hens, and fits better into a permanent coop. Penn State Extension supports 12-by-12-inch box dimensions as a solid starting point for most laying breeds.
Tools you need: plywood sheet, 2×4 supports, screws, drill, circular saw or handsaw, tape measure, pencil, sandpaper, bedding
- Step 1: Measure the coop wall: Note the width, height, and depth available before cutting anything.
- Step 2: Cut all panels: Cut front, back, bottom, top, and side panels to size.
- Step 3: Build the frame: Assemble the outer box with screws and check that the corners are square.
- Step 4: Add dividers: Cut and attach interior dividers to create separate compartments.
- Step 5: Attach the front lip: Screw a 3 to 4-inch board across the front bottom opening.
- Step 6: Add a slanted roof: Cut the back panel taller than the front so the lid angles downward, stopping hens from perching on top.
3. Milk Crate Nesting Box
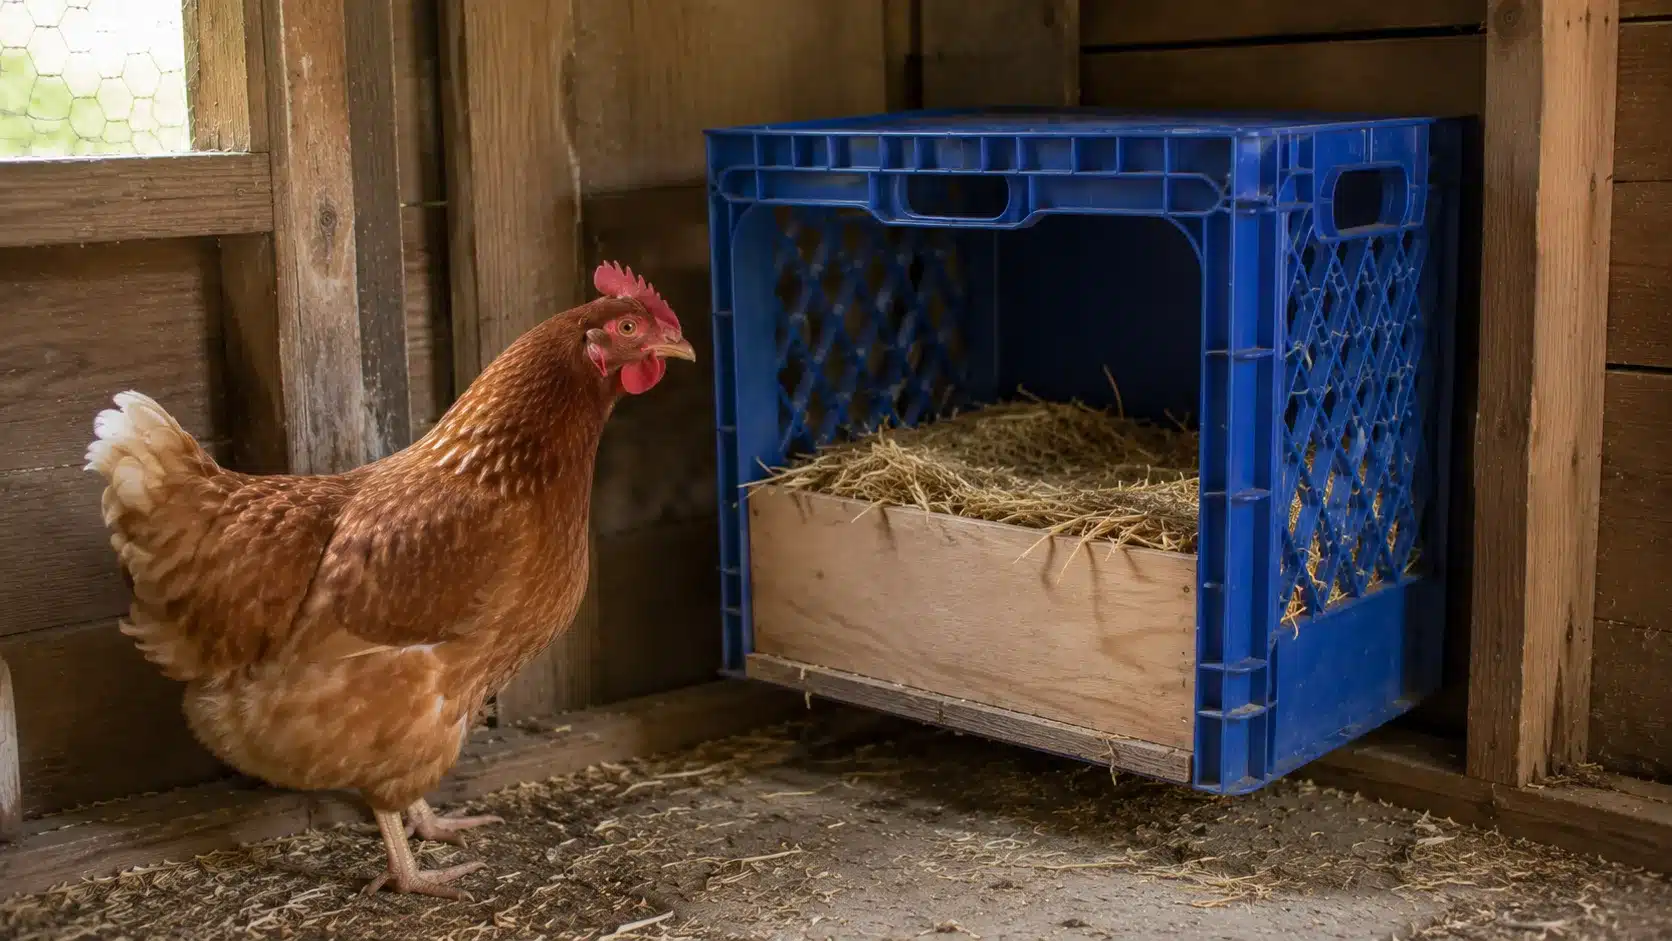
A plastic milk crate is one of the most available and free options for a fast setup. It is light, movable, and easy to scrub out.
The main thing to fix before use is the floor, since the grid base lets bedding fall through. A scrap wood insert or rubber mat solves that immediately.
Tools you need: sturdy milk crate, scrap plywood or rubber mat, zip ties or screws, small front board, bedding
- Step 1: Choose a strong crate: Pick one with thick walls that does not flex under light pressure.
- Step 2: Add a solid floor: Cut a plywood or rubber mat insert to fit inside the base.
- Step 3: Attach a front lip: Zip-tie or screw a short board across the front to hold bedding in.
- Step 4: Place in a quiet corner: Position it away from drafts and the roost area.
- Step 5: Secure it: Tie or screw the crate to the wall so it cannot tip sideways.
- Step 6: Add bedding: Fill with clean shavings or straw and check that the floor insert sits flat.
4. Roll-Away Nesting Box
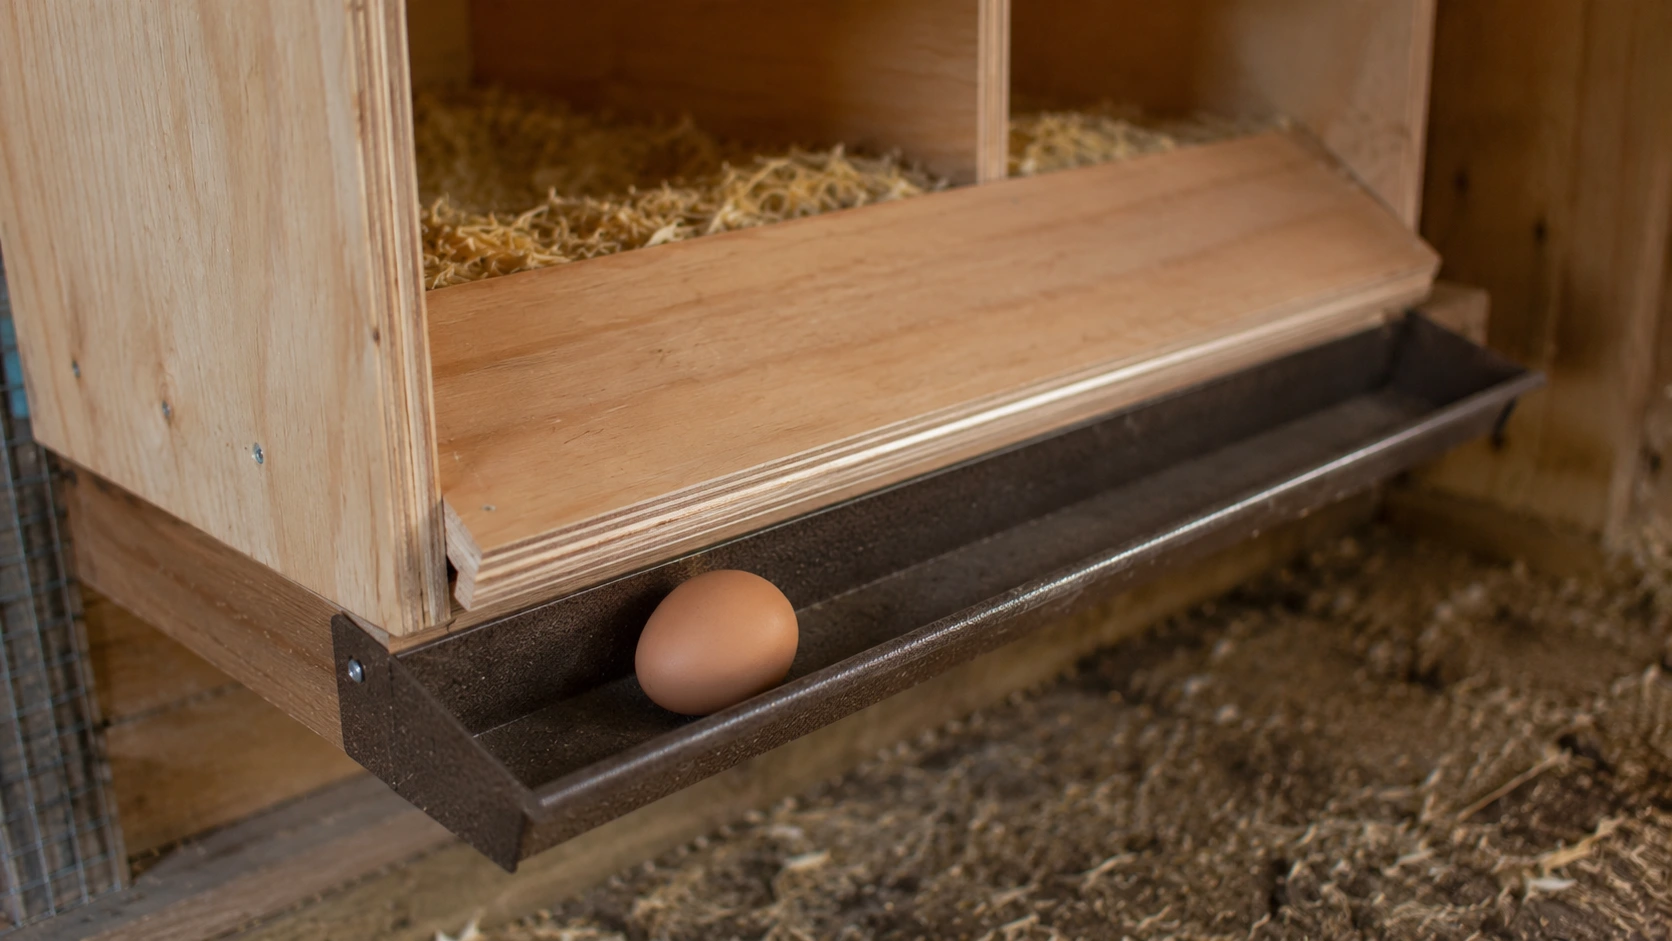
This build is worth the extra effort for anyone dealing with cracked eggs, egg eating, or hens tracking dirt across fresh eggs before collection.
The sloped floor lets an egg roll gently into a covered tray at the back right after laying. The slope must be shallow enough that the egg rolls slowly, typically 3 to 5 degrees; otherwise, eggs crack on arrival.
Tools you need: plywood, screws, drill, circular saw, indoor-outdoor carpet or nesting mat, egg catch tray, measuring tape
- Step 1: Build the outer box: Assemble the main box frame at standard 12-by-12 dimensions.
- Step 2: Cut the sloped floor: Cut the floor panel so it sits at a slight downward angle toward the back.
- Step 3: Build the egg catch tray: Create a shallow, covered tray that sits below the sloped floor exit point.
- Step 4: Line the slope: Glue or staple indoor-outdoor carpet or a soft nesting mat across the angled floor.
- Step 5: Test with a fake egg: Roll a practice egg down the slope before hens use the box.
- Step 6: Adjust as needed: If the egg rolls too fast or veers sideways, add a small lip guide or reduce the angle.
5. Plastic Storage Bin Nesting Box
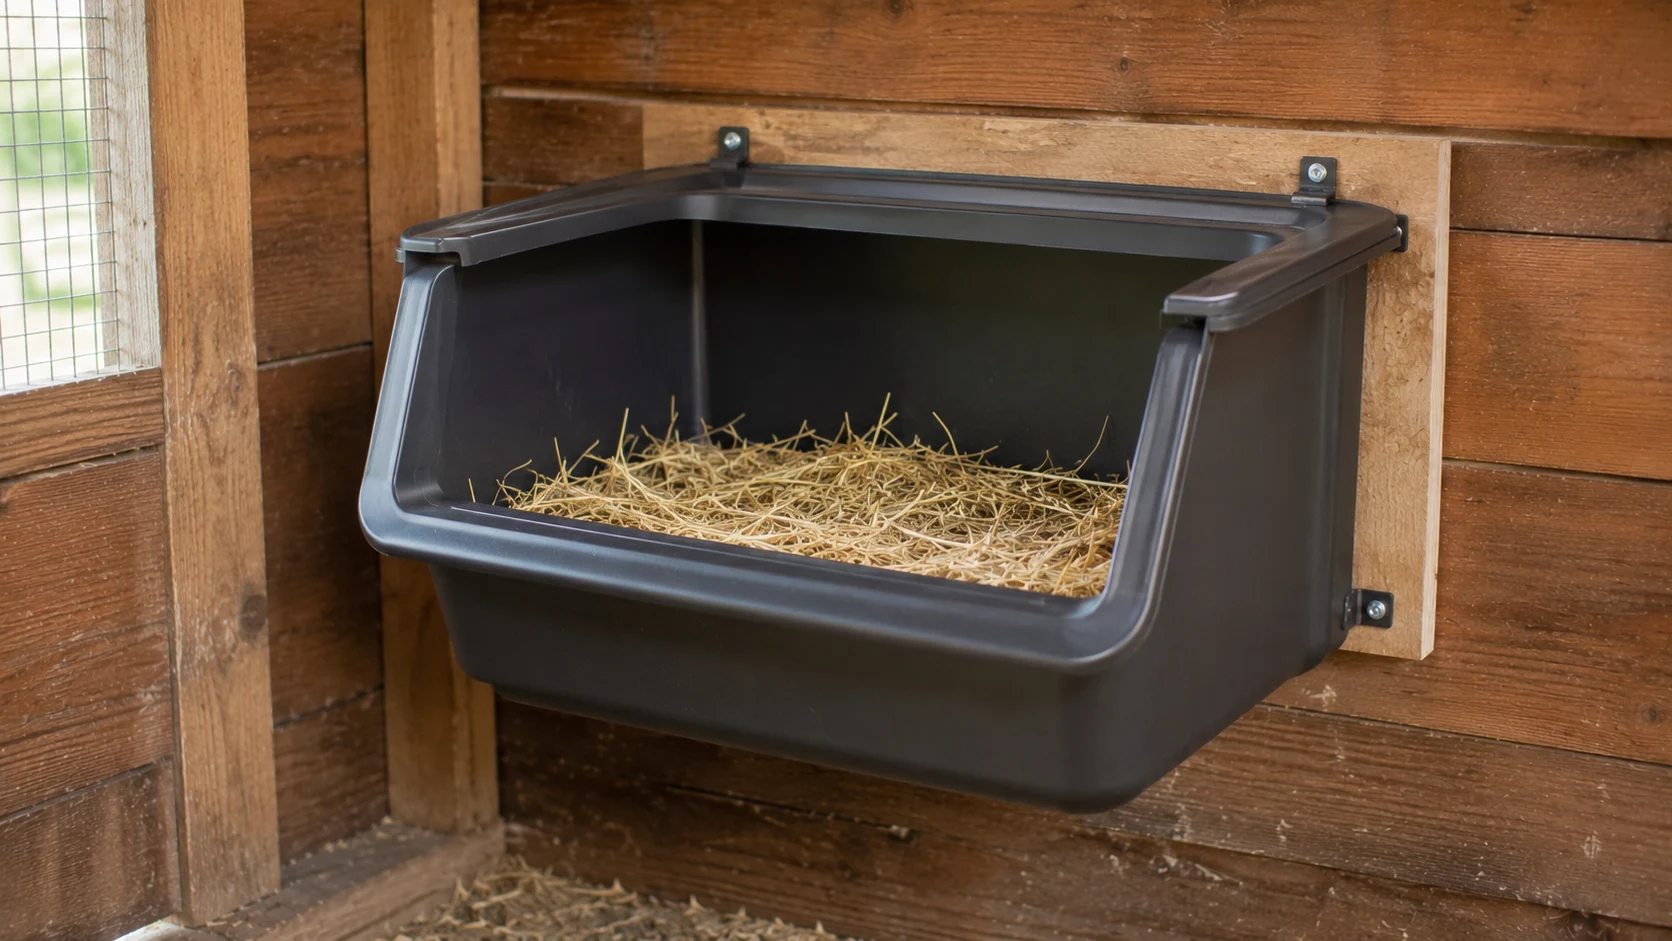
A thick plastic storage bin is a solid low-effort option when cleaning ease matters most. The smooth walls wipe down in under a minute.
The main concern is durability, since thin bins crack under regular use or temperature changes. Choosing a bin with walls at least 4mm thick extends the life significantly.
Tools you need: thick plastic storage bin, utility knife or jigsaw, sandpaper, screws, washers, bedding
- Step 1: Pick a sturdy bin: Press the walls firmly. If they flex easily, choose a thicker bin.
- Step 2: Cut the front opening: Cut away the upper section of the front panel, leaving a 3 to 4 inch base lip.
- Step 3: Smooth every edge: Sand or tape any rough cut lines before placing hens near it.
- Step 4: Mount it securely: Drill through the back panel and screw into the coop wall with large washers to spread the load.
- Step 5: Add bedding: Fill with clean, dry materials
- Step 6: Check for movement: Test that the bin does not flex or shift when you press one side.
6. Wooden Pallet Nesting Box
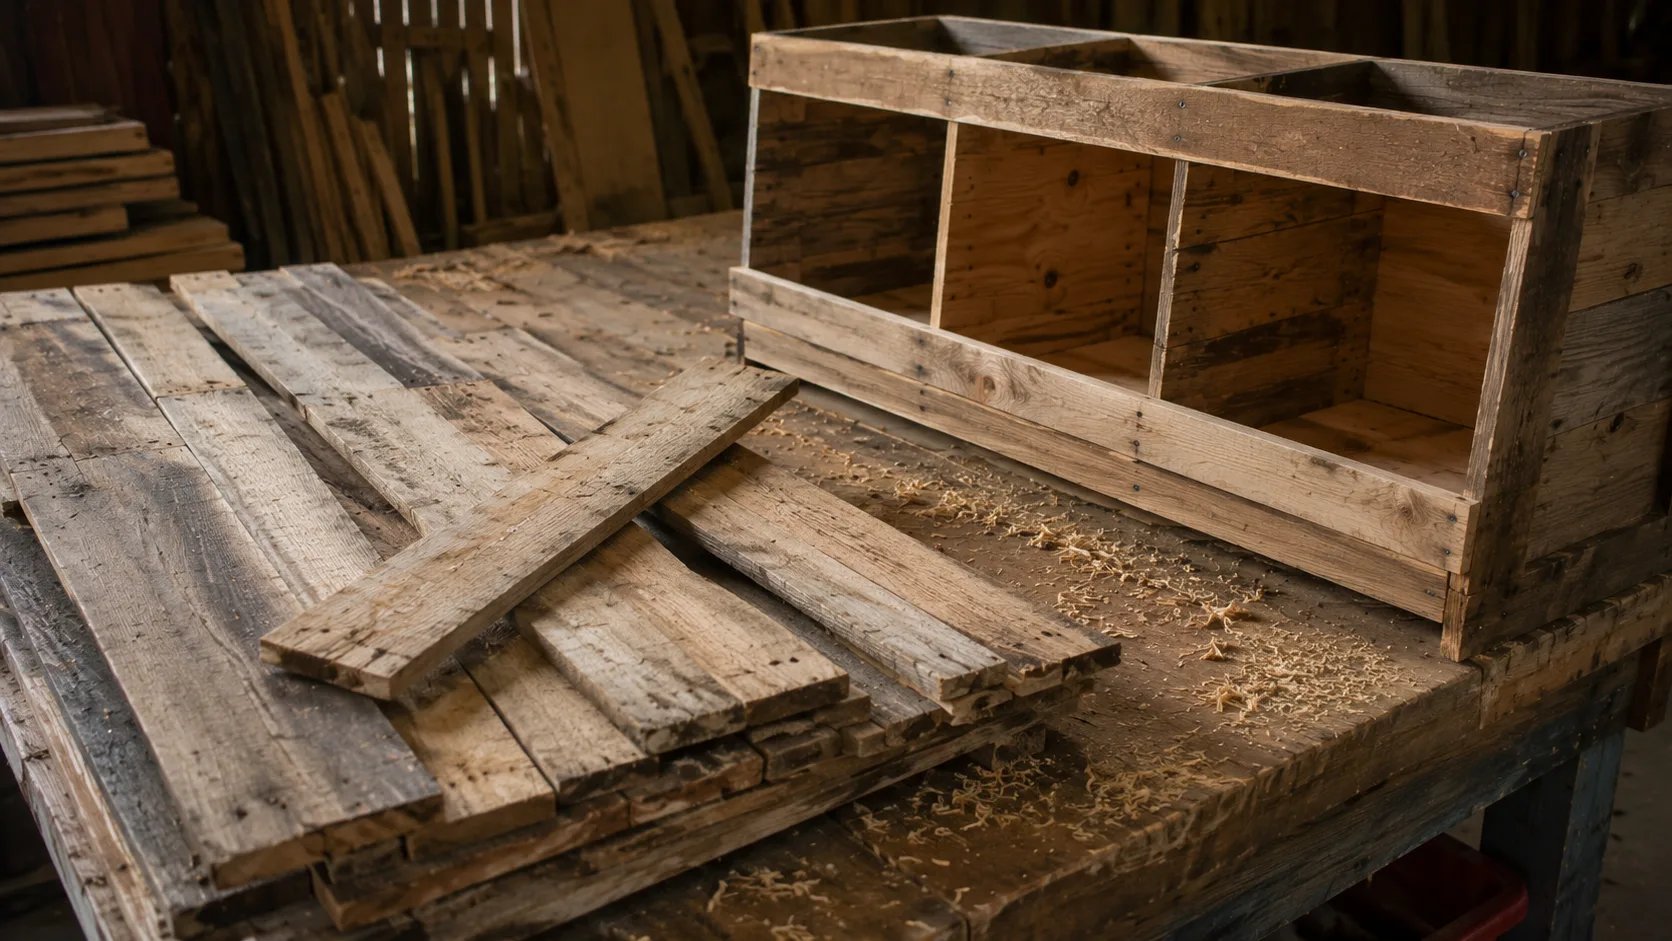
Wooden pallets are often free or very cheap, making them a popular option for backyard chicken keepers. The wood is already cut into usable sections, so there is less measuring and fewer materials to buy.
This method works well for larger co-ops and anyone who wants sturdy diy nesting boxes without purchasing full plywood sheets.
Make sure the pallet is clean and safe for poultry use before building.
Tools you need: clean pallet wood, pry bar, hammer, screws, drill, saw, measuring tape, sandpaper, bedding
- Step 1: Disassemble the pallet: Remove boards carefully and set aside the best pieces.
- Step 2: Measure and cut panels: Cut the pallet boards into sides, back, floor, and divider sections.
- Step 3: Build the frame: Assemble the outer structure using screws instead of nails for better strength.
- Step 4: Add dividers: Create individual nesting spaces based on flock size.
- Step 5: Install a front lip: Attach a 3 to 4-inch board across the opening.
- Step 6: Sand rough surfaces: Smooth splinters before adding bedding and introducing hens.
7. Repurposed Cabinet or Drawer Nesting Box
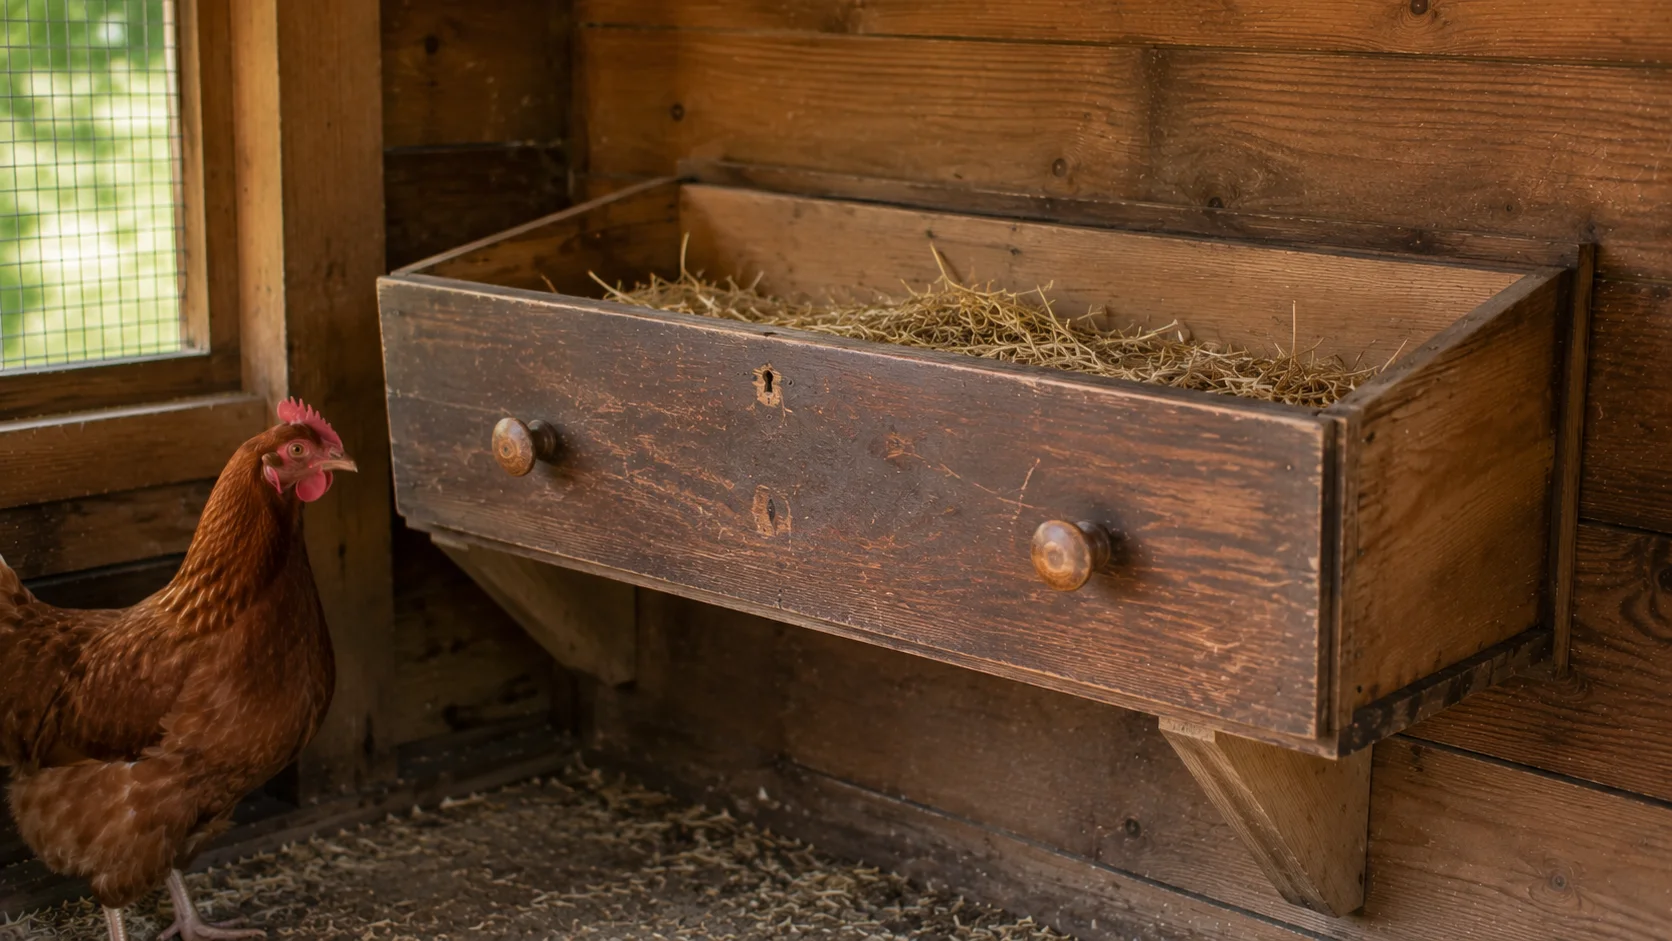
Old cabinets, dresser drawers, and storage units can become homemade diy chicken nesting boxes with very little work. The structure is already built, which makes this one of the fastest upcycling projects.
It is especially useful for anyone with leftover furniture in a garage, shed, or workshop.
The main goal is to create a stable, easy-to-clean nesting area with enough privacy for laying hens.
Tools you need: old drawer or cabinet, drill, screws, sandpaper, scrap wood for front lip, bedding
- Step 1: Inspect the furniture: Remove loose hardware, broken parts, and peeling materials.
- Step 2: Clean thoroughly: Wash and dry the unit before bringing it into the coop.
- Step 3: Add a front lip: Attach a short board across the opening to keep bedding inside.
- Step 4: Secure the unit: Screw it to a wall or stable support so it cannot tip.
- Step 5: Check for rough edges: Sand any splinters, sharp corners, or damaged wood.
- Step 6: Add bedding: Fill with clean straw or pine shavings and test accessibility.
All five builds can work well once the box feels safe, dry, and simple to maintain. The best build is the one the reader will actually keep clean. Before moving on, placement matters just as much as the build itself.
Which DIY Nesting Box Method Should You Choose?
The best method depends on what is sitting in the garage, how much cutting feels realistic, and whether the priority is speed, durability, or egg cleanliness. This table gives a fast comparison before the full build steps.
| Method | Best For | Watch-Out |
| 5-gallon bucket | Beginners, small flocks, renters | Must be secured so it cannot roll |
| Wooden plywood box | Permanent coop, long-term use | Takes more measuring and cutting |
| Milk crate | Fast setup, movable use | Needs a solid floor insert for stability |
| Roll-away box | Dirty eggs, egg-eating issues | Slope must be gentle, or eggs crack |
| Plastic storage bin | Easy cleaning, quick build | Thin bins crack over time; choose thick ones |
Quick guide: bucket for speed, wood for durability, roll-away for egg protection. For a first build, the bucket or the wooden box covers most backyard setups well.
Where Should Nesting Boxes Sit Inside the Coop?
A well-built box that sits in the wrong spot gets ignored. Hens need to feel safe inside the box, which means the surrounding area matters as much as the box itself.
Good placement checks:
- Quiet corner: Away from feeders, waterers, and the busiest foot traffic areas
- Away from roost droppings: Boxes placed directly below or beside roost bars get soiled quickly
- Moderate height: Between 18 and 24 inches off the floor is accessible without feeling exposed
- Outside access, if possible: A lid or door that opens from outside the coop makes collection faster and reduces flock stress
A common placement mistake is mounting boxes directly under the roost. Droppings fall overnight and cover both the box and any eggs inside by morning.
That single change, moving the box away from the roost line, fixes the dirty egg problem for a lot of backyard keepers before any other adjustment is needed.
The USDA National Agricultural Library supports providing hens with clean, dry, and well-maintained laying areas to support egg quality and flock health.
What Mistakes Make Chickens Avoid Nesting Boxes?
Even a correctly sized and well-placed box can sit empty if a few small details are off. These are the most common reasons hens skip the box, along with the fix for each one.
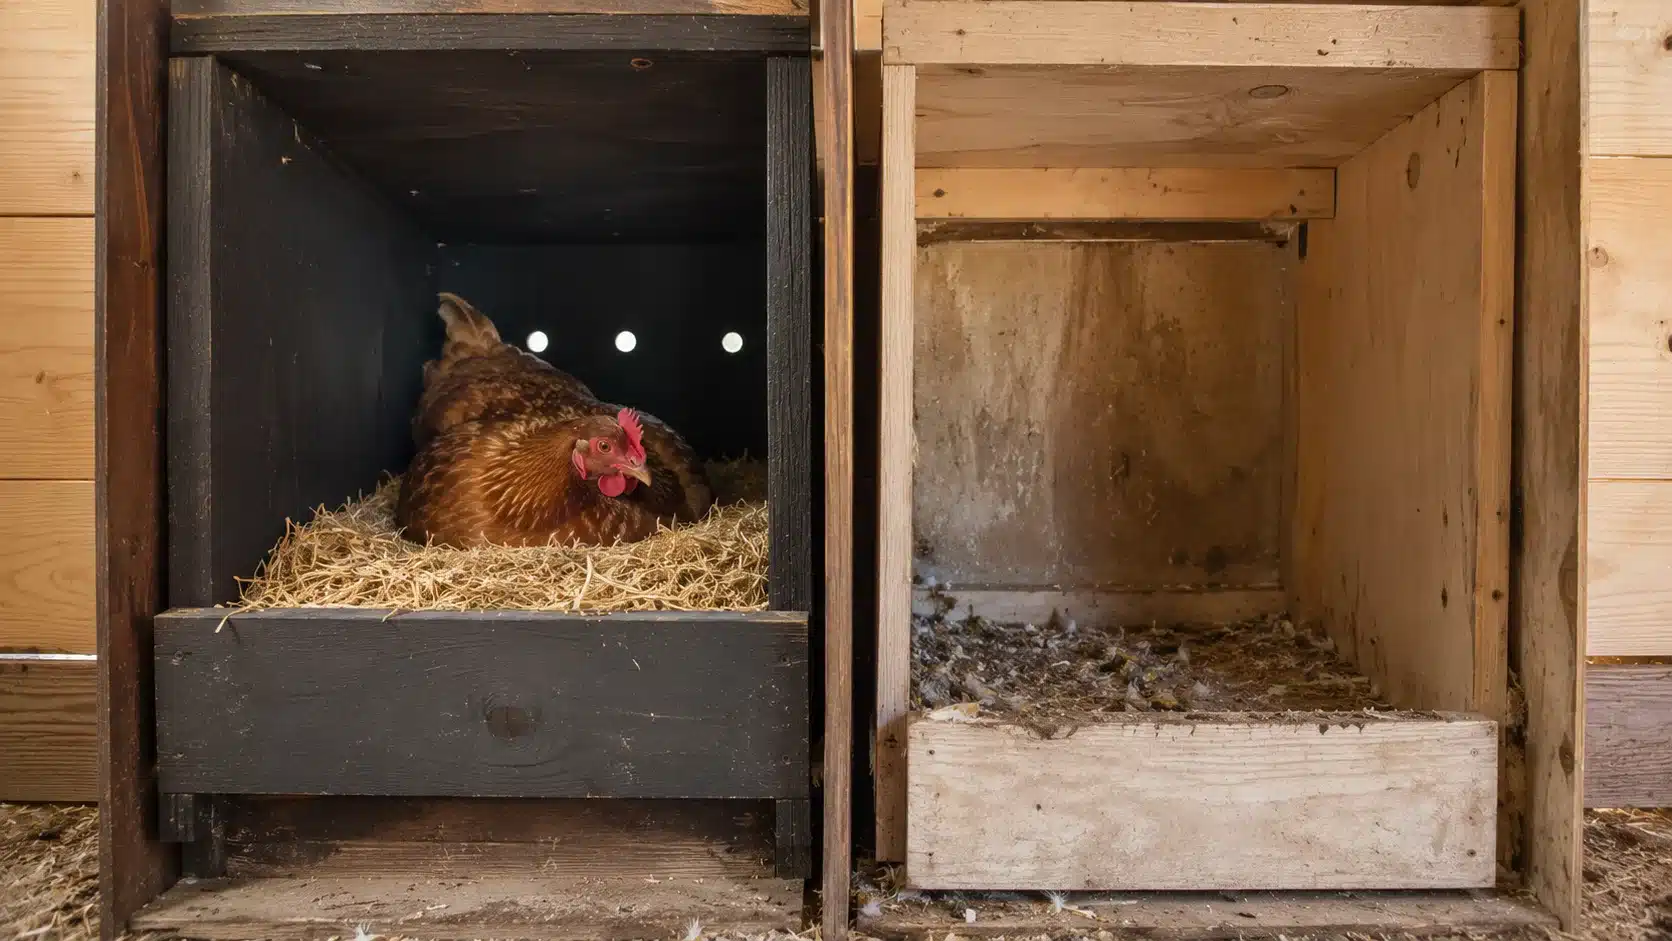
- Too much light: Hens want privacy when they lay. Add a curtain, reposition the box, or build a partial hood over the opening.
- Dirty or wet bedding: Replace bedding the moment it feels damp or smells off. Hens will not use a box that does not feel clean.
- Unstable box: A bucket or bin that shifts when a hen steps in creates a safety signal. Secure every box firmly before introducing hens to it.
- Placed near roost mess: Move the box to the opposite side of the coop from the roost bars if droppings are landing nearby.
- No front lip: Without a lip, bedding falls out, and eggs roll to the edge. A simple 3 to 4-inch board screwed across the front fixes this immediately.
- Hard egg collection: If eggs stay in the box for too long because collection is inconvenient, hens get used to laying elsewhere. Make access easy.
Small fixes usually make the biggest difference. Hens may avoid a box because it feels too bright, messy, shaky, or hard to use. Once you correct those details, simple diy nesting boxes often become a comfortable laying spot instead of empty coop furniture.
Are DIY Nesting Boxes Better Than Store-Bought Ones?
DIY nesting boxes work just as well as store-bought models when they are correctly sized, safely built, and properly maintained. The main advantage of building your own is flexibility: the dimensions, material, number of compartments, and access door placement all fit the actual coop rather than a standard retail design.
Store-bought boxes can save time and give a uniform look, which matters to some keepers. The tradeoff is that they may not fit every coop layout, and some are sized for appearance rather than hen comfort.
Where DIY sometimes falls short is in access for cleaning. A poorly designed box can trap moisture, hide mites, or make bedding replacement awkward. Planning the cleaning routine before the build, not after, closes that gap.
The CDC supports handwashing and surface cleaning when handling backyard poultry and eggs, making an easy-to-clean box design a practical health consideration, not just a convenience.
Frequently Asked Questions
Can I leave nesting boxes open at night?
Boxes should ideally be closed or blocked at night to stop hens from sleeping inside them. Hens sleeping in boxes leave droppings on the bedding and eggs. Roost bars positioned higher than the boxes usually solve this naturally, since hens prefer the highest sleeping spot available.
How often should nesting box bedding be fully replaced?
Full bedding replacement depends on flock size and how often eggs are collected, but a complete swap every one to two weeks is a reasonable baseline. Spot-clean damp or soiled areas daily during egg collection. Fresh, dry bedding keeps the box inviting and eggs cleaner between full changes.
Do nesting boxes need ventilation?
Nesting boxes do not need direct ventilation, but the coop itself must have good airflow to prevent moisture buildup, which affects bedding quality inside the boxes. A box that sits in a damp, poorly ventilated coop will develop mold and mite issues regardless of how well it was built.
Can I use cardboard boxes as temporary nesting boxes?
Cardboard can work as a short-term option if nothing else is available, but it absorbs moisture quickly, cannot be cleaned, and breaks down fast. Replace it with a more durable option within a week or two. A plastic bin, bucket, or crate is a better low-cost alternative that actually lasts.
At what age do pullets start using nesting boxes?
Most pullets begin laying and using nesting boxes between 18 and 24 weeks of age, depending on breed. Some keepers place a fake egg or golf ball inside the box a week before the expected laying age to guide young hens toward the right spot before instinct fully kicks in.
Final Thoughts
The best diy nesting boxes are not the ones that photograph well. They are the ones hens use without hesitation, eggs stay clean in, and the keeper does not dread maintaining.
Start with the right size, a safe and cleanable material, and a quiet spot away from the roost. Whether the build is a five-minute bucket or a full plywood setup, homemade diy chicken nesting boxes can be finished in a weekend with supplies most people already have around the house.
Getting the placement right, adding a proper front lip, and staying consistent with bedding changes will do more for egg quality than any upgrade after the fact. Build it simple, build it stable, and let the hens do the rest.
Which method are you planning to try first: bucket, wood, crate, bin, or roll-away? Drop it in the comments so others can see what is working in real co-ops.


