

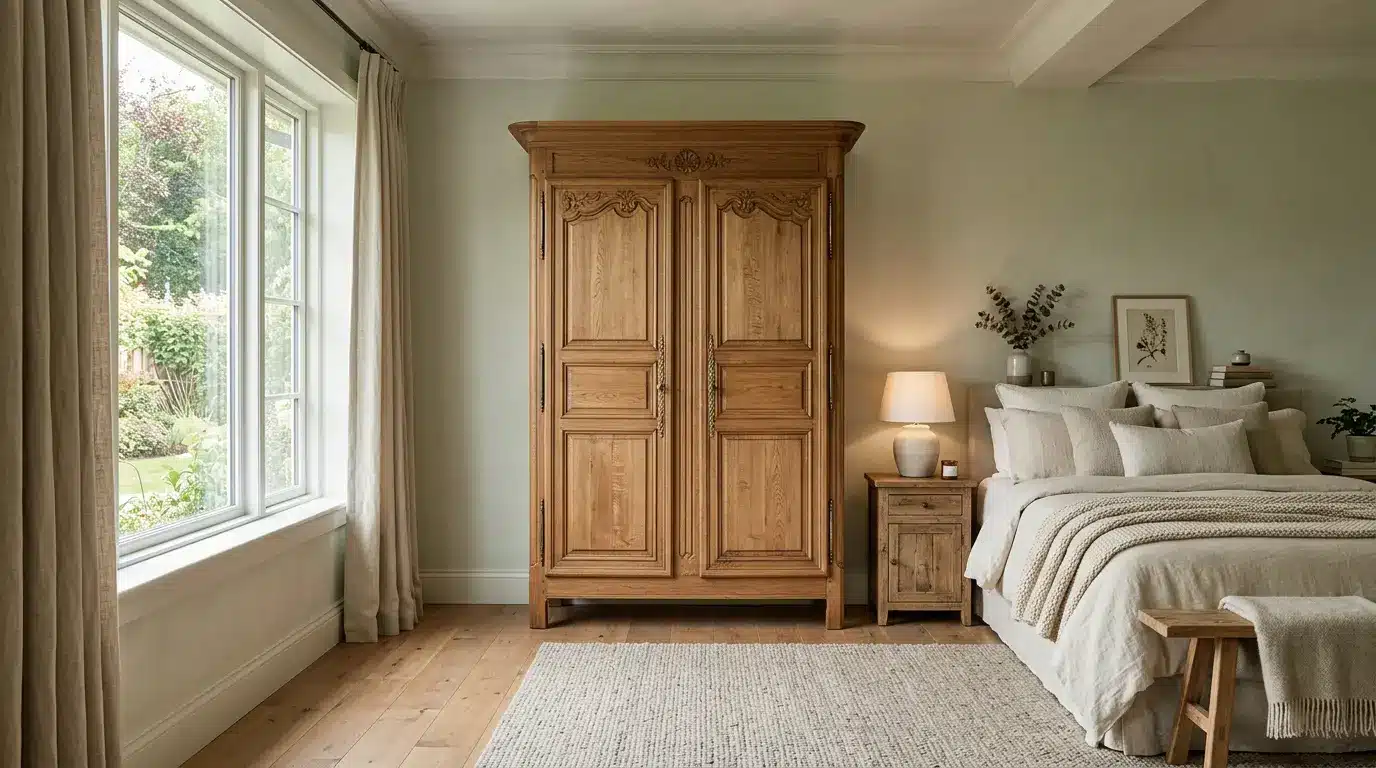
Quick Answer: An armoire is a freestanding storage cabinet used for clothes, linens, electronics, office supplies, or everyday items. It works as a flexible alternative to built-in storage and can be placed in bedrooms, living rooms, offices, or entryways. An armoire is a tall, freestanding storage cabinet built with doors and, traditionally, a good deal of carved wood detail. Unlike built-in closets, an armoire gives homeowners storage they can move, replace, or repurpose as their needs change, which is exactly why the piece has stuck around for centuries while so many other furniture trends have come and gone. Most versions include a full-height design with a mix of shelves, drawers, hanging rods, or compartments inside. The word itself comes from French furniture tradition, tracing back to the Old French armarie, which originally meant a cabinet for storing weapons. Designer Tip: An armoire should do more than solve a storage problem. Its size, finish, and placement need to balance the proportions of the room it sits in, or it ends up feeling like an afterthought rather than a piece of furniture. History and Origins of Armoires Armoires were not originally designed as bedroom furniture. The name comes from the Old French armarie, which traces back to the Latin armarium, meaning a cabinet used for storing weapons, tools, or other valuable items. Early armoires were large, simple storage pieces built mainly for function. Over time, especially during the Gothic and Renaissance periods, artisans began adding carved details, decorative panels, and more refined designs as woodworking techniques improved. By the 17th century, armoires had become symbols of craftsmanship and status in French homes, with makers like André Charles Boulle creating pieces featuring detailed marquetry and intricate carving. This shift from practical storage to decorative furniture is why antique armoires remain valued today. What are the Different Types of Armoires? Armoires come in a variety of designs, and their purpose often depends on their internal construction. Some are designed primarily for clothing, while others work better for linens, electronics, or decorative storage. The right type depends on what you need to store, the size of your room, and your home’s overall style. 1. Wardrobe Armoires Wardrobe armoires are primarily designed for clothing storage and often serve as an alternative to a traditional closet. They usually include a hanging rod for shirts, jackets, and dresses, along with shelves or drawers for folded clothes and accessories. They are especially useful in bedrooms with limited closet space because they provide storage while adding a furniture-like design element. 2. Linen Armoires Linen armoires focus on shelf storage rather than hanging space, making them ideal for towels, bedding, blankets, and table linens. Their enclosed design keeps fabrics protected from dust while giving rooms without built-in linen closets an attractive storage option. They are commonly placed in bedrooms, hallways, or guest areas. 3. Entertainment Armoires Entertainment armoires were originally designed to hide bulky televisions and media equipment behind closed doors. They typically included deep compartments, cable openings, and shelves for electronics. Although less common today, many are still reused for books, games, collectibles, or general living room storage, keeping clutter hidden. 4. Jewelry Armoires Jewelry armoires are compact storage pieces designed to organize smaller accessories. They often include shallow drawers, velvet lined compartments, ring holders, and hooks for necklaces or bracelets. Their slim design makes them a practical choice for bedrooms or dressing areas where regular jewelry boxes may not provide enough space. 5. Antique Armoires Antique armoires are known for their quality construction and timeless appearance. Many are made from solid wood and feature carved details, traditional hardware, and natural aging that gives each piece its own character. They are often used as statement furniture in traditional, vintage, or farmhouse-style interiors. 6. Modern Armoires Modern armoires emphasize simplicity with clean lines, flat-panel doors, and minimal detailing. They are designed to blend into contemporary interiors rather than act as heavily decorative pieces. Many modern versions include adjustable shelves and practical storage layouts, making them suitable for bedrooms, living rooms, and multipurpose spaces. What is an Armoire Used for? An armoire’s role tends to shift depending on which room it lands in, which is part of what makes it such an adaptable piece of furniture. 1. Clothing Storage This is the classic use. Hanging rods hold shirts, dresses, and jackets, while shelves or drawers hold folded sweaters and jeans. A homeowner renovating an older house may choose an armoire specifically because adding a built-in closet would mean cutting into original walls or architectural details worth preserving. 2. Linen Storage The shelving inside many armoires suits bedding, towels, and blankets just as well as clothing, especially in homes with limited linen closet space. 3. Entertainment Storage Older TV armoires were built specifically to hide bulky televisions and media equipment behind closed doors. This use has faded with the rise of flat-screen TVs, though the furniture itself hasn’t gone anywhere. 4. Home Office Storage A closed-door cabinet suits files, office supplies, and books, keeping a home office looking tidy when it’s not in use. 5. Entryway Storage Shoes, bags, and seasonal items all fit comfortably in an armoire placed near a front door, a fairly modern use for a very old piece of furniture. Armoire vs Wardrobe vs Closet The difference between an armoire, wardrobe, and closet often comes down to design, storage style, and use. An armoire is a freestanding piece of furniture with roots in French design, often featuring a mix of hanging space, shelves, and drawers. Wardrobes are also standalone storage units, but they usually focus more on practical clothing storage, especially for hanging garments. Closets, on the other hand, are built into the home and provide permanent storage space. Feature Armoire Wardrobe Closet Type Freestanding furniture Freestanding furniture Built-in storage Design Often decorative or furniture-focused Usually simple and functional Integrated into the room Storage Hanging space, shelves, and drawers Mostly hanging clothing storage Larger storage capacity with shelves and hanging areas Placement Bedrooms or living areas Mostly bedrooms Built into bedrooms or hallways An armoire adds storage with a decorative furniture feel, while a wardrobe focuses mainly on clothing organization. A closet provides the most permanent storage but cannot be moved or easily changed. An armoire can work as a wardrobe, but not every wardrobe has the detailed design or furniture-like character associated with an armoire. Choosing between them depends on your space and needs. Armoires work well in rooms lacking built-in storage or where flexibility matters, while closets suit larger storage needs and permanent organization. How to Choose an Armoire for Your Space Choosing the right armoire is about more than just appearance. Consider your available space, storage needs, interior style, and material quality to find a piece that feels practical and fits naturally into your home. Measure Available Space: Before anything else, measure the height and width of where the armoire will sit, along with door clearance and enough walking space around it once it’s in place. Choose the Right Storage Layout: Decide what you actually need inside. Hanging rods suit clothing, adjustable shelves handle folded items and linens, drawers fit smaller accessories, and open shelving suits books or display pieces. Match Your Interior Style: The style of your armoire should complement the overall look of your room rather than stand out as a separate piece. Traditional interiors pair well with dark walnut armoires featuring carved details and rich wood finishes. Modern spaces usually suit armoires with clean lines, flat panels, and simple finishes that keep the design minimal. Consider Material Quality: Solid wood tends to last longer and holds up better over time, though it comes at a higher price point. Understanding which wood types hold up best for furniture helps narrow the choice, walnut, oak, and mahogany consistently outperform softwoods for pieces that see daily use. Engineered wood offers a more affordable option without sacrificing too much durability for everyday use. Either way, check the hardware quality, since hinges and handles are often the first parts of an armoire to wear out. Where Should You Place an Armoire? 1. Bedroom: Use an armoire as a visual anchor beside the bed or against an empty wall where built-in storage isn’t available. 2. Living Room:A good spot for a piece that doubles as both storage and a design focal point, especially in rooms without built-in shelving. 3. Dining Room:Fits naturally against a long wall, giving the room a furnished, finished look beyond just a table and chairs. 4. Entryway: Positioned near the front door, an armoire can anchor the whole entry the way a console table might, while still hiding everyday clutter behind closed doors. Are Armoires Still Popular Today? Built-in closets have taken over much of the storage role of armoires, which, once filled, naturally reduces how often people reach for one out of necessity. That said, armoires haven’t disappeared. The rise of adaptable, movable furniture has given it something of a second life, particularly in small homes and apartments where built-in storage is limited. Modern armoires today are less about pure necessity and more about combining storage with genuine design intent. People buying one now are often choosing it as much for how it looks as for what it holds. How to Style an Armoire in Your Home An armoire suits a room best when it’s treated as a statement piece rather than something to hide in a corner. Pair it with surrounding furniture that complements its finish, add nearby lighting to highlight its details, and resist the urge to overcrowd the room around it. Updated hardware, like new pulls or hinges, can also refresh an older piece without a full refinish. A few pairings that tend to work well: A vintage armoire in an otherwise modern bedroom, used as a contrast piece A white or painted armoire in a farmhouse interior, keeping the overall palette light A dark walnut armoire in a traditional space, leaning into the furniture’s original character Pros and Cons of Using an Armoire An armoire can add both function and character to a home, but it is not the right storage solution for every space. Its biggest advantage is the flexibility it provides: storage without permanent installation while adding a furniture-like element to the room. However, armoires also take up valuable floor space and may not offer the same capacity as built-in closets. Pros Cons Adds architectural character Takes up floor space Movable storage solution Can be heavy to move Functions effectively without built-ins Holds less than a walk-in closet Serves multiple purposes Requires careful placement planning Understanding both the benefits and limitations helps homeowners decide whether an armoire fits their storage needs, room size, and interior style. Conclusion An armoire is the kind of furniture piece that quietly proves it deserves a spot in the room. It does not need to shout for attention or follow every passing design trend, it simply shows up, holds your things, and somehow makes the space feel more finished. Whether it ends up holding clothes, books, keepsakes, or the mysterious collection of items that need a proper place someday, a well-chosen armoire can become part of your home’s personality. The best pieces are not always the biggest or the most expensive. They are the ones that fit your space, match your style, and make everyday life just a little easier, more than most furniture can claim. Frequently Asked Questions What is the difference between an armoire and a wardrobe? An armoire is usually more decorative and may include shelves, drawers, and hanging space, while a wardrobe is typically designed mainly for hanging clothes. Why is it called an armoire? The word “armoire” comes from the Old French armarie, which originally referred to a cabinet used for storing weapons, tools, or valuable items. What is the English word for armoire? In English, an armoire is generally called a large wardrobe or storage cabinet, though the original French term is commonly used in furniture.

A mailbox is the first thing anyone sees before they even reach your door. Brick just does that job better than wood or metal. No yearly repaint, no warping after a bad winter, and it looks like it’s always belonged there. Starting from scratch is one path. Tearing out a post that’s been leaning for two years is another. Either way, brick gives you more to work with than a trip to the hardware store usually does. Coming up, you’ll find useful style options, from simple columns to designs with built-in planters, lighting, and secure package storage. You’ll also learn what to consider before building, typical costs, and simple ways to keep it looking its best over time. How Do You Plan a Brick Mailbox Installation? A brick mailbox installation starts with the right location and foundation, then moves to the insert and finishing details. 1. Choose a Safe Location: Check road clearance, utility lines, driveway visibility, postal placement rules, and any local codes before you pick a spot. 2. Build a Stable Foundation: A properly sized concrete footing supports the weight of the masonry and holds up against local soil and weather conditions. 3. Install the Mailbox Insert: Set the insert at a practical height and protect it from mortar, moisture, and poor drainage during construction. 4. Add the Brick and Finishing Details: Lay the brick courses evenly first, then add the cap, address plaque, lighting, planter, or landscaping around it. Brick Mailbox Ideas to Match Any Home Style Pick a brick color and design that fit your home’s architecture, driveway, and landscape so the mailbox looks like part of the property, not an afterthought. Popular add-ons right now include planters, lighting, newspaper slots, address plaques, stone accents, and different cap styles. 1. Traditional Red Brick Mailbox Classic red brick shaped into a simple rectangular column pairs naturally with a black metal mailbox insert, creating a timeless look that feels clean and understated. This style works well with Colonial, ranch, and traditional homes, especially when the exterior already includes brick walkways, masonry details, or classic wood trim. For a refreshed finish without replacing the material, painting brick can be an option worth considering. Best for: Colonial, ranch, and traditional home exteriors. 2. Modern White Brick Mailbox Painted or naturally light brick, paired with a dark mailbox insert, creates a sharp contrast against greenery and pavement. Keeping the shape plain, with straight edges and no extra trim, helps the design match a clean, modern exterior without competing for attention. Best for: Modern and minimalist homes with clean lines. 3. Brick Mailbox with an Arched Top A rounded arch on top softens the column’s boxy shape and adds a traditional architectural detail that echoes older masonry work. The curve also draws the eye upward, making a short column feel a bit taller and more substantial from the street. Best for: Homes with arched doorways, windows, or entryways. 4. Flat-Top Brick Mailbox A level concrete or stone cap keeps the look simple while directing rain away from the brick underneath, helping prevent staining and slowing mortar wear. It’s an easy match for almost any brick color since the design stays so plain and adaptable. Best for: Homeowners who want a low-fuss, budget-friendly build. 5. Brick Mailbox with a Stone Cap A natural stone or concrete cap set above the brick column adds contrast and gives the structure a finished, polished edge that catches the eye from the driveway. It also helps shield the brick below from rain, snow, and sun damage over time. Best for: Homes with stone accents on the porch or entryway. 6. Brick and Natural Stone Mailbox Brick paired with stacked stone or stone veneer creates texture and depth and works best when it matches materials already used on your house, driveway, or front walkway. The combination feels more custom than brick alone, without adding much extra cost. Best for: Properties with existing stone or veneer features. 7. Two-Tone Brick Mailbox Two complementary brick colors create a border, band, or patterned section that adds visual interest without requiring extra materials such as stone or metal accents. Keep the pattern simple, maybe one band near the top, so the design doesn’t feel busy or cluttered. Best for: Homeowners who want a custom look without added materials. 8. Brick Mailbox with a Soldier-Course Detail A row of bricks set vertically, rather than the usual horizontal pattern, placed around the mailbox opening or near the top of the column adds a subtle decorative band. It’s a small architectural touch that reads as intentional rather than plain. Best for: Traditional homes that want a subtle upgrade, not a bold one. 9. Herringbone Accent Brick Mailbox A small herringbone brick panel set into the front face adds texture and movement to an otherwise flat surface. Keep the pattern limited to one section, like a front panel or base border, so it stays clear, balanced, and doesn’t overwhelm the design. Best for: Homes with patterned brick or paver walkways already in place. 10. Brick Mailbox with a Built-In Planter A planter built into the side or back of the mailbox holds seasonal flowers, small ornamental grasses, or trailing vines that soften the brick’s hard edges. Swapping plants by season keeps the mailbox looking fresh without any structural changes. Low-maintenance front-yard plants work especially well here because they hold their shape without constant trimming. Best for: Gardeners who want color at the mailbox year-round. 11. Brick Mailbox with a Flower Bed A curved or rectangular garden bed wrapping around the base works well with low, compact plants that won’t grow tall enough to block the mailbox door or house numbers. This works especially well on properties with room to spare near the driveway entrance. Best for: Larger front yards with room for a landscaped bed. 12. Brick Mailbox with a Solar Light A small solar lantern mounted on top of the column or a ground spotlight aimed at it makes the mailbox easier to spot after dark, which helps with deliveries and safety. Solar options skip the wiring, so installation stays simple and inexpensive. Best for: Dark driveways, rural roads, or homes without nearby streetlights. 13. Brick Mailbox with an Address Plaque A metal, stone, or ceramic number plaque mounted on the front or side of the building improves visibility for delivery drivers, guests, and emergency responders. Use large, high-contrast numbers that are clearly visible from the road, especially on long or curved driveways. Best for: Homes on busy roads where quick visibility matters. 14. Brick Mailbox with a Newspaper Slot A separate opening built below the main mailbox keeps newspapers and small deliveries off wet ground, mud, or standing water after storms. This keeps paper goods dry and protected without needing a second, freestanding container near the driveway. Best for: Homeowners who still get daily newspaper delivery. 15. Brick Mailbox with a Package Compartment A larger locking compartment built into the lower section of the column securely holds small parcels, while the mailbox above remains reserved for regular mail and letters. This setup reduces porch theft without needing a separate delivery box. Best for: Frequent online shoppers who want package security. 16. Double Brick Mailbox for Two Homes One wide brick structure fitted with two separate mailbox inserts works well for shared driveways or homes set close together on a single lot. Matching address plaques on each side keep the two units easy to identify for mail carriers and visitors. Best for: Shared driveways or side-by-side properties. 17. Tall Brick Column Mailbox A taller, narrower column creates a stronger visual feature at the driveway entrance without taking up much ground space, which suits smaller yards or tight side lots. The added height also makes the mailbox easier to spot from a distance. Best for: Narrow lots that still want a bold entrance feature. 18. Wide Brick Mailbox with Side Columns Short brick wings or side columns framing the central mailbox add width and presence, which suit a wide driveway, circular entrance, or large front yard with room to spare. This layout often works well paired with matching gate posts or fence columns. Best for: Large properties with wide driveways or grand entrances. 19. Rustic Reclaimed-Brick Mailbox Reclaimed or weathered brick, with its uneven color and worn texture, complements farmhouse, cottage, and older home exteriors that already lean into a lived-in, timeworn look. It also pairs naturally with wood trim, exposed beams, or a gravel driveway, the same details that carry through in an English cottage-style home. Best for: Farmhouse, cottage, and older homes with character. 20. Brick Mailbox with a Small Roof A miniature pitched or sloped roof placed on top reflects your home’s existing rooflines and helps shed rain, snow, and debris off the structure more effectively than a flat cap. This detail works especially well on homes with visible gables or dormers. Best for: Homes with steep or distinctive roof lines. 21. Brick Mailbox with Matching Landscaping Coordinating the brick with nearby edging, pavers, mulch, and plants connects the mailbox to the rest of the front yard, rather than leaving it looking like a separate, disconnected structure dropped at the curb. For people already thinking through modern landscape design, extending those same material choices to the mailbox base ties the whole entrance together visually from the street. Best for: Homeowners who want the mailbox to feel fully built-in, not bolted on. 22. Brick Mailbox with Decorative Iron Accents A small wrought-iron scroll, hook, or trim piece attached to the column adds detail and contrast without changing its overall shape or requiring major construction. This works particularly well on properties that already feature iron railings, gates, or light fixtures. Best for: Homes with existing iron railings, fencing, or light fixtures. 23. Brick Mailbox with a Curved Wall Extension A short curved brick wall extending from one side of the column ties the mailbox into a larger entrance feature, garden wall, or fence line already present on the property. This creates a grander, more cohesive look at the driveway entrance. Best for: Properties with an existing brick wall, entry gate, or fenced yard. How Much Should You Budget for a Brick Mailbox? Cost swings based on size, materials, and whether you hire a mason or build it yourself. Here’s a general breakdown to help with planning. Cost Factor Typical Range Concrete footing and foundation $150 to $400 Basic brick column (materials and labor) $500 to $1,200 Stone or concrete cap $100 to $300 Built-in planter $50 to $200 Solar light or spotlight $20 to $80 Locking package compartment $150 to $400 Full professional installation $800 to $2,500 DIY build (materials only) $200 to $600 Prices vary by region and by the level of detail in the design, so get a local quote before locking in a budget. A basic column costs far less than a wide double mailbox with a planter, lighting, and a built-in stone cap. How Can You Personalize a Brick Mailbox? A brick mailbox doesn’t have to look like every other one on the street. A few personal touches make it feel like it belongs specifically to your house, not just any house. Match your brick to your home’s exterior: Pulling the same brick color or style from your house makes the mailbox look built-in rather than added on. Add a monogram or family name plaque: A small engraved or painted detail turns a functional structure into something more personal. Pick a cap that echoes your roofline: A peaked, flat, or curved cap can quietly mirror the shape of your own roof. Choose plants that match your garden style: Whatever grows near your front door or porch can carry over to the base of your mailbox. Add a house number in your own style: Hand-painted tile, cut metal numbers, or a carved stone plaque all read differently depending on what fits your taste. Frequently Asked Questions Is it Legal to have a Brick Mailbox? Brick mailboxes are generally legal, but they must follow USPS placement guidelines and any local road, safety, or HOA rules. What are the Best Plants to Put Around a Brick Mailbox? Low-growing plants like lavender, ornamental grasses, creeping thyme, and compact shrubs add color without blocking access, all reliable choices from a low-maintenance front yard plant palette that stays manageable year-round. What Flowers Go Best with Brick? White petunias, yellow marigolds, purple salvia, pink geraniums, and red begonias complement the warm tones of brick. What are the Latest Trends in Mailbox Design? Current trends include mixed brick and stone, built-in planters, solar lighting, large address plaques, clean lines, and secure package compartments. How Long Does it Take to Build a Brick Mailbox? A professional can usually build a brick mailbox in one to three days, although the foundation may need extra time to cure. Final Thoughts A good mailbox design fits your home, fits your yard, and stays easy to use every day. Small touches like an address plaque, planter, stone cap, or solar light add character without much extra work. Pick the style that fits your space, then build it to last. Once it’s in place, keep up with the small maintenance tasks, and it’ll hold that fresh, finished look for years.
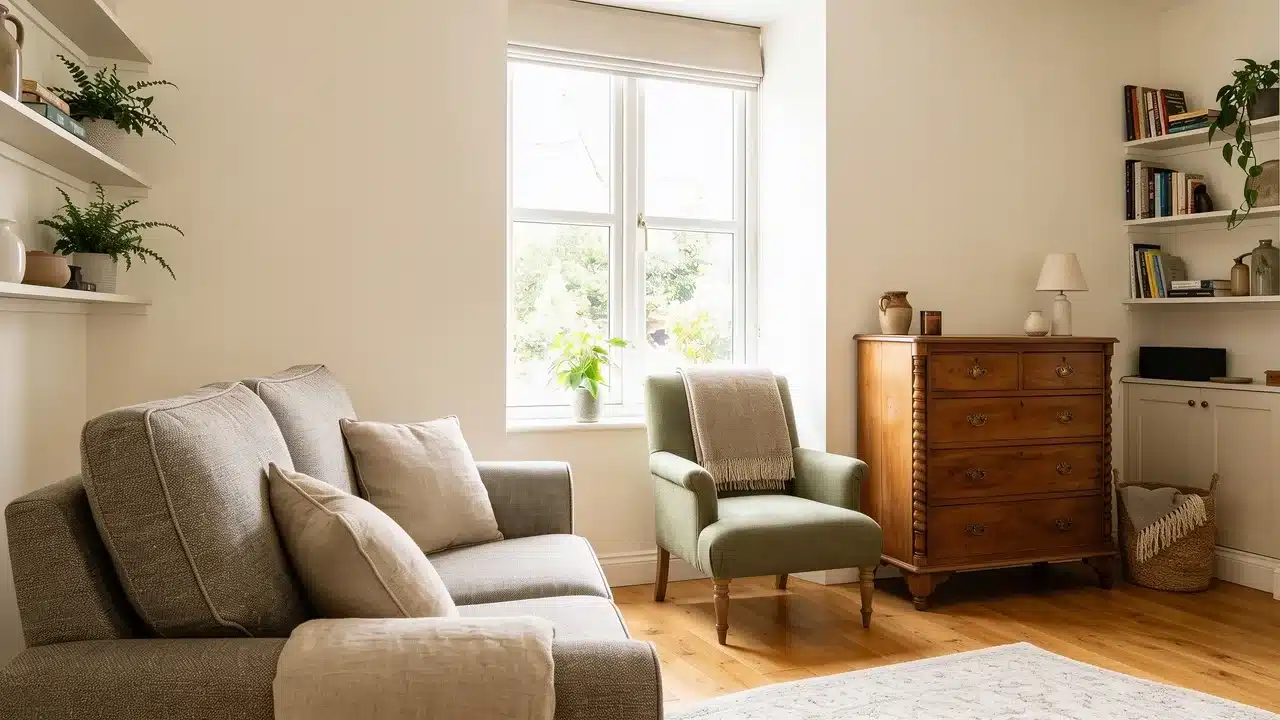
Downsizing comes down to one question, repeated for every room, does this piece earn its spot in the next home? Furniture to keep when downsizing is not always the newest or the largest item you own. It’s the piece that fits the new layout, gets used often, and still means something to you. Cutting back on furniture doesn’t have to mean cutting back on comfort or the pieces that carry real memories. Weigh each item against space, function, build quality, and its personal value, and the smaller home starts to feel like a fit rather than a squeeze. Furniture Worth Keeping When Downsizing Once the evaluation is done, certain furniture categories consistently earn their place in a downsized home. 1. Furniture You Use Every Day A sofa, armchair, dining table, bed frame, dresser, wardrobe, coffee table, or nightstand you reach for every day has already proven its value. Pieces you use daily or near-daily should be your first priority when deciding what to buy. These are the items that shape how comfortable and functional your new home feels from the first day you move in 2. High-Quality Solid Wood Furniture Dressers, cabinets, dining tables, and sideboards are examples of durable furniture that can outlast cheaper counterparts by decades. Oak, walnut, and cherry hold their structure through moves, refinishing, and daily wear. Replacing a well-made solid piece of the same quality usually costs more than keeping and restoring the one you already have. 3. Furniture With Multiple Uses A storage ottoman that works as seating, a footrest, and extra storage all in one uses less floor space. A chest that doubles as a coffee table, a writing desk that fits into more than one room, or a cabinet with flexible storage all follow the same logic. Furniture that adapts to changing needs earns its place after nearly every move. 4. Meaningful Heirloom Furniture Heirloom furniture carries meaning that outlasts its style. A family dining table, antique dresser, or handmade chest deserves space when still in regular use. Condition and fit in the new layout matter as much as the story behind it. Pieces tied to real memories and daily purpose earn their place. 5. Furniture with Built-In Storage Storage matters more once you’ve downsized, since every piece has to pull its own weight. Choosing the right storage solutions for small spaces can help keep a smaller home organized without adding unnecessary furniture. A storage bench by the door, a blanket chest at the foot of the bed, or a dresser and cabinet with deep drawers all keep the home organized without adding a separate storage unit somewhere else 6. Convertible Furniture A piece that serves multiple functions helps a smaller home stay comfortable without an extra room. A sofa bed, or sleeper sofa, combines seating and a guest bed in one piece. A daybed works as everyday seating, and a Murphy bed with a built-in sofa removes the need for a dedicated guest room. 7. Furniture That Fits Your New Home’s Scale Scale gets overlooked more than most. A piece that worked in a larger room can overwhelm a smaller one, even when well made. Apartment-scale sofas, nesting tables, narrow bookcases, and chairs with tapered legs work well in compact rooms. More small space furniture ideas can help create a functional layout without overcrowding the home. Large sectionals, oversized dining sets, and king-size bed frames are the most common mistakes. Which Furniture Should You Let Go While Downsizing? Before moving furniture into a smaller home, review each piece based on fit, function, quality, and personal value. Learning how to declutter before moving can make the downsizing process easier and more intentional. Let Furniture Go If: It creates crowding or makes rooms harder to move through It needs storage space but rarely gets used It no longer suits your current lifestyle or home setup It cannot be repaired, adjusted, or used in any other way You are keeping it only because of guilt or obligation Things to Consider Before Choosing Furniture Before deciding which pieces move with you, a few practical steps make the selection process much more reliable. 1. Measure Your New Space First Room dimensions, doorway widths, and hallway clearances decide whether a piece can even get inside. Measure every room before you commit to keeping anything. Sketch a simple floor plan to scale and place furniture outlines in it before moving day, so you know what fits before the truck is loaded. Check available storage and how much flexibility the layout allows for rearranging later 2. Choose Furniture That Fits Your Life Downsizing is a chance to choose furniture that better suits the way you live today. If you have recently been building a home or adjusting to a new layout, it is also a good time to rethink how much furniture you really need. Consider your daily routines, how often you entertain, and whether your hobbies or priorities have changed. Ask yourself: Do I use this furniture regularly? Does it support my current lifestyle? Would I regret leaving it behind? If the honest answer points toward “no,” that piece becomes a harder case to move. 3. Evaluate Furniture Quality Before Downsizing After years spent looking closely at wood, joinery, and finish work, I’ve learned that build quality is the clearest predictor of whether a piece is worth keeping. Solid wood construction, tight joints, and quality hardware hold up to another move and years of daily use. 4. Separate Sentimental Value from Emotional Attachment Family heirlooms, handmade pieces, and antiques often carry real meaning tied to who made them or what they witnessed. That reason to keep something is valid, as long as the piece still works in your new space and gets used. Keep the pieces that add value to your next home, not the ones you’re holding onto purely out of guilt. Downsizing Furniture Checklist Question Keep or Let Go Does it fit the new home’s layout? Do you use it regularly? Is it built to last through repairs? Does it solve a practical storage or space problem? Does it hold real personal meaning? Should You Replace Some Furniture After Downsizing? Furniture to keep when downsizing should support how you live now, not how you lived in a bigger house. Solid construction, everyday use, and genuine personal meaning are the three things worth considering before anything goes on the truck. Measure everything first, be honest about what you actually use, and keep what still earns its place. A smaller home doesn’t have to feel like a smaller life if every single piece in it is pulling its weight. Walk through each room slowly, imagine the new layout with each piece in place, and let go of anything that no longer fits. Happy Reading The furniture you keep when downsizing should support the way you live now. Choosing pieces with strong construction, practical daily use, and genuine personal meaning helps create a smaller home that still feels complete. From solid wood pieces to flexible storage solutions, each item should have a clear purpose before it takes up floor space. Focus on quality over quantity and keep what truly works for your home. Which piece of furniture are you planning to bring to your new space? Share in the comments below. Frequently Asked Questions How Do You Sell Furniture You Cannot Take with You? Online marketplaces, estate sales, and consignment shops are the most common options. Local buy-and-sell groups also move pieces quickly. Should You Buy New Furniture After Downsizing? Only if existing pieces do not fit the new space. Buying before measuring your new rooms often leads to poor-fitting choices. Is it Worth Reupholstering Furniture Before a Move? Yes, if the frame is solid and the reupholstery cost stays below the price of a comparable replacement piece. Should You Downsize Furniture Before or After Moving? Before. Deciding what stays while you can still measure both homes prevents moving pieces that will not fit the new space. What Should You Do with Antique Furniture That Does Not Fit? Consult an appraiser before selling. Some antiques hold more value than expected and may be worth storing or passing to family.
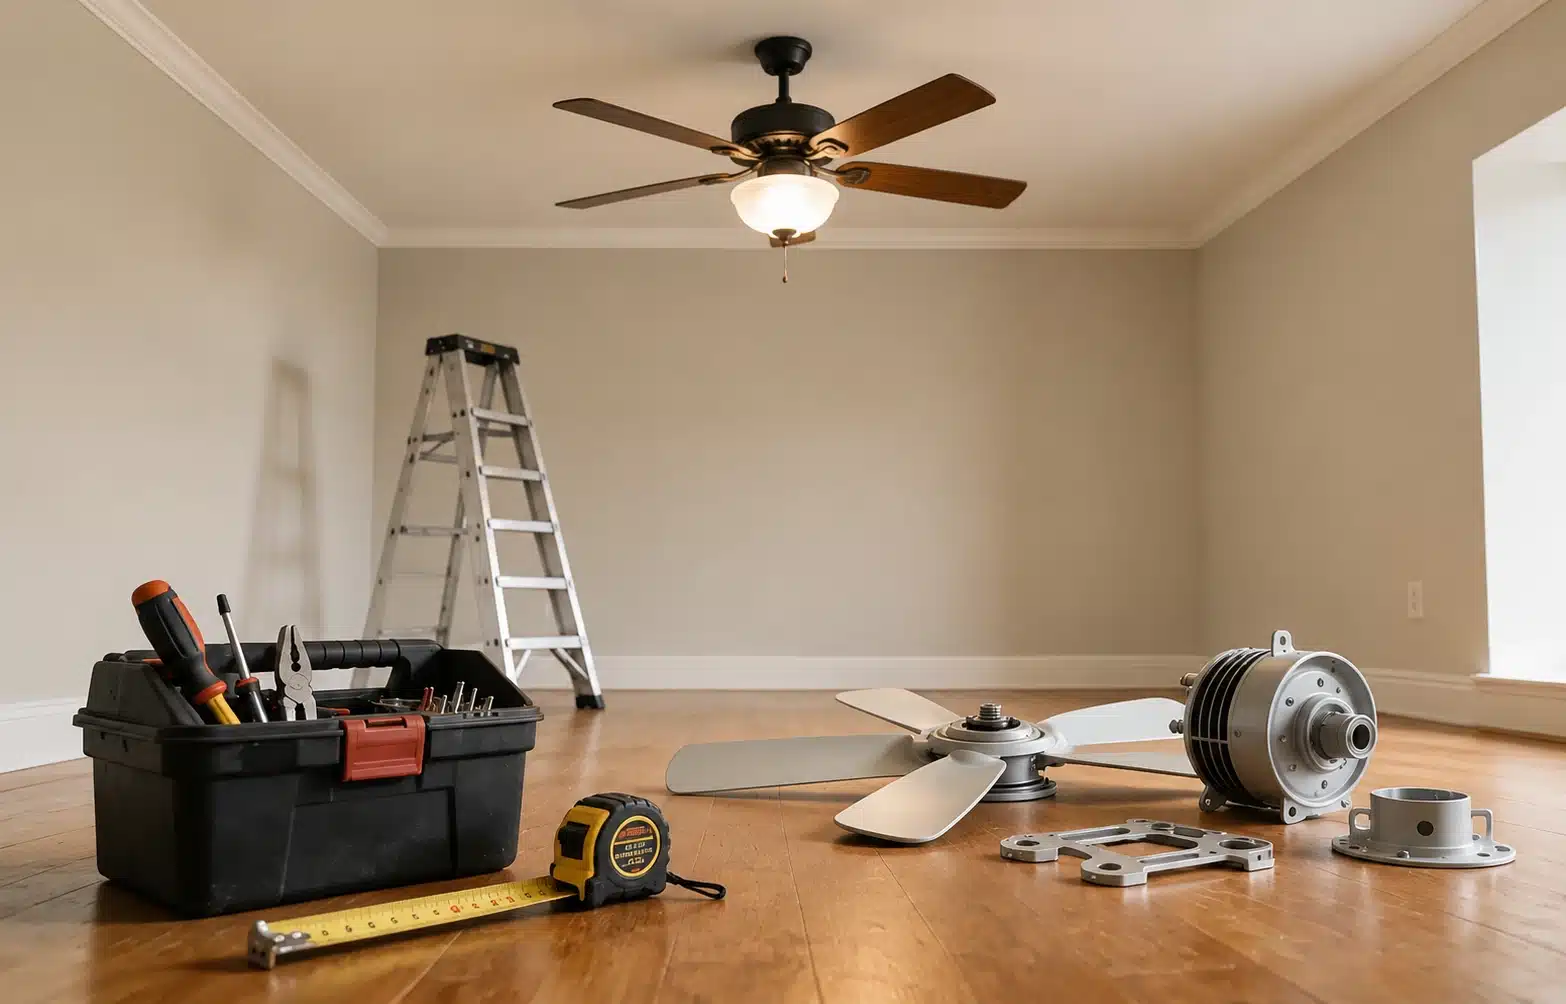
Quick Answer: Ceiling fan installation costs between $146 and $360 for a standard job with existing wiring, averaging around $253. New wiring, a vaulted ceiling, or an outdoor install can push the total past $600. The biggest cost driver is whether wiring already exists at the installation spot. You budgeted for the fan. You forgot that the installation is a separate cost. That catches most of us off guard. The final number depends almost entirely on what is already in your ceiling. Confirmed wiring and a fan-rated box keep costs low. No wiring, a vaulted ceiling, or an outdoor location pushes it significantly higher. According to Energy Star, certified fans can be up to 44% more energy-efficient than standard models, which changes how you think about the upfront cost. You will typically be billed $60 to $130 per hour for a licensed electrician. I will walk you through every variable so you know exactly what to expect before you make the call. How Much Does Installing a Ceiling Fan Cost? The price depends on one question, do you already have wiring in that spot? Find your scenario below. Your Installation Scenario What You Will Pay Fan replacement with existing wiring $85–$300 New install at existing fixture location $146–$360 New install with no existing wiring $400–$1,000 Vaulted or angled ceiling install $300–$600 Outdoor or wet-rated fan installation $250–$500 Smart fan setup with wiring $150–$600 Two or more fans in one visit Save $50–$100 on labor You will see different averages depending on which source you read. They measure different types of jobs. A simple swap looks nothing like a new install with fresh wiring. Labor runs $50 to $250. Your total depends on your scenario and who you hire. What Factors Change the Final Price? Several things move your number up or down. Here is what you need to know before you pick up the phone. 1. Labor: Who Should You Hire? A handyperson charges $50 to $80 per hour for a straightforward swap with existing wiring. An electrician charges $60 to $130 per hour, often with a $150 minimum for the first hour and a $100 to $200 job fee. Here’s my rule: hire a handyperson only if the wiring is confirmed and the box is fan-rated. Any work involving new wiring or circuit work requires a licensed electrician to avoid safety and code issues. 2. New Wiring vs. Existing Wiring Your wiring situation is the single biggest cost driver on any job. Replacing a fan on existing wiring runs $100 to $300 in labor, while new wiring adds $200 to $700. Open attic access keeps costs low; finished drywall means cutting in, fishing cable, and patching, which can add $300. New wiring runs $5 to $17 per linear foot, and a new circuit adds $150 to $600. In older homes where the electrician finds broader issues, such as an outdated panel or degraded circuits, the scope can expand well beyond a single fan install, and rewiring costs are worth knowing before that conversation happens. 3. Ceiling Type and Height Standard 8-foot ceilings add no extra cost. Vaulted or angled ceilings past 34 degrees need a sloped adapter, about $37. Ceilings 12 feet or higher may need scaffolding or a lift, adding $50 to $150. For downrod length, per Hunter Fan, subtract 9 feet from your ceiling height, then convert the result to inches. A 12-foot ceiling needs a 36-inch downrod. Downrods run $10 to $75. 4. Fan Type and Accessories Fan Type Fan Price Install Impact Standard (4–5 blade) $50–$300 Simple, 1–2 hours Low-profile or hugger $50–$400 Same as standard Smart or Wi-Fi-enabled $120–$600 Extra setup and app config Outdoor or wet-rated $100–$400 Weatherproof wiring required Dual-motor or directional $150–$1,850 Heavy; may need ceiling brace Your fan choice affects price and installation time, as shown above. A wall control or remote receiver adds $28 to $100. If your ceiling box can’t support a fan’s weight, swapping it runs $15 to $50 in parts plus $50 to $100 in labor. DC motor fans cost more upfront but use less power, and a fan can let you raise your thermostat by about 4 degrees while staying comfortable. Ceiling Fan Installation Cost by Location Where you live can shift your total installed cost by $100 or more. Local cost of living, licensing requirements, and demand all play a role. City Avg. Installed Cost Boston $392 New York City $406 Washington DC $378 Chicago $322 Seattle $364 Denver $322 Austin $294 Philadelphia $314 These numbers are a baseline, not a final price. Your actual invoice depends on your home’s specific wiring and layout, as well as the pro you hire. Should You Repair or Replace Your Fan? Before you budget for a full replacement, check whether a simple fix solves the problem for less money. Here is how to decide. Repair it if: Your fan is under 10 years old The issue is a wobble, a cracked blade, or a dead light kit The motor runs quietly and does not overheat The repair cost is lower than buying and installing something new Typical repair cost: $50 to $400 Replace it if: Your fan is 10 to 15 years old or more The motor hums, overheats, or stalls at different speed settings You cannot find replacement parts for your model You want smart controls, a DC motor, or quieter operation Your ceiling box is not fan-rated That last point matters most. A box built for a light fixture is not designed to support the weight and rotation of a fan. A wobbling or noisy fan is often a symptom, not the real problem, so check the box behind it before you buy anything new. If it is not rated, the whole setup needs to be replaced, which typically runs $150 to $600 installed. DIY Installation vs. Hiring a Professional You can save $100 to $250 on labor by doing it yourself. But getting it wrong costs you more than that to fix. Here is a look at both sides. Your DIY cost equals the fan price plus $10-$40 in materials. That covers wire connectors, mounting hardware, and basic tools. DIY works for you if: You are swapping a fan in the exact same location Your existing wiring and a fan-rated ceiling box are confirmed Your ceiling is standard height and easy to reach with a stepladder You have real experience with basic electrical work Always hire a pro if: New wiring or a new circuit is required There is no existing fixture at your installation location Your ceiling is vaulted, sloped, or over 10 feet tall Your ceiling box is not rated for fan support Local permits or inspections apply to the work Improper wiring is the top cause of ceiling fan failure. A fan that wobbles or stops working after a few months almost always traces back to the original installation. Professional work protects your home and keeps your warranty valid. How Much Time Does Ceiling Fan Installation Take? The time required depends on your existing setup and the scope of the installation. A simple fan swap at an existing wired location with a fan-rated box typically takes one to two hours. That includes removing the old fixture, checking the box, connecting the wires, mounting the new fan, and testing it at all speed settings. New installations requiring new wiring, circuit changes, or ceiling box upgrades take 2 to 4 hours. Add another hour if the electrician needs to access a finished attic, fish cable through drywall, or patch anything after the work is done. High ceilings change the picture. Anything above ten feet requires a ladder setup, careful downrod measurement, and slower work at height. That alone can add thirty to sixty minutes to an otherwise simple job. Outdoor installs and smart fan configurations add even more time. Running weatherproof wiring and configuring app controls or wall switches adds complexity that a standard swap does not. Tips to Lower Ceiling Fan Installation Cost Hiring an electrician is recommended when the installation involves electrical changes or safety concerns beyond a simple replacement. Consider professional help if you have: No existing wiring for the ceiling fan location No fan-rated electrical box for proper support Circuit capacity concerns or electrical issues High ceilings require specialized equipment Outdoor installations needing weather-rated connections Permit requirements related to electrical modifications A qualified electrician can confirm the fan is mounted securely and connected correctly, especially when the installation goes beyond replacing an existing fixture. Mistakes to Avoid When Installing a Ceiling Fan Most ceiling fan problems trace back to decisions made before installation, not during it. Buying a fan before checking the wiring is the most common mistake. Smart fans, fans with separate light kits, and fans with multiple speed controls may need a neutral wire that older homes do not have at the switch location. Finding that out after purchase means either returning the fan or running new wiring. Next, make sure the fan is sized correctly for the room. A fan too small for the space moves insufficient air. A fan too large for a low ceiling becomes a clearance hazard. Measure your room and ceiling height before you buy anything. Skipping the ceiling box check is where safety problems start. A standard light fixture box is not rated to support the weight and continuous rotation of a fan. Using one is a code violation and a real physical risk. Finally, accepting a vague quote creates the most budget surprises. Any estimate that doesn’t separate labor, materials, ceiling box work, and potential wiring changes leaves room for charges you didn’t plan for. Ask for a line-item quote before work begins. Frequently Asked Questions How Much will Home Depot Charge to Install a Ceiling Fan? Home Depot ceiling fan installation costs vary by location and project needs, including wiring, mounting requirements, and labor complexity. Exact pricing requires a quote. Are Ceiling Fans Worth Installing? Ceiling fans can be worth installing because they improve air circulation, reduce cooling demand, and provide comfort while using less energy than air conditioning. Are Ceiling Fans Outdated in 2026? Ceiling fans are not outdated in 2026. Modern designs, smart controls, efficient motors, and stylish finishes keep them practical for many homes. Why Should You Not Sleep with a Ceiling Fan on all Night? Sleeping with a ceiling fan running all night is generally safe, but some people may experience dryness, allergies, noise concerns, or discomfort from constant airflow. Is a 52-Inch Fan too Big for a 12×12 Bedroom? A 52-inch ceiling fan is usually suitable for a 12×12 bedroom and provides balanced airflow. Check ceiling height and blade clearance before installation. Final Thoughts So, what does installing a ceiling fan actually cost? For a simple replacement of existing wiring, you are looking at $85 to $300. A full new install without wiring goes up to $1,000. Your location, ceiling type, and fan choice all shift that number. The real work happens before you dial a number: know your wiring situation and check that your box can handle a fan. Everything else in this guide flows from those two answers. Have you installed a ceiling fan before? Drop your experience in the comments below. I would love to know what it cost you.
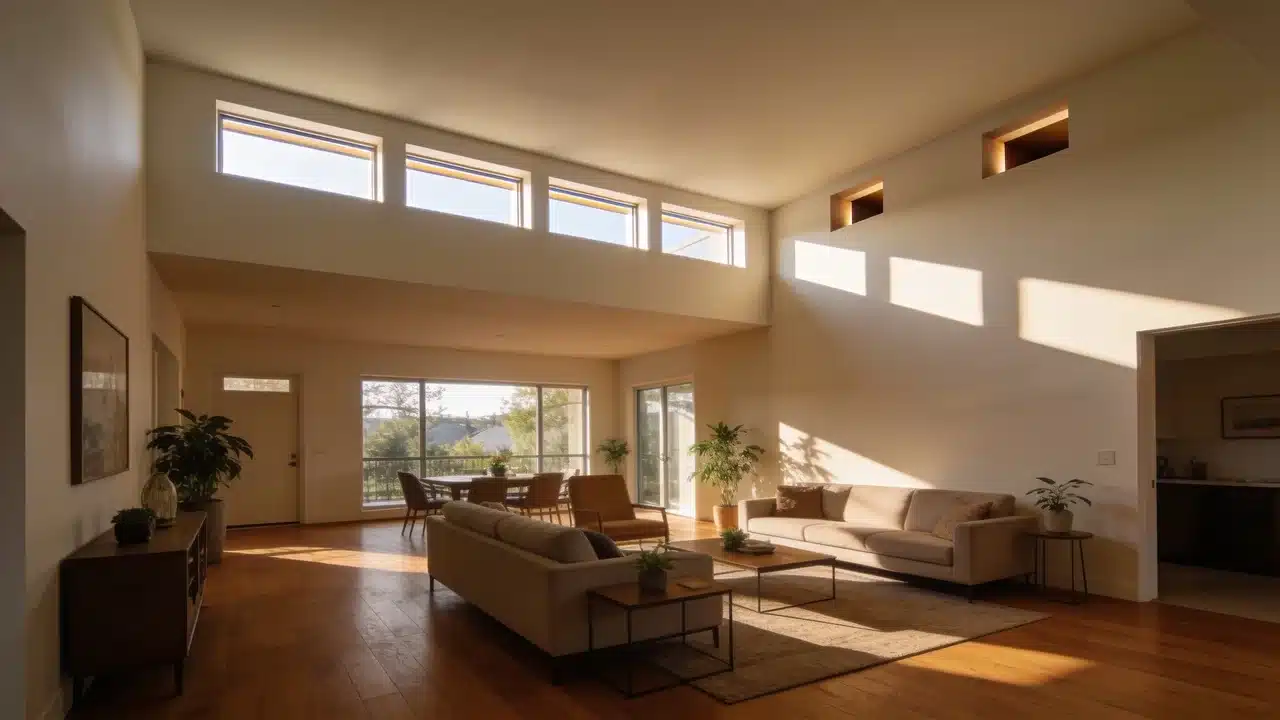
Quick Answer: A clerestory window is a high-set wall window, typically positioned near the roofline, designed to admit daylight and ventilation into a space without using lower wall area. Some windows do more than let in light. They change how a room feels, functions, and breathes. I’ve spent 12 years working through layout problems in real homes, and clerestory windows keep coming up as one of the most practical design decisions you can make. They solve problems that standard Windows simply cannot, a nd yet most people overlook them completely. In this piece, I’ll walk you through the full history and architectural role of clerestory windows, how they work, the types available, the benefits they bring to your home, where to place them, and what to check before installation. What is a Clerestory Window? A clerestory window is a window placed high on a wall, close to the ceiling or roofline. It takes its name from the clerestory, the strip of wall that sits above eye level. Sitting above the standard sight line, it keeps your lower walls free while still pulling daylight deep into the room. The idea is old. Ancient Egyptian temples used raised wall sections with openings to bring light into deep stone interiors, and Roman basilicas and Gothic cathedrals later used tall clerestory bands to fill vast spaces with daylight long before electric lighting existed. The core idea hasn’t changed much; only the materials and methods have evolved. Today, the same approach shows up in passive home design, where placement and orientation do the work artificial lighting used to handle. Standard windows trade wall space for daylight. Place one higher up instead, and sunlight will travel farther into the room, especially in longer or open-plan spaces. How Do Clerestory Windows Work? Placement is everything with clerestory windows. Because the glass sits high on the wall, sunlight enters at a steeper angle and reaches further into the room than a standard window at eye level ever could. In open-plan spaces, you notice the depth of light immediately. When the windows are operable, they also improve airflow through the stack effect. Warm air rises and exits through the upper opening, pulling cooler air in from below. Glazing choice, compass orientation, and external shading all affect how well this works in practice. Getting those three right is where most of the real performance comes from. What are the Types of Clerestory Windows Not every clerestory window works the same way. The type you choose affects the light, airflow, and the overall feel of the space. 1. Fixed Clerestory Windows Designed purely for daylight, fixed clerestory windows do not open. You’ll find them in most modern homes because they are simple to install and need little upkeep. They also cost less upfront since there’s no hardware involved. If ventilation isn’t a priority, this is usually the most practical starting point. 2. Operable Clerestory Windows These can be opened to let warm air out, making them useful in warmer climates or in rooms that heat up quickly. You get more control over indoor comfort without relying on air conditioning. Some models include automated controls, so you can manage airflow without manually reaching the window. 3. Continuous Clerestory Windows These run as long horizontal bands across the upper wall rather than sitting as individual units. This unbroken line of glass creates a strong visual statement in rooms with minimal detailing elsewhere. You’ll often see them in contemporary architecture because they distribute light evenly across a wide space. 4. Roofline Clerestory Windows These follow the angle of your ceiling or roofline rather than sitting in a flat wall section. Because they track the sun above you, they receive more direct sunlight during specific hours, making timing and orientation important. They work well with a pitched or vaulted ceiling The right type depends on your room layout, climate, and how much you want the windows to do beyond bringing in light. Why You Need Clerestory Windows in Your Home In my experience, homeowners come to clerestory windows trying to solve one problem and end up fixing several at once. The most immediate gain is daylight. Because the glass sits high on the wall, sunlight penetrates farther into the room than a standard window at eye level ever does. That depth of light reduces the amount of artificial lighting a room needs during the day, which matters most in longer layouts or open-plan spaces. Privacy is the second reason, and for many people, it is the deciding one. A clerestory window keeps the room bright while cutting direct sightlines from the street, a neighboring property, or a shared outdoor space. You get the light without the exposure. Because the glass sits above eye level, the lower walls remain completely free for shelving, storage, artwork, and furniture, without having to plan around window placement. In operable configurations, warm air rises and exits through the upper opening, pulling cooler air in from below. In rooms that heat up quickly, natural ventilation reduces the load on air conditioning without any mechanical system involved. Positioned and glazed correctly, they also support passive solar performance, retaining warmth in winter and managing heat gain in summer when combined with overhangs or external shading. High glazing also draws the eye upward, making a room read as taller and more open than its dimensions suggest. Best Rooms for Clerestory Windows Clerestory windows fit well in most rooms, but some spaces benefit more than others. Here is where they tend to work best. 1. Living Rooms: A natural fit, especially with vaulted ceilings. You get strong daylight throughout the space without sacrificing eye-level privacy. Since the glass sits well above furniture and seating areas, you can also arrange the room however you like without worrying that window placement will get in the way of a sofa or bookshelf. 2. Kitchens: Placed above cabinets and counters, they bring in light where task lighting often falls short. This works especially well in galley or U-shaped kitchens, where wall space is already occupied by cabinetry and appliances, leaving few options for standard counter-height windows. 3. Bathrooms: One of the most practical applications. You get daylight without compromising privacy, which matters most in bathrooms that face the street, a neighbor’s window, or a shared courtyard. It also reduces the damp, closed-in feel of windowless bathrooms, without the need for frosted glass or blinds. 4. Bedrooms: Clerestory windows provide light without direct exterior views, making them worth considering in street-facing rooms. They let you wake up to natural light each morning while keeping curtains or blinds unnecessary during the day, which is a small but noticeable change for anyone sensitive to overly dark rooms. 5. Home Offices: Natural light from above reduces screen glare and keeps the room feeling open without visual distractions from outside. For anyone working long hours at a desk, this steadier, indirect light is easier on the eyes than a standard window positioned right behind or beside a monitor. 6. Hallways and Staircases: These are often the hardest spaces to light well. A clerestory window can brighten areas with no exterior walls or other places to install glass. A dim, windowless corridor can turn into a space that feels connected to the rest of the home. Every room has different requirements. In my experience, the spaces that gain the most are those where privacy and daylight feel like competing needs. How Clerestory Windows Compare to Skylights All three bring extra light into a space, but they work differently and suit different situations. Knowing the distinction saves you from choosing the wrong option for your room. Feature Clerestory Windows Skylights Transom Windows Location High wall near ceiling Roof surface Above doors or windows Main Purpose Daylight and privacy Overhead lighting Supplemental light Ventilation Available in operable models Available in some models Usually limited Privacy High Depends on placement Depends on location Common Use Homes, offices, commercial buildings Dark rooms, upper floors Entryways and interiors In my experience, the choice usually comes down to one clear priority. If privacy matters most, clerestory windows are the stronger option. If you need overhead light in a room with no usable wall space, a skylight makes more sense. Transom windows work best as a decorative addition rather than a primary light source. Factors You Must Know for Installing a Clerestory Window Getting clerestory windows right takes more planning than you might expect. These are the factors worth thinking through before you commit. Room orientation and climate: South-facing windows bring more heat and light. In warmer climates, exterior shading or overhangs help manage direct sun. Glass type and energy performance: Low-E glazing reduces heat gain and improves overall efficiency. Accessibility and maintenance: High placement affects how you clean and operate the windows. Fixed units need a clear maintenance plan. Fixed vs operable and costs: Operable units cost more and need more upkeep. Structural changes for high-level glazing also add to the overall budget. Final Thoughts Not every home needs them. But if you are working with an open layout, high ceilings, a modern design, or a space where privacy and daylight feel like a trade-off, clerestory windows are worth serious consideration. If you have already noticed the problem of a room that never feels quite right, light that does not reach far enough, or walls too crowded for another standard window, this is likely the solution you have been looking for. Get the orientation, glazing, and ventilation balance right, and the results speak for themselves. If alternatives suit your space better, a skylight or transom may be the smarter call. Have you considered clerestory windows for your home? Drop your thoughts in the comments below. Frequently Asked Questions How much does it cost to install clerestory windows? Costs vary depending on size, glazing type, and whether structural changes are needed. Operable models and custom shapes typically cost more than standard fixed units. Do clerestory windows need planning permission? In many cases, yes. Any structural wall changes or additions to an existing home may require planning approval. Check with your local authority before starting work. Can clerestory windows be added to an existing home? Yes, but it requires structural work. A builder or structural engineer should assess the wall before any openings are cut. What is the best glazing for clerestory windows in hot climates? Low-E double glazing with a low solar heat gain coefficient works best. It limits heat entry while still allowing good light transmission. Do clerestory windows affect home insulation? They can if the wrong glazing is used. Well-specified double or triple glazing maintains thermal performance without sacrificing the daylight benefits.

Quick Answer: Ceiling mold returns if the moisture source isn’t fixed first. Identify whether humidity, a leak, or poor ventilation is the cause, treat the growth with hydrogen peroxide or white vinegar, and dry the surface completely before repainting. Patches under 10 square feet are DIY. Anything larger or recurring needs a professional. If you’ve spotted black, green, gray, or white patches on your ceiling, you’re likely dealing with mold caused by trapped moisture from humidity, a leak, plumbing, or poor ventilation. Black mold on the ceiling tends to worry you most, but color alone won’t tell you how serious it is. What matters more is where it started, how far it has spread, and whether you’ve addressed the moisture behind it. I’ll walk you through how to identify what’s on your ceiling, remove it safely, and stop it from coming back, so you’re not cleaning the same spot again next season. What is Mold? Mold is a fungus that grows where moisture, warmth, and a food source meet. On a ceiling, paint, drywall, and popcorn texture all provide that food source. Mold and mildew look similar but behave very differently. A patch that wipes clean in one pass and stays gone was probably mildew. A patch with texture, or one that returns, should be treated as mold. Feature Mildew Mold Appearance Flat, powdery Raised, fuzzy Color White or gray Black, green, or brown Depth Sits on the surface Can grow into the material underneath Removal Usually wipes away easily Often needs repeated cleaning and moisture correction Signs of Mold Growth on a Ceiling Ceiling mold shows up in different forms depending on the moisture source and surface type. Color, shape, and location can tell you a lot before you start cleaning. Black mold on the ceiling: dark, sometimes greasy-looking patches that often start small and spread outward in an irregular shape. White mold: a powdery or thread-like coating, easy to mistake for dust or efflorescence on drywall. Green or gray mold: speckled patches, frequently found near vents, corners, or areas with steady condensation. Early-stage growth: faint yellow or brown discoloration, sometimes mistaken for a ceiling water stain before it develops texture, knowing the difference changes both the urgency and the fix. What Causes Mold on the Ceiling? Ceiling mold needs two things to grow: a moisture source and something to feed on, both of which paint, drywall, and popcorn texture provide. Tracking down where the moisture is coming from is the real first step before any cleaning happens. 1. High Humidity and Condensation Your bathroom and kitchen are the most common spots for this. Steam from a shower or stovetop settles on a ceiling that never fully dries, especially without a strong exhaust fan. If that moisture has already built up, the mold on shower walls and grout needs the same attention as the ceiling above it. Over time, that repeated moisture builds a film that mold can grow on, even without a single visible leak. 2. Roof or Plumbing Leaks A leak leaves a different signature than humidity. Look for brown or yellow staining, a ring-shaped pattern spreading outward from one point, or drywall that feels soft or slightly sagging. These signs mean water has been sitting behind the surface, not just settling on top of it. 3. Poor Attic Ventilation When your attic can’t breathe properly, warm indoor air meets cold roof sheathing and condenses, even without an obvious source. Poor insulation makes it worse. You’ll often notice this along the edges of a top-floor ceiling, where insulation tends to be thinnest, especially near corners. How to Get Rid of Mold on a Ceiling These steps cover small ceiling mold patches, typically under 10 square feet, that haven’t penetrated deeply into the drywall. Supplies needed before starting: N95 respirator Disposable gloves Safety goggles Plastic sheeting Soft-bristle brush Hydrogen peroxide (undiluted) or white vinegar Clean cloths or disposable paper towels Step 1: Find and Fix the Moisture Source Cleaning visible mold without addressing moisture is a short-term fix. Check the bathroom ventilation fan, roof condition, nearby plumbing, and attic insulation before starting. Repairing or correcting the ventilation before cleaning ensures a lasting result. Step 2: Wear Protective Equipment Ceiling mold releases spores when disturbed, and working overhead increases the risk of exposure. Put on the N95 respirator, gloves, and safety goggles before entering the room. Old clothing that can be washed immediately afterward is also a practical choice. Step 3: Prepare the Room Lay down plastic sheeting to catch drips and protect furniture or flooring. Open a window if possible, and turn off the HVAC system so spores don’t circulate through the rest of the house while you work. Step 4: Apply a Mold Cleaning Solution Spray the affected area with hydrogen peroxide, a vinegar solution, or a commercial mold cleaner. Let it sit for several minutes so it has time to work into the surface rather than just sitting on top. Step 5: Scrub and Remove Residue Use a soft brush to loosen the mold, working gently so you don’t damage paint or texture. Wipe away the residue with a clean cloth, rinsing and switching cloths as needed to avoid spreading spores to a clean section. Step 6: Dry the Ceiling Completely Mold regrows quickly on damp surfaces. Use a fan or dehumidifier to dry the treated area fully before applying any paint or sealant. Repainting before the surface is completely dry and the moisture source is fixed will not hold. Note: Cleaning has limits, and pushing past them just delays a bigger repair. Replacement is usually the better call when the drywall is saturated or soft to the touch, the material is crumbling or visibly warped, or there are signs mold has spread behind the ceiling into insulation you can’t see or reach. If the drywall feels soft or crumbles, replacement is the more lasting fix. The same applies if mold has spread into the insulation behind the ceiling. Solution Best For Notes Hydrogen peroxide Small surface patches A gentle oxidizer that works well on painted drywall Vinegar Light, early-stage growth An affordable option you probably already have Commercial mold cleaners Larger or repeated growth Follow label instructions for dwell time and ventilation Bleach Limited, non-porous surfaces Often disappoints on drywall since it can’t reach mold growing beneath the surface How to Remove Mold Based on Your Ceiling Type The right approach changes depending on what the ceiling is made of. Painted ceilings are usually the easiest to clean, since the surface is smooth and non-porous. Repainting should wait until the moisture problem is fully resolved, or the new coat of paint will just cover the same issue. Drywall ceilings are porous, so mold can work its way below the surface. Light surface growth can often be cleaned, but if the drywall feels soft or crumbly, or if it has visibly stained through, replacing that section is usually the more reliable fix. Popcorn ceilings trap moisture in their texture, making them prone to mold. Scrubbing can also strip or damage the texture, so a gentler approach with more dwell time and less scrubbing works better here. Ceiling tiles tend to absorb moisture quickly and rarely clean up well once mold sets in. Replacement is usually faster and more effective than trying to salvage a stained tile. How Can You Prevent Mold From Returning A clean ceiling only stays that way if the conditions that caused the mold change too. Indoor humidity is the first thing to get under control. Keep it between 30% and 50%. A hygrometer gives you an accurate reading if you’re not sure where yours currently sits. Run the bathroom exhaust fan during every shower and for at least 20 minutes after, since most bathroom moisture problems come down to ventilation that stops too soon. Attic ventilation and insulation are worth checking too, particularly on a top-floor ceiling where condensation tends to build along edges and corners when insulation is thin. Repair any roof or plumbing leak as soon as it appears rather than leaving it for later, since even a slow drip provides mold with the exact conditions it needs to return. For rooms that are naturally humid, use mold-resistant paint on walls and ceilings so the surfaces are less hospitable to regrowth. Beyond that, dry up any spill or wet spot the same day it happens. Small moisture events feel minor in the moment but add up quickly on porous surfaces like drywall and ceiling texture. When repainting after the moisture problem is fixed, choose bathroom paint suited to humid conditions, and let the ceiling dry completely before applying it. When to Call a Professional for Mold Removal Most small, surface-level patches are manageable as a DIY project. Bring in a professional in a few situations. The affected area is larger than roughly 10 square feet. The ceiling feels soft, spongy, or damaged. Mold keeps coming back after you’ve cleaned it more than once. The mold followed a flood or a bad roof leak. Or you suspect it has spread into the insulation or the space behind the drywall. Any of these points to a moisture problem bigger than a surface cleaning can fix. A repeat patch is usually the clearest signal. If the same spot needs cleaning every few weeks, the moisture source is still active somewhere you can’t see. A professional with moisture-detection tools can find it faster than repeated guesswork Wrapping Up After more than a decade spent working through moisture and layout problems in real homes, I keep seeing the same thing: what you’re wiping off the ceiling is a symptom, not the source. Fix the humidity, the leak, or the ventilation gap first, and your cleaning will hold. Skip that step, and even black mold on the ceiling comes back within weeks, no matter how carefully you scrub. Work through the steps in order, starting with the moisture behind the stain rather than the stain itself. Then check the spot again in a month. If it’s still clear, you’ve solved it for good. Frequently Asked Questions Is Mold on the Ceiling Harmful? Mold on the ceiling can cause health concerns, especially for people with allergies, asthma, or weakened immune systems. Exposure may trigger irritation. What Causes Mold on Ceilings? Ceiling mold grows when moisture combines with materials like drywall or paint. Common causes include humidity, leaks, condensation, and poor ventilation. What Permanently Kills Mold? Permanently controlling mold starts with removing moisture sources. Cleaning solutions help remove growth, but fixing leaks and humidity prevents recurrence. Is it Safe to Sleep in a Room with Mold? Sleeping near visible mold on the ceiling may increase exposure, especially for people with sensitivities. Address the source of the mold and remove the growth before continued use.
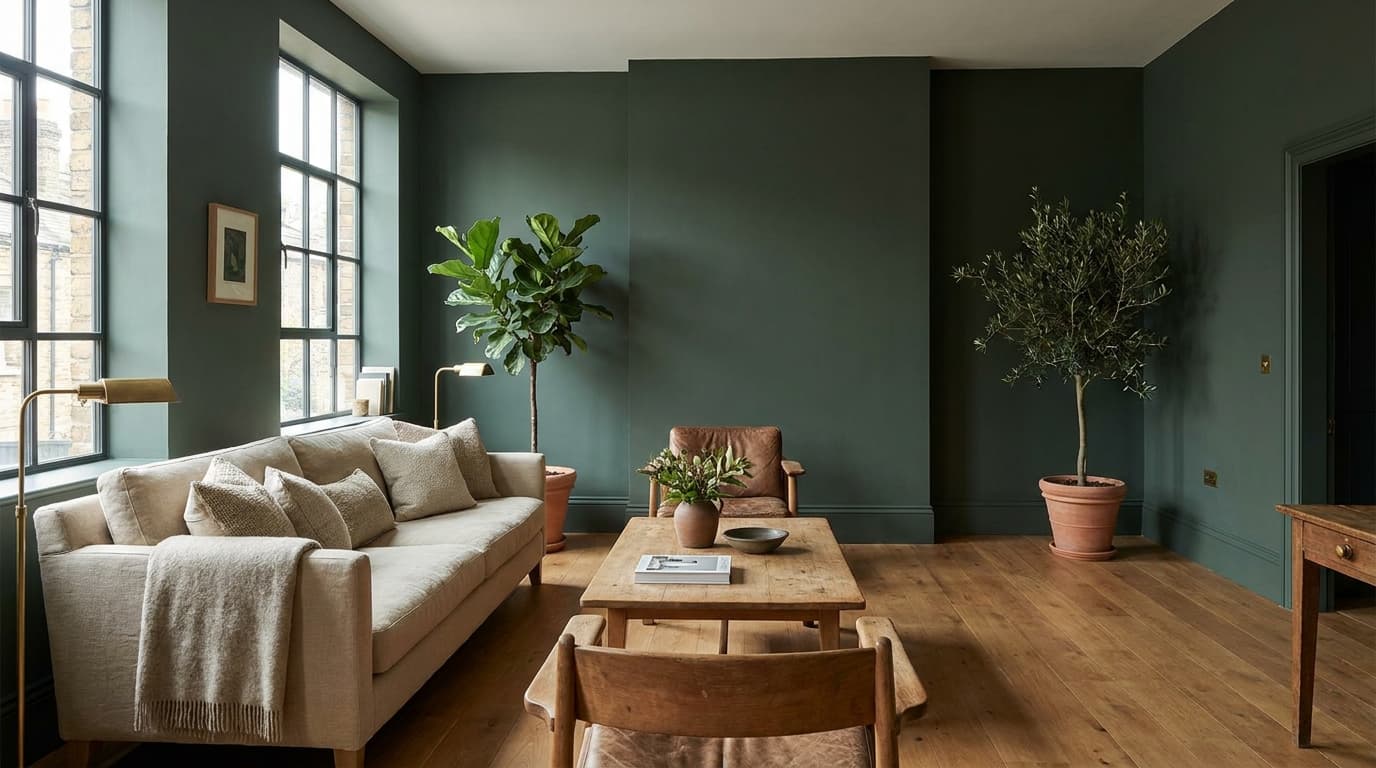
When you hold a Vintage Vogue swatch up to the light, it catches you off guard because it doesn’t look like your regular green. Tilt it toward the window, and it deepens into forest green, but when you bring it under a warm lamp, it softens into muted olive. Set it beside dark wood furniture, and it can slip into something close to charcoal. It’s the whole point and beautiful thing about this paint, and people keep coming back to this shade for exactly that reason. Vintage Vogue doesn’t earn attention by being bright. It earns it by holding layers most greens don’t bother with. Green gives it life, gray keeps it grounded, and a hint of black gives it weight. Put the three together, and you get a color that never quite looks the same twice, no matter which room it lands in. What Color is BM Vintage Vogue? Vintage Vogue by Benjamin Moore is a deep, smoky green with soft gray and black undertones. It works well on accent walls, cabinets, and trim in both traditional and modern homes. This shade brings depth without feeling too bold or too soft. It sits somewhere between forest green and charcoal, giving rooms a quiet, grown-up feel. People often pick it for kitchens, studies, and dining rooms, and it pairs easily with wood tones and brass fixtures. Vintage Vogue belongs to Benjamin Moore’s Historical Collection and evokes old architecture and quiet, natural landscapes. Feature Details Paint Brand Benjamin Moore Color Name Vintage Vogue Code 462 /HC-70 Collection Historical Collection Color Family Deep green LRV 11.85 Overall Feel Moody, earthy, sophisticated Vintage Vogue = Forest green + gray softness + black depth Understanding the Undertones of BM Vintage Vogue Vintage Vogue rarely looks the same twice. One glance in the morning and it reads as a rich forest green. Check it again at night, and it can look almost black. This is not paint acting strangely. It comes down to three layers working together: green, gray, and black. The Green Undertone Takes Center Stage in Natural Light: Sunlight brings the green forward, revealing a true forest shade that pairs well with plants and wood. Gray Keeps the Green From Feeling Too Bright: Gray softens the green, giving it a grown-up, sophisticated look instead of a playful, nursery feel. The Black Base Appears in Low Light: After dark, black takes over. Rooms can look almost charcoal, surprising homeowners who expected pure green. Tip: Never judge Vintage Vogue from a small paint chip alone. Test it on your actual wall first. How Vintage Vogue Looks in Different Areas of the Home Vintage Vogue does not behave the same way in every part of your home. Light changes room by room, and so does this color. A living room with large windows will show it off differently than a bathroom with a single small window. Knowing what to expect in each space helps you avoid surprises after the paint dries. Below is a room-by-room look at where this shade works best and what to watch for. 1. Living Room Vintage Vogue works well on fireplace walls and built-in shelving. These spots already draw the eye, so a deep green adds focus without taking over the whole room. It also suits a reading corner that gets soft, indirect light through the day. Pair it with warm neutrals like sand, cream, or soft beige on the surrounding walls. This keeps the room from feeling closed in, even with one bold wall. Adding a mix of textures, like a wool throw or a woven rug, helps the color feel warm instead of cold. Avoid pairing it with too much dark furniture in a small living room, as it can make the space feel more cramped than it is. 2. Kitchen Cabinets This is where Vintage Vogue truly shines. It contrasts beautifully against white or light stone countertops, giving cabinets a clear, defined look. Brass or gold hardware brings out the kitchen’s warmth and gives it a custom, high-end feel without a full renovation. A simple way to bring Vintage Vogue into your kitchen is to use it on the island and surround it with lighter cabinets. This creates a focal point in the room without overwhelming the whole space. 3. Bedrooms In bedrooms, Vintage Vogue works well with linen, oak, and soft beige tones. These materials add warmth and keep the room feeling calm rather than dramatic. A bedroom is often the best place to try this color on all four walls, since most bedrooms are used at night when the black undertone comes forward anyway. Balanced lighting matters here more than in any other room. Too little natural light can make the space feel dim rather than restful. Adding warm bedside lamps or layered lighting helps keep the mood cozy instead of dark. 4. Bathroom: Moody Spa Appearance Vintage Vogue pairs naturally with marble, brushed brass, and natural stone finishes. Together, these materials give small bathrooms a spa-like feel without needing much extra decor. It works especially well on vanity cabinets or as an accent wall behind a freestanding tub. Ventilation and lighting both matter in bathrooms, since humidity and low light can make dark colors feel heavier. A bathroom with a window or a skylight will get the best results from this shade. 5. Exterior Sunlight outdoors can shift this color more than indoor lighting does. A shaded exterior wall may look almost black, while a sun-facing wall can look bright green at midday. Surrounding brick or stone can also change how the color reads against your home. Always test a sample patch outside before committing to a full exterior job. Check it in the morning, at midday, and again in the evening to see the full range of shifts. What Colors Complement Benjamin Moore Vintage Vogue? Vintage Vogue rarely stands alone in a room. The colors around it decide whether the space feels soft, modern, or warm and natural. Picking the right partner shades can shift the whole mood of a room without changing the green itself. Below are three ways to pair it, grouped by the look you want to achieve. 1. For a Softer Look Simply White Pale Oak White Dove These lighter shades reduce the heaviness of Vintage Vogue and keep rooms feeling open. They work well on trim, ceilings, or adjoining walls when you want the green to feel calm rather than bold. 2. For a Warm, Natural Look Brass fixtures Beige textiles Terracotta accents Oak wood tones This pairing leans into the earthy side of Vintage Vogue and works well in cozy, lived-in spaces. Wood floors, brass hardware, and soft textiles help the green feel grounded instead of stark. 3. For a Modern Contrast Chantilly Lace Black accents Matte metal fixture This combination gives rooms a sharp, current feel while keeping the green as the star. Crisp white walls next to Vintage Vogue cabinets or trim create strong visual lines that suit modern kitchens and studies. Vintage Vogue Benjamin Moore vs Similar Dark Greens Vintage Vogue is not the only dark green Benjamin Moore offers, and it is easy to confuse it with a few close relatives. Each shade has its own personality, even when it looks nearly identical on a paint chip. Knowing the differences helps you pick the right one instead of guessing. 1. Vintage Vogue vs Dark Olive Dark Olive feels warmer and slightly lighter on the wall than Vintage Vogue. Vintage Vogue feels deeper and more dramatic overall, thanks to its stronger black undertone. If you want a green that leans more yellow and casual, Dark Olive is the better pick. Feature Vintage Vogue Dark Olive Overall Feel Deeper, more dramatic Warmer, slightly lighter Undertone Stronger black undertone Leans more yellow Best For Bold, statement look Casual, easygoing spaces 2. Vintage Vogue vs October Mist October Mist is a softer, lighter green suited to calm, quiet spaces. Vintage Vogue creates far more contrast and presence on the wall. October Mist works well for a subtle accent, while Vintage Vogue is better suited to a true statement wall. Feature Vintage Vogue October Mist Overall Feel High contrast, strong presence Soft and light Best Use Statement wall Subtle accent Suited Spaces Rooms wanting drama Calm, quiet spaces 3. Vintage Vogue vs Backwoods Backwoods reads as a more traditional forest green, with an LRV close to Vintage Vogue’s own. Vintage Vogue carries a stronger gray influence, giving it a smokier, more refined finish. Side by side, Backwoods leans brighter green while Vintage Vogue leans more neutral. Feature Vintage Vogue Backwoods Color Lean More neutral, gray-influenced Brighter, more traditional green Finish Feel Smokier, more refined Classic forest green LRV Close to Backwoods Close to Vintage Vogue 4. Vintage Vogue vs Salamander Salamander is richer and more dramatic on the wall, almost bordering on black in low light. Vintage Vogue feels more balanced, making it easier to live with day to day. Salamander suits homeowners chasing a bold, moody look, while Vintage Vogue works better for everyday rooms. Feature Vintage Vogue Salamander Overall Feel Balanced, easy to live with Richer, near-black in low light Best For Everyday rooms Bold, moody statement look Drama Level Moderate High Final Thoughts on Vintage Vogue Benjamin Moore Vintage Vogue is a deep green with real personality, built from a mix of green, gray, and black. That layered base is exactly why it shifts throughout the day and looks different in every room. Its success in your home comes down to two things: lighting and the colors placed around it. Used with intention, on a kitchen island, an accent wall, or a set of cabinets, it can turn a plain space into one with real character. Always test Vintage Vogue in your own space before committing to a full room. Its undertones show up differently from home to home, and a small sample tells you more than any photo ever will. Frequently Asked Questions Is Vintage Vogue Benjamin Moore a warm or cool green? Vintage Vogue leans warm because of its earthy green base, but gray and black undertones give it a balanced, muted appearance. Does Vintage Vogue Benjamin Moore increase home value? A well-chosen paint color can enhance a home’s appeal, especially in spaces such as cabinets, entryways, or feature walls. What finish is best for Vintage Vogue Benjamin Moore? Eggshell works well for walls, while satin or semi-gloss is better for cabinets, doors, and high-use areas. Does Vintage Vogue Benjamin Moore work with wood floors? Yes, it pairs especially well with warm oak, walnut, and natural wood finishes because they complement its earthy character. Is Vintage Vogue Benjamin Moore outdated? No, Its deep green tone works with both traditional and modern interiors when paired with suitable finishes and lighting.

