


Getting a bathroom layout right for accessibility is not just a code requirement; it is a matter of dignity and usability.
From my experience researching accessible design, the difference between a compliant bathroom and a truly functional one often comes down to a few key measurements and smart fixture placement.
No matter if you are planning a commercial restroom or updating a residential space for aging in place, understanding these standards from the start saves time, money, and a great deal of frustration later.
I’ll walk you through everything you need to know about ADA bathroom layout: the core dimensions, clearance rules, fixture placement, and practical floor plan strategies.
What Is an ADA Bathroom Layout?
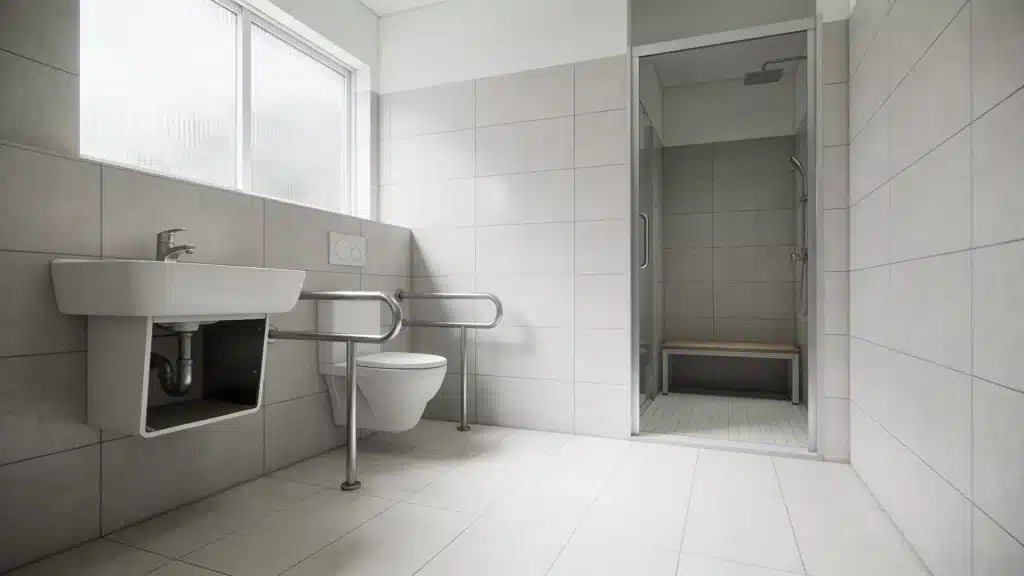
An ADA-compliant bathroom layout is a restroom design that meets the accessibility standards set by the Americans with Disabilities Act.
These guidelines define the minimum space required for a bathroom, where fixtures must be positioned, and the features that must be included to ensure that wheelchair users, elderly individuals, and people with mobility challenges can use the space safely and independently.
Under the Americans with Disabilities Act (ADA), ADA compliance is legally required in most public buildings, offices, restaurants, retail stores, healthcare facilities, hotels, schools, and government buildings in America.
Beyond commercial spaces, many homeowners are now applying these same principles to their own bathrooms as part of aging-in-place planning, making the layout relevant far beyond just public restrooms.
Key ADA Bathroom Dimensions and Measurement Standards
Every ADA-compliant bathroom is built around specific measurements that reflect how wheelchair users move and transfer.
Getting these right at the planning stage prevents costly modifications later. Here’s a clear breakdown:
| Feature | ADA Requirement | Why It Matters |
| Door opening | Min. 32 inches clear | Allows wheelchair entry |
| Turning space | 60-inch diameter circle | Enables full wheelchair rotation |
| Sink floor clearance | 30″ wide × 48″ deep | Supports the forward wheelchair approach |
| Toilet centerline | 16–18 inches from the wall | Position the toilet for safe transfers |
| Grab bar height | 33–36 inches from the floor | Aligns with seated reach range |
| Toilet seat height | 17–19 inches from the floor | Matches standard wheelchair seat height |
These measurements form the structural backbone of any compliant layout. Confirm the floor plan accommodates all of them simultaneously, not just each one in isolation.
ADA Bathroom Layout Accessibility Requirements
Clearance is arguably the most critical factor in an accessible bathroom. A bathroom can have all the right fixtures and still fail compliance if the open floor space is insufficient for a wheelchair to move safely.
Wheelchair Turning Space
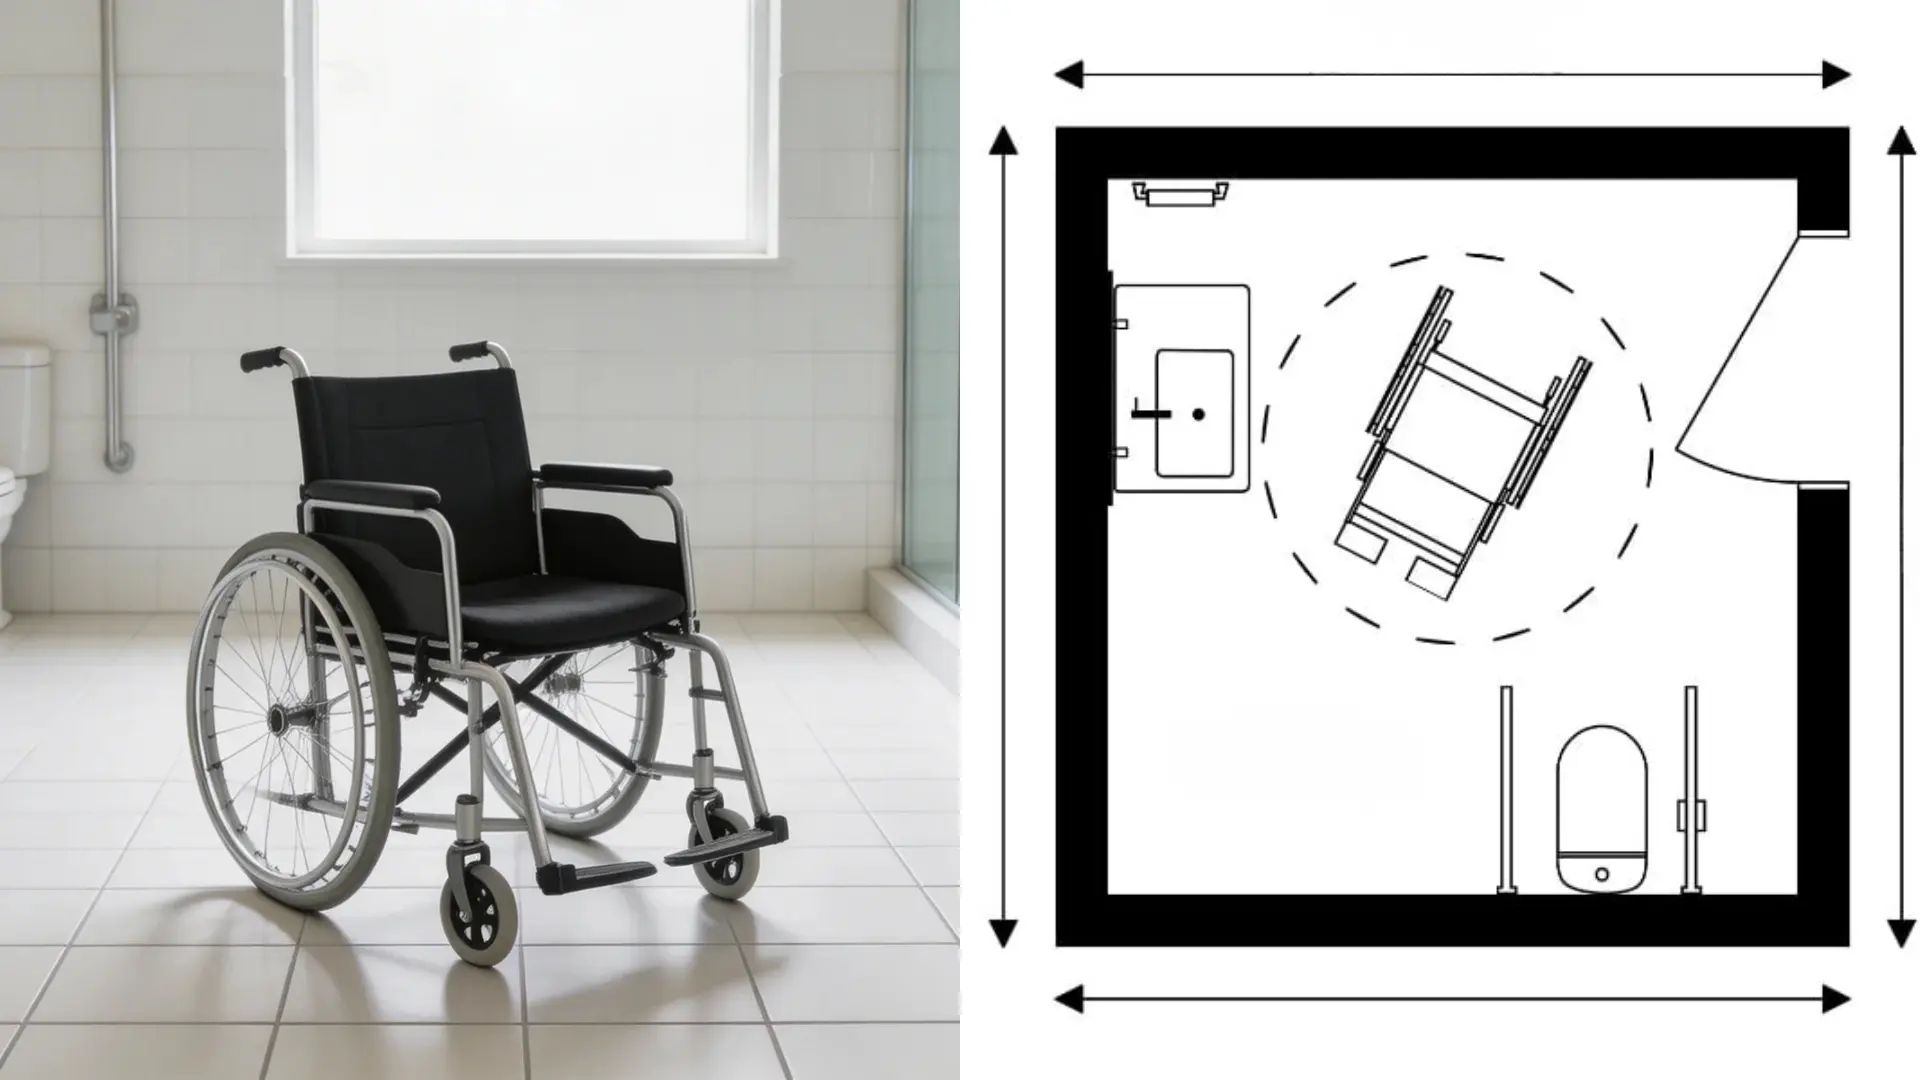
ADA standards require a 60-inch diameter turning circle somewhere within the bathroom. This allows a standard wheelchair to complete a full turn without obstruction.
In situations where a full circle is not possible due to space constraints, a T-shaped turning space is an accepted alternative; it allows a three-point turn and must be at least 36 inches wide in each arm of the T. The turning space can overlap with fixture clearance zones, which helps in tighter layouts.
Key considerations:
- The turning circle must be unobstructed
- It can be located near the entrance or the center of the room
- Fixtures should be arranged around it, not within it
Doorway and Entry Layout Requirements
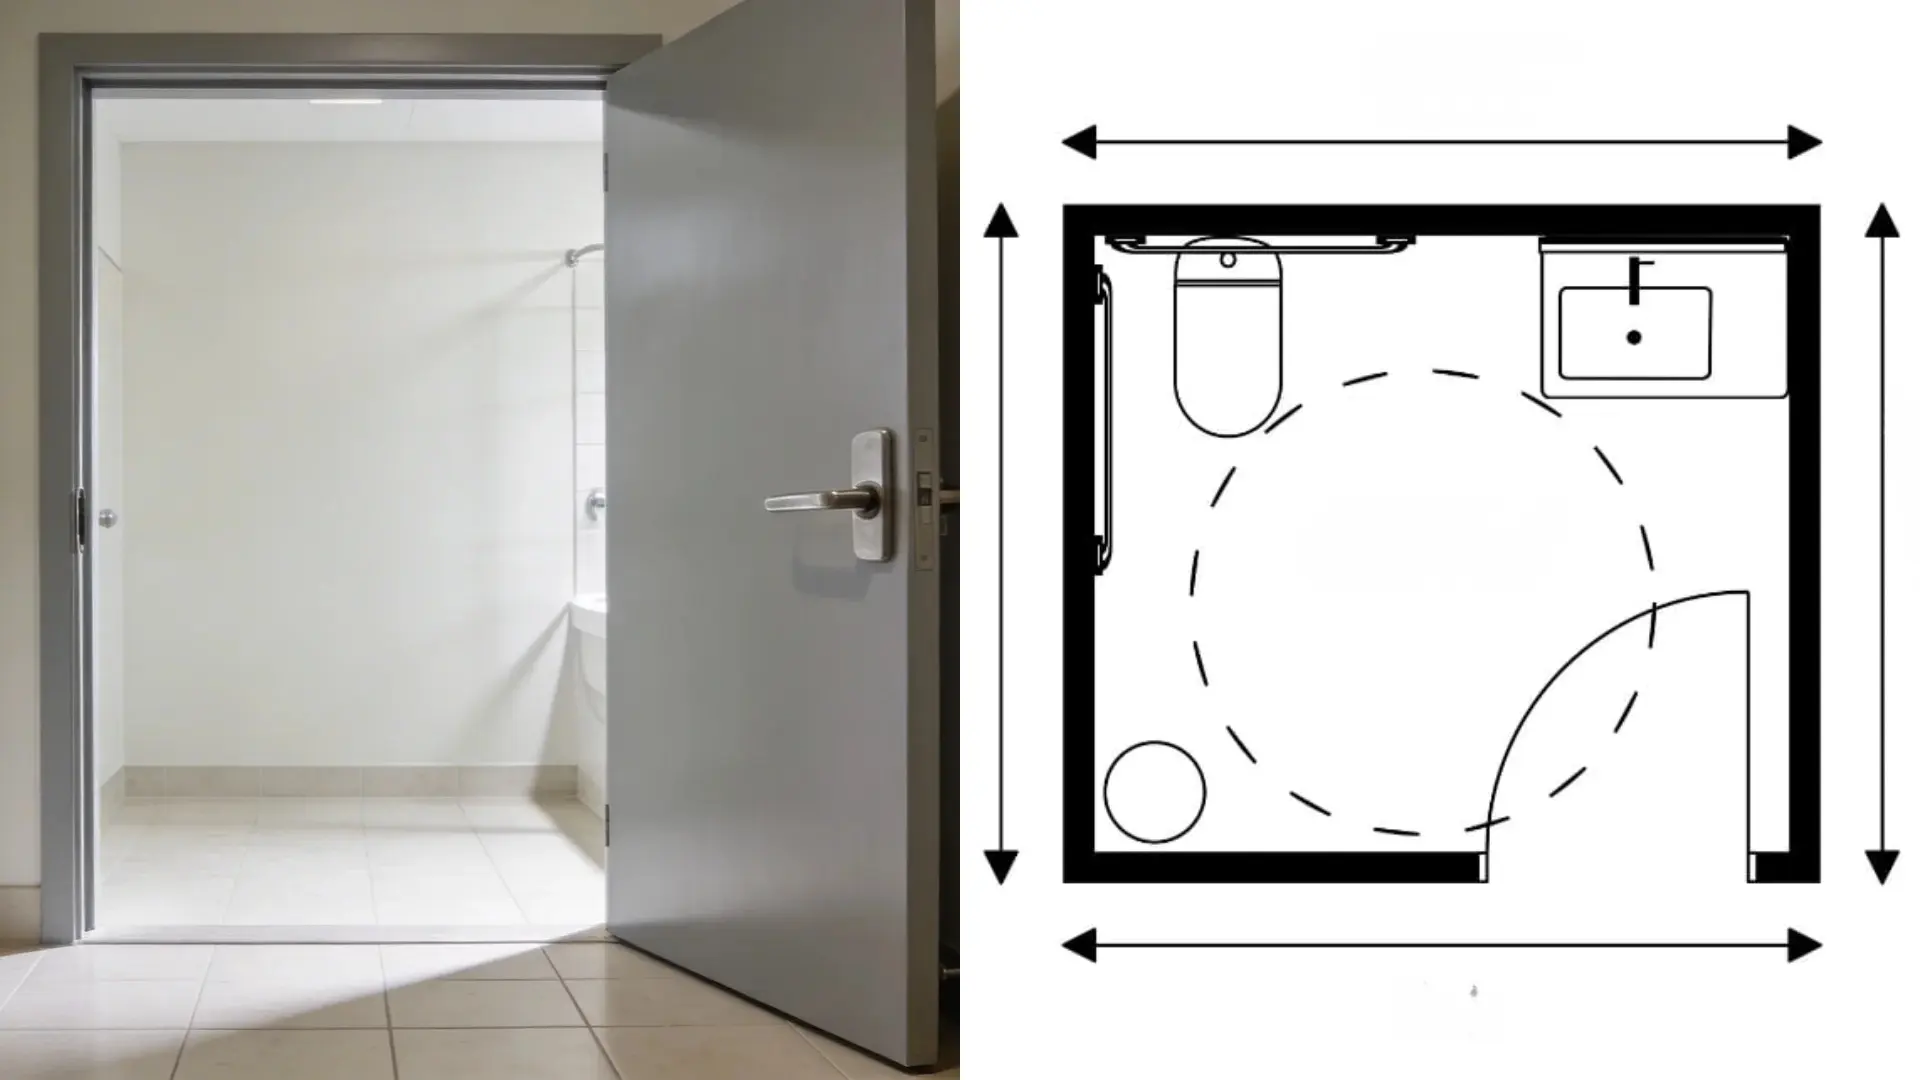
The doorway is the first accessibility checkpoint. ADA standards require a minimum 32-inch clear opening, though 36 inches is widely recommended for easier use.
Door swing direction matters significantly in small bathrooms; an inward-swinging door can block wheelchair movement or trap a user who has fallen. For this reason, outward-swinging or sliding doors are strongly preferred in compact ADA layouts.
Key entry considerations:
- The door must not obstruct any fixture clearance zone when open
- A clear floor space of at least 18 inches must exist beside the latch side of the door for wheelchair approach
- Door hardware must work with one hand and avoid tight grasping or twisting; lever handles are commonly used because they are easier to operate.
ADA Sink, Lavatory, and Shower Layout Requirements
Sink and shower areas have distinct ADA requirements, but both follow the same core principle: an open, unobstructed space that allows a wheelchair user to approach, position, and use each fixture independently.
1. Sink and Lavatory Clearance Requirements
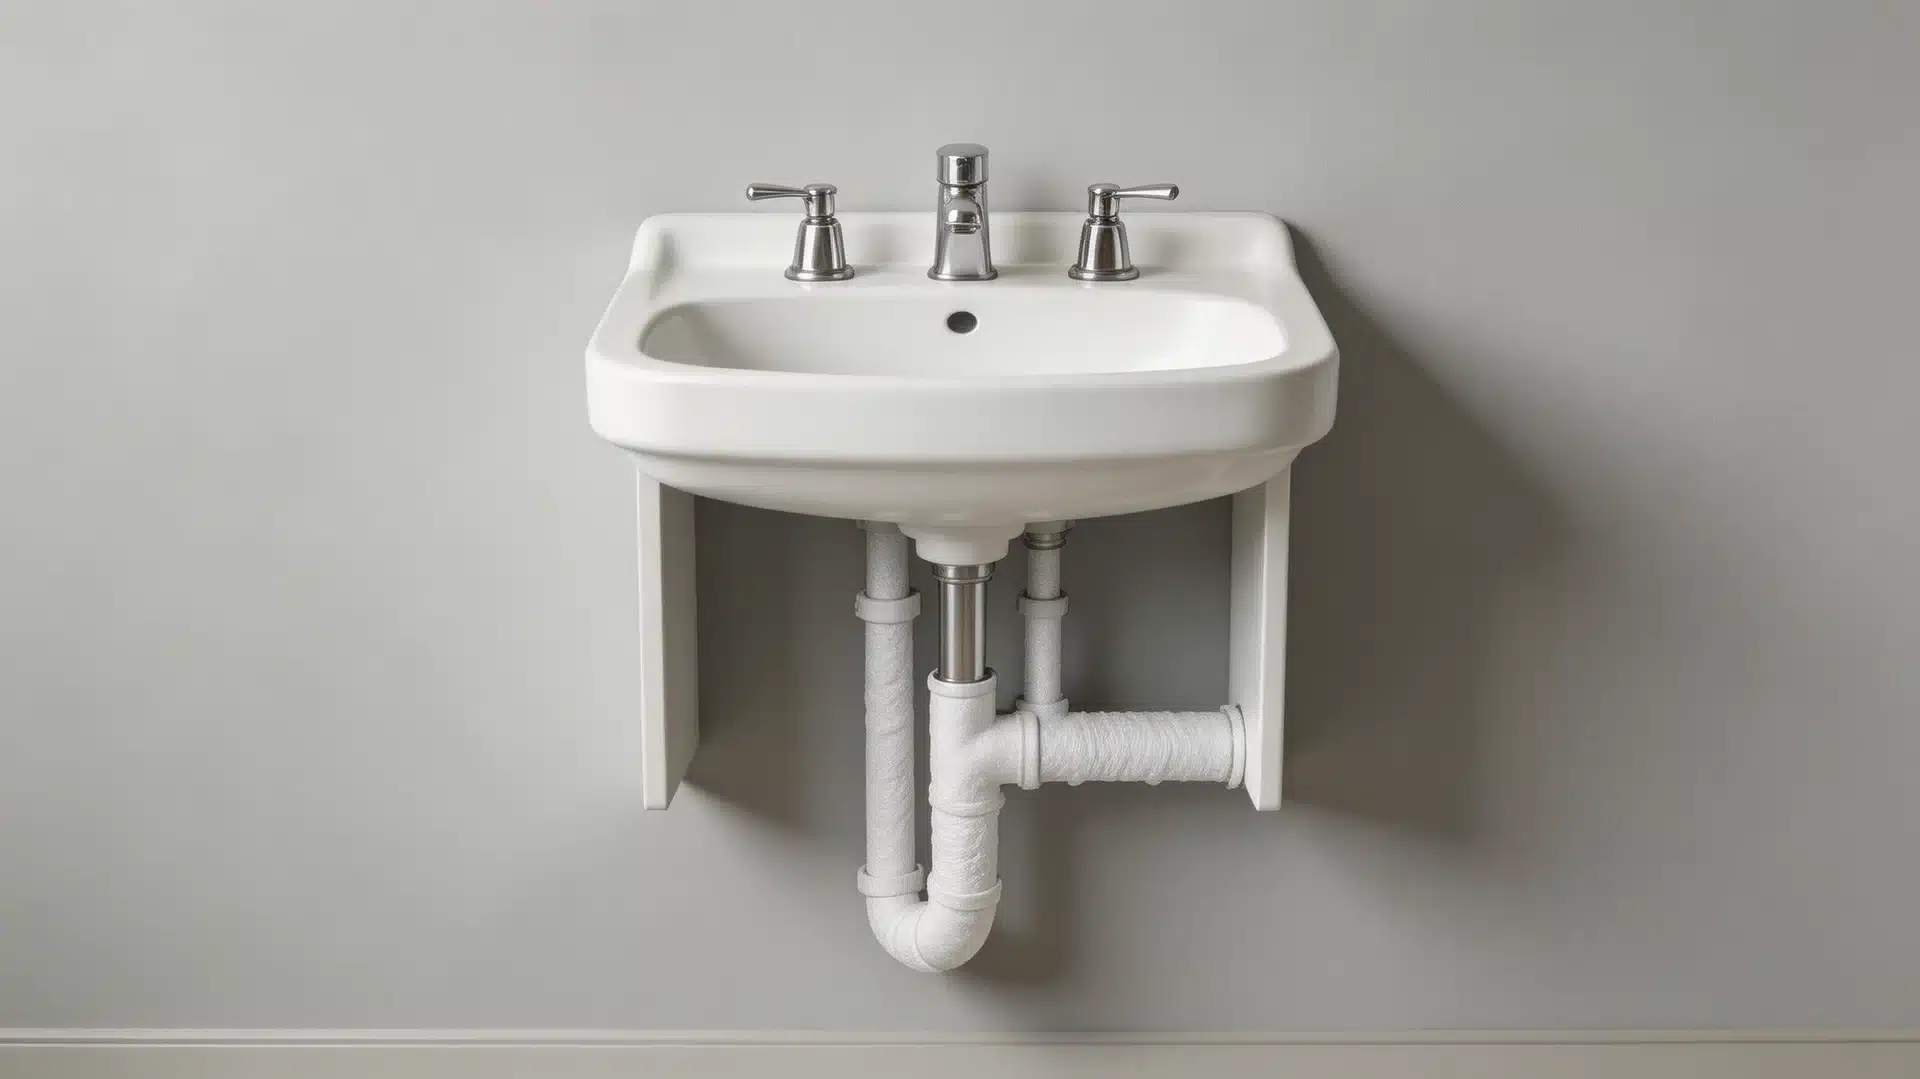
Most sink areas fail compliance because standard cabinets block the knee clearance wheelchair users need to pull close to the basin. An accessible layout requires a fully open space beneath the fixture.
The maximum sink height is 34 inches; the knee clearance height must be at least 27 inches; the knee clearance depth is 17–25 inches; and a 30” × 48” clear floor space must remain open in front.
Lever, touch, or sensor-activated faucets are required; standard twist knobs do not qualify.
2. Roll-In Shower Layout
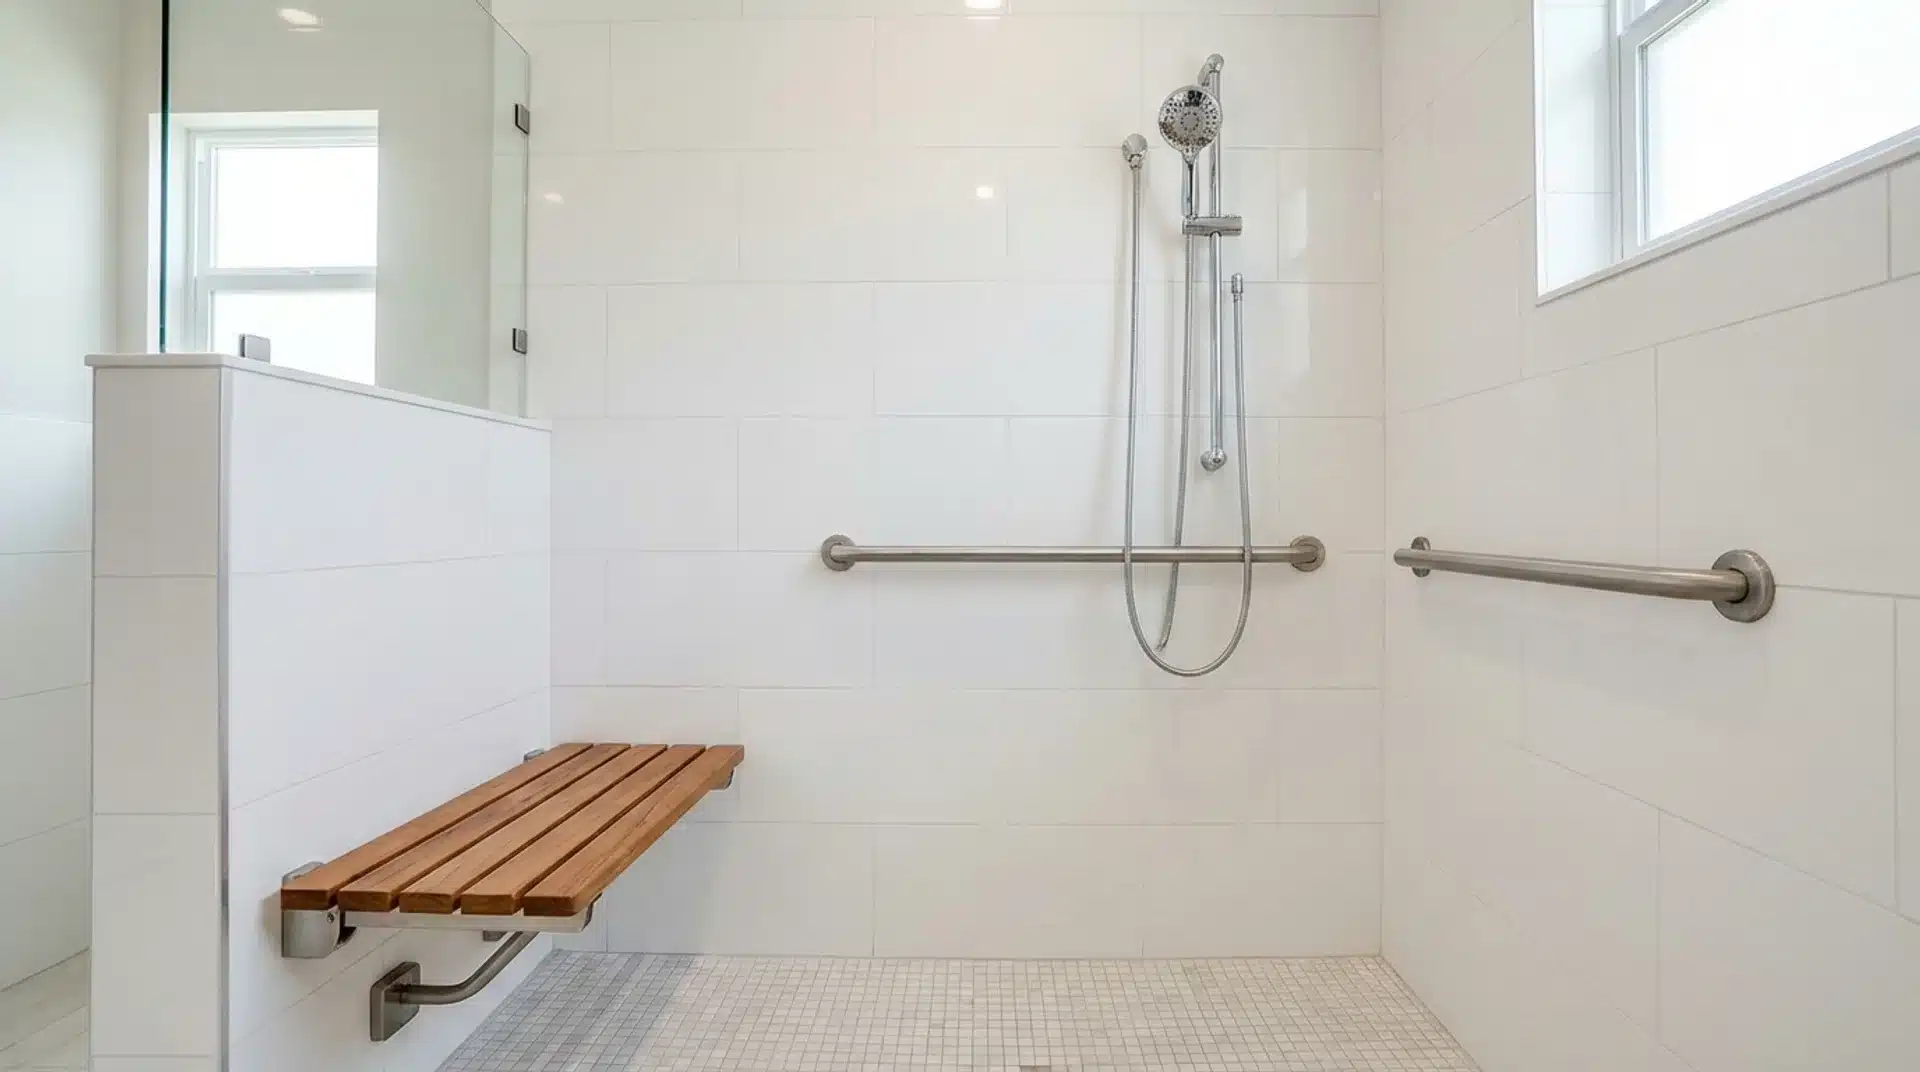
A roll-in shower allows a wheelchair to enter directly without transferring. Under ADA standards, a roll-in shower must measure at least 60 × 30 inches to allow wheelchair entry and maneuvering.
Entry must be curbless, sitting flush with the floor. A fold-down seat at 17–19 inches, grab bars on the control and back walls, and a handheld showerhead on a minimum 60-inch hose are all required features for full seated usability.
3. Transfer Shower Layout
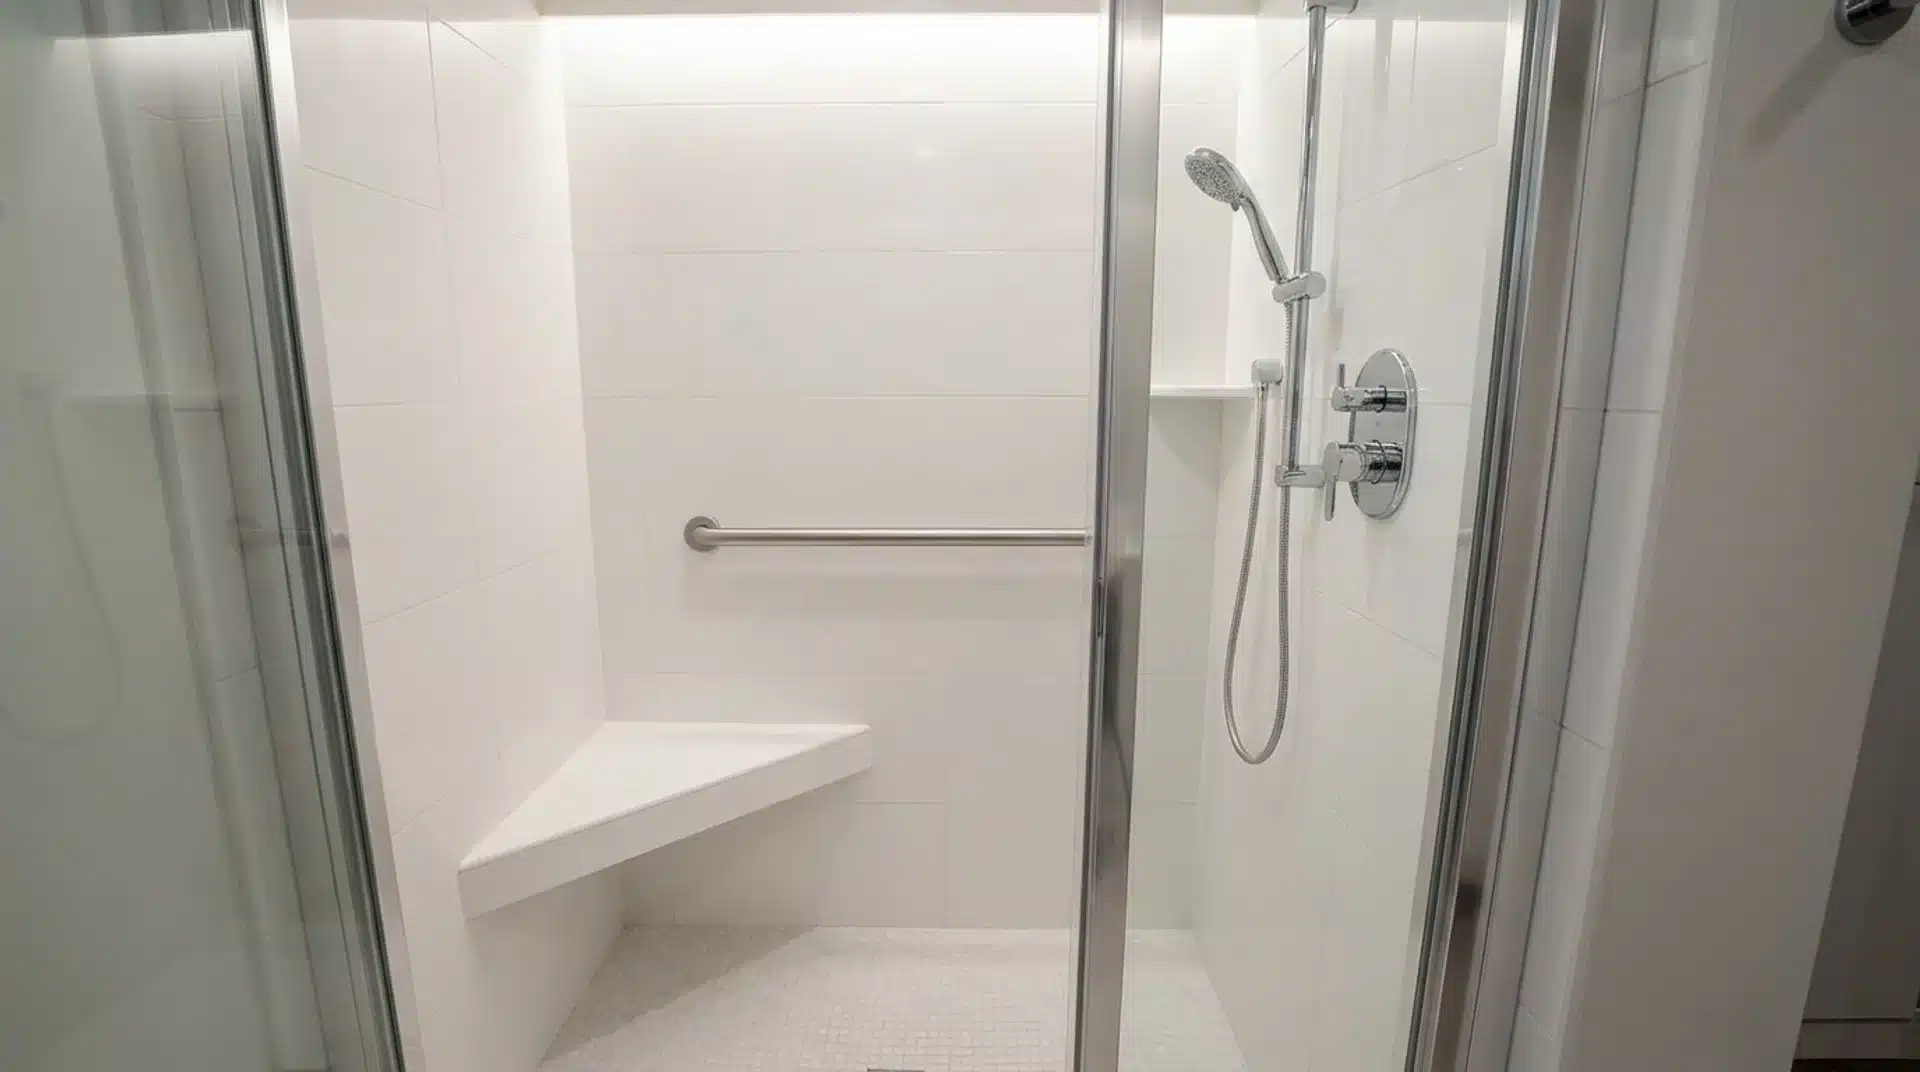
A transfer shower is designed for users who move from their wheelchair onto a built-in seat rather than rolling in directly. Typically 36 × 36 inches, the wheelchair parks beside the opening, and the user slides across.
Grab bars on the side and back walls support the transfer, and shower controls must be positioned so they can be reached from a seated position on the shower seat without requiring the user to reach across the water spray.
Selecting between these fixture types comes down to the user’s mobility level and available floor space; both can meet full ADA compliance when the layout is planned around clearance zones from the start.
Accessible Sink Design Features
Good sink design goes beyond measurements; the right fixture choices make compliance practical, and the space easier to use daily. The following table gives feature ideas and their specifications:
| Feature | Specification | Reason |
| Sink type | Wall-mounted or undermount | Keeps the knee space fully open below |
| Pipe covering | Insulated or covered pipes | Prevents leg contact burns |
| Faucet controls | Lever, touch, or sensor-activated | Operable with one hand or a closed fist |
| Mirror height | Bottom edge no higher than 40 inches | Usable from a seated wheelchair position |
| Drain placement | Toward the rear of the basin | Reduces obstruction to knee clearance depth |
These four details are easy to overlook during fixture selection, but they directly affect how functional the sink area feels for wheelchair users every day.
ADA Toilet Placement and Grab Bar Layout
Toilet placement in an ADA bathroom is precise. The toilet cannot simply be pushed against a wall; it must be positioned so that a wheelchair user can pull alongside it and transfer safely.
Toilet Location and Clearance Requirements
Correct toilet positioning depends on four specific clearance rules that work together to create a safe, functional transfer zone. Here’s how it works:
- The toilet centerline must sit 16–18 inches from the nearest side wall
- A 60-inch clear floor space must extend from the front of the toilet
- Side clearance is non-negotiable; being too close to a wall eliminates the transfer zone entirely
- A minimum clear floor space of 60 inches wide and 56 inchesdeep measured from the rear wall to allow wheelchair transfer.
Even a layout that looks compliant on paper can fail in practice if any one of these clearances is compromised by a partition or poorly placed fixture.
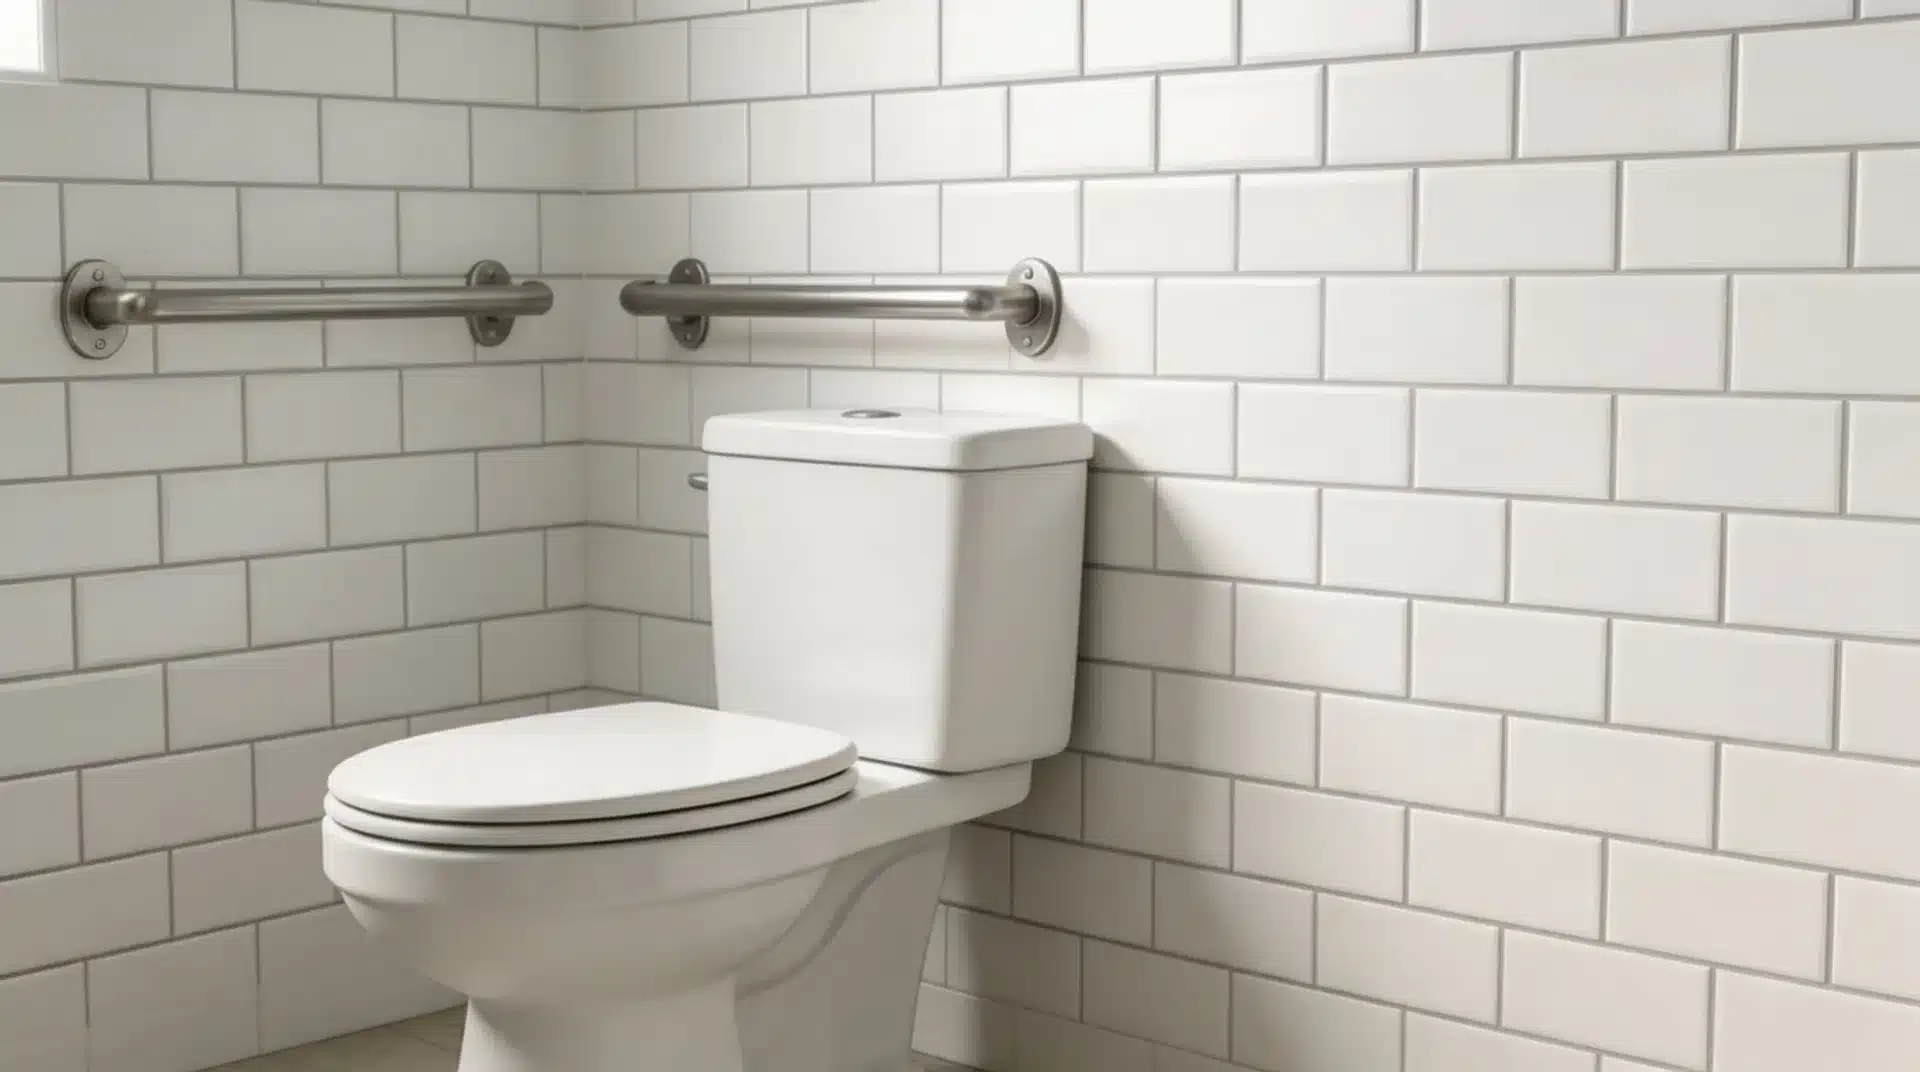
Grab Bar Placement Around the Toilet
Two grab bars are required in every compliant toilet area; their positions and load capacities are strictly defined. Here’s how it works:
- Side grab bar: At least 42 inches long, mounted 33–36 inches above the floor beside the toilet
- Rear grab bar: At least 36 inches long, mounted behind the toilet at the same height range
- Both bars must support a minimum of 250 pounds of force
- The side bar must extend forward past the toilet front to assist users pushing up from a seated position
Towel bars and decorative rails do not meet this standard. Only purpose-built grab bars rated for the required load qualify for compliance.
Common ADA Bathroom Floor Plan Layouts
The right floor plan depends on available square footage and building type; no single layout fits every situation, but the same core rules apply across them all. Here’s a clear breakdown of floor plans:
| Layout Element | Standard Requirement | Compact Space Strategy |
| Minimum room size | 60 × 60 inches for single-user | 56 × 60 inches with careful planning |
| Turning circle | 60-inch diameter at the room center | Overlap with fixture clearance zones |
| Sink placement | Near the entrance, left or right | Wall-mounted to free up floor space |
| Toilet placement | Along the opposite wall from the sink | Corner placement with measured side clearance |
| Door type | Outward-swinging preferred | A sliding or pocket door eliminates swing conflict |
| Clearance zones | Each fixture has a dedicated space | Overlapping zones permitted under ADA standards |
Even the smallest compliant bathroom can work well when the layout is built around clearance zones first, and fixtures are chosen to fit around them.
ADA Bathroom Design Tips
Planning a compliant bathroom is easier when you approach the layout systematically rather than trying to fit accessibility features into an already-designed space. Here are some helpful tips:
- Map the 60-inch turning circle on your floor plan first; every fixture placement works around it
- Choose wall-mounted sinks from the start; retrofitting open knee clearance into existing cabinetry is expensive
- Specify lever faucets and lever door hardware early; adding them later costs more and disrupts finishes
- Use non-slip flooring throughout; smooth tile becomes a safety risk when wet, compliance status aside
- Verify door clearances on both sides before finalizing the plan; the approach side matters as much as the swing side
- Keep the path from door to toilet unobstructed; even a small fixture placement error makes a compliant bathroom hard to use
A well-planned layout does more than meet the minimum standard; it makes the bathroom genuinely comfortable, safe, and easy to use every day.
Frequently Asked Questions
Does ADA compliance apply to private homes?
ADA rules apply to commercial spaces, not private homes. However, homeowners often follow them for accessibility, aging in place, or future needs. Multi-family housing may still require compliance under Fair Housing Act regulations.
Can the toilet clearance zone overlap with the sink clearance zone?
In commercial settings, toilet and sink clearances cannot overlap. In residential units, limited overlap is allowed if dimensions are increased. Misinterpreting this rule often leads to layout errors in compact bathroom designs.
Do ADA bathrooms need to be larger than standard bathrooms?
Not always. ADA bathrooms can fit compact spaces if planned properly. Prioritizing turning space, using wall-mounted fixtures, and optimizing layout allows compliance without significantly increasing overall bathroom size.
Final Thoughts
An ADA bathroom layout is built on precision: specific clearances, precise fixture positioning, and deliberate floor-plan decisions that prioritize mobility and independence.
After years of helping people optimize their spaces, I’ve learned that accessible design is some of the most intentional work you can do; every measurement earns its place.
The standards here, from the 60-inch turning circle to grab bar heights to sink knee clearance, each serve a real functional purpose. Getting the layout right from the start means fewer redesigns and a space that works for everyone.
The best accessible bathrooms are not just compliant, they are genuinely easy to use. Drop a comment below and let me know whether this blog was helpful.


