


Does your son’s tiny bedroom feel more like a cramped closet than a fun place to sleep and play? You’re not alone in this struggle with limited space. Many parents face the challenge of creating an excellent room when space is limited. I’m here to show you that small doesn’t mean boring or uncomfortable. The best boys’ bedroom ideas for small rooms prove that creativity always beats size. Your little guy deserves a space that reflects his personality and interests, no matter how small it might be. With thoughtful planning and clever tricks, you can change even the tiniest room into his favorite hangout spot. Get ready to turn that small space into your son’s dream bedroom experience! Why Small Bedrooms Need Smart Design Small bedrooms present unique challenges that require creative solutions to make them work well. Limited floor space means you need to think differently about furniture placement and storage options. Every piece in the room must serve multiple purposes to maximize functionality without creating clutter. Smart design helps create comfortable sleeping areas while leaving room for play and study activities. The right layout can make a tiny space feel bigger and more welcoming for your child. Good design also considers how your child will use the room as they grow older. A well-planned small bedroom can boost productivity by creating dedicated zones for different activities. When done right, smart design turns space limitations into opportunities for creativity and better organization. Amazing Space-Saving Boys’ Bedroom Ideas I’ve gathered innovative ideas that help you make the most of every inch in your boy’s small bedroom. You’ll find wise furniture choices and clever storage solutions that turn tiny spaces into amazing rooms. 1. Bunk Bed with Built-in Desk This bunk bed setup features a sturdy top bunk and a spacious desk below, creating a multi-functional space. It helps save floor space by combining sleeping and working areas in one. The desk area is ideal for studying, gaming, or drawing. The built-in desk also includes storage for books, pens, and school supplies, making it an excellent choice for busy, space-conscious kids. Appropriate Age: 6-14 years Decor Tip: Use bright colors and a fun chair to keep the desk area lively and comfortable. 2. Lofted Bed with a Reading Nook A lofted bed is heightened, leaving the space below open for a cozy reading nook. Add a comfy chair, cushions, and soft lighting to create a peaceful corner for reading or relaxing. This design makes the room feel spacious and functional, perfect for those who enjoy a quiet, secluded space. The raised bed creates a sense of separation, offering both privacy and comfort. Appropriate Age: 6-12 years Decor Tip: Add curtains or a small rug to create a private, cozy nook under the bed. 3. Murphy Bed for Extra Floor Space A Murphy bed folds up into the wall when not in use, making it a great choice for small rooms. This setup provides a clean look and allows the room to be opened up for play or activities. It’s an efficient way to maximize space. When the bed is folded up, you get a clean and tidy room, perfect for when the kids want to use the space for games, playtime, or other activities. Appropriate Age: 5-12 years Decor Tip: Keep the wall simple with a neutral tone to let the foldable bed incorporate flawlessly. 4. Wall-Mounted Storage Solutions Maximize storage with shelves, hooks, and organizers mounted on the walls. This option frees up floor space while keeping books, toys, and accessories neatly stored. Wall-mounted items are perfect for displaying personal collections, like action figures or trophies, giving the room a unique touch. With the added storage, it’s easy to keep everything organized and accessible while maintaining a clean, uncluttered space. Appropriate Age: 5-14 years Decor Tip: Use floating shelves to create an open, airy feel in the room, and add bins for easy organization. 5. Under-bed Storage Drawers A raised bed allows for the addition of large, easily accessible storage drawers underneath. These drawers can store clothes, toys, or extra bedding, keeping the room clutter-free. It’s a smart, simple way to organize. With the added storage space, the room can maintain a neat and tidy appearance while the bed remains functional and comfortable for sleeping. The extra drawers help maximize storage without taking up additional floor space. Appropriate Age: 4-10 years Decor Tip: Use colorful bins or boxes that can easily slide in and out for convenient storage. 6. Built-in Wardrobe and Shelves A custom-built wardrobe with integrated shelving makes the most of small spaces. With drawers, open shelves, and hanging space, everything has its place. This type of storage is perfect for keeping the room tidy and organized. The wardrobe’s design can be personalized to meet the child’s needs, whether it’s more hanging space or additional shelves for toys. It helps create a clutter-free environment, even in a small room. Appropriate Age: 6-14 years Decor Tip: Consider adding matching baskets and labeled boxes for a more organized and neat wardrobe area. 7. Wall-Mounted Floating Desk A wall-mounted desk frees up space while providing a spot to study, play, or do artwork. The floating desk gives the room a modern touch and keeps the floor area open for other uses. It’s a practical solution for small spaces, creating a clean and organized workspace. The wall-mounted design also allows you to place shelves or hooks underneath for added storage and organization. Appropriate Age: 8-14 years Decor Tip: Pair it with a comfy chair and a minimalistic lamp for a clean, functional workspace. 8. Compact Trundle Bed with Extra Sleep Space A trundle bed pulls out from beneath the main bed to provide an extra sleeping area when needed. It’s great for sleepovers or guests while saving space during the day when tucked away. The trundle bed ensures there’s always room for extra guests without compromising the room’s size. It’s a clever design choice that balances practicality with style, giving more flexibility to the room. Appropriate Age: 5-10 years Decor Tip: Add fun, colorful bedding that’s easy to pull out and make the room feel welcoming. 9. Custom Storage with Built-in Stairs This design maximizes space by incorporating built-in stairs with storage compartments. The stairs serve as both a functional piece and a way to store books, toys, or clothing. The customized design makes use of every inch of space, ensuring that the room remains organized and free of clutter while maintaining a sleek, modern look. Appropriate Age: 7-14 years Decor Tips: Use storage bins or boxes to organize the stair compartments for easy access to toys or books. 10. Corner-Set Bed with Storage Bins Positioning the bed in the corner maximizes the remaining space, and adding storage bins underneath provides room for organization. This layout keeps the floor open, making the room feel bigger. The storage bins help keep everything neat, from toys to clothes. It’s a great choice for smaller rooms where space is limited, but functionality is key. Appropriate Age: 6-12 years Decor Tip: Choose bins in coordinating colors or patterns to add personality while keeping things tidy. 11. Under-Bed Trundle with Desk Combo This space-saving design includes a trundle bed with a desk tucked underneath, providing both a sleeping area and a study or workspace. The trundle bed slides out when needed, giving you extra sleeping room without taking up floor space. It’s a clever way to maximize functionality and comfort in a small room. Appropriate Age: 5-10 years Decor Tip: Choose simple, neutral furniture and add colorful accessories to give the room a playful touch. 12. Hanging Chair in the Corner A hanging chair in the corner of the room creates a laid-back, cozy atmosphere. This fun piece of furniture is perfect for reading, relaxing, or daydreaming. It adds a playful touch and can be paired with pillows and throws for extra comfort. The floating chair design keeps the space feeling open and light. Appropriate Age: 6-14 years Decor Tip: Add a small rug and a few cushions around the chair to create a comfy nook for relaxation. Fun Bedroom Themes Perfect for Small Spaces I’ve collected exciting theme ideas that bring personality and adventure to your boy’s small bedroom. You can choose from creative designs, such as pirate ships and space experiences, or modern styles, including industrial lofts and minimalist themes. 13. Industrial Loft with Exposed Pipes This design features industrial-style furniture with exposed pipes, a metal bed frame, and reclaimed wood. The mix of materials gives the room a modern, edgy look. It works well with minimalistic, masculine decor, making the space feel like a stylish, grown-up retreat. The exposed pipes add a raw, urban feel, while the wood elements balance out the cold metal for a cozy yet trendy vibe. Appropriate Age: 10-16 years Decor Tip: Pair with dark colors like gray and black for a sleek, grown-up feel that is still cozy. 14. Playful Pirate Ship Bed For a daring twist, this pirate ship bed features a ship-like structure with a small ladder and lookout post. It’s perfect for sparking imagination and creative play, all while offering a cozy spot to sleep. The bed design can include details like sails, a wooden helm, and even a treasure chest. It turns the bedroom into a fantasy adventure zone, making bedtime feel exciting and full of fun. Appropriate Age: 4-8 years Decor Tip: Add nautical-themed pillows and rugs to enhance the pirate ship feel and bring the theme to life. 15. Minimalist Black and White Theme This design keeps things simple with black and white color schemes. It includes sleek, modern furniture, clean lines, and a clutter-free space. A minimalist approach creates an open, calming atmosphere, perfect for older kids who appreciate a more urbane style. By sticking to a monochrome palette, the room can feel bigger and more organized, allowing the focus to be on the essentials. Appropriate Age: 8-16 years Decor Tip: Incorporate bold artwork or colorful accents to bring personality to the black-and-white theme. 16. Sports-themed room with Wall Art This sports-themed room features wall decals, framed posters, and bedding featuring sports teams or equipment. It’s a great way to showcase a love for a particular sport or athlete while making the room feel personal. The room can be decorated with items from the child’s favorite sport, such as a basketball hoop, a soccer ball lamp, or a jersey collection displayed on the walls. Appropriate Age: 6-12 years Decor Tip: Add a basketball hoop or soccer ball lamp for extra flair and fun. 17. Space-Themed Decor with Glow-in-the-Dark Elements Decorate the room with stars, planets, and galaxies that glow in the dark. This theme brings outer space into the bedroom, turning bedtime into an exciting, imaginative experience. Glow-in-the-dark stickers can be placed on the walls or ceiling, allowing the room to come alive at night. It’s perfect for any child who loves Space Quest and dreams of studying the stars. Appropriate Age: 5-12 years Decor Tip: Use glow-in-the-dark stickers or ceiling lights to create a nighttime galaxy effect. 18. Rope Swing Bed A unique and playful twist on the traditional bed, this rope swing bed is suspended from the ceiling, adding a sense of fun to the room. It’s ideal for kids who love an unconventional, exciting design. The rope swing creates a fun, light-hearted atmosphere and can be paired with simple, cozy bedding for comfort. Appropriate Age: 5-12 years Decor Tips: Use sturdy ropes and add soft, neutral bedding to balance out the boldness of the swing. 19. Modern Farmhouse with Wood Accents This modern farmhouse design combines rustic wood elements with clean, modern lines. The room features natural wood furniture, like a wooden bed frame and dresser, paired with soft linens and neutral colors. It creates a cozy, inviting space with a warm, earthy feel. The natural textures add joy, making the room feel balanced and stylish. Appropriate Age: 8-16 years Decor Tip: Use woven baskets and plaid accents to complement the rustic vibe and keep the room cozy. 20. Street Art-Inspired Room A street art-inspired room brings an urban, creative vibe with bold colors, graffiti-style artwork, and industrial elements. This design often features murals or wall decals, with the walls acting as a canvas. The room can showcase the child’s creativity with furniture that adds an edgy, cool vibe. It’s perfect for a child who loves art and individuality. Appropriate Age: 8-16 years Decor Tip: Use colorful accessories and paint to match the room’s vibe while ensuring the space feels lively. 21. Superhero-Themed Bedspread and Accessories Convert the room into a superhero haven with themed bedspreads, curtains, and accessories like wall decals or rugs. This fun design can feature a favorite superhero or comic book theme, bringing the child’s imagination to life. Bright colors and bold patterns help make the room feel energetic and exciting, perfect for a superhero fan. Appropriate Age: 4-10 years Decor Tip: Include action figure displays and themed bedding to add depth to the superhero theme. Wrapping Up I hope these creative solutions inspired you to see your son’s small space in a completely new way. Remember that the best rooms aren’t always the biggest ones, but the ones filled with love and imagination. Your boy will treasure a thoughtfully designed space that shows you understand his interests and needs. Small rooms can become cozier and more special than large, empty spaces. Take your time selecting the ideas that best fit your family’s style and budget. Most importantly, have fun with the process and let your son help pick his favorites. Drop a comment below and share which idea made your son’s eyes light up. I’d love to celebrate his excitement with you!
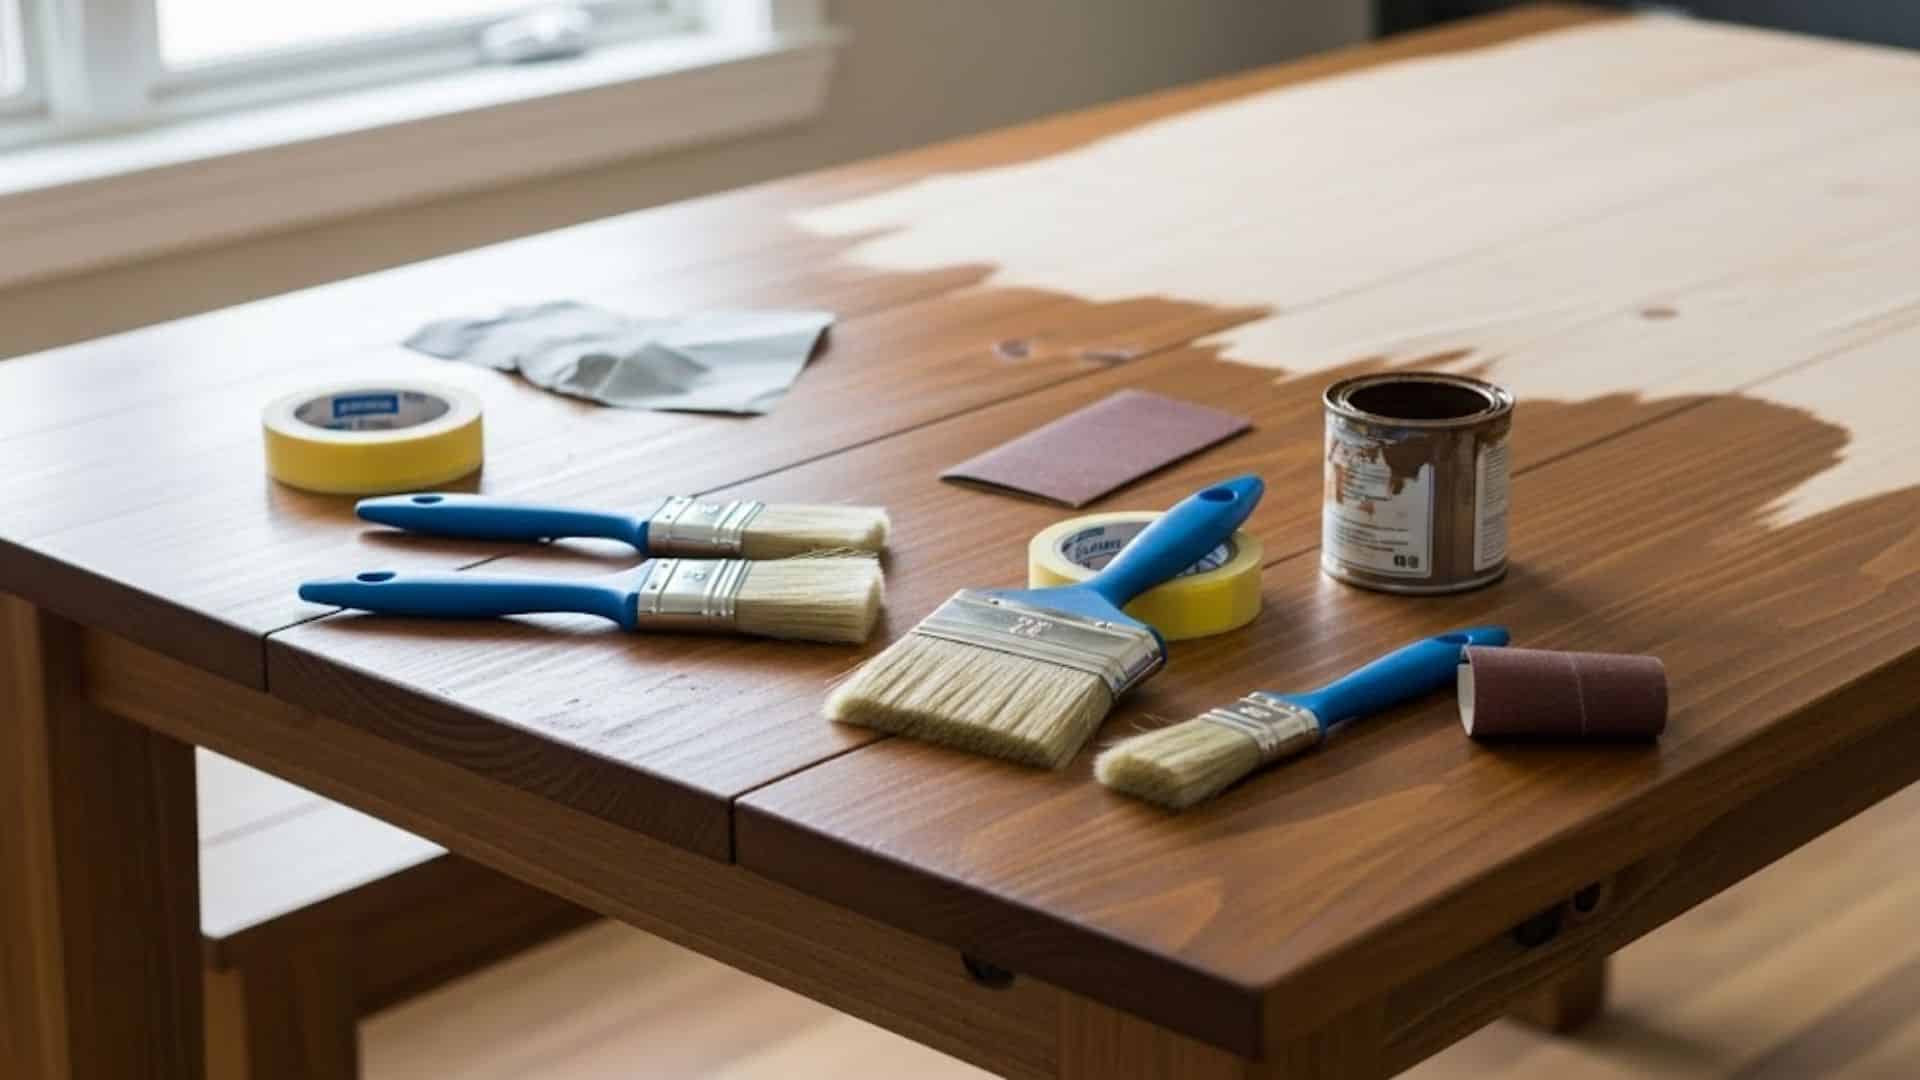
Looking at your tired old dining table and thinking if it’s time for a change? Before you start shopping for expensive new furniture, I have exciting news for you. Your current table might just need a little love and imagination to become the star of your dining room again. I believe DIY dining table makeover ideas can change any boring or worn-out piece into something stunning. You don’t need to be a skilled carpenter or spend a fortune to achieve excellent results. With some basic supplies and a free weekend, you can completely change how your dining space looks and feels. I’m here to help you find the perfect project. Your dining room changeover starts with just one simple decision to try something new! Material You’ll Need for a DIY Dining Table Makeover To complete your DIY dining table makeover, you’ll need a few essential materials and tools. Below is a table showing the estimated cost range for each material required, keeping the project budget-friendly and accessible. Material/Equipment Estimated Cost Range (USD) Gloves $3 – $15 All-purpose cleaner $5 – $15 Scraper $5 – $20 Sandpaper (220-grit) $4 – $20 Paint primer (gray) $15 – $40 Paint sprayer $25 – $80 Satin black paint $15 – $40 Stain (walnut and espresso) $10 – $30 Lint-free rags $5 – $15 Polyurethane sealant $10 – $30 Soft bristle brush $5 – $15 Total Estimated Cost $102 – $320 NOTE: Costs are estimates and may vary based on location, material availability, brand choices, and current market prices. DIY Dining Table Makeover: Step-By-Step Guide I’ll walk you through five key steps to alter your dining table completely. You’ll learn how to prepare, sand, prime, paint, and stain your table for professional-looking results. Step 1: Fix Loose Parts and Clean Thoroughly Start by fixing any loose parts, like table legs. Tighten any screws or bolts to ensure everything is secure once the structure is solid. Clean off any dirt, grime, and old stains. Use a scraper to remove larger chunks, and then wipe down surfaces with a rag and an all-purpose cleaner. Pro Tips Ensure you scrub the hard-to-reach spots with a brush. Remove any removable pieces, like table leaves, for easier cleaning. Use gloves to protect your hands from cleaning agents. Step 2: Sand the Surface Next, lightly sand the table’s surfaces with 220-grit sandpaper. Sanding removes any old finish, giving the new paint or stain a good base to stick to. Don’t rush; take your time to ensure a smooth surface. You can also sand the chairs for a more uniform look. Pro Tips Work in small sections to avoid missing any spots. Use a high-quality sandpaper for a smoother finish. Always blow off the dust before starting the next step. Step 3: Apply Primer Once everything is sanded and smooth, apply a coat of primer. A good primer helps paint bond better and prevents chipping. For the base and chairs, use a gray primer, which works well with dark colors like black. Let it dry completely before proceeding to the next step, which is painting. Pro Tips Apply primer with a sprayer for an even coat. Use a light coat to avoid any streaks. Let the primer dry for at least an hour before painting. Step 4: Paint the Base and Chairs After the primer is dry, it’s time to paint. For the base and chairs, use a durable satin black paint. A paint sprayer makes the job quicker and gives a smoother finish. Be sure to apply thin layers and allow each coat to dry before adding another. Pro Tips Use a sprayer for even coverage and fewer brush marks. Paint in light, even strokes, to avoid drips. Allow enough time for each coat to dry completely. Step 5: Stain the Tabletop For the tabletop, choose a stain that suits your style. Start with a light stain, such as walnut, and layer darker stains, like espresso, for added depth. Let each coat dry before applying the next. Finish off with a polyurethane sealant to protect the wood from wear and tear. Pro Tips Use a lint-free rag to apply the stain evenly. Wipe off excess stains immediately to avoid uneven coloring. Apply at least two coats of stain for a rich, more vibrant look. Watch How it is Done: DIY Dining Table Makeover Video Tutorial DIY Dining Table Makeover Ideas You Can Try I’ve gathered innovative makeover ideas that can convert your old dining table into something special and new. You can choose from different techniques and materials that match your style and skill level. 1. Rustic Farmhouse Look Convert your dining table into a rustic farmhouse piece by sanding it down and applying a light white or gray wash. This simple distressed finish adds a lovely, aged look. The rustic feel is ideal for creating a warm and welcoming dining space, especially in homes with vintage or country-style decor. 2. Industrial Metal and Wood Fusion For a modern, industrial appeal, consider replacing wooden legs with metal ones or simply painting the existing legs matte black. This combination of raw wood and sleek metal brings a stylish, rugged look that is ideal for creating an urban or minimalist dining area. The fusion of both materials gives it a unique appeal. 3. Chalk Paint for a Shabby Chic Look Use chalk paint in soft pastels or neutral tones to give your table a shabby chic makeover. Lightly distress the edges for a vintage, weathered effect. This technique adds character and joy to any dining space, offering a cozy, relaxed atmosphere, and it’s a budget-friendly way to update an old table. 4. Geometric Patterns on the Tabletop Create a bold, modern look by adding geometric patterns to your table. Use painter’s tape to create sharp, clean lines and paint each section in contrasting colors. This DIY project is perfect for a contemporary or artistic dining room, allowing you to experiment with vibrant shades or subtle neutrals for a unique design. 5. Marble Effect Using Contact Paper Mimic the luxurious appearance of marble by applying marble-patterned contact paper to your table. It’s an affordable, simple solution for a high-end look without the hefty price tag. This makeover gives your dining table a graceful, refined feel that works in both modern and traditional dining rooms. 6. Decoupage Tabletop with Fabric or Paper For a personalized touch, decoupage fabric or decorative paper onto your dining table. Choose fabrics or prints that match your home’s style, and use decoupage glue to apply them smoothly. This technique is ideal for adding texture and color, creating a unique dining experience while repurposing old materials. 7. Ombre Painted Tabletop Add a trendy, eye-catching touch to your table with an ombre-painted effect. Choose two or more paint colors and blend them together from light to dark for a smooth, gradient look. This fun project creates a unique, dynamic centerpiece for your dining room that reflects your personal style. 8. Reclaimed Wood Tabletop for a Vintage Feel Replace your old tabletop with reclaimed wood to add a rustic, vintage appeal. The unique, natural imperfections of the wood will give your table character and history. This sustainable choice not only improves your space but also adds warmth and texture, making it perfect for a cozy dining area. 9. Glass Top Dining Table with a Wooden Base For a sleek, contemporary look, replace your wooden tabletop with a glass one. This minimalist design accentuates the wooden base, creating an airy, cultured atmosphere in your dining space. Glass tops are ideal for modern, open-concept rooms, allowing the natural beauty of the wood to be showcased underneath. Maintenance Tips for DIY Dining Table Makeover Taking care of your newly made-over dining table will keep it looking great for years to come. These simple tips will help you protect your hard work and investment. Clean spills immediately: Wipe up any liquid spills right away to prevent staining or water damage to your new finish. Use placemats and coasters: Protect the surface from hot dishes, scratches, and ring marks by using protective mats during meals. Dust regularly with a soft cloth: Keep your table clean by dusting it weekly with a microfiber cloth to maintain its fresh appearance. Apply protective wax annually: Give your table a thin coat of furniture wax once a year to keep the finish looking smooth and protected. Following these easy habits will ensure your DIY makeover stays beautiful and functional. Your table will remain the centerpiece of your dining room for many years. Common Mistakes to Avoid Before you begin your DIY dining table makeover, it’s helpful to know some common mistakes to avoid. Here are a few things to keep in mind: Skipping the sanding step can prevent the paint from sticking properly and result in a rough finish. Choosing the wrong paint or stain can cause uneven coverage or affect the final look of your table. Not allowing enough drying time can lead to smudges, streaks, or peeling once you move to the next step. Skipping the protective coat can cause your table to become damaged from spills or everyday wear. Avoiding these mistakes will help you achieve a polished and long-lasting result. With patience and attention to detail, your table makeover will turn out beautifully! Wrapping It Up Your dining table makeover pilgrimage doesn’t have to end here with these DIY dining table makeover ideas. I hope you found the perfect project that matches your style and skill level. Remember that every expert was once a beginner, so don’t worry if your first attempt isn’t perfect. The most important thing is having fun and creating something that makes you smile every day. Your friends and family will be amazed at what you accomplished with your own hands. Take your time, be patient with yourself, and enjoy the process. Drop a comment below and tell me which makeover idea caught your eye!
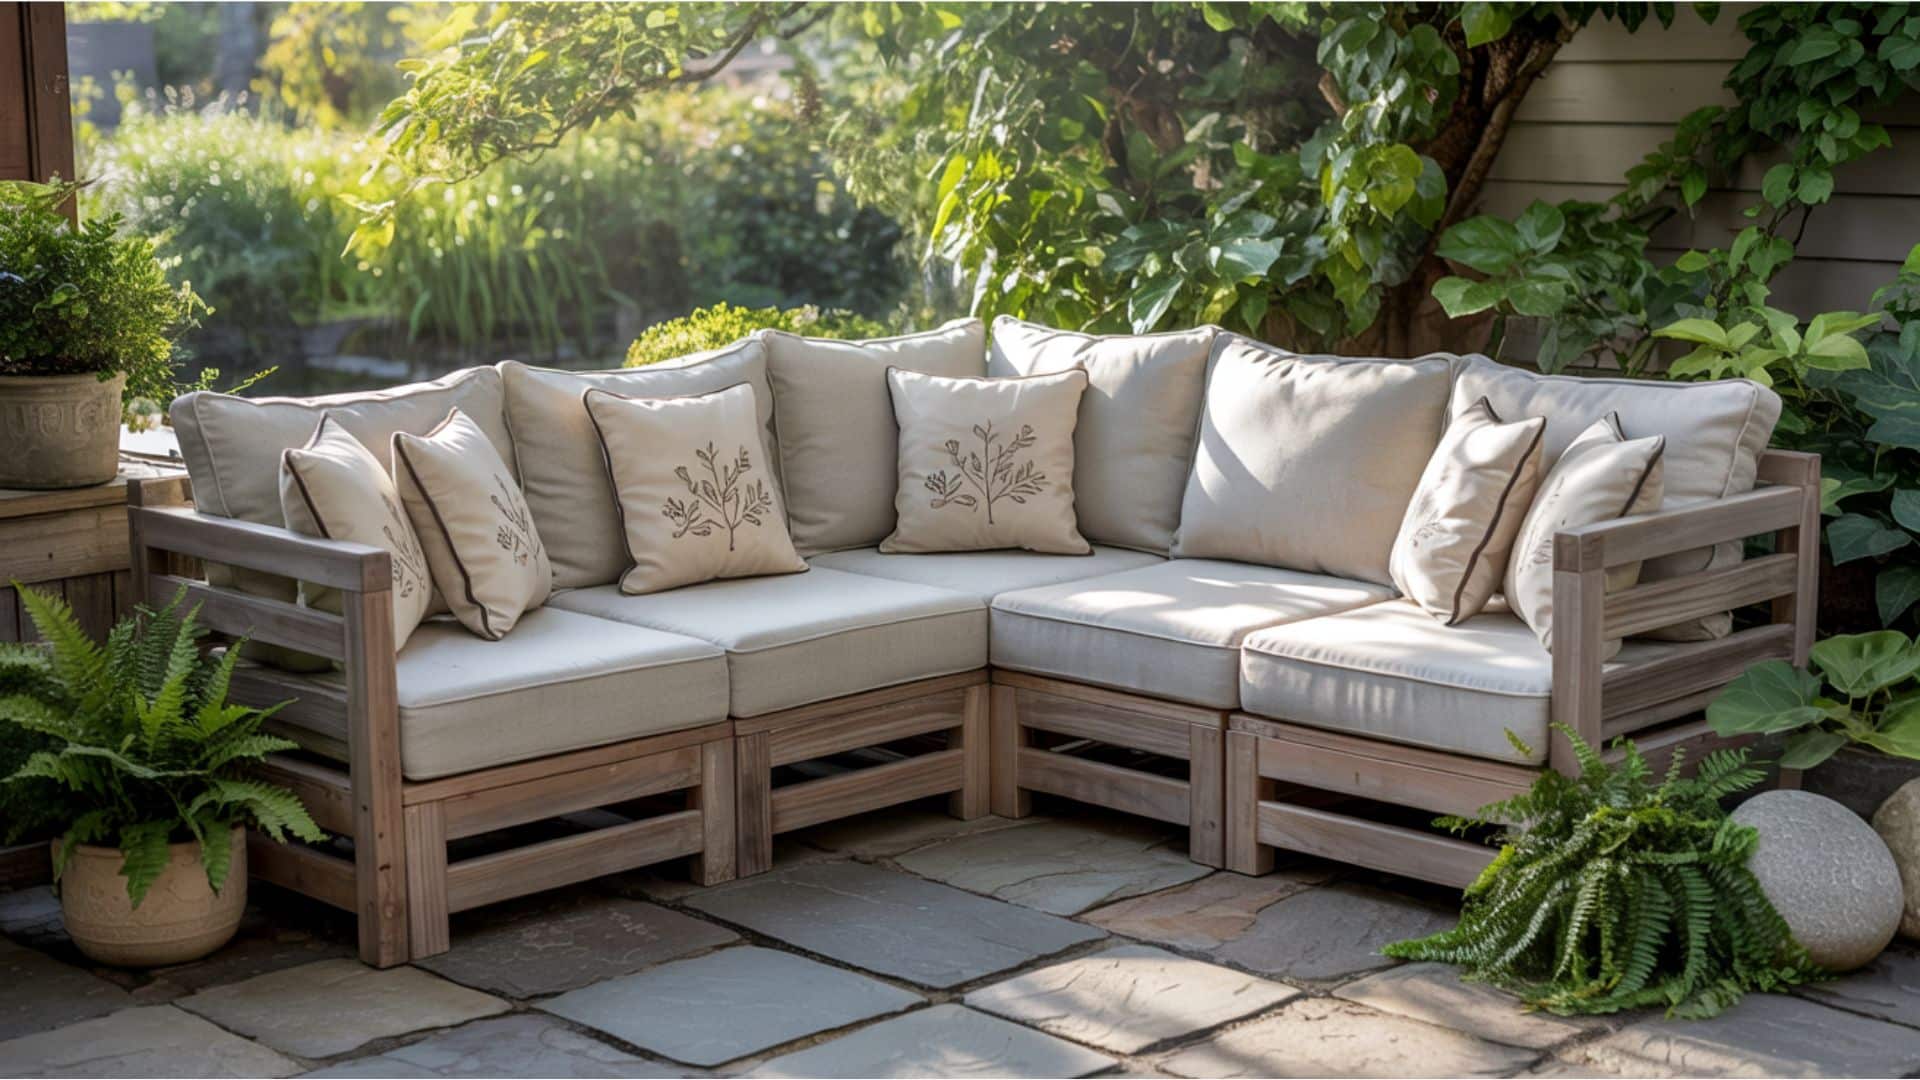
Tired of seeing those crazy high prices for outdoor sectionals at furniture stores? You’re not alone! A decent outdoor sectional can cost thousands of dollars. However, here’s the good news: you can build your own DIY outdoor sectional for significantly less money. Plus, you get to make it exactly how you want it. Want it bigger? Make it bigger. Prefer different colors? Pick whatever you love! I’m here to show you exactly how to create an amazing outdoor sectional that’ll make your neighbors jealous. You’ll save tons of money and have fun doing it. Ready to build something awesome? Let’s get your hands dirty! DIY Guide for an Outdoor Sectional Building it yourself means you also control the quality. You’ll know every joint is solid and every screw is tight. No shortcuts or cheap materials here. There’s also something amazing about relaxing on furniture you built with your own hands. Your friends will be impressed when you tell them you made it. You’ll save money and create something extraordinary at the same time. Materials and Tools You’ll Need I want to show you exactly what your DIY outdoor sectional will cost to build. The table below breaks down each material and outlines the associated costs. Material/Equipment Estimated Cost Range (USD) 4×4 Lumber (corner/support) $30 – $60 2×4 Lumber (frame/sides/back) $60 – $150 1×4 Lumber (slats) $25 – $60 Pocket hole screws (1 1/2″) $8 – $15 Wood screws (3″ & 4″) $8 – $18 Wood glue $4 – $10 Orbital sander (if needed) $25 – $50 Sandpaper (120 & 220 grit) $5 – $12 Drill with a pocket hole jig $20 – $45 (jig only) Speed square $5 – $10 Tape measure $5 – $12 Clamp $8 – $18 Silicone caulk $4 – $10 Spar urethane (for sealing) $12 – $25 Cushions (24×24″ per piece) $20 – $45 each (x4–6: $80–$270) Paint (Early American/White) $15 – $30 Exterior wood stain $10 – $25 Miter saw (if needed) $60 – $120 (buy) / $20–$40 (rent) Impact driver (if required) $30 – $70 The Total Estimated cost is $374 – $1,000. These prices provide a clear idea of the potential costs involved in your DIY project. Adjustments can be made based on the materials you select or the tools you already own. NOTE: The costs are estimates and may vary based on location, material availability, sales, and the specific products chosen. STEP 1: Plan Your Sectional Design Before you begin, plan the layout and design of your outdoor sectional. Decide on the shape, size, and placement. Use standard measurements or adjust them based on your space and style preferences. Helpful Advice Sketch your design before cutting. Measure your space carefully to ensure a good fit. Consider a modular design for flexibility. STEP 2: Cut and Assemble the Frame Begin cutting your lumber pieces to size for the frame. This includes side posts, back supports, and corner posts. Once the cuts are made, assemble them using wood glue and screws, ensuring everything is tightly secured for stability. Helpful Advice Use a speed square to ensure cuts are straight. For extra support, use wood glue along with screws. Pre-drill holes to make screwing easier and prevent splitting. STEP 3: Build the Slat Supports and Back Rest Cut the slat supports and backrest pieces to the correct size. Attach the slat supports evenly across the sectional’s base. Install the backrest pieces, making sure they’re securely attached to the frame. Helpful Advice Measure carefully to ensure even spacing of the slats. Securely attach slats with screws or nails. Use clamps to hold the pieces in place before screwing them together. STEP 4: Sand and Stain the Wood Smooth out any rough edges with a sander before applying wood stain. Use a pre-stain conditioner to ensure even coloring, then apply your desired stain (e.g., Early American). Seal the wood with spar urethane to protect it from the elements. Helpful Advice Sand the wood first with 120-grit sandpaper, then finish with 220-grit sandpaper. Apply two coats of stain for a rich, finished look. Let each coat dry before adding another for the best result. STEP 5: Assemble the Sectional and Add Cushions Once the frame and backrest are complete, assemble the sectional by attaching the pieces together. Finally, place your cushions on the frame for added comfort and adjust them to achieve the perfect fit. Helpful Advice Use screws to securely attach the final back and side pieces. Space the cushions evenly for a neat look. Make sure the cushions are weather-resistant for long-lasting use. Follow Along: DIY Outdoor Sectional Video Walkthrough Design Ideas You Can Try to Make It Unique Change your basic outdoor sectional into a stunning centerpiece with these design ideas. The table below shows different ways to customize your build for maximum style and functionality. Design Element Creative Ideas Shape L-shaped, U-shaped, Curved edges, Modular pieces Storage Built-in side tables, Hidden compartments, Lift-up seats Color Two-tone stain, Distressed finish, Painted accents Comfort Adjustable backs, Built-in cup holders, Extra-deep seats Details Rope accents, Metal hardware, Carved patterns Additions Built-in planters, Integrated lighting, and Removable ottomans Size Compact balcony, Oversized family, Expandable modules Weather Sloped drainage, Quick-dry spacing, UV-resistant finish Mix and match these design elements to create a sectional that perfectly fits your space and style. Choose the features that matter most to you and incorporate them into your build plan. Maintenance and Care Tips for Outdoor Sectional Taking care of your DIY outdoor sectional keeps it looking great for years. Regular maintenance goes a long way toward protecting your investment. Clean your sectional monthly with mild soap and water to remove dirt and prevent stains from setting in. Check all screws and joints twice a year, tightening any loose hardware to keep your sectional sturdy and safe. Cover or move your sectional during harsh weather, such as heavy storms, to prevent unnecessary damage and wear. Apply fresh stain or sealant every two years to protect the wood from sun damage and moisture. Following these simple steps will keep your sectional beautiful and functional. Your hard work deserves proper care to make it last for decades. Mistakes to Avoid when DIYing an Outdoor Sectional Even experienced builders make mistakes when creating outdoor furniture. Learning from these common errors will save you time, money, and frustration. Measure twice and cut once because rushing through planning leads to pieces that don’t fit together correctly. Choose weather-resistant wood, such as cedar or teak, instead of regular pine, which is prone to rotting quickly outdoors. Never skip the weatherproofing step, as unsealed wood will crack, warp, and deteriorate within just one season. Build a strong frame with proper support beams, or your sectional will wobble and fall apart. Avoiding these mistakes means your sectional will be sturdy and beautiful from day one. Take your time and do it right the first time. Summing It Up Your DIY outdoor sectional project offers incredible savings while giving you complete control over the design. You’ll create exactly what you want without breaking the bank. Plus, there’s nothing quite like the pride of relaxing on furniture you built yourself. Every time you sit down, you’ll remember the satisfaction of creating something beautiful with your own hands. Don’t let the project intimidate you – just take it one step at a time. You’ve got all the knowledge you need to succeed right here. Start gathering your materials and get ready for an amazing weekend project. I’d love to hear how yours turns out; comment below with your questions and success stories!
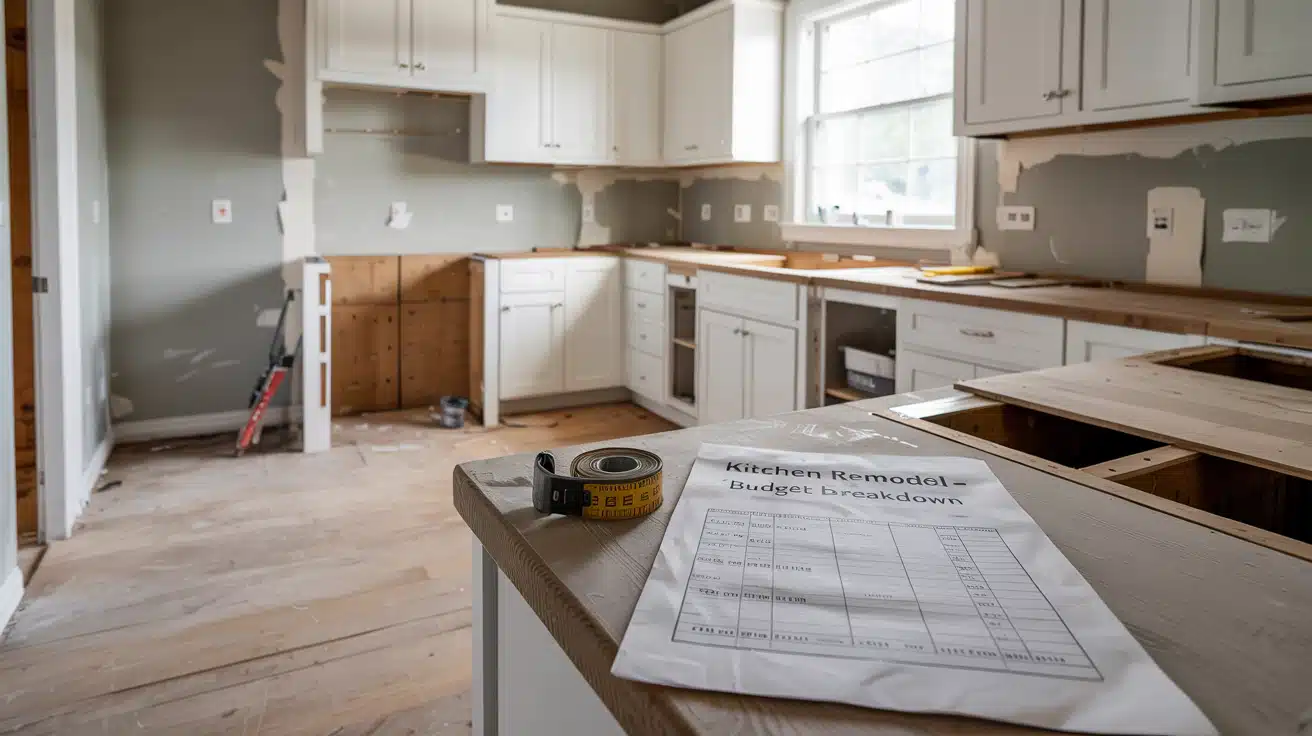
Thinking about a small kitchen remodel cost, but without appliances, and unsure how much you’ll actually need to spend? You’re not alone. I’ve been there, too, trying to figure out how much to budget and where the money goes. In this guide, I will walk through everything you need to know: pricing breakdowns, cost-saving tips, material options, and the most common mistakes to avoid. This post will help you make better choices and avoid surprises. Ready to feel more confident about your plan and your wallet? Let’s get into the details. Average Cost of a Small Kitchen Remodel If you’re searching for the cost of a small kitchen remodel without appliances, you’ll find a wide range based on the choices you make and the level of changes involved. I’ve seen remodels range anywhere from $6,500 to $50,000, depending on the extent of the changes you want to make. If you’re making surface improvements, your costs will be on the lower end. But if you’re changing the layout or bringing in custom work, expect that number to climb. Knowing this ahead of time helps both of us make smart, confident decisions. Key Cost Factors in a Small Kitchen Remodel Excluding Appliances Before you start spending, you should understand what drives costs, work scope, materials, labor, permits, and who is responsible for them. 1. Scope of Work The amount of work planned affects your total cost more than you might expect. If you’re only doing minor updates like paint or hardware, costs stay lower. However, once you start changing walls, moving plumbing, or replacing entire cabinet runs, the costs add up quickly. I’ve learned it’s essential to decide early on how deep you want to go, so your spending stays under control. 2. Materials (with Price Tiers) You are aware that material choices have a significant impact on your budget, depending on the quality, brand, and finish level. Cabinets (Stock vs. Semi-custom and Custom) Cabinet choice plays a significant role in your budget. Stock cabinets are the most affordable and ready-made. Semi-custom options offer more flexibility in terms of sizes and finishes, but come at a higher cost. Custom options offer complete design freedom and fit, but they’re the most expensive. If you’re watching your budget closely, I’d suggest going with stock or semi-custom, primarily if your current layout works well. Countertops (Laminate vs Granite and Quartz) Countertop prices vary a lot depending on the material. Laminate is budget-friendly and comes in many styles. Granite sits in the middle, potent and popular but pricier. Quartz is higher in cost but durable and low maintenance. Suppose you’re looking to save on laminating work. If durability and appearance matter more to you, granite or quartz may be worth the added cost. Just ensure it aligns with your entire budget plan. Flooring Options Flooring choices can affect both cost and comfort. Vinyl and laminate floors are budget-friendly and easy to install. The tile looks clean and holds up well, but it often comes with higher labor costs. Wood adds warmth, but it also increases the budget. If I were remodeling, I’d choose flooring based on traffic, maintenance needs, and whether it fits with the rest of the home’s design. 3. Labor and Contractor Rates Labor rates depend on where you live and the complexity of your remodel. If you’re in a large city, expect to pay more. For example, remodels in California or New York often cost more than similar projects in the Midwest or smaller towns. Specialized tasks like electrical, plumbing, or tile work add to the total. Always request written estimates and compare them with those of more than one contractor. In my experience, choosing a skilled and reliable crew is worth the time it takes to obtain multiple quotes and check references. 4. Permits and Local Regulations Some remodeling work, mainly if it includes electrical or plumbing changes, requires permits. These permits protect you by ensuring that the work complies with local codes, but they also come with associated fees and wait times. I recommend checking with your local government early to avoid potential delays. Skipping this step can lead to trouble if you’re ever inspected or decide to sell your home later on. 5. DIY vs Professional Remodeling Doing the work yourself can save you thousands, but it also comes with risks. I’ve seen people start strong but run into problems that cost more to fix. You’ll need the right tools, time, and skill. Hiring a professional costs more upfront, but usually means faster results and fewer mistakes. If you’re confident in your abilities, DIY may be a viable option. Otherwise, it’s worth considering where expert help makes sense. What You Can Expect at Each Budget Level Knowing what fits in your budget helps you plan smarter. I’ll break down what you can realistically expect at each price range. Remodel for Under $10,000 If you’re working with less than $10,000, focus on do-it-yourself improvements and surface updates. Think paint, refinishing cabinets, new hardware, or swapping out light fixtures. You may also be able to update countertops or add vinyl flooring. You can stretch this budget further by doing the work ourselves, buying discounted materials, and avoiding layout changes. It’s a great choice for making things look fresher without going deep. This is often the best starting point if you’re focused on keeping your small kitchen remodel cost as low as possible. Remodel for $15,000–$25,000 In this range, you can tackle more noticeable changes. You might replace some cabinets, install new but affordable flooring, and even adjust the layout slightly. It allows room for contractor help and better material choices. I’d say it’s a balanced budget; you get a more functional space without going overboard. You still manage costs by mixing lower-cost materials with a few focal upgrades like lighting or backsplash. Remodel Above $30,000 With over $30,000 to spend, you can take on a complete change. This may include custom cabinetry, tile flooring, premium surfaces, and significant layout changes. If walls need to move or plumbing has to be relocated, this budget makes it possible. You’ll have room to bring in professionals for every phase. It’s ideal if your kitchen needs more than just cosmetic changes and you’re aiming for long-term satisfaction. Remodeling Options That Fit Your Budget and Needs You can match your budget with practical upgrades. From minor surface changes to full updates, knowing what’s possible at each price point helps you plan smarter and spend wisely $5K Kitchen Upgrade Possibilities With a $5,000 budget, you’ll focus on essential refreshes that make your kitchen look better without major changes. You can repaint or refinish cabinets instead of replacing them, apply a peel-and-stick backsplash, and swap out old light fixtures and cabinet hardware. Budget-friendly flooring like vinyl plank or laminate is also possible. To stay within this price range, avoid moving plumbing or electrical lines and keep your layout exactly as it is. These updates improve appearance, not design or structure. $15K Remodeling Options That Balance Cost and Impact A $15,000 kitchen remodel gives you room to make noticeable upgrades beyond just cosmetic fixes. You can replace lower-end cabinets, install upgraded laminate or entry-level quartz countertops, and put in tile or mid-range flooring. This budget allows for slight layout tweaks, new lighting fixtures, and a fresh coat of paint. You might even work with a contractor for installation help. It’s a practical budget for updating function and style while still watching costs. $65K Full Kitchen Renovation Scope With a $65,000 budget, you can achieve a high-end kitchen transformation. This includes custom cabinetry, stone countertops like granite or quartz, and premium flooring such as hardwood or porcelain tile. You can open up the space by removing a wall, moving plumbing and electrical for better flow, and adding under-cabinet lighting, crown molding, and new windows. Every part of the kitchen can be redone to fit your taste and needs. It’s a full renovation with top-tier materials and professional workmanship throughout. Tips to Save Money on Your Remodel You can cut costs without cutting quality by planning carefully, selecting wisely, and avoiding unnecessary changes during the process. 1. Smart Material Choices Choosing materials that look good and last, without being the most expensive, helps your money go further. Focus on value over name brands. You can select affordable options like stock cabinets or vinyl flooring to stay on track without giving up function or durability. 2. Phased Remodeling Approach You don’t need to do everything at once. Breaking the project into smaller phases helps manage expenses. Start with what matters most, then move to other updates when ready. I’ve found that phasing work gives us flexibility and more time to plan each stage carefully, helping avoid debt or rushed decisions. 3. Stay Within Existing Layout Changing the location of plumbing or walls can add significantly to the cost. You and I can keep expenses lower by keeping the current layout. This way, updates focus on finishes and function instead of costly infrastructure. It’s a smart way to make improvements while avoiding major construction and unnecessary labor charges. 4. Comparing Multiple Quotes Obtaining multiple quotes helps you understand pricing differences and the quality of service. I suggest asking detailed questions and checking what’s included. You can avoid overpaying or missing key services by comparing several estimates. It’s one of the easiest ways to make sure you’re getting a fair deal. Planning Tools and Budgeting Resources Using the right planning tools can help you stay on track during your remodel. Simple items like checklists, timelines, and a clear plan make it easier to organize tasks and avoid confusion. At the same time, reliable budgeting resources, such as cost estimators, budget templates, and expense trackers, help you avoid overspending and stay within your budget. You can make smarter choices by combining these tools. Having structure and a way to monitor costs gives you more control and confidence from start to finish. Common Mistakes and Hidden Costs to Avoid You can prevent budget problems by understanding what often goes wrong and being prepared for unexpected expenses. Overlooking permit requirements that lead to project delays or fines. Forgetting to include disposal and cleanup fees in the budget. Skipping inspection of old wiring or plumbing that may need updates. Underestimating labor costs for specialty work like tiling or lighting. Rushing material choices without checking long-term maintenance or replacement costs. Conclusion Now you have a much clearer picture of what a small kitchen remodel might cost without appliances. You’ve seen how your choices, materials, layout, labor, and planning can make all the difference. With the right approach, it’s possible to keep costs down while still achieving results that feel like a significant improvement. Don’t forget to apply the tools, tips, and budgeting ideas we covered. The more prepared you are, the better the outcome will be. And if you’re ready to keep learning, I’ve got more helpful blogs waiting for you. Go ahead and check them out, you’ll be glad you did.

Are you tired of your boring bathroom door making your space feel cramped and outdated? I get it; most people don’t realize how much their bathroom door affects both style and function. Your door choice can make or break your entire bathroom design while impacting privacy, space, and even airflow, which is why understanding standard door widths can make a big difference. The wrong door makes small bathrooms feel like tiny closets, while the right one opens up space you never knew existed. There are amazing bathroom door ideas that can completely change your space, whether you prefer sliding barn doors or high-tech smart glass. Get ready to change your bathroom with doors that are anything but ordinary! Why Your Bathroom Door Matters Your bathroom door does way more work than you might think. It keeps your private moments private and blocks embarrassing sounds from traveling through your house. The right door can make your whole bathroom look amazing or completely ruin the style you’re going for. If you have a tiny bathroom, picking the wrong door can make it feel like a closet. Wise door choices open up space you didn’t know you had. You also need to consider the effects of steam and humidity from hot showers. Some doors handle moisture better than others and won’t warp or get moldy over time. The door you pick affects how air moves around your bathroom, too. Good airflow keeps things fresh and prevents that stuffy feeling. Innovative Bathroom Door Ideas That Save Space I’ve found that the right door can make your small bathroom feel twice as big. You’ll love these clever options that slide, fold, and pivot to give you more room to move around. 1. Frosted Glass Sliding Door Frosted glass sliding doors provide privacy while allowing natural light to filter through. The frosted glass gives a soft, blurred look. It’s perfect for modern homes where you need separation without blocking out light. The sliding mechanism saves space, and it is easy to open. These doors are a stylish, functional solution for dividing rooms without closing them off entirely. 2. Barn Door with Chalkboard Paint The barn door with chalkboard paint combines rustic charm with practical use. You can write notes, reminders, or designs on the door’s surface. It adds a unique, personalized touch to any room. The wooden frame gives it a classic, country feel, and the sliding mechanism makes it easy to operate. This door is ideal for kitchens, home offices, or innovative spaces. 3. Mirrored Pivot Door A mirrored pivot door creates a sleek, modern appeal. The reflective surface makes rooms appear larger and brighter. It’s a striking design choice that works well in contemporary settings. The door pivots on a single point, opening easily and smoothly. It’s perfect for bedrooms, closets, or any space where you want to enhance light and create a clean, open feel. 4. Louvered Wooden Door Louvered wooden doors offer a mix of privacy and ventilation. The slats allow air to flow through while keeping the room enclosed. Made from durable wood, they bring a natural, classic touch to any room. The wooden finish adds warmth, while the slats provide a textured design. This type of door is perfect for bathrooms, laundry rooms, or areas needing airflow. 5. Stained Glass Panel Door Stained glass panel doors add a colorful, artistic element to your home. The vibrant glass panels let in light while maintaining privacy. Framed in wood, this door creates a traditional yet eye-catching look. The glass features intricate patterns, making each door unique. It’s a beautiful choice for hallways, entryways, or living rooms, providing both style and privacy. 6. Reclaimed Wood Pocket Door A reclaimed wood pocket door brings a sustainable and rustic touch to any space. Made from salvaged wood, it has a history and a unique texture. The door slides smoothly into the wall, saving space and offering a clean look. It’s perfect for modern homes that want to maintain a natural, eco-friendly feel. This door adds both charm and functionality to any room. 7. Acrylic Translucent Door Acrylic translucent doors provide a modern, minimalistic design while offering privacy. The translucent acrylic allows light to pass through, brightening up the room. It’s lightweight and durable, making it a low-maintenance option. This door is perfect for contemporary spaces where you need privacy but still want to maintain an open, airy atmosphere. It’s sleek, functional, and stylish, fitting well in any modern home. 8. Bifold Shoji Screen Door Bifold Shoji screen doors bring a touch of Eastern design to your home. Made from wood and rice paper, they fold easily to save space. The wooden frame gives the door structure, while the paper panels offer privacy without blocking light. This door is perfect for creating separation in smaller spaces. It adds a peaceful, graceful touch to your home decor. 9. Cork-Covered Door Cork-covered doors are eco-friendly and functional. The cork surface provides a soft texture and natural insulation. Cork is also sound-absorbent, reducing noise between rooms. This door adds warmth and a unique touch to any space. It works well in offices, bedrooms, or libraries, where you need quiet and style. The cork material is sustainable and easy to maintain, making it a great choice for eco-conscious homes. 10. Origami-Inspired Folded Door Origami-inspired folded doors are unique and visually striking. They feature intricate folds that create a dynamic, textured surface. Made from lightweight materials, these doors are easy to operate while still making a bold statement. The design resembles paper folding, bringing a playful yet modern touch. Perfect for contemporary homes, they offer a stylish alternative to traditional doors while adding depth to a room. 11. Curved Glass Door Curved glass doors bring a futuristic, luxury touch to your space. The smooth curves of the glass add a unique, sleek design. This type of door enhances the flow of light and makes rooms feel more open. It pivots easily for smooth operation, offering both style and functionality. Ideal for contemporary or minimalist spaces, it adds a modern touch that’s visually striking and practical. 12. Carved Teak Door Carved teak doors showcase intricate craftsmanship. Made from durable teak wood, this door has a rich, golden-brown color. The carvings give it an artistic and unique touch. Teak’s natural oils make it resistant to moisture, making it suitable for both indoor and outdoor use. This door brings warmth, texture, and a rustic, timeless look, making it a smart choice for any home. 13. Magnetic Privacy Door Magnetic privacy doors offer a smooth and secure way to separate spaces. The strong magnets hold the door firmly in place while still allowing easy access. These doors are great for creating privacy in bedrooms, bathrooms, or offices. The magnetic feature eliminates the need for locks or handles, providing a simple, modern solution. They are easy to install and perfect for homes where convenience is key. 14. Marble Slab Pivot Door Marble slab pivot doors create a lavish, luxurious look. Made from solid marble, this door has a sleek, polished surface that adds refinement to any room. The pivot mechanism allows the door to open smoothly. Its bold, timeless design works well in high-end interiors, such as entryways or large master bedrooms. The natural veining in the marble makes each door unique. 15. Vintage Suitcase Door Vintage suitcase doors add a quirky, nostalgic element to your home. Made from old suitcases, they provide a unique, vintage look. The leather straps and metal hardware give this door an antique feel. It’s perfect for rooms with eclectic or retro designs. This door brings personality and character, making it a conversation piece in any home. It’s functional and fun, offering an innovative twist on a traditional door. 16. Concrete Slab Door Concrete slab doors provide a modern, industrial appeal. Made from solid concrete, they are sturdy and durable. The door’s raw, minimalist design makes a bold statement in contemporary spaces. It’s perfect for lofts, offices, or homes looking for an urban, sleek feel. Concrete is highly durable and requires minimal maintenance, making this door both functional and stylish in modern homes. 17. Laser-Cut Steel Door Laser-cut steel doors offer a bold, industrial look with intricate designs. The laser-cut patterns allow light to pass through while providing privacy. Steel ensures that the door is durable, secure, and low-maintenance. This type of door is ideal for modern or industrial spaces where a combination of style and security is needed. It’s a striking door option for those looking to make a statement. 18. Textured Fiberglass Door Textured fiberglass doors are durable, low-maintenance, and versatile. The fiberglass material mimics the look of wood or metal while offering superior resistance to wear and tear. The textured surface adds visual interest and depth. These doors are perfect for both interior and exterior use. Ideal for homes in areas with harsh weather, they are built to withstand the elements while enhancing your home’s design. 19. Sliding Mosaic Tile Door Sliding mosaic tile doors add a colorful and artistic touch to your home. The small tiles create vibrant patterns that brighten up any room. This door is perfect for kitchens, bathrooms, or areas where you want to add a pop of color. The sliding feature saves space, and the tiles are easy to clean. It’s a clever and functional door that makes a statement in any space. 20. Perforated Aluminum Door Perforated aluminum doors offer a modern, industrial design with added functionality. The perforations allow light and air to flow through while maintaining privacy. The aluminum material is lightweight, durable, and resistant to rust. This door is ideal for contemporary homes or businesses that require a sleek, low-maintenance solution. It’s both stylish and practical, fitting well in various modern settings. 21. Folding Accordion Door Folding accordion doors offer a flexible way to divide spaces. They can be folded back to save space when not in use. Made from lightweight materials, they are easy to operate. The design features multiple panels that fold neatly, providing an efficient solution for rooms needing occasional separation. These doors are perfect for closets, laundry rooms, or as room dividers in smaller spaces. 22. Etched Glass Nature Door Etched glass nature doors combine art with functionality. The glass panels feature intricate etchings of nature-inspired designs, like trees or flowers. This door allows light to pass through while maintaining privacy. The light patterns add a graceful, peaceful touch to any room. Perfect for living rooms or home offices, it brings a serene, natural element into modern or traditional homes. 23. Woven Rattan Door Woven rattan doors bring an earthy, textured look to your home. Made from durable rattan fibers, they have a light, airy feel. The woven design allows for airflow while maintaining privacy. These doors add a tropical, bohemian vibe to any space. Perfect for bedrooms, kitchens, or as closet doors, they combine natural materials with a timeless, rustic charm. 24. Holographic Film Door Holographic film doors offer a futuristic, eye-catching look. The holographic film reflects light, creating a dynamic and colorful effect. These doors are perfect for spaces that need a modern touch. The material is durable and easy to clean, making it both stylish and practical. This door works well in home offices, studios, or any space looking to make a bold statement. 25. Salvaged Window Frame Door Salvaged window frame doors offer a unique, vintage look. Made from repurposed window frames, each door is one-of-a-kind. The wood gives it a rustic, timeless appeal. This door works well in eco-friendly homes or spaces with a historical theme. It’s perfect for adding character and charm to rooms while promoting sustainability. An excellent choice for entryways or as a statement piece. 26. Leather-Paneled Door Leather-paneled doors add a luxurious, tactile element to your space. The smooth leather panels give the door a rich, refined look. Leather is durable and provides a soft, warm texture. This door works well in high-end interiors, like home offices or master bedrooms. The leather panels create a lavish focal point, making this door a unique addition to any space. 27. Plexiglass Color-Block Door Plexiglass color-block doors are modern and visually striking. The door features blocks of different colored plexiglass panels, giving it a sleek, contemporary feel. The transparent material allows light to pass through, while the color blocks add personality. It’s a great choice for modern spaces that want a pop of color. Perfect for entryways or modern interior rooms, this door adds a unique flair. 28. Copper Patina Door Copper patina doors have a stunning, aged look. The copper surface naturally develops a greenish patina over time, adding character. These doors are durable and have an antique feel. The copper’s unique coloring changes with time, making each door distinct. Perfect for industrial-style homes, entryways, or accent walls, they offer a mix of old-world charm and modern durability. 29. Herringbone Wood Door Herringbone wood doors feature a classic pattern that is both stylish and timeless. The wood panels are arranged in a V-shaped, zigzag pattern, creating a striking visual effect. Made from high-quality wood, this door is sturdy and graceful. The herringbone design adds texture and depth to any room. Ideal for living rooms or entryways, this door combines refinement with natural beauty. Wrapping It Up Choosing the perfect bathroom door comes down to balancing your style, space, budget, and practical needs. I hope these innovative bathroom door ideas have inspired you to think beyond basic hinged doors. Remember to consider moisture resistance, privacy levels, and the available space. If you go modern with smart glass or rustic with reclaimed wood, the right door will make your bathroom feel like a completely new space. Your bathroom deserves a door that’s both beautiful and functional, so pick one that makes you smile every time you use it. Have you found your dream door, or do you have questions about the installation? Comment below and let me know which bathroom door ideas caught your eye!
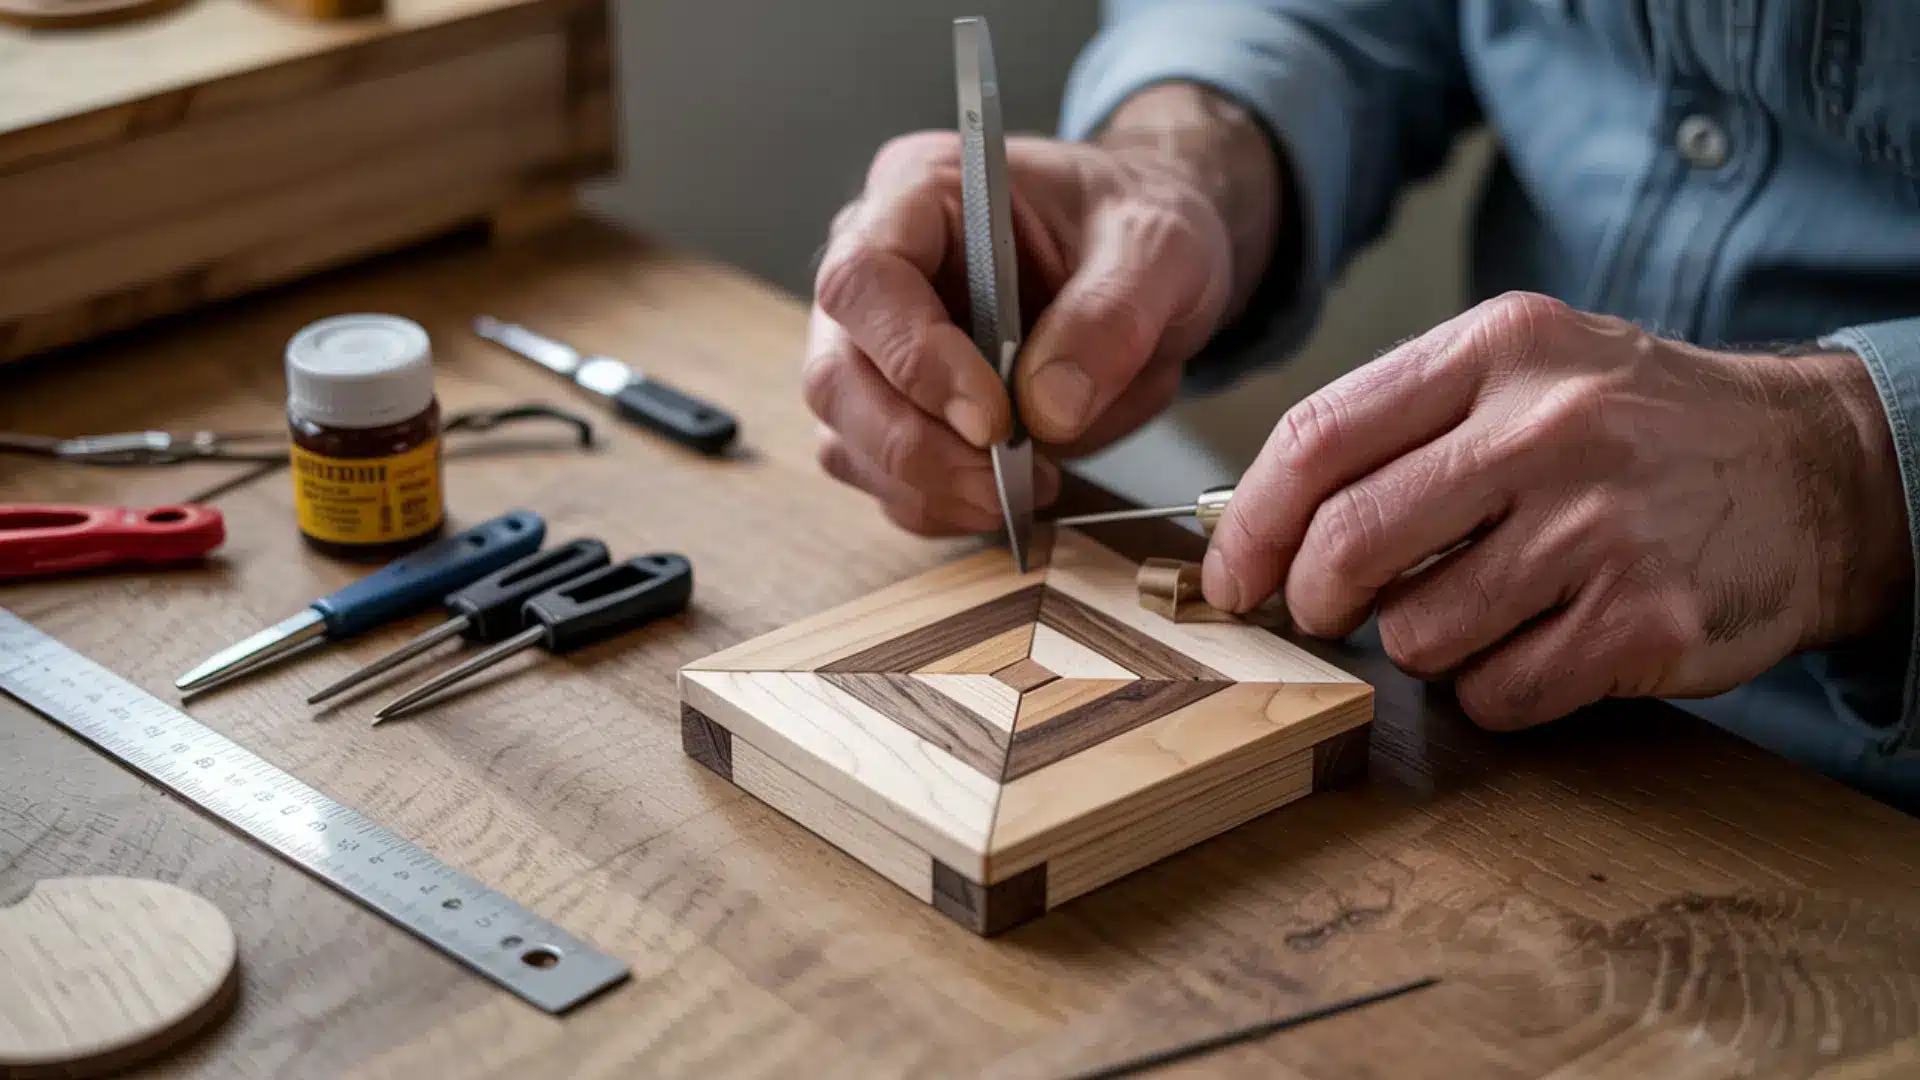
Ever looked at a wooden table or box and wondered how those sharp shapes or patterns are set into the surface so neatly? Wood inlay can seem tricky at first, but with the proper guidance, you can absolutely do it yourself. In this blog, I’ll walk you through what wood inlay is, what materials work best, and exactly how to get started. You’ll find step-by-step instructions, project ideas for all levels, and simple tips to help you avoid common problems. If you’ve worked with wood before or are just curious, this guide gives you the tools to try something new with confidence. Ready to learn how it works and what you’ll need to begin? Understanding Wood Inlay Work Wood inlay involves placing contrasting materials, such as wood, resin, or metal, into carved spaces on a solid surface to form shapes or patterns. This method has roots in ancient Rome, Egypt, and Asia, where it was applied to furniture and ceremonial items. Unlike marquetry, which uses thin pieces laid on a surface, or veneer, which covers larger areas with thin sheets, inlay adds detail directly into the base. Step-by-Step Guide to Creating Wood Inlays Follow these clear instructions to prepare, cut, install, and finish inlay work with accuracy using basic tools and steady technique. Tools Required Chisels (various sizes) Craft knife or precision blade Ruler or marking gauge Router or rotary tool Clamps Sandpaper (fine grit) Wood glue or epoxy Safety glasses and a mask Step 1: Planning and Cutting the Design Start by sketching your design directly onto the wood surface or transfer it using carbon paper. Use a ruler or template to keep lines accurate. Mark clear boundaries for the inlay and check alignment from multiple angles. Carefully cut along the marked area using a chisel or precision blade. For more detailed work, a router with a guide may help shape recesses without damaging surrounding areas. Step 2: Setting the Material in Place Dry-fit each inlay piece to check accuracy before applying glue. Ensure the fit is snug but not forced, which can damage the edges. Apply a thin, even layer of adhesive to the inside of the cavity. Press the material gently into position, making sure all parts are flush with the surrounding surface. Use clamps or weights if needed while it sets. Clean up any excess glue before it hardens. Step 3: Smoothing and Finishing Techniques Once the adhesive is fully dry, begin sanding the entire surface with fine-grit sandpaper to bring all parts to an even level. Move slowly to avoid removing too much material. After sanding, apply your choice of finish, such as oil, wax, or varnish, based on the object’s intended use. Always test finishes on a sample first to check for surface reactions or discoloration. Step 4: Fixing Fit or Surface Issues If gaps are visible after placement, use wood dust mixed with glue to fill them. Let it dry thoroughly, then resend. If the inlay is uneven or loose, check for movement in the base material or improper cuts. Adjust with careful trimming or replace the affected part. Avoid rushing corrections, as minor flaws can become more noticeable after the project is complete. Regular inspection during each stage helps avoid long-term issues. Wood Inlay Ideas for Every Skill Level This section offers practical project ideas suited for different experience levels. Each one helps you practice key skills, from simple shapes to larger builds, using various materials and tools. Simple Coasters with Basic Shapes This beginner project is perfect for getting used to the inlay process. Use small wood blanks to make coasters and insert simple shapes like lines, triangles, or diamonds. Focus on clean cuts, smooth fits, and applying glue evenly. Minimal tools are needed, and results are quick to see. It’s a great way to build control and understand how contrasting materials behave when worked into shallow surface recesses. Framed Wall Plaque or Sign Use a flat wooden board to create a plaque with a symbol, shape, or lettering made from inlay. You can trace the design or use stencils. Carve shallow recesses using a chisel or craft knife, then fit thin strips or shaped wood into place. This project teaches surface layout, edge control, and precision placement. It’s a useful way to build focus without handling complex joints or deep cuts. Small Wooden Box with Lid Detail This project introduces corners, surface variation, and alignment. Start with a basic wooden box and design a simple border or shape on the lid for the inlay. You’ll learn to work across flat and raised areas, helping with your hand skills and layout planning. It’s also a chance to practice gluing and sanding on a functional object. The box serves as a great gift or storage item when finished. Serving Tray with Border Inlay A serving tray offers a flat, medium-sized surface to test longer inlay lines or curves. Use a ruler and compass to create the pattern, then cut and place thin wood or metal into shallow grooves. This teaches longer cuts, pattern continuity, and finish control. Handles and raised edges can be added for function. The final tray looks polished, and you’ll gain comfort working with slightly larger tools or routers. Keepsake Box with Multiple Inlay Panels This box features more detail, often combining inlay on the lid, sides, or even inside. It demands layout planning and precise measurement. You’ll need to shape and fit pieces consistently across multiple faces, requiring a steady hand and repeatable cuts. This helps improve your handling of repetitive tasks, like cutting numerous identical pieces. The result is a personal project that shows improvement in control, accuracy, and surface finishing. Tabletop with Repeating Geometric Pattern A tabletop design gives space to practice complex layouts like grids, diamonds, or repeating bands. This project requires planning full patterns before cutting and ensures each inlay aligns across a large area. It’s ideal for using routers and advanced layout tools. You’ll also learn to manage surface leveling and keep edges consistent. Working across a wider surface teaches patience and helps refine techniques learned in smaller projects. Decorative Wall Panel with Mixed Materials This advanced project lets you combine wood with metal, resin, or stone to create high-contrast visuals. Choose a balanced design and lay it out across a wooden board. Different tools are needed for each material, so this project teaches tool switching and adhesive compatibility. Surface leveling becomes more complex with mixed textures. The panel works well as a display piece, allowing you to test detailed patterns and highlight precision. Materials Used in Wood Inlay Different materials are chosen based on contrast, strength, and purpose. Selection depends on the project type, tools, and surface needs. Common Types of Wood for Inlay Work Popular choices include walnut, maple, cherry, and ebony. Each offers contrast in color and texture, and most are easy to shape and sand. Walnut – deep brown, ideal for darker accents Ebony – very dark, dense, clean edges Maple – pale tone, smooth grain Cherry – warm reddish tone, easy to work with Hardwoods are favored for strength. Matching densities helps prevent cracking, especially in small and mid-size designs. Other Materials Often Used (Stone, Metal, Epoxy) Materials like metal, stone, and epoxy are used when a stronger definition or texture is desired. Thin brass or aluminum strips form precise lines. Crushed stone adds a coarse, natural surface. Epoxy allows bright colors and works well for narrow gaps. These materials each require different handling tools and bonding methods. Testing fit and adhesive compatibility is essential when mixing materials to avoid weak points or uneven finishes in the final result. Tips on Choosing the Right Combination Choose materials based on your design, tools, and experience level. Start with basic wood pairings to learn control and shaping. When combining woods, use opposing tones for contrast. For more visual impact, integrate metal or resin only after testing fit and finish. Always match material hardness to avoid shifting after sanding or use. Checking how materials react with glue and finish helps prevent problems once the piece is complete and sealed. Where to Get Supplies and Kits Several trusted online sources provide wood inlay supplies, including Inlay Product World,Bell Forest Products, and Exotic Wood Zone. When evaluating suppliers, consider factors such as product variety, wood types, return options, shipping reliability, and clear customer feedback. Reliable sellers offer detailed descriptions and clear images that help assess grain and tone. Starter kits may include essential tools and materials, while individual items can be chosen based on specific project needs. Choosing suppliers with consistent quality and clear policies helps ensure smoother results for both small and large builds. Helpful Tips to Improve Accuracy and Build Quality Improving results in wood inlay often comes down to preparation, tool handling, and choosing materials that match the surface and project type. Check your fit early using dry runs before applying adhesive; this helps avoid gaps or uneven surface levels. Work slowly with harder materials, and use sharp tools to prevent chipping or rough edges around recesses. Seal both the inlay and base wood if working in changing humidity to reduce movement and ensure long-term strength. Avoid forcing pieces into place; gently reshape them to preserve surface detail and reduce the risk of damage. Conclusion Now that you’ve got a solid overview of wood inlay, you can see it’s more about steady steps than special talent. You’ve learned how the process works, which materials to use, and how to start with small, rewarding projects. If you’re thinking about giving this a try, go back to the tools list and pick a simple plan from the ideas section. Keep it low-pressure; your first project is all about learning. Remember, the more time you give each step, the better your result will be. Want to build on this and keep learning? Check out more of my guides and posts on hands-on woodworking tips, right here on the blog.
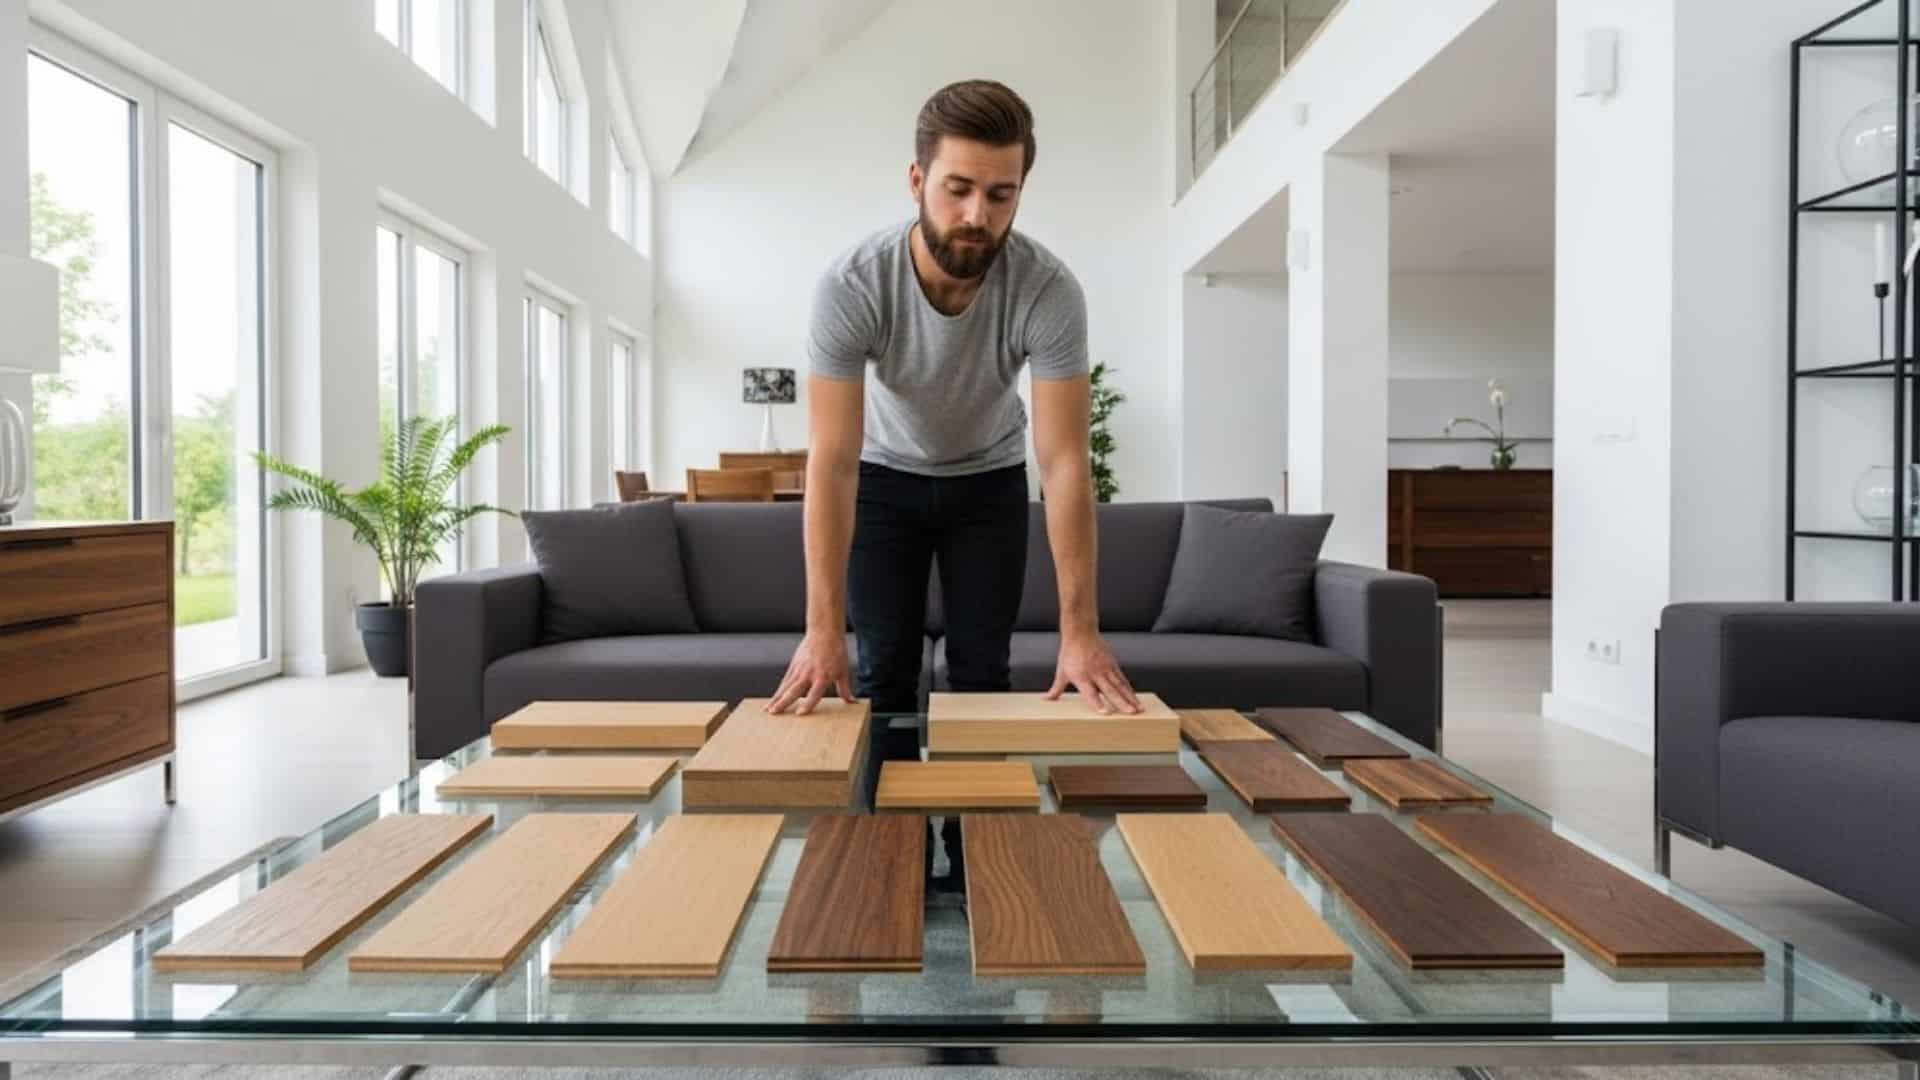
Mixing wood tones and finishes is much easier than you imagine! Different wood tones create visual interest and depth that make spaces feel layered and refined, much likehow oak vs walnut choices affect overall style and balance. I’ll show you how to identify undertones, create perfect contrast, and test combinations before making a purchase. You’ll find simple rules for confidently combining woods, proven combinations that always work beautifully, and room-specific tips that prevent costly mistakes. Get ready to convert your space into something stunning! Understanding Wood Tones Wood has its personality and undertones, just like paint colors. Warm woods have honey, golden, or red hints that make rooms feel cozy. Cherry, mahogany, and traditional oak all have warm undertones. Cool woods show gray, ashy, or white undertones that create a modern, crisp look. Maple, ash, and whitewashed pine fall into the cool category. Woods also fall into three categories: light, medium, and dark. Light woods, such as birch, naturally brighten spaces. Medium tones like walnut add richness without overwhelming. Dark woods like ebony create drama and refinement. The contrast between these levels affects your room’s mood completely. High contrast feels bold and striking. Low contrast looks calm and unified. Understanding these basics helps you mix woods confidently. The Rules for Mixing Wood Tones These three simple rules will save you from decorating disasters. Follow them, and your wood mixing will always look professional. Rule 1: Stick to the Same Undertone Family Warm woods play nicely with other warm woods. Cool woods combine beautifully with cool companions. This happens because similar undertones create balance instead of fighting each other. Your cherry dining table will love that walnut bookshelf nearby. But mixing warm oak with cool gray-washed pine creates awkward clashes. Rule 2: Vary the Intensity Levels Light, medium, and dark woods create perfect visual balance together. This variation adds depth and prevents your room from looking flat. A light maple coffee table pairs with medium walnut side tables and dark ebony frames. Without this contrast, everything mixes into one monotonous blur. Rule 3: Limit Yourself to 2-3 Wood Tones per Room Too many different woods create visual chaos and overwhelm your space entirely. Two to three wood tones provide enough variety to stay interesting without crossing into messy territory. More than three stars competing for attention make decorating decisions much harder while destroying cohesion. Perfect Wood Tone Combinations I’ve been watching these proven combinations make homes beautiful for decades. You’ll create a look that feels both intentional and effortless with any pairing. 1. Classic Warm Combinations Warm wood combinations bring cozy comfort to any space. These pairings never go out of style and work in both traditional and modern homes. Oak and walnut create the perfect balance of light and dark richness Cherry and maple mix beautifully with their shared red undertones Honey oak with darker browns adds depth while staying warm and inviting These combinations feel natural because they share similar golden undertones. You’ll find these pairings in well-designed homes everywhere. 2. Modern Cool Combinations Cool wood combinations create fresh, contemporary spaces that feel clean and cultured. These pairings work exceptionally well in minimalist and Scandinavian-inspired interiors. Gray-washed woods with white oak deliver crisp, airy refinement Ebony and light ash create stunning high-contrast drama Bleached pine with silver-toned finishes keeps spaces feeling light and modern These combinations feel current and fresh without being trendy. They’ll look stylish for years to come. 3. Neutral Combinations that Always Work Neutral combinations offer foolproof options that work with any decorating style. These safe choices let you experiment with colors and textures elsewhere in your room. Natural oak with painted wood creates a versatile, lasting appeal Weathered wood with fresh pine brings casual, relaxed vibes Unfinished wood with white-washed pieces keeps things simple and clean These combinations work because they’re subtle and understated. You can build any design style around these reliable foundations. Room-by-Room Application Each room in your home has unique opportunities for mixing wood tones successfully. I’ll show you how to apply the golden rules in your most important spaces. 1. Living Room: Mixing furniture pieces, flooring, and built-ins Your living room offers the most opportunities to mix wood tones successfully. Start with your flooring as your base tone, then choose furniture that complements it. Built-in bookshelves can bridge the gap between your floors and coffee table. Mix a light oak coffee table with medium walnut side tables and dark picture frames for perfect balance. 2. Kitchen: Cabinets, Islands, and Open Shelving Coordinate Kitchens work beautifully with two main wood tones that complement each other. Use your cabinets as the dominant wood tone, then add contrast with your island or open shelving. White oak cabinets paired with a darker walnut island create stunning visual interest. Maintain consistent hardware finishes to ensure a flawless integration. 3. Bedroom: Bed Frames, Nightstands, and Dressers Bedrooms feel most relaxing when wood tones stay within the same family. Your bed frame should be the focal point, with nightstands and dressers supporting that choice. A medium cherry bed frame works beautifully with lighter maple nightstands and a darker mahogany dresser. This creates depth without overwhelming your peaceful space. 4. Dining Room: Table and Chair Combinations Your dining table and chairs no longer need to match perfectly. Mix a rich walnut table with lighter oak chairs for contemporary appeal. The key is keeping undertones similar while varying the intensities. Add a matching walnut buffet to tie the room together and create a cohesive, intentional look. Tips for Testing Wood Combinations Testing wood combinations before you buy saves money and prevents decorating disasters. These simple strategies help you make confident decisions about your wood mixing choices. Get actual wood samples: Visit stores and collect real wood pieces, not just photos or online swatches. Check colors in different lighting: Move samples around your room throughout the day to see how they change. Create a simple mood board: Tape samples to cardboard and live with them for a few days. Match your fixed elements first: Start with your floors and built-ins, then choose furniture that works with them. Take your time with this testing process, and trust your instincts. You’ll know the right combination when you see it, because it’ll feel natural and balanced. Final Thoughts You now have all the tools to mix wood tones that go together like a professional interior designer. Remember the golden rules: stick to similar undertones, vary your light and dark intensities, and limit yourself to a few woods per room. These proven combinations and room-specific tips will guide your decorating decisions confidently every time. Don’t be afraid to experiment with samples and trust your instincts along the way. Your personal taste and style preferences matter more than any strict decorating rule I can give you. Start with one room and watch as the beauty of mixed wood tones alters your entire home. Drop a comment below and tell me about your exciting wood mixing experiences!