

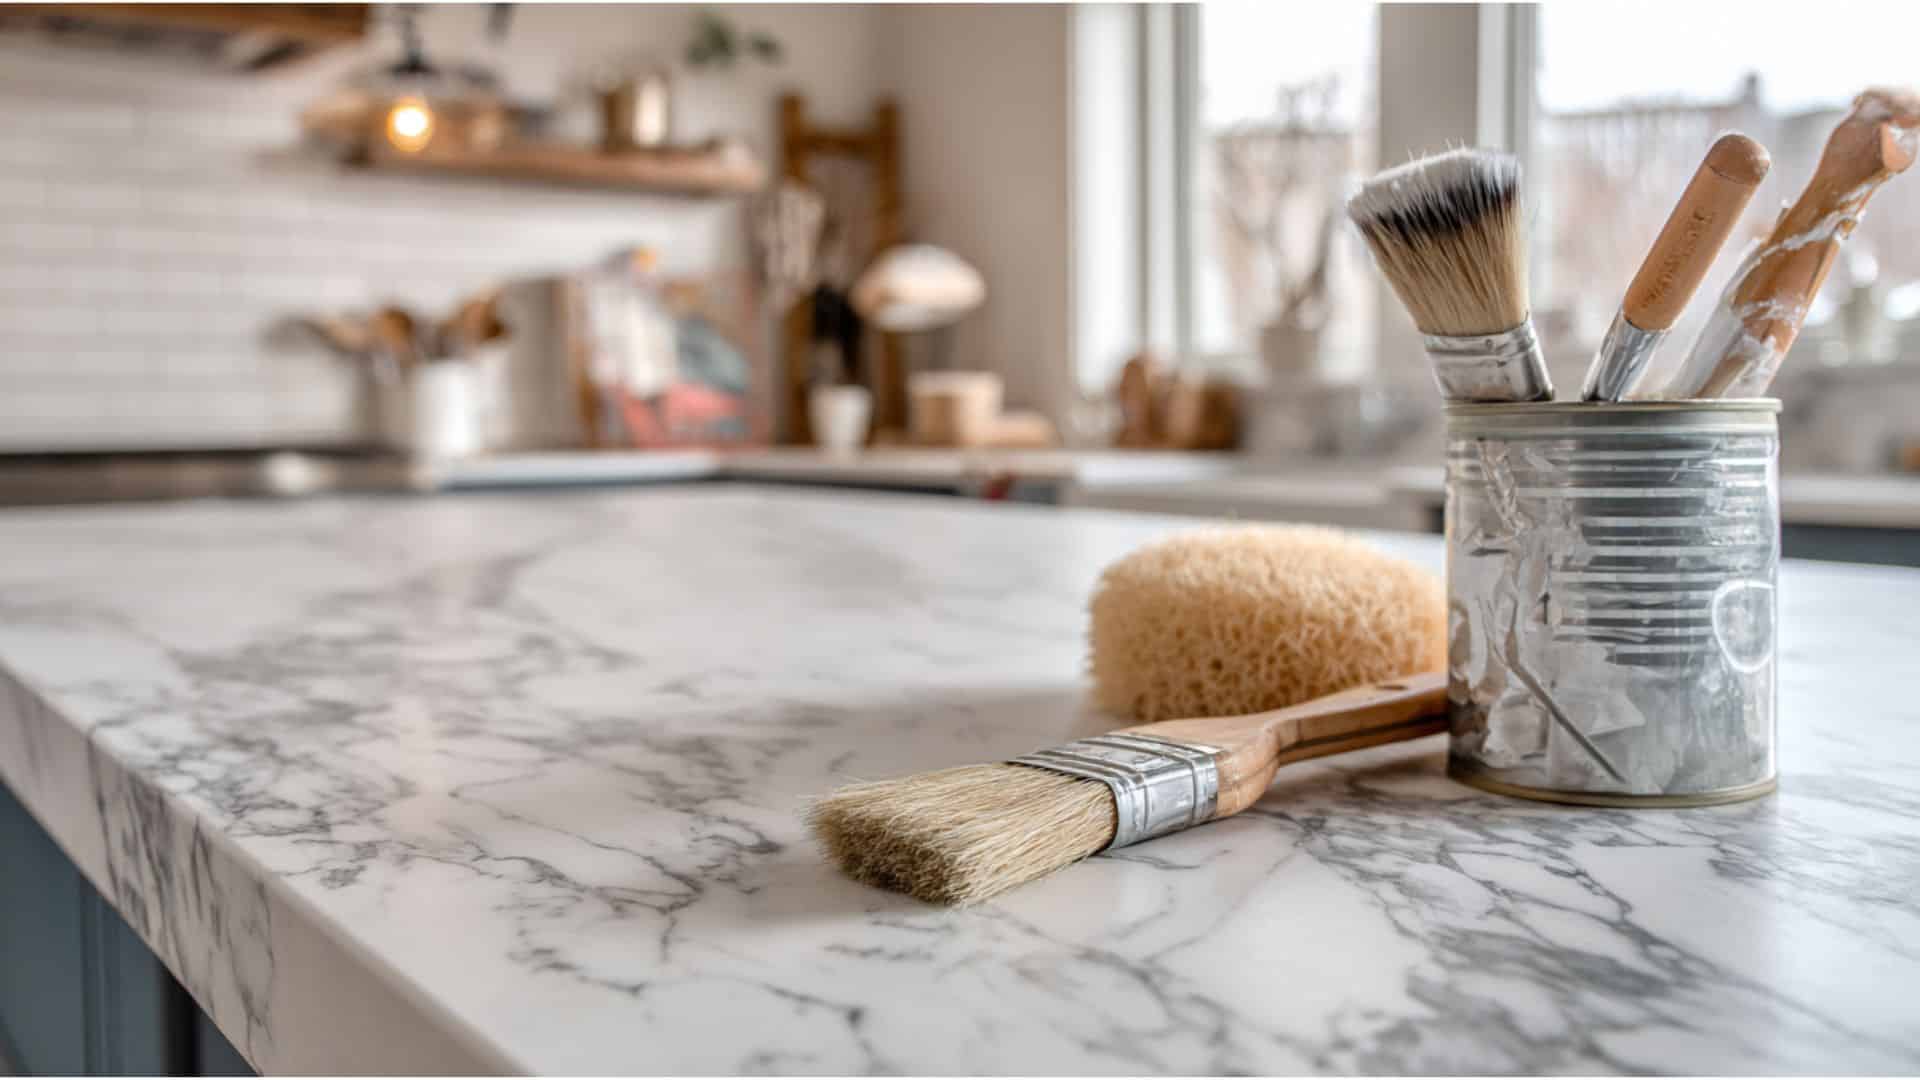
Ever dreamed of having gorgeous marble countertops but worried about the cost? Marble countertops bring lasting grace to any kitchen or bathroom. Their unique veining and natural beauty make every surface special. But here’s the exciting part – you don’t need to break the bank! DIY marble countertops are your ticket to luxury on a budget. I’m here to show you exactly how to create stunning faux marble surfaces. You’ll save thousands while getting that high-end look you’ve always wanted. Here, I will walk you through every step needed for success. Ready to alter your space? Let’s turn your countertop dreams into reality! Why DIYing a Marble Countertop is Worth It Marble countertops are a lasting and wise choice that never goes out of style. Their unique veining and natural patterns add beauty to any space, making each countertop one-of-a-kind. If you prefer a classic white marble or something with bold, colorful veins, it complements both modern and traditional styles. Marble’s durability is another big plus. It can handle daily wear and tear in kitchens and bathrooms, making it a practical yet luxurious option. While it might seem expensive, it adds lasting value to your home. With proper maintenance, marble countertops can last for many years. Overall, marble is a versatile material that combines flawlessly with any design, creating a stunning and functional focal point in your home. Choosing the Right Marble for Your Project When choosing the right marble for your project, it’s important to consider the color, pattern, and price. Here’s a quick guide to help you determine which marble is best suited for your needs. Marble Type Description Best For Carrara Marble Classic white with soft gray veins, this is a classy and versatile choice. Kitchens, bathrooms, and floors. Calacatta Marble Bright white with bold, dramatic veins in gold or gray. Luxury kitchens, bathrooms, and features. Emperador Marble Dark brown with lighter veins, rich and warm. Bathrooms and classic interiors. Statuario Marble White with dramatic gray veining, premium appearance. High-end kitchens, bathrooms, and countertops. Crema Marfil Light beige with subtle gold and brown veins. Neutral spaces, living rooms, and bathrooms. Thassos Marble Pure white with minimal veining, clean and bright. Contemporary designs and modern bathrooms. Now that you have an idea of the different types of marble, choose the one that best fits your style and budget. Each option can alter your space and add a unique touch to your home. Step-By-Step Process: DIY Marble Countertops Create a stunning faux marble countertop with these easy, cost-effective steps. Each stage ensures a smooth, professional-looking result that lasts. Here is what you’ll need for DIY Marble Countertops Paint (Valspar Bistro White or your preferred color) Glaze Sea sponge Rag Chip brush A duck feather or a small paintbrush Polycrylic (Minwax Clear Matte) Painter’s tape Sandpaper (220 grit) Foam brush (for applying polycrylic) STEP 1: Prepare Your Countertop Surface Start by thoroughly cleaning your existing countertops to remove any dirt, dust, or grime. Remove fixtures, such as sinks and cooktops, to make the job easier. Apply painter’s tape around areas you don’t want to paint, and cover the surrounding space to prevent accidental spills. Bonus Tips: Use a mild cleaner to avoid any residue. Ensure your tape is pressed down tightly to prevent paint bleeding. Take your time cleaning for the best results. STEP 2: Apply the Base Coat Once your countertop is clean and dry, apply a crisp white base coat. This is the foundation for the faux marble look. Use a roller for an even spread, and allow it to dry completely before moving to the next step. Bonus Tips: Allow the base coat to dry completely to prevent smudges when applying the next layers. Choose a paint designed for countertops for better durability. Apply a second layer if the first coat isn’t fully opaque. STEP 3: Create the Veins For the marble effect, mix one part paint, one part glaze, and three to four parts water. Use a sea sponge to stamp the paint mixture onto your countertop in small sections. Then, quickly blot with a dry rag to create soft, combined lines that mimic the veins of marble. Bonus Tips: Practice your veining technique on scrap paper before applying it to your work. Work in smaller sections to keep the paint wet for mixing. Don’t worry if it looks messy – you can fix it! STEP 4: Add the Marble Veins Once the initial veining layer has dried, mix one part paint with one part glaze and add a few drops of water. Using a duck feather or small brush, apply random veins at a slight angle. Create a more natural look by using a chip brush to blur the lines gently. Bonus Tips: Use a feather for a soft, natural look. Experiment with darker veins for added depth and dimension. Don’t be afraid to adjust the veins if they don’t look right at first. STEP 5: Seal Your Countertop Once the paint and veins are dry, apply a protective clear finish with polycrylic. This ensures the marble look lasts and protects your countertops from spills and scratches. Use a synthetic brush for the best finish, and let the coat dry before adding additional layers. Bonus Tips: Opt for a matte finish for a realistic look. Let the polycrylic dry completely before using your countertop. Lightly sand between coats for a smoother finish. See the Process: DIY Marble Countertops Video Walkthrough Cost Analysis and ROI DIY marble countertops can cost as little as $200 to $900 for materials and basic tool rentals. On the other hand, hiring a professional to install marble countertops in an average kitchen typically costs between $1,200 and $6,000. This means DIYers can save anywhere from $1,000 to $5,000 compared to hiring a pro. While the savings are significant, the return on investment (ROI) for DIY projects typically ranges from 50% to 65%. Professional installations tend to deliver a higher ROI of approximately 70%–81%, thanks to their better durability and increased buyer appeal. So, while DIY marble countertops offer major savings, a professional installation provides greater resale value and long-term return. Consider your budget and future plans when deciding between a DIY installation and a professional installation. NOTE: The figures provided are estimates and may vary based on factors such as location, materials, and project complexity. Always get multiple quotes to ensure accuracy. Common Mistakes to Avoid When installing DIY marble countertops, it’s easy to make mistakes, but they can be avoided with a bit of care and attention. Here are some common errors to watch out for: Failing to properly clean the surface before starting can cause the paint to peel or not adhere well. Skipping the sealing step leaves your countertops vulnerable to stains and damage from spills or moisture. Applying too much paint or epoxy at once can lead to uneven coverage or drips. Using the wrong cleaning products can damage the marble’s surface over time, so always choose gentle, pH-balanced cleaners. By avoiding these mistakes, your DIY marble countertops will last longer and retain their appearance for years to come. Make sure to follow the steps carefully for the best results. Wrapping It Up DIY marble countertops offer incredible savings while delivering beautiful results. You get the luxury look without the hefty price tag. Plus, you’ll feel amazing knowing you created something gorgeous with your own hands. The key is to take your time and follow each step carefully. Your patience will pay off with stunning countertops that’ll make friends jealous. Don’t let fear hold you back from this rewarding project. Start planning your DIY marble countertops makeover today! You’ve got all the knowledge needed to succeed. Share your success story and inspire others to take the plunge. I’d love to hear about your experience – please comment below with your questions or share your excellent results!
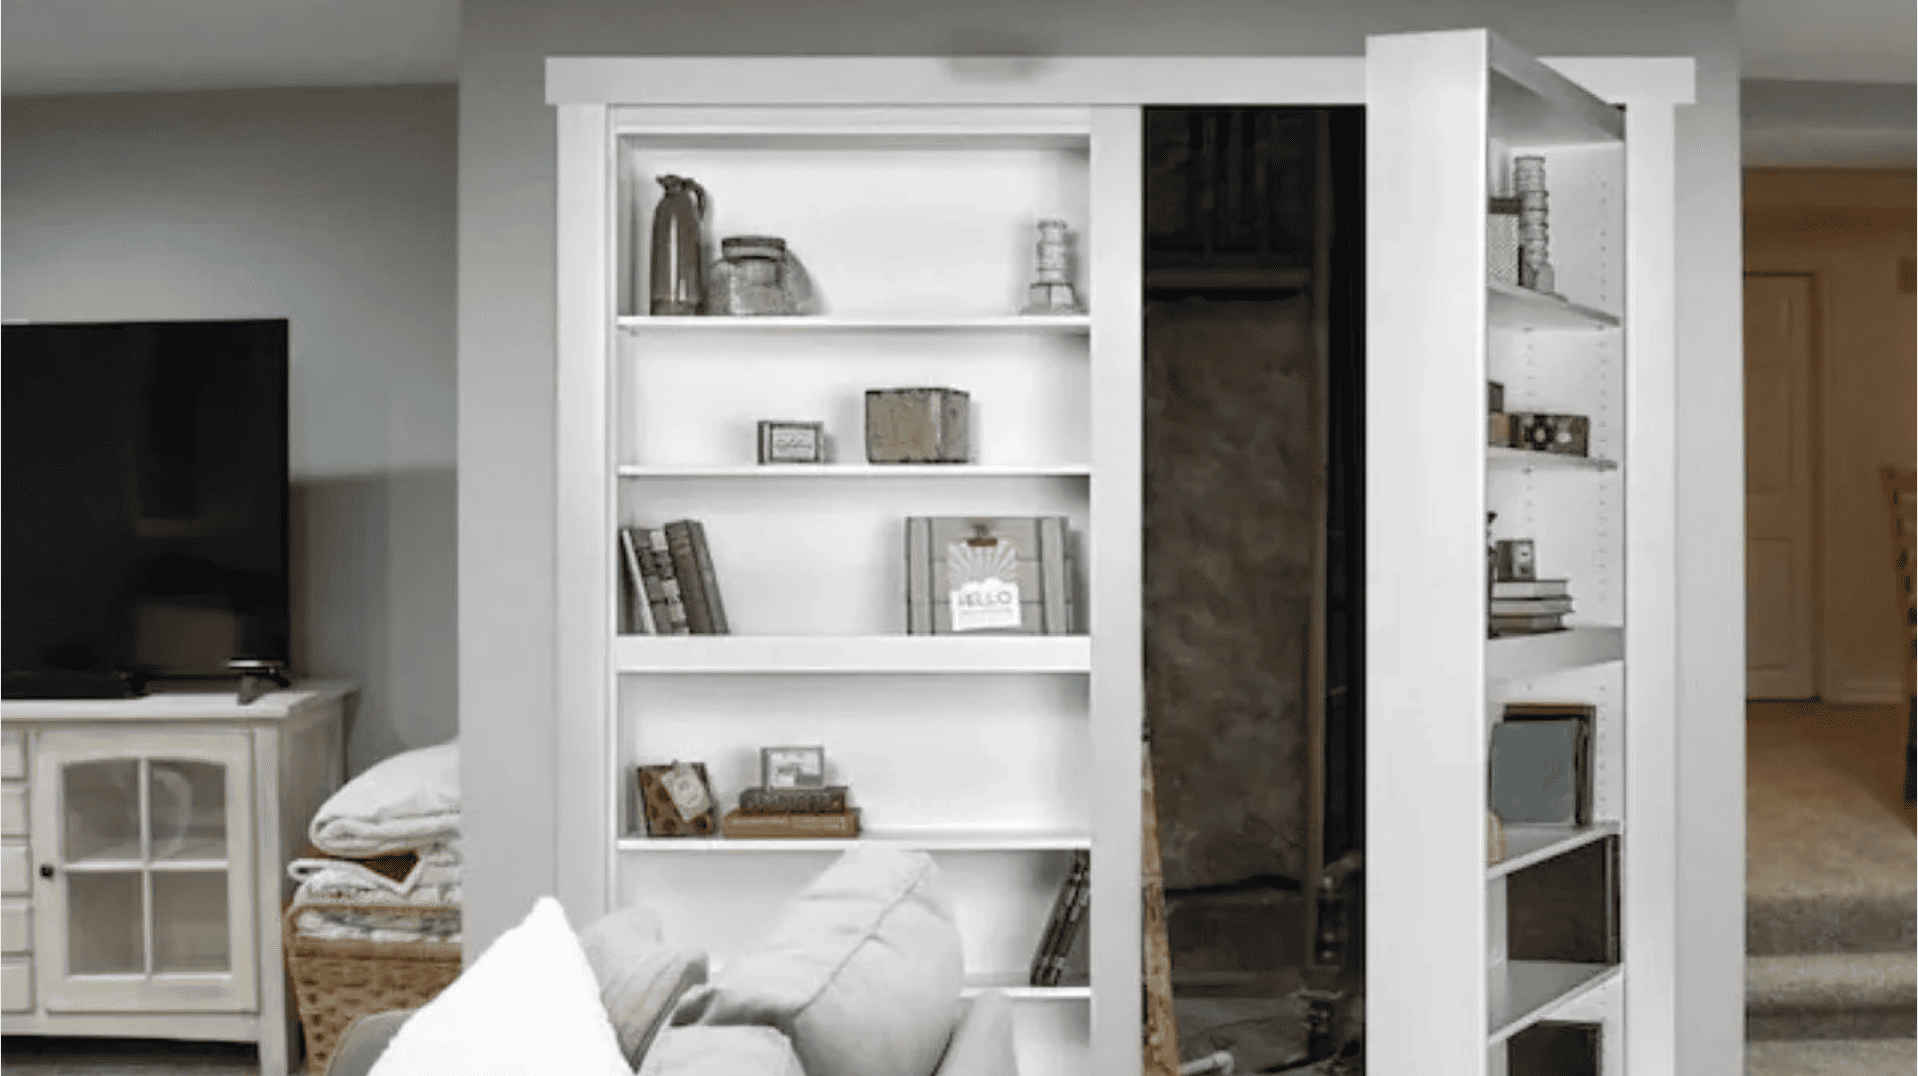
Have you ever dreamed of having a secret passage in your home, like in spy movies? Now, you can make that dream come true! DIYing a hidden door is one of the coolest home projects you can tackle without breaking your budget. Building your secret door costs much less than buying expensive kits and gives you complete innovative control. I’m here to show you exactly how to create your professional-looking mystery door that works perfectly. You’ll learn everything about planning, building, and maintaining your secret passage. If you want hidden storage or just something incredibly fun, building your own secret door is easier than you think. Get ready to become the coolest homeowner on your block! Why You Should Consider a DIY Hidden Door Hidden doors aren’t just for movies and mystery novels anymore. They’re becoming popular home features that everyone can enjoy building and using. A DIY hidden door adds an instant wow factor to your home that guests will never forget. Kids love finding secret passages, making your house the coolest one on the block. You can create private spaces for hobbies, work, or quiet time away from the busy demands of family life. Hidden doors also solve storage problems by creating concealed spaces for valuables, seasonal items, or clutter. Building one yourself becomes an exciting weekend project that combines imagination with practical carpentry skills. If you’re looking for a secret reading nook, a hidden pantry, or simply something unique and fun, a DIY hidden door can convert ordinary rooms into extraordinary spaces with mystery and joy. Types of DIY Hidden Doors You Can Build You have several exciting options when choosing which type of DIY hidden door to build. Each style offers different benefits and works best in specific areas of your home. Door Type Description Best For Difficulty Bookcase Secret entrance behind fake shelves Studies, basements Medium Mirror Hidden passage behind the wall mirror Bedrooms, hallways Easy Cabinet Secret storage in kitchen/bath cabinets Kitchens, bathrooms Easy Photo Frame Small compartment behind the artwork Any wall space Beginner Sliding Panel Modern barn door-style entrance Large rooms, lofts Hard Consider your skill level and available space when selecting your hidden door project. Start with easier options, such as photo frames or mirrors, before tackling more complex bookcase doors. DIY Hidden Door: Step-By-Step Process This five-step process will guide you through creating your own secret bookcase door, from planning to painting. I’ll show you each essential step to build a functional hidden door that looks professional and operates smoothly. Here are the materials you’ll need: 2×4 lumber Plywood (3/4 inch thick) Quarter-inch plywood or wood panel Screws (lag bolts, deck screws) Pocket hole screws and wood glue Magnetic door catches Baseboard trim Primer and paint (flat black and white) Dark-stained bamboo flooring Handle for the door Door hinges (heavy-duty) Sandpaper STEP 1: Plan and Measure Your Space Begin by planning the location of the secret bookcase door. Measure the width and height of the doorframe accurately to ensure a proper fit. Make sure the door can clear any surrounding walls or furniture when opened. Consider how deep you want the bookcase to be for storage and how to conceal it flawlessly against the wall for a truly secret door effect. Bonus Tips: Double-check measurements to avoid mistakes. Leave enough space for the door to swing open freely. Consider the room’s layout when deciding on placement. STEP 2: Build The Frame After measuring, begin by building a sturdy 2×4 frame for the bookcase door. This frame will provide the necessary strength and structure to support the weight of the bookshelf and its contents. Ensure the frame is square and level to prevent any issues when mounting the door. Use screws to assemble the frame and check for stability before moving forward. Bonus Tips: Use clamps to hold the frame in place while you work. Ensure the frame is level for smooth operation. If the wood is warped, straighten it before use. STEP 3: Attach The Plywood Panels Once your frame is set, the next step is to attach the plywood panels to it. Secure the panels with screws to the frame for a sturdy construction. Use quarter-inch plywood or wood paneling to cover the frame’s front side, ensuring it looks smooth and flawless. This step creates the surface for your bookcase door and conceals the 2×4 structure behind it. Bonus Tips: Pre-drill holes to avoid splitting the wood. Ensure the plywood is flush with the frame. Use a strong adhesive for extra hold. STEP 4: Install The Hinges and Handle Now, install heavy-duty door hinges to support the door’s weight. Attach the hinges to the frame and door to make sure the door opens and closes easily. Add a handle on the inside of the door, making it easy to pull open from within the room. Ensure everything is correctly aligned for smooth operation and a correct fit. Bonus Tips: Use at least 3 hinges for stability. Test the door for smooth opening and closing. Ensure the handle is comfortable and easy to use. STEP 5: Finish and Paint The final step is to finish the bookcase door with a clean, attractive paint job. Apply a primer coat, and then use your desired exterior paint. For contrast, consider painting the door’s exterior in white, while the interior gets a dark, moody color like flat black. Allow the paint to dry completely for the best results. Bonus Tips: Sand between coats for a smooth finish. Use a brush for detailed areas and a roller for flat surfaces. Let the paint cure completely before using the door. Cost Analysis and ROI of DIYing a Hidden Door Building your hidden door costs just $150–$400 when you buy materials smart and do the work yourself. That’s huge savings compared to purchasing pre-made kits! Store-bought hidden door kits typically cost $700–$ 1,000 or more for materials alone. Add professional installation, and you’re looking at $1,500–$3,000 or more for the complete project. Hiring professionals guarantees perfect results, but DIY saves you thousands in labor costs. Hidden doors can enhance your home’s value, particularly in more desirable neighborhoods. The best part? Well-built DIY hidden doors need very little maintenance over the years. You get a cool, functional upgrade that pays for itself while impressing everyone who visits. Why pay triple when you can build something amazing yourself? NOTE: The above costs are estimated and may vary depending on material choices, quantity, location, and specific project needs. Maintenance and Troubleshooting Your DIY hidden door will last for years with just a little regular care and attention. Simple maintenance prevents big problems and keeps your secret door working like new. Check your hidden door monthly by opening and closing it to catch problems early before they worsen. Focus on hinges and handles, as they receive the most use and wear out the fastest over time. Adjust the door alignment twice a year because wood expands in the summer heat and contracts during the cold winter months. Apply light oil to hinges and moving parts every few months to keep everything operating smoothly and quietly. NOTE: Call professionals for repairs if your door won’t close properly, makes loud noises, or has structural damage issues. Final Thoughts Building a DIY hidden door brings movie magic right into your everyday life in a truly exciting way. You’ve learned how to create secret passages that amaze guests and provide practical storage solutions. Your hidden door will become the favorite feature that everyone talks about when visiting your home. I believe you’ll love the satisfaction of building something this unique and functional with your own hands. Ready to create your secret passage? Share your DIY hidden door photos and questions in the comments below!
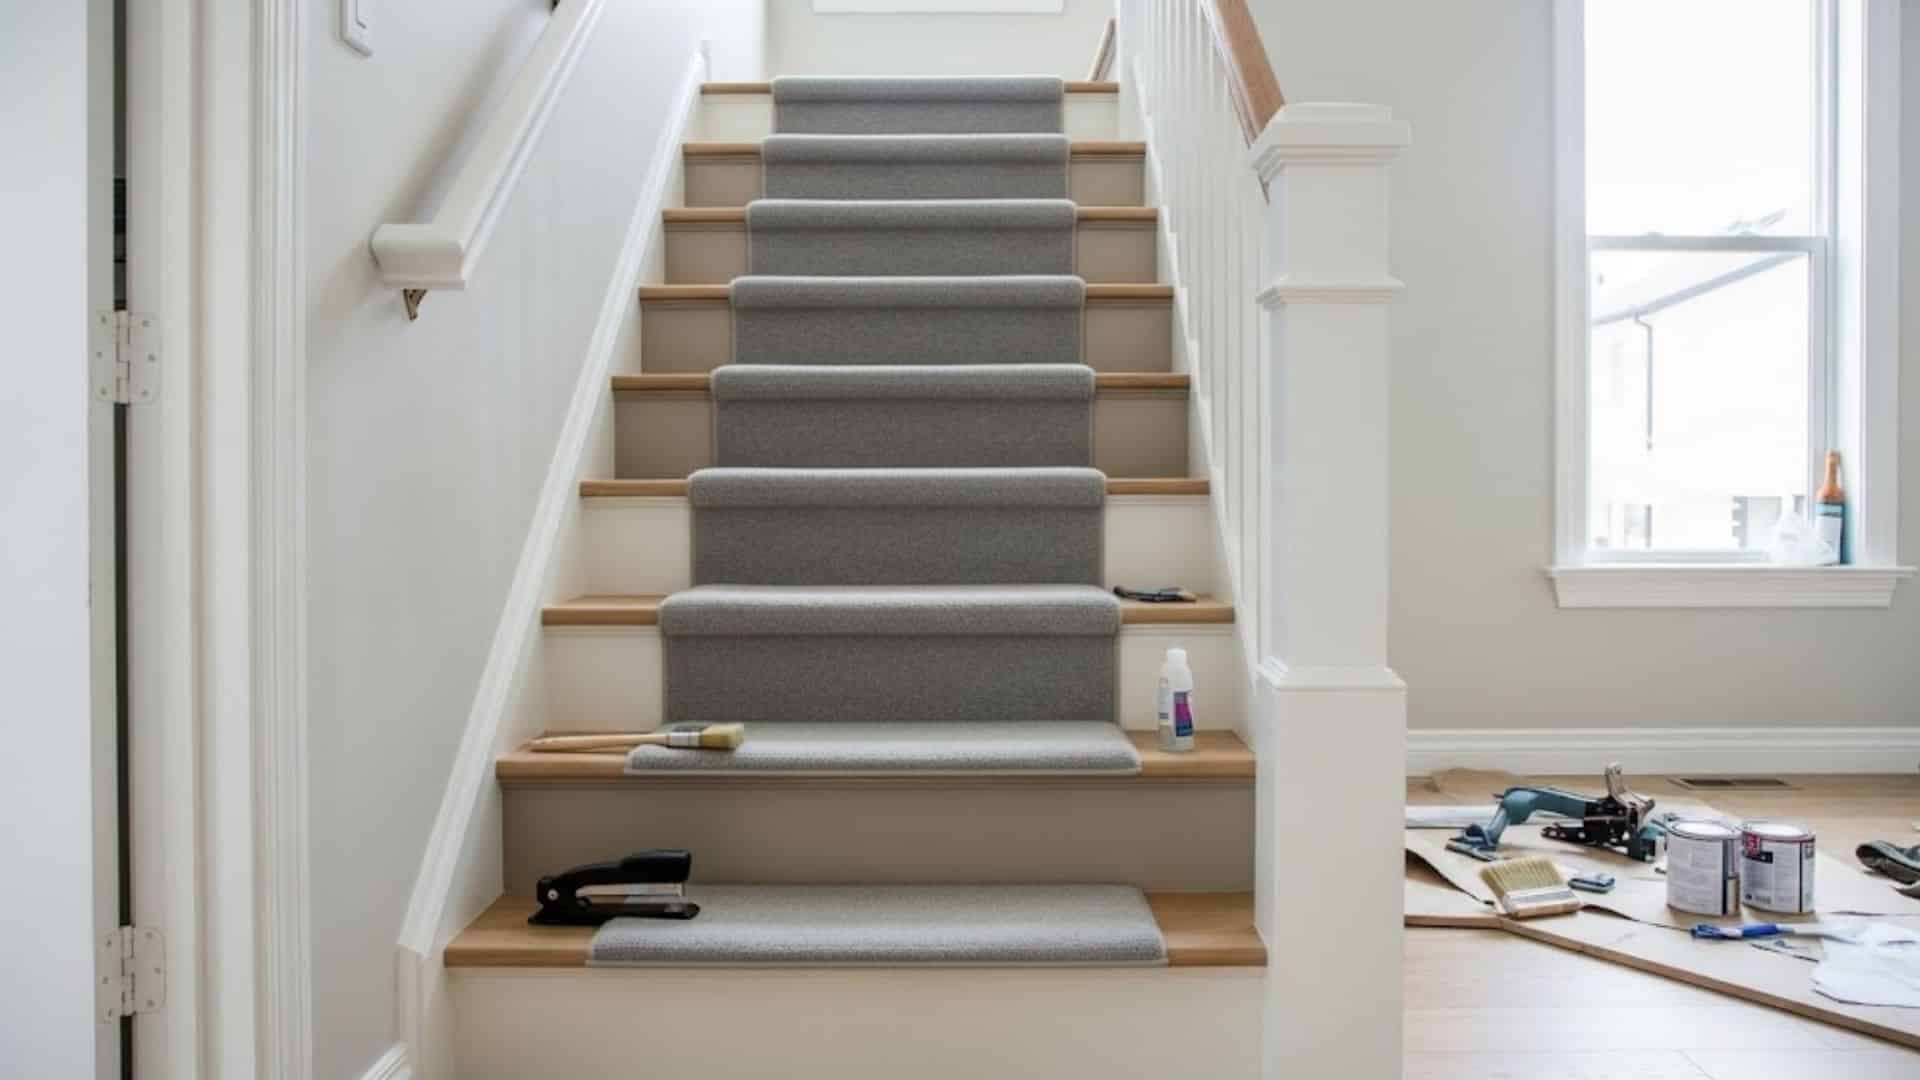
Are you tired of looking at your boring, outdated stairs every single day? I have the perfect solution for you! A DIY cheap stair makeover is one of the smartest home improvement projects you can tackle. You can change your stairs into stunning focal points for under a few hundred dollars. Most makeovers can be completed in just one weekend, making them perfect for busy homeowners like you. I’m here to show you exactly how to create a beautiful stair changeover on any budget. You don’t need special skills or expensive tools to get professional-looking results at home. My step-by-step approach covers everything, including materials, costs, instructions, and maintenance tips. Get ready to fall in love with your stairs all over again! Why a Stair Makeover is Worth It Stairs are one of the most overlooked spaces in your home, but they have huge makeover potential! You walk past them every single day, so why not make them beautiful? A stair makeover offers incredible value for your investment compared to other home projects. You can completely alter the look for under a few hundred dollars. Most stair makeovers can be completed in just one weekend, making them perfect for busy homeowners. Even if you’re a complete beginner, stairs are forgiving to work on. You can practice your painting and decorating skills without major consequences. Plus, when guests visit, updated stairs create an excellent first impression that makes your whole house feel more expensive and well-maintained. Material You’ll Need for a Stair Makeover The following table outlines the estimated cost range for each material required for a DIY, budget-friendly stair makeover. These prices reflect budget-friendly options that will help you alter your stairs affordably. Material/Equipment Estimated Cost Range (USD) Carpet runners (6 ft each) $8 – $40 per runner Primer and paint $15 – $40 (per quart/set) Electric stapler $22 – $80 9/16 staples $3 – $13 Carpet tape $5 – $15 Steamer $20 – $50 Carpet cutter $8 – $20 Antiquing wax $10 – $20 Sconce lights $15 – $40 each Rechargeable light $10 – $25 Total Estimated Cost $116 – $343 This table provides an estimated cost range for each essential material required for your stair makeover. Depending on your specific needs, the total cost may vary, but this should give you a good idea of what to expect. NOTE: These costs are estimated and may vary depending on material choices, quantity, and location of purchase. Step-By-Step Process: DIY Cheap Stair Makeover This simple five-step process will change your stairs from boring to beautiful on a budget. I’ll guide you through each step, building on the last to create a professional-looking makeover that you can complete over a weekend. STEP 1: Clean And Prepare the Stairs Start by wiping down your stairs with a damp paper towel to get rid of any dust or debris. If you’ve sanded the stairs, use a vacuum to ensure they’re completely clean before painting. Proper preparation is key to a smooth finish, so take your time to ensure the surface is well-prepped for the paint and runner installation. Pro Tips: Use a microfiber cloth to trap dust more effectively. Take breaks to avoid over-exerting yourself while prepping. Vacuum the edges thoroughly for a cleaner surface. STEP 2: Prime And Paint the Risers Apply a coat of primer to the risers (vertical parts of the stairs) for a smooth finish. Once dry, use Sharon Williams Pure White for the top coat. This color complements your walls, creating a flawless look. Be sure to let the primer dry fully before applying the paint for the best result. Pro Tips: Wait for the primer to fully dry before applying the top coat. Use a small brush for detailed areas like corners. Apply a second coat for a more even, durable finish. STEP 3: Paint the Treads With Shiitake For the treads (flat part of the stairs), use Shiitake paint to match the flooring. This color adds a neutral, warm tone and blends well with your home decor. If you don’t want to refinish the stairs fully, this step provides a quick solution for a fresh, updated look without sanding the old surface. Pro Tips: Use a roller for a smooth, even coat. Let each coat dry before adding another. Work in sections to avoid streaks or smudges. STEP 4: Install the Carpet Runner Measure your stairs and mark where the runner should be placed. Then, use an electric stapler to attach it, starting at the bottom and working your way up. Pull the runner tight to avoid creases, stapling underneath each stair lip to keep it securely in place. Pro Tips: Use carpet tape to hold the runner in place as you staple. Make sure to staple at the edges and at the bottom back crease for a firm hold. Don’t rush – go slowly to get each stair even and tight. STEP 5: Add Finishing Touches and Gallery Wall Complete the makeover by installing a sleek newel post and painting the handrails with a dark wash of Urbane Bronze. Once that’s done, update your gallery wall with new frames and add some stylish sconce lights to enhance the space. This adds a modern, personal touch to your upgraded stairs. Pro Tips: Use a remote-controlled sconce for easy on/off access. Choose frames that complement your runner and wall colors. Consider adding extra frames later to complete your gallery wall. Watch How it is Done: DIY Cheap Stair Makeover Video Tutorial Maintenance and Longevity Tips for Stairs Your beautiful stair makeover will last years longer with simple, regular care and smart maintenance habits. Clean your stairs weekly with a damp cloth to prevent dirt buildup that can damage finishes. Vacuum carpet runners regularly and spot-clean stains immediately before they set in permanently. Keep leftover paint on hand for quick touch-ups when you notice small chips or scuffs appear. Use a small brush to fix problem spots before they become bigger issues. Consider refreshing high-traffic areas every two to three years with a fresh coat of paint. Complete redos are only needed when colors look outdated or materials show major wear. Place small rugs at the bottom and top of the stairs to reduce daily wear and tear. Your stairs will stay beautiful much longer with these simple protective steps. Common Mistakes to Avoid while DIYing Stair Makeover Even simple stair makeovers can go wrong if you’re not careful. Learning from these common mistakes will save you time, money, and frustration. Skipping proper prep work means your paint won’t stick well and will look bumpy and unprofessional. Choosing weak materials for high-traffic areas will result in chipping and wearing within months. Ignoring safety codes when adding thick materials can create uneven steps that cause dangerous falls. Rushing through steps without allowing for proper drying time can lead to peeling paint and wasted effort on the weekend. Take your time and do each step properly for the best results. Your future self will thank you for the extra effort you put in today. Wrapping It Up Your DIY cheap stair makeover can create excellent results without breaking your budget or schedule. I’ve shown you how paint, carpet runners, and simple finishing touches make the biggest visual impact. Remember, you can achieve dramatic modifications for under a few hundred dollars and one weekend of work. The key is taking your time with prep work and choosing durable materials for high-traffic areas. Your beautiful new stairs will welcome guests and bring a smile to your face every day. I encourage you to start planning your stair changeover today and join thousands of homeowners who’ve discovered this budget-friendly makeover magic. Share your experience in the comments below!

So you want to set up a baddie room, but don’t know where to start? Lots of people want a cool, confident space that shows off their style but also feels cozy and real. Maybe your room feels boring. Maybe it just doesn’t feel like you. That’s where this blog comes in, especially if you’re mixing styles like a vintage room aesthetic with a bold baddie vibe. I’m going to walk you through everything: colors, furniture, lights, and the overall vibe. You’ll learn simple ways to change your room without spending too much or making it hard. By the end, you’ll have real ideas that work for you. Ready to give your space that bold look with a baddie room twist? Keep reading. You’re gonna love what’s next. What Makes a Baddie Room Stand Out A Baddie room is one of the few interior styles where confidence is the entire point. It’s not softened by neutrals, it’s not restrained by minimalism, and it’s not accidental. The baddie room aesthetic is a deliberate, high-energy space built around bold color, statement lighting, and glam texture, and if the room doesn’t feel like it belongs to someone who knows exactly what she wants, it isn’t done yet. That’s what separates it from comparable styles. A VSCO room is beachy and low-effort. A cottagecore space leans soft and nature-driven. A grunge room is dark and deliberately unpolished. The baddie aesthetic sits in its own category: modern, sleek, and unapologetically extra. LED lighting, faux fur, full-length mirrors, and a color palette that makes a statement the moment you walk in. Build Your Baddie Bedroom With the Right Color Palette In a baddie bedroom, colors aren’t just picked to look pretty; they’re chosen to match your energy. These shades are bold, strong, and full of life. They help your room feel like a space that’s all about confidence, style, and attitude. The Go-To Baddie Color Families These four anchor everything else in the room: Hot pink: The highest-energy choice. Loud, unapologetic, and effective in small doses or as a dominant wall color, depending on how much coverage you want. Black: The anchor. Nearly every baddie palette needs black somewhere, bedding, frames, furniture legs, or accent walls, to keep the energy from reading as chaos. Purple: Rich and moody. Works well as a secondary color paired with black or as a dominant in a softer, more editorial space. Metallics: Gold, silver, and chrome are the finishing layer. They reflect light, add contrast, and make the room feel more expensive than it is. How to Build a Palette That Actually Works Pick two dominant colors and one metallic. More than that, the room starts reading cluttered rather than bold. Here are four pairings that hold together: Hot pink, black, and silver, fierce and high-contrast; works best in bedrooms with strong natural light Lavender, gray, and gol, calmer energy, still elevated; good for rooms that double as study or work spaces Dark purple, black, and chrome, edgy and moody; a strong fit if you’re also drawn to the vintage room aesthetic and want some of that depth without going full retro. Blush pink, white, and rose gold, soft baddie; glam without aggression, works well in smaller rooms where dark colors would close things in One practical note: test your main wall color on a 12-by-12-inch board before committing. LED lighting, which you’ll be adding, shifts color temperature significantly, and a color that reads neutral in daylight can shift warm or cool depending on what strip lighting you run behind the headboard. Must-Have Baddie Room Decor Items Creating a true baddie room is also about the details you add. The right decor brings your personality into the space and gives it that baddie vibe. From glowing lights to statement furniture, these are the key pieces that turn your room into a full baddie zone. 1. LED and Neon Lights Lighting is the single most effective and affordable way to change how a room feels. LED strip lights along the back of a headboard or underneath a bed frame cast a soft halo that reads far more expensive than the $15 to $40 it actually costs. For color, stick to pink, purple, or cool blue; warm white reads more cottagecore than baddie. A neon sign adds a secondary focal point. Keep the message short: one word or a simple symbol lands harder than a full phrase. 2. Posters, Wall Art, and Photo Collages Your walls should do work. Mix fashion editorial prints with selfies, Polaroids, or screenshots from social media saved at print resolution. Use a grid or washi tape layout instead of formal frames if you want the look to feel raw and personal rather than gallery-finished. The best collage walls don’t look curated, they look accumulated, like evidence of a person who has strong opinions and isn’t keeping them to herself. 3. Glam Furniture and Textiles Baddie furniture choices are driven by shape and material more than specific styles. Low platform beds read more modern than traditional frames. Clear acrylic chairs add a visual lightness that keeps the room from feeling heavy when you’re working with dark colors. For textiles, faux fur, velvet, and satin are the materials that do the most work. Layer a faux fur throw over velvet pillows — the texture contrast is what gives the bed that styled, editorial quality. 4. Mirrors, Vanity Areas, and Functional Decor A full-length mirror is non-negotiable. If you can add LED strips around it, do it, it turns a functional piece into a focal point. The vanity is the other anchor of any serious baddie bedroom: a clear tray for perfume bottles, acrylic organizers for makeup, and a ring light or lit mirror for application. The goal is organized glamour, not cluttered chaos. Everything on that vanity surface should be something you actually use. DIY Baddie Room Makeover Plan With a little planning and creativity, you can give your room a total glow-up without needing a big budget. Here’s a step-by-step plan to help you do just that. Step 1: Look Around Your Current Space Start by seeing what you already have. What do you like about your room? What feels boring or out of place? Maybe your walls feel empty, or your furniture just doesn’t match your vibe. Write down what you want to change: color, layout, lighting, or storage. Step 2: Plan Your Mood Board Now the fun part, your vision. Search Pinterest, Instagram, or TikTok for baddie room inspo. Screenshot rooms, lighting, posters, colors, and vibes you love. Put it all together into a digital collage or use a notebook. Pick 2–3 main colors and decide the style you’re going for (edgy, soft glam, sporty, etc.). Step 3: Make a Budget Shopping List You don’t have to buy everything at once. Break your list into must-haves and nice-to-haves. Check affordable places like Amazon, Target, IKEA, thrift stores, or even dollar stores. Look for deals, and don’t forget DIY options—like printing your own posters or repainting old furniture. Step 4: Rearrange and Stage Your Room Before adding anything new, move your stuff around. Try different setups for your bed, desk, or mirror. Sometimes, just flipping your layout makes the whole room feel fresh. Then, slowly start adding your new decor. Stage it like a TikTok room—mirror lights on, shelves styled, blankets folded, cute. With these simple steps, you can build a baddie room that looks amazing, feels like you, and fits your budget. Just plan smart and stay true to your vibe. Room-by-Room Baddie Decor Ideas A true baddie doesn’t just stick to one space. She brings that same confident, stylish energy into every part of her home. Maybe it’s your bedroom, your desk area, or even your bathroom, you can show off your bold personality through smart decor choices. Bedroom Your bedroom is the heart of your baddie space; it’s where your style really shines. This is the place to be bold, cozy, and 100% you. Here are some top ideas to give your room that strong baddie vibe. LED Strip Lighting Behind the Headboard: Place LED lights behind your headboard or around your bed frame to create a soft glow. This instantly makes the room feel cozy and cool. Faux Fur Throw and Plush Pillows: Layer your bed with a faux fur blanket and pillows in bold baddie colors—black, hot pink, and metallics. This adds texture and drama. Wall Collage with Y2K Prints and Selfies: Fill a wall with magazine clippings, trendy TikTok art, or printed selfies. Use washi tape or clips for a raw, edgy feel. Full-Length Mirror with LED Trim: A mirror with lights is a must for outfit checks and selfies. You can DIY one by adding LED strips to a plain mirror. Vanity Corner with Acrylic Organizers: Set up a glam space with clear drawers, glass perfume trays, and a light-up mirror. Keep things cute and tidy. Living Room Your living room doesn’t have to be plain or boring. With a few stylish upgrades, you can turn it into a chill but bold space that shows off your baddie energy the moment someone walks in. Velvet Accent Chairs or Ottomans: Add chairs or ottomans in velvet for a luxe vibe. Colors like deep red, blush, or jet black make a bold statement. Neon Quote Signs: Hang a neon sign that fits your mood—“Slay All Day” or “No Bad Vibes.” It adds instant baddie attitude to the room. Floating Shelves with Statement Decor: Use shelves to show off candles, fashion books, mini figurines, or framed selfies. Style it your way. LED Coffee Table Setup: Place LED lights under or around your coffee table to give your living space that cool-glow baddie vibe. Gallery Wall with Iconic Divas: Create a wall with glossy framed pics of your faves—Rihanna, Nicki, Megan. It brings attitude and girl power into the space. Bathroom Additions Your bathroom deserves just as much style as the rest of your space. With the right touches, it can feel just as bold, clean, and confident as a true baddie zone. Hot Pink or Leopard Print Shower Curtain: Make your shower stand out with bold prints. Leopard or hot pink adds instant baddie energy to a plain bathroom. Countertop Tray with Perfumes & Jewelry: Display your everyday items on a cute tray. It looks neat, and your stuff stays in reach. Ring Light Mirror: Good lighting = good makeup days. Use an LED or ring light mirror to keep things glowing. Plush Floor Mat with Sass: Get a fun bath mat with words like “Slay Station” or “Get It Girl.” It makes even the floor fun. Matching Towel Sets in Pop Colors: Stick to your baddie palette—black, pink, lavender—and get towels that match. It ties the whole look together. Study or Desk Setup Your desk setup should feel just as bold and put-together as the rest of your room. Small details and fun touches can turn it into a space that keeps you both motivated and stylish. Pink Desk Lamp with Adjustable Light Modes: Go for a cute LED lamp in your favorite shade. Bonus if it has brightness settings for mood and study time. Acrylic Desk Accessories: Keep your space organized and pretty with clear pen cups, file trays, and holders. Glam + tidy. Motivational Wall Art Prints: Hang up bold quotes like “Boss Babe” or “You Got This” to keep your hustle strong and stylish. Faux Fur Desk Chair Cover: Add a fluffy throw or fur cover to your chair. It makes sitting feel comfier and cuter. Color-Coded Notebooks and Binders: Pick school or work supplies that match your room, blush, black, lilac. It helps you stay on theme and organized. How to Choose Your Baddie Aesthetic Style The baddie room aesthetic has three clear sub-styles, and knowing which one you’re working toward before you start buying things saves a significant amount of money and backtracking. Style Main Colors Vibe Decor Features Personality Match Y2K Baddie Hot pink, purple, silver Playful, trendy, bold LED lights, fun posters, sparkly touches Outgoing, stylish, socially confident Soft Baddie Blush, white, pastel tones Calm, pretty, clean Fluffy textures, soft lights, cozy corners Creative, comfort-driven, still wants glam Dark Baddie Black, deep red, plum Edgy, cool, confident Sleek furniture, chrome accents, bold lighting Quietly powerful, artistically inclined Most rooms that work well borrow from two of these columns rather than committing entirely to one. A soft baddie color palette with dark baddie furniture shapes is a common combination that lands well; it avoids both the risk of reading too sweet and the risk of reading too oppressive. The style sub-types aren’t rules; they’re starting points for figuring out where your instincts already sit Tips to Slay Your Baddie Room Makeover These are the decisions that determine whether a baddie room looks finished or still in progress. Most of them don’t cost anything. Stick to your two dominant colors throughout the room. Every new piece you add should pass the question: Does this belong to my palette? If not, it waits. Layer textures, not just colors. A room that’s all velvet reads flat. Mix faux fur, satin, and a hard shiny surface, the contrast is where visual interest comes from. Give decor room to breathe. Overcrowded shelves and walls make a baddie room read chaotic rather than confident. Edit down until each item has space around it. Run your LED lights before you arrange anything else. The color temperature of your strip lighting changes how every other element in the room looks — furniture, bedding, and wall color. Set the lighting first. Use storage that matches the aesthetic. Visible bins, trays, and drawers in your palette colors make organization look intentional. A clear acrylic drawer unit costs $30 to $60 and does more for a baddie bedroom than most decorative pieces at the same price. Use walls as much as floor space. Floating shelves, oversized mirrors, and gallery walls take a room vertically and make a small space feel larger. Add personal details that are actually personal. Printed selfies, a poster from a concert you went to, your actual perfume bottles rather than decorative fakes. A baddie room that could belong to anyone doesn’t belong to you yet. Photograph the room after every major addition. It’s the fastest way to see what’s working, what’s competing, and what needs to go. Frequently Asked Questions Can I create a baddie room in a rental? Yes, you can. Use peel-and-stick wallpaper, removable hooks, plug-in lights, and lightweight decor. Avoid drilling holes or painting unless your lease allows it. Focus on items you can move later, like rugs, mirrors, bedding, desk decor, and wall prints. How do I make a small room feel baddie? Keep the layout open and use decor with purpose. Choose a tall mirror, floating shelves, under-bed storage, and slim furniture. Add bold details through lighting, pillows, and wall art instead of bulky pieces. A small room can still feel stylish and confident. What bedding works best for a baddie bedroom? Go for bedding that feels bold, soft, and photo-ready. Satin, velvet, faux fur, or crisp cotton all work well. Black, blush, white, silver, and deep purple are strong choices. Add two or three statement pillows, but avoid adding so many that the bed feels messy. How can I keep a baddie room clean? Give every item a clear place. Use trays for perfume, bins for beauty items, and drawers for extras. Clean surfaces every few days so the decor still stands out. A baddie room looks best when it feels styled, not crowded or hard to use. Can I share a room and still use this style? Yes. Focus on your side of the room first. Add your own bedding, lamp, wall prints, mirror, or small shelf. Keep your color choices clear so your area feels personal. You do not need to control the whole room to show your style. What should I avoid in a baddie room? Avoid using too many colors, too many posters, or decor that does not match your vibe. Also skip cheap lights that flicker or make the room look harsh. The goal is bold and stylish, not crowded, random, or hard to relax in. How do I update my room for each season? Switch small pieces instead of changing the whole room. Try lighter bedding in spring, brighter accents in summer, deeper tones in fall, and cozy textures in winter. Keep your main furniture the same, then rotate pillows, candles, throws, and wall prints. Can thrifted decor fit a baddie room? Yes, thrifted decor can work really well. Look for mirrors, lamps, trays, frames, stools, and small shelves. You can repaint, clean, or style them with newer pieces. Mixing thrifted finds with glam decor makes the room feel more personal and less basic. Summing Up This guide gave you everything you need for a baddie room: style ideas, color palettes, decor elements, and even how to plan your makeover step by step. Take what you’ve learned, look at your space, and start small. Maybe you begin with a mood board, switch up your lighting, or just reorganize your desk. Mix styles, try things out, and don’t be afraid to change it up. Want more room ideas or styling tips to match your vibe? Make sure to check out our other blogs for more inspo, tricks, and examples that’ll help you glow up your space even more.

Do you love quiet mornings, soft colors, and the feeling of flipping through old books? I do too, and that’s why I think a light academia bedroom might be just what you need. This style brings together warm tones, vintage pieces, and meaningful decor to create a peaceful space for thinking, reading, or just unwinding. In this blog, I’ll discuss everything from color ideas to layout tips and decor suggestions. If you’re starting from scratch or updating a few corners, these ideas are easy to try. Ready to build a room that feels calm, personal, and classic? Understanding Light Academia Bedroom Style This style focuses on quiet living, soft tones, and a love for books, writing, and slow routines. It brings together calm colors, vintage items, and meaningful details that make a space feel thoughtful, lived-in, and cozy without being too dark. Origins & Emotional Vibe Light academia comes from a love of old books, classical music, and quiet afternoons spent reading or writing. It values calm over drama and leans into the soft side of school life, sunlight on notebooks, handwritten letters, and peaceful thought. People drawn to this style enjoy learning, reflection, and simple routines. It’s often filled with things that tell quiet stories, old postcards, worn books, and items passed down over time. Everything feels personal, warm, and softly inspiring. Light Academia vs. Dark Academia Both styles are built around similar values, but they show them in different ways. Light academia uses soft, warm colors like beige, cream, and faded rose, while dark academia leans into browns, deep greens, and gray. The lighter version feels hopeful and open, while the darker one feels serious and rich. One works well in sun-filled spaces, the other suits dim lights and moody corners. Both focus on books, learning, and emotion, but one feels lighter in both look and tone. Light Academia Bedroom Ideas You Can Try Now These ideas are easy to mix and match, whether you’re starting from scratch or just updating your space. They focus on comfort, calm colors, and small touches that bring the style together without needing a full room makeover. 1. Build a Cozy Reading Nook Choose a quiet corner by the window or near a bookshelf. Place a soft armchair or cushion seat, a small side table for tea or candles, and a stack of old books nearby. You can also drape a throw blanket over the chair for comfort. A floor lamp or reading light will make this space perfect for quiet afternoons. It doesn’t have to be large, just a spot where you can sit, read, and enjoy a little peace whenever you need a break. 2. Create a Gallery Wall of Literary Quotes Pick your favorite lines from classic books or poems and print them in black or brown ink. Use neutral or gold-tone frames for a collected look. Add pages from old books, sketches, or vintage photos to fill the space. Keep the prints clean and simple to match the quiet tone of the style. Arrange them over your desk, bed, or reading area. This makes the room feel personal and full of meaning without adding clutter or bright colors that pull attention away. 3. Drape Sheer Curtains for Soft Light Use light-colored sheer curtains, white, cream, or soft grey, to let sunlight gently enter the room. These curtains give you privacy while keeping the space feeling open and peaceful. They work well in bedrooms that get lots of daylight and help soften the look of the windows. If you layer them with heavier curtains, you can also control how much light enters. Hang them high and wide to make the room feel taller and give the windows a more open, balanced shape. 4. Layer Neutral Bed Linens Start with a solid-colored sheet set in cream, white, or soft taupe. Add a beige or grey quilt, then top with a knitted throw or thin blanket at the foot of the bed. You can include two or three pillows in different shades of the same color. This layering helps the bed feel full, soft, and welcoming without needing any bold colors. Choose simple patterns or textures like cable-knit or linen to keep things interesting but quiet. Keep it soft, warm, and restful. 5. Add a Vintage Typewriter or Globe You don’t need a working typewriter, just one that looks well-loved and fits on a desk or shelf. A small globe, especially one with warm tones or a faded map, also works well. These pieces bring a sense of history and learning to the room. Place them on top of stacked books, beside a lamp, or near a framed quote. Even if they’re just for show, they reflect the love of knowledge and quiet hobbies that sit at the heart of this style. 6. Use Brass or Wooden Lamps Skip bright overhead lights and go for lamps with warm bulbs and soft tones. Brass or wood lamp bases add depth without being too bold. Look for simple shapes, nothing too shiny or modern. Place one on your desk, another by the bed, and maybe a third near a reading chair. Warm light helps you focus or relax while keeping the room calm. Soft lighting is one of the easiest ways to support the thoughtful mood of light academia. 7. Stack Classic Books by Color Pick books with muted or worn covers, browns, creams, faded blues, or deep greens. Stack them on shelves, desks, or windowsills in neat piles or lined rows. You don’t need full sets, just ones that fit the feel. Try grouping by tone instead of alphabet. You can mix old books with new ones if they match in color. This brings in that scholarly feeling without needing to decorate much. It’s a quiet way to add interest and make the room feel more lived-in. 8. Display Pressed Flowers in Glass Frames Press flowers between the pages of a heavy book for a week or two, then place them in glass frames or between two sheets of clear acrylic. Hang them on the wall or lean them on a shelf. Stick to soft colors like faded pinks, off-white petals, or light greens. These frames are gentle reminders of nature and time. They pair well with old books, hand-written notes, or vintage prints. They add a soft and reflective touch that fits this look perfectly. 9. Add a Neutral Area Rug Pick a rug in cream, light grey, or taupe with a faint pattern or simple border. Place it under the bed or desk area to bring warmth to the floor and make the space feel more grounded. A soft rug helps absorb sound, which adds to the quiet mood of the room. If you have wood or tile floors, it also makes things more comfortable. Choose one that’s easy to clean and not too thick; it should add texture, not bulk. 10. Hang a Corkboard with Polaroids and Poems Use a corkboard to display personal items, like your favorite short poems, black-and-white polaroids, or ticket stubs from places you’ve been. Keep the colors light and earthy to stay in theme. Add twine, small clips, or pins to hang each piece. This makes the wall feel more personal without needing large or expensive art. It’s also easy to change the display whenever you want, which adds a sense of flow and movement to the room without changing your whole setup. 11. Style a Dresser With Candles and Journals Top your dresser with a few stacked journals, a candle in a soft scent like sandalwood or vanilla, and maybe a framed photo or dried flowers. Keep the colors soft and the items few. You don’t need to fill every inch; leave space around each object. This small setup adds personality without mess. It’s useful too, your journals are within reach, and the candle can be lit during writing or reading time. Simple touches like these help the space feel steady and quiet. 12. Use Wooden or Rattan Baskets for Storage Choose baskets made from natural materials in light or medium brown. Use them to hold blankets, books, papers, or chargers. Place one under a bench, beside your bed, or in a corner to keep the room tidy. These baskets keep clutter out of sight without using plastic or metal, which don’t fit the style as well. They also add texture without drawing too much attention. This is a small but smart way to keep things organized while staying true to the look. 13. Frame a Map or Sheet Music Look for vintage-style maps or pages of classical sheet music to frame. Stick with faded tones and paper that looks aged. You can find these online or in secondhand shops. Use a plain frame in black, brown, or soft gold to hold the focus on the print. Hang it above a desk, bed, or in a reading corner. This idea adds a layer of quiet interest, connecting the room to old stories, distant places, or thoughtful study without saying too much. 14. Incorporate Warm String Lights or Fairy Lights Choose soft yellow or cream-toned string lights, nothing bright white or colored. Drape them along shelves, across the headboard, or around a window frame. These lights give the room a warm glow that’s easy on the eyes and helps set the mood for reading or resting. Avoid shapes or patterns that are too playful; stick with plain bulbs or tiny drops. When the rest of the lights are off, these make the space feel soft and still. It’s a quiet, cozy detail. 15. Use Soft Beige or Sage Paint on the Walls If you’re allowed to paint your room, try a soft beige, dusty white, or muted sage. These gentle colors add a bit of tone and work well with wood furniture, books, and natural fabrics. Even one painted wall can shift the mood. Avoid anything too bright or too dark. These shades reflect light well and help the space feel open. If you can’t paint, try using large fabric wall hangings or paper backdrops in these colors instead for a similar effect. Light Academia Color Palette for a Calm Space The colors in a light academia room should feel soft, warm, and grounded. These shades help create a peaceful setting where you can focus, rest, and think. By mixing soft neutrals with subtle accents, you can bring out the thoughtful and classic mood this style is known for. Best Neutral Shades to Begin With Start with soft base colors that make the room feel open, calm, and consistent without being too plain or cold. Cream – A warm base that adds softness without being too yellow Off-white – Keeps the space light while adding a cozy undertone Beige – A classic pick that pairs well with vintage or wooden furniture Light grey – Offers contrast without being harsh or modern Taupe – A mix of grey and brown for a grounded, earthy touch Gentle Accent Colors That Work Well These colors can be added in small ways to bring warmth, interest, and a lived-in feeling without overpowering the space. Olive green – Works well for cushions, frames, or vases Dusty pink – A subtle romantic shade for throws or wall art Pale blue – Brings calmness and ties in with vintage themes Muted gold – Adds depth to hardware or picture frames Warm brown – Ideal for wooden accessories, books, or vintage finds Furniture & Layout for Light Academia Style The right furniture helps set a peaceful tone while keeping your room useful and inviting. Choose pieces that feel lived-in, make smart use of space, and add character without clutter. Keep things simple, classic, and easy to move around. Vintage Pieces That Still Work Every Day Choose furniture that feels familiar and useful. A wooden desk with drawers can double as a study area and display surface. Add a tall bookshelf for storing your favorite reads or vintage finds. \A worn leather chair or a soft armchair can create a quiet reading spot. Cane or rattan accents, like a stool or bench, add texture without making the room feel heavy. Stick with items that do more than one thing and fit easily in a calm setting. Smart Layout Tips for Small Spaces In small rooms or shared dorms, space matters more. Go vertical with shelves above your desk or bed. Use under-bed bins for extra storage. If you’re short on room, try a fold-down desk or a wall-mounted table. Choose pieces that serve two jobs, like a bench with hidden storage or a stool that works as a nightstand. Keep walkways clear and avoid bulky items. A few smart layout choices can make even the smallest room feel open and useful. Lighting Considerations for Light Academia Style Lighting changes how a room feels, so it’s important in a light academia space. Focus on warm, soft sources of light. Use gentle lamps, natural sunlight, and candles to build a quiet, calm setting that feels just right for reading, resting, or thoughtful study. Desk Lamps, Sconces & Candles Pick lamps with warm bulbs and soft shades, no bright white or cool blue lights. Wood or metal bases in dark or muted finishes look best. Use wall sconces for smooth, even light. Add candles in safe holders on desks or shelves for the quiet glow. Try calming scents like vanilla, cedar, or linen. Place a desk lamp near your reading corner and another by the bed. The goal is to avoid harsh light and create soft pools of light across your space. Natural Light Maximization Make the most of daylight by using sheer curtains in white, cream, or light grey. These soften sunlight while keeping the room bright. Keep window areas clear, avoid large plants or piles of books on sills. Light-colored walls help reflect the sun’s glow. You can also hang mirrors to bounce light into darker corners, making your space feel more open without adding extra lights. Letting natural light do the work keeps the room grounded, open, and true to the style. Seasonal Styling Ideas for Year-Round Comfort Light academia can shift with the seasons using small changes. You don’t need to redo the whole room, swap a few textures, colors, or accents to keep the space feeling calm and in tune with the time of year. Spring/Summer Updates Swap heavy layers for light linen throws in cream, sage, or pale peach. Add soft floral prints on pillows or framed art. Freshen the air with dried lavender or clean cotton scents. Keep fabrics breezy, gauze curtains, crisp sheets, or lightweight quilts work well. Small potted plants or pressed leaves can bring life to corners without being overwhelming. These changes help the room feel light and open. For a relaxed space, focus on freshness, soft greens, and plenty of sunlight. Fall/Winter Cozy Touches Bring in deeper shades like rust, amber, and warm brown through blankets or throw pillows. Add wool or cable-knit textures on the bed or reading chair. Switch to candles in scents like cedar, clove, or vanilla. Use extra lamps or fairy lights to soften long nights. A flannel quilt or heavier curtain can make the room feel warm without changing its base look. These little swaps make the space feel snug and calm, perfect for colder months and longer evenings spent inside. Starter Checklist for Light Academia Decor If you’re starting from scratch, this list includes the key pieces that can transform your space into a calm, thoughtful retreat. Must-have elements: Wooden desk Bookshelf Layered bedding Wall art/prints Warm lighting Journal or writing tools Candle or diffuser Soft rug Curtains Stack of vintage books Conclusion A light academia bedroom doesn’t need to be complicated or expensive, it just needs to feel like your quiet place to think and relax. By using soft colors, vintage touches, and simple layouts, you can shape a space that feels both personal and practical. These ideas work in any room size and can grow with you over time. Try just one or two changes and see how the mood shifts. Want more design tips like these? Take a look at our other blogs for simple ways to make your space feel like home.

Have you seen people online dressing like old-school writers, reading poetry, or posting pictures of coffee and books? That’s all part of something called the Academia aesthetic. It’s everywhere on TikTok, Pinterest, and Instagram. And it’s got people wondering, what does it actually mean? In this blog, I’ll help you understand the different types of Academia aesthetics: Dark Academia, Light Academia, and Classic Academia. You’ll learn how each one feels, how they’re different, and how to tell which one fits you best. Maybe you’re just curious. Maybe you want to try it yourself. Either way, this guide will make it easy to get the vibe. So… which kind of Academia fits your vibe? Keep reading to find out. What the Academia Aesthetic Really is About The Academia aesthetic is all about loving learning and the mood that comes with it. It’s inspired by people who enjoy reading, writing, and being in quiet, thoughtful spaces—like old libraries or classrooms filled with books. It’s more than just a style. It’s a way of showing your love for knowledge. This look draws inspiration from older times, particularly from European schools and universities. Think of places with wooden desks, long halls, and shelves stacked with books. It reminds you of old stories, soft music, and the smell of paper and ink. No matter which kind you like, Dark, Light, or Classic, they all share a few key things: A deep love for reading and learning Calm, soft colors like brown, beige, gray, and black Old-style or secondhand clothes Peaceful music and quiet vibes A calm and smart feeling overall It’s a style that makes you feel cozy, thoughtful, and connected to the past. Different Kinds of Academia Styles This part looks at each type of Academia style – how it feels, how it looks, and how people show their love for learning through it. Each one showcases a distinct approach to thinking, dressing, and engaging with books, art, science, or self-expression. Dark Academia Dark Academia is for people who are drawn to the deep side of life—books about death, quiet places, and slow thinking. It’s all about the love of old ideas, hard questions, and quiet study. People who like this style enjoy classic novels, long essays, old films, and rainy weather. The mood is serious and inward. It reflects loneliness, deep thought, and a bit of mystery. Books, candles, ink pens, and Latin phrases show up a lot in this style. Dark Academia searches life’s deeper meanings. It focuses on death, time, sadness, and the search for truth through old texts and ideas. Classic literature, Greek mythology, and deep philosophy are common topics. It values learning that feels serious and emotional. This aesthetic also includes mystery, gothic beauty, and a strong love for solitude and thinking quietly in quiet, book-filled spaces. Light Academia Light Academia shares many of the same interests as Dark Academia—like books, writing, and old buildings, but without the sadness or gloom. It’s more about joy, beauty, and finding peace in quiet moments. This style loves the small things: writing letters, pressing flowers, reading poetry, or walking through sunny gardens. The main colors are creams, soft browns, pastel yellows, and warm beiges. Light Academia values the gentle side of learning. It focuses on love, kindness, poetry, and calm reflection. Joy is found in simple things like walking outside, sharing letters, and reading in soft sunlight. This aesthetic avoids darkness and instead celebrates peaceful moods, warm colors, and personal connection. Classic Academia Classic Academia is the most traditional style. It celebrates old universities, academic traditions, and structured learning. This is the kind of aesthetic you’d imagine in old black-and-white photos of scholars or students on Ivy League campuses. The focus is on being neat, orderly, and thoughtful. People who follow this style usually enjoy formal writing, essay reading, strict study routines, and a well-kept schedule. The color palette includes navy, burgundy, gray, beige, and dark green. There’s a strong sense of pride in education, discipline, and tradition. This style is often linked to prestigious schools, uniforms, and the idea that learning is both a duty and a privilege. Art Academia Art Academia is perfect for people who see the world through color, texture, and feeling. It’s messy, free, and always in motion. It celebrates drawing, painting, writing, sculpting, and any way to express what’s going on inside. Unlike the more polished types, this one welcomes clutter, imperfections, and emotion. The space around someone who loves Art Academia is full of brushes, paper, charcoal, and half-done work. Art Academia celebrates emotion, personal storytelling, and the act of creating. It values messy work, unfinished art, and the process over the final result. The focus is on expression through painting, sketching, journaling, or any form of visual art. It supports freedom, experimentation, and emotional depth. This aesthetic allows for imperfection and encourages creating from feelings, not rules. Romance Academia It’s inspired by the Romance, where feeling is more important than facts. This style is less about studying and more about loving deeply. People who love Romance Academia seek beauty in nature, handwritten poems, long talks, and quiet moments of love or reflection. Romance Academia explores how emotions shape human experiences. It’s about understanding people, love, heartbreak, beauty in the everyday, and history through feeling rather than just facts. This aesthetic pulls from music, old paintings, letters, and nature walks. It celebrates the idea that knowledge can come from the heart as much as the mind and that feeling deeply is a kind of wisdom. Chaos Academia Chaos Academia celebrates the wild side of learning. It’s for those who learn best in a swirl of thoughts, movement, and messy inspiration. This style doesn’t follow any rules. It blends subjects, breaks structure, and values creative freedom above all. There’s beauty in the madness, books everywhere, scribbled notes on every wall, loud music, and ideas that never stop. Chaos Academia celebrates fast thinking, messy learning, and the beauty of not having everything figured out. It values creativity, passion, and the freedom to jump between ideas. There are no rules here, just energy, expression, and excitement. Common themes include nonlinear learning, emotional writing, mixed topics, and spontaneous creation. It’s a space for people whose best ideas come during chaos, not calm. Academia Aesthetic Comparison Chart If you’re trying to find which Academia style feels right for you, this table shows the basic look, colors, clothes, and places linked to each one. Type Colors Clothing Places Dark Academia Black, gray, brown, dark green Turtlenecks, coats, tweed jackets, leather shoes Quiet rooms, old libraries, rainy windows Light Academia Cream, soft brown, beige, pale yellow Cardigans, skirts, soft shirts, sweaters Sunny desks, gardens, and simple writing spaces Classic Academia Navy, burgundy, forest green, gray Sweater vests, button-up shirts, ties, trench coats Study halls, book-filled rooms, and school buildings Art Academia Rust, mustard, deep red, faded blue Overalls, scarves, loose layers, paint-stained tops Art corners, work tables, and rooms full of sketches Chaos Academia Mixed, bold, no set colors Mismatched layers, bags, bold socks, or shirts Crowded desks, note-covered walls, open books Romantic Academia Rose, maroon, cream, soft green, blue Lace tops, long skirts, soft coats, old-style shoes Flower fields, writing spots, quiet corners outside Academia in Pop Culture: How Films, Books, and Shows Shaped Style Films, books, and shows often show different types of Academia looks. It’s not just about school, it’s about how school life feels, and the mood that comes with it. Different kinds of media show this in their own ways. Take Dead Poets Society, for example. It shows a group of boys in a strict boarding school, reading poetry and asking big questions about life. The look is full of blazers, worn-out books, and rainy days. This is what many call the dark side of the academic look. Then there’s The Secret History, a book that also shows a group of smart students, but with a more mysterious tone. Fans of this style often wear dark colors, vintage clothes, and carry books like they’re treasures. On the other hand, there’s the softer version, seen in Legally Blonde, Gilmore Girls, orAnne with an E. These focus on personal growth, learning, and strong female leads. People drawn to this style love soft sweaters, pastel skirts, clean notebooks, and coffee shop corners filled with books. The mood is lighter and warmer, but still full of thought and creativity. People see these characters and want to live that life, even if only a little. Their closets fill up with turtlenecks, oxfords, long coats, and old leather bags. Their rooms get cozy, with warm lamps, framed quotes, and piles of books on every surface. Even their habits change; they start reading more classics, writing by hand, or visiting libraries just for the quiet. Common Misconceptions About Academia Aesthetics Academia aesthetics are often misunderstood. Many people think it’s only about how someone dresses, but it’s not just fashion; it’s about how someone sees learning, beauty, and time. Another common idea is that these styles are only for people in top schools or with perfect grades. That’s not true. Anyone who enjoys books, art, thinking, or calm spaces can connect with these styles, regardless of their study location or background. Some also believe that only quiet, introverted people follow these looks. While many enjoy peaceful settings, others use these styles to share bold ideas, strong emotions, or messy, creative energy, especially in Art or Chaos Academia. It’s also important to remember that Academia styles often pull from Western history and school culture. This can leave out other voices and stories. People should feel free to shape the look in ways that reflect their own culture, history, and view of learning. Final Thoughts The Academia aesthetic is so much more than clothes or room decor, and it’s about enjoying learning and showing who you are. You don’t need to follow any fixed style. Mix things up. Try out what feels right. Want a dark, bookish vibe? Go for it. Prefer soft colors and cozy spaces? That works too. These styles are meant to grow with you. They can change as you do. So have fun with it. There’s no “right” way to do it, just your way. Want more? Check out my other blogs for simple tips on expressing your own style and building a space you love.
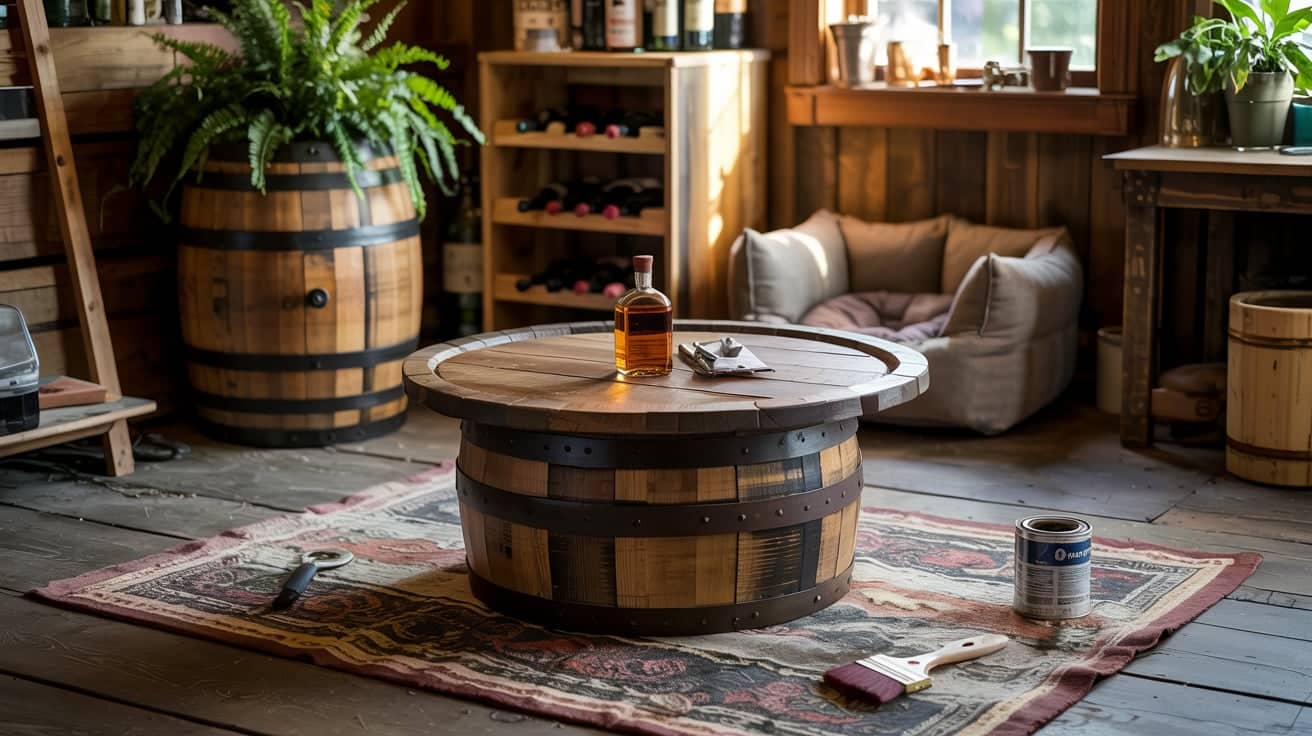
Have you ever come across an old whiskey barrel and wondered what you could do with it? If you’re like me, you want to make something that’s not just practical but also adds character to your space. That’s precisely what you’ll find here. In this blog, I’ll walk you through a variety of whiskey barrel project ideas you can try at home if you’re handy with tools or just getting started. By the end, you’ll have plenty of simple, functional options to turn that barrel into something you’ll actually use. Ready to get inspired? Why Whiskey Barrel Projects are So Popular Whiskey barrel projects have gained popularity for their resourceful use of reclaimed wood, offering a rustic touch that complements both indoor and outdoor spaces. Repurposing these barrels not only reduces waste but also adds useful, long-lasting features to your home. Their sturdy build makes them suitable for a wide range of applications, from furniture to planters. Widely shared across hobby forums, DIY blogs, and social media, these projects continue to appeal to homeowners, woodworkers, and upcyclers alike. Innovative Whiskey Barrel Project Ideas to Inspire You These barrel-based ideas bring function and beauty to various areas of your home or garden using full-size or mini whiskey barrels. 1. Pub Table A whiskey barrel can serve as the sturdy base for a pub-height table. Add a round wood or glass top, and you’ve got a high-top gathering spot for kitchens, patios, or man caves. Some designs include footrests or built-in bottle racks. This project requires minimal cuts and works well with full barrels, making it a go-to choice for those wanting both style and function. 2. Coffee Table Cutting a barrel in half lengthwise allows it to function as a bold coffee table. Add a flat top and possibly storage inside the open cavity. Perfect for rustic interiors, this low-profile piece becomes a conversation starter. It’s also possible to add wheels for mobility or a lift-top for hidden storage. The result is both functional and grounded in vintage design. 3. End Table Use barrel sections or quarter cuts to create compact end tables. These can stand beside couches, beds, or reading chairs. Add a circular top and a small lower shelf for added practicality. This idea suits tight spaces and provides a natural look with minimal materials. It’s a good beginner project with room for customization using paint, stains, or small drawer inserts. 4. Barrel Cabinet Hinge a barrel vertically to open like a cabinet. Add internal shelves, lighting, or racks for glasses and bottles. This design fits well in living rooms or dens. It works beautifully as a liquor cabinet, media storage, or general organizer. With a locking latch and lined interior, it adds function while maintaining a rustic appearance. You can also mount it on wheels for easy movement. 5. Dog Bed Cut a large opening into the side of a barrel and sand the edges for safety. Insert a cushion or memory foam to create a cozy bed. Ideal for small to medium-sized dogs, this project offers both style and comfort. Sturdy and insulated, it can sit indoors or on covered porches. Pet owners love its blend of reuse and pet care functionality. 6. Wall-mounted Shelf Flatten barrel staves and mount them on brackets for a unique shelf set. You can also mount a halved barrel directly to the wall and add internal platforms. These shelves are great for kitchens, bathrooms, or entryways. They showcase books, plants, or décor while giving your space character. It’s a great way to use leftover parts from other barrel projects. 7. Planter Half whiskey barrels make perfect large planters. Drill drainage holes and add a plastic liner for durability. These containers suit herbs, flowers, or even small shrubs. Place them on patios, walkways, or porch corners to bring greenery into your space. They’re popular for their natural drainage and capacity. Plus, they age beautifully outdoors with minimal care. 8. Rain Barrel Add a spigot, lid, and screen to a full barrel to create a rainwater collection system. Position it below a gutter downspout for optimal use. This eco-friendly project helps reduce water bills and supports garden irrigation. Use food-safe sealants inside to ensure safety. It blends utility with appearance, outperforming plastic alternatives while offering a natural look. 9. Garden Pond Line a full or half barrel with pond liner and fill it with aquatic plants or goldfish. Add a small pump for circulation if needed. Ideal for compact gardens or patios, this mini pond introduces tranquility to outdoor areas. Choose a shady spot to reduce algae growth. It’s a beginner-friendly way to incorporate water elements without major digging or structural work. 10. Trash Can Convert a full-size barrel into a rustic trash bin. Add a lift-up lid or hinge it on one side. Use an interior liner or plastic container to simplify emptying. This is a functional upgrade for patios, garages, or even inside rustic-themed kitchens. It disguises waste bins in plain sight while adding structure and visual weight to the area. 11. Lazy Susan Turn a barrel hoop or top into a rotating tray. Add a lazy Susan bearing underneath for smooth movement. These trays are great for dining tables, counters, or buffets. You can also use them to organize spices or condiments. It’s a low-effort project with high usability, especially if you’re repurposing barrel tops left over from larger builds. 12. Coat Rack Mount barrel staves vertically and attach hooks to hold coats, hats, or bags. You can also include a small shelf on top for keys or decor. This setup works well in mudrooms, entryways, or behind doors. It’s a quick build with maximum functionality. Staves are curved, giving the rack a sculpted look while supporting daily use. 13. Lighting Fixture Upgrade barrel staves or hoops into pendant lights, sconces, or chandeliers. Add wiring, sockets, and bulbs to complete the fixture. This works well over dining tables or entryways. You can customize finishes to match the room. It’s a high-impact upgrade that highlights craftsmanship while reusing barrel elements in a functional way. 14. Mini Bar Cut a barrel horizontally and hinge the top to serve as a mini bar chest. Include dividers for liquor bottles and accessories. You can mount wheels for mobility or install LED lighting inside. This compact piece is excellent for small apartments or entertaining spaces. It’s portable, practical, and a conversation piece for guests. 15. Firewood Holder Use metal hoops and partial staves to build a cradle for firewood. It keeps logs organized and elevated off the floor. This project suits fireplaces, wood stoves, or outdoor fire pits. The curved shape helps cradle logs securely. It adds visual structure and keeps your heating space neat and tidy while reusing leftover barrel materials. 16. Wreath Base Use barrel hoops as the base frame for seasonal wreaths. Wrap them with dried flowers, greenery, or holiday accents. These can be hung on doors, walls, or even used as table centerpieces. They’re sturdy and offer a circular form without needing to buy wireframes. A simple and innovative use for leftover hoops. Getting Started with Whiskey Barrel Projects Before beginning any whiskey barrel project, it’s important to start with the right foundation. Authentic barrels can be sourced from local distilleries, online marketplaces, or suppliers of reclaimed materials. Choose between used barrels with character or new ones for cleaner finishes. Gather essential tools, such as a jigsaw, sander, screws, and protective gear. You’ll also need materials like sealant, liners, and finishes, depending on your project. Always clean and dry the barrel thoroughly, remove residue or mold, and seal the wood properly to ensure long-lasting, safe results for indoor or outdoor use. Build Ideas by Room or Outdoor Space Match your whiskey barrel project to specific areas in your home or yard for maximum function and visual impact. Living Room & Kitchen Barrel coffee tables, end tables, and mini bars work well in cozy spaces, adding structure and beauty. Wine racks and Lazy Susans made from staves or tops serve both decorative and storage purposes. These pieces offer practical solutions that pair well with existing furniture while preserving the unique look and texture of the barrel wood. Patio & Garden Use barrels to create rain collection systems, large planters for herbs or flowers, and compact water ponds. They suit outdoor spaces perfectly due to their durability and natural resistance to weather. Trash bins and firewood holders can also be constructed to blend with outdoor decor while serving essential roles in maintaining order and convenience. Entryways & Utility Areas Add function to overlooked spaces with coat racks built from barrel staves, wall-mounted shelves for organization, or barrel dog beds with a custom cushion. These ideas make good use of small areas and provide storage or comfort. With simple tools and minimal materials, they bring usefulness to transitional areas of your home. Customization Tips & Skill Levels Tailor your whiskey barrel project to your experience level and style preferences while ensuring safety for practical, everyday use. Easy vs. Intermediate vs. Expert Builds: Start with simple projects like planters or dog beds if you’re a beginner. Move to cabinets or lighting fixtures as your skills grow. Personalizing with Paint, Engraving, and Lighting: Add color, monograms, LED strips, or hardware to match your home’s style and give your barrel project a distinct identity. Safety Tips for Food, Pets, and Weather Exposure: Use food-safe finishes, seal sharp edges, and apply waterproof coatings for barrels placed outdoors or used for pet furniture. Where to Buy Barrels, Parts & Kits Finding quality whiskey barrels or parts is key to a successful project. Reliable sources include online platforms like Etsy and Amazon, as well as local distilleries that offer used barrels with character. Decide between full barrels for structural builds or DIY kits for simpler projects; kits often include hardware and instructions. When shopping, check for the condition of the wood, stability of the metal band, and any unpleasant odors. Ensure the barrel suits your intended use, whether for display, storage, or outdoor installation. Maintenance & Longevity Keep your whiskey barrel projects in good condition year-round with proper care techniques suited for both indoor and outdoor environments. How to Weatherproof for Outdoor Use: Apply a clear, UV-resistant sealant to protect the wood. Elevate barrels off the ground slightly to avoid direct moisture exposure. Preventing Mold, Pests, and Rot: Keep barrels clean and dry. Use liners for planters, inspect regularly for insects, and avoid leaving standing water inside. Resealing and Refinishing Every Season: Sand rough or worn areas and reapply protective finishes yearly to maintain appearance and structural integrity over time. Conclusion Now that you’ve seen all these whiskey barrel project ideas, which one are you most excited to try? If you’re building a planter, a mini bar, or something unexpected, you’ve got what you need to get started. I’ve broken everything down so you can feel confident, regardless of your skill level. Remember, even small projects can make a big difference in your home or garden. If you’re looking for more easy DIY tips and ideas, go check out my other posts. I’ve got plenty more waiting for you