

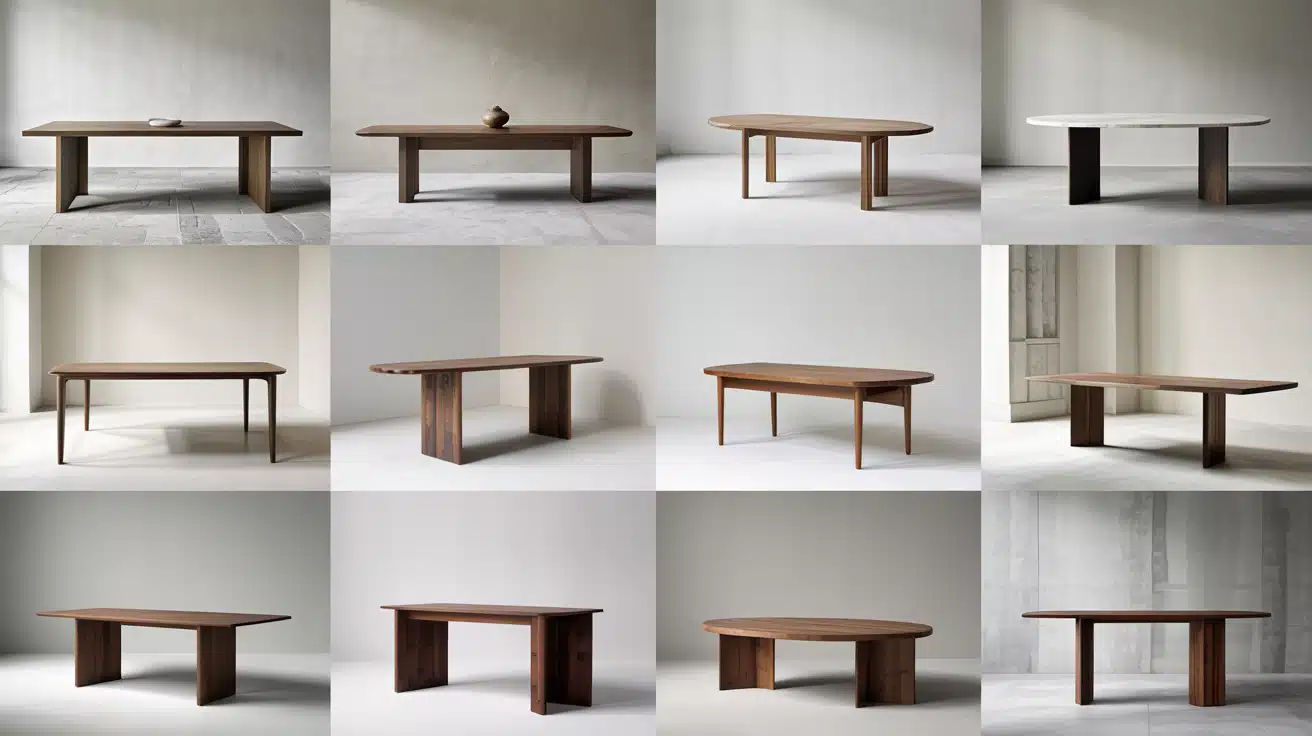
Have you ever wondered if the shape of your table really matters? I used to think any table would do, until I saw how much it affects how you and I use a room. The right table shape helps you move around freely, seat people comfortably, and optimize your space. In this guide, I’ll walk you through common table shapes, show you how to match them with your layout, and help you choose the best materials and designs. You’ll also get practical tips to keep your table easy to clean and long-lasting. By the end, you’ll know exactly which table shape fits your needs and why it’s worth choosing wisely. Table Shapes and Their Unique Features The shape of a table influences how people interact, how a room feels, and how space is used. It’s more than just a surface; it affects seating, movement, and function. A well-chosen shape supports comfort, fits the room layout, and serves the purpose better, whether it’s for dining, meetings, or activities. 1. Rectangular This is the most widely used table shape, known for its practicality and familiarity. It fits naturally in long, narrow rooms and provides ample seating along both sides, making it suitable for families, meetings, or formal settings. Its linear design helps with efficient space planning and ensures every person has a clear space. The shape also accommodates extensions or leaves, allowing more guests to be seated without compromising comfort or flexibility in the room layout. 2. Square Square tables work well in rooms with even proportions. They create balance and symmetry, making the layout visually consistent. They support equal spacing between seats, which can lead to more engaging conversations. However, square tables typically accommodate fewer people than rectangular ones, making them ideal for smaller gatherings. The compact footprint also makes them a good fit for studio apartments or casual dining nooks where conserving space is a priority. 3. Round Round tables offer an inclusive seating arrangement where every seat feels equally placed. Without corners, this shape improves movement around the table and reduces the risk of bumping into edges. It’s especially suitable for small to medium-sized rooms, helping maximize the usable area while maintaining a comfortable flow. The absence of head seating makes this shape a popular option for informal meals or group discussions. 4. Oval Oval tables combine the length of a rectangular table with the soft curves of a round one. This shape supports easier movement around the perimeter and fits well in narrow or oblong spaces. The rounded edges offer a softer visual appeal and make it easier to squeeze in an extra chair without obstruction. Oval tables are a suitable option when flexibility and smooth traffic flow are essential. 5. Racetrack Oval Racetrack oval tables feature straight sides with rounded ends, resulting in a streamlined profile. They are commonly found in conference rooms due to their clean, structured design that allows everyone to see each other. This shape blends formality with efficiency, providing balanced proportions without sharp edges. It’s also used in dining areas that require both visual appeal and functionality, accommodating moderate to large groups with ease. 6. Squoval A squoval table blends the structure of a square with the gentle curves of an oval. This hybrid shape provides soft corners while maintaining a stable footprint. It’s often chosen for its visual balance and space efficiency. Squoval tables are frequently used in custom builds where design precision and comfort are both important. They can be adapted to a variety of interior spaces, from modern homes to collaborative office settings. 7. Boat Shape Boat-shaped tables widen slightly in the center, enhancing visibility and giving a graceful contour to the tabletop. This subtle curve enhances sightlines in meetings and creates a sense of openness during meals. The tapered ends contribute to an understated profile while still allowing for extended seating. These tables are often selected for executive settings or upscale dining areas where function and form must align seamlessly. 8. Arrowhead Sharp, angular points distinguish arrowhead-shaped tables at either end. These bold lines lend a modern and assertive character to the room. They are usually chosen for statement-making designs in innovative offices, showrooms, or design-forward dining spaces. While the pointed ends may limit seating at the tips, the overall layout offers visual energy and architectural contrast in otherwise neutral environments. 9. Scalloped Scalloped tables incorporate a flowing, wavy edge design that adds a decorative element to the surface. These tables often reflect traditional or artisanal craftsmanship. Their contours introduce motion and detail that contrast with more rigid shapes. While they may not suit every setting, they work well in spaces where visual softness or vintage charm is desired. The shape also invites visual interest even without additional décor or table settings. 10. Freeform / Organic Freeform or organic tables do not follow symmetrical shapes, often showcasing natural curves, asymmetry, or live edges. They are typically custom-made and are favored in settings that aim to highlight individuality or craftsmanship. These tables often reflect the raw beauty of the material and work best as centerpiece items in creative spaces, galleries, or custom-designed homes. Their irregularity makes each piece distinct in appearance and layout impact. How to Match Table Shape with Room Layout Use this guide to determine which table shapes best suit your room layout, allowing you to optimize both space and function. Long/Narrow Rooms Rectangular and boat-shaped tables are ideal for long, narrow rooms. Their linear design maximizes seating without overwhelming the space. These shapes help maintain clear walking paths along the sides while allowing plenty of surface area for meals or meetings. The boat shape adds a soft curve in the middle, improving visibility and circulation while still maintaining the efficient footprint of a rectangular layout. Square Rooms Square and round tables work well in rooms with equal dimensions. They create balance and visual symmetry while promoting equal seating around the table. This arrangement supports face-to-face interaction, making it perfect for intimate dining or collaborative conversations. Because square rooms often have limited wall clearance, these shapes ensure the available floor space is used efficiently without crowding corners or restricting movement around the table. Open Layouts Oval, elliptical, and squoval tables are best suited for open-plan areas. These shapes blend smoothly into shared spaces by reducing sharp edges and creating a natural visual flow. Their soft contours allow for more effortless movement and flexible seating arrangements. In open layouts where multiple zones serve different functions, these table shapes are defined without creating harsh boundaries, helping maintain a cohesive and functional overall design. Tight Spaces Round and racetrack oval tables are handy in smaller or confined areas. Their curved edges eliminate corners, which allows for smoother traffic flow and safer movement. These shapes can fit more comfortably into tighter layouts while still offering ample seating. The racetrack oval, in particular, combines the space-saving qualities of a round table with some of the extended capacity of an oval, making it practical for compact dining areas. Table Shape vs Seating Capacity Understanding how each table shape affects seating helps you plan more effectively for guests, comfort, and available space in your room. Table Shape Typical Size Seats (Comfortably) Rectangular 72″ x 36″ to 96″ x 42″ 6–10 Square 36″ x 36″ to 60″ x 60″ 4–8 Round 36″ to 72″ diameter 4–10 Oval 72″ x 42″ to 96″ x 54″ 6–10 Racetrack Oval 72″ x 42″ to 120″ x 48″ 6–12 Squoval 60″ x 36″ to 96″ x 42″ 6–10 Boat Shape 84″ x 42″ to 120″ x 48″ 8–12 Arrowhead 72″ x 36″ to 96″ x 42″ 6–8 Scalloped Varies (often custom sizes) 4–6 Freeform / Organic Varies (custom, irregular) 2–10 (depends on design) Edge Profiles and Base Designs Understanding edge styles and base types helps you choose a table that balances appearance, comfort, and structural support. Popular Edge Styles Edge styles like straight, bullnose, beveled, ogee, and live edge influence both the look and feel of a table. Some provide a clean and modern finish, while others offer softer curves or handcrafted appeal. Each edge style contributes to how the table interacts with the surrounding decor and impacts comfort when seated close. Leg and Base Types Pedestal, trestle, hairpin, and cross legs offer different strengths and visual effects. Pedestal bases allow more legroom, while trestle bases provide added stability. Hairpin and cross legs are often chosen for modern or industrial looks. Choosing the right base depends on the table’s shape, size, and the seating arrangement you plan to support. Choosing the Right Shape Based on Purpose Table shape should suit its primary use, if dining, working, or relaxing, to ensure comfort, practicality, and proper room function. Dining Room Tables Dining tables benefit from shapes that support both daily use and gatherings. Rectangular and oval tables accommodate more people and fit formal spaces, while round and square tables offer a more casual, close-knit atmosphere. These shapes balance function and style, making them practical choices for a wide range of dining room layouts and sizes. Kitchen Tables Kitchens often require efficient use of space. Round and square tables are practical here because they allow smoother movement and fit well in compact areas. They also work great in breakfast nooks, providing a relaxed place to gather without overwhelming the kitchen. These shapes keep traffic flowing and are easy to maintain in busy environments. Boardroom Tables Professional settings call for shapes that support discussion and visibility. The racetrack, boat shape, and elliptical tables help everyone stay visually connected during meetings. These designs also optimize space, ensuring that communication flows easily while preserving a clean and organized appearance. They are standard choices in executive rooms and collaborative business environments. Classroom / Activity Tables Tables in educational or activity-based spaces should encourage participation and be safe for everyday use. Round and square shapes support group interaction, while cut-corner and reverse-rounded options reduce sharp edges, adding safety. These shapes promote accessibility and ease of movement, helping students or users stay engaged in learning or hands-on tasks. Patio or Outdoor Tables Outdoor tables must adapt to variable conditions and flexible seating. Round and freeform tables suit these environments well by offering smooth layouts and ease of movement. Their adaptable forms work with both casual and formal outdoor setups. Choosing weather-resistant materials with these shapes ensures long-term use in changing climates and spaces. Table Shape, Style, and Material: Choosing What Fits Your Interior Select shapes and finishes that blend with your interior style, match material preferences, and support simple day-to-day maintenance. Matching Shape to Interior Style Different shapes align with specific design styles. Elliptical, squoval, and freeform tables complement modern and minimalist spaces. Rectangular and live-edge tables work well in rustic or farmhouse interiors. For traditional spaces, oval and square shapes provide symmetry and structure. Matching the shape to the interior look helps create a consistent and polished environment. Material Considerations Materials affect how each shape looks and functions. Wood offers warmth and versatility across a wide range of shapes. Metal suits thin or sleek designs, such as elliptical and round tables. Glass pairs well with oval or racetrack styles for a light appearance, while ceramic adds durability in kitchens. Not all shapes are available in every material; therefore, consider compatibility during the selection process. Maintenance & Cleaning Tips Keeping a table clean depends on both shape and edge style. Some features collect debris easily, while others facilitate quick and simple maintenance. Ornate or grooved edge profiles can trap dust, crumbs, and spills more easily. Straight and bullnose edges are smoother and easier to wipe down. Round and oval shapes eliminate corners where dirt tends to accumulate. Simpler designs and smooth finishes reduce cleaning time in busy environments. Tables used daily benefit from low-maintenance materials, such as sealed wood or laminate. Buying Guide: Ready-Made vs Custom Tables Use this guide to compare store-bought tables and custom options based on fit, budget, design flexibility, and personal requirements. Where to Buy Tables are widely available from major retailers like IKEA, Arhaus, and Article, offering a mix of affordable and premium options. These brands provide a range of shapes, materials, and sizes. For more specific needs or unique designs, local woodworkers often build to order and allow input on finishes, dimensions, and detailing not found in mass-produced furniture. DIY vs Custom Build Custom tables are ideal when standard options don’t fit a space or match design goals. They’re often chosen for irregular room layouts or when a specific look is required. Shapes like squoval, boat, scalloped, and freeform are commonly made to order. Going custom ensures the table aligns with unique dimensions and layout needs, offering flexibility beyond off-the-shelf solutions. Conclusion You and I both now know that table shape plays a much bigger role than we might have thought. From everyday meals to focused meetings, the shape you choose affects how comfortably people sit, how smoothly they move around, and how well the room works overall. I’ve given you the tools to choose a shape that suits your lifestyle, space, and style. Now it’s your turn to take what you’ve learned and put it to use. If you’re still deciding or want more ideas, check out my other guides on furniture layout and design tips. Let’s keep creating spaces that feel just right for you.

A Feng Shui dining room is all about promoting balance, harmony, and positive energy in your home. By following Feng Shui principles, you can improve the flow of energy in your dining space, supporting your well-being and prosperity. In this blog, I’ll share key Feng Shui tips focusing on table shape, seating arrangement, lighting, and decor. We’ll also talk about common mistakes to avoid so your space stays harmonious. Let’s look at the core principles that lay the foundation for creating a positive dining room environment. Key Feng Shui Principles for Your Dining Room Feng Shui focuses on creating harmony and balance in your home. By following a few key principles, you can make your dining room a space that invites positive energy. Let’s look at some essential tips. Importance of Table Shape and Material Shape: In Feng Shui, round or oval tables are ideal. These shapes encourage smooth energy flow and avoid any sharp corners that can disrupt the chi. Material: Wood is the preferred material for dining tables. It provides grounding and stable energy. Glass or metal tables may bring cooler, less grounding energy, which is not ideal for a dining space. Placement Tips: Place your dining table in the center of the room, with enough space around it for easy movement. This helps ensure a smooth flow of energy and creates a welcoming environment for everyone. Ideal Seating and Chair Placement Comfortable Seating: Choose chairs that are comfortable and provide support. Ensure they have strong backs to make everyone feel secure. Even Spacing: Arrange the chairs so they’re evenly spaced around the table. This promotes balance and harmony for everyone seated. Avoid Facing the Door: Never place chairs with their backs to the door. This can create a feeling of vulnerability and disrupt the flow of energy in the room. Lighting and Ambiance Soft Lighting: Feng Shui emphasizes the importance of lighting in creating a calm, inviting space. Use soft lighting to make the room feel cozy and welcoming. Dimmer Switches: Adding dimmer switches allows you to adjust the lighting to fit the mood. This flexibility is key for setting a relaxed and harmonious atmosphere. Create Balance: Lighting should not be harsh or overly bright. Balance your light sources to promote peace and tranquility in the dining area. By following these principles, you can turn your dining room into a space filled with positive energy and balance. Feng Shui Dining Room Ideas Here are some Feng Shui dining room ideas that can help you create a space filled with positive energy, balance, and prosperity. 1. Hang a Calming Wall Art Choose artwork with peaceful themes like nature scenes, landscapes, or abstract pieces in soft colors. Avoid anything too bold or chaotic, as it may disrupt the energy flow. 2. Bowl of Fresh Fruit as a Centerpiece A bowl of fresh fruit on the dining table symbolizes abundance and vitality. Opt for vibrant, seasonal fruits to keep the energy flowing and bring natural color into the space. 3. Use Neutral or Earth-Toned Table Linens Earth tones like beige, soft browns, and greens can create a calm, grounded energy. Opt for tablecloths or placemats in these shades to enhance the Feng Shui of your dining area. 4. Statement Pendant Light Over the Table A pendant light or chandelier positioned above the dining table adds balance and focus. Choose soft lighting to create a warm, inviting atmosphere without overwhelming the space. 5. Potted Plants Place a few healthy, thriving plants in the corners of your dining room. Plants are a great way to bring the wood element into the space and promote growth and vitality. 6. Use Wooden or Bamboo Furniture Incorporating wooden or bamboo furniture helps balance the energy in the room. These materials connect to the wood element, which symbolizes growth, strength, and stability. 7. Decorate with Crystal or Glass Items Place a crystal or glass vase, bowl, or other decor item on your table or sideboard. Glass symbolizes the waterelement, which can add clarity and fluidity to the energy in your dining room. Using Colors and Decor to Boost Positive Energy Colors and decor are powerful tools in Feng Shui. They can help create a balanced, harmonious dining room that supports good energy flow. Let’s go through how to use colors and incorporate the five elements to improve your space. Feng Shui Colors for Dining Rooms Soft, Calming Colors: Feng Shui suggests using soft colors like green, pale blue, or yellow. These colors promote relaxation and well-being, making your dining room a peaceful place for meals and gatherings. Red for Vitality: Red is a powerful color in Feng Shui, symbolizing energy, vitality, and abundance. While too much red can be overwhelming, it can be used as an accent color to add warmth and excitement to the room. Incorporating the Five Elements Feng Shui is all about balancing the five elements: wood, fire, earth, metal, and water. Here’s how to incorporate them into your dining room decor: Wood: Add wooden furniture or plants to bring in the wood element. This promotes growth, renewal, and vitality. Fire: Candles or bright lighting can represent the fire element. It adds warmth and energy to the room. Earth: Use earthy tones or materials like ceramics or stone to create a grounded and stable feeling. Metal: Incorporate metal through decor items like picture frames, mirrors, or metal furniture accents to add clarity and precision. Water: Water can be represented by using mirrors, glass elements, or even a small water feature. This brings calm and fluidity to the space. By combining the right colors and elements, you’ll increase the positive energy in your dining room, making it a space of harmony and abundance. Practical Feng Shui Tips for Your Dining Room Incorporating practical Feng Shui tips can make a big difference in creating a dining room that supports good energy. Here are a couple of easy but effective ways to enhance the space with mirrors, fresh flowers, and fruit. Mirror Placement for Abundance Mirrors can reflect positive energy and expand the space. Place mirrors where they reflect beautiful views or decor to improve the energy. Avoid placing mirrors directly across from the door, as they can push out positive energy. Be sure to avoid mirrors that reflect clutter, as they may bring negative energy. Fresh Flowers and Fruit for Prosperity Fresh flowers and a bowl of fruit symbolize abundance and prosperity in Feng Shui. They add life, color, and vitality to the dining room, creating a welcoming environment. To maintain the positive energy, replace the flowers and fruit regularly. Avoid keeping wilted flowers or rotting fruit, as they can bring negative energy. Common Mistakes to Avoid in a Feng Shui Dining Room Certain factors in your dining room can create negative energy and disrupt the balance. It’s important to be mindful of these elements to maintain a harmonious space. Here are some common mistakes to avoid: Overhead Beams: Beams above the dining table can create a feeling of pressure or discomfort, blocking positive energy flow. Bathrooms Nearby: A bathroom close to the dining area can drain energy and disrupt the flow of harmony in the space. Clutter: A cluttered dining room prevents energy from flowing freely, creating a chaotic and stagnant environment. By avoiding these negative influences, you can ensure your dining room remains a balanced, positive space. Wrapping Up Creating a Feng Shui dining room is all about finding balance, inviting positive energy, and fostering harmony. By following simple tips like choosing the right table shape, using soothing colors, and adding decor like fresh flowers and mirrors, you can turn your dining space into a welcoming, prosperous area. I’ve also learned that avoiding mistakes like clutter and negative energy helps keep the chi flowing smoothly. Now that you’re equipped with these Feng Shui dining room tips, feel free to check out my other blogs for more ideas on how to enhance your home’s energy and design.
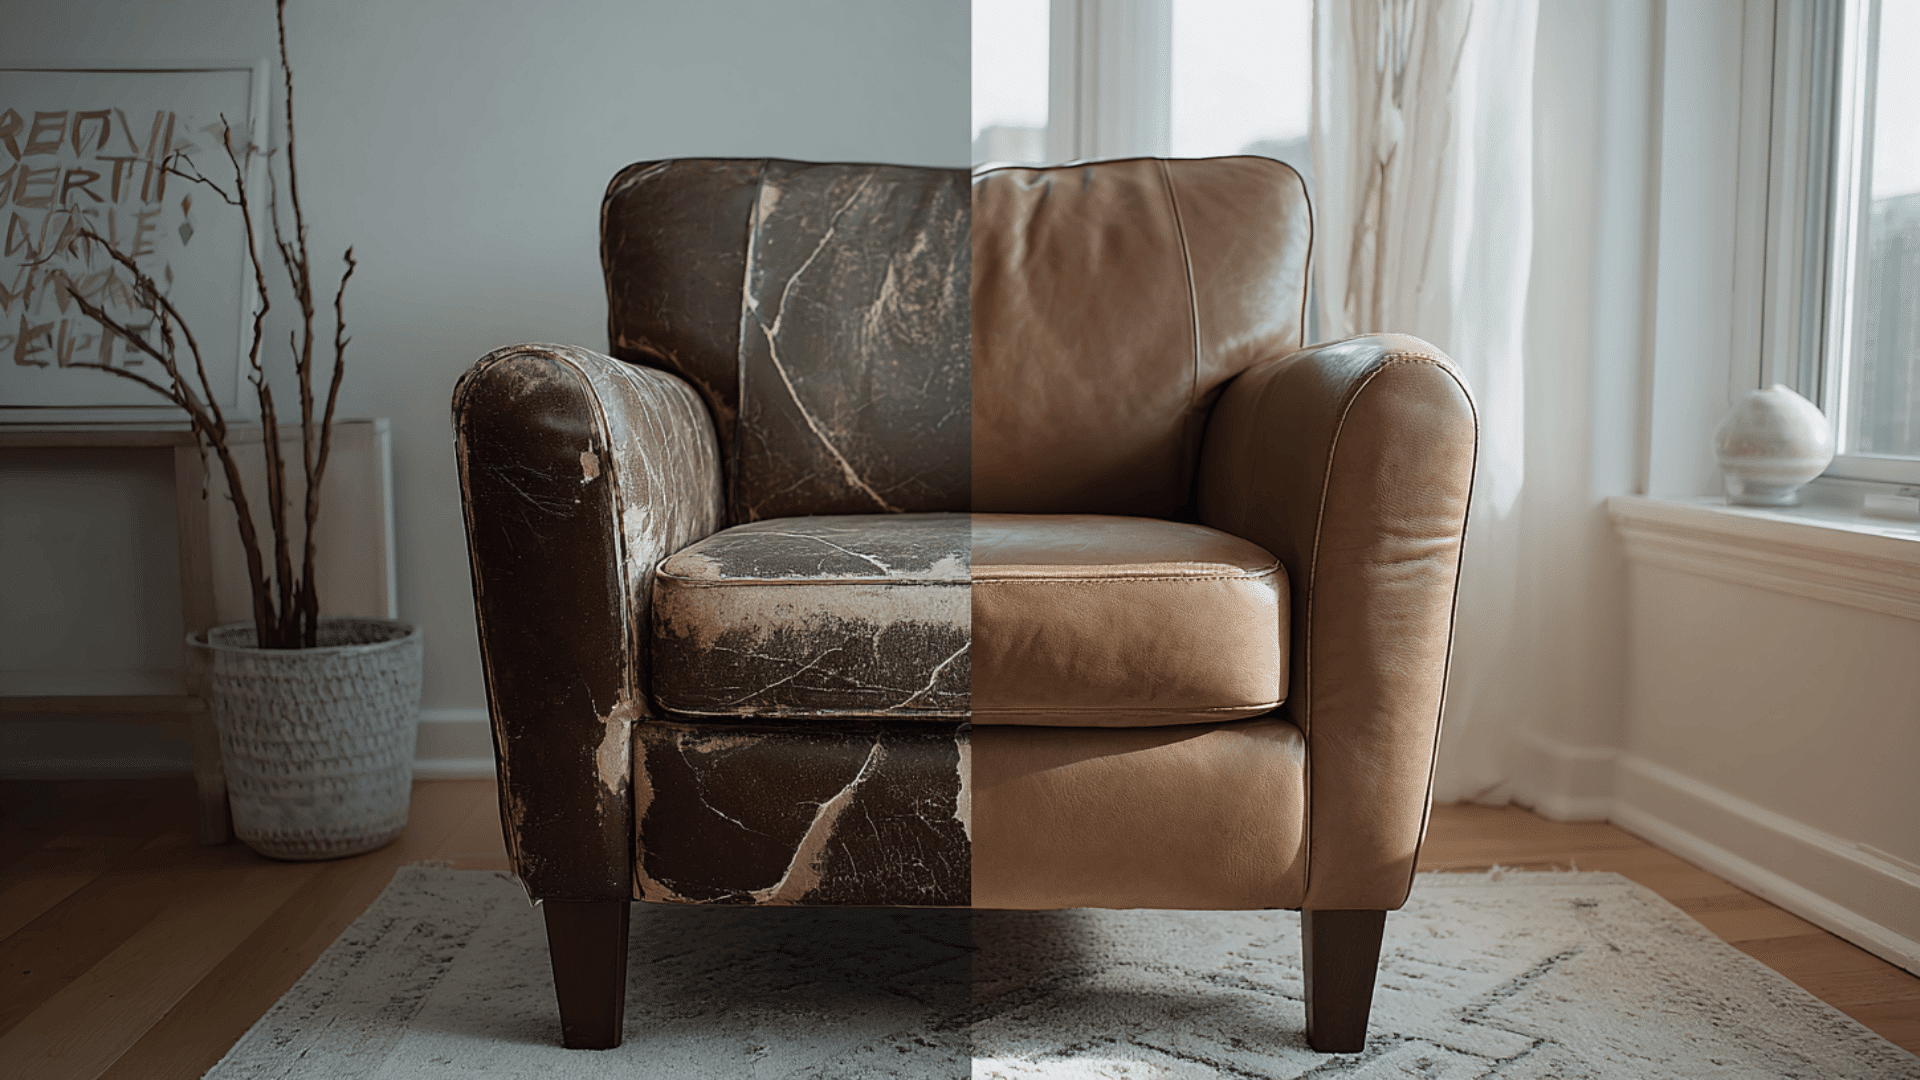
Faux leather is a popular choice for furniture, jackets, bags, and shoes, thanks to its low cost and easy care. But one question comes up often: How long does faux leather last? The answer isn’t the same for everyone. It depends on the type of faux leather, how often it’s used, how well it’s maintained, and even where it’s stored. In this guide, you’ll see what actually affects how long it lasts, how to spot signs of wear, and what you can do to keep it looking good longer. I’ll also walk you through how faux leather compares to real leather so you can decide which one makes more sense for your needs. Let’s start with the basics, so you know exactly what you’re working with. What is Faux Leather? Faux leather is a man-made material that looks like real leather but isn’t made from animal hide. It’s often used in furniture, jackets, bags, and shoes. PU, PVC, and Vegan Leather There are a few common types of faux leather: PU leather (polyurethane): Softer and more flexible. Often looks and feels more like real leather. PVC leather (polyvinyl chloride): Thicker and stiffer. Usually, more water-resistant but can crack faster. Vegan leather: A broad term for any non-animal leather. It includes PU and PVC but also newer plant-based options like cork or pineapple leather. Each type has different strengths depending on how you plan to use it. How It Differs From Real Leather Faux leather isn’t made from animal skin. It’s created by applying a plastic coating to the fabric, giving it the look of real leather without using any animal products. One big difference is cost. Faux leather is usually more affordable than real leather, which makes it a budget-friendly choice for many people. In terms of durability, real leather tends to last longer. It can age nicely over time, while faux leather may start to crack or peel after a few years. Faux leather also requires less maintenance. You don’t need to condition it like you would with real leather, and it’s easier to clean. When it comes to feel, real leather is typically softer and warmer. Faux leather might feel stiffer or more like plastic, depending on the type and quality. There’s also a noticeable difference in smell. Real leather has a natural, earthy scent, while faux leather often smells like plastic or chemicals. Faux leather is a popular pick if you want the leather look without the high price or the use of animal products. How Long Does Faux Leather Last: Average Lifespan How long faux leather lasts depends on its quality, how often it’s used, and how well it’s cared for. General Lifespan Expectations Most faux leather lasts between 2 to 5 years with regular use. But if the material is high-quality and well-maintained, it can last up to 10–20 years in ideal conditions. This isn’t common, but it can happen with gentle use and proper care. Lifespan by Product Type Some items wear out faster than others. Here’s how long you can expect different faux leather products to last: Jackets: About 2–4 years if worn often. They crack faster with sun exposure and body movement. Sofas/Couches: Usually last 3–5 years with daily use. Pets, spills, and sunlight can shorten that. Bags & Backpacks: Hold up for 2–3 years with regular use. Straps and corners show wear first. Shoes & Boots: Often last 1–2 years before peeling or cracking. They wear out quickly with heavy walking. Car Seats: Can last 4–6 years if kept clean and shaded. Heat and friction wear them down faster. Faux leather can hold up well if you use it gently and clean it often. But daily wear and tear will shorten its life. Factors Affecting Faux Leather’s Durability Faux leather doesn’t wear the same for everyone. Its lifespan depends on what it’s made of, how it’s used, and how often it’s cared for. 1. Material Quality Some faux leathers break down faster than others. The type and thickness of the material make a big difference. PU leather is flexible and often more breathable. It holds up better for clothing or light furniture use. PVC leather is tougher but prone to cracking, especially when bent or stretched often. High-end faux leathers like Ultraleather or Naugahyde are built for heavy wear. They’re used in commercial seating, RVs, and hospitals. If you want long-lasting faux leather, go for thicker layers and trusted brands, not just low-cost options. 2. Usage Environment Where faux leather is placed and how often it’s used will impact how long it lasts. Indoor use in shaded, cool rooms helps it last longer. Outdoor use shortens its life due to heat, rain, or direct sunlight. Items used every day, like chairs or shoes, show wear much faster than bags or jackets worn occasionally. Use matters. Even high-quality material won’t last if it’s placed where it’s stressed every day. 3. What Shortens the Life of Faux Leather These habits can cause faux leather to wear out faster than it should: Letting dirt and dust build up: Grit can slowly scratch and wear down the surface Using alcohol-based or harsh cleaners: These strip away protective coatings and dry out the material Leaving items in direct sunlight: UV rays fade color and make the surface brittle Ignoring early signs of cracking or peeling: Small issues can quickly spread if left untreated Storing in damp or humid areas: Excess moisture can lead to warping or mold Placing under constant friction: Repeated rubbing in the same spots weakens the surface fast Avoiding these common mistakes will help your faux leather last much longer. How to Make Faux Leather Last Longer Taking care of faux leather doesn’t take much effort. A few simple habits can add years to its life. Cleaning Tips Regular cleaning keeps faux leather looking fresh and helps prevent wear. Wipe it weekly with a damp cloth to remove dust and dirt Blot spills right away to stop stains before they set Use mild soap and water for deeper cleaning Dry the surface completely after cleaning to avoid moisture damage Preserving Faux Leather with Products and Storage Apply faux leather conditioner once a month to maintain flexibility. Use a protectant spray made for synthetics to guard against stains and fading. Always test products on a small, hidden spot first. Store items in a cool, dry place away from heat and humidity. Cover them with a breathable cloth to block dust and sunlight. Hang jackets on wide hangers to prevent creases. Avoid airtight plastic covers, which can trap moisture and cause peeling. What to Avoid A few common mistakes can quickly shorten the life of faux leather. Direct sunlight causes fading and drying Sharp objects can easily scratch or puncture the surface Heat sources may cause warping, cracking, or shrinkage Heavy stacking can stretch or dent the material permanently With the right care, faux leather stays strong, smooth, and good-looking far longer than most people expect. Faux Leather vs. Real Leather: Durability Comparison Not sure which type to choose? Here’s a simple breakdown of how faux leather compares to real leather in terms of durability, care, and cost. Feature Faux Leather Real Leather Durability Lasts 2–5 years on average; 10+ with care Can last 20–40 years or more with proper maintenance Aging Tends to crack or peel over time Ages well and often looks better with time Care Easy to clean and low maintenance Needs regular conditioning and careful cleaning Water Resistance More water-resistant, but may crack when exposed to heat or sun Absorbs water unless treated, but won’t crack as easily Feel & Look Smooth, but may feel plastic-like Soft, warm, and natural texture Smell Often has a chemical or plastic odor Has a rich, natural leather scent Price Cheaper, better for tight budgets More expensive, often seen as an investment Ethics Vegan-friendly; no animal products Made from animal hide Faux leather makes more sense if you’re on a budget, prefer animal-free products, or want low maintenance. Real leather is a better choice if you want long-term durability and don’t mind the extra care. Common Signs It’s Time to Replace Faux Leather Even with good care, faux leather doesn’t last forever. Watch for these signs that it might be time for a replacement. Cracking and peeling: The surface starts splitting or flaking off, especially in areas with frequent bending or use. Severe flaking: Thin layers begin to shed or rub off, leaving patches of exposed fabric underneath. Color fading: The surface loses its original tone, often due to sun exposure or harsh cleaning products. Sticky or tacky texture: A rubbery or sticky feel can mean the coating is breaking down from heat or age. Stiff or brittle surface: If the material becomes hard or inflexible, it’s at risk of cracking or tearing soon. Conclusion If you notice more than one of these issues, the material is likely past its prime and won’t last much longer. Faux leather can hold up well with the right care, but like any material, it has its limits. If you’ve ever wondered how long faux leather lasts, the answer depends on quality, usage, and upkeep. Paying attention to small details, like where you store it and how you clean it, can make a big difference over time. Once the surface starts cracking or peeling, though, it’s usually near the end of its life. Want more practical tips on caring for everyday materials or choosing long-lasting home items? Read my other blog posts for helpful advice you can actually use.
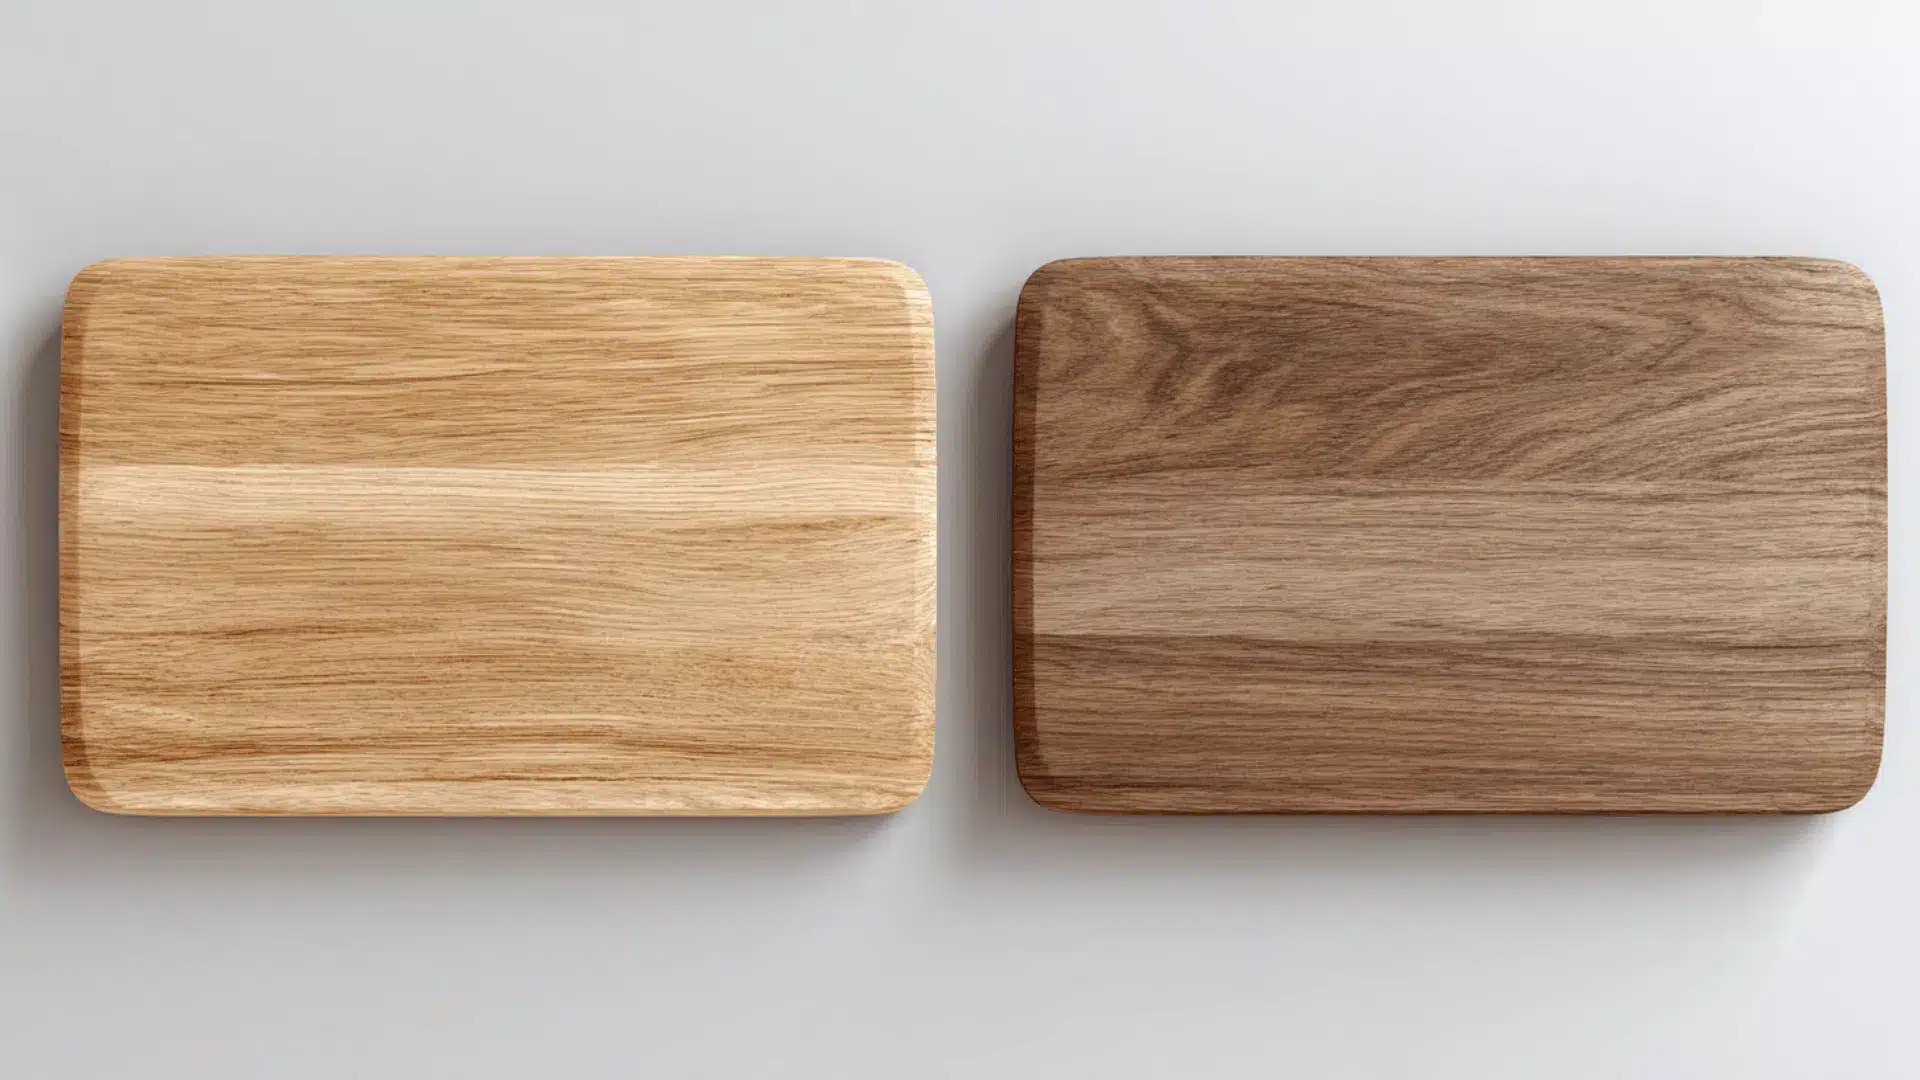
When I was choosing wood for my home, oak and walnut came up a lot. Both are beautiful and long-lasting, but they offer very different looks, prices, and uses. If you’re picking out furniture, planning new floors, or starting a DIY project, it helps to know the pros and cons. In this blog, I’ll share what I learned about appearance, strength, cost, and sustainability. You’ll find clear, side-by-side comparisons to help you figure out which one fits your home and style best without getting overwhelmed by all the options out there. Let’s take a closer look at how these two woods stack up and where each one truly shines. Oak is harder and more durable than walnut, with a Janka rating of 1,290–1,360 lbf compared to walnut’s 1,010 lbf. Walnut is more expensive but offers a darker, richer look, while oak is more affordable and better suited for high-traffic use. What Makes Oak and Walnut Top Hardwood Choices Oak and walnut are two of the most popular hardwoods used in homes today. They both look great and last a long time, which is why people often compare them before making a choice. Both woods offer a mix of beauty and strength. Here’s why they’re so well-liked: They’re durable. Oak is harder, but walnut still holds up well. They look good. Oak has a light, classic look. Walnut has a rich, dark tone. They work for many styles. Modern, rustic, or traditional, both woods can fit in. They’re widely used. You’ll see them in flooring, furniture, cabinets, and more. If you’re picking wood for a project, it usually comes down to these two, but you may also compare walnut vs cherry wood for similar use cases. Oak vs. Walnut: Key Differences Oak and walnut differ in more than just color. They vary in strength, price, grain, and how they’re used in the home. These core differences can help you decide which wood works better for your project. Feature Oak Walnut Color Light to medium brown Rich, dark brown Grain Open and bold Smooth and varied Hardness Higher (more durable) Softer (easier to work with) Price Range $3.50–$16.00 per board foot $7.50–$22.00+ per board foot Workability Tougher to cut and shape Easier for fine or custom details Common Use Flooring, cabinetry, and high-use furniture Accent pieces, custom furniture Look & Feel Classic, rustic Modern, refined Sustainability Renewable and widely available Less abundant and slower to grow Appearance and Grain Patterns Oak and walnut look very different. That’s why your choice often depends on the style you want. Color Differences Oak has a lighter and more neutral tone. White oak usually shows pale beige or soft gray shades. Red oak leans warmer, with pink or reddish tones. Oak also takes stain well, so you can adjust the color to fit your space. Walnut has a darker, richer color. It ranges from deep brown to almost purplish-black. The center of the wood is dark, while the outer sapwood is pale yellow. Over time, walnut naturally darkens, especially when exposed to sunlight. Grain Patterns Oak has a bold, open grain. The lines often appear wavy or uneven, giving it a more rustic or textured look. White oak can show ray-like marks and flecks that stand out more than red oak. Walnut’s grain is smoother and more refined. It can be straight, curly, or gently wavy. The texture feels softer and less busy than oak, which makes walnut a better fit for sleek or high-end designs. Oak looks classic and strong, while walnut feels rich and modern. Each one gives a different look, depending on the room and lighting, especially when considering mixing wood tones in a room. How Oak and Walnut Take Stain Oak absorbs stain very well because of its open grain, making it easy to customize color from light to dark finishes. This makes oak a flexible option for matching different interior styles. Walnut is usually not stained because of its naturally rich color. Instead, it is often finished with oil or clear coats to highlight its natural tone. Staining walnut can sometimes mute its depth. Oak vs. Walnut: Durability and Strength This is where the real difference shows. Oak and walnut are both strong, but not in the same way. Janka Hardness Comparison Wood Type Janka Hardness (lbf) White Oak 1,360 Red Oak 1,290 Walnut 1,010 Oak is harder than walnut, with a Janka rating of 1,290–1,360 lbf compared to walnut’s 1,010 lbf, as seen in the strongest wood types by hardness. On the Janka scale, red oak scores around 1,290, while white oak is about 1,360. Walnut ranks lower, around 1,010. That means oak handles scratches, dents, and heavy traffic better. Still, walnut is no weak wood. It’s used in furniture that lasts for years. But if you’re putting wood in a high-use area like a hallway or kitchen, oak gives you better resistance. Best for Heavy Use If you have kids, pets, or heavy furniture, oak is a safer bet. It handles wear and tear without showing damage easily. Walnut works well in areas with less foot traffic or for decorative pieces that won’t get bumped or scratched as much. Scratch and Dent Resistance Oak’s grain helps hide scratches. Even if it gets a dent, it blends into the texture. Walnut’s smoother surface shows marks more easily. But because it’s softer, it’s also easier to repair with sanding and oiling. If you need something tough, oak wins on durability. But walnut still holds up well in the right setting. Workability and Maintenance When choosing wood, it’s important to know how easy it is to work with and take care of. Here’s how oak and walnut compare: Feature Oak Walnut Ease of Cutting Harder to cut; tough on tools Softer and easier to shape Splintering Risk More likely to splinter along the grain Low risk of splintering Chipping Can chip if the tools aren’t sharp Rarely chips during cuts Staining Takes stain well for custom looks Often left natural due to rich color Sanding Requires effort due to hardness Sands smoothly with minimal effort Maintenance Resists wear and hides scratches Needs touch-ups; scratches are more visible Finish Needs Holds up well over time with simple care May need oiling or polishing occasionally If you want something easy to work with and refinish, walnut is user-friendly. For strength and long-term wear, oak is more rugged and lasting. Oak vs. Walnut: Cost and Availability The price and availability of each wood can make a big difference in your decision. Oak is more affordable and widely available. Red oak typically costs between $3.50 and $7.50 per board foot, while white oak ranges from $6.00 to $16.00 per board foot, depending on grade and thickness. It’s easy to source across the U.S., making it ideal for large projects like flooring, cabinets, and trim. Walnut is a premium hardwood with higher pricing. Most black walnut falls between $7.50 and $18.00 per board foot, though rare or figured cuts can go up to $22.00 or more per board foot. Walnut is less common than oak, especially in large quantities, which drives up the cost. Furniture made with oak is usually more budget-friendly. Walnut is often reserved for high-end, custom, or decorative work. If you want something strong and cost-effective, oak is a practical choice. If you’re aiming for a rich, premium look, walnut brings that extra style at a higher price. Note: Prices can vary based on location, lumber supplier, and market demand. Always check with local vendors before purchasing. Best Use Cases for Each Wood Oak and walnut each serve different purposes depending on your needs. Here’s a quick look at how each wood matches different uses: Project Type Best with Oak Best with Walnut Flooring High-traffic areas like hallways and living rooms Low-traffic, formal rooms like studies or bedrooms Cabinetry Kitchens and laundry rooms for daily use Offices or high-end kitchens for a sleek look Furniture Dining tables, shelving, and sturdy storage pieces Accent tables, desks, or custom designs Decorative Use Rustic or traditional interiors with bold texture Modern or minimalist spaces needing a rich contrast Long-Term Use Built-ins and everyday furniture built to last Heirloom-quality pieces meant to stand out If your priority is strength and everyday function, oak is a reliable choice. For bold, refined style in lower-use areas, walnut brings a richer look. Sustainability and Environmental Impact If you care about where your wood comes from, this section helps you understand how oak and walnut compare in terms of environmental impact. Oak Oak is generally a sustainable choice, especially when sourced from managed forests. It grows widely in the U.S., making it easier to harvest locally. This reduces the need for long-distance shipping, which helps lower the carbon footprint. Because oak trees grow at a moderate pace and are replanted often, the wood is considered renewable. Look for FSC-certified oak (wood approved by the Forest Stewardship Council for meeting responsible forestry standards) if you want to be sure it’s responsibly harvested. Walnut Walnut grows more slowly and is less common than oak, which makes it less renewable in comparison. It also tends to come from fewer regions, which can increase shipping distances and impact its environmental footprint. Still, many walnut suppliers follow responsible harvesting practices. Buying from certified sources helps reduce the impact on native forests. What to Look For Choose wood that is FSC or PEFC certified Look for local suppliers to cut down on transportation Avoid rare or exotic walnut varieties if sustainability is a concern If you’re looking for a more eco-friendly option, oak tends to have a smaller impact. But with smart sourcing, walnut can still be a responsible choice. Conclusion When I compared oak vs. walnut, I realized it’s not just about price or appearance; it’s about what fits your space and lifestyle. Oak has a strong, familiar look I’ve always liked, while walnut adds bold contrast and warmth that might work better for you. Both can last for years if you take care of them. If you’re unsure, think about what matters most: style, function, or lasting appeal. I found it helpful to see how each wood matched my existing decor. You can check out other blogs I’ve written on wood types, design tips, and room-by-room styling. They might give you the clarity you’re looking for. Frequently Asked Questions Is oak or walnut harder? Oak is harder than walnut, with oak ranging from 1,290–1,360 lbf and walnut around 1,010 lbf on the Janka scale. Which is more expensive, oak or walnut? Walnut is more expensive, typically costing $7.50–$22 per board foot, while oak ranges from $3.50–$16. Does a walnut scratch easily? Walnut is softer than oak, so it can show scratches more easily, but it is also easier to repair. Is oak or walnut better for flooring? Oak is better for flooring because it is harder and more resistant to dents and wear. Which is better for furniture? Both work well, but oak is better for durability, while walnut is preferred for premium, decorative furniture.
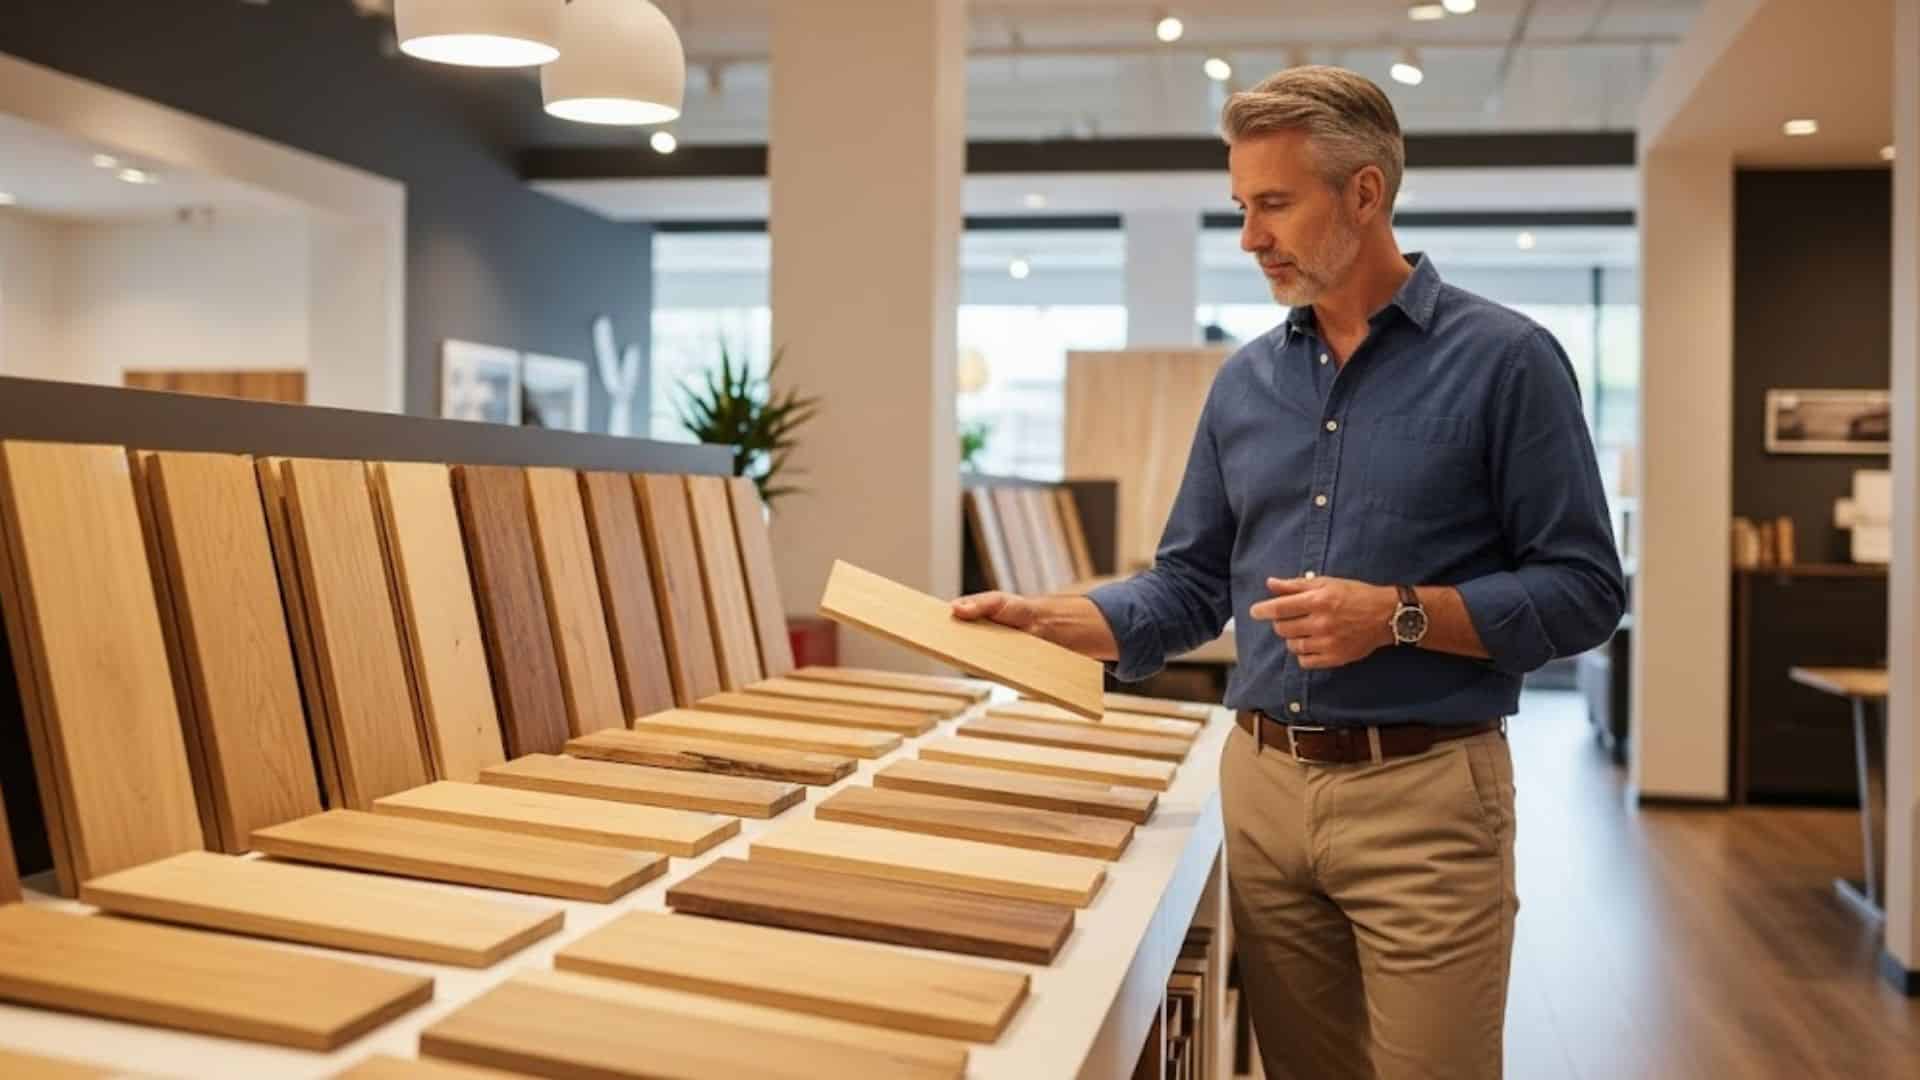
Have you ever noticed why some dining tables look amazing for decades while others fall apart quickly? The secret lies in choosing the best wood for a dining table that matches your lifestyle. I’ve seen families regret their wood choice after just a few years of daily use. The right type of wood affects everything from durability to style and functionality in your dining room. A well-chosen wooden table can handle kids’ homework sessions, holiday feasts, and game nights without succumbing to wear and tear. Your dining table becomes the heart of your home, where memories are made every single day. Smart wood selection alters ordinary meals into memorable moments that bring families together. Get ready to find the perfect wood that will make your dining room shine! Best Type of Wood for a Dining Table The wood used for dining tables falls into two main categories: hardwood and softwood. These terms refer to how trees reproduce rather than the actual toughness of the wood. Hardwood comes from deciduous trees that shed their leaves annually, while softwood originates from evergreen trees that maintain their foliage year-round. The naming convention can be misleading since some softwood varieties are actually harder than certain hardwood types. The key factor in selecting a dining table is the density and strength of the wood fibers. Hardwood generally features denser cellular structures that provide better resistance to dents and scratches. Softwood contains more air pockets, resulting in lighter weight but typically lower durability for dining furniture applications. Key Factors to Consider When Choosing Dining Table Wood When I help you choose the perfect wood for your dining table, I focus on four key factors. You should consider how strong it needs to be, what it will look like, the level of care it requires, and what fits your budget. 1. Durability and Hardness The Janka scale measures the hardness of different woods by testing the force required to dent them. Harder woods like oak and maple can handle busy family meals without showing every scratch. If you have kids who do homework at the table or frequently host dinner parties, you need wood that won’t look worn out after a few years of regular use. 2. Grain Pattern and Appearance Wood grain is like a fingerprint, making each piece unique and beautiful. Some woods have bold, wavy patterns that become the star of your dining room. Others have subtle, straight lines that mix quietly with your decor. The natural color can be light, like honey, or dark, like chocolate, and many woods change color as they age over time. 3. Maintenance Requirements Different woods require varying levels of care to maintain their best appearance over time. Some need regular oiling or special cleaners to prevent water damage and stains. Others have protective finishes that make cleanup as easy as wiping with a damp cloth. Think about how much time you want to spend maintaining your table between your busy schedule and family activities. 4. Budget Considerations Wood prices can range from affordable to very expensive, depending on the rarity of the wood. Common woods like pine cost less upfront but might need replacing sooner than premium options. Exotic woods may be more expensive initially, but they can last for generations if properly cared for. Consider the total cost, including delivery, assembly, and future maintenance, when making your final decision. Top Woods for Dining Tables Each wood type brings its personality and benefits to your dining room. I’ve selected premium hardwoods that offer both durability and beauty for your table. You’ll find the right choice depending on your style preferences and budget considerations. 1. Oak Wood Oak has been a popular choice for dining tables for hundreds of years. This wood can handle heavy use and resist scratches from daily meals. The grain pattern stands out clearly, giving your table character and distinction. One downside is that oak can feel heavy to move around. Best For: Traditional farmhouse kitchens and rustic dining rooms with vintage appeal. Maintenance Level: Low to moderate 2. Maple Wood Maple wood offers a clean, smooth surface that works well in many home styles. This wood accepts stains beautifully, allowing you to match almost any color scheme. Maple resists dents better than softer woods. However, maple can sometimes look plain compared to more dramatic woods. Best For: Modern homes and contemporary spaces that need clean, simple lines. Maintenance Level: Low 3. Cherry Wood Cherry wood begins with a light pinkish hue that gradually converts into a rich, reddish-brown over time. This natural aging process makes each table unique and more beautiful with age. The Cherry feels smooth to the touch. The main drawback is the higher price compared to standard wood. Best For: Formal dining rooms and luxury homes that showcase fine craftsmanship. Maintenance Level: Moderate 4. Walnut Wood Walnut delivers a premium look that instantly upgrades any dining room. This wood combines strength with beauty, lasting for generations with proper care. The chocolate brown color stays consistent throughout the wood. Walnut costs significantly more than bare wood, making it a major investment. Best For: High-end dining rooms and mid-century modern homes with urbane style. Maintenance Level: Moderate to high 5. Mahogany Wood Mahogany brings a lasting classiness that never goes out of style. This wood cuts and shapes easily, allowing for detailed carvings and designs. The reddish-brown color deepens beautifully with age. The biggest concern is the environmental impact, as some mahogany comes from endangered forests. Best For: Classic dining rooms and antique-style homes with traditional furniture pieces. Maintenance Level: Low to moderate How to Choose Your Perfect Wood The final step in choosing your dining table wood involves careful evaluation and hands-on research. Start by creating a simple decision matrix that weighs budget, durability, appearance, and maintenance needs. Score each wood option against these factors to determine which one best suits your needs. Ask furniture makers important questions about wood sourcing and quality before making a purchase. Learn about the various joinery methods, construction techniques, and warranty or repair options they offer. These details matter for long-term satisfaction. Visit showrooms and workshops to see the wood options in person. Examine grain patterns and finishes under different lighting conditions. Feel the wood surface and notice the weight differences between various types of wood. Touch samples help you understand how each wood will look and feel in your home. Tips for Maintaining Your Wooden Dining Table When it comes to caring for your wooden dining table, a little effort can go a long way in preserving its beauty. Here are a few simple tips to keep your table looking great for years: Clean with a soft, damp cloth and mild soap to remove dust and spills. Avoid harsh chemicals or abrasive cleaners, as they can damage the wood finish. Regularly dust the table to prevent dirt buildup, which can scratch the surface over time. Always wipe up spills immediately to prevent moisture from soaking into the wood. These simple practices can help protect your dining table and keep it in excellent condition. Consistent care will preserve the wood’s natural beauty and significantly extend the table’s lifespan. Final Words I hope this guide helped you understand how different woods can change your entire dining experience. You now know that oak brings rustic appeal while walnut adds luxury to any room. Consider your family’s daily habits, your decorating style, and how much you enjoy setting the table. Consider whether you need something challenging for busy families or sleek for formal entertainment. The perfect wood choice will serve your family well for many years to come. Visit your local furniture store or browse online catalogs to see these beautiful options yourself. Share your thoughts about your favorite wood choice in the comments below; I’d love to hear your story!
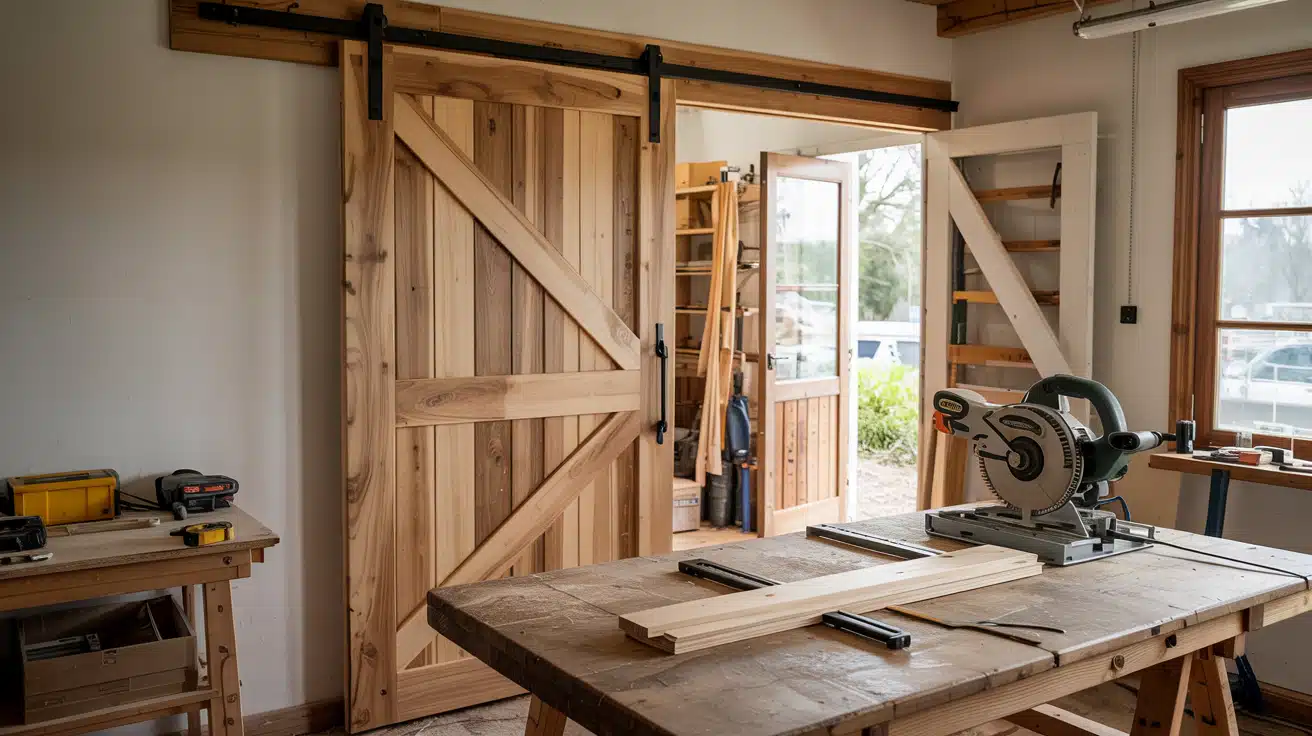
Are you thinking about building a barn door but aren’t quite sure where to start? I get it, it can seem like a big project. You might be wonderingwhat materials to buy, what tools you’ll need, or how to make sure everything lines up just right, and understanding standard door widths can help you plan more accurately. In this post, I’ll show you how to build a barn door from start to finish. You’ll find clear steps, practical tips, and simple options that actually work. Ready to save some money and do it yourself? Let’s get into it. Choosing the Right Barn Door Style When picking your barn door, you’ll want to match the style to your needs. Think about where you’ll install it and how you plan to use the space. Popular Styles (Z-frame, X-frame, flat panel, Dutch) Each barn door style offers a different level of support and simplicity. A Z-frame provides strong bracing, often used where moisture or weight might cause sagging. An X-frame is classic and symmetrical, popular in rustic builds. A flat panel is a clean option using just horizontal planks, often chosen for its minimal layout. Dutch doors are split in half, letting the top and bottom open independently, useful in barns or pet-friendly areas. Interior vs. Exterior Use Cases Interior barn doors are usually lighter, easier to install, and focused on dividing spaces such as bedrooms, closets, or bathrooms. These often slide on tracks and require less insulation or sealing. Exterior barn doors, on the other hand, must withstand moisture, wind, and long-term use. They’re often heavier, use treated wood, and include additional framing support or weatherproofing materials to reduce swelling or movement over time. Step-by-Step Build a Barn Door In this section, I’ll guide you through each part of the build, allowing you to follow along easily. I’ve kept it simple, so you can get it done without hassle. Tools and Materials Checklist Table saw Circular saw / Track saw Sliding compound miter saw Drill / Drill press Brad nailer (18 gauge) Router Orbital sander 120-grit sandpaper 220-grit sandpaper 500-grit sandpaper Flap disc Cutoff saw / Angle grinder Stud finder Measuring tape Straight edge / Spacer board Clamps Shop vac / Air compressor / Leaf blower Spray paint (black satin) Painter’s tape Cardboard (for screws during painting) Rags / Alcohol wipes OSB sheathing panels Cedar fence pickets (5/8″ thick) 1×4 board 3/16″ thick metal flat bar 1¼” brad nails Wood glue / Construction adhesive Wood filler Oil-based polyurethane (ultra-flat sheen) Metal screws Sliding barn door hardware kit Recessed handles Step 1: Measure the Door Opening and Plan the Layout Start by measuring the opening to determine the door size. For double doors, each door should slightly overlap the center and cover the trim if needed. Uses 18½-inch wide doors for a 34-inch opening. This layout allows doors to meet in the center and clear clutter while controlling sound. Planning includes deciding between single, double, or pocket-style layouts based on space and framing. Once sizing is settled, you can plan material cuts and hardware alignment. Step 2: Cut the Back Panels The builder uses 5/8-inch cedar pickets and OSB plywood as the core of each door. After letting cedar boards dry to reduce shrinkage, OSB is cut using a table saw. The rough width is cut slightly oversized, then trimmed to the exact width (e.g., 18 inches) for precision. Height is left slightly long for later adjustment. If needed, flip OSB sheets during cutting. These core panels become the structural base for mounting pickets and support hardware. Step 3: Test Fit and Determine Final Door Height Before final cuts, test-fit the OSB panels to check how the height looks and functions in the actual space. A spacer board helps simulate floor clearance and track height. The final height is chosen to allow smooth sliding and visual balance. This step ensures the doors aren’t too short or tall once installed. Leave room for the mounting board and track, and make sure the top edge aligns well with the backer board and railing placement above the opening. Step 4: Install the Mounting Backer Board To support the track hardware, a 1×4 board is mounted above the opening. Use a stud finder to locate framing for secure anchoring. Sand the board smooth and paint it to match the wall for a clean, low-profile finish. Align the board at the correct height, and if needed, drill extra holes or add blocking behind the drywall for a stronger hold. This board provides critical support for the rail and ensures the doors move safely and evenly. Step 5: Cut and Attach the Cedar Pickets Cut cedar pickets to match the door width. For double doors, lay them out to align grain patterns. Trim the top or bottom boards as needed to fit. You can divide the total height by the number of pickets for uniform sizing. Attach each board to the OSB using wood glue or construction adhesive and 18-gauge brad nails (1¼-inch long). For extra strength, add a center row of nails. Label doors clearly to track left/right sides, tops, and backs. Step 6: Fill Nail Holes and Prep for Metal Trim Use wood filler to cover nail holes, then smooth excess with a damp rag. Avoid over-sanding cedar to preserve natural texture and saw marks. Measure and cut a 3/16-inch thick metal flat bar for trim. Use a metal cutoff saw or angle grinder, then smooth the sharp edges. Cut the top and bottom trim to the door width and the side trim slightly longer to overlap. Lay everything out before painting. Clean metal with alcohol before applying black satin spray paint outdoors. Step 7: Drill and Paint Metal Trim and Screws Use a drill press or standard drill to make holes in the metal bar. Drill three holes in each short piece and seven in long side pieces, spaced evenly. For center-facing door edges, stagger screw positions to prevent bumping. Sand all holes and clean the metal before spray painting. Insert screws into cardboard and give them a few light coats of paint too. Apply two to three thin coats to both metal and screws for a strong, clean finish. Step 8: Final Sanding and Polyurethane Finish Use 120-grit sandpaper on an orbital sander to smooth the door sides and 220-grit to slightly bevel the edges. Lightly sand the surface of pickets to even the texture without removing too much character. Clean all sawdust using compressed air or a blower. Apply oil-based polyurethane (ultra-flat sheen) to highlight the natural knots and grain. Watch for drips on the edges. Let dry, then flip and repeat coats on the other side. Light sanding between coats ensures a smooth final finish. Step 9: Attach Metal Trim to Doors After the polyurethane is fully dry, attach the painted metal trim. Start with the top and bottom pieces, pre-drilling each hole to prevent wood splitting. Use clamps if needed to align the metal perfectly to the edge. Then attach the vertical side bars, overlapping the ends. This step strengthens the edges and gives the doors a finished, professional appearance. Metal trim also helps maintain straight lines over time, especially for doors that are opened and closed frequently. Step 10: Install Sliding Hardware and Handles Mark and pre-drill hardware holes on the door face, 2 inches from each edge. If bolts are too short, router out a recess in the back of the door to seat the bolt heads. Install rollers and recessed handles. Make sure they are aligned and square. To avoid a gap between doors, stagger screw heads on inner edges. Follow the rail kit’s instructions for mounting height and door clearance. Then install the rail, floor guide, door stoppers, and safety pads. Watch the full build in action to see each step come together. Click below to view the complete video walkthrough and results. Finishing Your Barn Door Now that your barn door is built, I’ll guide you through the final touches. You’ll choose how it looks and how well it holds up over time, especially outdoors. Painting or Staining Options Paint or stain can be chosen based on the desired appearance and the space where the door will be used. Stain works well for highlighting the natural wood grain, while paint offers a smooth, solid look. Before applying either finish, sanding the surface is important to ensure good adhesion. The surface should be clean and dry. Using a brush allows for better control around edges. Applying two coats provides stronger coverage and longer-lasting protection. Protective Finishes for Outdoor Use For doors exposed to outdoor conditions, applying a clear protective coat is essential. Exterior-grade polyurethane or water sealers are commonly used to help resist moisture and sunlight. It’s recommended to apply the finish after painting or staining and allow full drying between coats. This process helps reduce the risk of warping, swelling, or cracking caused by weather exposure. Even one proper coat can significantly increase the door’s durability in outdoor environments. Budget and Time Breakdown When you plan your barn door project, it helps to know what you’re spending and how much time you’ll need. I’ll walk you through both so you can prepare well. DIY vs. Store-Bought Comparison Feature DIY Barn Door Store-Bought Barn Door Time Investment Requires several hours of hands-on work Minimal effort, arrives ready to install Customization Full control over design, size, and finish Limited to available styles and sizes Tools and Skills Needed Basic tools and comfort with measurements None required beyond installation Material Selection Choose your own wood and hardware Pre-selected materials Labor You handle everything from cutting to installing Professional finishing and assembly included Flexibility Easily adjust to fit unique spaces May need trimming or adjustment Cost-Saving Tips and Alternative Materials These simple choices can help reduce the cost without affecting strength or function: Use construction-grade pine or spruce instead of cedar or oak Reuse hardware from old doors or cabinets Buy boards in bulk or use off-cuts from other projects Check local salvage yards or community boards for free or cheap materials Skip decorative trim and go with a flat panel layout for fewer cuts and pieces Use screws instead of nails for better strength and flexibility Customization and Style Ideas for Barn Door Once your barn door is installed, you can add personal touches to match your space and preferences. Here are a couple of simple ways to give your door more character. Vintage Finishes, Modern Looks, Chalkboard Inserts Adding your own design elements can make a basic door stand out. For a worn-in look, try distressing the wood with sandpaper or a wire brush before sealing. A more modern style might use clean lines, smooth panels, or matte black hardware. You can also attach a chalkboard panel to part of the door, great for pantries, kids’ rooms, or schedules. These small changes can help your door match different rooms without needing to rebuild it. Using Reclaimed or Eco-Friendly Wood Choosing reclaimed wood or responsibly sourced materials is a smart way to cut down waste and keep costs manageable. Boards from old barns, pallets, or demolished homes often have a unique look and natural wear. Just make sure the wood is clean, dry, and free of pests before using it. Eco-friendly lumber options are also available at many hardware stores if you prefer something new but sustainably produced. Common Mistakes to Avoid A few simple oversights can slow you down or weaken your final result. Here’s what to watch out for before and during your build: Skipping the level check before mounting the track or hinges Using untreated wood for outdoor doors without a protective coat Ignoring stud placement when installing sliding hardware Failing to leave enough clearance between the door and the floor Choosing warped or wet boards that may shift over time Not pre-drilling holes, which can lead to split wood Over-tightening screws, causing hardware to strip or pull loose Conclusion Now that you’ve seen each step, you know how to build a barn door that’s both strong and practical. You’ve got the tools, the process, and the know-how to make it happen. Whether you’re adding it to a shed or inside your home, you can build it your way. Just take your time, follow the steps, and don’t skip the finishing touches. Need more ideas or want to find other DIY projects? Check out the rest of the blog, you’ll find plenty to keep your hands busy.
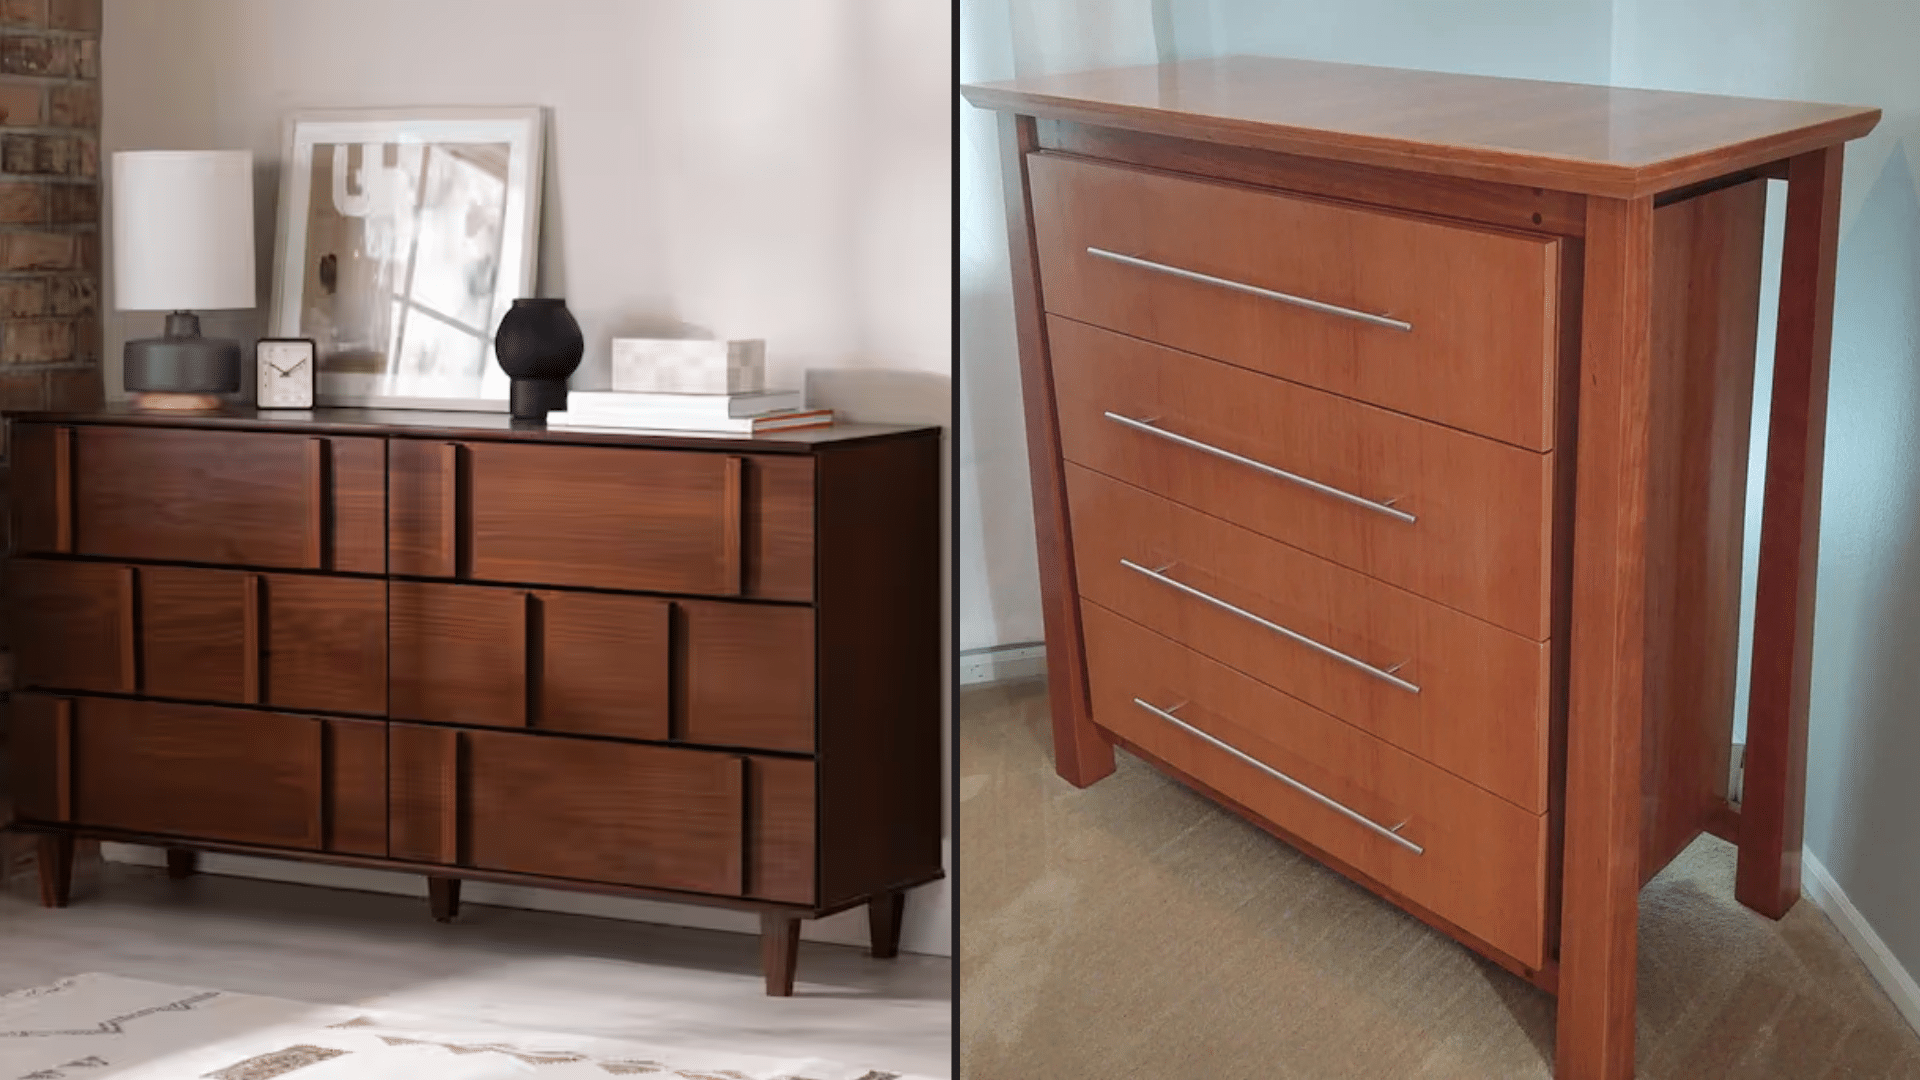
Trying to decide between walnut and cherry wood? You’re not alone; this is a common choice when you’re picking wood for furniture or home projects. You might be wondering which one is more durable, which one looks better, or which is easier to maintain, much like when comparing oak vs walnut for furniture choices. I will walk you through the key differences in color, grain, strength, and daily use. By the end, you’ll have a clear sense of which wood works best for your needs. So, which one will suit your space better, walnut or cherry? Let’s find out. Walnut vs. Cherry Wood: Understanding the Woods Before choosing between cherry and walnut, let me help you understand where each wood comes from and how it’s commonly used. What is Walnut Wood? Walnut wood comes mainly from North America, especially the eastern and central United States. It’s widely available through lumber suppliers and furniture makers. Its natural shade ranges from light to deep brown with a straight or slightly wavy grain. You’ll often notice a darker core and lighter sapwood. While popular for furniture, it’s also used in gunstocks, wall paneling, and crafted wooden items like bowls and utensils. What is Cherry Wood? Cherry wood is sourced mainly from the American Black Cherry tree, which grows in the eastern United States. It starts with a light tone, but deepens gradually over time with light exposure, becoming a richer shade. Its grain is tight and uniform. While you often see it in fine furniture, cherry is also used for cabinets, musical instruments, and turned items due to its smooth surface and consistent structure. Walnut vs. Cherry Wood: Appearance and Value When you’re choosing between cherry and walnut wood, how each one looks really matters. Let me walk you through how they differ in color, texture, and how they age over time. Color and Visual Appeal When comparing walnut and cherry side by side, walnut tends to offer a darker, more dramatic look from the outset. It ranges from medium brown to deep chocolate, often featuring rich burls and color variations that make every piece unique. Cherry, in contrast, begins with soft pink or golden tones and naturally matures into a rich, reddish-brown hue over time and exposure to light. To truly appreciate the difference, viewing them side by side will reveal how distinct and beautiful each option is. Grain and Texture Walnut usually has a more open grain, which makes it easier for you to work with and allows stains or finishes to absorb smoothly and consistently. Its grain can be straight or have wild, flowing patterns, depending on the cut. Cherry, on the other hand, has a smooth, fine, and closed grain that gives a clean surface but can make staining tricky, especially for beginners. If you’re aiming for a consistent tone, cherry may require more careful preparation and conditioning. Walnut vs. Cherry Wood: Durability and Hardness When selecting wood for furniture, strength is crucial. Let’s examine how walnut and cherry wood withstand everyday use, from resisting dents to withstanding sunlight and moisture. Janka Hardness Test Results The Janka hardness test helps you understand how well a wood resists dents and wear. Walnut scores around 1010, giving it an edge in toughness. If you’re building something for heavy use, such as a dining table or bench, walnut may handle bumps and scuffs better. Cherry scores around 950, still a hardwood but slightly softer. You may find that cherry gets minor scratches more easily, especially during the first year when it’s still maturing and hasn’t darkened fully through exposure. Which Wood Lasts Longer in Daily Use? If you’re furnishing a busy home, walnut’s natural hardness gives it a slight advantage in resisting wear from pets, kids, or daily movement. It also ages well with minimal change in structure. Cherry is less resistant to scratches and dents, but with proper care and controlled lighting, it remains strong and stable. Cherry is more sensitive to UV, so it can darken unevenly if only parts are exposed to light. Both hold up well with the right maintenance routines. Comparing Workability for Woodworkers If you’re building with walnut or cherry, the ease of cutting, shaping, and finishing the wood will significantly impact your results. Let’s look at what to expect with each. Cutting, Carving, and Joining Walnut’s structure is easy to handle with both hand and power tools. If you’re shaping edges or creating joinery, the grain tends to cooperate without splintering or chipping. It’s a strong choice for carving details and smooth cuts. Cherry, in contrast, has a clean, even surface that machines beautifully but can be less forgiving when stained or sanded unevenly. If you’re joining pieces, both woods glue well, but walnut offers fewer surprises during shaping or intricate woodworking tasks. Staining and Finishing Challenges When it comes to staining, walnut usually accepts finishes with minimal preparation. A clear coat or light oil can bring out its natural tone without much effort. Cherry, however, can darken quickly and unevenly when exposed to certain stains, especially if not properly conditioned. If you’re finishing cherry, using a sanding sealer or gel stain can help control color absorption. For best results, match your finish to your final setting: oil for a rich grain, lacquer for clean surfaces, or polyurethane for durability. Walnut vs. Cherry Wood: Furniture-Specific Comparisons When you’re choosing between walnut and cherry for furniture, it helps to know how each performs in real spaces. Here’s how they compare across tables, beds, and living room pieces. Dining Tables If you’re selecting wood for a dining table, walnut holds up well against frequent use and casual wear. It’s less likely to show small scratches, and minor imperfections blend into its natural grain. Cherry looks great in dining areas with its warm tone, but it can show marks more easily, especially early on. You’ll want to be cautious with hot dishes, moisture, or spills. Walnut’s color is more forgiving, while cherry creates a softer presence as it deepens over time. Beds and Dressers Walnut is heavier and brings solid support, which helps if you want your bed frame or dresser to stay in place and feel sturdy. Its consistent density makes it ideal for long-lasting, heirloom pieces. Cherry is slightly lighter, which can make dressers easier to move or reposition. In bedroom settings, cherry darkens gradually, especially in spots exposed to sunlight. This means one side of a headboard or dresser may shift in tone faster unless you rotate it occasionally. Sofas and Living Room Furniture For daily use in shared spaces, walnut generally holds up better to knocks, toys, or foot traffic. It’s less prone to showing scuffs and adds visual depth even in high-traffic areas. If you’re buying or building custom, walnut allows for more visible character and contrast. Cherry suits formal or softer living rooms, especially where natural light helps it age evenly. However, in store-bought options, cherry is more commonly used for trim and accent tables than for full structural framing. Use-Case Scenarios Beyond Furniture If you’re considering walnut or cherry for more than just furniture, here’s how each wood performs in kitchens, crafts, and specialized projects where durability and performance are just as important. Kitchen Cabinets In kitchen environments, wood needs to handle constant exposure to heat, humidity, and accidental splashes. Walnut holds up well to temperature swings and resists minor surface wear, making it a solid option for busy kitchens. Cherry performs reliably, too, but is slightly more prone to oil stains if left untreated. If you’re looking for clean, long-lasting cabinetry, both options are viable, though walnut offers better resistance to daily wear and high heat. Regular sealing is essential for maintaining the finish and longevity. Cutting Boards and Countertops When it comes to food-contact surfaces, both walnut and cherry can be made safe with the right finishes. Walnut is a favorite for cutting boards due to its fine grain and moderate hardness; it resists deep scoring and doesn’t dull knives quickly. Cherry is softer and may wear down faster, but it’s still used in decorative boards and countertops. If you apply food-grade oils regularly and avoid excess moisture, both woods can stay hygienic and visually appealing for years. Musical Instruments and Crafts Craftspeople and instrument makers often choose walnut and cherry for their tonal balance, stability, and finish quality. Walnut’s density and visual contrast make it popular for guitar bodies, wind instruments, and decorative inlays. Some luthiers prefer cherry for its consistent grain and smoother sanding quality. If you work on delicate, detailed items, cherry is easier to handle during shaping. For projects requiring both beauty and performance, either wood can meet high craftsmanship standards when properly seasoned. Walnut vs. Cherry Wood: Quick Comparison Table Before diving into detailed comparisons, here’s a simple side-by-side overview to help you see how walnut and cherry wood differ at a glance. Feature Walnut Cherry Color Medium to dark brown, sometimes with purplish or gray undertones Light pinkish tone that deepens to reddish-brown over time Grain Pattern Mostly straight, occasionally wavy, or with burls Fine, straight, smooth grain with even texture Hardness (Janka) Approx. 1010 Approx. 950 Durability Strong, holds up well in high-traffic areas Durable but more prone to surface dents and scratches Cost Generally higher due to lower availability More moderately priced and widely accessible Best Suited For High-end furniture, desktops, and musical instruments Cabinets, furniture, small crafts, decorative trim Sustainability and Environmental Impact When you’re comparing walnut and cherry, it’s not just about how they look or perform; it’s also about where they come from and how responsibly they’re harvested. Both woods can be sourced through sustainable forestry practices, but cherry, mainly when grown domestically, is often easier to trace and transport with less environmental impact. If you’re looking for reassurance, you can check for certifications like FSC or PEFC, which confirm the wood was harvested from forests managed with long-term ecological responsibility in mind. If you’re working with a local supplier or purchasing imported material, choosing certified sources supports better forest management and helps reduce the environmental footprint of your project. Maintenance and Care Tips Regular upkeep helps both walnut and cherry look their best and last longer. With the right care routine, you can minimize wear and maintain your natural appearance for years. Use soft, lint-free cloths to clean the surface without leaving scratches. Apply a gentle wood cleaner, avoid harsh chemicals or abrasive pads. Polish occasionally using oil or wax products specifically made for natural hardwoods. Treat high-touch areas every few months, depending on usage and exposure. Keep humidity levels stable indoors to avoid wood movement or cracking. Conclusion Now that you’ve gone through all the details, you can confidently decide between walnut and cherry wood. You’ve seen how they compare in strength, appearance, and how they age over time. If you’re choosing a new dining table or a kitchen upgrade, you now know what fits your lifestyle best. Remember, what matters most is how the wood will work for you, not just how it looks on day one. If you’re still unsure, take a moment to review the quick comparison table. And when you’re ready, check out my other posts to help you make even more intelligent choices.