


Frustrated by dull or dated granite countertops? I’ve been there, staring at a beautiful stone surface that just feels worn out.
The problem is simple: granite is slick, non-porous, and naturally resistant to paint. If you’ve tried coating it without the right prep, you already know how quickly peeling and chipping happen.
I’m going to show you how to paint a granite countertop properly so it lasts and looks professional.
You’ll learn the exact prep steps, which primers and paints actually work, how to create a faux marble effect, and how to protect your investment during the curing process, all with materials you can get today.
Can You Paint Granite Countertops?
The first time I painted a countertop over real granite, I skipped the bonding primer. Within three weeks, the finish was peeling near the sink. That is the mistake this article is built around.
Yes, you can paint granite countertops, but the surface is slick and dense. Regular paint will not hold without the right prep. What follows is the full process, the cost breakdown, what goes wrong, and when painting is not the right call for your kitchen.
| Difficulty | 3 out of 5 — patience and timing matter more than skill |
| Time | 1 full day of active work, plus 7 days of cure time |
| Cost | $200 to $500 for most kitchens |
| Tools Needed | Scrubbing pad, bonding primer, paint kit, epoxy resin and activator, rollers, painter’s tape, plastic tarp, spray bottle, gloves |
| Skill Required | Beginner to intermediate — the epoxy stage benefits from a helper |
| Cost Note: Figures in this article are estimates based on national averages. Actual costs vary by region, kit brand, counter size, and project scope. Run through the full supply list before buying — most people underestimate what they need beyond the kit itself. |
What Goes Wrong When People Paint Granite Countertops
Before walking through the steps, here is where this project actually fails. Granite is naturally polished and smooth, which means paint has almost nothing to grip. Every failure I have seen starts before the first coat goes on.
- Skipping deep cleaning: Grease near the stove and oils around the sink are invisible once dry. Primer applied over either will peel within weeks, not months.
- Using the wrong primer: Wall primer and cabinet primer do not bond to polished stone. Only a bonding primer rated for slick, non-porous surfaces will hold. Check the label — not every product listed as “multi-surface” covers actual granite.
- Ignoring kit instructions: Some systems require fine-grit sanding or chemical etching before priming. These are not optional steps. Skipping them breaks adhesion at the base, and no topcoat fixes that.
- Rushing the epoxy stage: Epoxy has a limited working window. If you mix it without having the counter fully taped, primed, and dry, you will be making decisions under pressure. That is when coverage gets uneven.
- Pulling tape too late: Tape left past the product’s window can bond into the cured finish and tear it when removed.
- Using the counter too soon: Seven days is not a suggestion. Placing dishes, water, or appliances on the surface before full cure will mark and weaken the finish permanently.
Keep these in mind as you work through the steps below. Most of them are not recoverable once the epoxy cures.
What Tools and Products You Need

Prep tools and protection materials matter as much as the coating. A paint kit covers the main finish, but you still need cleaning supplies, tape, plastic, rollers, and epoxy ready before you start. Running short on any of these mid-project is stressful — the epoxy especially does not wait.
- Cleaning supplies: Brillo pad or firm scrubbing pad, strong surface degreaser, and dry cloths. Cooking oil and grease must be fully removed before primer goes on.
- Protection supplies: Painter’s tape and a plastic tarp for cabinet fronts, sink edges, walls, floors, and appliance openings. Epoxy drips — full coverage is not optional.
- Bonding primer: The white base primer included in most kits, or a standalone bonding primer rated for slick, non-porous surfaces. Confirm your kit specifies granite as an approved surface.
- Veining supplies: Gray paint, a spray bottle of water, and a sponge or soft brush to soften marble-style lines.
- Epoxy supplies: Resin, activator, a stir stick, a foam roller, and gloves. Mix only after the counter is completely ready.
- Optional prep items: Fine-grit sandpaper or a chemical etching product, depending on what your specific kit requires. Read the instructions before deciding this step does not apply.
How to Paint Granite Countertops Step by Step
The process is not complicated, but the order matters. Timing between stages matters just as much as the steps themselves. Plan meals and counter access before you start, especially if this is your main kitchen.
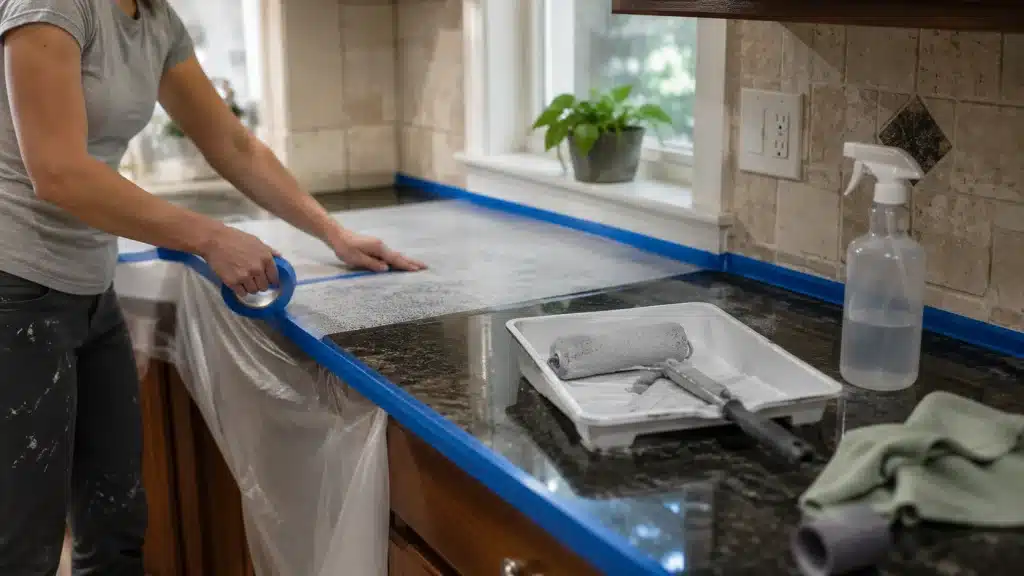
Step 1: Remove Fixtures and Protect the Kitchen
Remove the cooktop and, if you can do it safely, the faucet. Tape sealed around a faucet can get trapped under cured epoxy and become nearly impossible to remove cleanly.
Then tape off walls, cabinets, floors, sink edges, and appliance openings. Lay plastic tarp under the counter edges, epoxy will drip.
| Pro Tip: Remove the faucet before taping, not after. Epoxy cured around a faucet base becomes a permanent bond, removing it later chips the finish. |
Step 2: Scrub the Granite Clean and Let It Dry Completely
Use a Brillo pad or strong degreaser and scrub the full surface, paying extra attention to the area near the stove and around the sink. These zones collect cooking oils that are easy to miss. Wipe away all cleaner residue and let the granite dry fully before moving on.
The same failure mode shows up when people try painting bathroom tile floor, any greasy or damp residue left behind stops adhesion regardless of how good the primer is.
| Safety Note: Do not prime over any moisture, cleaner residue, or greasy film. Even a surface that looks clean can retain cooking oils. If in doubt, scrub a second time and wait another 30 minutes before priming. |
Step 3: Apply Two Thin Coats of Bonding Primer
Start at the edges so the original granite color does not show through later, then roll the first coat across the full surface in a thin, even layer. Let it dry for about one hour, or as directed by your kit. Apply the second coat the same way.
Thick primer layers cure unevenly, leave ridges, and make the final epoxy look less smooth, thin and even is always right. The same bonding primer logic applies when painting shower tile, polished granite and glazed tile share the same non-porous surface challenge, and the solution in both cases is identical.
| Pro Tip: Do the edges first on both primer coats and on the epoxy pour. Edges are easy to miss when you are focused on the main surface — doing them first means they get proper coverage. |
Step 4: Plan and Paint the Marble Veining
Sketch a rough layout on paper before touching the counter. Loose, slightly diagonal lines look more natural than anything straight or symmetrical.
Use gray paint to draw the veins over the white base, mist the lines lightly with a spray bottle, then soften with a sponge or brush. Wait 30 to 45 minutes before applying epoxy.
| Pro Tip: Practice on paper first, not on the counter. Soft, irregular lines look realistic. Heavy, repeated, or symmetrical lines look painted. |
Step 5: Mix the Resin and Activator
Mix epoxy resin and activator according to your kit’s instructions. Stir slowly and thoroughly — typically around three to four minutes, so the clear coat cures correctly.
Do not mix until the counter is already taped, primed, and dry. Once the resin and activator are combined, the working window is limited.
| Safety Note: Do not start mixing epoxy until everything else is ready. The working time after mixing is fixed. Starting before the surface is prepared forces rushed decisions and uneven coverage. |
Step 6: Pour and Roll the Epoxy
Pour the mixed epoxy across the countertop in a slow S-shaped pass. This distributes the product more evenly before you roll.
Use the foam roller with light pressure to guide epoxy across the surface, self-leveling epoxy needs direction, not force. Watch for dry spots, thick patches, and missed edges as you work.
Step 7: Smooth Drips and Pull Plastic at the Right Time
Epoxy runs over the counter edges. Smooth the underside with the roller before it sets, and check every corner. Then remove the plastic tarp before it bonds to the underside of the cabinets.
Cured epoxy in plastic is a mess to deal with, pull it while the epoxy is still working.
| Safety Note: Pull the plastic tarp while the epoxy is still in its working window. Once cured, removing bonded plastic can pull chunks of the finish with it. |
Step 8: Work With a Helper During the Epoxy Stage
One person mixes and prepares while the other rolls and checks coverage. A helper can spot drips, thin areas, and missed edges faster than one person can manage alone.
The epoxy window is not forgiving, two people make a real difference in how the finish comes out.
Step 9: Let the Countertop Cure for Seven Days
After the epoxy is finished, keep the surface completely clear and dry for a full seven days. No dishes, no appliances, no water near the edges. This is the step most people rush and the one that determines how long the finish actually holds up under daily use.
| Safety Note: Do not place anything on the surface during the cure period. The finish may feel dry to the touch within 24 hours but it is not fully hardened. Early contact leaves permanent marks. |
The faster-the-second-time lesson here is this: tape your faucet base, not around it.
I lost two hours the first time chipping cured epoxy off a chrome base I should have just removed. It takes ten minutes to pull a faucet. It takes much longer to fix the finish if you do not.
What Does It Cost to Paint Granite Countertops?
For most kitchens, expect to spend between $200 and $500 as a DIY project. The kit price is not the full number. Budget for prep supplies, protection materials, and enough product to cover the whole surface without running short on the epoxy pour.
| Cost Item | Typical Range | Notes |
| Countertop paint kit | $100 to $250 | Some kits cover around 35 sq. ft. — measure first |
| Epoxy kit or topcoat | $75 to $300 | Higher cost for larger counter footprints |
| Bonding primer | $20 to $60 | Only if not included in the kit |
| Tape, tarp, rollers, gloves | $30 to $80 | Routinely left out of the initial budget |
| Degreaser and cleaning supplies | $10 to $25 | Non-negotiable prep item |
| Extra supplies or small mistakes | $25 to $100 | Touch-up paint, sandpaper, extra brushes |
| Likely DIY total | $200 to $500 | Varies by kitchen size and product choices |
Running short on epoxy halfway through a pour is one of the more stressful DIY situations — and it is preventable. Measure the square footage of your counters before you buy, not after you open the kit.
Pros and Cons of Painting Granite Countertops
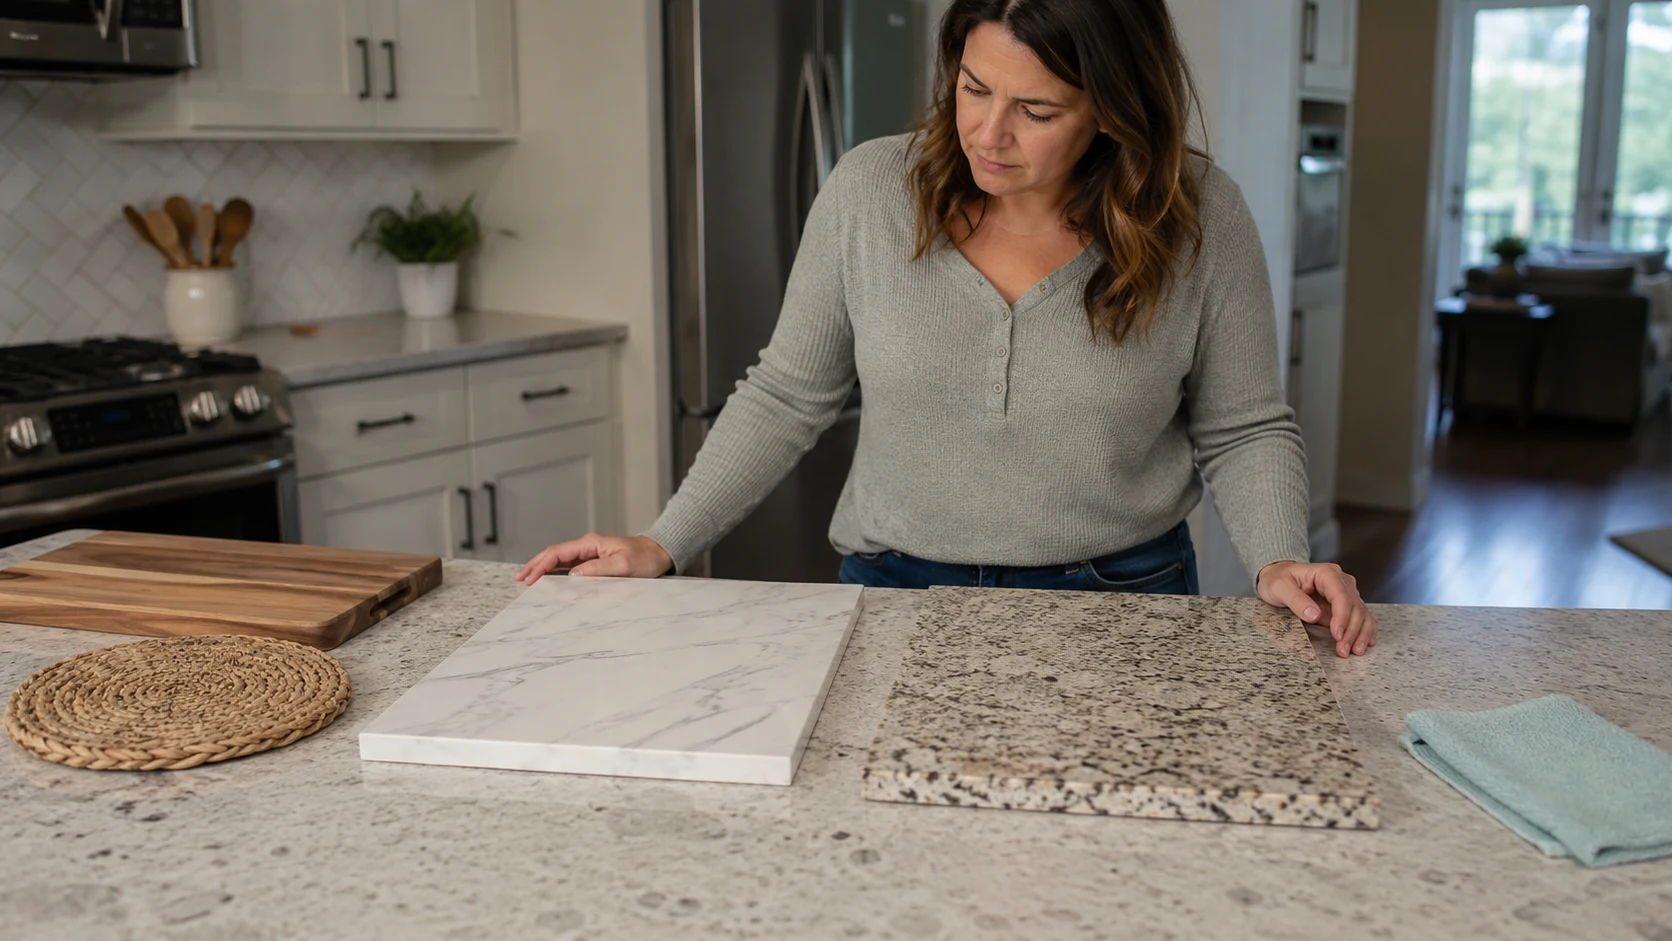
Painting granite countertops can make a dated kitchen feel cleaner for less money, but it changes how the surface must be treated every day. This is not a like-for-like swap for stone.
| Pros | Cons |
| Costs far less than replacement | Less durable than natural stone |
| Covers dated or busy granite patterns | Can chip or scratch under daily use |
| Creates a faux marble finish at low cost | Hot pans damage the painted layer |
| Doable as a weekend DIY project | Prep is time-consuming and unforgiving |
| Good short-term cosmetic update | Difficult to reverse cleanly if needed later |
| Works well on bathroom vanities | May affect resale perception |
| Products widely available at hardware stores | Counter is out of use during the 7-day cure |
If a short-term visual update is the goal and you are comfortable with the maintenance rules that come after, paint can work. If low maintenance and long-term durability are the priority, look at the alternatives below first.
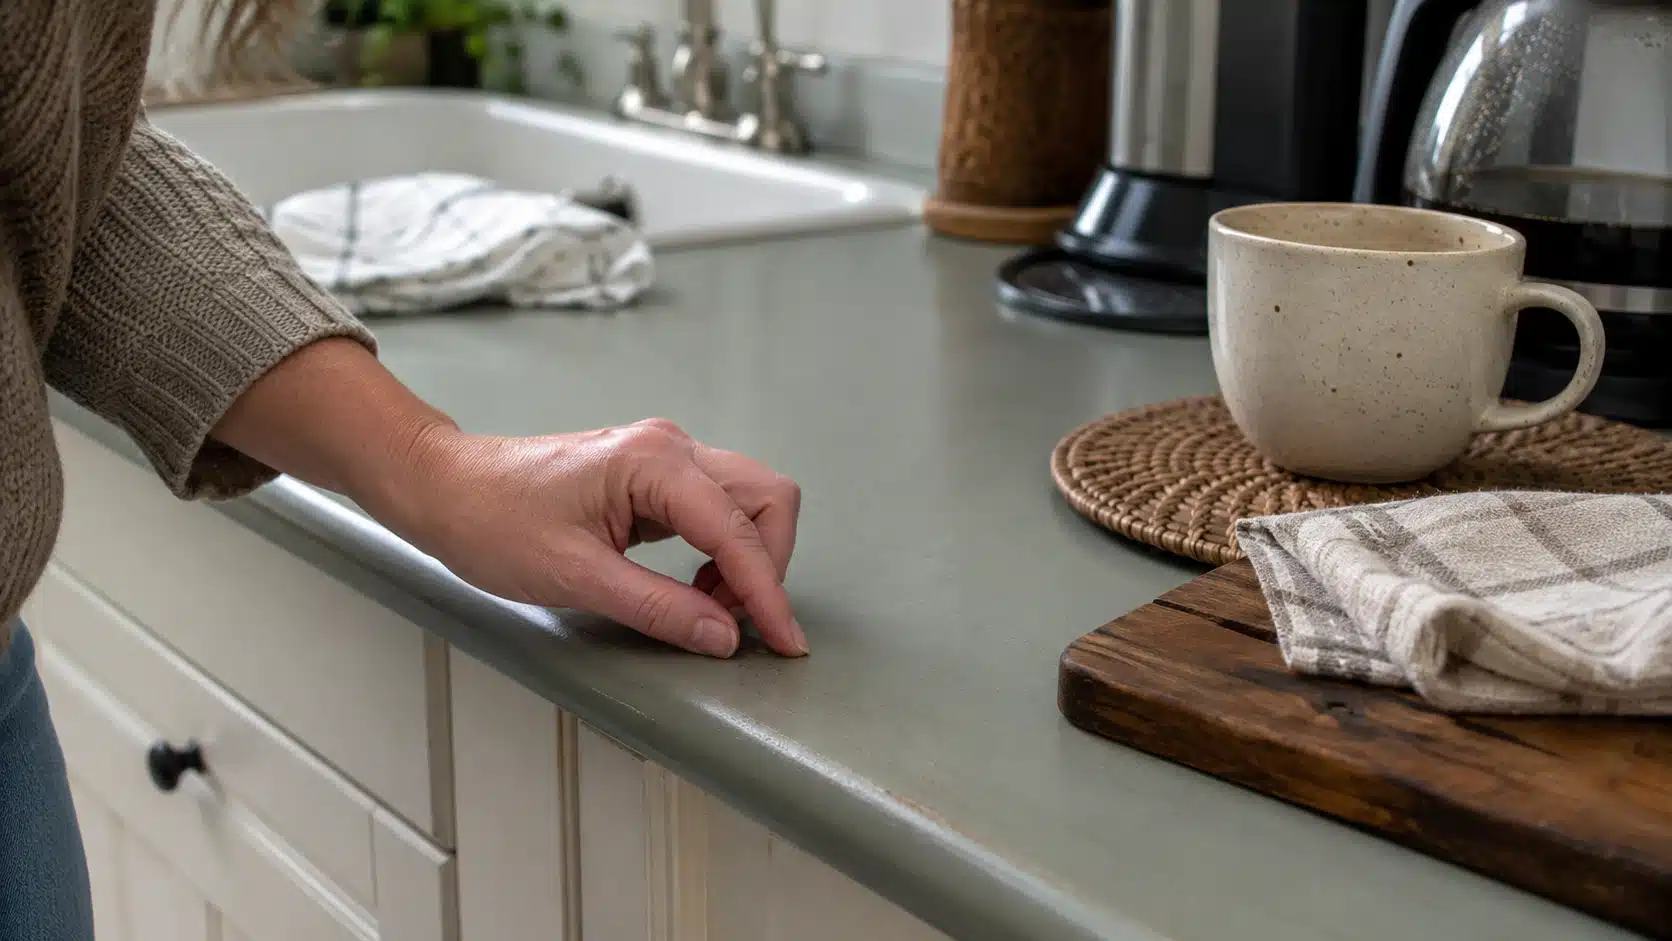
How to Care for Painted Granite Countertops
- Gentle Cleaning: Use mild dish soap and water only. Avoid abrasive scrubbers, bleach, or heavy-duty cleaners that can damage the epoxy finish or dull the topcoat over time.
- Protect Surfaces: Always use cutting boards, trivets, and pads under hot pots, pans, or appliances. Avoid cutting or placing extreme heat directly on the countertop to prevent chips and marks.
- Topcoat Awareness: Understand the difference between satin and semi-gloss finishes, as the sheen affects durability and wear patterns. Choose the appropriate finish for your kitchen’s daily use.
- Immediate Spill Management: Wipe up water and spills promptly, especially around faucets or sink edges. Early attention prevents staining, moisture damage, and potential lifting of the painted surface.
- Early Chip Repair: If small chips appear, touch them up immediately. Addressing them early prevents the exposed area from spreading and ensures your painted granite maintains a uniform, durable finish.
How Long Do Painted Granite Countertops Last?
There is no honest universal number because conditions vary too much. In a high-use kitchen with daily cooking, the finish near the stove, sink rim, coffee station, and primary prep area shows wear first.
In those zones, chips and dullness can appear within a few months in the most demanding kitchens.
In a bathroom vanity or a lighter-use countertop, the same finish maintained correctly can hold up significantly longer.
What is consistent across every version of this project is this: strong prep and a full cure period will always outperform a rushed job, regardless of how long the timeline ends up being.
What Are Better Alternatives to Painting Granite?
If painting granite countertops does not fit the situation — wrong budget, heavy kitchen use, or granite with real resale value — the counter is not always the problem. These alternatives are worth running through before opening a paint kit.
- Deep clean and re-polish: A countertop that looks dull often just needs a proper deep clean and reseal. That alone can change the feel of the whole kitchen without touching the stone.
- Change the cabinet color: Painting the cabinets can make dark or busy granite feel calmer without touching the stone at all. The counters rarely look as dated once the rest of the kitchen aligns with a coherent minimalist kitchen design.
- Update the backsplash: A simpler backsplash reduces visual noise around a patterned slab and modernizes the kitchen quickly at lower cost than counter replacement.
- Professional refinishing: A pro may offer surface treatments or resurfacing options that are more durable than DIY paint and leave the stone in recoverable condition.
- Countertop overlay systems: Some overlay products sit over the existing surface and offer more structural stability than a painted layer. DIY marble countertops use a similar faux-finish approach but with different adhesion demands than epoxy on stone.
- Replace only the high-use zone: An island or a short counter run may be worth replacing while less-used sections stay as they are.
Paint is one way to deal with granite that is no longer working. If the stone is high quality or the kitchen gets heavy daily use, changing the surrounding finishes is almost always the smarter first step.
Frequently Asked Questions
These are the questions I hear most from people who are standing in front of dated granite trying to decide whether to paint it or live with it.
Can you paint granite countertops white?
Yes, with the right bonding primer and a countertop-rated paint or epoxy system. White shows crumbs, scratches, and dust more than darker finishes, so daily cleaning and a careful topcoat matter more. A faux marble design with soft gray veining hides surface wear better than a flat white alone.
Can you paint granite countertops without sanding?
Only if your product label explicitly permits it. Many systems require sanding, etching, or a bonding primer to create grip on polished stone. A surface that stays glossy through prep will cause peeling within weeks regardless of how good the topcoat is.
How long does paint last on granite countertops?
It depends on prep quality, product used, kitchen use intensity, and whether cure time was followed. In a high-use kitchen, wear near the sink and stove can appear within months. In a bathroom or low-use counter, the finish can hold for years with proper daily care.
Can you put hot pans on painted granite countertops?
No. The epoxy and paint layer can discolor, soften, or mark under high heat. Use trivets or heat pads every time. Real granite handles heat well; the coating applied over it does not.
Is painted granite safe for food prep?
After full curing, yes — but food should not be cut directly on the surface. Use cutting boards, follow the kit’s care instructions, and choose a topcoat that the manufacturer explicitly rates for countertop use near food.
Can painted granite countertops be reversed?
Removing cured epoxy or paint from granite is difficult and can permanently dull or scratch the stone. If the original granite has value or may be needed in its natural state, think carefully before painting. Returning to the original surface is not reliably possible.
What kind of paint do you use on granite countertops?
A countertop-specific paint kit with an epoxy topcoat, not wall paint, not chalk paint. The kit must list granite or non-porous surfaces as approved applications. A bonding primer rated for slick surfaces is required, not a standard latex wall primer.
Does painting granite countertops affect home resale value?
It can. Buyers who notice a painted countertop may factor in replacement cost or question what is underneath. In a kitchen that is already dated overall, the visual improvement may offset this. In a kitchen with higher-end finishes, it is more likely to raise questions than help.
Final Thoughts
Now you know that painting a granite countertop isn’t just about brushing on color, it’s a careful process of prep, priming, and epoxy application.
I’ve covered why cleaning and degreasing matter, how to use a bonding primer, the best way to create marble veining, and the importance of a full seven-day cure.
Following these steps ensures your painted countertop looks great and holds up under daily use. You can confidently choose the right kit, protect surrounding areas, and maintain the surface properly afterward.
Try these methods on your countertop, and let me know how your finished project turns out. Careful prep really does pay off.


