

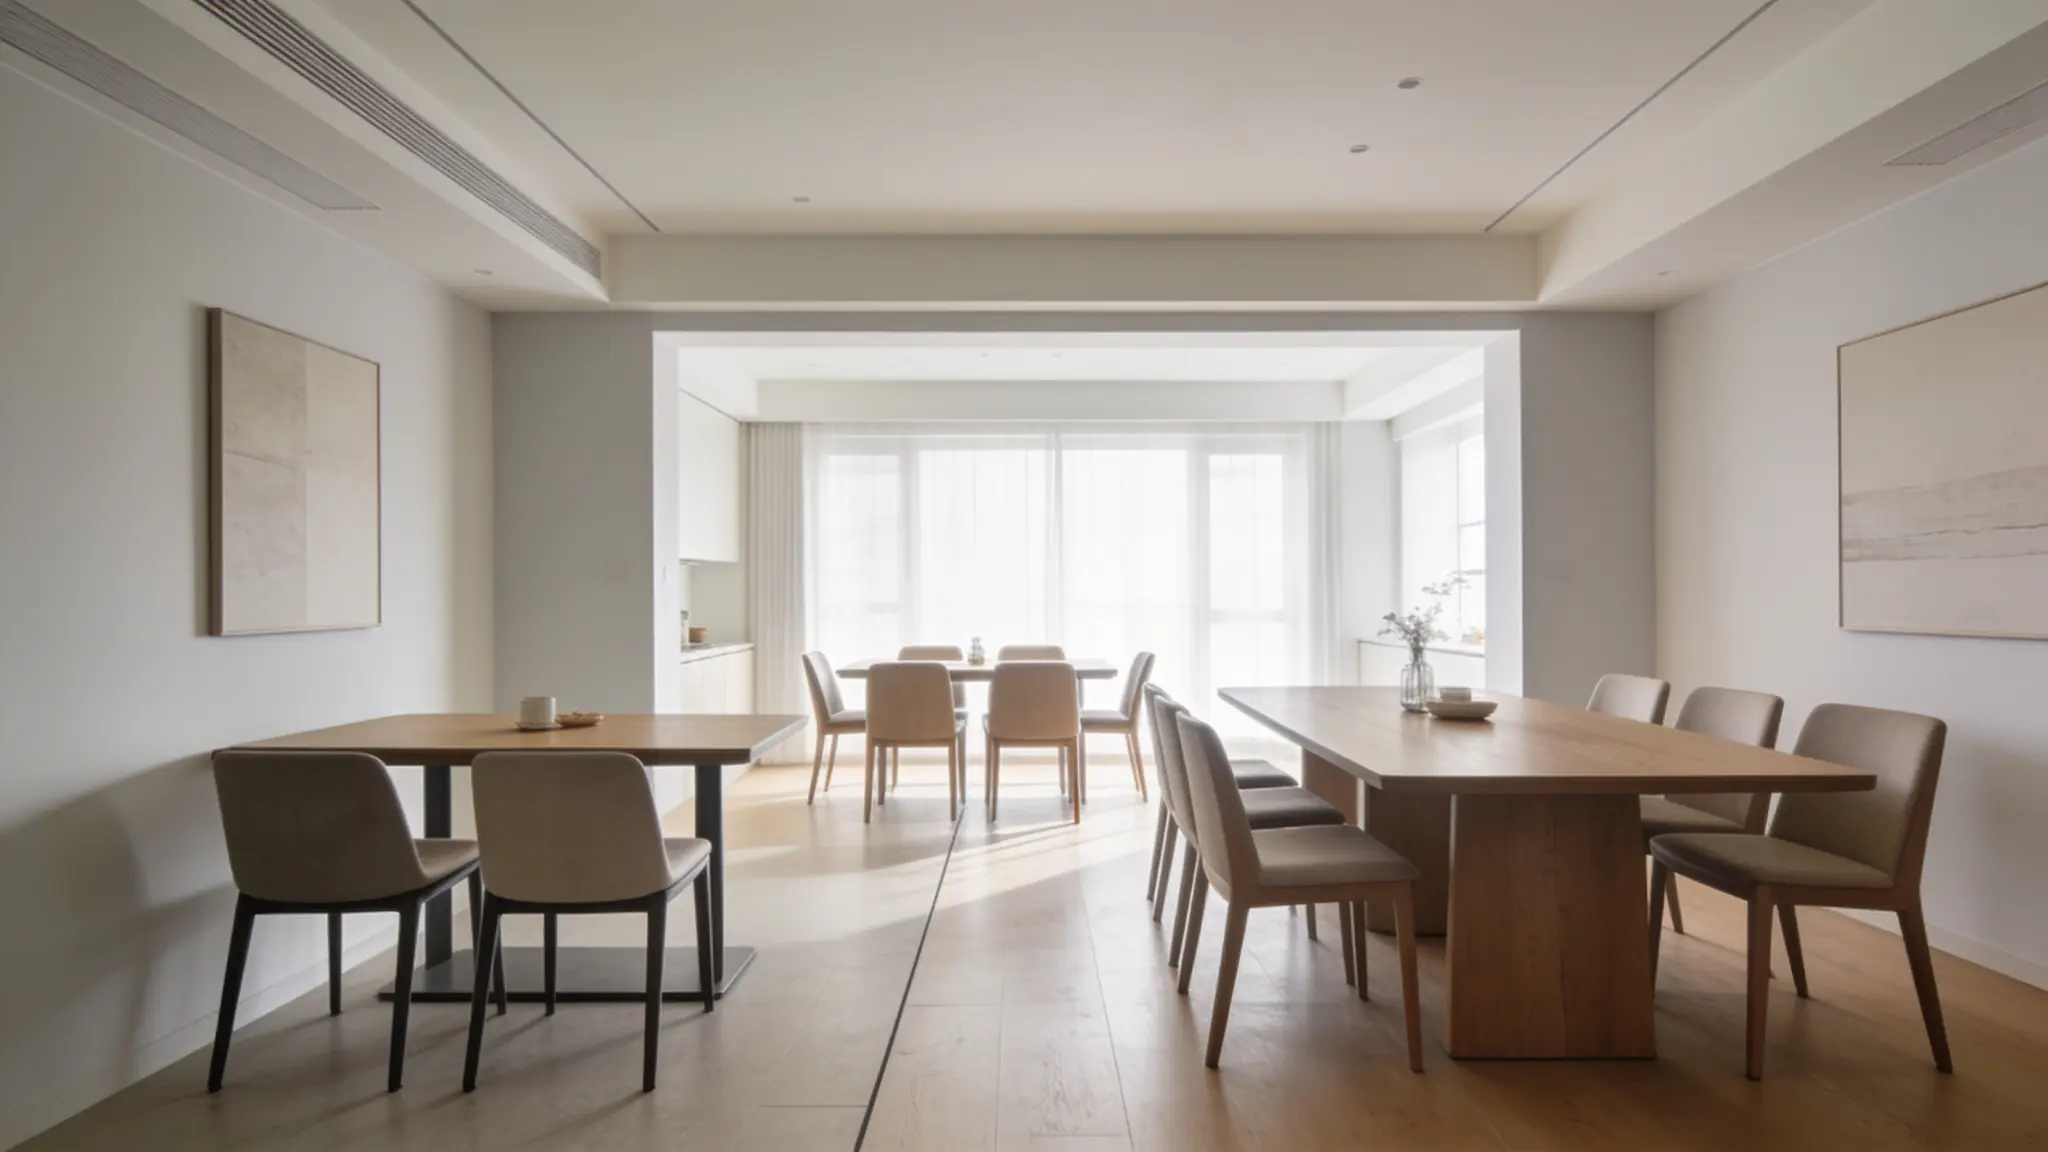
A table can measure right and still feel wrong. The missing piece is usually the space around it. Dining table dimensions matter because length, width, and height decide how many people can sit, how chairs move, and how the room feels during meals. Most dining table sizes depend on seating count, table shape, and the space around the table. Standard table sizes also change by layout, so a round six-seater will not fit the same way as a rectangular one. I’ll keep the choices simple so you can measure once, compare clearly, and buy with confidence. How Much Space Does a Dining Table Actually Need? Before comparing dining table dimensions, three numbers matter more than the table size itself: 24 inches of table edge per person: the minimum for a plate, a glass, and elbow room 36 inches of clearance around the table: enough for chairs to pull out and someone to walk behind a seated guest 42 to 48 inches of clearance on any side that serves as a main walkway through the room Most rooms don’t fail because the table is too large in the abstract; they fail because those clearance numbers weren’t applied before buying. Tape the footprint on the floor before committing to a size. That single step catches most mistakes. Pro Tip: Use painter’s tape to mark your intended table footprint on the floor, then pull a chair up to each side and check whether you can stand up without hitting the wall. If the answer is no, go smaller, not because the table won’t fit, but because the room won’t function. Standard Dining Table Dimensions by Seating Count Seating count is the right starting point. The sizes below are for rectangular tables, which are the most common. Shape-specific sizing comes in the next section. 1. Two-Person Tables A two-person table typically measures 30 x 36 inches. That gives two people room for plates, glasses, and a small central dish without taking over a compact kitchen or studio apartment. If the table also doubles as a work surface or coffee station, move up to 30 x 42 inches; the extra length makes a real difference when the table is doing more than one job. In tight spaces, one long side can sit flush with a wall, but that edge won’t work as a seating side. Plan for that before you place the order. 2. Four-Person Tables The standard four-person rectangular table runs 36 x 48 inches. This is the size that fits most apartment dining areas and smaller homes without compromising chair clearance. A 30 x 48-inch table can work if the room is genuinely tight, but 36 inches of width is the practical minimum for daily family meals, anything narrower and shared dishes in the center start to feel like a problem. 3. Six-Person Tables A six-person table needs 36 x 60 to 72 inches. The 60-inch length will technically seat six, but it works best with slim chairs and minimal place settings. A 72-inch table is the more honest answer; it gives six adults genuine elbow room and leaves space in the center for serving dishes without everyone crowding the middle. If you’re deciding between the two, check your clearance on both sides and choose 72 inches if the room can hold it. The standard dining table height of 28 to 30 inches is what most chairs are built around, but if you’re pairing a six-person table with non-standard seating, always verify the seat-to-tabletop gap measures 10 to 12 inches. 4. Eight-Person Tables Eight people need 36 to 42 inches wide and 78 to 96 inches long. A 78-inch table can work with narrow chairs, but for regular use with adults, 90 to 96 inches is more comfortable. The typical layout seats three on each long side, one at each end. Before finalizing, check whether the end chairs clear any nearby doors or walkways. End chairs are the first thing to cause a problem in a room that wasn’t measured carefully. 5. Ten to Twelve-Person Tables A ten-person table requires 40 to 44 inches wide and 96 to 120 inches long. For twelve, expect 42 to 48 inches wide and 120 to 144 inches long. These are large-room tables; they need open layouts, wide walkways, and chairs that pull back without hitting adjacent furniture. For ten people, 108 inches feels more functional than 96. For twelve, 132 inches is a better starting point than the minimum 120. Tables this size only work if the room genuinely has space around them. Measure the clearance on all four sides before comparing options. Dining Table Dimensions by Shape Shape affects how the table fits in a room, even when the seating count is the same. Decide on seat count first, then use shape to match the table to your specific room layout. The right table shape depends heavily on whether your room is long and narrow, squarish, or open-plan, and each of those layouts has a clear answer. 1. Rectangular Tables Rectangular tables are the most practical choice for most rooms because dining rooms tend to be longer than they are wide — the table follows the room rather than fighting it. They work especially well when you need end chairs or an extendable table with leaves. Best For Why It Works Long dining rooms Follows the shape of the room without wasting floor space Open layouts Defines a clear dining zone within a larger space Larger families Seats more people without requiring extra width End chairs Both ends can seat an additional person Extendable tables Leaf extensions work naturally with the rectangular format If you use an extendable table, always check the fully open dimension before buying, that’s the measurement the room needs to support, not the collapsed size. 2. Round Tables Round tables work best in square rooms. Everyone faces the center, which makes conversation easier, and there are no end positions that feel disconnected from the group. They also remove sharp corners from tight spaces, which matters in rooms where you move around the table frequently. Seats Common Diameter 2 people 30 to 36 in 4 people 36 to 48 in 6 people 54 to 60 in 8 people 72 in Round tables become impractical past six people, not because of seating, but because the center becomes unreachable. A 72-inch round table seats eight, but reaching across it at a meal is awkward. For eight or more, a rectangular or oval table is more functional. 3. Square Tables Square tables work well in square rooms for two to four people. They feel proportional and balanced, which makes them a natural fit for breakfast nooks, sunrooms, and smaller apartments. Beyond four people, a square table starts to waste floor space — each additional person adds to the width in both directions, and the center becomes hard to use. Seats Common Size 2 people 30 to 36 in 4 people 36 to 44 in 6 people 54 to 60 in 8 people 60 to 72 in If you’re choosing between a square and a round table for two to four people, the room shape makes the call: square room, square table; square room with softer furniture, round table. 4. Oval Tables An oval table gives you the seating capacity of a rectangle with softer ends and better movement around the table. In rooms where a rectangular table feels boxy or where people regularly walk around the ends, an oval is worth considering. The rounded ends make it feel less formal and easier to navigate in tighter layouts. Seats Common Length 4 people 48 to 60 in 6 people 60 to 72 in 8 people 78 to 96 in 10 people 96 to 120 in The width of an oval table is set by the manufacturer, not the seat count. Confirm the width before ordering, because a narrow oval at 32 inches will feel tight even if the length is right. Room Size and Table Dimensions at a Glance This chart combines the clearance rule, 36 inches minimum on all sides, with common table sizes to give you a practical starting range by room size. If you’re also thinking through how the dining room fits into a larger open-plan space, the principles behind feng shui dining room layout are worth reading alongside this. They address traffic flow and furniture placement in ways that overlap directly with clearance planning. Room Size Good Table Size Comfortable Seating 8 x 8 ft 30 to 36 in round or square 2 10 x 10 ft 36 to 48 in round or 36 x 48 in rectangular 4 10 x 12 ft 36 x 60 in rectangular or 48 in round 4 to 6 12 x 12 ft 54 to 60 in round or 36 x 60 in rectangular 6 12 x 14 ft 36 x 72 in rectangular 6 to 8 14 x 16 ft 40 x 84 to 96 in rectangular 8 14 x 18 ft 42 x 96 to 108 in rectangular 8 to 10 If your room has a sideboard, a wide doorway swing, or a kitchen island on one side, treat that as a wall when calculating clearance. Choose the smaller end of the table range for that room size. What Else Affects Dining Table Fit Two tables with identical listed dimensions can feel completely different at home. These four factors are worth checking before the final decision. Chair Style: Armchairs need 6–8 extra inches of space compared to side chairs. Padded or curved chairs also add depth — measure fully extended chairs before assuming they fit. Table Base and Edge: Pedestal bases improve legroom, while four-legged tables can block corner chairs. Rounded or beveled edges feel less sharp in tight spaces than square edges. Daily Use: Consider everyday activities, not just meals. Extra surface for laptops, homework, or serving dishes may require 6–12 additional inches in length. Extendable Tables: Always measure the fully extended table. Confirm leaf storage and that there’s still at least 36 inches of clearance on all sides. How to Measure for the Right Dining Table Dimensions Measuring once correctly saves a return trip. Here’s what to check before comparing any specific table: Measure the full room length and width: include any indentations or fixed furniture in the calculation, not just the open floor space Subtract 72 inches from the room length and 72 inches from the room width: what remains is the maximum table footprint (36 inches clearance on each side) Check the main traffic path: if people regularly walk behind seated guests, that side needs 42 to 48 inches of clearance, not 36 Allow 10 to 12 inches of legroom between the chair seat and the table underside, chairs sit at 17 to 19 inches, which means a standard 28 to 30-inch table height works for most Check the table apron depth: a deep apron reduces usable legroom and can stop chairs from sliding in fully; measure the underside before buying, not just the height Mark the footprint on the floor with painter’s tape and pull a chair up to each position, if you can’t sit comfortably and stand without hitting a wall, the table is too large for that room Common Sizing Mistakes to Avoid Most table purchases that don’t work come down to the same few errors. These are worth checking before you commit: Choosing the largest table the room can technically hold — technical fit is not the same as comfortable function Forgetting to add chair pull-out space to the clearance calculation Measuring room length but not checking the traffic path behind seated guests Choosing a round table large enough that no one can reach the center Checking the collapsed size of an extendable table without checking the open size Ignoring the table apron depth when evaluating legroom A floor test with painter’s tape catches most of these before they become a return shipment. Frequently Asked Questions Can lighting affect table fit in a dining room? Yes. Overhead fixtures or chandeliers need clearance above the table. Low-hanging lights can obstruct movement or create awkward sightlines, so account for their placement when measuring your table footprint to maintain a functional and visually balanced dining area. Does flooring type impact table placement? Hardwood, tile, or carpet can affect chair movement and stability. Rolling chairs slide more easily on hard surfaces, while thick rugs reduce clearance. Consider flooring type when choosing table dimensions to avoid cramped or uneven seating and ensure chairs can be pulled out comfortably. Should the table shape match the room layout? Yes, a table should complement the room’s shape. Rectangular tables suit long rooms, square or round tables fit square rooms, and oval tables improve traffic flow in tight corners. Matching shape to room improves comfort, seating efficiency, and aesthetics without overcrowding the space. How do table leaves affect everyday use? Extendable leaves change the table footprint. Even if stored within the table, extra length requires sufficient clearance for daily chairs and movement. Always plan for the maximum extended size, not just the collapsed size, to prevent congestion during meals or gatherings. Can decorative table aprons reduce usable space? Yes. Deep aprons can block chairs from sliding in fully, reducing legroom and seating comfort. Measure the underside clearance, not just the tabletop height, especially for tables in smaller rooms or when using chairs with arms. Summing Up Picking the right dining table starts with knowing how your room works every day. Dining table dimensions help you check the exact fit, dining table sizes show how many seats make sense, and standard table sizes give you a clear way to compare options before you buy. I’d measure the room first, then check seating, chair width, and clearance before looking at style. That order keeps the choice practical and saves you from buying a table that feels too tight. Use the charts above, mark the size on your floor, and check the open size if the table extends. If you’re ready to shop, take your room measurements with you and choose a table that fits daily life first.
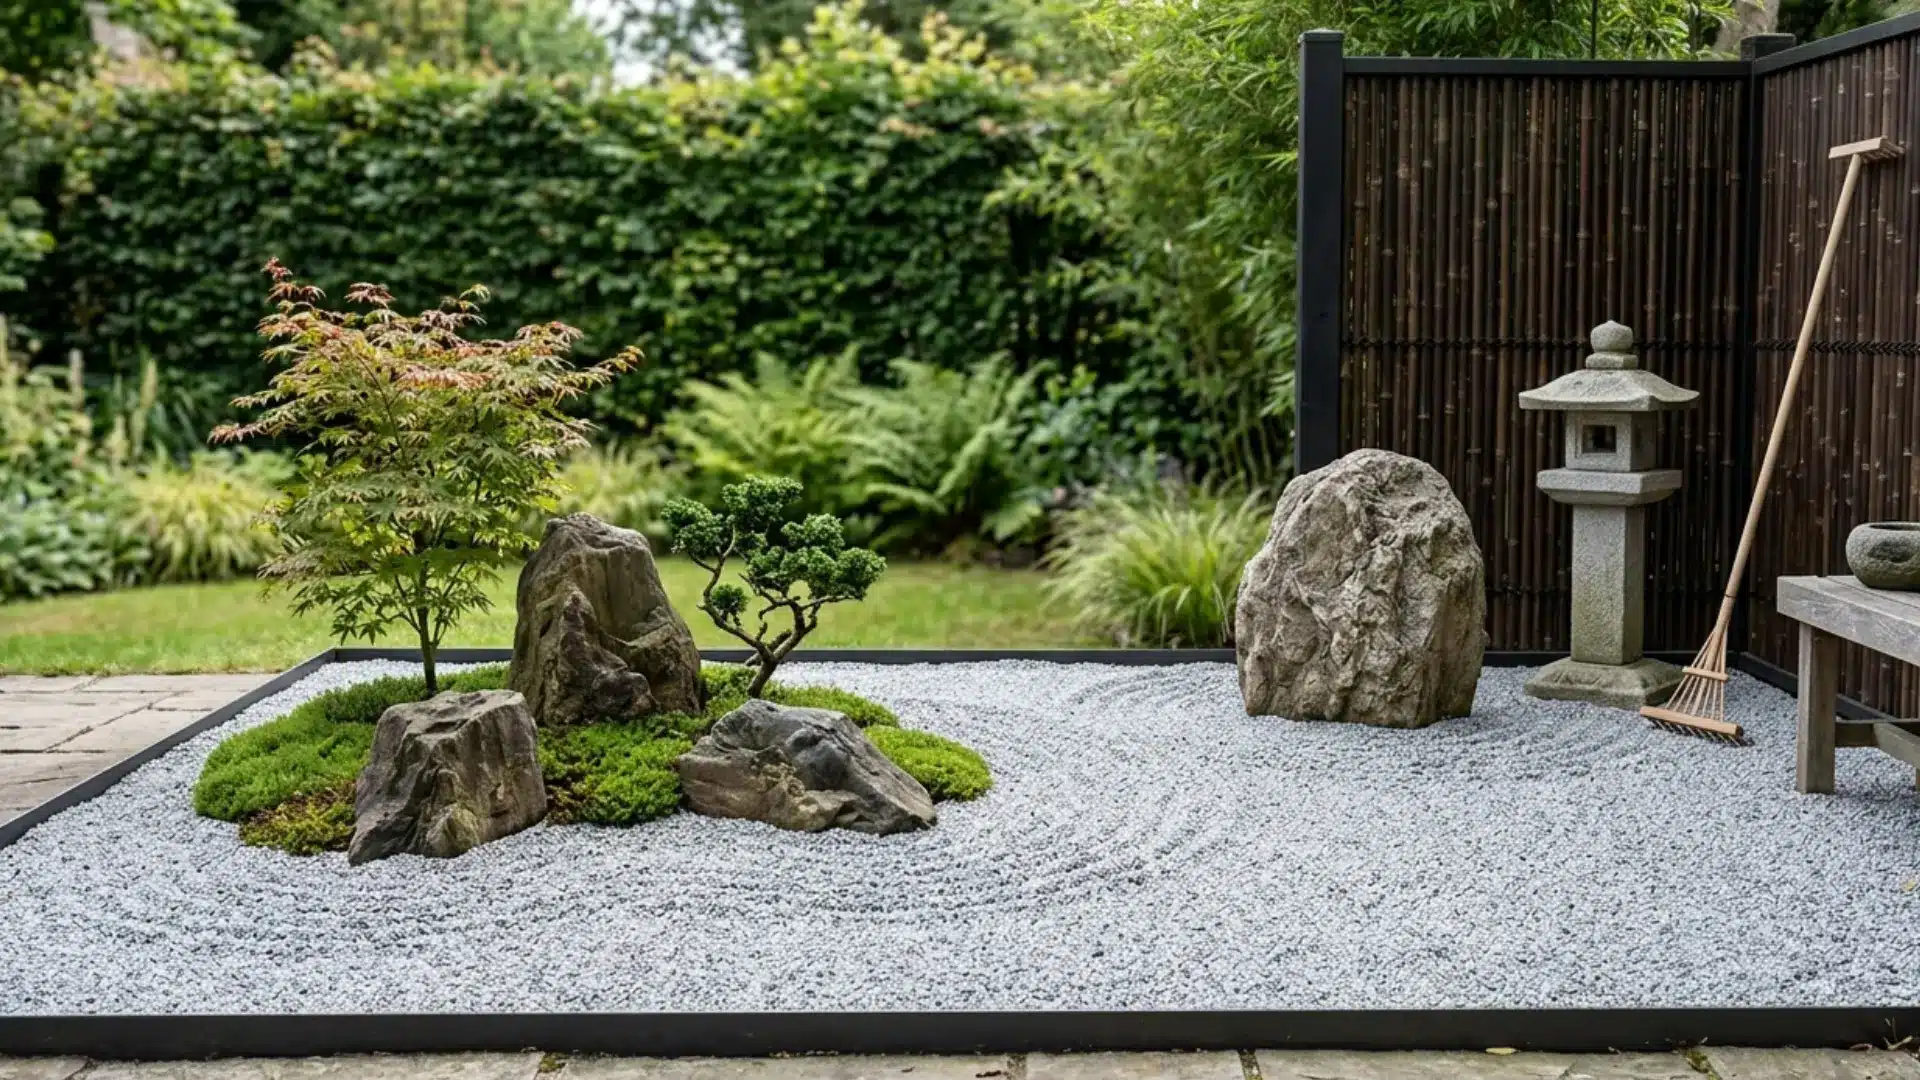
Gravel is cheap. Rocks look great on day one. But I’ve seen more “Zen corners” turn into weed patches and sunken gravel beds after one wet winter than I can count. The materials and the ground preparation are the whole game here. Get those right and a Zen garden is about as low-maintenance as outdoor landscaping gets. Get them wrong, and you’re re-raking mud and pulling grass through landscape fabric every spring. This guide covers what a Zen garden actually is, which materials hold up in real outdoor conditions, how to plan and build one from scratch, and what to do when the space is small or the budget is tight. Cost Note: Figures in this article are estimates based on national averages. Actual costs vary significantly by region, contractor, materials, and project scope. Always get at least three quotes before committing to any project above $1,000. Zen Garden Basics: What You’re Actually Building A Zen garden, known historically as karesansui, is a dry landscape built from rock, gravel, and sand, with minimal or no planting. The design came out of medieval Japanese Buddhist monasteries, where monks used raked gravel to represent water and large stones to represent mountains or islands. The philosophy is simple: open space and natural materials create calm. You’re not filling the garden, you’re editing it down until only what matters remains. Raked patterns in gravel or sand carry the same idea. They’re impermanent, easy to redo after wind or rain, and the act of raking them is itself part of the practice. A Zen garden doesn’t require any of this if you’re not interested in the meditative aspect. It can just be a clean, low-maintenance outdoor space with good bones and no clutter. Zen Garden Design Principles: What to Know Before You Start A Zen garden works best when restraint is built into the design from the beginning. The mistake most people make is treating the space like any other garden bed and filling it with too much. Here’s what the design logic actually looks like in practice: Keep the layout open. Empty space is a feature, not something to fix. Use natural materials: rock, sand, gravel, wood, bamboo, moss. No synthetic edging or colored mulch. Avoid symmetry. Odd-number groupings of rocks (3, 5, 7) look more natural than even arrangements. Stick to a tight color palette: gray stone, pale gravel, green moss, warm wood tones. Let rocks anchor the design. Plants are secondary. Use bamboo screens or hedges to separate the garden from surrounding noise and activity. Each element carries meaning if you want it to. Rocks represent mountains or islands. Raked gravel represents water. Moss adds age and softness. The same instinct toward balance and harmony shows up in other Japanese-influenced design traditions, but in a Zen garden, the tools are rock and gravel rather than furniture arrangement. Zen Garden Material Comparison: What Holds Up and What Doesn’t Before anything goes in the ground, the material selection determines how much work this garden will take two years from now. Here’s how the core options compare on the things that actually matter outdoors. Material Cost (approx.) Durability Maintenance Best Use Crushed granite $35–$55 per ton Excellent Low. Compacts well, holds patterns Main raking surface, paths Pea gravel $25–$45 per ton Good Moderate. Scatters easily, needs edging Accent fill, borders Decomposed granite $40–$65 per ton Good Low once settled. Can compact hard Paths, low-traffic areas Natural flagstone $2–$5 per sq ft Excellent Low. Heavy risk in freeze-thaw climates Stepping stones, edging Timber edging $1.50–$3 per linear ft Fair (untreated), Good (treated) Replace every 5–8 years, untreated Garden borders Metal edging (corten or galvanized) $3–$6 per linear ft Excellent Very low. Stays put for 15+ years Clean borders, long runs Bamboo screening $4–$8 per linear ft Fair Needs UV treatment; replace every 4–6 years Privacy screens, borders Crushed granite is the most reliable raking surface for a backyard Zen garden in most US climates. It compacts slightly, which keeps it from scattering like pea gravel, and it holds raked lines better than coarser materials. Pea gravel looks cleaner initially but spreads onto adjacent surfaces with foot traffic and any moderate wind. If the garden edges a lawn or paved area, use proper metal or stone edging, not plastic, it fails within two seasons in climates with freeze-thaw cycles. What Fails Two Winters Later Plastic edging buckles and pops out of the ground. Cheap timber edging rots from the bottom up in high-moisture areas and usually needs replacing within five years, often sooner near sprinkler lines. Untreated bamboo screening fades and splits when it is exposed to direct sunlight all summer. Landscape fabric works well at blocking weeds initially, but if it wasn’t installed flat and pinned properly, it creeps, bunches, and eventually shows through the gravel surface. Any of these problems are fixable, but they require redoing work you’ve already paid for once. The other common failure point is drainage. If the cleared area wasn’t leveled and tamped before gravel was laid, the surface develops low spots after the first heavy rain. Those spots collect water, the gravel sinks, and the flat, raking surface turns uneven. On clay-heavy soils, it’s worth adding an inch of coarse sand under the landscape fabric before the gravel layer to improve drainage. Step-by-Step: How to Build a Zen Garden at Home The following steps apply to a typical backyard corner, side-yard, or patio-edge Zen garden in the 50–200 square foot range. Larger spaces follow the same sequence but require more material and more precise ground preparation. Project Size 50–200 sq ft (typical backyard corner) Difficulty 2 out of 5 — beginner-accessible with basic tools Time 1–2 weekends depending on ground prep complexity Estimated Cost $200–$800 for a DIY build (materials only) Tools Needed Rake, garden tamper, utility knife, wheelbarrow, level, shovel Step 1: Choose the Right Spot Find a location that’s naturally separated from foot traffic and daily activity. A patio edge, side yard, or backyard corner all work. Place it where you can see it from a window or door; that sight line matters more than most people expect, since the garden gets used more as a visual anchor than as a space you actually sit in every day. Check the sun exposure before committing: moss and ferns need partial shade, while gravel-only gardens handle full sun without issue. Step 2: Clear and Level the Area Pull every weed, remove all grass and roots, and dig out any rocks that would create high spots under the fabric. Use a rake to break up the soil surface and then a tamper to firm the ground. A flat, compacted base is what keeps the gravel and rocks from shifting over time. Don’t skip the tamping step; it’s the most commonly skipped and the reason most DIY Zen gardens look uneven within a year. Step 3: Sketch the Layout Before You Touch a Rock Draw the design on paper first. Mark where the feature rocks go, where stepping stones will land, where any plants are placed, and which areas will be open, raking surface. The best Zen garden layouts are asymmetric and leave roughly 60 to 70 percent of the surface as open gravel. Avoid making every element the same size or spacing them at equal intervals; that reads as artificial, not natural. Step 4: Install the Edging Set your edging around the full perimeter before anything else goes in. Metal edging driven 3 to 4 inches into the ground is the most durable option and stays flush with the surface. Pressure-treated timber works if it’s staked every 3 feet, though softwood species rot faster than hardwood at ground contact. The edging keeps gravel contained and gives the garden a clean boundary against the adjacent lawn or paving. Don’t skip this on small Zen garden builds — loose edges make even good layouts look unfinished. Step 5: Place Feature Rocks First The largest rocks go in before any fabric or gravel. Partially bury them, about one-third of the rock below ground level, so they look settled rather than placed. Group in odd numbers, with the largest rock offset from the center. Once the rocks are positioned to your liking, walk away and come back the next day. Most people move them at least once after they’ve had time to look at the layout fresh. Step 6: Lay the Landscape Fabric Pin the fabric flat across the cleared area, cutting openings around any rocks or plants already set. Use landscape staples every 12 to 18 inches along the edges and wherever the fabric meets a rock. Overlapping seams by at least 6 inches prevents gaps where weeds push through. The fabric is the maintenance layer; install it sloppily, and you’ll be pulling weeds through your gravel for years. Step 7: Spread Gravel 2 to 3 Inches Deep Crushed granite at 2 to 3 inches is the right depth for a raking surface. Shallower than that, and the fabric shows through when you rake. Deeper than 3 inches, and the material cost jumps without much benefit. Spread and level with a rake, then check for low spots with a 4-foot level before finalizing. For a 100-square-foot garden, you’ll need roughly 1 to 1.5 tons of gravel. Step 8: Add Plants Sparingly Pick two or three plants maximum. Japanese maple, dwarf pine, ornamental grass, moss, or a single bamboo clump all work well depending on your climate and light conditions. Cut openings in the landscape fabric, add amended soil as needed for each plant’s requirements, and give them enough space from the edging and rock clusters that they don’t crowd the open surface over time. If you want occasional color without committing to flowering plants in the gravel, seasonal cut flowers in a simple stone vessel near the bench are easier to manage than anything planted in the ground. The garden should still read as mostly gravel and stone after planting. Step 9: Finish with One or Two Functional Details A stone lantern, a stepping stone path, or a low bench gives the garden a usable anchor point. A small water feature built from a repurposed barrel is worth considering if budget allows; the sound carries a lot of weight in a tight space. Keep the total number of decorative elements under three. The restraint is the point. Zen Garden Cost Breakdown Line Item Low End High End What Drives Variation Gravel / crushed granite (100 sq ft) $50 $120 Local stone availability, delivery charges Landscape fabric + staples $25 $60 Fabric grade (woven vs non-woven) Edging (metal, 40 linear ft) $80 $200 Material (plastic vs galvanized vs corten) Feature rocks (2–3 boulders) $30 $200 Rock type, size, local sourcing vs delivery Stepping stones $20 $100 Flagstone vs cast concrete Plants (2–3 specimens) $30 $150 Dwarf specimens vs mature stock Stone lantern or water feature $40 $300 Decorative stone vs cast resin; pump cost for water Total (DIY, materials only) $275 $1,130 Site prep and rock selection push most builds toward the higher end Most DIY Zen garden builds land in the $300 to $600 range for a 100-square-foot space when sourcing materials locally. The biggest cost variable is feature rocks. Boulders that look like they’ve been in the ground for decades can run $150 or more each at a landscape supplier, while sourced field stone from a local farm or stone yard can cost almost nothing if you’re willing to haul it yourself. Zen Garden Ideas for Different Spaces The design logic stays the same regardless of size, but the approach shifts based on what you’re working with. 1. Small Backyard Zen Garden Ideas for Tight Spaces In a tight yard, you don’t need sprawling acreage to establish a sense of calm. Implementing focused small zen garden ideas can transform an underutilized corner or a narrow side yard into a striking visual escape. Use a bamboo screen or an existing fence as the rear boundary, which does double duty for privacy. One large boulder, a compact gravel surface, and a single Japanese maple or dwarf pine are enough to anchor the space. Resist the urge to add more just because there’s room. 2. Zen Patio Ideas for an Existing Outdoor Living Area A patio edge is one of the easiest places to build a Zen-style border. Gravel between the patio surface and a rear garden bed softens the hard line between paving and planting. Add a potted bamboo clump near a corner wall for vertical structure. River stones around planters add texture without needing any additional ground prep. The whole thing can be done in a weekend without touching the existing patio. 3. Budget-Friendly Zen Garden Ideas If the budget is under $150, skip the water feature and the stone lantern entirely. Local field stone sourced yourself, bagged crushed granite from a home improvement store, and a single moss starter pack are all you need for a clean, functional small Zen garden. A tabletop version using a shallow tray, fine sand, and three small river stones costs under $30 and functions the same way at desk scale. How to Maintain a Zen Garden The maintenance list for a well-built Zen garden is genuinely short. These are the only regular tasks that matter: Rake the gravel surface after heavy rain or wind to restore the pattern and level any shifted material. Pull weeds while they’re small. Any weed that gets through the fabric is easiest to remove in the first two weeks before the root system establishes. Top up the gravel layer if it drops below 1.5 inches in any area. Thin spots show the fabric and look unfinished. Prune plants once a year to keep their shape simple. Japanese maples and dwarf pines tolerate light shaping well; don’t hard-prune either in summer. Inspect the edging each spring for heave or buckling. Metal edging rarely needs attention; timber edging should be checked for rot at the base every two to three years. Think of the raking as the ongoing maintenance, not a chore. A Zen garden maintained in 10-minute sessions every couple of weeks stays in better shape than one ignored for a month and then tackled all at once. Common Zen Garden Mistakes to Avoid Too many plants: Every plant added is a maintenance commitment. Three plants maximum for most backyard Zen gardens. Skipping the fabric: Weeds through gravel are harder to remove than weeds in soil. The fabric is worth the 30 minutes it takes to install it properly. Wrong gravel depth: Less than 1.5 inches and the fabric shows through when you rake. More than 4 inches and the material cost climbs without improving function. Plastic edging: It buckles in freeze-thaw conditions and degrades in UV. Metal or natural stone edging is the only long-term solution. Choosing plants for the wrong climate: Moss needs consistent moisture and partial shade. Bamboo spreads aggressively without a root barrier. Match the plant to your actual conditions, not the design inspiration photo. Overdecorating: A stone lantern and a bench. That’s the ceiling. Past two elements, the garden stops reading as calm and starts reading as cluttered. Frequently Asked Questions What is the best gravel for a Zen garden? Crushed granite is the most durable and easiest to rake. It compacts slightly and holds pattern lines better than pea gravel, which scatters with any foot traffic. Use a particle size between 3/8 inch and 5/8 inch for a surface that rakes cleanly and stays stable. How do I keep weeds out of a Zen garden? Install woven landscape fabric before laying gravel, pin it every 12 inches along all edges, and overlap seams by at least 6 inches. This eliminates most weed pressure. Pull any breakthrough weeds while small, before root systems establish through the fabric layer. How deep should gravel be in a Zen garden? Two to three inches is the functional range. Shallower than 1.5 inches and the fabric shows through when raking. Deeper than 4 inches wastes material without improving drainage or appearance. What plants work best in a backyard Zen garden? Japanese maple, dwarf pine, moss, ornamental grass, and bamboo (in a root barrier) are the most reliable choices. Pick based on your climate and light conditions. Moss needs partial shade and consistent moisture. Everything else on this list handles sun exposure reasonably well. How much does a Zen garden cost to build? A DIY build for a 100-square-foot space typically runs $275 to $800 in materials, depending on rock selection and edging choice. The biggest cost variable is feature boulders. Locally sourced field stone keeps costs at the low end. Can you build a Zen garden on a patio or concrete surface? Yes. On a concrete surface, use contained gravel beds with solid edging rather than in-ground installation. Feature rocks sit directly on the surface. Drainage becomes less of a concern, but containment matters more to prevent gravel migration onto the surrounding area. Do Zen gardens need water features? No. Traditional karesansui gardens have no water at all. The gravel surface represents water symbolically. A small recirculating fountain can add sound to the space if that matters to you, but it adds maintenance and is not a structural requirement. Final Verdict: Is a Backyard Zen Garden Worth Building? The best zen garden ideas do not have to start with a full backyard makeover. You can begin with one quiet corner, a patio edge, or a small side-yard space. I like this approach because it feels simple and doable, even if you are new to garden design. Focus on simple materials first. Rocks, gravel, sand, moss, and a few plants can create a calm look without much fuss. Keep the layout open, avoid clutter, and let each detail have space to stand out. Regular care matters too. Rake the gravel, remove leaves, and lightly trim plants. These small habits keep your garden peaceful. Pick one idea, gather your materials, and create a peaceful space you’ll enjoy every day.
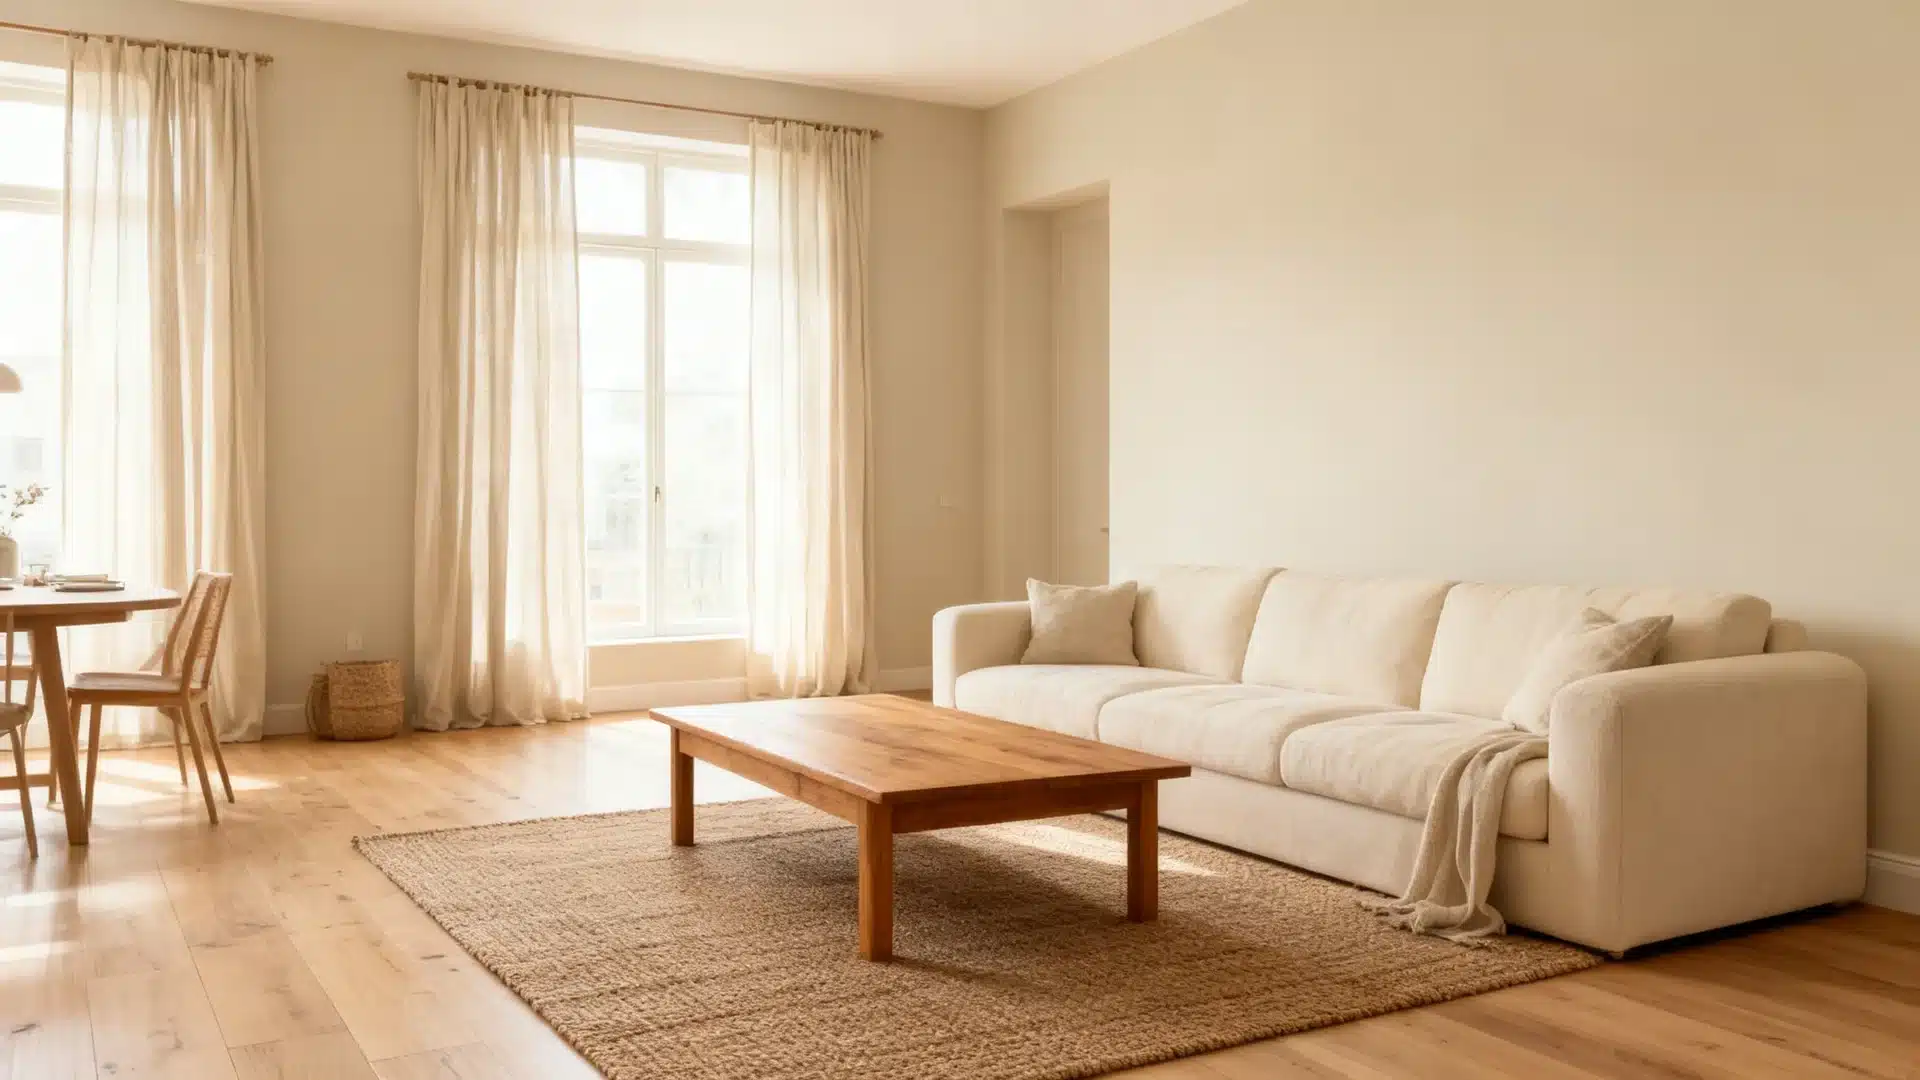
Detail Value Color Name Natural Linen Code SW 9109 Brand Sherwin-Williams LRV 66 HEX #DFD3C3 Color Family Warm yellow/beige neutral Color Temperature Warm Undertones Warm beige, greige, soft cream, possible peach-pink shift When people choose a warm neutral, the worry is almost always the same: will it look too yellow, too peachy, too beige, or too bland once it is on the wall? I have had that exact conversation more times than I can count. People bring in a chip that looks soft and airy in the store, paint a room over the weekend, and call me Monday morning wondering why it looks nothing like they expected. Sherwin Williams Natural Linen is that kind of color. It sits between beige, cream, and soft greige, which is exactly why it is popular for whole-home palettes, bedrooms, living rooms, kitchens, and exteriors. It looks calm and neutral on a chip. On the wall, it has enough warmth and undertone movement to behave differently depending on the light in your room. This review covers undertones, lighting shifts, finishes, room use, proper testing, and which colors pair well with it. What is Sherwin-Williams Natural Linen SW 9109? Sherwin Williams Natural Linen SW 9109 is a light warm neutral from Sherwin-Williams’ yellow paint color family. Sherwin-Williams describes it as a light, warm neutral with a subtle breezy feel and a greige undertone. It sits between beige, cream, and soft greige, which makes it useful when white feels too stark but a deeper beige feels too heavy. With an LRV of 66, Natural Linen sits in a light-to-medium range. It reflects enough light to keep rooms feeling open, but it still gives walls warmth and body. It is neither crisp white nor heavy beige. That middle position is what makes it useful across room types and design styles. Natural Linen looks easy on paper, but the undertones decide whether it feels soft, warm, peachy, or slightly dull in your room. What Undertones Does SW 9109 Have? Sherwin-Williams Natural Linen has warm beige and greige undertones, with a soft cream base. In some lighting, it can also show a slight peach or pink warmth that catches people off guard. Lighting plays a major role in how Natural Linen reads. Its warmth is the reason people are drawn to it, but that same warmth can shift depending on whether the room has cool light, warm flooring, or certain bulb temperatures. Natural Light Natural Linen reacts strongly to the direction of sunlight. In brighter rooms, it can feel airy and soft. In cooler rooms, the greige side becomes more noticeable, and the color settles into something more muted and neutral. North-Facing Rooms: Natural Linen can look more muted and slightly greige in north-facing rooms. Use warm bulbs and lighter trim to keep it from feeling flat. South-Facing Rooms: South-facing light brings out Natural Linen’s warm beige and cream side. Be careful with orange or golden wood floors; make the color look peachier. East-Facing Rooms: Morning light makes Natural Linen feel soft and fresh. Later in the day, it settles into a calmer beige-greige. West-Facing Rooms: Afternoon light makes Natural Linen look warmer and richer. If you dislike peach or golden undertones, test it late in the day. Artificial Light Warm bulbs in the 2700K to 3000K range make Natural Linen feel cozy and warm, bringing out the beige quality. Cool bulbs at 4000K or above can pull the greige side forward and make it look less warm and more neutral gray-beige. Strong yellow bulbs may push the color too far toward creamy or peachy, so test with your actual bulbs before deciding. If your lighting is the variable you are unsure about, comparing cool white and daylight bulbs first will save you a repaint later. Once the undertones are clear, the next step is choosing the right finish so the color performs well on the surface. What Paint Finish Should You Use for Natural Linen? Finish affects how much light reflects from the wall. Natural Linen in matte will look softer and more muted. In satin, it may look slightly cleaner and warmer. Choosing the right sheen based on the surface and room type makes a real difference in the final result. Flat / Matte: Best for ceilings and low-traffic walls. It gives Natural Linen its softest look but is not ideal for busy rooms where cleaning the walls regularly is part of daily life. Eggshell: Best for living rooms, bedrooms, dining rooms, and most walls. It keeps the color balanced, easy to clean, and true to its warm beige quality without adding noticeable sheen. Satin: Best for kitchens, bathrooms, hallways, and laundry rooms. It adds durability and a little more light reflection, which helps Natural Linen stay bright in rooms with more moisture or traffic. Semi-Gloss: Best for trim, doors, and cabinets. It gives a sharper definition and a harder surface, but is too reflective for most walls. High Gloss: Best for small accents only. It can make Natural Linen look deeper and shinier than most rooms need. My usual recommendation is eggshell for most walls, satin for busy rooms, and semi-gloss for trim or cabinets. A quick read on how paint sheens work makes the matte versus satin call much easier. How Does Sherwin Williams Natural Linen Look in Different Rooms? Natural Linen can work in many rooms, but the room’s lighting and fixed finishes determine whether it feels warm and soft or too creamy. Here is what to expect in the most common spaces. 1. Living Rooms Natural Linen works well in living rooms with light wood furniture, woven textures, cream upholstery, linen curtains, and warm ambient lighting. It adds enough warmth to make the space feel settled without making it heavy. It suits transitional, modern farmhouse, coastal, traditional, and soft organic spaces particularly well. Pair it with a warm white trim, and the combination reads clean, grounded, and intentional. 2. Bedrooms In bedrooms, Natural Linen creates a restful, warm backdrop. It pairs well with white or soft linen bedding, warm wood nightstands, natural fabrics, and soft lamps that create a gentle glow. Avoid pairing it with icy gray bedding or cool blue-white trim because the warmth of the walls can look uneven or disconnected against those cooler elements. 3. Kitchens On kitchen walls, Natural Linen works well beside warm wood cabinets, cream cabinets, light stone, butcher block countertops, and brass hardware. It brings a soft warmth to the kitchen without competing with the materials around it. If the kitchen has cool white quartz, gray tile, or chrome-heavy finishes, test Natural Linen carefully first because the warmth in the color can clash visually with a very cool room. 4. Cabinets Natural Linen can work on cabinets when you want a soft beige-cream look instead of white. It suits warm countertops, natural stone surfaces, wood floors, and aged brass hardware well. If the counters are cool white or light gray, they may look too beige or show a slight peach on the cabinet surface, which tends to look unintentional rather than warm. 5. Bathrooms Natural Linen can look warm and soft in bathrooms that have cream tile, warm stone, wood vanities, brass or bronze fixtures, or sandy neutral tile. In bathrooms with blue-gray tile, stark white porcelain, or cool LED overhead lighting, it can look slightly off. The greige side can become more visible in a cool, small bathroom, and the result may feel less soft than the chip suggested. 6. Exteriors Natural Linen can work well outdoors because natural daylight makes it read lighter and more neutral than it does indoors. It suits stucco, siding, porches, brick, and homes with wood and stone accents. Test it in both full sun and full shade before committing. Shaded exterior walls may show more beige-greige depth, while direct sunlight may make it look lighter and creamier than expected. After room use, the next step is testing it correctly because Natural Linen can shift more than people expect from a single swatch. What Homeowners Say About Sherwin Williams Natural Linen On Reddit, Natural Linen came up in a discussion about choosing a paint color for a darker room with wood flooring and very little natural light. That kind of setting is useful because it shows why people often consider Natural Linen when plain white feels too stark but deeper beige feels risky. The general takeaway from the conversation is that Natural Linen is seen as a warm, easy neutral with enough depth to keep a room from feeling flat. It was suggested as a light cream with an orange-warm base, which lines up with how this color can read in real homes. It is not a cold white, nor a heavy tan. It sits in that softer middle space where a room can feel lighter while still keeping warmth. The thread also reflects a common homeowner concern: paint has to work with the floor, furniture, lighting, and room use. Natural Linen was mentioned because it could brighten the space while still working with warm wood floors. That makes it a practical option for living rooms, basements, bedrooms, and casual spaces where comfort matters. The review opinion is simple: Natural Linen is best for rooms that need warmth, softness, and a neutral base that feels more lived-in than white. Still, it should be sampled first, especially in rooms with low light or strong warm flooring. How to Test Natural Linen Before Painting Here is the common mistake: someone sees Natural Linen looking soft and airy in an online photo, paints a room, and wonders why it looks peachy, dull, or more beige than expected. The photo was taken in different light with different materials. The solution is straightforward and costs very little. Step 1: Get the Right Sample: Order a Sherwin-Williams peel-and-stick sample or paint sample for Natural Linen SW 9109. Do not use a small chip or a digital swatch. The liquid sample applied to the wall or a board is the only format that shows the true color accurately. Step 2: Test Two Coats: Apply two coats to a large foam board or wall patch. One coat is not enough to accurately judge the depth and tone. Step 3: Use More Than One Wall: Place the sample on a wall that receives direct light and one that does not. Natural Linen can look noticeably different between these two positions in the same room. Step 4: Check It at Four Points in the Day: Check the sample in the morning, at midday, in the late afternoon, and at night under your usual lighting. That full range tells you more than any single snapshot. Step 5: Hold It Against Fixed Finishes: Hold the sample next to your trim, flooring, tile, countertops, cabinets, and fabrics. The color lives in the room alongside all those materials, not in isolation on the wall. Step 6: Check Your Bulbs: If the color looks flat or slightly peachy under artificial light, swap in a warm 2700K bulb before deciding the color is wrong. The bulb change often resolves the problem. Step 7: Wait 48 Hours Before Deciding: Paint cures differently than it looks wet. Give the sample 48 hours before making a final call. Testing is especially important with Natural Linen because its soft warmth can shift toward beige, cream, or peach depending on the room and the light. Similar Colors to Sherwin Williams Natural Linen SW 9109 If you are shortlisting warm neutrals, comparing Natural Linen with nearby colors before committing helps you decide whether you need something lighter, grayer, warmer, or deeper. Browsing the most popular greige and beige colors side by side is also helpful when your shortlist is still wide. This is also where the accessible beige vs natural linen comparison comes up most often. Color Code Brand LRV Tone Key Difference vs Natural Linen Accessible Beige SW 7036 Sherwin-Williams 58 Warm greige Darker, grayer, and more grounded than Natural Linen Kilim Beige SW 6106 Sherwin-Williams 57 Warm beige Deeper and more traditional beige, warmer leaning Natural Choice SW 7011 Sherwin-Williams 73 Warm off-white Lighter and cleaner, less beige depth than Natural Linen Benjamin Moore Muslin OC-12 OC-12 Benjamin Moore 66.54 Soft warm neutral Softer and creamier cross-brand alternative In the accessible beige vs natural linen comparison, Natural Linen is the better choice if you want a lighter, softer, warmer neutral with a relaxed feel. Accessible Beige is the better choice if you want more gray balance, stronger depth, and a more grounded result on the wall. If the lighter end of that table appeals to you, Natural Choice SW 7011 behaves like a cleaner, brighter cousin of Natural Linen and deserves a sample of its own. Sherwin Williams Natural Linen Coordinating Colors Natural Linen is easiest to pair when the surrounding colors feel calm and connected rather than sharp or overly bright. Since it already has warmth, beige softness, and a greige undertone, the best pairings either add gentle contrast or deepen the palette without fighting the base color. Divine White SW 6105: A warm off-white that works beautifully for trim, ceilings, and doors. It gives a soft, warm transition rather than a sharp contrast. Antler Velvet SW 911: A deeper warm neutral that adds depth and richness in adjoining rooms, built-ins, or accent surfaces without leaving the warm color family. Gris Morado SW 9156: A muted purple-gray that gives Natural Linen a cooler, more unexpected contrast without clashing. It works well as an accent in connected spaces. Pure White SW 7005: A cleaner white option for trim if Divine White feels too warm for your space or trim style. Urbane Bronze SW 7048: A deeper warm-dark accent for doors, hardware finishes, exterior details, or contrast built-ins. The safest approach is to let Natural Linen stay as the main soft neutral, then use whites for structure, deeper neutrals for depth, and muted accents only where the room needs contrast. If neither trim white above feels right, testing a few warm white paint colors against your sample usually settles the question. Who Should Avoid Sherwin Williams Natural Linen? Natural Linen is a soft warm neutral, but it is not the safest choice for every home. It works best when the room already has warmth in the flooring, lighting, furniture, or fixed finishes. In cooler spaces, it can look more peachy, beige, or muted than expected. Situation Why It Can Be a Problem Cool gray tile The warm beige base can clash with blue-gray or icy gray tile. Stark white trim Cool white trim can make Natural Linen look creamier, warmer, or slightly peachy. Chrome-heavy finishes Chrome, cool nickel, and blue-gray stone can make the color feel disconnected. Very dark north-facing rooms Low, cool light can make Natural Linen look muted beige-greige instead of soft and warm. Crisp modern white interiors Natural Linen is not a clean white. It has warmth, body, and beige depth. Strong orange flooring Golden oak or orange-toned wood can pull out the peach or tan side of the color. Natural Linen is worth testing in homes with warm wood, natural textures, soft whites, and earthy finishes. It is less reliable in rooms built around cool gray, blue-white, or high-contrast modern materials. If your floors are the sticking point, the pairing rules for wall color with hardwood floors make the undertone call much easier. Decor Styles That Work Best With Sherwin Williams Natural Linen Natural Linen works well across several decor styles because it is warm without feeling too heavy. Its beige-greige base, with a possible soft peach or earthy orange shift, helps it sit comfortably beside wood, stone, linen, warm metals, and muted accent colors. Modern Farmhouse & Rustic: Natural Linen works well with wood beams, worn finishes, black metal accents, and textured fabrics. It gives the room warmth without making the walls feel dark or overly beige. Coastal & Transitional: This color suits coastal and transitional spaces when paired with light wood, soft white trim, muted blues, sage greens, and sandy neutrals. It keeps the room light while adding more warmth than a plain white. Minimalist & Organic Modern: Natural Linen is a good choice when cool gray feels too cold. It adds quiet warmth to clean-lined rooms with natural wood, stone, woven textures, and simple furniture. Traditional & Classic: In traditional homes, Natural Linen works with crown molding, warm wood furniture, antique brass, layered fabrics, and soft white trim. It gives the space a settled look without feeling too formal. Cottage & Casual Interiors: Natural Linen also fits relaxed interiors with slipcovered furniture, warm lamps, vintage pieces, and natural fiber rugs. It keeps the palette soft and easy to live with. The main thing to watch is the room’s undertone balance. Natural Linen looks best when the surrounding finishes are warm, muted, or natural. If the room is filled with cool gray tile, blue-white trim, or chrome finishes, test it carefully before choosing it. Is Sherwin Williams Natural Linen Still Worth Choosing? Yes. Natural Linen is worth choosing if you want a warm neutral that feels soft, light, and more relaxed than a classic beige. It works well in homes with light wood flooring, warm textures, soft white trim, and natural materials throughout. It is not the best choice if the home has very cool gray finishes, stark white trim with a blue base, or artificial lighting that pulls out peachy warmth. In those conditions, a cooler neutral or a lighter off-white tends to perform more reliably. Natural Linen is best treated as a warm neutral with movement, not a simple background beige. Test it in your own light and beside your actual materials before choosing. Frequently Asked Questions Is Natural Linen a good paint color for resale? Yes, Natural Linen can be a good resale color if the home has warm finishes and good natural light. It feels softer than white but still neutral enough for most buyers. Avoid it in homes with lots of cool gray tile or blue-white trim. Can Natural Linen work with gray furniture? Natural Linen can work with gray furniture if the gray has a warm or taupe base. It may look less balanced beside cold blue-gray upholstery. Add warm wood, cream textiles, brass, or woven textures to help the wall color and furniture feel connected. Should I use Natural Linen on the ceiling? Natural Linen is usually better on walls than on ceilings. On a ceiling, it can make the room feel warmer and slightly lower. If you want a soft look, use a warm white ceiling color instead so the walls still have gentle contrast. Does Natural Linen work with black accents? Yes, black accents can work well with Natural Linen when used in small doses. Think black window frames, picture frames, curtain rods, or light fixtures. Too much black can feel harsh, so balance it with wood, linen, warm metal, and soft whites. What flooring looks best with Natural Linen? Natural Linen looks best with light oak, white oak, warm wood, limestone, travertine, and other natural materials. These finishes support its warm neutral base. Very cool gray floors can make it look more beige or slightly peachy than expected. How many coats of Natural Linen do you need? Two coats give Natural Linen full, even coverage on most primed or previously painted walls. One coat often looks patchy and lighter than the true color. Over dark or bold existing colors, plan for a primer coat first, then two finish coats. Final Thoughts Choosing a warm neutral is not only about liking the swatch. Natural Linen changes with light, flooring, trim, and finish in ways that are hard to predict from a chip or an online photo. Sherwin Williams Natural Linen is a strong choice when you want a soft, warm neutral that feels easy to live with, but it needs the right setting to look the way people expect it to. Give it warm materials, good lighting, and a clean trim color, and it delivers. Place it in a cool, low-light room with chrome finishes and stark white trim, and it can feel off without you being able to explain exactly why. Test it properly before you commit. Sample it on two walls, check it across the full day, and hold it beside your fixed finishes. That single step saves more paint regrets than anything else. Drop a comment with your room direction, flooring color, and whether you are using Natural Linen on walls, cabinets, or exterior siding. I will share my honest take.

Heard the term rough in plumbing and wondered why everyone treats it like such a big milestone? It can be confusing when you see open walls, exposed pipes, and no working fixtures yet. If you’re building a home or planning a remodel, you’re probably trying to understand what happens during rough-in plumbing and why it matters. I know it can feel overwhelming when contractors use unfamiliar terms without much explanation. The good news is that this stage is easier to understand than it sounds. By the end, you’ll know what a rough-in is, what plumbers install during this phase, why inspections matter, and how this work prepares your home for sinks, toilets, showers, and other finished fixtures. Cost Note: Figures in this article are estimates based on national averages from Angi and industry guides (2025). Actual costs vary significantly by region, contractor, pipe material, and number of fixtures. Always get at least three quotes before committing to any project above $1,000. What Is Rough-In Plumbing? Rough-in plumbing is the phase where plumbers install every pipe, drain, and vent connection inside open walls, floors, and ceilings before drywall, tile, or cabinetry goes up. By the time rough-in is done, your home has the full infrastructure for water supply and waste removal, but no visible fixtures yet. No faucets, no toilets, no showerheads. Think of it as the plumbing skeleton. Every fixture location is staked out and connected to the system. The toilet may not be there, but its drain stub-out is already set at the right distance from the wall. The shower may have nothing installed yet, but its valve, P-trap, and supply lines are roughed in and waiting. That positioning is what rough-in means: the hidden work that makes the finished work possible. Line Item Low End High End What Drives the Variation Single bathroom rough-in $3,000 $20,000 Fixture count, pipe material, labor rates Whole-house rough-in (2,000 sq ft) $8,000 $30,000 Number of bathrooms, stories, slab vs crawl space Cost per fixture (rough-in only) $300 $600 Fixture type, access difficulty, regional labor Cost per square foot $4.00 $15.00 Complexity, number of stacks, layout Finish plumbing (add after rough-in) $1,500 $6,000+ Fixture quality, number of trim items Those ranges are wide because rough-in cost is almost entirely driven by how many fixtures you have, what pipe material is used, how many stories the home has, and your regional labor market. A simple one-bathroom remodel in a single-story house with accessible walls is nothing like roughing in a three-bathroom custom home on a slab with a master suite above the garage. Both are “rough-in plumbing,” and the cost reflects the difference. What Happens During a Plumbing Rough-In? The plumber works from the building plan, marking fixture locations and running the three-core systems before any surface goes up. Here is what gets installed at each rough-in task. Rough-In Task What It Means Fixture layout Marks where toilets, sinks, tubs, showers, and appliances will go Water supply lines Runs hot and cold water pipes to each fixture location Drain lines Adds pipes that carry wastewater away from sinks, toilets, tubs, and showers Vent pipes Installs pipes that allow air movement through the drain system to prevent siphoning and odors Pipe supports Secures pipes so they stay stable inside walls or floors Pressure testing Checks water lines for leaks before walls are closed Inspection Confirms the rough-in meets local code before the next stage begins Most of this work happens during framing, before insulation and drywall. That open-wall window is the only practical time to run pipes cleanly. Once the walls close, access to fix problems costs significantly more. Rough-In Plumbing vs. Finish Plumbing This is the distinction I hear most homeowners mix up in their contracts, and it matters because the two phases are usually billed separately. Rough-in covers everything hidden: the drain pipes, vent stacks, supply lines, and stub-outs that end inside walls and floors. Finish plumbing, also called trim-out, is the second visit your plumber makes after drywall, tile, and cabinets are done. That is when the visible pieces get connected: toilets, faucets, showerheads, under-sink drain assemblies, and fixture valves. In a bathroom remodel, for example, painting shower tile is one of the final steps that only happens after finishing plumbing is complete. Comparison Point Rough-In Plumbing Finish Plumbing Main job Install hidden pipe routes Connect usable fixtures Timing Before drywall and finished surfaces After walls, floors, and cabinets Includes Drains, vents, supply lines, stub-outs Toilets, faucets, sinks, valves, trim Access needed Open framing Finished rooms Inspection type Rough inspection before covering Final inspection after fixture install Also called Rough-in phase Trim-out plumbing When you see a contract that lists rough-in and finish plumbing as separate line items, that is correct. Do not assume rough-in covers installed fixtures. If a contractor’s quote only mentions rough-in, ask explicitly what finish plumbing will add to the total. New Construction Plumbing Rough-In: Main Steps New construction rough-in happens after framing is complete and before insulation or drywall goes up. That open-wall window is the only practical time to run pipes cleanly through studs, joists, and slab penetrations. Understanding the full scope of a new build also means knowing what comes before the plumber even arrives, the structural decisions made at the framing stage, including the roof framing type, can affect how drain stacks are routed to the exterior. Here is how the rough-in process unfolds on a typical multi-bathroom new build. Confirm the whole-house rough-in plan has been reviewed and approved before framing closes. This walkthrough covers drain routing, fixture rough-ins, venting, water lines, and stack locations. The primary stack rises from the slab with a 45-degree offset, then runs through the floor joists. It serves the toilet, shower, and lavatory while maintaining proper drain pitch. A three-inch line connects to the toilet. A three-by-two wye sends two-inch piping to the shower P-trap and lavatory. The lavatory wet vents both fixtures. Upper-floor bathrooms tie into shared roof venting. Each includes a toilet, lavatory, and tile shower with valve rough-in and a handheld connection stub-out. Additional stacks serve secondary bathrooms, using three-inch toilet lines and two-inch branches for lavatories and tile showers, with P-traps insulated near unconditioned spaces like garages. The main workhorse stack handles the heaviest fixture load: laundry areas, a bar sink, and multiple bathrooms feeding into the same drain system. Laundry and utility rough-ins include a washing machine box, water heater stub-outs, and a floor drain or pan drain routed to the exterior. Upper-level plumbing often uses cast iron for the main stack to reduce noise transfer through floor assemblies. Island kitchen sinks and top-floor laundry add fixture complexity. Water supply uses PEX-A expansion pipe entering at 1.25 inches before splitting into two one-inch distribution systems, one for hot and one for cold. Each step builds on the one before it. Skipping the walkthrough at Step 1 or rushing the drain pitch at Step 2 creates problems that do not show up until the tile is in and the walls are closed. What Fixtures Are Planned During Rough-In? Every fixture that needs water, drainage, or both gets its position set during rough-in. The list matters because a missed fixture location means opening walls later at full remodel cost. Common fixture locations that must be staked out during rough-in include: toilets, bathroom sinks, kitchen sinks, showers, bathtubs, laundry sinks, washing machines, dishwashers, ice maker lines, water heaters, outdoor hose bibs, and floor drains. Shower rough-in is one of the more precise placements on this list. The valve position, drain center, and curb height all have to align with whatever small bathroom shower design you have chosen, because changing any of those dimensions after tile is in means demolition. The same logic applies to kitchen sinks: the drain stub-out position needs to match the cabinet layout, which is why the kitchen layout and design should be finalized before rough-in begins. Appliance connections are the most commonly forgotten category. If you plan to add a refrigerator ice maker, a bar sink, or a wet bar, those stub-outs need to be in the wall before drywall closes. Adding them after costs multiples of what they would cost during rough-in. Where Rough-In Plumbing Budgets Go Wrong This is where most homeowners get surprised. The rough-in quote looks manageable until one of these hits. Fixture Locations Are Changed After Rough-In Starts Moving a toilet drain six inches because the vanity turned out to be wider than planned is not a small job. The drain is already set in concrete or through framing. Changes mid-rough-in cost $500 to $2,000 per fixture relocation, depending on how far along the work is. Pipe Material Upgrades PEX is the most common supply pipe in new construction and runs $0.50 to $2.00 per linear foot for materials. Copper runs two to four times that. If the original quote assumed PEX and the inspector or HOA requires copper in certain sections, that gap adds up fast on a whole-house rough-in. Slab or Underground Work When drain lines have to go under a concrete slab, excavation and concrete patching add $1,500 to $5,000 or more on top of standard rough-in costs. This comes up in slab-on-grade homes and basement bathroom additions more often than homeowners expect. Inspection Corrections Failing the rough-in inspection is not a disaster, but it does cost time and sometimes money. Common correction items are drain slope, vent sizing, and pipe support spacing. Budget a buffer of 5 to 10 percent of the rough-in total for corrections, especially in jurisdictions with stricter inspectors. Finish Plumbing Treated as Included Some homeowners sign a rough-in contract and assume the fixtures will be installed in the same visit. They are not. Finish plumbing is a separate mobilization. If your contract does not include it, expect an additional $1,500 to $6,000 depending on fixture count and quality. The same budget discipline applies to other home systems: house painting costs, for instance, are also routinely underestimated when interior and exterior work are scoped separately. What is Negotiable vs. What Isn’t Rough-in pricing has real and fake flexibility. Here is where you can push back and where you cannot. Negotiable: Pipe material choice (PEX vs. CPVC for supply lines), fixture count (cutting a planned bar sink or second laundry location), timing flexibility if your schedule is not rigid, and bundling rough-in with finish plumbing in a single contract for a lower combined rate. Not negotiable: Permit fees, inspection scheduling, required drain slope per code (a quarter-inch drop per foot of horizontal run), vent sizing requirements, and licensed plumber requirements for any work that will be inspected. Asking a contractor to skip a permit to save money on rough-in plumbing is the single most expensive shortcut in residential construction. When you sell the home or file a claim, unpermitted plumbing becomes your problem. How Long Does Rough-In Plumbing Take? A small bathroom remodel takes one to two days of rough-in. A full new construction project on a two-story home with three bathrooms, a kitchen, and a laundry room takes four to seven days, sometimes longer if inspections require return visits or if the framing crew and plumbing crew have scheduling gaps. Delays are most common when fixture selections are not finalized before rough-in starts, when framing changes force pipe reroutes, or when the inspection is scheduled but the work is not ready. All three of those delays are preventable with better planning before the plumber mobilizes. Questions to Ask Your Contractor Before Rough-In Starts These are the questions I recommend asking before you sign anything or before the first pipe goes in. The answers tell you whether you have a contractor who has done this before or one who is figuring it out on your project. Does this quote include finish plumbing, or is that a separate contract? What pipe material are you using for supply lines, and why? Are all fixture locations finalized before you start? What happens if they change? Will you pull the permit, and is that cost included in the quote? Who schedules the rough-in inspection, and what happens if it fails? Is underground or slab work in scope, and how is that priced? What is your process if framing changes force a pipe reroute? A contractor who cannot answer these specifically is a contractor whose rough-in quote will have surprises attached to it. Common Rough-In Plumbing Mistakes to Avoid Most of the expensive rough-in mistakes are not plumbing errors. They are planning errors that the plumber had to work around. Choosing fixture locations too late, after rough-in has already started Not confirming cabinet or vanity dimensions before drain stub-out placement Setting toilet drains too close to walls (standard rough-in distance is 12 inches from the finished wall to the center of the drain) Skipping vent pipe requirements or assuming the inspector will not catch them Getting the drain slope wrong (water sits in improperly sloped pipes and causes chronic clog issues) Running pipes where future fasteners will hit them without installing nail plates Skipping pressure tests before drywall closes the walls Covering walls before inspection approval The toilet distance issue is worth flagging specifically. A toilet set at 10 inches from the wall instead of 12 means the toilet physically cannot be installed correctly later. That drain has to move, and by that point, moving it involves cutting concrete or opening floors. Why the Rough-In Inspection Matters The rough-in inspection is the one point in the project where an independent set of eyes confirms the work is safe before it gets permanently hidden. The inspector checks drain pitch, vent sizing, pipe supports, water line routing, and code compliance for your jurisdiction. In 37 states, that means International Plumbing Code (IPC) requirements. Other states, including California, Oregon, and Minnesota, have their own adopted codes. Passing the inspection also protects you at resale. If unpermitted rough-in plumbing is discovered during a home sale inspection, it becomes a negotiating item or a deal-breaker. Permitted and inspected work is documentation that the plumbing was done to code at the time of construction. Pro Tip: Ask your plumber to pressure-test the water supply lines before calling for the rough-in inspection. A failed pressure test found during inspection means a second inspection visit. Finding it yourself before scheduling saves days on your timeline. Frequently Asked Questions About Rough-In Plumbing How do table finishes affect room feel? Glossy or reflective surfaces can make a room feel brighter and larger, while dark or matte finishes add warmth but may feel heavier. Consider lighting and wall color when choosing a finish to ensure your table complements the room’s overall look. Can a rug impact table clearance? Yes. Thick or high-pile rugs reduce chair clearance and make pulling out chairs harder. Measure the rug size and pile height to ensure at least 36 inches of space around the table, maintaining comfort and free movement. How do table corners affect safety? Sharp corners can cause bumps in tight spaces, especially with children. Rounded, beveled, or bullnose edges reduce impact risk while maintaining functional table dimensions in a smaller dining area. Do room doors influence table placement? Yes. Swinging doors can block chairs or limit clearance. Measure door arcs and ensure end chairs or walkways aren’t obstructed before selecting a table size, especially in compact dining areas. How does table shape affect conversation? Round tables promote eye contact and easier conversation for small groups. Rectangular tables separate diners at the ends, while oval tables balance seating and flow in narrow rooms. Choose a shape to improve interaction and comfort. Can lighting height affect table fit? Pendant or chandelier height should allow unobstructed view and movement. Low lighting can interfere with headspace above chairs, so ensure proper clearance between the table surface and light fixture. Summing Up Getting a handle on your home’s hidden infrastructure takes the stress out of your next big renovation or build. Now that you understand how rough-in plumbing lays the structural framework for your water lines, drains, and vents, you can confidently navigate contractor quotes and timelines. Recognizing the clear line between this open-wall skeleton phase and the final trim-out ensures you won’t face surprise expenses when it is time to install your actual fixtures. This foundational knowledge ultimately protects your budget, saves your sanity, and ensures your project passes inspections with flying colors. What part of your upcoming plumbing project feels the most challenging? Drop a comment below to share your experiences or ask a question.
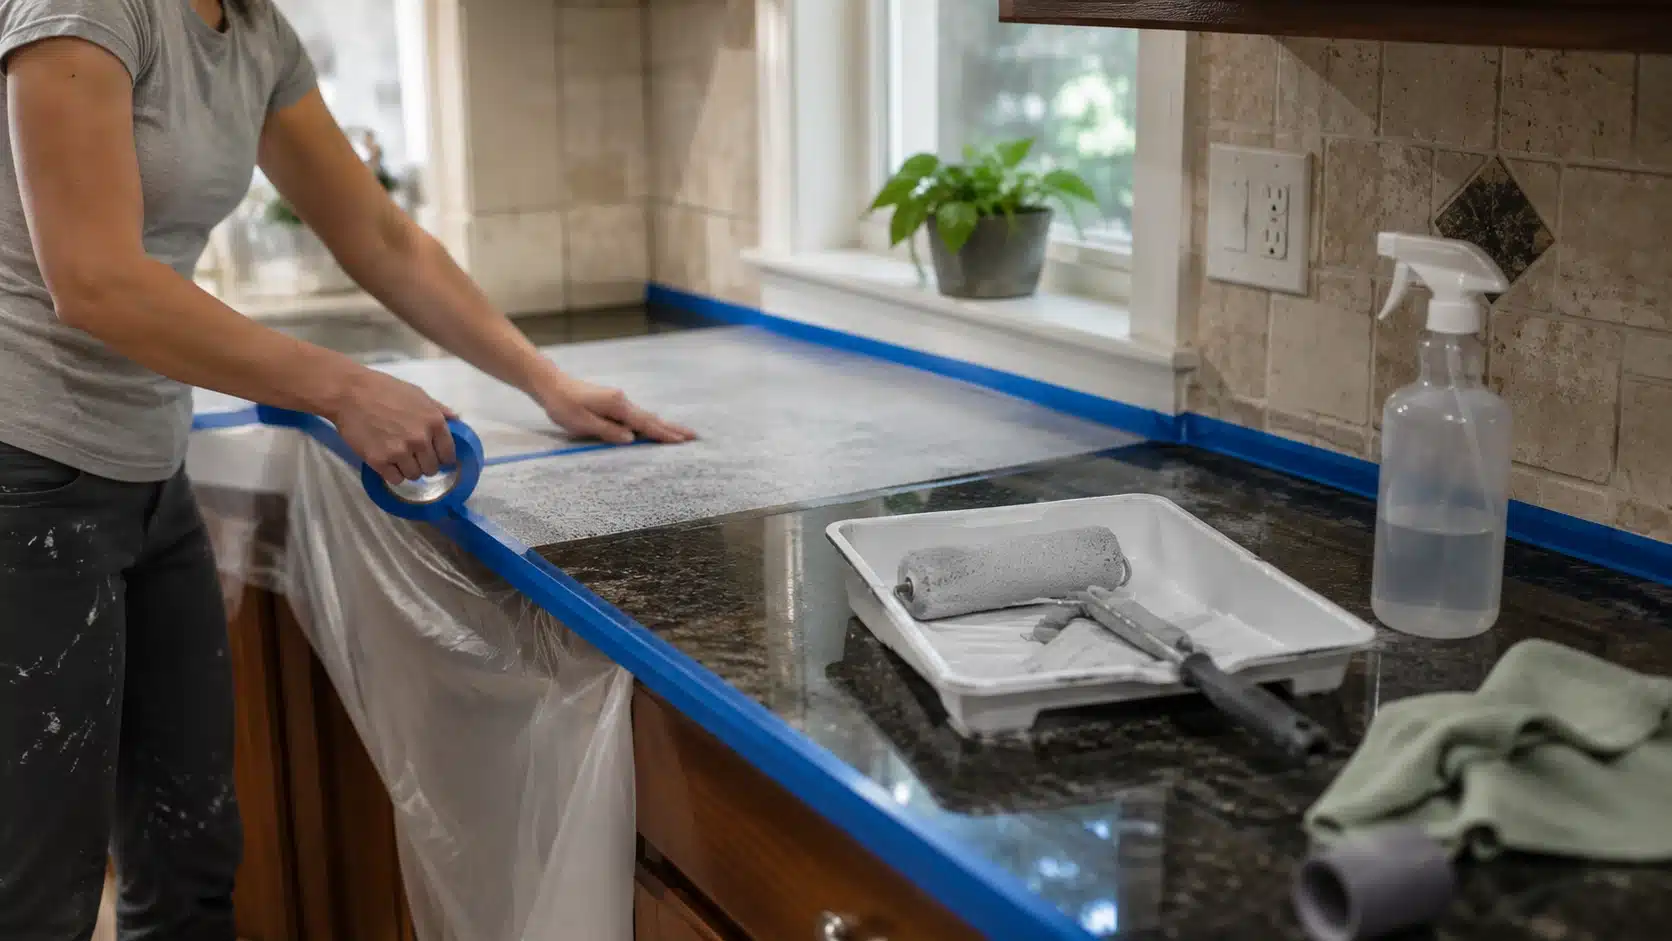
Frustrated by dull or dated granite countertops? I’ve been there, staring at a beautiful stone surface that just feels worn out. The problem is simple: granite is slick, non-porous, and naturally resistant to paint. If you’ve tried coating it without the right prep, you already know how quickly peeling and chipping happen. I’m going to show you how to paint a granite countertop properly so it lasts and looks professional. You’ll learn the exact prep steps, which primers and paints actually work, how to create a faux marble effect, and how to protect your investment during the curing process, all with materials you can get today. Can You Paint Granite Countertops? The first time I painted a countertop over real granite, I skipped the bonding primer. Within three weeks, the finish was peeling near the sink. That is the mistake this article is built around. Yes, you can paint granite countertops, but the surface is slick and dense. Regular paint will not hold without the right prep. What follows is the full process, the cost breakdown, what goes wrong, and when painting is not the right call for your kitchen. Difficulty 3 out of 5 — patience and timing matter more than skill Time 1 full day of active work, plus 7 days of cure time Cost $200 to $500 for most kitchens Tools Needed Scrubbing pad, bonding primer, paint kit, epoxy resin and activator, rollers, painter’s tape, plastic tarp, spray bottle, gloves Skill Required Beginner to intermediate — the epoxy stage benefits from a helper Cost Note: Figures in this article are estimates based on national averages. Actual costs vary by region, kit brand, counter size, and project scope. Run through the full supply list before buying — most people underestimate what they need beyond the kit itself. What Goes Wrong When People Paint Granite Countertops Before walking through the steps, here is where this project actually fails. Granite is naturally polished and smooth, which means paint has almost nothing to grip. Every failure I have seen starts before the first coat goes on. Skipping deep cleaning: Grease near the stove and oils around the sink are invisible once dry. Primer applied over either will peel within weeks, not months. Using the wrong primer: Wall primer and cabinet primer do not bond to polished stone. Only a bonding primer rated for slick, non-porous surfaces will hold. Check the label — not every product listed as “multi-surface” covers actual granite. Ignoring kit instructions: Some systems require fine-grit sanding or chemical etching before priming. These are not optional steps. Skipping them breaks adhesion at the base, and no topcoat fixes that. Rushing the epoxy stage: Epoxy has a limited working window. If you mix it without having the counter fully taped, primed, and dry, you will be making decisions under pressure. That is when coverage gets uneven. Pulling tape too late: Tape left past the product’s window can bond into the cured finish and tear it when removed. Using the counter too soon: Seven days is not a suggestion. Placing dishes, water, or appliances on the surface before full cure will mark and weaken the finish permanently. Keep these in mind as you work through the steps below. Most of them are not recoverable once the epoxy cures. What Tools and Products You Need Prep tools and protection materials matter as much as the coating. A paint kit covers the main finish, but you still need cleaning supplies, tape, plastic, rollers, and epoxy ready before you start. Running short on any of these mid-project is stressful — the epoxy especially does not wait. Cleaning supplies: Brillo pad or firm scrubbing pad, strong surface degreaser, and dry cloths. Cooking oil and grease must be fully removed before primer goes on. Protection supplies: Painter’s tape and a plastic tarp for cabinet fronts, sink edges, walls, floors, and appliance openings. Epoxy drips — full coverage is not optional. Bonding primer: The white base primer included in most kits, or a standalone bonding primer rated for slick, non-porous surfaces. Confirm your kit specifies granite as an approved surface. Veining supplies: Gray paint, a spray bottle of water, and a sponge or soft brush to soften marble-style lines. Epoxy supplies: Resin, activator, a stir stick, a foam roller, and gloves. Mix only after the counter is completely ready. Optional prep items: Fine-grit sandpaper or a chemical etching product, depending on what your specific kit requires. Read the instructions before deciding this step does not apply. How to Paint Granite Countertops Step by Step The process is not complicated, but the order matters. Timing between stages matters just as much as the steps themselves. Plan meals and counter access before you start, especially if this is your main kitchen. Step 1: Remove Fixtures and Protect the Kitchen Remove the cooktop and, if you can do it safely, the faucet. Tape sealed around a faucet can get trapped under cured epoxy and become nearly impossible to remove cleanly. Then tape off walls, cabinets, floors, sink edges, and appliance openings. Lay plastic tarp under the counter edges, epoxy will drip. Pro Tip: Remove the faucet before taping, not after. Epoxy cured around a faucet base becomes a permanent bond, removing it later chips the finish. Step 2: Scrub the Granite Clean and Let It Dry Completely Use a Brillo pad or strong degreaser and scrub the full surface, paying extra attention to the area near the stove and around the sink. These zones collect cooking oils that are easy to miss. Wipe away all cleaner residue and let the granite dry fully before moving on. The same failure mode shows up when people try painting bathroom tile floor, any greasy or damp residue left behind stops adhesion regardless of how good the primer is. Safety Note: Do not prime over any moisture, cleaner residue, or greasy film. Even a surface that looks clean can retain cooking oils. If in doubt, scrub a second time and wait another 30 minutes before priming. Step 3: Apply Two Thin Coats of Bonding Primer Start at the edges so the original granite color does not show through later, then roll the first coat across the full surface in a thin, even layer. Let it dry for about one hour, or as directed by your kit. Apply the second coat the same way. Thick primer layers cure unevenly, leave ridges, and make the final epoxy look less smooth, thin and even is always right. The same bonding primer logic applies when painting shower tile, polished granite and glazed tile share the same non-porous surface challenge, and the solution in both cases is identical. Pro Tip: Do the edges first on both primer coats and on the epoxy pour. Edges are easy to miss when you are focused on the main surface — doing them first means they get proper coverage. Step 4: Plan and Paint the Marble Veining Sketch a rough layout on paper before touching the counter. Loose, slightly diagonal lines look more natural than anything straight or symmetrical. Use gray paint to draw the veins over the white base, mist the lines lightly with a spray bottle, then soften with a sponge or brush. Wait 30 to 45 minutes before applying epoxy. Pro Tip: Practice on paper first, not on the counter. Soft, irregular lines look realistic. Heavy, repeated, or symmetrical lines look painted. Step 5: Mix the Resin and Activator Mix epoxy resin and activator according to your kit’s instructions. Stir slowly and thoroughly — typically around three to four minutes, so the clear coat cures correctly. Do not mix until the counter is already taped, primed, and dry. Once the resin and activator are combined, the working window is limited. Safety Note: Do not start mixing epoxy until everything else is ready. The working time after mixing is fixed. Starting before the surface is prepared forces rushed decisions and uneven coverage. Step 6: Pour and Roll the Epoxy Pour the mixed epoxy across the countertop in a slow S-shaped pass. This distributes the product more evenly before you roll. Use the foam roller with light pressure to guide epoxy across the surface, self-leveling epoxy needs direction, not force. Watch for dry spots, thick patches, and missed edges as you work. Step 7: Smooth Drips and Pull Plastic at the Right Time Epoxy runs over the counter edges. Smooth the underside with the roller before it sets, and check every corner. Then remove the plastic tarp before it bonds to the underside of the cabinets. Cured epoxy in plastic is a mess to deal with, pull it while the epoxy is still working. Safety Note: Pull the plastic tarp while the epoxy is still in its working window. Once cured, removing bonded plastic can pull chunks of the finish with it. Step 8: Work With a Helper During the Epoxy Stage One person mixes and prepares while the other rolls and checks coverage. A helper can spot drips, thin areas, and missed edges faster than one person can manage alone. The epoxy window is not forgiving, two people make a real difference in how the finish comes out. Step 9: Let the Countertop Cure for Seven Days After the epoxy is finished, keep the surface completely clear and dry for a full seven days. No dishes, no appliances, no water near the edges. This is the step most people rush and the one that determines how long the finish actually holds up under daily use. Safety Note: Do not place anything on the surface during the cure period. The finish may feel dry to the touch within 24 hours but it is not fully hardened. Early contact leaves permanent marks. The faster-the-second-time lesson here is this: tape your faucet base, not around it. I lost two hours the first time chipping cured epoxy off a chrome base I should have just removed. It takes ten minutes to pull a faucet. It takes much longer to fix the finish if you do not. What Does It Cost to Paint Granite Countertops? For most kitchens, expect to spend between $200 and $500 as a DIY project. The kit price is not the full number. Budget for prep supplies, protection materials, and enough product to cover the whole surface without running short on the epoxy pour. Cost Item Typical Range Notes Countertop paint kit $100 to $250 Some kits cover around 35 sq. ft. — measure first Epoxy kit or topcoat $75 to $300 Higher cost for larger counter footprints Bonding primer $20 to $60 Only if not included in the kit Tape, tarp, rollers, gloves $30 to $80 Routinely left out of the initial budget Degreaser and cleaning supplies $10 to $25 Non-negotiable prep item Extra supplies or small mistakes $25 to $100 Touch-up paint, sandpaper, extra brushes Likely DIY total $200 to $500 Varies by kitchen size and product choices Running short on epoxy halfway through a pour is one of the more stressful DIY situations — and it is preventable. Measure the square footage of your counters before you buy, not after you open the kit. Pros and Cons of Painting Granite Countertops Painting granite countertops can make a dated kitchen feel cleaner for less money, but it changes how the surface must be treated every day. This is not a like-for-like swap for stone. Pros Cons Costs far less than replacement Less durable than natural stone Covers dated or busy granite patterns Can chip or scratch under daily use Creates a faux marble finish at low cost Hot pans damage the painted layer Doable as a weekend DIY project Prep is time-consuming and unforgiving Good short-term cosmetic update Difficult to reverse cleanly if needed later Works well on bathroom vanities May affect resale perception Products widely available at hardware stores Counter is out of use during the 7-day cure If a short-term visual update is the goal and you are comfortable with the maintenance rules that come after, paint can work. If low maintenance and long-term durability are the priority, look at the alternatives below first. How to Care for Painted Granite Countertops Gentle Cleaning: Use mild dish soap and water only. Avoid abrasive scrubbers, bleach, or heavy-duty cleaners that can damage the epoxy finish or dull the topcoat over time. Protect Surfaces: Always use cutting boards, trivets, and pads under hot pots, pans, or appliances. Avoid cutting or placing extreme heat directly on the countertop to prevent chips and marks. Topcoat Awareness: Understand the difference between satin and semi-gloss finishes, as the sheen affects durability and wear patterns. Choose the appropriate finish for your kitchen’s daily use. Immediate Spill Management: Wipe up water and spills promptly, especially around faucets or sink edges. Early attention prevents staining, moisture damage, and potential lifting of the painted surface. Early Chip Repair: If small chips appear, touch them up immediately. Addressing them early prevents the exposed area from spreading and ensures your painted granite maintains a uniform, durable finish. How Long Do Painted Granite Countertops Last? There is no honest universal number because conditions vary too much. In a high-use kitchen with daily cooking, the finish near the stove, sink rim, coffee station, and primary prep area shows wear first. In those zones, chips and dullness can appear within a few months in the most demanding kitchens. In a bathroom vanity or a lighter-use countertop, the same finish maintained correctly can hold up significantly longer. What is consistent across every version of this project is this: strong prep and a full cure period will always outperform a rushed job, regardless of how long the timeline ends up being. What Are Better Alternatives to Painting Granite? If painting granite countertops does not fit the situation — wrong budget, heavy kitchen use, or granite with real resale value — the counter is not always the problem. These alternatives are worth running through before opening a paint kit. Deep clean and re-polish: A countertop that looks dull often just needs a proper deep clean and reseal. That alone can change the feel of the whole kitchen without touching the stone. Change the cabinet color: Painting the cabinets can make dark or busy granite feel calmer without touching the stone at all. The counters rarely look as dated once the rest of the kitchen aligns with a coherent minimalist kitchen design. Update the backsplash: A simpler backsplash reduces visual noise around a patterned slab and modernizes the kitchen quickly at lower cost than counter replacement. Professional refinishing: A pro may offer surface treatments or resurfacing options that are more durable than DIY paint and leave the stone in recoverable condition. Countertop overlay systems: Some overlay products sit over the existing surface and offer more structural stability than a painted layer. DIY marble countertops use a similar faux-finish approach but with different adhesion demands than epoxy on stone. Replace only the high-use zone: An island or a short counter run may be worth replacing while less-used sections stay as they are. Paint is one way to deal with granite that is no longer working. If the stone is high quality or the kitchen gets heavy daily use, changing the surrounding finishes is almost always the smarter first step. Frequently Asked Questions These are the questions I hear most from people who are standing in front of dated granite trying to decide whether to paint it or live with it. Can you paint granite countertops white? Yes, with the right bonding primer and a countertop-rated paint or epoxy system. White shows crumbs, scratches, and dust more than darker finishes, so daily cleaning and a careful topcoat matter more. A faux marble design with soft gray veining hides surface wear better than a flat white alone. Can you paint granite countertops without sanding? Only if your product label explicitly permits it. Many systems require sanding, etching, or a bonding primer to create grip on polished stone. A surface that stays glossy through prep will cause peeling within weeks regardless of how good the topcoat is. How long does paint last on granite countertops? It depends on prep quality, product used, kitchen use intensity, and whether cure time was followed. In a high-use kitchen, wear near the sink and stove can appear within months. In a bathroom or low-use counter, the finish can hold for years with proper daily care. Can you put hot pans on painted granite countertops? No. The epoxy and paint layer can discolor, soften, or mark under high heat. Use trivets or heat pads every time. Real granite handles heat well; the coating applied over it does not. Is painted granite safe for food prep? After full curing, yes — but food should not be cut directly on the surface. Use cutting boards, follow the kit’s care instructions, and choose a topcoat that the manufacturer explicitly rates for countertop use near food. Can painted granite countertops be reversed? Removing cured epoxy or paint from granite is difficult and can permanently dull or scratch the stone. If the original granite has value or may be needed in its natural state, think carefully before painting. Returning to the original surface is not reliably possible. What kind of paint do you use on granite countertops? A countertop-specific paint kit with an epoxy topcoat, not wall paint, not chalk paint. The kit must list granite or non-porous surfaces as approved applications. A bonding primer rated for slick surfaces is required, not a standard latex wall primer. Does painting granite countertops affect home resale value? It can. Buyers who notice a painted countertop may factor in replacement cost or question what is underneath. In a kitchen that is already dated overall, the visual improvement may offset this. In a kitchen with higher-end finishes, it is more likely to raise questions than help. Final Thoughts Now you know that painting a granite countertop isn’t just about brushing on color, it’s a careful process of prep, priming, and epoxy application. I’ve covered why cleaning and degreasing matter, how to use a bonding primer, the best way to create marble veining, and the importance of a full seven-day cure. Following these steps ensures your painted countertop looks great and holds up under daily use. You can confidently choose the right kit, protect surrounding areas, and maintain the surface properly afterward. Try these methods on your countertop, and let me know how your finished project turns out. Careful prep really does pay off.
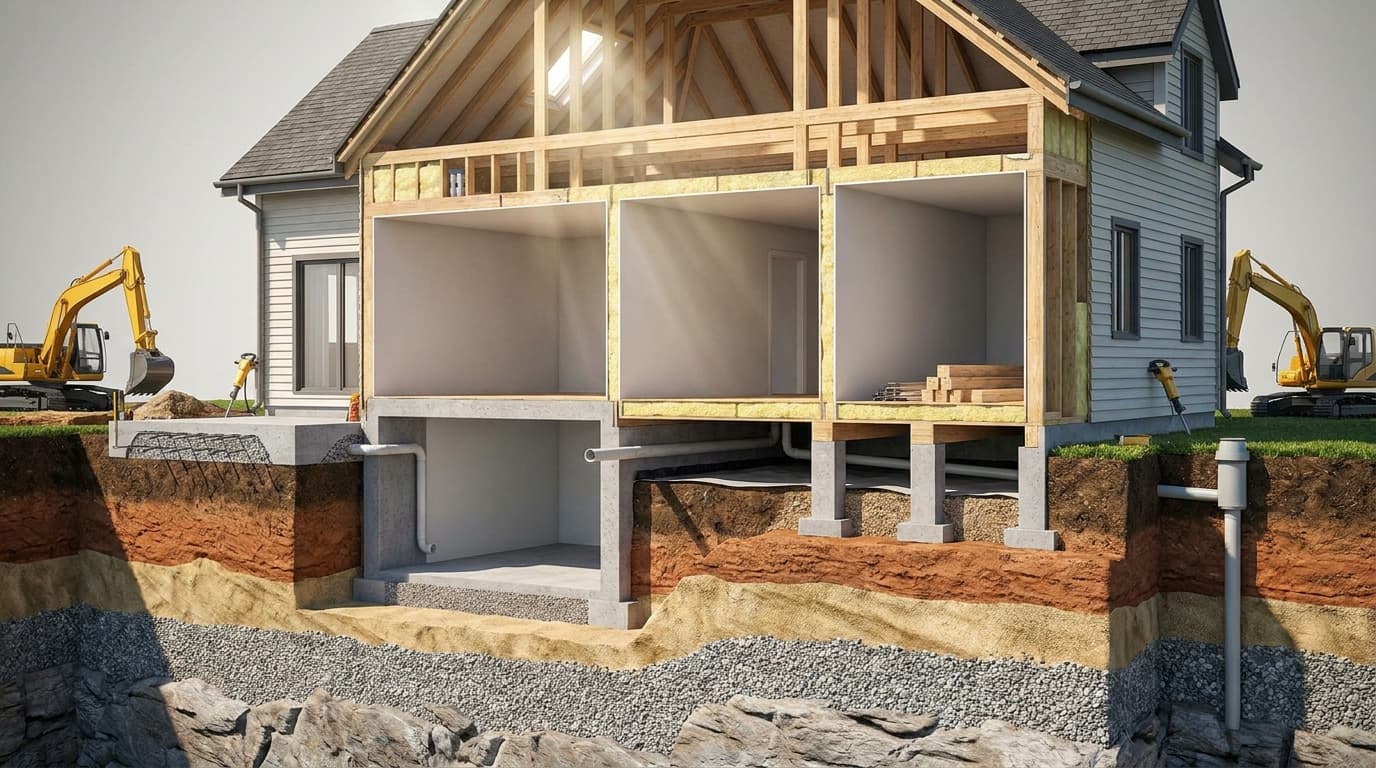
A house foundation type decision can shift your total build budget by $10,000 to $60,000 before you’ve bought a single board of lumber. If you’re planning a new build, comparing lots, or trying to decode a contractor’s bid, the foundation line item is usually the one that causes the most confusion. This guide breaks down all house foundation types, what each one costs in real numbers, where budgets go wrong, and what to ask before you sign anything. Cheapest Foundation Type Concrete slab ($4,000–$12,000) Most Expensive Foundation Type Mat/raft foundation ($25,000–$70,000) Most Common Hidden Cost Waterproofing, drainage, and soil correction Biggest Budget Risk Discovering poor soil conditions after excavation starts Cost Source HomeAdvisor national averages, 2024–2025 The table above is a quick orientation, not the full picture. What type of lot you need and what it ends up costing depend heavily on where you’re building, what the soil is doing, and how your contractor prices the work beneath the surface. That detail is what this article is built around. What a House Foundation Actually Does (And Why Type Matters) A house foundation transfers the entire weight of a structure into the ground safely and prevents it from shifting, settling unevenly, or absorbing moisture in ways that damage the frame above. Every crack in a wall, every door that sticks in a frame, every sloping floor in an older home can often be traced back to what happened at the foundation level years earlier. Choosing the wrong type for your soil conditions or climate is one of the most expensive mistakes you can make in a new build. It is also one of the hardest to fix after the fact, because the foundation is already under your house. The choice you make before the slab is poured or the piles are driven is the one you live with for decades. The Key Factors That Determine Which House Foundation Type You Need No single foundation type works everywhere. Before any cost conversation makes sense, these five factors have to be assessed for your specific site: Soil Type & Bearing Capacity: Clay expands/contracts; loose or sandy soil may need deeper support. Soil-bearing tests are essential before excavation. Frost Line Depth: Footings must extend below frost line to prevent heave; depth affects excavation and foundation type. Water Table & Drainage: High water tables add hydrostatic pressure; exterior waterproofing may cost $10,000–$30,000 extra. Building Size & Structural Load: Larger, heavier homes require deeper footings, more reinforcement, and additional concrete. Local Building Codes: Permit and inspection requirements vary; skipping them risks delays, fines, or resale liability. These factors are why a contractor cannot give you a reliable foundation cost estimate without a site visit and, ideally, a soil report. Any bid based on a phone description of your lot should be treated as a rough planning number only. If you’re still in the early stages of deciding whether to build at all, the build on your land full sequence of decisions that come before foundation selection. All House Foundation Types: What They Cost and When to Use Them The following breakdown covers each foundation type from the most commonly used to the most specialized, with honest cost ranges and the conditions that make each one the right or wrong choice for a project. 1. Concrete Slab Foundation A concrete slab is poured directly onto prepared, compacted soil in a single continuous pour, with reinforcing steel embedded inside. It is the least expensive foundation option and the fastest to complete. In the right conditions, it performs exceptionally well for decades with almost no maintenance. Typical cost range: $4,000–$12,000 for a standard residential slab. This assumes flat terrain, stable soil, and a region where frost depth is not a factor. Works Well For Watch Out For Warm-climate builds with stable, flat lots Plumbing runs through the slab; repairs require cutting concrete Homes where no basement or crawl space is needed Not suitable for lots with frost heave risk or expansive clay soil Budget-constrained builds where soil conditions allow Zero access to utilities under the floor after pour The hidden cost most homeowners miss: soil preparation. If your lot has fill dirt, tree roots, or soft spots, the contractor must excavate and recompact before pouring, which can add $1,000 to $5,000 to the base estimate. 2. Basement Foundation A basement foundation uses poured concrete or concrete block walls that extend well below the frost line, with a floor slab at the base. The depth that protects the foundation from frost also creates usable square footage. A finished basement can add meaningful living space, but even an unfinished one is useful for utilities, storage, and mechanical systems. Typical cost range: $15,000–$50,000. The wide range reflects excavation depth, wall type, waterproofing specification, and regional labor costs. On bedrock sites that require blasting, costs can go higher. Works Well For Watch Out For Cold-climate builds that require deep footings anyway High water table sites require extensive waterproofing Homes that need extra living or utility space Ongoing moisture management: sump pumps, drainage tile, wall sealants Sloped lots where partial basements are feasible The most expensive standard foundation type to build and to maintain The waterproofing line item on a basement foundation deserves its own attention. Interior drainage systems run $50 to $100 per linear foot; exterior excavation-based systems run $100 to $300 per foot. For a full-perimeter system, that means $8,000 to $30,000 on top of the base foundation cost. Many contractors quote the foundation and the basement waterproofing costs separately, so budget both before committing to this type. 3. Crawl Space Foundation A crawl space foundation uses short stem walls to raise the home 18 inches to 4 feet above grade, creating a narrow accessible area under the floor. It is the practical middle option between a slab and a full basement: more accessible than a slab for plumbing and electrical work, and less expensive to build than a basement. Typical cost range: $8,000–$20,000. Ventilation systems, moisture barriers, and insulation are often add-ons that push the actual project cost toward the higher end. Works Well For Watch Out For Sloped or uneven lots where slab grading is impractical Moisture accumulates easily without proper ventilation and vapor barriers Regions with moderate climate and accessible utility needs Pest entry is a persistent concern without encapsulation Mid-range budgets that need utility access under the floor Encapsulation adds $5,000–$15,000 but is often necessary in humid climates Crawl spaces that are not properly encapsulated and ventilated tend to become the source of mold, floor rot, and pest damage within 5 to 10 years. That maintenance liability rarely shows up in the initial quote. 4. Pier and Beam Foundation Pier and beam foundations support the home on a grid of vertical concrete piers with horizontal beams running between them. The house sits elevated above the ground, with open space underneath. This approach adapts well to uneven terrain and is common in older homes across Texas, the Southeast, and coastal regions. Typical cost range: $12,000–$35,000. Depth of piers, soil conditions, and whether you are building new or rehabilitating an existing system all drive variation. Works Well For Watch Out For Coastal areas and flood-prone zones where elevation matters Floors can shift and squeak as pier posts settle or wood ages Uneven terrain that would require major grading for a slab Requires regular inspection; settling piers need leveling every few years Easy access to plumbing and electrical under the floor Moisture and pest management are still required in the open underfloor space If you are buying an older home with a pier and beam foundation, get an inspection from a specialist who can evaluate whether the piers have settled unevenly and whether the beams show rot or insect damage. Repairs on a neglected system run $4,000 to $15,000 or more. 5. Pile Foundation Pile foundations drive long steel or concrete columns deep into the ground until they reach stable load-bearing soil or bedrock. They are used when the top layers of soil are too soft, waterlogged, or unstable to carry the structural load. This is not a residential first choice but the only viable option on sites with poor bearing capacity. Typical cost range: $20,000–$60,000, with significant upward variation based on pile depth, soil resistance, and equipment mobilization fees. On coastal or waterfront builds, costs can exceed this range substantially. Works Well For Watch Out For Soft, waterlogged, or low-bearing-capacity soil Specialized equipment required; not every contractor can quote this accurately Heavy structures requiring deep load transfer Engineering design fees add $3,000–$10,000 on top of installation Flood-zone or oceanfront builds with strict elevation requirements Very high upfront cost with no practical lower-cost substitution on problem sites 6. Raised Foundation A raised foundation lifts the home clearly above grade using piers, columns, or perimeter walls. Unlike a standard crawl space, the clearance is often substantial enough to walk under. This design is common in flood zones, on hillside lots, and in regions where moisture management requires significant airflow under the structure. Typical cost range: $10,000–$25,000. Bracing and seismic retrofits in earthquake-prone regions can add significantly to this range. 7. T-Shaped Foundation The T-shaped foundation is the standard cold-climate approach. Footings are poured first and go below the frost line, then walls are built on top of the footings, and the slab or floor system is placed last. The cross-sectional shape, wider at the base than at the top, distributes load and resists the upward pressure of freezing and thawing soil. Typical cost range: $15,000–$40,000. Deep footing requirements in northern states push costs toward the upper end of this range. 8. Frost-Protected Shallow Foundation (FPSF) An FPSF uses rigid foam insulation placed horizontally around the perimeter of a shallow footing to keep the ground warm enough to prevent frost penetration. This allows footings to be placed at shallower depths in cold climates, reducing excavation and concrete costs compared to a T-shaped system. Typical cost range: $10,000–$30,000. The savings over a deep T-shaped system come from reduced excavation, but the insulation installation must be done precisely according to engineering specifications. Shortcuts in placement defeat the frost protection entirely. 9. Mat or Raft Foundation A mat foundation is a thick, heavily reinforced concrete slab that covers the entire building footprint. Rather than concentrating load at specific points, it spreads the total weight across the maximum possible ground area. This is the correct choice when soil bearing capacity is uniformly low and isolated footings would punch through or settle unevenly. Typical cost range: $25,000–$70,000. This is the most material-intensive option. The concrete volume alone on a large residential mat can approach what a standard basement costs just for the walls. 10. Insulated Concrete Form (ICF) Foundation ICF foundations are built from interlocking foam blocks that serve as the formwork for poured concrete. After the concrete cures, the foam stays in place as permanent insulation. The result is a wall with high structural strength, excellent thermal performance, and good sound attenuation. ICF is increasingly used for high-performance homes where the energy savings over time justify the higher upfront cost. Typical cost range: $20,000–$50,000. Skilled labor is a requirement; ICF systems are less forgiving of placement errors than standard poured concrete. Modifications after the fact are difficult and expensive. 11. Concrete Block Foundation Concrete block (CMU) foundations are built by stacking and mortaring hollow concrete masonry units, typically with steel reinforcement threaded through the cores and grouted solid. They were standard practice through much of the 20th century and remain common in certain regions. They are easier to repair than poured concrete, though they are more susceptible to water infiltration through mortar joints. Cost notes: CMU foundations are priced similarly to poured concrete in most markets, though local labor and material availability affect the comparison. Waterproofing is a non-negotiable add-on for CMU walls; block that is not sealed allows moisture to wick through the mortar at a rate that can cause significant damage within a few years, and prolonged water intrusion is one of the more common causes of water stains on ceilings in older homes with block foundations. 12. Poured Concrete Foundation Poured concrete walls are formed in place using temporary steel or aluminum forms, then filled with concrete and steel reinforcement in a single continuous pour. The result is a wall with no joints, no mortar lines, and uniform strength throughout. It is the current standard for new residential basements and foundation walls in most of the country. Poured concrete outperforms CMU block on lateral soil pressure resistance, which matters on sites with heavy clay soils or steep lot slopes. The trade-off is that repairs, when needed, require cutting and patching rather than replacing individual blocks. 13. Hybrid or Mixed Foundation Hybrid foundations combine two or more foundation types on the same structure to address site-specific conditions. A home built on a sloped lot might use a full basement under one portion and a crawl space or slab under the other. Custom builds with multiple sections and complex footprints often require this approach. The cost of a hybrid system is site-specific and cannot be estimated without detailed plans and a geotechnical assessment. What matters from a budget perspective is recognizing that the transition points between foundation types require careful engineering to prevent differential settlement, which is when one section of a foundation moves at a different rate than another and causes cracks in the structure above. Foundation Cost Summary: All Types Side by Side Here is how all 13 house foundation types compare on cost. These are national average ranges. Your actual numbers will vary by region, soil conditions, and contractor. Foundation Type Cost Range (USD) Primary Hidden Cost Concrete Slab $4,000–$12,000 Soil preparation, re-compaction Basement $15,000–$50,000 Waterproofing, sump pump, drainage tile Crawl Space $8,000–$20,000 Encapsulation, vapor barrier, pest control Pier and Beam $12,000–$35,000 Pier leveling, beam inspection, and moisture management Pile $20,000–$60,000 Engineering design, equipment mobilization Raised $10,000–$25,000 Bracing, seismic retrofit in applicable zones T-Shaped $15,000–$40,000 Deep excavation, footing depth in northern climates Frost-Protected Shallow $10,000–$30,000 Insulation precision, engineering review Mat/Raft $25,000–$70,000 Concrete volume, specialized reinforcement ICF $20,000–$50,000 Skilled labor premium, precision installation Concrete Block $10,000–$30,000 Waterproofing, mortar joint sealing Poured Concrete $12,000–$35,000 Forming labor, curing time, and a skilled crew are required Hybrid/Mixed Site-specific Differential settlement engineering, transition detailing The cost figures above represent the foundation work alone. Site preparation, grading, permits, and waterproofing are frequently quoted as separate line items. Foundation type is also one of the biggest variables in overall construction cost per square foot, particularly when comparing slab builds to basement builds in the same region. Cost Note: Figures in this article are estimates based on HomeAdvisor national averages, 2024–2025. Actual costs vary significantly by region, contractor, soil conditions, and project scope. Always get at least three quotes before committing to any foundation type. See the construction cost per square foot guide for how foundation type factors into total build budgets by region. How Soil and Climate Determine Your Foundation Options The two variables that contractors can least control are also the ones that most commonly blow up a foundation budget: what is in the ground and what the weather does to it. Expansive Clay Soil: Found in TX, OK, CO, and CA; swells when wet, shrinks when dry; can crack reinforced concrete. Requires deeper footings, drainage, or pier/pile systems. Loose or Fill Soil: Common on disturbed or low-lying sites; compresses over time if not compacted. Soil-bearing tests before construction prevent costly post-pour fixes. Frost Depth: Major driver of cost differences; colder regions need deeper, protected footings (T-shaped or FPSF), increasing foundation costs significantly. High Water Tables: Hydrostatic pressure can affect slabs/walls; waterproofing becomes structural necessity. Low bids may under-specify or plan to upcharge later. Where Foundation Budgets Go Wrong The most common budget surprises in foundation work fall into four categories. They are predictable, and knowing them in advance is how you protect yourself in contract negotiations. Unexpected Soil Conditions: Loose fill, debris, underground water, or rock can appear after excavation; budget 10–15% contingency for soil-related changes. Waterproofing & Drainage: Low bids often under-specify; confirm scope in writing, including interior/exterior drainage, sump pump, and perimeter drains. Permits & Inspections: Multiple inspections may be required; fees and scheduling delays can increase project costs. Grading & Drainage: Proper lot slope is critical; exterior grading is often separate from the foundation quote and affects long-term waterproofing performance Concrete Foundations: Why They Dominate Modern Residential Builds Concrete is the material behind most of the foundation types on this list: slabs, poured walls, ICF systems, mat foundations, and most modern piers are all concrete-based. Its dominance is not incidental. Concrete handles compressive load exceptionally well, resists pests, can be formed into nearly any shape, and, when properly reinforced and cured, lasts longer than the home above it in most conditions. What concrete does not do well is handle tension without steel reinforcement. An unreinforced slab or wall will crack under the kinds of loads and ground movements that residential foundations routinely experience. Every concrete foundation quote should specify the rebar schedule, the concrete mix design, and the minimum curing time before backfilling. If a bid does not mention these details, ask. They are the difference between a foundation that performs for 80 years and one that starts showing problems in 15. Basement and Foundation: How the System Works Together A basement functions as the foundation itself, supporting the house above while resisting soil and water pressure. Key components work together: footings distribute wall loads to the soil, walls resist vertical and lateral pressures, the floor slab provides a usable surface and counters hydrostatic forces, perimeter drainage tiles divert groundwater, exterior waterproofing blocks moisture migration, and the sump pump collects and removes water. Removing any part compromises the system. Chronic basement leaks usually indicate gaps in one area, such as missing or failed drain tiles, insufficient exterior waterproofing, or an undersized sump pump, showing that each element is essential for a functional, water-managed foundation.. Foundation Warning Signs Every Homeowner Should Know If you are buying an existing home or monitoring a home you already own, these are the signs that warrant a professional foundation inspection rather than a wait-and-see approach. Warning Sign What It May Indicate Urgency Stair-step cracks in the brick or block exterior Differential settlement or frost heave High; get an inspection Horizontal cracks in basement walls Lateral soil pressure or water pressure; walls may be bowing Urgent; do not delay Doors and windows are binding in frames Foundation movement causing the structure to rack Moderate to high, depending on progression Sloping or bouncy floors Pier settlement, beam rot, or crawl space moisture damage Moderate; monitor and inspect Water in the basement after rain Failed waterproofing, drain tile blockage, or grading issue High; source must be identified Gaps between the foundation wall and the sill plate Settlement or deterioration of the top-of-foundation course High: structural implication Hairline cracks in concrete are common and often cosmetic. Width matters: cracks wider than 1/4 inch, cracks that are growing, or any horizontal crack in a basement wall are not cosmetic and require evaluation. Foundation repair costs escalate quickly when problems are deferred. A $3,000 crack repair becomes a $30,000 wall stabilization project if the underlying cause is not addressed in time. Foundation Maintenance: What Actually Matters Year to Year The most effective foundation maintenance is almost entirely about water management. These are the tasks that prevent the problems described above from developing in the first place: Clear Gutters and Downspouts: Keep gutters and extensions free of debris and direct water at least 6 feet from the foundation to prevent leaks and wall deterioration. Maintain Positive Grade: Ensure the soil slopes away from the home, ideally 6 inches over the first 10 feet, to avoid surface water pooling near the foundation. Annual Inspections: Check crawl spaces and basement walls at least once a year, using a flashlight and moisture meter for early detection of cracks or moisture intrusion. Seal Cracks Promptly: Fill visible cracks in concrete before they widen or freeze, preventing water infiltration and structural damage. Manage Plantings: Keep trees and large shrubs at least 10 feet from the foundation to prevent root intrusion and soil shrinkage that can cause settling. What to Ask Your Contractor Before Signing a Foundation Bid These five questions will tell you more about a contractor’s competence and a bid’s completeness than almost anything else: Have you reviewed a soil report for this site, and if not, will you require one before finalizing pricing? A contractor who prices a foundation without a soil report is assuming conditions that may not exist. That assumption becomes a change order after excavation starts. What does your waterproofing specification include, and is it in this bid or a separate line item? This question separates the complete bids from the incomplete ones immediately. What permit inspections are required, and are permit fees included in this estimate? You want to know who is responsible for scheduling inspections and whether delays in inspection timing can affect your contract price. What is your concrete mix design, and what is your minimum cure time before backfilling? If a contractor cannot answer this, they are not specifying the work at the level required for a quality outcome. What is your contingency process if we find unexpected soil conditions after excavation? You want this spelled out in advance: what triggers a change order, how it is priced, and what documentation you receive. Frequently Asked Questions Can climate change affect my home foundation? Extreme weather events, flooding, and shifting soil patterns caused by climate change can affect foundations. Homes in flood-prone or erosion-prone areas may need additional reinforcements, drainage, or soil stabilization to maintain long-term structural integrity. How does nearby construction impact foundation stability? Heavy construction next door can cause vibrations and soil displacement. Foundations may settle unevenly, causing cracks or shifts. Monitoring the foundation and consulting a structural engineer early helps prevent damage and manage risks. Are older foundations more prone to pest infestations? Yes. Aging foundations, especially crawl spaces, may have cracks or gaps allowing termites, rodents, or ants to enter. Regular inspections, sealing gaps, and pest control measures help protect the structural integrity. Do foundations affect energy efficiency in homes? Foundation type impacts insulation and moisture control. Basements and ICF walls can improve thermal performance and reduce energy costs, while poorly insulated slabs may increase heating and cooling requirements. Can landscaping influence foundation health? Yes. Trees with invasive roots or poorly graded gardens can shift soil and affect foundations. Maintaining proper distance from trees, positive grading, and root barriers prevents long-term damage. What is the role of foundation vents? Vents in crawl spaces control moisture and airflow. Properly placed and maintained vents prevent mold, wood rot, and structural weakening. Incorrect placement can lead to dampness and pest issues. Final Verdict Foundations are the part of a home you rarely see, but I’ve realized they set the stage for everything above. You now know the main house foundation types, what affects your choice, and common problems to watch for. I’ve also shared practical tips for maintenance, budgeting, and when to call a professional. Understanding concrete foundations, soil, climate, and water issues helps you avoid costly mistakes and keeps your home stable for years. I hope you feel more confident evaluating foundations for your home. Try applying these tips, check your own foundation for warning signs, and let me know your thoughts or experiences in the comments.

